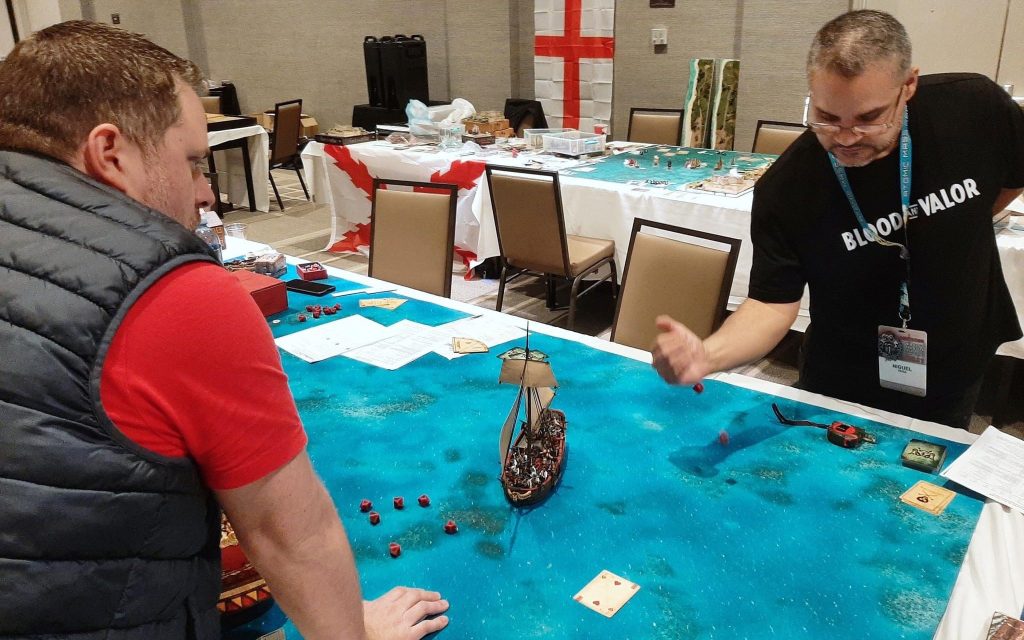
I debuted this force at the Adepticon 2023 Sea Tournament. It’s designed to be a fast, aggressive close-in fighter and boarding list, able to bring an impressive amount of swivel shot and small arms fire to bear for a ship of its size. With increased Fortune, a massive attacker bonus, a free starting move and the ability to engage a defender under a False Flag, Caesar and his crew can close the distance quickly and punch well above their ship class.
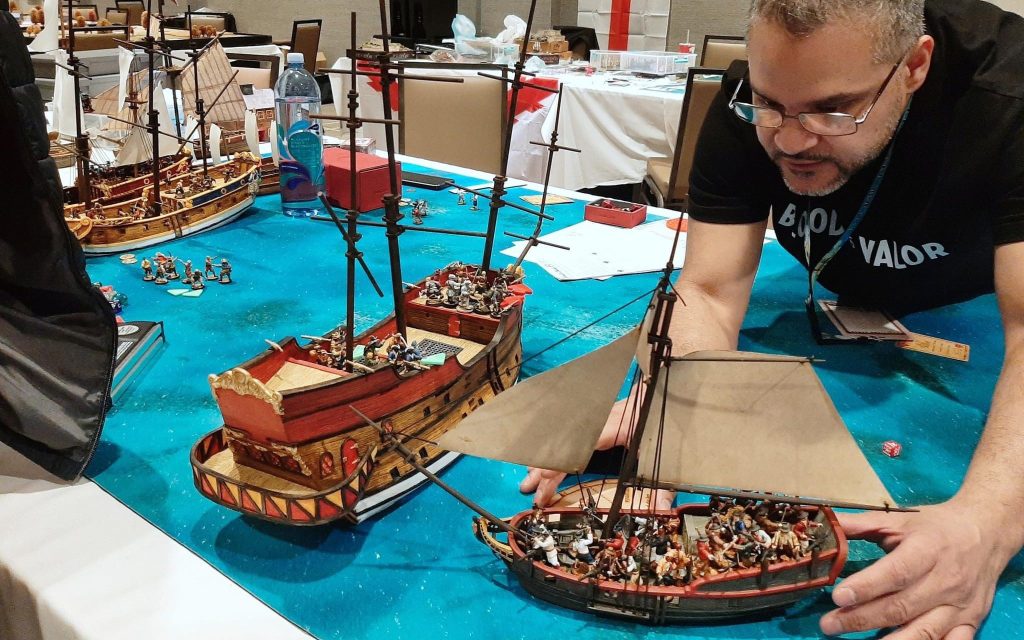
Black Caesar’s Marauders Tournament List
Force Overview
- Black Caesar’s Marauders
- Faction: Caesar’s Men (RtB)
- Commander: Black Caesar
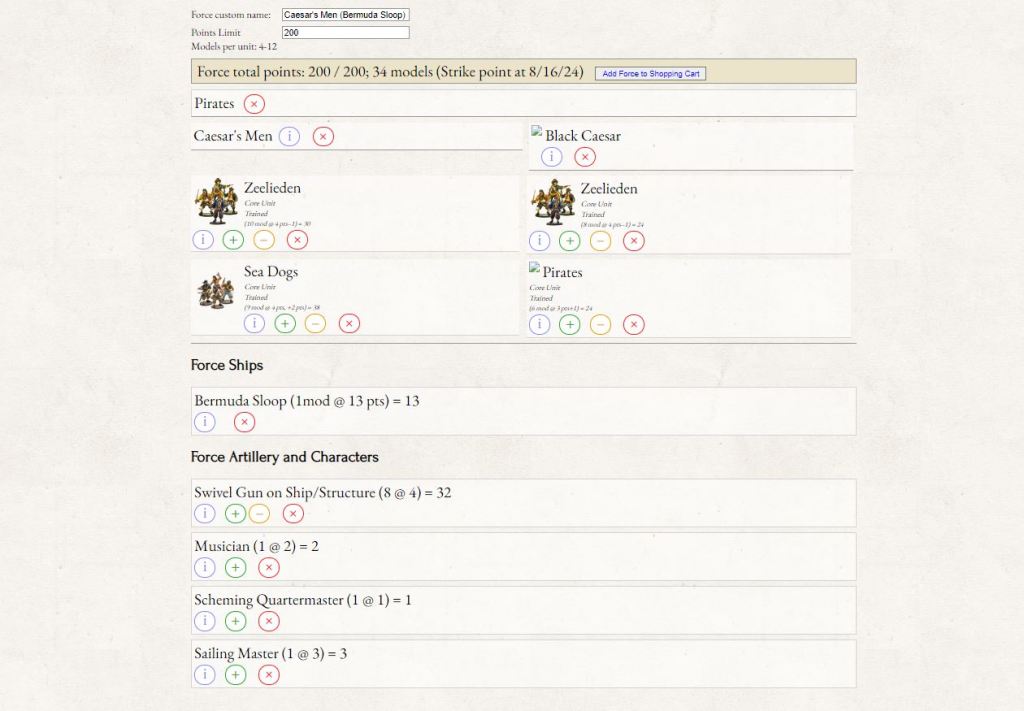
- Points: 200
- Theater: Sea
- By Niguel Vega
Here is a screenshot of the force on Blood & Plunder Force Builder, and the link to the saved list:
FACTION RULES
Caesar’s Men are limited to taking ships of Size 2 or smaller. The controller has the option of adding +4 to their roll to determine the Attacker. This is particularly important since being the Attacker allows Caesar to engage his opponent under a False Flag.
In game terms, the attacker sailing under a False Flag rolls a die at the start of each turn; on a 7+ his opponent recognizes Caesar and his crew for who they are and can attack them normally. However, if the ruse holds, Caesar’s opponent cannot fire upon Caesar’s ship unless Caesar fires at them first or the ships move within 12″ of each other.
Furthermore, if the attacker in a scenario, their controlling player can, once per game, discard all the Activation Cards in their hand and replace them with the same number of new cards without spending a Fortune Point.
Finally, all units in Caesar’s Men gain Ruthless.
COMMANDER
At 22 points, Black Caesar is a beast. Ruthless already overlaps with his faction bonus skill, but he also adds Hard Chargers to make his assaults even more devastating. Tough helps his unit shed the Fatigue they’re likely to incur fighting in-close. Finally, God’s Blessing or The Devil’s Luck grants him 4 Fortune Points to start.

Two Command Points make him a solid if not exceptional captain. His 8″ Command Range is a bit limited, but fine for the smaller ships his force is restricted to.
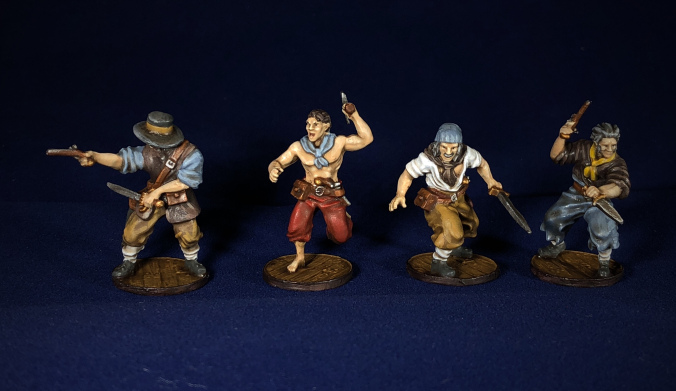
For weapons, Caesar is uniquely armed with a standard melee weapon and Blunderbuss, and I couldn’t help but continue this theme when equipping his command unit.

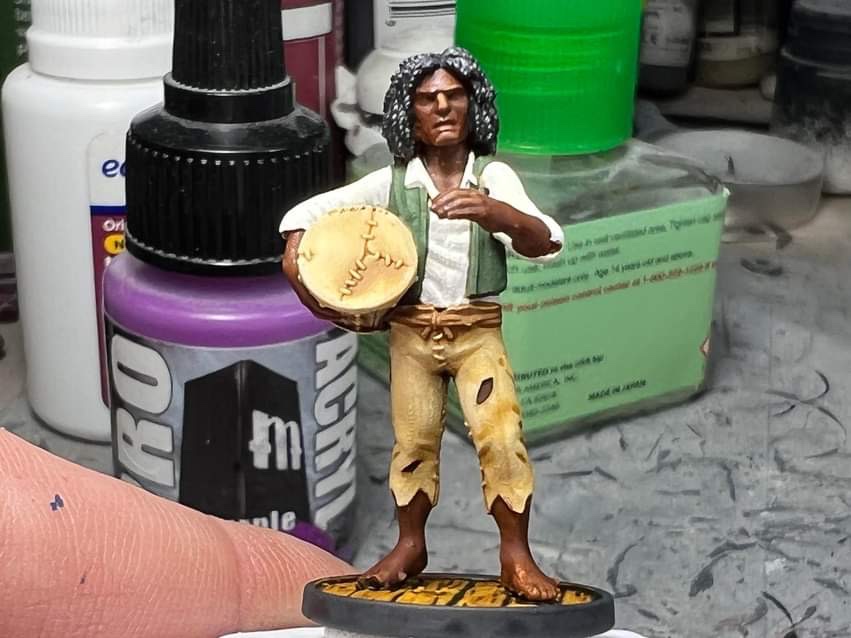
CHARACTERS
A Musician is attached to Caesar’s unit for 2 points, granting him the much needed Inspiring, as well as the same effects of Terror, helping to lump a bit of Fatigue on his opponent’s units just as the game begins, providing symmetry with the faction’s Ruthless.
As the Musician doesn’t count against the character limit for Caesar’s unit, I also added a Scheming Quartermaster to them for 1 point. The Scheming Quartermaster (SQM) gives the command unit Elan and overlaps Caesar’s Hard Chargers, but also adds his own 3″ range Command Point which can be used for a Grapple, Charge or Fight Action. However, as befitting these dastardly villains, a force that includes a Scheming Quartermaster must roll a d10 after deployment and before the first turn begins. On a 1-5, the SQM is “Biding His Time” and has no ill effects, but on a 6-10 the Quartermaster’s schemes and plots have weakened the Captain’s authority and the Commander of this Force loses 1 Command Point for the duration of the game.
Finally, for 3 points, a Sailing Master is attached to the units of Pirates in the stern, providing them with a Free Advanced Maneuver Action to increase the speed of the ship by 1″ for one turn and granting them the sailing mastery to perform the maneuver on a 4+, as well as providing a 4″ range Command Point for a Change Sail Setting or Advanced Maneuver Action. This will help Caesar’s Men maintain their speed and maneuverability advantage, especially when coupled with some of the upgrades made to his ship.
UNITS
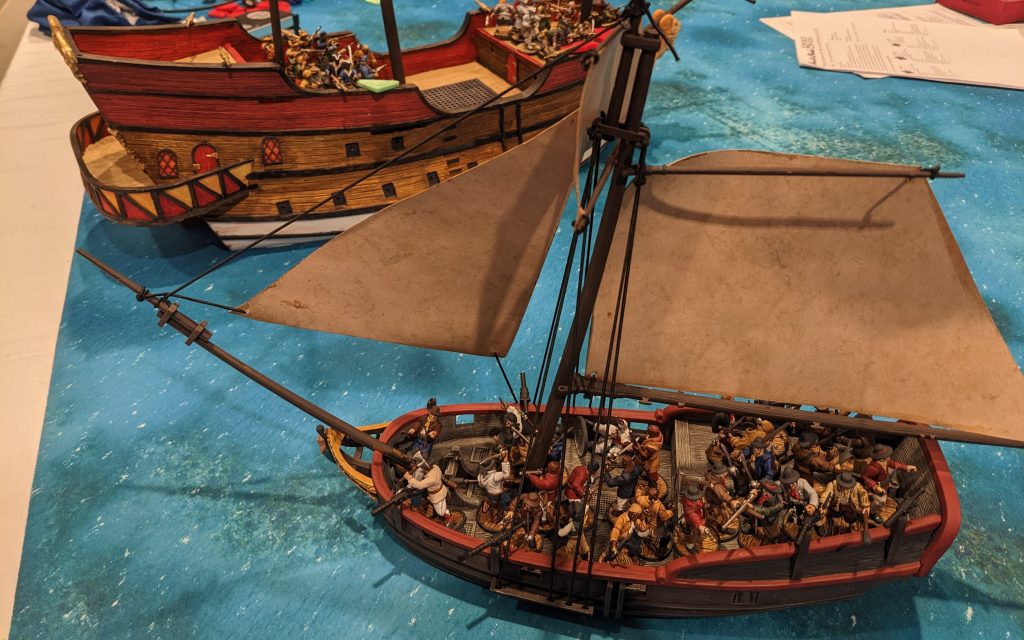
Space is at a premium on Caesar’s Bermuda Sloop, but we still managed to (barely) cram in four units totaling 34 sailors.
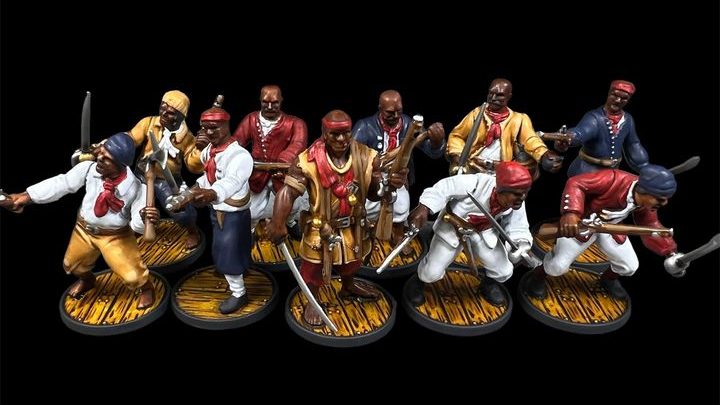
Sea Dogs (Black Caesar’s Command Unit)
Caesar’s Men has access to a wide range of sailor units from across many nationalities, so when it came down to choosing the command unit, it was about choosing sailors who had access to the right equipment and added something to the broad range of skills already provided by Caesar and his chosen fighting men. The Sea Dogs added Brawlers into the mix of boarding-focused skills, as well as Sailors and Expert Artillery Crew in case Caesar needed to personally take Command of the tiller or swap assignments with a beleaguered gun crew. I took a unit of 9, which allowed 3 Sea Dogs to replace their pistols with blunderbusses for no cost (4 total in the unit counting Caesar), and armed one with Stinkpots.
With Ruthless, Hard Chargers, Brawlers, and Tough, these are solid, hard-hitting boarders. At full strength with the attached Commander, you can half-shoot with all 4 blunderbusses and the Stinkpot and only pick up one reload for the blunderbusses. With some luck and maybe the prolific use of available command points, you could grapple an opposing ship, fire 8 dice of blunderbuss shot and drop a stinkpot onto their deck, inflicting casualties, fatigue, and silencing any defensive fire before charging over with 5 pistols still fully loaded (the musician is only armed with a melee weapon).
Trained, and with a Commander attached, activating on a Heart or Diamond would get you two actions, and a command point would get you a third.
Zeelieden
What’s not to like about Zeelieden? Expert Sailors, Expert Artillery Crew, and Hard Chargers, with solid morale and average sailor fighting skills, they’re my go-to unit for gun crews. With Ruthless added from the Faction, they’re solid boarders as well. I took two units, downgrading their weaponry to just standard melee weapons; one 10-man unit for the 4 forward swivels and an 8-man unit for the swivels at the rear (mostly due to space constraints in the stern deck).
Activating them with a Spade or Heart triggers a free Reload from Expert Artillery Crew.

Pirates
My last unit choice came about as I struggled with a conundrum. I wanted at least two units per deck, but I also wanted to make sure that every unit I spent points on contributed something to the battle beyond waiting around for a boarding action. With Caesar’s Sea Dogs serving as my primary boarders, I decided I wanted a cheap, catchall unit that was armed with or could be upgraded to include muskets.
With 7’s for their fighting skills and saves, and 6 Morale, the generic ‘Pirates’ are NOT the best sailors in the game. However, at 3 points, they’re cheap, and with Artillery Crew and Sailors, they fulfill that catchall role and War Cry made them a little scarier when they leapt over to the opposing deck. But what sold me on them over other units was their available armament. They came armed with a Brace of Pistols, and for 1 point per model, I was able to ADD buccaneer guns. Plus, 1 out of 3 could ADD a blunderbuss for free. So, at 4 points per model, I had a 6-man unit armed with buccaneer guns, a brace of pistols, and two blunderbusses. If I had 2 points to spare I could have given one model Stinkpots or Firepots!

Sailing Master
I added a Sailing Master to this unit, making them Expert Sailors and granting them a free Advanced Maneuver to increase the ship’s speed by 1″ for one turn.
For this list, these guys are great for using lower suit activation cards, as they don’t have any particular skills you want to trigger and, outside of boosting the ship’s speed, they’re largely here to take shots of opportunity where available, act as a secondary boarding unit, or repair the ship.

FORTUNE POINTS
Black Caesar’s God’s Blessing or The Devil’s Luck gives this force 4 Fortune Points. The first thing I use Fortune for is the False Flag roll. You can’t use Fortune on the roll to determine who’s the attacker (with a +4 bonus, you’re already enjoying a big advantage on that) but if you do win the roll, then it’s very important to succeed in pulling off the False Flag.
Once engaged, you may want to burn a Fortune Point to redraw your hand (remember that, as the attacker, you can do that once per game for free) or reroll a bad Save or Morale check – I found myself having to reroll my Morale checks more often than I would have liked during a tense duel with a galleon in order to keep my swivels going.
SHIP
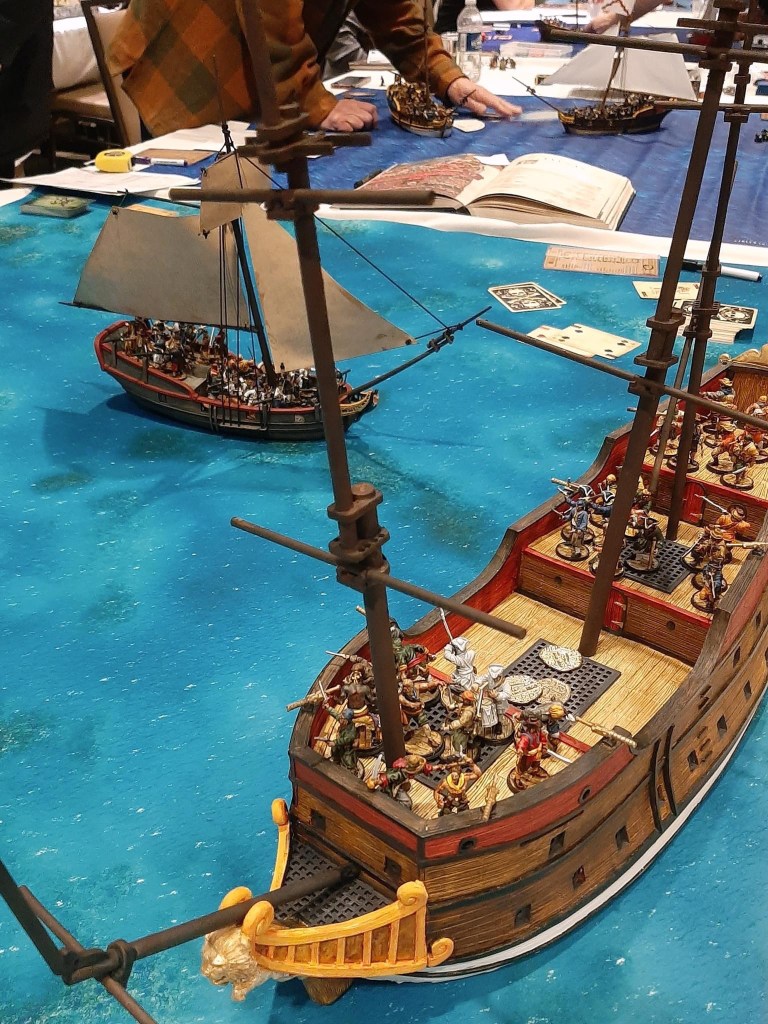
I invested a lot of points into the Bermuda Sloop, and by the time I was done she almost cost as much as an unimproved galleon!

Reinforced Bulkheads at 3 points gave those aboard the benefit of hard cover, a must-have for me.
Freshly Careened Hull at 4 points gives the ship the option to take a single move at its starting sail setting (no upgrades or modifiers taken into account) immediately after being deployed. This is immensely valuable, granting you a chance to close the distance a turn if your opponent has not taken this upgrade on their vessel.
Improved Rig at 4 points increases a ship’s top speed by 1″. I picked this upgrade to work in conjunction with my Sailing Master, giving me a single 6″ move a turn. A total of 7 points invested for an extra 1″ of movement a turn seems like a lot, but it also allows me to take advantage of any gusts of wind events that might come about without risking damage to my rigging. This combination of upgrades is one of the things I’m a little uncertain about in the long run, but speed is important for this list, so for now I’m letting it ride.
For armament I picked up 8 Swivels, split evenly between the two decks. Twelve dice of shot per volley is pretty solid, and if they’re loaded when Caesar activates and he has both his command points, he can order both crews to fire with devastating effect.
FORCE TACTICS
This list opens up with a lot of pre-game hijinks.
First, it has an optional +4 to determine the attacker in a scenario. It has an optional free move after being deployed. After being deployed, you roll to see if the Scheming Quartermaster is fomenting unrest. At the start of the battle, the opposing force is affected by Terror unless they also have a musician. If you are the attacker, and you choose to sail under a False Flag, you have to roll for that at the start of each turn unless you’ve unmasked yourself or been unmasked.
A checklist might be in order…
Winning the attacker roll and successfully utilizing the False Flag is a key element of this list. If you do attack under a False Flag, you’ll likely experience a bit of a calm before the storm, where you use that period of safety from enemy fire to maneuver into position for an optimal opening volley. With careful seamanship there’s a very good chance you’ll get the first shot in the engagement, and if you coordinate that moment with Caesar’s activation, and he has both of his Command Points, you can reveal your hostile intent behind two 12-dice swivel volleys. Patience is a virtue here – ideally, you want to sail within under 12″ of range (which will automatically reveal your ruse) and then unload on your opponent, hopefully inflicting enough casualties and fatigue to limit his return fire.
Attack Strategies
Small arms fire in this list is a bit underwhelming, but Ruthless helps, and big volleys of swivel fire can certainly pile on the Fatigue. Remember that only one unit needs to have more Fatigue than the attacking unit for Ruthless to trigger for everyone in the section.
Boarding Strategies
For all of the skills in their favor, I still consider this a mid-tier boarding list – they’re very competent at boarding, but they’re not the absolute best at it. Ruthless and Hard Chargers will get Caesar’s Sea Dogs down to 4+ at best on a charge, Brawlers will give them a roll for extra hits on 10s, and 5 pistols in the unit will let you reroll those 5 dice if they miss. A volley from the blunderbusses coupled with a stinkpot has a good chance of piling on some Fatigue and silencing any defensive fire before the boys swing over, but be mindful of crewmen with lances or bayonets who, if not suppressed by Fatigue, can still take defensive action.
The Pirates aren’t even as good as all that, with base 7’s going down to a 6+ if Ruthless triggers. They are equipped with braces of pistols, so they always have a close-quarters volley available and can reroll misses, plus War Cry can help them pile on a little more Fatigue on a Charge.
Your Zeelieden gun crews, however, are also very capable, if not specialized, boarding crews. With only melee weapons and no boarding pikes they’re not doing anything fancy on the way in, but they’re big units with base 6’s, Hard Chargers and Ruthless. Once you’re grappled and stuck in, have them abandon the guns and join the festivities!
To sum it all up – this is an aggressive list. Be smart, but BE AGGRESSIVE. Sail that ship like you stole it (because, chances are you did). Get close, unleash hell, then get to grips with your opponent to finish them off.

So, what happens when it all goes wrong?
You end up the defender or fail the False Flag roll, your opponent knows you’re a murderous villain with ill intent on a glass cannon close combat ship and is angling his cannons for a ranging shot.
I had this exact scenario play out while facing a swivel-armed galleon in the Adepticon 2023 Sea Tournament. To add insult to injury, my opponent managed to False Flag *ME*. It was a tough fight, with the height differential between the ships making boarding a Dedicated Action.
My best advice, in this case, is to stay focused and not get discouraged. Use your speed and maneuverability to close the distance without getting raked – you’re not in the toughest ship but you should be able to survive a volley or two. That should be enough for you to get close enough to board your opponent. Use the Sea Dogs to silence any defensive fire and get to grips with the enemy in close combat. Unload your swivels and then abandon them and engage the enemy. It won’t be pretty, but you are not built for an extended exchange with ship-mounted cannons.
If you’re facing an opponent armed with swivels or small arms in this unlucky turn of events, you’re much better off. You’re surprisingly good at an extended exchange with those kinds of vessels. You’ll be as fast and usually faster than any other ship and with no threat of structural damage you can run and gun with the best of them. Of course, if your opponent starts targeting your rigging, I’d advise you to grapple and settle things mano-a-mano.
FINAL THOUGHTS

There’s a lot going on with this list out of the gate, and understanding the flow of the symmetry is important, otherwise, you risk forgetting a benefit that you invested points into.
Adopt a very step-by-step process during the setup, deployment, and pre-game portion of the first turn. You have several things to do and they all can impact the game significantly, so don’t rush through it.
This list gives you a lot with which to seize the initiative, so take advantage of your free move, speed, and maneuverability. This isn’t a list where you can play it safe or be gun-shy. Get to the range you need to be at, unload into the opposition, and then grapple and board for the finish.
And above all, have fun doing it!
Article by Niguel Vega
Additional Content Suggestions
- Read more about the ADEPTICON 2023 Sea Tournament Adepticon 2023 Blood & Plunder Tournament Report
- British Navy Royal Galleon – 3rd Place Tournament List from the 2023 Adepticon Tournament
- Golden Age Pirates Faction Review from Raise the Black
- Submit a Force form where you can share your favorite Blood & Plunder Force with the community on Blood & Pigment
Related Products
- Blood & Plunder 18th Century Sloop Ship Model by Firelock Games
- Blood & Plunder: Raise the Black containing the Black Caesar’s Men Faction
- Pirates of Legend Captains Box Set containing Black Caesar
Pingback: Blood & Pigment at 2023 Adepticon Part 2 - Video - Blood & Pigment
Pingback: 18th Century Bermuda Sloop - Blood & Plunder Ship Overview