Adepticon 2023 has come to a close, and what a thrilling event it was! Players from across the country gathered to showcase their skills and strategies on the high seas in the Blood & Plunder Sea tournament. The tournament featured a wide range of skills from veterans to first timers, each bringing their own unique strategies and tactics to the table. I brought an unusual force featuring a Galleon, which typically only shows up in 400+ points games. This caused heads to turn and opponents to be intimidated. Below is a breakdown of the force that I took to the Adepticon 2023 Sea Tournament.
Force Overview

Faction:
Commander:
Points:
Theater:
Creator:
British Royal Navy (Raise the Black)
Chaloner Ogle
200
Sea
Jason Klotz
Force List
Building a force for this tournament was my first ever step into the faction of the new British Royal Navy from the Raise the Black Expansion. As expected for the English, the faction focuses on ranged combat and Fatigue management.
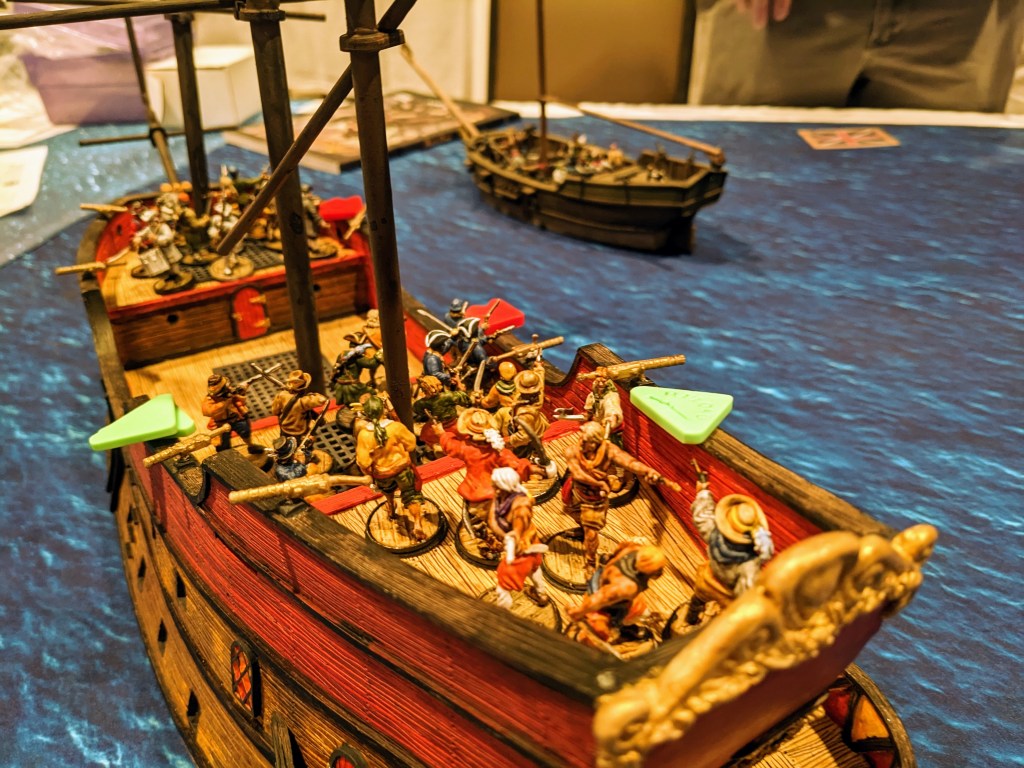
Here is a screenshot of the force I used along with a link to the force on the Blood & Plunder Force Builder:
https://forcebuilder.bloodandplunder.com/index.php?builder&forceid=6e093ad9

British Royal Navy – Faction Rules
The British Royal Navy is a new faction added in the Raise the Black Expansion. It has 3 special abilities
- All Sea Dog and Able Seamen units in This Force gain the Tough Special Rule.
- This Force adds +4 when determining the attacker in a scenario.
- This Force’s Commander may spend two Command Points to issue either a Reload or Shoot action to all units assigned to artillery with the Expert Artillery Crew Special Rule that are within its Command Range (Note that the Broadside! Special Rule will apply if the Commander has it).
My entire force is made up of Sea Dogs and Able Seamen, so 100% of them get the Faction benefit of Tough. This is an important aspect of the force when used properly.
Tough: If this unit ends an activation with any amount of Fatigue, and it did not Push, it may remove a point of Fatigue at the end of its activation.
Used properly this special ability allows a unit to remove a point of Fatigue almost every round. If your initiative cards don’t cooperate and you have to Push, it allows you to remove one Fatigue every other round.
The +4 when determining the role of Attacker comes into play when you consider the commander selected in this force (more on that in a bit).
The ability to spend two Command Points to either issue a Reload or Shoot action is one of the more common new abilities in Raise the Black expansion. It exists as an option in almost every Royal Navy Faction. It’s meant to represent their more disciplined structure and sailors’ ability to readily obey commands. All 3 units of Sea Dogs in this force get the benefit of the ability.
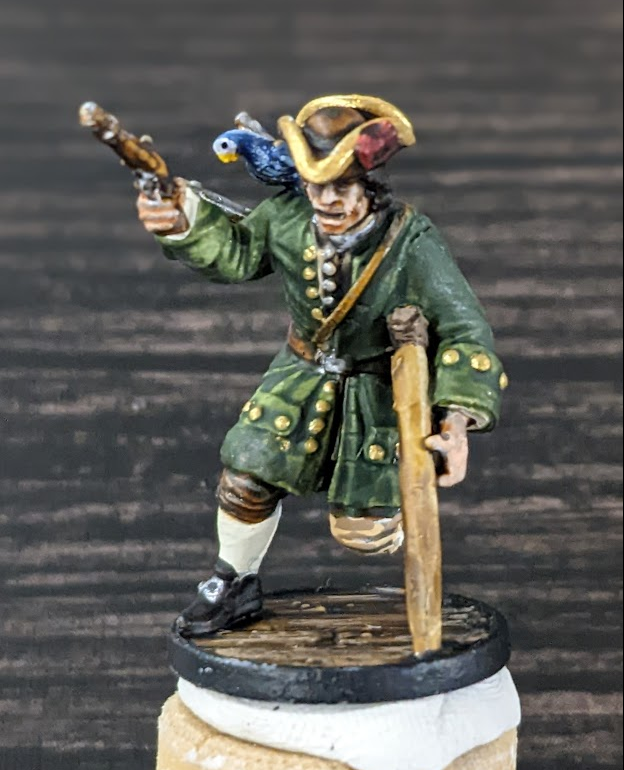
Commander – Chaloner Ogle

I had never heard of Chaloner Ogle prior to playing Blood & Plunder and the release of Raise the Black. But that is one thing about this game that I love, you periodically get a mini history lessons (pun intended) while you play. Ogle was a navy man with a long career that saw combat many times, yet managed to retire in one piece.
I specifically took him for two primary reasons: his ability to fly False Colors and his Strict special ability.
There is not currently an official Chaloner Ogle miniature so I used my custom Benjamin Hornigold miniature as a proxy.
False Colors: If the Force led by this Commander is the attacker in an amphibious or sea scenario, it may fly false colors to deceive the opposing force. Roll one d10 at the start of each turn. On a 7+ the ruse is discovered and has no effect, so no further rolls are made. Otherwise, no unit in this Force may be attacked by any enemy units this turn unless a unit in this Force attacks first or moves within 12” of an enemy unit.
Being in a Galleon makes you a big, slow-plodding target. One of the risks of this build is your opponent running away and keeping their distance and pummeling you with cannons or muskets at long range. Because it focuses so heavily on Swivels, range can be an issue. With a base 6, anything over 16″+ means you need 10s to hit. And in a ship as slow as the galleon there are plenty of ships that can outrun you and run circles around you at range. False Colors allowed me to throw my opponent for a loop and deny them shots while I closed. More on the tactics of using this ability later.
In my 3rd round both of us took units with False Colors. Thankfully I won the roll-off. But it let me dictate when to shoot and in all 3 games gave me the option to shoot first.
Strict: During this Commander’s activation, any friendly unit rolling a Test may gain one point of Fatigue to apply a -1 bonus to that Test. is may not be done if the unit is Shaken or would become Shaken.
Strict is an amazing ability. When activated it gives a -1 on any test, e.g. -1 the Shoot on the Swivel guns making the base to hit a 5 instead of a 6. This benefit not only applies to the Command unit, but ANY unit activated on Command Points. With this build that gives 2 of your other swivels a -1 Shoot in exchange for a Fatigue point. Since the Faction also has tough you can shake it off at the end of the round. If you are short actions and Push, the Standard Bearer and using the free Command Action to Rally can keep fighting and hopefully you’ll recover later in the round.

Characters
I used 3 Characters in my force: a Master Gunner, Musician, and Standard Bearer. This build requires a good bit of Fatigue management if you want to maximize your firepower. This made the Musician and Standard Bearer more useful than in other forces.
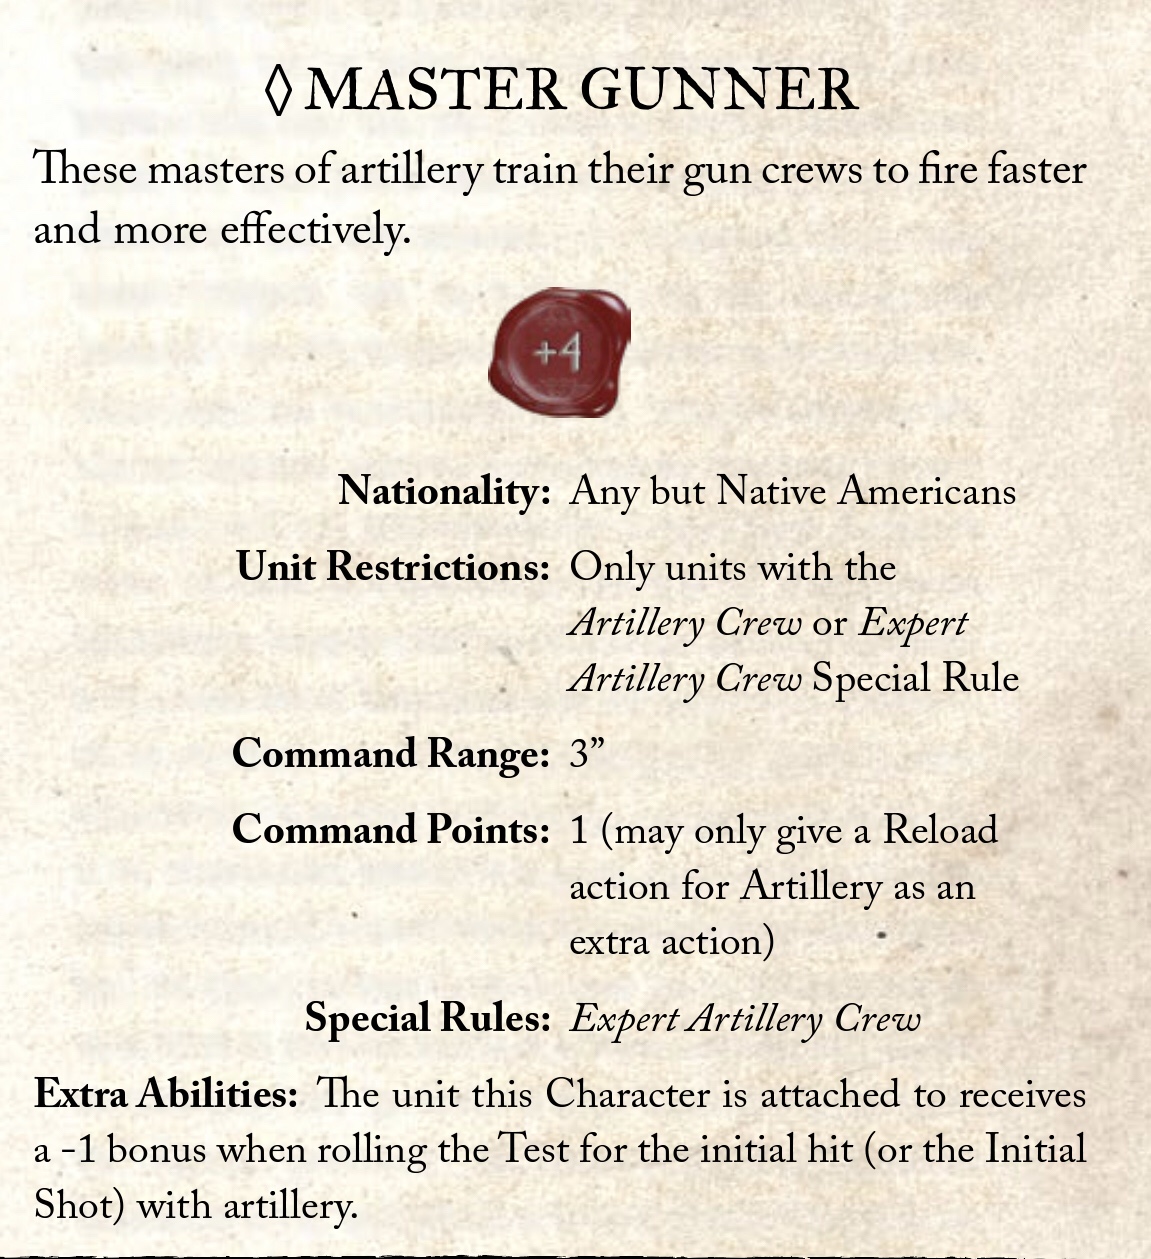
Master Gunner
For me personally, if I’m at sea and playing more than 100pts, a Master Gunner is a MUST HAVE. They are one of the most used and most efficient models in the game. They give a Unit Expert Artillery Crew and offer you a free Reload Command Point.
One thing many new players often overlook is that the Command Point they offer does NOT have to be given to the unit to which he’s attached. For this particular force, I pretty consistently used my Master Gunner to reload the unit to Reload the Sea Dogs on the rearmost deck as they were out of range of my primary Commander.
Musician
Most of the time I take a Musician it’s just because I have a 2 pt gap and can’t cram anything else in my force and a Cook doesn’t make sense for the build. He is limited to Standard Melee Weapons only so on many units he’s potentially a penalty. I stripped my Sea Dogs to melee only to lower their points and get more bodies on the ship.
For this specific build, I took a Musician for two reasons:
- Terror – It’s a gamble and with the number of new factions that have it, it’s much more common than it used to be. But the chance to inflict Fatigue early was worth the risk. In my 3rd game, it was useless as my opponent also had Terror.
- Inspiring – This gives the commander Inspiring which allows all Units in Command Range to get a free re-roll on any failed Rally test results when the commander is active.
This comes in handy when you need to use Command Points to Rally multiple units in a single round as they will all get free re-rolls. This came in handy more than once in the Adepticon tournament.

Standard Bearer
The Standard bearer is not one I take often. But for this force with my Commander is using Strict nearly every round and Pushing forces to fire the swivels as fast as possible. Thus the option to get a bonus Command Point to Rally is handy for Fatigue management.


Units
I had 4 Units of just two varieties: Sea Dogs and Able Seamen. I poured the majority of my points into arming the 8 swivel guns on the Galleon.
Sea Dogs
The Sea Dog is the tried and true backbone sailing model of the English and British Factions. It is arguably one of the best units in the game for its specific role. Sea Dogs have Expert Artillery which makes them excellent at operating a ship’s guns – both cannons and swivels. In my instance, I dropped their pistols in favor of Melee Weapons only making them only 3 points apiece by default. The unit also has Brawlers which, while not great, is still good in Melee, should someone be willing to board my ship.
The main command unit had 4 Swivels and the other two units of 8 had 2 Swivels apiece. 8 is a little overkill for 2 swivels, but dropping to 6 on each doesn’t leave a large enough unit to be super effective elsewhere. I could have poured more points into the Able Seamen, but I wanted to keep the big guns firing and avoid getting strike points from excessive Fatigue. The two smaller units of Sea Dogs had a single Firepot each.
Able Seamen
The British Royal Navy has a few options for lower-cost Musket units at 6pts or less: Able Seamen, Zeeliden, and Euro Sailors. I opted for the Able Seamen for the lower Resolve. Again for me this was a Fatigue focused build. They also have access to firepots on 1 in 4 models. I took a small unit just to have the 4th card and be able to use it to “throw away” activations early in the game without sacrificing a larger more expensive unit. They are also Veteran so they get a higher number of actions than the other two unit options.
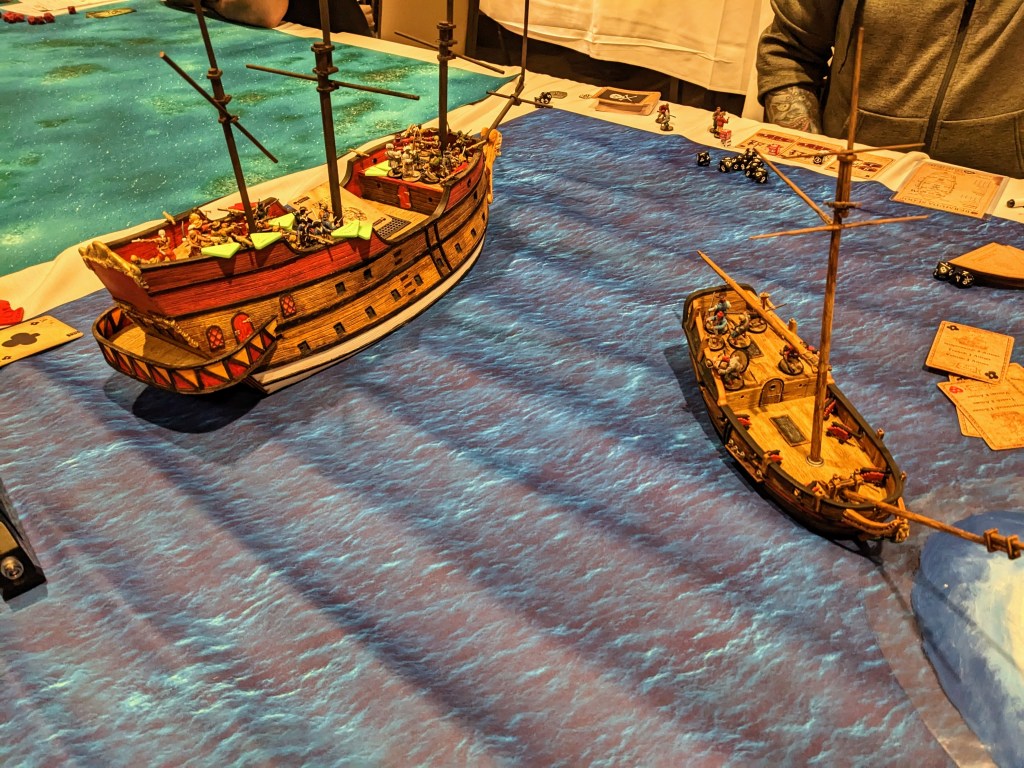
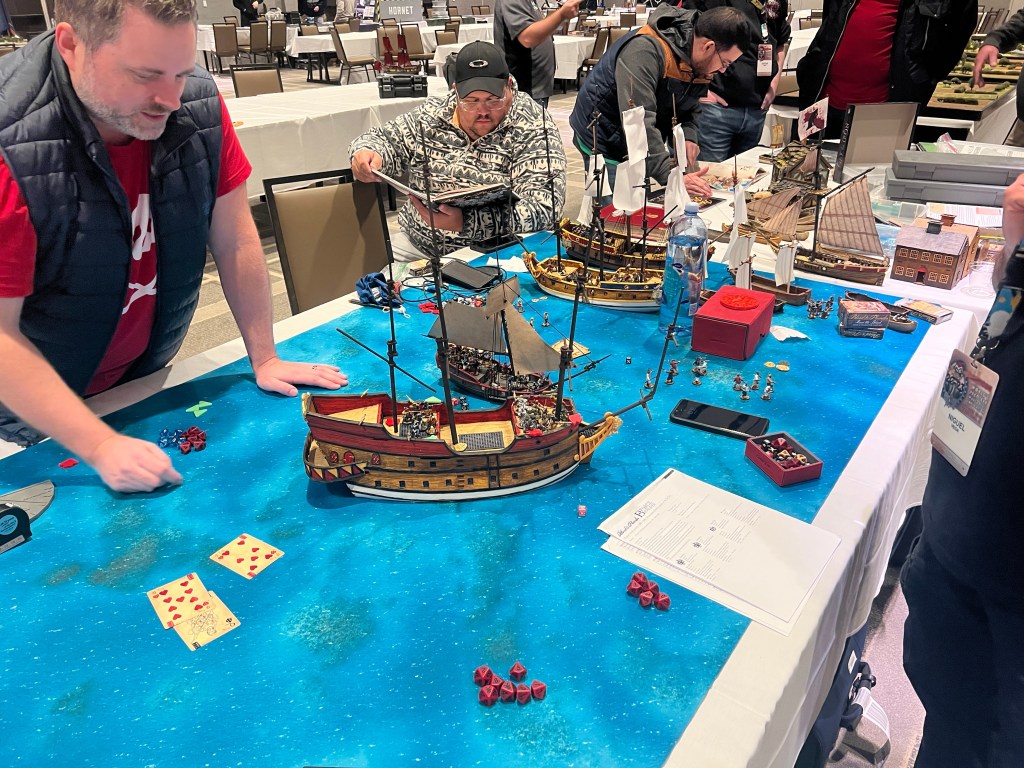
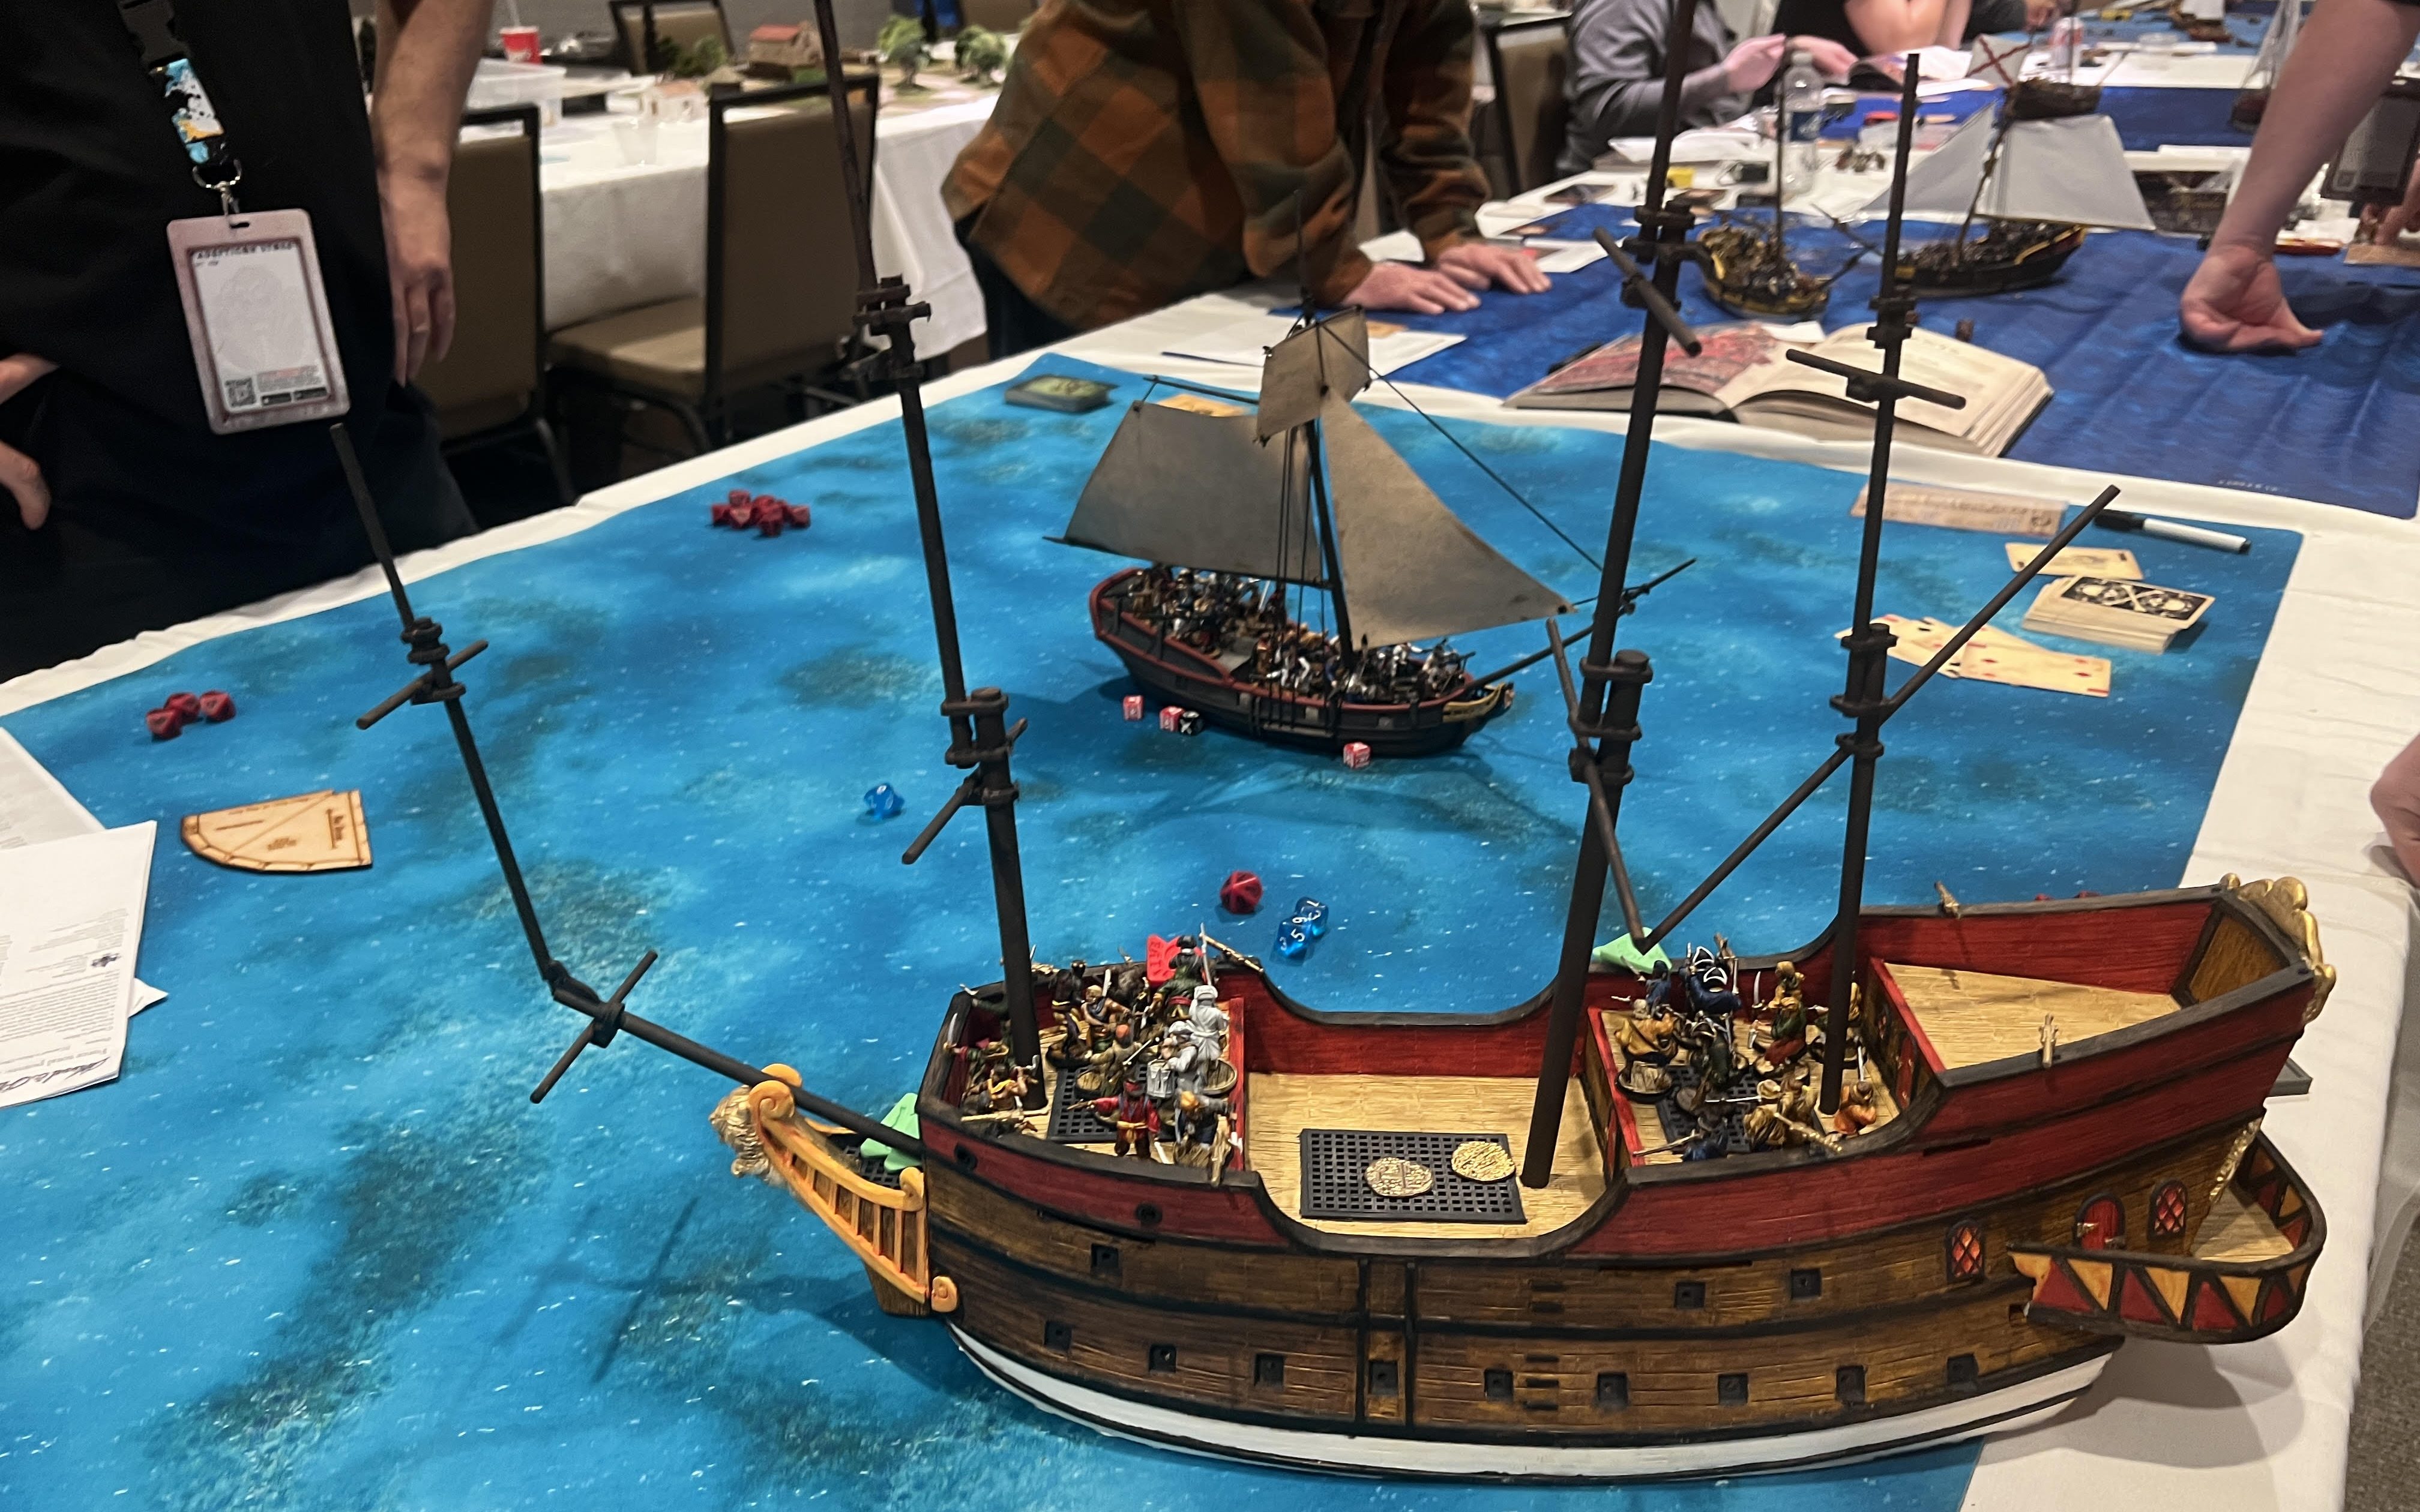
My Ship – The Galleon
This was a 200pt Sea tournament. Showing up with a Galleon is NOT the go-to option at that point level. The Galleon typically only makes an appearance on the game table at 400pts or more. This fat daddy looked like overkill. Of the forces on the board I think 60-70% took the new 18th Century Sloop. Partially due to the recent release of the starter kit, but also because it’s a solid option at that point level. But I think the next biggest ship in the event was a Brigantine.
Why Did You Bring A Galleon?!?
- To use Niguel Vega’s own phrase against him, “It was a PsyOp”. When you bring the biggest ship in the game it automatically comes with a natural intimidation factor. No one wants to fight an opponent easily 4x their size. Psychologically, I knew that would put my opponent on their back foot out of the gate
- Cannons recently got an overhaul and became more deadly. Because of their new bump in effectiveness, I expected more people to build cannon-focused lists. The Galleon has a trait called Heavily Built that allows it to ignore the first Hit applied by each attack (not the ranging shot). Every hit you shrug off at the Hull is one less that passes on to your troops.
- With a Fortitude of 5 and an Integrity of 7, this ship can take 28 damage before being reduced to a Fortitude of 1 and being in actual danger of death. I suspected that would be more than enough to stand up against the majority of opponents that did take cannons.
- It is BIG. duh. One implicit benefit the ship has is its high deck height. Based on the standard game rules any model that has to Move up and elevation greater than 2″ from its current Height requires a Dedicated Climb Action (pg59-61). This again adds to the intrinsic defensive nature of the ship.
- It’s TALL. Units on the top decks gain the benefits of being in an elevated firing position against most ships (pg 53). This gives all opponents a +1 to their Shoot save. This is a 10% difference.
Why Shouldn’t Everyone Just Take A Galleon? Is It An Unfair Advantage?
The Galleon is a big, beautiful ship, but it is not without serious risks. Especially in a tournament. For all of its benefits, it has just as many risks and negatives.
- It’s expensive… and I mean in points, not just dollars. At 25pts you are putting 12.5% of your force in just the ship. The more points you spend on your ship, the few models you have in your force, and the fewer guns you can bring to bear. Smaller ships are much faster, more maneuverable, and have better upgrades. If you wanted to keep all the defensive abilities and make your opponent still have to climb you, you would be just as well off taking a Fluyt and saving 10 points in your force (you will only have 6 Swivels, but more muskets)… but I don’t own a Fluyt.
- The ship is extremely long. This has a HUGE differential on your effective Shoot range. When you sail a Sloop, most times both decks are in the same range band. A Galleon has a literal 9″ distance between its front and rear decks. If your front deck is in range, there is a high possibility you will have +2 To-Hit with your rear deck against the same opponent. In big games against other big ships, this is less risky cause you will always have something to shoot. Against smaller ships, this can be a HUGE disadvantage.
- That big ship is as slow as pond water when you turn. You have a max turn of 2″. Against smaller more nimble ships you can be in a world of hurt if you get turned around and lose line of sight on your target.
- If a Scenario requires an opponent to “keep away” from you they can turn and run and you are likely unable to catch them. Or they can speed for the front/rear of your ship and make it difficult for you to get all of your guns focused on the target.
- The Galleon lacks the Staysails ability that comes on other large ships (e.g. 6th Rate and Light Frigate). This gives it a -2 Speed Windward making it extremely difficult to travel upwind.
- If you run aground, you might as well hang it up. You have almost zero chance of recovering and pulling out a win. When you cross a Shoal you have to roll a D10 and add your Draft value to it. If it’s 15+ you run aground. The Galleon has a Draft of 12. This means without outside upgrades, you have an 80% chance of running aground!
If you do end up Running Aground requires you to get your sail setting to 0. Do a successful Repair and then take multiple Change Sail Setting Actions to get back underway. If you were at Full Sail (e.g. 4″) it takes 4 actions to get to Speed zero. 1 to Repair and then 4 more to get back up to speed. If you can throw away 9 actions to do that in a tournament and win, you are a better man than me. - It takes a long time to paint and rig. This thing is a hobby project that is going to take more than a few hours to complete. Heck, I brought it without finishing the stern or getting to the rigging/sails.

Tactics for Using False Flags
If you’re successful, False Flags prevents your opponent from shooting at you until your ruse fails or they get withing 12″ of your location. For this force, I focused on Swivel Guns. That puts my max effective range at 20″ (10s to Hit), with a more optimal range being 12″. While 12″ is prime firing range, if your opponent is the first to get in 12″ they would get to shoot first.
Every scenario started opponents at 24″ apart. The Galleon moves 4″ max and 2″ on a turn. Most opponents will be moving 4-6″. Based on trajectory that means you have less than one full round to benefit from False Flags. You goal is to get your opponent to use at least 2 of their Activations and not get within 12″. That means you can then shoot on your second activation card. In a standard 4 card activation that eats half your opponents shots in the first round while only costing you a single activation.
Burn your Able Seamen activation first and sacrifice their 4 musket shots to deny my opponent shots from 2 of full units. The first activation throw whatever non spade/club card you want as neither of you will shoot. On the second card, go low clubs if you have the movement space to not trigger an attack. If it’s on the edge, use your high spade because you are NEED to shoot first before losing your ruse (could also be 3rd card).
Deploying the Galleon
Depending on my opponent I deployed at a slight angle (c. 30°) or completely parallel to the back edge of the board. The Galleon is so long, that if you deploy too far forward you will lose your ruse on the first activation. If my opponent started on direct intercept course or lacked cannons that meant they were likely going for some boarding action so I started parallel and as far away as possible.
If you KNOW your opponent is going for a board and running a 6″ move ship, they are very likely going to be on you and boarding by late in round 1 and for sure in round 2. That means you likely want to shoot earlier and forego the False Flags benefit to thin your enemy’s numbers and inflict Fatigue asap.
It wasn’t relevant at this tournament, but I wouldn’t be afraid to turn tail and run after the initial deployment to eat time and your opponent’s activation cards. With some practice you can figure out how to get as close to 12″ apart as possible without losing the ruse.
Unit Placement On The Galleon
Because of the placement of the swivel guns there isn’t much you can do to switch up your unit deployement locations. The Able Seamen could go in any Deck, but I put them in the fighting top on the 3rd deck. This keeps them in range of the Commander but also in with the Sea Dogs so you can spread hit dice between units if needed. Putting them in Deck 2 to draw fire is an option, but almost guaranteed to have them killed or prone in a couple of salvos. More testing would be needed to know what the better option would be. Because they had firepots and I expected to be boarded at the rear I left them on Deck 3 for defensive purposes.
- Fore Deck – Command Unit. 4 Swivels. 12 Sea Dogs.
- Deck 2 – Empty
- Deck 3 – 8 Sea Dogs w/ 2 Swivels; 4 Able Seaman
- Deck 4 – 8 Sea Dogs w/ 2 Swivels
Force Tactics
This force’s strength is its swivel guns, the ability to manage Fatigue, and the intrinsic defensive capabilities of the Galleon.
- Initial placement on the battlefield is extremely important. You REALLY want to be Attacker as the Defender places their ship first. If you lose, deploy in the middle and hope for the best. If you win, put your nose facing the same direction as the enemy ship. And put the midpoint a couple of inches in front of the center of the enemy ship so you can keep up with their movement (they will be 1-3″ faster).
- Keep the wind’s position in mind. If you get Windward, or worse, in the Wind’s Eye you are in trouble.
- At the start of every game, I activated the small unit of Able Seamen first. This lets you get in range of an enemy before you have to activate the heavier guns.
- With a ♠ or ♥ and Expert Artillery you get a free Reload.
- On a ♦, use Strict on the Command Unit, take a Command Point or Push to get the 3rd action.
- If you draw a ♣ you are guaranteed 3 actions.
- I took firepots on 3 different units. I expected at least 1 enemy to close and board. The firepots were there to cause confusion and hopefully fire on the enemy ship. Units on burning decks can’t make Ranged attacks so that would delay incoming shots. If they ignored the fires and tried to board anyway that puts them in danger of the fire spreading and destroying their own ship. Alternatively, you could take Stinkpots for the guaranteed denial of shooting, but I like the greater risk/reward of the pyro aspect.
Activation Cards
Your goal is to focus on keeping your swivels firing as fast as possible.
- Activating any Sea Dog lets you Shoot, Reload, Reload:
- With a ♠ or ♥ and Expert Artillery you get a free Reload.
- On a ♦, use Strict on the Command Unit, take a Command Point or Push to get the 3rd action.
- If you draw a ♣ you are guaranteed 3 actions.
- If you get too many ♦s, use the 2 Command Points Faction bonus to reload all units and save actions and you’ll have the potential to fire twice in a single round.
Fatigue Management
- When the effects of incoming Fatigue get to be too much use your Standard Bearer to get a free Rally.
- Don’t forget to use your Musician on the Command unit.
- Tough will kick in on the rounds you don’t Push which will also help you avoid Fatigue.
Your commander only has an 8″ range so you can’t use it on the Unit in the rear deck. But you can use the Master Gunner on the 3rd Deck to reload the rear unit.I’ve been informed that it has been officially ruled that the rearmost deck is officially 8″ from the front deck when measuring range on the ship despite the physical measurements. Per the rules on pg 63 all decks are considered to be 4″ for purposes of determining range. Which means the rear deck is 8″ from the front deck despite the physical 9″ distance. That lets Ogle command anyone onboard the ship.
Strategies for Targetting Your Opponents
- If the enemy has 3 light cannons or fewer. Ignore them. Focus on the other deck. The Galleon will ignore the first hit, leaving fewer hits being passed forward to the crew. And since cannons reload slower, if you clear the other deck they will have fewer muskets or swivels to shoot you.
- If they have swivels and cannons on the same deck, concentrate on that one first as it is the most dangerous.
- Don’t focus on kills. Focus on Fatigue. If you keep your opponent Shaken and/or Prone, that makes a big difference. This build will win in a Fatigue war because it avoids it & recovers quickly. If you Fatigue an opponent, they lose actions and be unable to fire back as quickly.
- If they are a boarding-focused build, look for the special Characters that they are using to bolster their forces. Target them early and try Fatigue them and deny/minimize their bonus Command Points and abilities.
- Commanders are game changers. It is possible to focus on that unit exclusively in hopes of taking them out or using a Fortune Point to Cheat Death. In one round I accidentally killed my opponent too quickly. The tournament is Strike Point driven, meaning you want to inflict as many strike points as you can while taking as few as possible. My opponent burned their fortune early (with good reason) and couldn’t use the Cheat Death ability to move to another unit. Their commander was dead so when they had to take a Strike Test a the end of the round they auto-failed. This ended the match before I could earn more Strike Points by slaughtering more of their men. … hey, it’s not poor sportsmanship in a competitive event.

Conclusion
The Adepticon sea tournament was an excellent event. Thanks to Joseph for organizing it and running around answering questions like a madman (p.s. he says to remind you to read your rulebooks at least once a year). I hope this article was helpful in shedding light on the madness of this build. So, buy yourself a Galleon and have fun. But if you have to fight one in a tournament, don’t be intimidated. You CAN beat it. …and I expect some of you to try next year.
written by Jason Klotz
Additional Content Suggestions
- Read more about the ADEPTICON 2023 Sea Tournament Adepticon 2023 Blood & Plunder Tournament Report
- Galleon – Blood & Plunder Ship Overview
Related Products
- Blood & Plunder Galleon Ship Model by Firelock Games
- Blood & Plunder: Raise the Black containing the British Royal Navy Faction
Pingback: Adepticon 2023 Blood & Plunder Tournament Report
Pingback: Blood & Pigment at 2023 Adepticon Part 2 - Video - Blood & Pigment