
Long John Silver is one of the most iconic characters in the pirate genre. Silver is one of the chief antagonists in the Robert Louis Stevenson novel, Treasure Island (1883). Because of it’s popularity, Treasure Island has been turned in to plays, tv shoes and multiple full-length movies. When I saw the parrot model was going to be part of the “Box of Plunder” for the Raise the Black Kickstarter I immediately wanted to make a Long John Silver mini… even if he’s a little after the time period for Blood & Plunder.
Inspiration for the Long John Silver
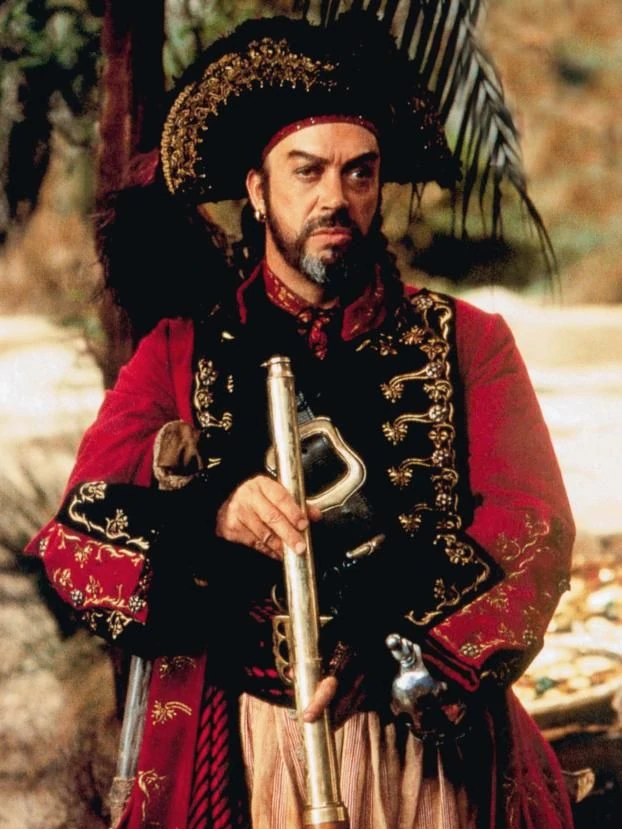
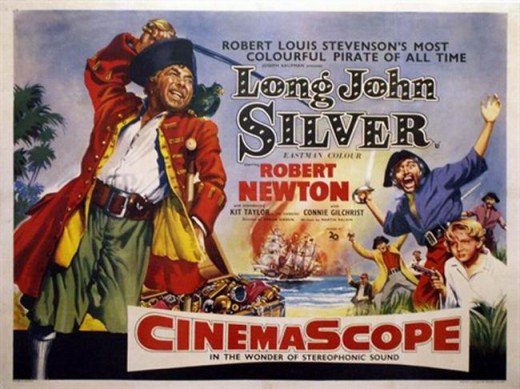
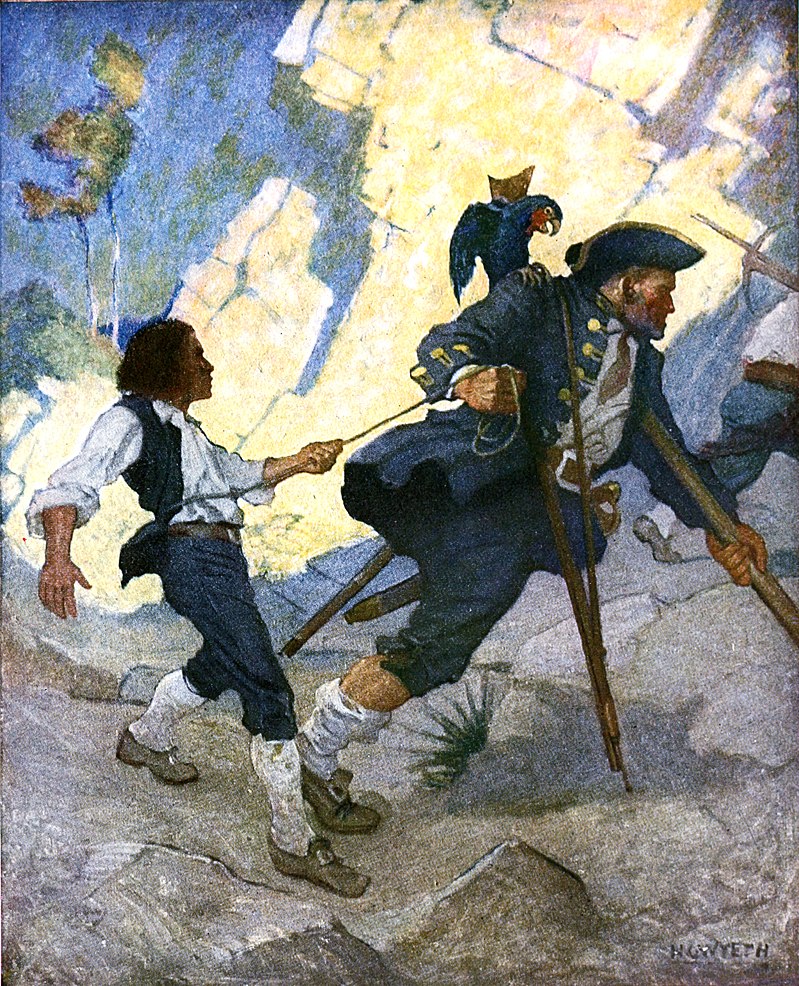
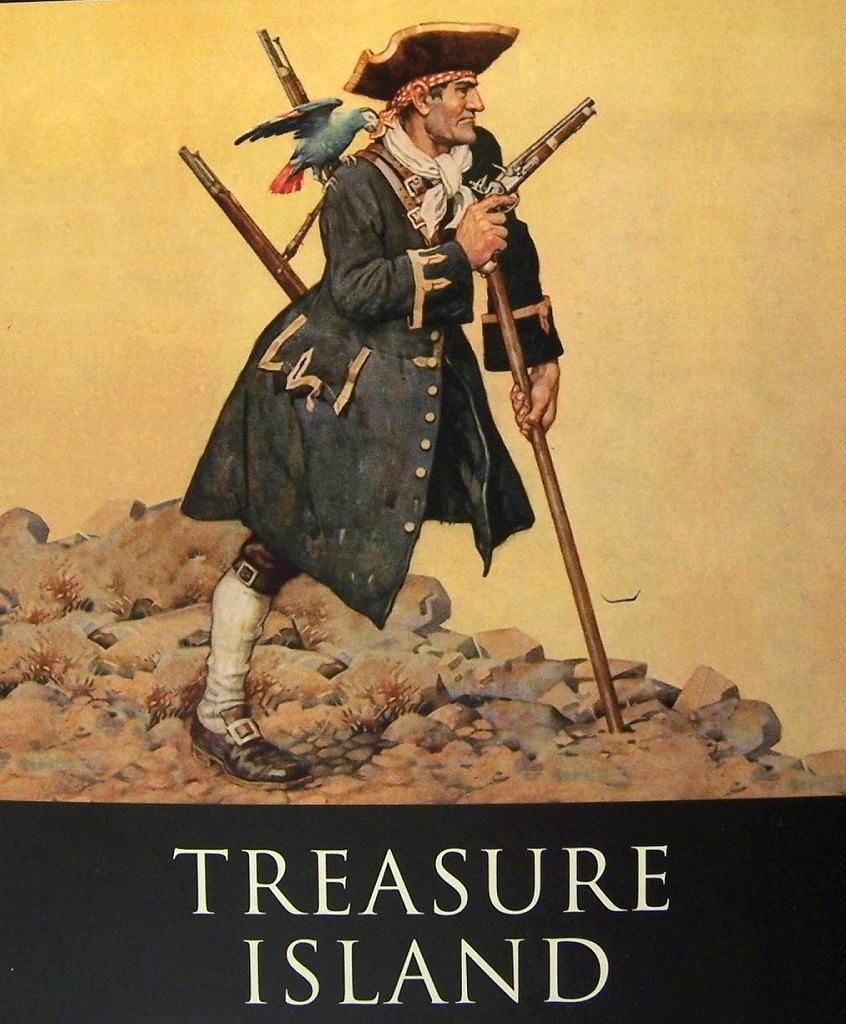
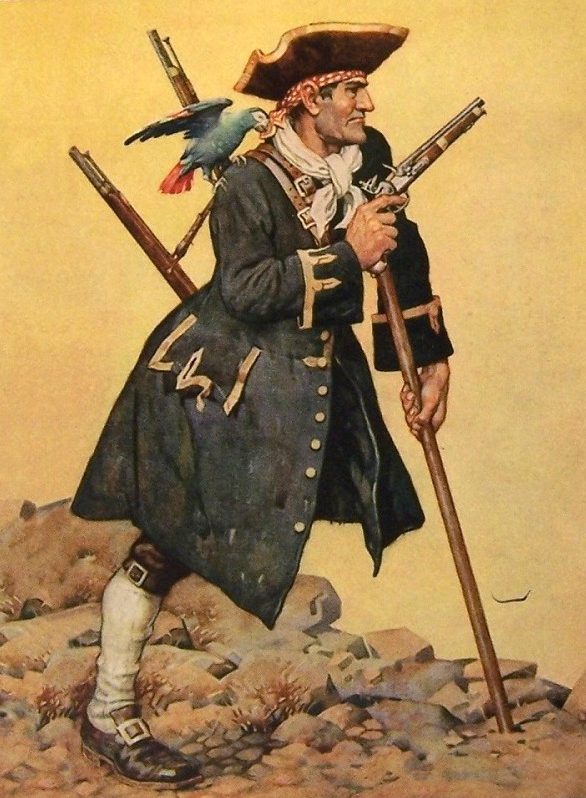
The character has been drawn and created in several different fashions. The following is a collection of some Long John Silver Artwork and actor portrayals of the character.


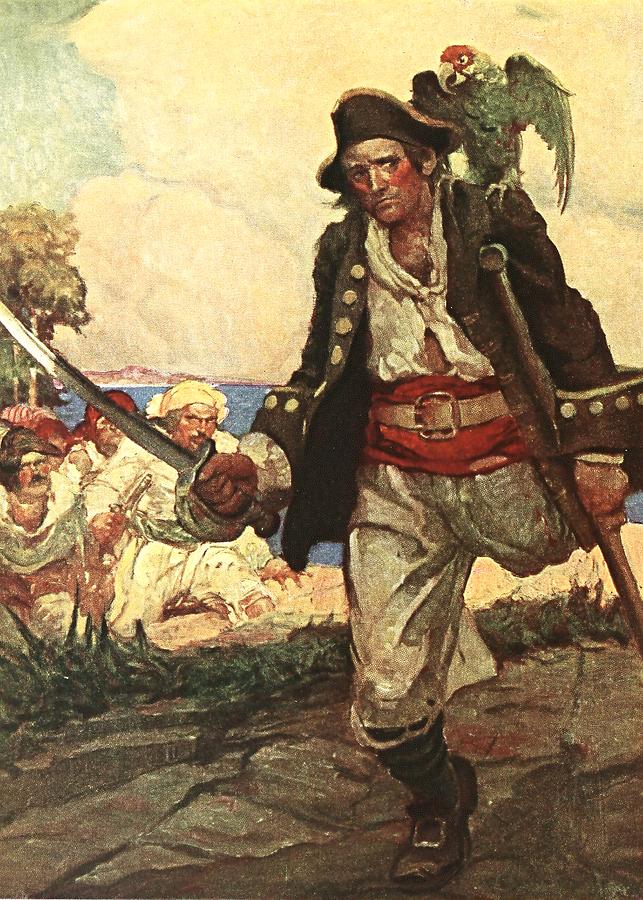


This one in particular has always stood out to me and is the one I wanted to focus on for the construction of the Blood & Plunder model. It is an artic creation by Monro Scott Orr. This piece seems to be one of the more practical renditions. The coat hat and weapon all look like they could fit the time period and the concept avoids some of the more whimsical pirate renditions.

What You Need to Make the Long John Silver Miniature
I pulled parts from the following model kits:
- Soldiers
- Sailors
- Box of Plunder – Unfortunately, this is currently only available to Kickstarter backers. Though you might be able to find it on ebay or talk someone into selling you the parrot miniature. It’s not a deal breaker for the overall build though.
- Cavalry (Optional)
Specific Parts List
- Soldier F7 body.
- Soldier A5 for Left Arm
- Sailors P36 – Pistol hand
- Soldier F1 – Hat
- Soldier F4 – Head
- Parrot from the Box of Plunder
- Right arm – not sure, pulled from the bits of something, likely a sailor or Soldier – just tried to match the sleeve cuffs
- Left hand from the Box of Plunder
- Crutch – I cut a thin section from a scrap sprue for the length and scored it up a bit to give it some carved texture. Then cut a short curved sprue bit for the top as an armrest.
- Two muskets or carbines. I used Carbines from the Cavalry (I think…). But you can get options from the Sailor, Cavalry & Militia boxed sets.
Steps I took to Actually Make the Miniature
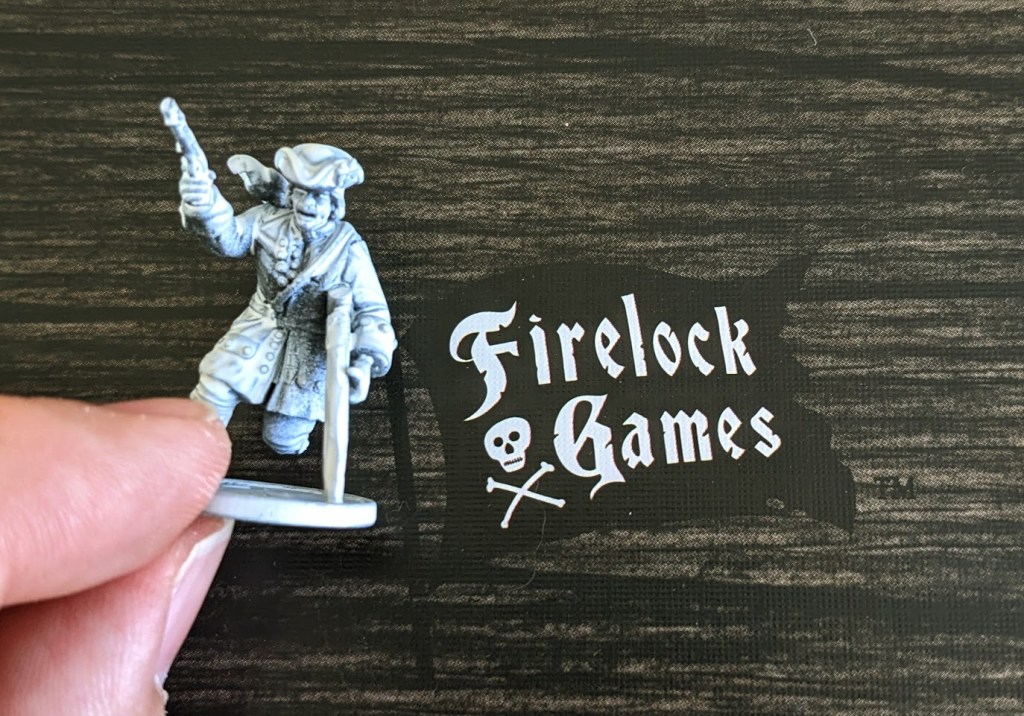
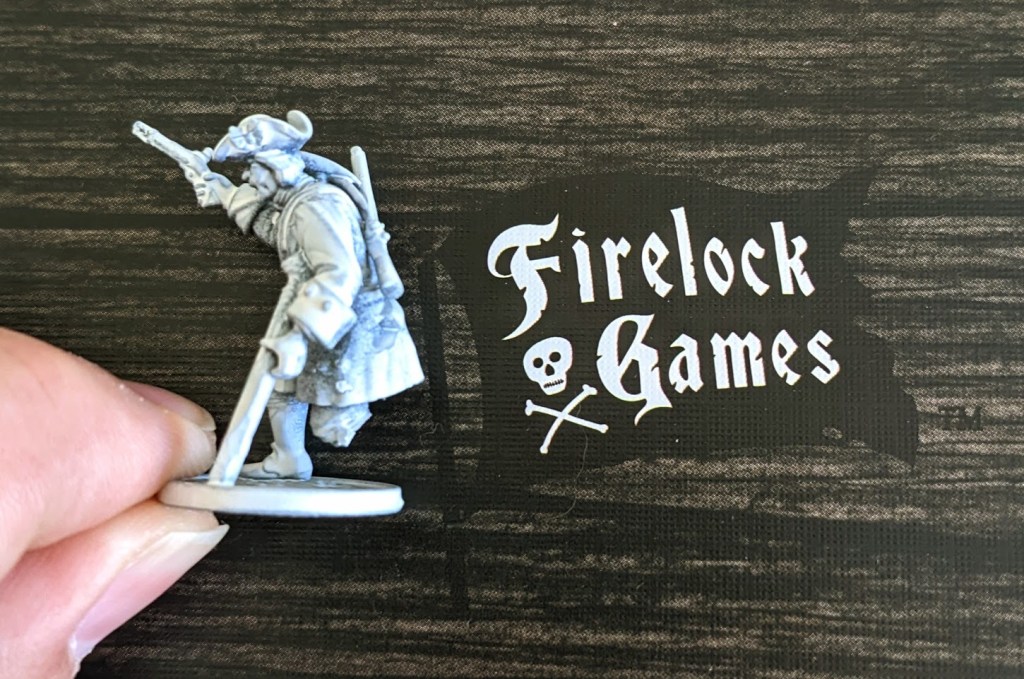
Step 1. Selecting a Torso & Legs
I took the base art and looked at the miscellaneous options I had on the sprues my Raise the Black boxes. I settled on the Soldier model F7. His position was a little hunched over, meant to look like he was about to charge into battle. A perfect pose to lend itself to leaning forward on a crutch. Normally I would glue the mini straight to the base early on, but on this one I didn’t because I needed to make sure I got the crutch position correct.
Step 2. Remove the Leg
I removed the right leg just below the knee and then used my hobby knife to scored up the nub to give it some grooves make to look like wrapped cloth at the end.
Step 3. Prep the left Arm for the Crutch
Soldier Arm A5 is one that is extended straight and so it works to angle down along the length of the crutch. I had to trim the top of the shoulder a bit to notched a little bit to be able to flair the arm out at an angle to fit the crutch underneath. In order to give the crutch a little more room, I also notched the armpit out a bit. I got impatient and should have cut a bit more than I should have to make it a tighter fit.
Step 4. Building the Crutch
The Crutch When working on the crutch I actually started with the idea of using a wooden toothpick. I cut one to length and fiddled with getting it in place, but the texture just seemed too far off for what I wanted. Instead, I decided to use chunks from the scrap sprues. I cut a chunk of the thin straight support material and then “gnarled it up” a bit with my hobby knife so it didn’t look like a perfectly round smooth chunk of plastic. I cut an arced chuck from one of the other sections of sprue to use as an armrest at the top.


Step 5. Assembling the Left Arm & Crutch
Assemble the left arm, crutch, and hand. It’s a bit “fun”. You’ll want to dry fit and work it out as best you can before you assemble it. Once you are happy with the arm and crutch glue them in place. Then fool with attaching the hand.
I used an open cupped hand from the Box of Plunder to try to get it “sort of” in place to be grabbing the crutch. The wrist has to be cut at a bit of an angle to get it to align properly. Even if it’s not a perfect fit, you can get it close enough to look good enough.
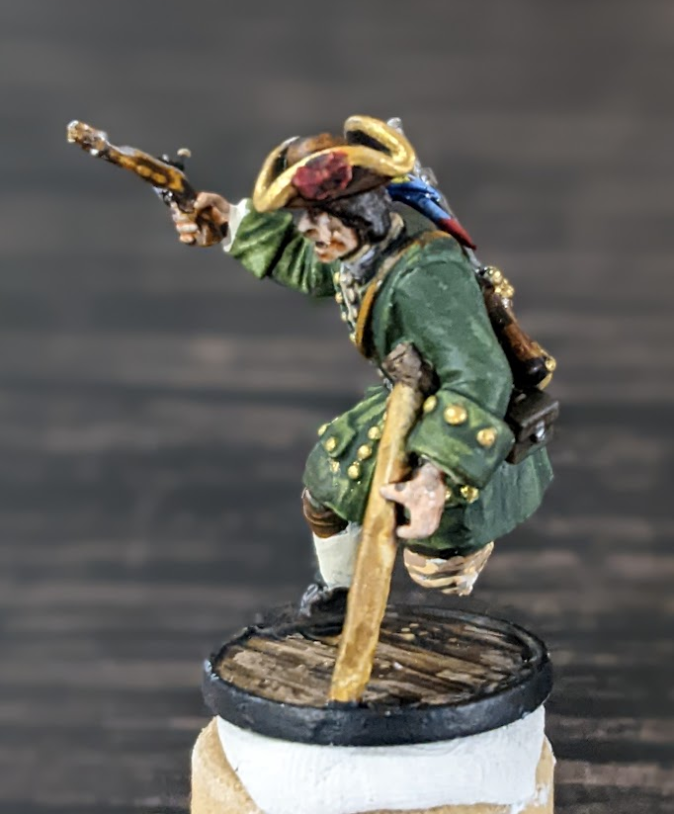
Step 6. Attach the Left Arm & Pistol
The Left Arm is from a Sailor model with the elbow bent and worked well to attach the Sailor P36 Pistol in an upward raised format. This should be a simple straightforward glue and go.
Step 7. Attach the Head and Hat
There was no customization on the Head and Hat so they went with the body selected nicely. It was too late for me, but you might want to do a head with hair in a ponytail to be able to paint it as a do-rag/headscarf.
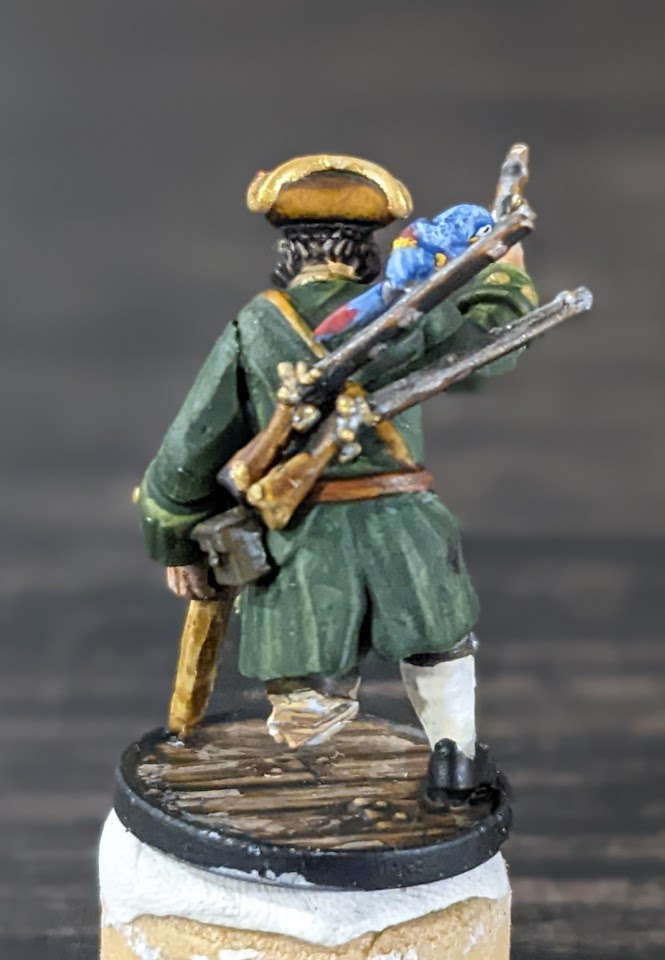
Step 8. Rear Mounted Weaponry & Parrot
For the muskets on the back, I only attached one initially in order to have beet access during painting. I used some extra Cavalry carbines. I figured it would be lighter and easier for a one-legged man to carry. But you can use some of the unused muskets from any other set and carefully trim the hands off. If they look bad you might try covering them with a fake strap or painting them to look like straps.
I had to use tweezers to get the parrot in place. It’s a super thing model and with the tricorn and pistol arm in the way, there was no way to get my fat fingers in place. If you don’t care about the art, it would probably have been better to reverse the angle on the guns. As is, they don’t really fit with the angle of the shoulder straps (but I don’t care).

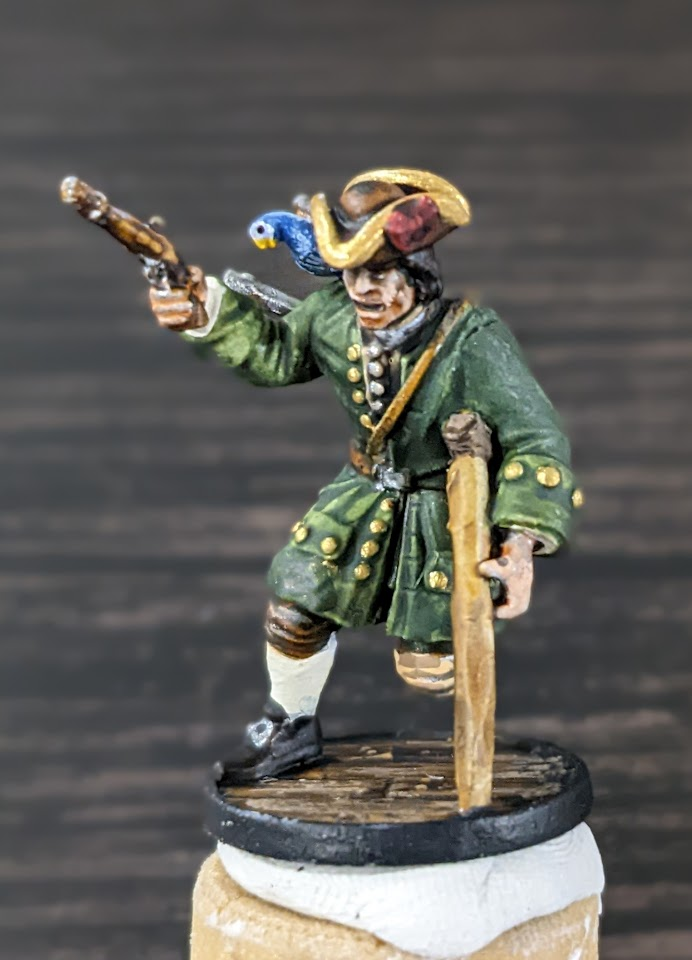
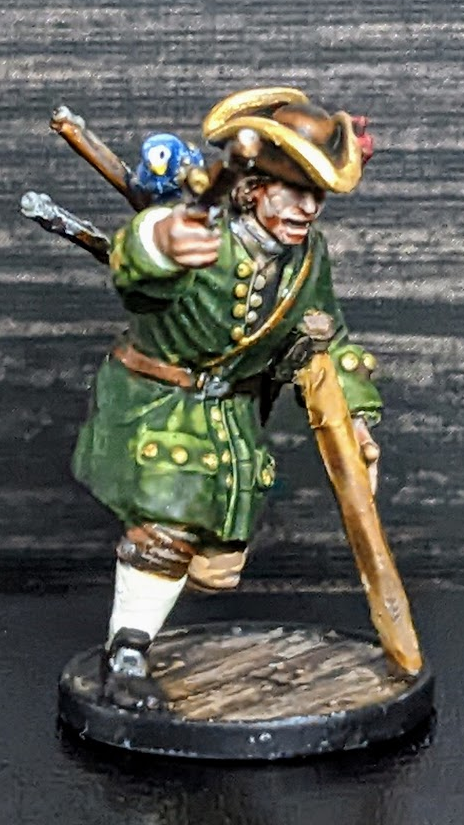
Finished Product
Here are some quick picks of the fully painted version of the miniature. Hope you enjoy and create one of your own! Would love to see pictures and see your comments below.

Uses for Long John Silver in Blood & Plunder
You can use the new model in a few ways during your Blood & Plunder games. Here are a few of my top suggestions:
A Grizzled Veteran

I always pictured Long John Silver as a crusty old sea dog who has more stories and tales than he knows what to do with. He has charisma and charm and is able to win the hearts and minds of those around him. That makes him perfect for the role of a Grizzled Veteran.
The Grizzled Veteran is one of my favorite Fighting Men characters added in the No Peace Beyond the Line expansion rulebook. I use him in a large number of land and sea games. It’s an extremely powerful upgrade for 3 points. He grants your unit Tough & Battle Hardened. He also gives your unit the ability to use a Command Point for a free Rally action.
Tough essentially removes 1 point of Fatigue for free every round if you didn’t Push. Combined with Rally you can shrug off Fatigue quickly. This is particularly good in larger units or units of Militia. The Rally also DOES NOT have to be used on just the unit he’s attached to, it’s anyone in 3″. So if you are on a ship, you can holler encouragement and “motivation” to units in nearby decks.
Son of Neptune

The Son of Neptune fighting man is similar to a Grizzled Veteran but is more suited to sea games. He also grants a unit Tough but instead offers Expert Sailors over Battle Hardened. On larger ships where you are more prone to need sailing actions, he is a good option.
I don’t find that I take a Son of Neptune in smaller games (under 200 points), but occasionally there is a scenario that calls for him as a good option. In larger games, even if you don’t need the sailing skills, the ability to Rally is invaluable.
Cook
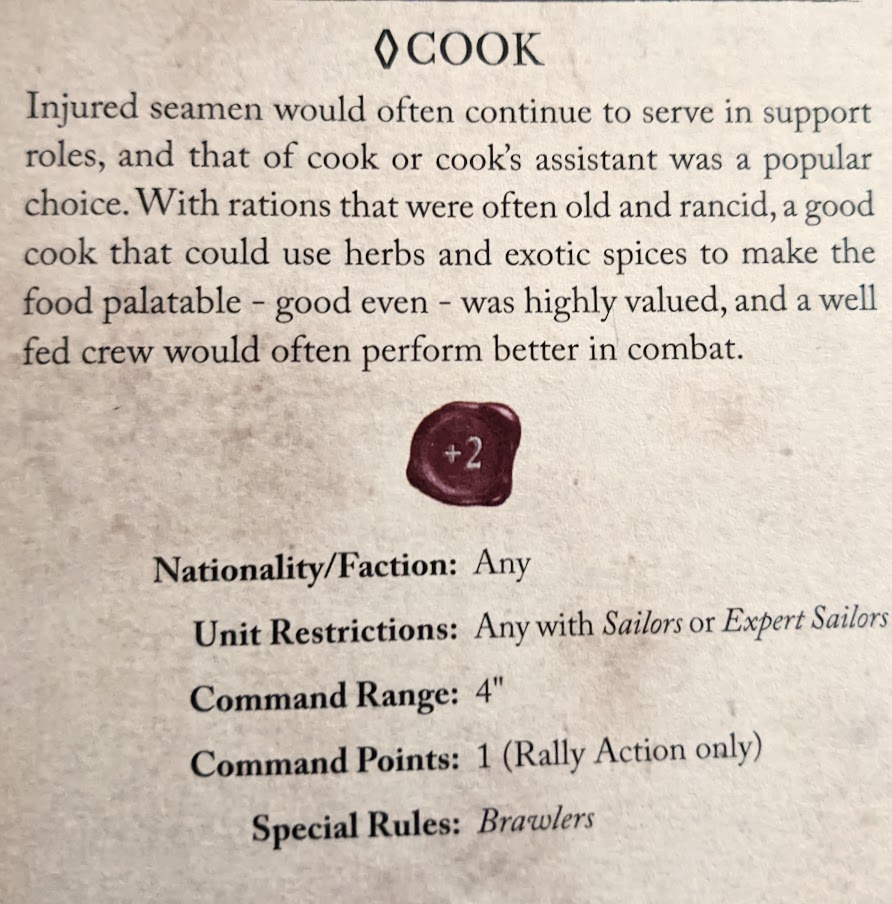
One of the new Fighting Men released in the Raise the Black Expansion is a Cook (pg 150). Because injured men often had difficulty serving in the rigging they were sometimes given the job of cook or cook’s assistance. This role corresponds with Long John Silver nicely as he lies and sells his services as a Cook aboard the Hispanola in the novel.
Cooks like the other two options mentioned give you a free Rally command point. It also grants the unit Brawlers. If you are building a Boarding focused or Melee Charging focused force this is a good one to add to the lead unit. When paired with a Unit that already has Hard Chargers, Brawlers just adds a double whammy by being able to do additional hits on 10s.
A Custom Commander
One of the coolest options in the Raise the Black expansion is the ability to create your own custom unit commander. Each Faction allows you to select an Untested, Experienced or Seasoned commander. The Experienced and Seasoned commanders get to select from a list of Special Abilities that are popular among their faction. Since Long John Silver is English take a look at the abilities to create your own commander on pg 82.
My suggestion if you want to stick to a thematic flavor for Silver is a Seasoned Commander with Resilient and Inspiring abilities. Resilient because he is able to maintain a chaotic, rag-tag crew of mutineers to the very end of their search, through heavy losses and suspicions of treachery. Inspiring because the man has a “silver tongue” and is able to convince people to do things they wouldn’t normally be able to do.
Additional Reading Suggestion
- Get more info on Fighting Men in our Complete Guide to Blood & Plunder Characters
- Learn more about what is on each sprue in the Complete Guide to Raise the Black Plastic Miniature Sprues
- Listen to the free audiobook for Treasure Island on YouTube: https://www.youtube.com/watch?v=atBFFhV2Jcs
Pingback: Adepticon 2023 - British Royal Navy Galleon - Blood & Pigment
Pingback: "Klotz's Kitbashes" - Custom Miniatures for Blood & Plunder - Blood & Pigment