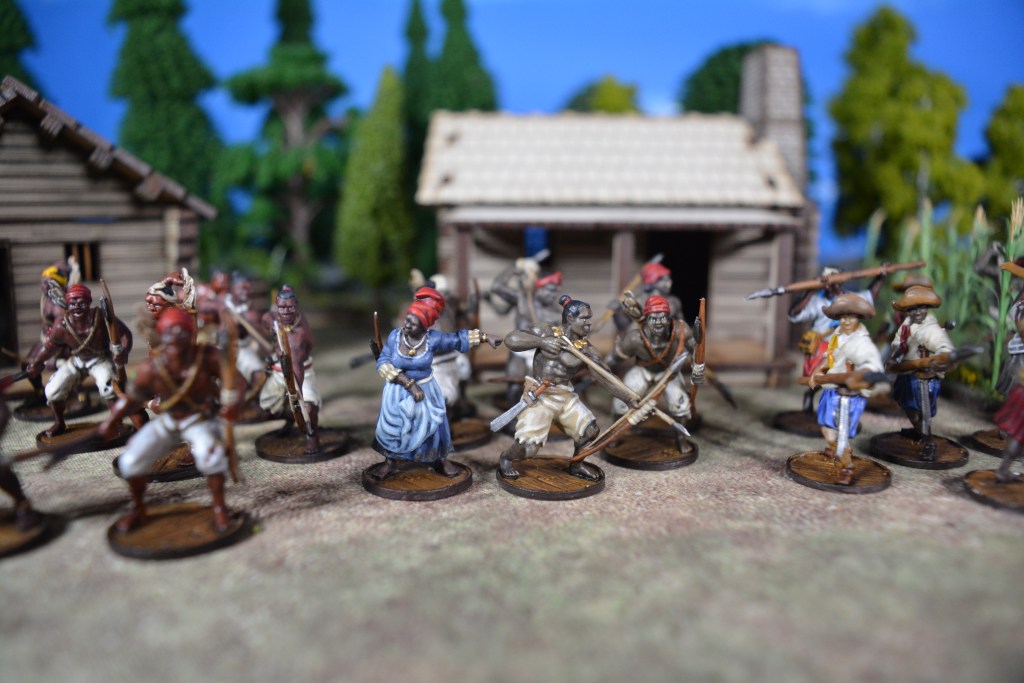
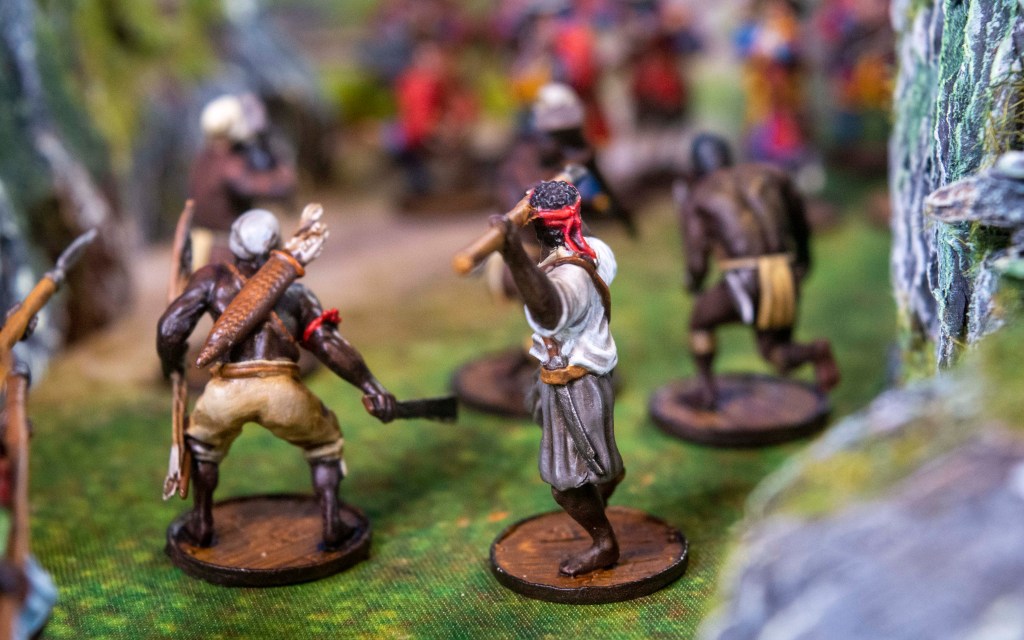
The Raise the Black expansion for Blood & Plunder includes no less than 40 diverse factions, ranging from the British Army to Blackbeard’s Men, to Spanish Mission Indians. One of the factions that looks most exciting and different to me is the Maroon faction. Now you can play Blood & Plunder as a fiercely independent force of free Africans in the 18th Century Americas. With this faction you can set deadly ambushes or perform daring night raids against your enemies with a small band of quick and deadly warriors.

Article Contents
- Maroon History
- Maroon Faction Special Rules
- Maroon Units
- Maroon Commanders
- Maroon Tactics
- Maroon List Building
- Buying into the Maroons
- Recommended Reading on the Maroons
- Final Thoughts
Maroon History
Slavery was a brutal reality throughout the world in the 18th century. Thousands upon thousands of people were transported from Africa to the New World every year. Everywhere the horror of slavery was practiced, people put under forced labor would do what they could to escape. These escaped slaves would coalesce into Maroon communities. Their societies were varied and complex throughout South, Central, and North America and the Caribbean Islands. Valuing secrecy, loyalty, and self-sufficiency, but also authoritarian and willing to compromise to gain peace, these Maroon communities were perpetually at some level of war with the colonial communities near them.
Many of these escaped slaves were warriors, captured in wars in Africa, and, in spite of a lack of resources, they were able to put up impressive levels of resistance against colonial powers constantly attempting to stamp them out. Forced to retreat into the most inhospitable terrain to maximize safety, these communities learned to use terrain to their advantage, developing strong defenses, types of sophisticated camouflage, and learning to set deadly ambushes against the regular expeditions sent out against them. These Maroon communities included women & families and lasted many generations in some cases, but overall, they included a majority of men. These men counted armed warfare against those who would enslave them as an ever-present reality.
Maroon Communities
Maroon communities sprung up wherever slavery existed but they were most successful and long-lasting in regions with rocky or marshy terrain that provided some level of natural defense. The Jamaican Maroons are the most well-known example. Maroons town was founded in the dense and rocky inland areas of Jamaica while still under Spanish control in the 17th century and increased under English rule in the 18th century. Maroons were a constant terror to plantation owners who feared raids on their lightly defended farms. While mostly self-sufficient, there were commodities that Maroon communities could not produce and night raids on outlying plantations were common. Maroons also were in regular contact with Africans still enslaved on plantations which gave them plentiful and accurate intel on the targets of their raids. Maroon raids were so feared and hated, Jamaica’s government regularly offered bounties for Maroons, dead or alive. When they became particularly troublesome, Governors would assemble military expeditions against the Maroon towns. But, being constituted of local militia or pressed men, these expeditions were not particularly successful, often ending in disaster and massive loss of material and life.
The Maroons had constant scouts and sentries in the field, allowing them to set deadly ambushes in the most advantageous of terrain. Using effective camouflage, they would let the English troops walk right past them before springing their trap on the encircled English forces. It was only in the mid to late 18th century that the English governors were able to gain some control of the Maroon communities by offering them peace and trade in exchange for giving up some level of autonomy and letting English officials live among them and help decide community disputes.
Maroon Community Locations
Maroon communities sprung up throughout North America, the Caribbean, Central America, and down into South America. The Portuguese brought massive numbers of Africans into Brazil, and the Maroon communities that developed in the South utilized forts, and even cannons to defend themselves against regular expeditions against them. The Africans in Dutch-controlled territories like Suriname endured cruel masters and the most severe punishments, making the Maroons committed and ruthless enemies once they escaped. No quarter was asked for or given in the skirmishes between Dutch bush fighters and Maroon warriors. We could spend a lot of time looking at Maroon history, but let’s take a look at the actual Maroon faction coming out in Raise the Black.
Maroon Faction Special Rules
Overall this force utilizes high-cost models that are good at surviving and fighting a guerilla war, utilizing cover and surprise attacks. This Faction is heavy on Special Rules, so let’s look at these rules real quick, one at a time.

Limited Visibility
The first two rules let the Maroon player control the battle environment to some degree. Using the Limited Visibility: Night scenario rule limits line of sight to 12″ unless there is a light source on the board. This affects both players equally, but with mobility bonuses from rules like Quick and Skirmishers on many of their units, this limit to visibility can work to the Maroons’ advantage. Move up so you’re within 12″, shoot, then pull back so you’re out of line of sight. With a Trained unit, you can pull this 3 action combo with a Spade, Heart, or Club.
Lay in Wait
If the Maroons are on defense, they get to place up to half their units using the Lay in Wait scenario rule. This allows you to place half your units after all the attacking units have been placed, and you can place them outside your normal deployment zone (with some limits). The downside is you have to deploy those units Prone, which can make the vulnerable on the first turn. Maroons were famous for their ambushes. With effective intelligence networks, Maroons usually knew of attacks hours or even days before they were in danger and they would lay in wait for their enemies, hitting them from all sides and then disappearing into the forest.

Limitation on Ship Size
The third rule simply prohibits the Maroons from using proper ships. Maroons seem to have rarely ventured out on the water, and if they did, it was in small and simple boats. Notably absent is a prohibition against using cannons. There are records of Maroons in Brazil having cannons of some mounted on fortifications. With high-cost models and no artillery bonuses, artillery wouldn’t be great for this faction, but it would be possible! You could use that single light cannon chaser on a Piragua!
Defense against being Charged
Now, this fourth special rule is the most fun in my opinion. This rule rewards sudden and long-range charges. Maroons were highly skilled at camouflage and they would suddenly set upon a column of soldiers, attacking unprepared militia with clubs and machetes before they could respond. If you start more than 8″ away from a unit and manage to charge that unit, that unit will take a +1 penalty to any Defensive Attack. This is a small penalty but is especially effective against militia units with a base Shoot skill of 7. Hitting only on 8’s is pretty rough. Or if you’re charging those cursed Flibustiers with the ever-present pistol, that pistol shot goes up to an 8 as well.
Hidden
The final Special Rule grants all units in this faction is Hidden. This makes Maroons more difficult to root out of cover from long range. This combined with the rule above makes the Maroons very dangerous versus militia factions.
Maroon Force Options
We have three distinct force options representing Maroon communities found in various places in the New World.
Jamaican Maroons
The Jamaican Maroons are the most famous and they get a strong showing here. The African Warrior unit, which is one of the two Core Units in this faction, can exchange Bows for Muskets, but when they do, they usually get the Slow Reload Special Rule which gives them an extra Reload token every time they shoot. This makes them very slow and clumsy. The African Warriors fighting in the Jamaican Maroon force will gain the Poorly Equipped Special Rule instead. Maroons could fire and reload quickly, even while on the move, but they often struggled to consistently acquire good quality powder and balls for their muskets. They sometimes even resorted to shooting buttons from their guns… African Warriors are the cheapest core unit available to the Jamaican Maroons (believe it or not), and this Force Option makes them more useful when using muskets. (Note: There is a printing error in the book for the Jamaican Maroons, but their Force Option is correct on the online Force Builder.)
Brazilian Maroons, or Quilombolas
The Brazilian Maroons, or Quilombolas, intermixed with the local natives, they get access to Warrior Archers as a Core Unit, but the Veteran, highly skilled Coromantee Warrior becomes a Support unit. The Commander of the Brazilian Maroons also gains the Castilian Special Rule, making fortifications a smart option. The Brazilian Maroons built up massive settlements in the jungle and fortified them with palisades, ditches, camouflage, and even cannons. Castilian gives units a bonus to their Resolve when their commander rallies them within a fortification.
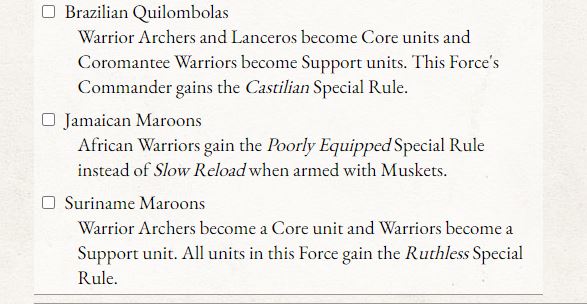
Suriname
Lastly, we get the Maroons in Suriname, or Dutch Guiana. The Dutch were extremely harsh to the slaves in this colony, and many Africans escaped. The Dutch were aggressive about hunting them down, making the Maroons’ campaign for survival a constant and brutal struggle. Being less well-equipped than their cousins in Jamaica, this Force gains Warrior Archers as Core units and Warriors as Support Units. Having a cheaper Core unit is good, and the Native Warrior unit fits right into the Maroon tactics of hitting hard in melee from long distances. All units in the Suriname Maroon Force also gain the Ruthless Special Rule, making both their Melee and Ranged attacks that much more deadly, if they can manage their Fatigue.


The Brazilians are great for defense, the Suriname Maroons are great for offense, and the Jamaicans are best at musketry which makes them good all-around.
Maroon Units
We’ve already looked at some of the unit composition options while considering the Force Options, but let’s look at the units available to the Maroon faction in detail.

Maroon Core Units
Without considering the Force Options, the Maroons only have 2 core units: The African Warrior and the Coromantee Warrior.
African Warrior
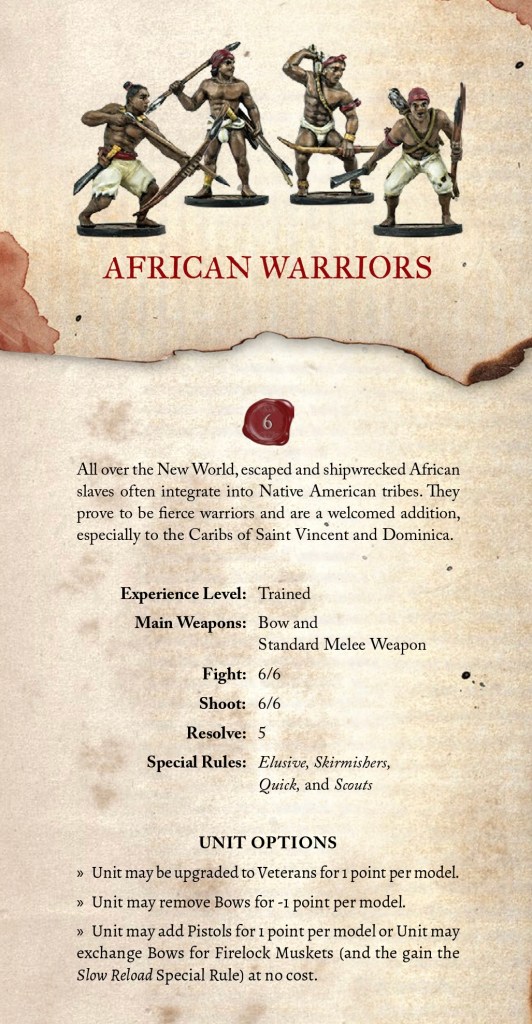
The African Warrior, introduced in No Peace Beyond the Line, is the cheapest Core unit (in the “base faction” at least). This 6-point model has lots of solid Special rules which work really well in this faction, but you still have to deal with the 6-point base price. Not cheap! With a stat line of 6/6/6/6/5, they can do everything decently but aren’t particularly vicious on the attack. They have lots of upgrade options which makes them that much more flexible, but they start to look pretty good once they have muskets in the Jamaican Maroon faction.
Their Special Rules include Quick, Skirmishers, Elusive, and Scouts, along with the Hidden rule granted by the Faction rules. That makes them super mobile, and hard to shoot from a distance. Their 6 Fight Save is solid as well. Those great saves, along with Elusive and Hidden and a Resolve of 5 make them a very sturdy unit.
Their weakness is their lack of striking power. With a 6 Fight and no melee weapon upgrade options, they aren’t going to steamroll an enemy unit like a unit of Marins or Enter Ploeg might. They can take pistols which are good in melee, but that adds considerable cost.
You will likely need to take a unit of African Warriors minis in most Maroon forces. Jamaican Maroons should be equipped with Muskets and Suriname Maroons can do well both bows so they can lay down Fatigue to trigger their Ruthless ability. African Warriors seem least useful in the Brazilian Maroons Force since you have access to Warriors Archers for cheaper.

Coromantee Warriors
This is the Maroons elite, veteran, melee killing machine. Many of the Africans that were brought over as slaves were skilled warriors captured during the wars between West African Kingdoms. These Coromantee were proud leaders and dangerous opponents. They are super expensive, but they are Veteran, they have ALL the Special Rules, and they are good at melee and decent at shooting.
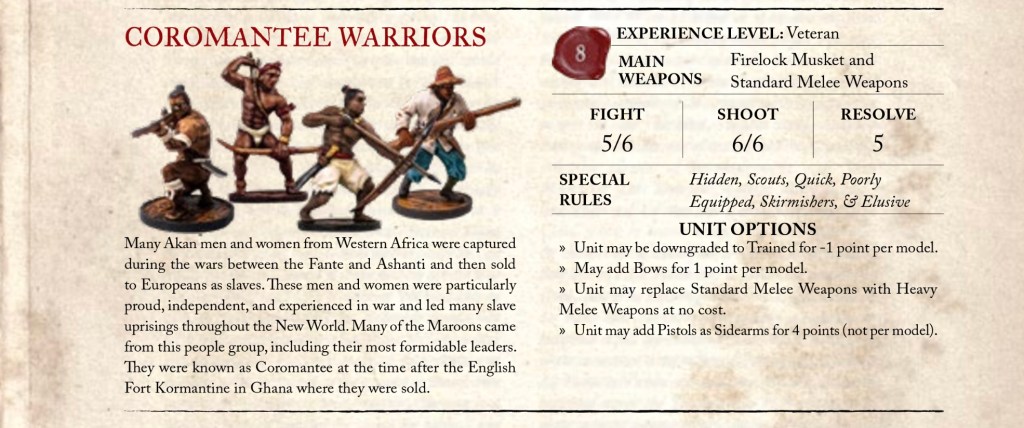
The Coromantee have similar stats to the African Warrior, but they have a 5 Fight instead of 6. They start at the Veteran level, and have different unit options, including the cheaper Pistol Sidearm. This unit could make a great command unit, especially if combined with a generic leader with the Tough or Expert Ambushers Special Rule that could buff them even more. Fun fact: you can easily make a 100-point force with a single unit of Coromantee. I’ve seen that single-unit force win games! It’s crazy. All you have to do is not die, and keep taking out enemies!
You may be able to pull some minis from the Militia boxed set to serve as models.

Support Units
The base Maroon Faction includes Warrior Archers and Lanceros as Support units. Both these units cost 5 points at the basic Trained level and one provides great Ranged options while the other provides deadly melee abilities.
Warrior Archers
Warrior Archers are great! With a 5 Shoot Skill, Warrior Archers can hit the enemy from anywhere. They can’t necessarily kill the enemy, but they can hit them, and hopefully slow them down with Fatigue. This unit is pretty weak in melee so keep them back where they can take advantage of the Hidden rule and help you control the board with arrows. Adding a Grizzled Veteran to this unit can help you manage the Fatigue that can build up from firing more than once in a turn.
For only 4 points, you can add a Sidearm Musket which can really help with taking an enemy unit out. If you can trigger Ruthless or a Commander’s Cold Blooded bonus on that musket shot, you can get that base shoot number down to 4 which is nasty! This unit is available as a Core unit for both the Brazilian and Surinamese Maroons.
In addition to the Raise the Black Native Americans set, you can use the Warrior Archer metal minis from Firelock for this unit. This extra model pack can help to add additional sculpts and variety to your forces.
Lanceros
Maroons grew up learning to use a variety of weapons, including bows, lances and muskets. The Maroons on Jamaica fought alongside the Spanish for several years against the English after they invaded the island in 1655 (before eventually switching sides). Lanceros are a strong melee unit, and they have the advantage of being able to make a defensive melee attack. Their Lances hand out a nice penalty on their target’s Fight Save which makes them that much more deadly. They have the Elusive, Skirmishers, and Scouts Special Rules, but lack the Quick rule that lets the African Warriors and Coromantee accomplish those long range charges. While they lack Quick, they have the Ruthless Special Rule that helps them finish off a unit that has taken some shots from your archers earlier in the game.
There are 4 spearmen options available in the Native Americans boxed set. The Lanceros metal minis are also available for additional models to the unit.

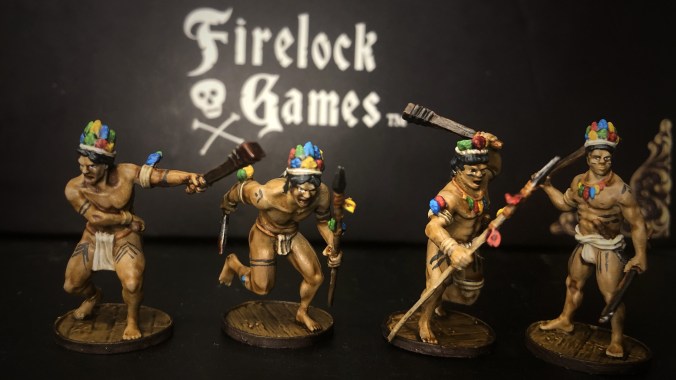
Warriors
This unit is only available to the Suriname Maroons as a Support Unit. In short, Warriors are awesome. For only 4 points, you get one of the best charging units in the game. With Quick and free Thrown (or Heavy Melee) Weapons, these guys can zoom in and destroy everything in their path. They Resolve isn’t as good as the other Maroon units, but boy they hit hard. They can take bows if you want them to be more multi-purpose, or you can take Sidearm Muskets for 4 points. If you upgrade them to Veteran, they can easily accomplish that 12″ charge you need to catch your enemy unaware. With that >8″ charge you can trigger that faction ability that penalizes their Defensive Attacks.
Below are a sample of the metal Warrior minis. They are painted with a Caribbean feel because they were done before the Marrons faction existed. Bur if you trimmend the edges of the hair a bit and changed the skintone they would be good proxies.
Maroon Commanders
The Maroon faction has two historical Commanders and a trio of the new Standard Commanders.

Standard Unaligned Renegade Commanders
The Raise the Black expansion provides new “Standard Commanders” for each nationality that can be customized . Each nation has a list of Special Rules that Commanders can draw from. The Untested Commander is 0 points, 1 Command Point, and a measly 4″ Command Range. The nice part about even this free commander is that he is armed just like whatever unit he is attached to. The Experienced Standard Renegade Commander gets 2 Command Points, 8″ Command Range at gets to select one Special Rule from the Renegade Commander list.
- Ruthless
- Evade
- Elusive
- Guerilla Commander
- Cunning
- Hidden
- Tough
- Expert Ambushers

The Seasoned Renegade Commander increases that Command Range to 12″ and adds one more Special Rule from the Renegade Commander rule list. The rules available to the Renegade Commander are listed above. There are some pretty good options there that combo well with the Maroons’ strengths. If you want to use decisive charges to take out units, the Expert Ambushers Special Rule looks like a really good option. That would give all units within the Commander’s Command Range Hard Chargers (-1 bonus on a Charge Fight action) which is perfect! Without Thrown Weapons, this faction needs to get those Fight numbers boosted for maximum impact. Ruthless is another great option, especially for the Jamaican Maroons with muskets. Guerilla Commander gives units the Skirmishers rule but that only helps if you’re using a lot of Warrior Archers because all the other units already have that rule in this faction!
Historical Commanders
“Colonel” Cudjoe
This faction has access to two Historical commanders, one of which is Legendary (but still needs a unique figure created as of the writing of this article).
“Colonel” Cudjoe is an aggressive leader who doubles down on the Ruthless tactic. He provides both Terror to prime the pump, and Cold Blooded, which gives Ruthless to units shooting or fighting during his activation. A classic combo with a leader like this is combining his Ruthless bonus with a Sharpshooter character’s Marksmen action to double up those bonuses. With a 6 Shoot on both the African Warriors and Coromantee Warriors, you can get Cudjoe’s unit’s base Shoot skill down to 4.
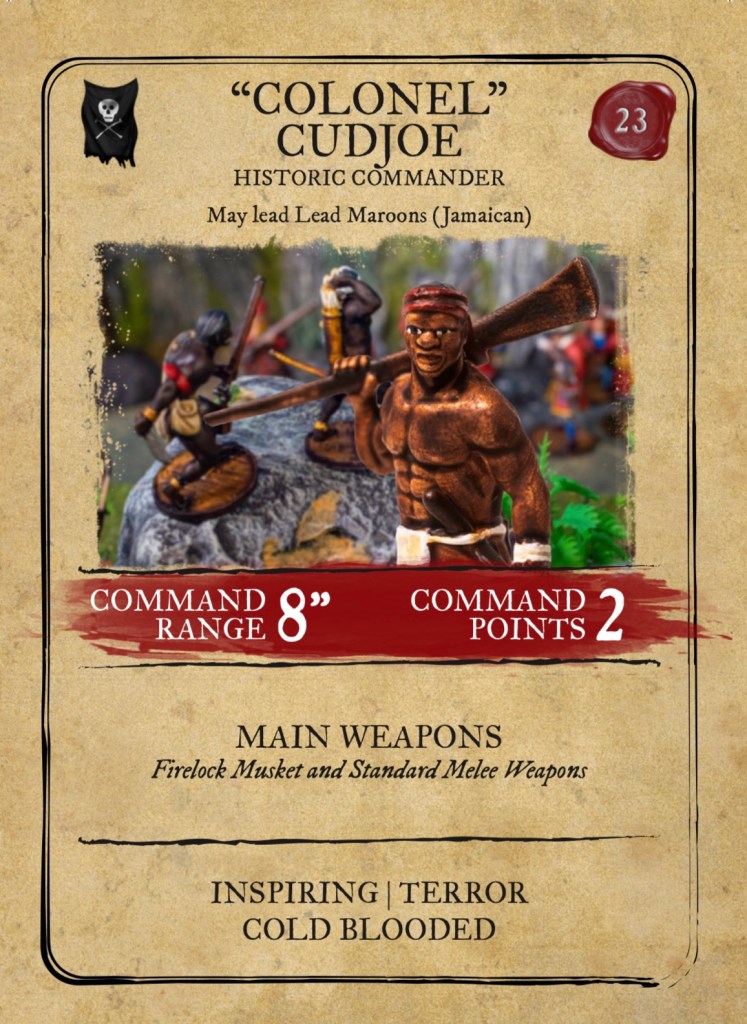
Notably absent in the list of rules available to the Renegade Commander is the Inspiring rule. If you want that great bonus to your Rally actions, the Maroon player will have to use a historic commander,
Colonel Cudjoe can only lead the Jamaican Maroon Force.
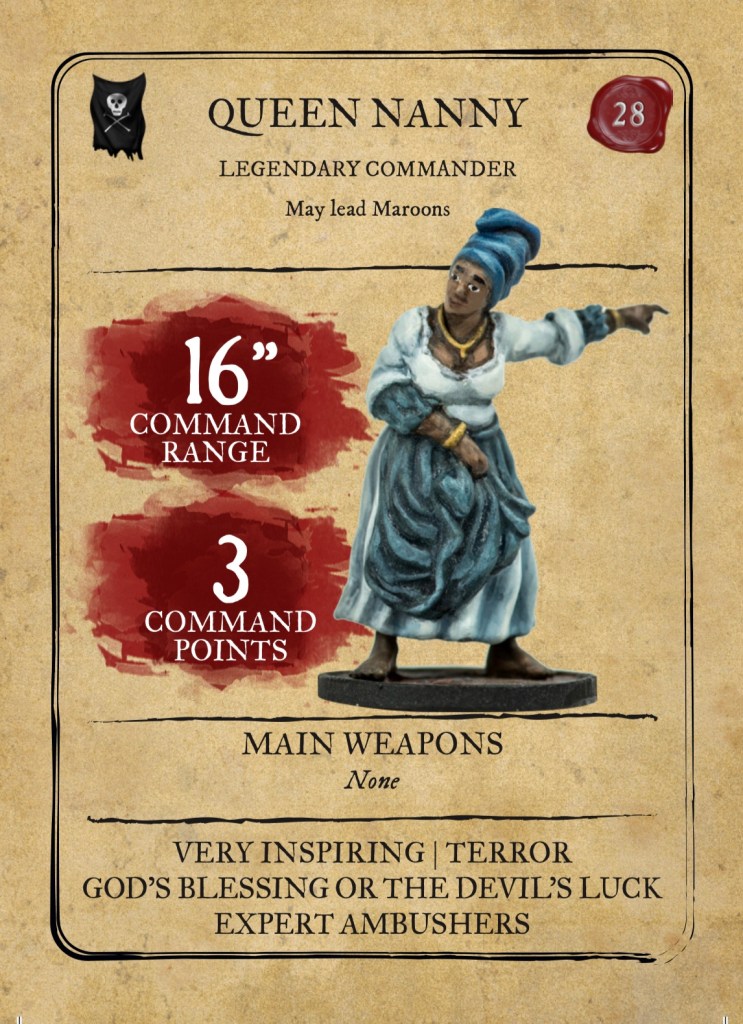
Legendary Queen Nanny
Possibly the most legendary of all Blood & Plunder commanders, Queen Nanny holds a place of honor in Jamaican folklore, even today. The legends surrounding her abilities are remarkable!
Queen Nanny’s Historical Background
Queen Nanny led the Windward Maroons on Jamaica for several decades. Managed successful defensive campaigns against English expeditions against Maroons and was a savvy negotiator when the English sued for peace. There are a handful of eyewitness accounts of Queen Nanny, some including her wearing a “belt of knives” around her waist. But much of the information about Queen Nanny has been orally passed down from one generation to the next in Jamaica. There are accounts of her accomplishing supranational feats like catching bullets, and bewitching springs of water to lure enemies to their death. There are many articles and books on Queen Nanny out there and it’s all fascinating reading!
Queen Nanny Blood & Plunder stats
And she’s pretty great in Blood & Plunder! She’s got a long list of Special Rules and they’re all good! Very Inspiring is possibly one of the best Special Rules a Commander can wield, granting re-rolls on failed Rally attempts to all units within command range. With her full 16″ command range, her entire Force should regularly benefit from that rule. Terror forces all units in the opposing Force to take a Fatigue test before the game even starts. God’s Blessing or the Devil’s Luck grants that extra Fortune Point. Last, Queen Nanny has Expert Ambushers which makes those charges more effective. All those rules, extra Fortune Point, and 3 Command points with a large Command Range all for 28 points is a great deal! But, considering the cost of Maroon units, it’s still a hefty cost.
Queen Nanny Mini Suggestions
Unfortunately there is not an official Queen Nanny mini yet, but hopefully one is coming in the future. For now, she is best represented by the Local Guide from the “Civilian Special Characters” 4 pk or one of the female Boucaniere models.
Tactics for Playing the Maroons
The Maroon faction has great options for both offense and defense on land. At sea, they lose much of their power so I wouldn’t not necessarily recommend putting them in boats unless you have to. Their primary weakness is the lack of low-cost models. You’re Force will very likely be smaller than your opponent’s, so your challenge will be to take out enemy units faster than they can neutralize your units.
Defensive Tactics
On Defense, make sure to use the Lay In Wait faction rule to help seize the best defensible areas early in the game. With solid shoot saves, combined with Hidden and Elusive on most of your models, you should be able to shoot at your enemy at an advantage throughout the early portion of any game. If they attempt to close distance to even the playing field, strike heard with a long-range Charge. To pull of the ideal charge, you’ll need to use either a Trained unit (African Warriors, Coromantee Warriors, or Warriors) with a Commander/Character (with a Command Point) or a Veteran unit using a Spade for your activation. The Space will get you 4″ for free from Quick, then you’ll need two more action after that to accomplish that full “greater than 8″ charge” that will nerf the defender’s Defensive Attack. The ultimate combo would be Veteran African/Coromantee Warriors with the Commander on a Spade. Quick move, normal move, Charge move, Skirmish Move back, then a Command Point back again. That would get you one Fatigue, but you’d cover 12″ forward and 8″ back!
The Brazilian Quilombolas are especially well suited for defense. The Castilian rule on their Commander will make Rally tests more effective within a Fortification. Invest 16-30 points in a Palisade Fort, and you have hardcover right where you want it and solid Resolve all around.
Offensive Tactics
If you’re on the Offense, you get the option of using the Night rules which limits normal visibility to 12″. With your high mobility, you can move up to that 11″ line, shoot, then move back out of range again. Leverage the extra moves on your Spades on Hearts to your best advantage. Any European Force will struggle to keep up with action efficiency. The hardest part is knowing when to stop skirmishing with ranged weapons and commit to the melee.
Another very effective tactic on offense is just simple rushing. Move up quickly, shoot at close range, then charge. If you can keep in some sort of cover on your way in, those solid Save and Resolve numbers should keep your units from disintegrating. One unit might not make it, but that’s the cost of business.
Maroon Army List Examples
Here are a few examples of Maroon lists at various point levels.
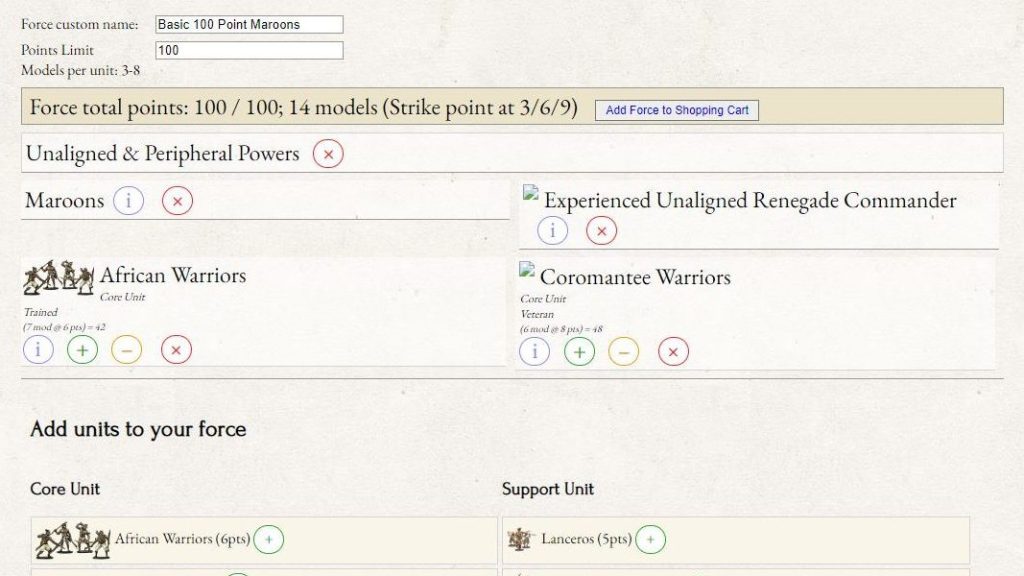
100 Point Basic Maroons
Having only 2 units is pretty rough, and you’ll have to play carefully, but it can function. I would recommend Ruthless on the Experienced Commander to maximize the effectiveness of the musketry and the Jamaican force option.
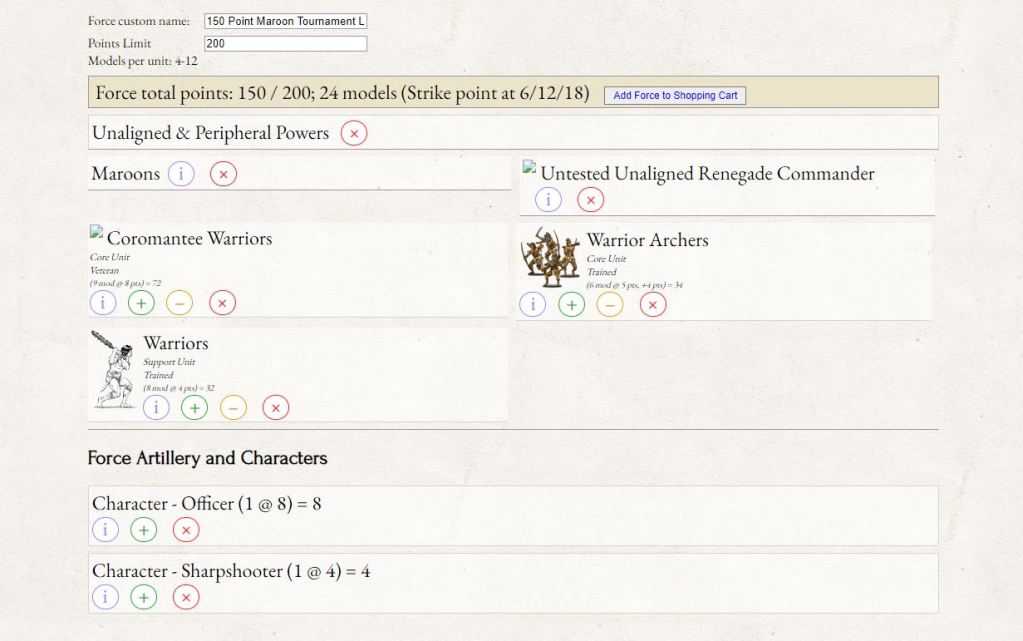
150 Point Land Tournament List
This Surinamese Maroon list squeezes 24 models into 150 points. The Warriors Archers throw down the Fatigue, the Warriors with the Officer can make those power-charges, and the Coromantee can do whatever needs doing. If you keep the Sharpshooter in the Coromantee unit, you can get up 9 models (pushing the maximum unit size a little), plus the commander for a total of 10 muskets with Marksmen and Ruthless to make them super deadly when needed.
200 Point Quilombolas Fort
This is a defensive force, using an 8-piece Palisade Fort (like comes in the box). With 4 units, you probably want to deploy one outside the fort as a flanking force, but that can be dangerous, depending on the scenario. The Warriors Archers are equipped with sidearm muskets since musketry isn’t African Warriors’ strong suit. The Officer can help Archers fire more often, and the Veteran, combined with the perks the Commander receives from being in a complete fort, will keep your Fatigue under control.

200 Point Queen Nanny
This Force could attack or defend. Using the Suriname force option to gain the Ruthless ability, this Force benefits from all the archery to suppress and strain the enemy, then the Hard Charging Coromantee and Warriors to rush in a mop things up. The African Warriors keep their bows, and both the Warriors and Warrior Archers get Sidearm Muskets. Soften up with Arrows, move in with the Warriors and Coromantee, shoot and charge! Win or lose, it will be a quick and bloody game.

I would attach Queen Nanny to the Warrior Archers in this list since she doesn’t contribute to attacks and they should be further back and in less danger of getting killed.

Buying Into the Maroons
You can build Maroon lists with a fairly low number and diversity of models. You can do a lot of proxying as long as you have their weapons reasonably correct.
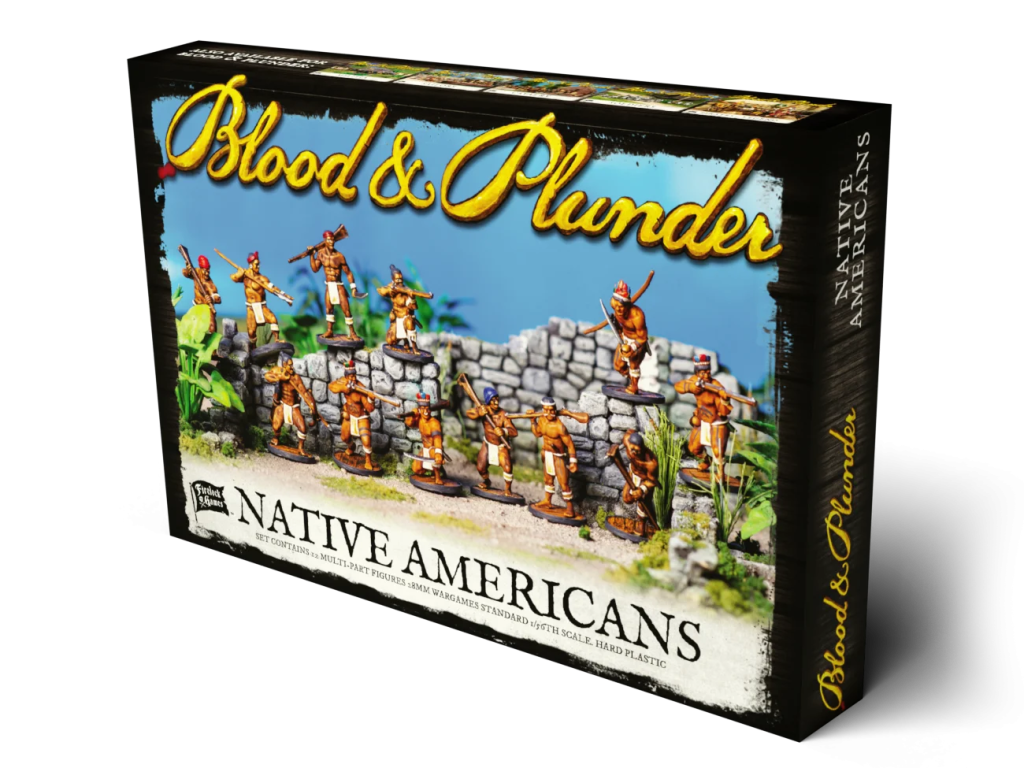
- The new plastic Native American box can be used to build 12 Maroon models, equipped with bows, clubs, machetes, and muskets. Buying one or two boxes of the plastic, multi-part plastics would be a great place to start.
- You can supplement with a couple of packs of the metal minis, all of which look pretty good painted up as Africans:
- The plastic Militia Sprues can also be painted as Maroons since Maroons regularly wore jackets and trousers. This is probably the best way to get a lot of models armed with muskets if you want to play the Jamaicans.
- Queen Nanny is best represented by the Local Guide mini who is part of the “Civilian Special Characters” 4 pk that also contains a Governor, Spy and Ship’s Pilot which are excellent additions to any collection. You could also use one of the female Boucaniere models.

Recommended Reading on the Maroons
The Wikipedia page on the Maroons gives a good overview of their struggles, conflicts, and various regions where they were major players.
The Maroons of Jamaica 1655-1796: A History of Resistance, Collaboration & Betrayal is the most respected work on the Jamaicans. It provides a fair and interesting analysis of their political structures, their military achievements, and the various English and Maroon leaders that were important during the long conflict between the English and Maroons in Jamaica.
Maroon Societies: Rebel Slave Communities in the Americas (edited) by Richard Price is a large collection of essays and historical pieces on Maroons throughout the New World, including Spanish territories, Jamaica, French Caribbean Islands, Dutch Guiana and Portuguese Brazil. Some essays are better than others, but there’s a lot of interesting reading in there.
If you want some free, online reading, JSTOR.org has a lot of articles on the Maroons and most of them can be accessed for free using any Gmail address.
Final Thoughts
The Maroon faction has a lot going for it. With lots of Special Rules, you have lots of ways to take your enemy off guard. You have the capability of charging across long distances, and you have the potential to make those charges deadly. The various deployment and visibility options can make ranged/sniping games pretty interesting as well. The various Force Options actually change up force building a lot with this faction. There are a lot of fun lists to explore, and those flexible Standard Commanders increase that diversity and flexibility. The Maroons’ main weaknesses are their high model costs and their reliance on area terrain. If there are no woods/bushes/cover on a board, a lot of the rules like Elusive, Hidden, and Scouts cease to add value to your units, and then you just have slow reloading musketeers.

Additional Article Suggestions
Here are some more
- Black Caribs Faction Review
- African Skin Tone Painting Guide
- Complete Guide to Raise the Black Plastic Miniature Sprues
- Buyers’ Guide to Raise the Black
- Raise the Black Two Player Starter Set Preview
- Ultimate Guide to Blood & Plunder Nations & Factions
Article by Joseph Forster
Very nice, I really ike to play this faction! Also I think this could be used to represent the Gaspar Yanga forces that lead to the creation of the free town of “El Pueblo Libre de San Lorenzo de los Negros”, the first free town for slaves that existed recognized by the Spanish Crown (1609), it could be also interesting.
Pingback: 6 Methods for Painting African Warriors - Blood & Pigment
Pingback: Tyler Carlson - Blood & Plunder Player Spotlight - Blood & Pigment
Pingback: 150 Point Maroon Tournament Force - AdeptiCon 2024 - Blood & Pigment
Pingback: Port Royal vs Blood & Plunder - A Game Comparison - Blood & Pigment