I’ve been working away on my 6th Rate Frigate for a couple of months now and I finally got it finished (almost). It was a big project but noticeably less work than the mighty Galleon. Here are some pictures of the finished ship along with a few tips and things I learned while making it.
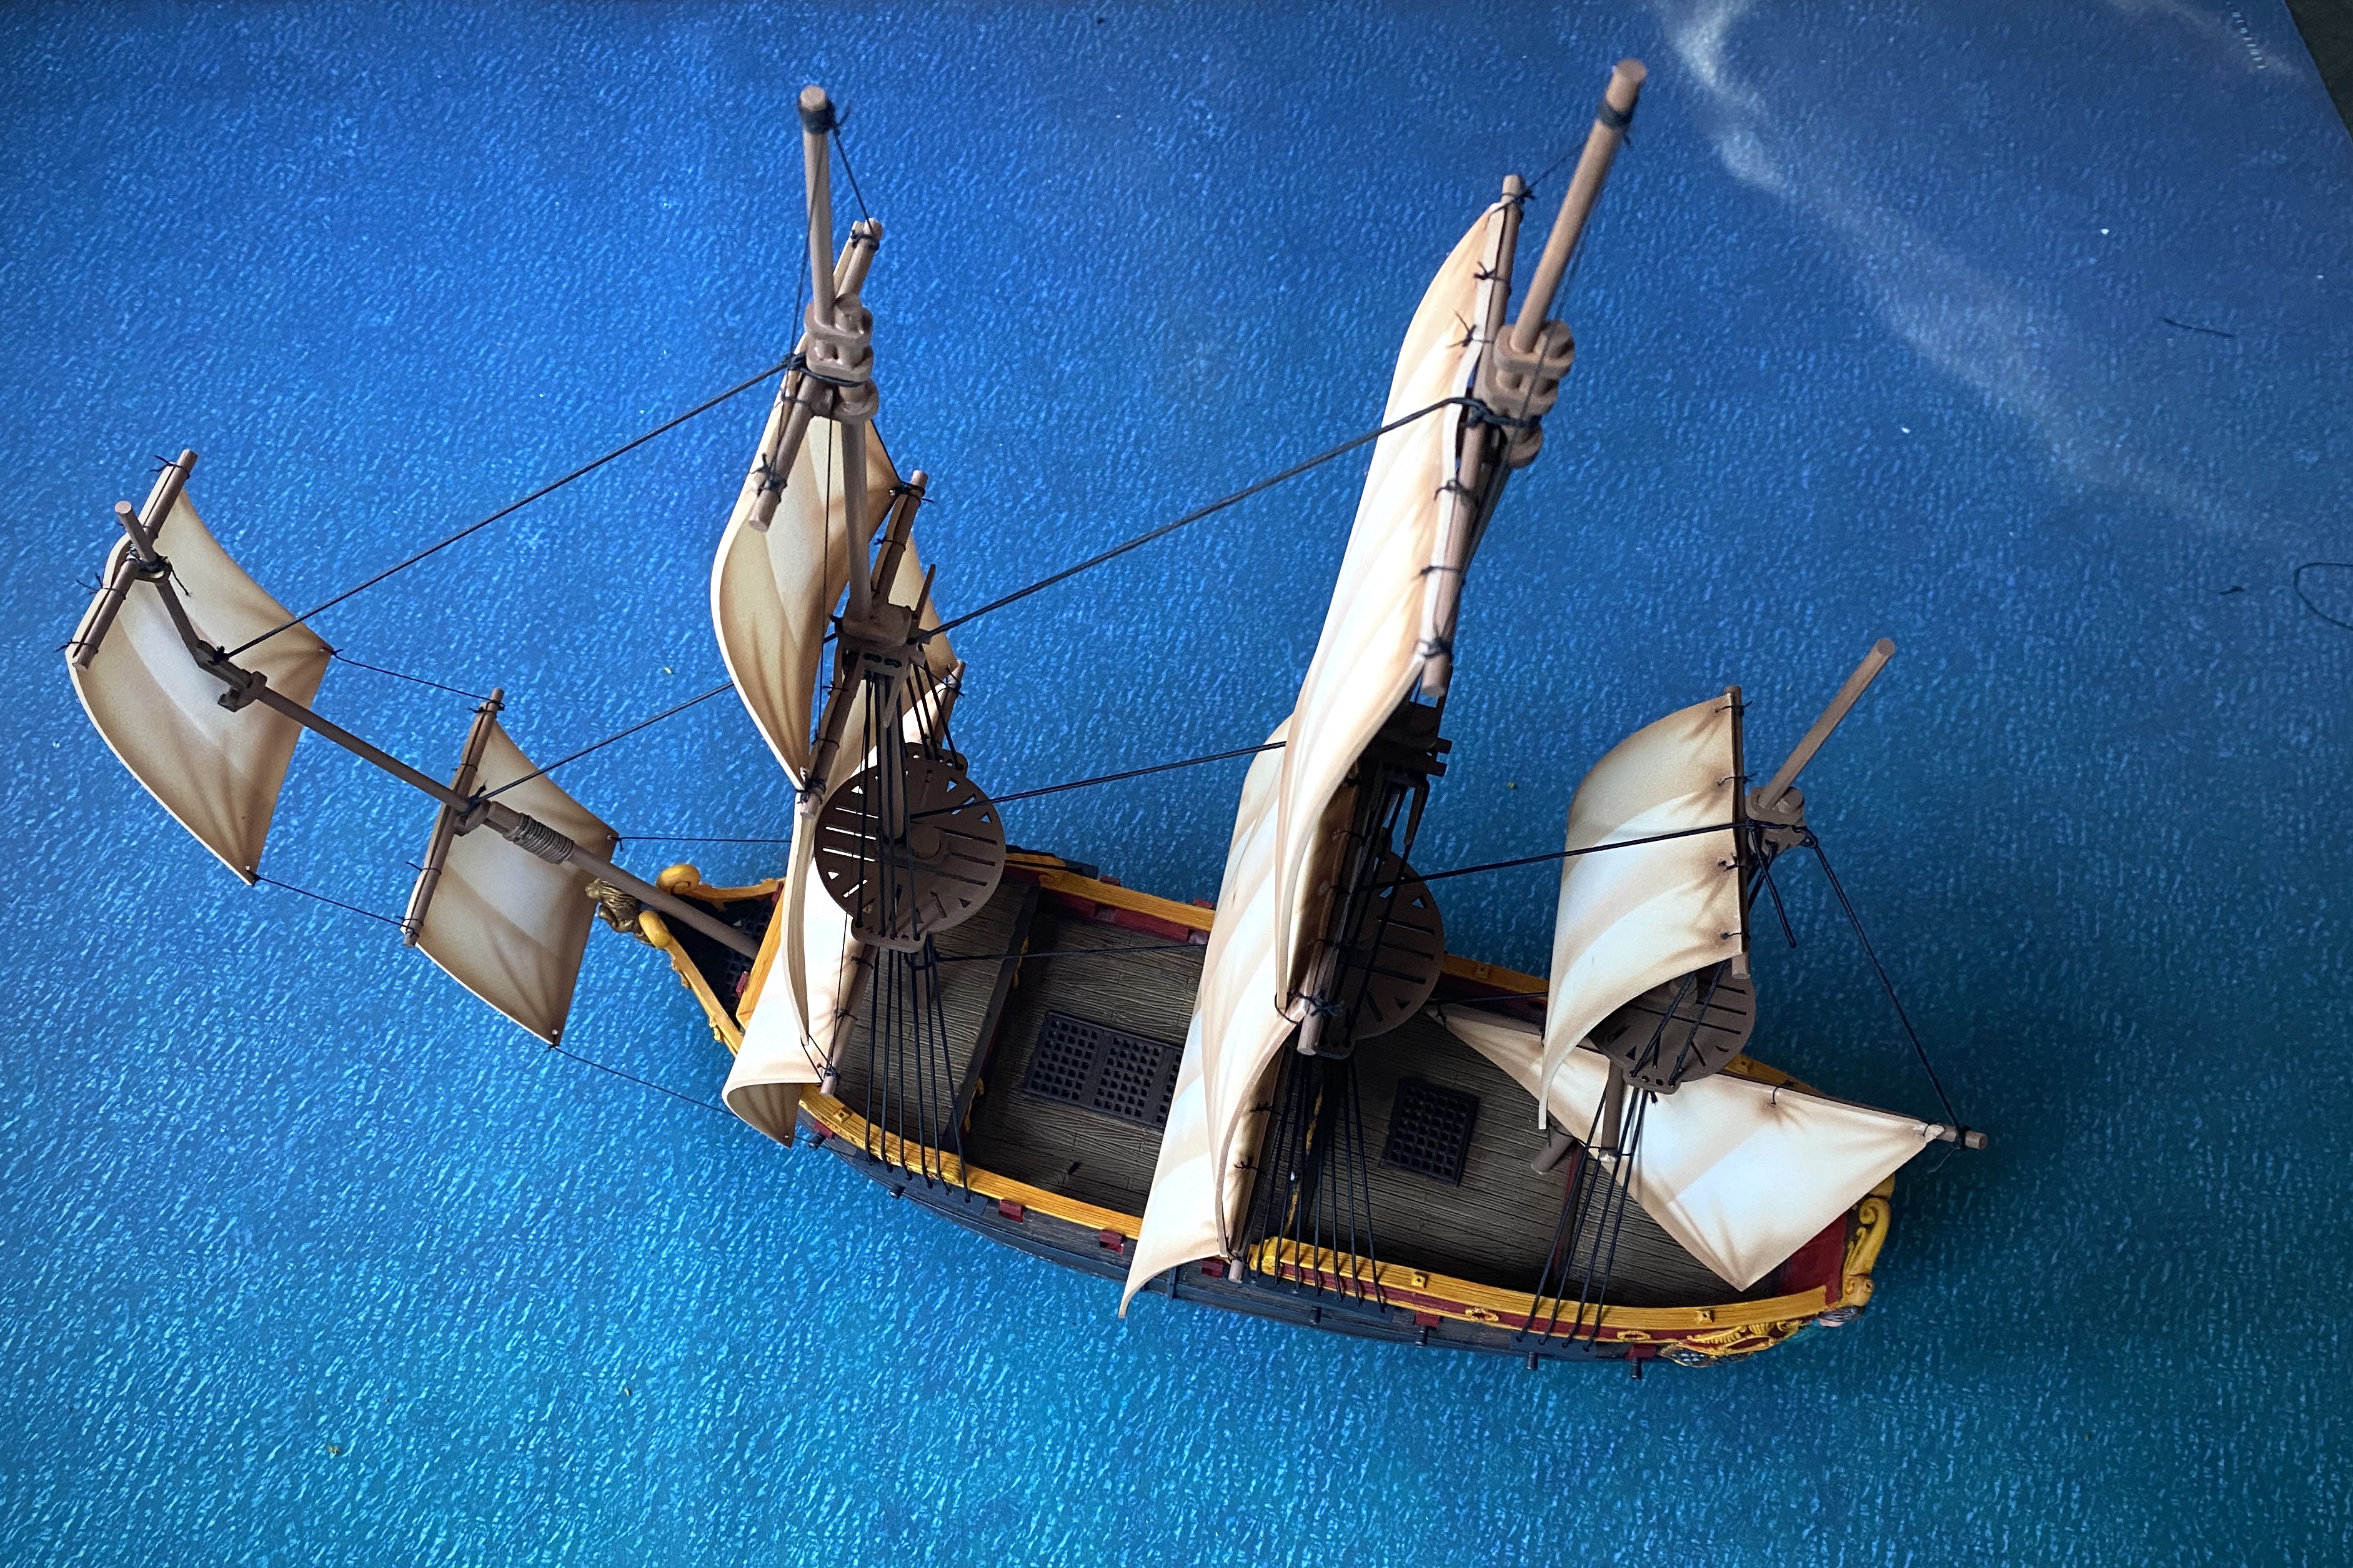
It’s a beautiful model with lots of ornamentation. It’s also a 1-piece hull, unlike the larger 3-part Galleon hull.

I used Benerson Little’s color guide for Oak & Iron to decide on my color scheme.

The guide was very helpful and detailed although I had to google half the terms to decipher it. My actual knowledge of ship anatomy isn’t very good… Wales, works, outboard, gunwales, quarter badges, upper works, lower counter, headrails etc. I need to educate myself!
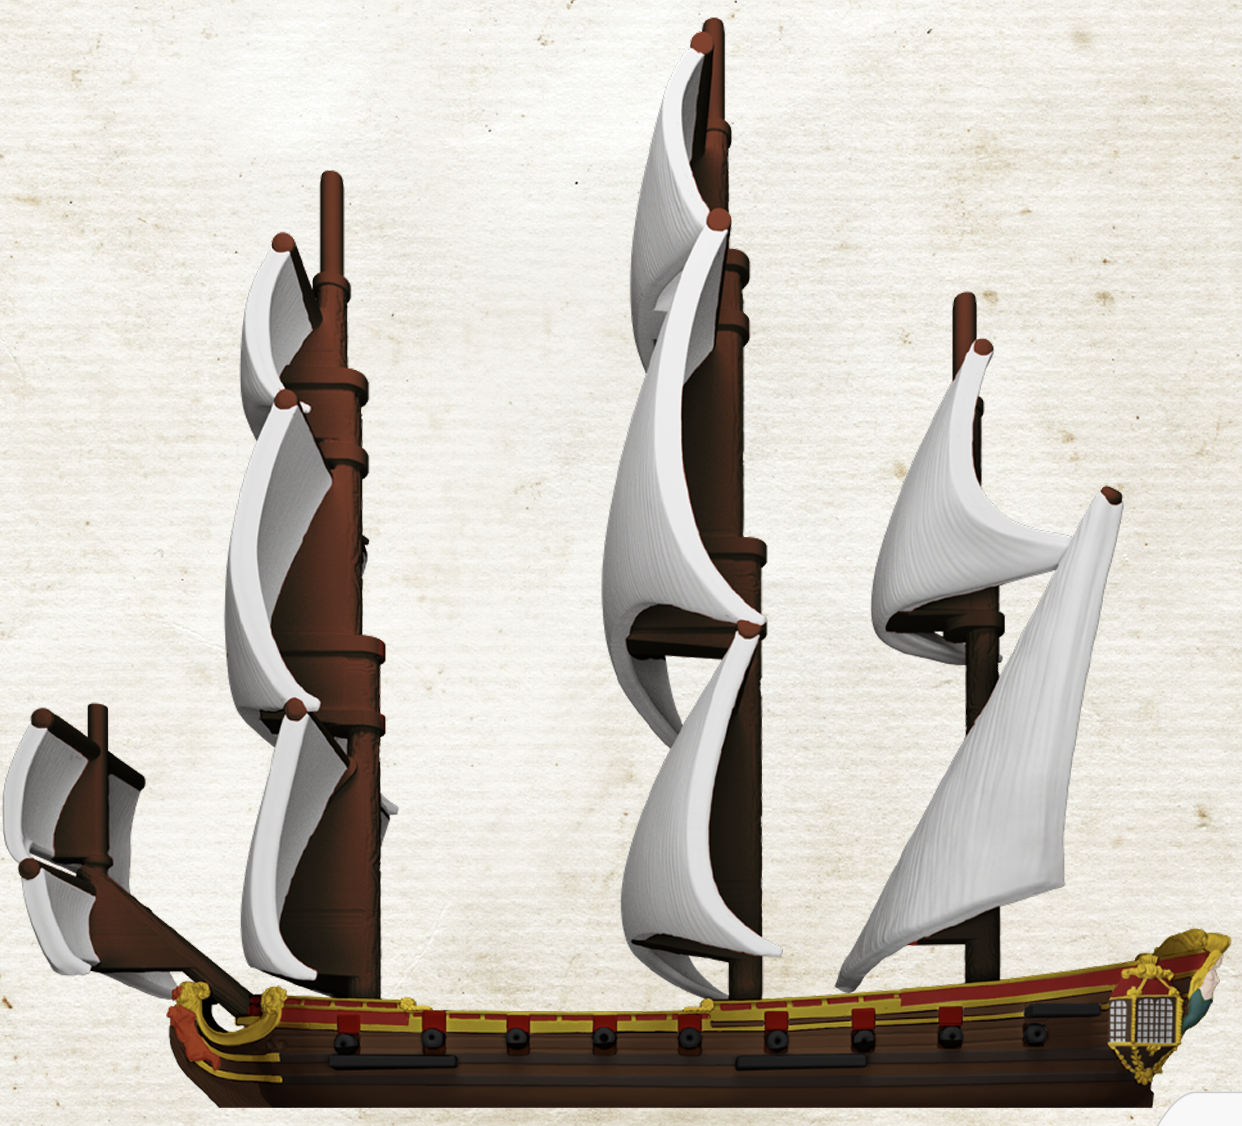
The picture helped a lot! I stuck pretty close to the guide here with the exception of the figurehead which I gilded (along with the coat of arms and some of the window trim).

Using bright colors for the carvings on the back makes them slightly PG-13… At least my wife thought so.

Unsure of how to paint these wall ornaments, I just stuck with the yellow for consistency.

I used Citadel’s line of reds and yellows for this ship. I used Vallejo Chocolate Brown for the hull exterior and Old Wood for the decking.
Things I Learned
I finally got down how to do these cannon hatches this time. It’s probably my least favorite part of building these ships and I’ve gone to leaving them off entirely on the smaller ships (after reading that often didn’t exist).
Cannon Gun Ports
I primed them on a board, one side at a time, then painted them their basic colors. I only glue them on after the hull paint job is complete. If you glue them on before painting the full hull, it is highly likely that you will pop them while you work and have to re-glue them and you’ll likely damage the paint job.

But you can’t glue them all on all at once! If you glue them all on you’ll block some of the areas you need clear to do the rigging. But it’s much harder to glue them on when your ship is fully rigged! So glue everything you can on after the hull is finished but before you’ve rigged. Then glue the last ones on when the rigging is done (this is the last step I haven’t completed yet). After gluing them on, I finished the hatch paint job by touching up the edges and applying a wash.

Paint the Cannons BEFORE you glue them on, AFTER you paint the hull
I also advise you completely paint the cannons before gluing them into the hull, and only glue them in when the hull paint job is complete.

I finally left enough clearance on my mast sections to run the string through the holes without pulling my hair out. Leave plenty of space between the fighting top on top and the connector below.

This is the trick I’m most proud of. I sprayed the gratings black during the priming step. Jamming a paintbrush into every single little square of these grates is tedious. Extremely tedious. And it completely ruins a paintbrush. It saved me at least an hour by spraying the grates this time.
Suggestions for Rigging the Blood & Plunder 6th Rate Frigate
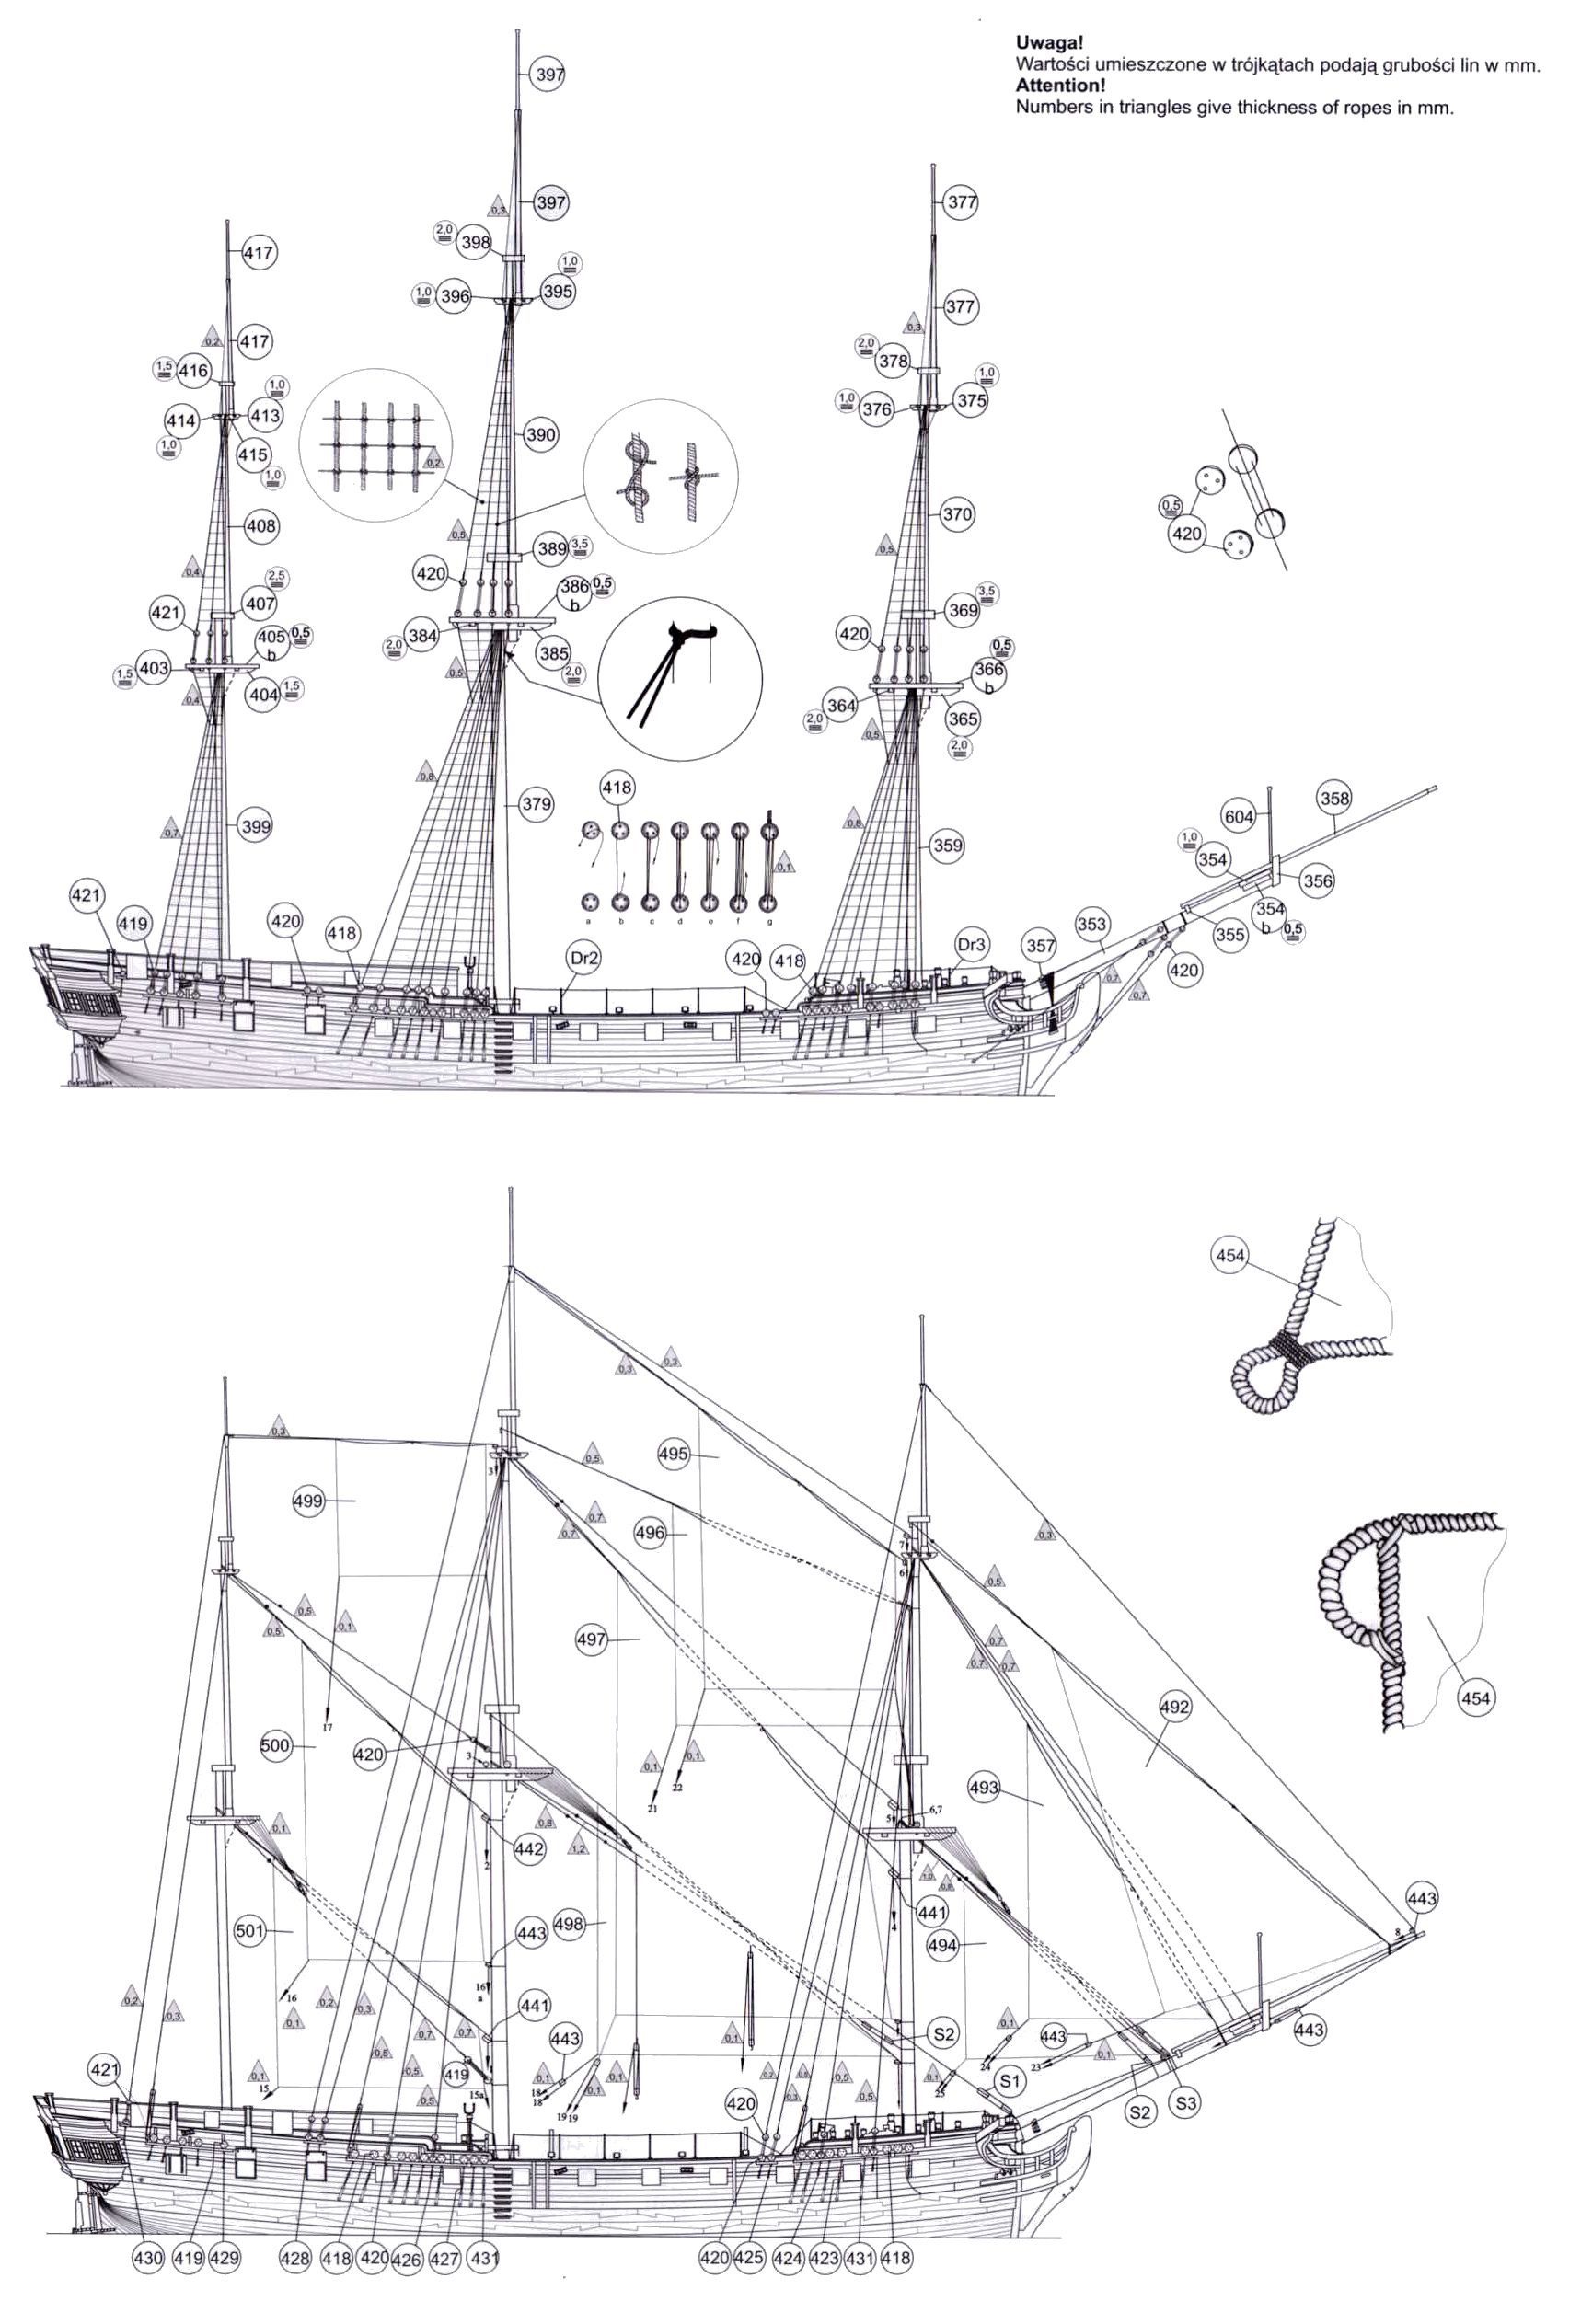
I spent a little time studying a rigging diagram and adding a lot of extra lines to make it look a little more complete. I’m not up for tying the ratlines yet but adding the support lines for the masts and yards.

Running all these extra lines meant I ran out of the elastic thread included in the kit well before I was finished so I had to go buy some. But all these larger diameter threat was bought up for making face masks! I had to buy a smaller threat which I used for all the yard supports. It’s not consistent but it looks OK. If you need additional rigging lines, here is a link for a spool of medium diameter elastic thread I recommend.
Bowsprit
I chose to extend the bowsprit with a second dowel to make the ship a little longer and sleeker. But, I may have overdone it… I plan on adding a couple of jib sails in the front as well but haven’t got to it yet. I should mention these sails were made by Rick Casler out of craft foam. He creates a batch every once in a while and sells to players. You can contact him through Facebook if you’re interested in getting a set for your ship(s).

I also remembered to glue the mizzenmast together with the sail at an angle so the sail looks more functional.

Pecking away at this project for months wasn’t making much progress, but when I finally sat down and really focused on it, things went pretty fast. I had just finished the Galleon when I first got the 6th Rate in the mail and I wasn’t psychologically ready for another major project. But now it’s finished and I can get some more minis painted and work on the new 4Ground terrain!
Comparing the Ship
Speaking of the Galleon, I was very pleasantly suprised by the price point of this ship compared to the Galleon. The Galleon is larger and apparently much more complex to cast. At $300, it’s a major hit on your pocketbook. At $169, the 6th Rate is still a luxury item, but nearly half the cost for a huge ship. It’s smaller and not as tough in a game, but it’s much more nimble and more of a warship in other ways.

Conclusion
I’m looking forward to getting it to the table and putting it through its paces!I painted it up as Spanish so I’ll likely sail it under the Armada de Barlovento faction first.
Thanks for stopping by! If you’re interested in this ship, make sure to read Dan Carlson’s ship review article on this blog which can be found here. You can read about how it functions in the game and see some other players have painted their ships.
Absolutely beautiful as always. Nicely done.
Did you use the sail templates for the light frigate ? B&P doesn’t seem to have sail templates on their site specifically for the 6th rate
Also gorgeous work
You can use the galleon rigging guide and templates. It’s the exact same rigging set.
Thanks!
Pingback: Blood & Plunder Ship Overview - 6th Rate Frigate
Pingback: 6th Rate Frigate - Blood & Plunder Ship Overview - Blood & Pigment