Seeking painting details for my Galleon ship model? Though not extensively documented, I’ve compiled a rough guide to assist you. While I may lack meticulous notes and photos from the past few months of work, I believe it can still be of use. Hope you find it helpful!

Step 1 – Assemble the Galleon Ship model and remove excess Resin
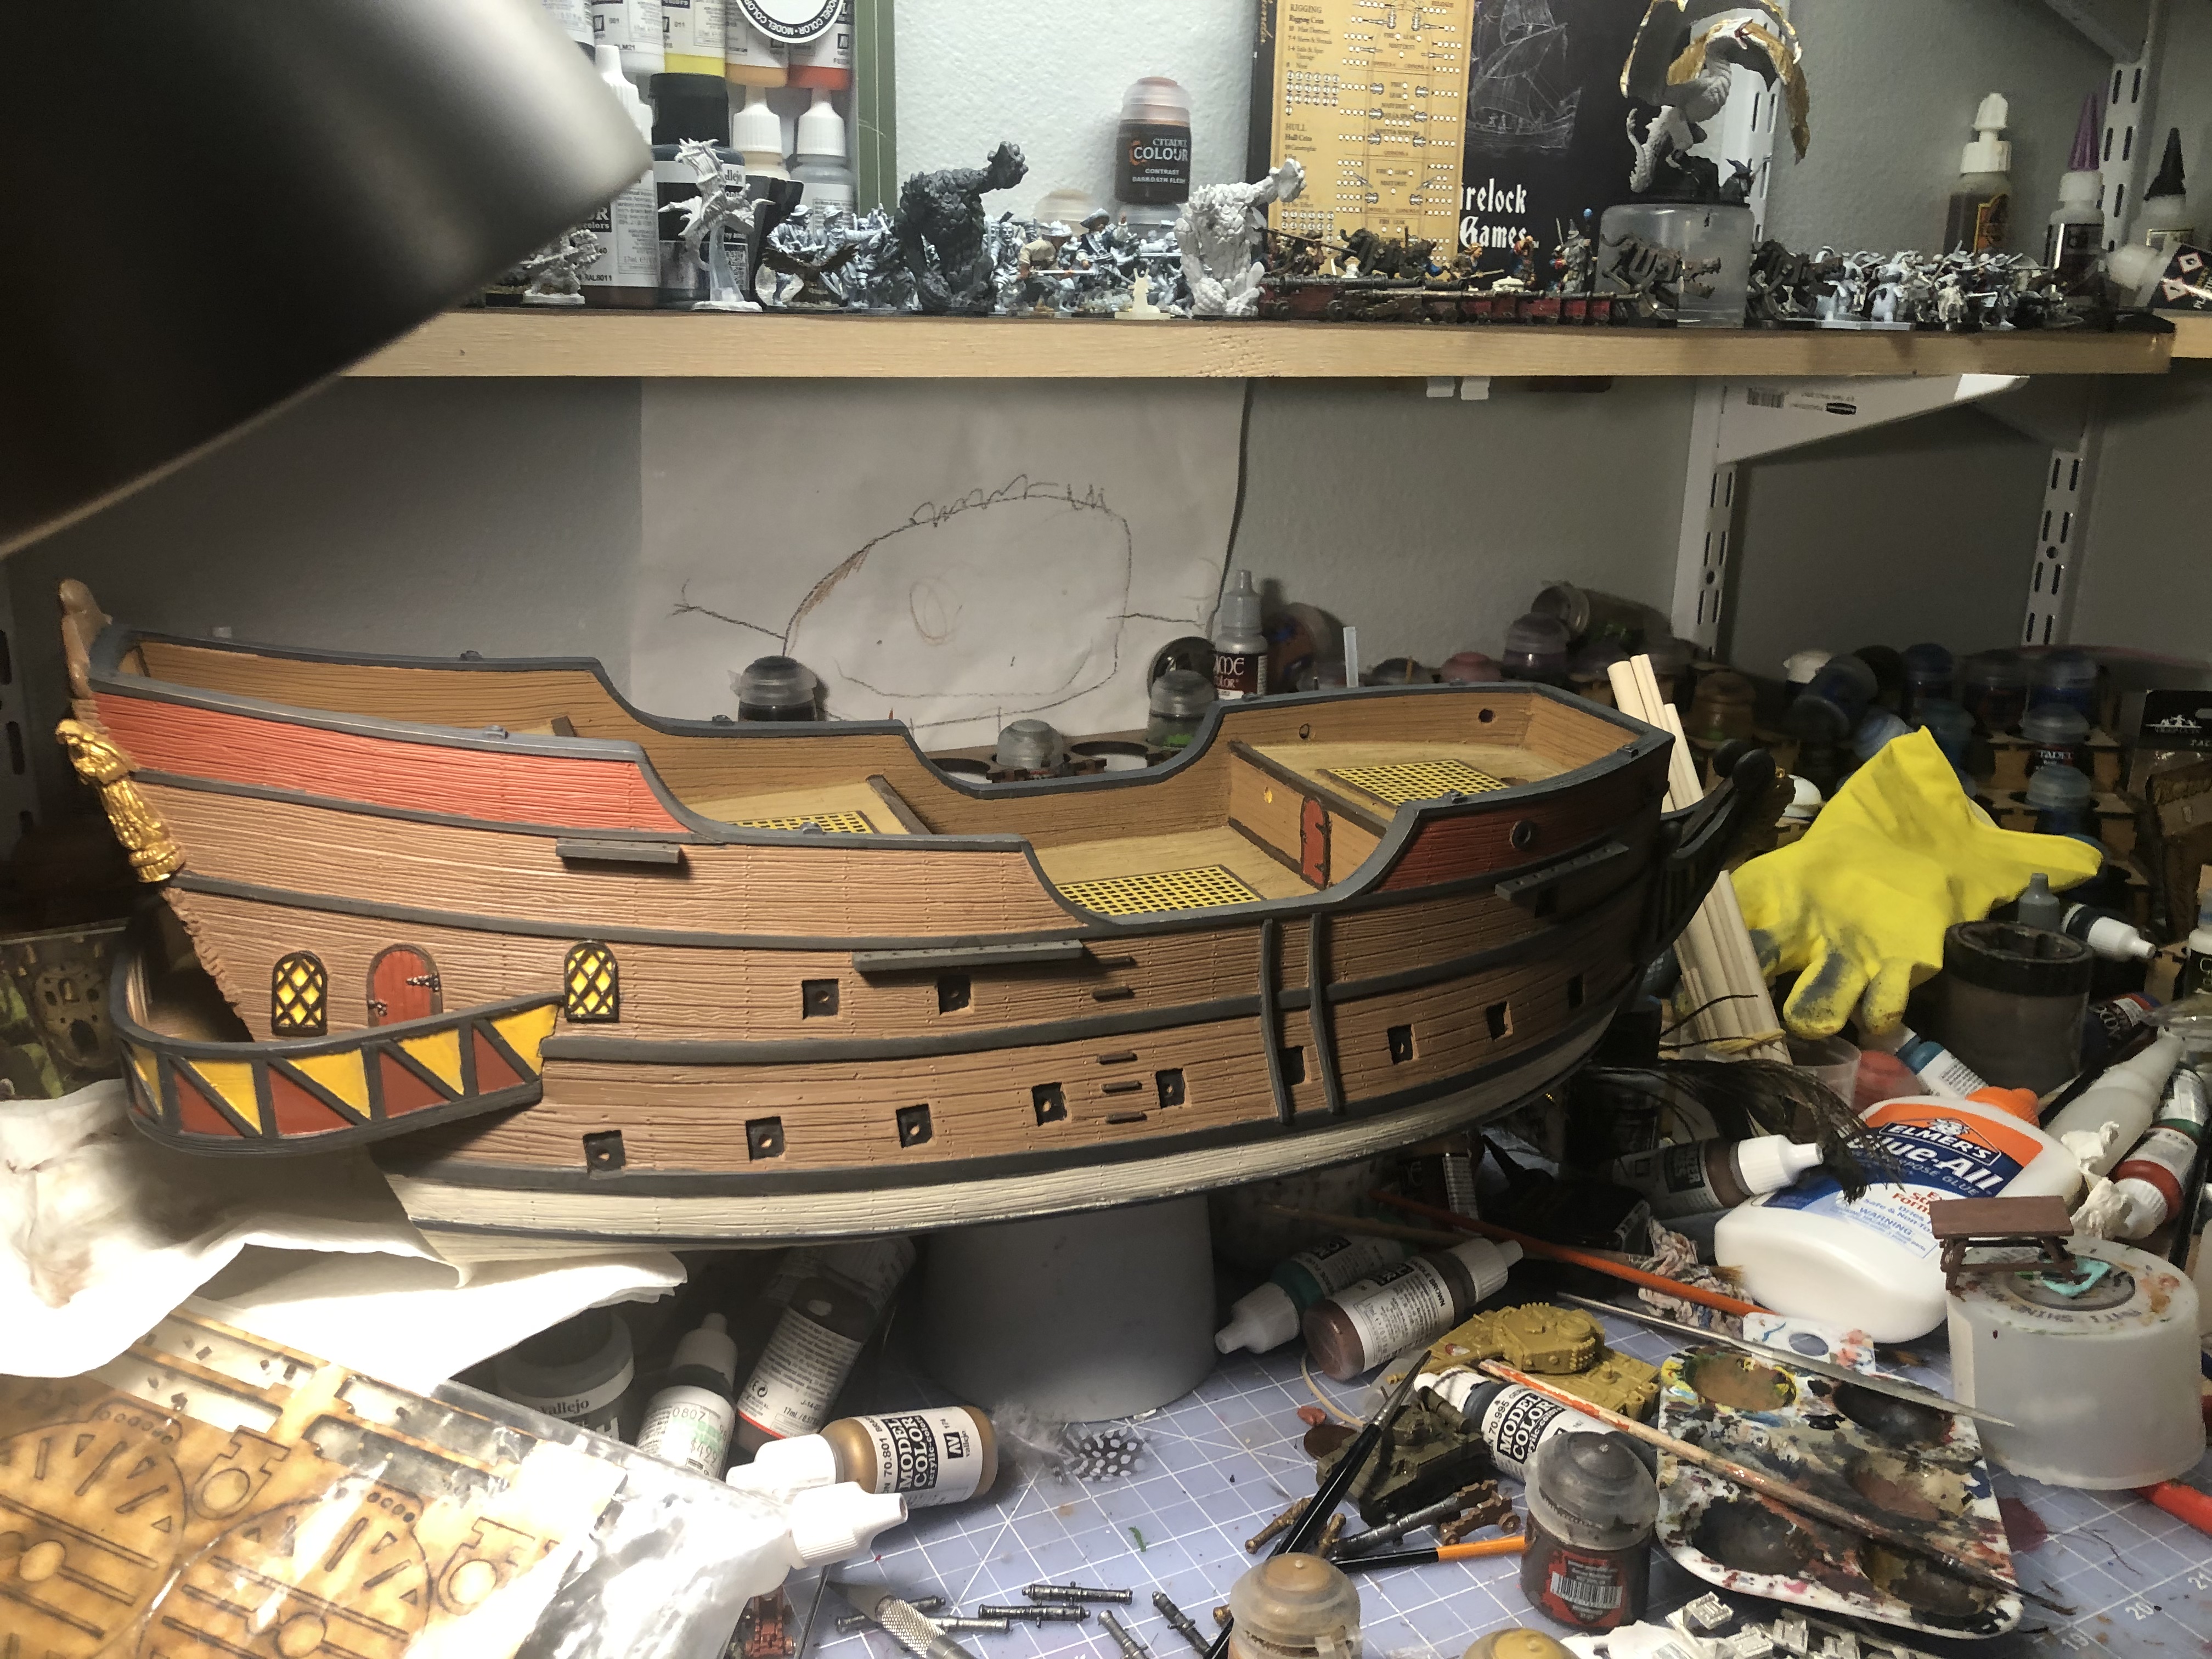
The Galleon models comes in several parts that have to be glued together. The prow is a separate piece as is the gallery in the stern. Aligning these pieces proved challenging. And some areas were requiring me to remove excess resin from the gallery and fill gaps between the hull and prow with Green Stuff.

I’m not too skilled with sculpting with Green Stuff but it came out alright.

This section took a good bit of filler as well but you don’t see this area much during play so I didn’t spend too much time on it.

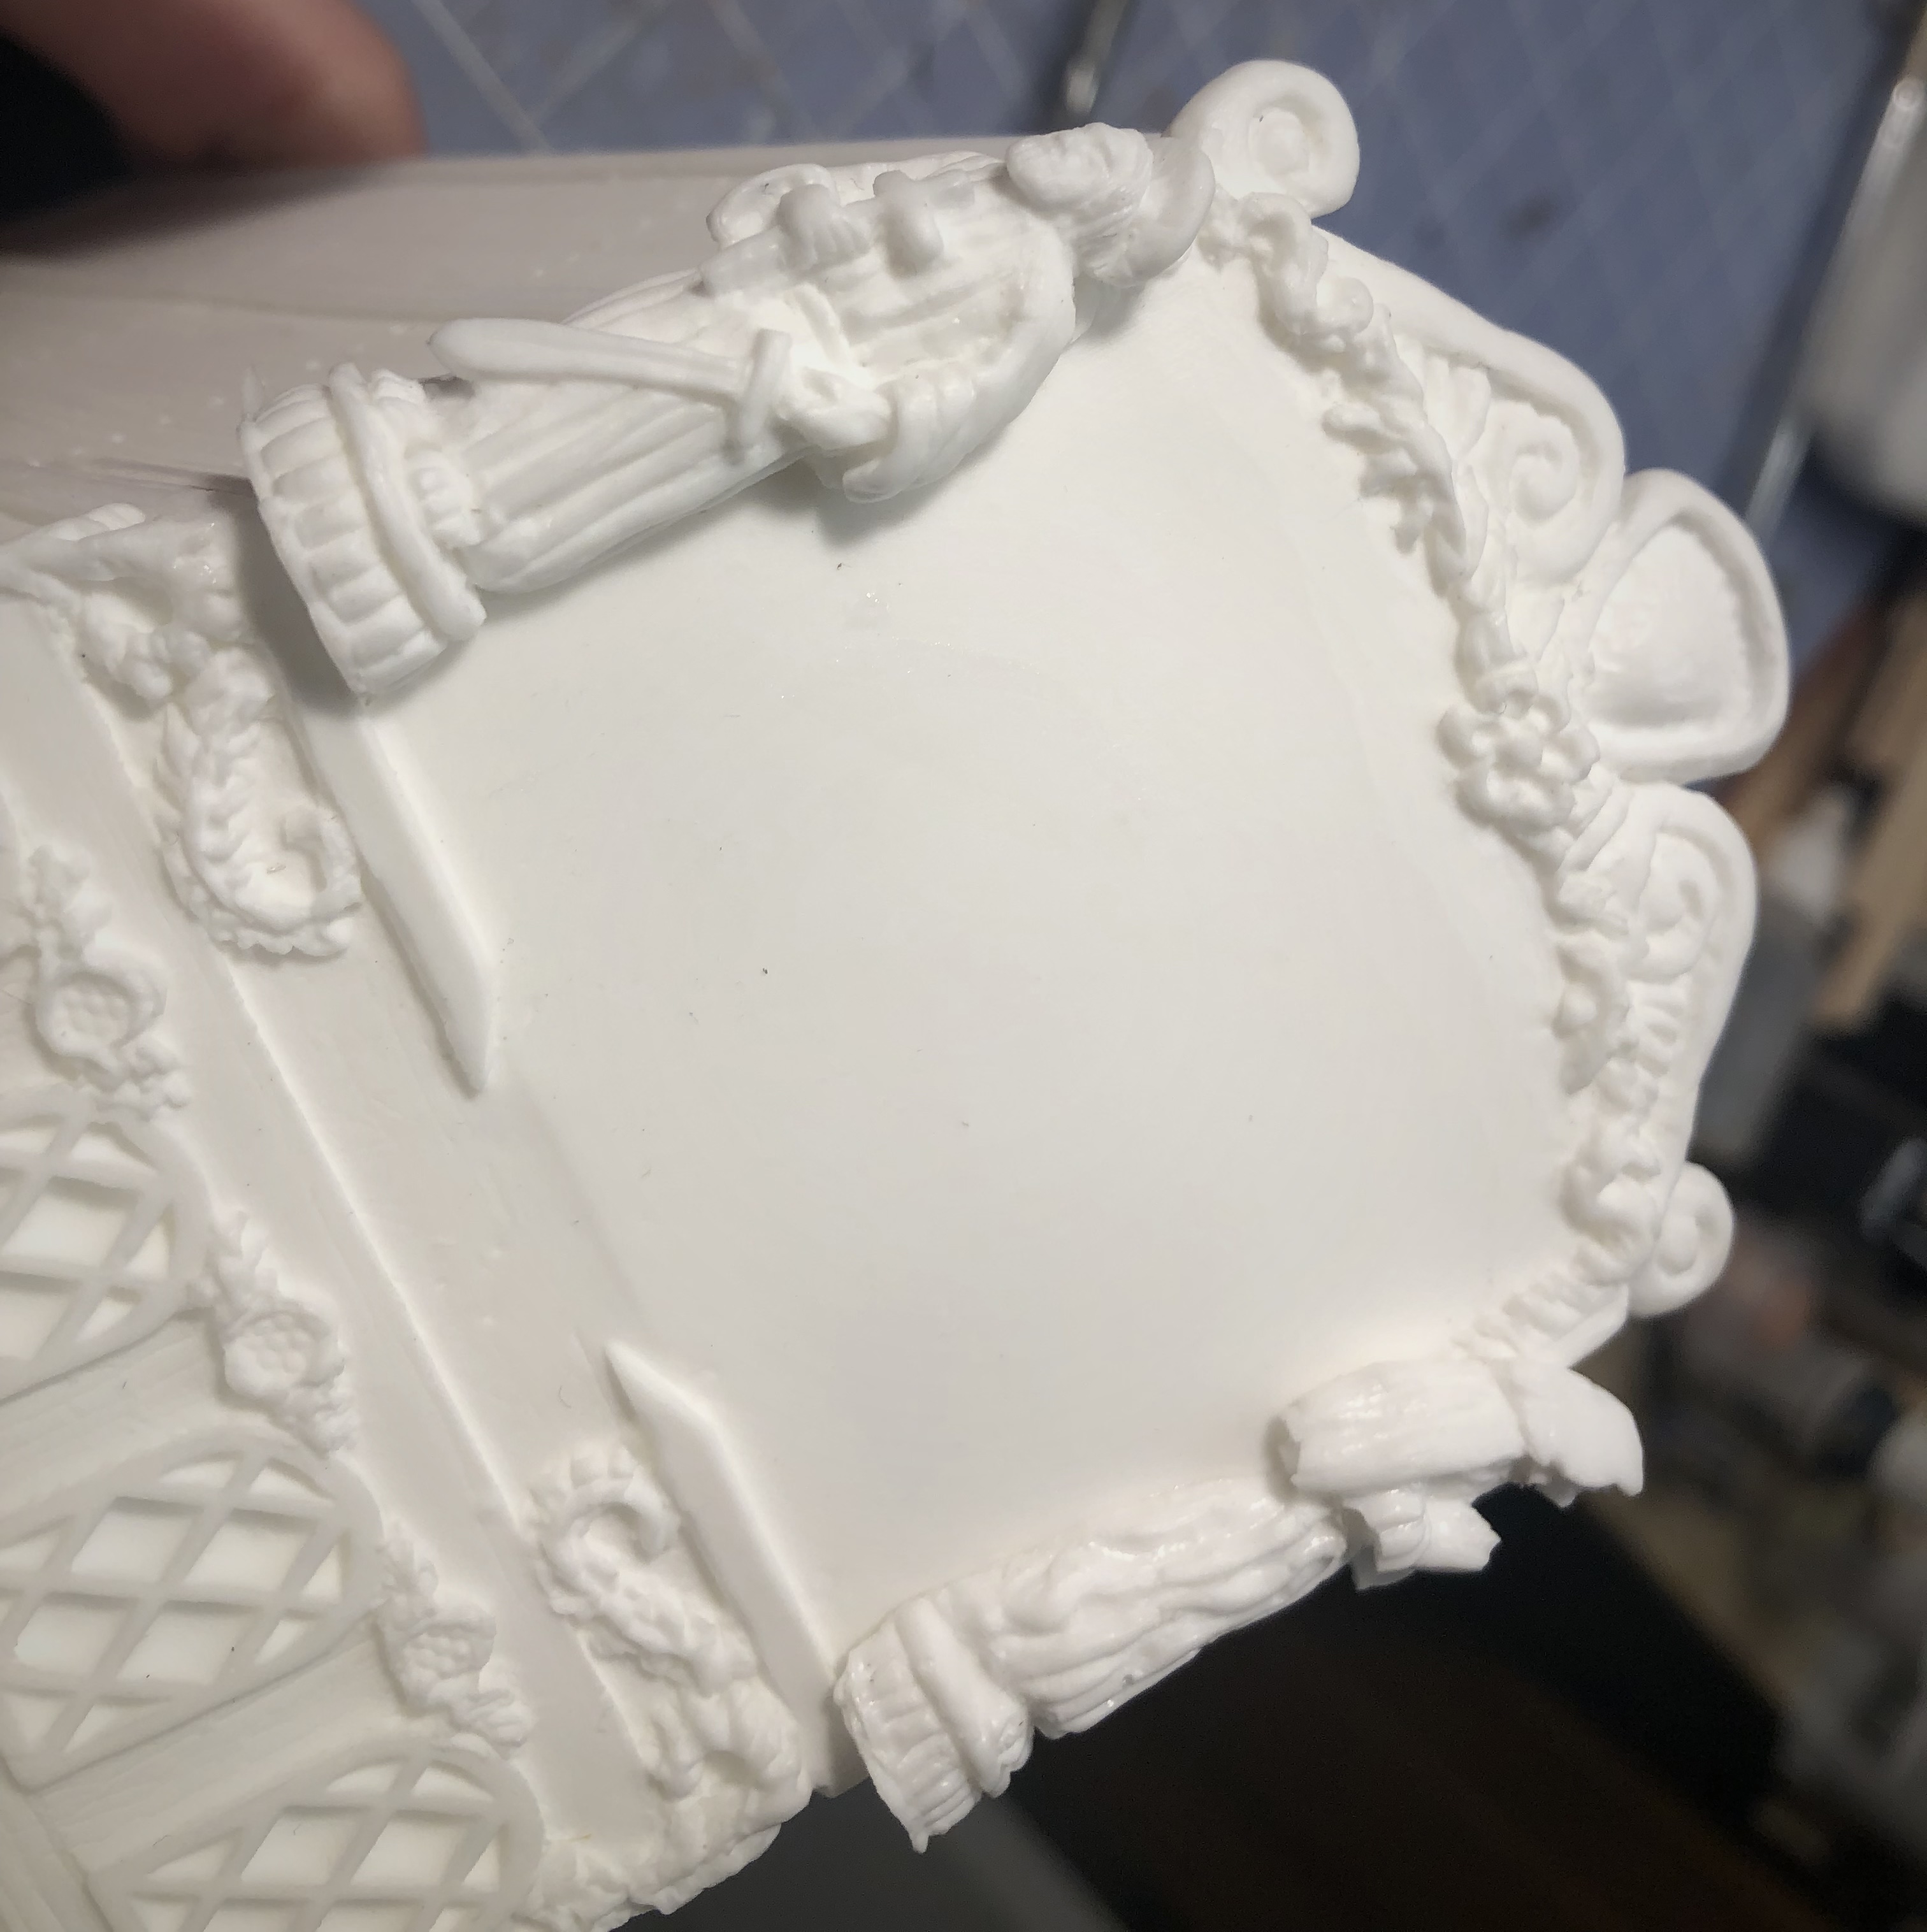
Assembling the Stern Decorations
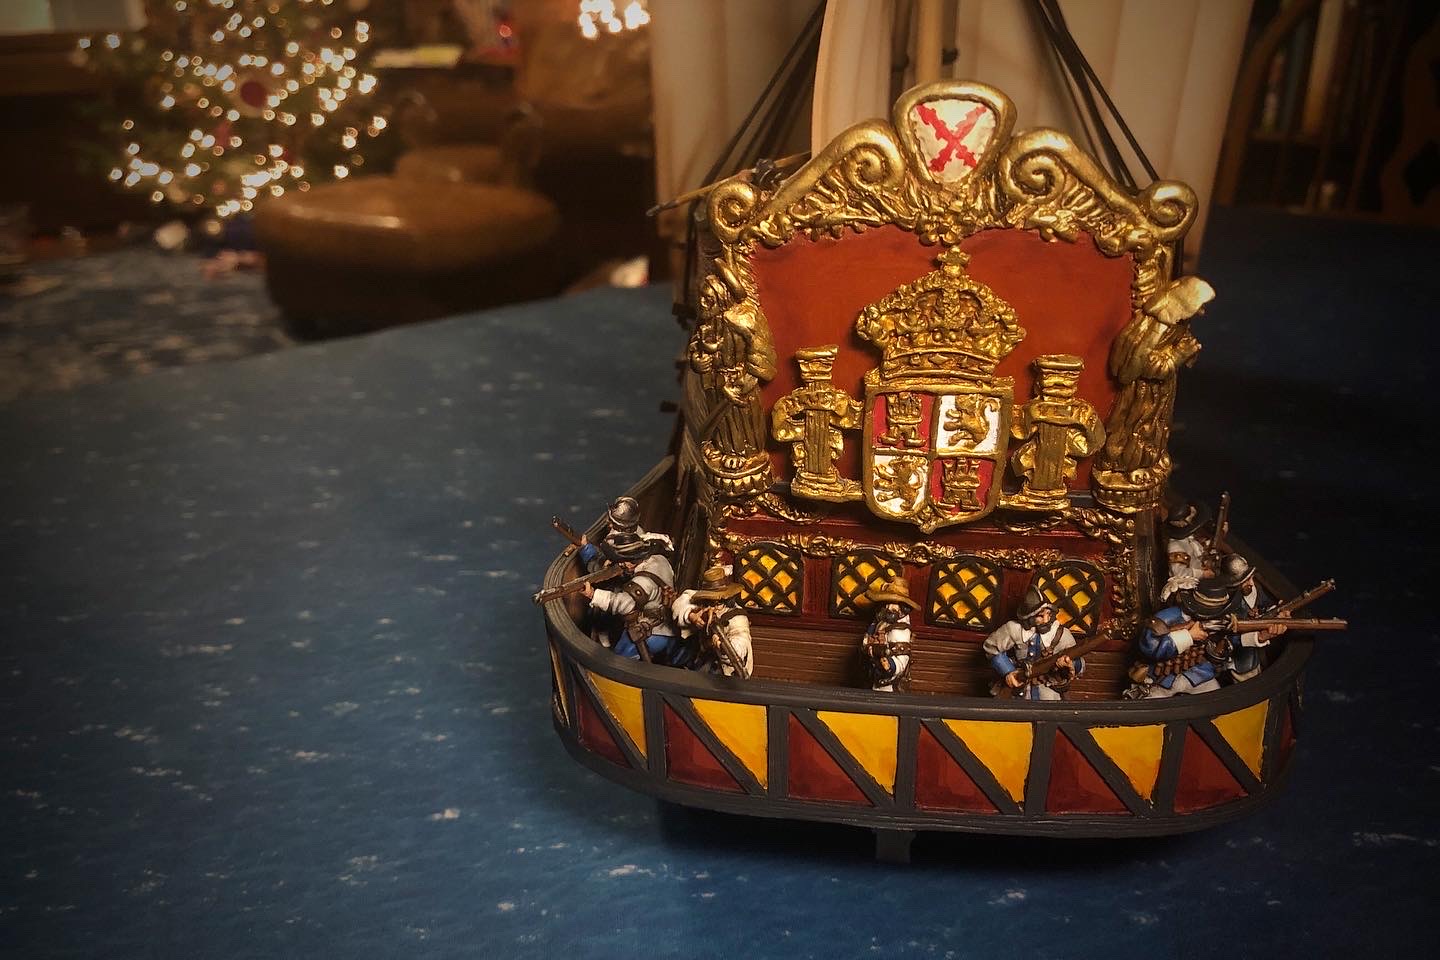
For the stern decorations, you have options. You can use the Catholic saints or the lions for the corners. I plan to use my Galleon for my Spanish force so I went full Catholic. There are two coats of arms you can add to the center of the stern but I didn’t glue mine on at this point. Both coats of arms were warped and would lie flat against the stern so they took a lot of sanding and reshaping to make them fit. I have one stuck to the back with some sticky take for now and I plan to install a magnet in the back of the ship and in both decorations so I can use either.
There are no gun ports to clean up but there will be some excess resin on various edges and in the ports on the front deck. Once all the resin parts are in place and the you’ve removed all extra resin from edges and holes, wash the model with hot water. Soap is a good idea but make sure to rinse it very thoroughly because soap residue isn’t any better than the release agent that might be on the resin.

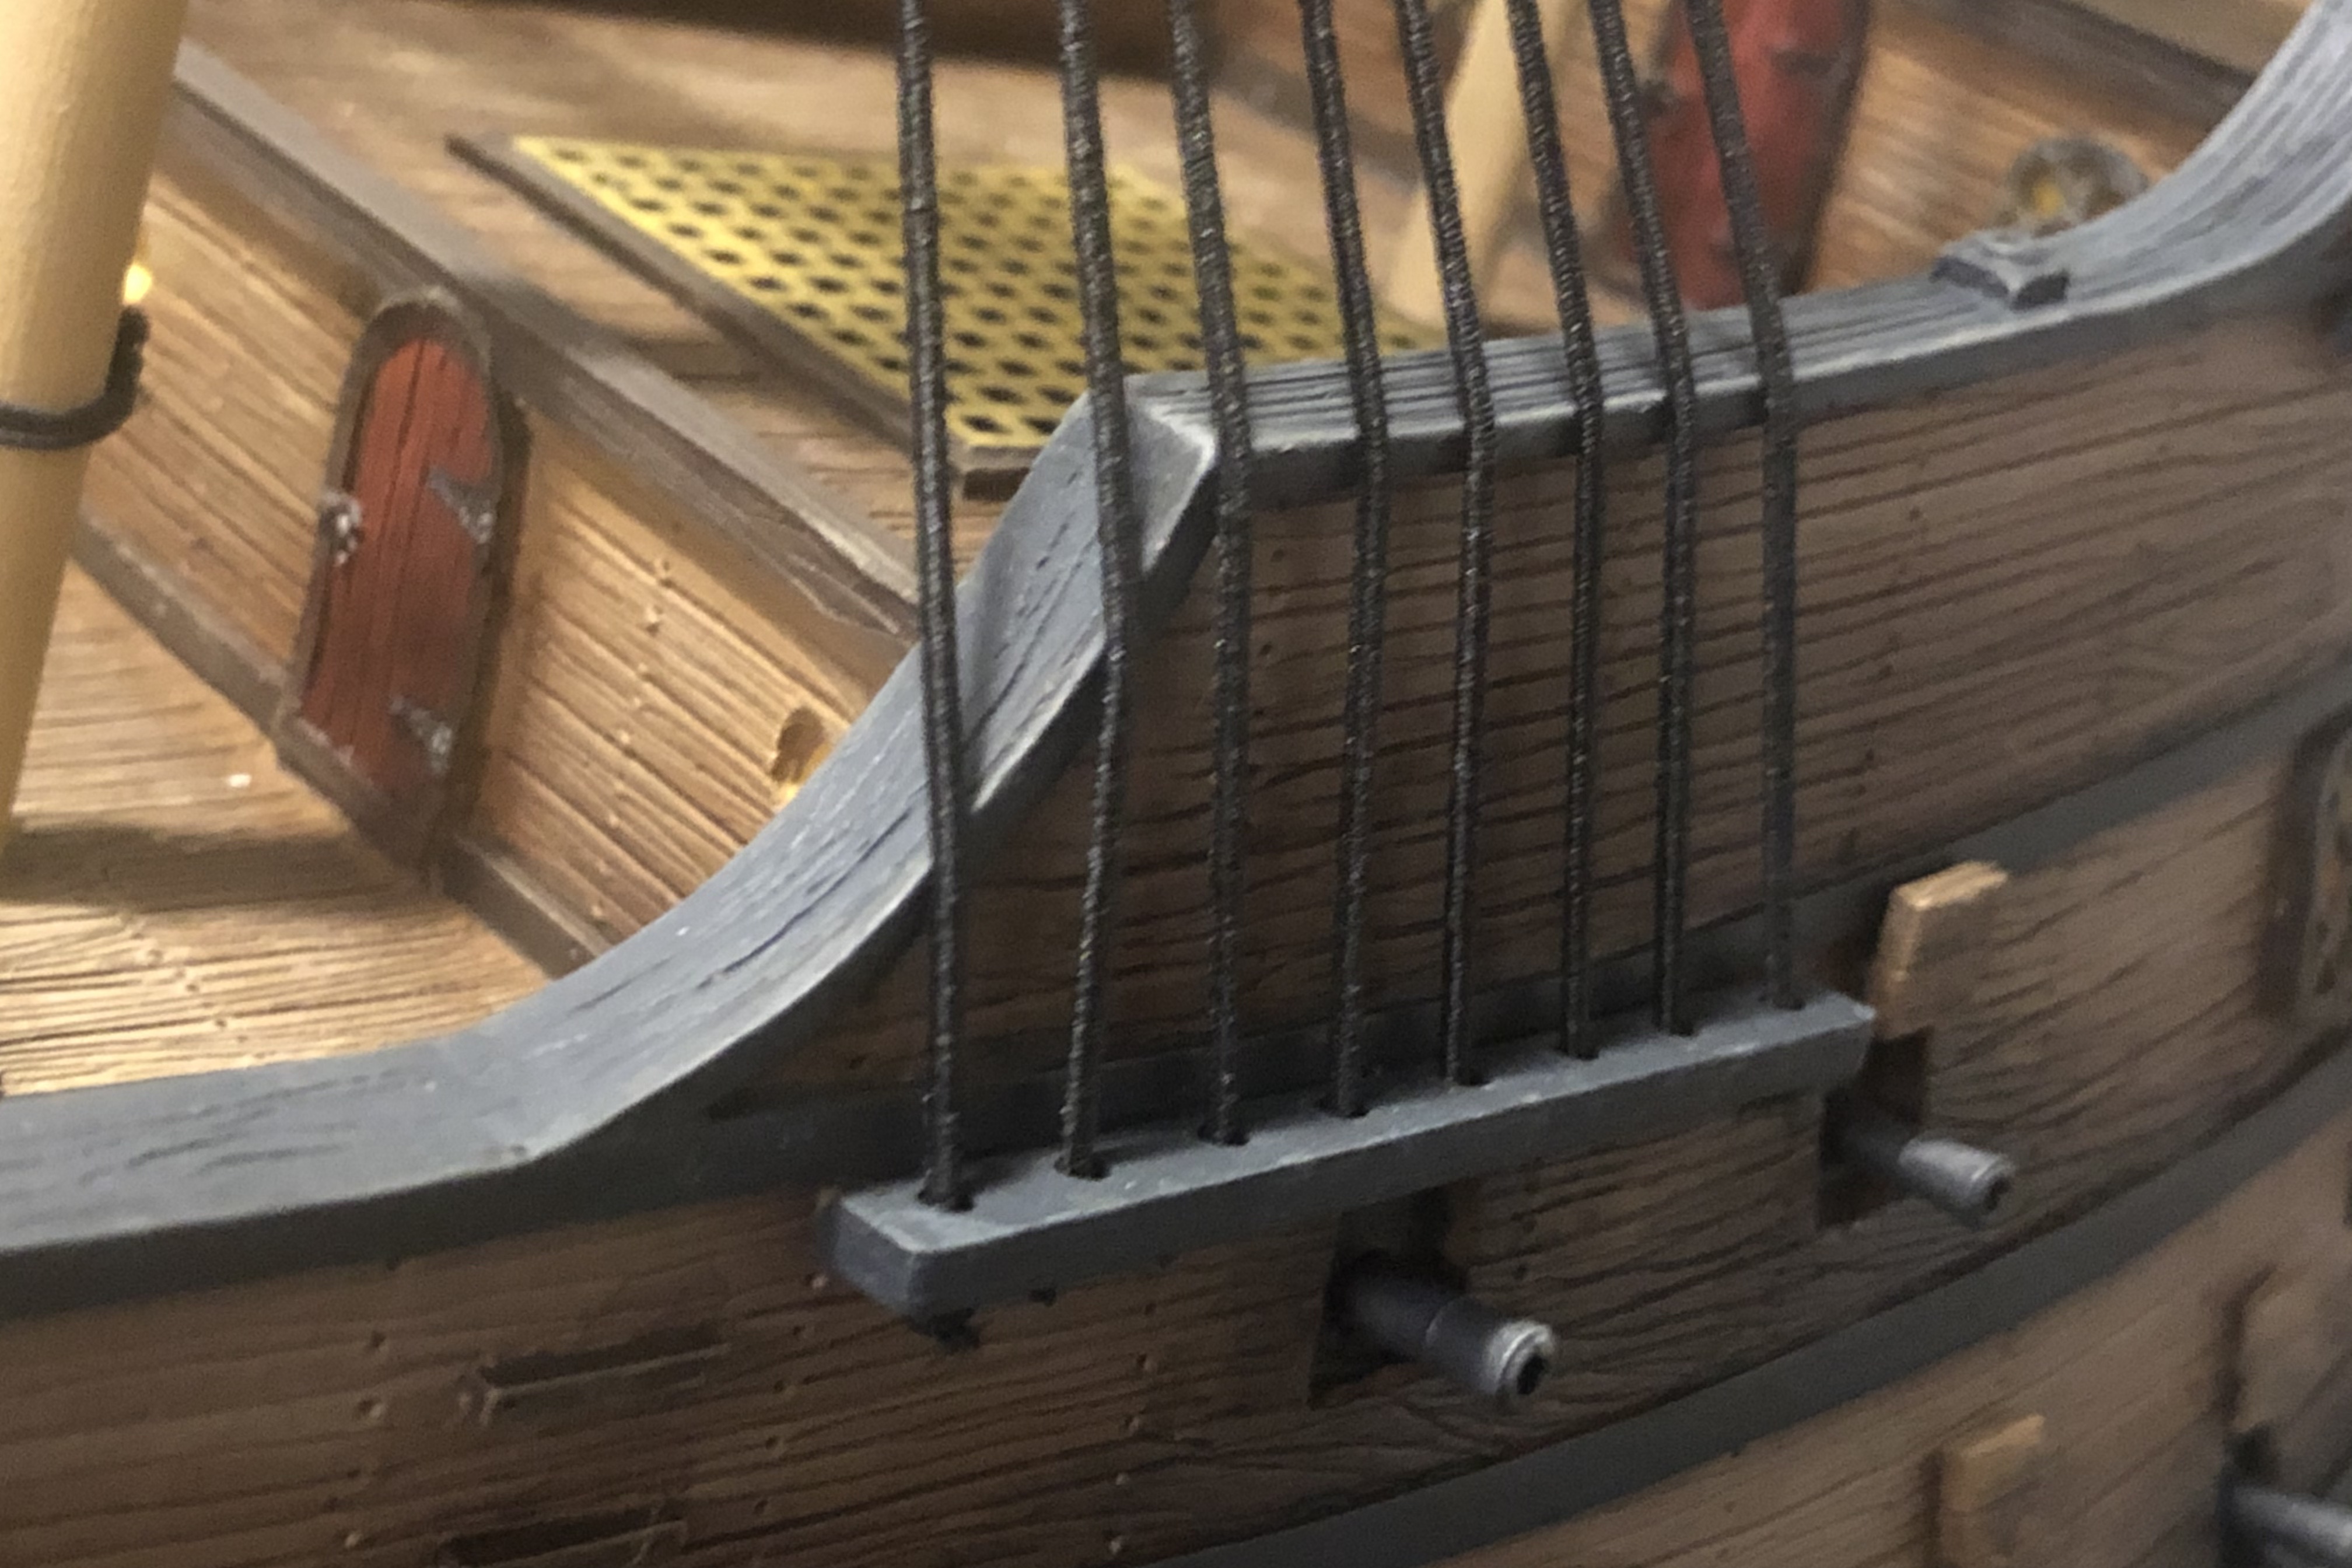
After the hull has dried from its bath, glue in the wooden rigging bits that connect to the outside walls of the hull.
You could glue on the gun port hatches here but I would advise against it because you’re very likely to break them off as you paint it.
Step 2 – Prime
I used a rattle can Army Painter brown for my primer and used it as my base color for the hull exterior. It took me a couple sessions to prime it properly just because it was so large! I did one end, let it dry, then did the other half. After that dried I went over it again carefully covering any spots I missed or giving a second coat to areas that were too light.
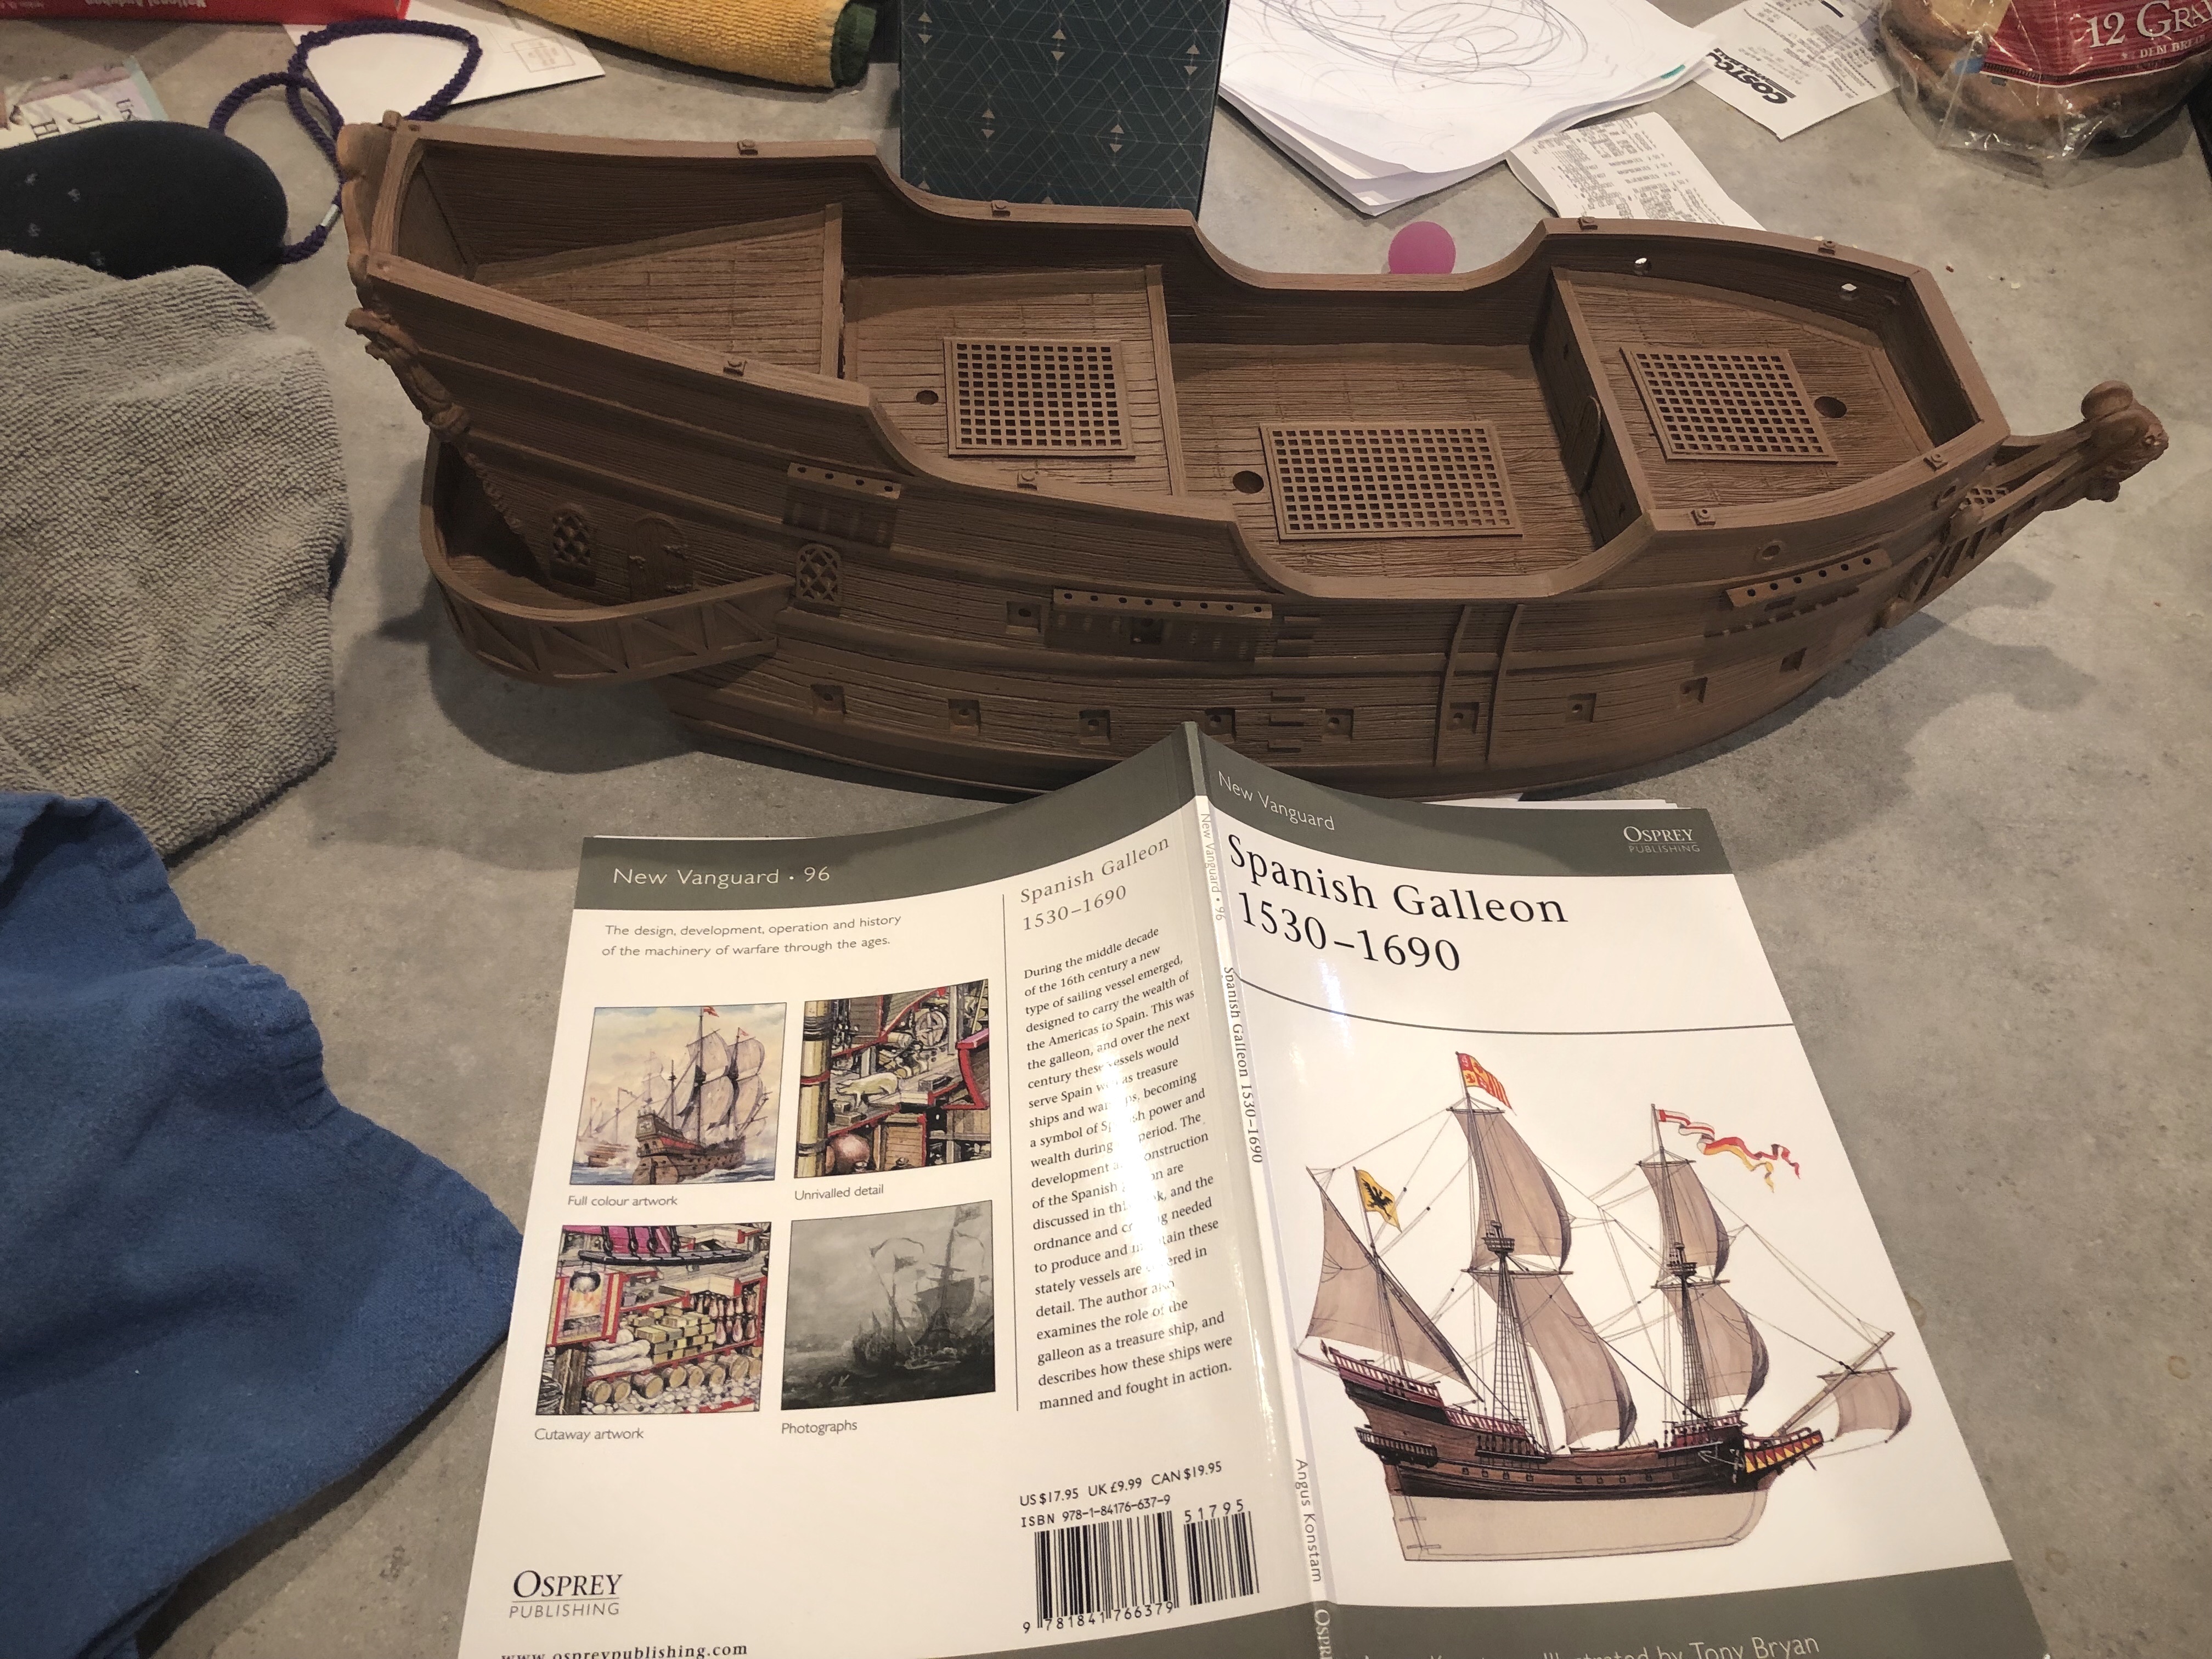
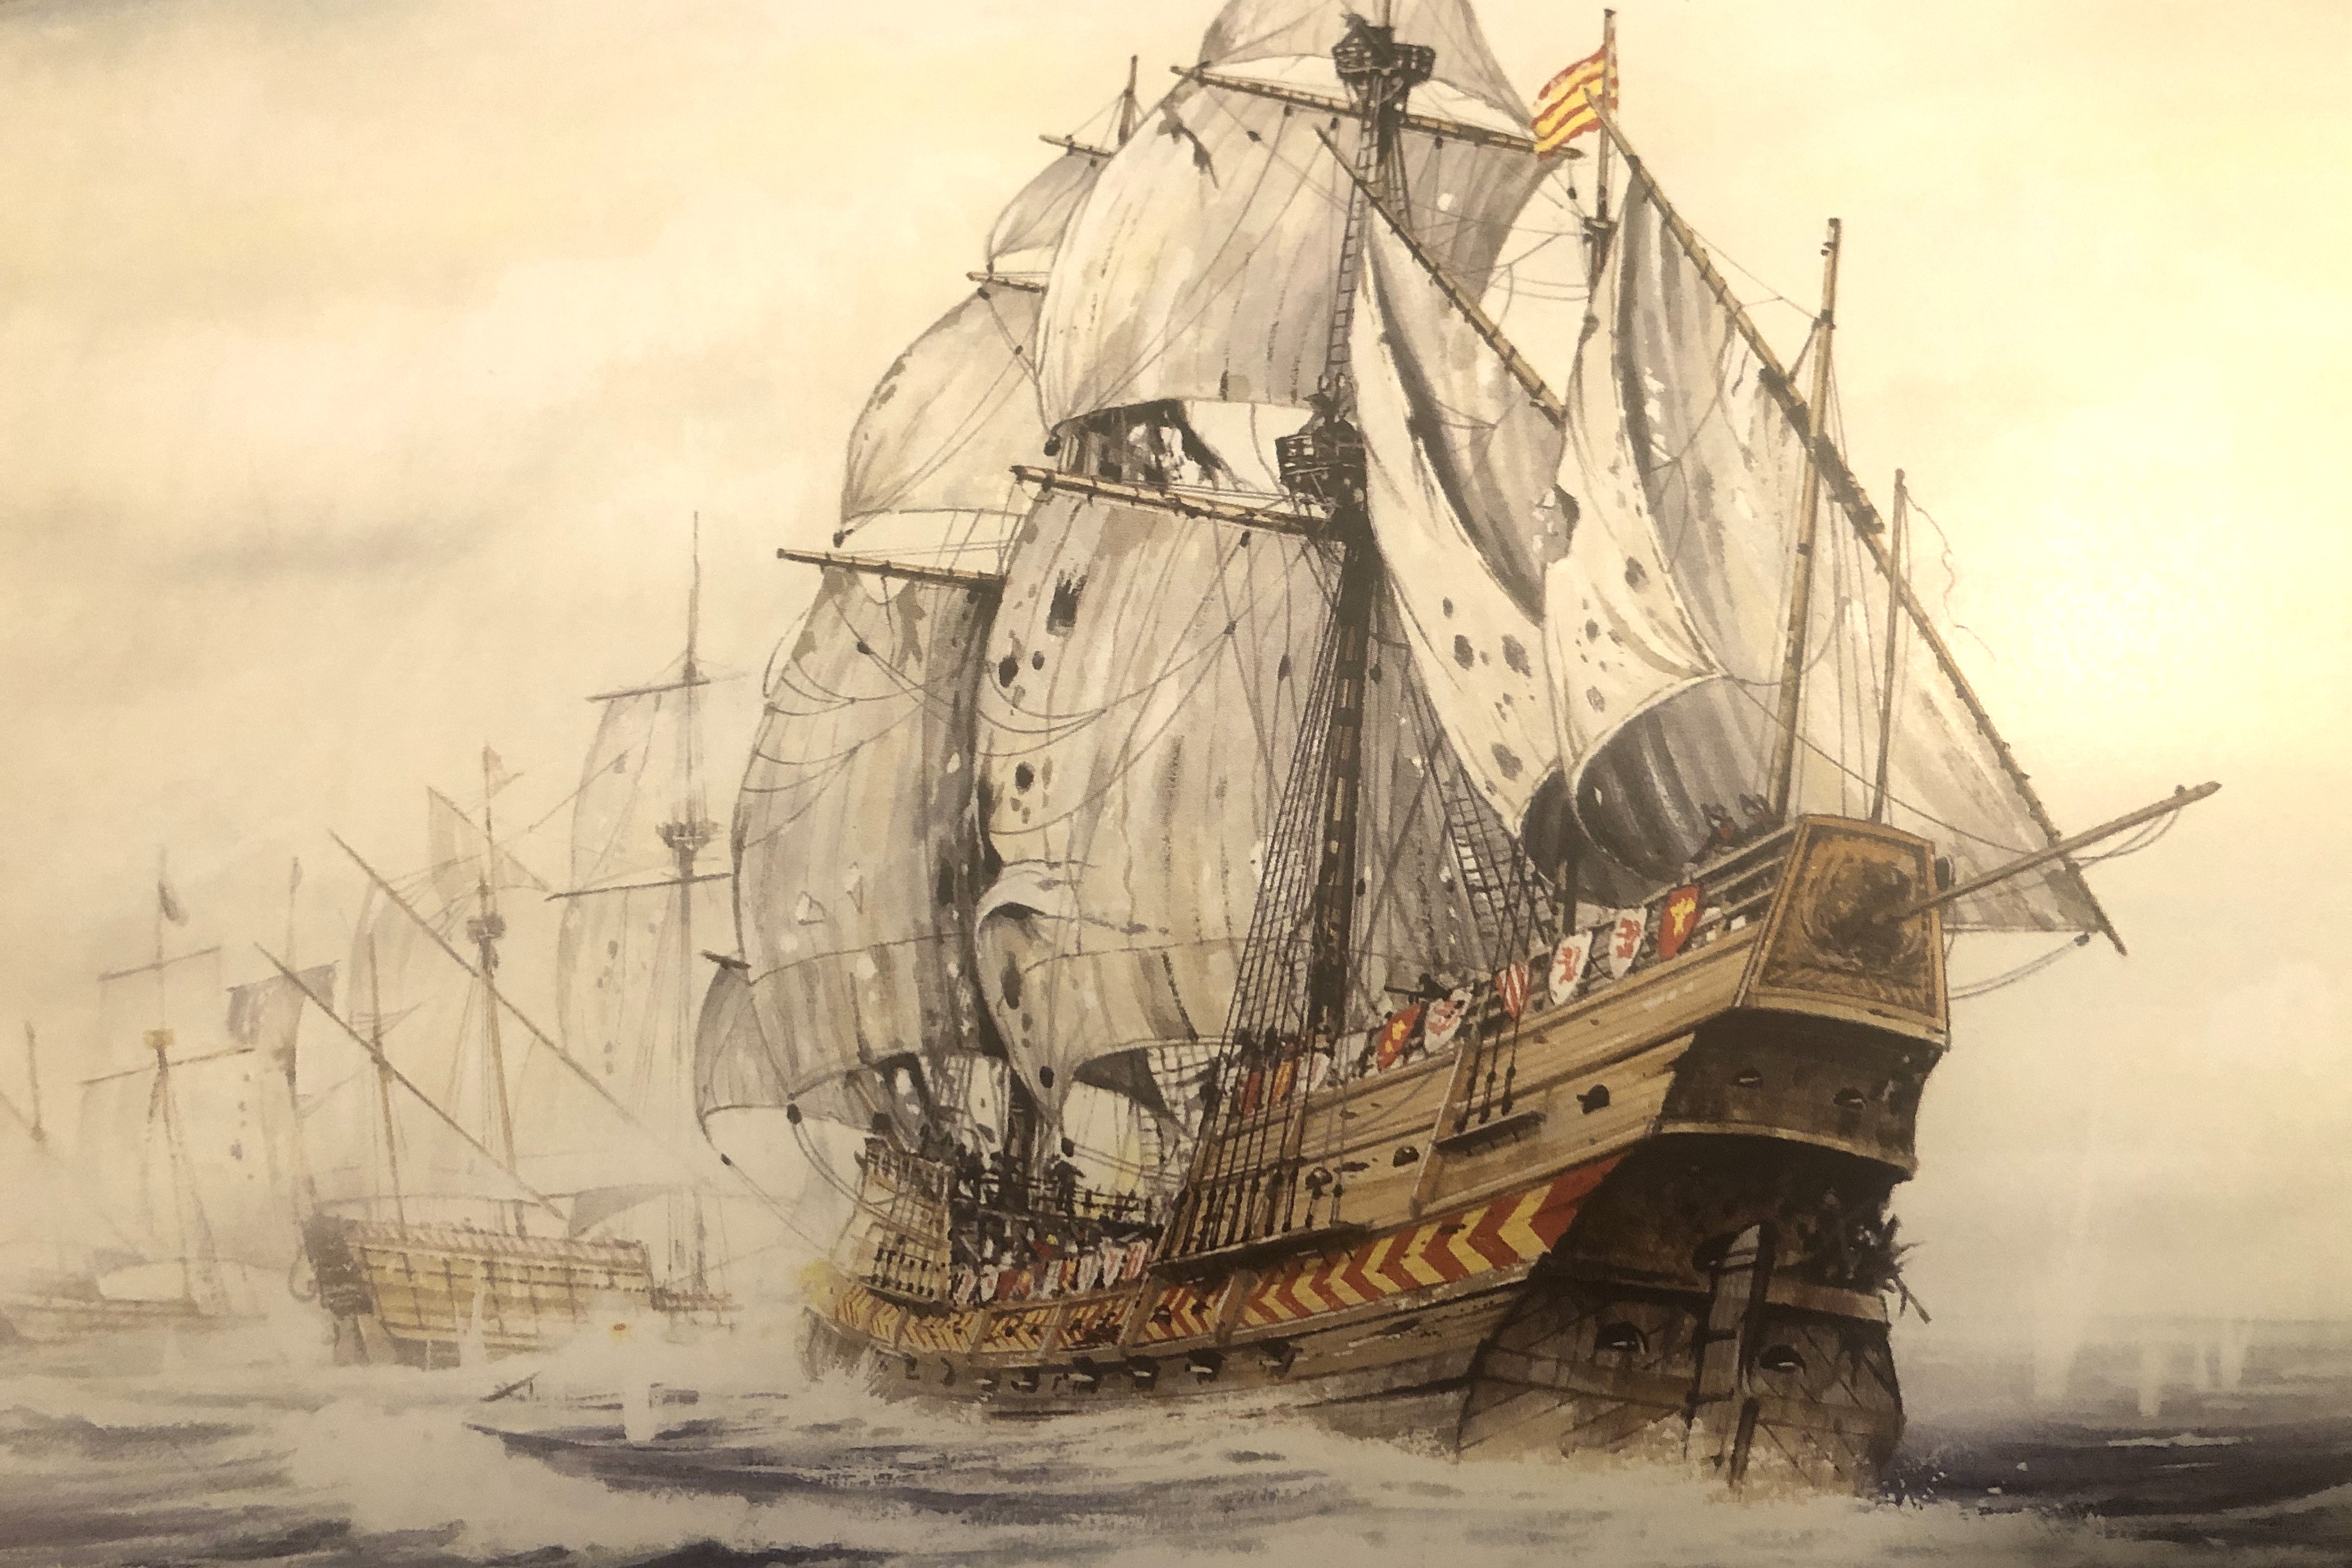
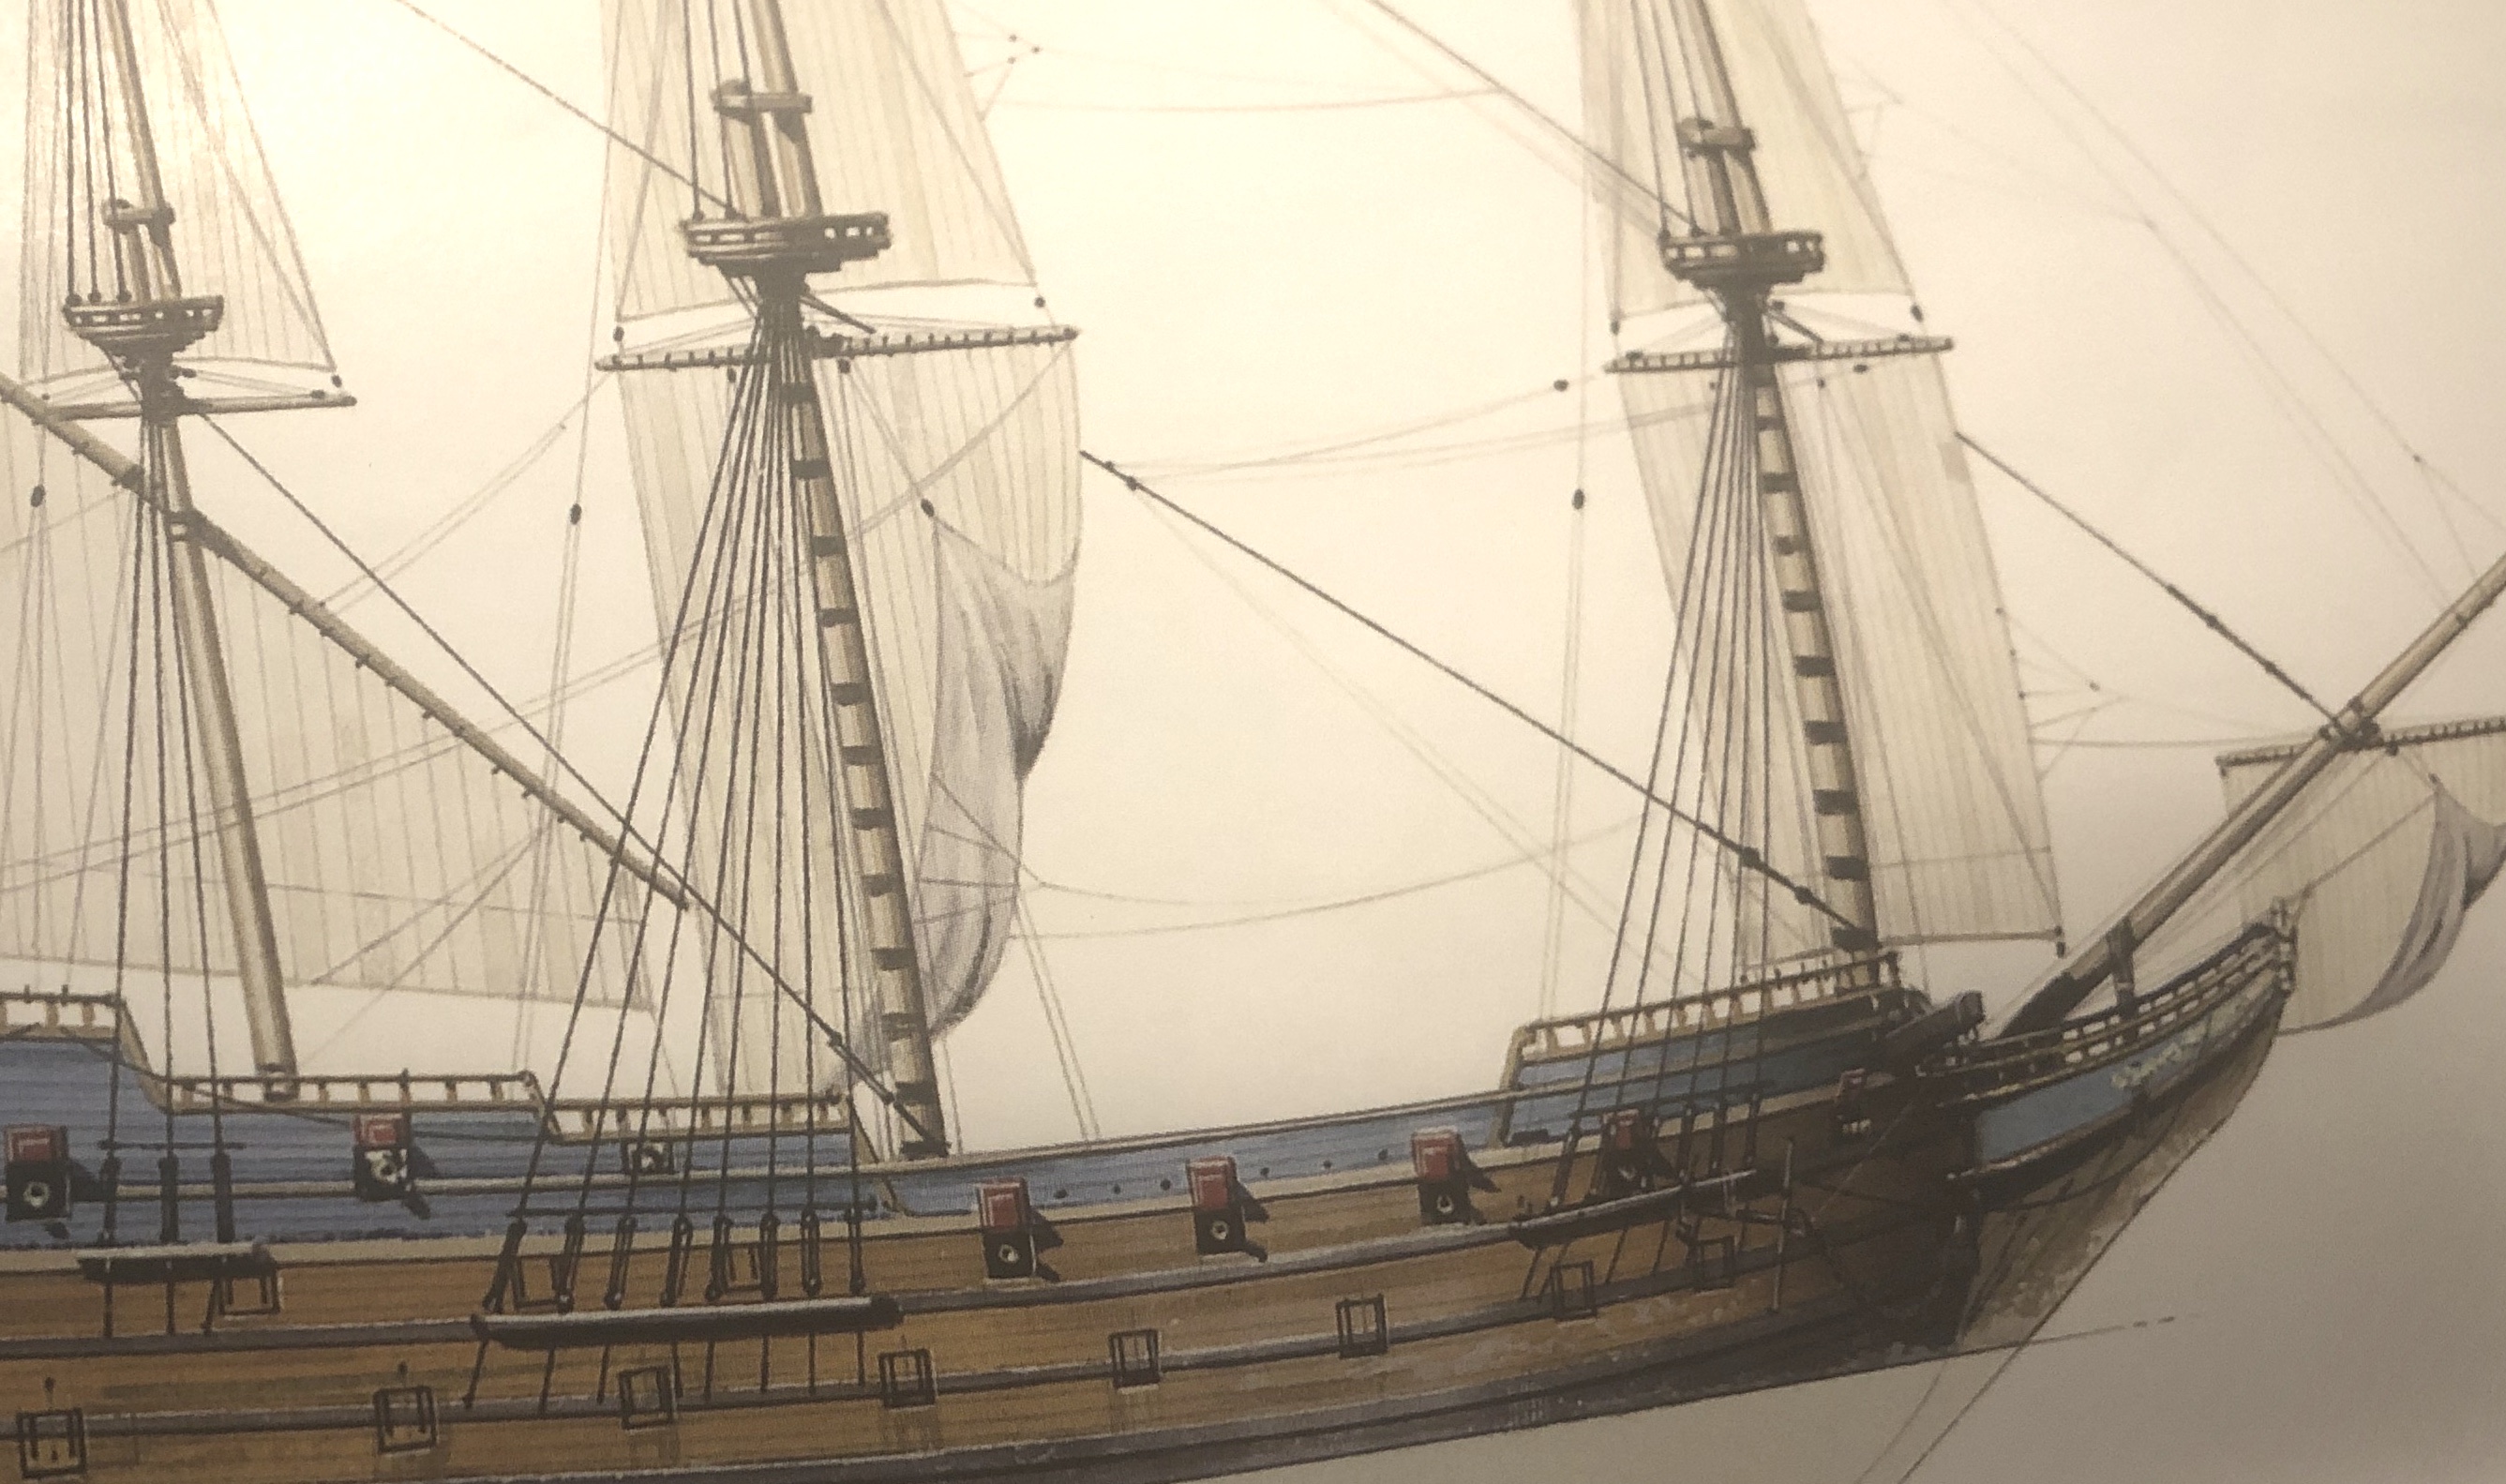
I purchased this Osprey book on the Spanish Galleon for some inspiration and I thought it was worth it. The reading was interesting and there are some good paintings that gave give you some paint schemes to copy.


Step 3 – Base Colors
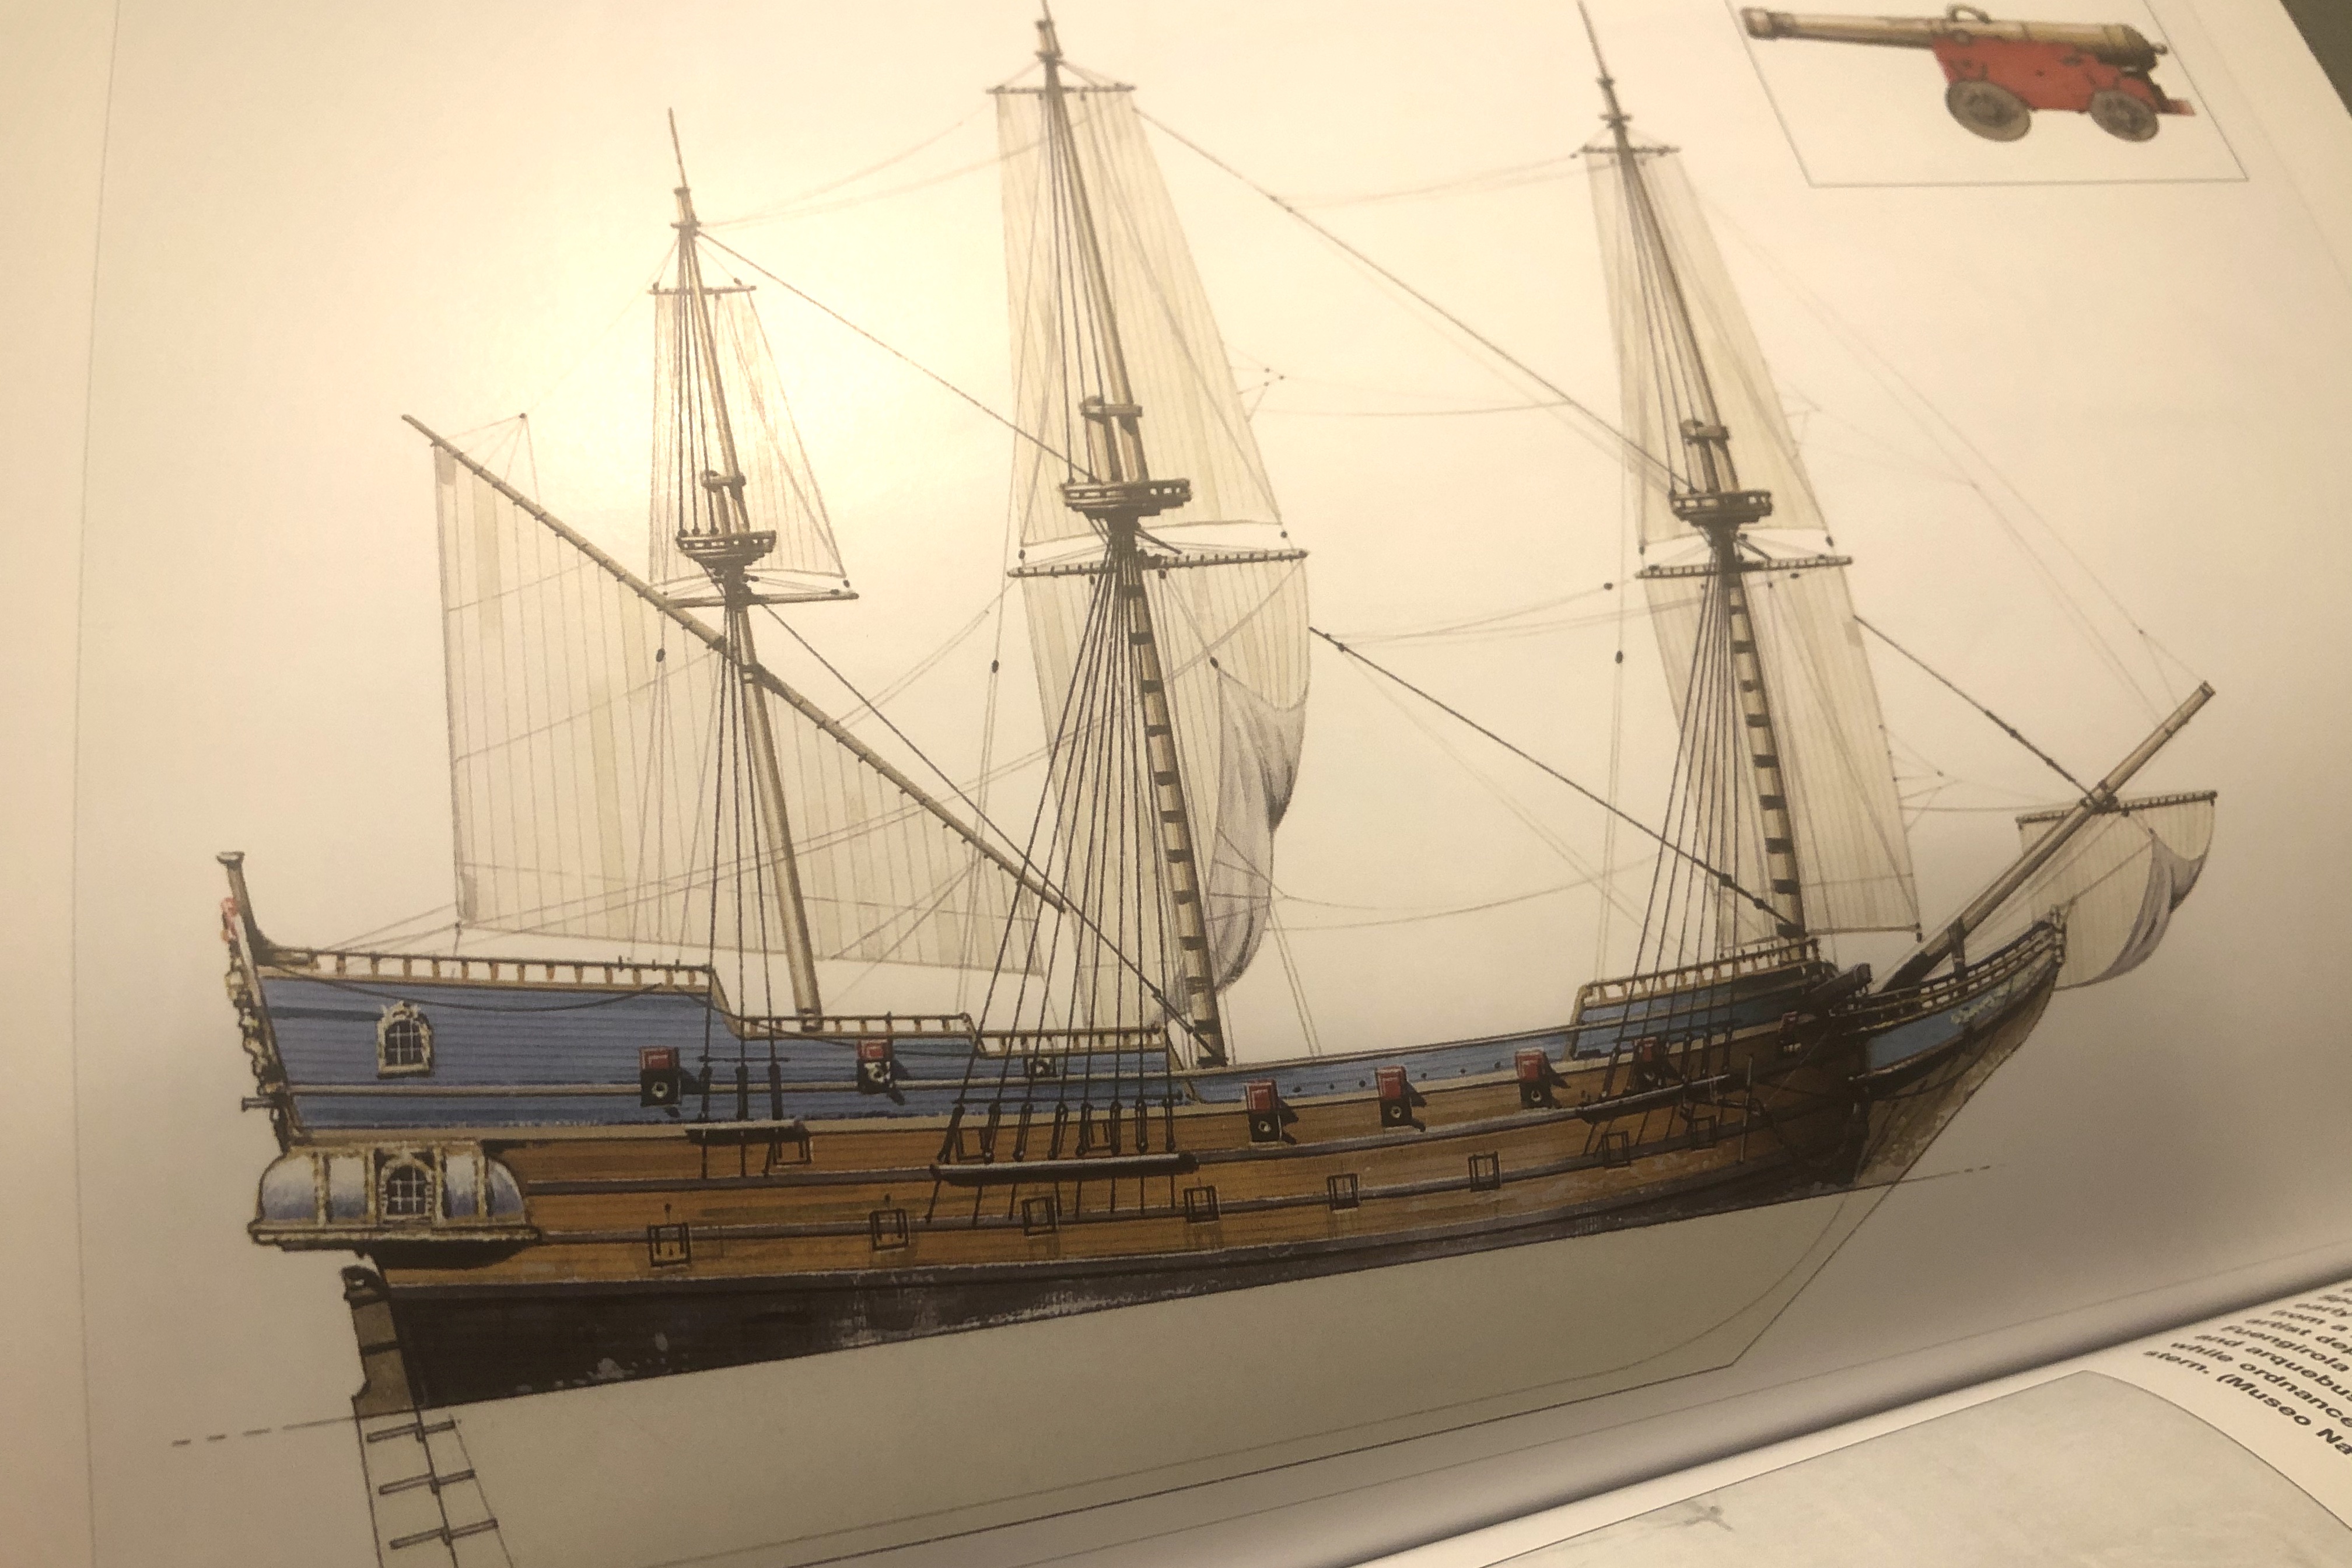
I decided to take this image as my rough guide for my paint scheme:
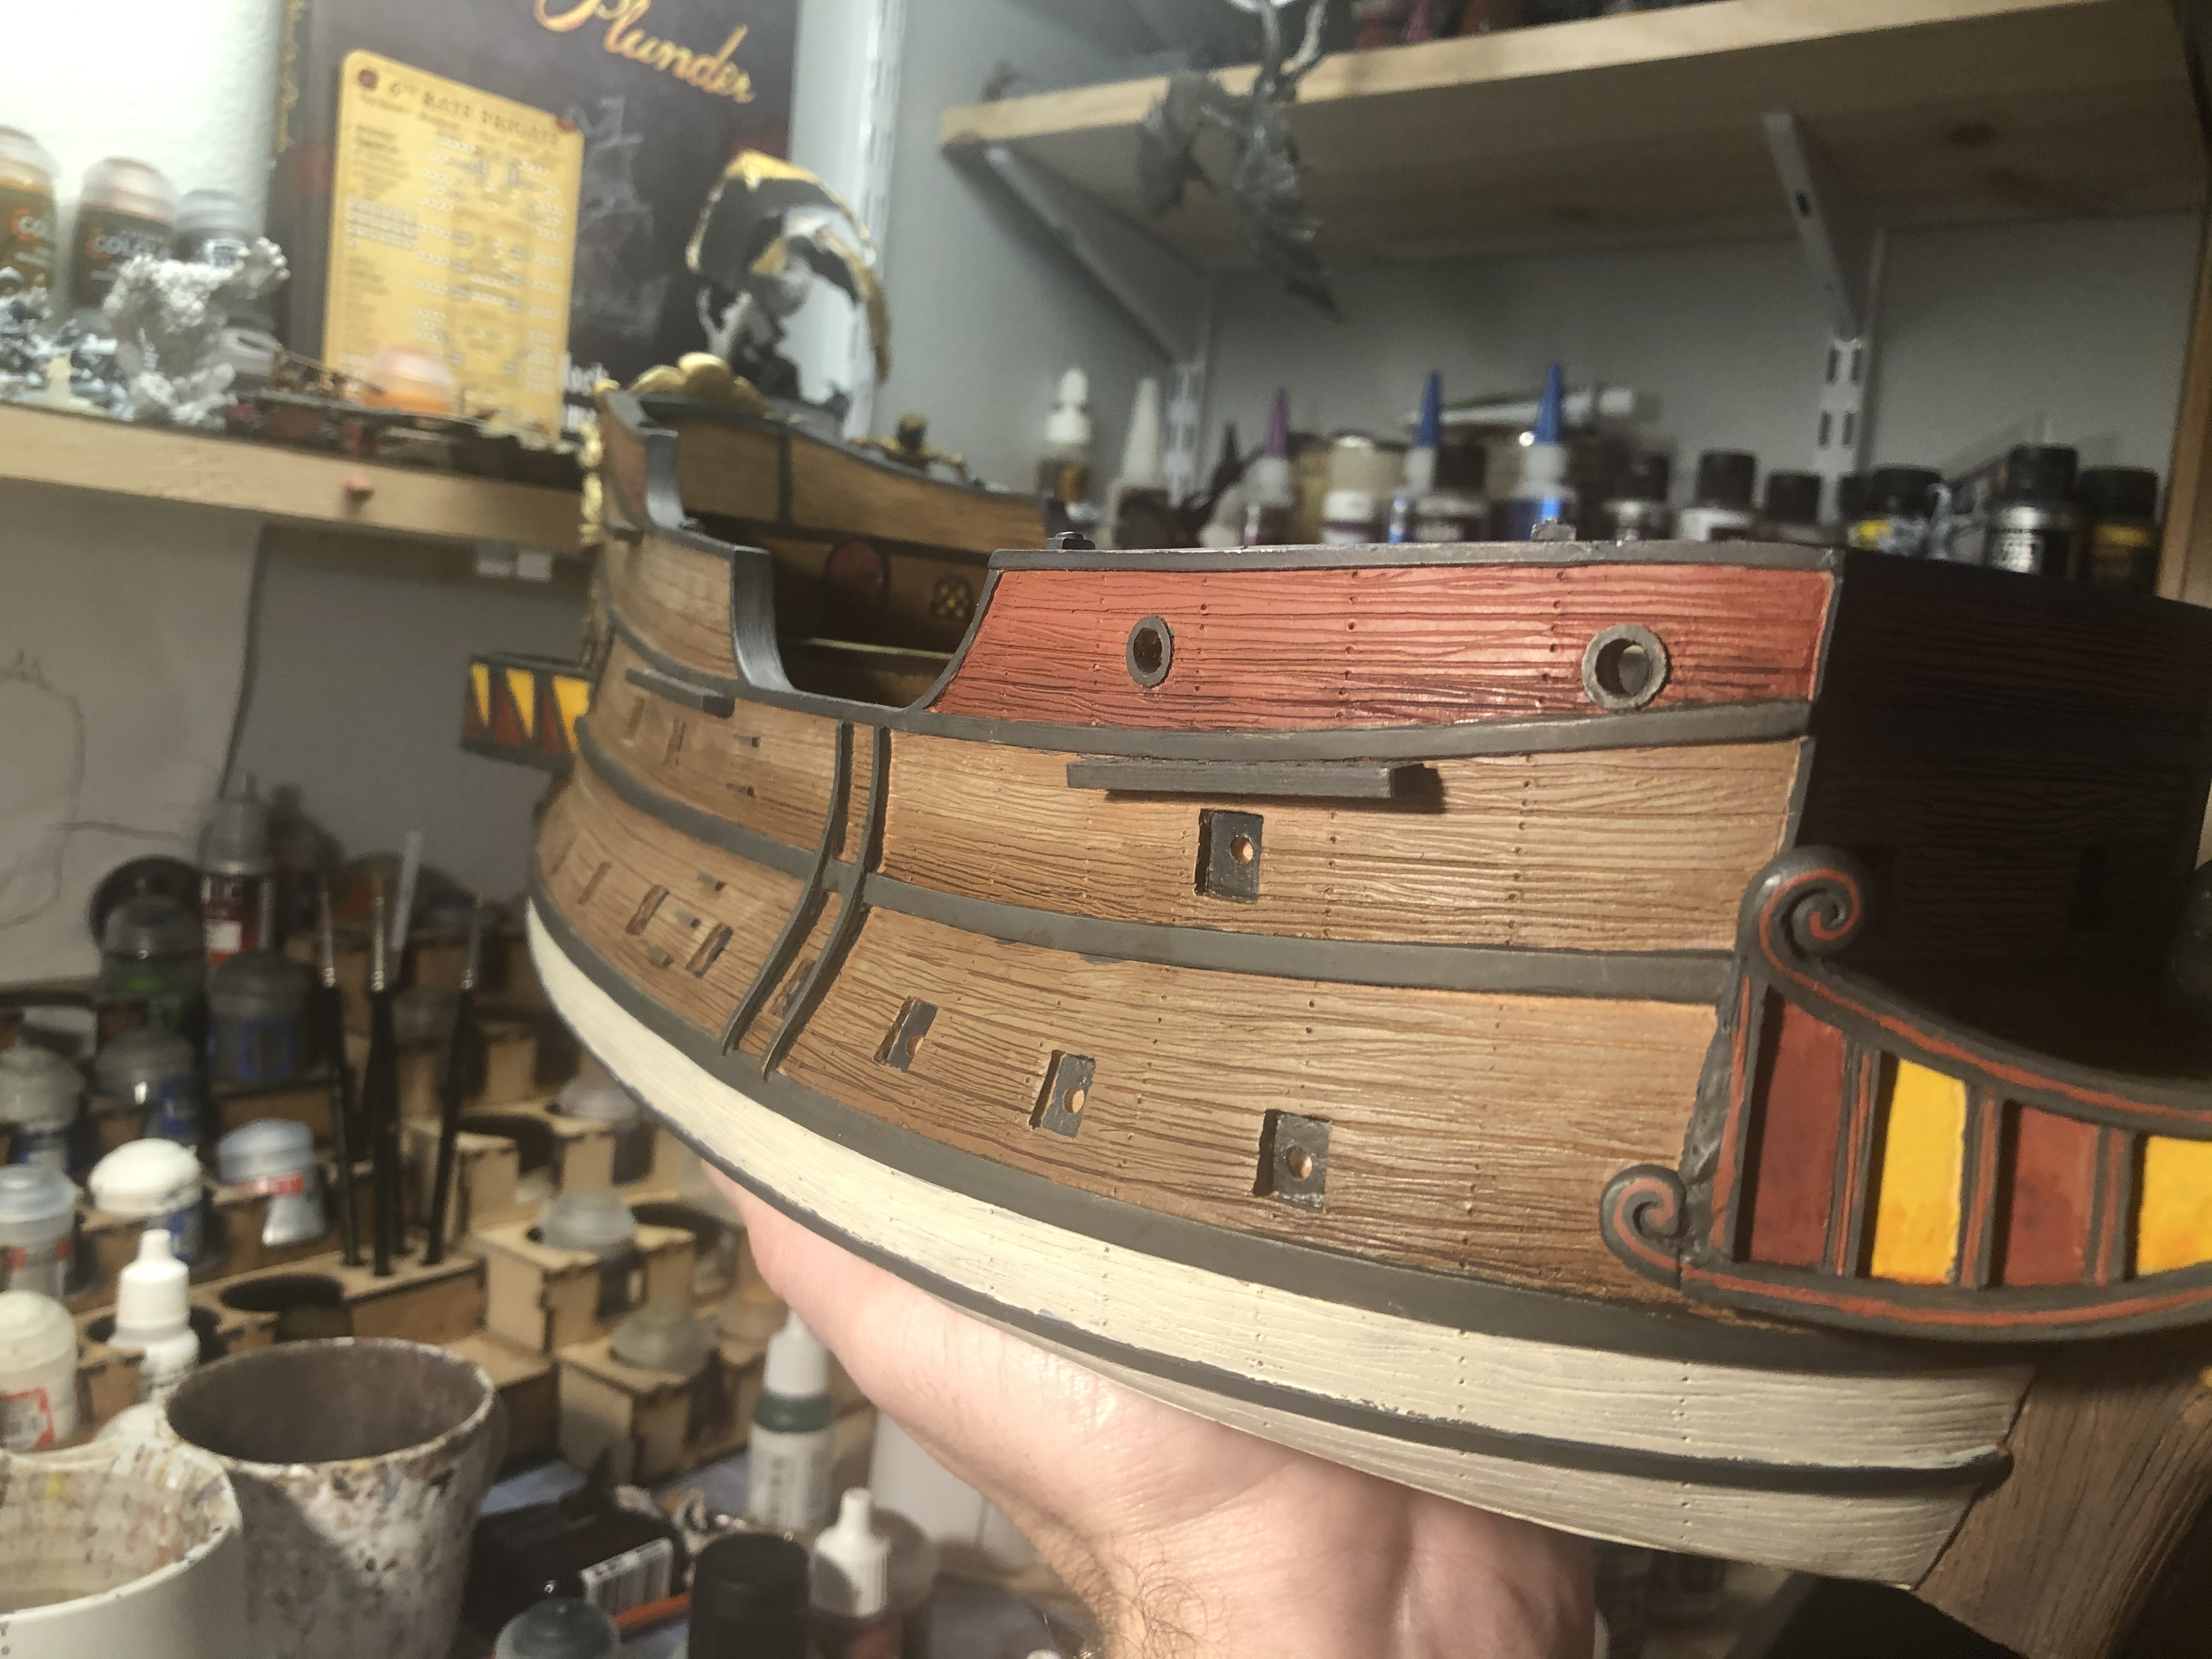
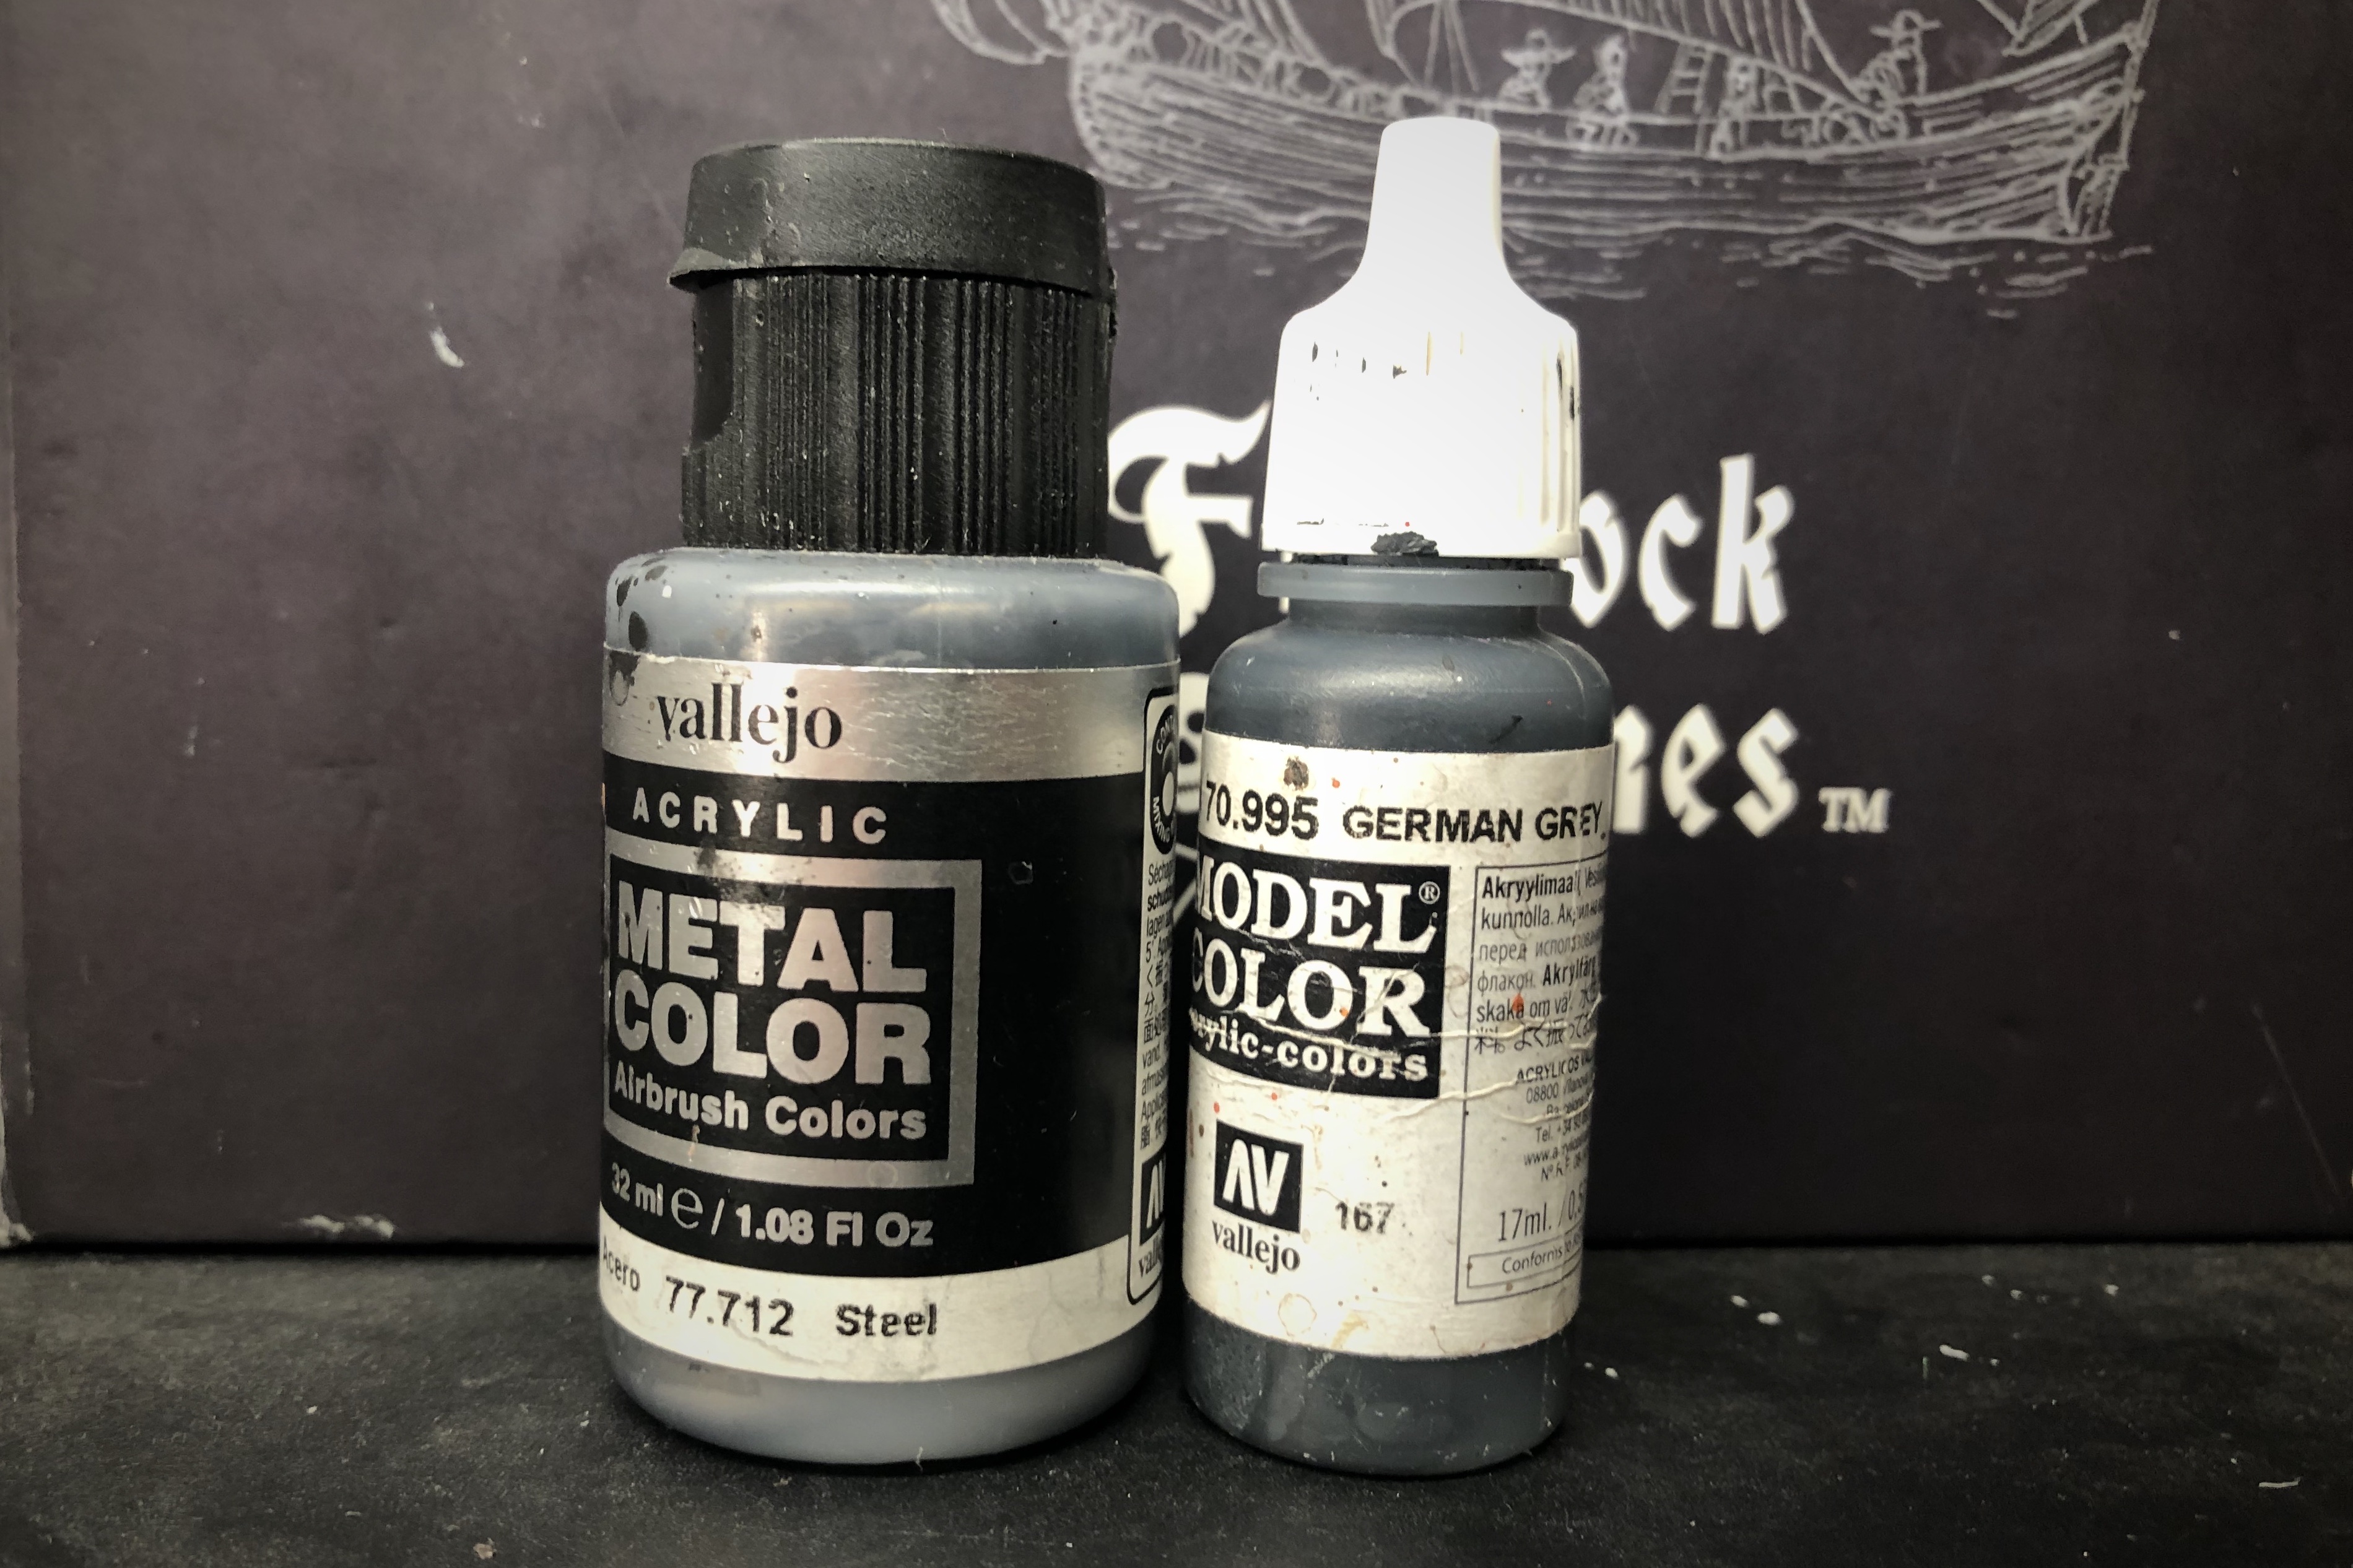
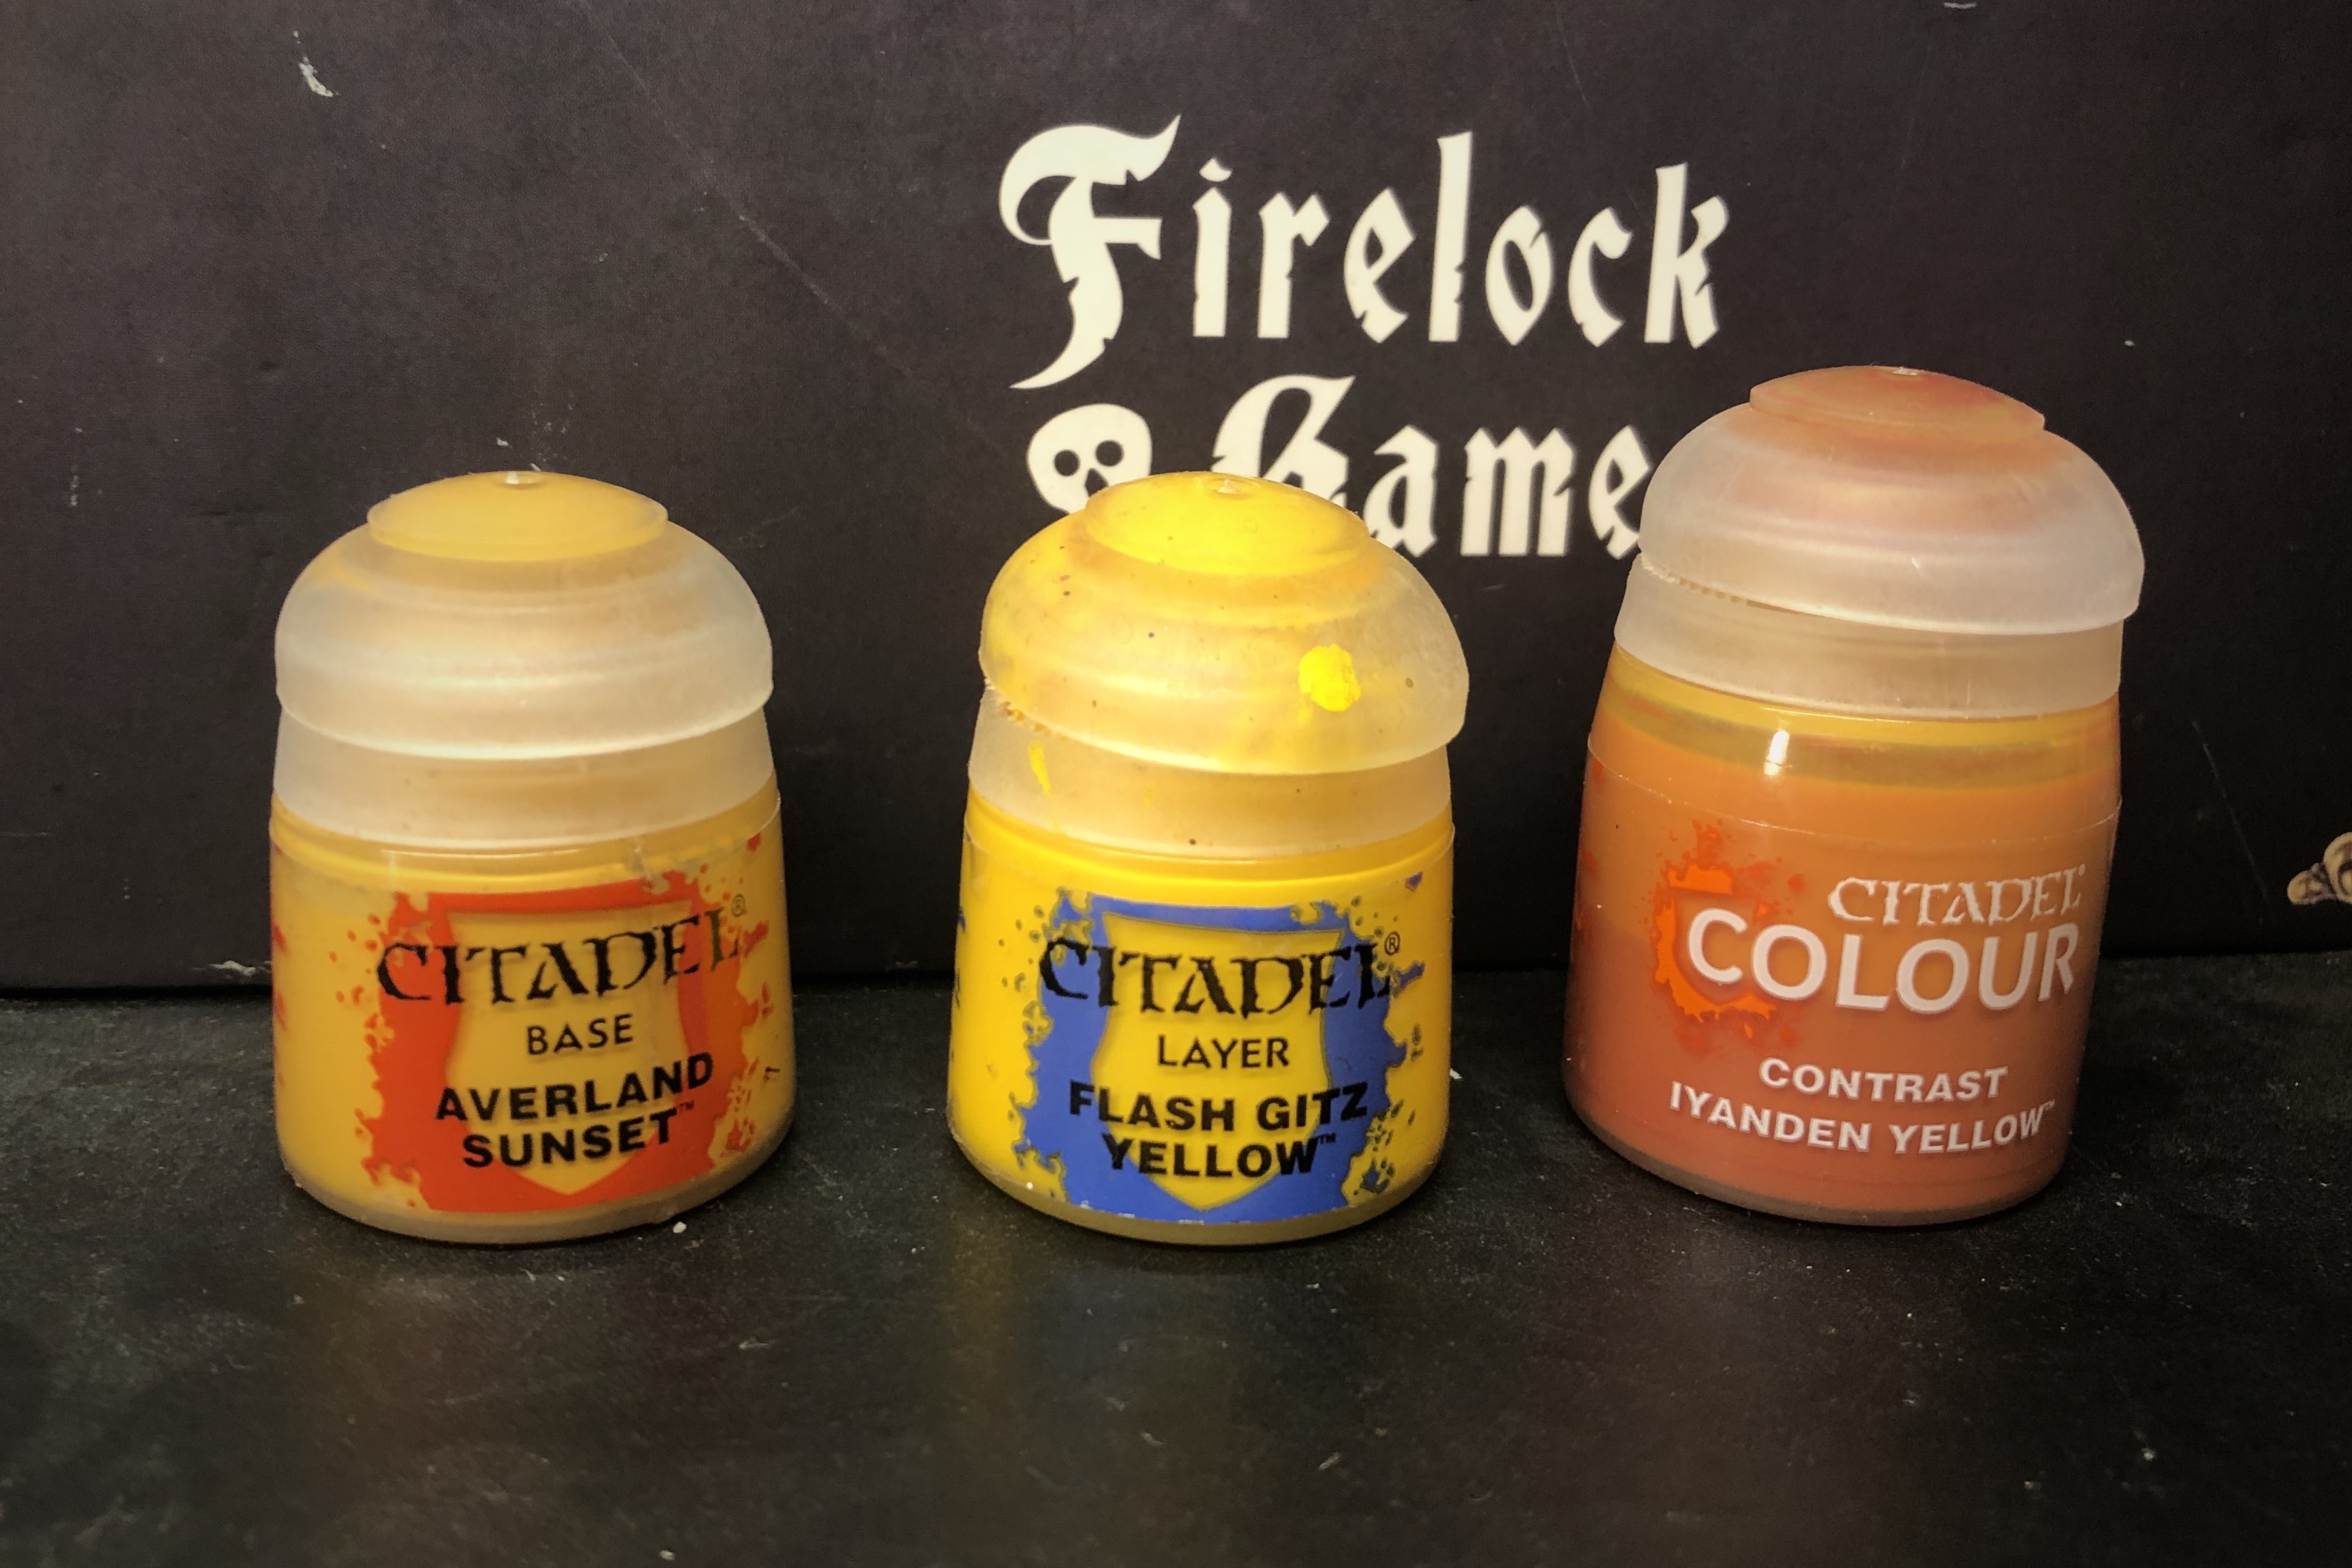
For my basic hull colors I used the Army Painter basic brown primer for the majority of the hull, Vallejo German Grey for the horizontal trim and rigging bits and the prow, Cavalry Brown for the red panels on the gallery, prow, and forward and rear decks and the various doors, and Game Color Bonewhite for the lowest piece of the hull. For the yellow panels I used Citadel Averland Sunset.

Application of the German Grey took the longest as you have to be careful and cover the top, front and bottom of all those stripes! I nearly went crazy…
I saved the top railing for as late as possible since I had to handle those edges to hold and move the model and I find it is constantly rubbing off, even if I wear a rubber glove.

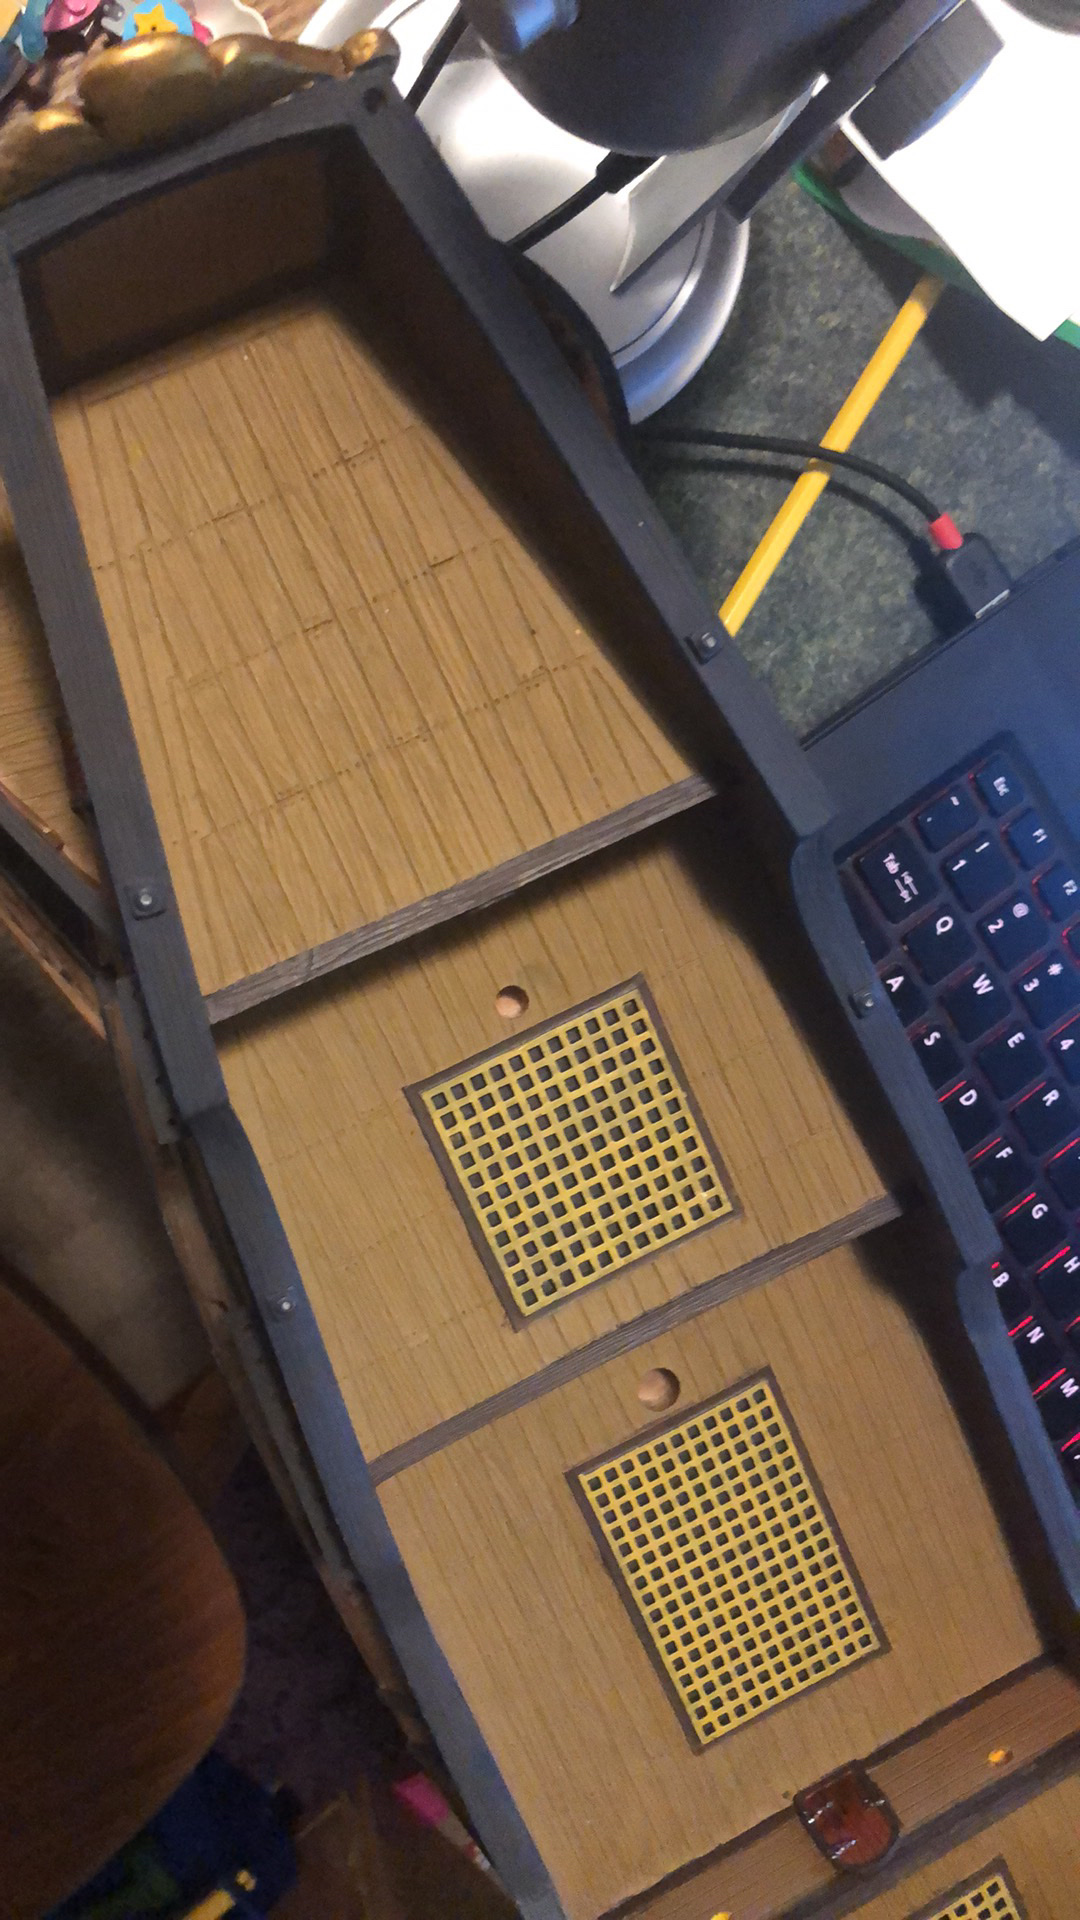
Painting the Decking
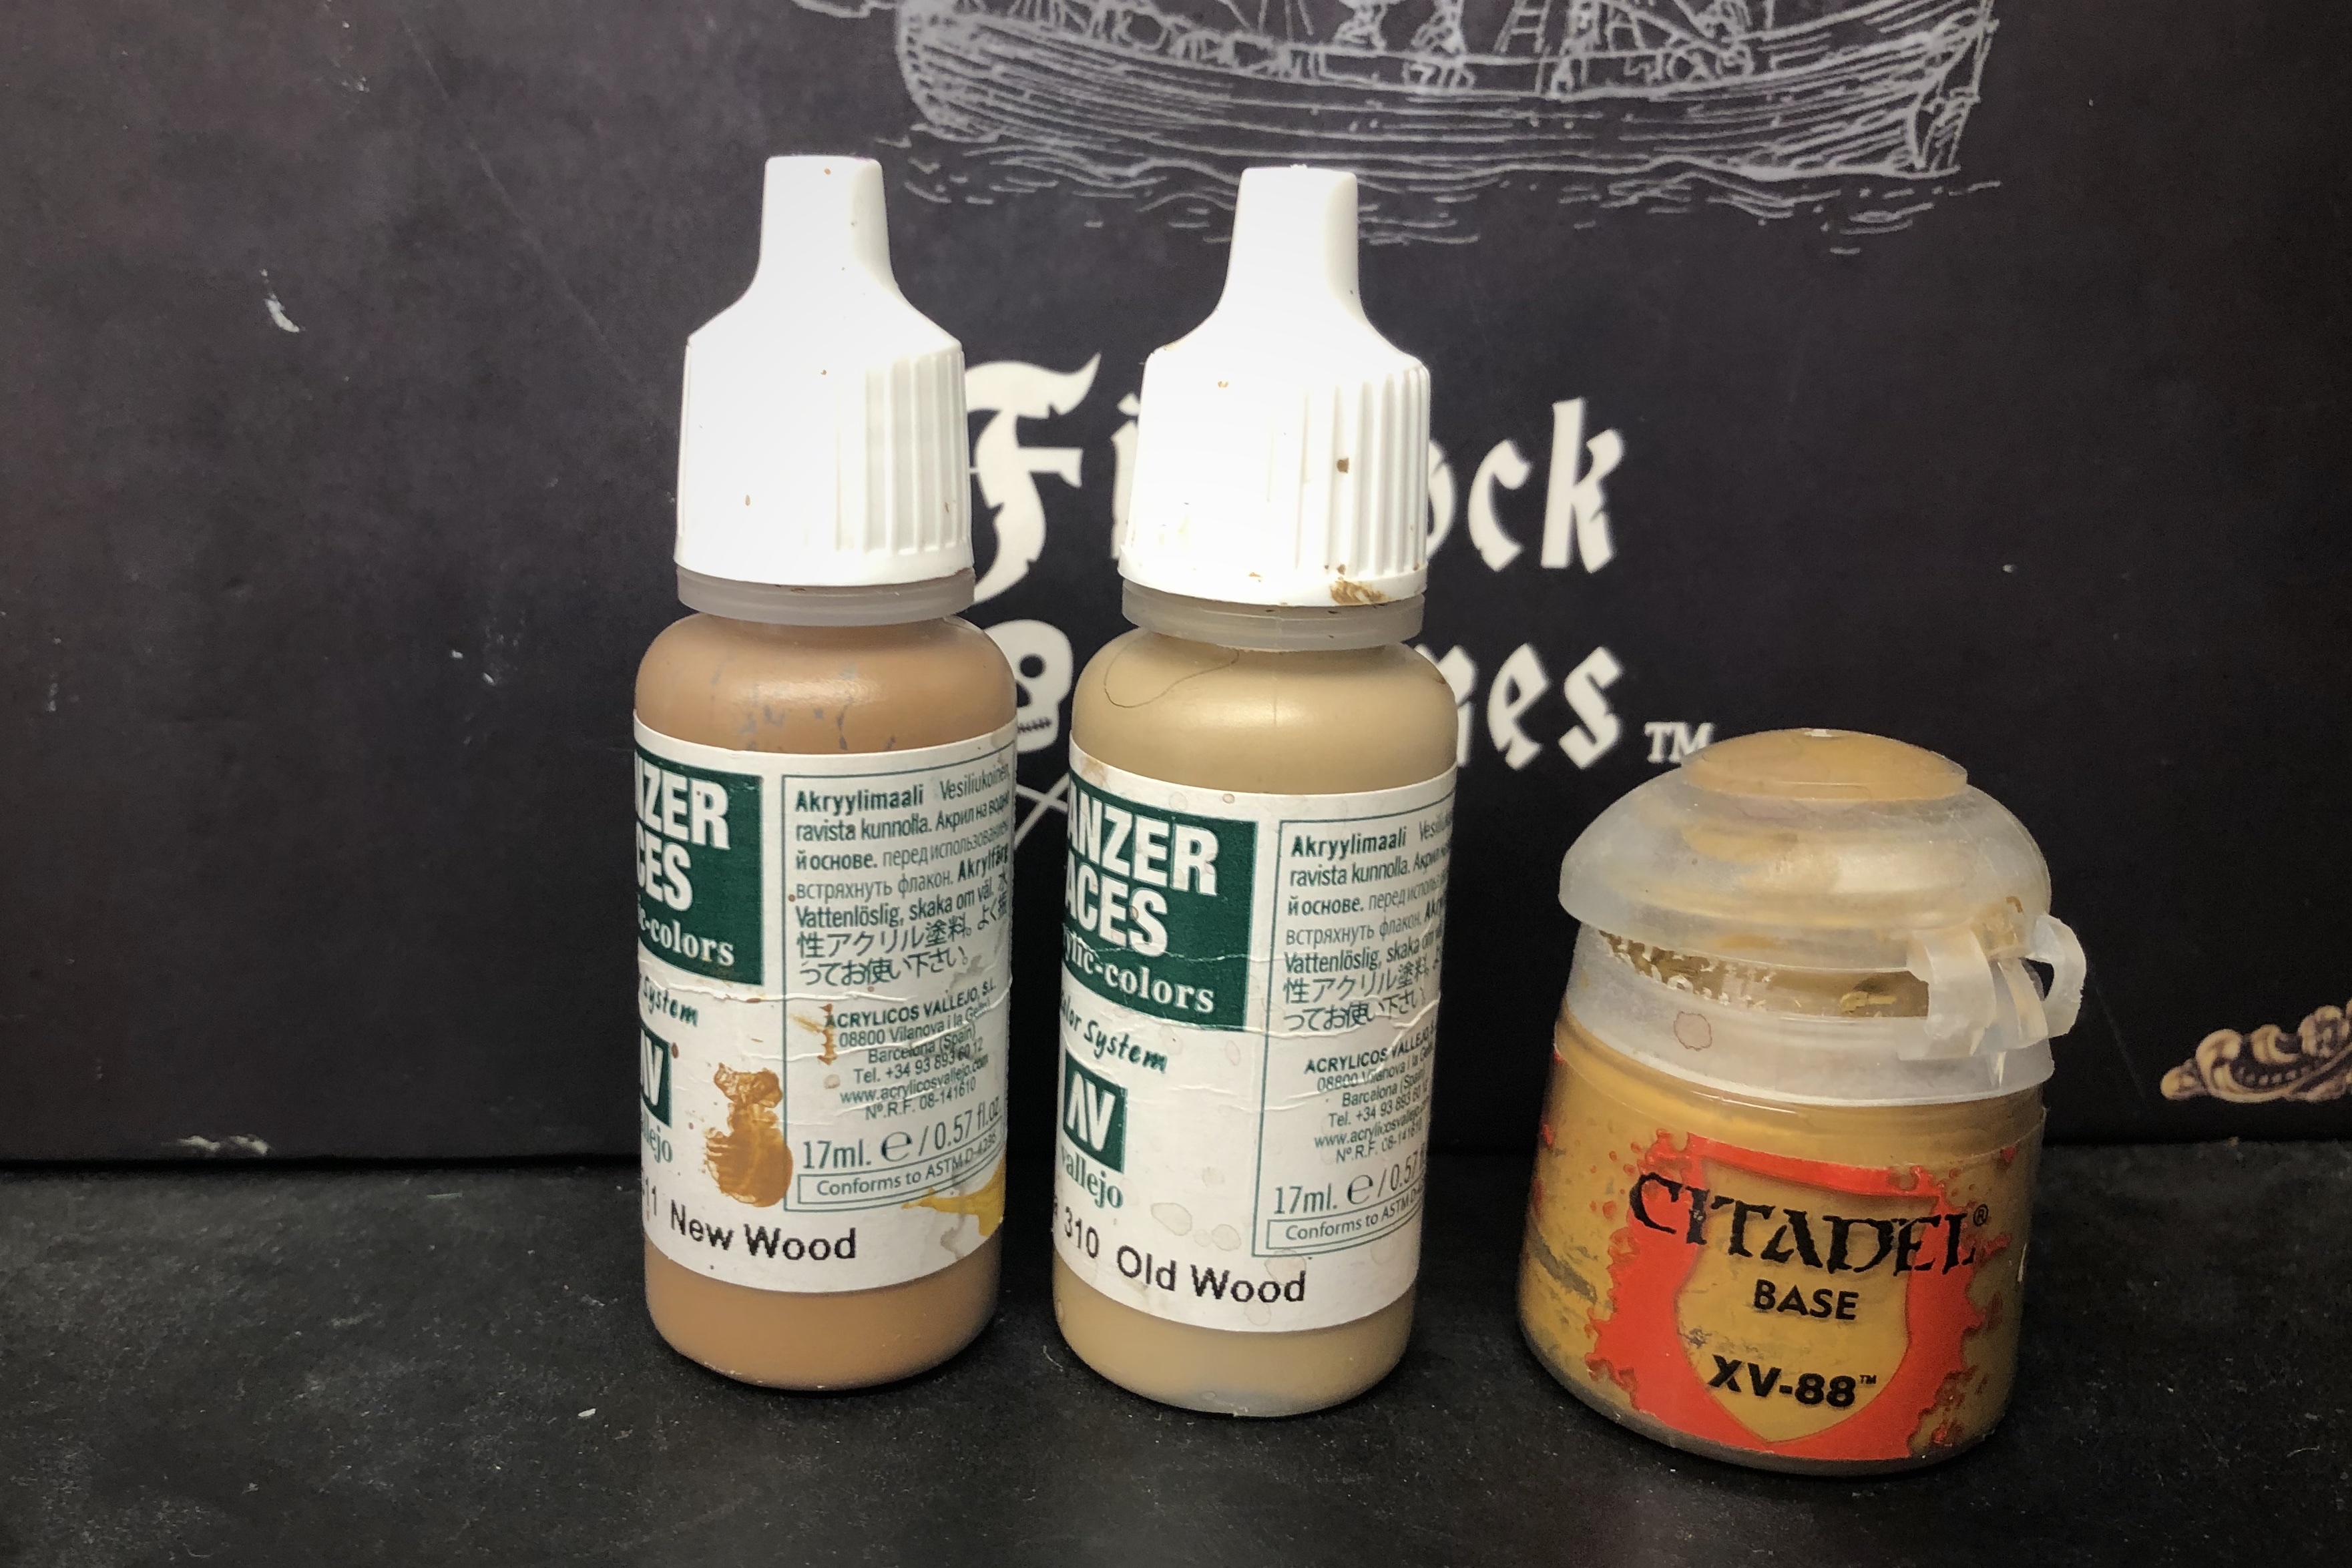
For the deck and inside walls of the hull I used these three paints: Citadel XV-88 for the deck (I use this paint for all my models’ bases) and Vallejo Panzer Aces New Wood for the inside of the walls.
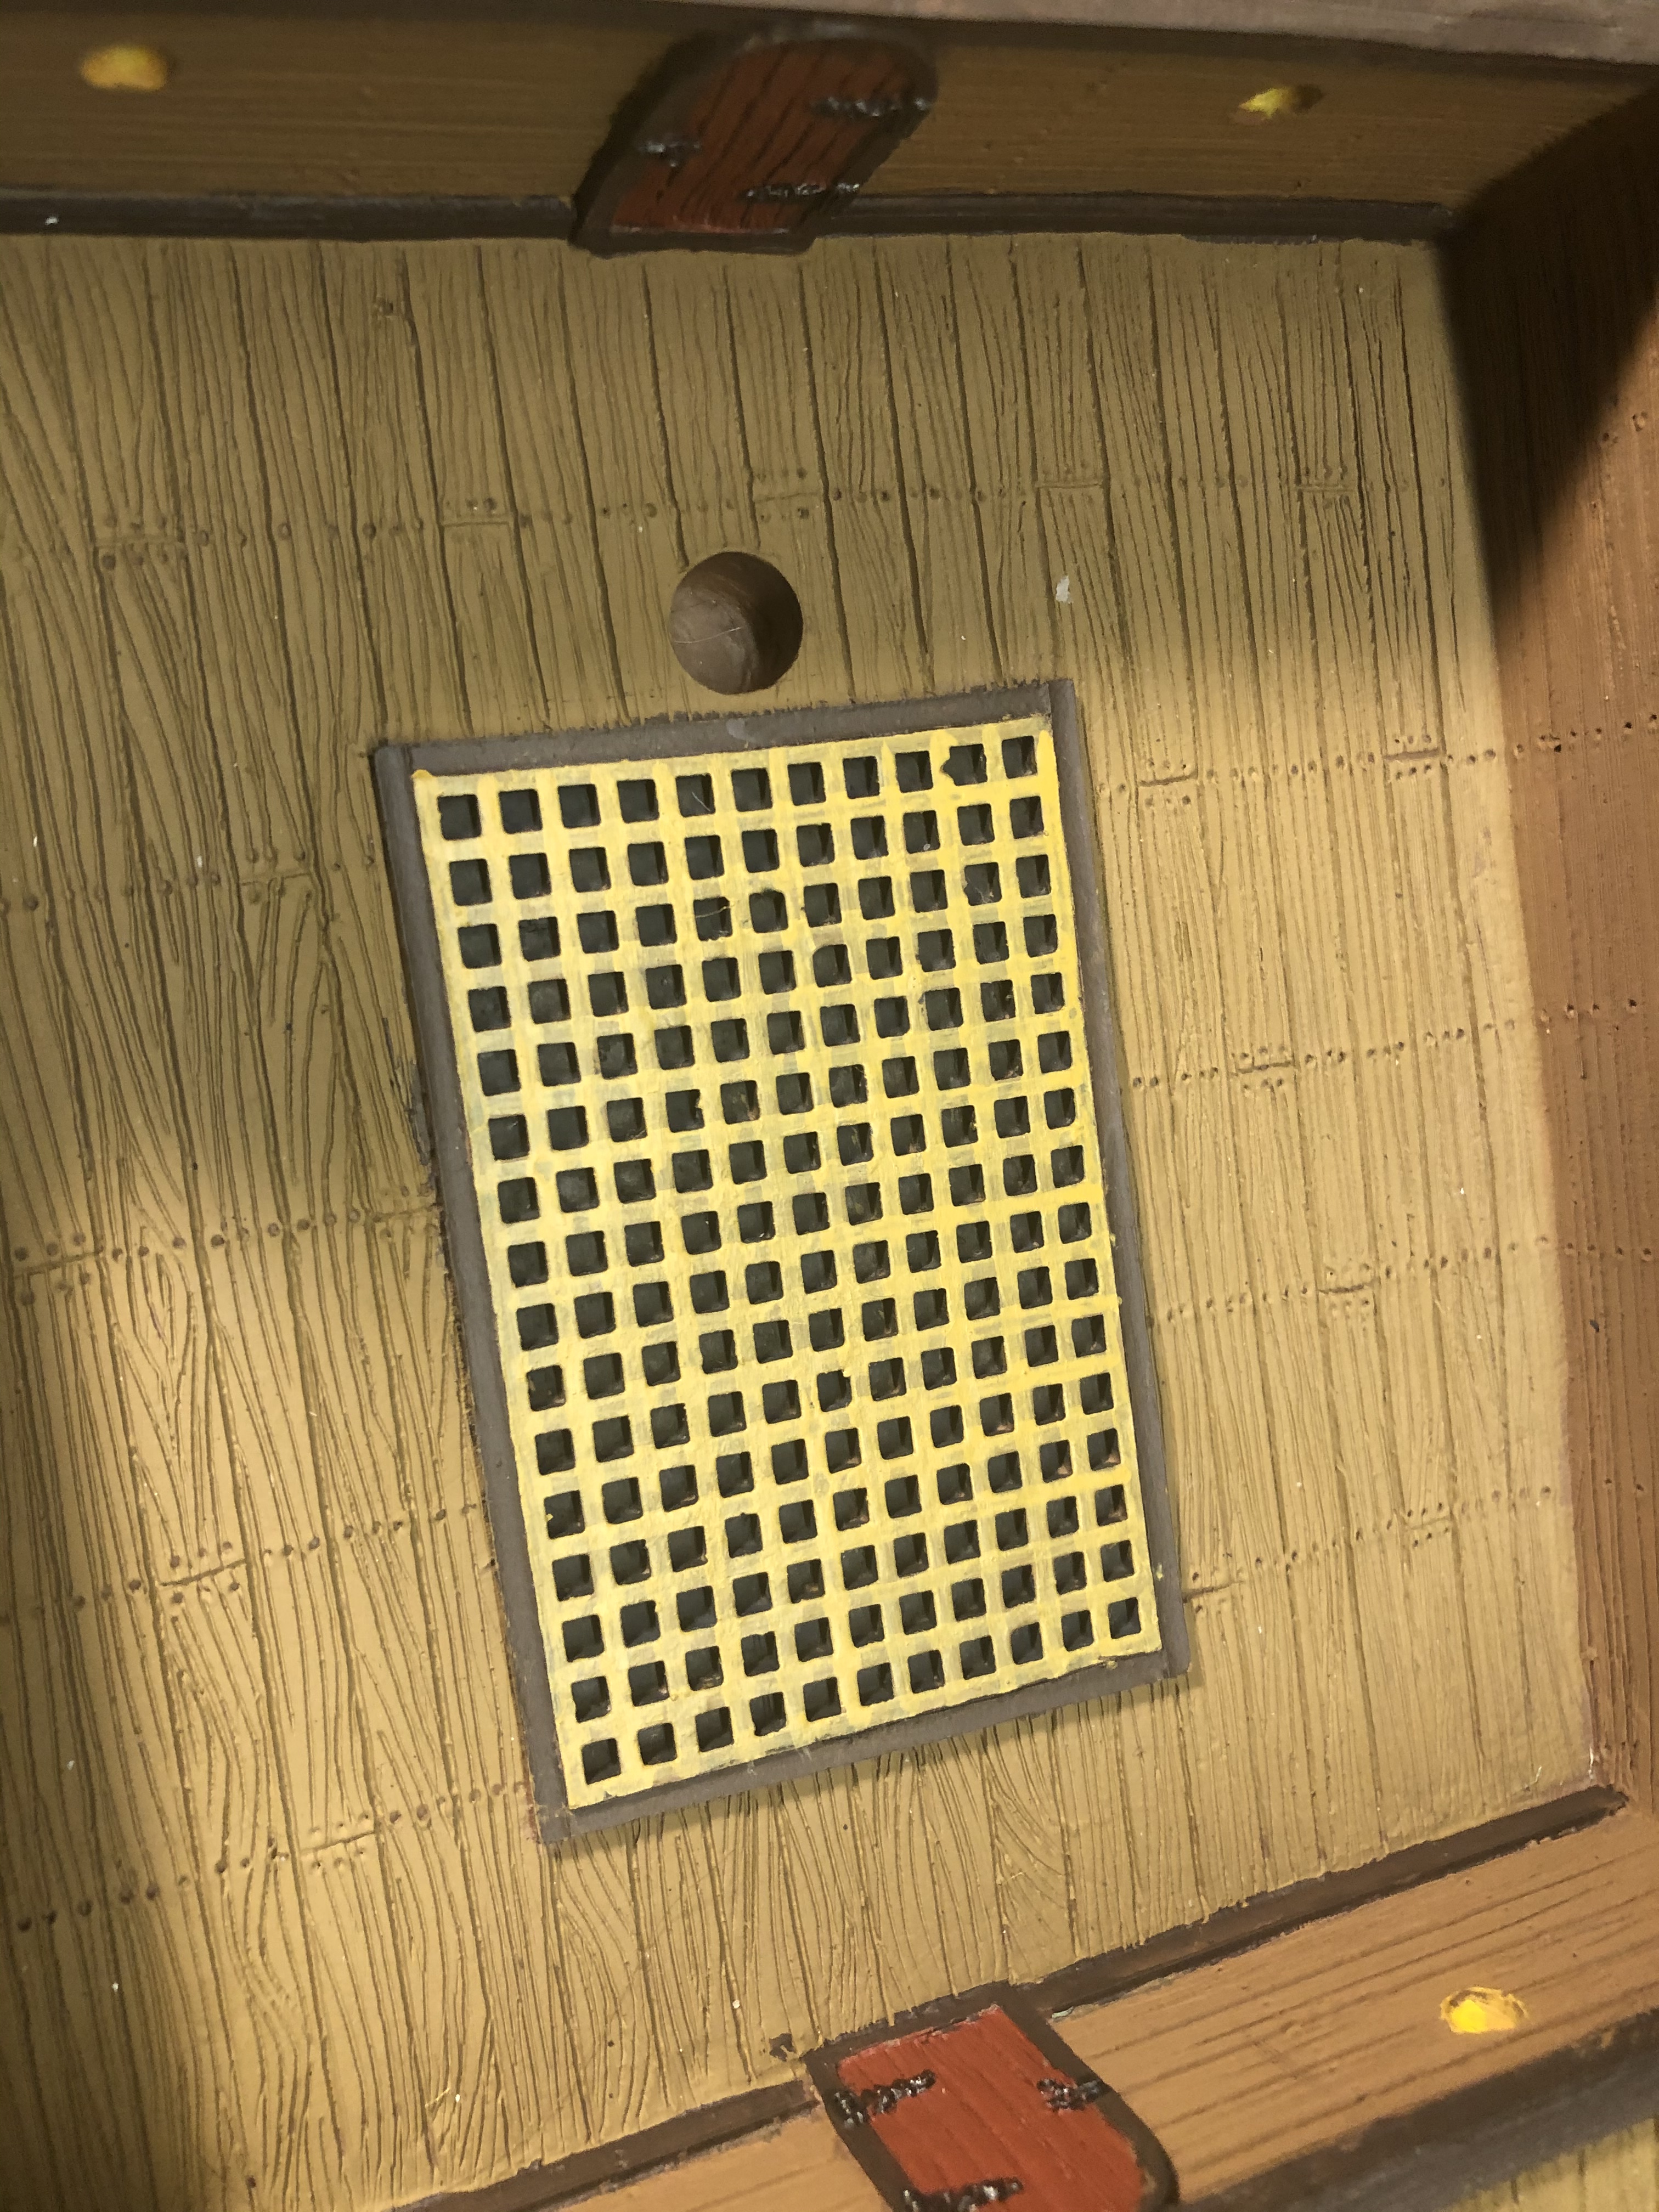
I’m not entirely happy with how I did the gratings on the decks but this is what I did. First I used German Grey to paint inside all the squares of the grate. I’ll try using a black spray paint while priming next time because this is extremely tedious to do by hand. If you do it this way, use a terrible brush with stiff bristles. It will get very mangled by the time you’ve done all 100+ squares 2-3 times.

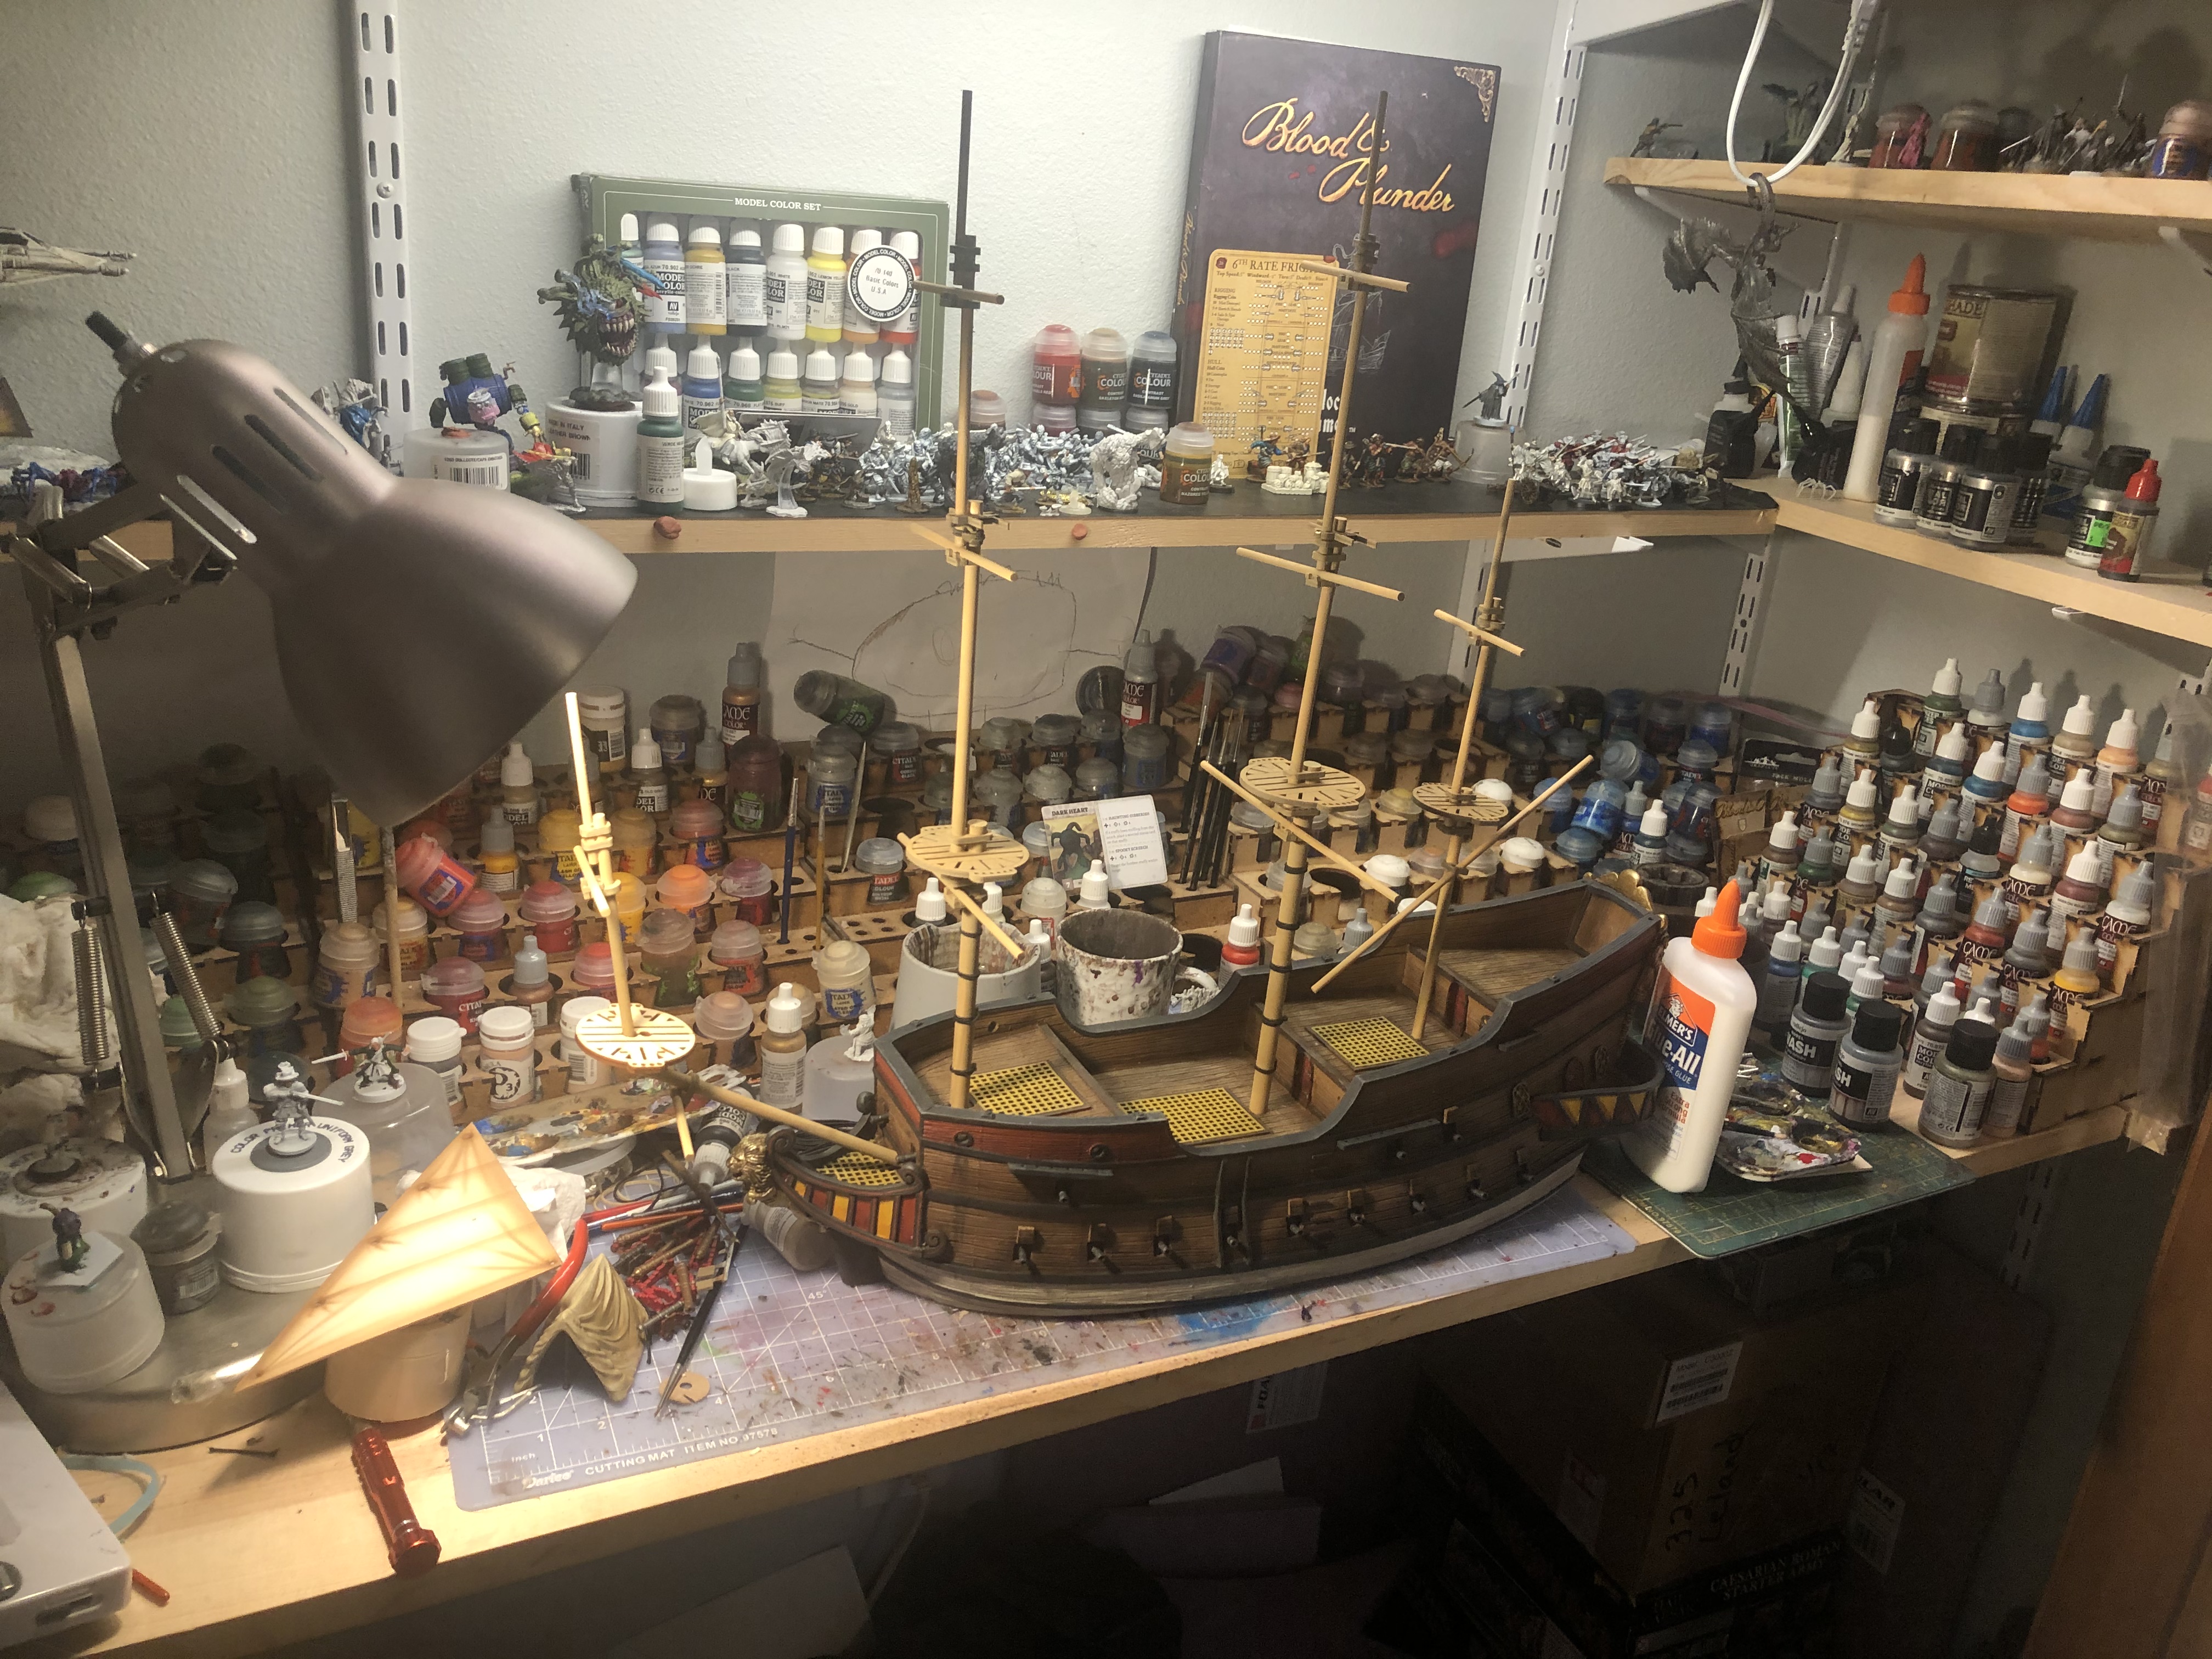
My 6th Rate Frigate arrived while I was working on this Galleon. They’re almost the same length but the Galleon ship model is substantially taller and heaver and it has much more surface area.

Painting the Wooden Grates
I used Dryad Bark for the wooden frame around the grate, then used Zamesi Desert for the actual grating. In my (limited) research, this grate is made of wood. You could just use the same color you use for the deck, but I wanted a little contrast.
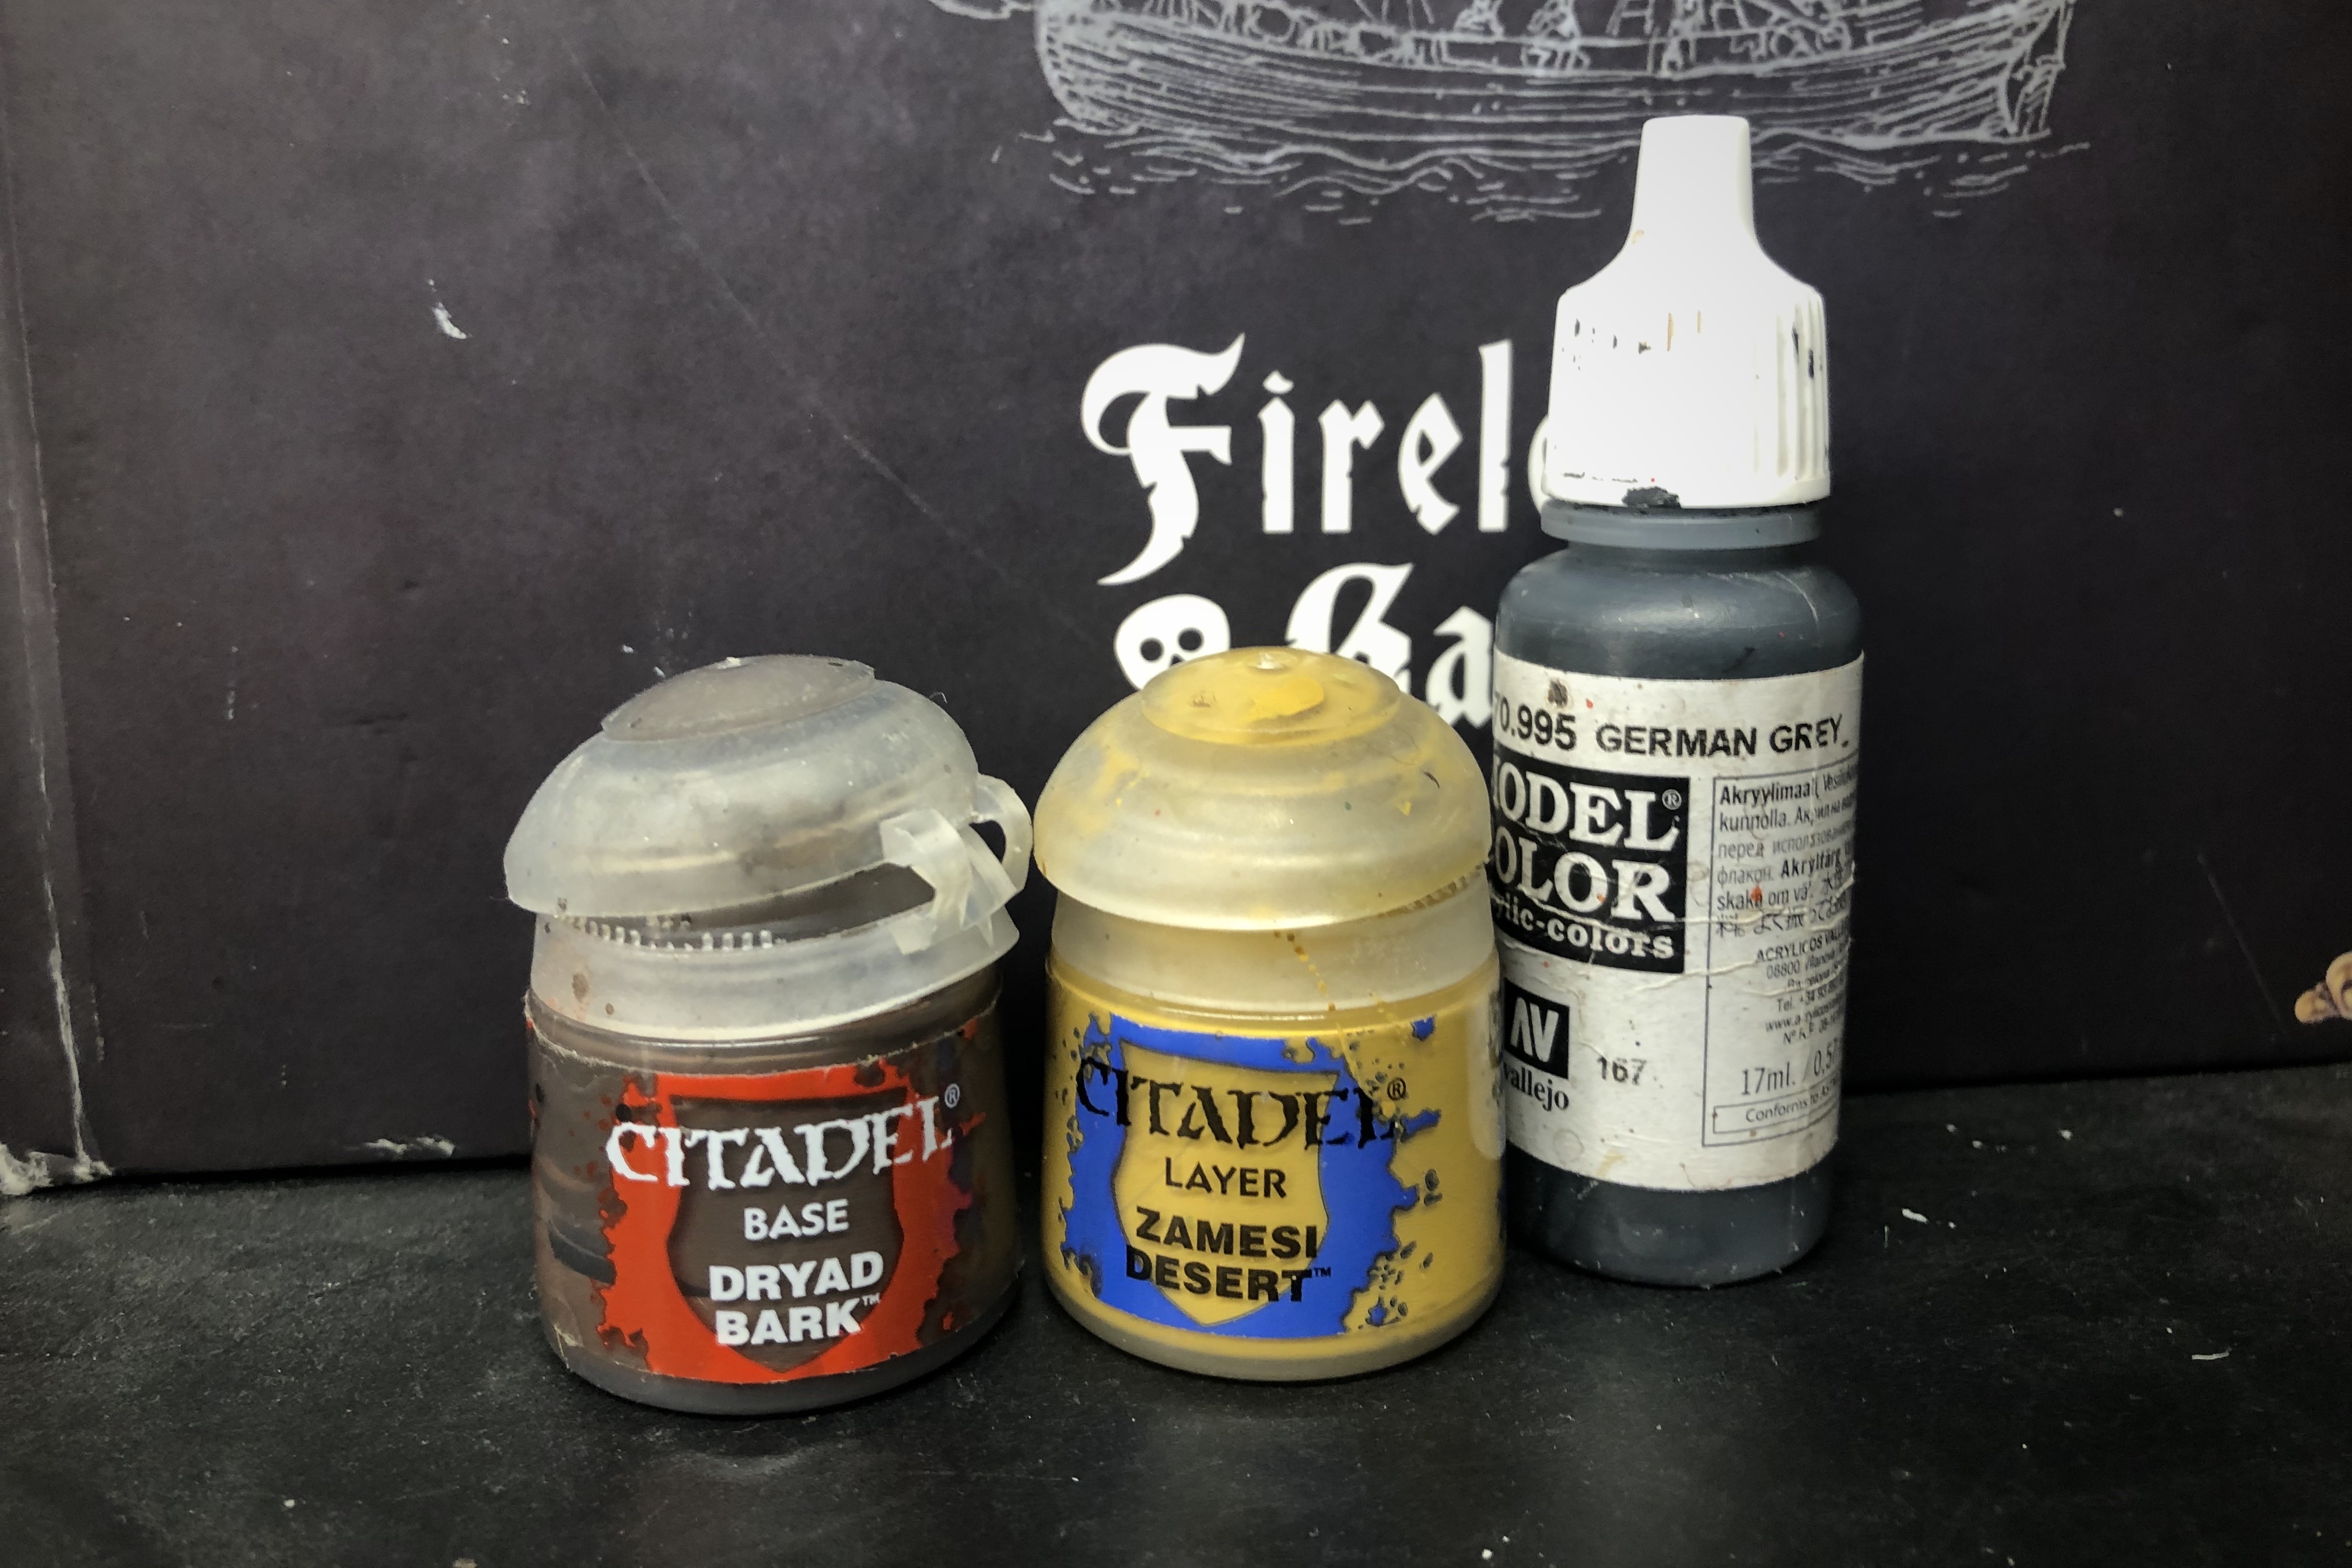
The Zamesi Desert is a layer paint so I had to apply a couple coats. It would have been better to apply a coat of XV-88 first, then put the brighter Zamesi Desert on top of that.
Here is the hull with all the base colors down.
Here are the paints I used for some of the other small bits and details:
- Black for all the cannon ports
- Dryad Bark for the door frames and some of the wood trim on the edges of the decks
- Averland Sunset for inside the panes of the windows with highlights of Yriel Yellow for some contrast
- Vallejo Metal Color Steel for the door hardware and the window frames
- Vallejo Model Color Brass for all the ornamentation on the stern and the lion figurehead

Once nearly all the base colors were down, I finally finished the top railing with German Grey.
Once all the base colors were down I started building the masts, painting the cannons and applying some weathering.
Step 4 – Weathering and Details
I took the Cavalry Brown and put a stripe over the German Grey on the prow. Not necessary but I thought it looked cool and it appeared in one of the pictures in the Osprey book.
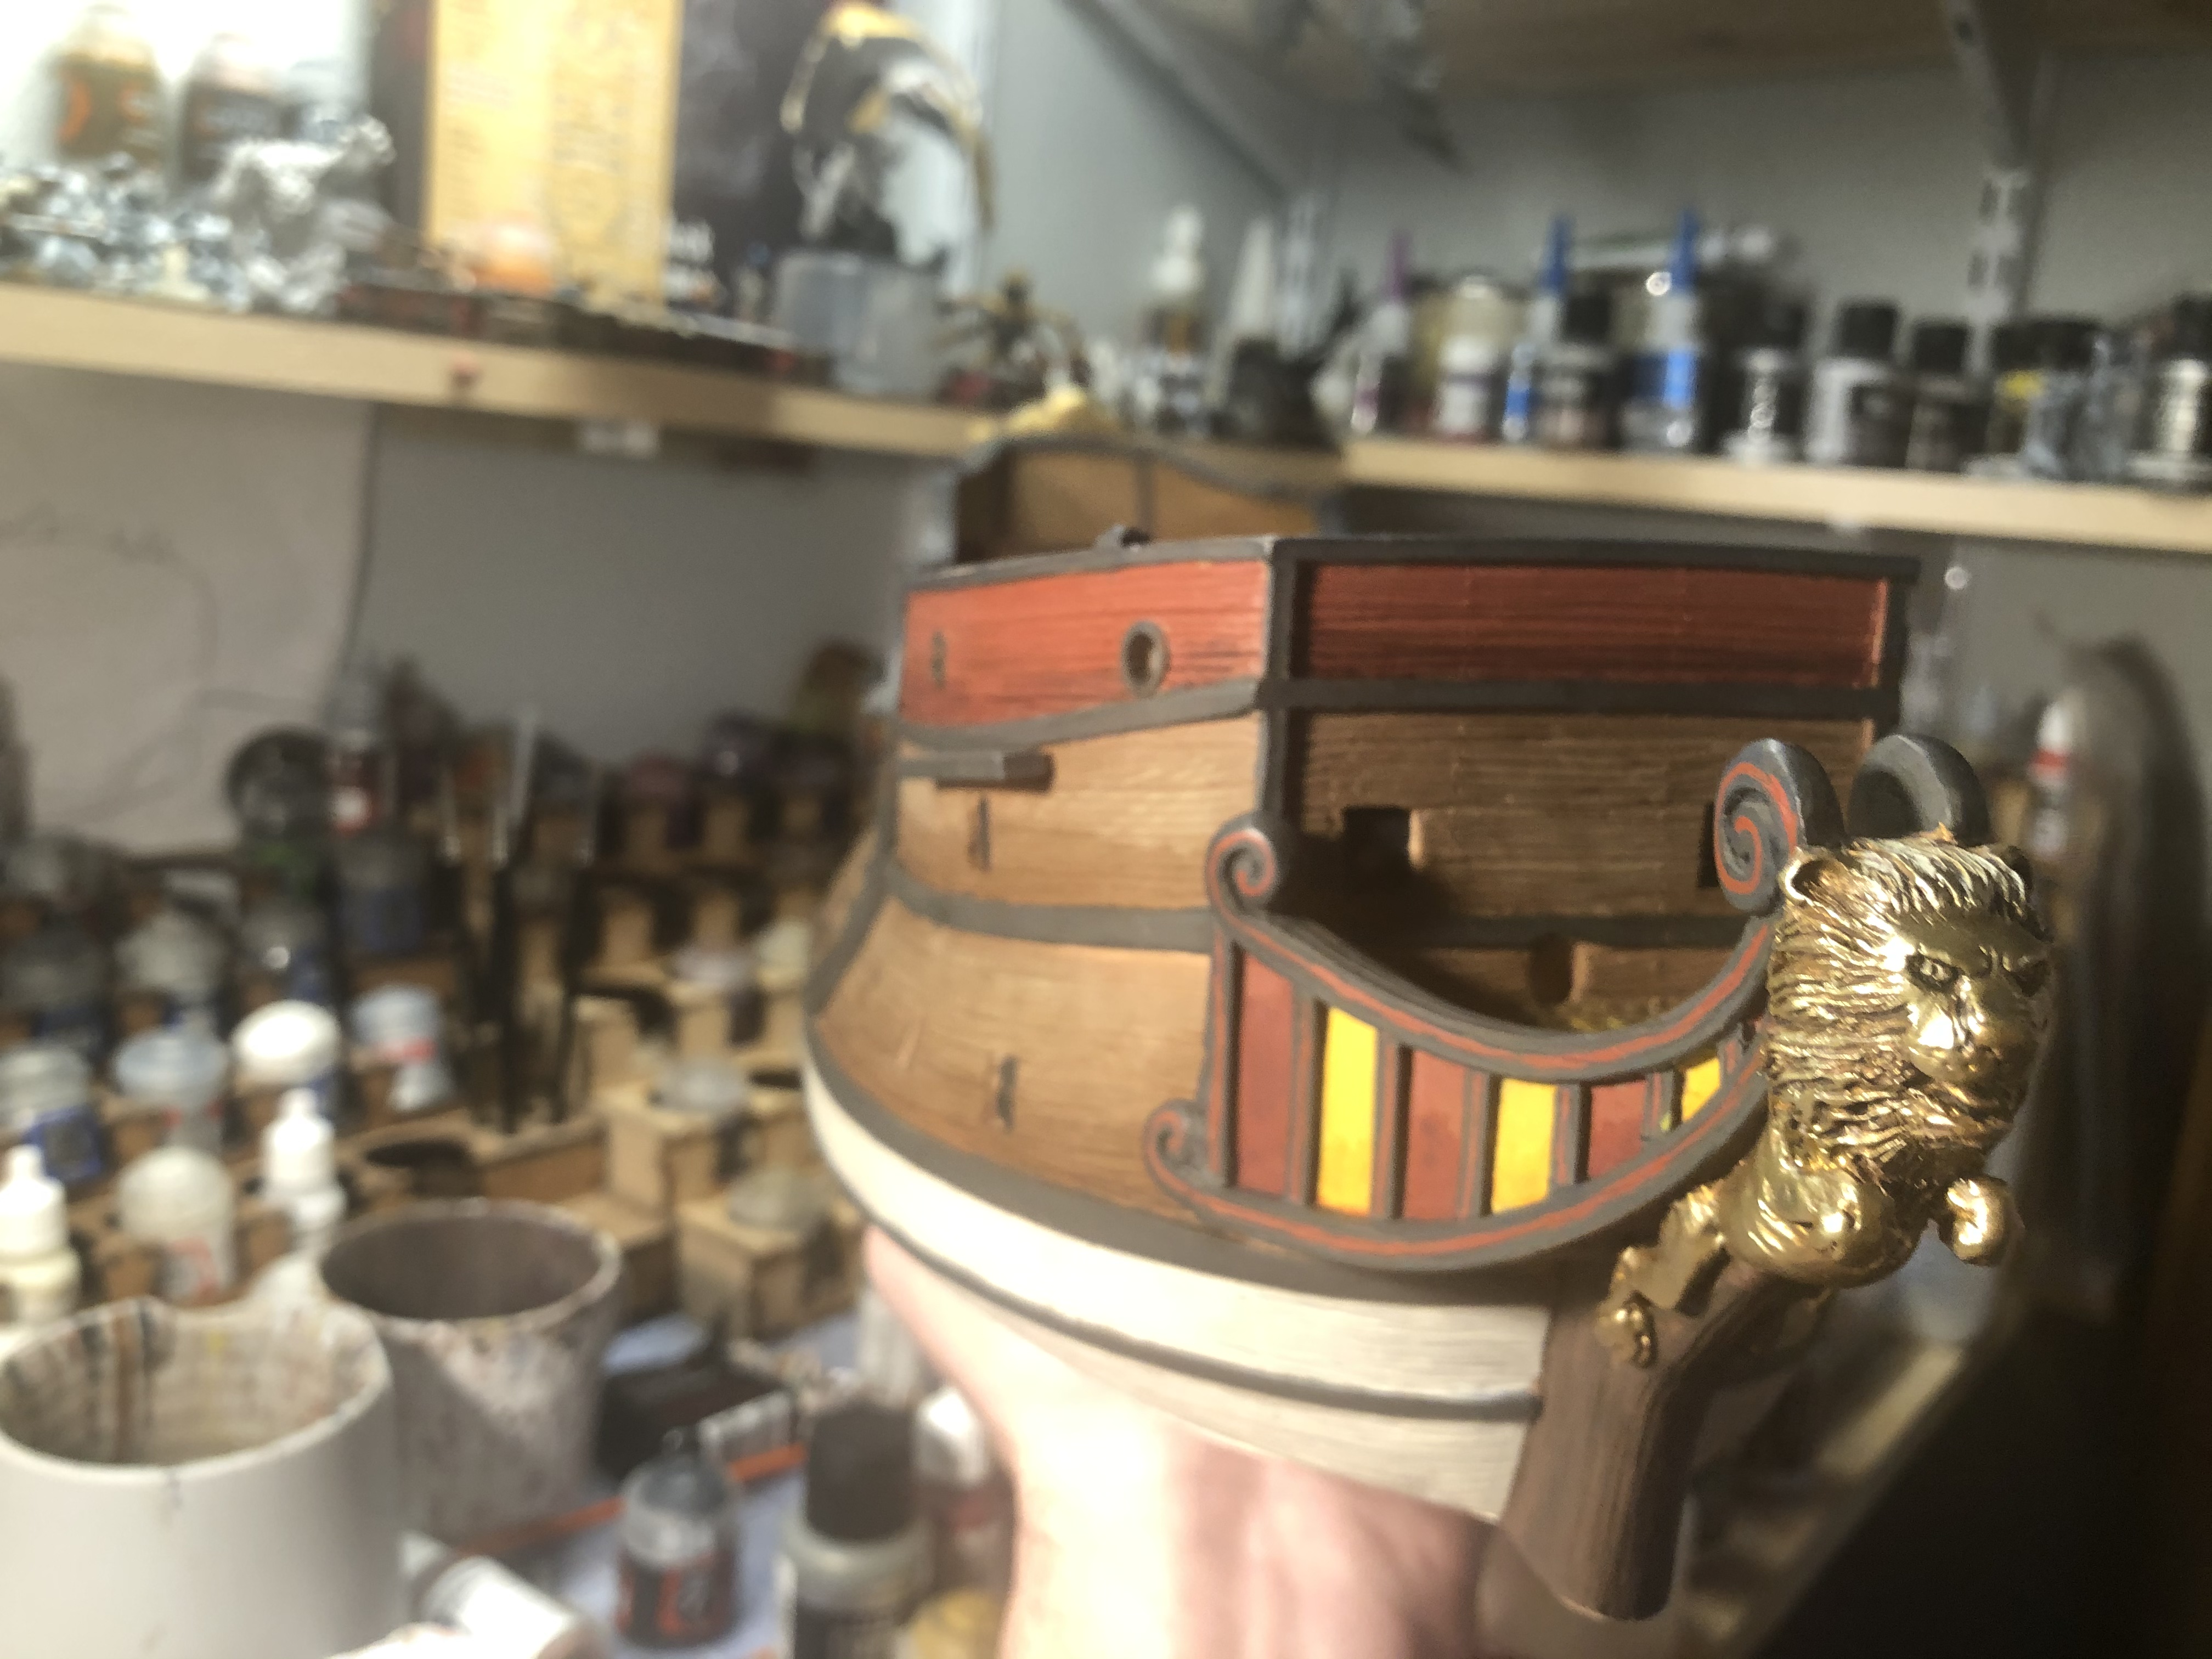
For the brass on the figurehead and stern I applied Seraphim Sepia all over the Brass, then highlighted with Metal Color Gold which is much brighter than the Brass.

I think I applied another coat of Seraphim Sepia over the Gold highlights just to blend things together and tone it down a little.

Adding Weathering Effects
For general weathering over the decks and hull I used mostly Vallejo’s Dark Brown Model Wash. You could use Citadel’s trusty Agrax Earthshade but I think this stuff works better, especially for large areas like this. It spreads better and doesn’t pool and leave nasty tide marks.
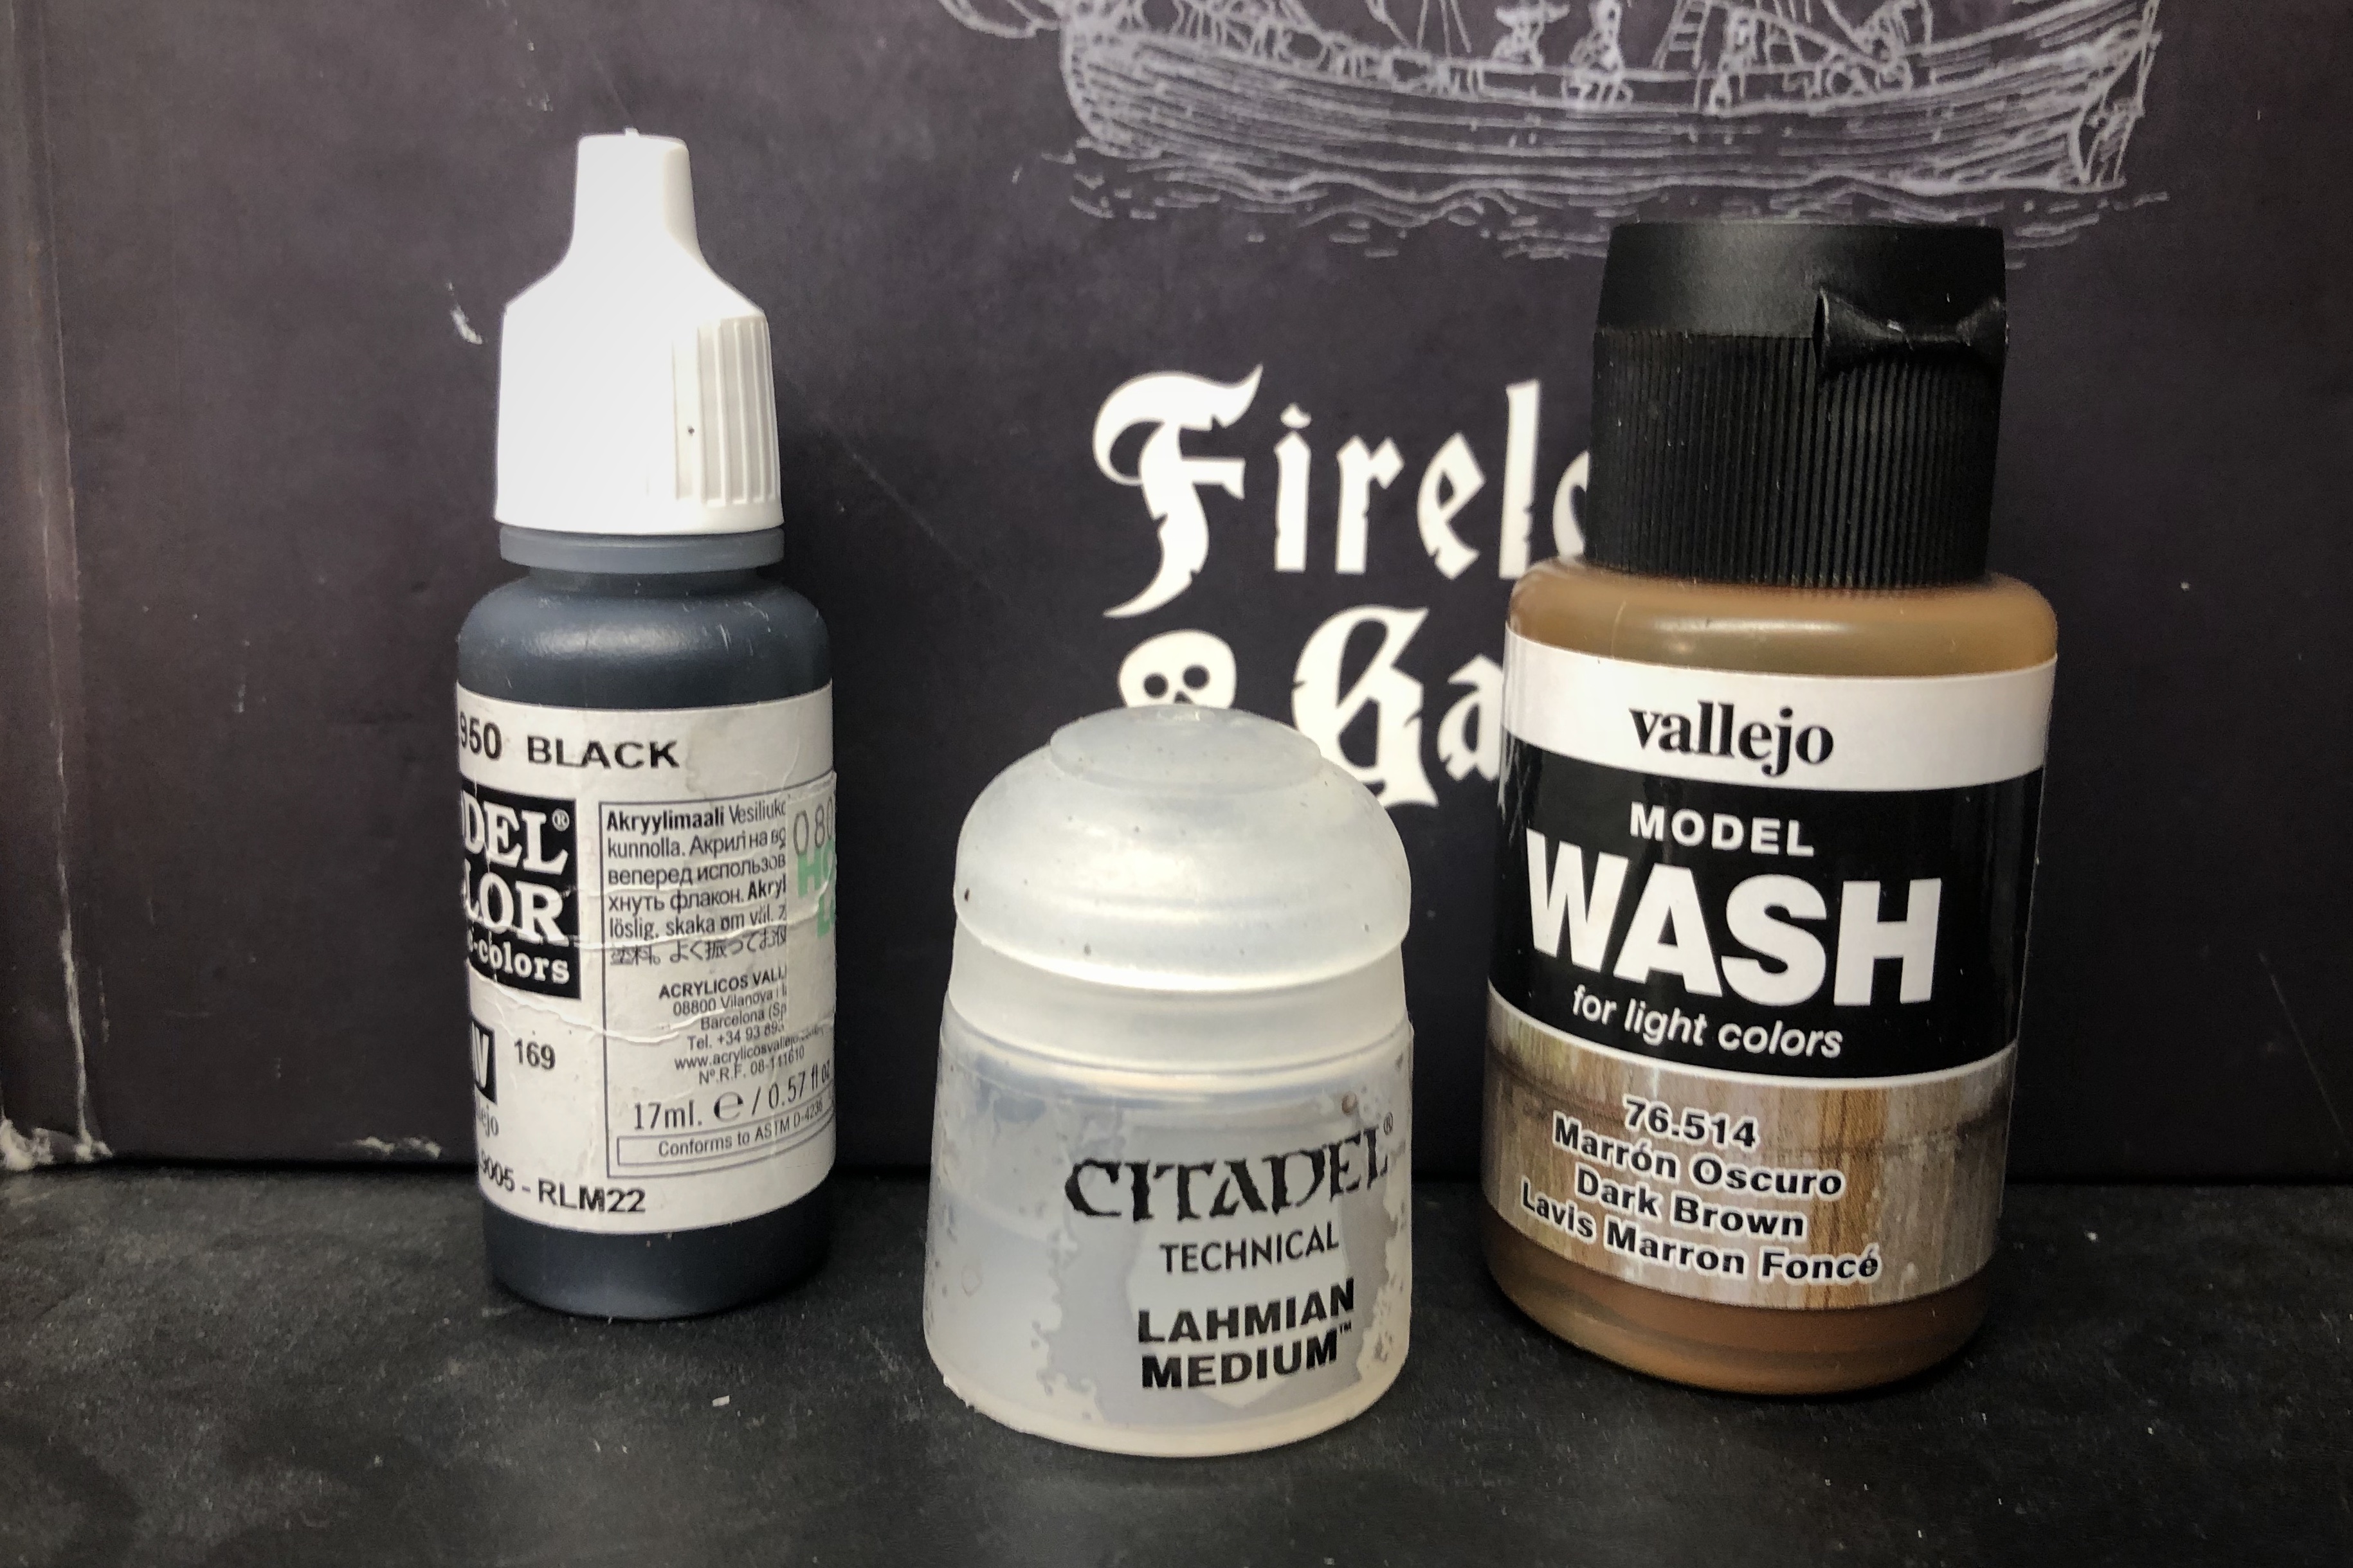
I focused the use of the washes on the lower portions of each segment of the outer hull trying to mimic the way a curved hull would get weathered. Not sure if that’s exactly how it would happen, but it looked good to me.
Before I put powder stains around the gun ports I had to attach the cannons and hatches.
Prepping the cannons

I painted the cannon barrels with an approximately equal mix of German Grey and Steel after priming them in Black. I painted the inside of the barrel with pure Black.
Gluing the cannons into the ports was harder than I anticipated. Some didn’t want to go in straight and I had to clear out some of the holes with a knife to make them fit. I did a quick Steel drybrush to the barrels after they were glued in to give them a little more metallic glint.
Hatches and Gunports
I primed the hatches while still attached to the metal sprue, then glued them on before painting them with Vallejo Panzer Aces New Wood and applying a Dark Brown Wash to them. Gluing on the hatches is one of the most frustrating parts of building a ship for me. I’ve been laying the ship on its side on a towel so I can glue one side’s worth on a time but I usually have one hatch dry crooked or get some glue in a bad place or pop a cannon out of it’s port.
While doing the stern chasers I found a little hack that made things easier. I put a tiny piece of sticky tack on the back of the hatch, then added the glue. The sticky tack held the hatch in place while the glue dried and it was small enough that it wasn’t visible at all when it was done.

Around the gun ports I used a couple layers of black glaze using Lahmian Medium with a drop of Black. I used this same Black glaze to make some streaks coming out of the ports on the front deck.
After using that Dark Brown Vallejo Wash on the decks I drybrushed them with Panzer Aces Old Wood, then applied some more weathering when the walls meet the deck. I thinned Typhus Corrosion with some Laymian Medium to put anywhere I wanted looking extra grimy.

Citadel Carroburg Crimson was used as a wash to darken the lower portions of each red panel in the gallery and front of the ship along with the doors and any other area painted with the Cavalry Brown color.

Painting the Bowsprit and Railing
I couldn’t find my standard Citadel yellow wash so I used my newly aquired yellow contrast paint to shade the lower portions of the yellow panels. Once finished, I added brighter yellow highlights on those panels by mixing some Flash Glitz Yellow into the original Averland Sunset.
These panels could be a lot neater…

I did an edge highlight on the larger areas of German Grey on the hull with German Tank Crew. You could just mix a little white into your base color but some variation on the edges and corners looks nice.
The Coat of Arms on the Stern
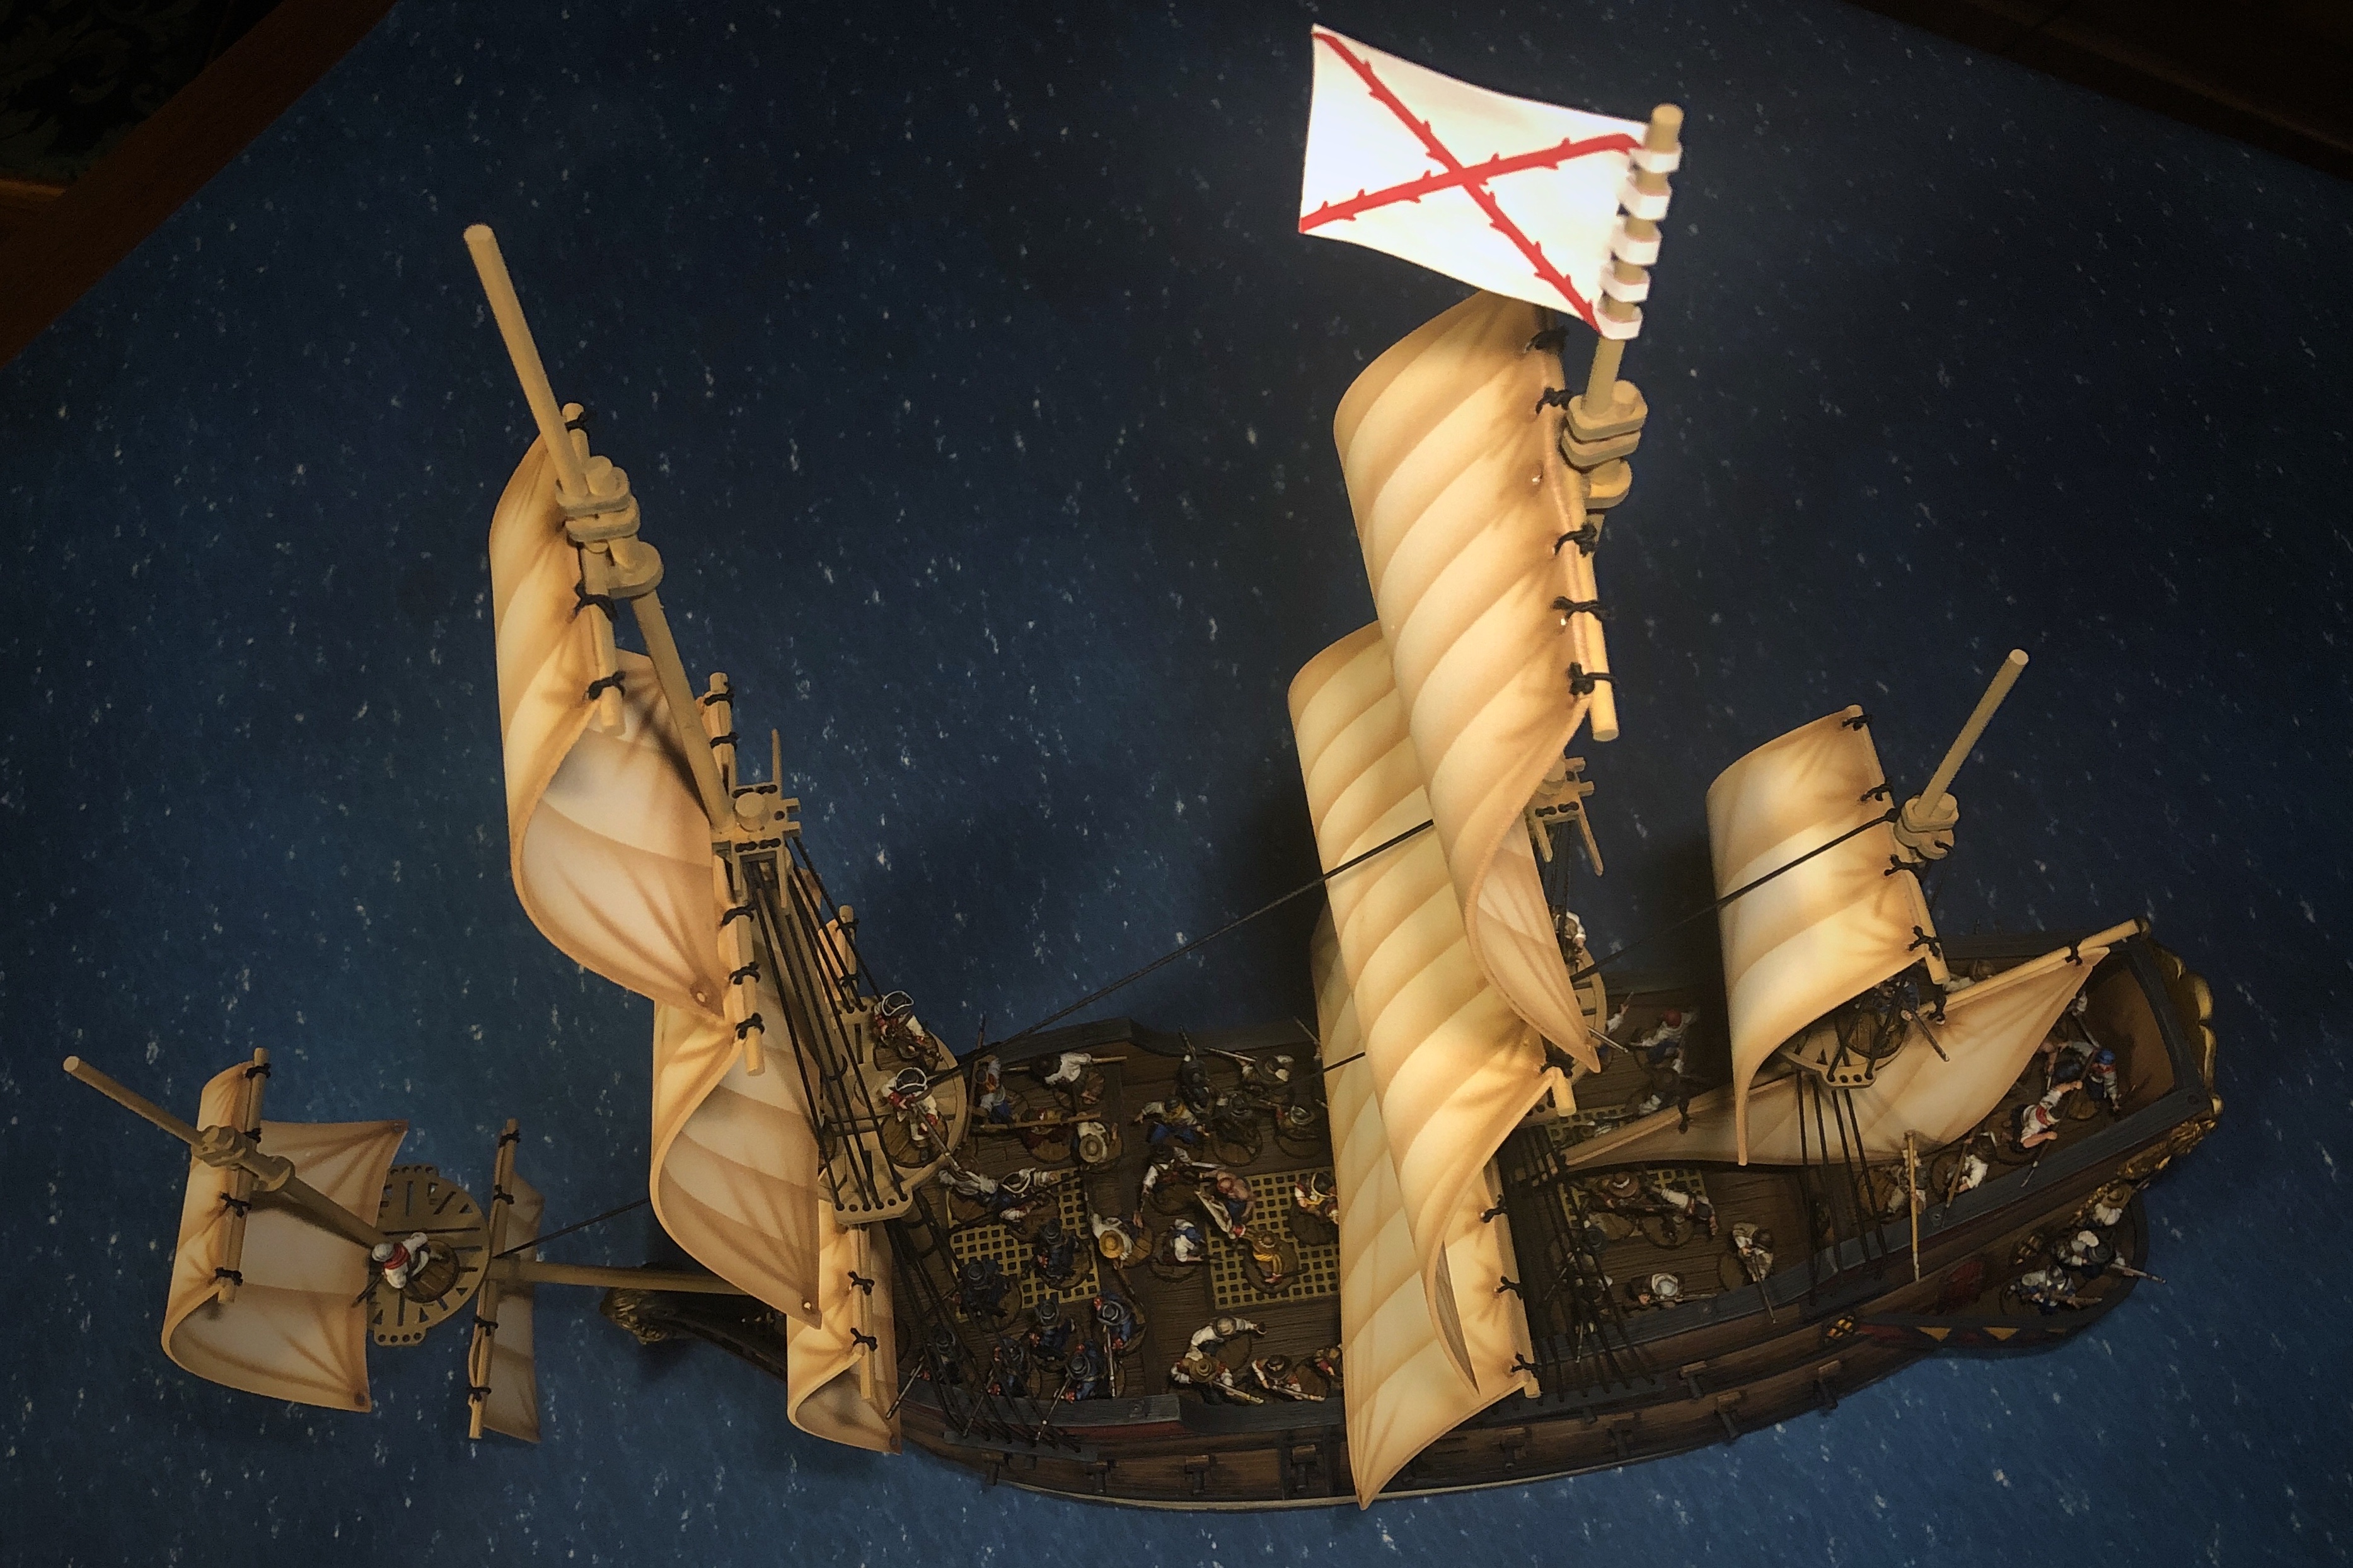
One of the last details I finished was the coat of arms for the stern. I used the Spanish coat of arms and used the same combination of Brass/Seraphim Sepia/Gold on most of it with some red and white fields for the quadrants. Nothing fancy. I also painted a cross of Saint Andrew on the shield on the stern. Like I mentioned before, this coat of arms doesn’t lay very flat so I just have it temporarily connected for now. My plan is to connect it with magnets but my local game store was out of the magnets I needed so it’s sticky tack for now!
I should mention I didn’t even bother painting the inside of the gallery railing. It’s primed brown but if I wanted to paint it up nicely, I would have had to do it before gluing it to the hull. You can’t really see the inside of that railing unless you’re really trying to.
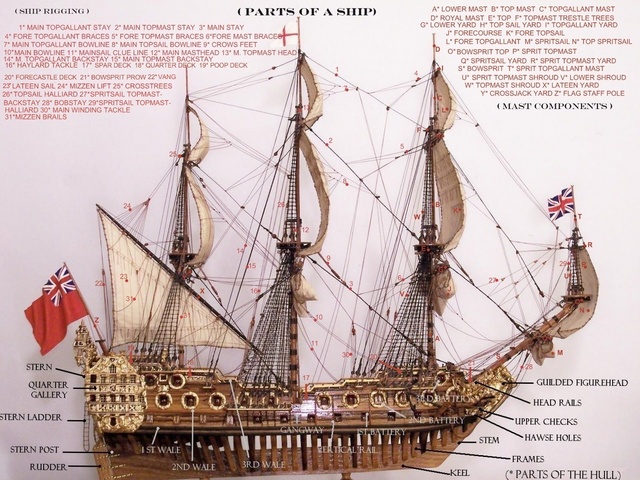
Step 5 – Building the Masts
I started working on this step well before I was done weathering. You can start right away when you begin the project if you want! It takes several days to get these masts together because you can only glue one segment at a time. I would glue a new piece on each mast at the end of a painting session every evening and let it dry overnight.

Galleon Rigging Instructions
Following the diagram on Firelock’s website wasn’t too difficult but I did end up making a couple small mistakes.
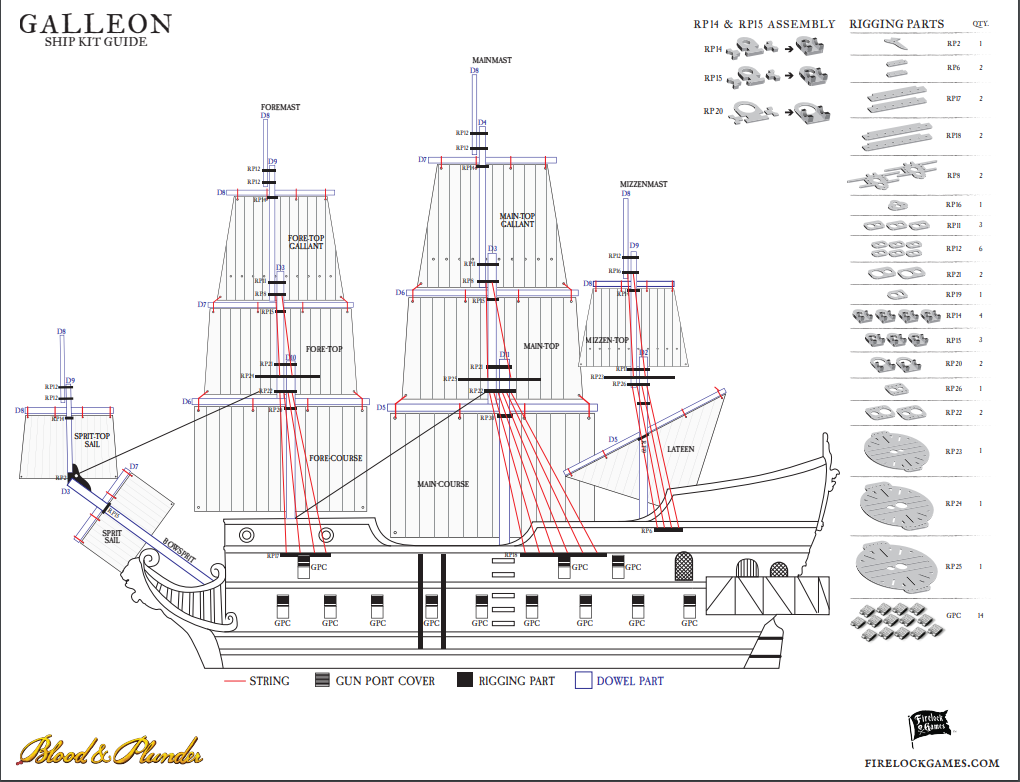
There are a lot of pieces to these masts and doing a little bit every night made it easier to make mistakes. The biggest mistake I made was using the longer dowel meant for the second segment of the mainmast on the foremast. This made these two masts equal in height instead of having the mainmast be the tallest. By the time I discovered my mistake, the glue was set and I couldn’t get it apart.
The other mistake I made was connecting the lateen sail too low on the the mizzenmast. I didn’t want it interfering with the fighting top but I wish I had it put it up as high as possible. My lateen sail nearly touches the deck and I wish it was higher. Not a huge deal, but again, my glue had set so hard by the time I discovered this that I couldn’t change it without breaking pieces and making a mess. I’ll know better for the 6th Rate (although I might put a gaff sail on that one instead of a lateen).

Bowsprit
I modified the bowsprit because it looked too tall to me. I cut a bit off the “sprit topmast” so it didn’t come up so far and I also added a fighting platform up.
This fighting top didn’t come with the kit, but I had an extra i had bought previously from Firelock so I glued it on.

When they were all glued together, I spray painted all the masts with rattle can Citadel Zandri Dust which is a tan color with a yellow undertone.
In all the images I looked at I noticed the lower portions of the foremast and mainmast had rope bindings so I used some of the elastic rigging string and tied bands around the masts at regular intervals. It’s a small thing but I think it improves the look.
Once I had the masts all built painted, I glued them into the hull. The foremast was a really loose fit so I jammed a piece of that elastic thread into the hole with the glue to make the fit tighter.
Step 6 – Varnish
Once I had the hull complete and the masts painted and glued in, I sprayed the entire thing with 3 good coats of Testors flat Spray Lacquor. These resin models scratch like crazy if you don’t protect them so don’t skip this step! Between moving the big model around moving those metal figures in and out, you need several coats of that flat varnish to protect it.
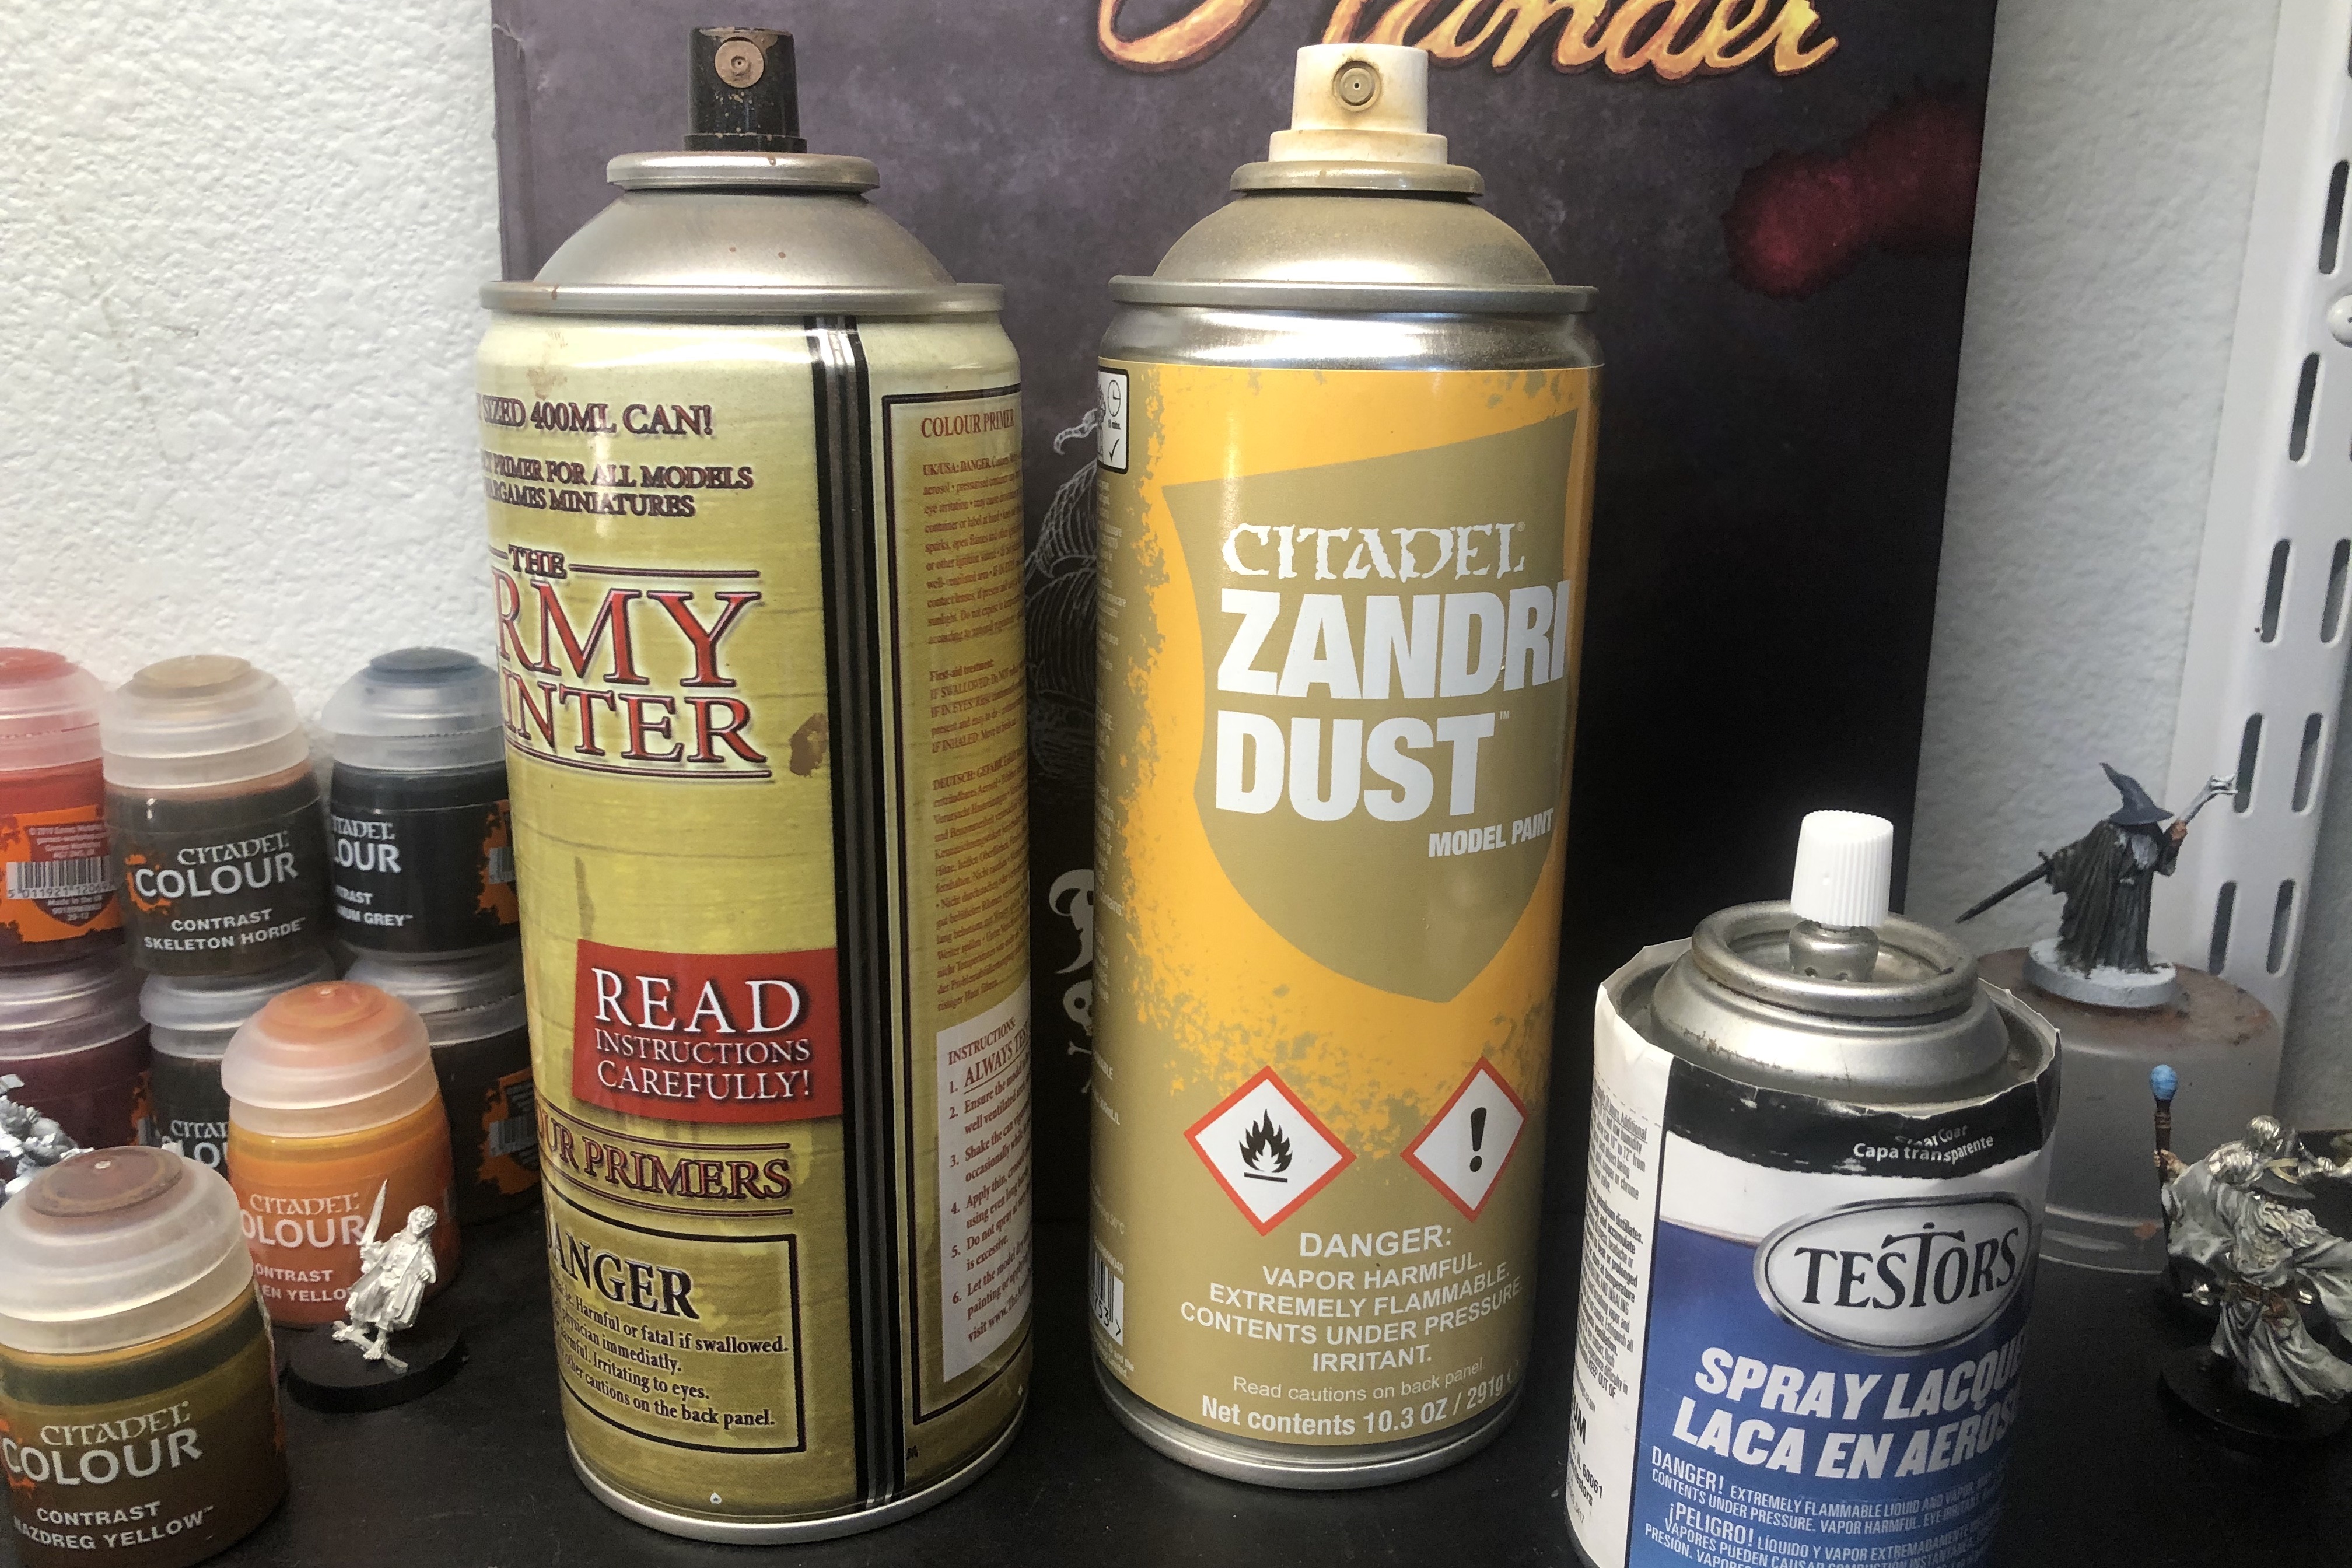
Here is the primer, mast color and varnish I used.
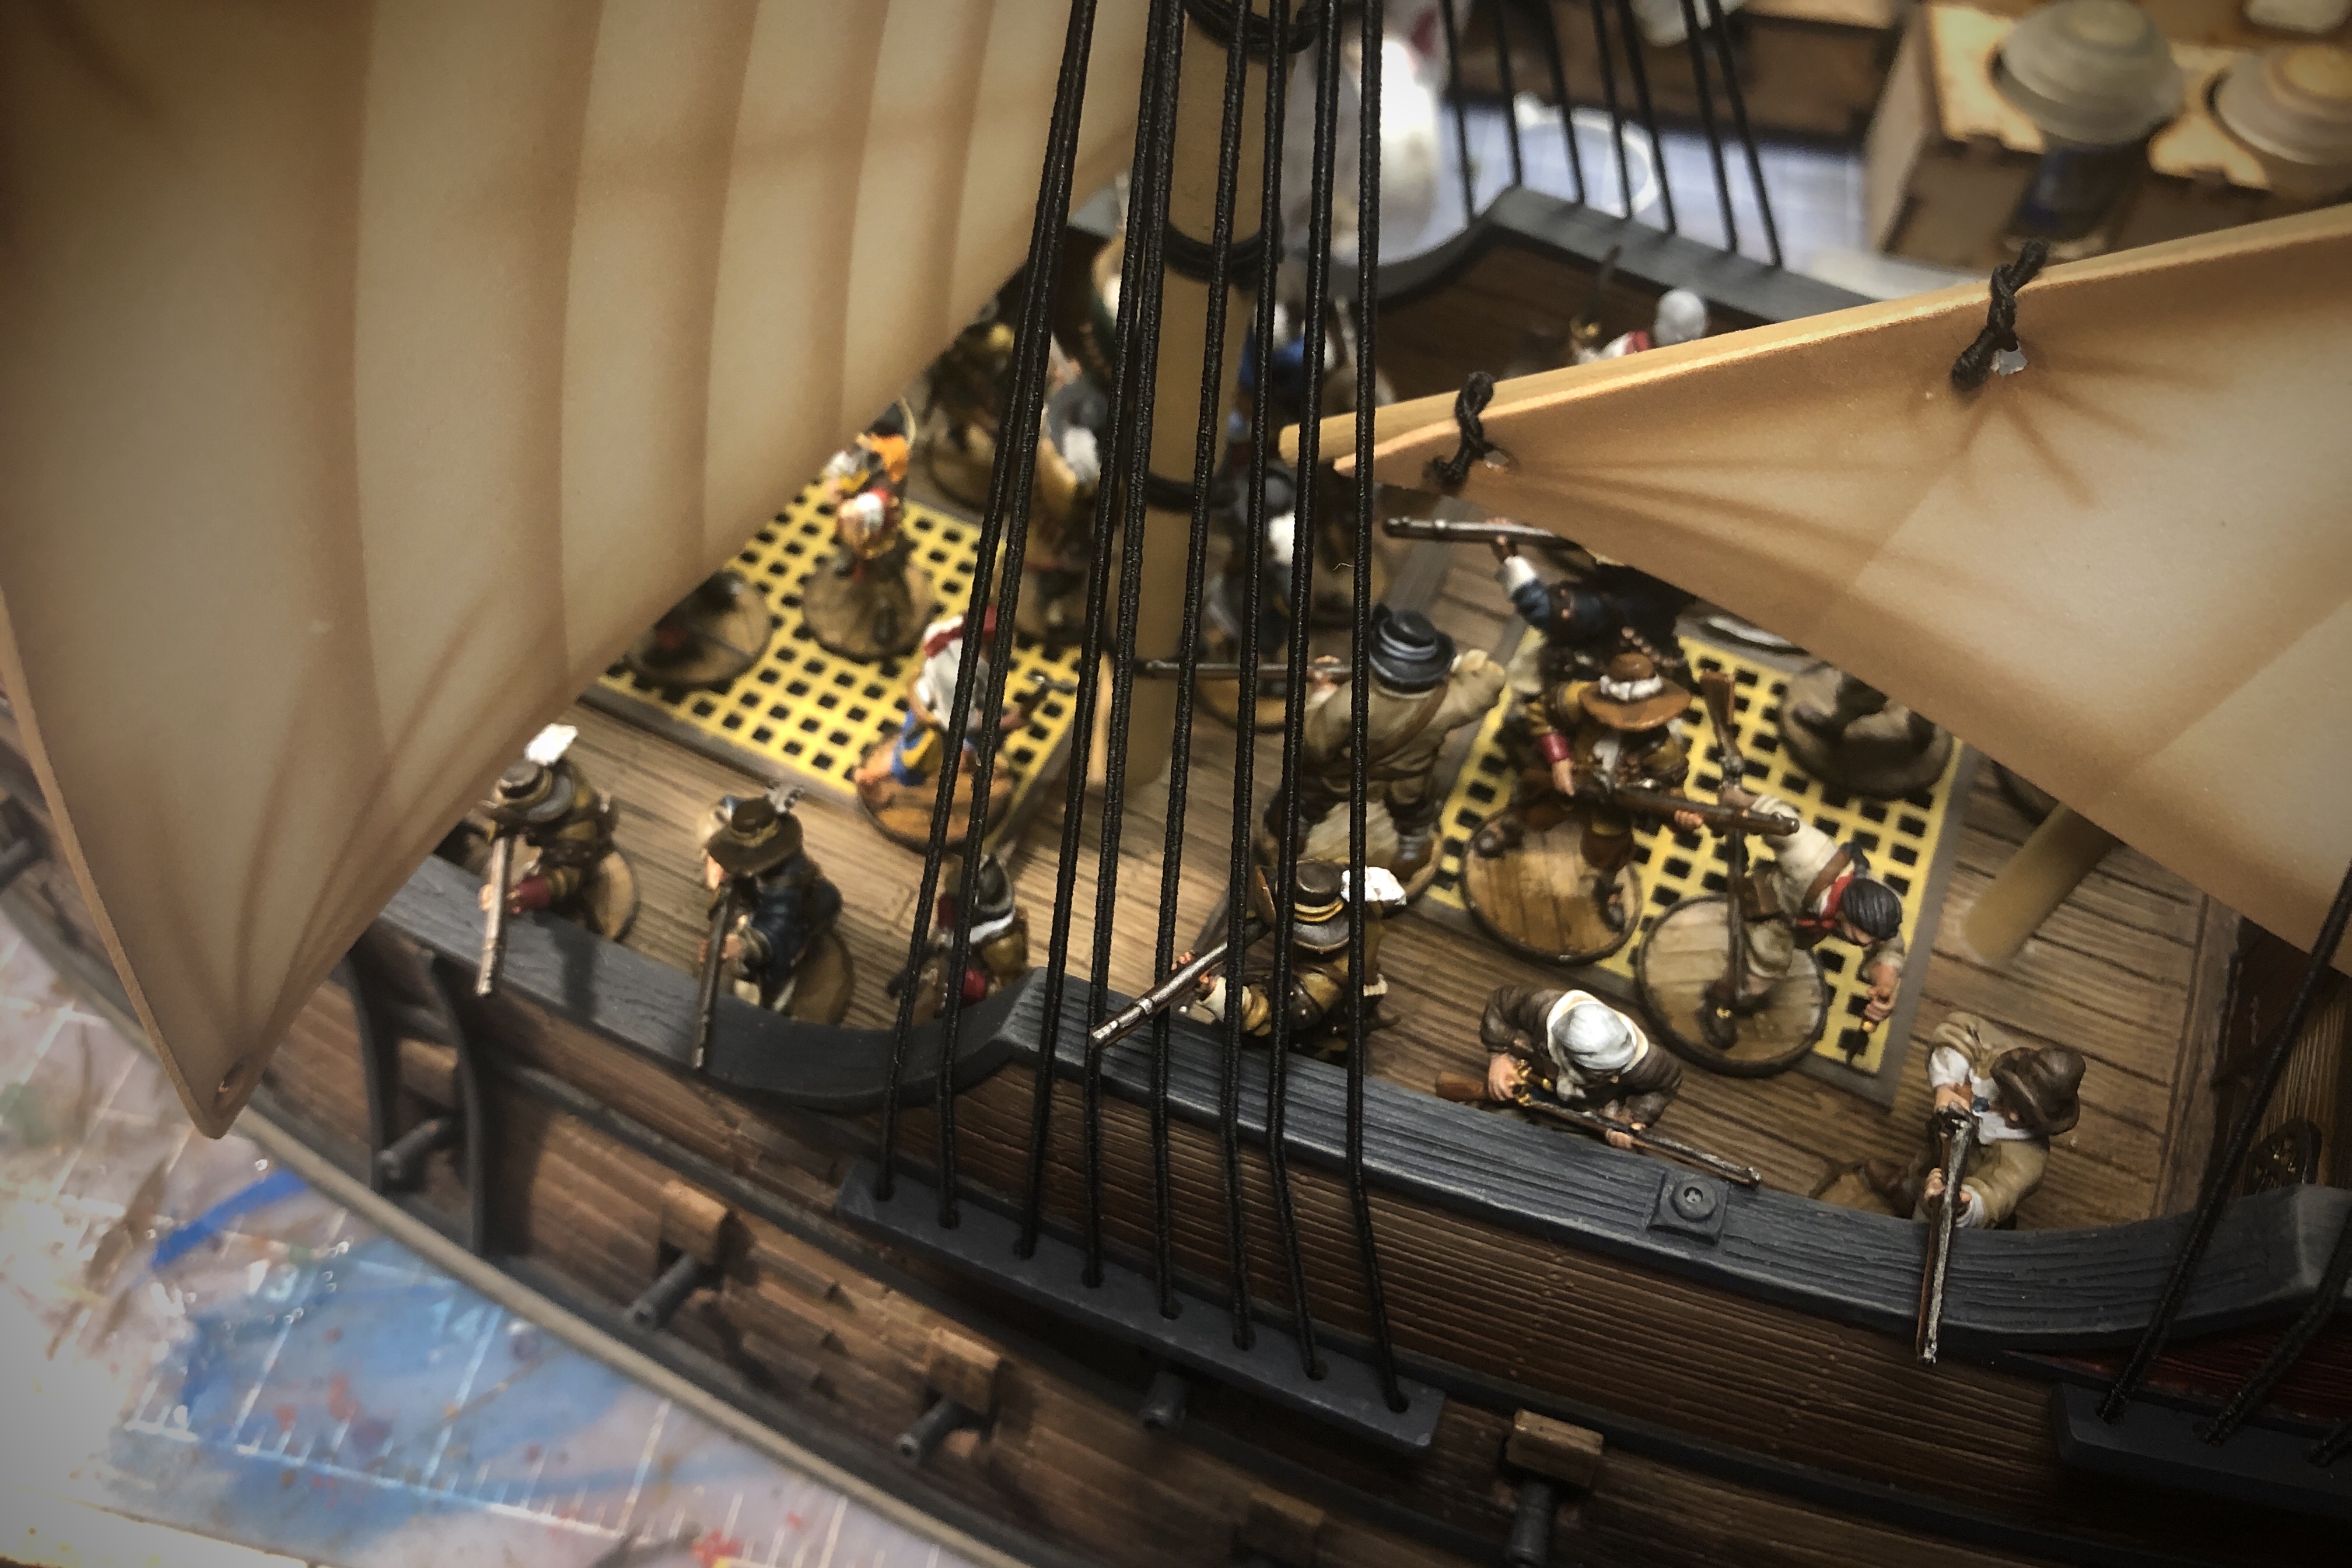
Step 7 – Rigging and Sails
Last step! The kit doesn’t come with sails but you can download templates from Firelock Games download section. I like thin sheets of foam because you can paint it and form it a little. I cheated and purchased this set of sails from Rick Casler who I contacted via the Blood and Plunder Facebook group. He airbrushes set of foam sails and I think they look great. But plain white foam sails are great too and I’ve used lightly textured off-white scrapbook paper as well. I got a leather punch that I use to punch small holes in the foam for the rigging thread.
There are a lot of sails on this ship… I thought I could do this in 60-90 minutes but it took more 3 hours or more to complete the rigging and I didn’t do anything fancy. It’s just a lot of work.
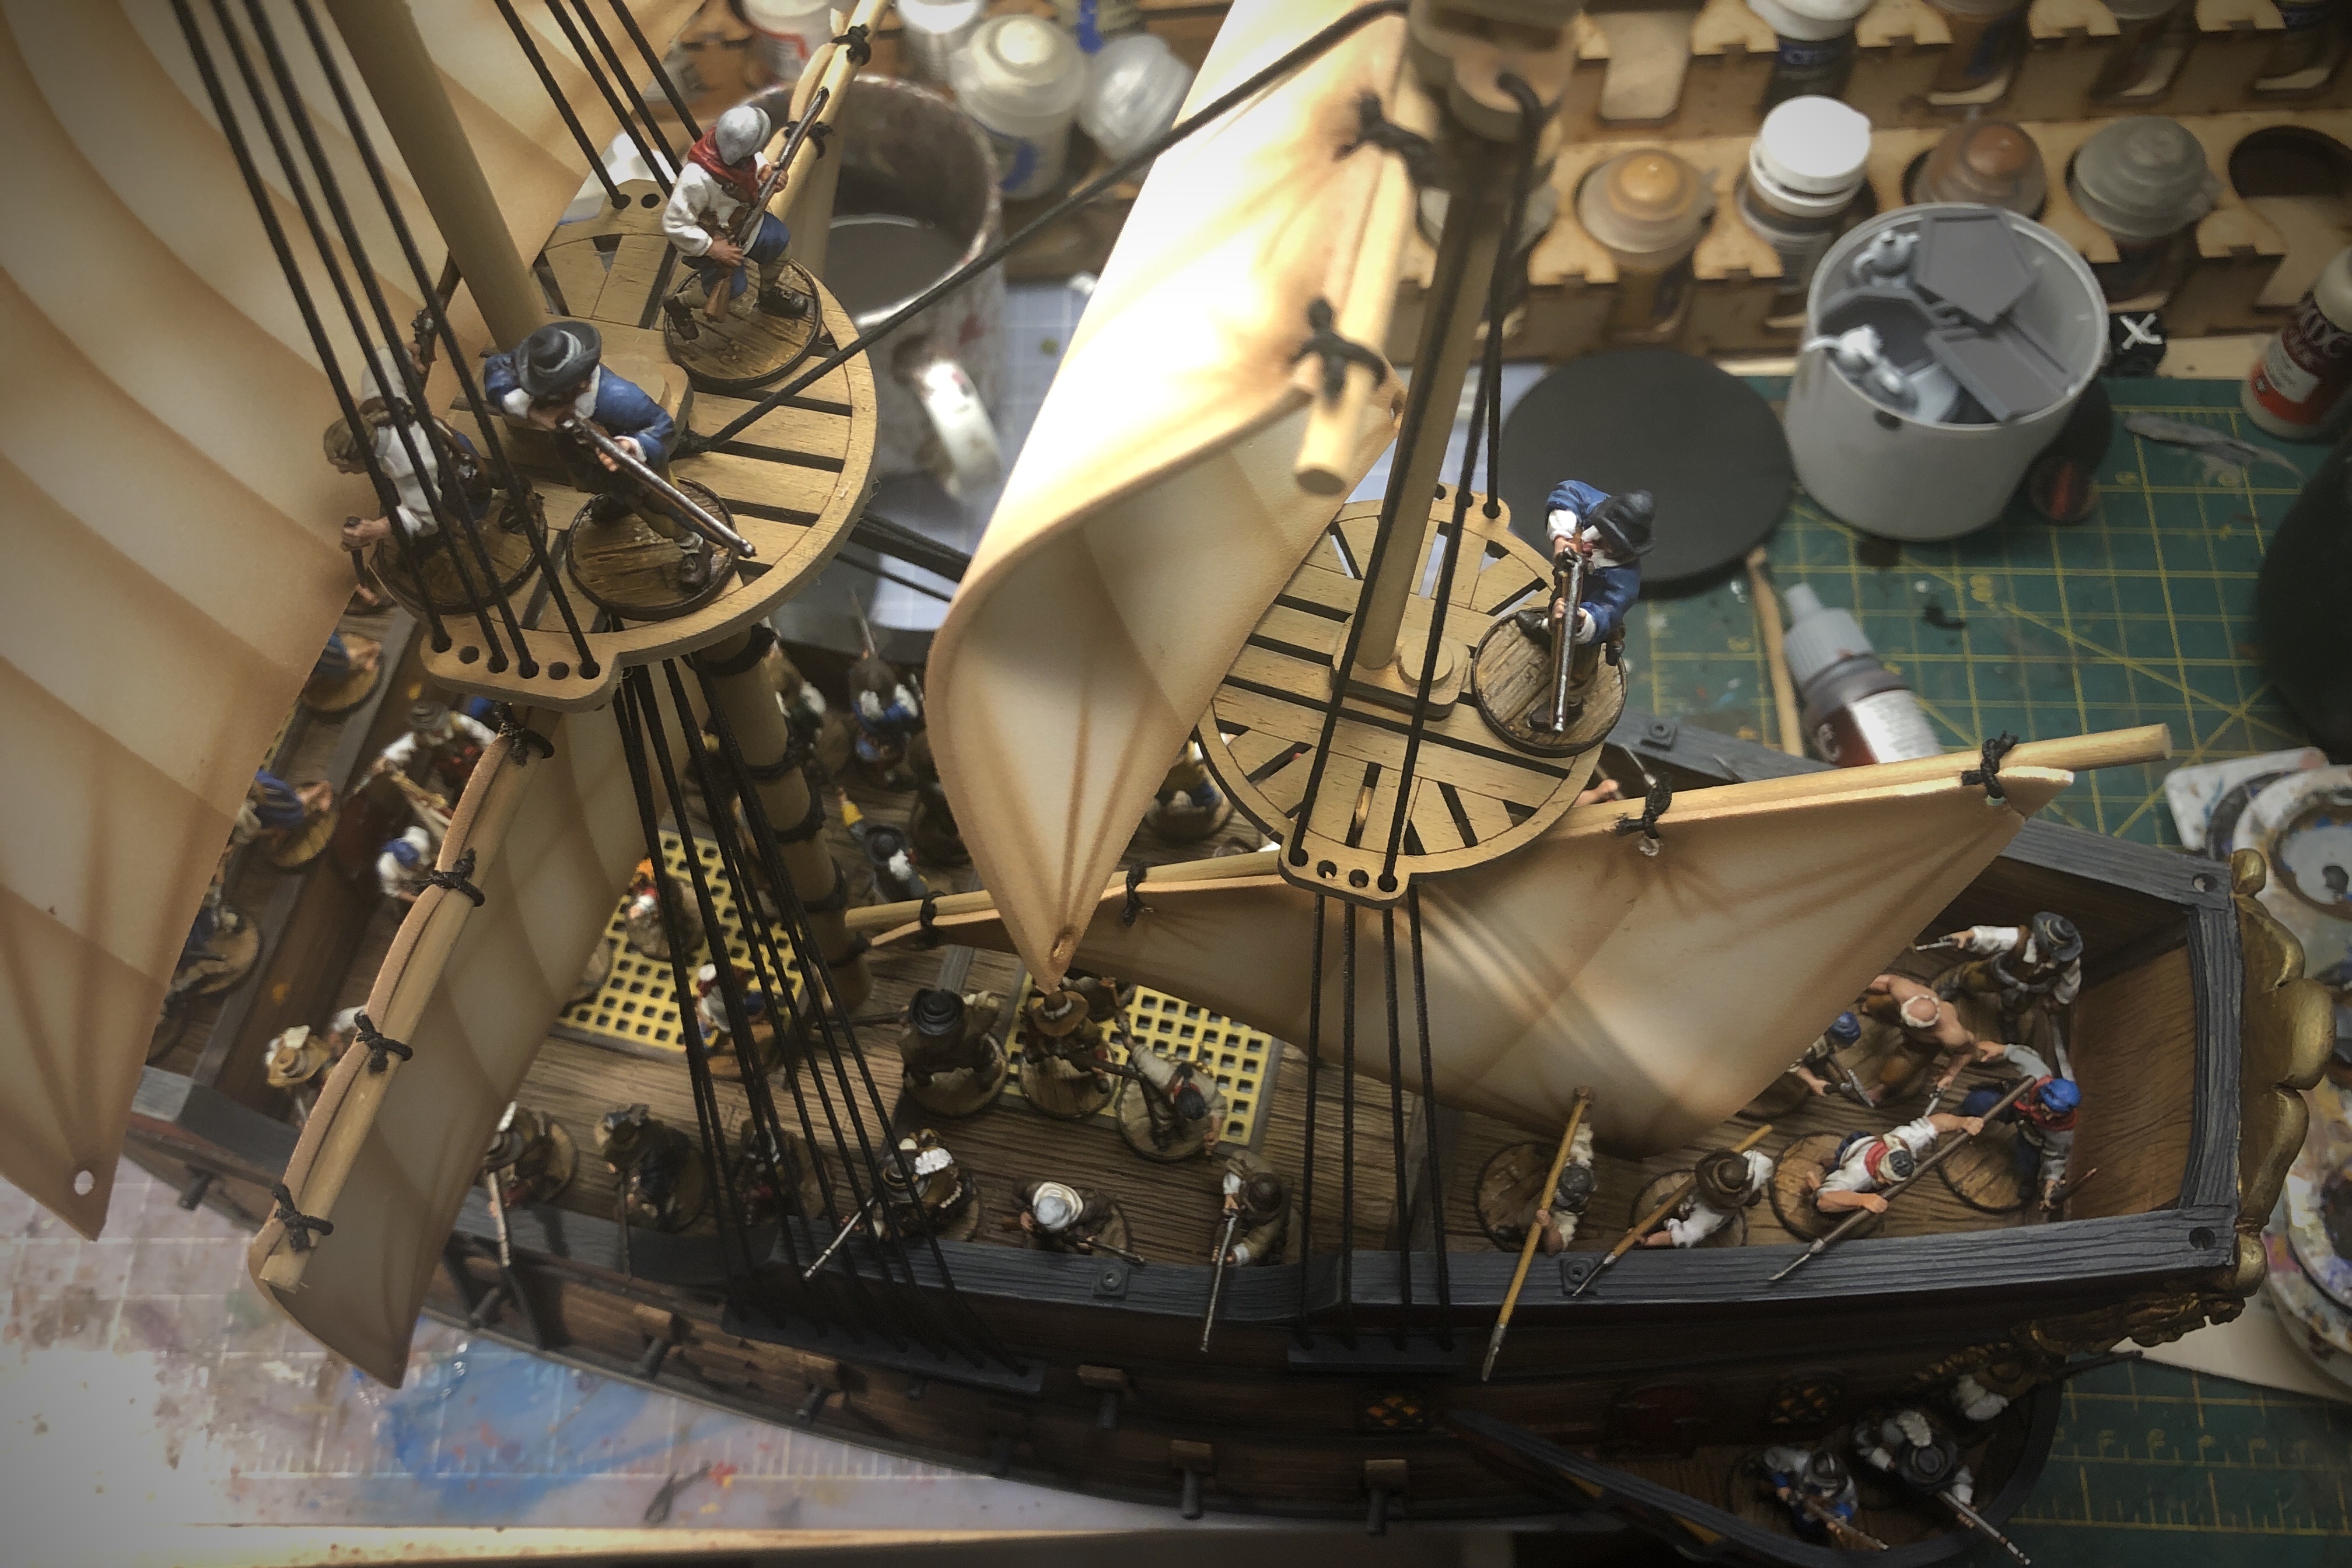
Fighting Tops
I also noticed that you can’t use every hole in the fighting tops when running lines up to the next joint. There might be 6 holes for line on each side of a fighting top but only 2 holes for line on the next mast joint so I could only use 4 of those holes in the fighting top. That probably won’t make sense until you actually look at it…

I added a couple lines running at an angle between the masts but overall, I did it real close to the Firelock diagram.
It mostly just a bunch of busy work but I learned a couple things. Don’t pull the “ratlines” too tight or you will pull all the masts hard enough to make them crooked. There’s a lot of lines if thread going up to that fighting top and if you make them all pretty tight, that’s a lot of pressure. Make them taught, but not overly tight. You might want to go down to your local craft store or get some elastic line on Amazon.
Between adding those wrappings around the masts and adding a couple lines between the masts, I used a lot more line than came in the kit. If you want to make the sails look full, you can tie a line around the mast close to where the sail ends and then you can bend the sail and let the bottom of the sail rest on that elastic line around the mast which will keep it there on the “ledge” making the sail keep it’s curve.
Conclusion
Finally finished! That was a major project! The size of the ship and the money invested in it kind of intimidated me and kept me from working on it like I should have but once I buckled down and got serious about the project, it wasn’t so bad. I don’t have a great idea of how many hours I put into the project but I’m going to guess 15-20. Just that rigging took me more than 3 hours!
I didn’t cover every detail but that was my basic process, but I hope seeing my method will be of help to some!
I feel ready to jump into painting the 6th Rate Frigate now and I think it will go faster after gaining some experience with this ship.
Thanks for reading! Good luck with your Galleon!
Pingback: Completed 6th Rate Frigate | Blood & Pigment
Pingback: Ship Overview – The Galleon | Blood & Pigment
Which Army painter brown did you use? I selected oak brown but that feels too dark.