I haven’t been able to actually play a real game of Blood & Plunder for several weeks now so I set up a solo game using the Palisade Fort for a second time. Last game was 100 points but I upped it to 200 for this game. At 200 points the fort takes up a lower percentage of the defender’s total force points which should make it a little stronger.

The Forces
I had the English defend the fort this time with a Native faction attacking. The fort seems perfect for fighting vs the Natives since it provides permanent cover and lets the force with the fort always defend and waste less time moving, giving more actions to your units for shooting and reloading. It also makes it much harder for the Natives to charge in with their spear and axes and massacre a fatigued unit. With no options for cannons, the Natives have no way to blast through so they have to rely on small arms and hand to hand combat.

I wanted a unit of Artillery Crew and a unit Musketeers which are both support units so I stretched my 200 points to include a full 6 units (fort rules in development will provide more options for including more artillery crew without using up those Support unit slots).
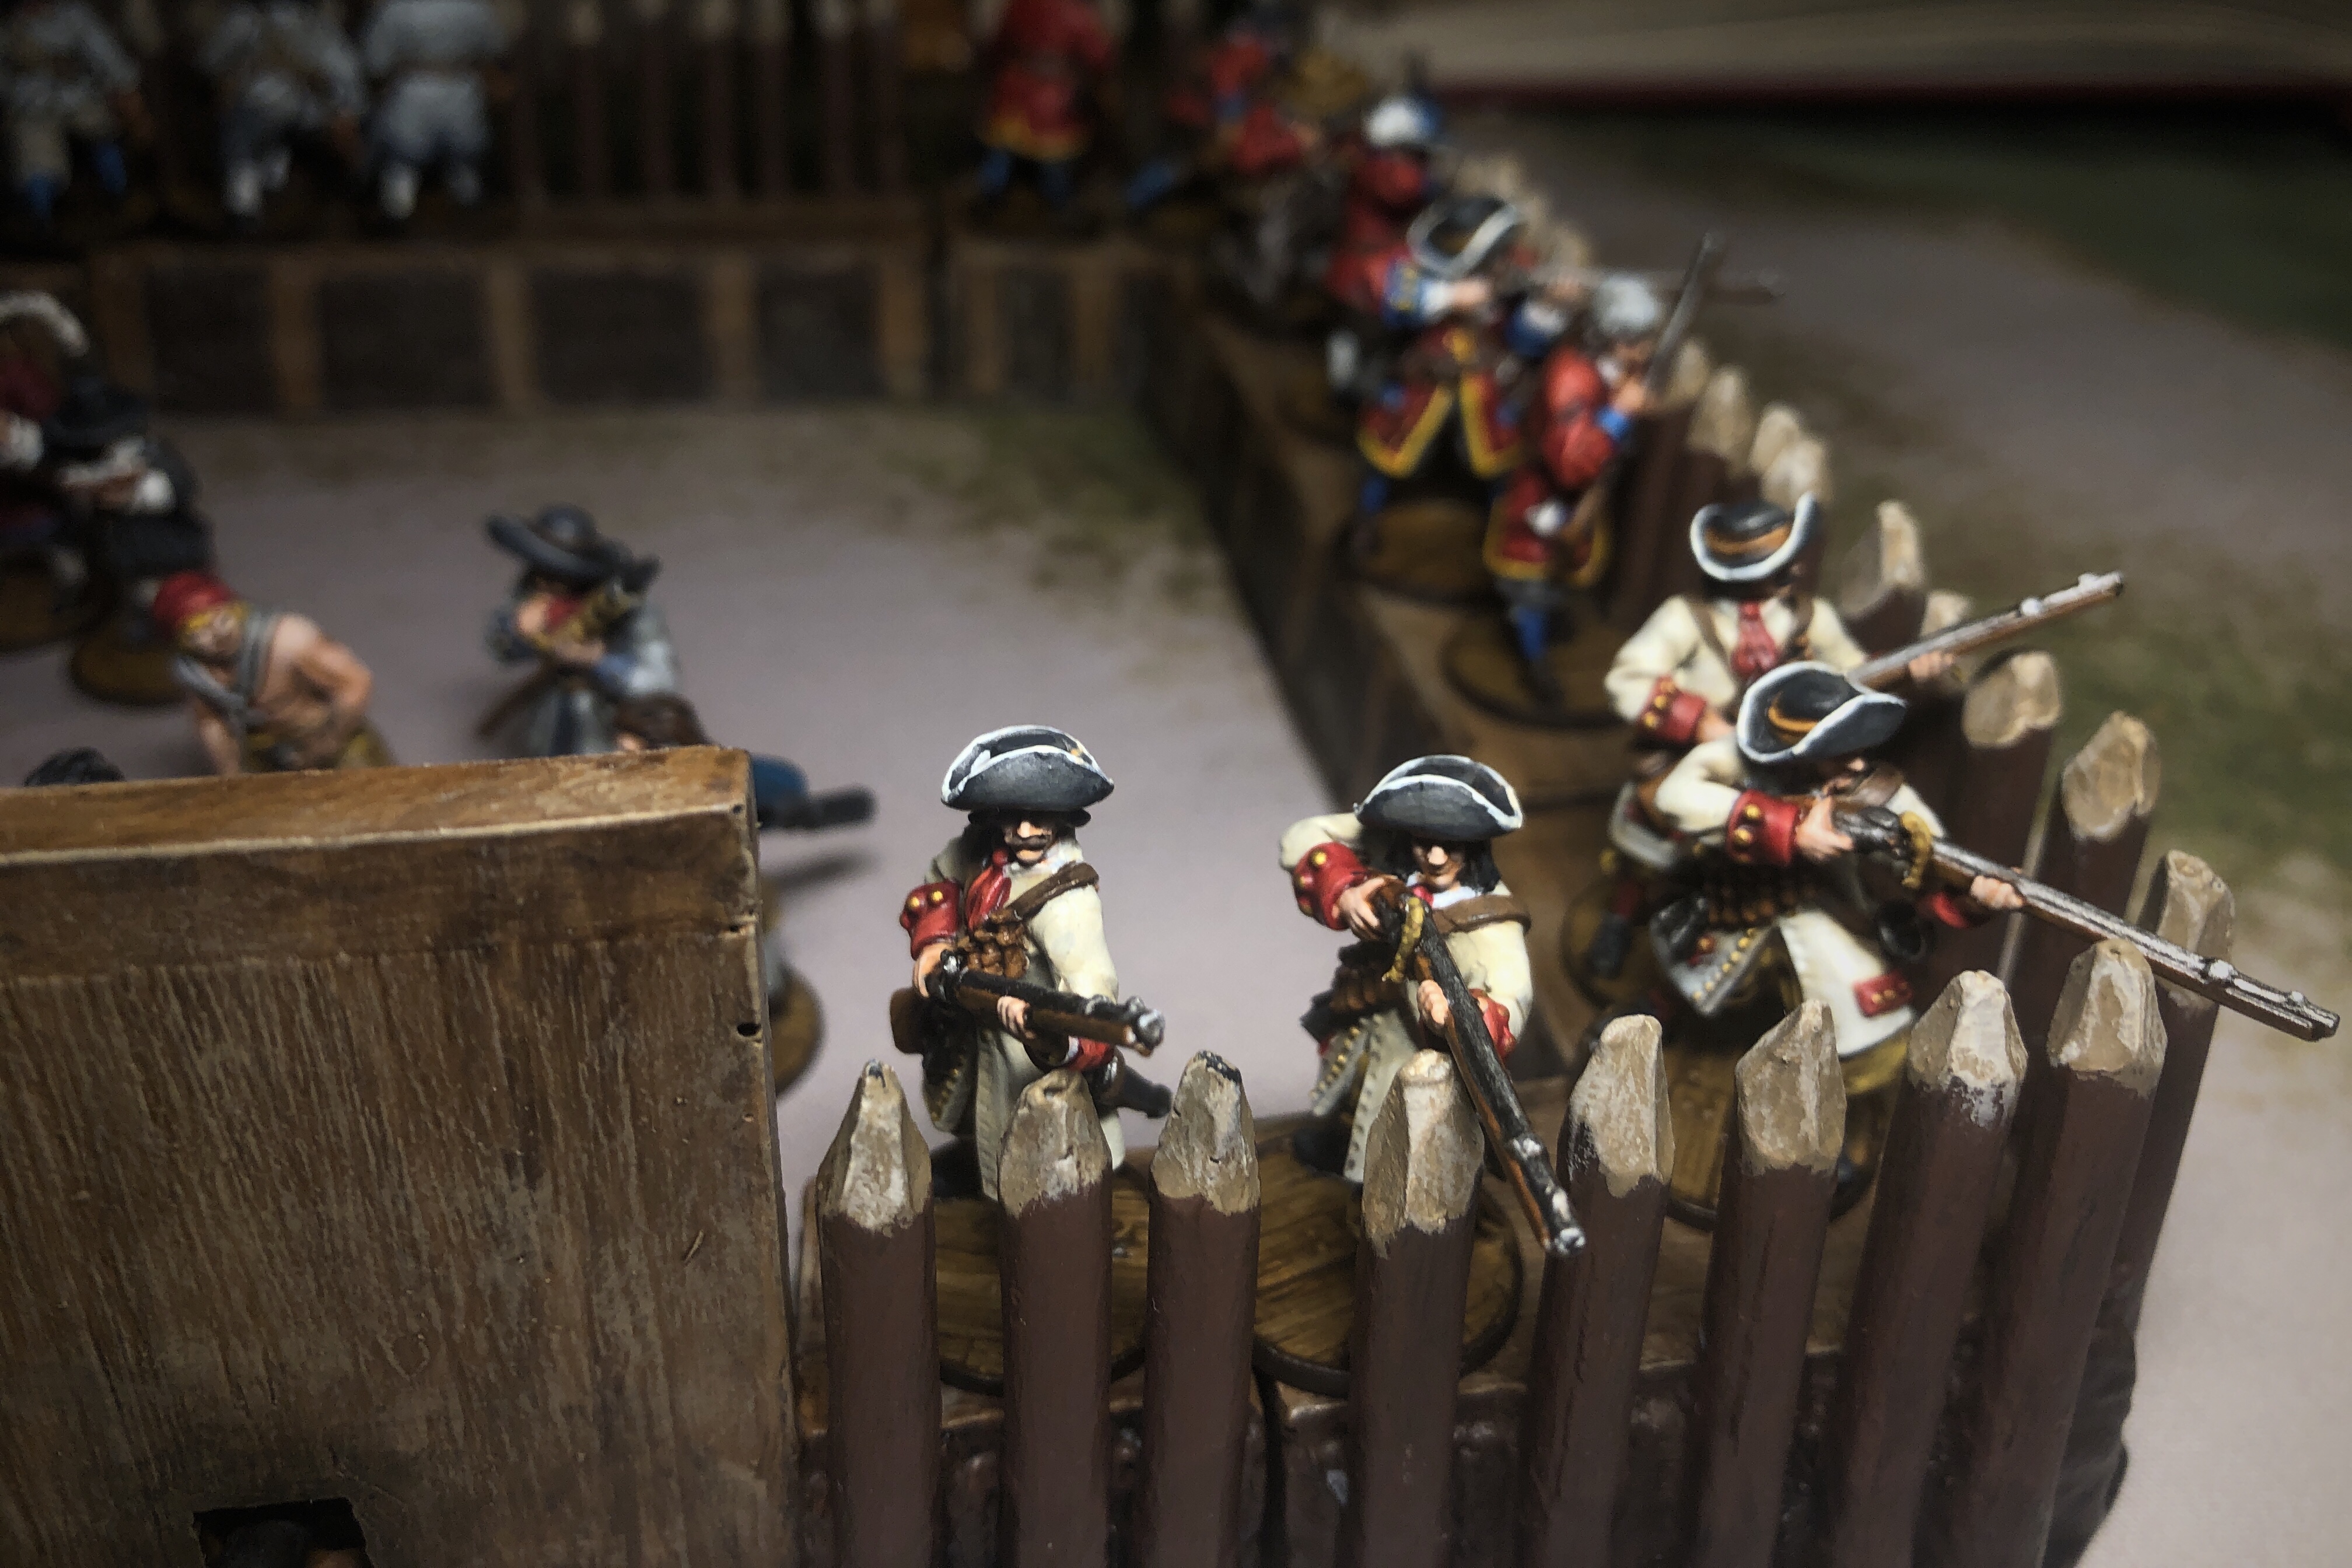
My English Caribbean Militia Force included:
- 6 Trained English Militia with an Experienced Militia Commander with a Spiritual Leader at his side.
- 6 Trained English Militia
- 6 Trained English Militia
- 4 Freebooters
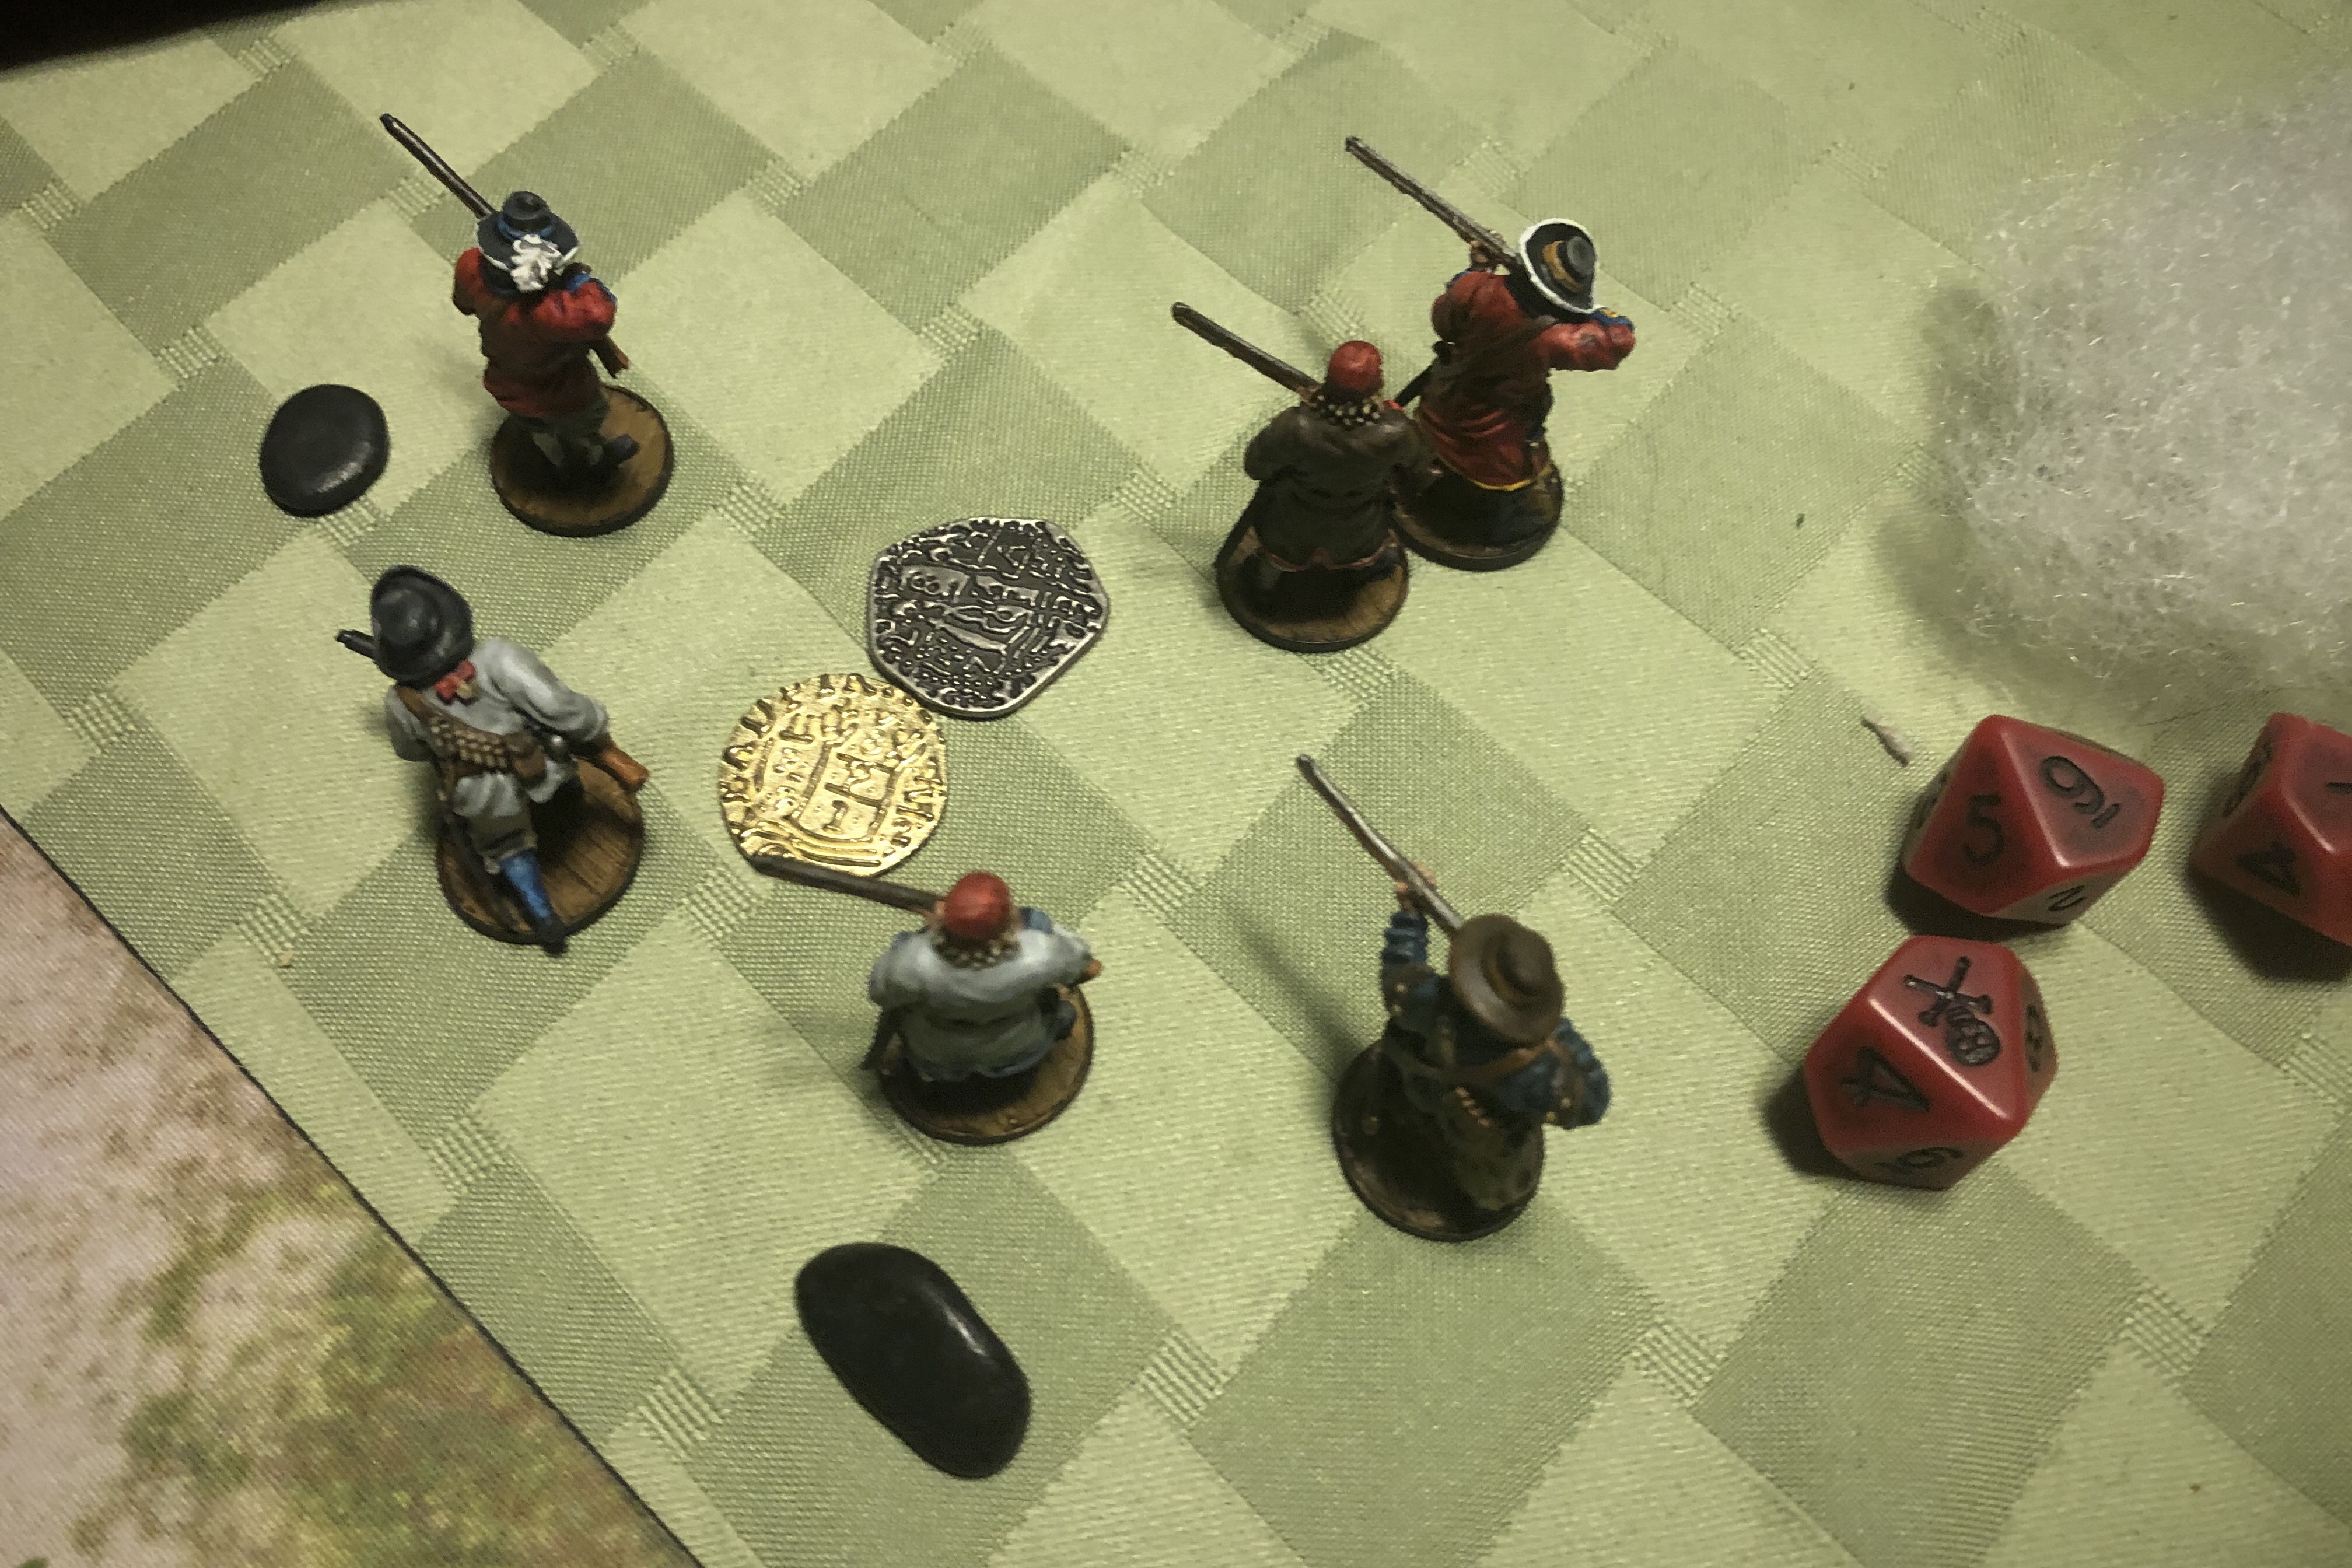
- 4 Musketeers
- 5 Trained Militia Artillery Crew with a Master Gunner assigned to a Light Cannon with Grapeshot
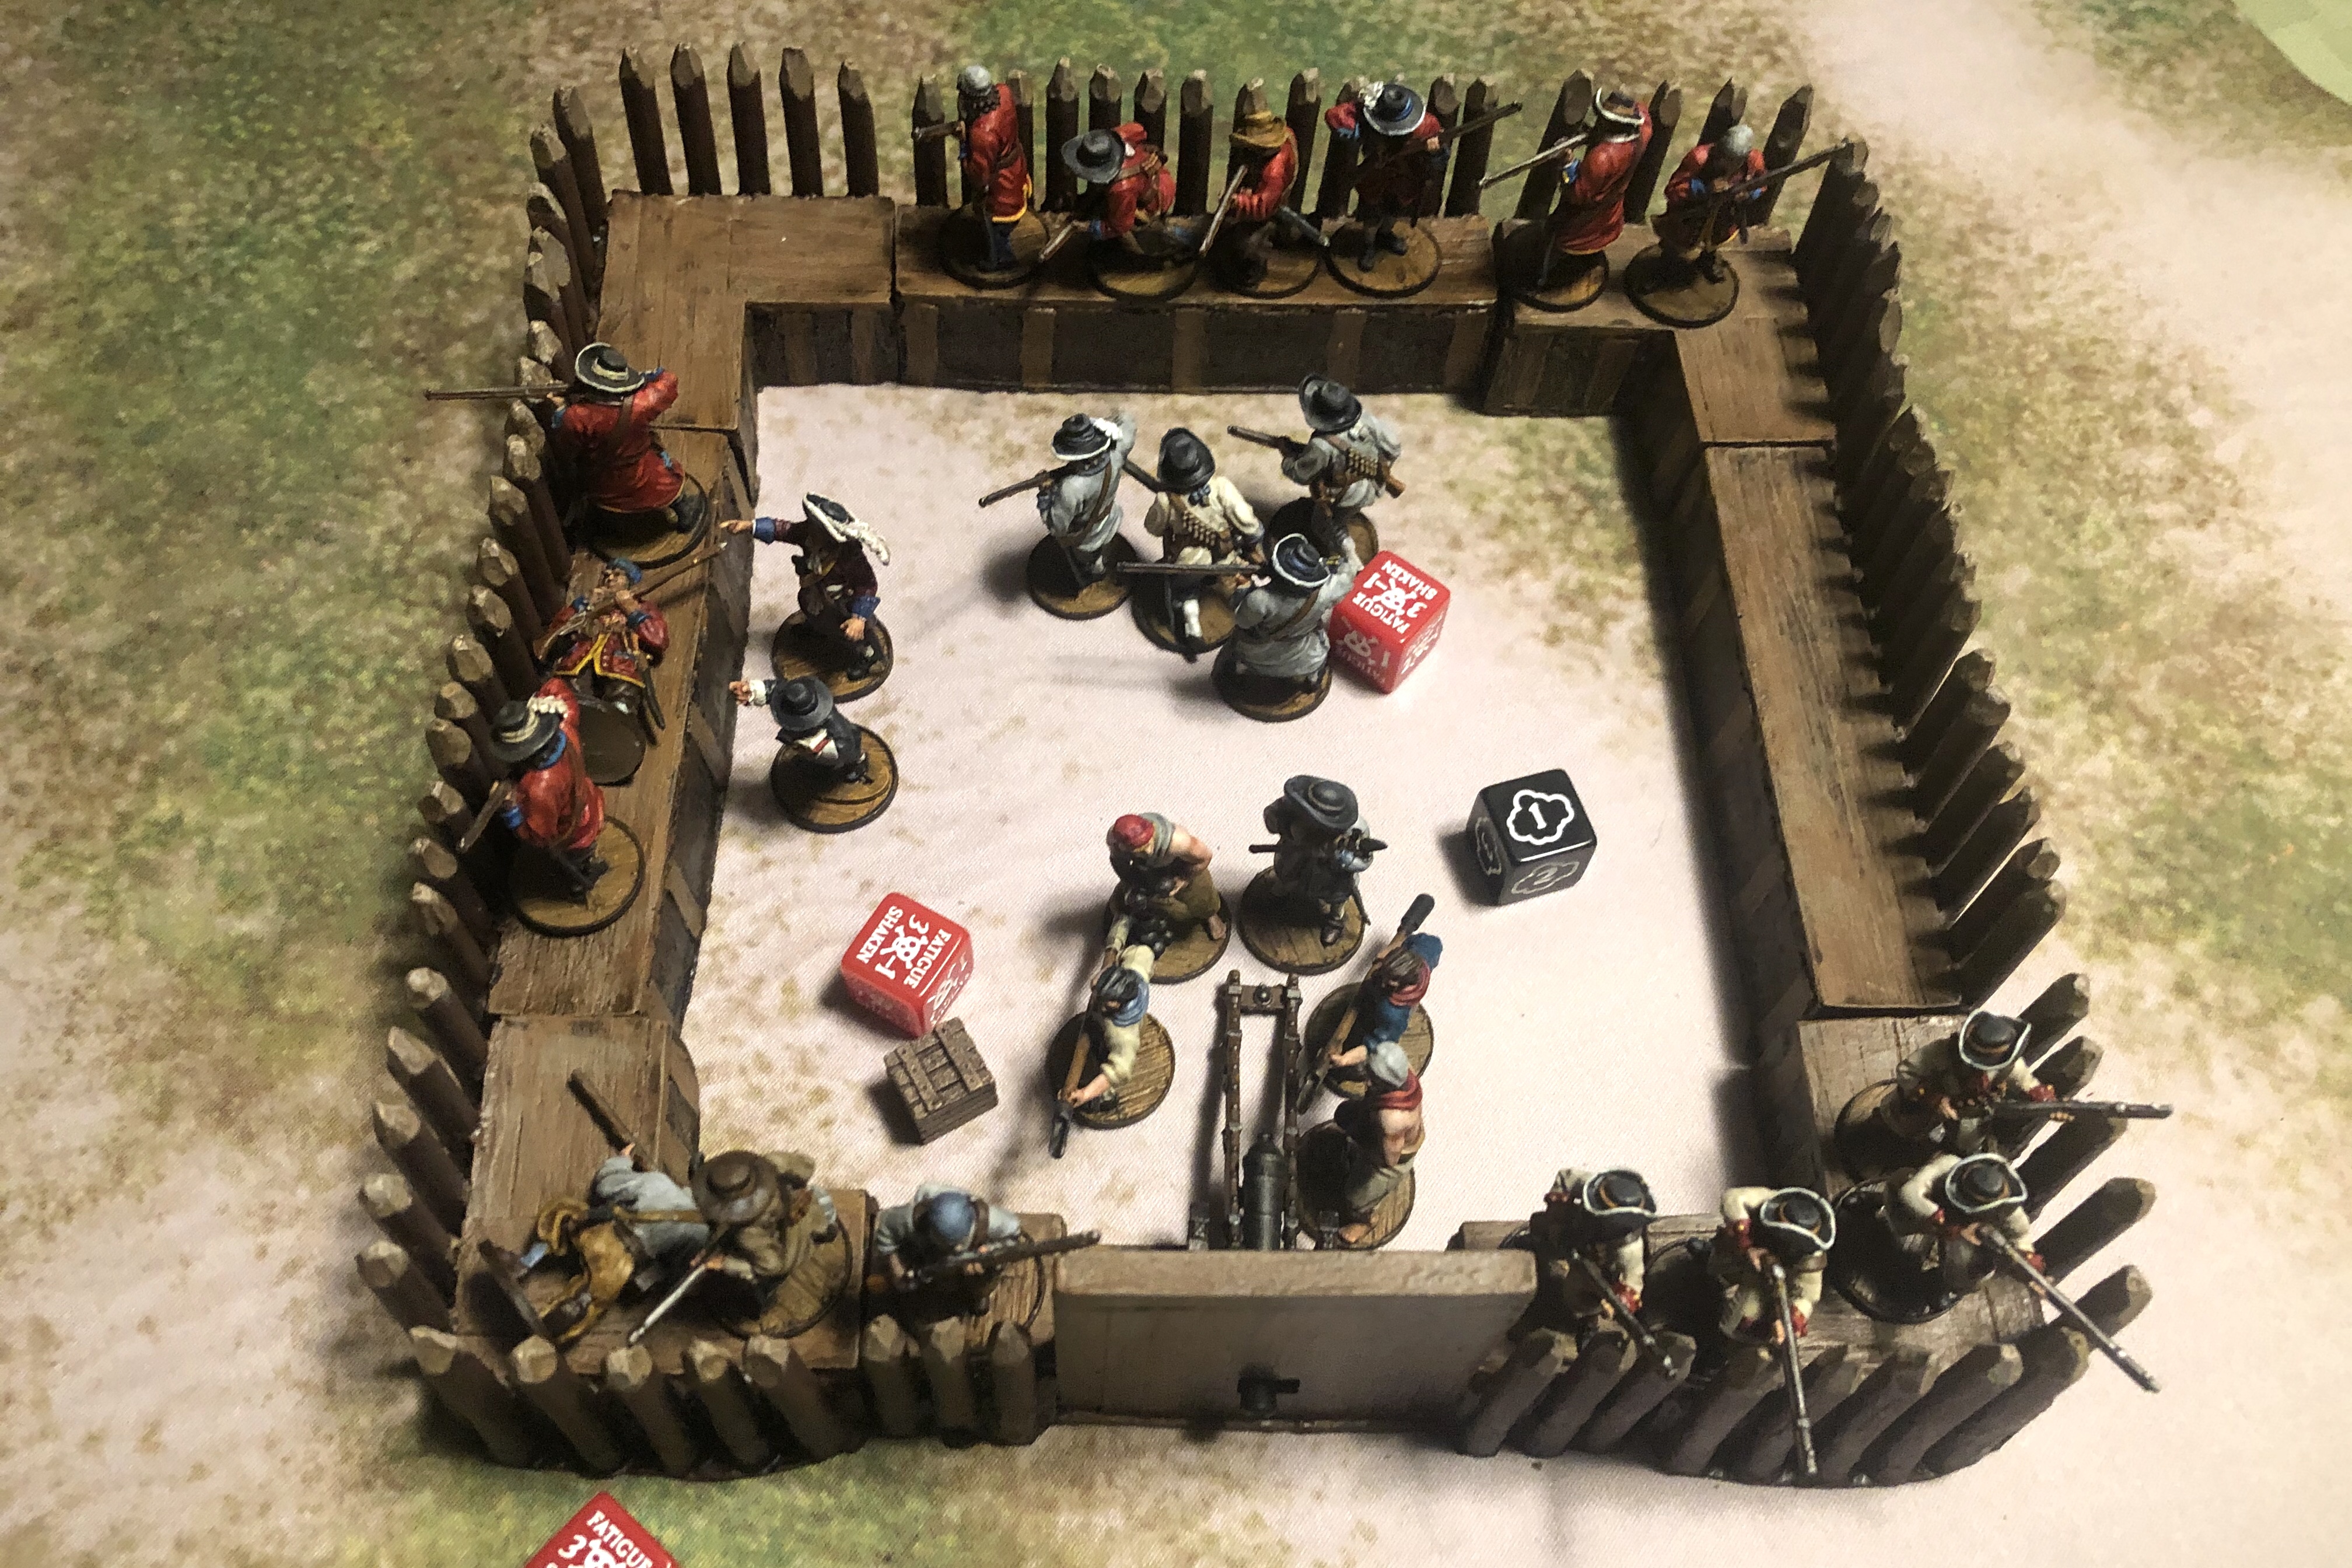
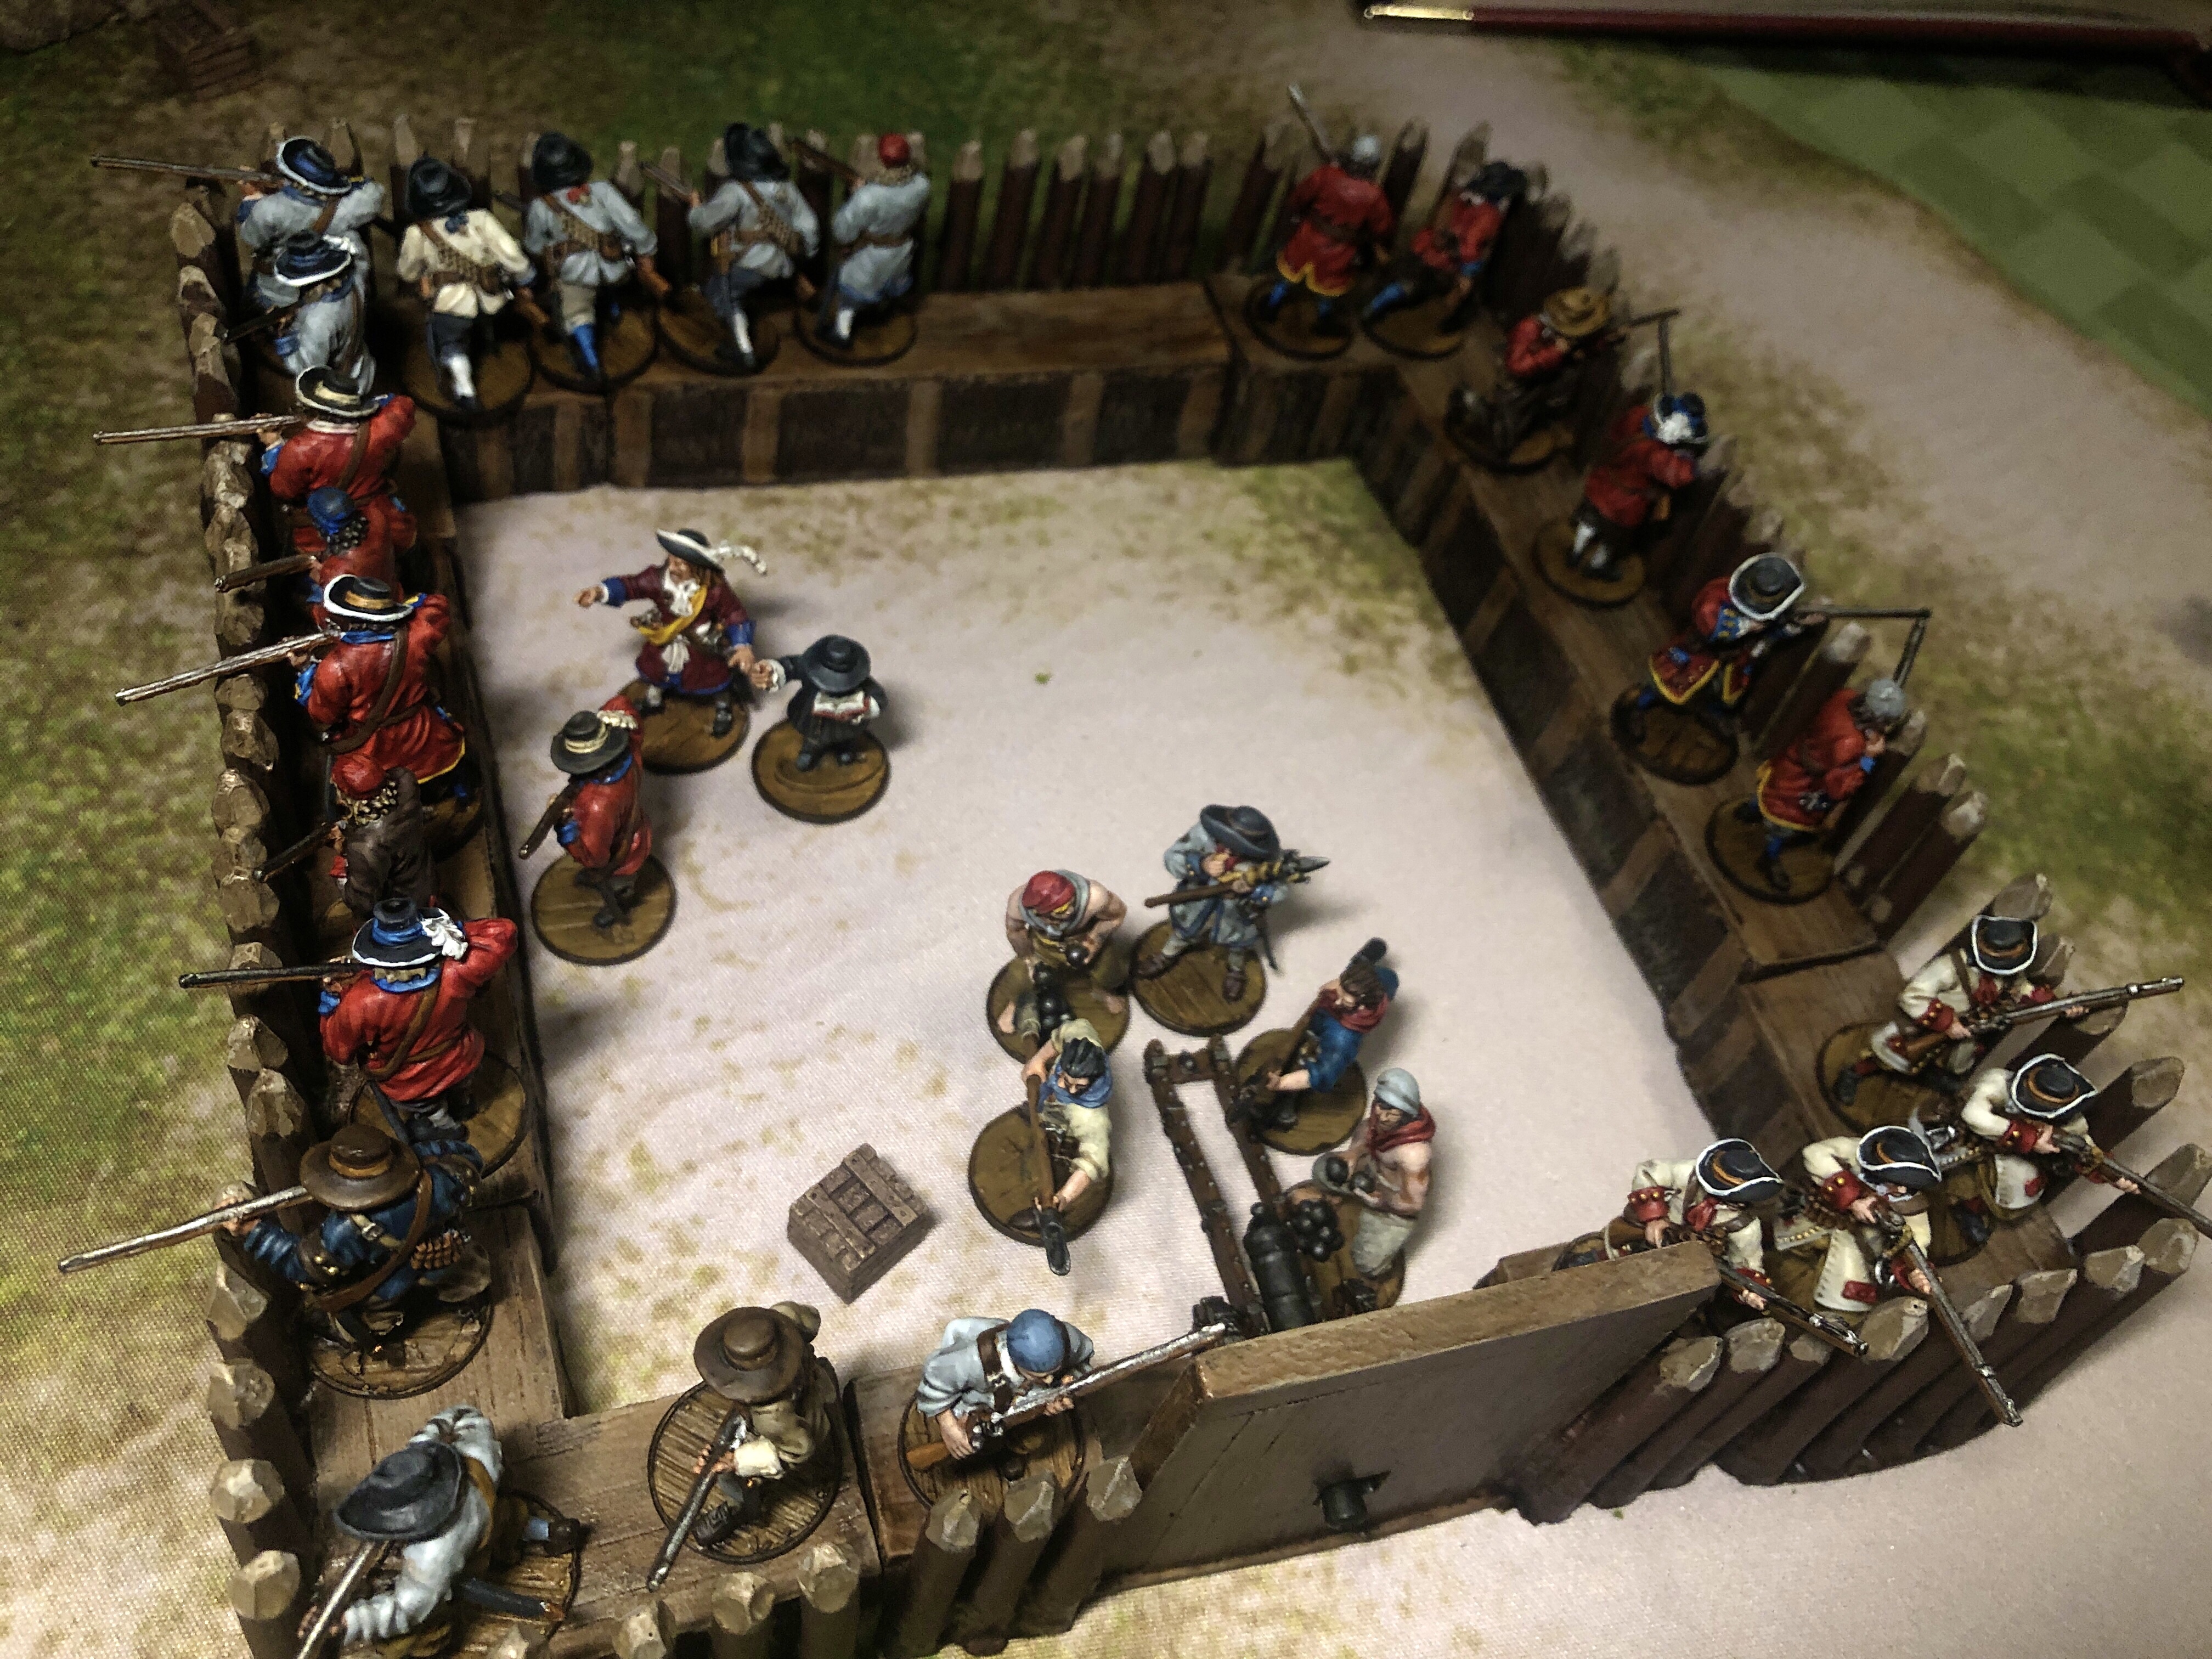
- A full 8 section closed palisade fort costing 3 points per section

As detailed in my previous post, the current beta rules for the Palisade Fort provide hard cover for models behind the walls and they function much like structure sections with a few exceptions. They take a dedicated Climb action to get over and their Fortitude/Integrity numbers currently sit at 3/4.
With full hard cover vs all those arrows, solid Resolve on all units, an Inspiring commander and an extra Fortune Point to help mitigate the occasional terrible Save roll, this felt like a good counter-Native force.
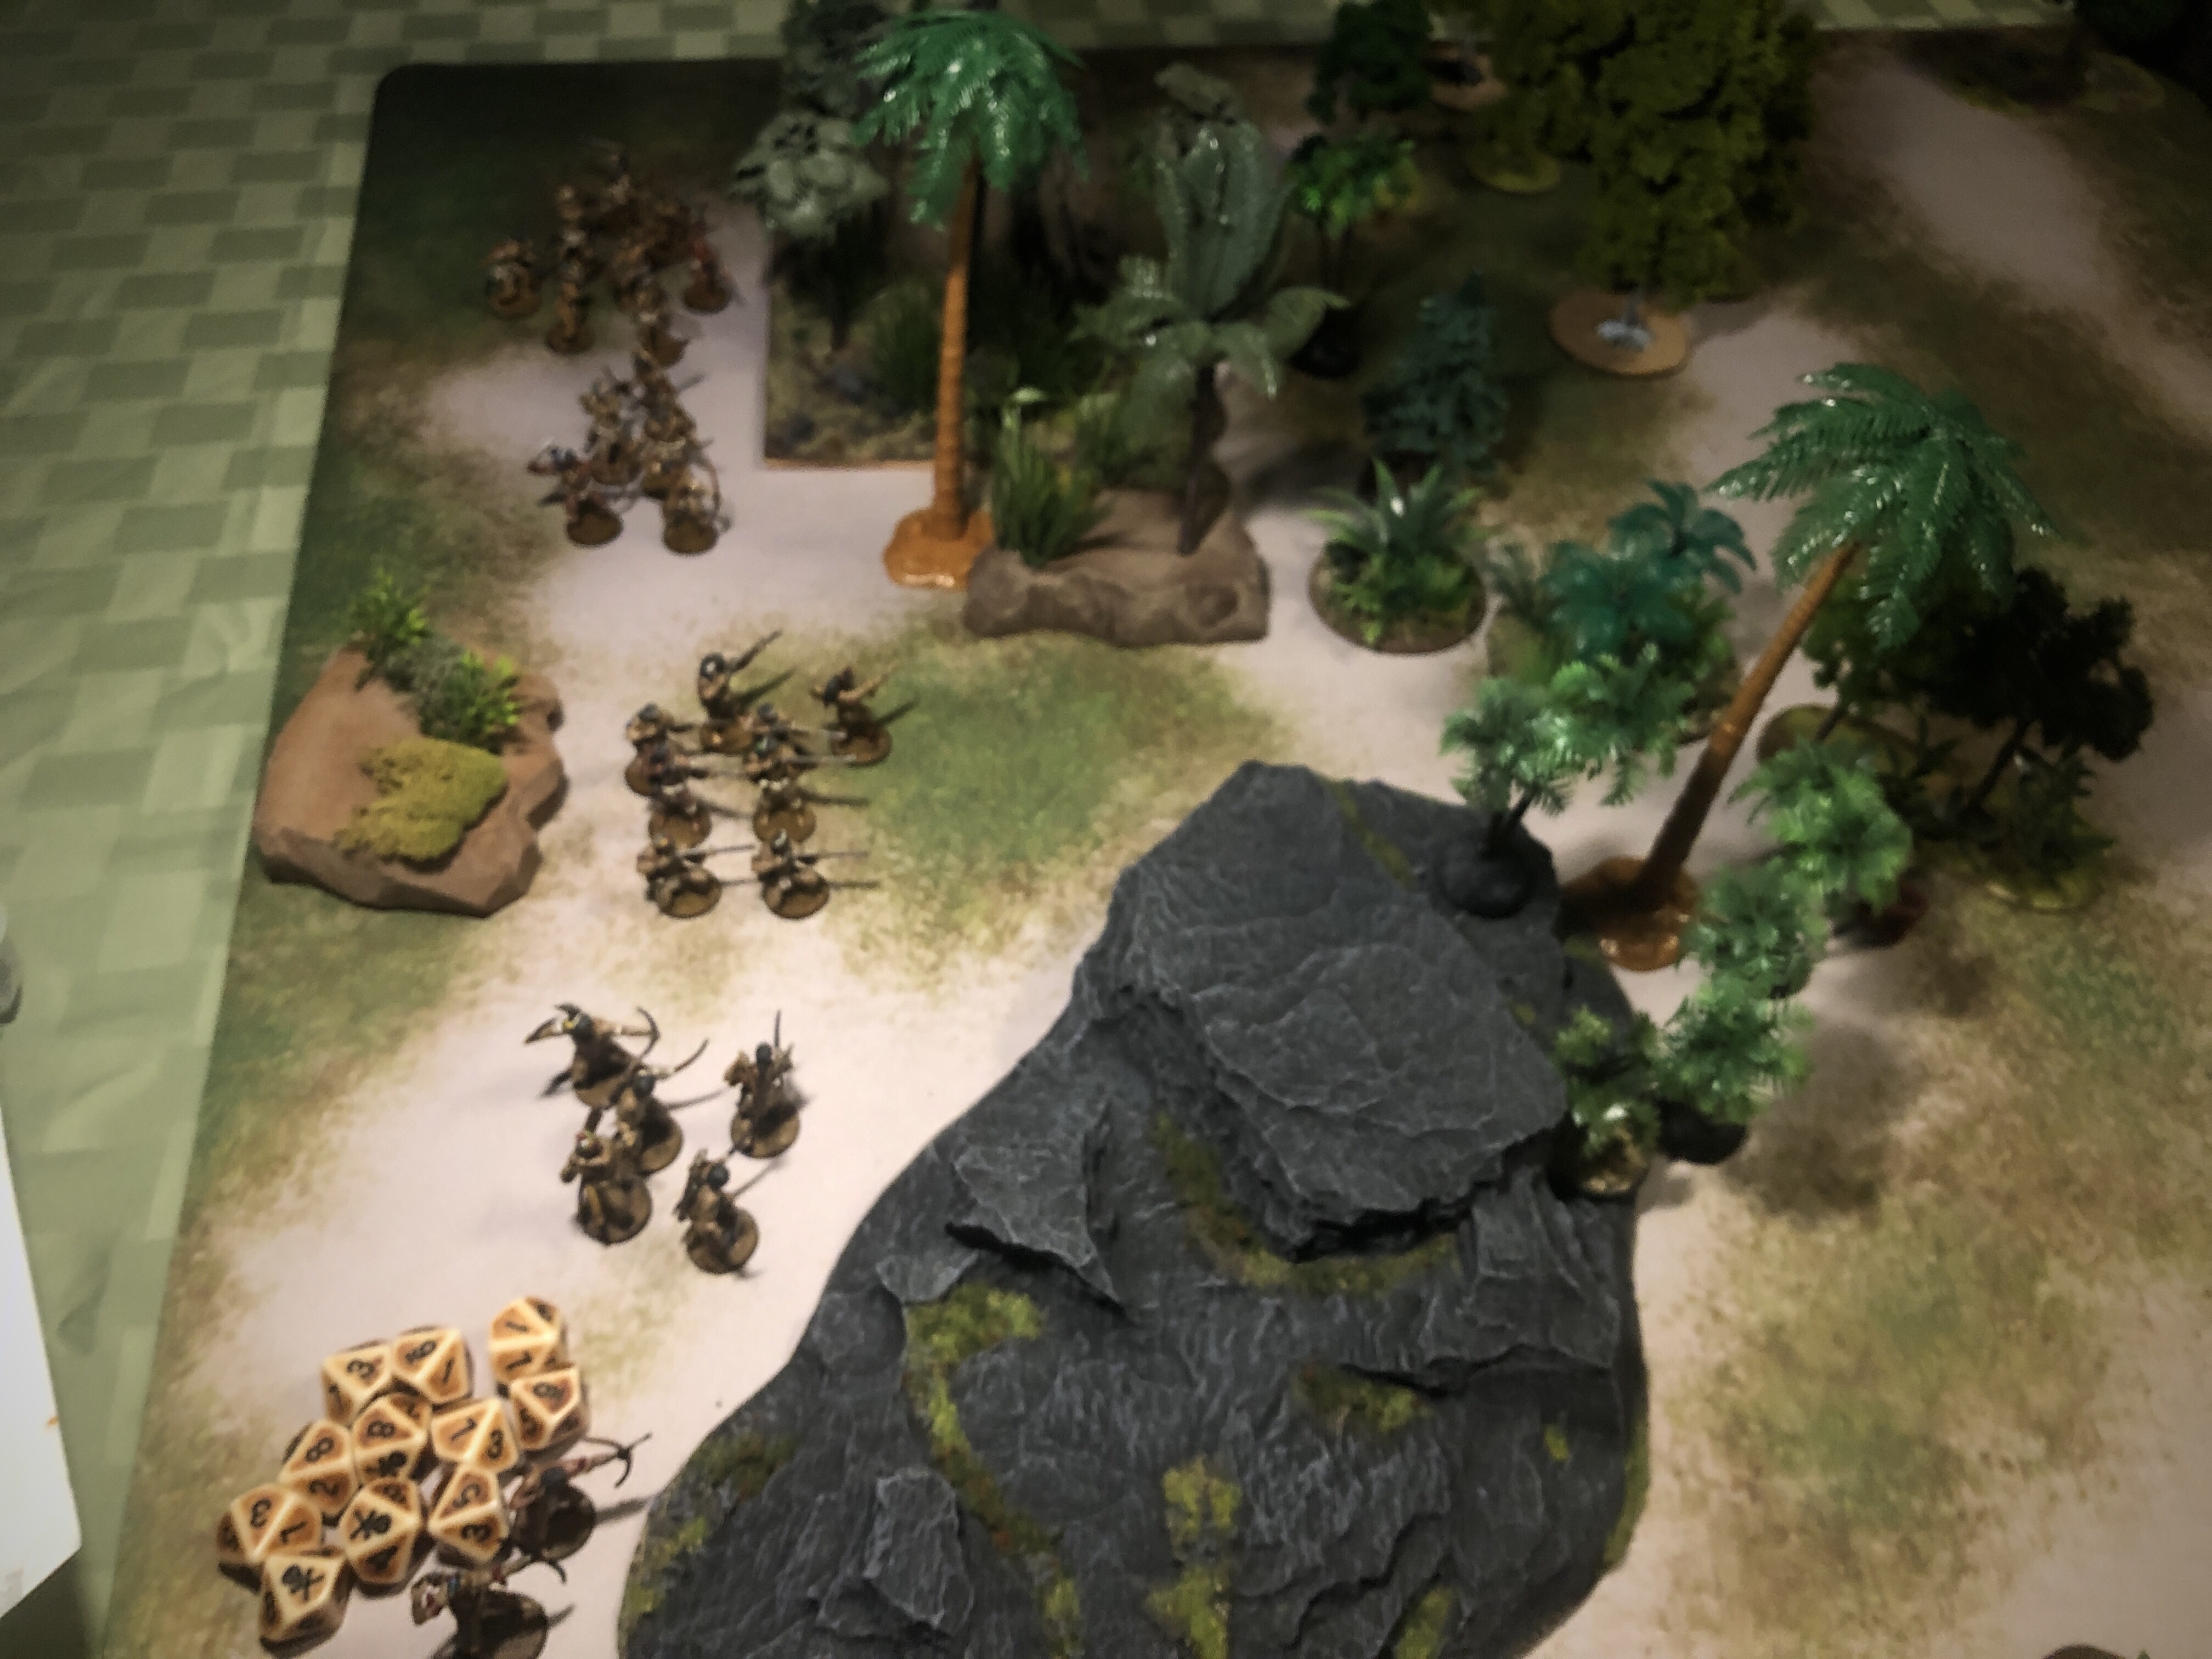
For the Native force I used a favorite King Oldman force I had printed out and lying around from a previous game. The Caribbean Tribes have the nearly-crippling Sound of Thunder rule on all their units but they also have access to Poisoned Arrows and King Oldman who is an excellent commander for a low price of 20 points.
The Caribbean Tribes force included:
- 7 Veteran Warrior Musketeers with the Great Warrior upgrade and King Oldman attached. Oldman gives them Buccaneer Tactics which includes Fast Reload and Marksmen.
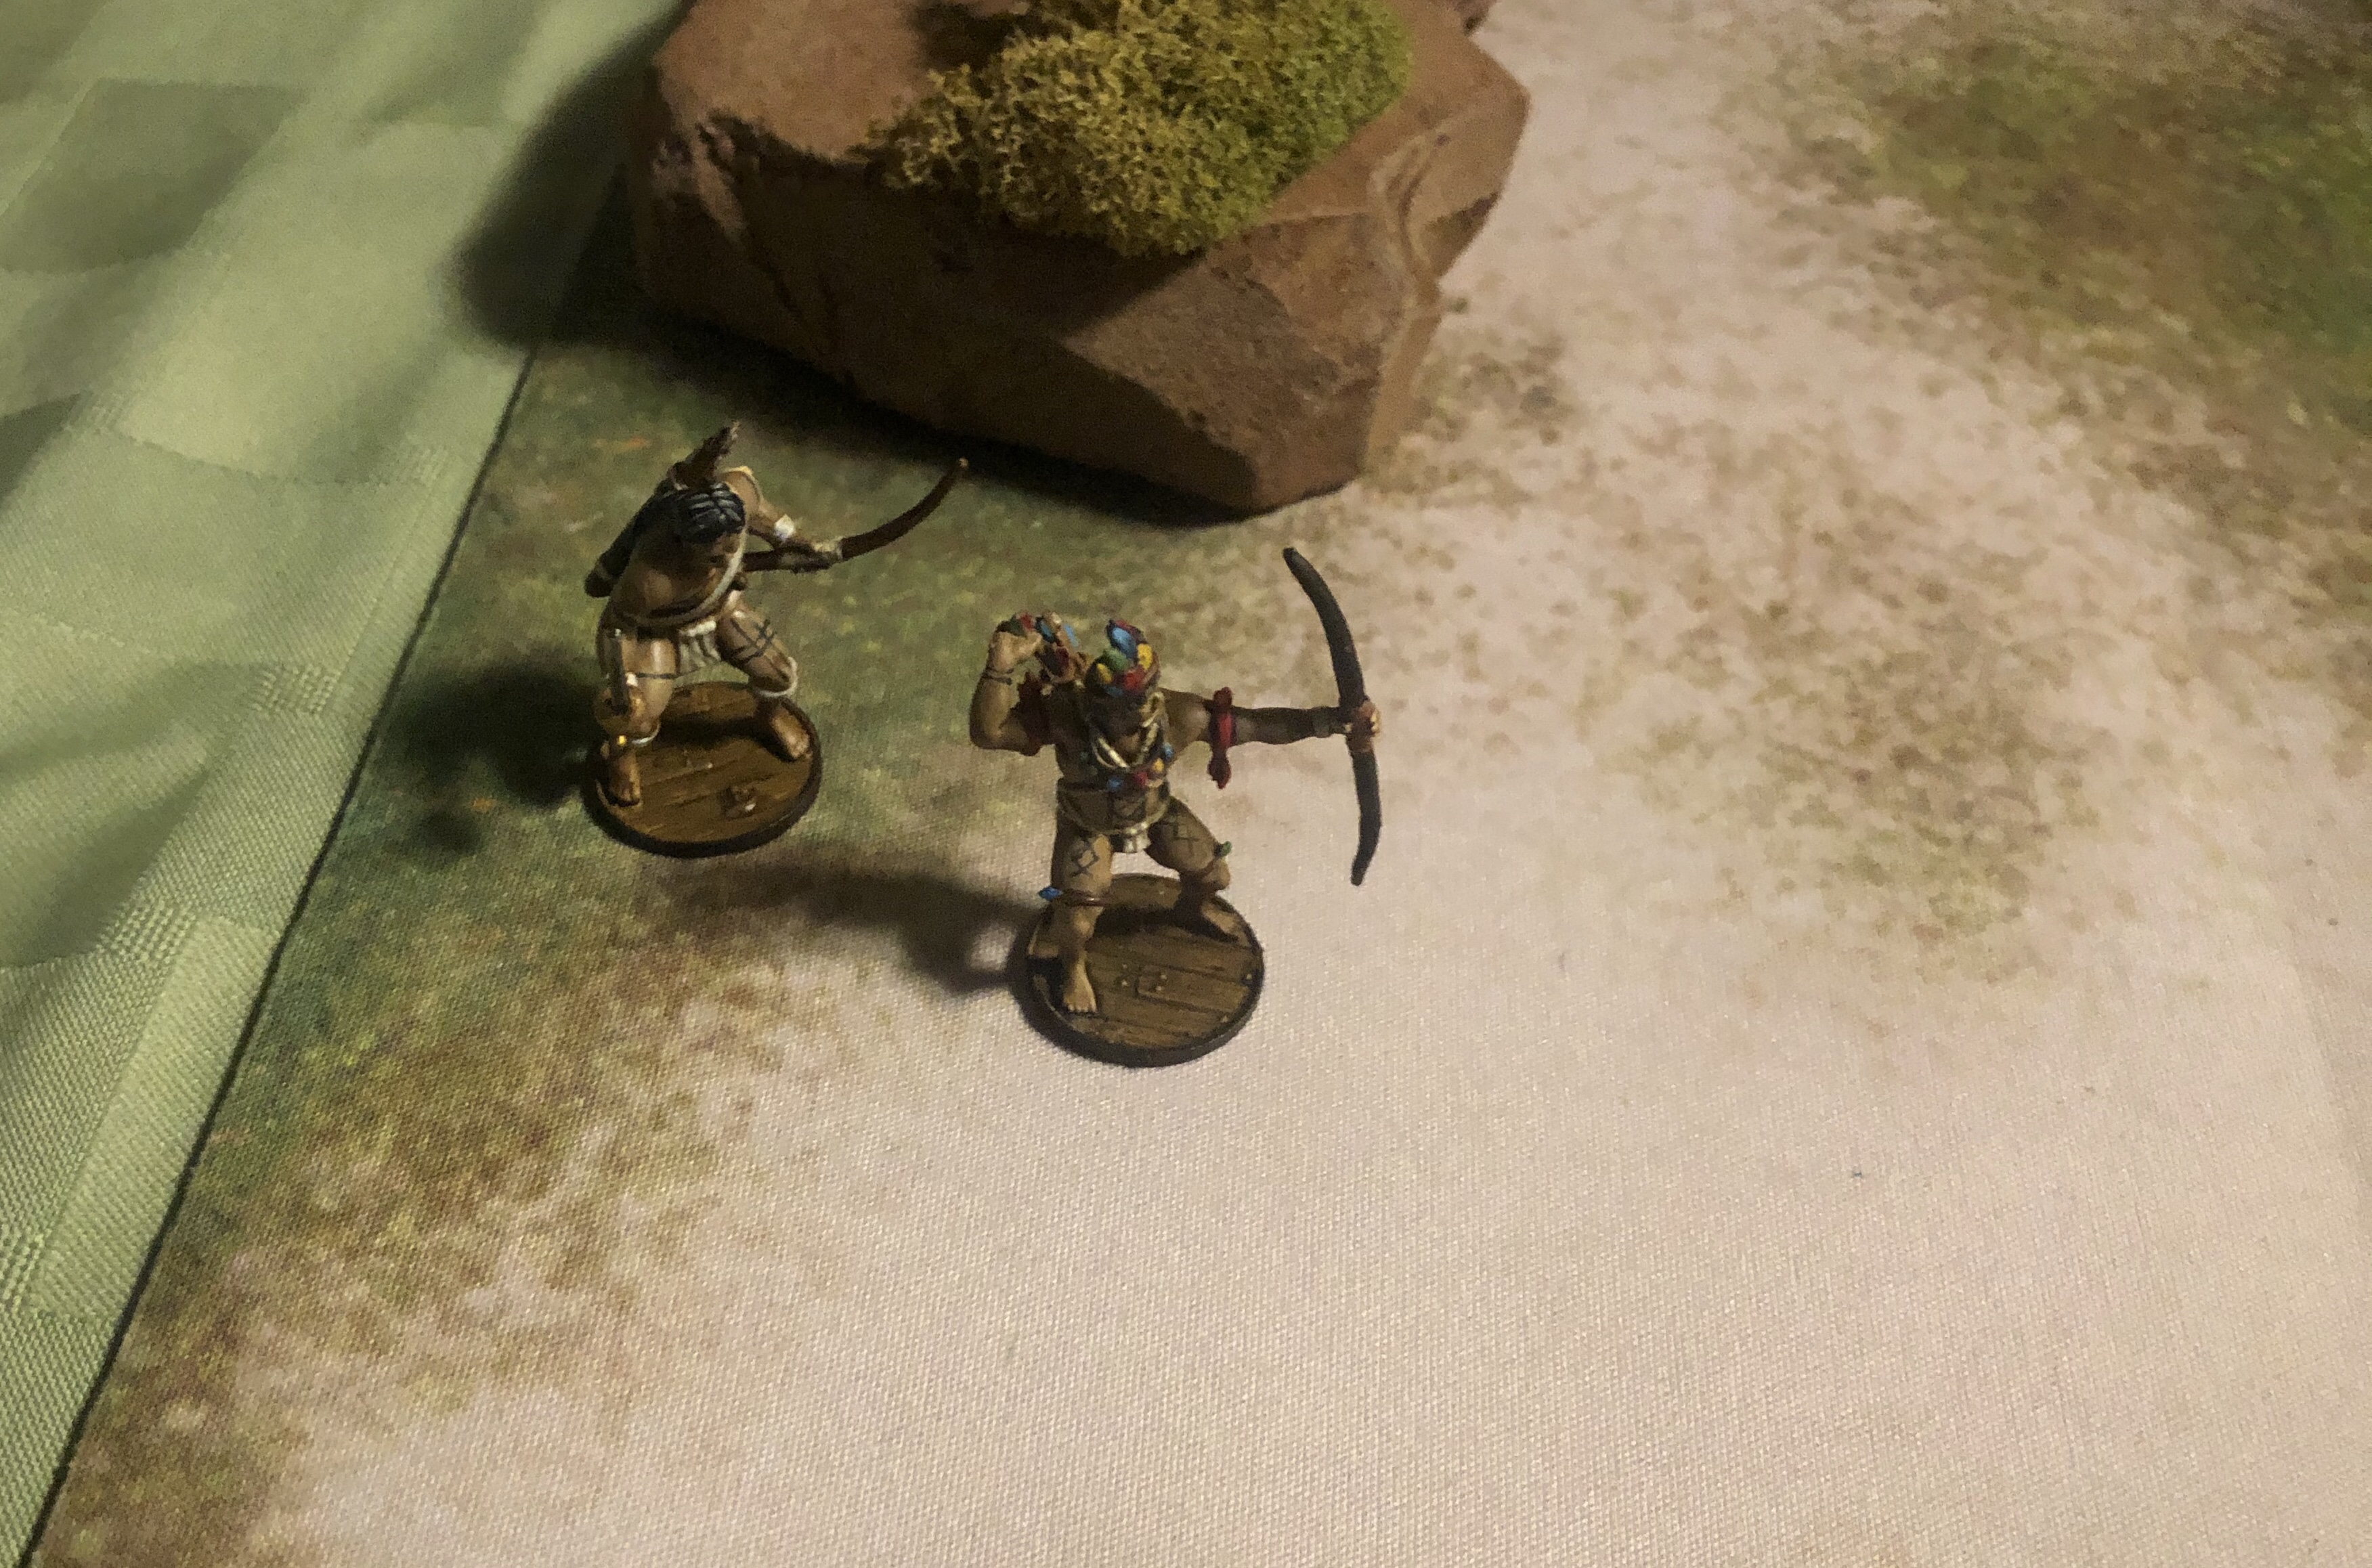
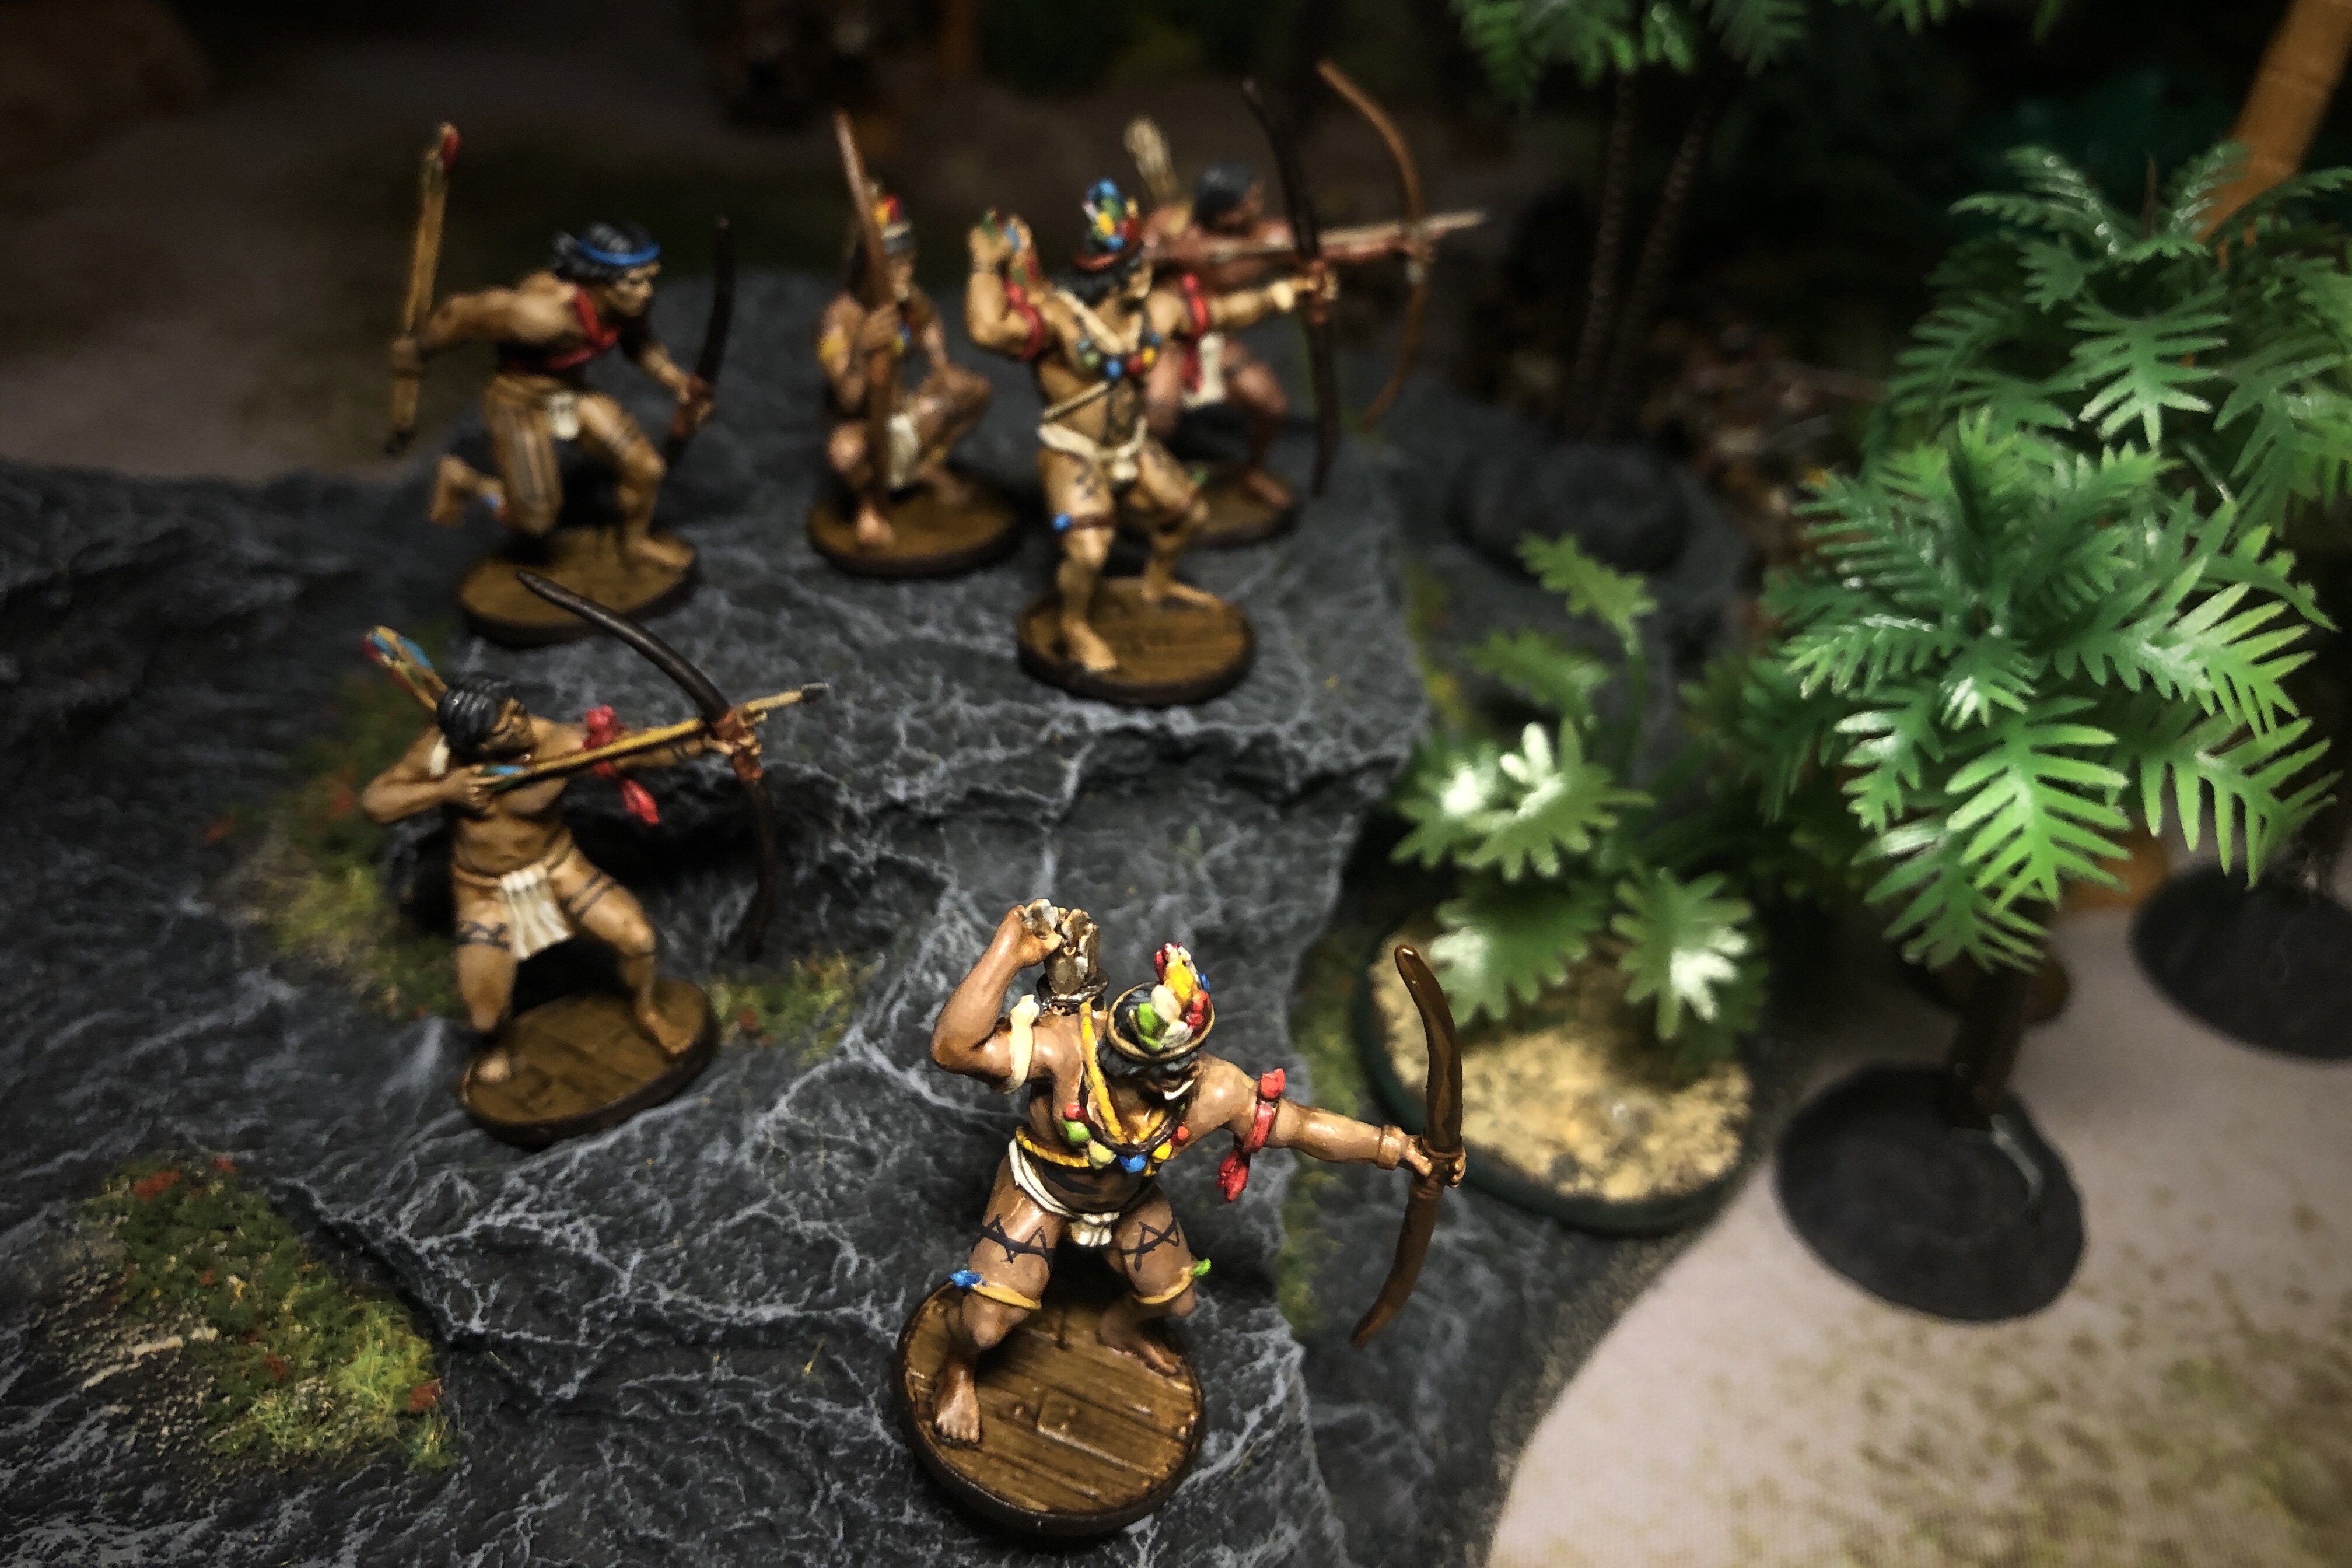
- 5 Warrior Archers with Poisoned Arrows and a Grizzled Veteran
- 5 Warrior Archers with Poisoned Arrows
- 6 Young Warriors with Poisoned Arrows
- 8 Veteran Warriors with Thrown Weapons, Musket Sidearms and an Officer attached
At 32 models, the Natives were still slightly outnumbered by the 34 Englishmen.
The Scenario
I used the Raid scenario from the core rule book with the English as the Defenders.
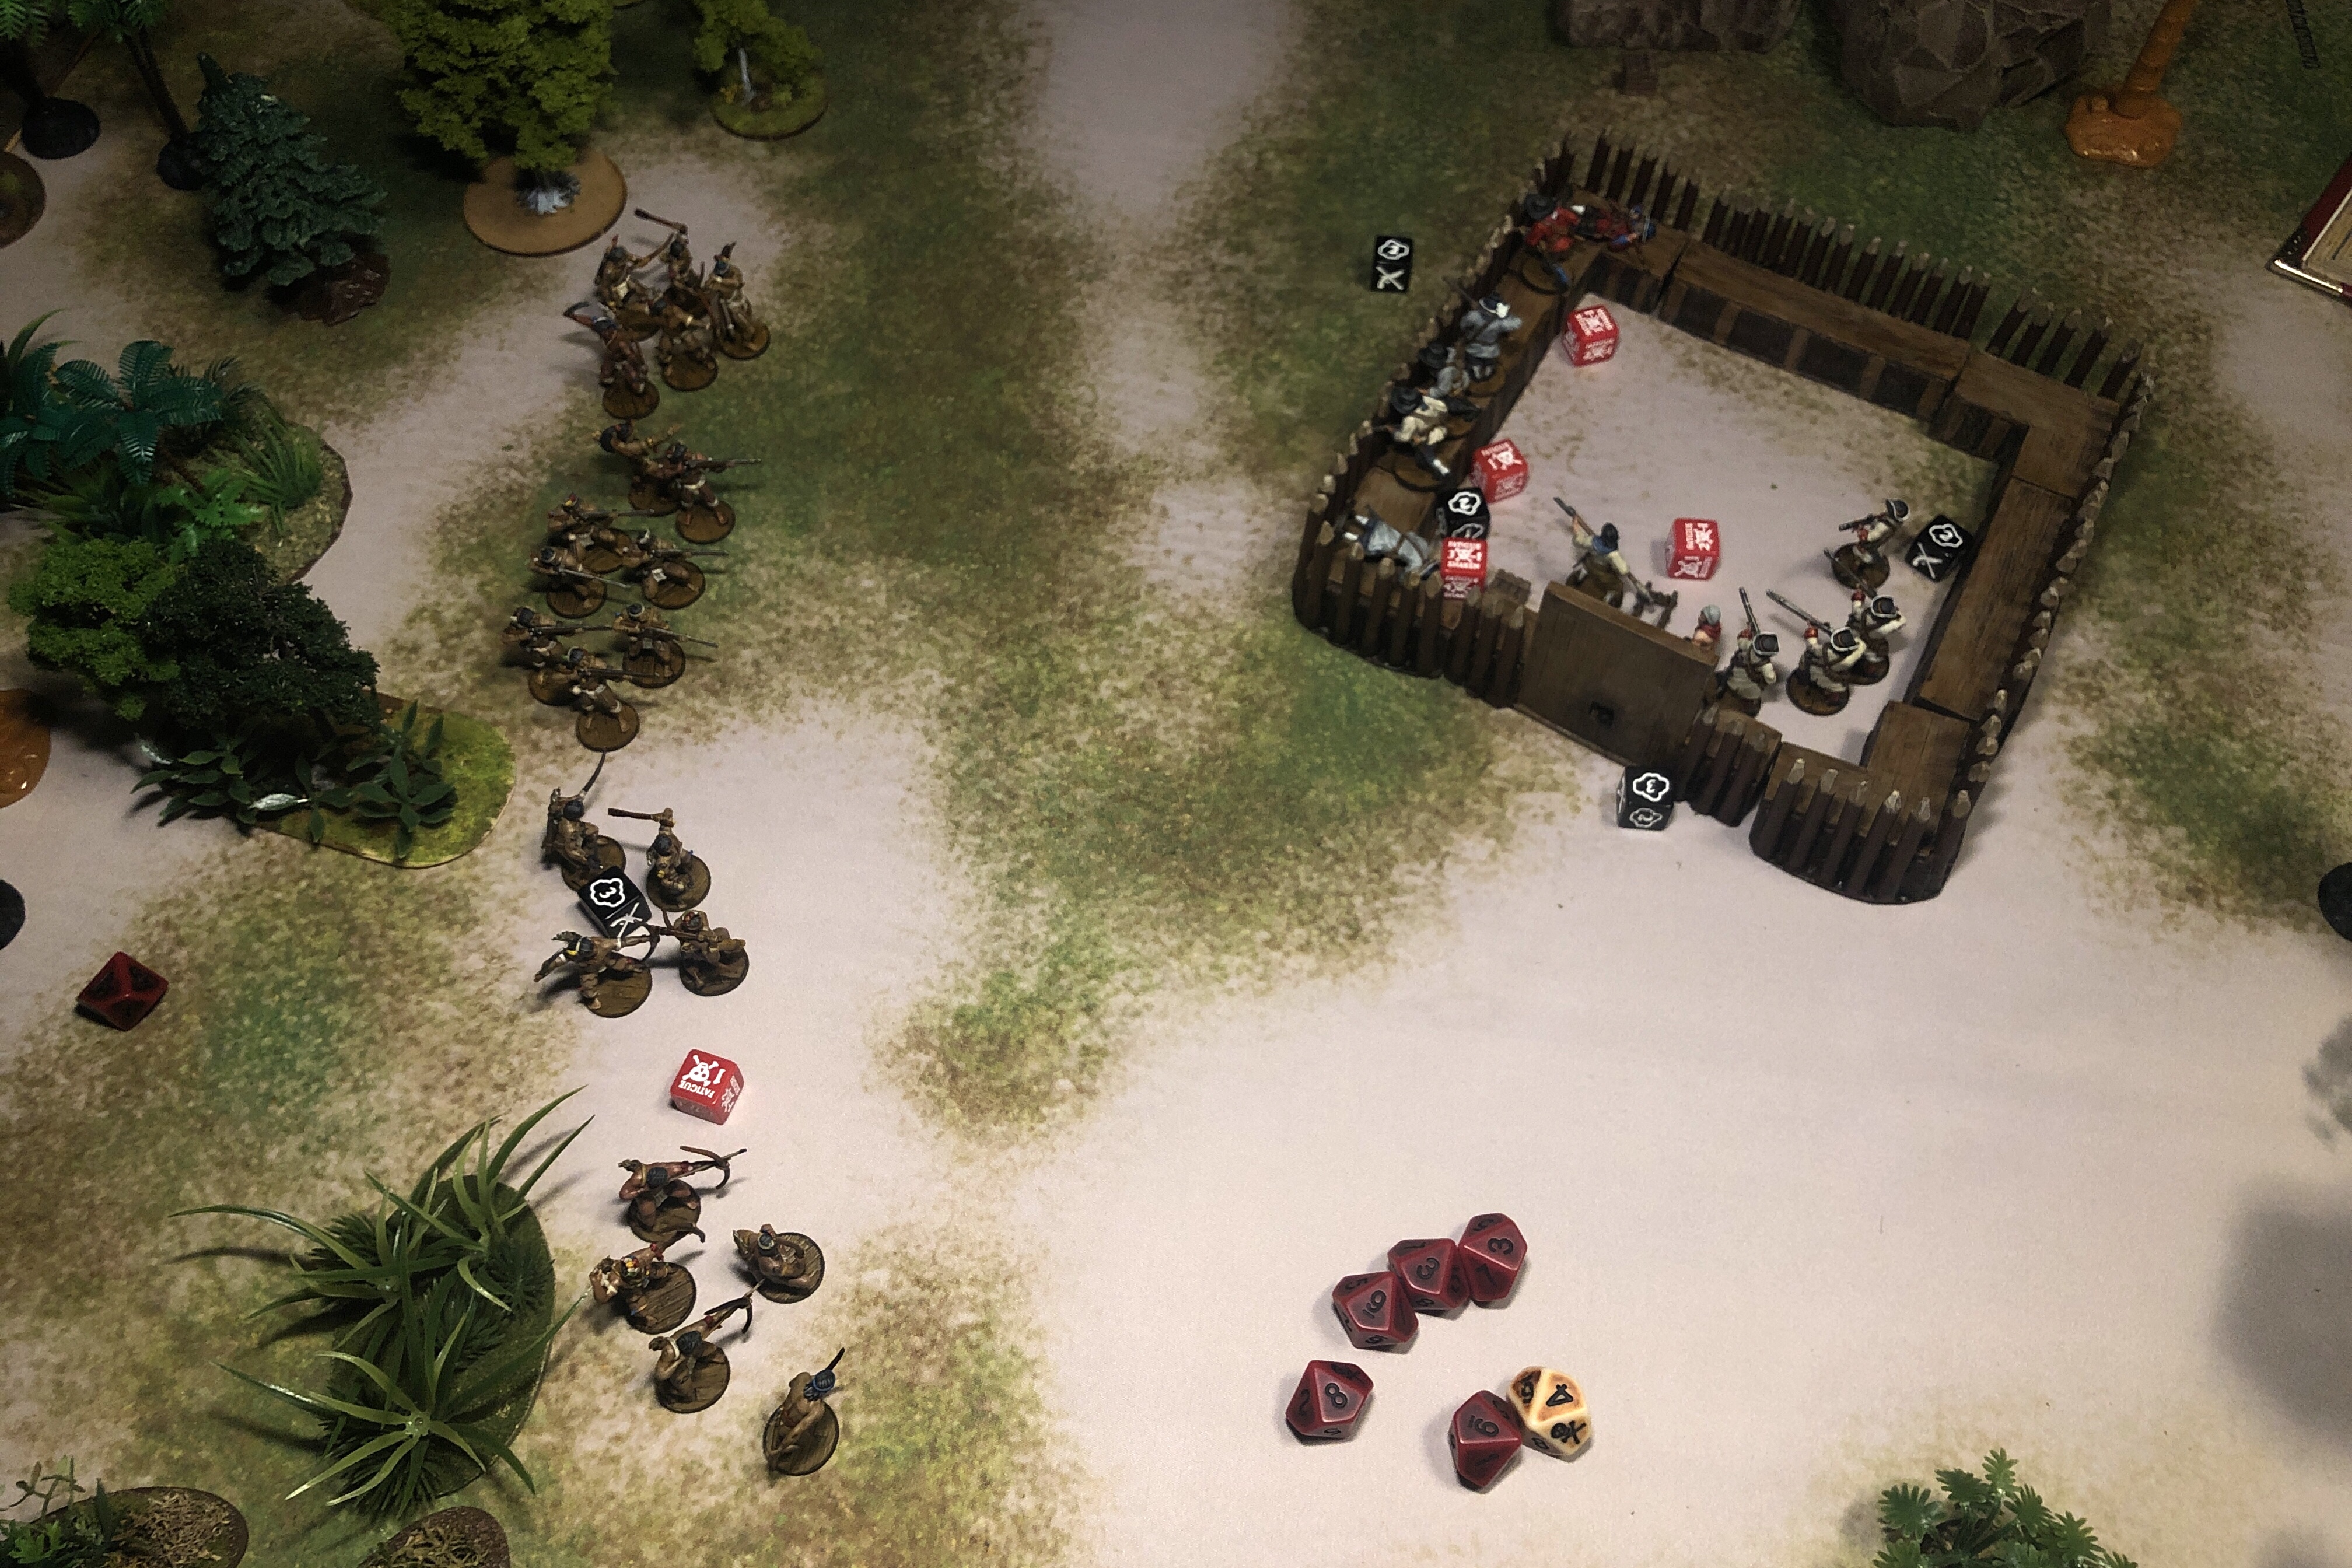
After setting up a basic board, I placed the English fort in a quadrant of the board and cleared all terrain within 8″ of the fort. I then setup the defenders in the fort with the majority of the units on the two sides that would be threatened by the two board edges the Attacker can deploy from.

I placed one objective in the fort itself, then the other behind the fort, further into the English quadrant. Make it hard for the Natives!

The scenario gives the Defender Strike Points if the Attacker takes control of these Objectives and the Attacker starts taking a Strike Point at the end of round 3 if they fail to get within 4″ of at least one objective.
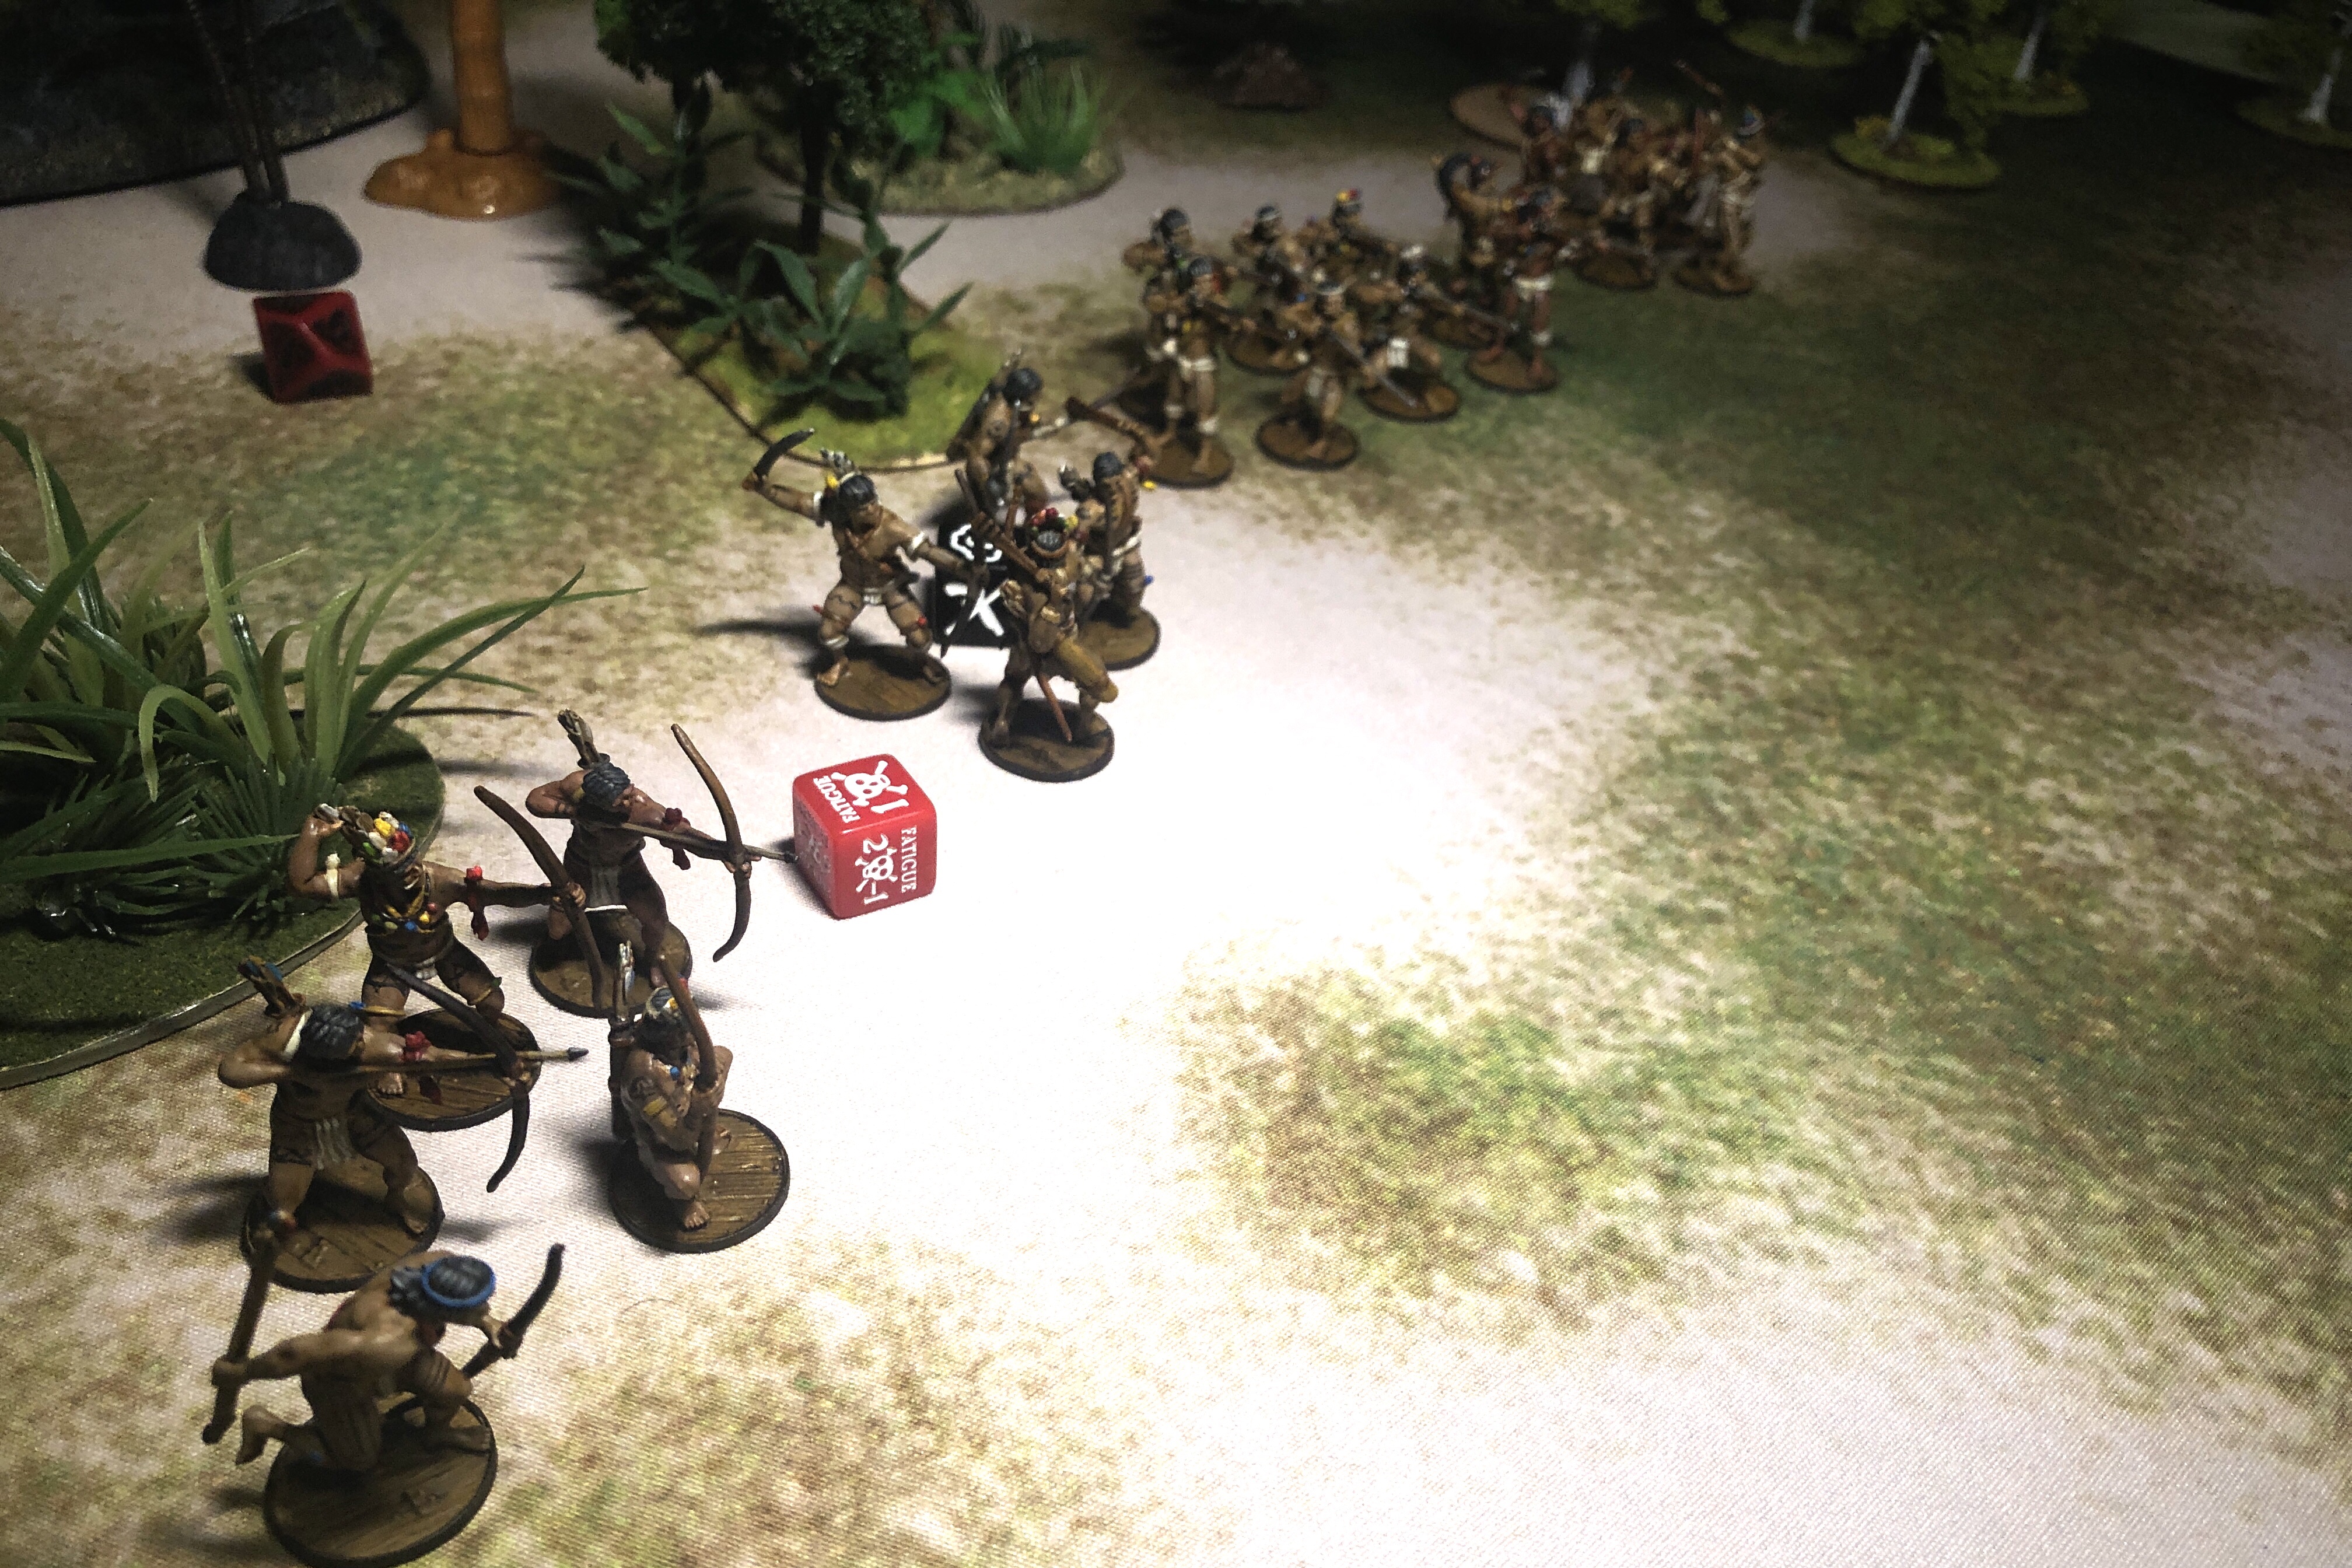
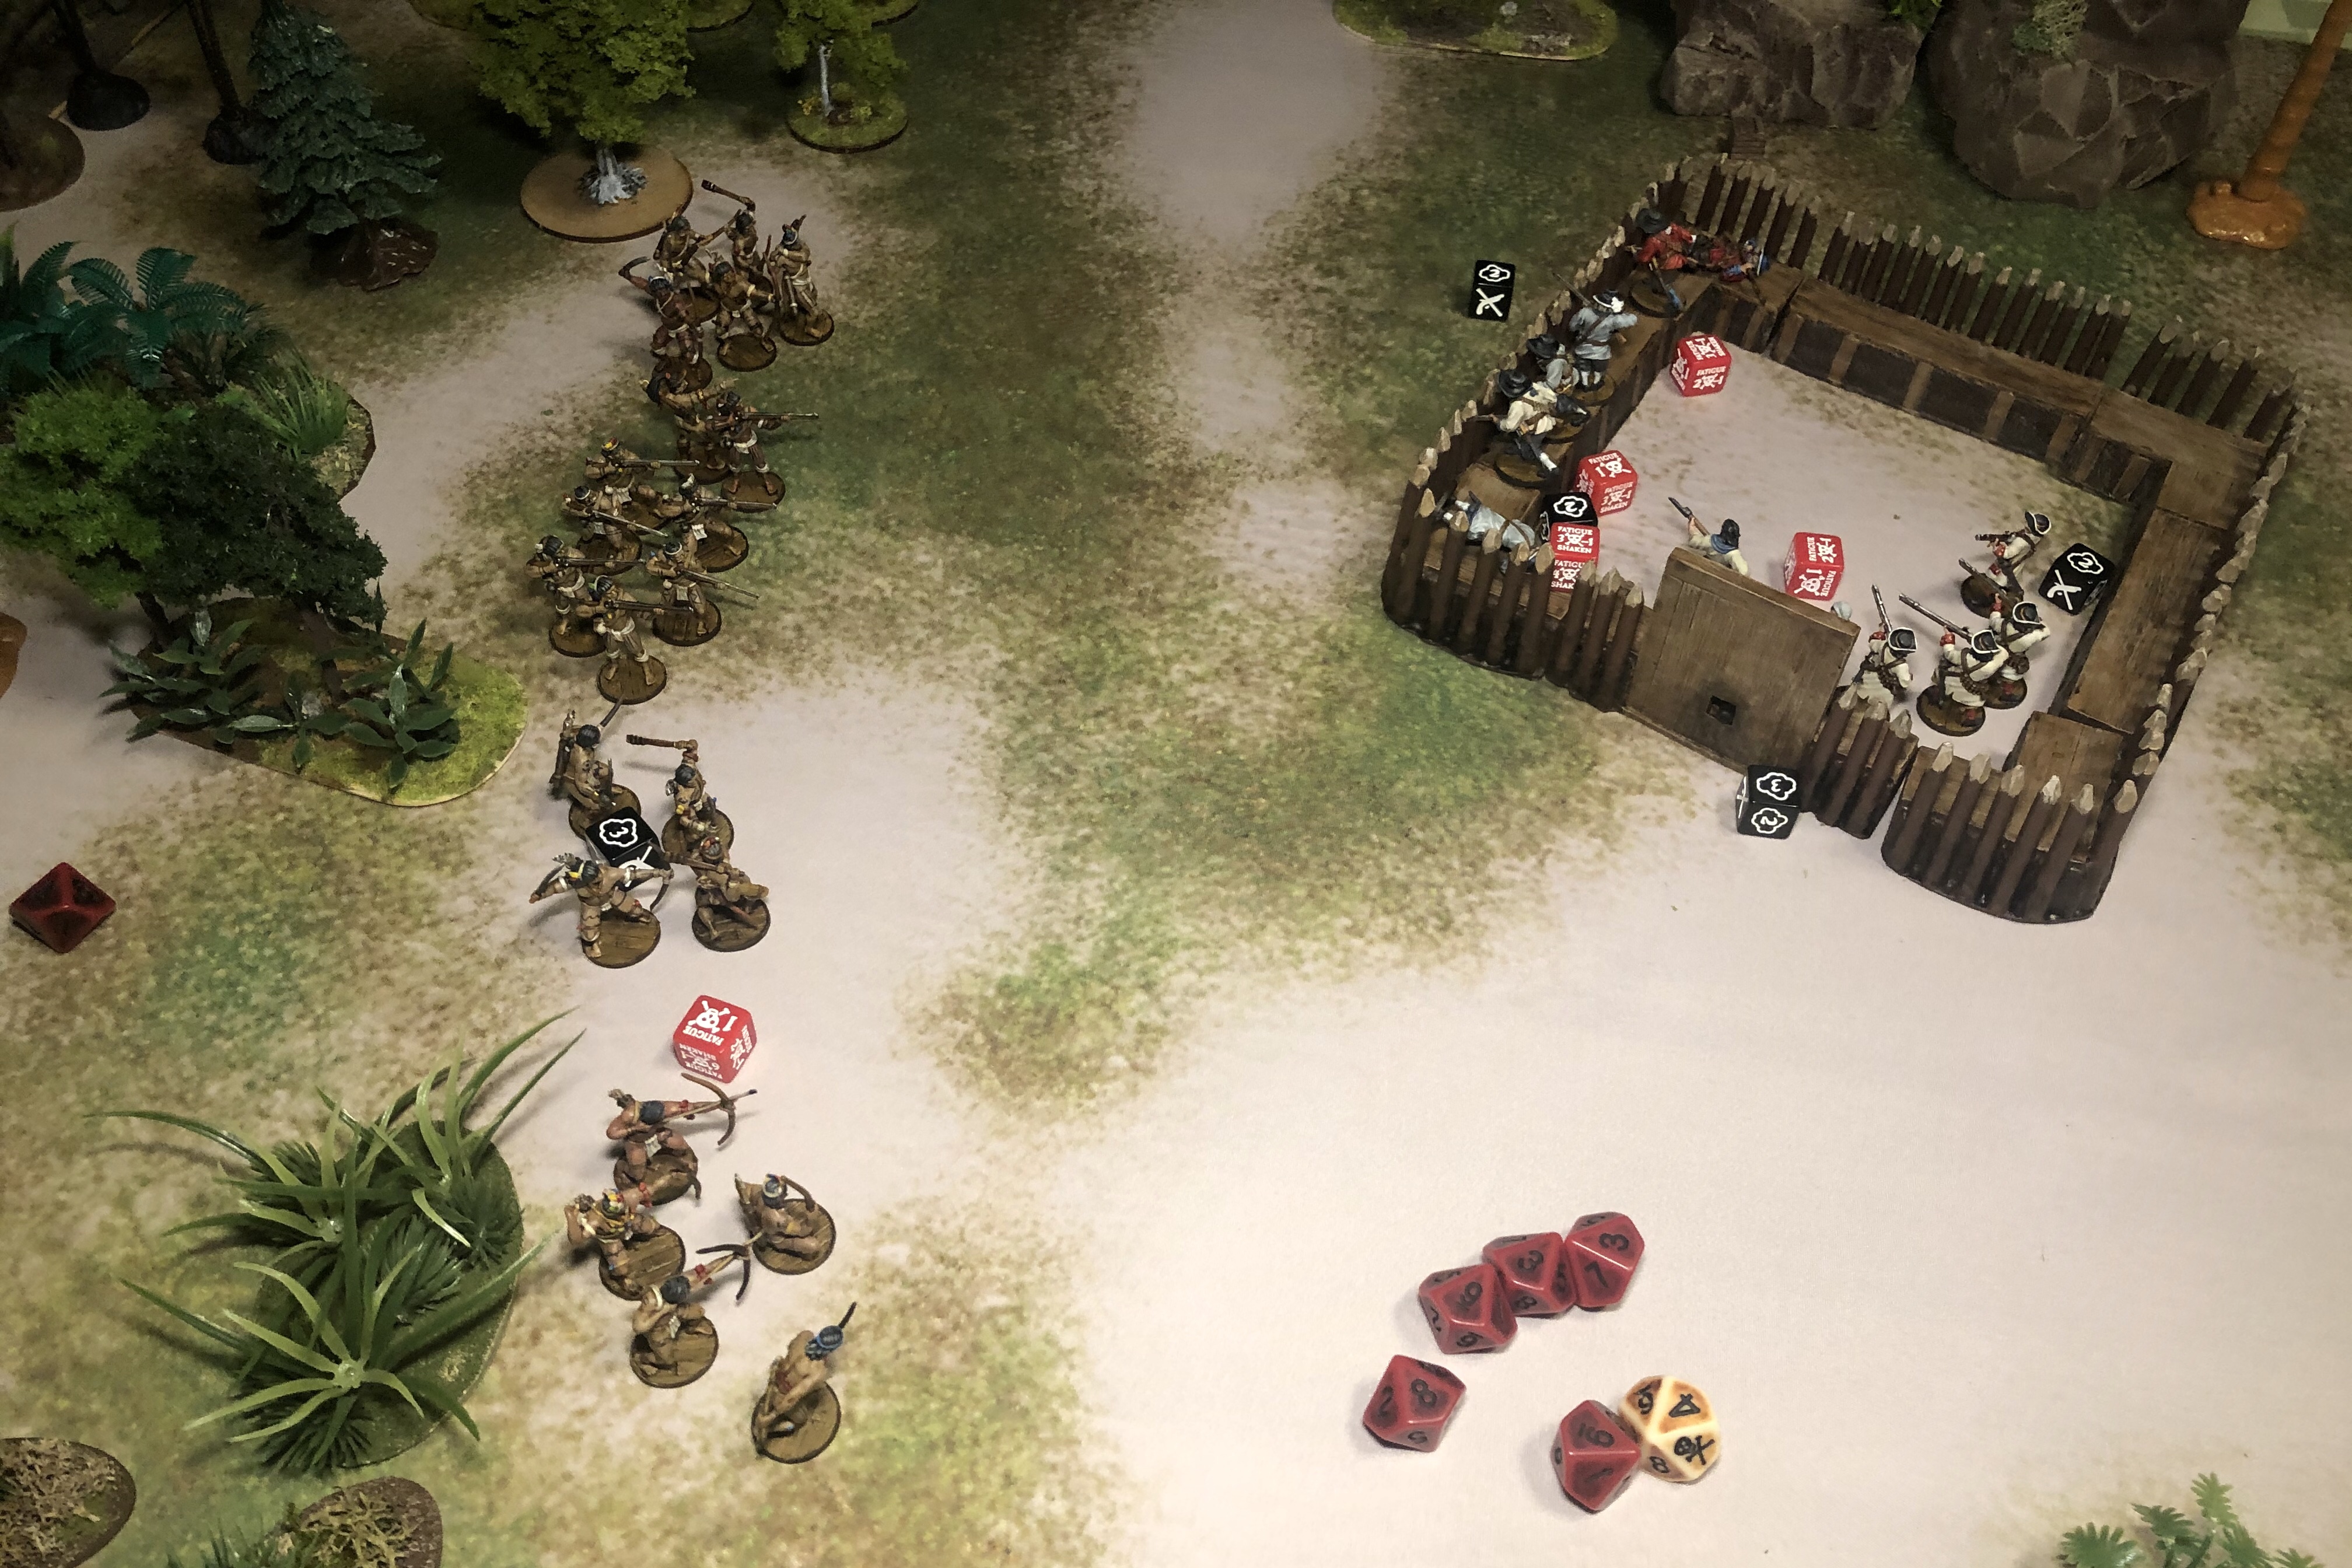
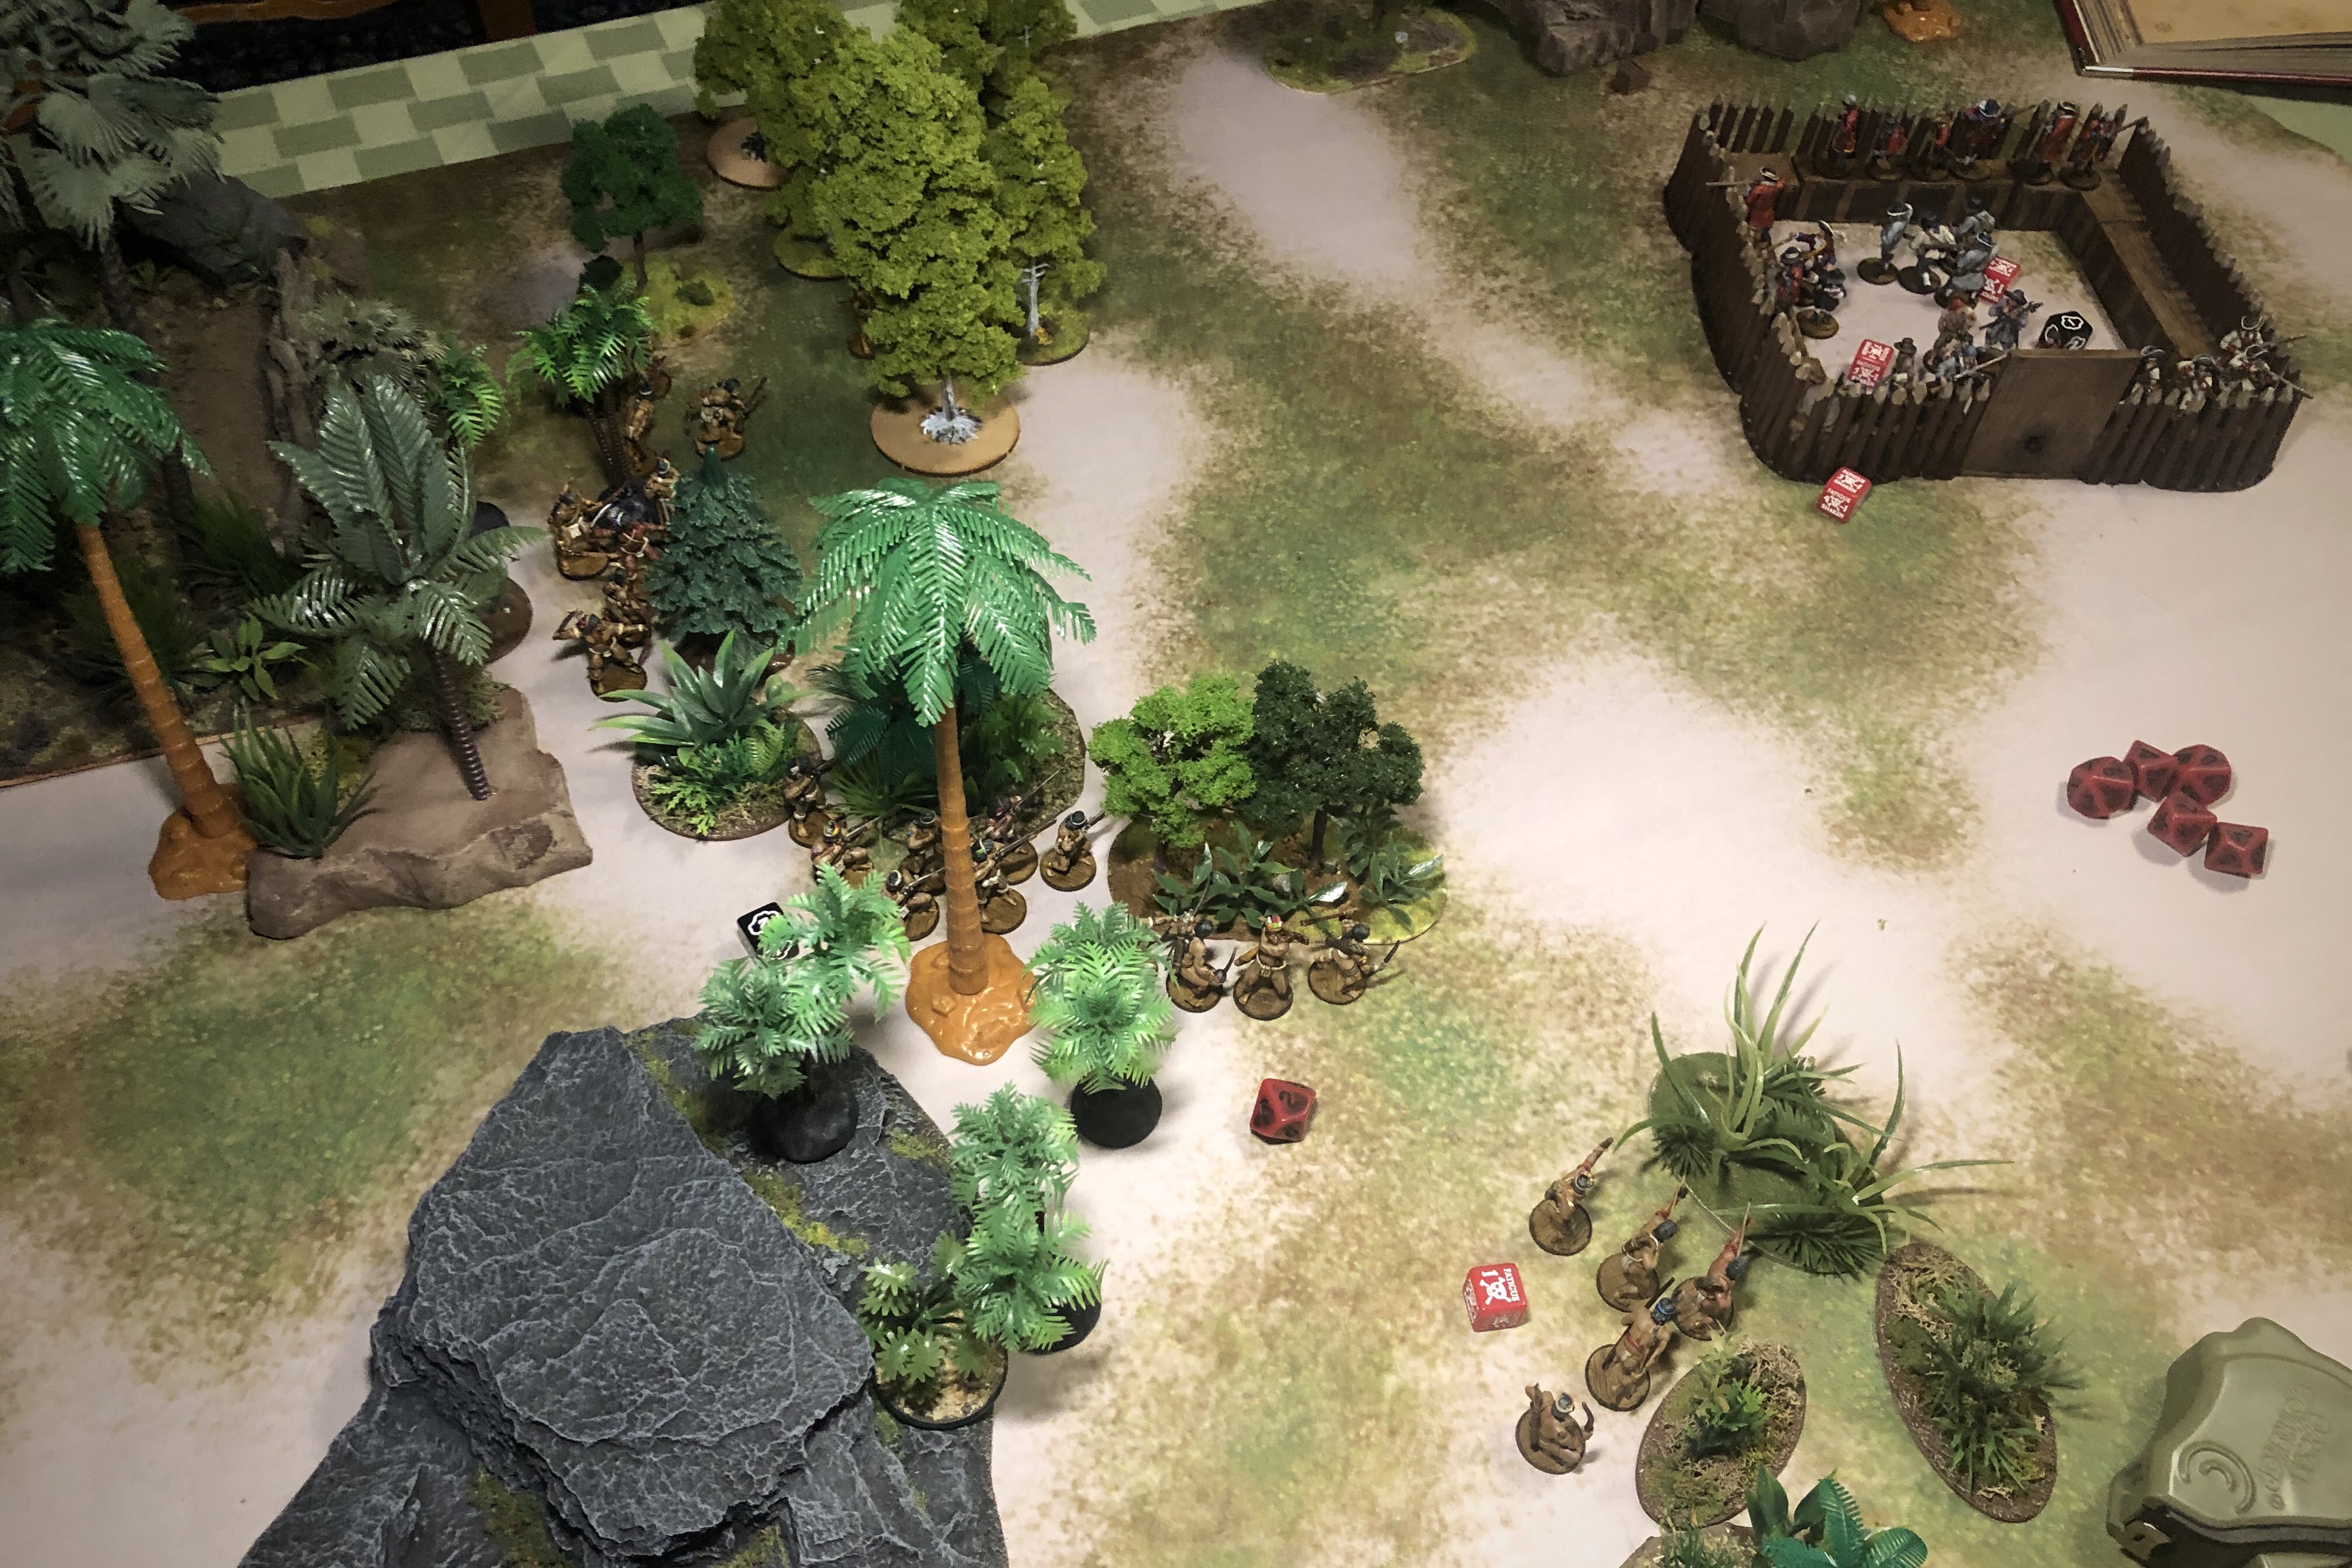
I placed all the Natives on the far small edge of the board. I could have set some up closer to the fort on the long edge of the board and placed up to half of them closer using the Native Lay in Wait ability they gain while attacking, but I wanted to bring the entire force into the fight at the same time and I knew it would be hard getting Fatigue on the English on the first turn anyway so I just kept the Native units close to each other on the small edge.
The Game
The first turn was very boring for the English as the Natives maneuvered into position. No shots were fired as the Natives were able to keep out of line of sight.

I tried to use my command points wisely so I could move each unit about 12″ forward. The Young Warriors got the Spade for their Quick ability and the Warriors didn’t need to advance as quickly since they role in the battle comes a little later.
Lead and arrows started flying on the second turn. I was able to move up my archers and start firing poisoned arrows into the fort. It applied some Fatigue, but the Inspiring English Commander cleaned it all up by the end of the turn.
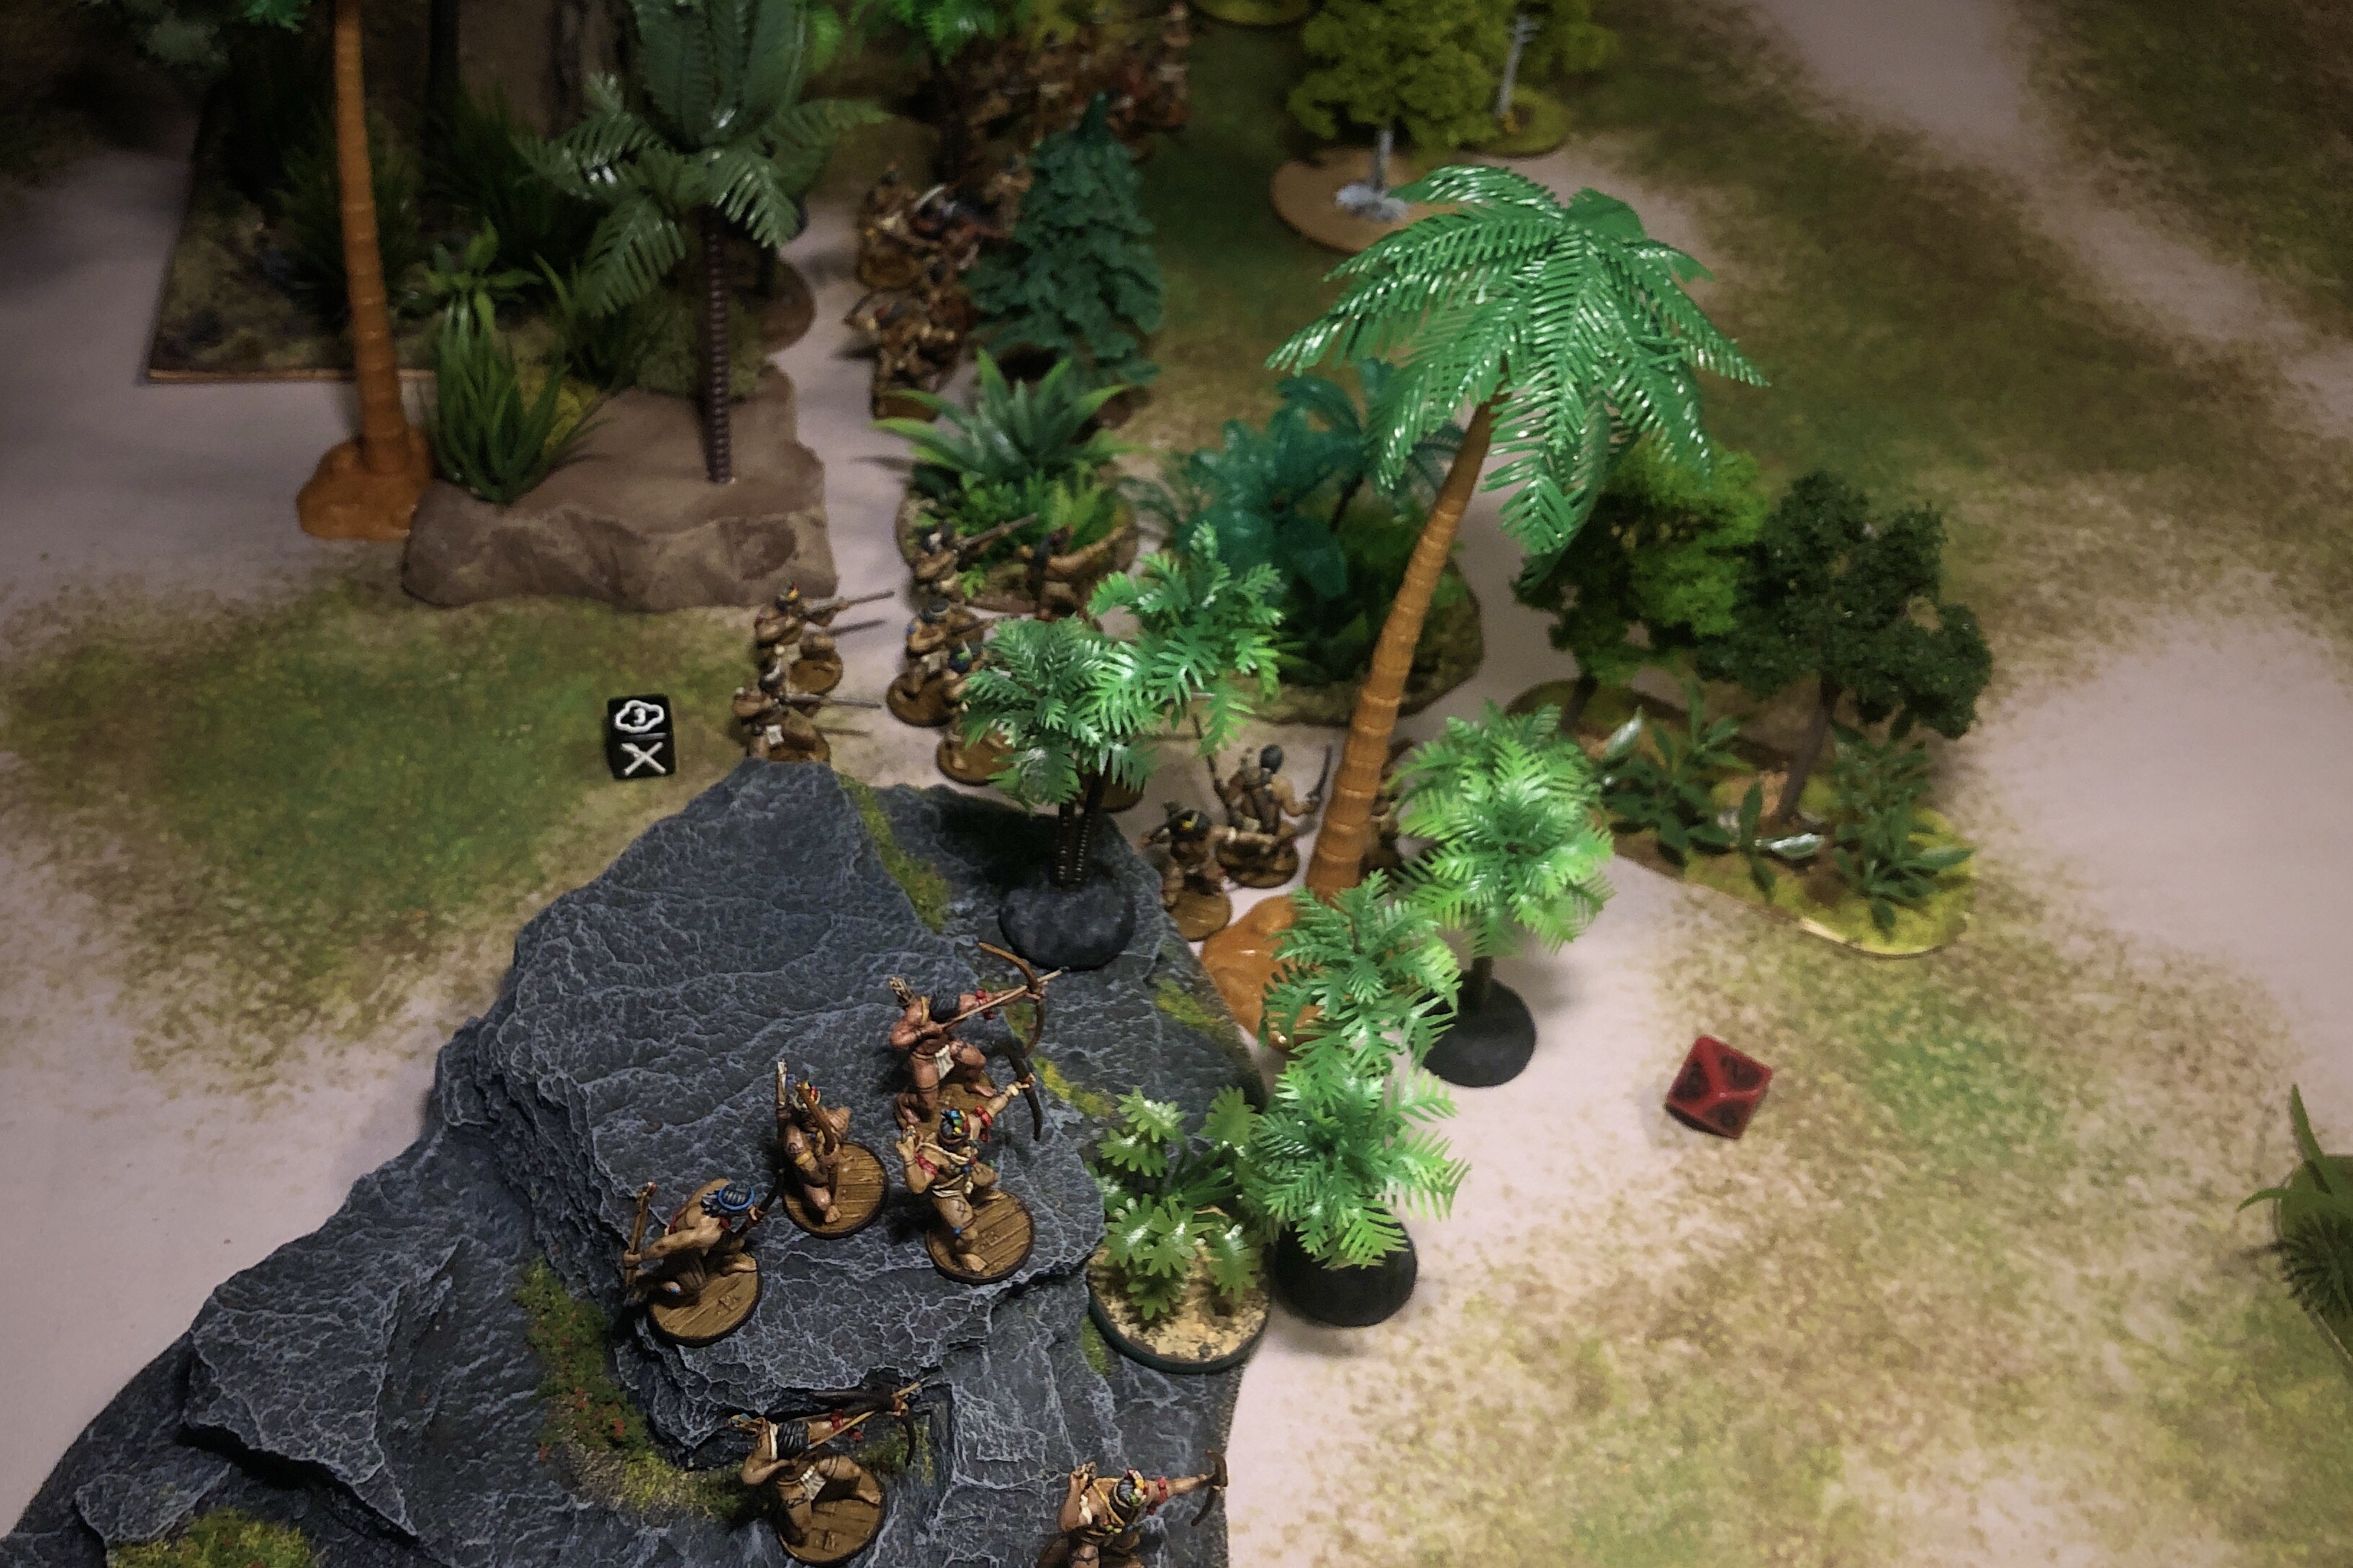
The Natives parked a little more than 12″ away from the fort so they could take advantage of the Hidden special rule. This made it very difficult for the English defenders to even target the Natives. I had to use Drilled shots to get my target number down to a 10. English Militia start at 7, +3 for a range of 12″ and then another +1 for Hidden and that takes away all extended range rules! It felt rather futile but if the Natives can stay there all day, I felt the English needed to return fire in some capacity.

I targeted the command unit with the Natives arrows and they ended up taking a couple models out on the second turn.

Things started heating up on turn 3 and by the end of the turn, the English were really hurting. The command unit was prone with 3 Fatigue, the second unit of Militia had lost 3 men and had retreated from the parapet with 3 Fatigue and the Freebooters were prone with 3 Fatigue as well!
At this point the English had lost 6 models and used 2 of their 4 Fortune Points.
And the Natives had only lost 2 models!
The Warrior Archers were firing at a minimum for twice per turn and the Fatigue really built up on turn 3!

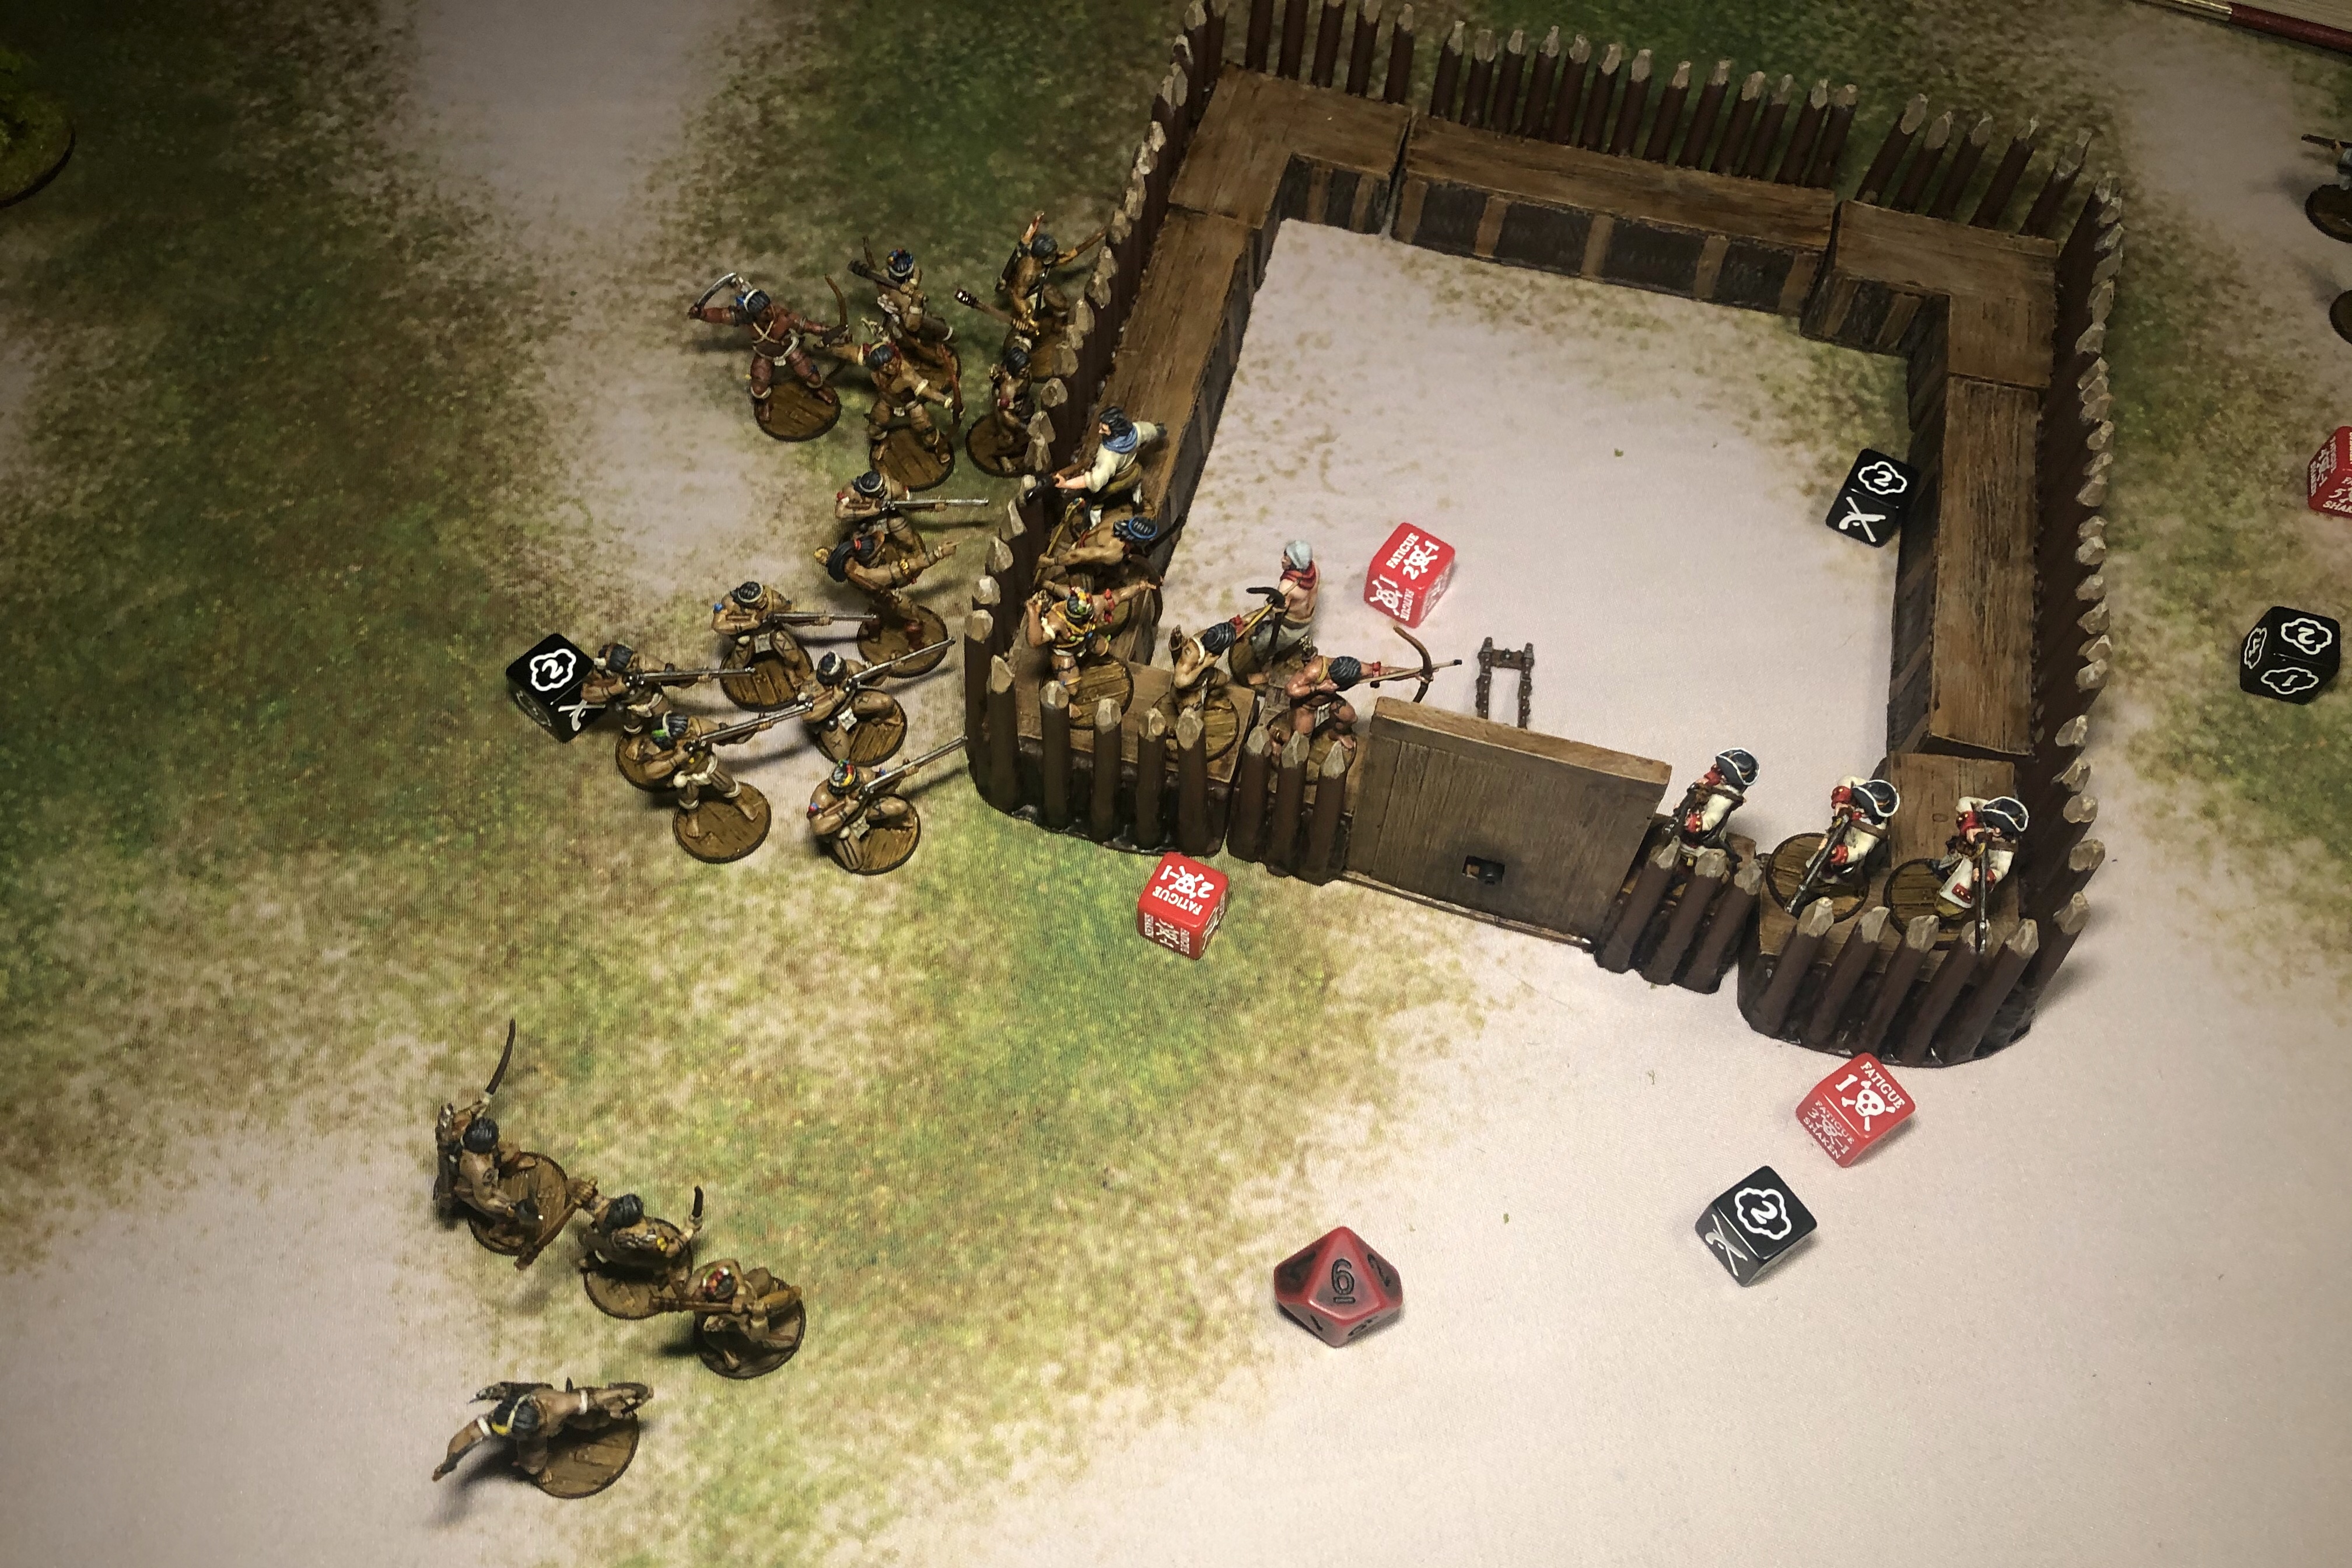
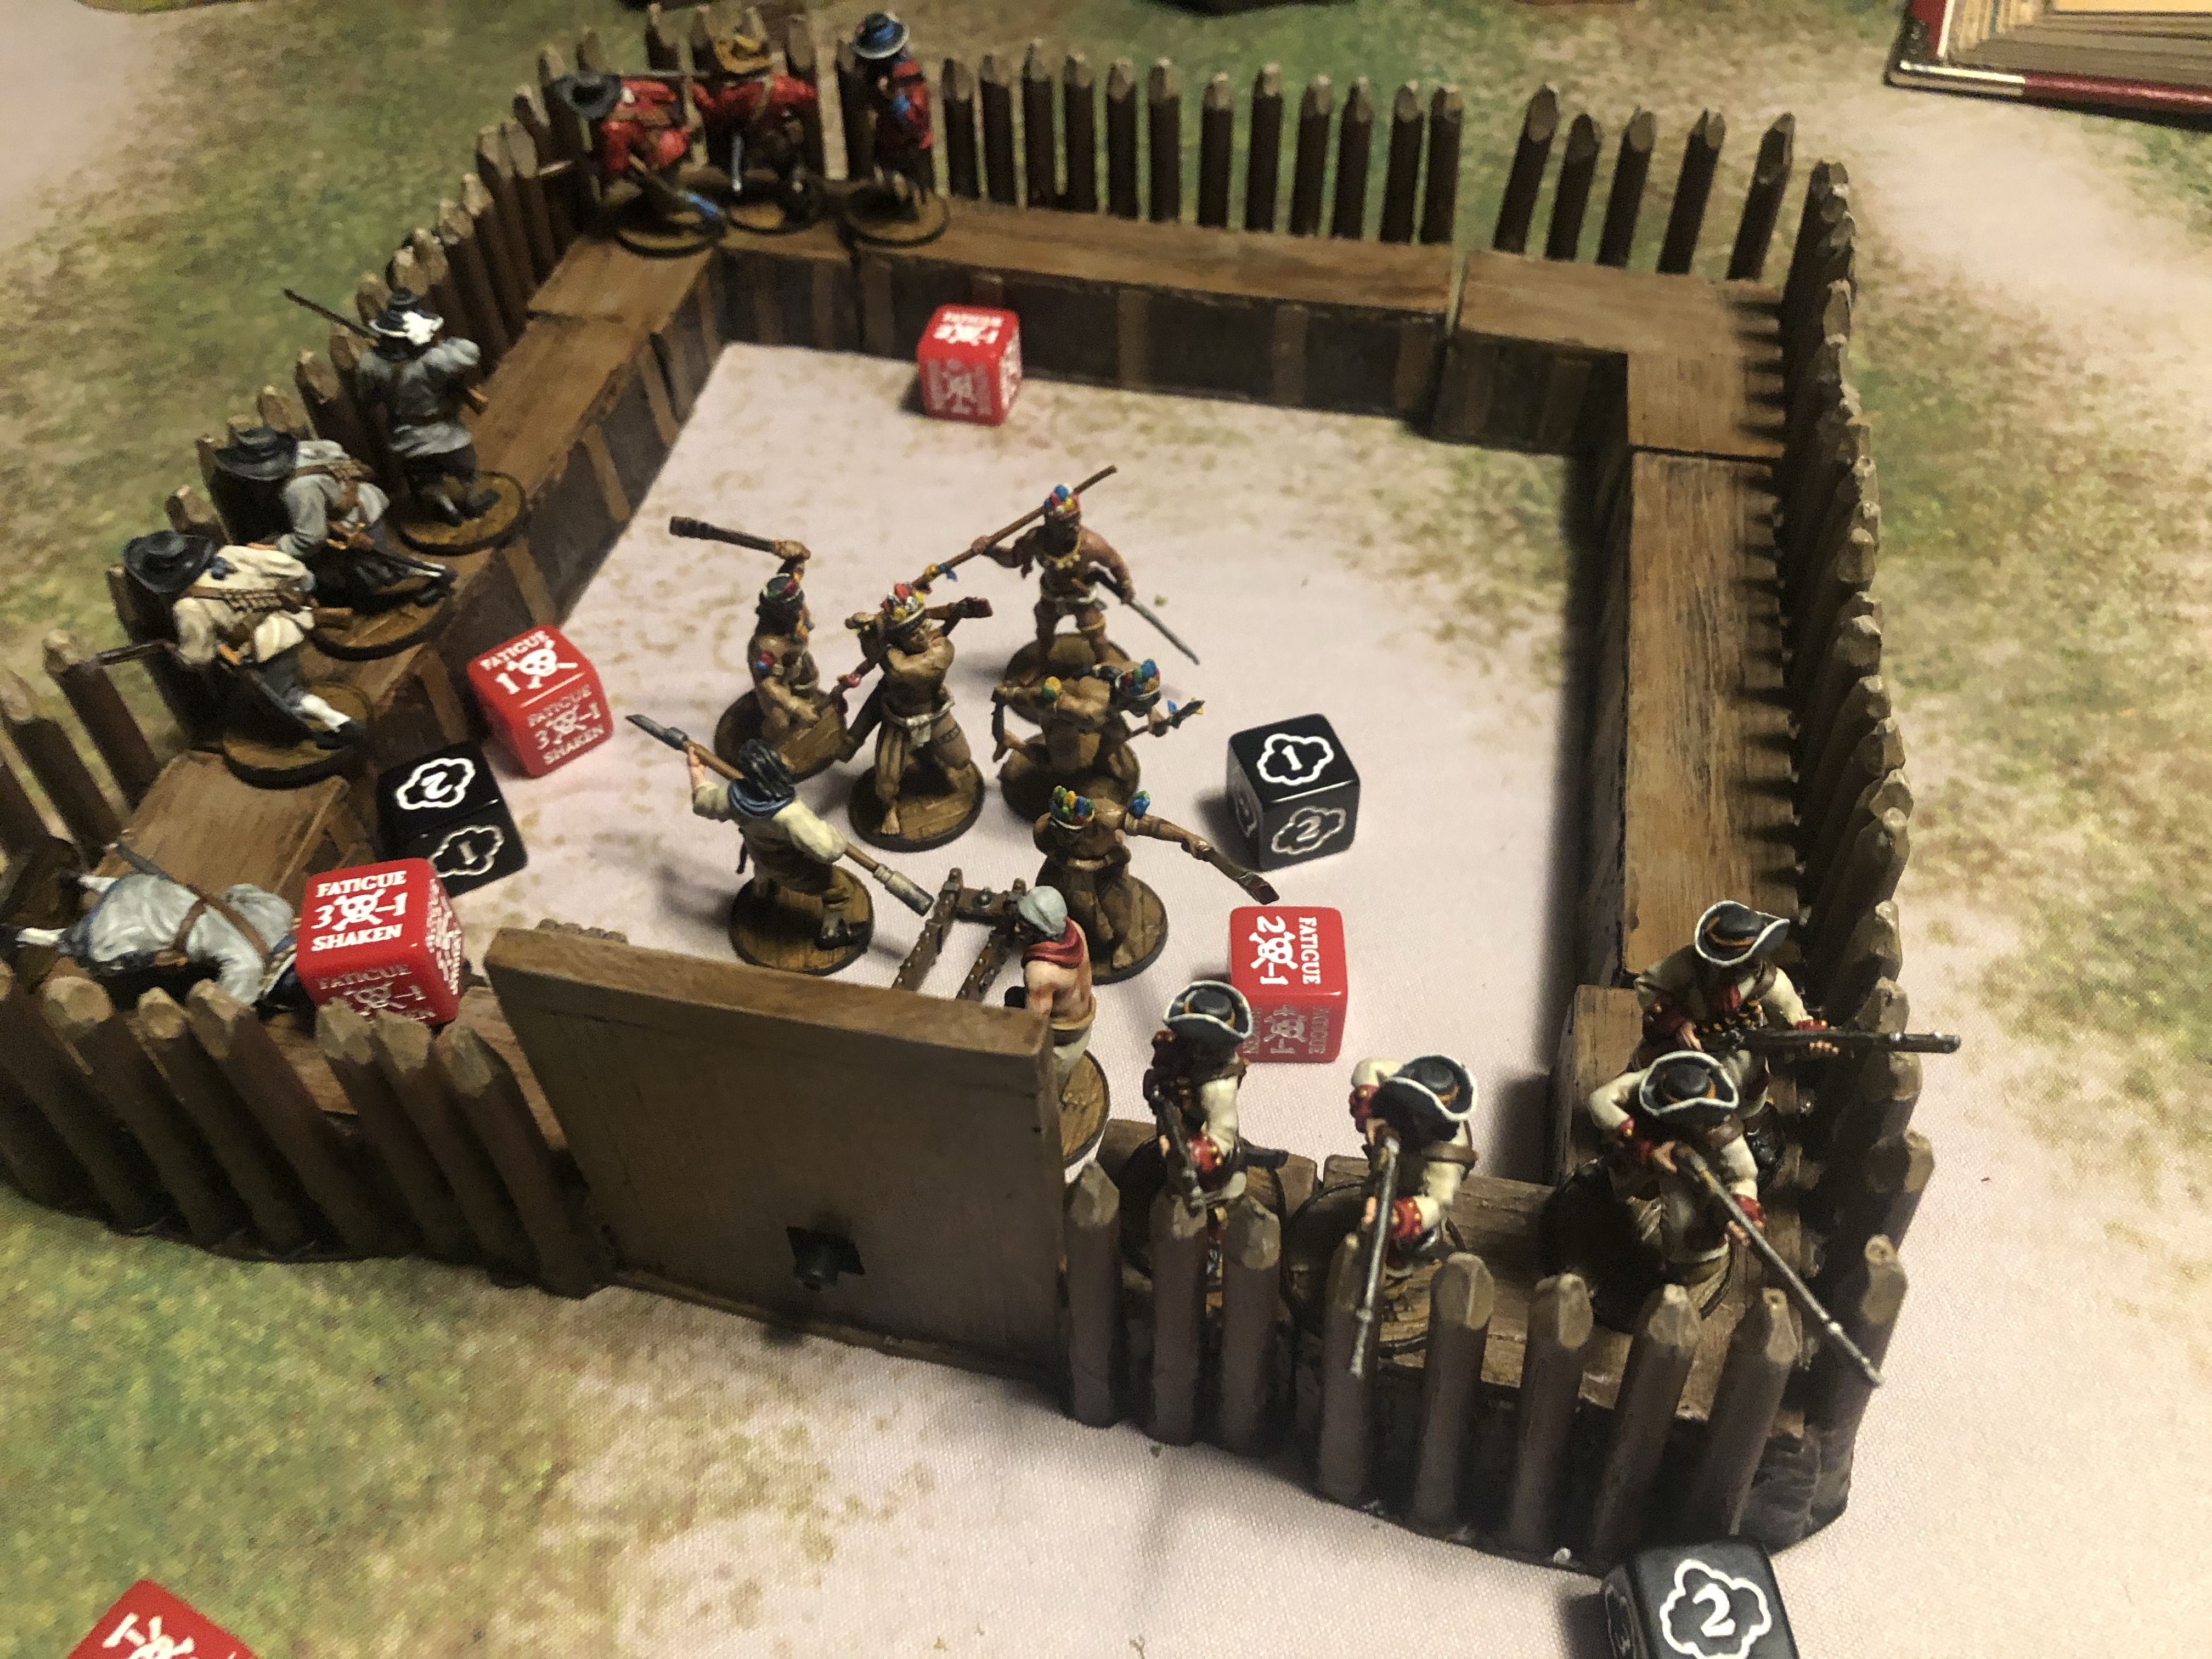
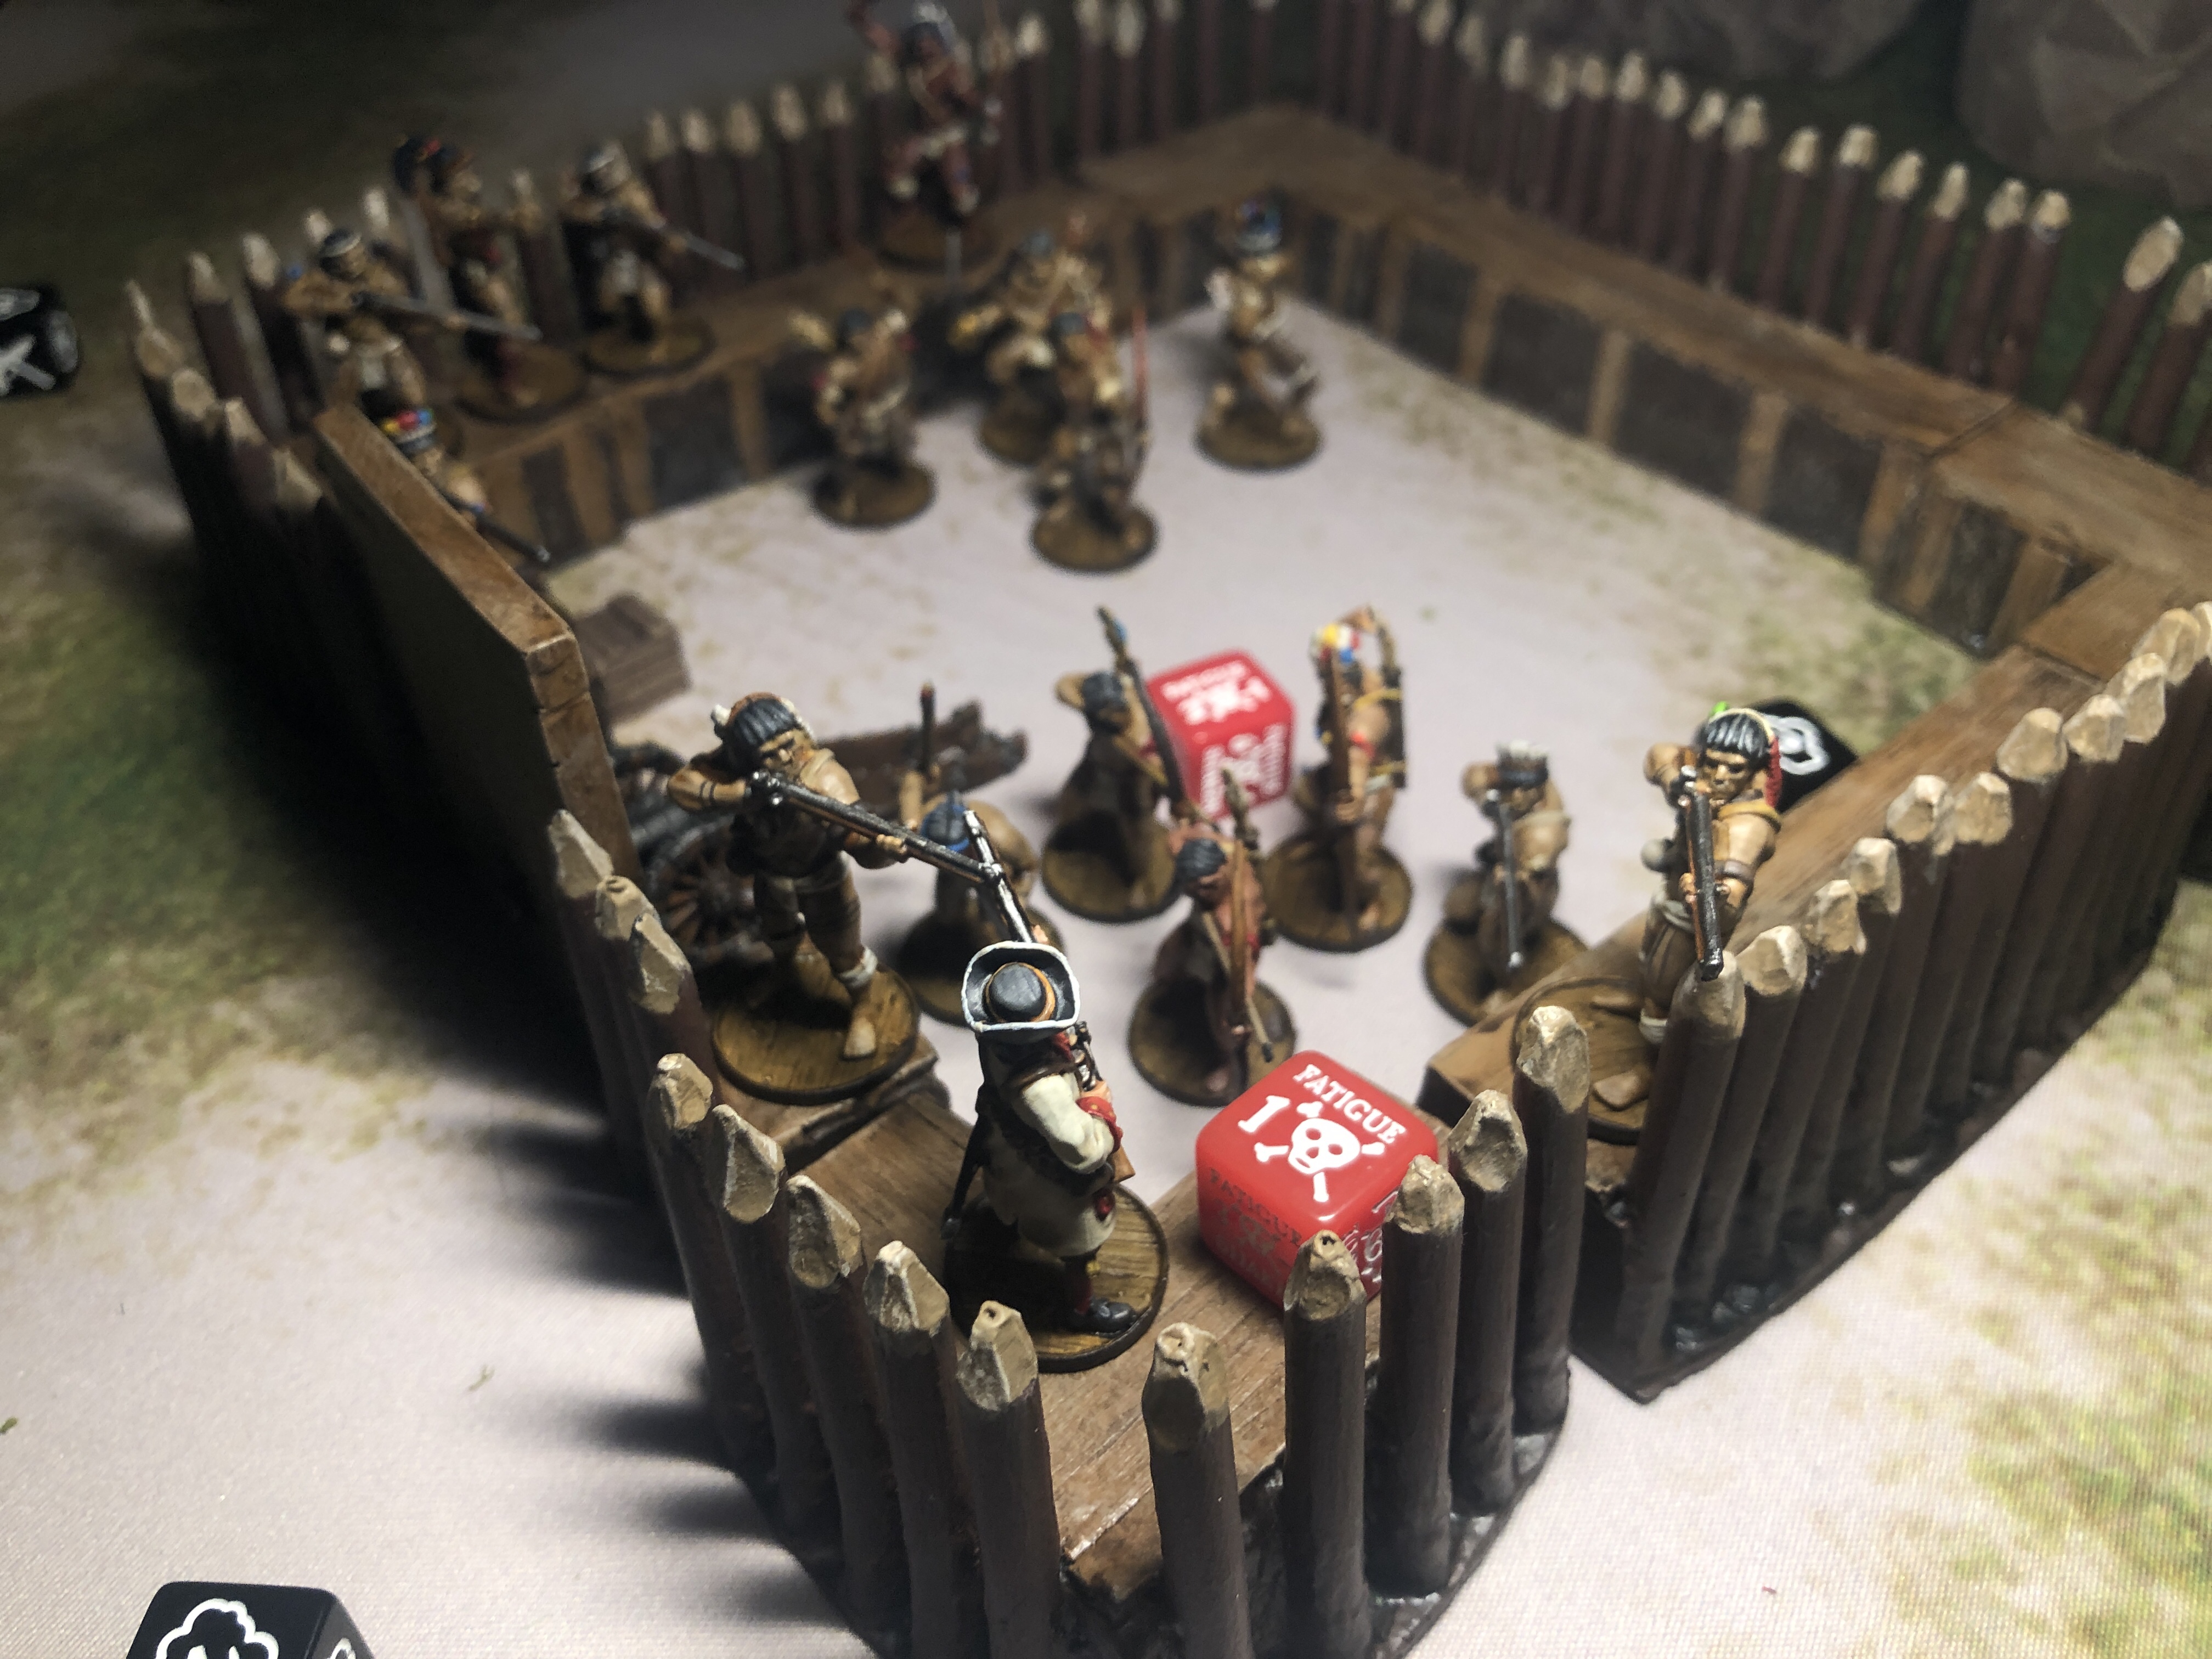
This is the point in the battle where the Warriors get to rush in a clean things up! But this fort made it much harder for them! I rushed them forward into contact with the wall at the end of turn 3, just hoping for the high card at the start of turn 4.
I used a Fortune to draw a new Native hand and they got a Spade but it wasn’t enough! The English activated first. They had a lot of Fatigue slowing them down, but the commander was able to get some of his men to fire a point blank volley into the Warriors. It took out a couple models but they miraculously didn’t take Fatigue from the losses, even with their Sound of Thunder rule. The Officer used his command point to accomplish the Dedicated Climbing Charger over the parapet
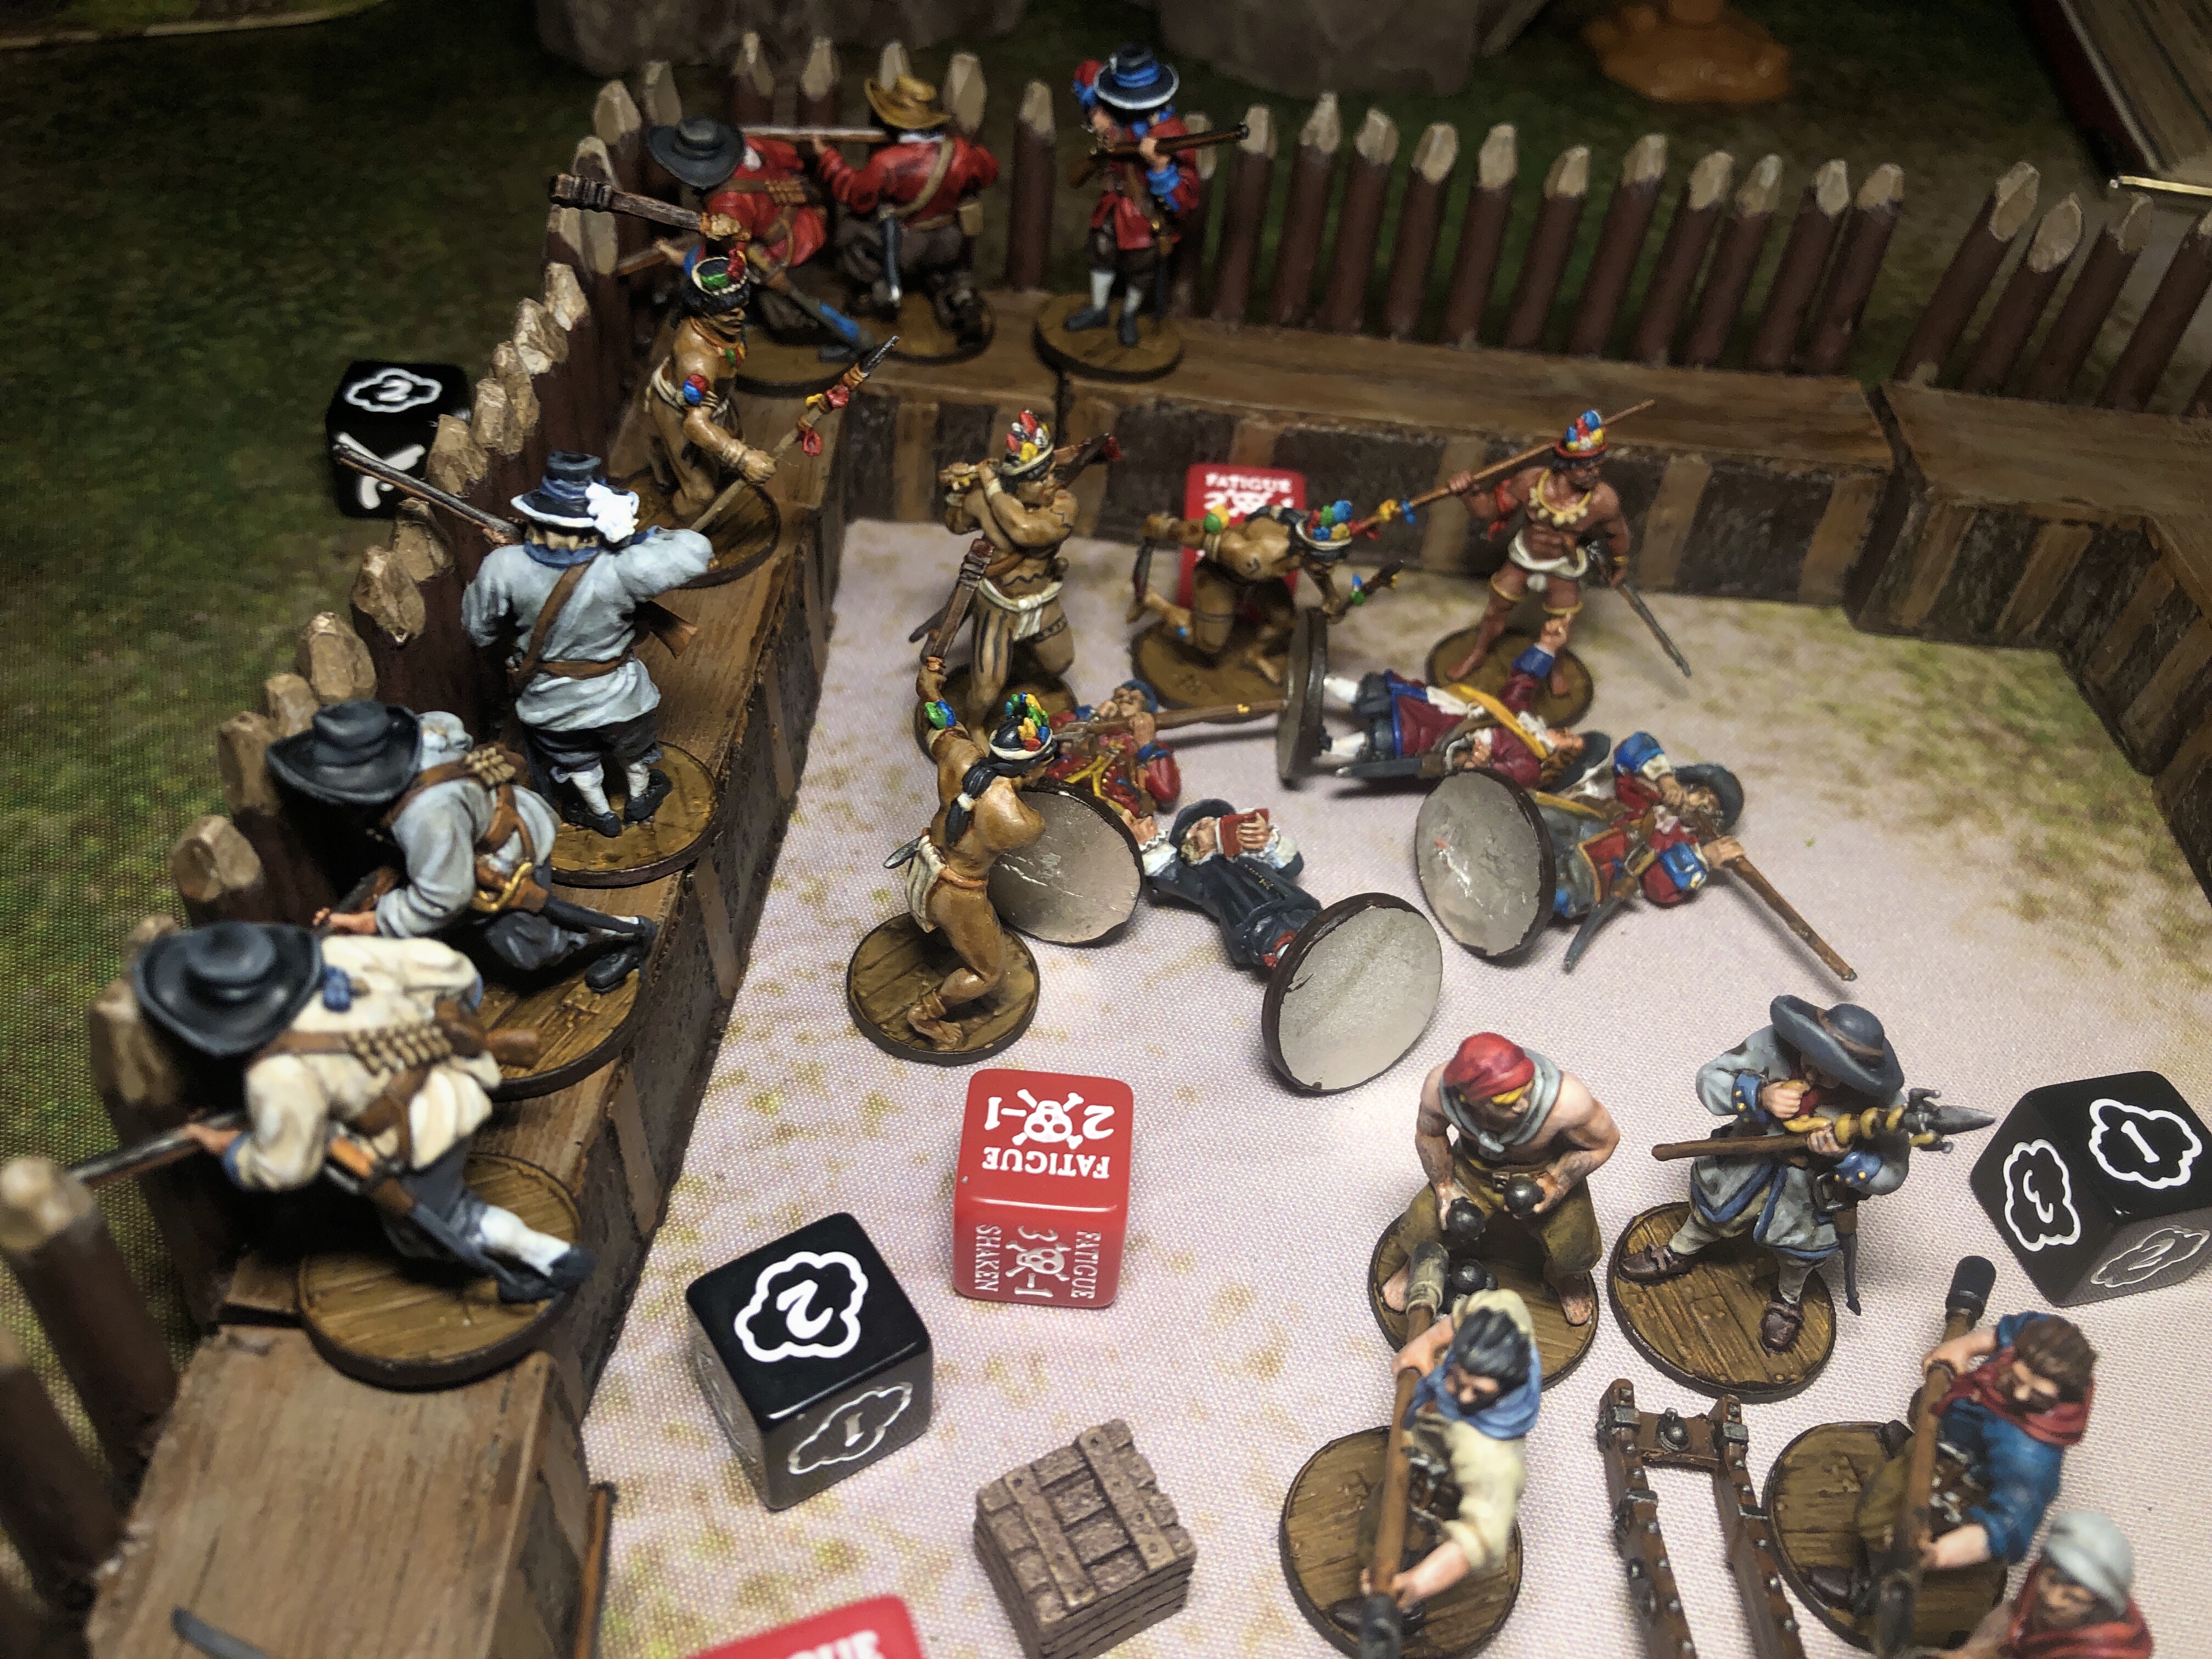
Bad news for the English commander. The English took a -1 bonus to their melee Saves since the Warriors were climbing but it wasn’t enough. The Warriors destroyed the command group then boldly took another Charge action into the cannon crew! (I may have misplayed a little here since the units on either side of the English Command unit may have become engaged with the Warriors, but neither had the ability to fire a defensive volley.)

The English cannon crew lost 2 men but they didn’t waver, leaving those two units engaged in the center of the fort.
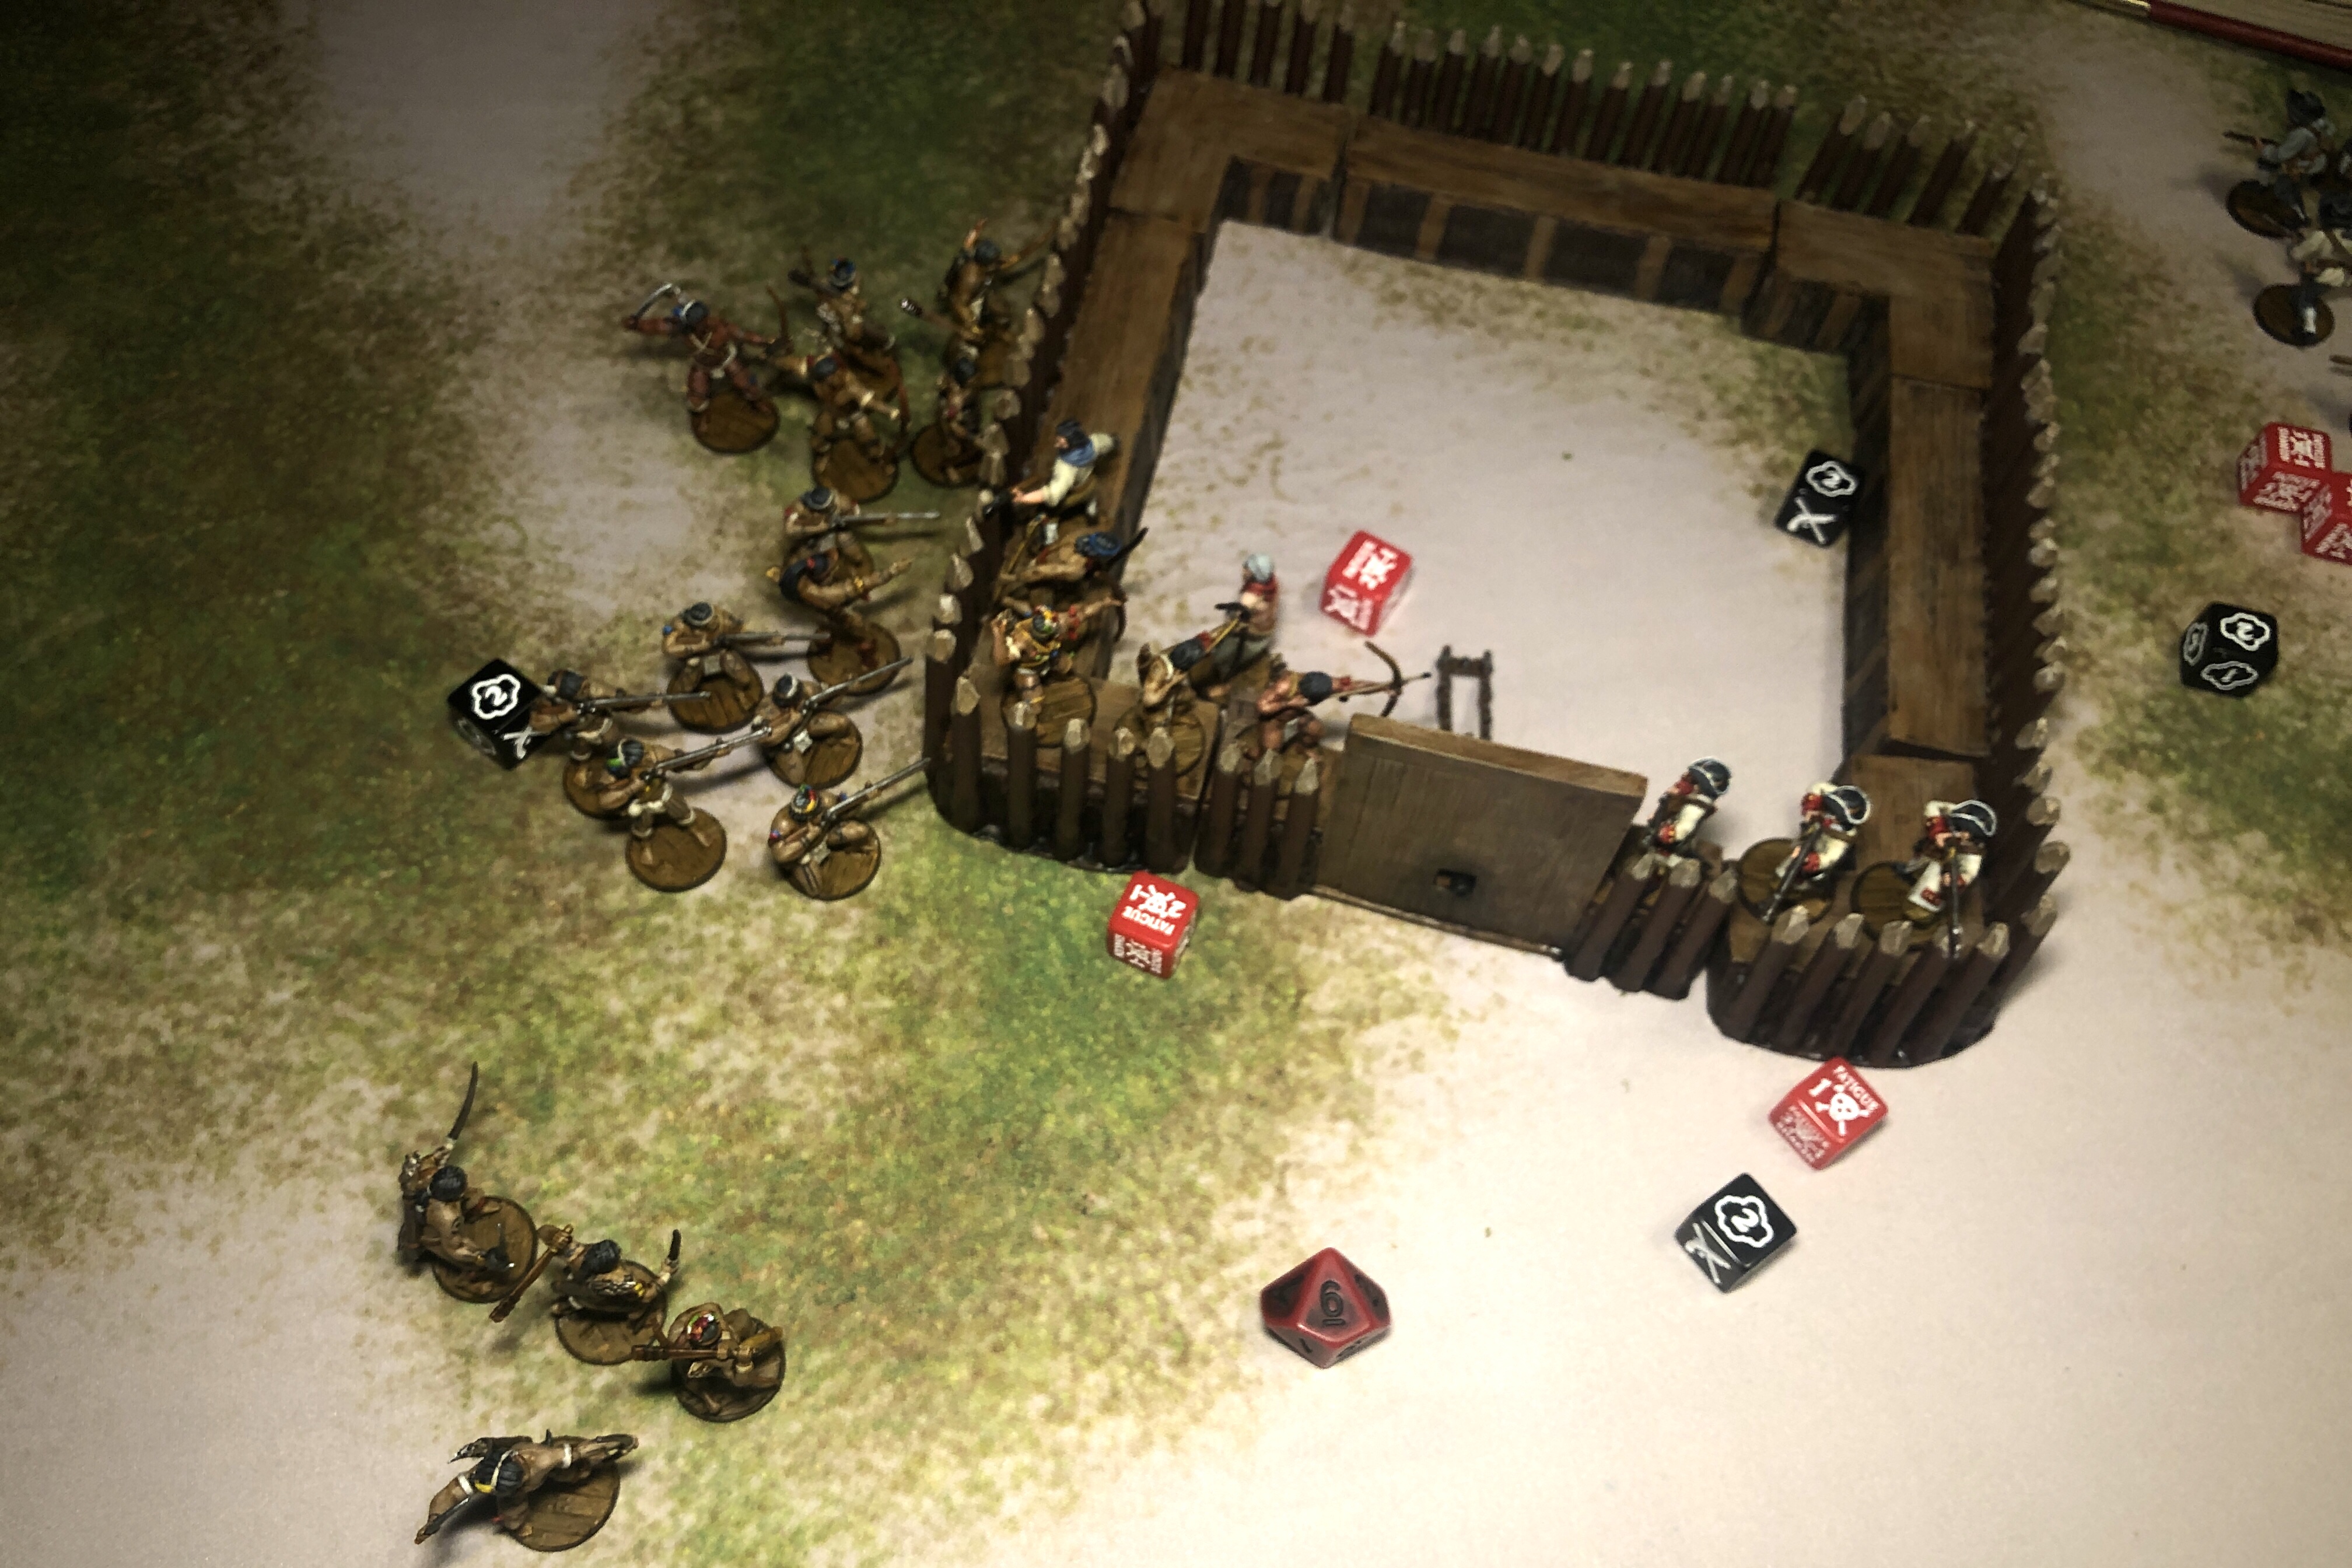
The English Musketeers promptly counter-charged and destroyed the bold warriors.
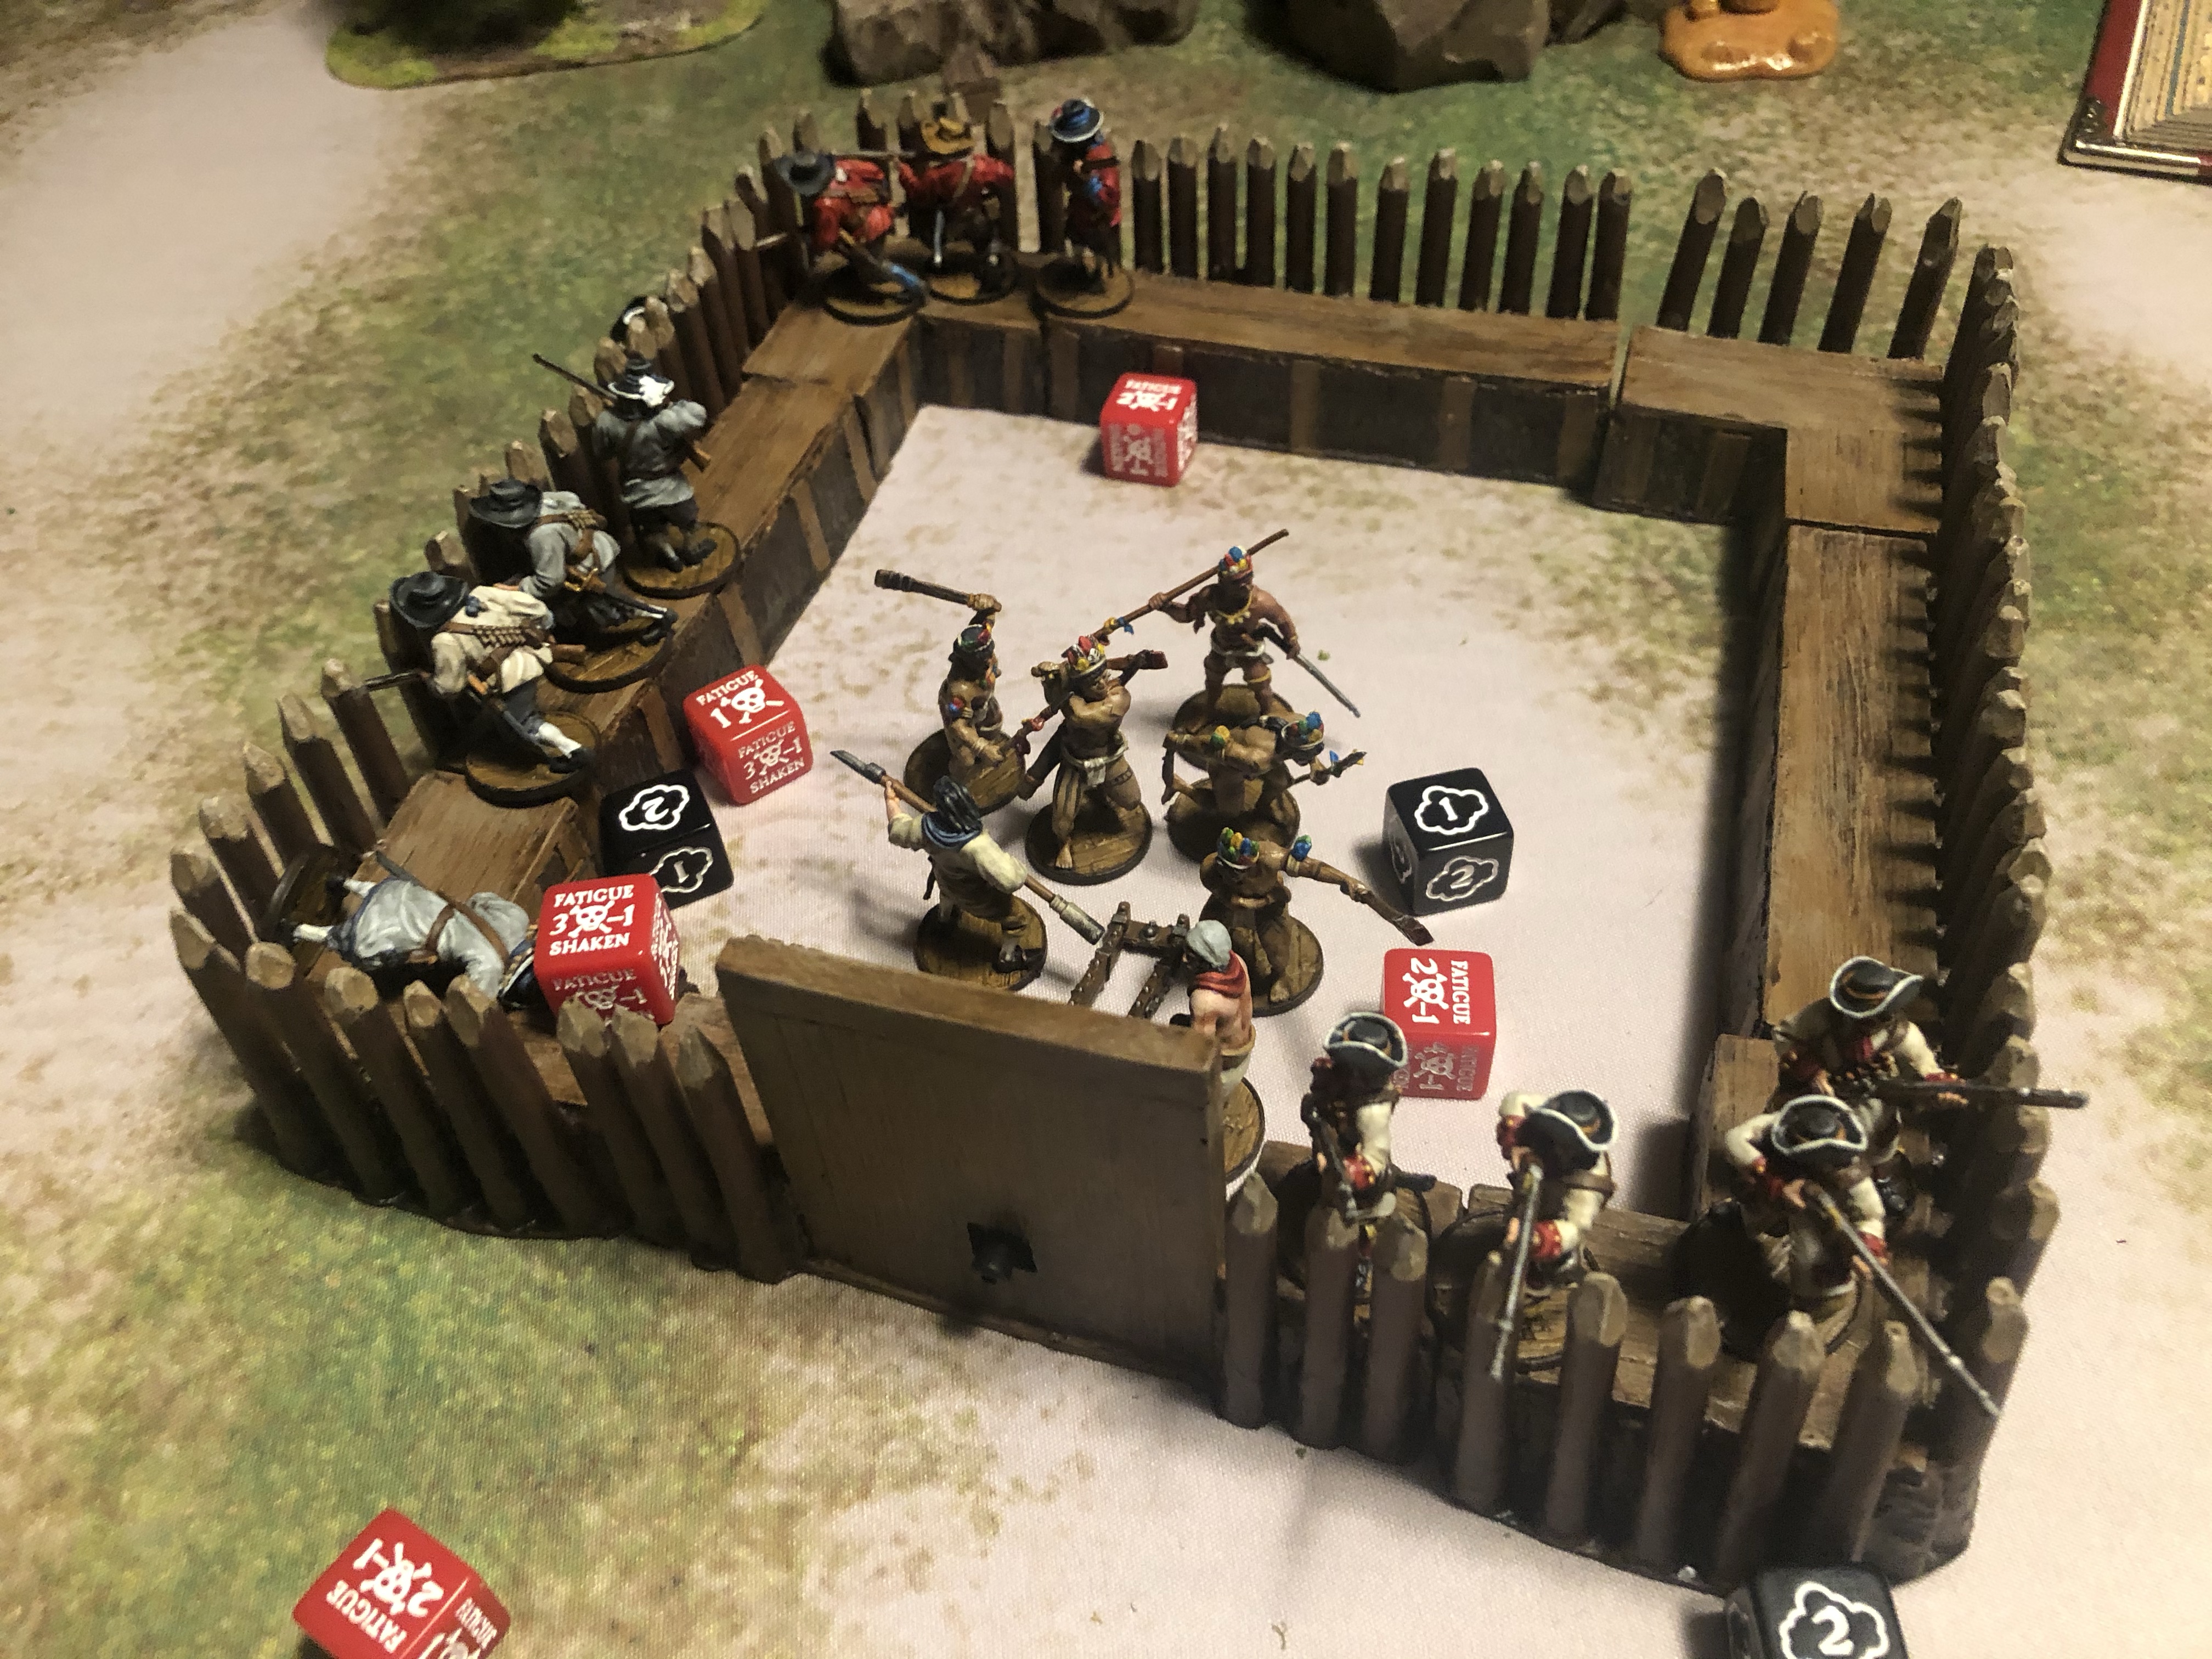
The English retained control of the fort but without a commander, reduced numbers and an abundance of reload and Fatigue markers, the rest of the Natives broke from cover and boldly advanced while still firing their poisoned arrows.
Even with the Natives in the open, there wasn’t any way the rest of the English could shoot fast enough to drive back the advancing Natives.
By the end of turn 4 the English had 2 Strike Points from casualties but the Natives also had a Strike Point for not having units close to any objective markers. No Strike Test was necessary.
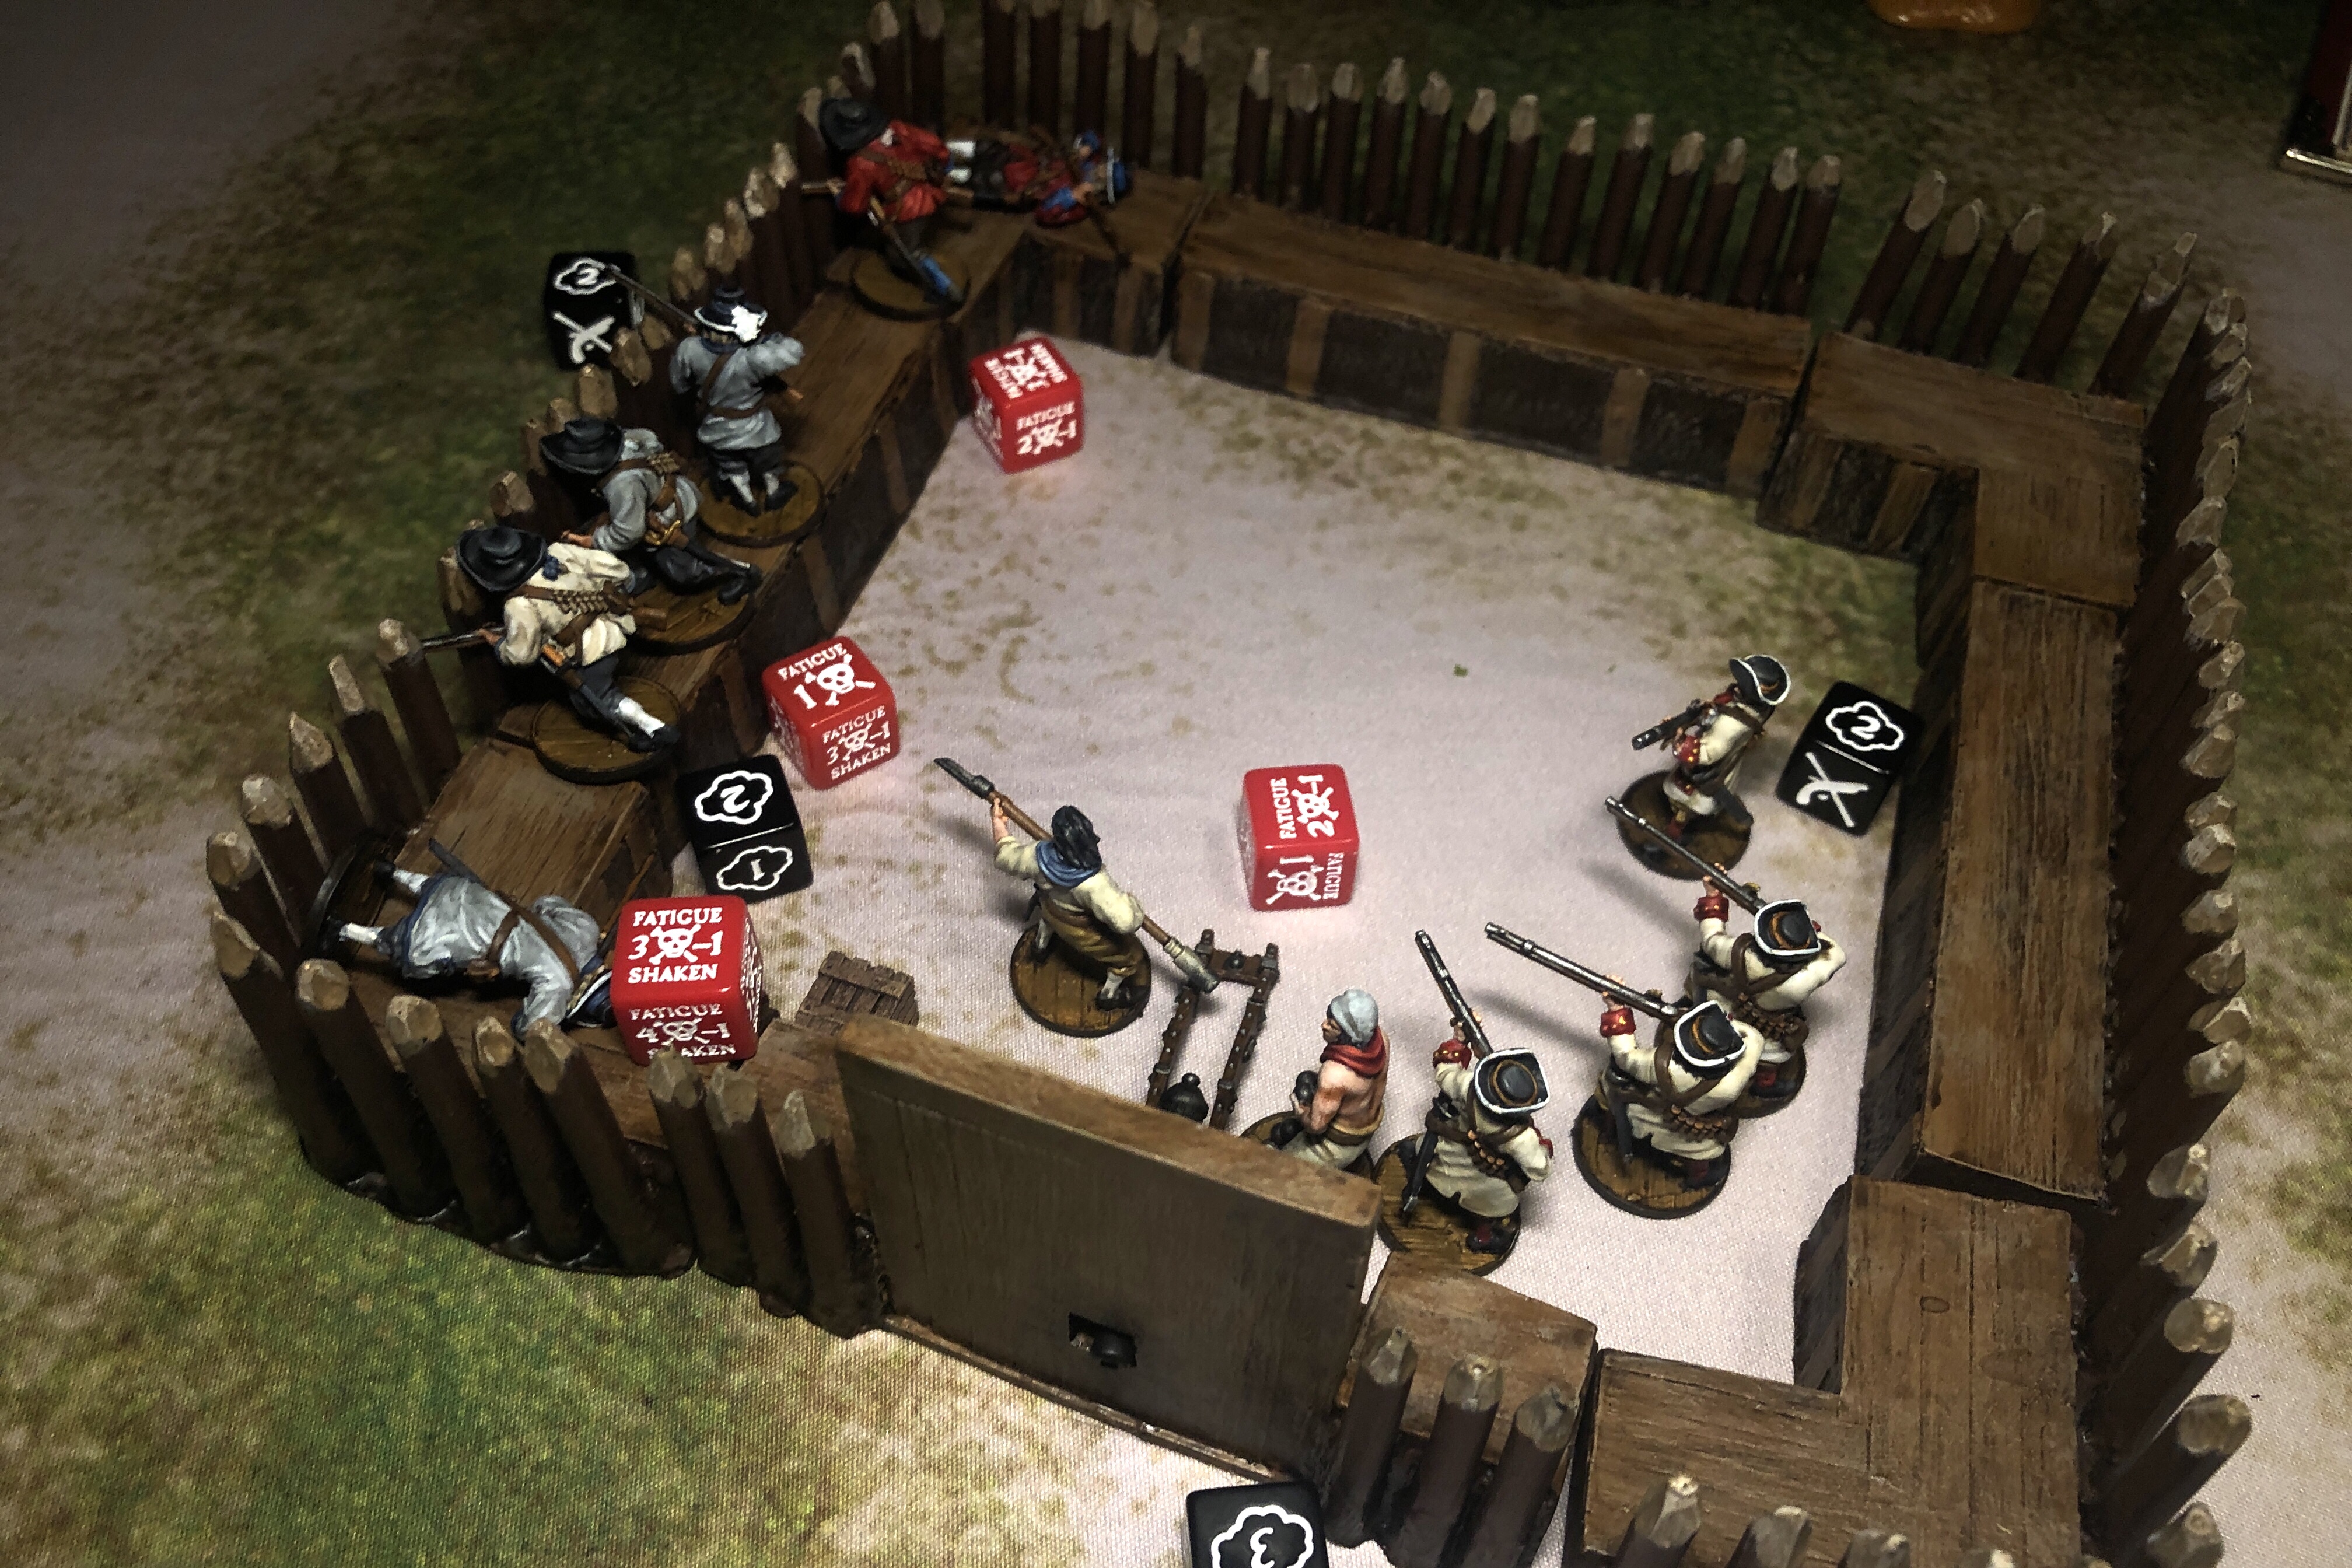
Over the fifth turn, the Natives advanced again to get into contact with the fort wall. The Young Warriors were able to sprint up the wall early and then Oldman was able to command them to charge over the wall and take out another English unit before being counter-charged by the cannon crew with the basic melee weapons.
The game technically ended here with the English down to 5 models and the Natives threatening one objective and only having lost 1 Strike Point worth of models. With 34 English Strikes and 1 Native Strike, the English had to take a Strike Test but their commander was dead so it was an auto fail. But I continued to play it out just for fun.
Oldman was able to use all his Command Points early on turn 6 to vault most of the remaining units over the wall.
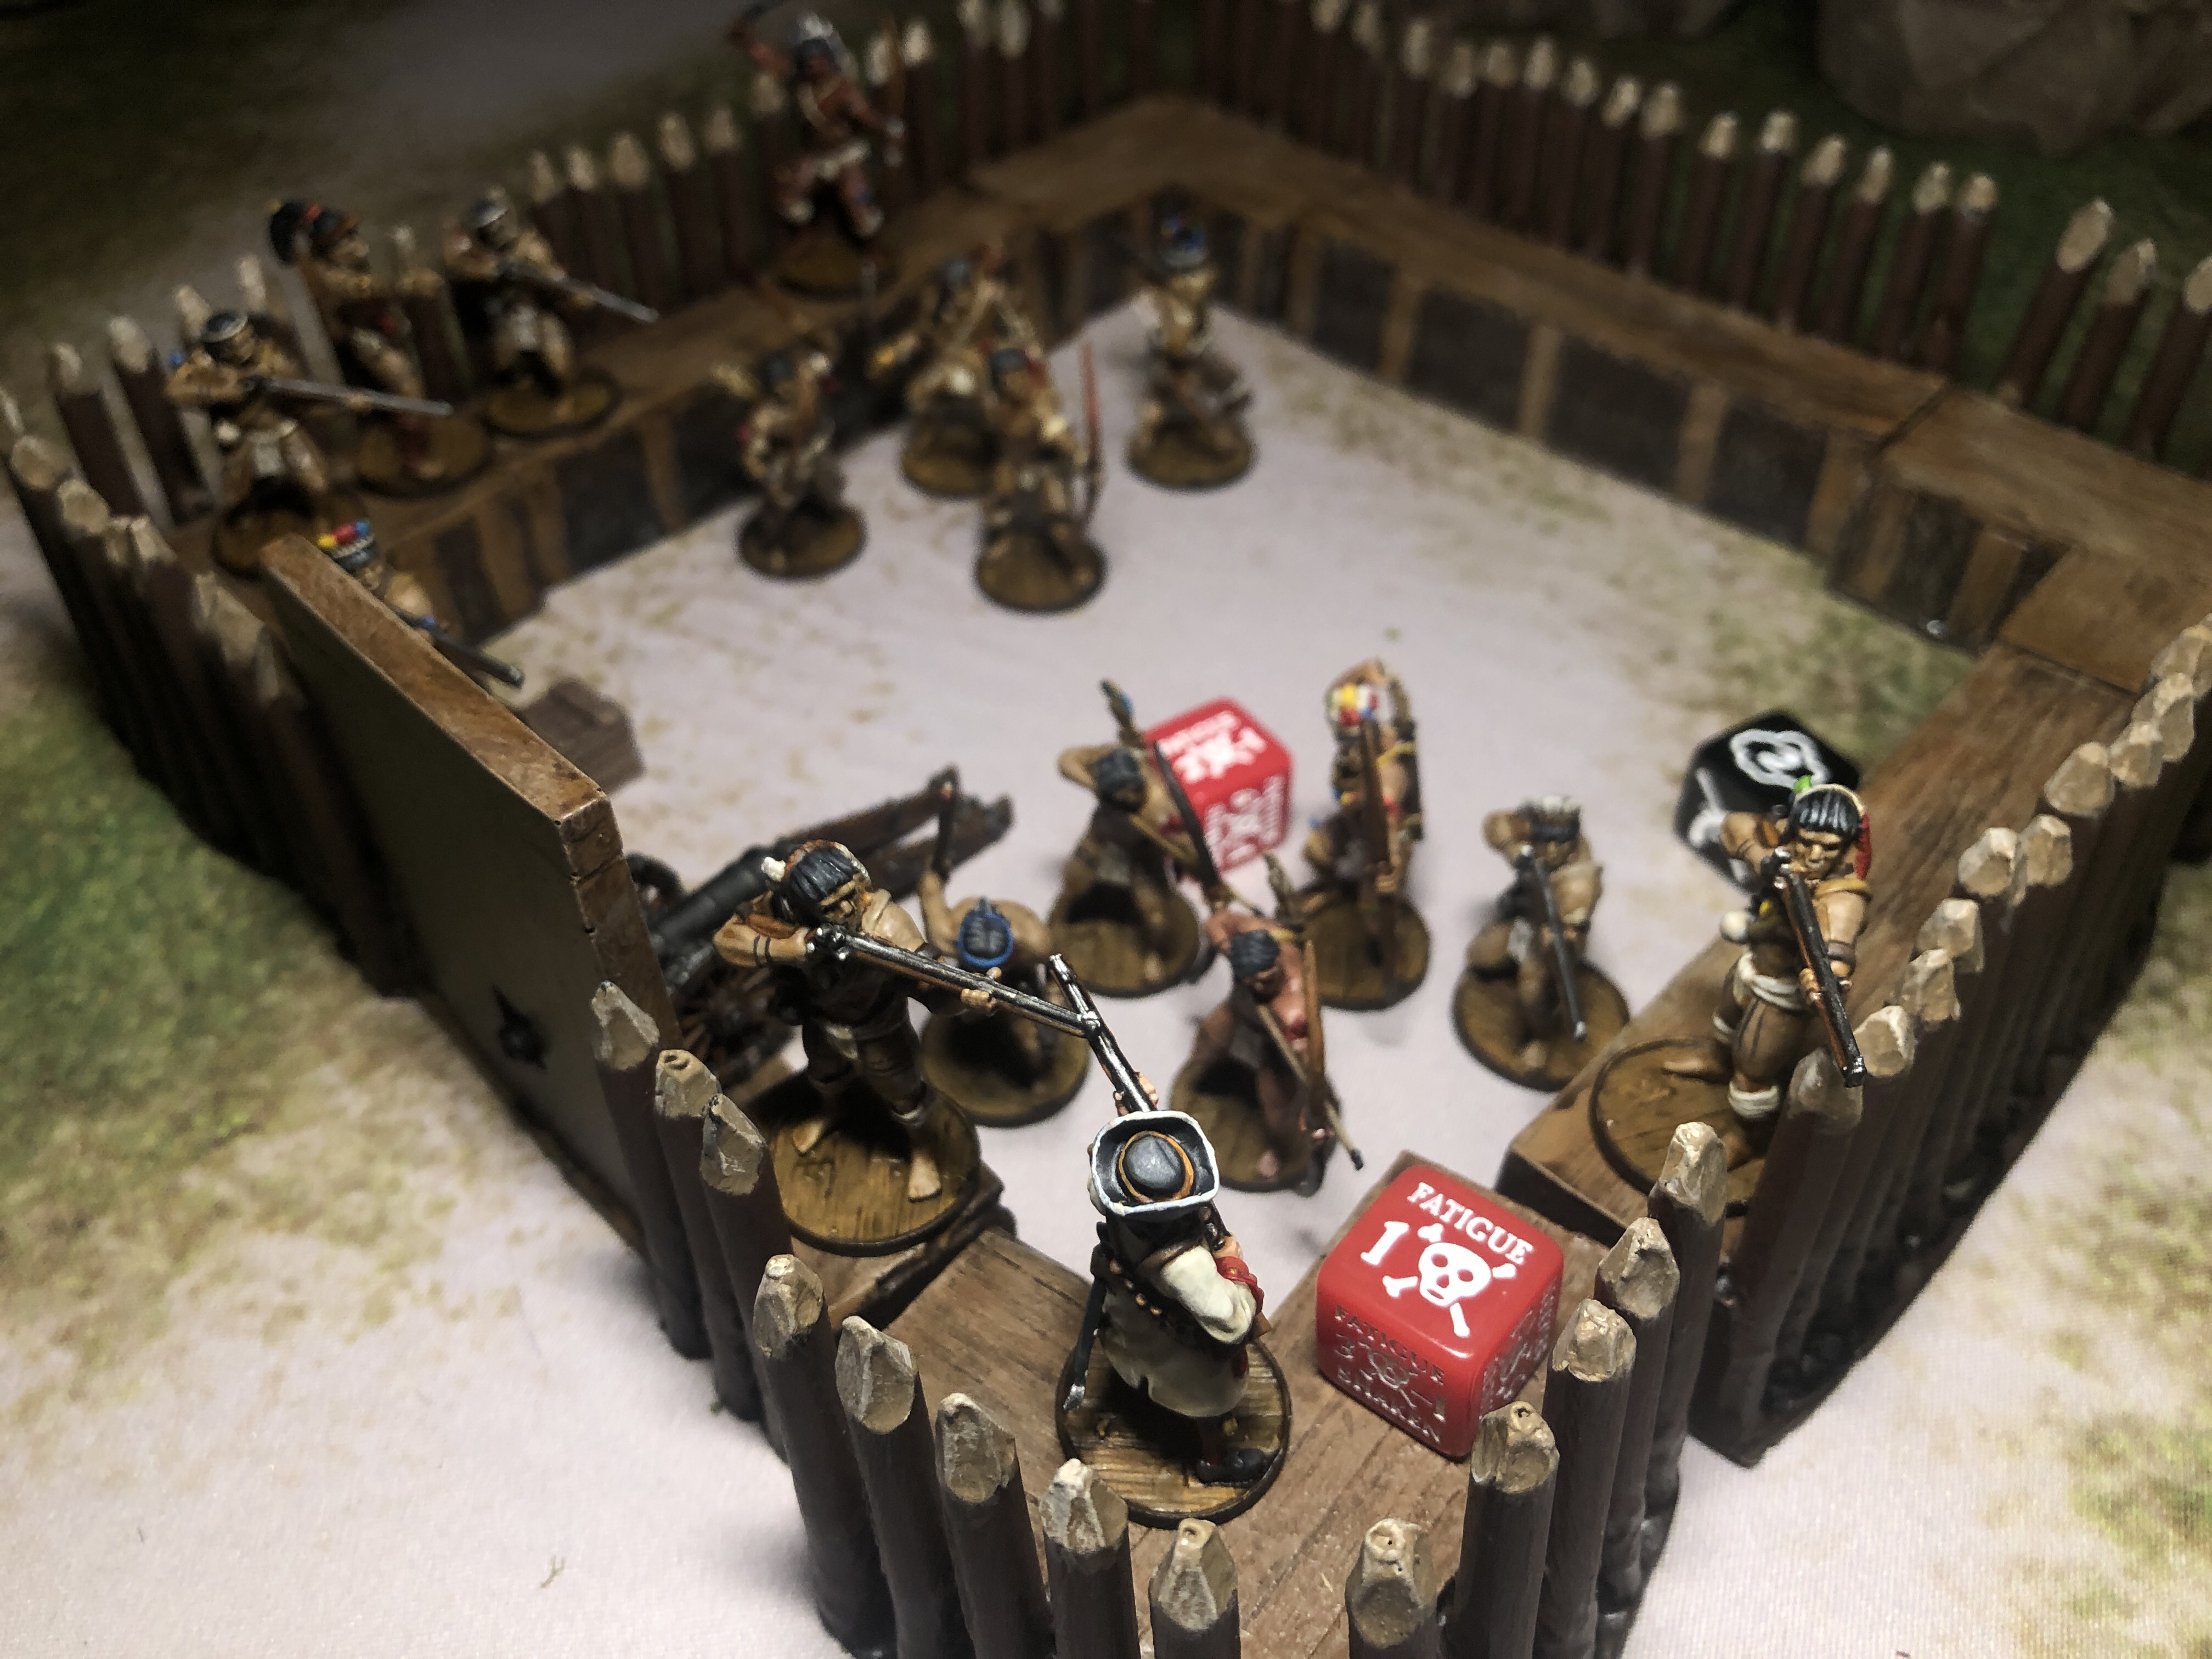
They quickly took out the cannon crew and charged the last brave Musketeers.

It got down to 1 man and he succeeded his Save but finally failed a second Fatigue check and with 2 Fatigue on a 1 model unit, the last Englishmen fell to the Natives.

The final casualty count was 12 Natives totaling 68 points vs the entire force of 34 English models.

Post Game Thoughts
- This game felt substantially different than my previous 100 point game with the fort using two European powers. I felt the fort provided a lot of value at both 100 and 200 points but the 200 point game was much more interesting (that’s usually the case).
- The English did pretty well keeping the Fatigue off for 2 turns but that third turn was a disaster. Once all that Fatigue was down, it became very difficult to actually do anything to hurt the oncoming Natives.

- I should have included a Grizzled Veteran in the English force. It may have been hard to use the Rally action every time, but just having a unit with Tough on the board would have helped more than a little bit.
- The Hidden rule was a major advantage for the Natives in this game. It can be hard for the Natives to keep their units at the ideal distance to make this rule work in most games, but the stationary nature of the fort gave them much more control of the range of the encounter. If they English started at 7 and had a +1 penalty to their shots and couldn’t hit on 11+, that meant very few hits ever got through before the melee started. Meanwhile the Archers start at 5 so their hitting on 8’s and firing 2-3 times per turn. The English Militia were saving on 4’s while the Natives were looking for 6’s when they actually were hit. The English had a solid 5 or 4 Resolve across the board but were forced to re roll a success while the Natives had a poor Resolve of 6 and had to roll extra Fatigue dice when they were hit but they were actually hit so seldom that the Fatigue battle quickly tipped in favor of the Natives. All those numbers are very asymmetric and I think it could have gone either way if the English Resolve rolls had been a little luckier.
- The Native Musketeers did provide some of the killing power but the bows probably provided more value overall.
- The cannon shot a couple times and was able to reload fairly quickly in this game. At one point it nearly disabled the unit of Young Warriors but they rallied and got back into the game before the end. As far as I could tell, the Hidden rule applied to cannons as well. Grapeshot starts at 4, takes a +3 penalty for 12″+ range then another penalty for Hidden and that brings you to a target number of 8 with 3 dice. That was the best firepower the English could bring to bear on the Natives but it was only able to fire a couple times and if they “Native player” had wanted to, they could have avoided the cannon port on the gate altogether rendering it pretty useless.. The upcoming Bastions for the fort will make cannons more threatening on a fort, but they also will make it much more expensive.

- The game had a similar tempo to many games I’ve played with the Natives but the seemingly inevitable Warrior Charge on the beleaguered troops was delayed until turn 4 instead of turn 2 or 3 with the fort present. With a bit more luck, I think the English could have held. I think I should have been more careful with the English to try to keep at least one unit per wall side loaded and reasonably free from Fatigue to help repel charges at all times. It was a difficult choice between trying to fire on the Natives with the dice I could muster, and just sitting there, trying to be prepared for the charge if it came. I know I was playing both sides so some of the mystery wasn’t really there but I still felt the stress of those decisions.
- Even though the English lost, I felt the fort provided enough value to make it worth the 24 points it would cost at 3 points per section. I don’t think it should cost any more than that. I am looking forward to trying some Bastions and adding a Blockhouse to the center of a larger fort.
- In my English vs Spanish game, the Fortitude/Integrity of the palisade walls was in the forefront but this game had no offensive cannons so the other rules were much more important. It felt fairly balanced and useful in both scenarios.
- At 200 points, this basic fort felt reasonably full. 6 units might not have been the best choice, but it did give them some tactical advantages for a while since they had more activation cards than the Natives. The small size of the units didn’t seem to be that much of a penalty here and an argument could be made that it was a good tactic to counter the Natives. A large and small unit take Fatigue at the same rate so larger units mean more models tied up rallying while more smaller units mean the Natives have to split their attacks more ways and can’t be as efficient. Those small units disintegrate faster once models start to die but I felt the small units size was at least OK within the fort. Giving forces that include a fort deeper access to Cannon Crews is a good design choice that has come up since I played this game and that would have given me more options while building this English force.
- I really enjoy playing the Natives and I know I favor them a little. I tried to be super fair while playing both sides in this solo game but I realize that I can’t be entirely balanced and that may have effected the outcome of the game.
- I have been using Spiritual Leaders a lot in my forces lately since I finally got some fun models painted up for them. I used one in the English force here. I’m not sure he fully paid for himself, but I do think its a potentially good option for forces going up against Natives. It’s nice to have another option to reroll a Save vs arrows. If you’re looking for 3’s of 4’s it hurts to fail them all and not have a Fortune to re-roll a set of dice that have an extremely high probability of coming up better on a second roll.

- I hope this world health crisis passes quickly! Having to play solo is certainly low on the list of terrible things right now, but I’m really looking forward to being able to play some real games with real people again!

Thanks for reading! I’m looking forward to playing with this fort against a real opponent. It changes up the game a lot!
The rules have solidified a good bit since my post a month ago it’s still in development. I’m looking forward to those rules being all finished so more people can enjoy using this fortification. Feel free to comment with ideas, criticism or compliments on how the fort functions in game play.
I was just thinking of doing a solo battle myself natives vs Spanish in the tower.
Who makes that gaming mat you had?
This is a Tablewar F.A.T mat in their Caribbean line. I got their Caribbean sea mat as well and I really like them!
https://tablewar.com/collections/fatmats/products/4x3caribbeantropics