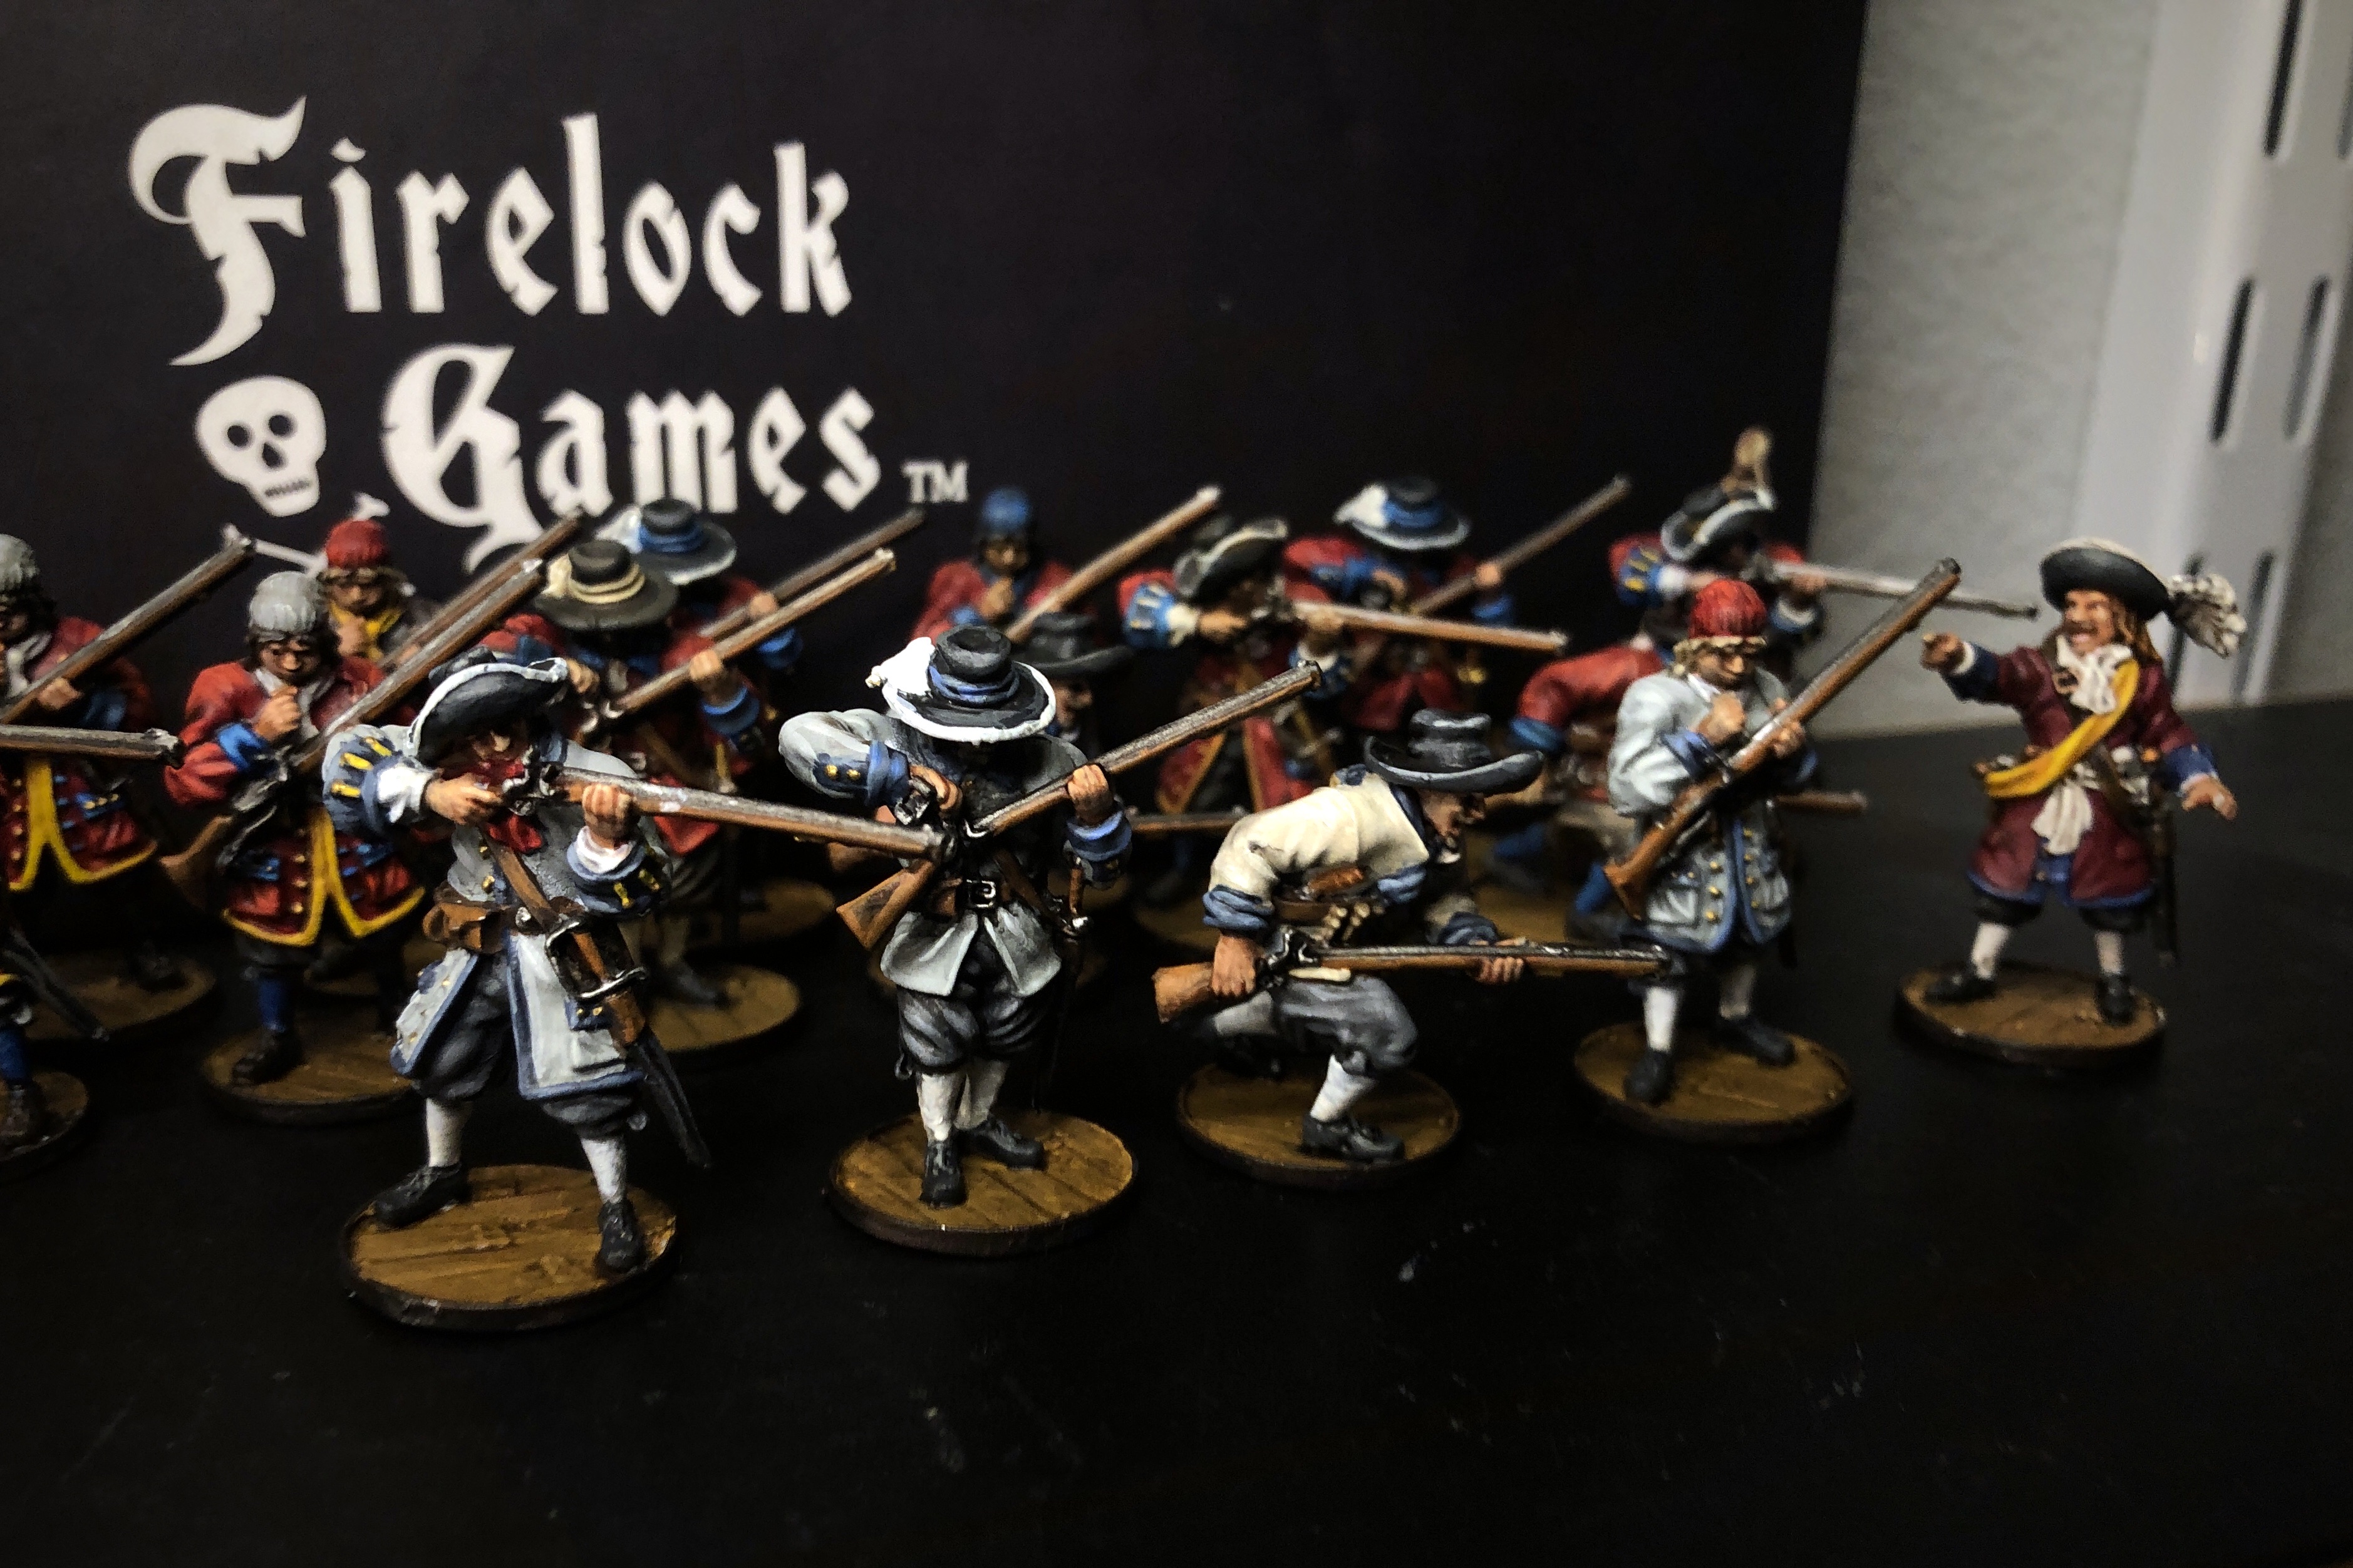
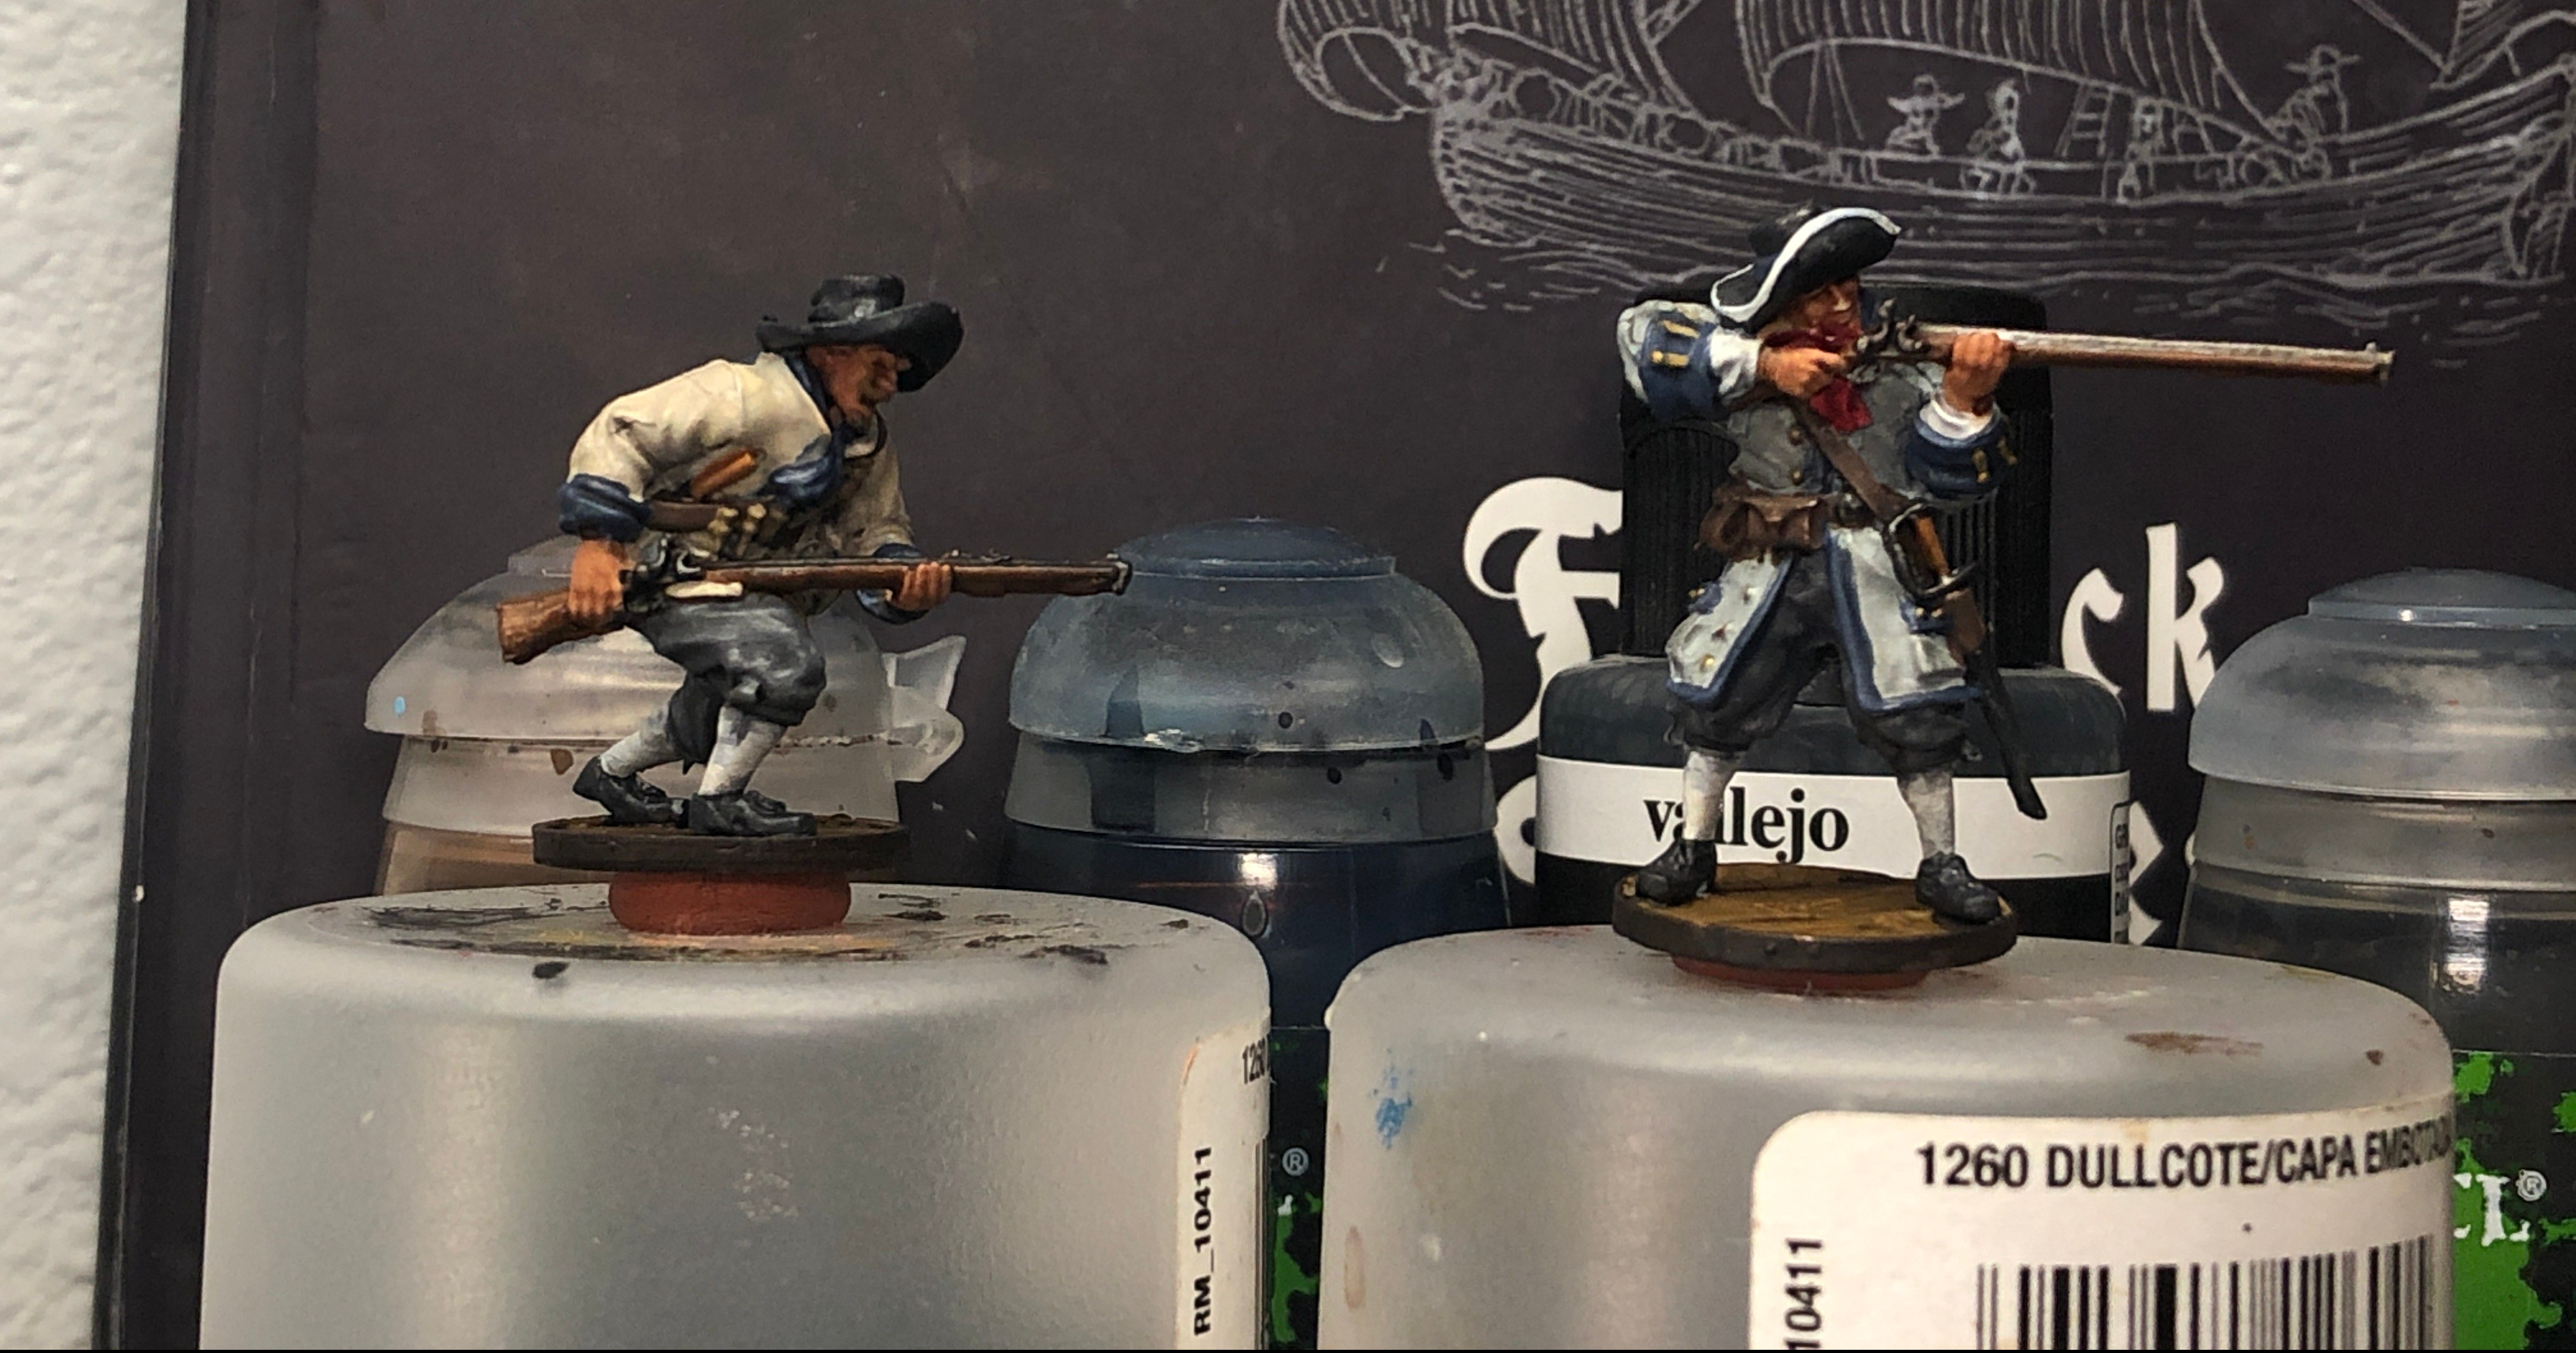
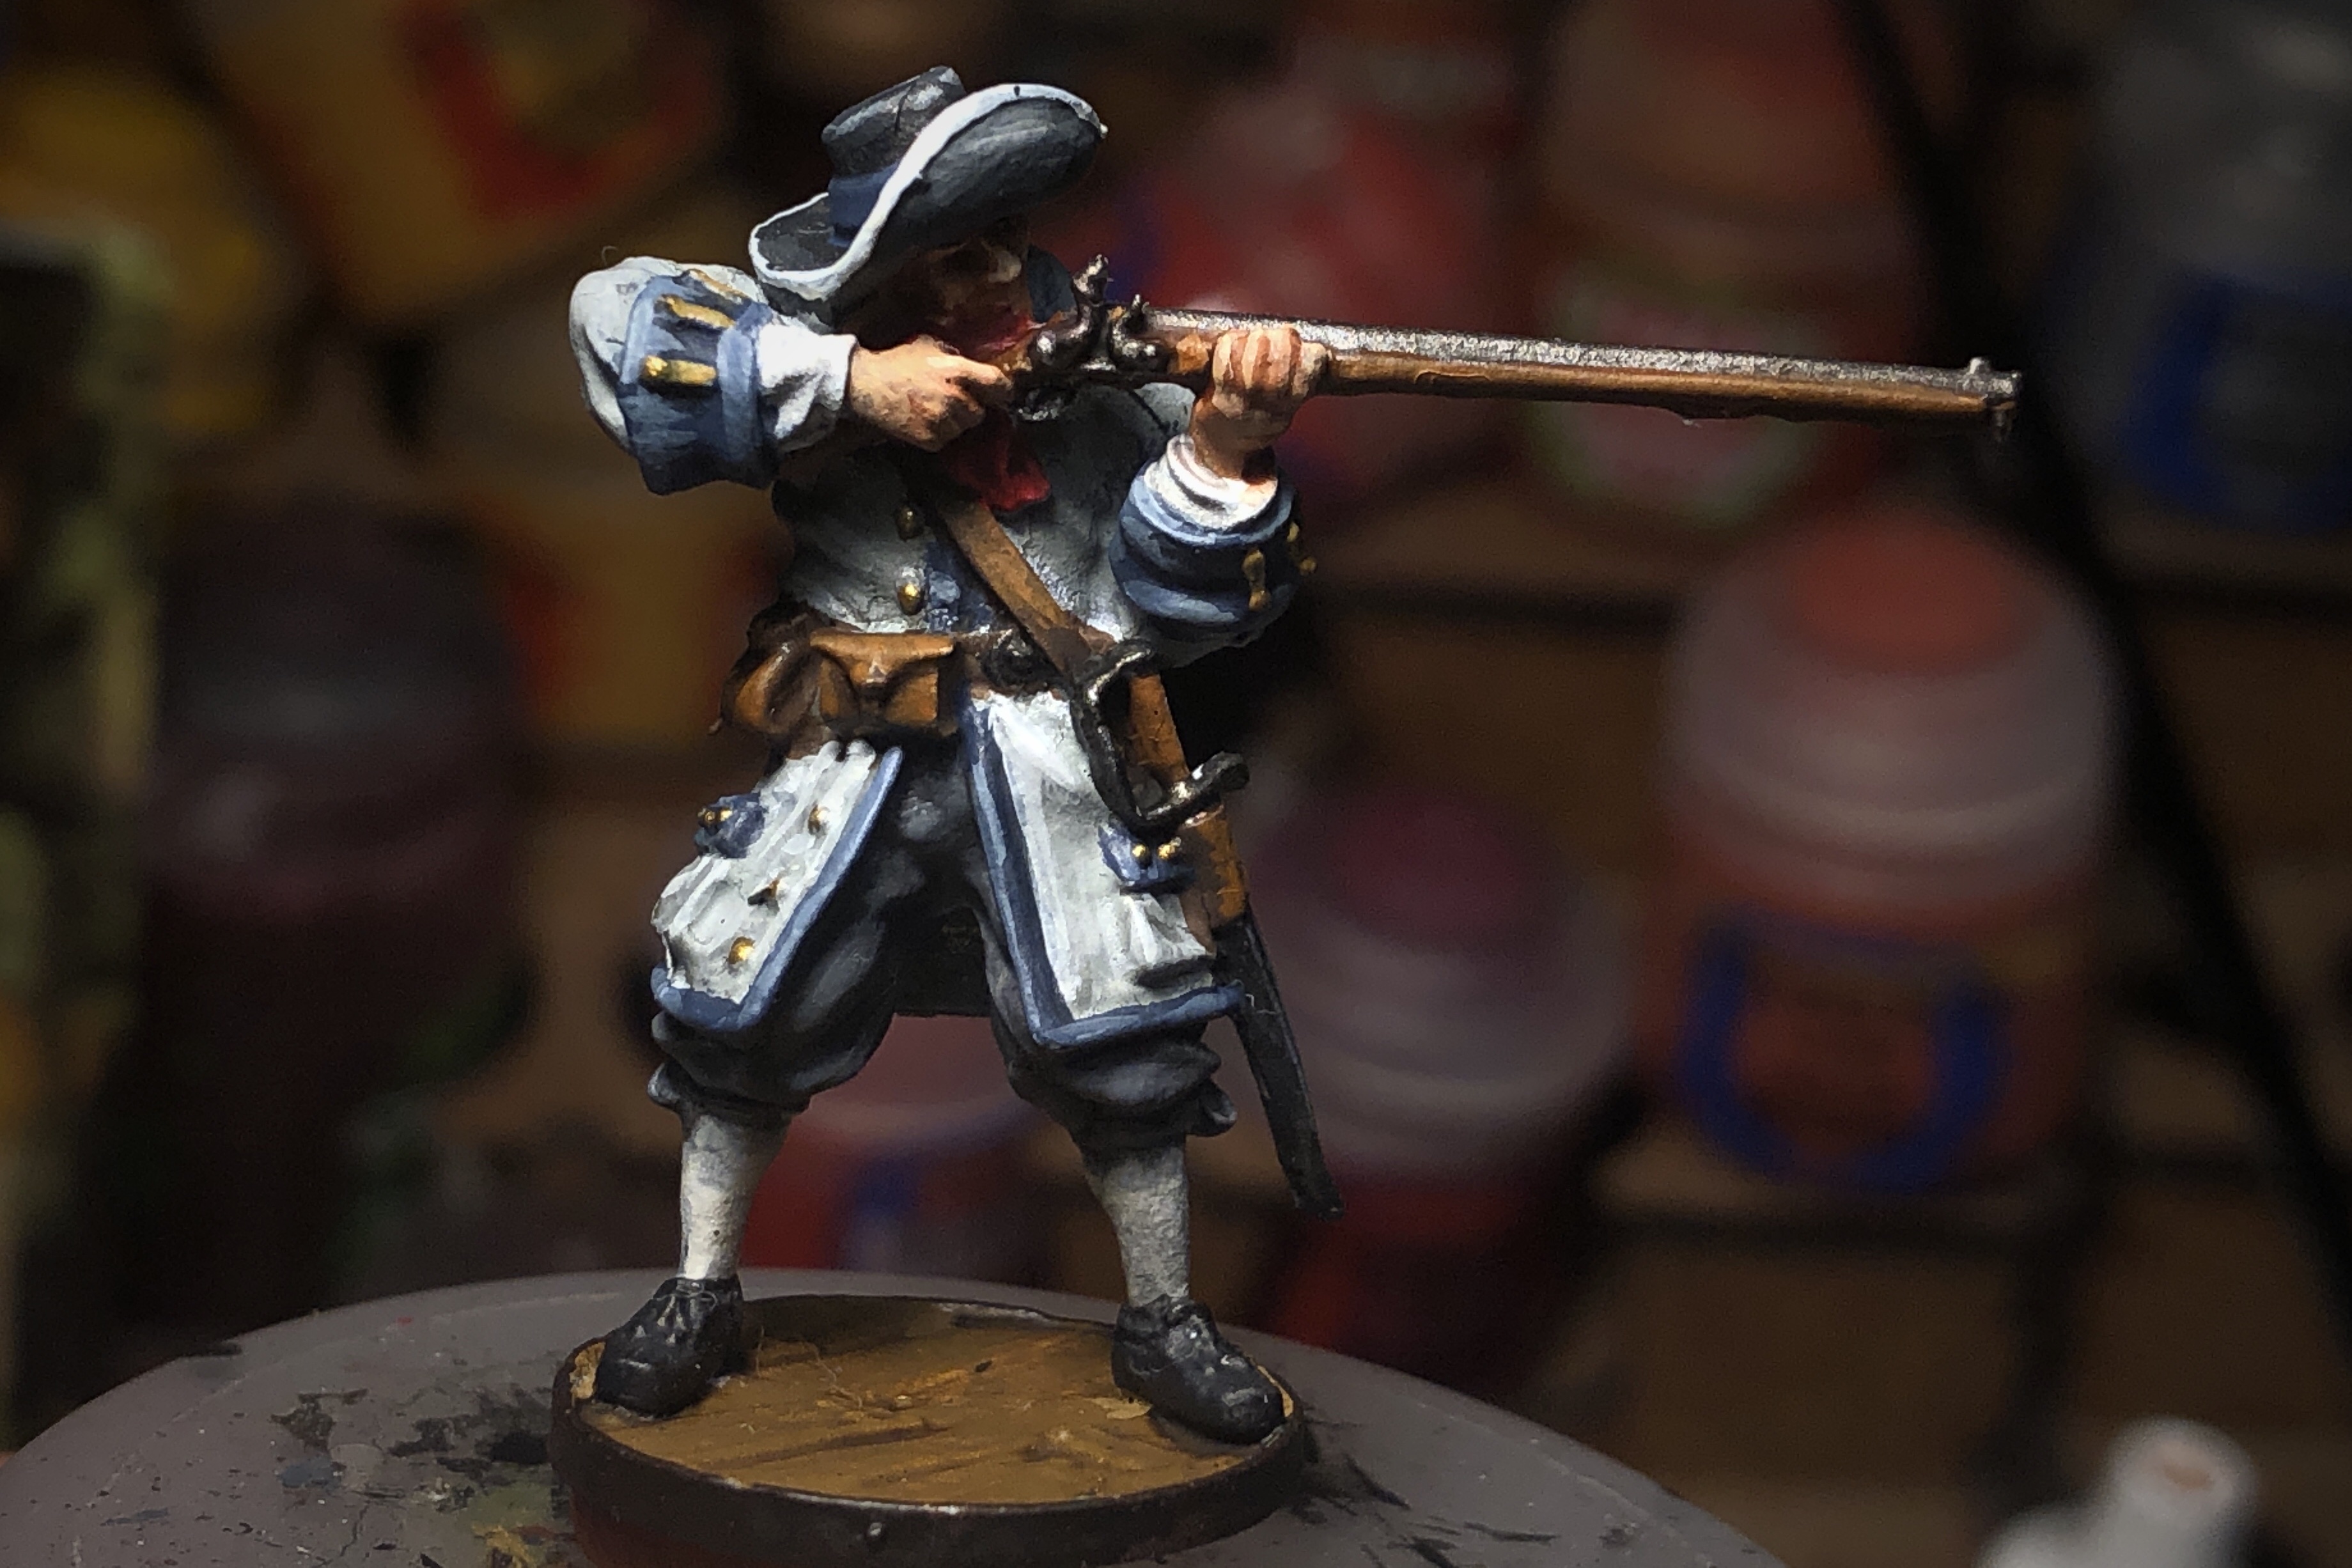
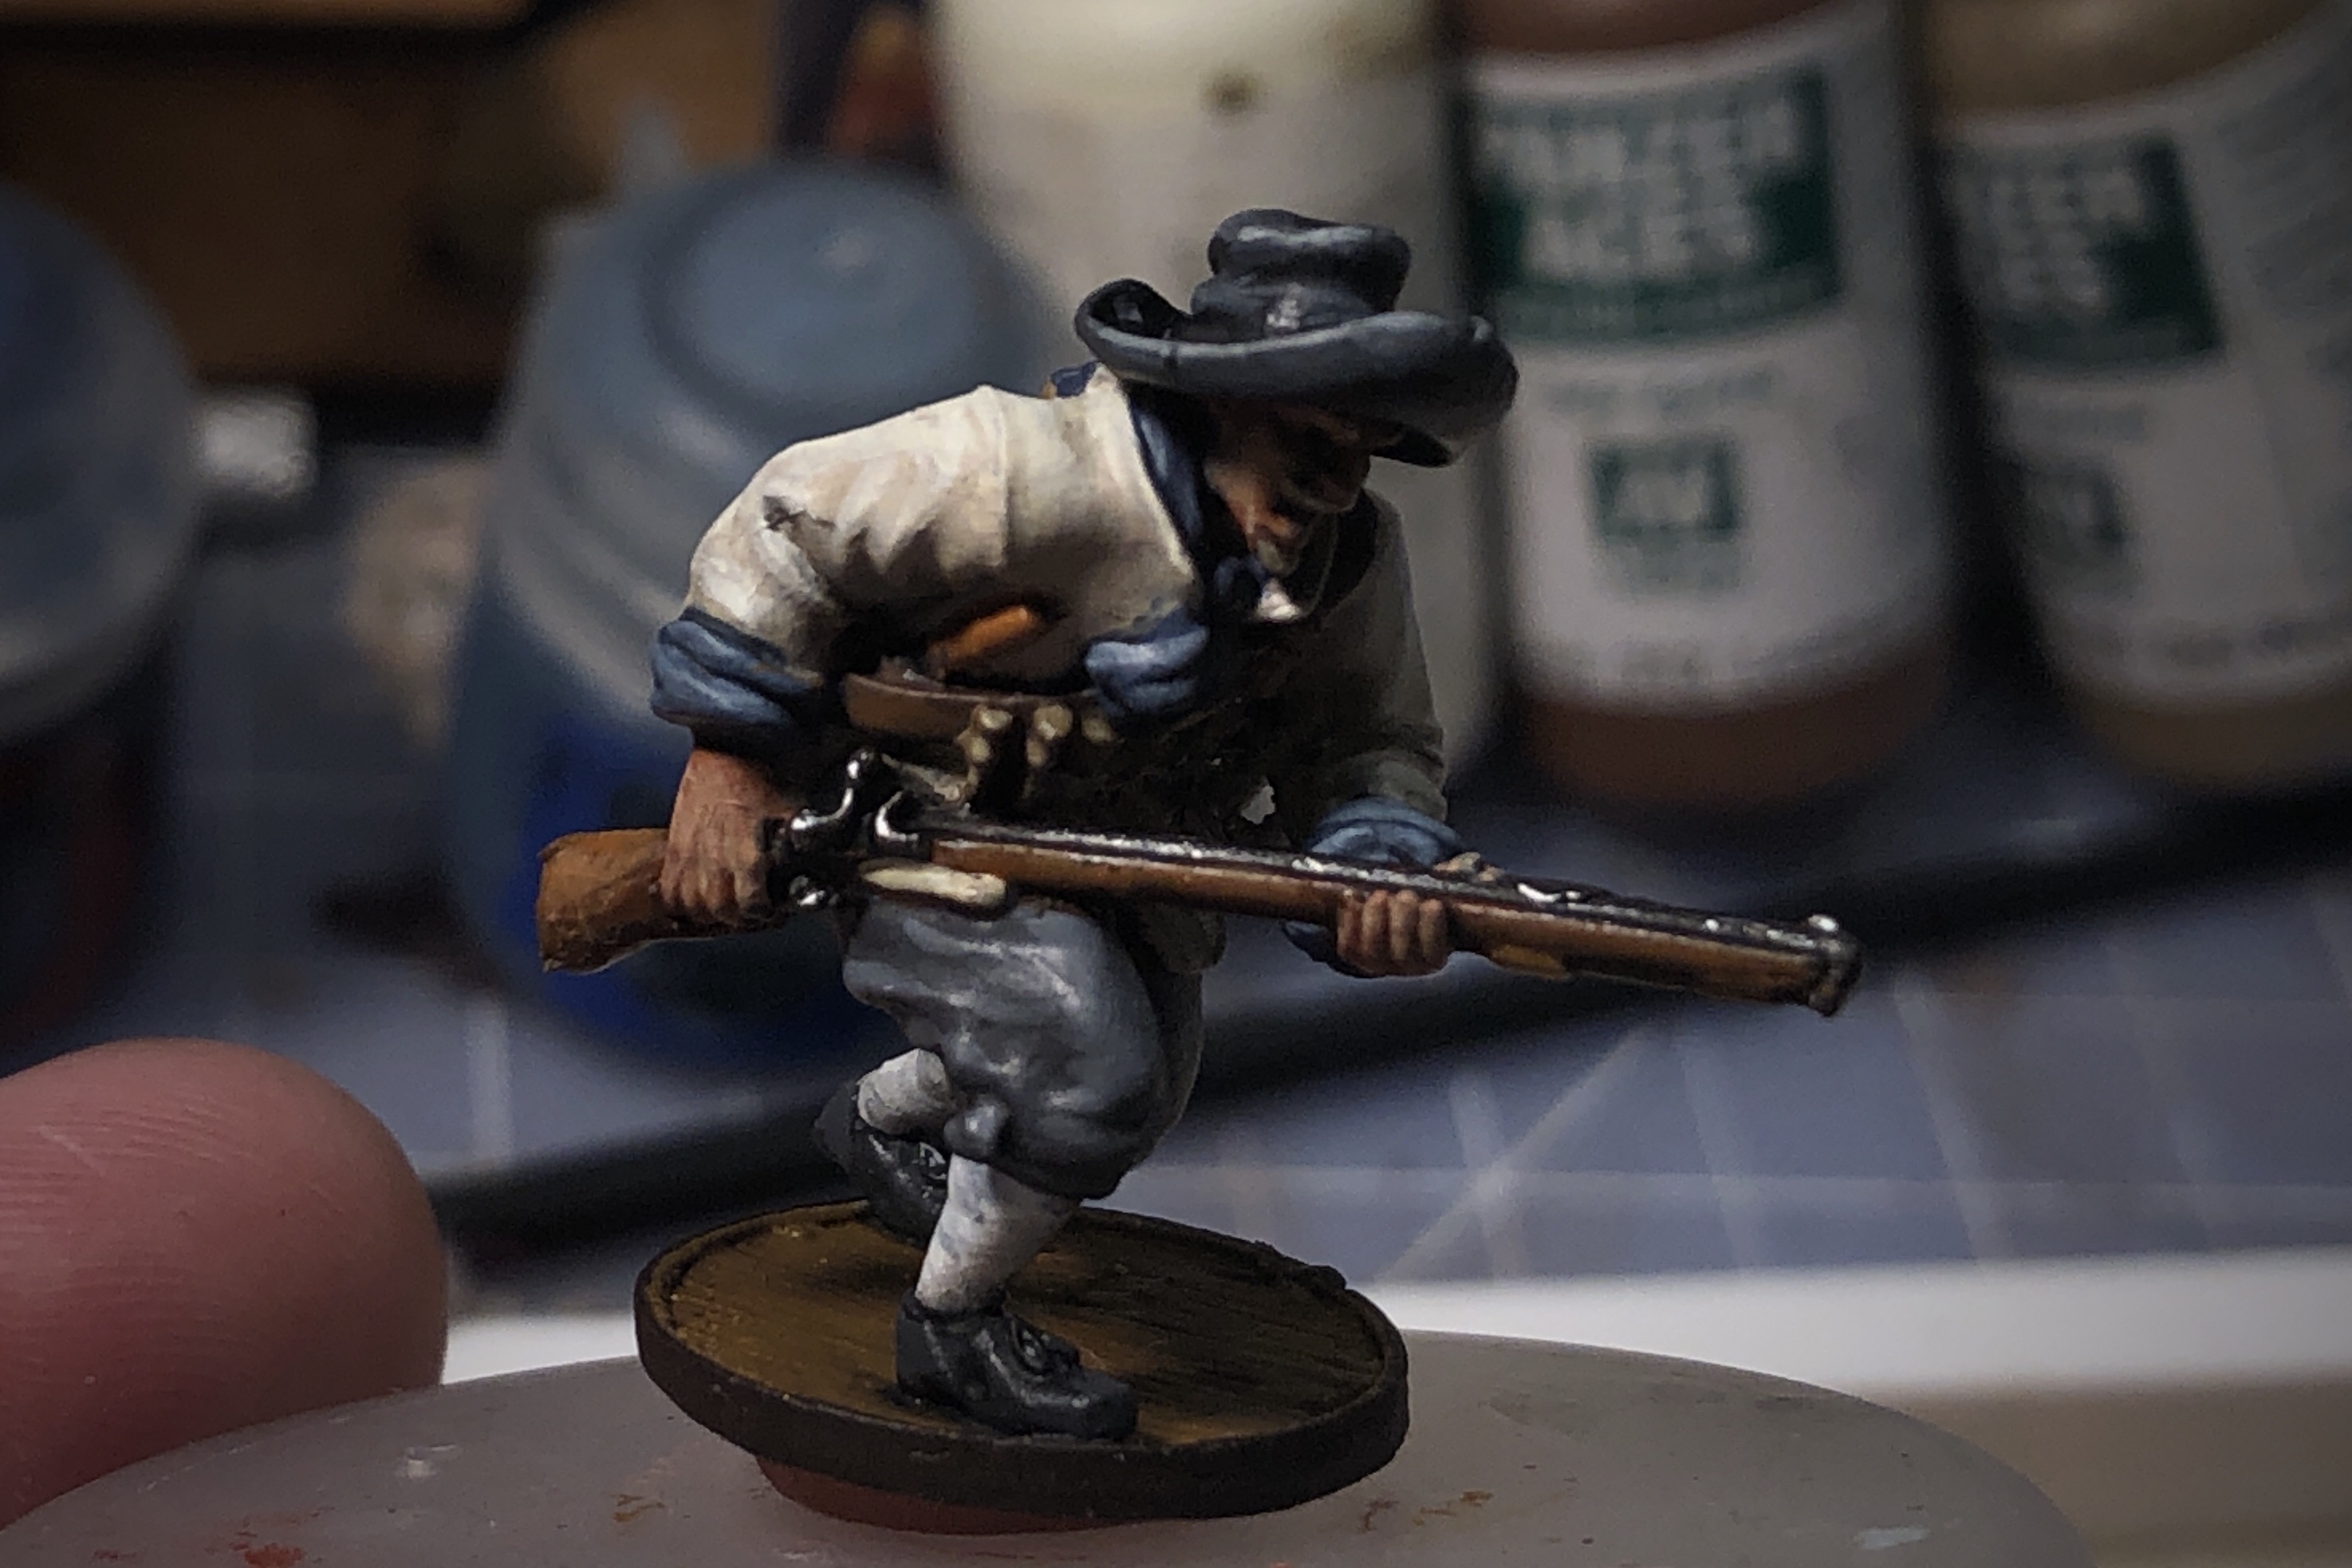
This isn’t the typical Redcoat English militia color scheme but I’ve painted a bunch of these militia in red and I wanted to do something different. This is a quick guide using my standard approach of Base/Wash/Highlight.
Step 1 – Prep and Prime
Standard practice for metal minis. I detail the model with a knife, scraper and file, then rinse it in hot water before priming.

I like to prime in Army Painter Uniform Grey then spray again from the top in white. In this case, I acquired some of these models second hand and they were primed in pure white and I just went with it.
Step 2 – Base Colors
I won’t take long in this step as I used simple colors with no mixing. I tried to keep it simple by keeping these 4 models in inform colors but it still turned out to be a lot of different paints.
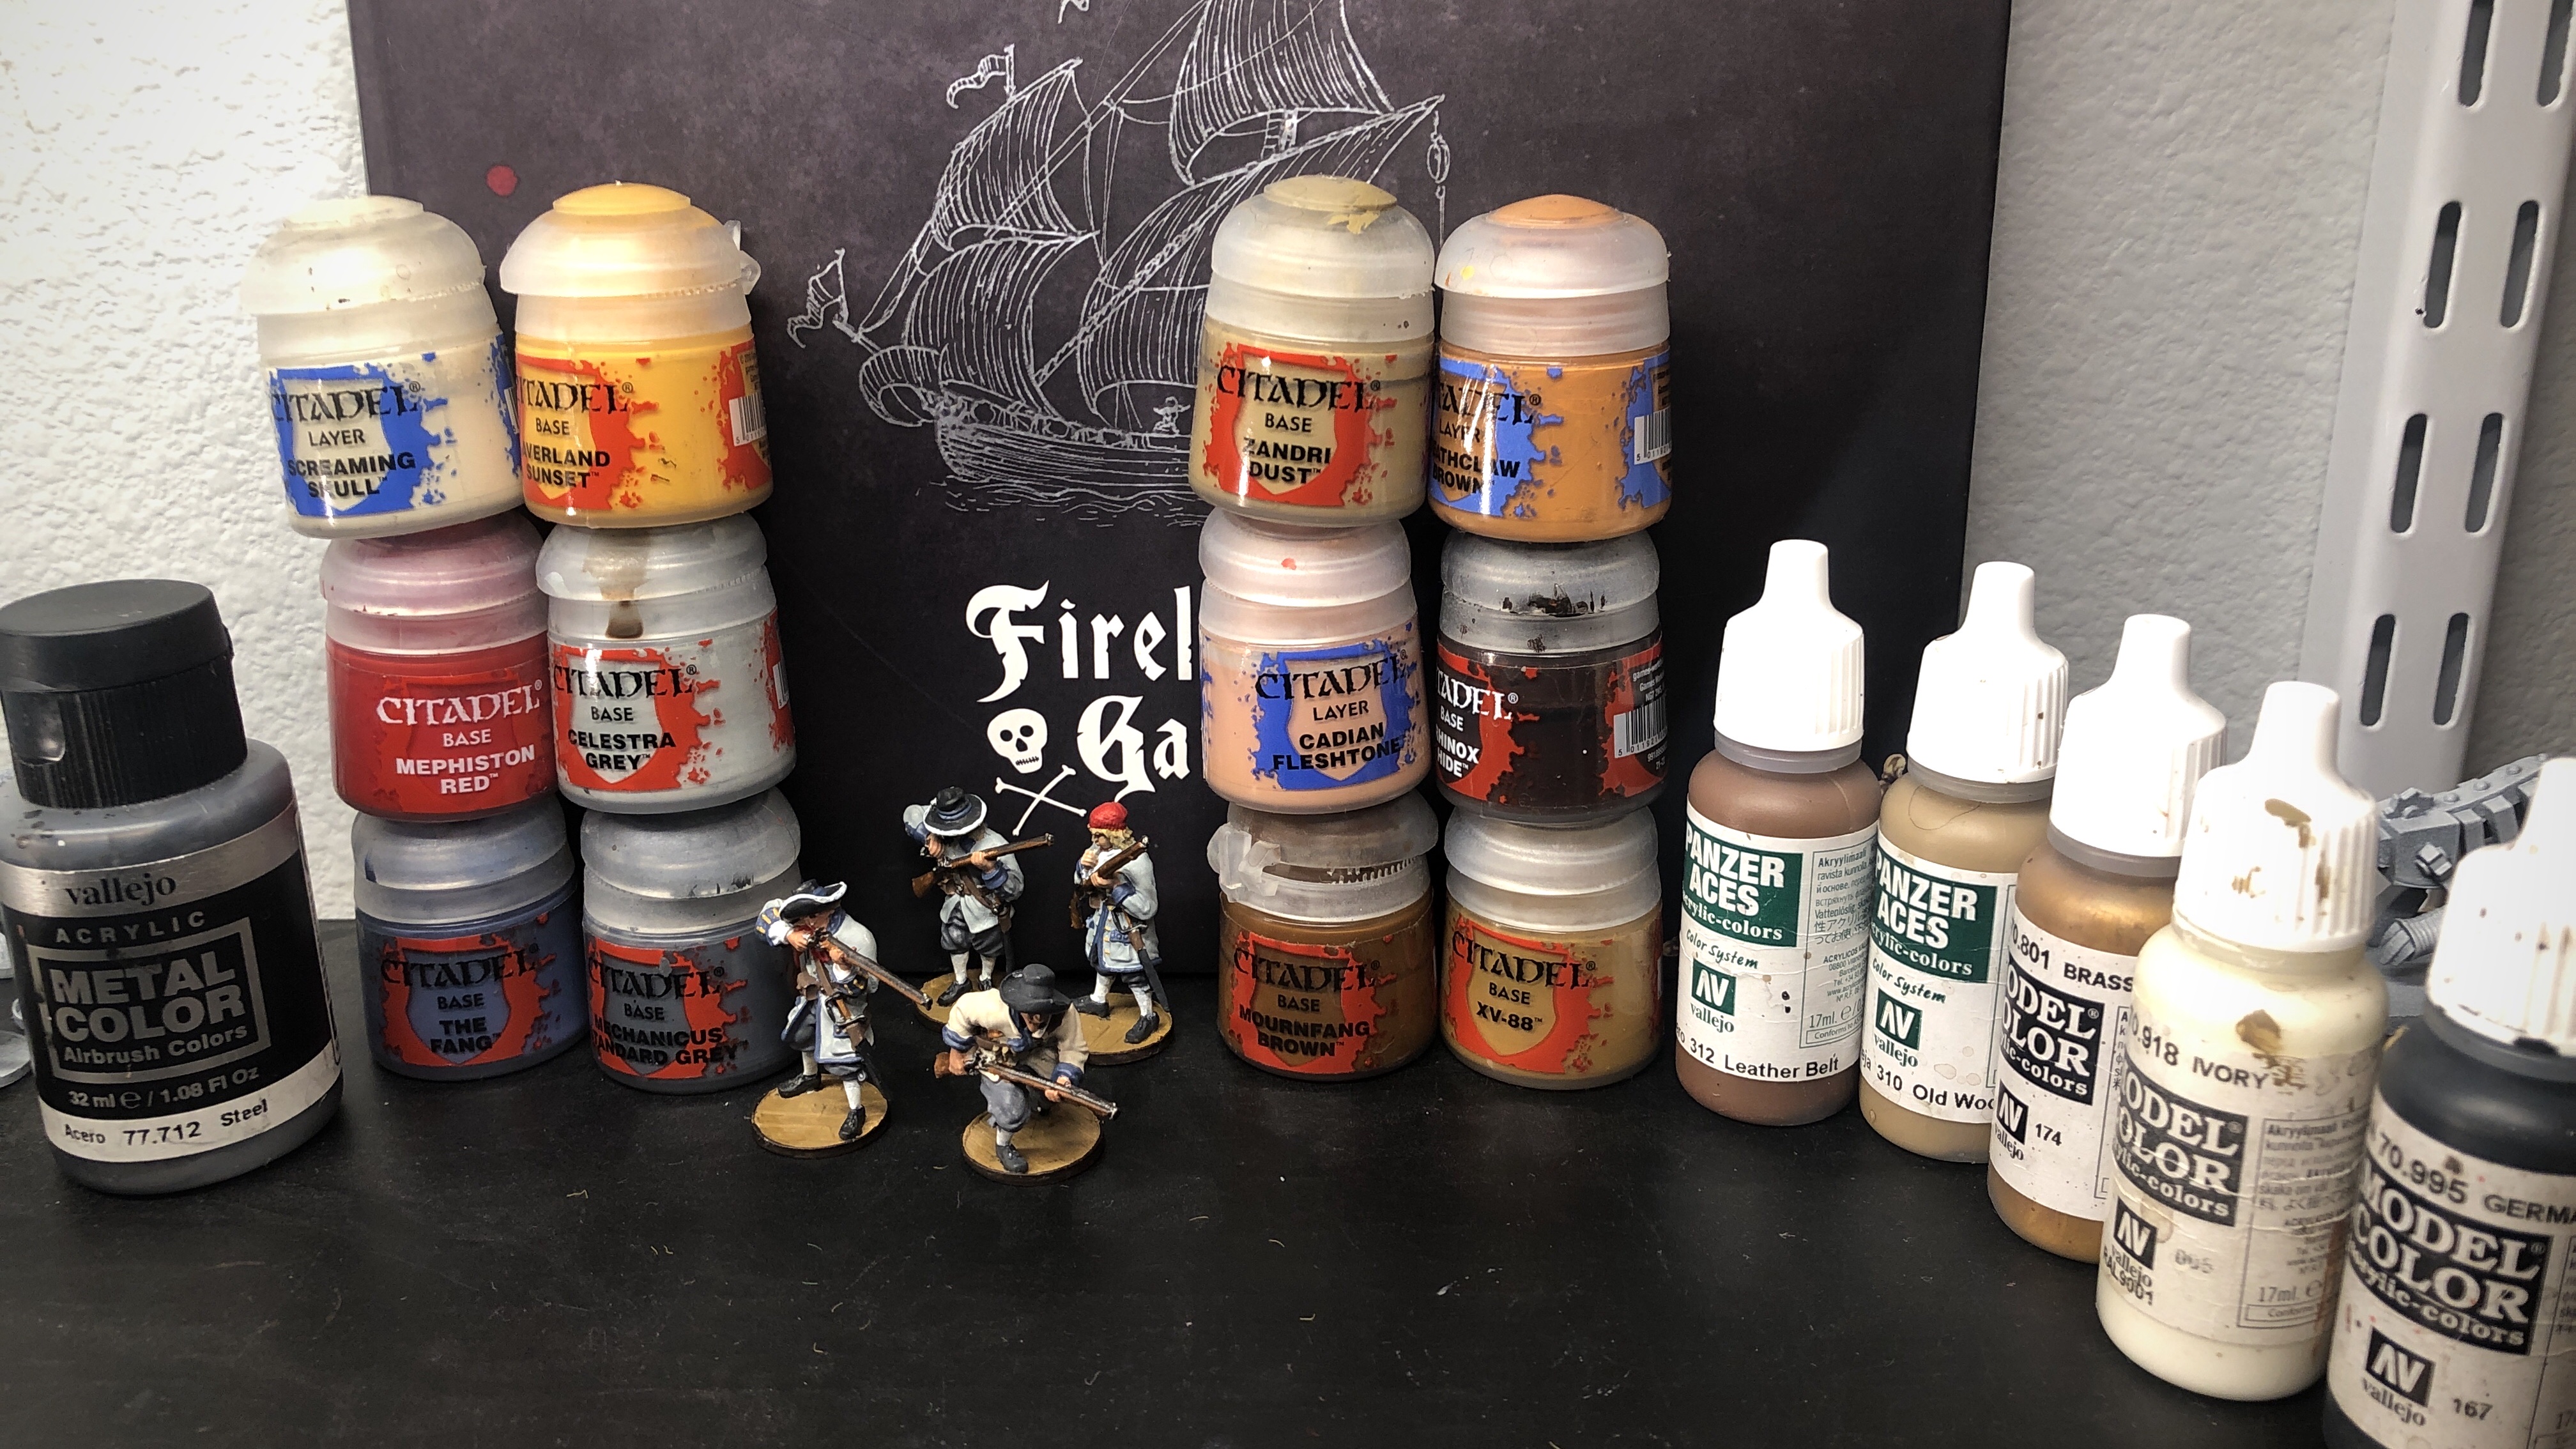
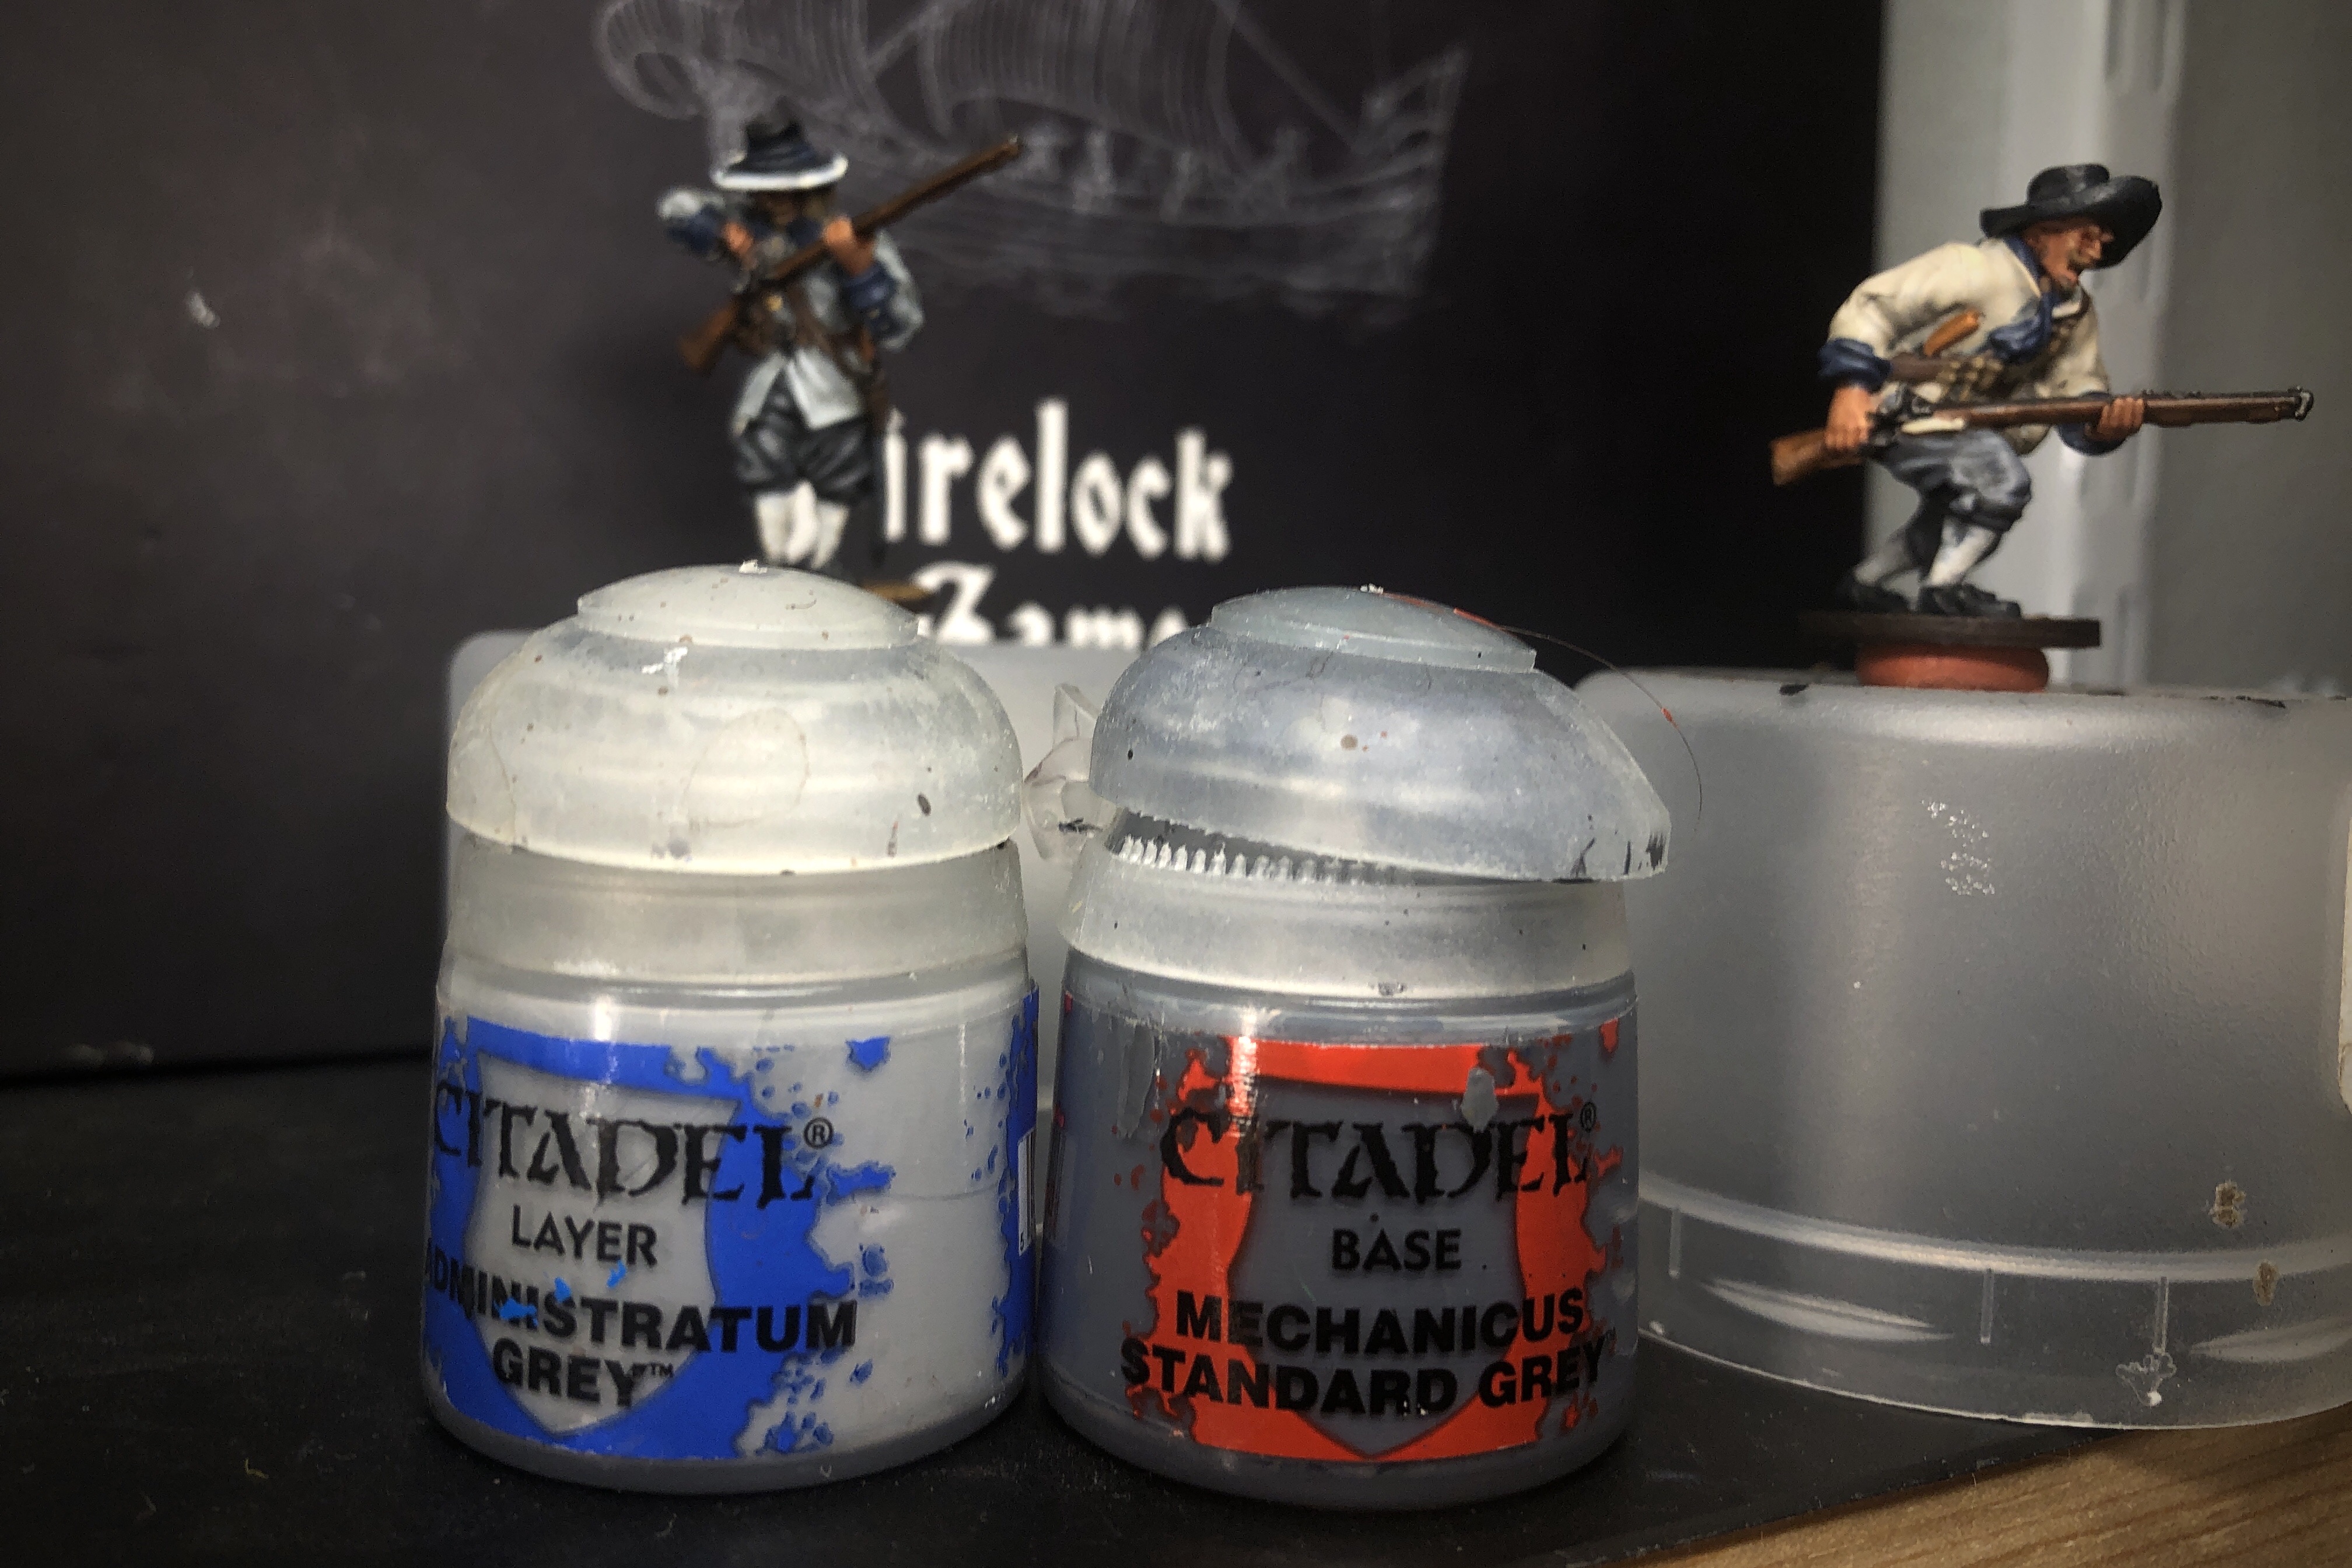
I used 18 bass colors.
Citadel Paints
- Celestra Grey – Uniform coats for 3 models
- The Fang – Coat trim on all 4 models, hat bands and neck toe for the running model
- Screaming Skull – Overshirt for running model
- Mechanicus Standard Grey – Pants for all 4 models
- Mournfang Brown – Musket wood
- Cadian Fleshtone – All flesh areas
- Zandri Dust – All hair areas
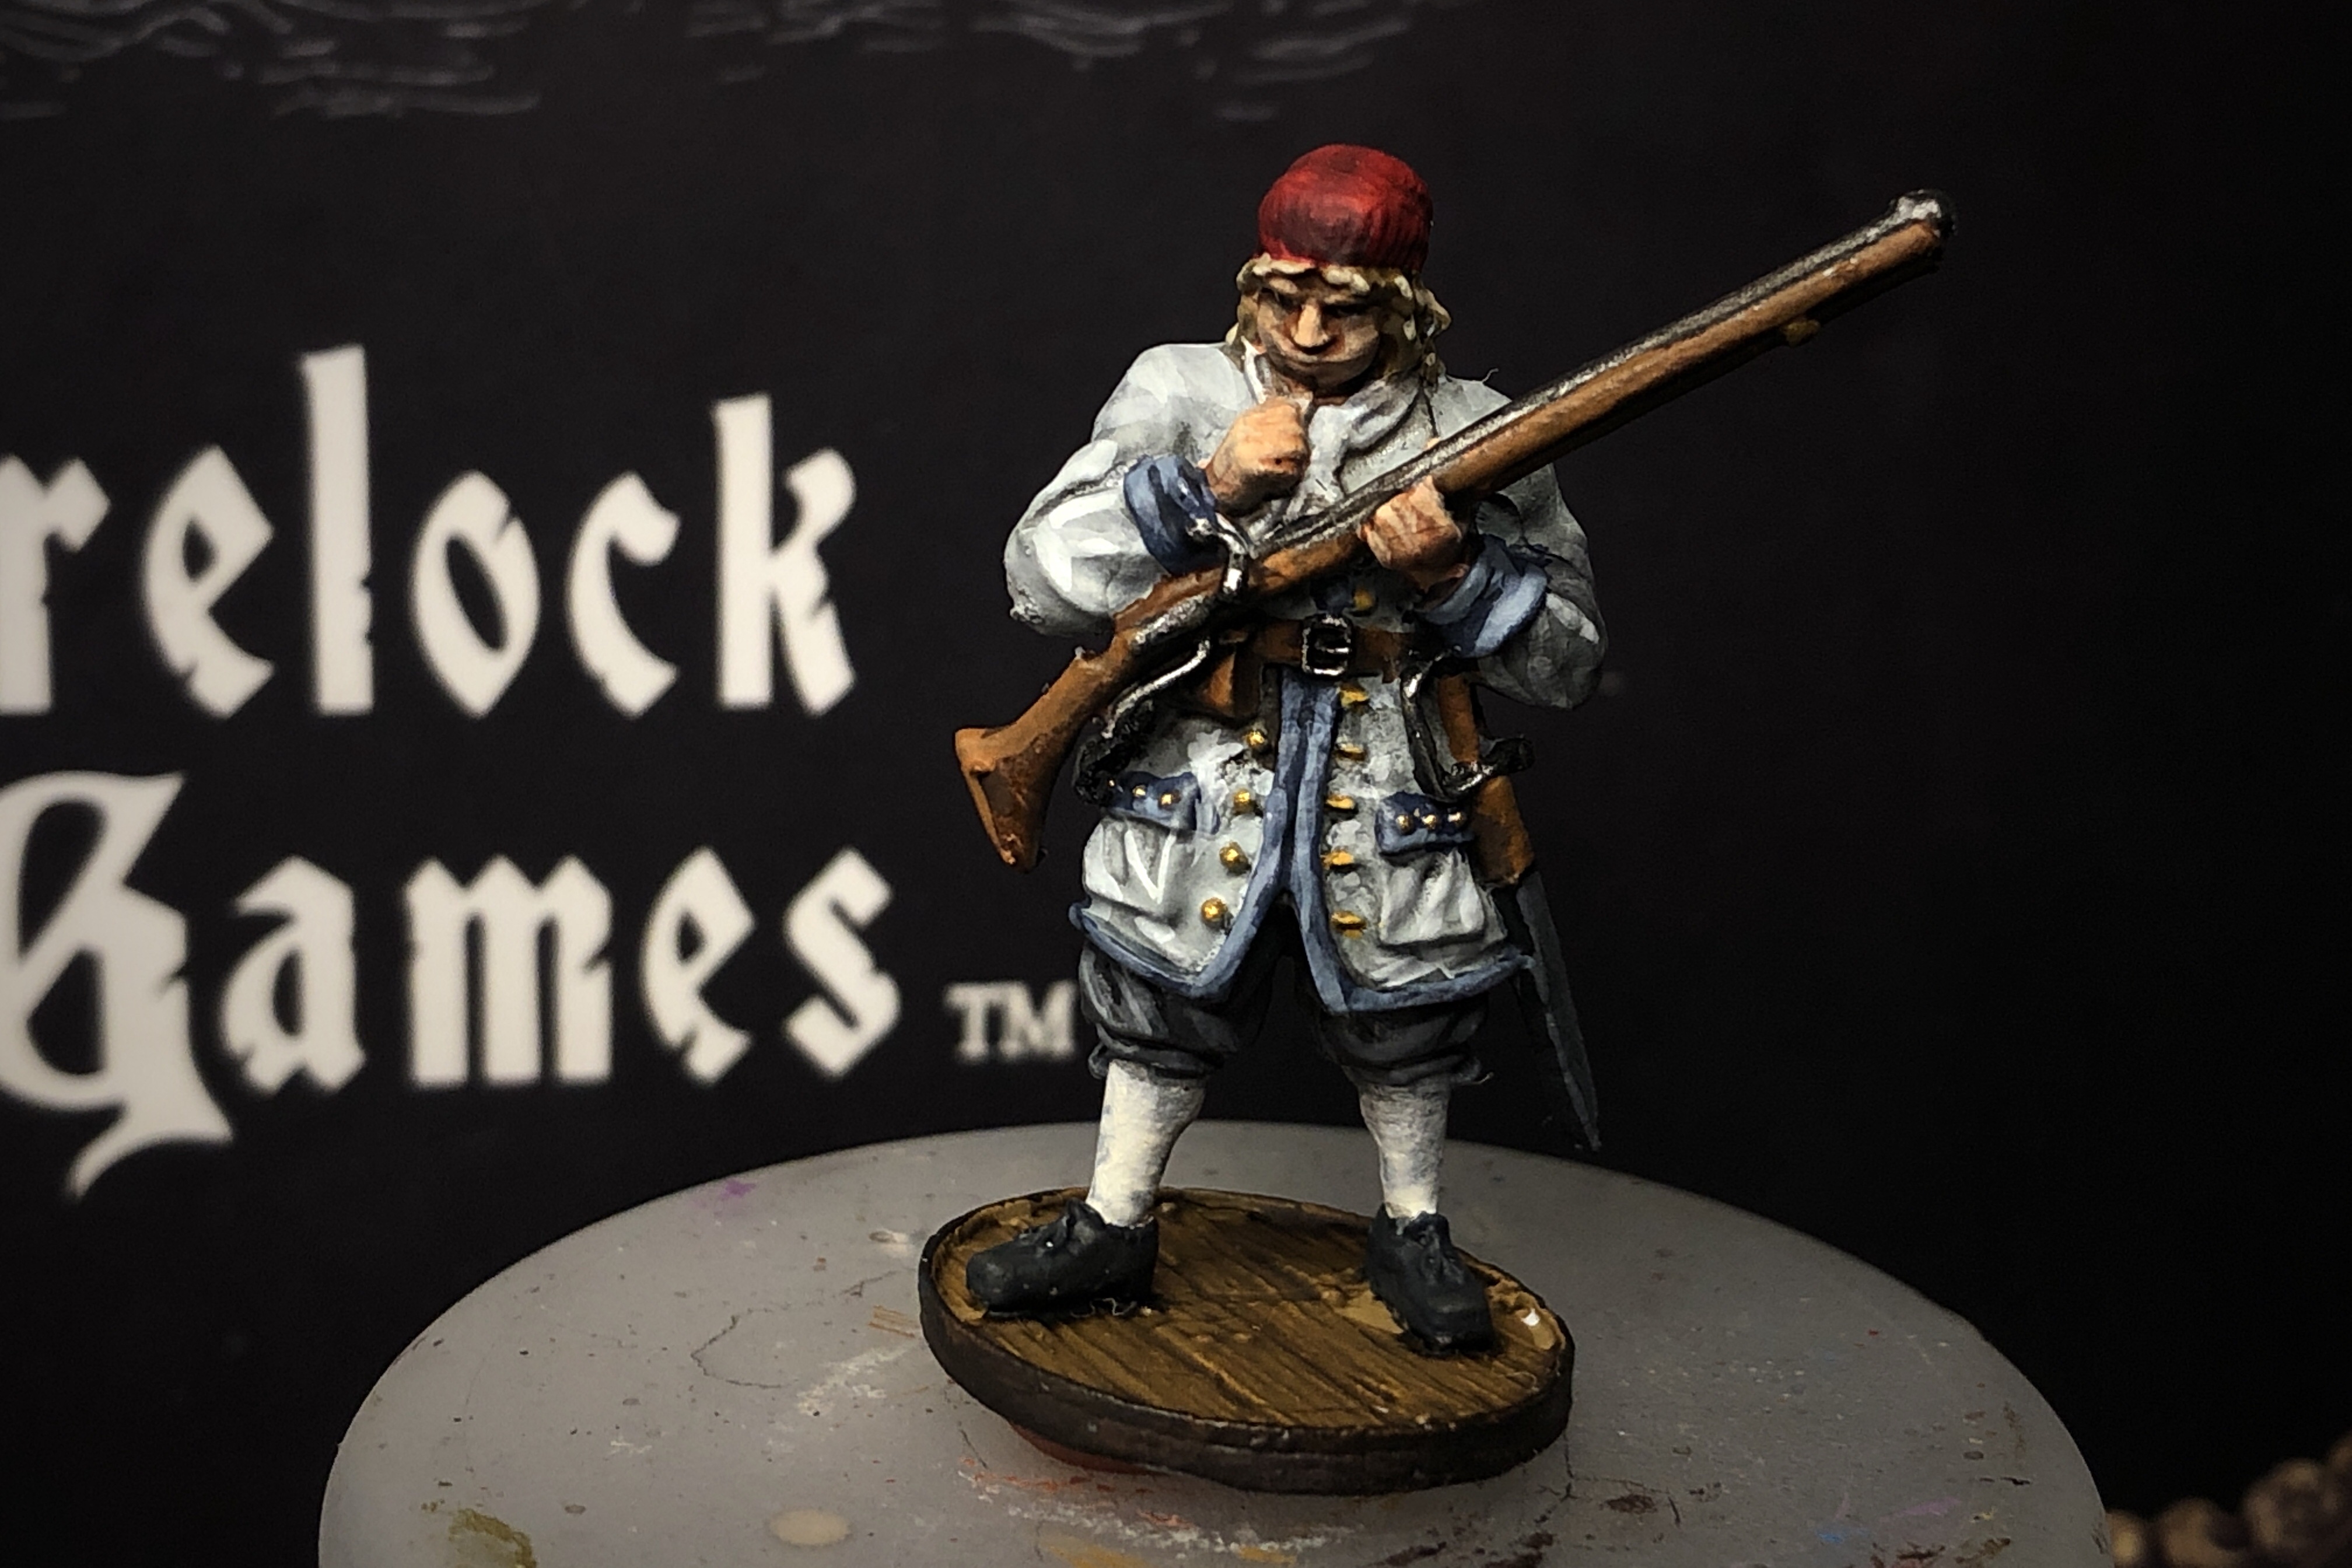
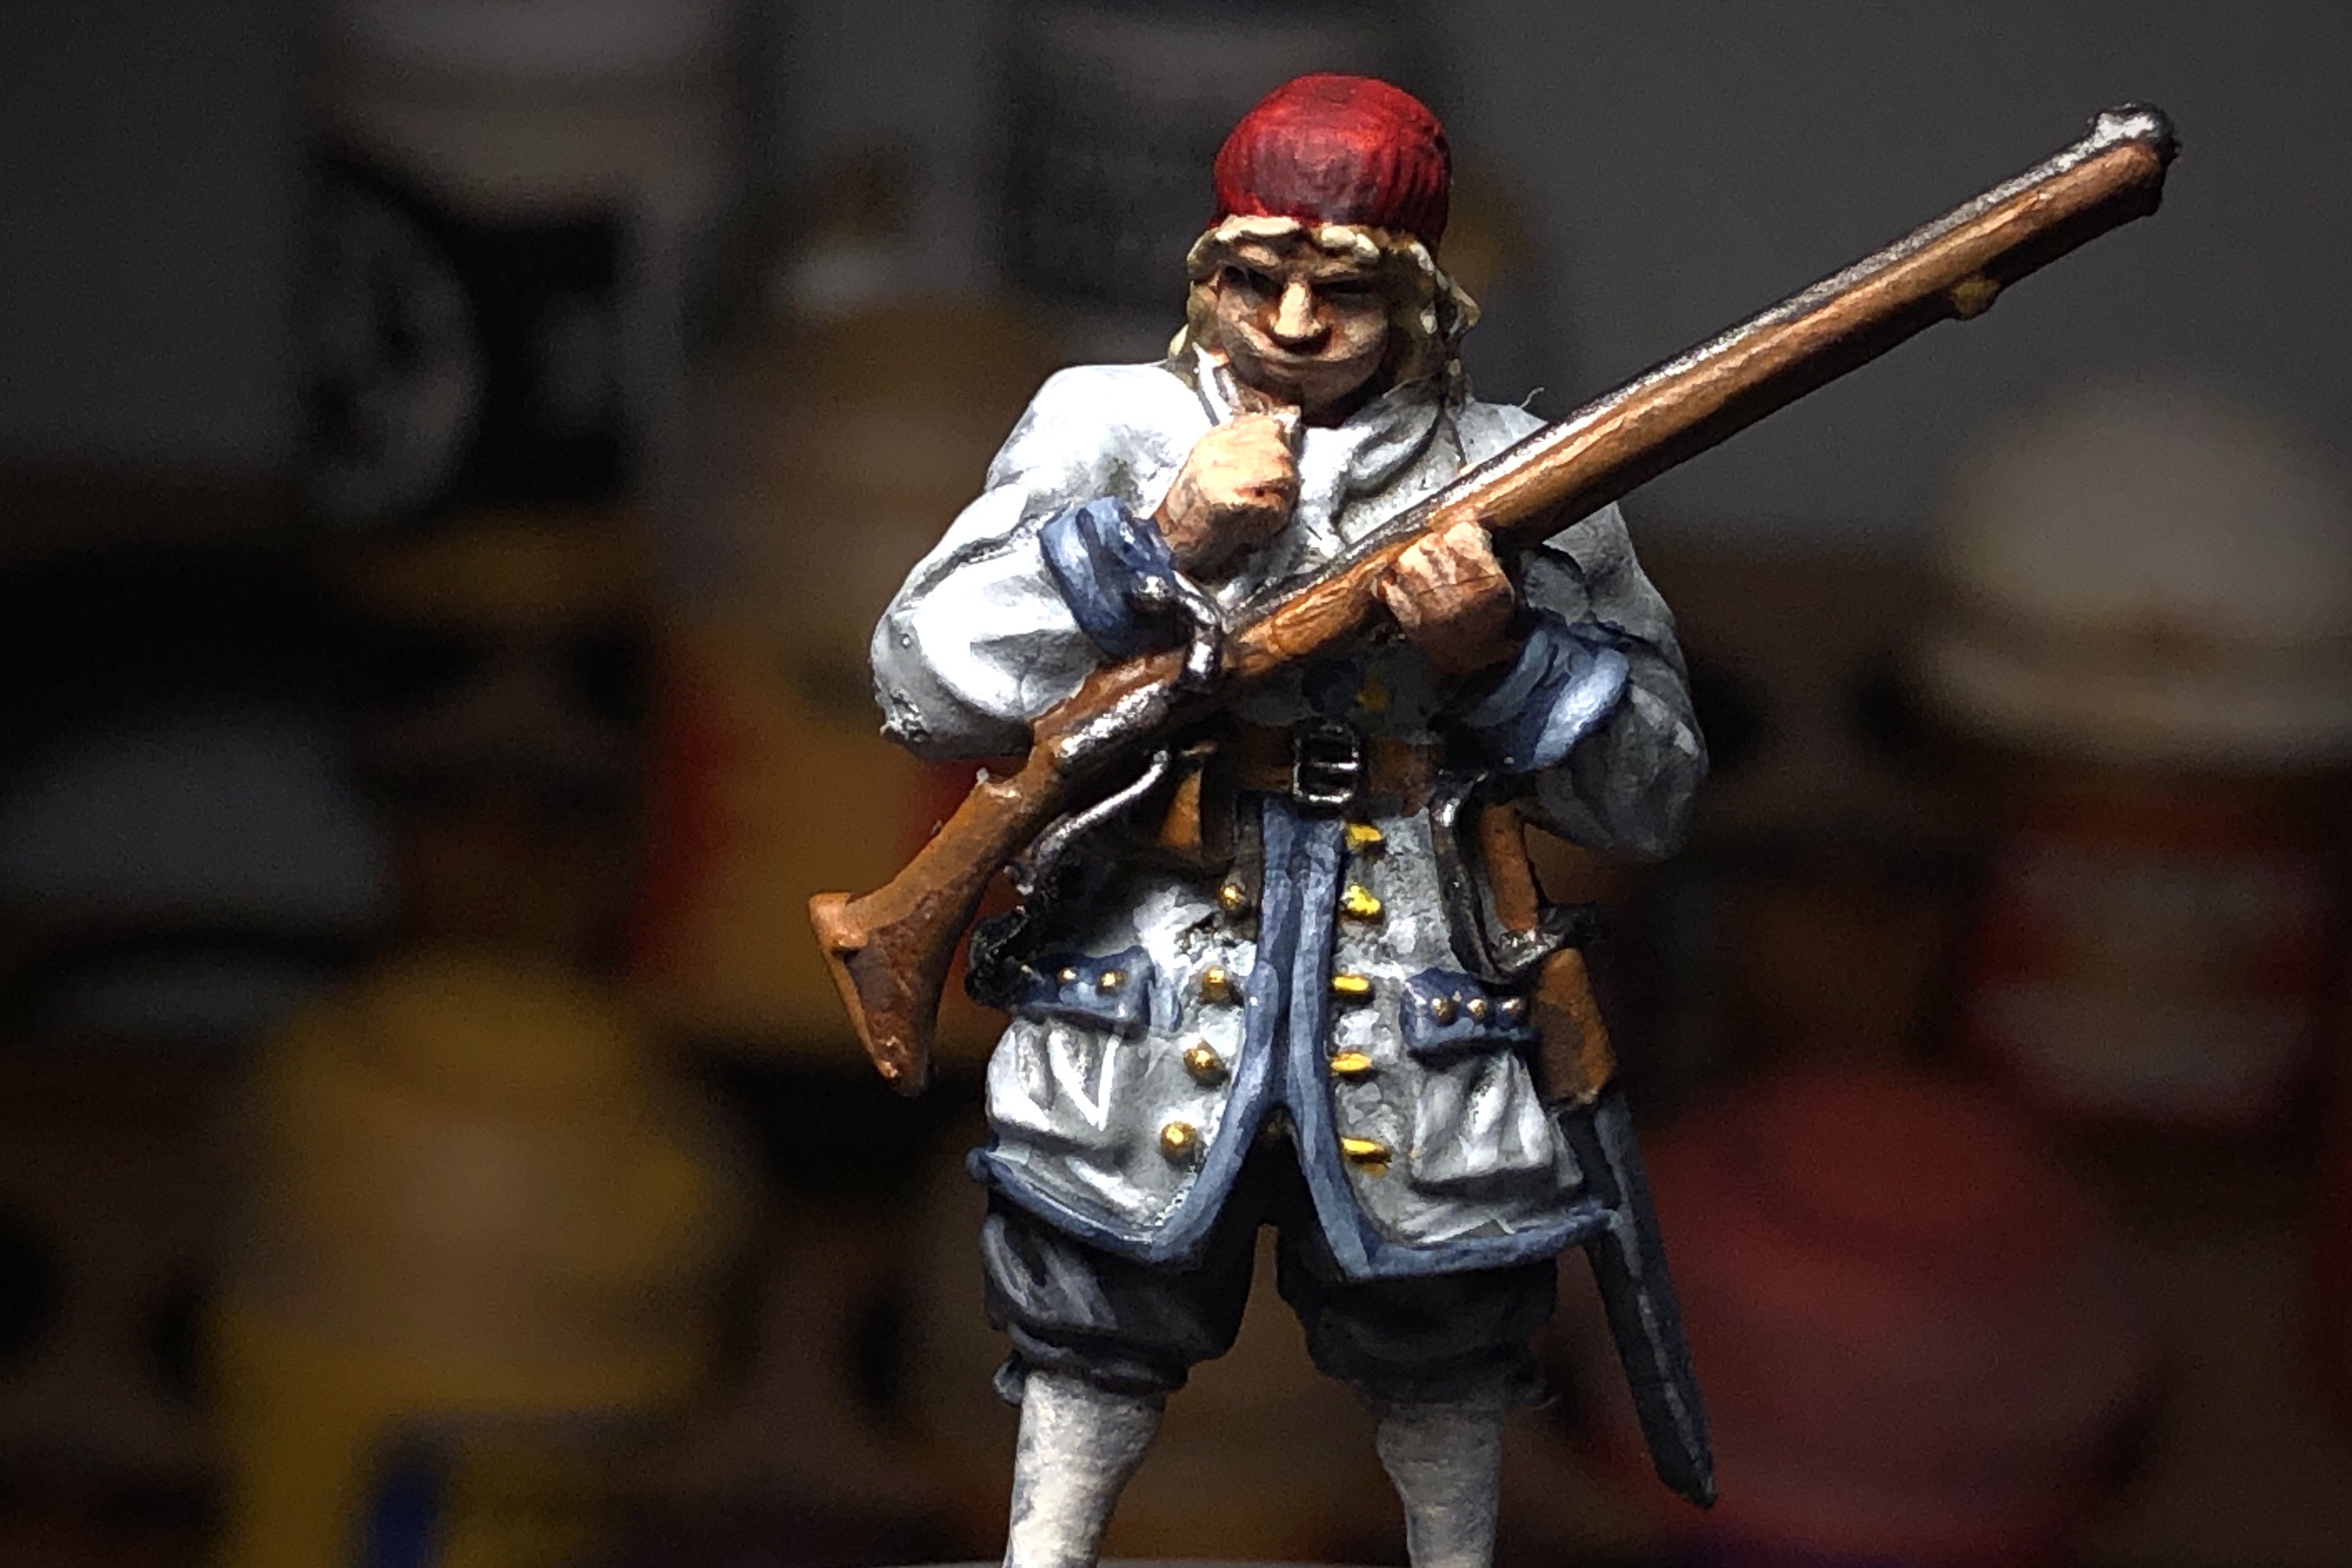
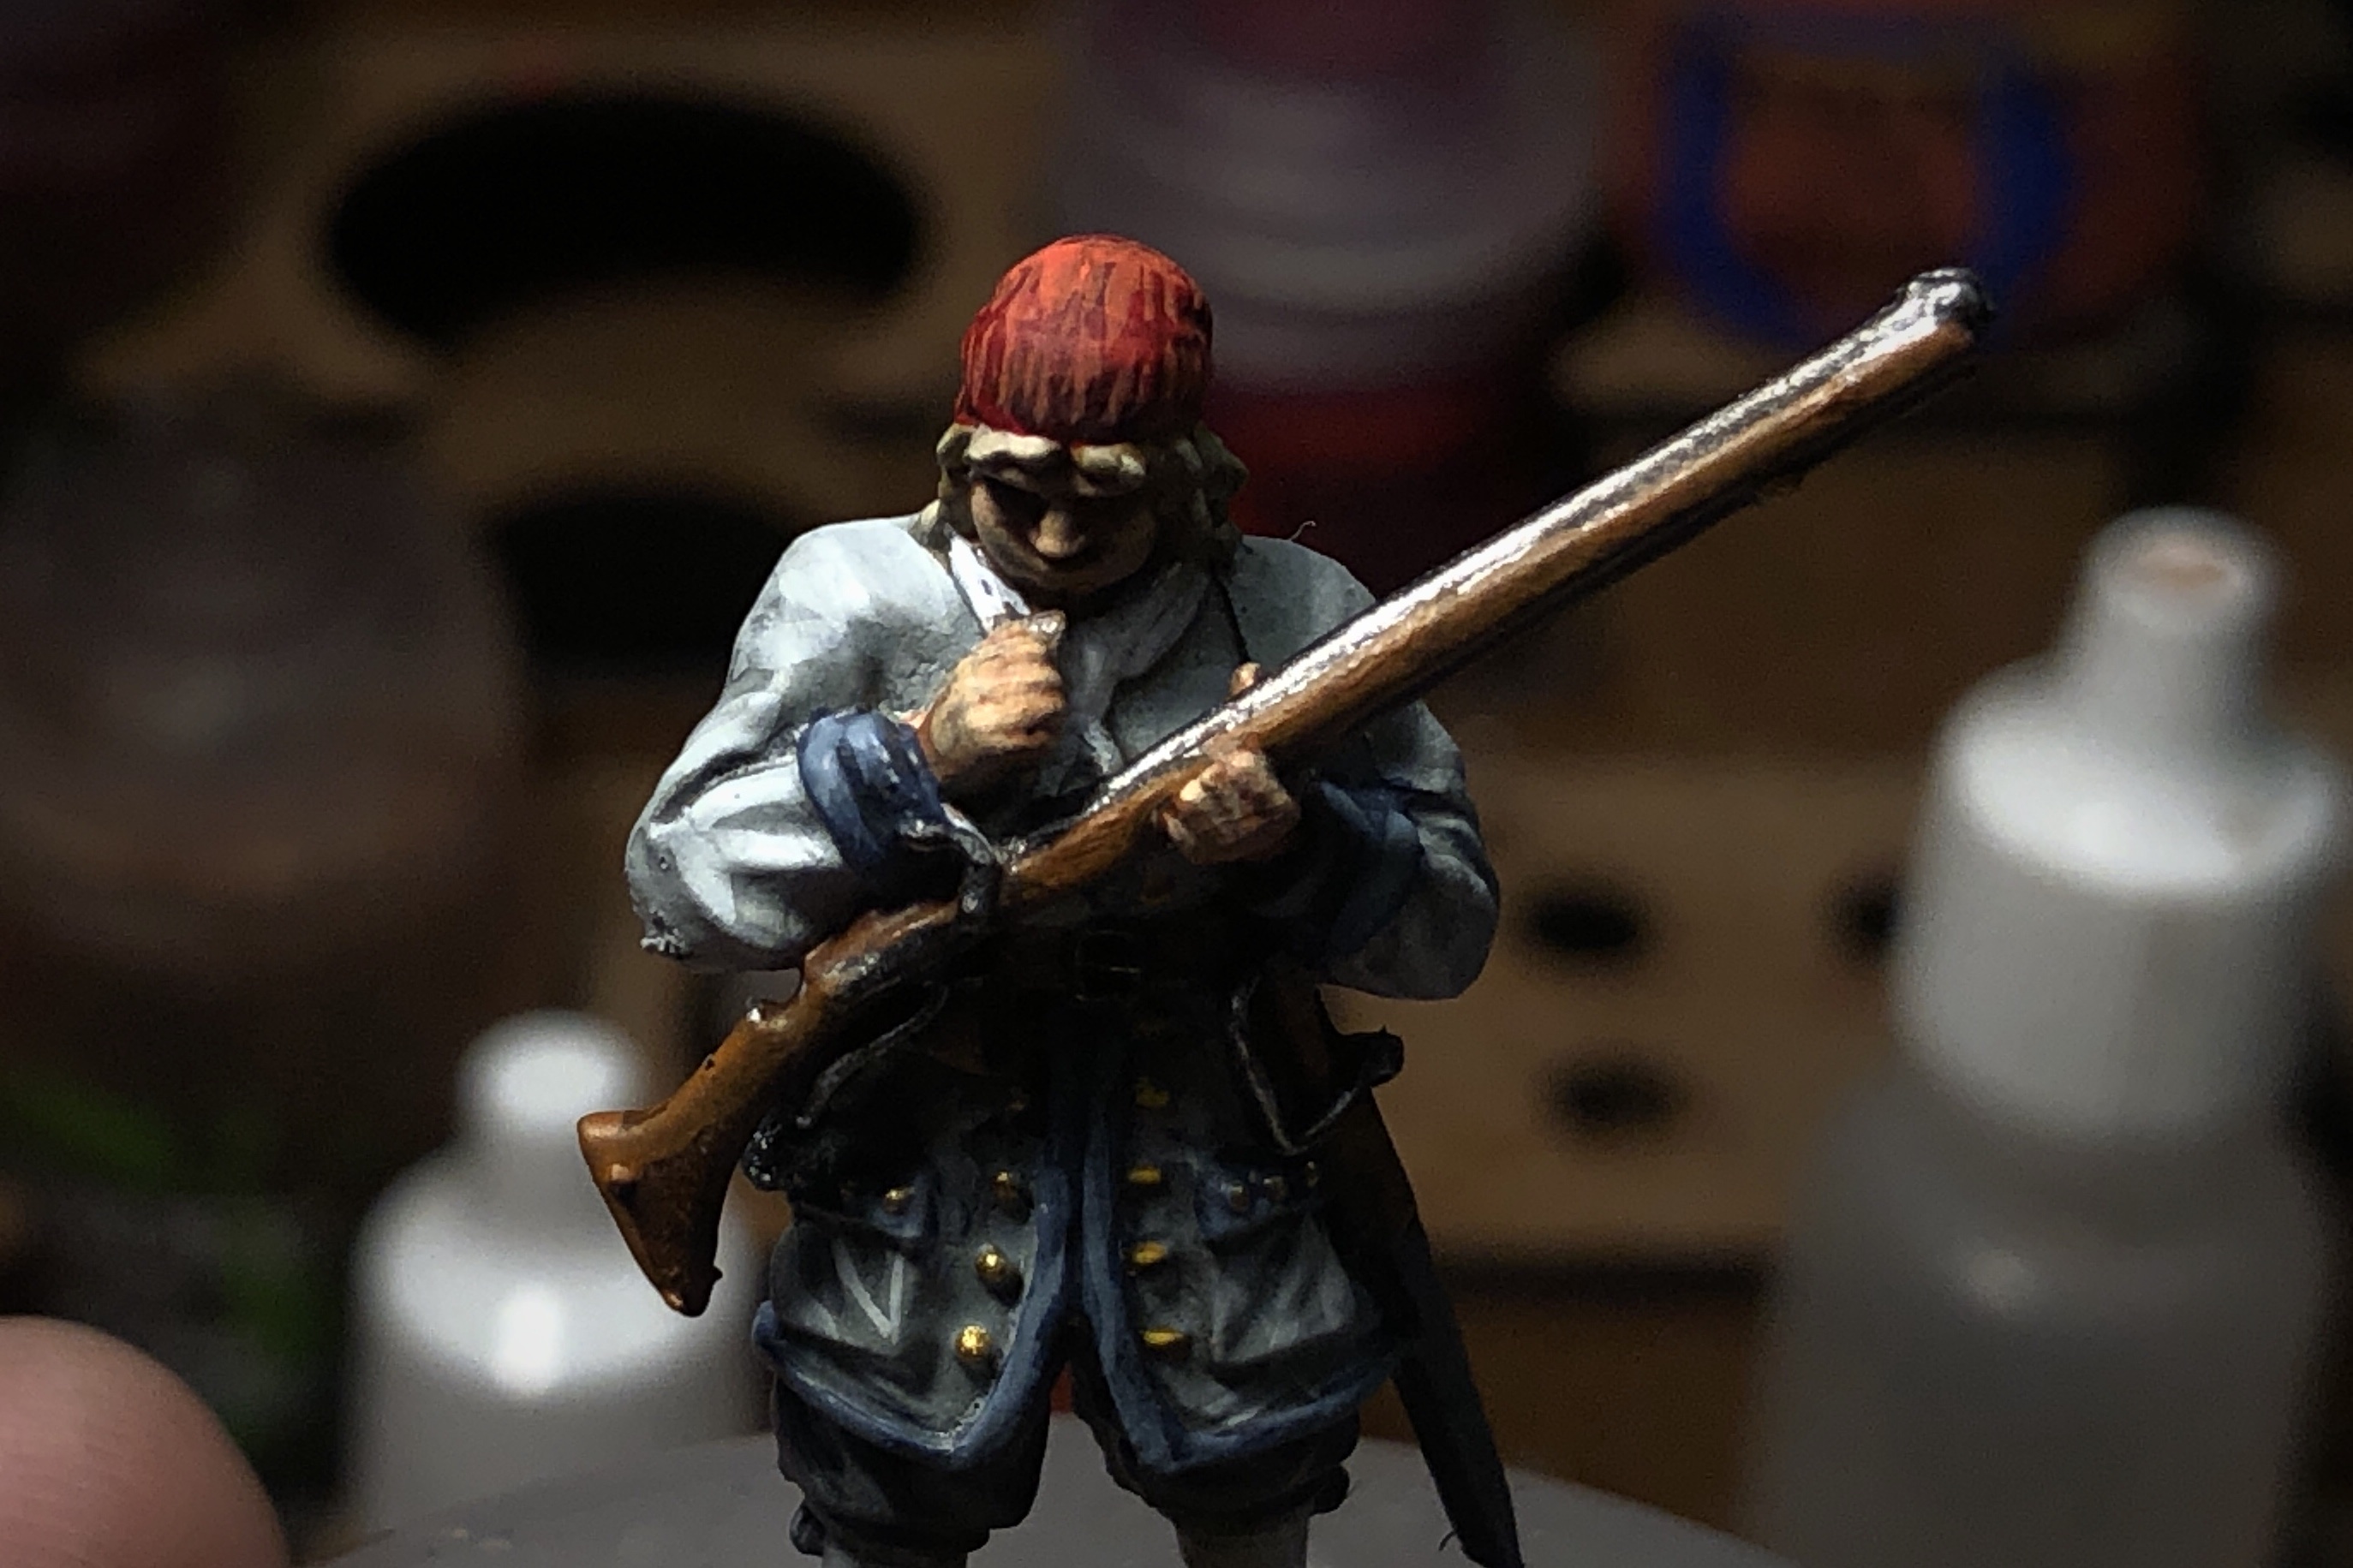
- Mephiston Red – Stocking cap and neck tie for shooting model
- XV-88 – Base
- Rhinox Hide – Base rim
- Averland Sunset – Cuff trim on shooting model and button holes on stocking cap model
- Skragg Brown – Sword and knife handles
Vallejo Paints
- German Grey – Hats, shoes and scabbards
- Ivory – Shirt sleeves for shoot model, all stockings, hat trim and neck tie for stocking cap model
- Leather Brown – All straps, cartridge boxes and pouches
- Old Wood – Wooden cartridges on running model (could use Zandri Dust)
- Brass – Buttons and (eventually) ramrod keeper on muskets
- Steel – Musket hardware, grenade on running model , sword hilts and all belt buckles
You could obviously go with more variation on things like hair color, strap color and neck ties, but I’m trying to keep things to a smaller set of colors.
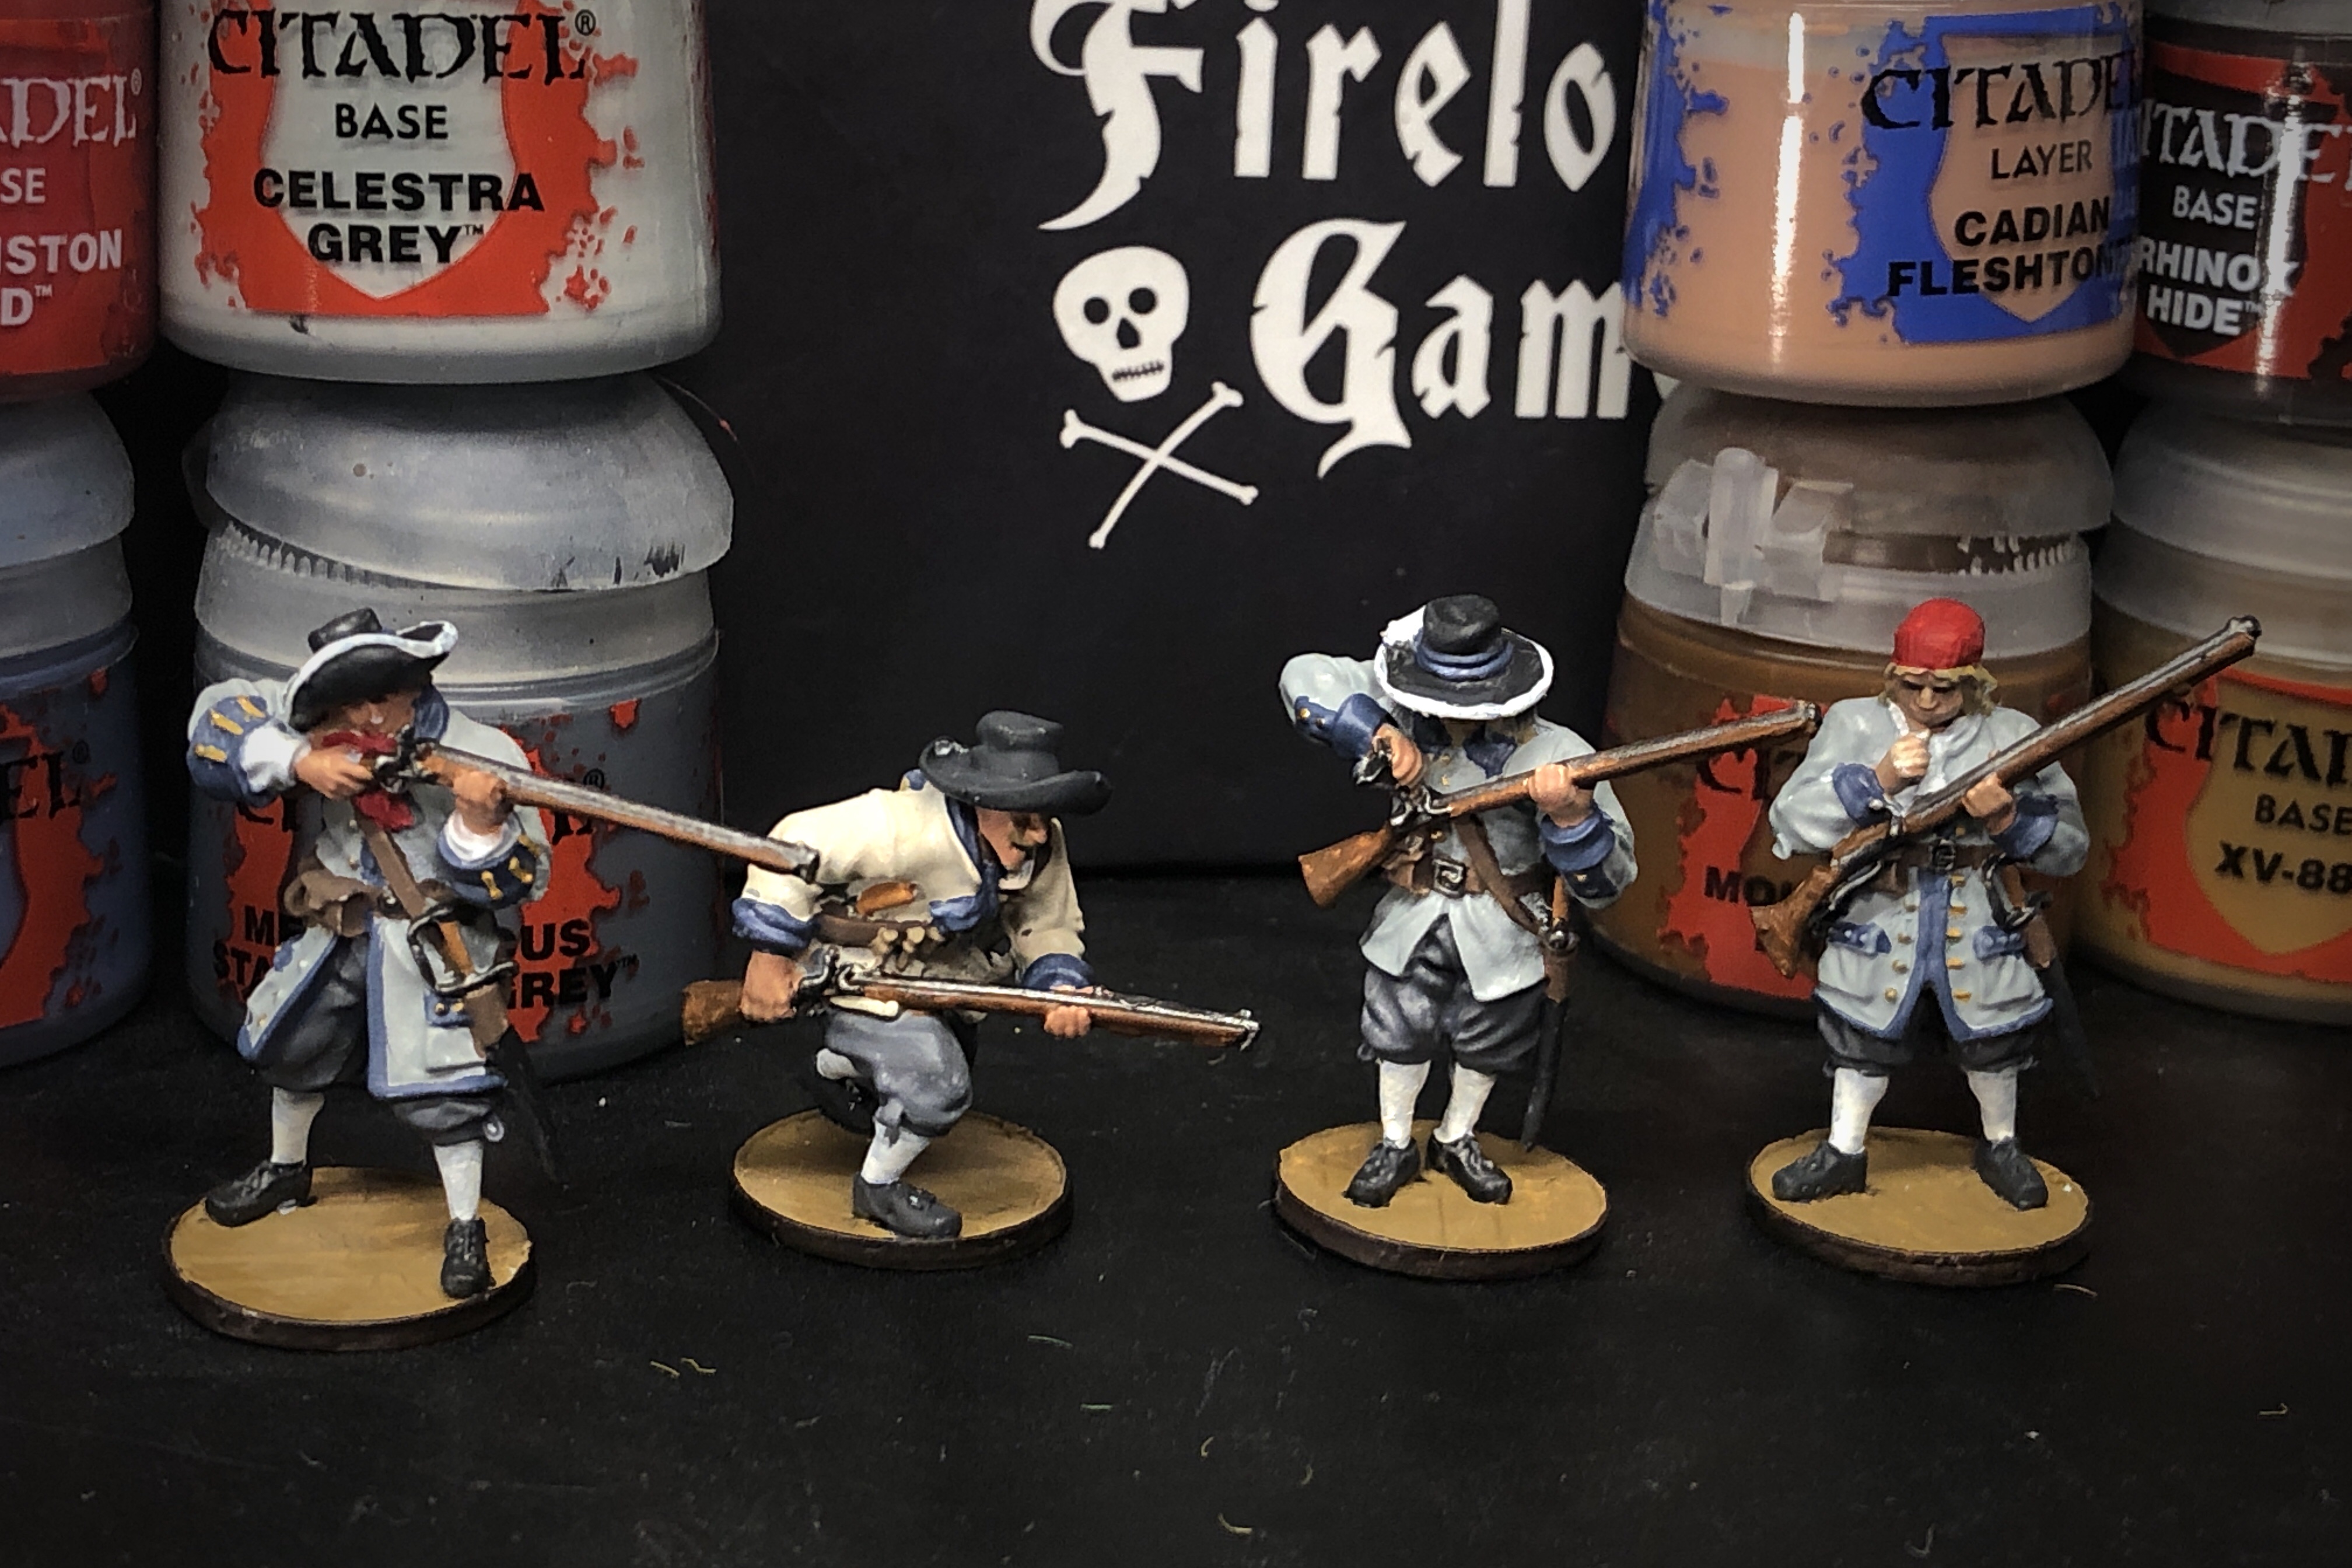
Step 3 – Shades
This step should go quickly. I used the Citadel selection of shades but I threw in a new (to me) Vallejo Wash just to get some experience with it.
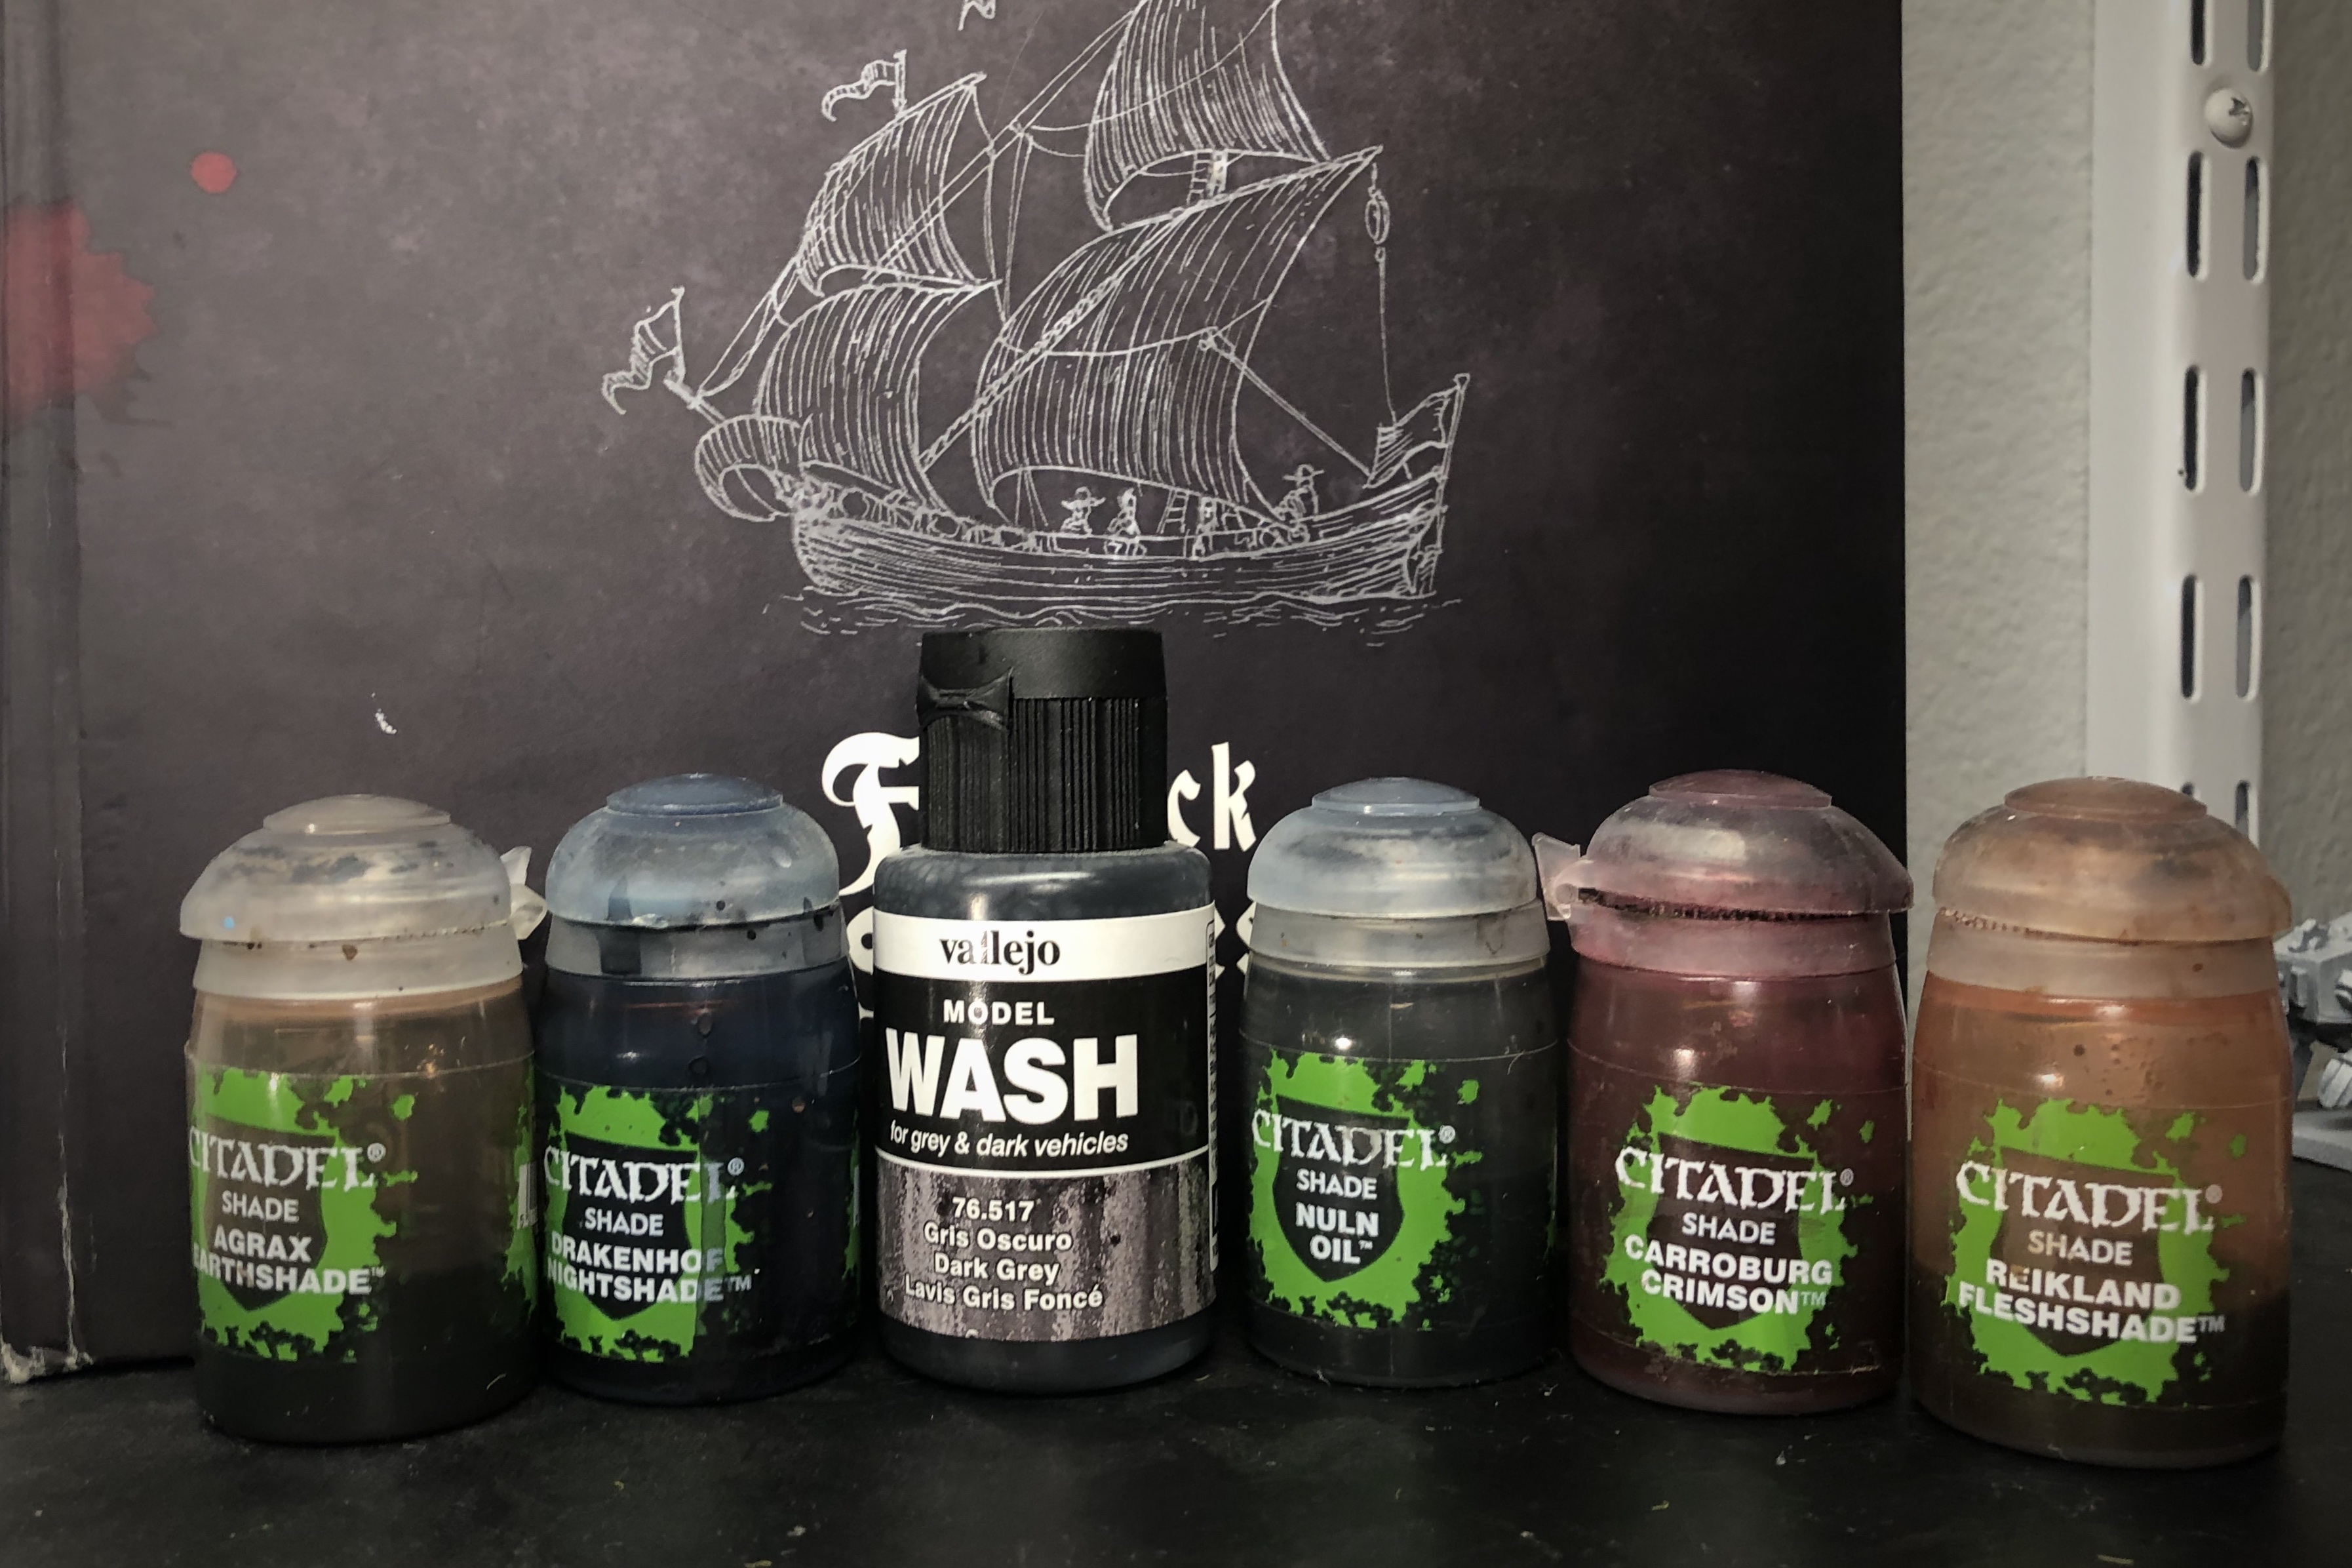
- Reikland Fleshshade for the skin areas
- Agrax Earthshade for the base, muskets, straps, boxes and hair
- Nuln Oil for the steel, hats, shoes and scabbards
- Carroburg Crimson for the red
- Drakenhofe Nightshade for the jacket trim and other blue areas
- A diluted mix of Agrax Earthshade and Nuln Oil for the pants
- A heavy diluted mix of Agrax Earthshade and Nuln Oil for all the white areas
- Diluted Dark Grey Vallejo wash for the great jackets
Step 4 – Highlights
This is where I end up spending the most time. The returns are diminishing, but I like the finished product and I can’t force myself to skip any of this step.
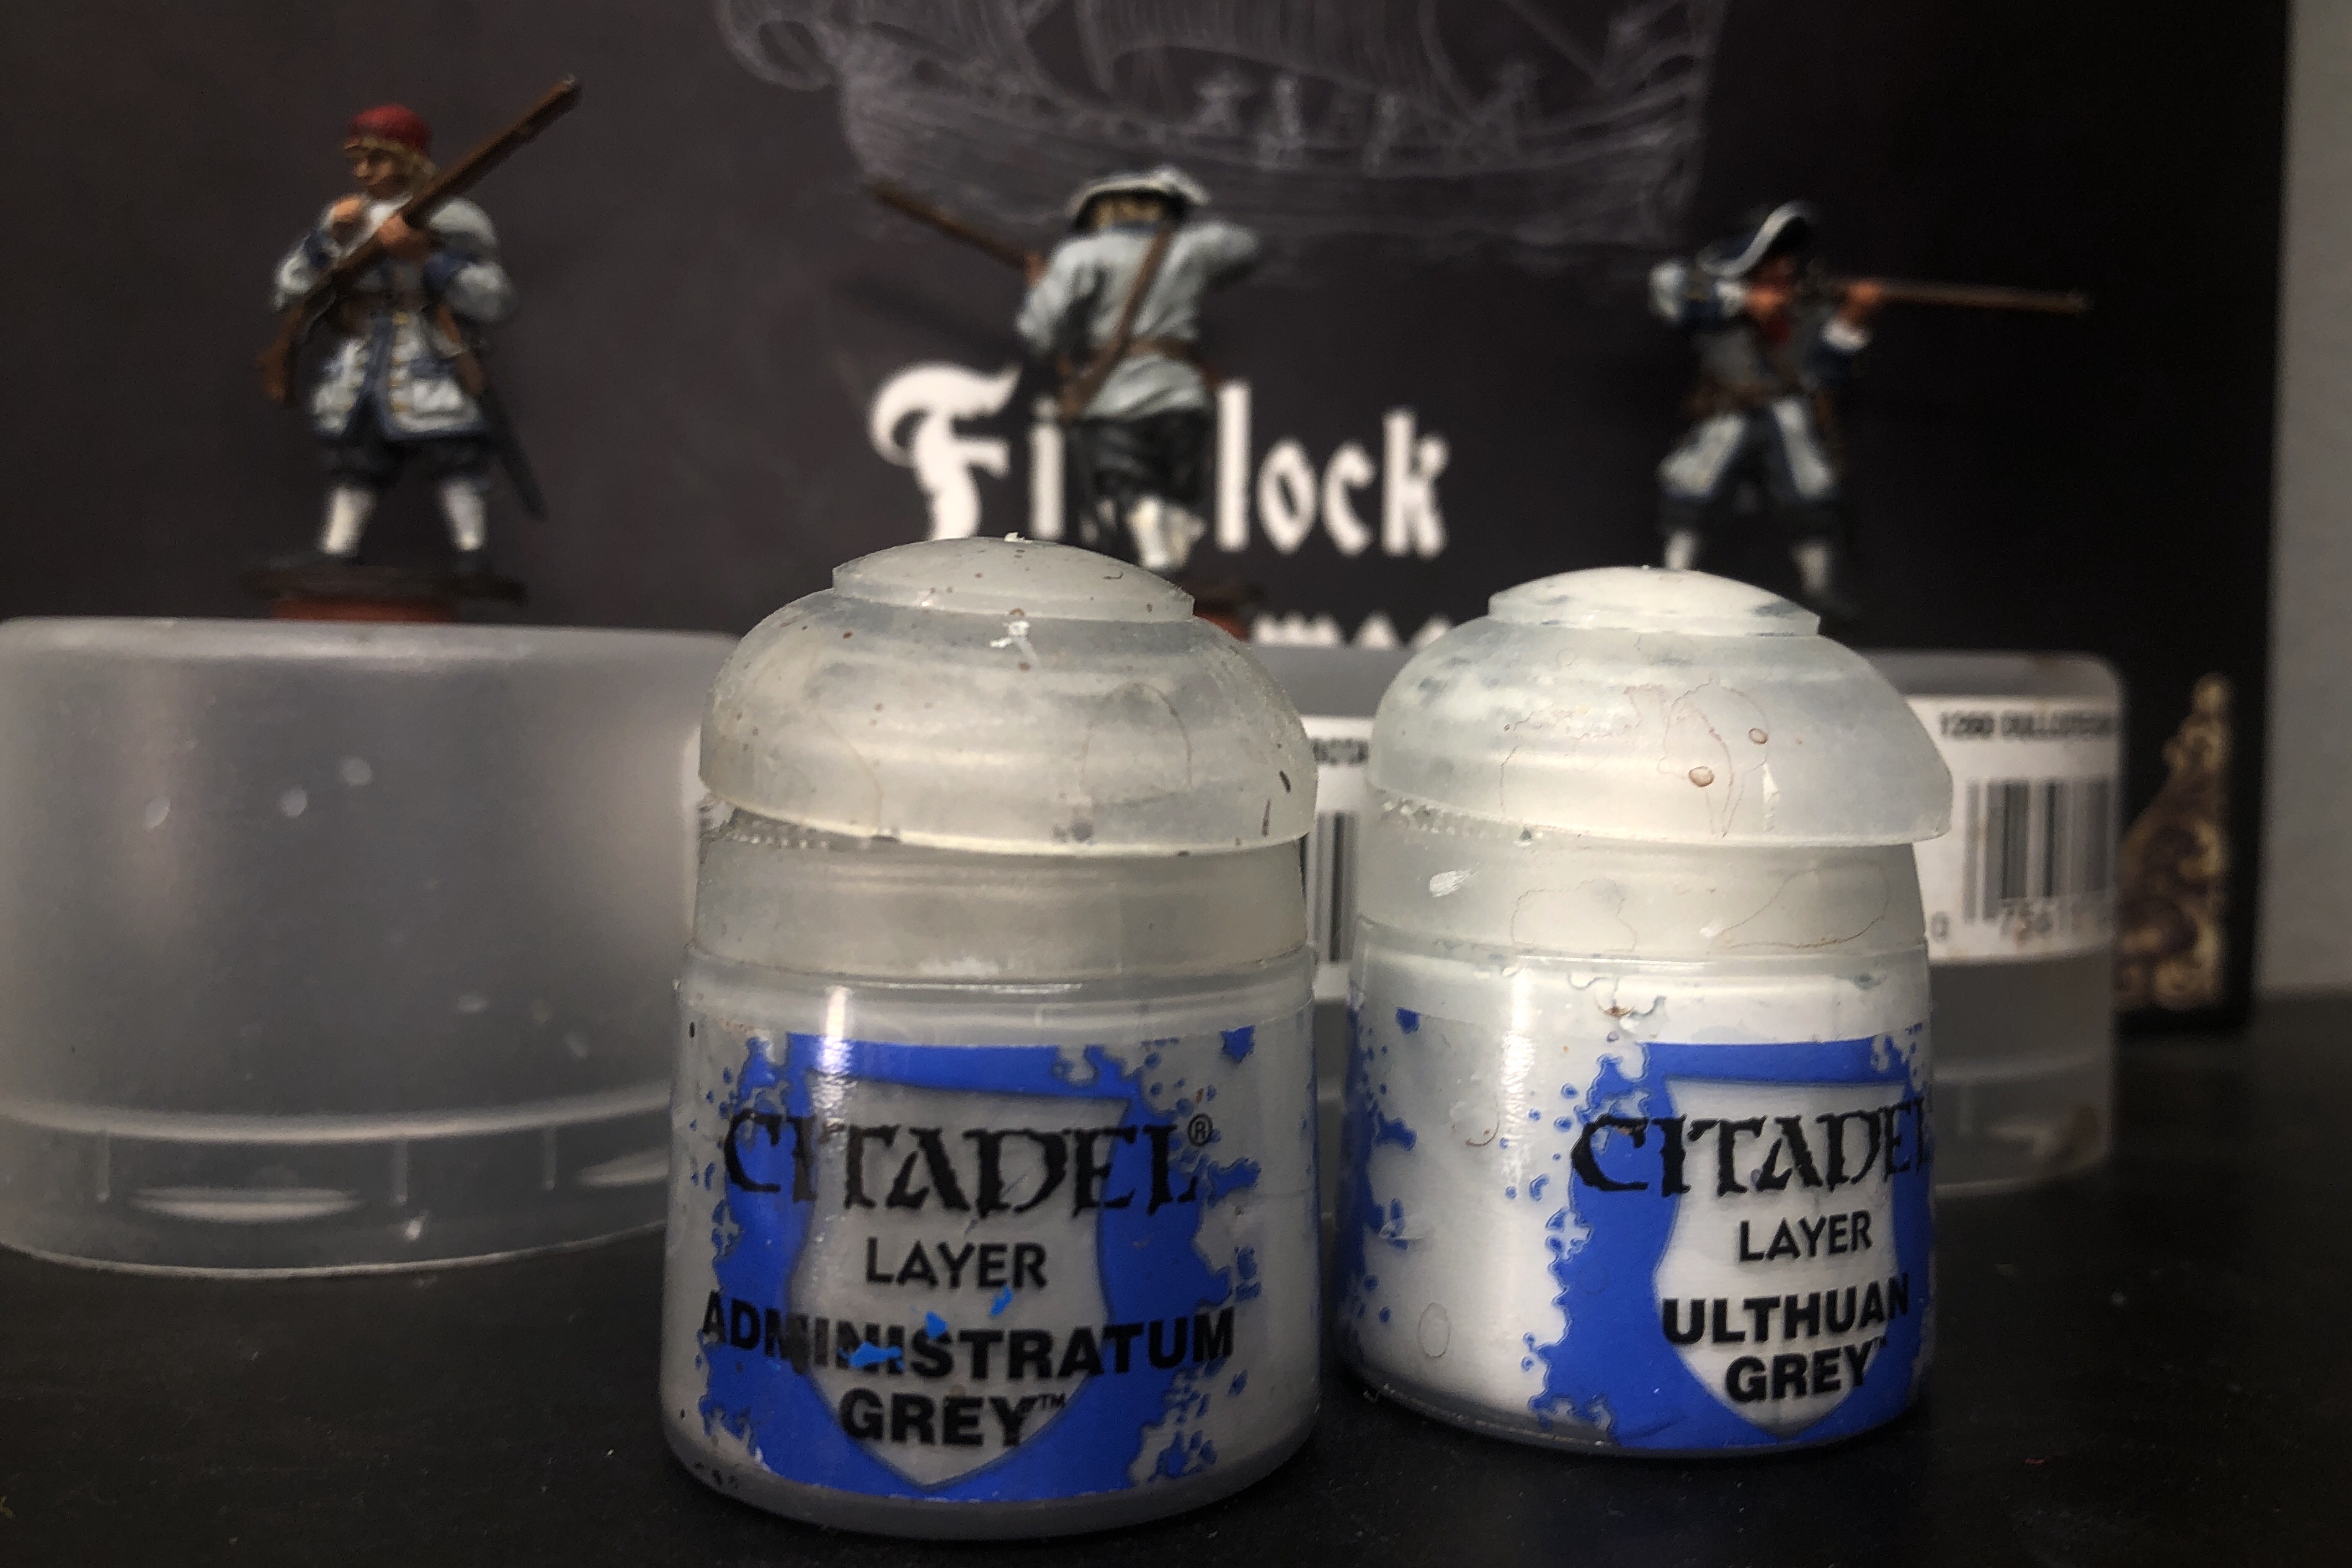
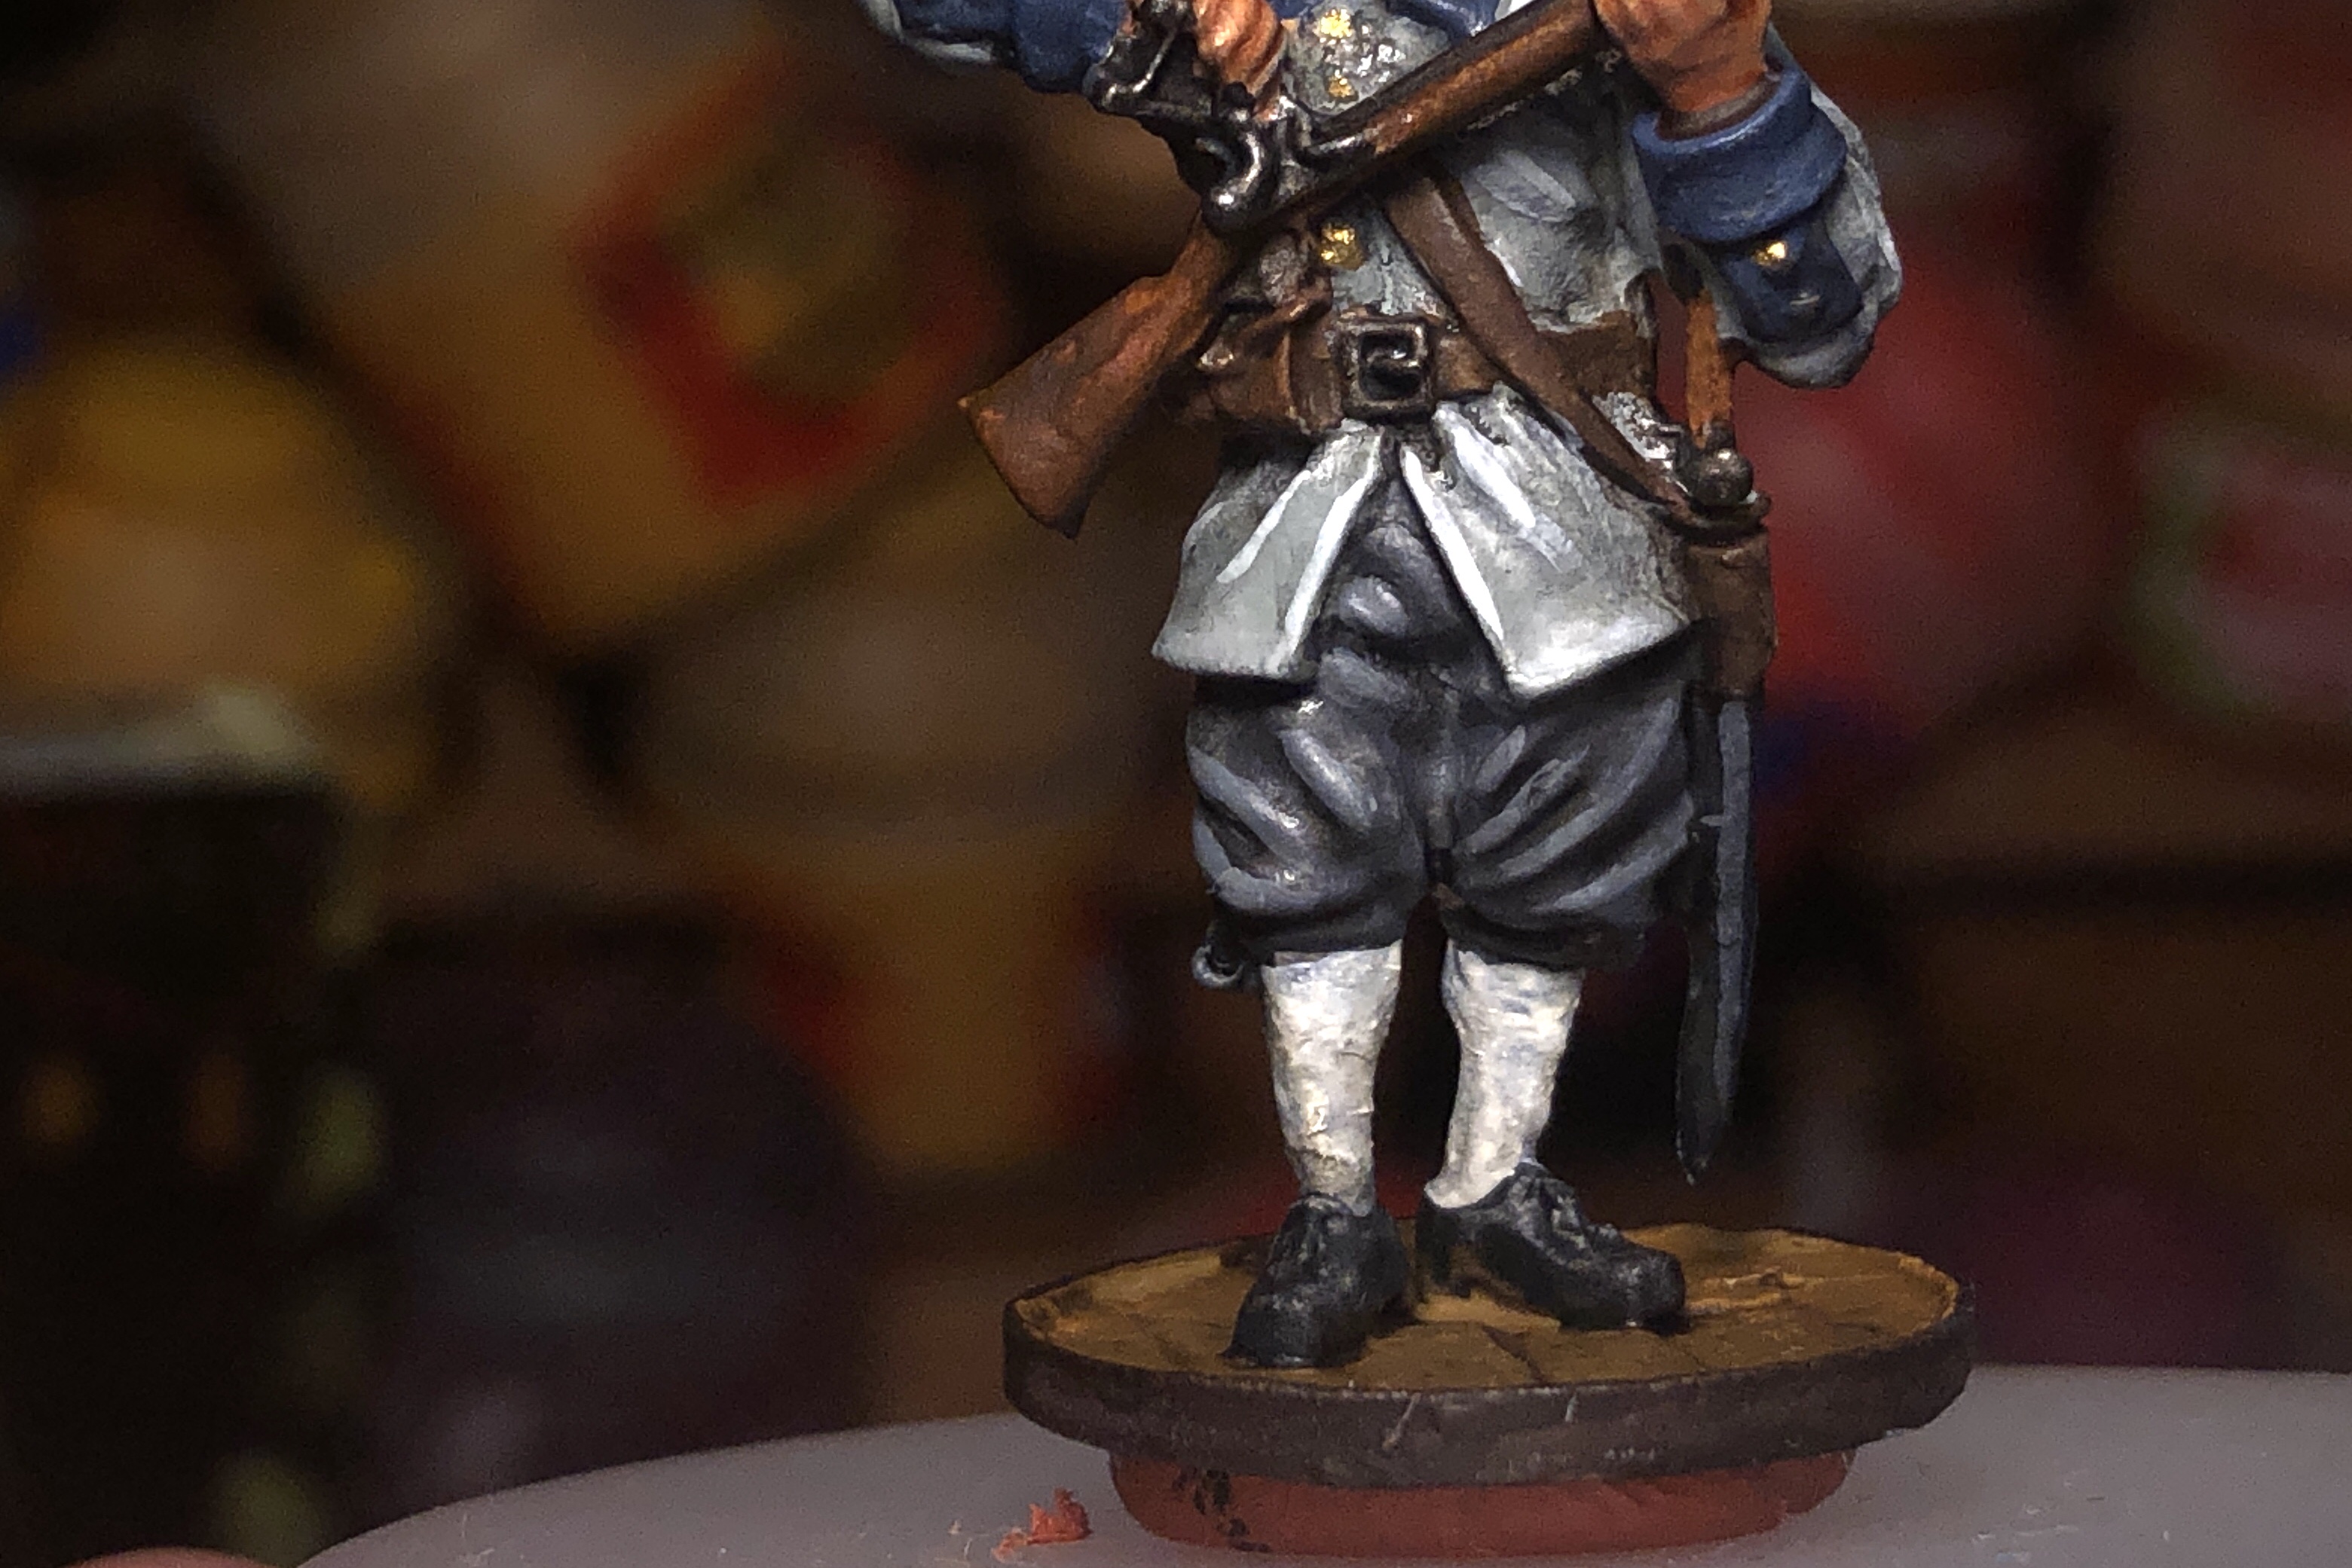
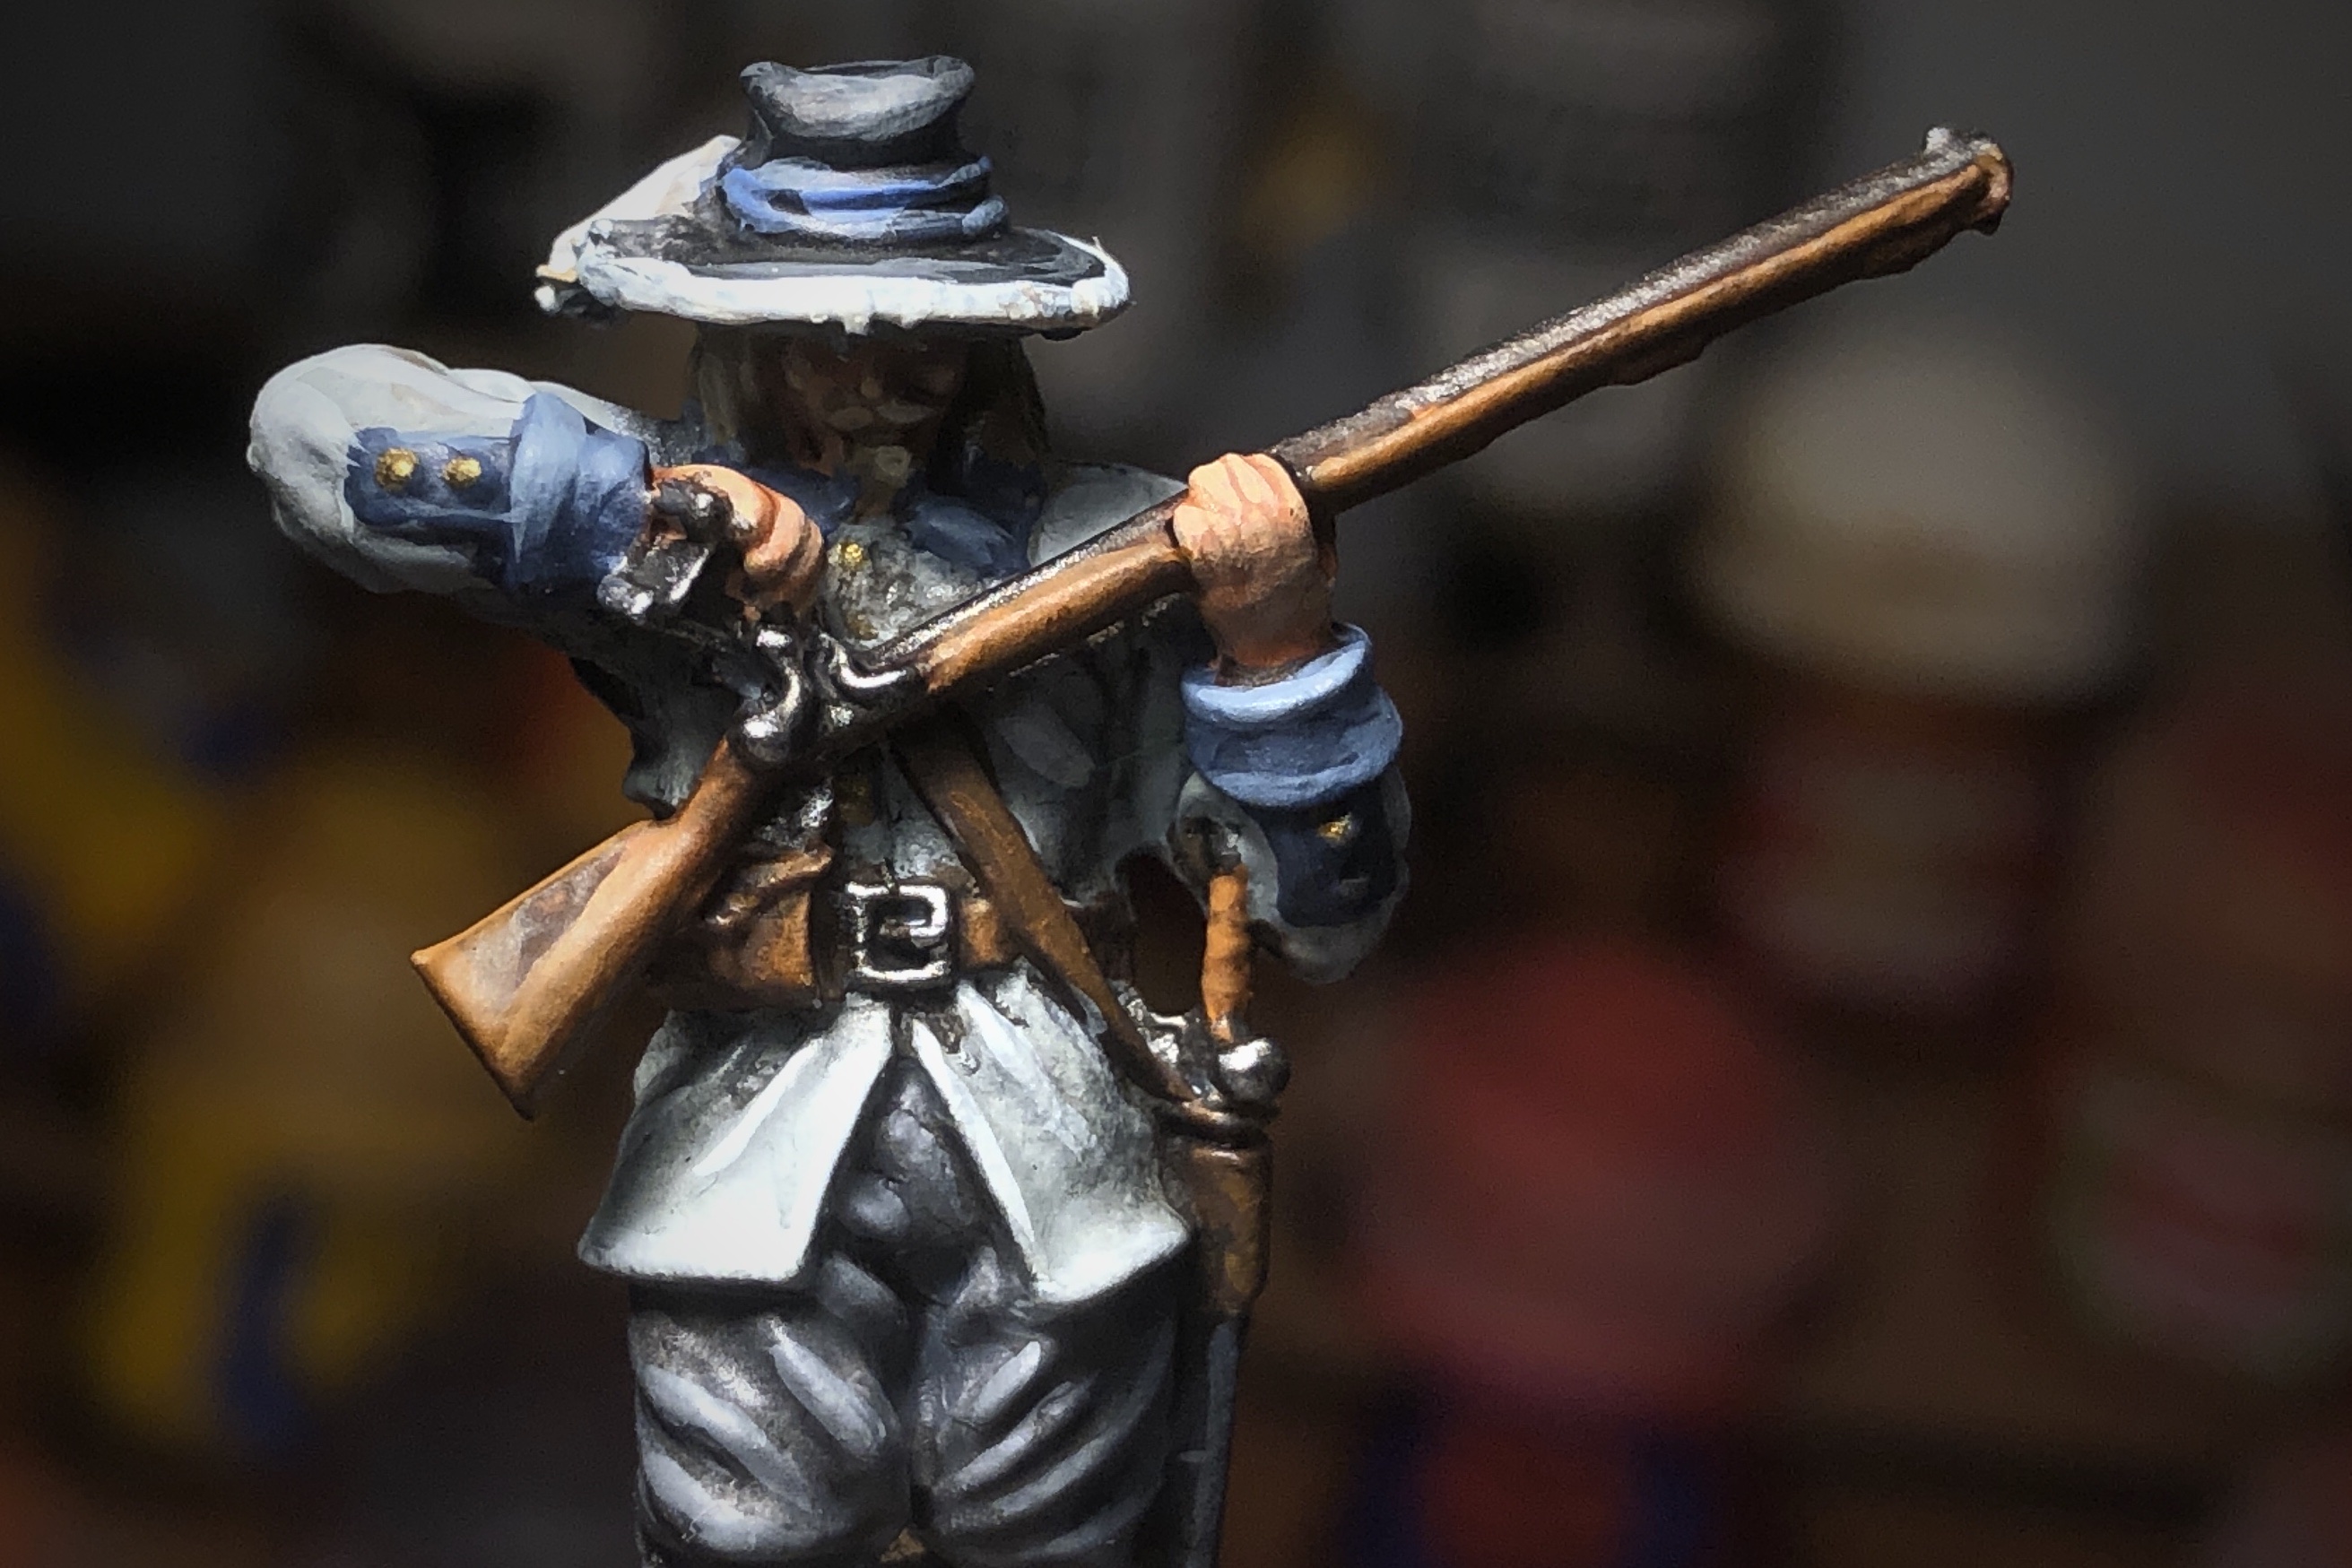
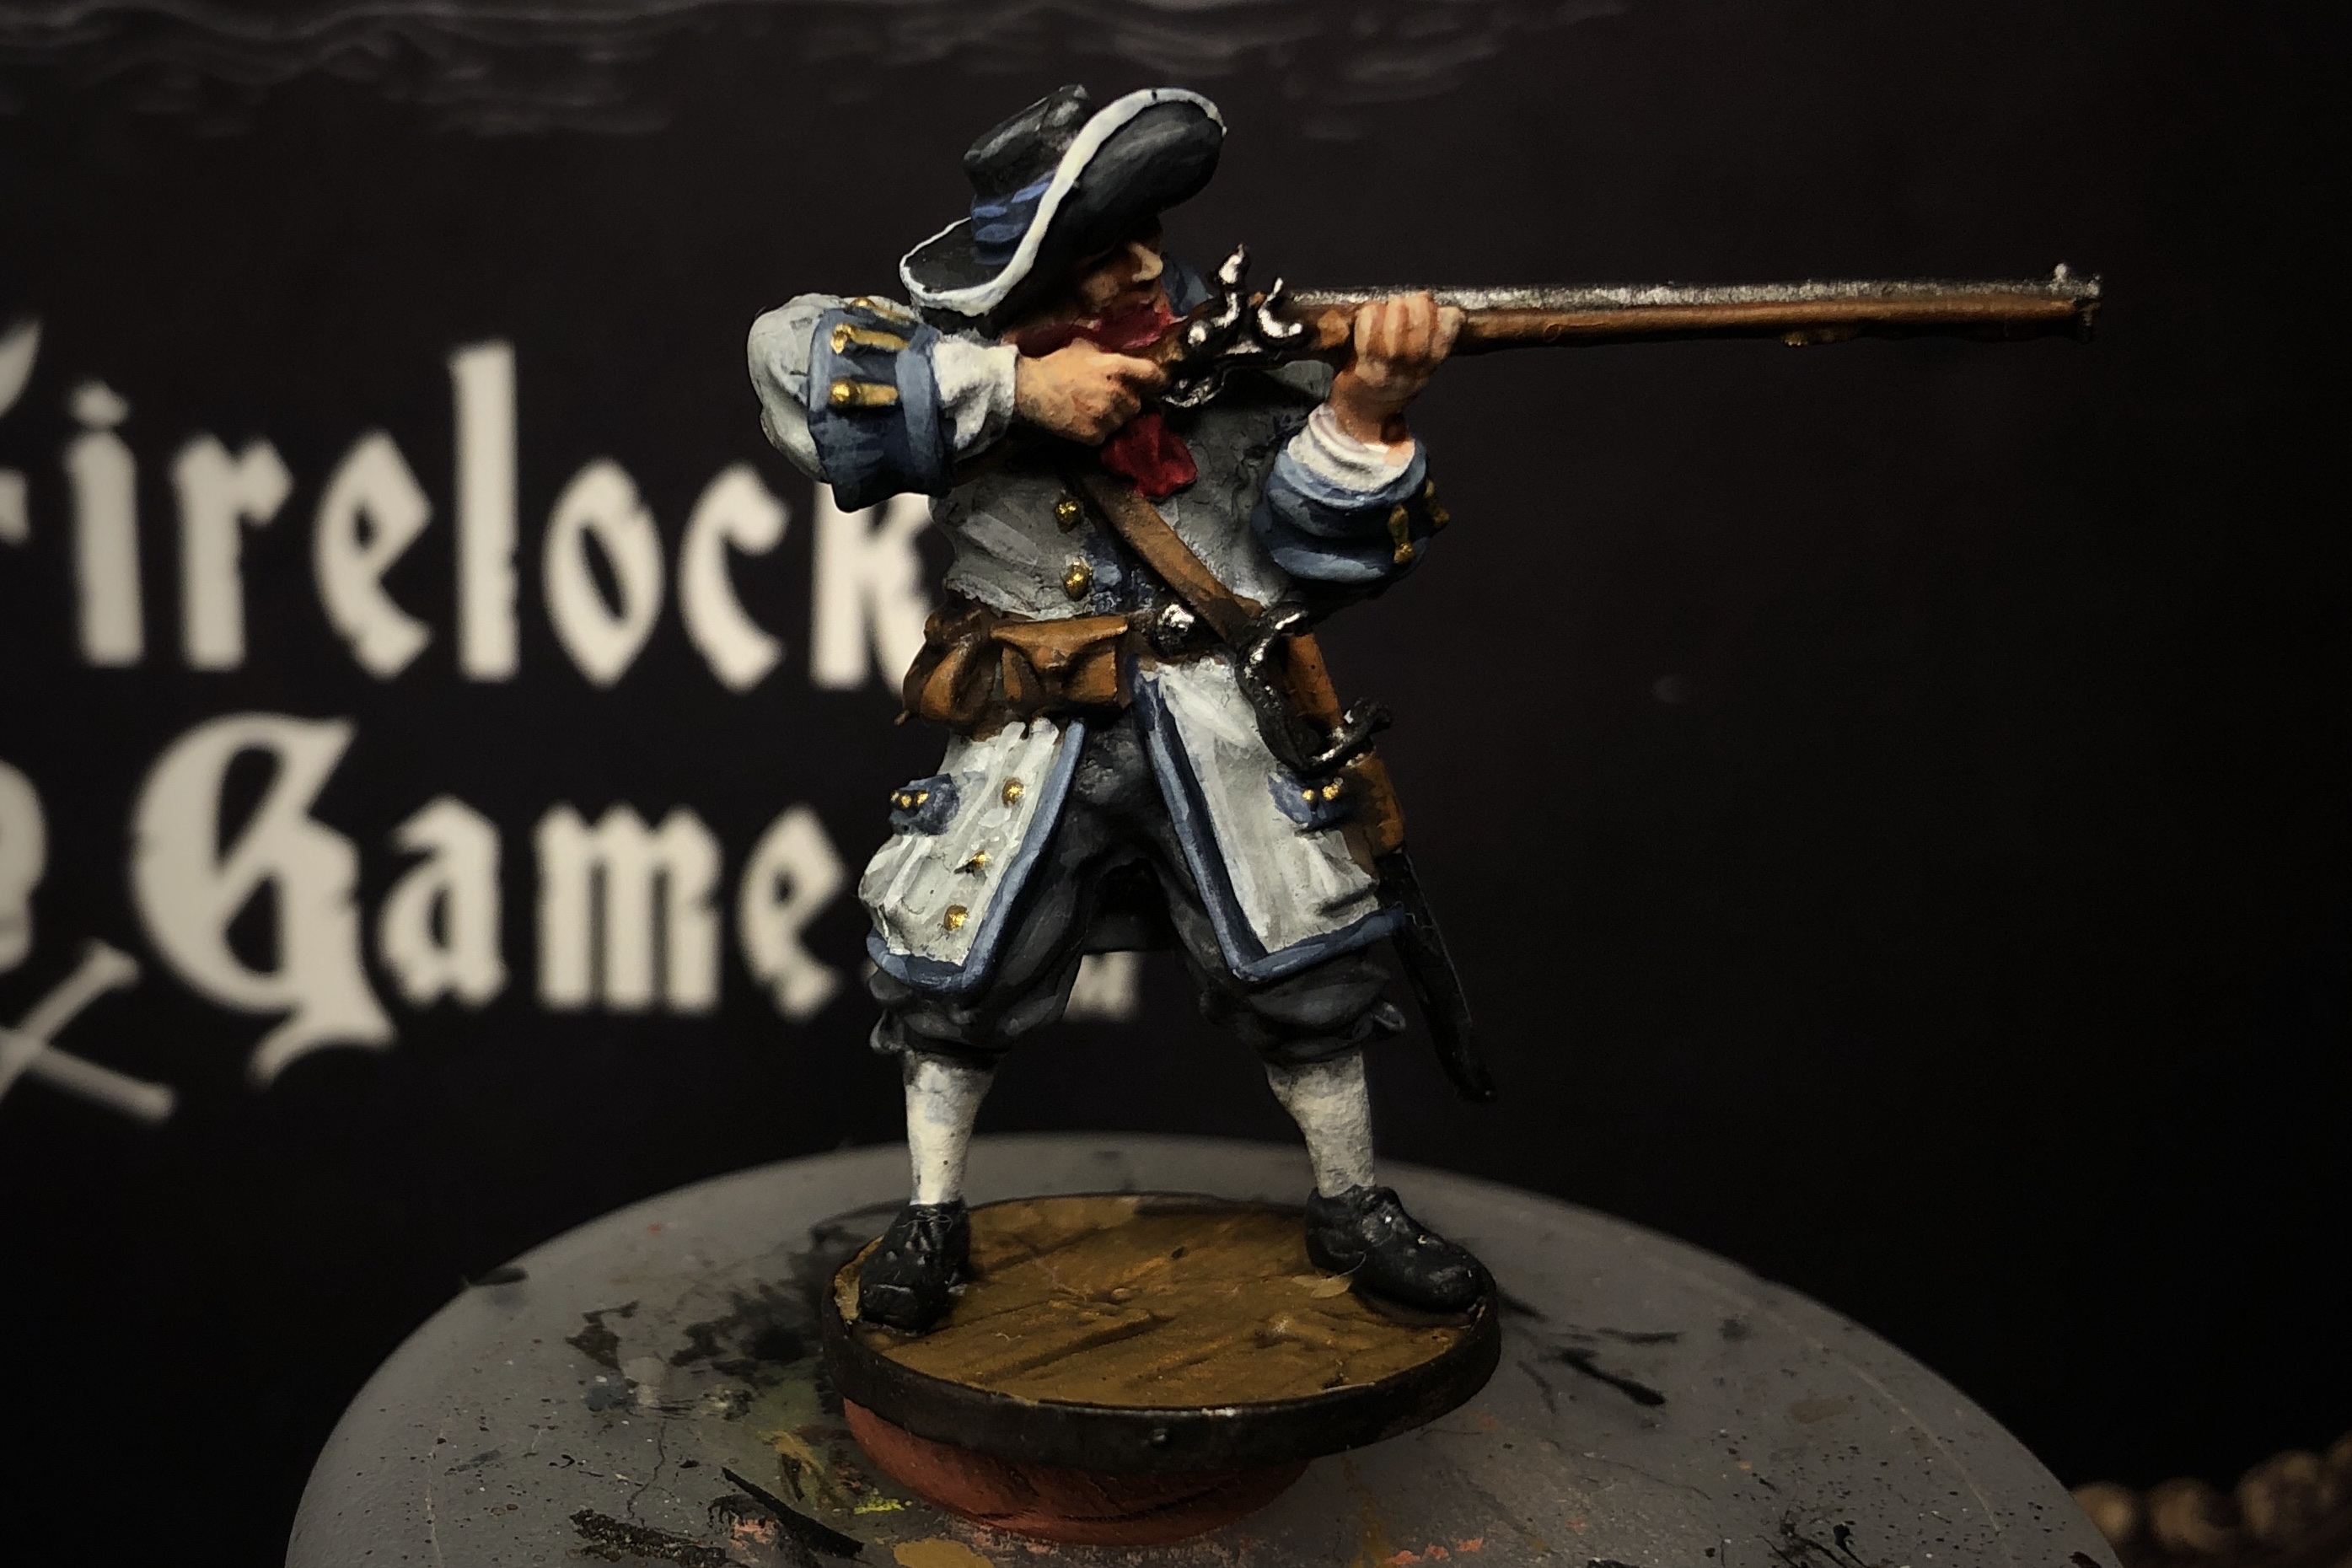
For the grey jackets I used Administratum Grey, eventually adding some Ulthuan Grey for some brighter lines.
And even some put Ulthuan Grey lines on the creases of the coat.
For the pants I added some Administratum Grey to the original Mechanicus Standard Grey and thinned it with plenty of water.
You don’t need to obsess over the pants but there are some nice creases on some of these models that are easy brighten up.
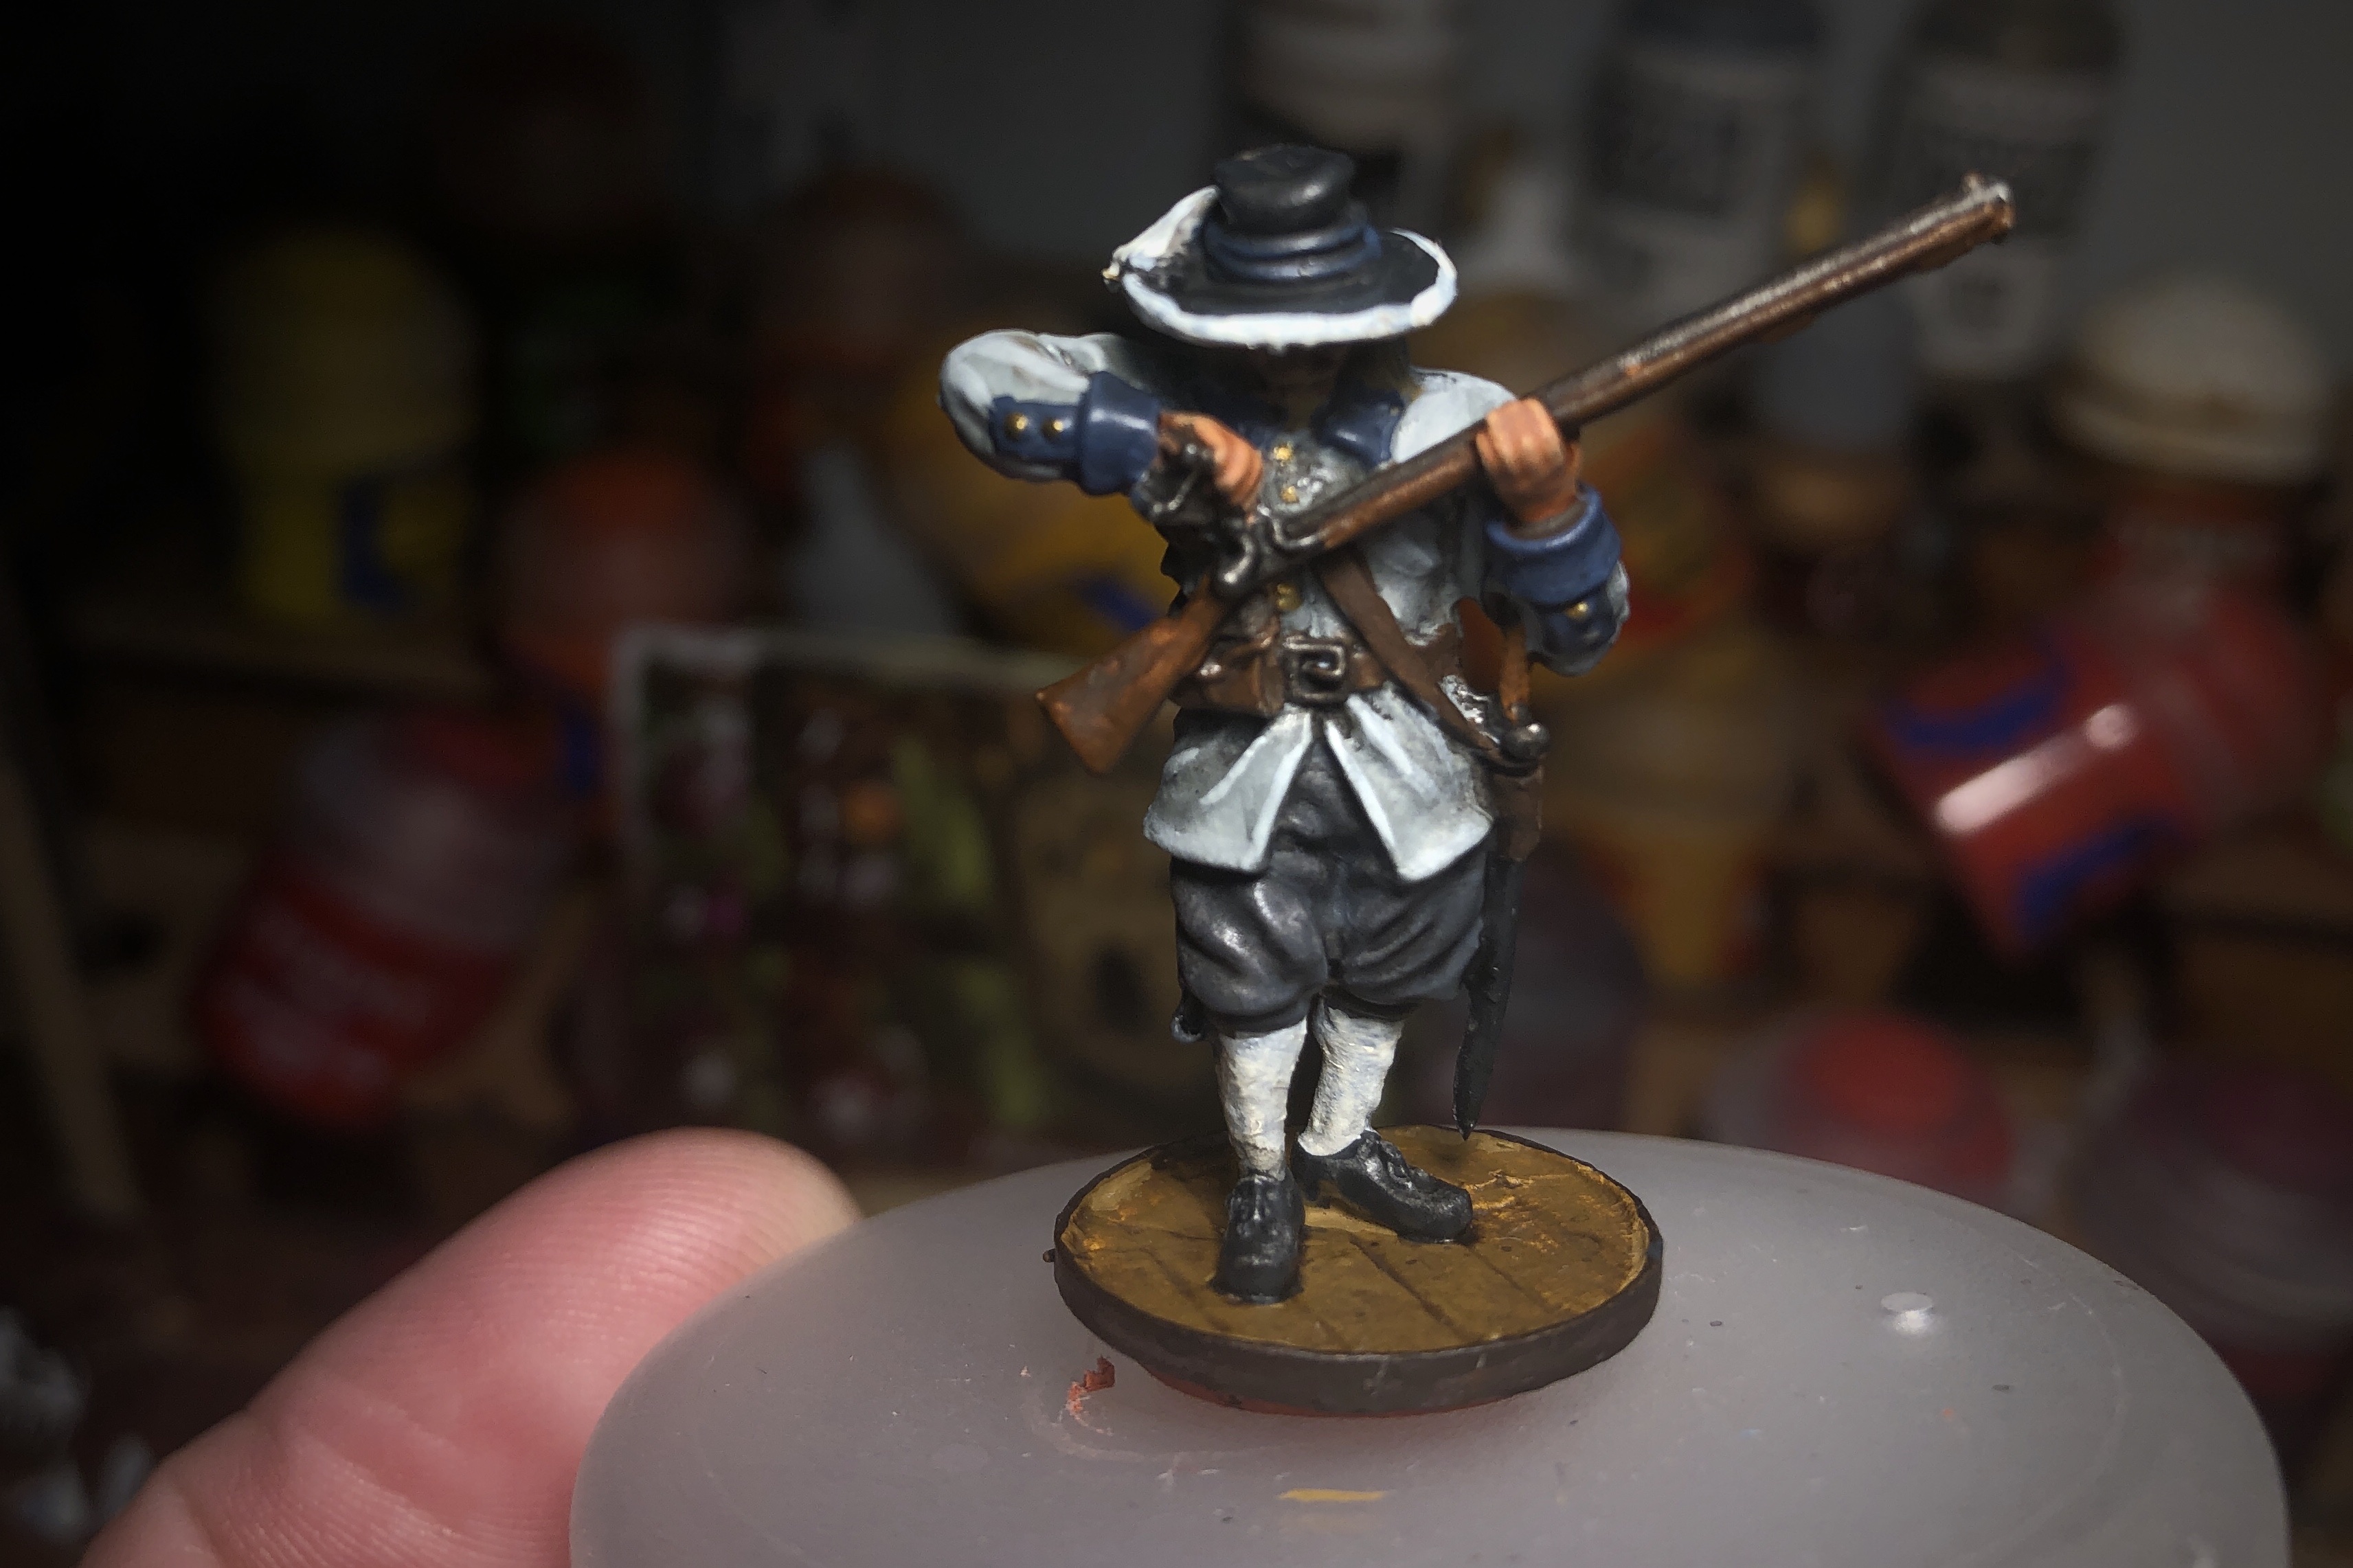
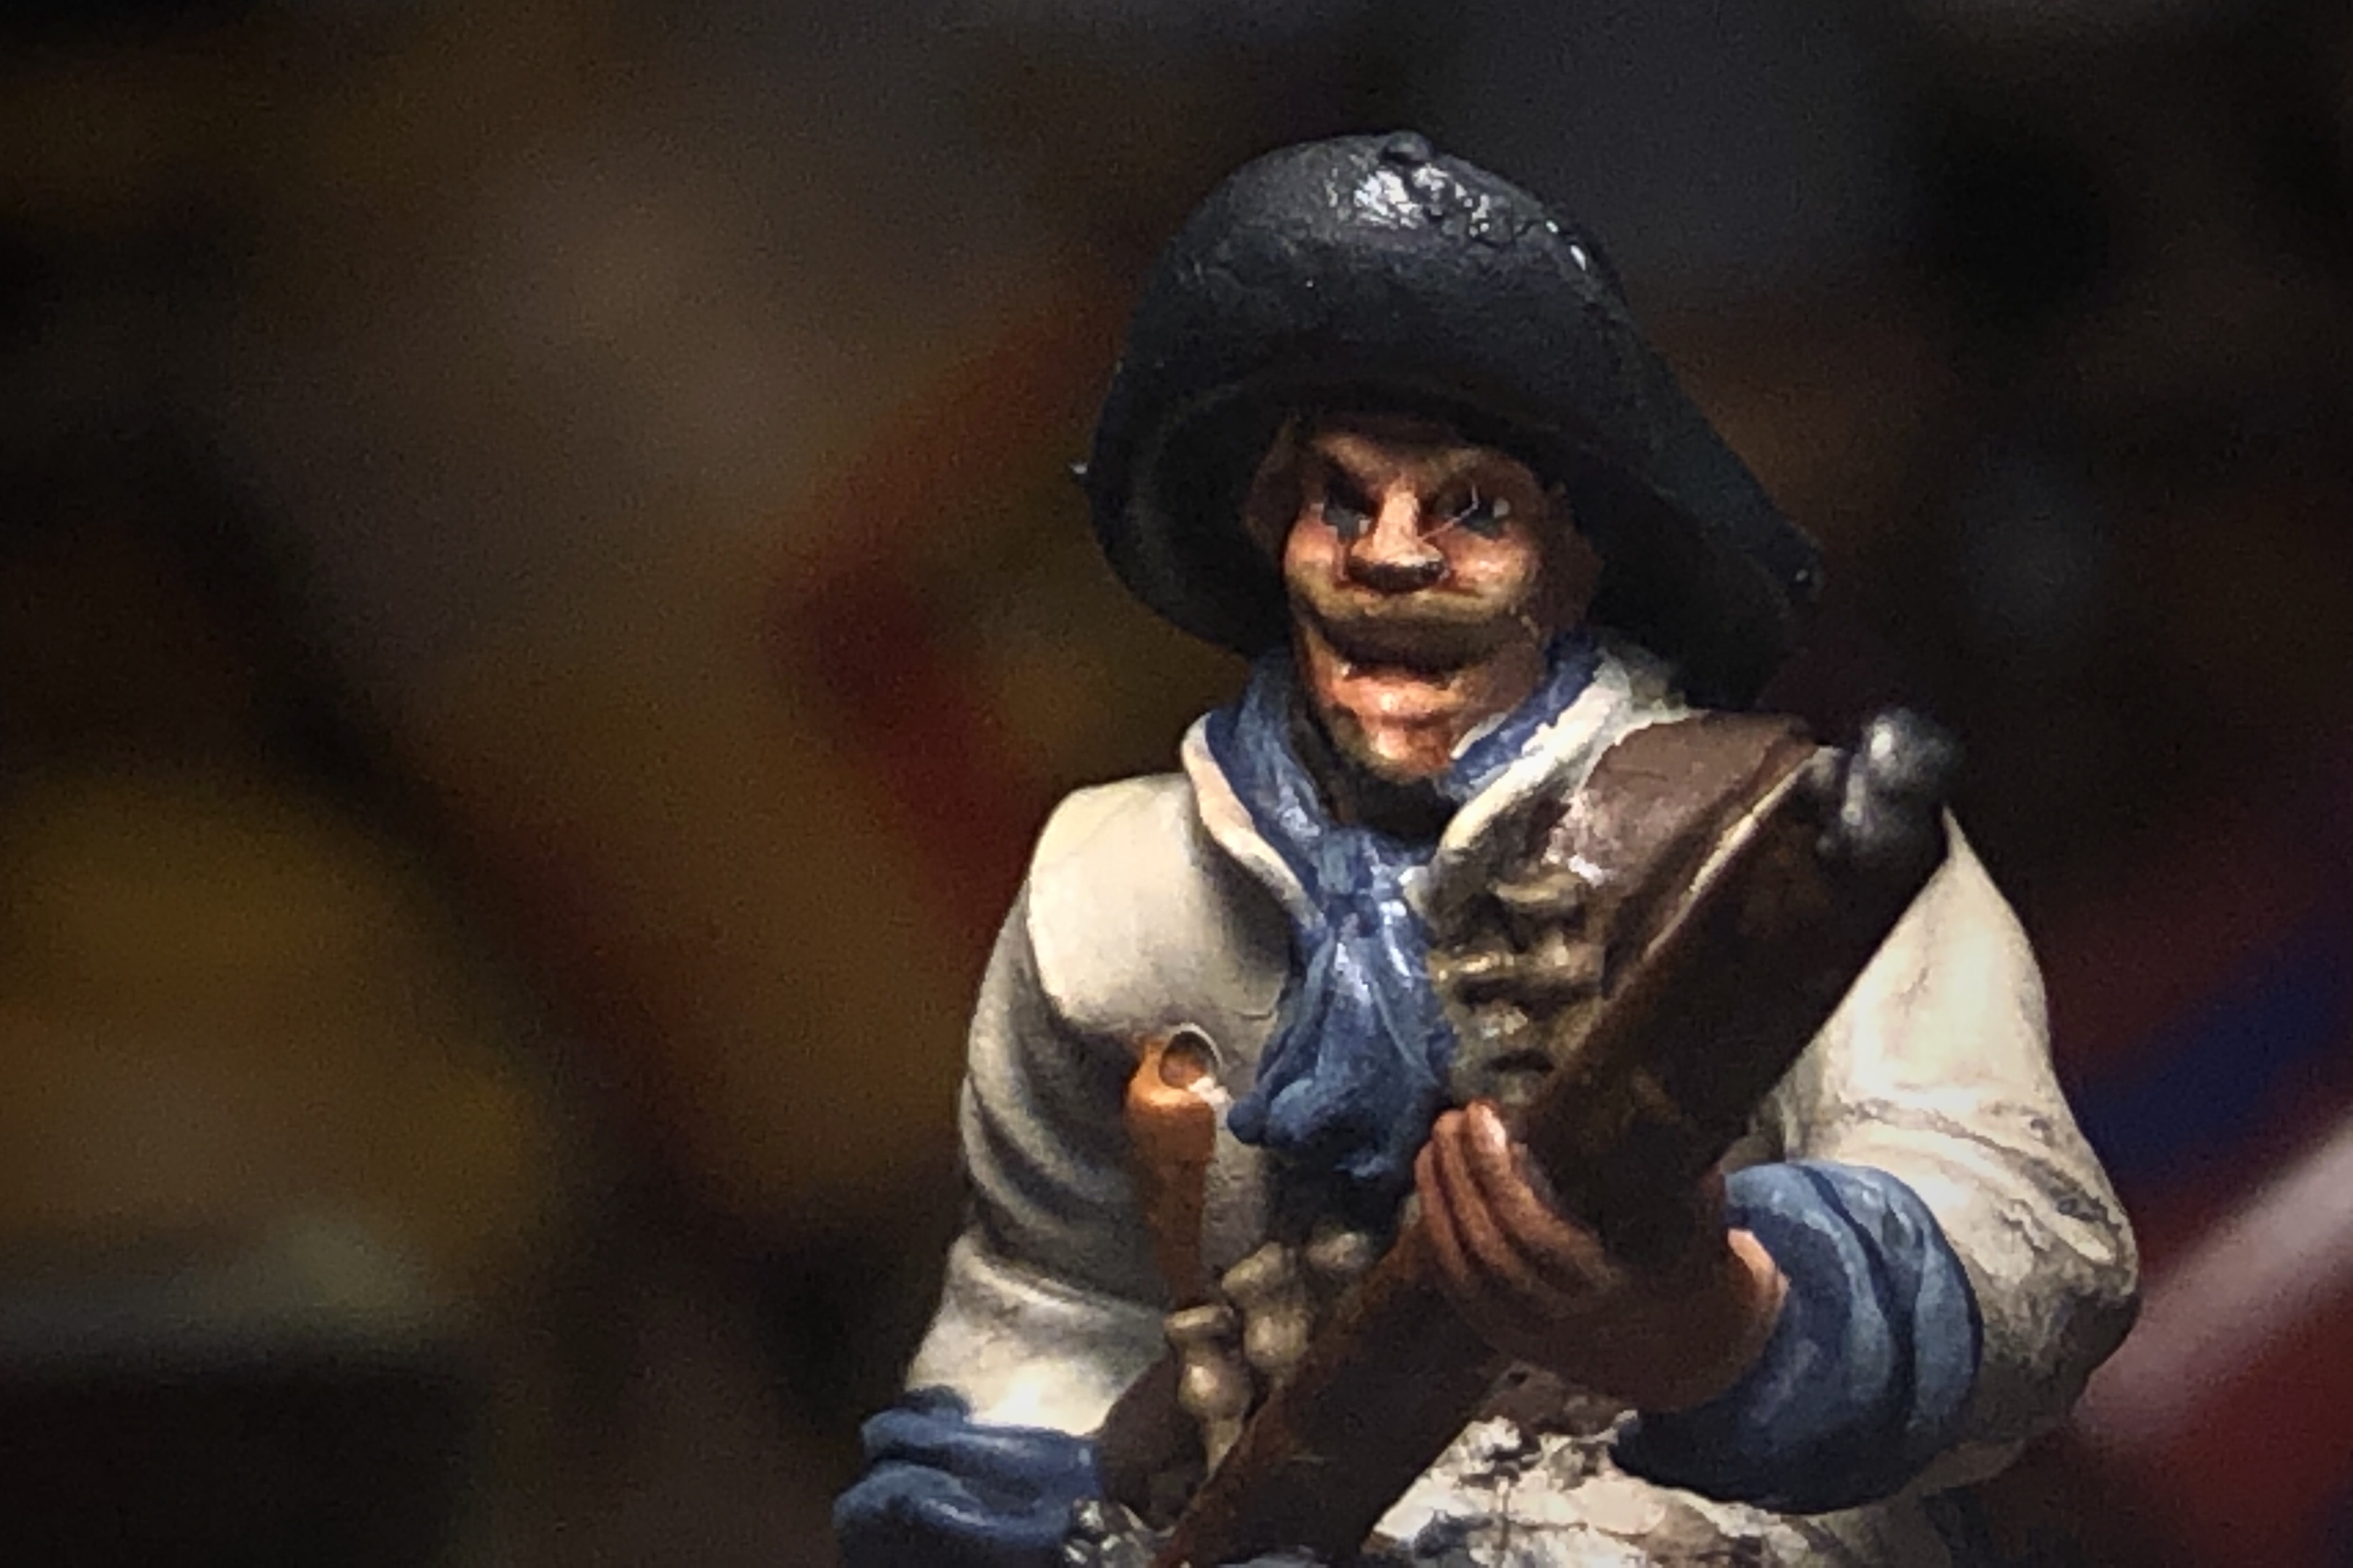
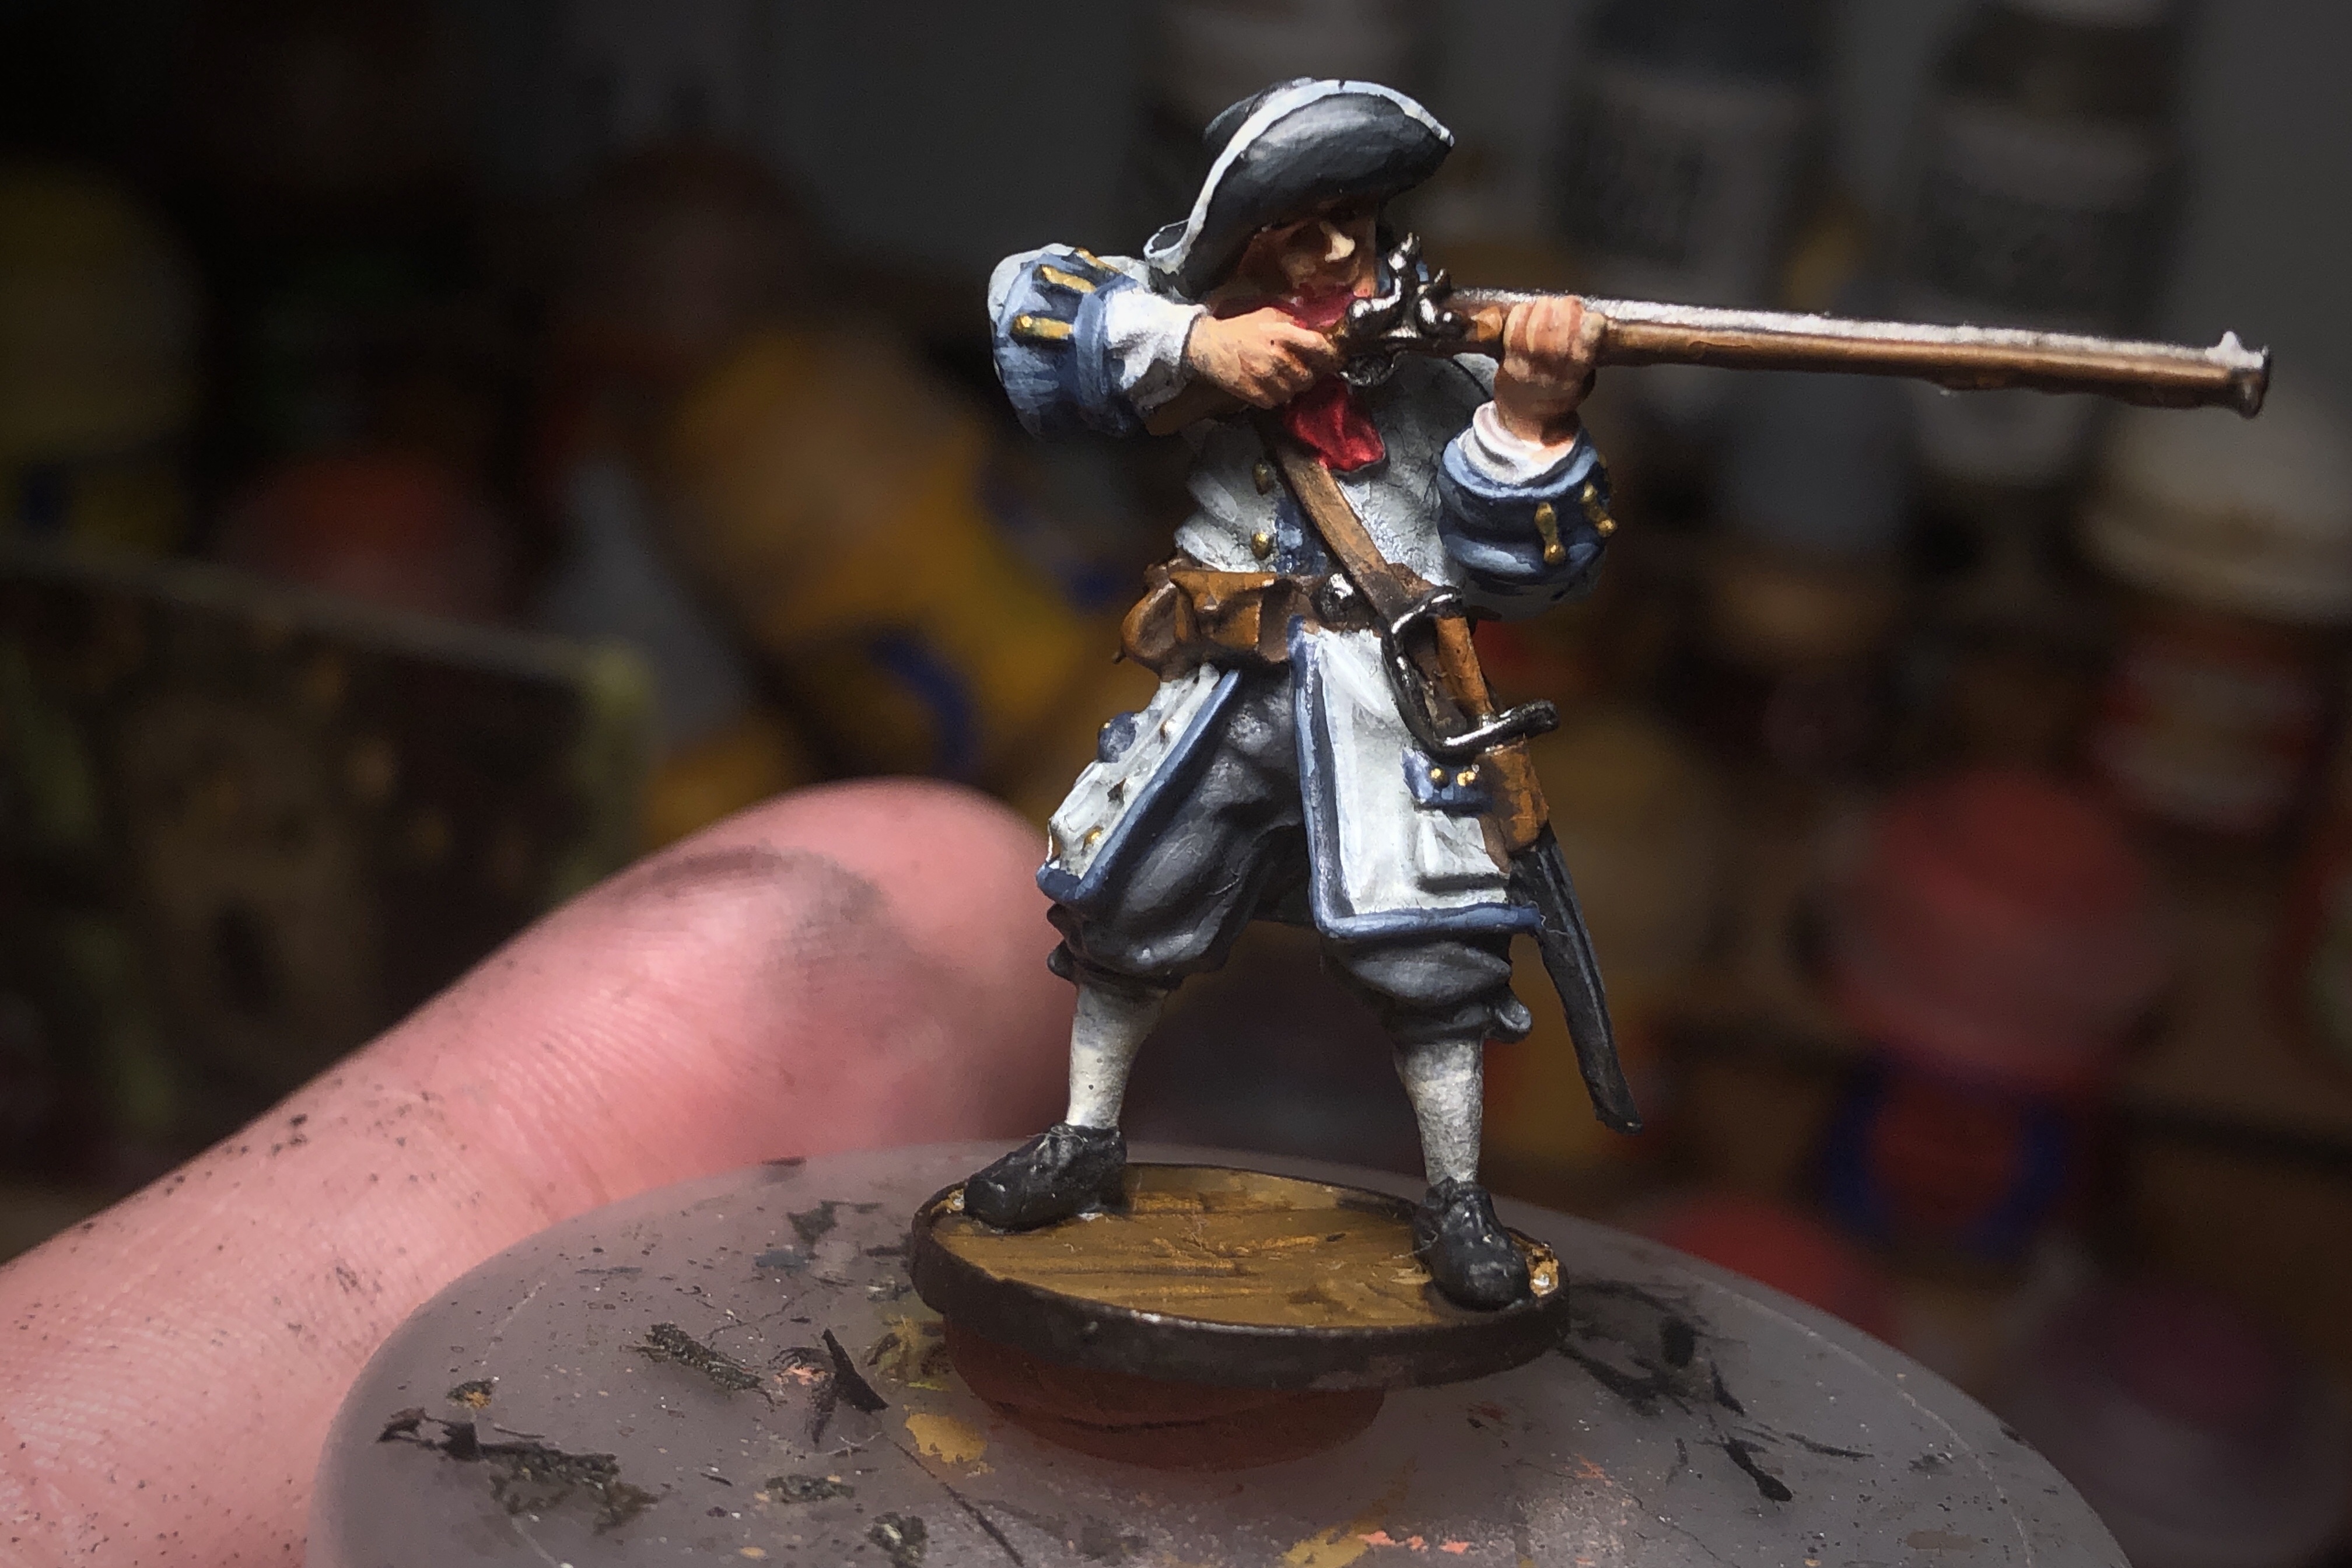
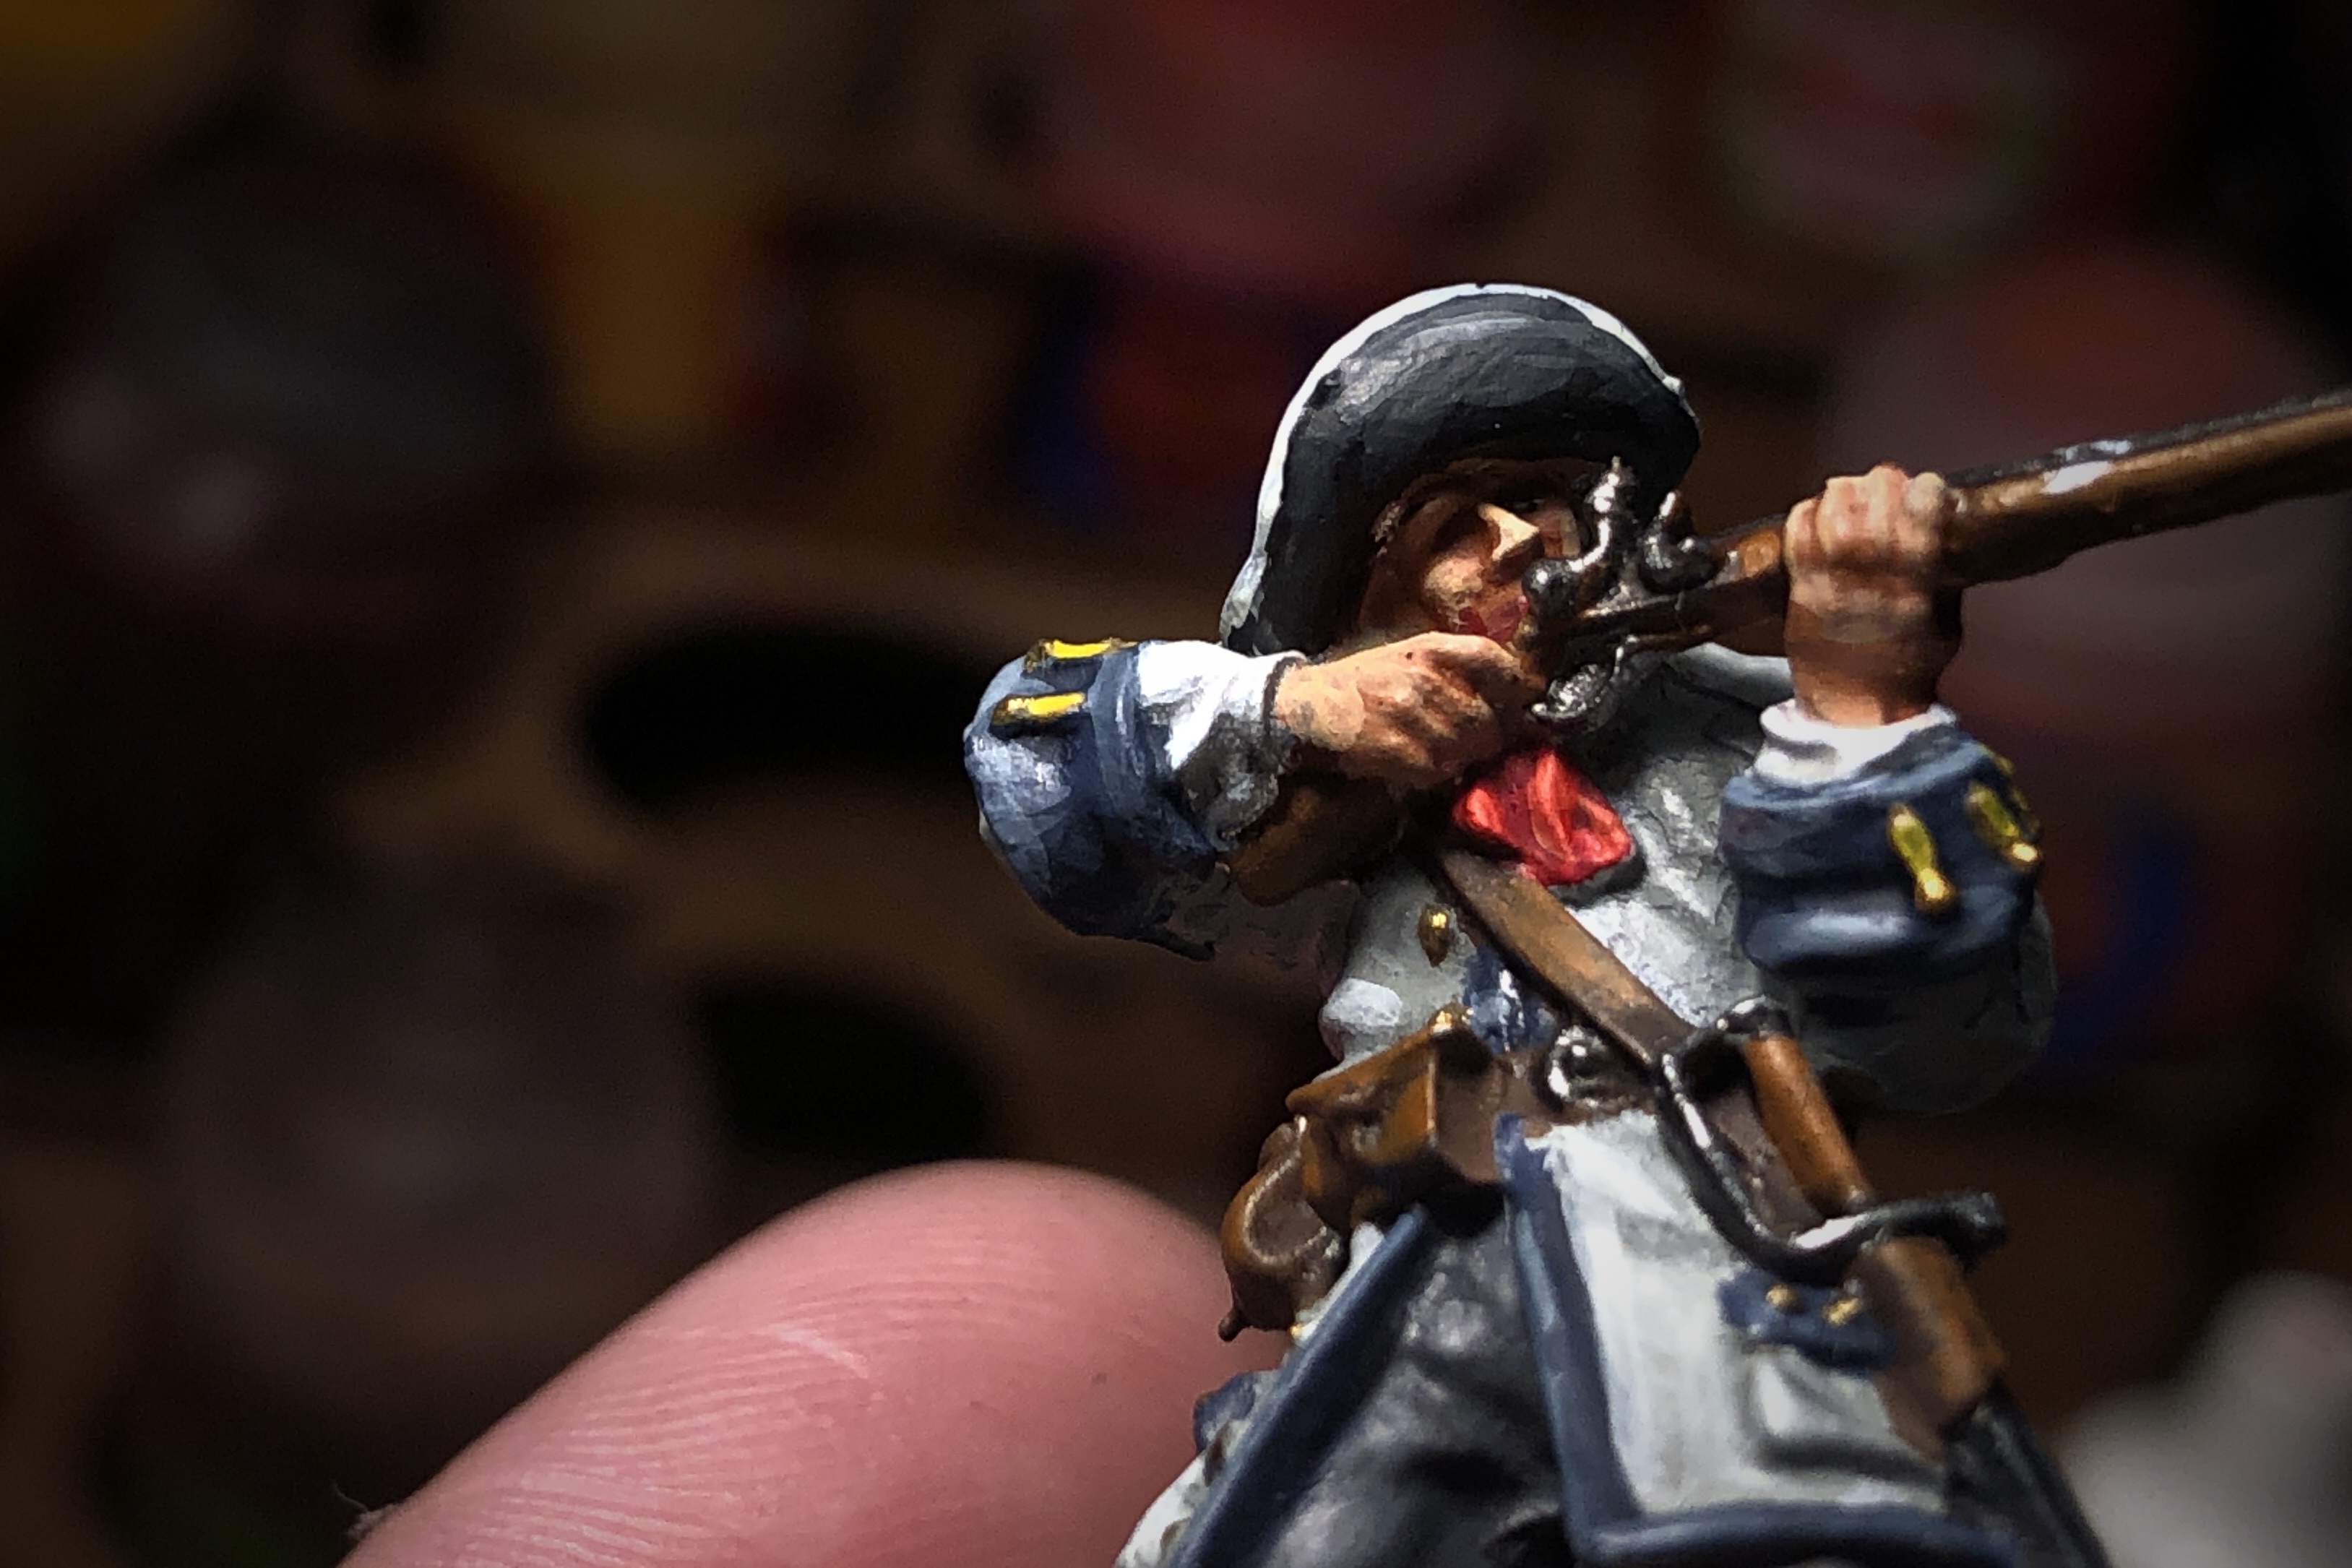
I usually start with the eyes but I’ll do them now. Ivory dashes for the whites with small dots of German Grey for the pupil. This guy ended up with more pupil than necessary and I’ll push that back a little with the skin tone when I’m highlighting the face.
There isn’t a lot of flesh areas on these models so the skin didn’t take as long as usual.
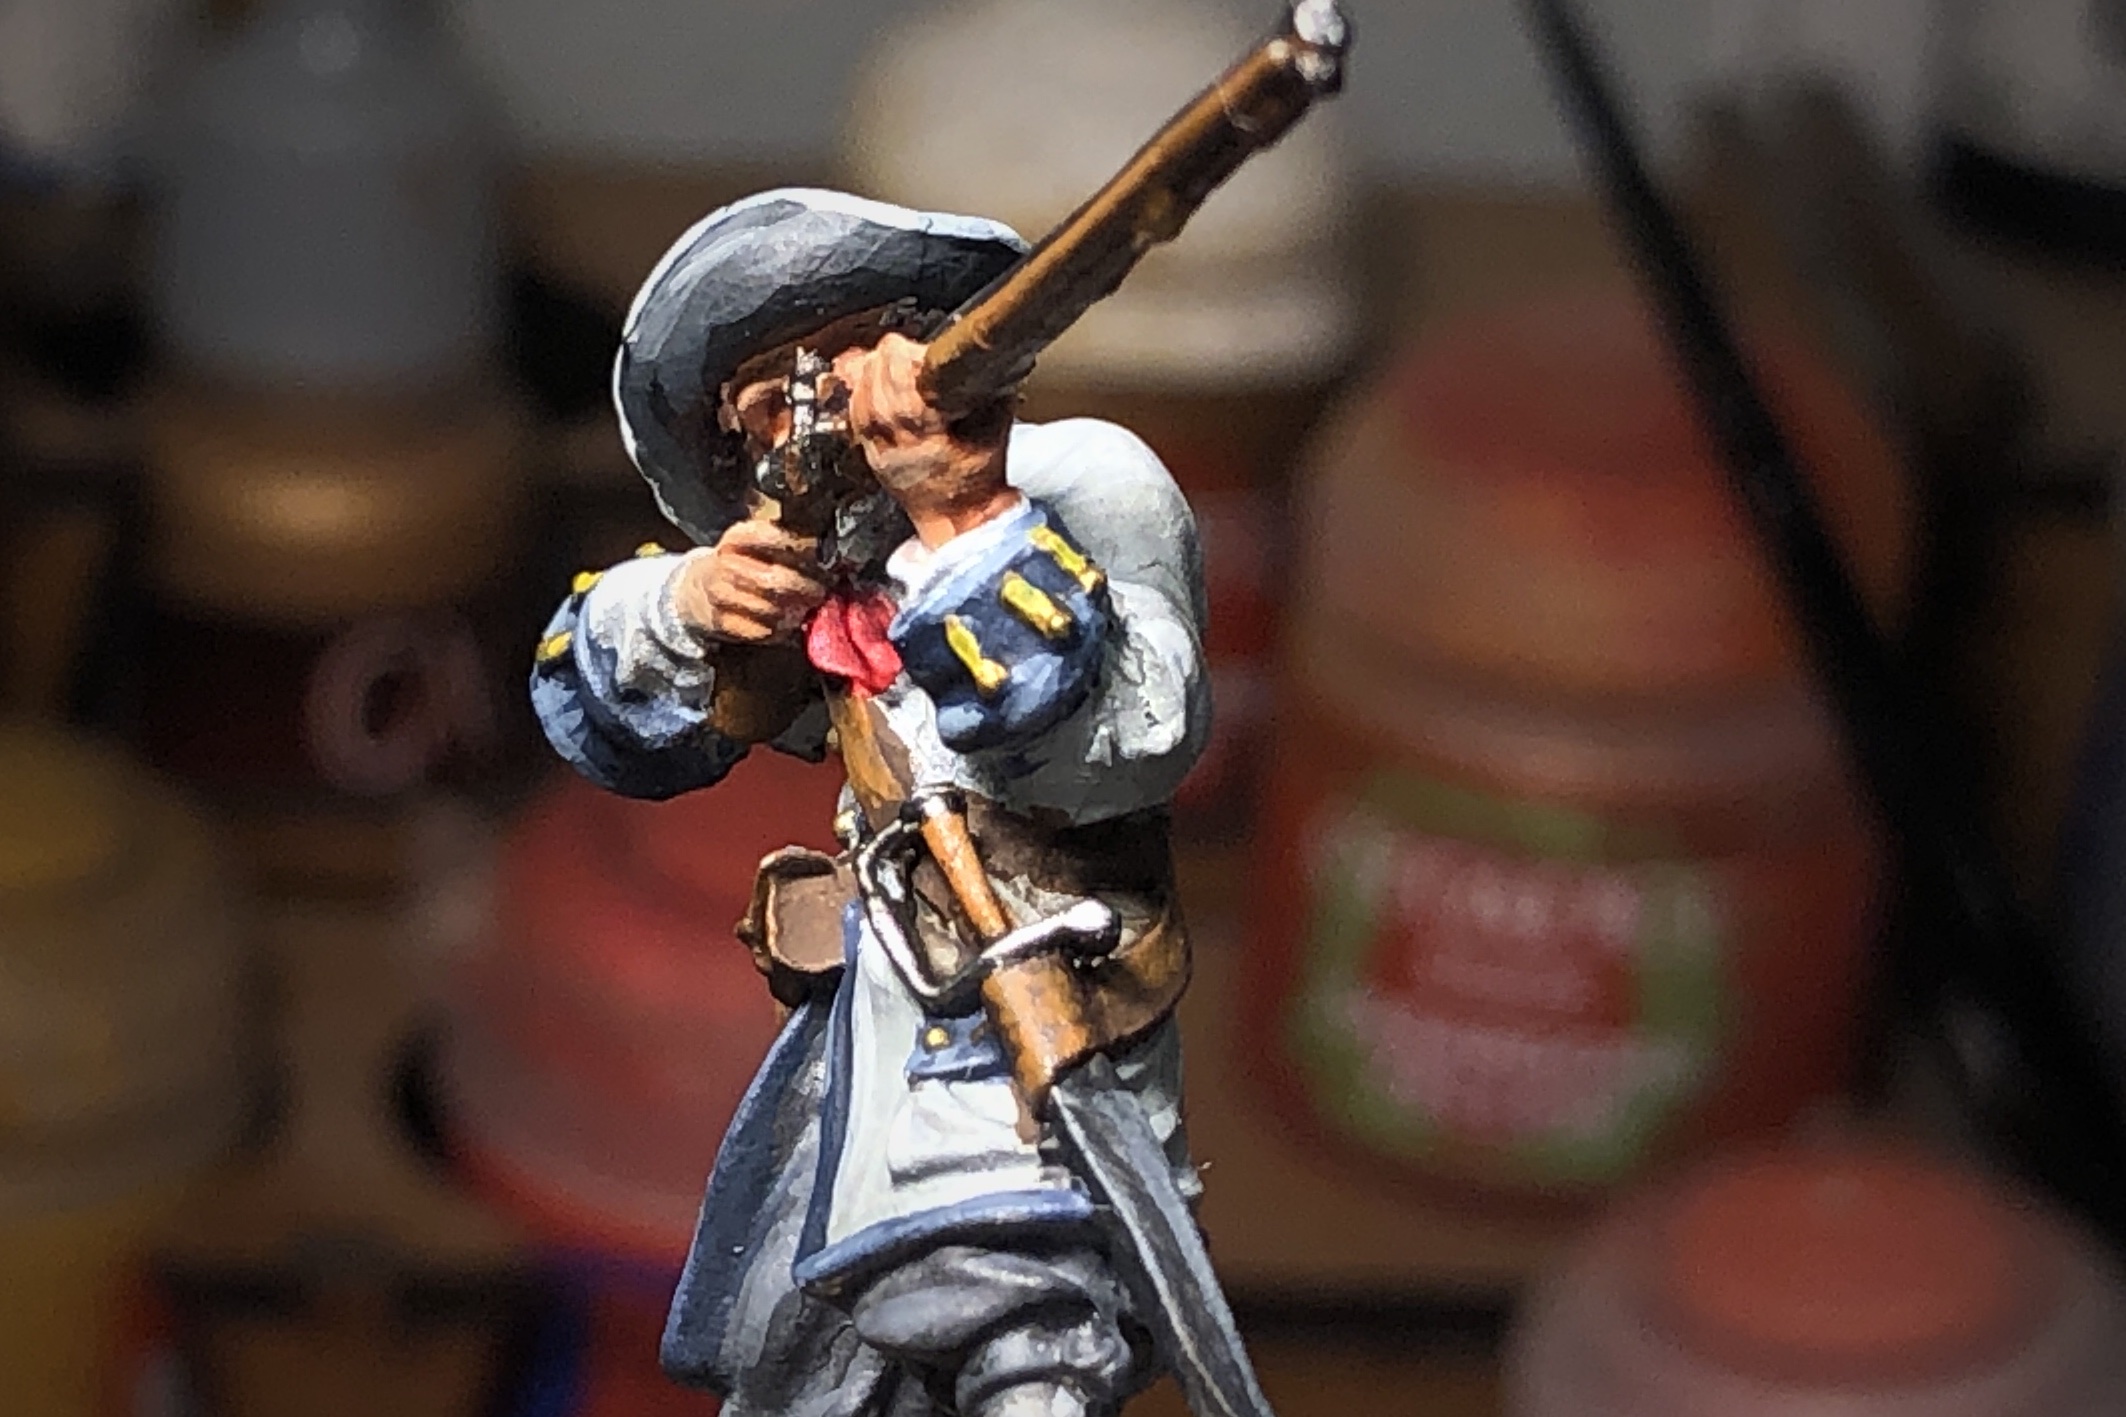
Somehow I didn’t get a picture while I was doing it, but somewhere before doing the eyes I highlighted the blue trim areas on the jackets and hats. I added some Russ Grey to the original Fang color, and finished with adding a little Hoeth Blue to the Russ Grey for a brighter final highlight.
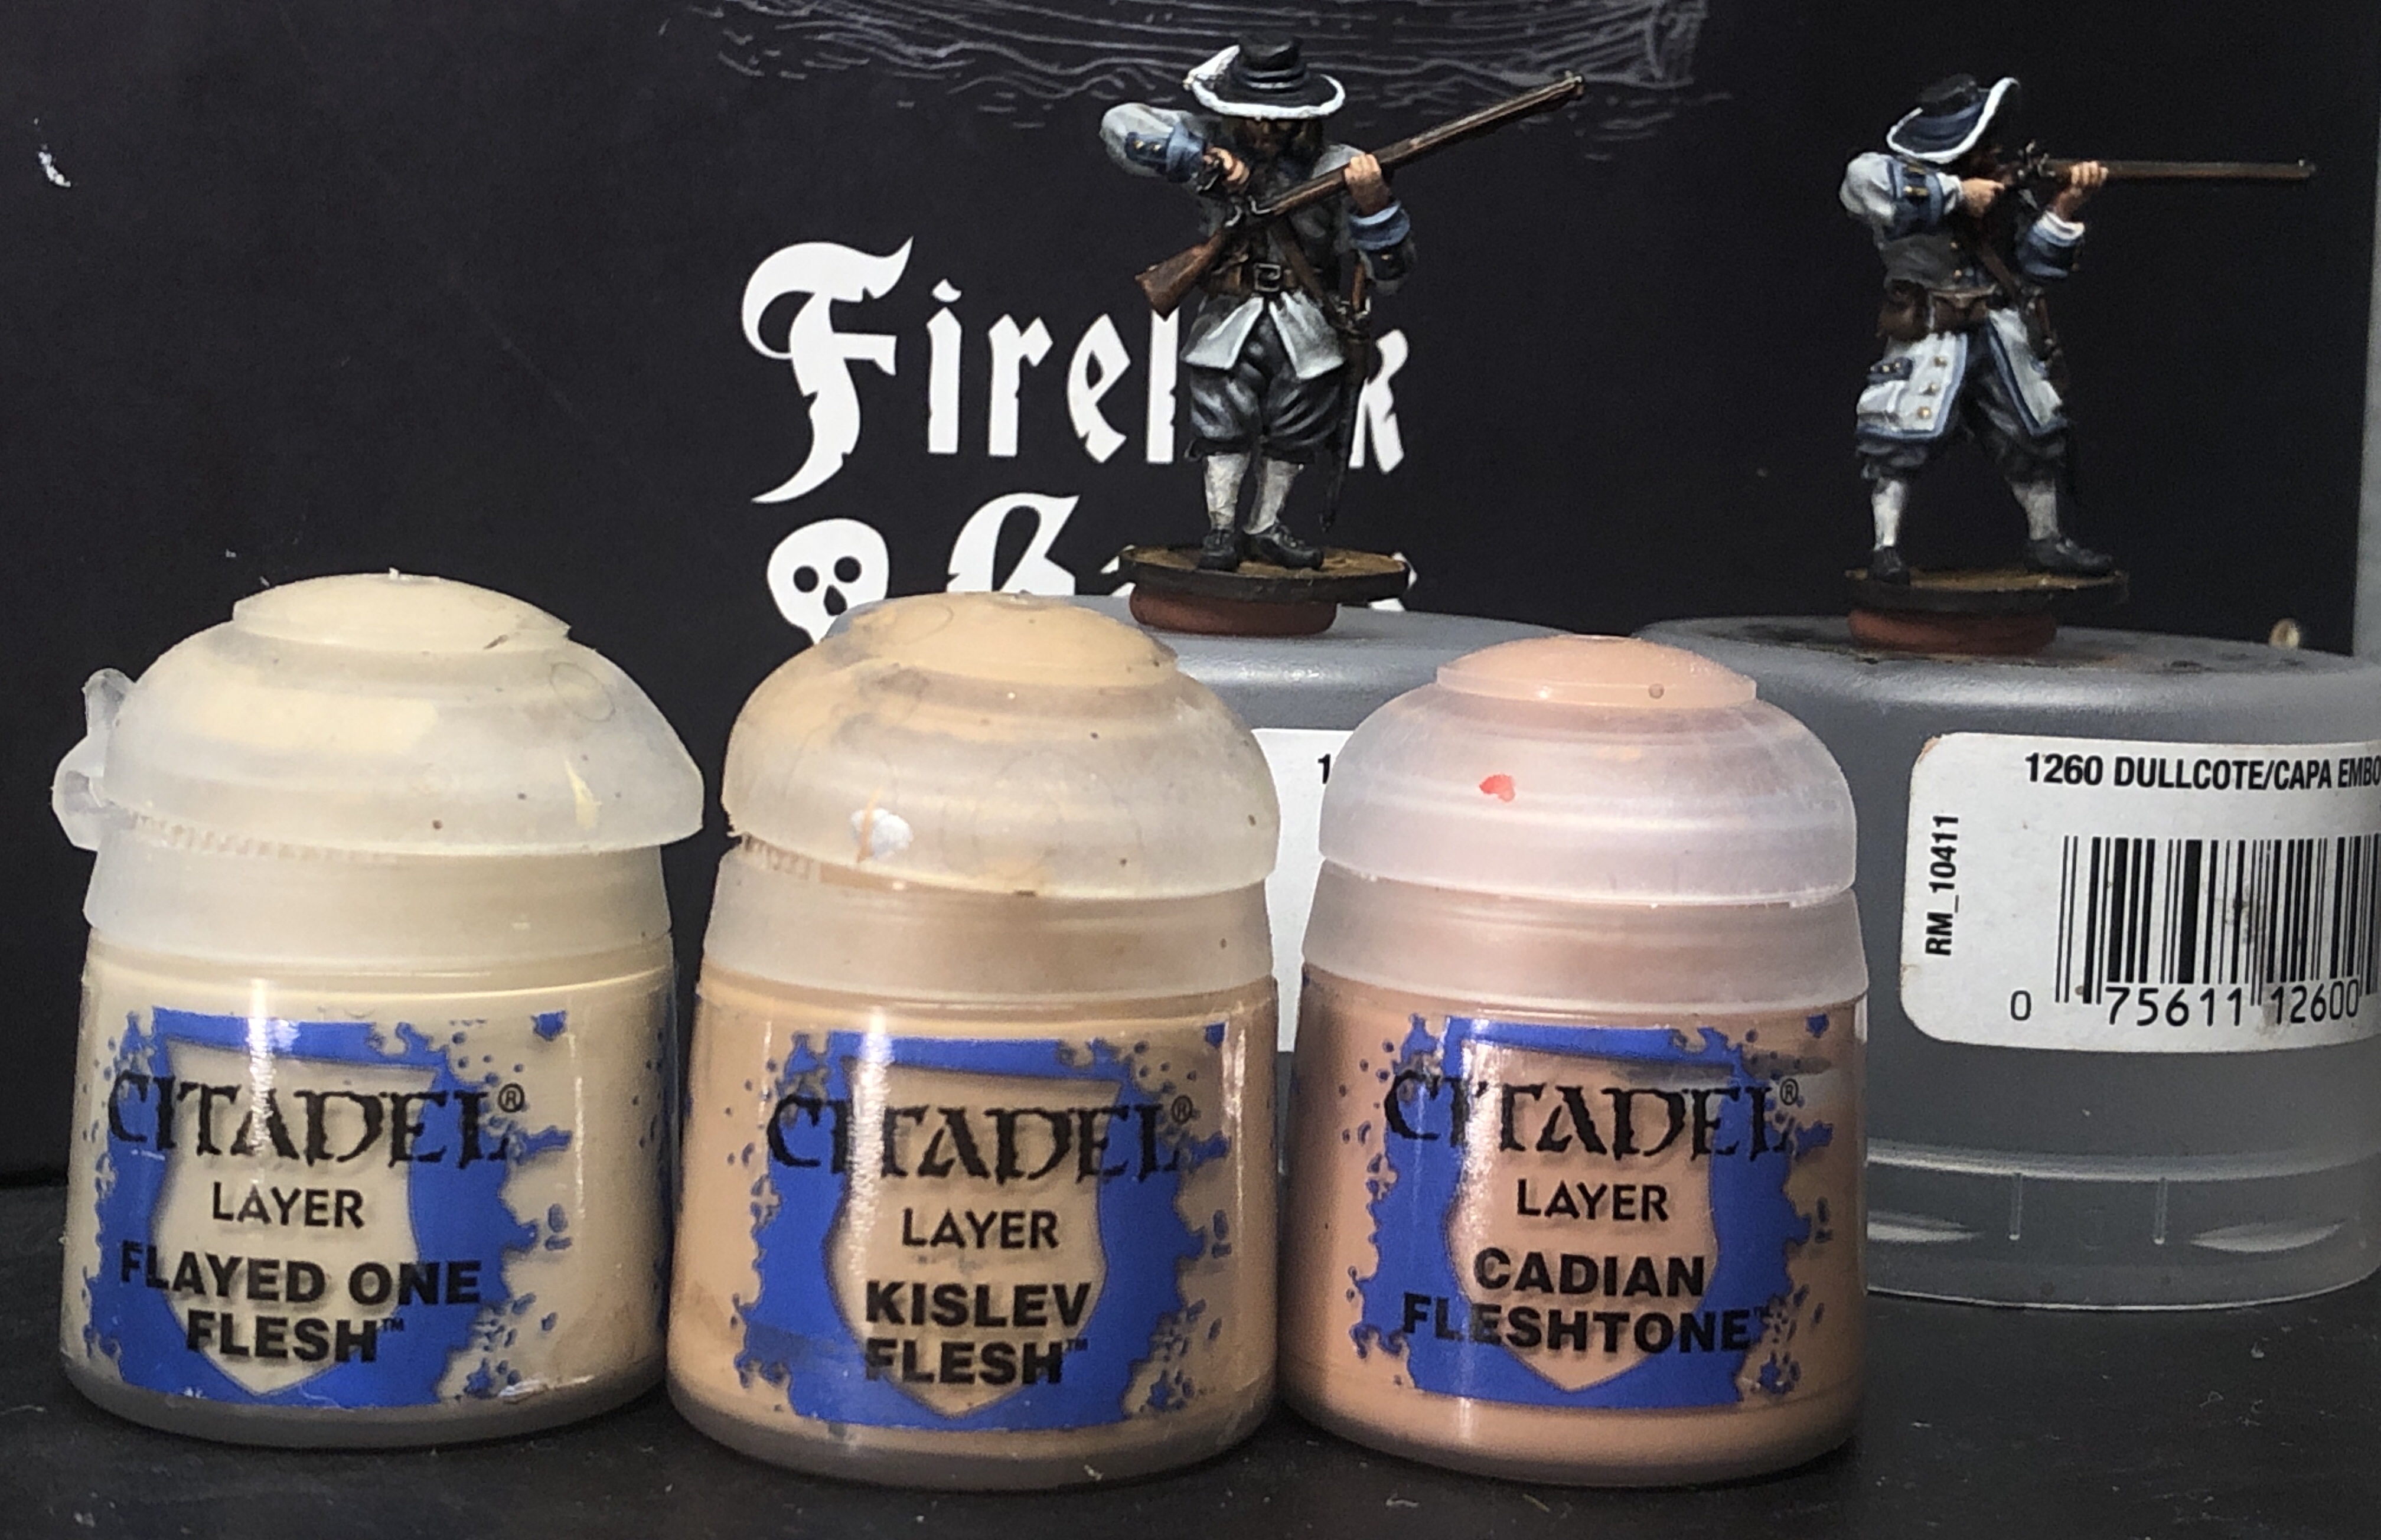
I’m planning to explore some Vallejo options for skin tone that isn’t quite so pink, but for now I’m still using the Citadel Cadien Fleshtone, Kislev Flesh and Flayed One Flesh. I always mix up a spectrum of these colors in my wet pallet to help smooth transitions on the skin but with minimal skin areas and nothing very large, I moved quickly through the flesh highlights.
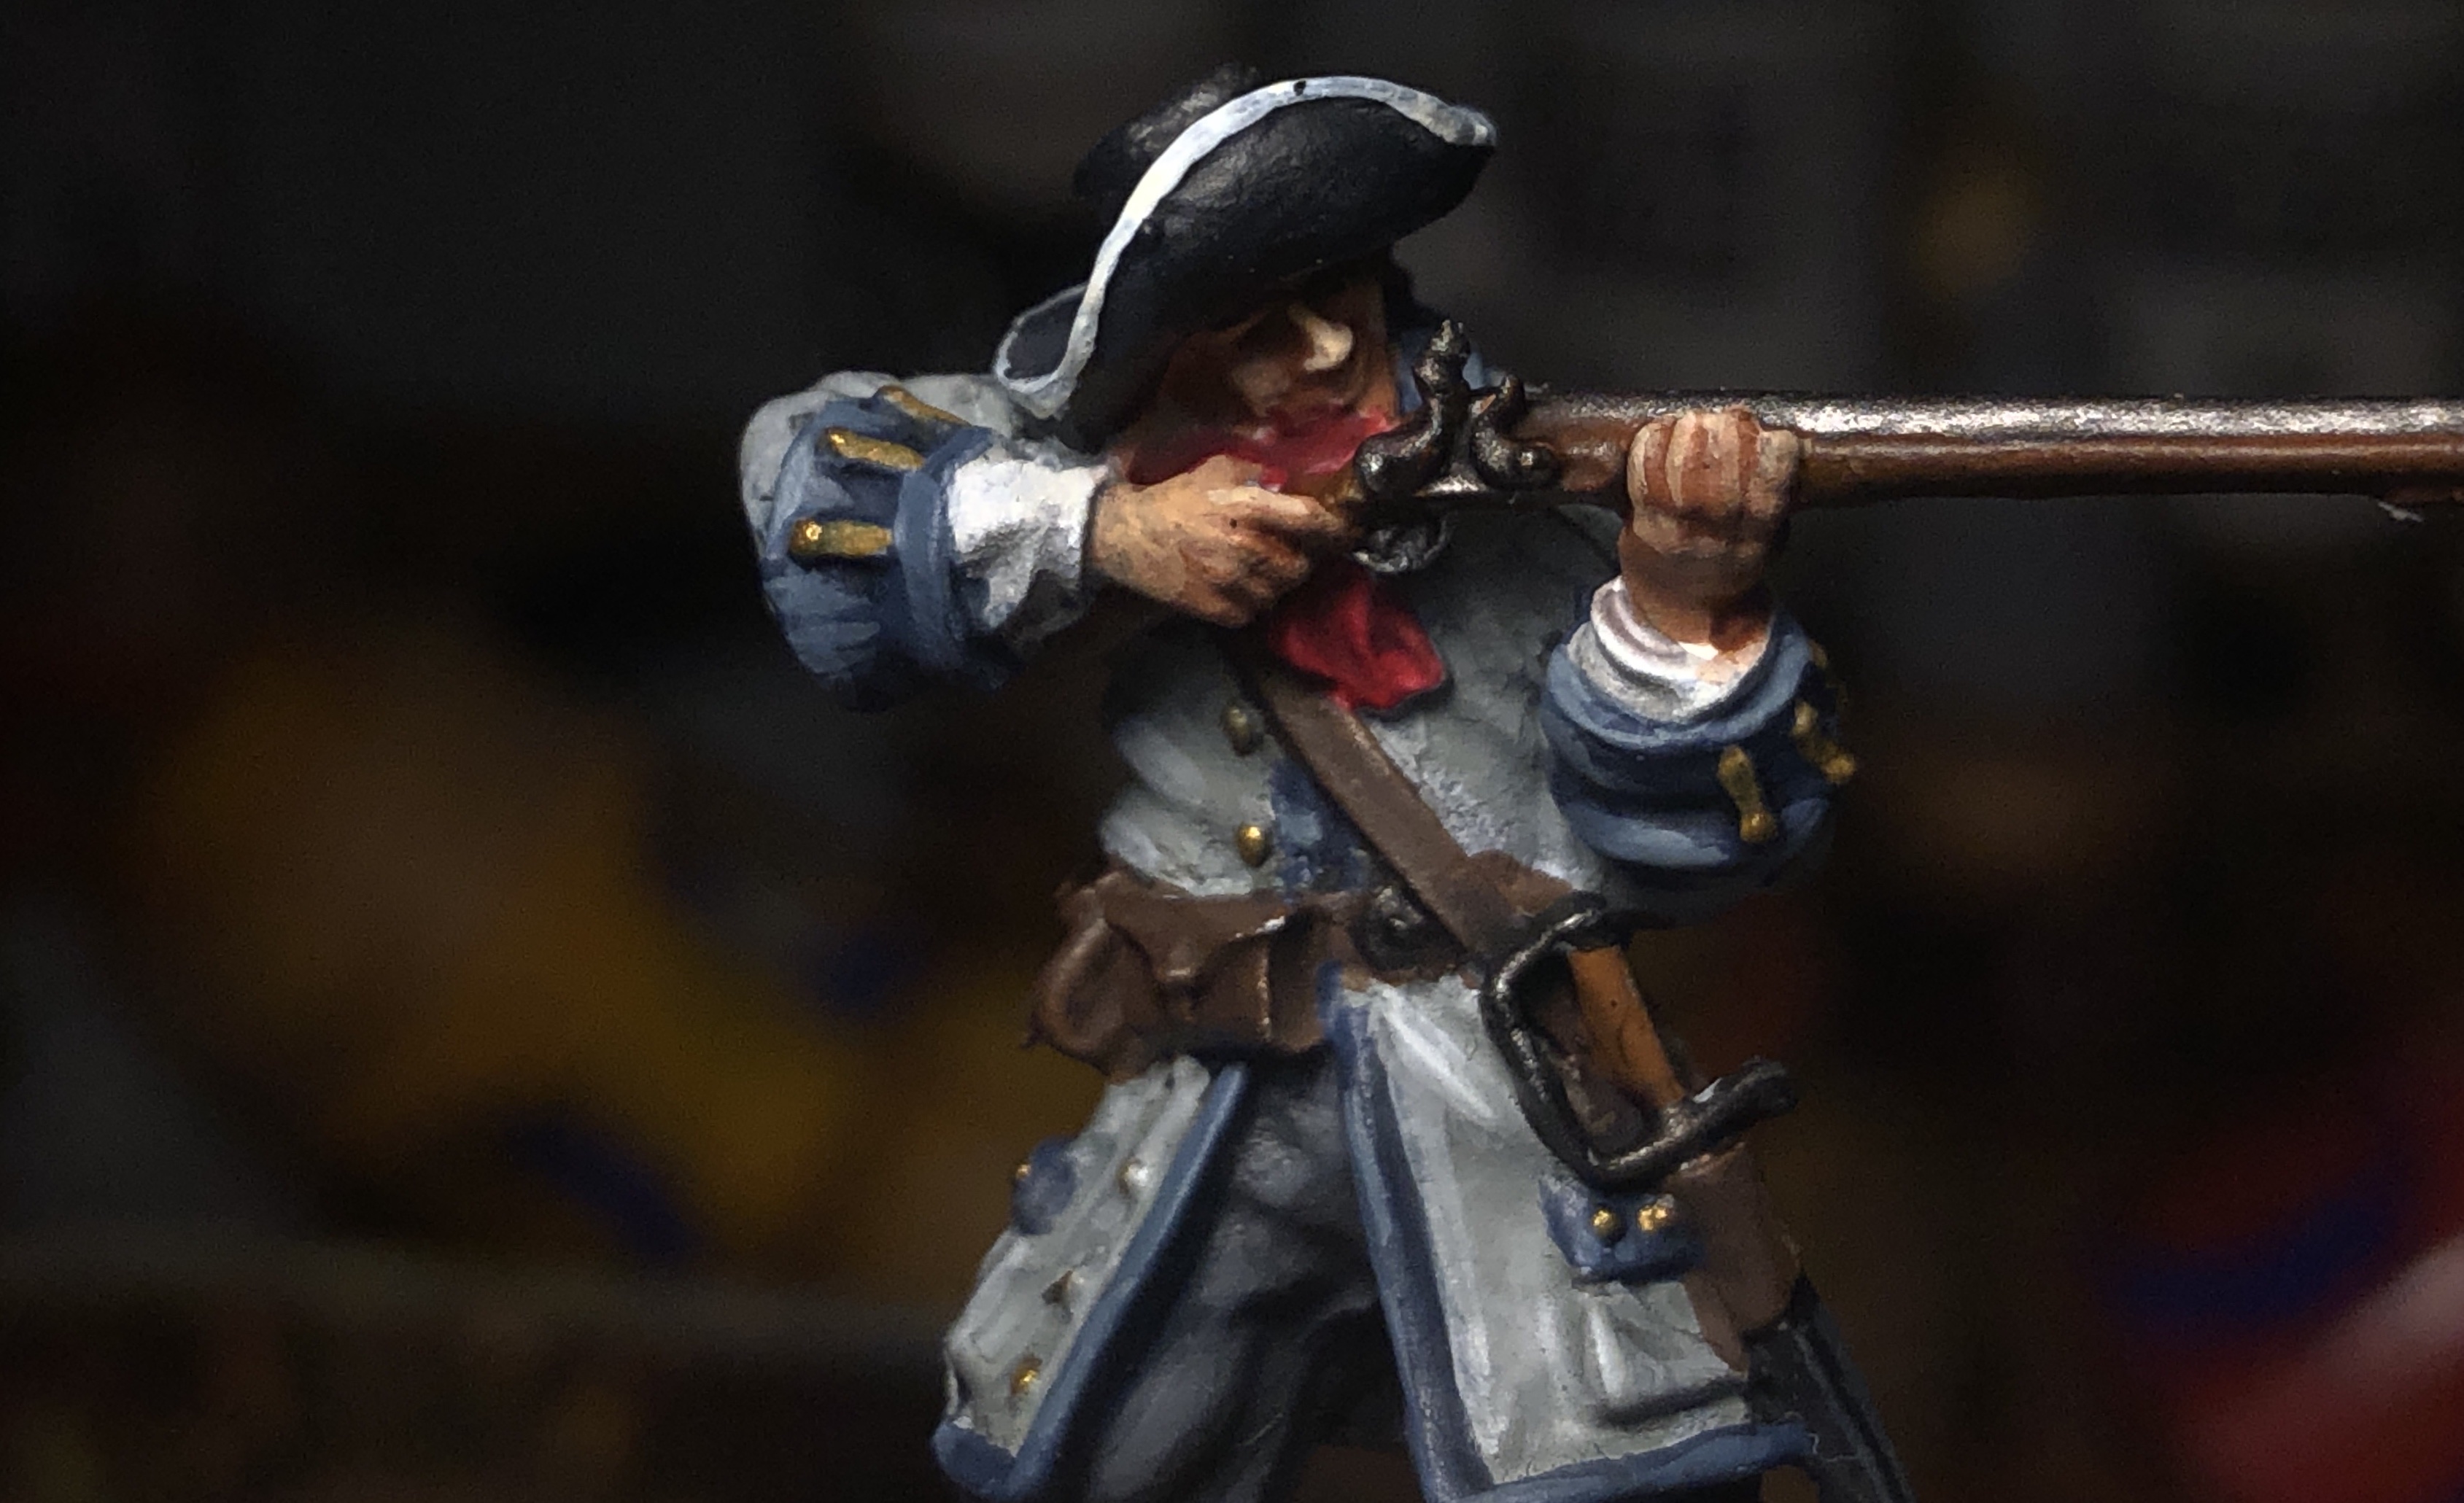
Cheeks, nose, fingers and foreheads are my primary focus areas.
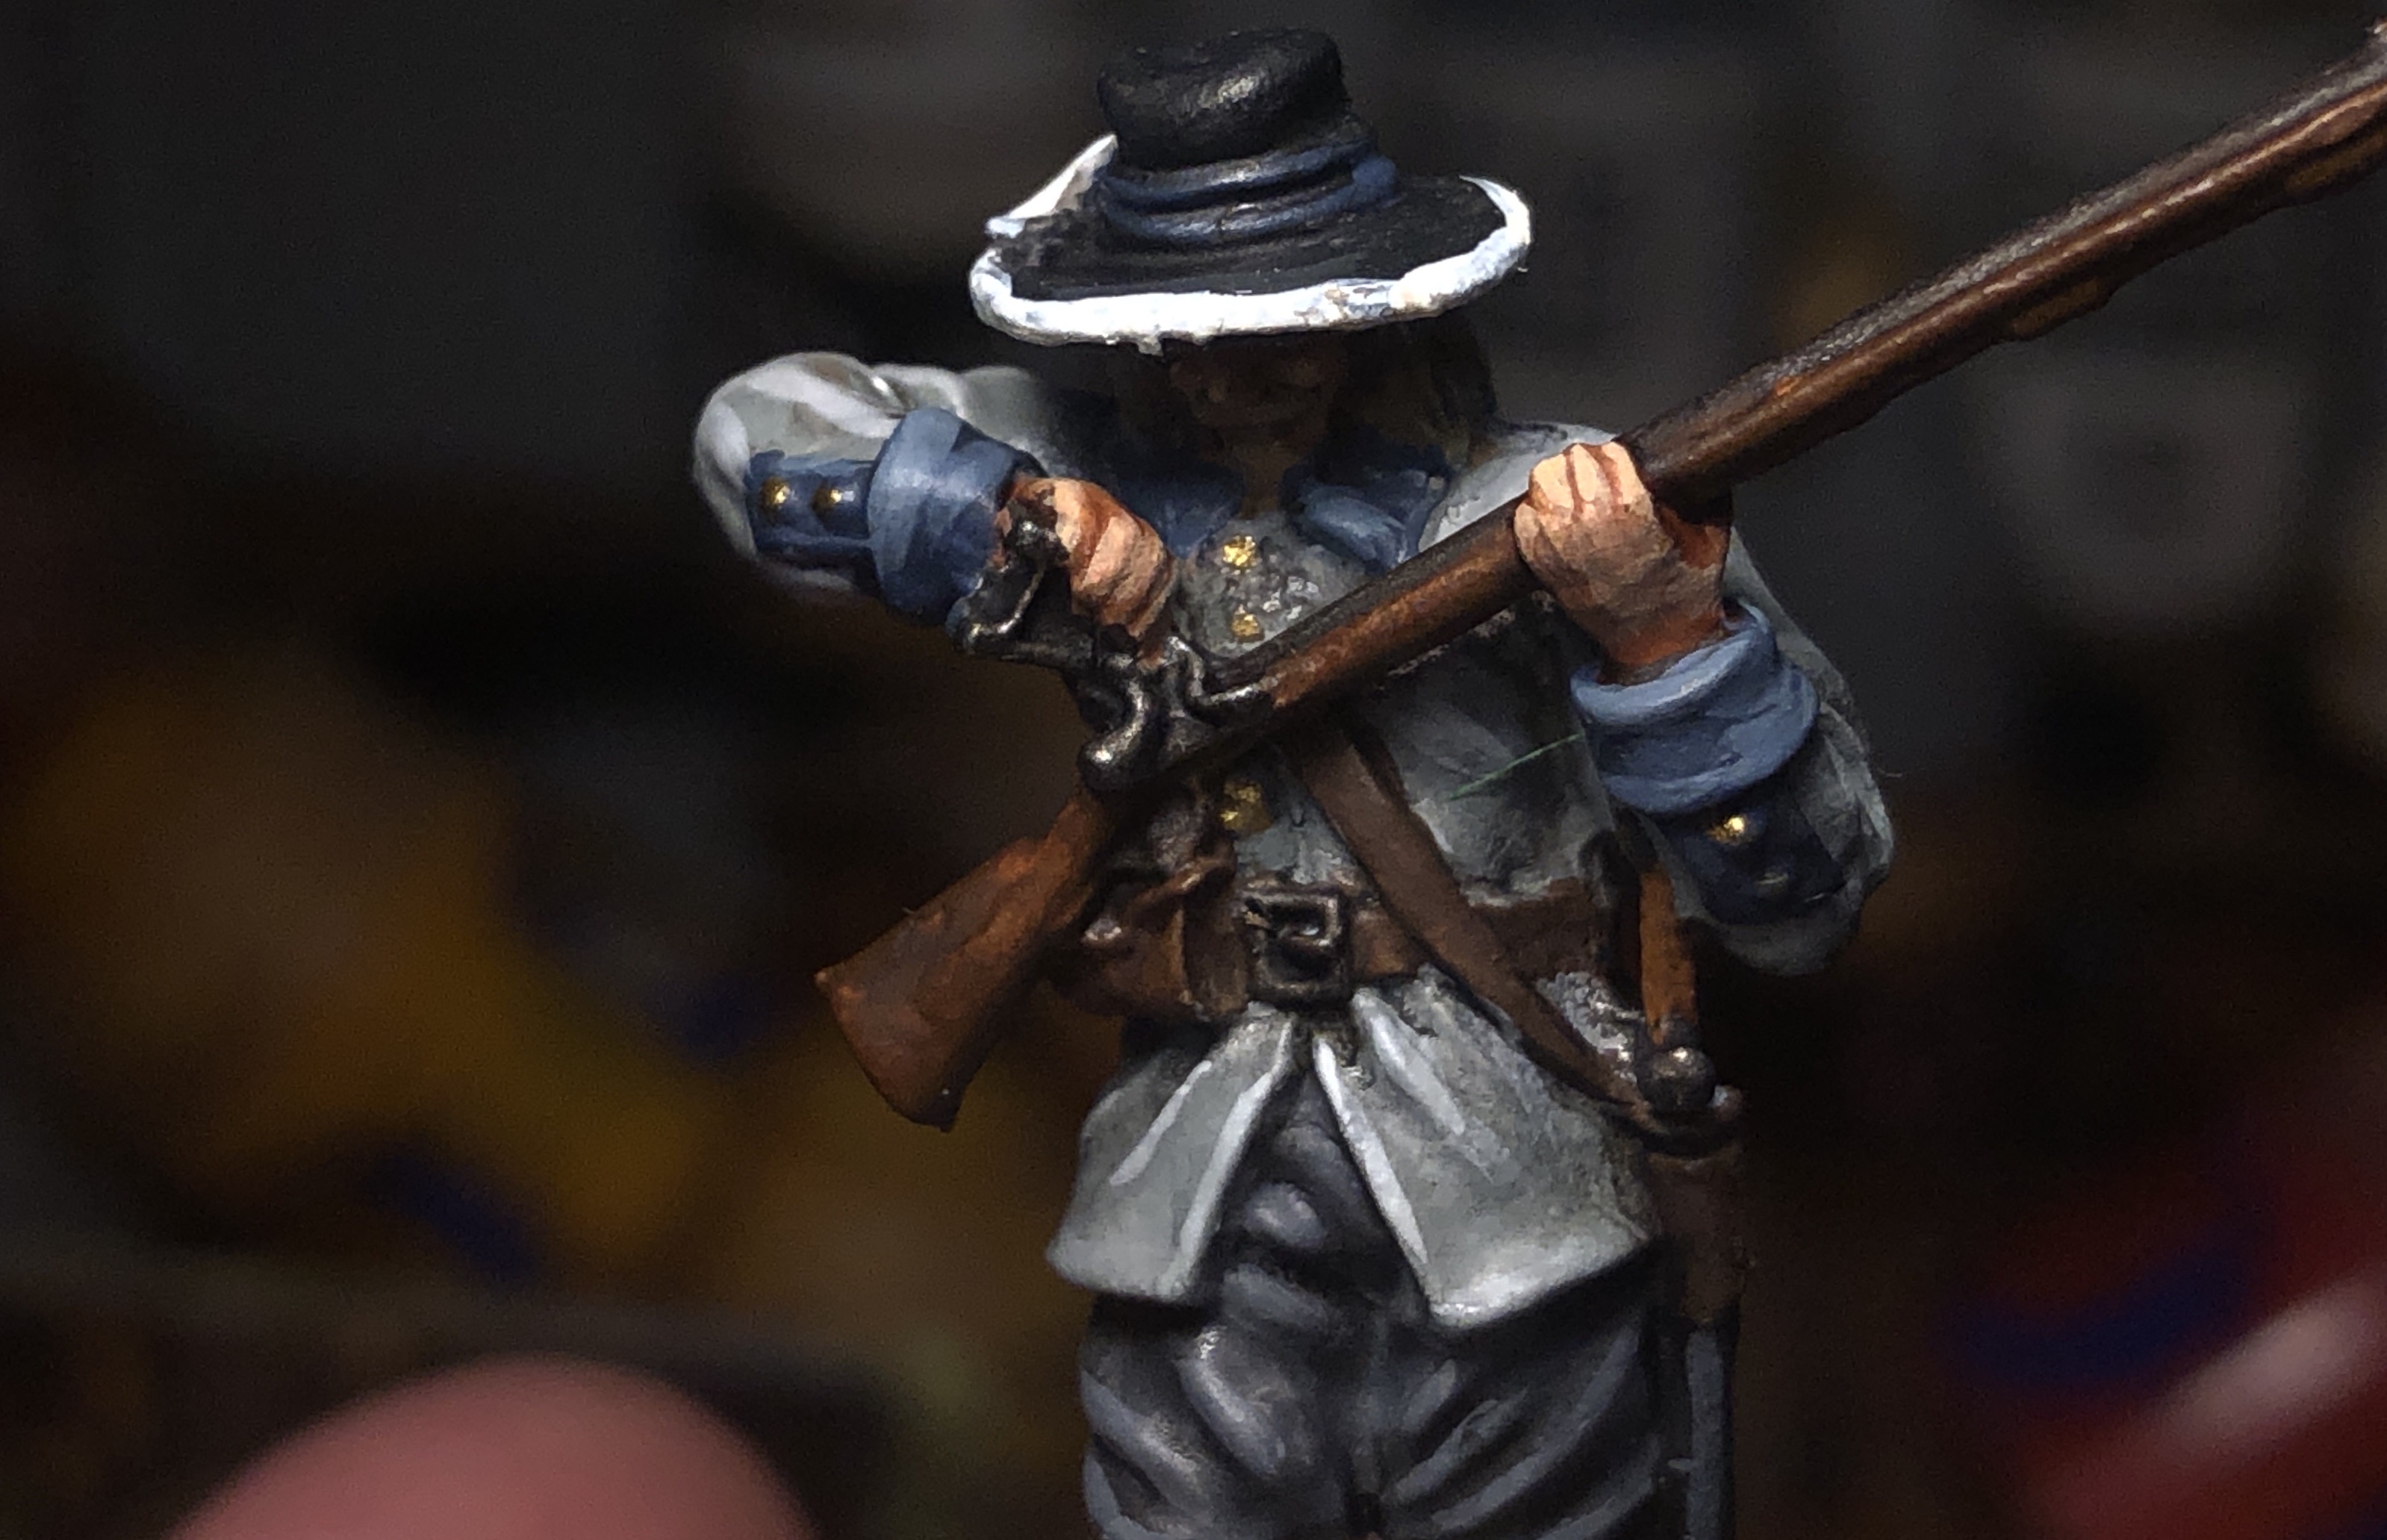
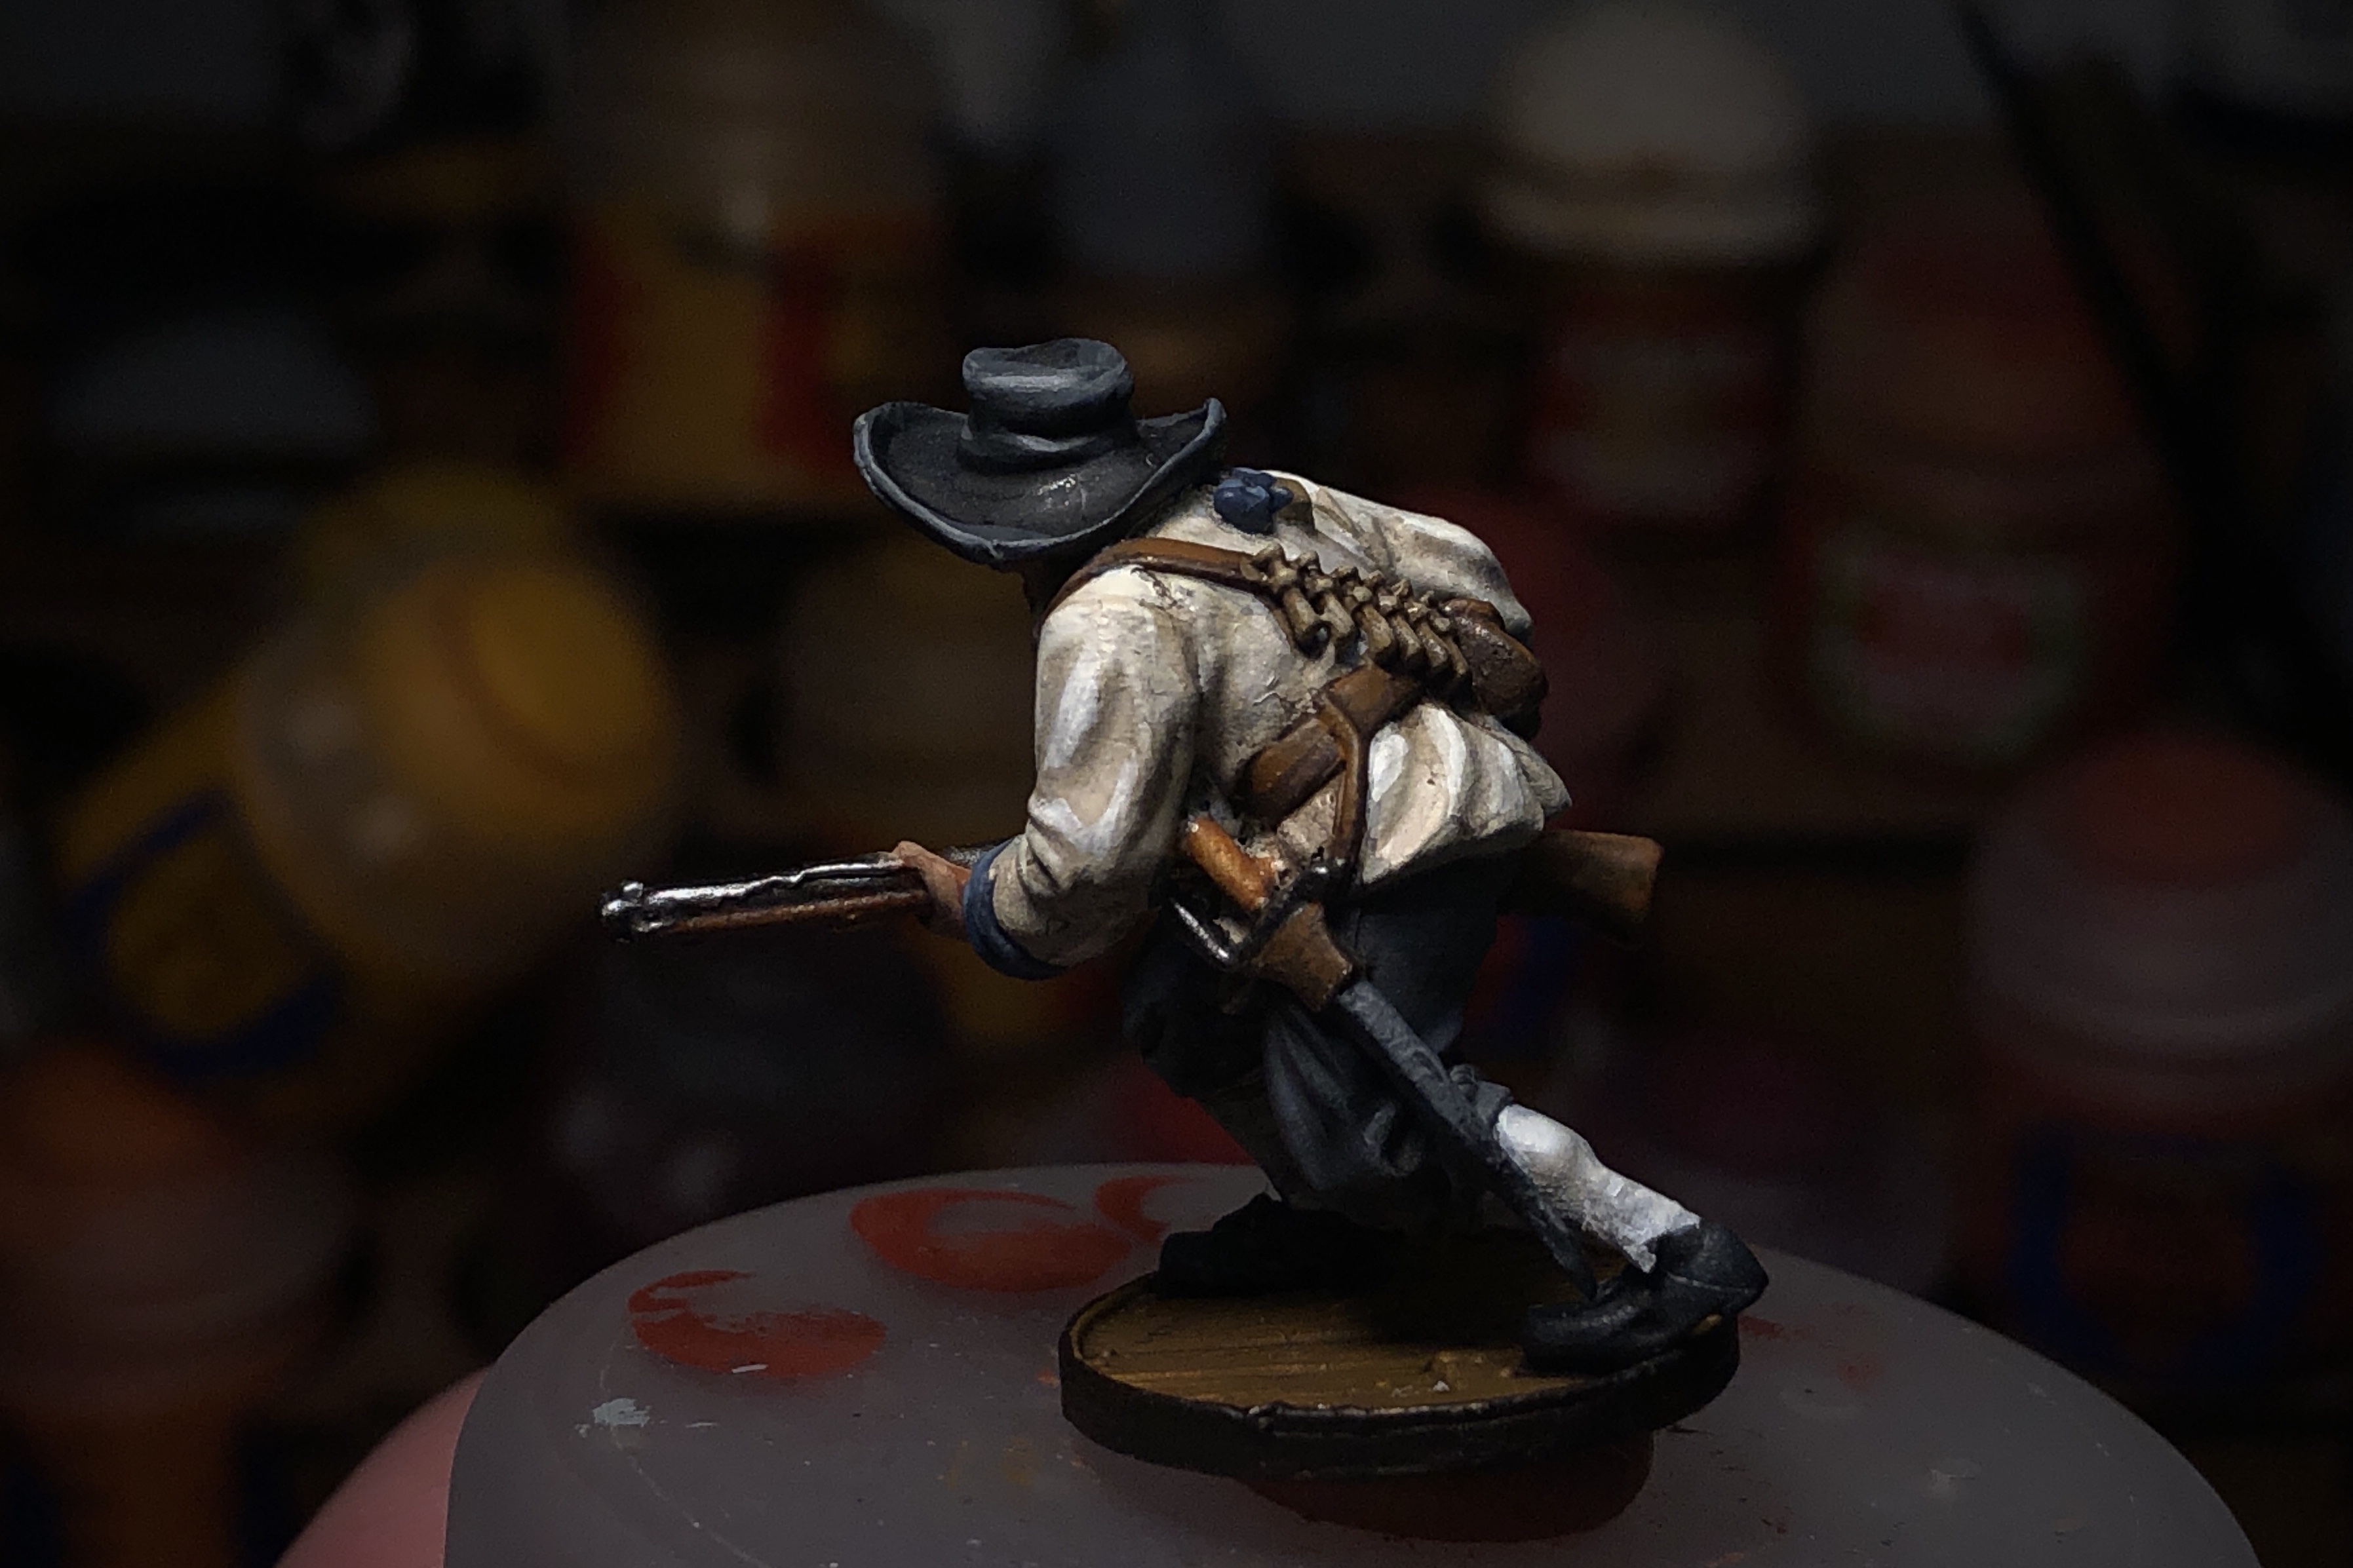
For all the brown leather and the musket stocks I used Skrag Brown then some Deathclaw Brown, mostly on the muskets.

For the leather I use a very fine brush and brush on many fine lines to give a worn and cracked look.
For the shoes and hats I gradually mixed some Administratum Grey into German Grey. I used this same combination to put edge highlights on the sword scabbards as well.

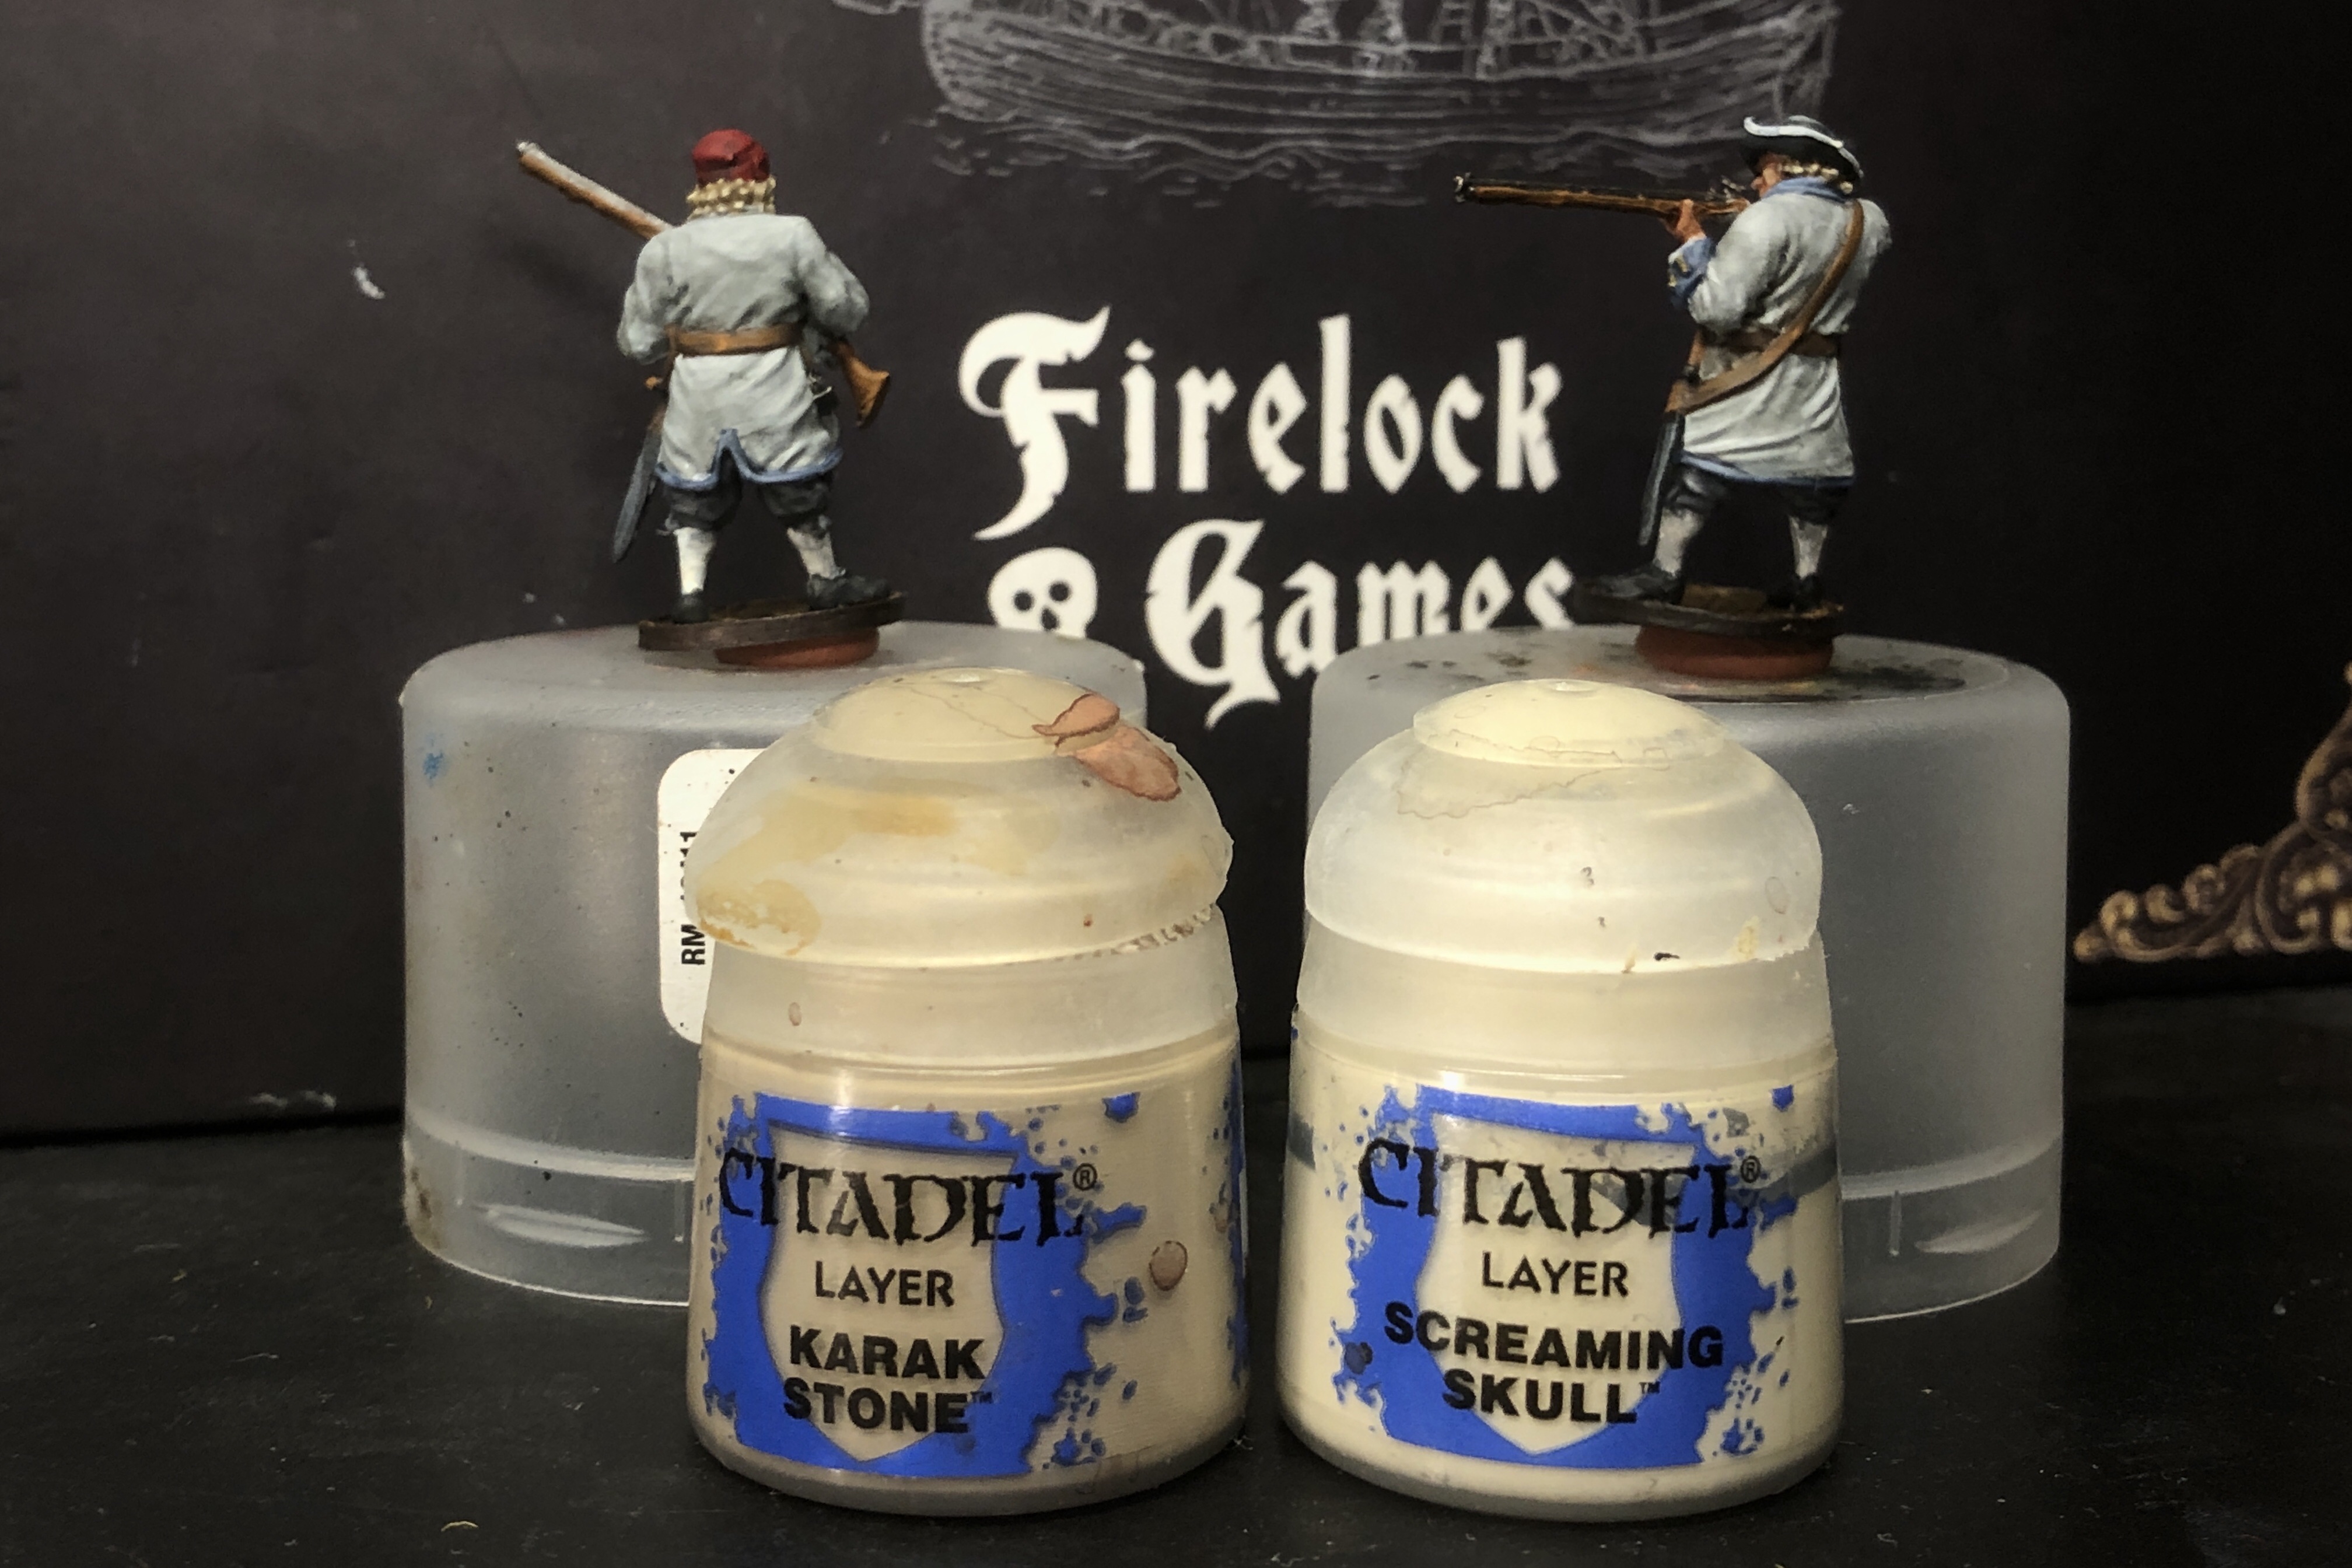
For all the hair and the cartridges I used Karak Stone for the main highlight with a tiny bit of Screaming Skull added at the end.
I used this opportunity to neaten up the dividing line between this red hat and the hair on this model.

Quick dabs on these bumpy cartridges.
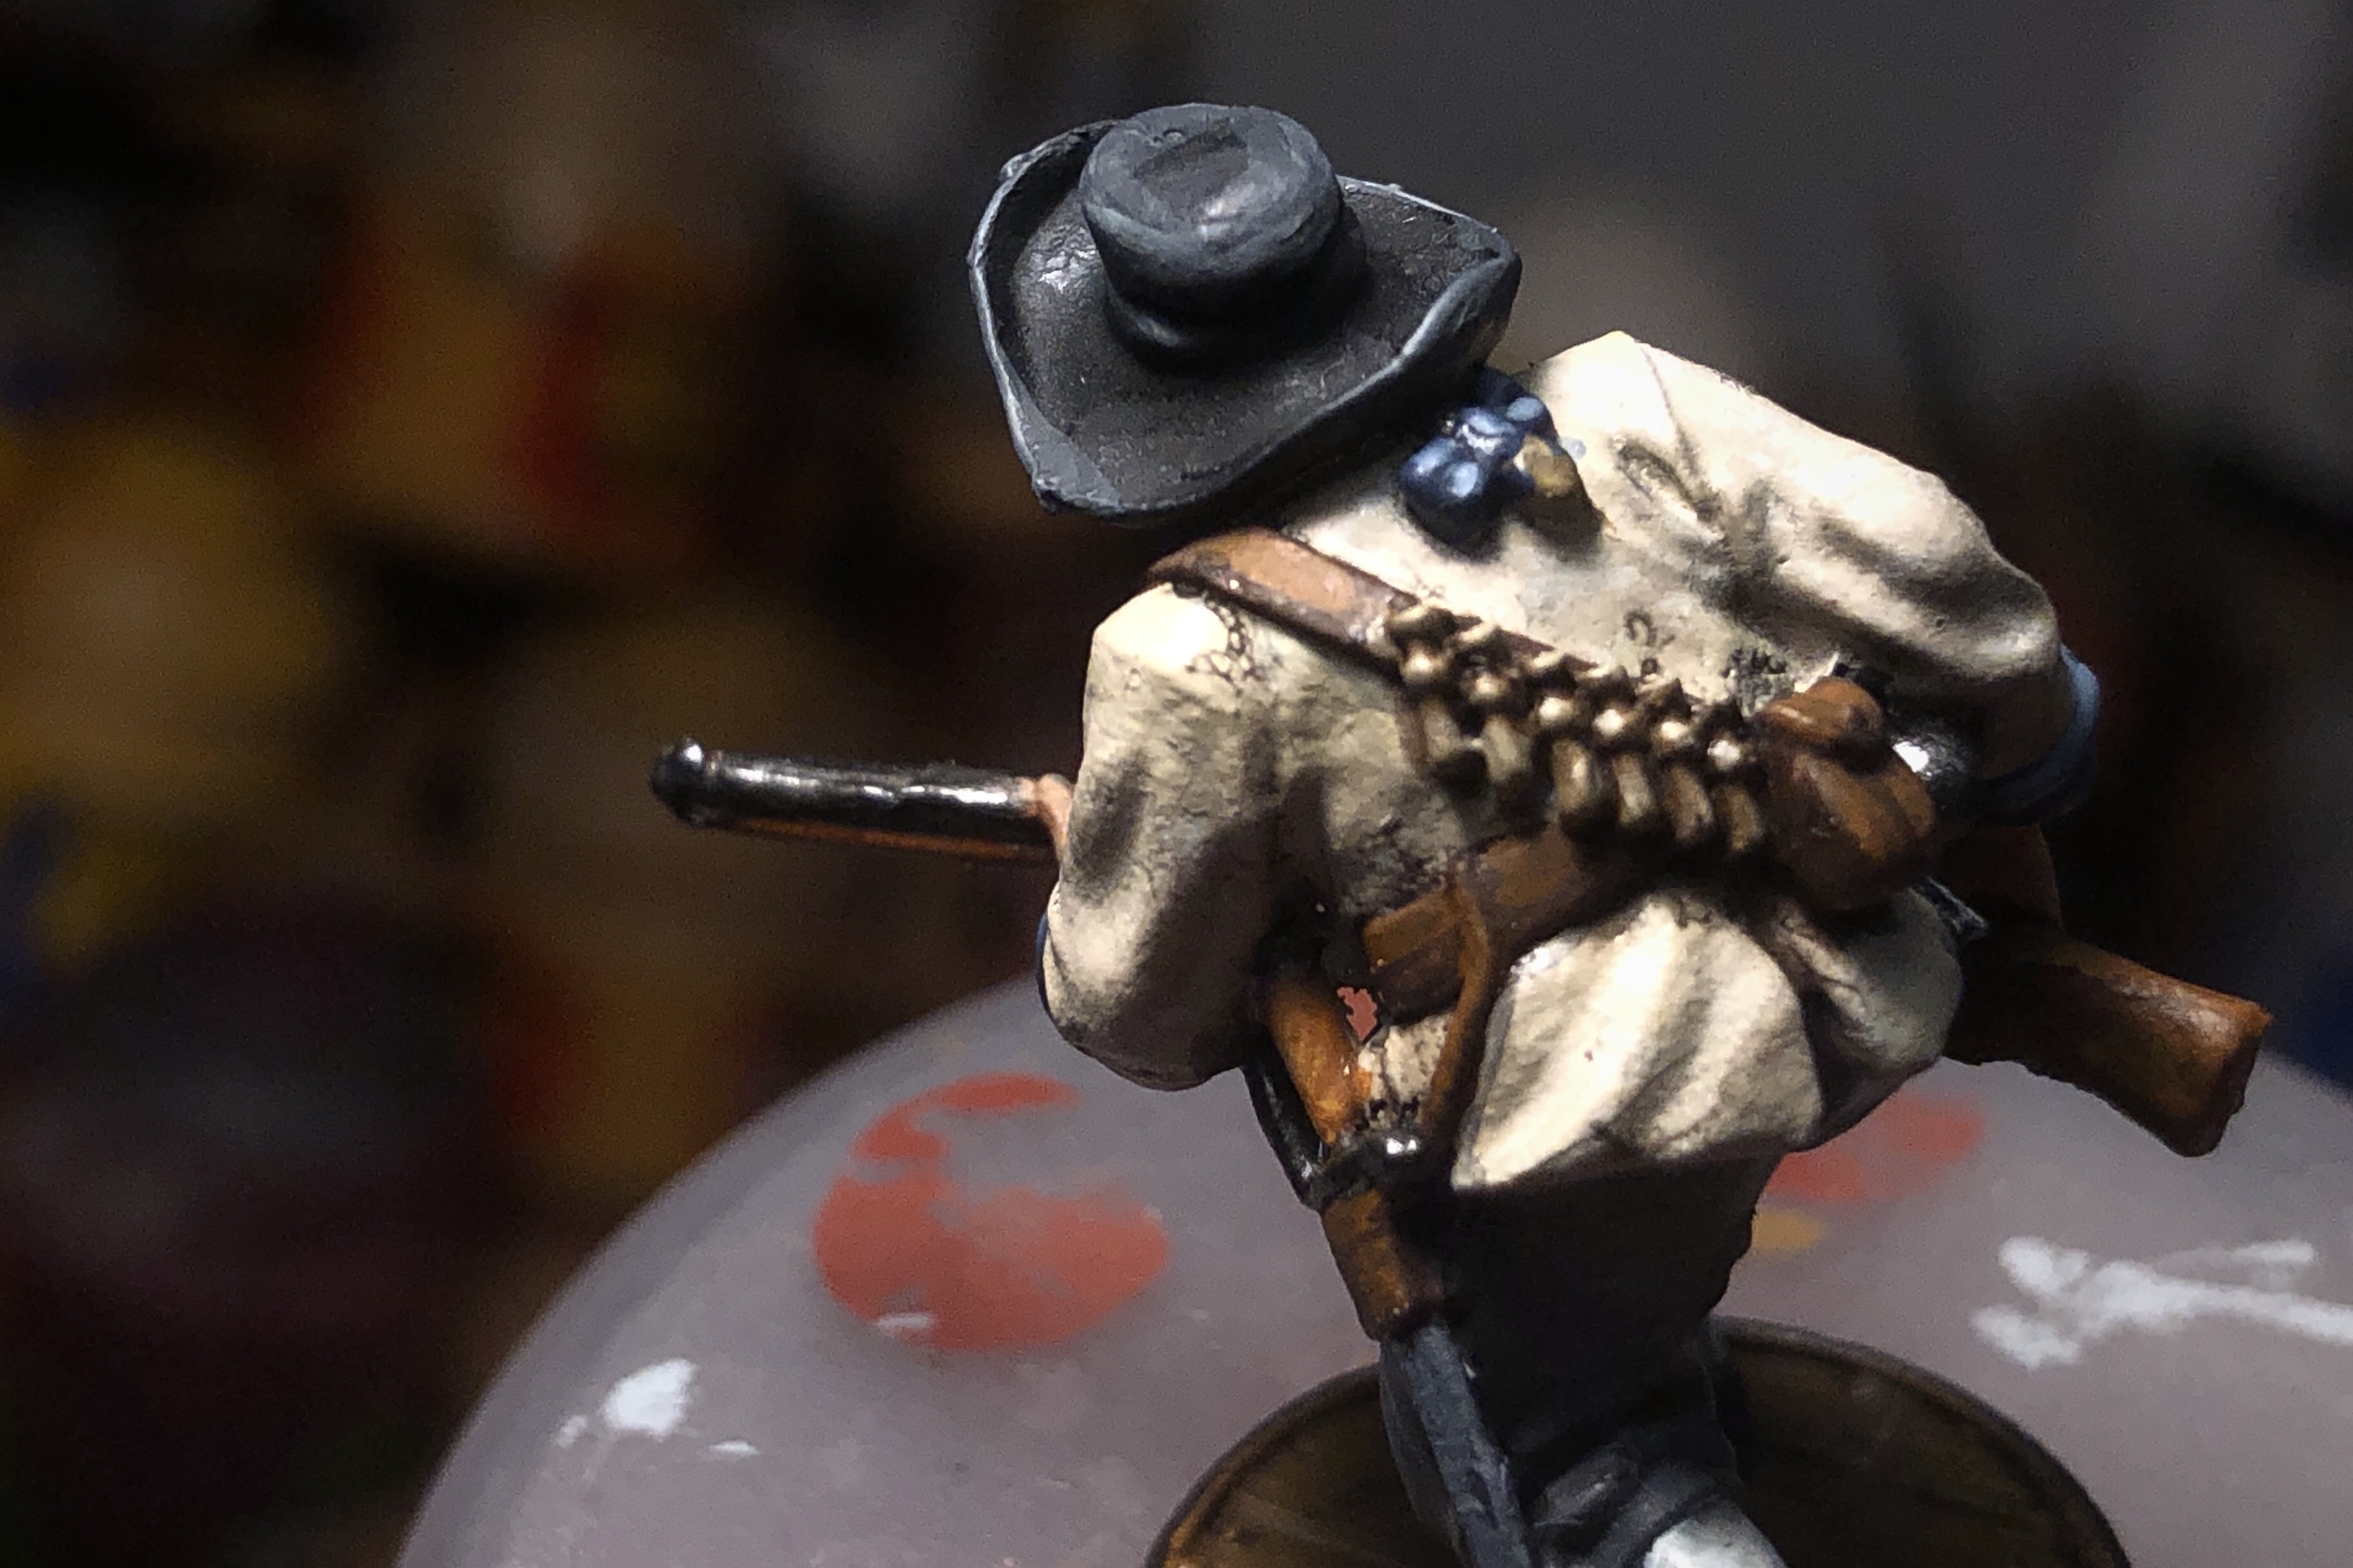
For the steel elements I reapplied some of the original Steel and added some Duraluminium for the brighter areas.
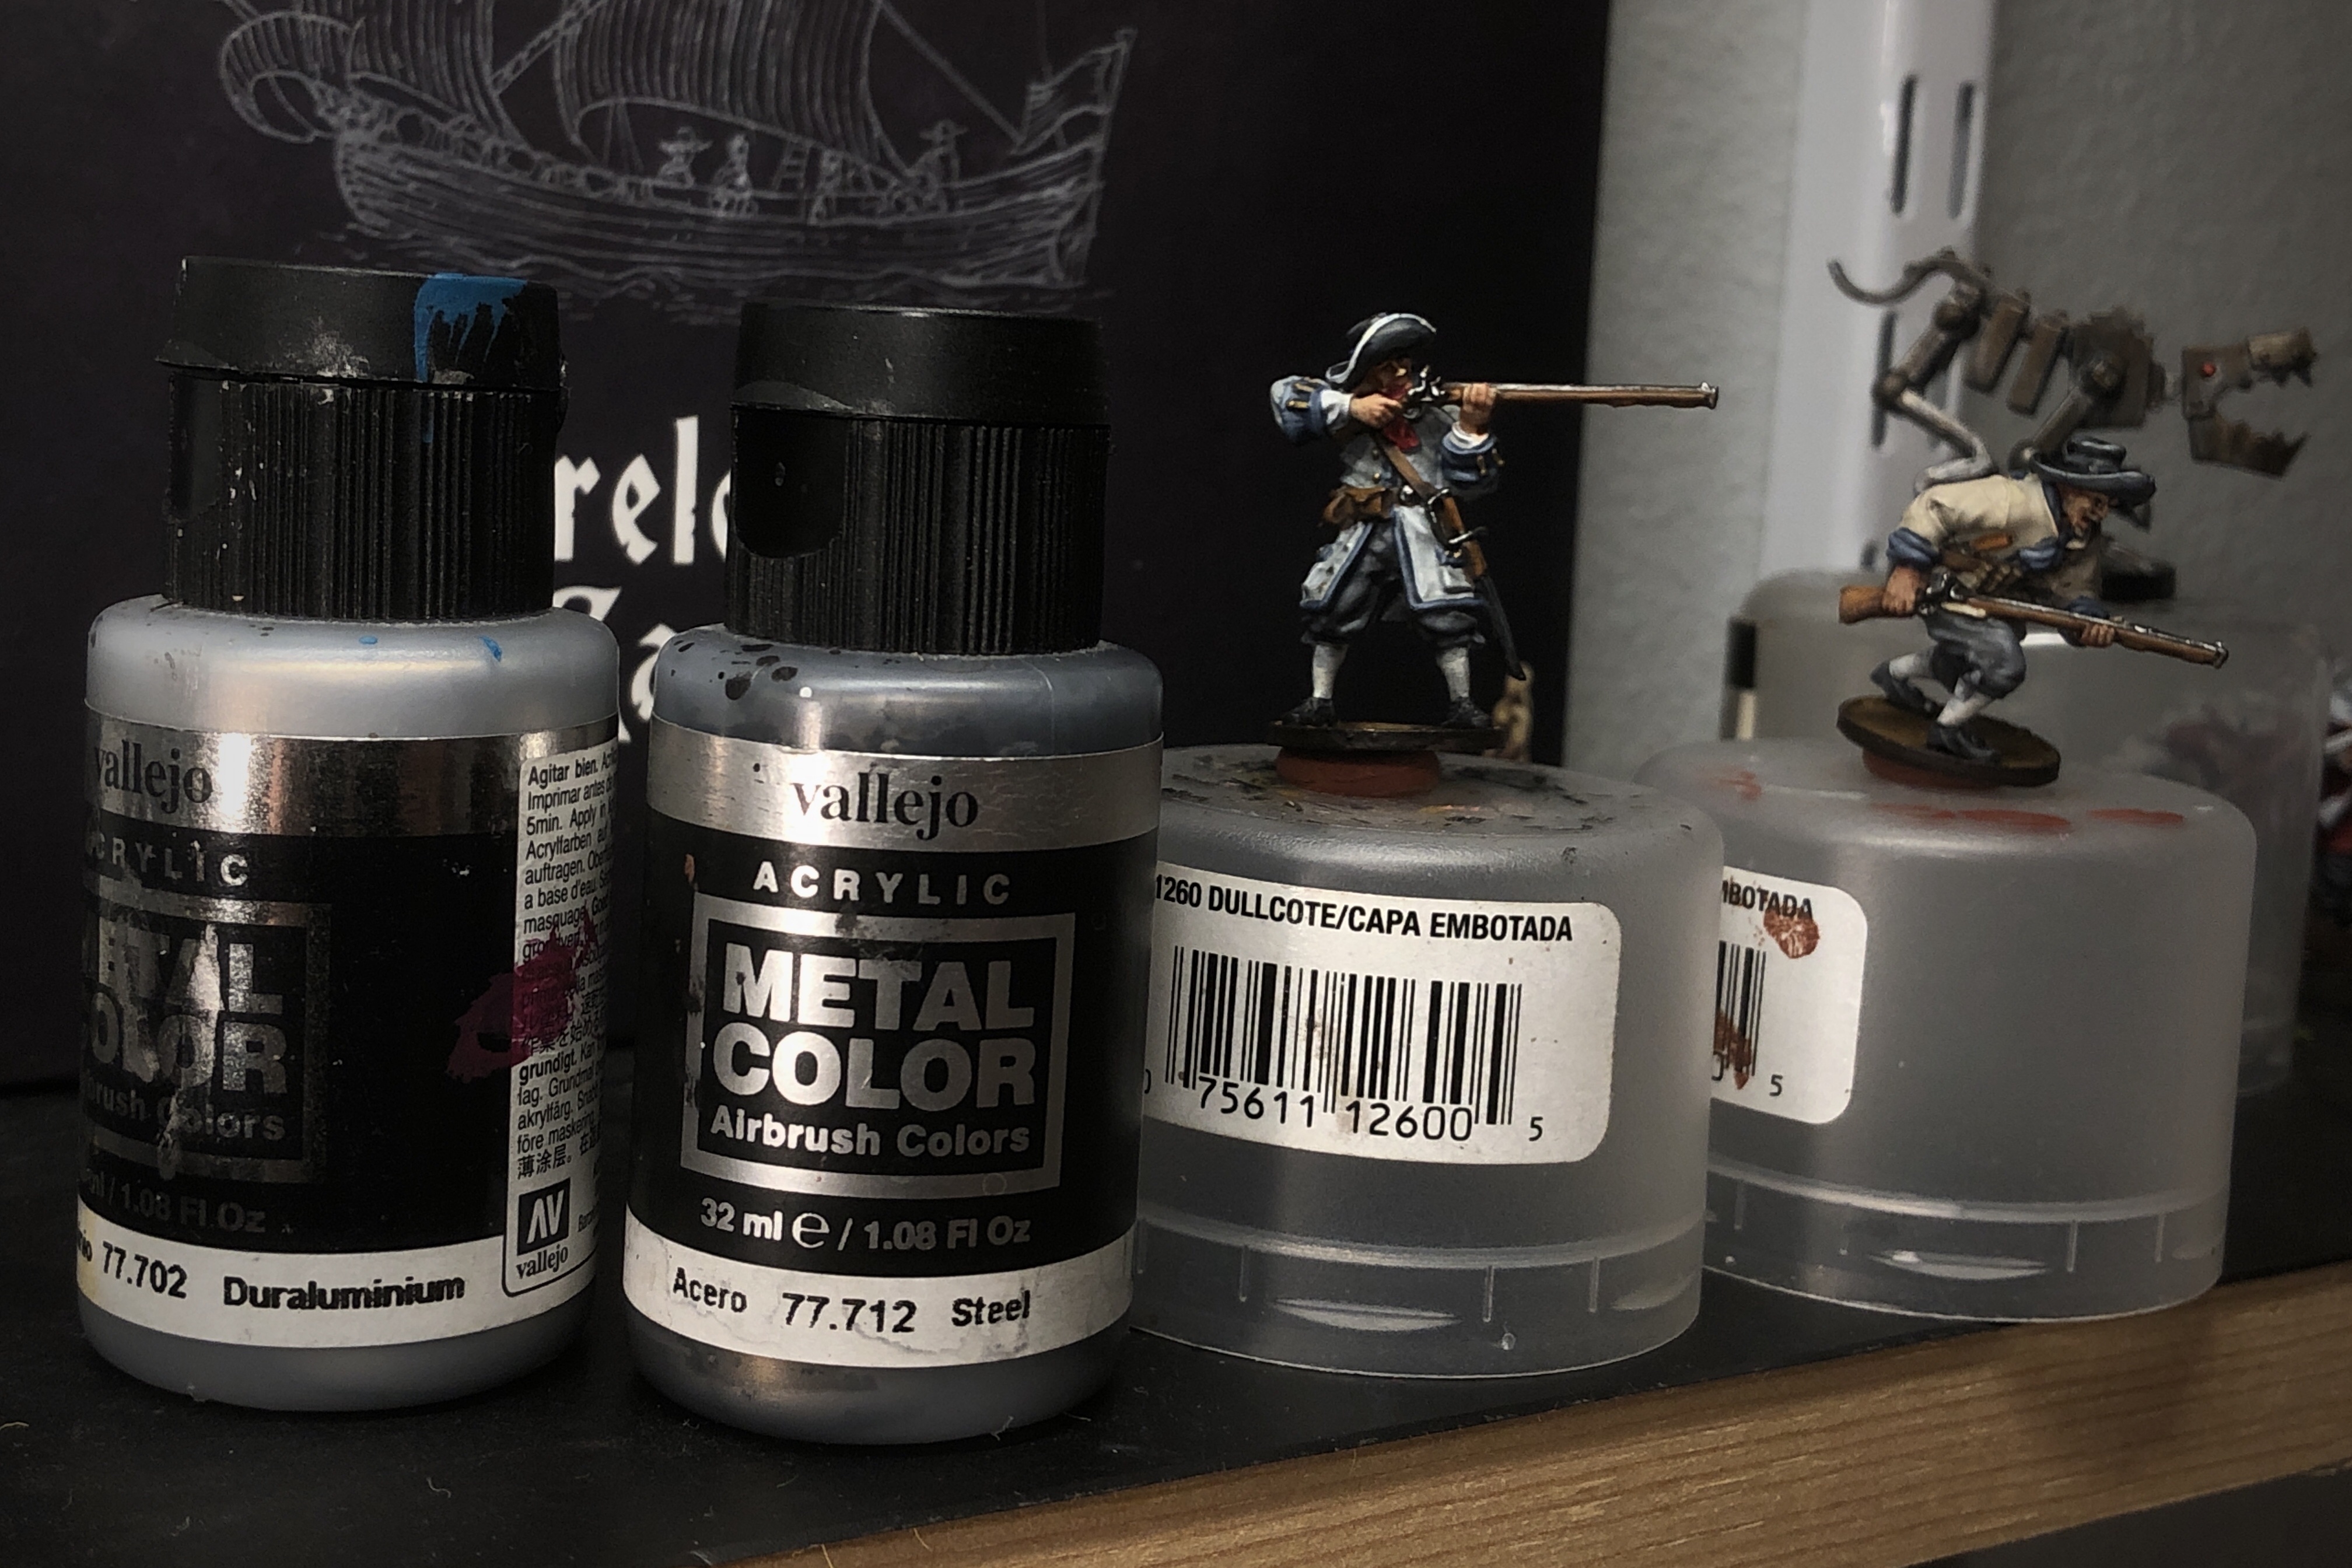
I make sure to use a “hard pallet” for all metallic paints as they can pollute an entire wet pallet and introduce metallic flakes in any other paints you take out of the wet pallet.

I sure love theses Vallejo Metal Color paints. This is the Steel and Duraluminium put together in one well.
Even if you skip most of this highlighting process, I encourage you to highlight the metal. It really brightens up the miniature
Belt buckles, sword hilts, musket barrels and locks all look much better with some highlights.
For the buttons I mixed a little Old Gold in with the original Brass.
You could just use Brass and it would be a little richer contrast.
I also used the Brass to paint the ramrod guides on the bottom of the muskets.
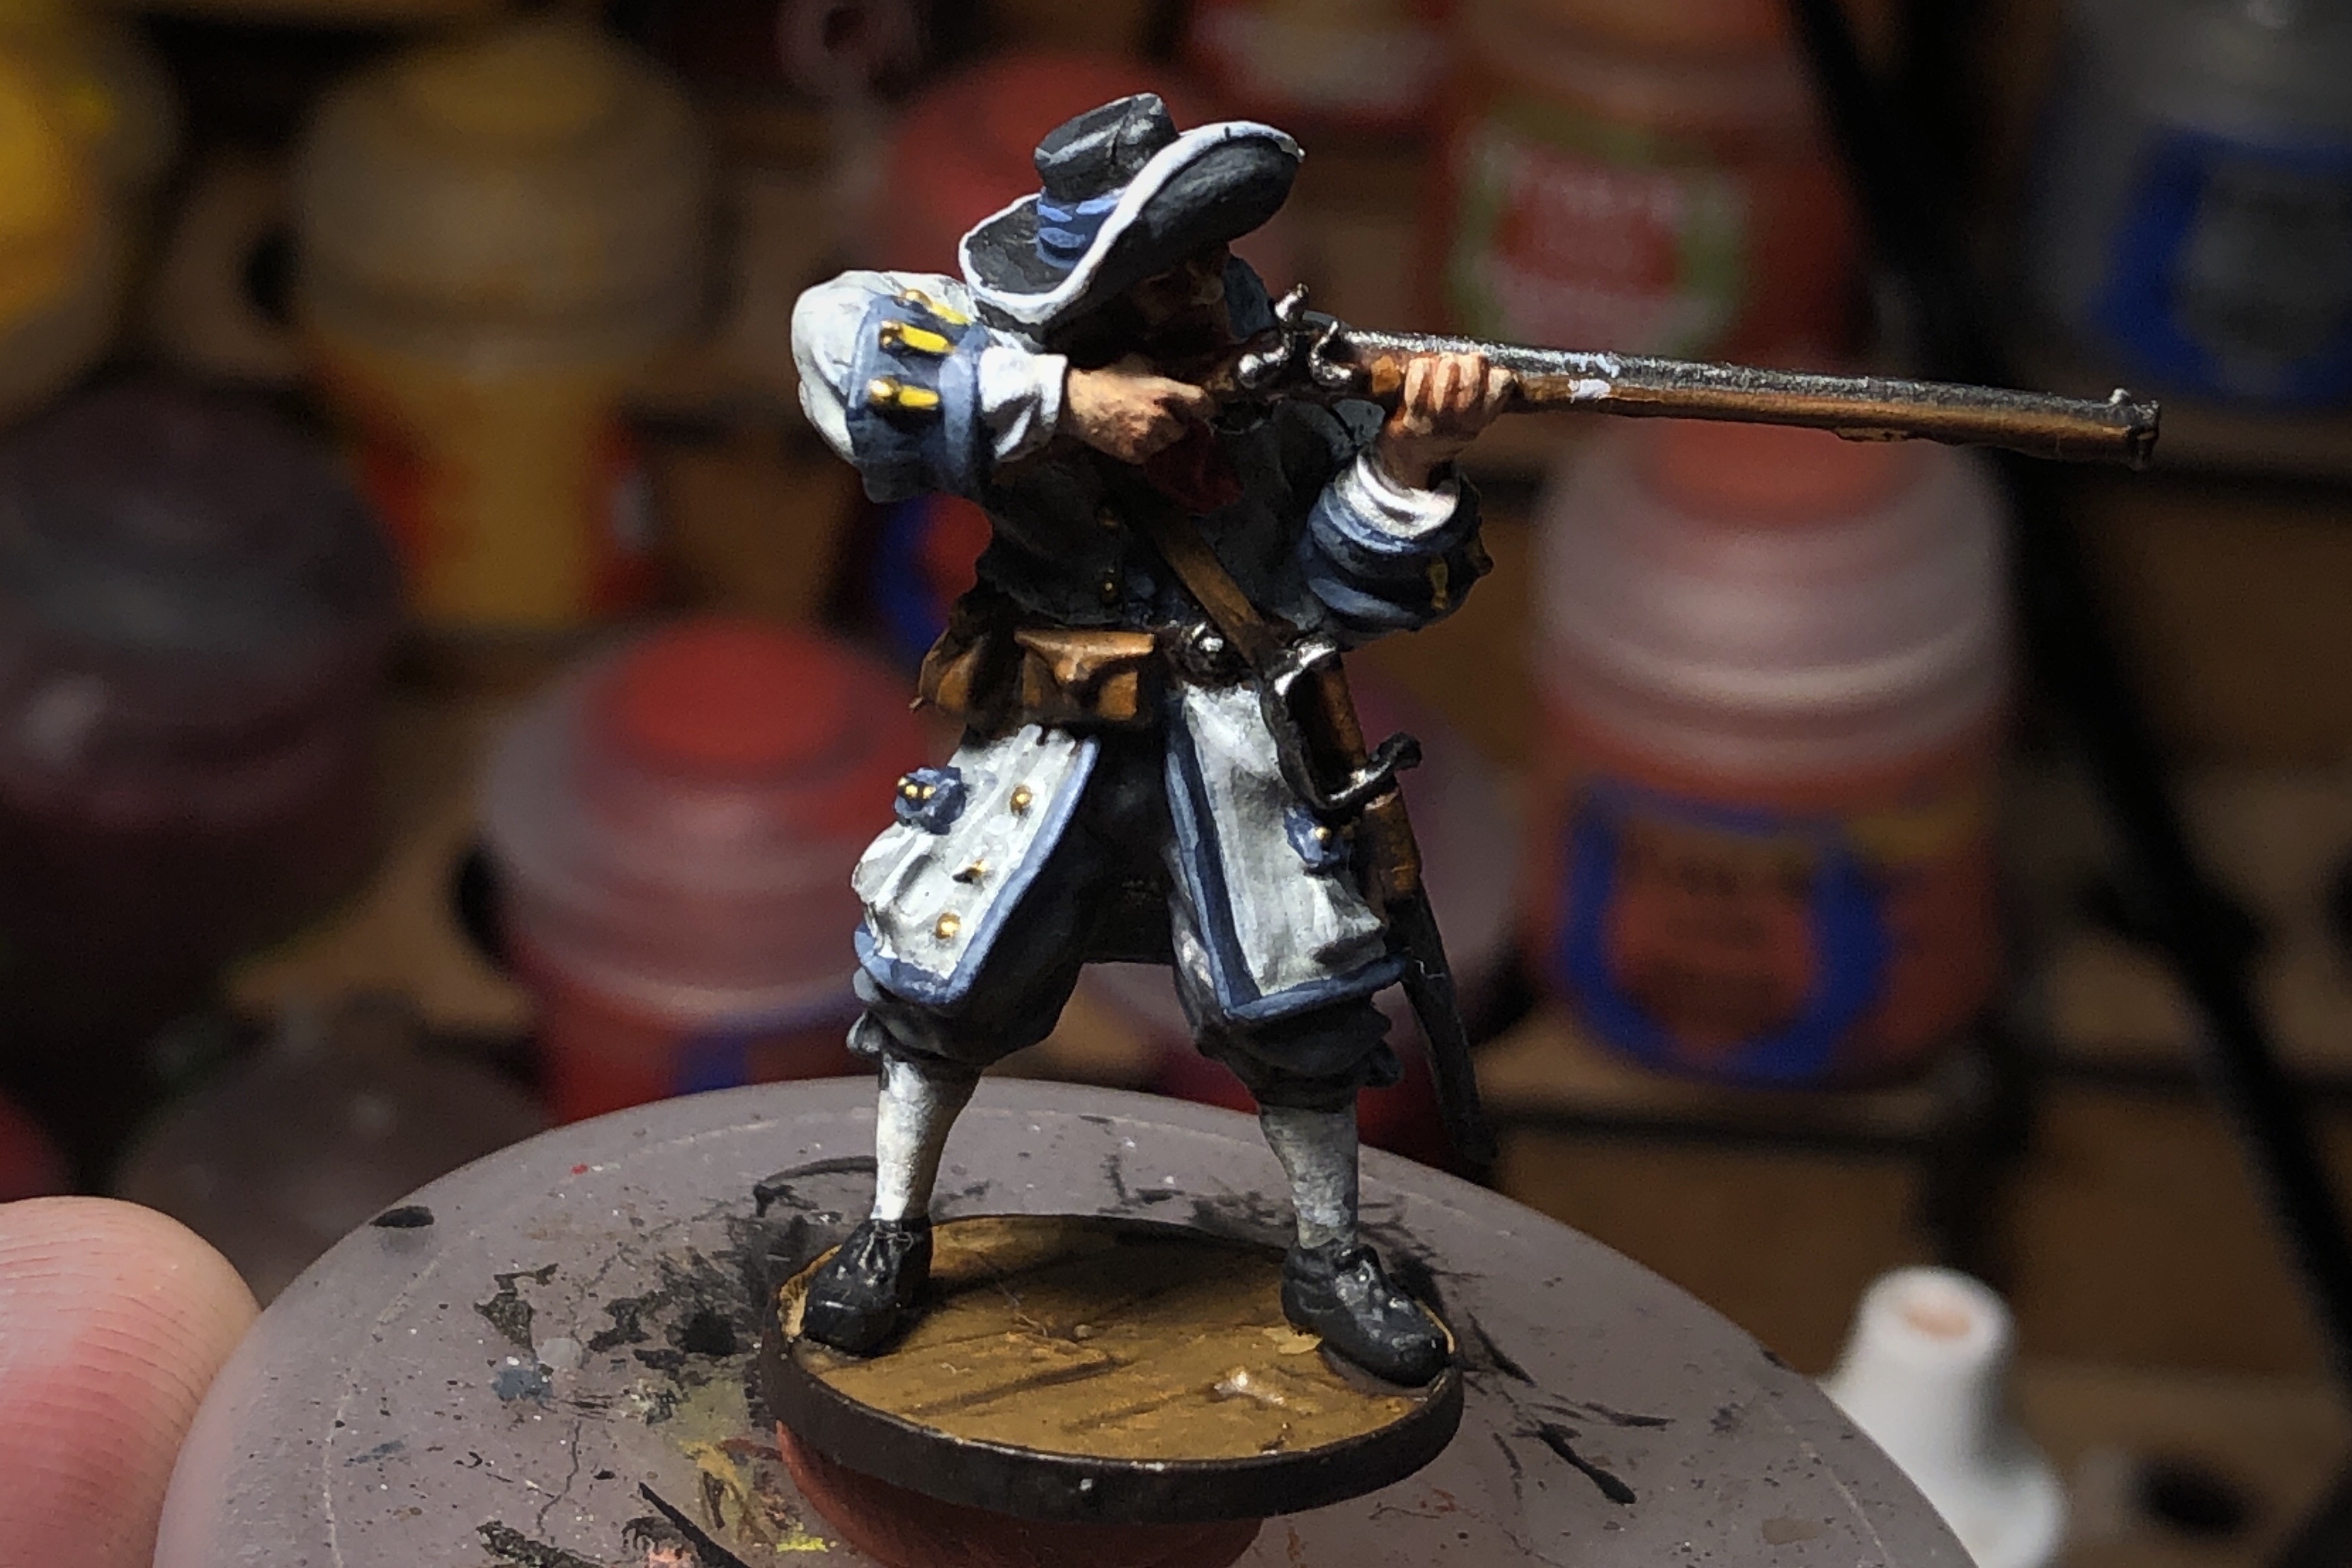
For the bits of yellow on two of the models I did quick highlights with Yriel Yellow.
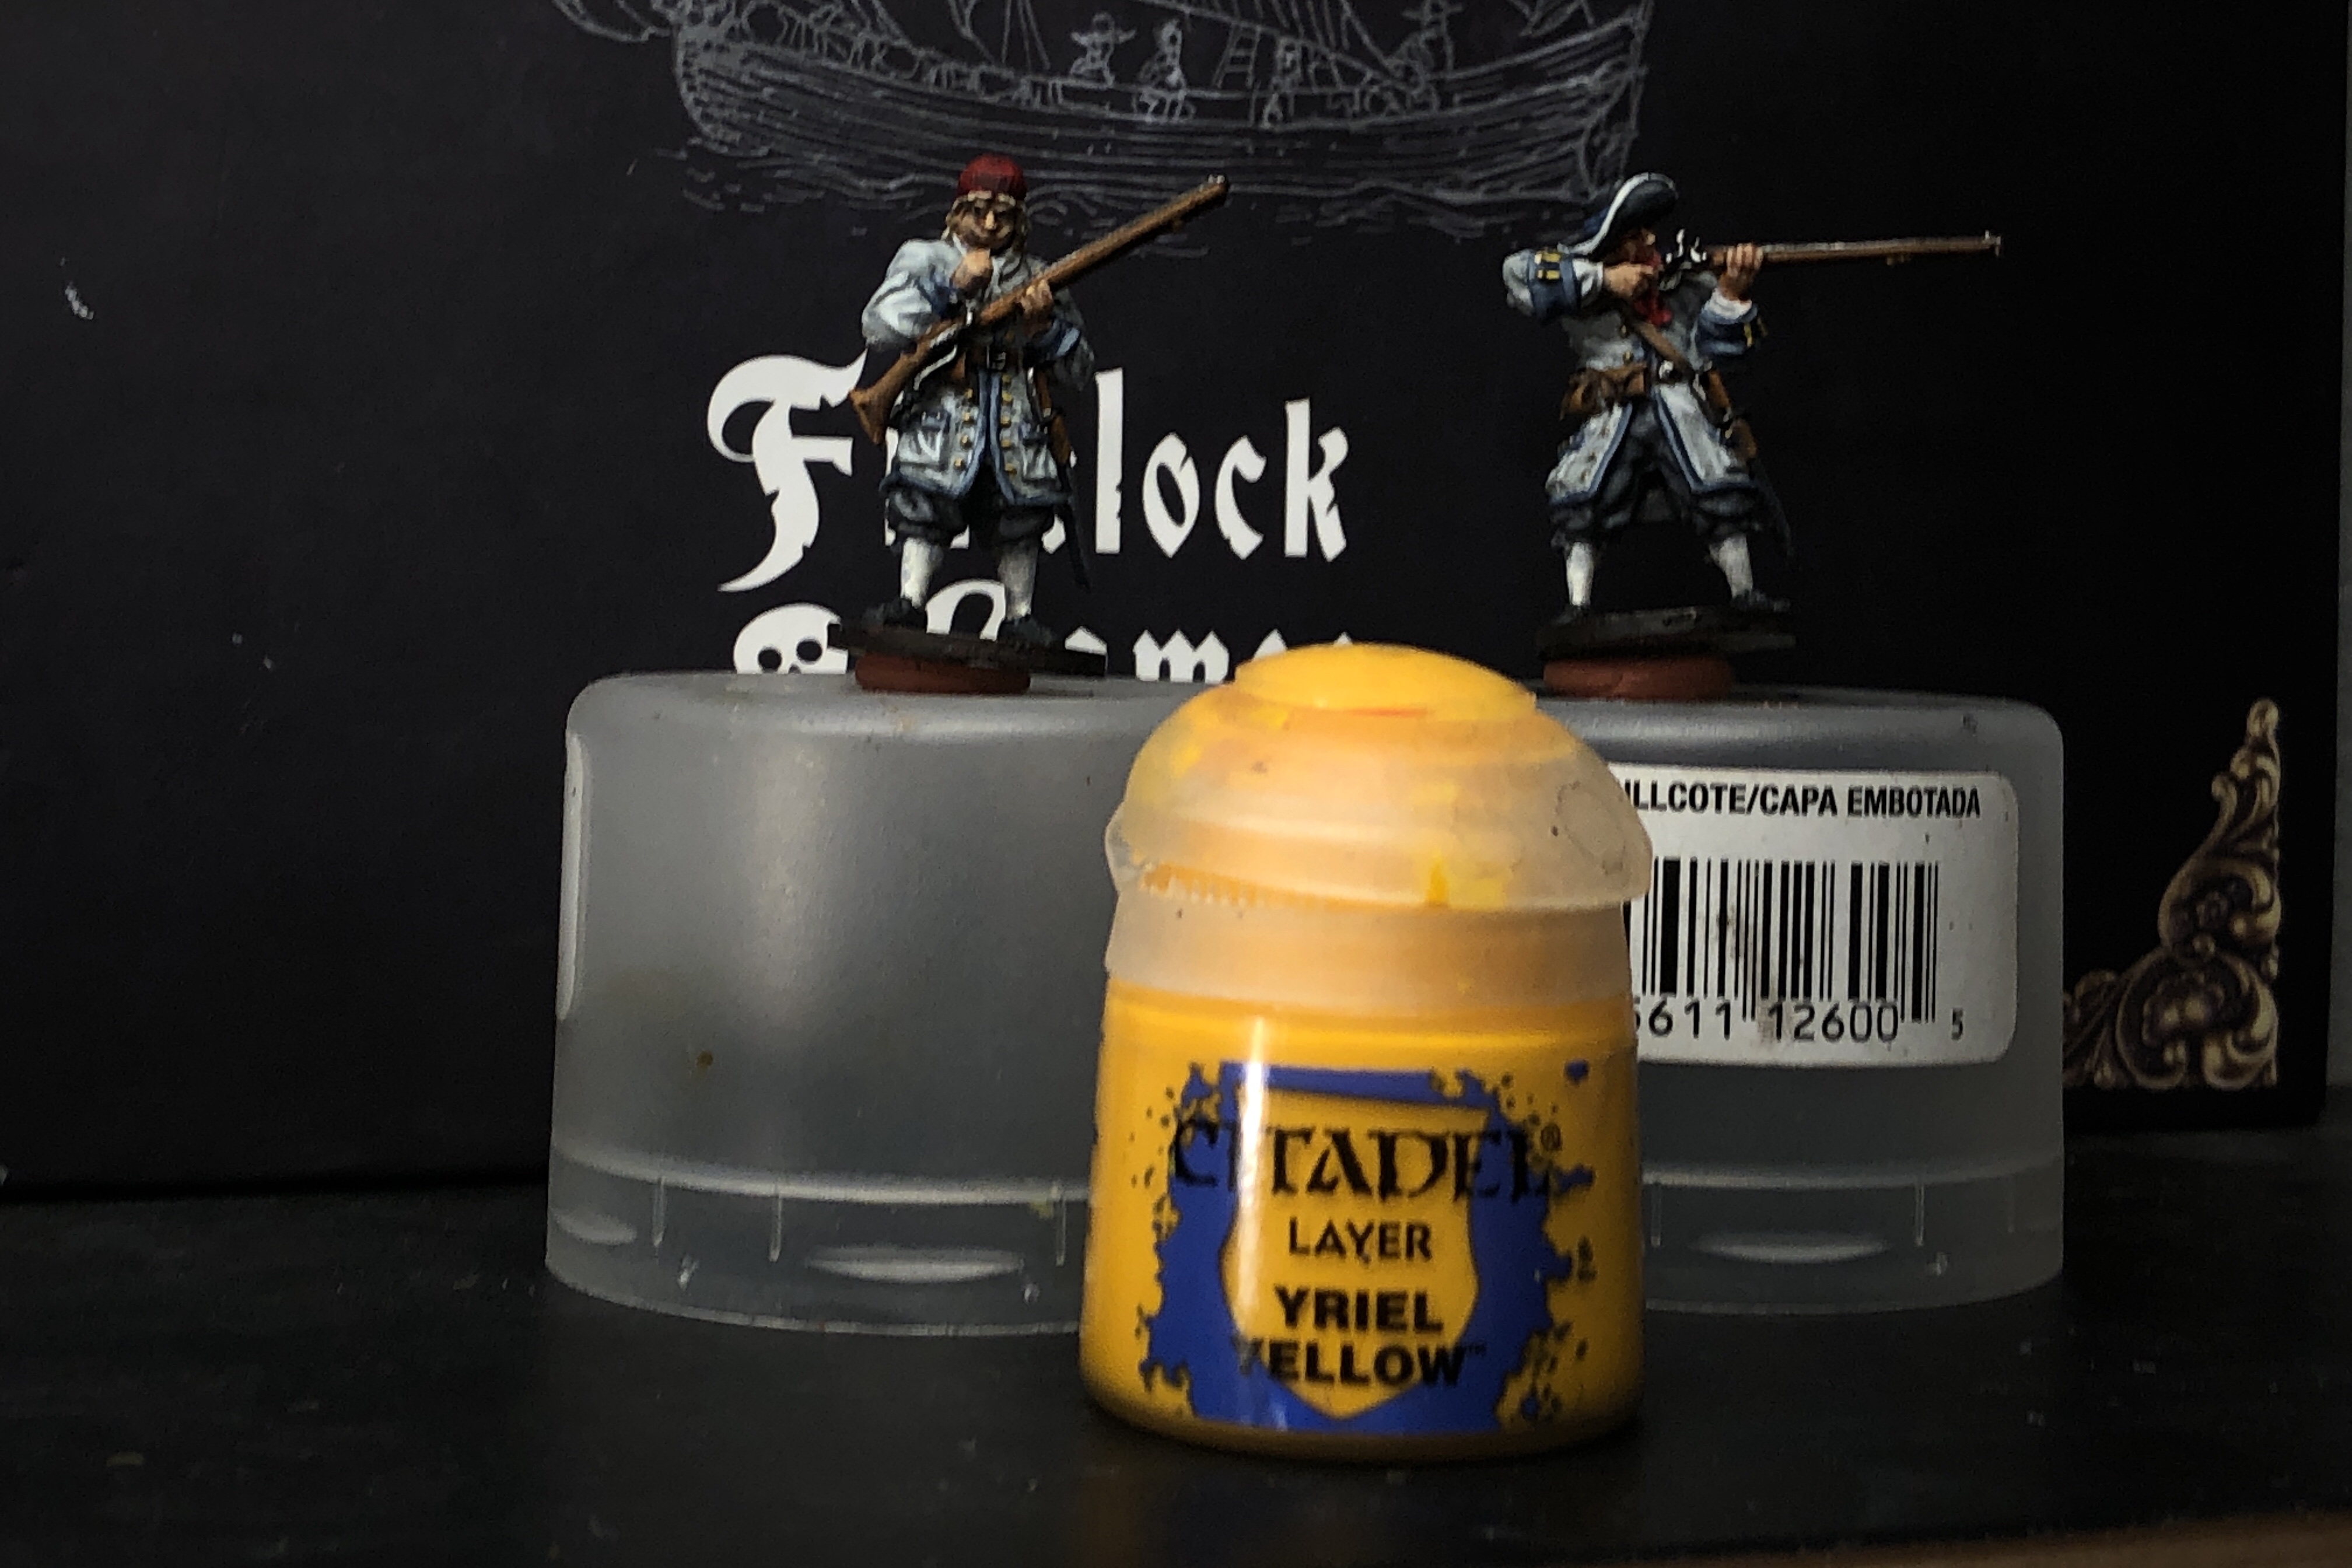
The ornamental button holes on the stocking cap model.
And the bits on the cuffs of the shooting model.
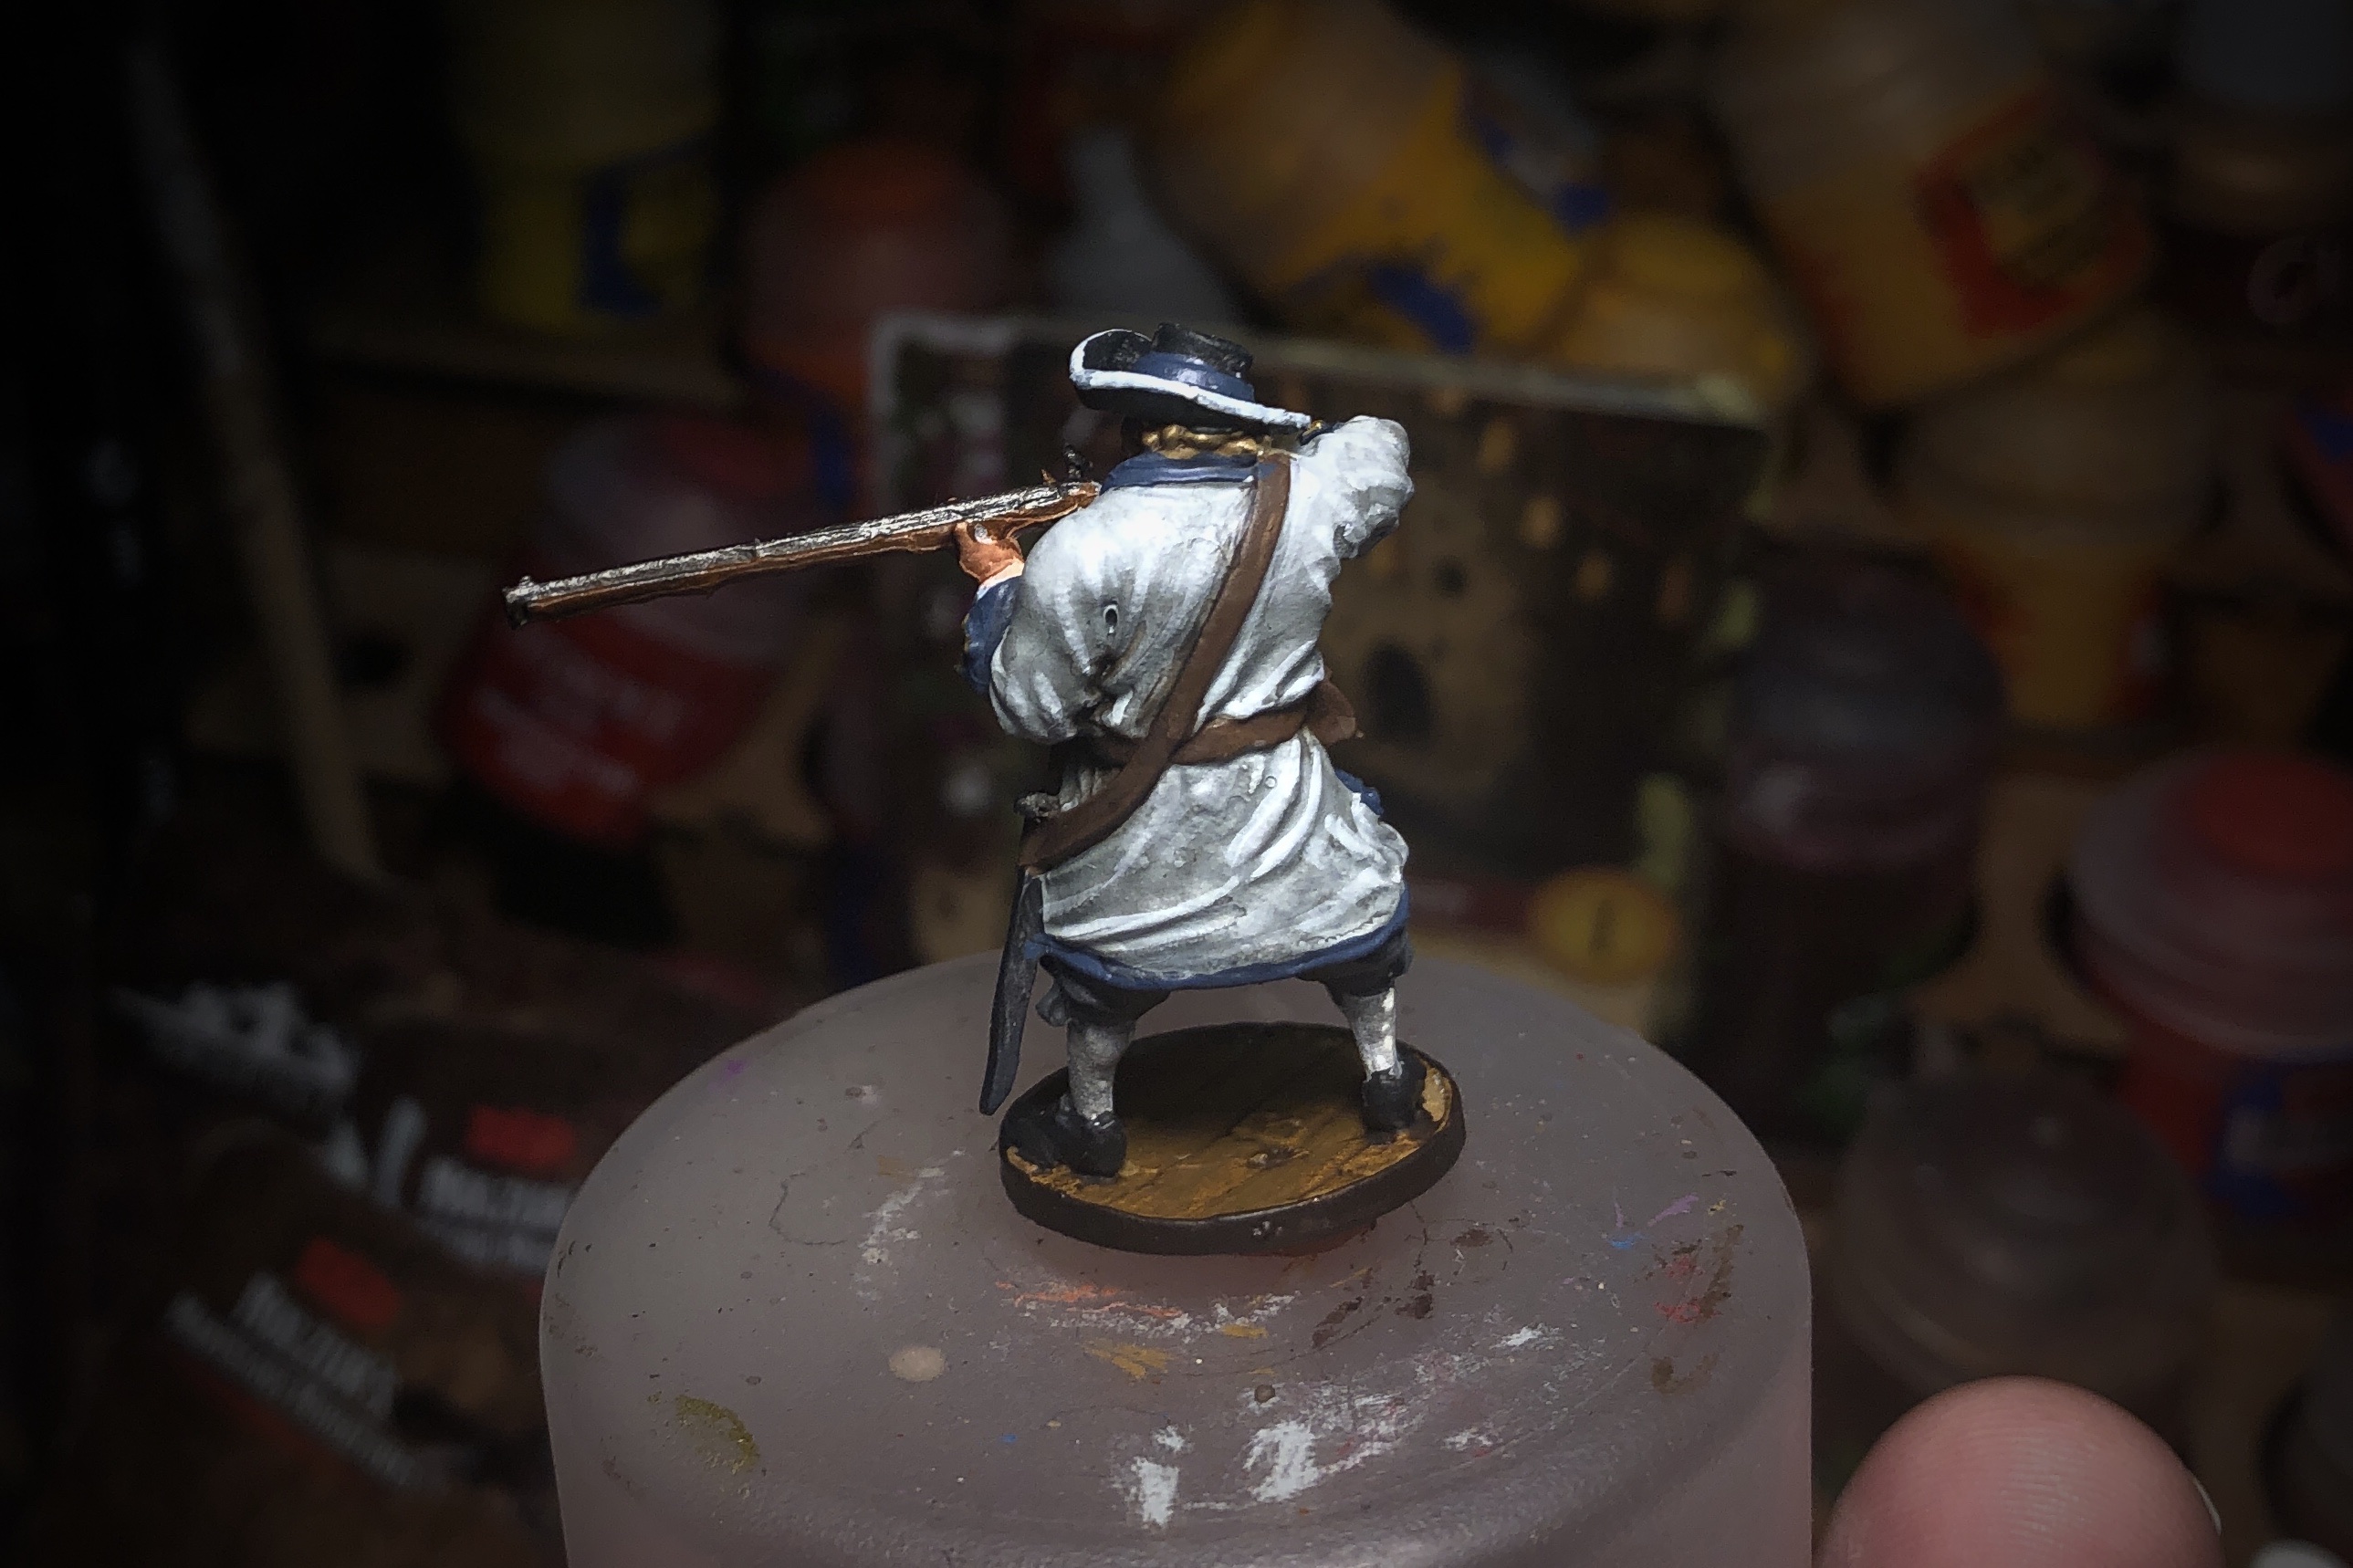
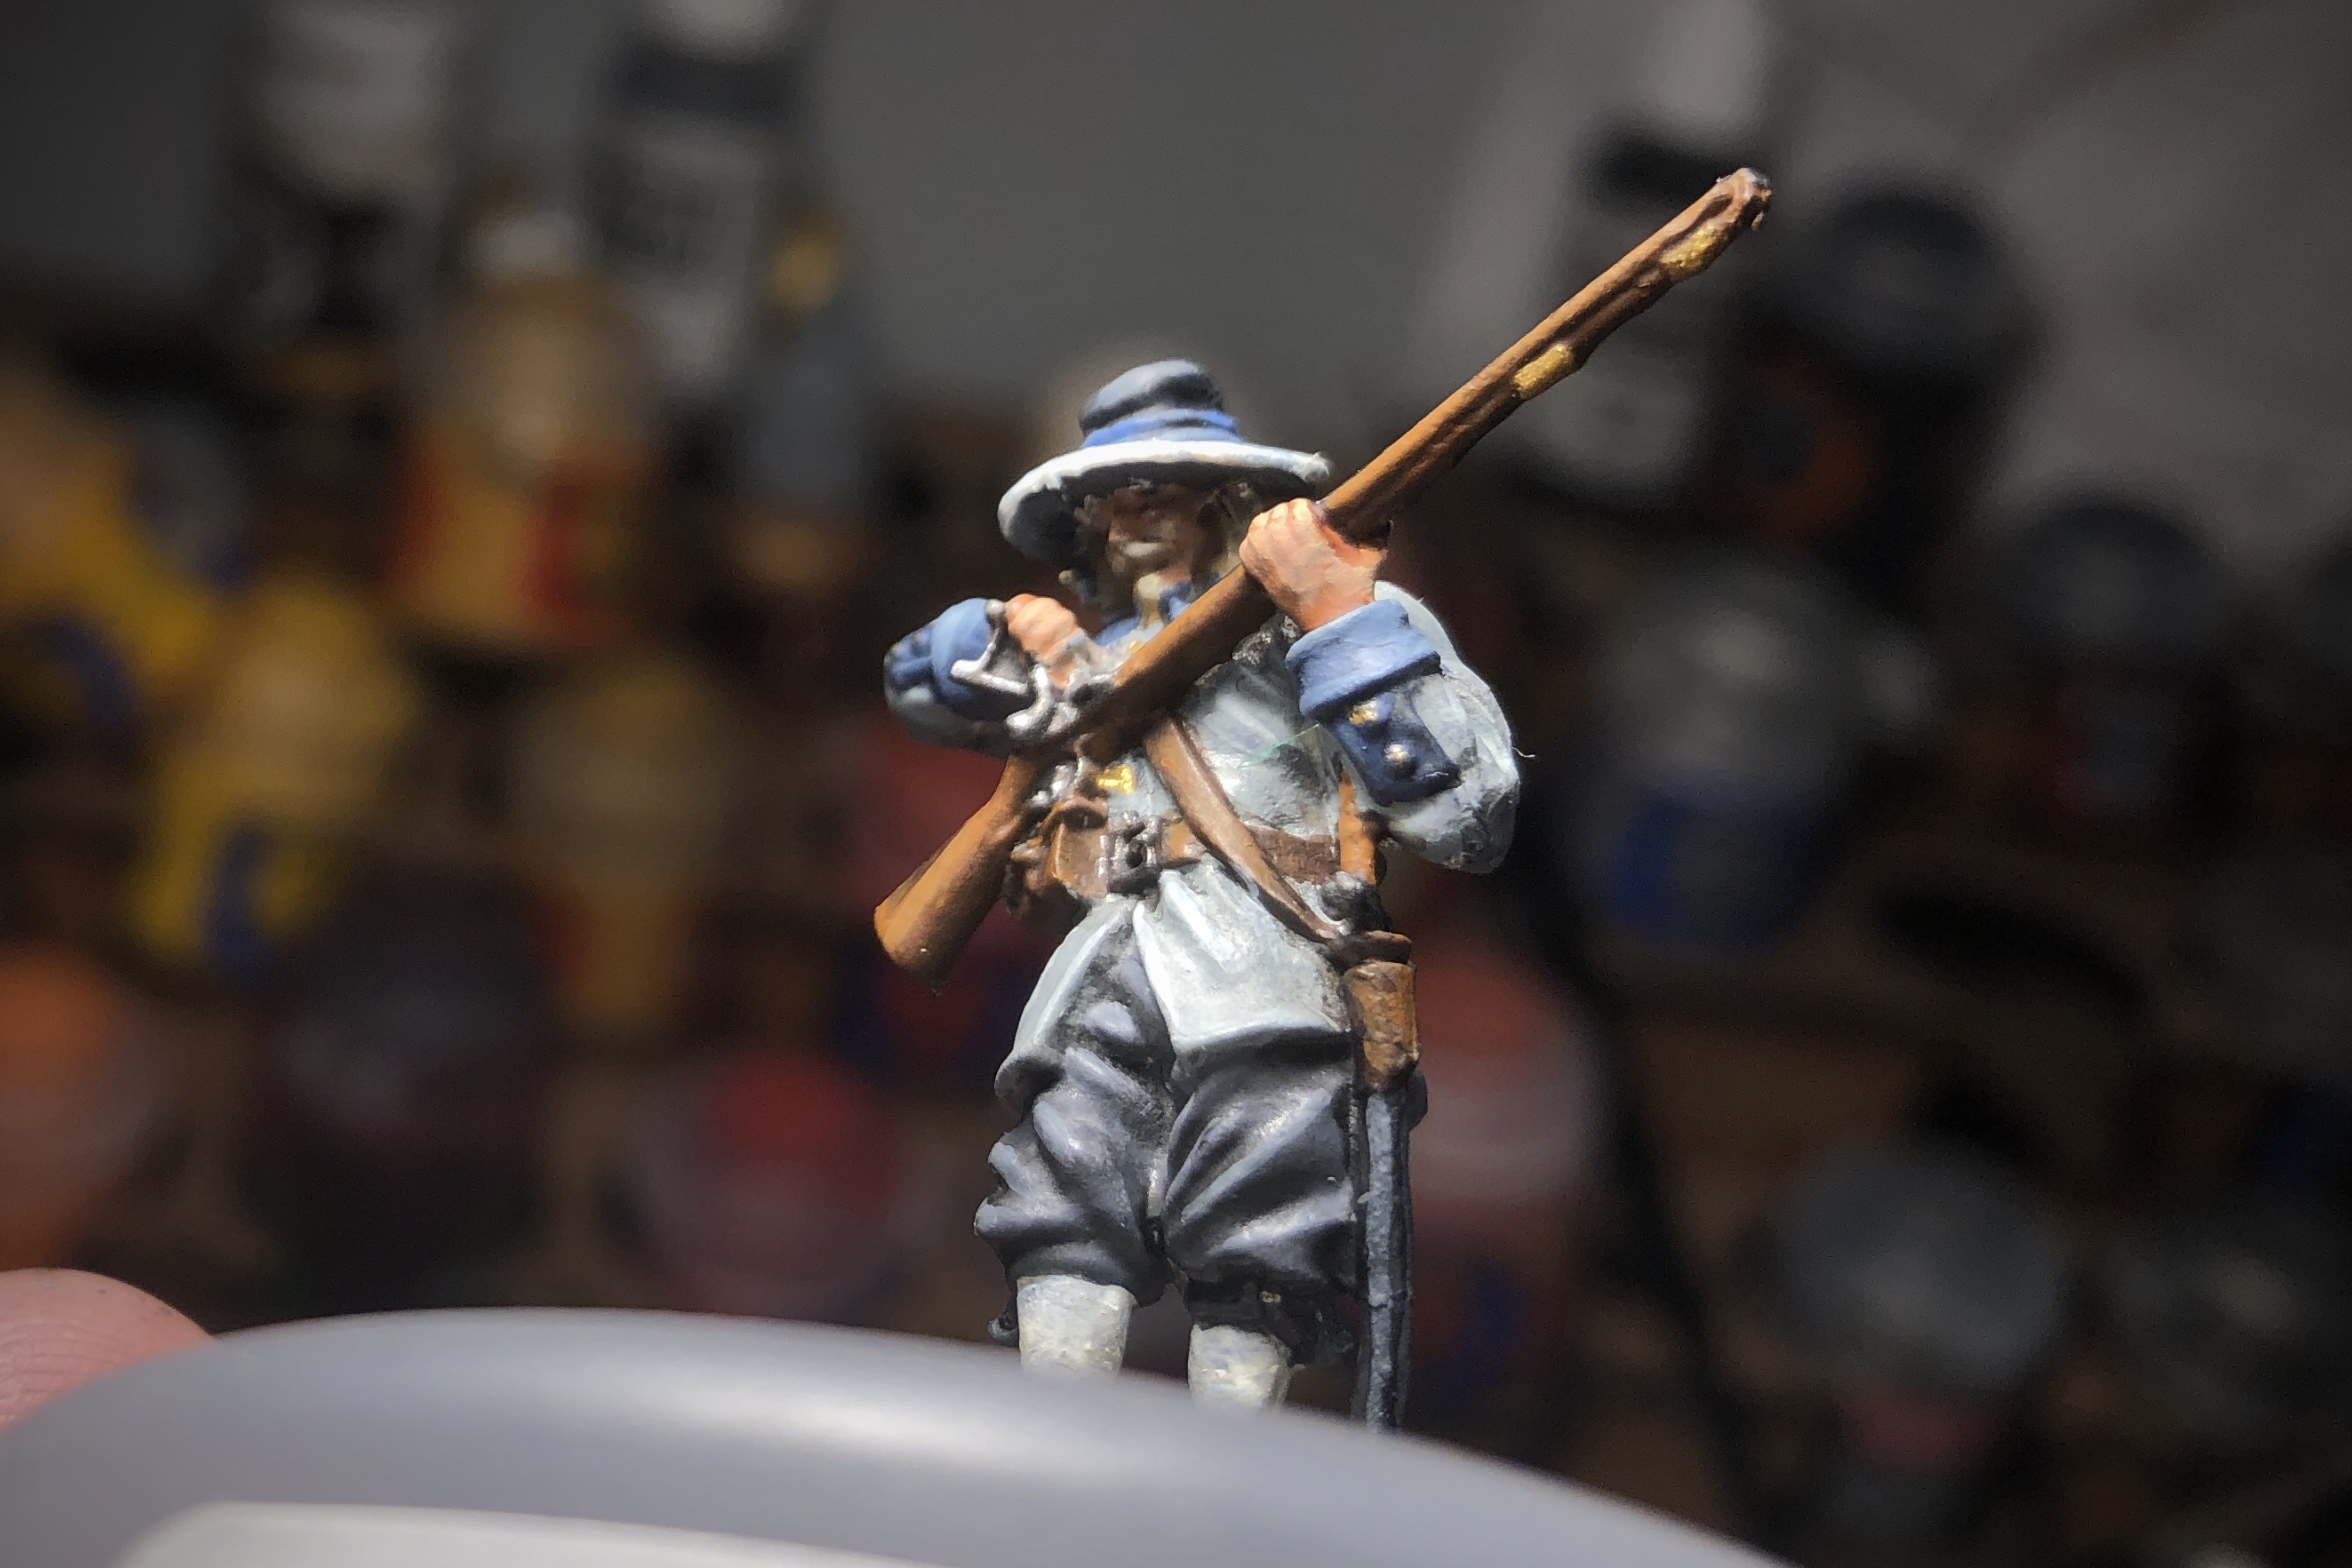
Whites aren’t my favorite to highlight so I guess I saved them until near the end. I mixed up a range of white going from Screaming Skull, to Ivory to pure White.
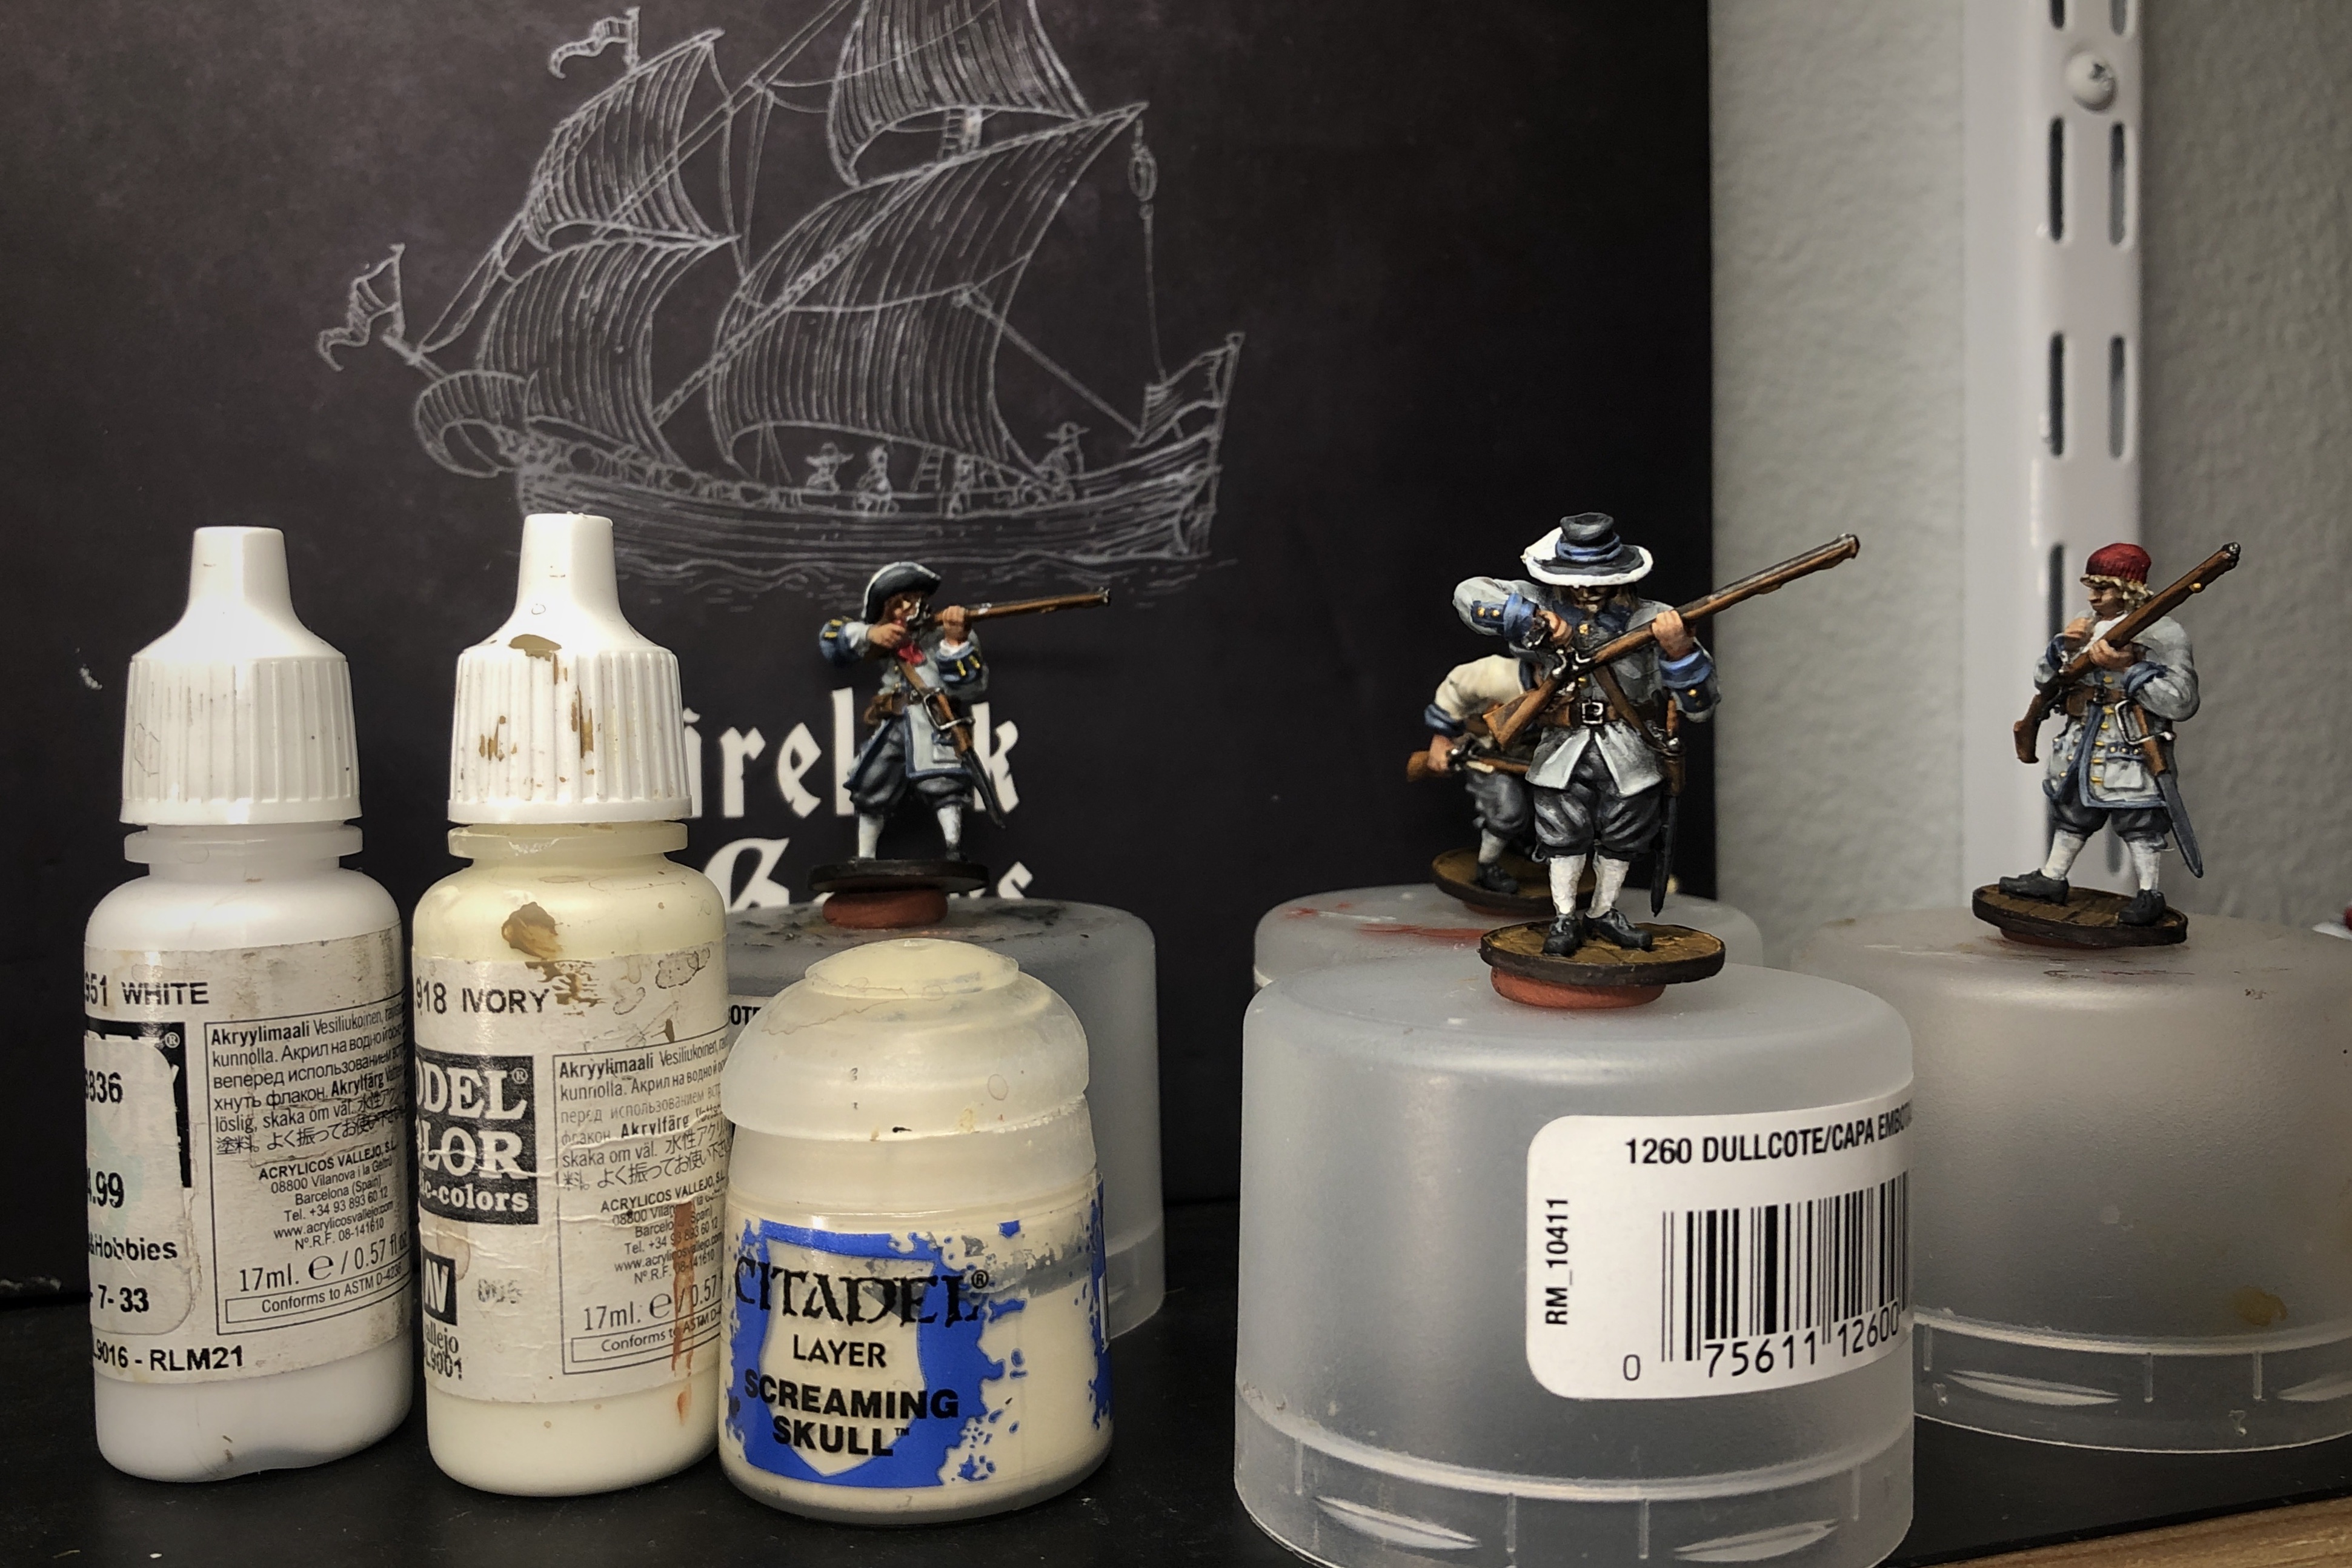
I started with the overshirt of the running model. This was based with Screaming Skull so I reapplied some of it straight, worked my way up to pure Ivory and even added a little pure White to the Ivory for some of the most raised portions.
It’s very difficult to get a good picture of highlighted white colors…
Then I used the Ivory and White for all the stockings and the shirt sleeves coming out of the cuffs of the shooting model. I almost forgot the white feather as well!
Red is the last color!
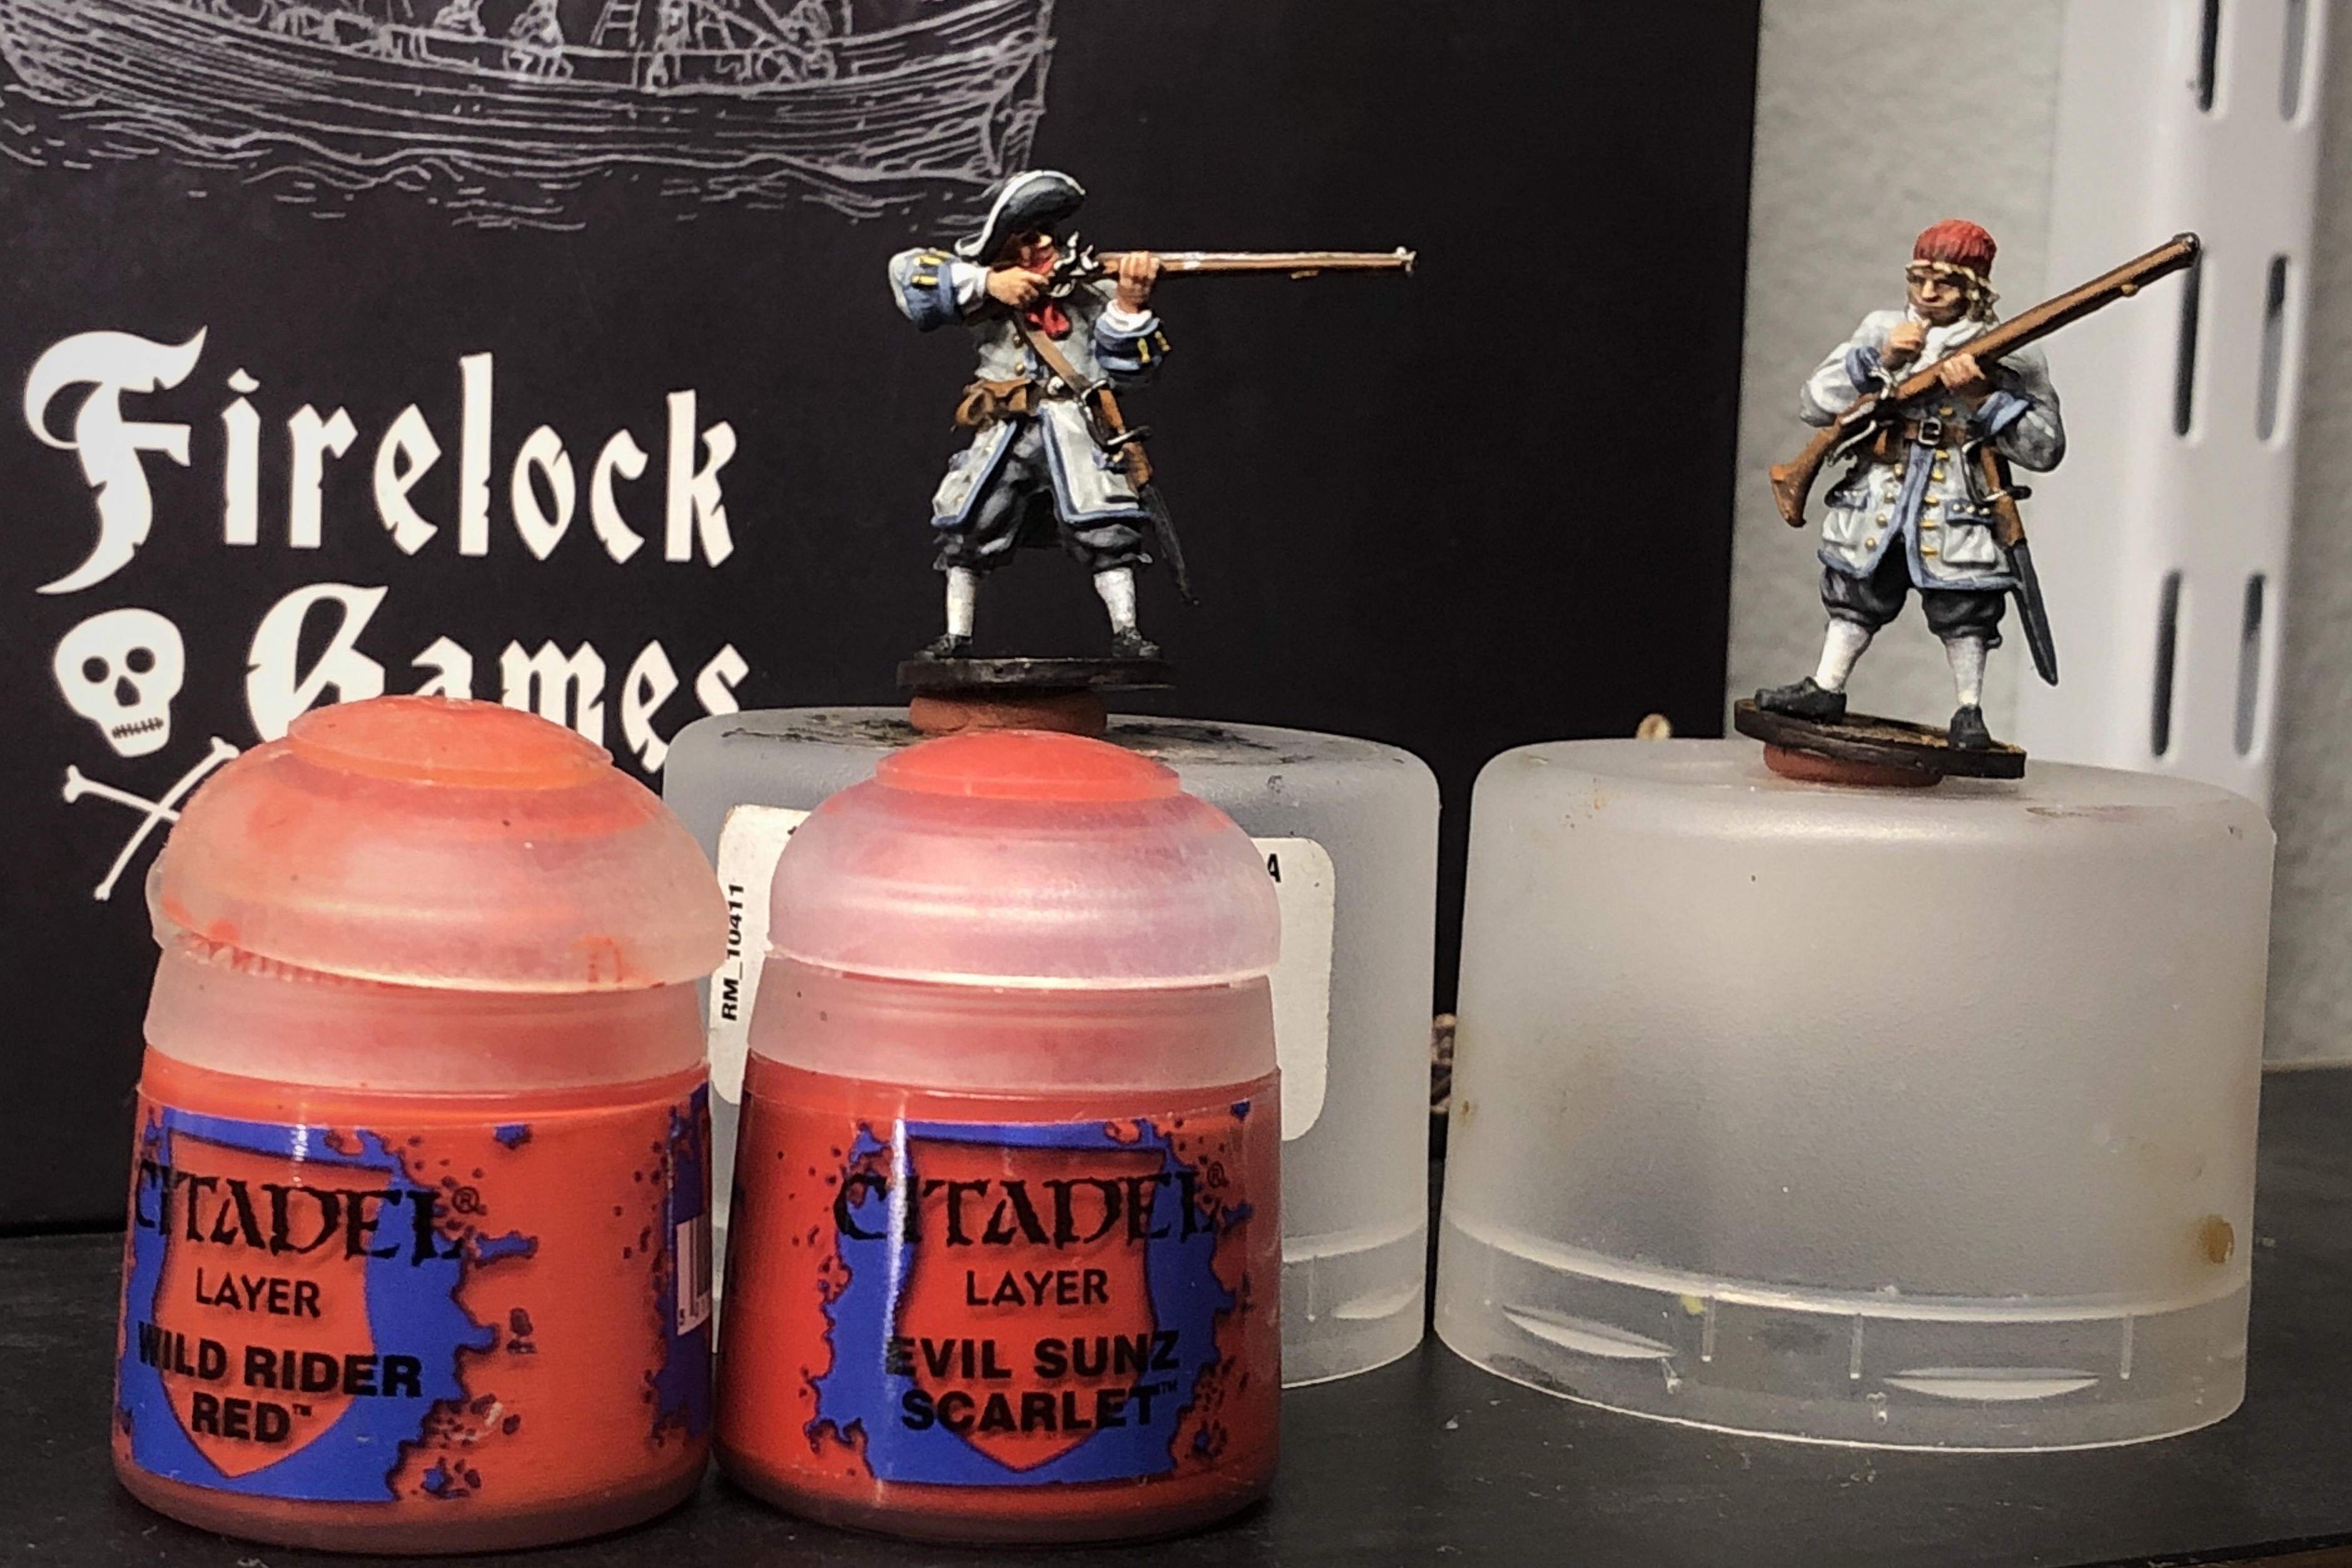
For the stocking cap and red neck tie I started with pure Evil Sunz Scarlet and finished with Wild Rider Red.
The stocking cap has plenty of lines and texture to work with. I used lots of vertical strokes.
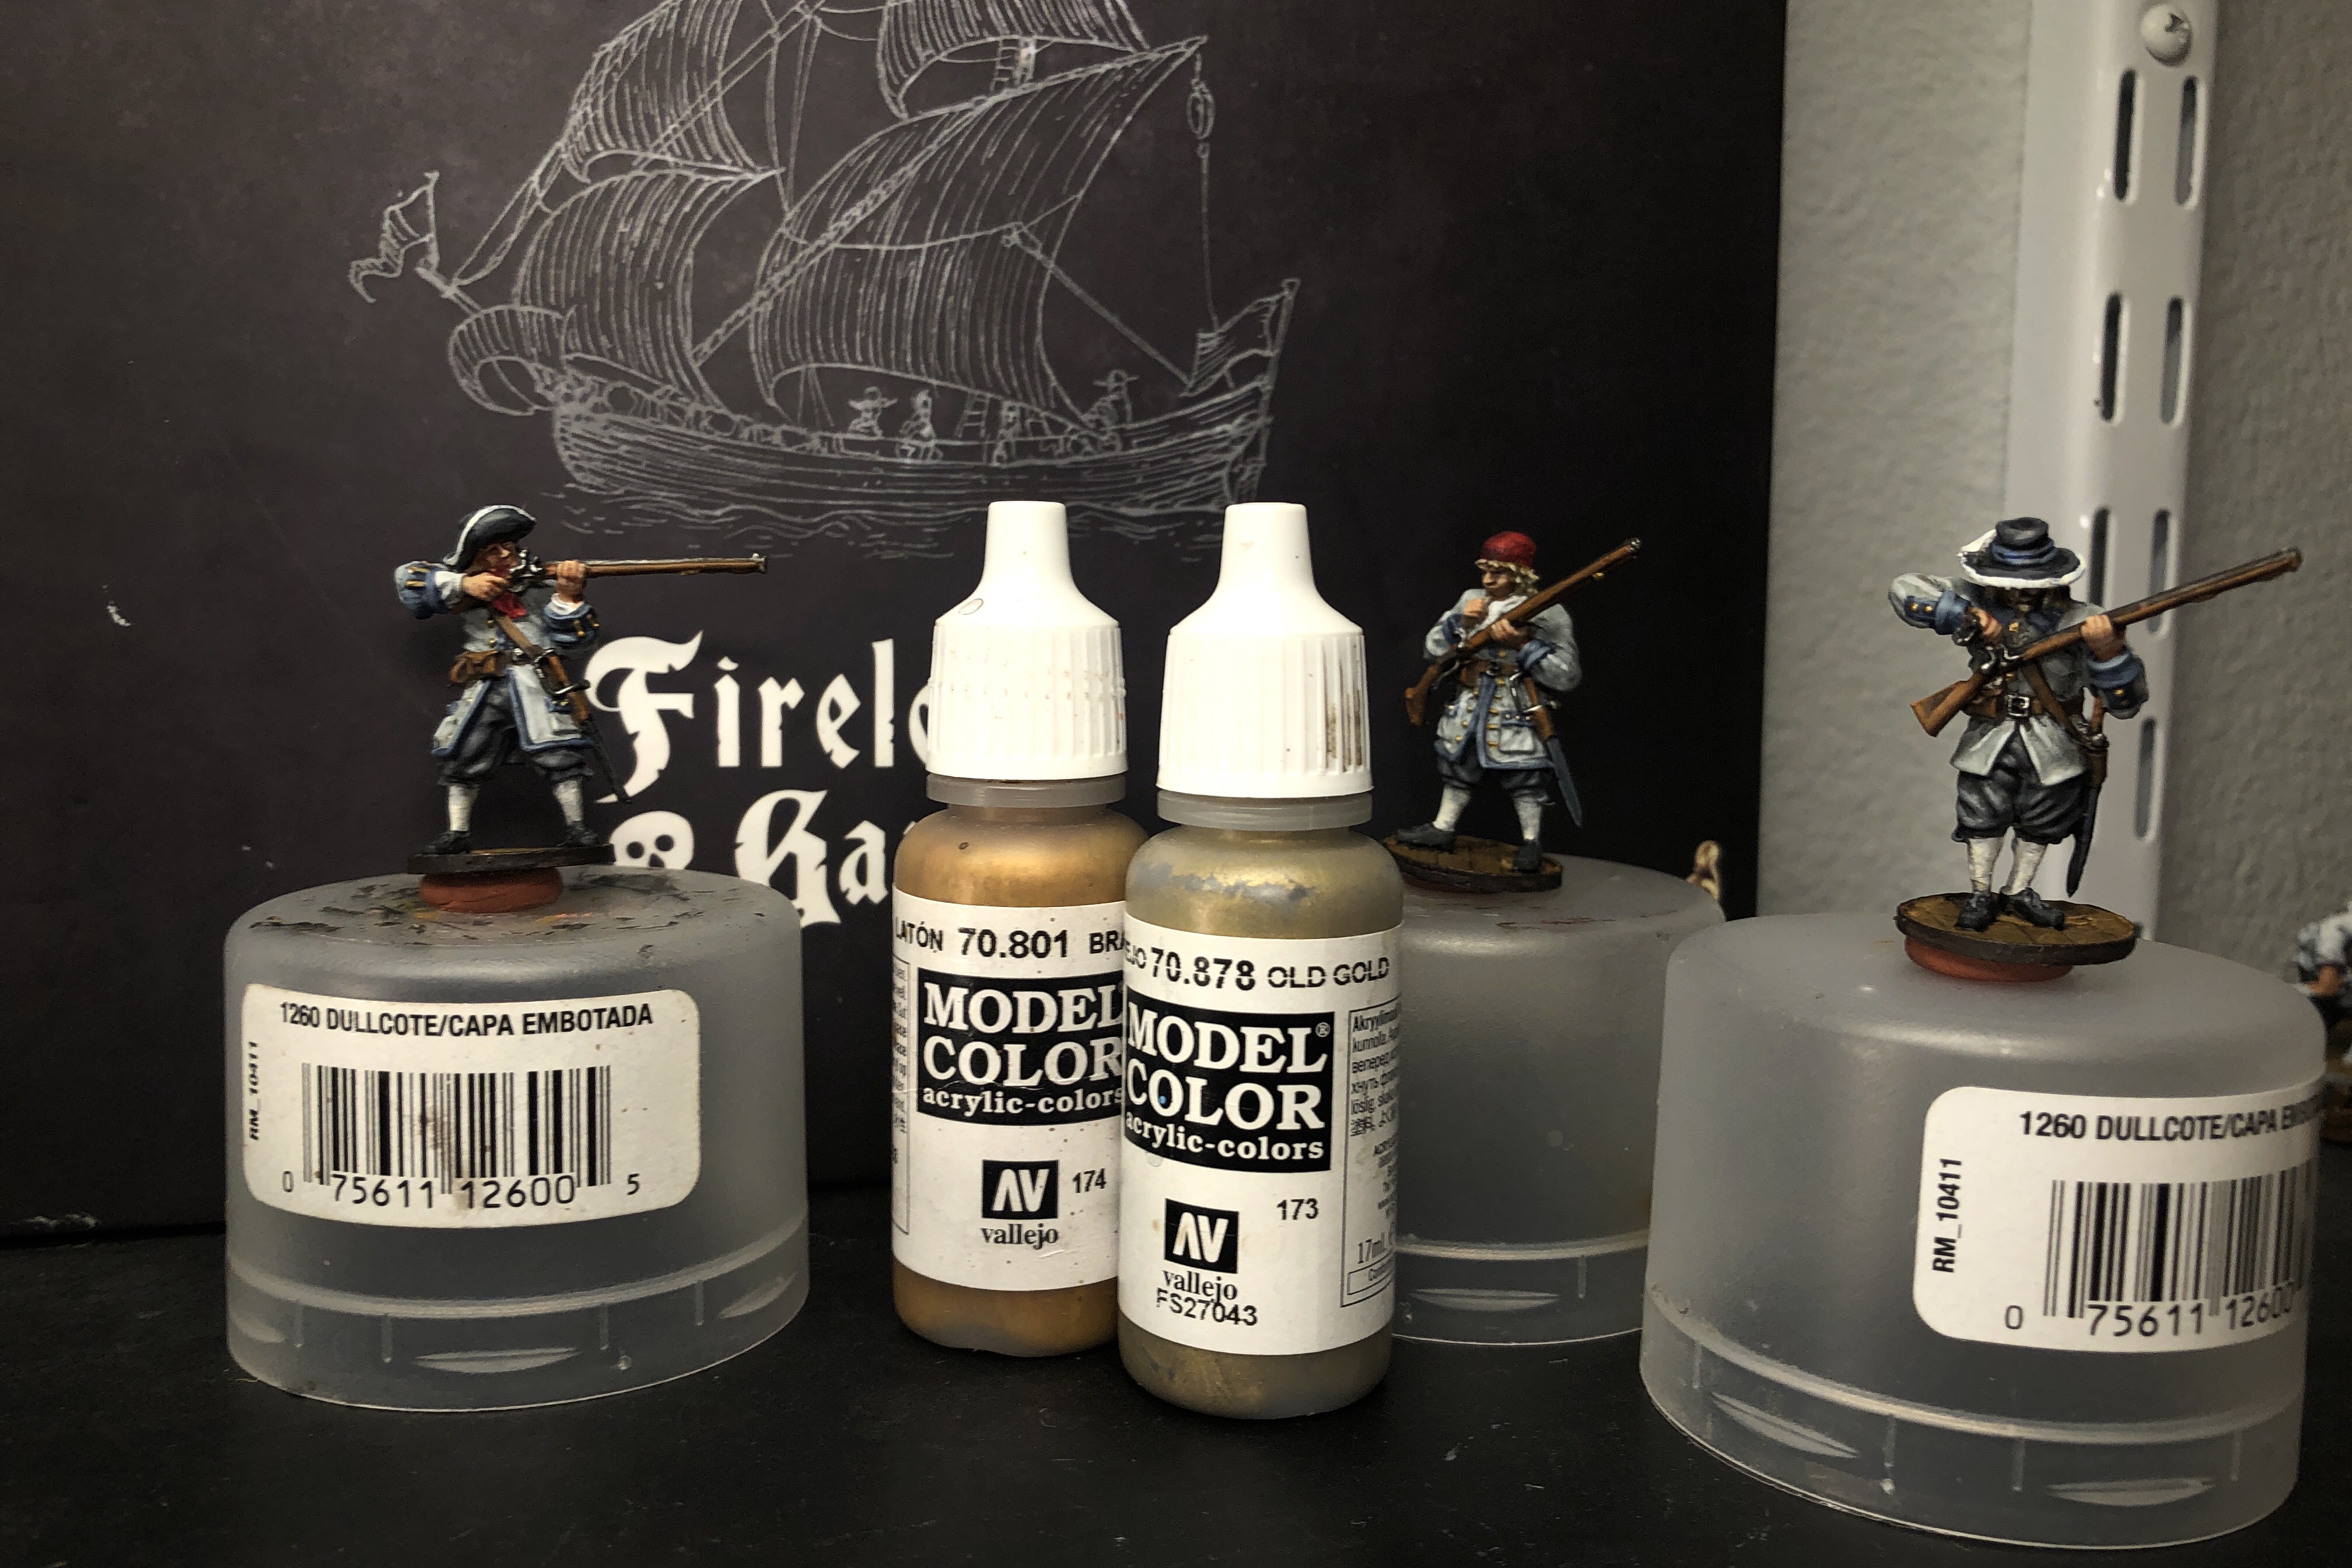
And they’re done! I stuck them back on my strip of cardboard and sprayed them twice with the Testors dullcote spray.
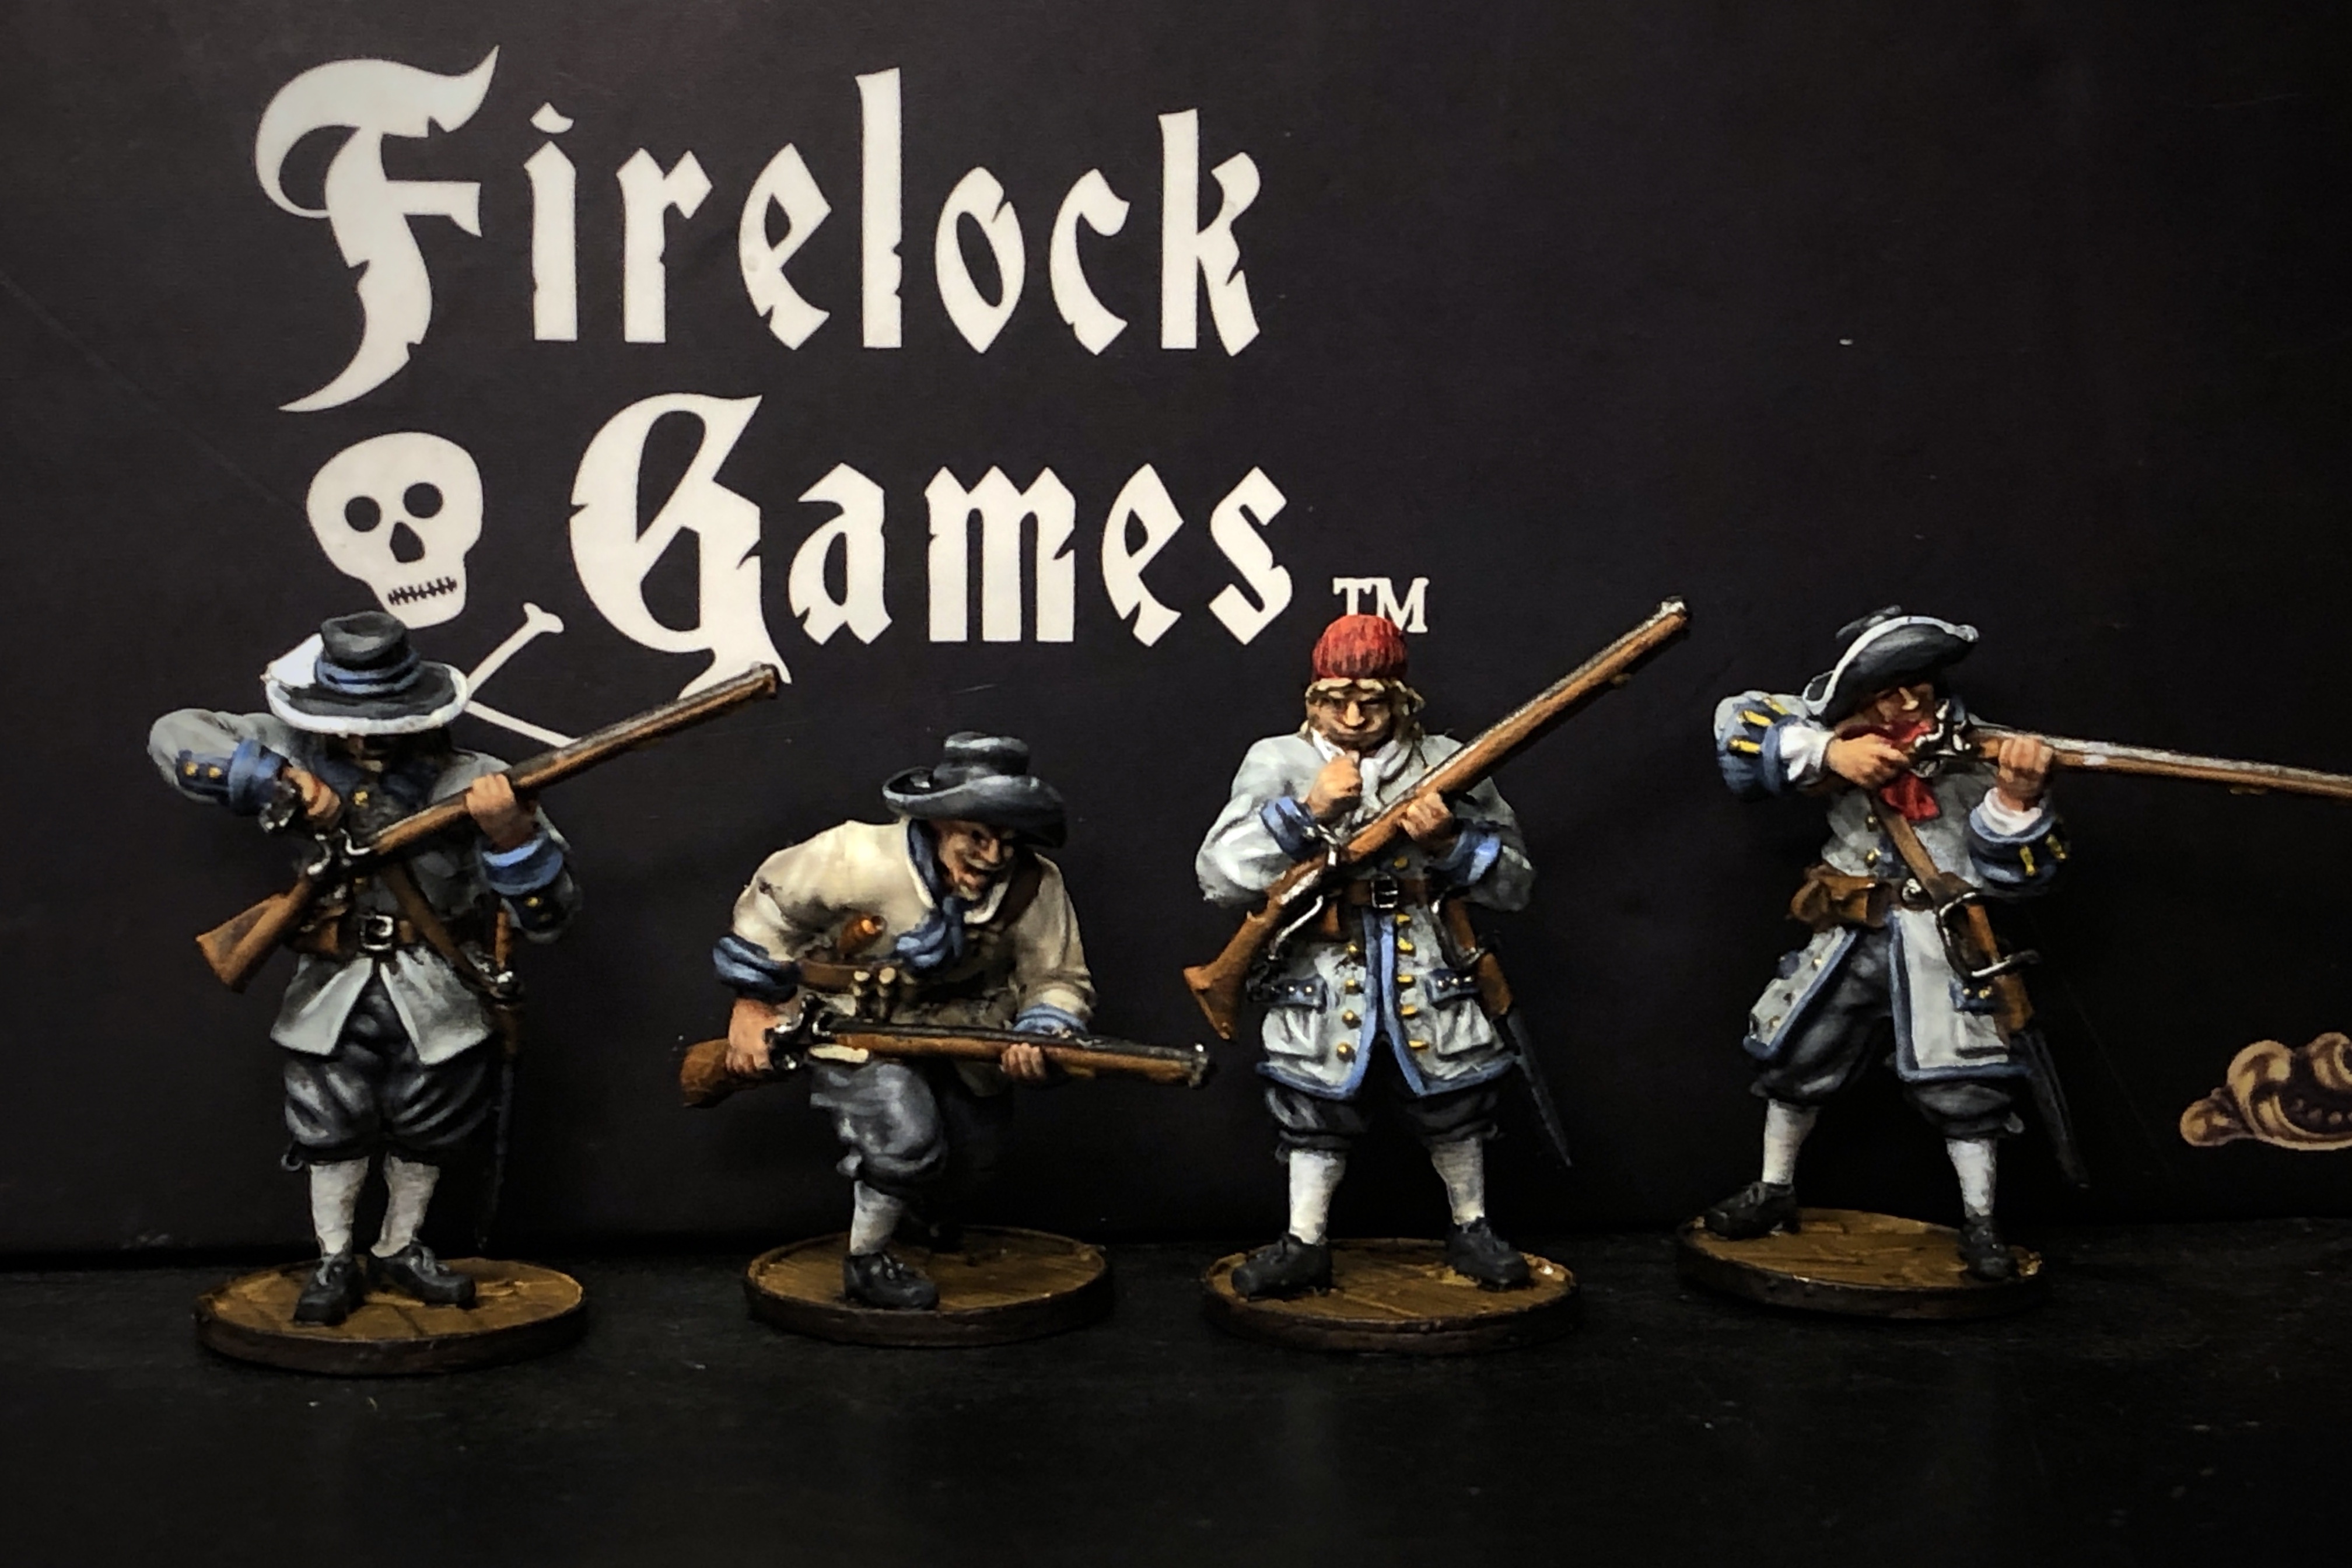
I plan to mix these in with my standard red English militia for some variety, or I can pull a couple militia models from the Spanish or Dutch to make a more ragtag group of English Militia which will be visually distinct from a second unit or red militia.

Or I can sneak these into larger units of Spanish militia to expand my untrained horde. I might do another set with this same basic color scheme so I have a solid set of 8 matching minis which seems to be a nice flexible size. Maybe even another English commander to match.

I know this isn’t going to be a super popular color scheme for the English, but I hope it’s helpful to some. I still have 16 more English Militia which I started in the red as a mass batch but I got bogged down. My goal is to put together another picture guide using the red scheme as well one of these days.
Thanks for reading!
Pingback: Blood & Plunder Painting Guides - Blood & Pigment