Roll out the great guns! There are many ways to build a force in Blood & Plunder. In this series, we’ve identified 6 different styles of forces people build for sea games and we’re going to look at each one individually. The 6 types for sea forces this series covers includes:
Each of these styles has specific strengths and weaknesses and some will be be stronger at different scenarios. In this article we will look at the Great Guns style of sea force in detail. How do you focus your list to maximize your use of cannons?
We will be focusing in on 200 point lists as that seems to be the current common point level for sea tournaments right now.This will be a pretty detailed and nerdy article, so buckle up!
This will be a very detailed look, covering:
- Basic Elements Needed
- Strengths & Weaknesses
- Tips & Tricks
- Strong Ship Choices
- Appropriate Factions
- Strong Commanders & Characters
- Example Forces
- How it relates to the core scenarios
Great Guns Force Builds
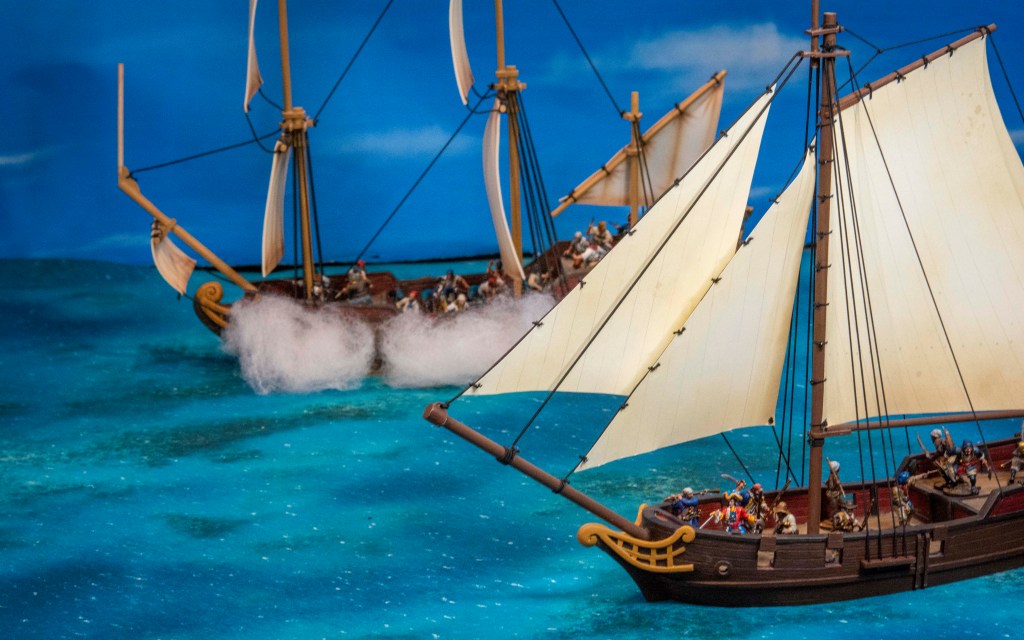
In this style of force, you spend the majority of your points on as many cannons and cheap cannon crew as you can. During the game you try to keep your distance from your enemy and blast their ship to pieces while maintaining a good distance between and not letting the enemy close to boarding range. to rush into close range.
Common elements for this force type include:
- A ship with space for several guns, preferably at least Medium Cannons
- 3-7 pairs of Medium or Light Cannons
- Commander with the Broadside! or Expert Broadside! Special Rule
- Master Gunner character
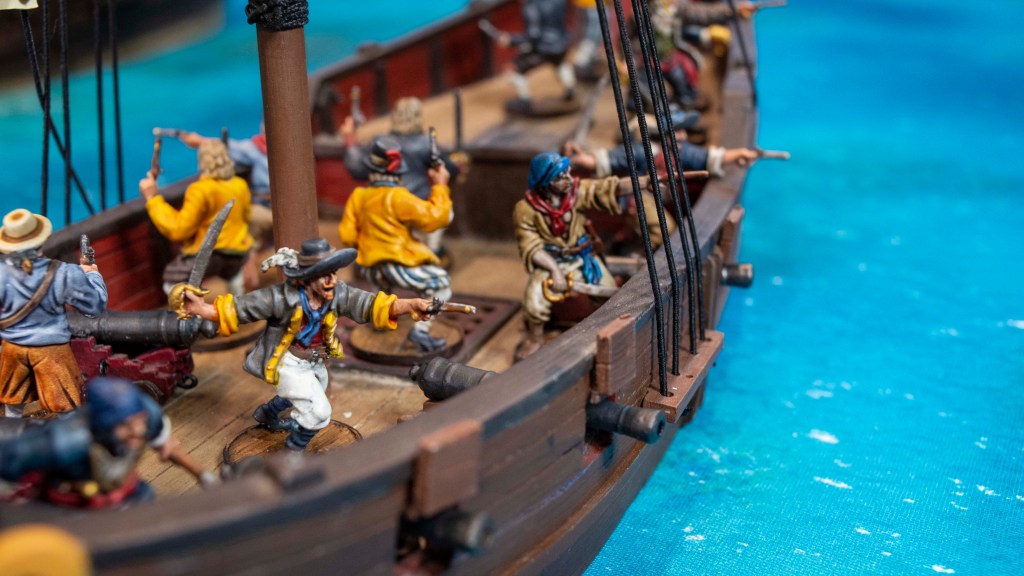
- Plenty of sailor models with Artillery Crew or Expert Artillery Crew Special Rules
Great Guns Strengths
This style of list can do serious damage to an enemy ship and crew from long distances away. You can start pouring on the pain from turn one. When you shoot solid shot from your cannons at an enemy ship, not only do you hurt their crew, you can also mess up their ship, slowing or crippling their ship and giving control of the scenario to you.
Great Guns Weaknesses
Cannons take up a lot of points which means you’ll have a pretty basic crew with few or no significant small arms to defend themselves if the game moves into melee combat. If a enemy crew manages to close the distance and grapple your ship, things could go bad for you really quickly. With most of your units assigned to your cannons, you lose flexibility as well. It’s difficult to respond to various game conditions like a change of wind direction, a critical hit on your ship that needs repair, or a unit becoming shaken during the game.
Tips & Tricks for Great Guns Forces
Shoot your cannons a lot. That’s the main thing! Try to get maximum value out of your cannons because you’re spending a lot of points on them. Hopefully you can shoot turn 1 and get a few damage down on his hull, kill a couple models and get a Lucky Hit that might cause some inconvenient issues. Cannons get 4 reloads after firing so your challenge is getting all those off ASAP so you can shoot again, causing more mayhem and consternation in the enemy’s ship. Here’s some ways to increase loading efficiency:
- Use crew with Expert Artillery Crew Special Rule if at all possible
- This rule will give you a free Reload action when you activate with either a Spade or a Heart. Those free actions help a lot! With a Heart you can get a free Reload and then perform 2 Reloads and optionally Push to take a 3rd action to completely reload. This can be worth it if you really need to fire again next turn, but be careful because if your crew becomes shaken, you’re really screwed. You can’t shoot cannons in the same activation that you stand/go prone. Once your crew is prone, you’ll have to rally them with a dedicated action (probably commander activation), then stand them up and possibly reload on their activation, but they can’t shoot until they have a new opportunity to activate or get a CP. Don’t become Shaken!
- Use a Master Gunner character
- This character is super important for most Cannon lists. He grants the Expert Artillery Crew Special Rule, he has a Command Point he can use to help his or an adjacent unit Reload, and he provides a bonus to the initial “to hit” roll when his unit fires their cannons. For 4 points, he’s a great deal for this style of force. Don’t leave the docks without him!
- Try to use a Commander with the Broadside! Special Rule
- This isn’t as essential, but it can help. This rule basically lets you fire multiple decks of cannons all at once, applying all damage in one attack instead of 2-3. This can dramatically increase the chance of scoring those debilitating Critical Hits on your enemies ship. (If you score enough hits on the enemies ship in a single attack, it can score a Critical Hit.) Expert Broadside! is rare but even better as it also allows you to reroll a disappointing Critical Hit.
- Make sure to give each cannon crew a Command Point every turn if possible. To be effecient you want to be shooting every turn for the first several turns if at all possible. To do this, you basically need to take 3 actions on your activation and gain a Command Point as well. Commanders, Master Gunners and Officers can all hand out valuable extra actions out of a unit’s activation.
- Try to be the Attacker. Being the Attacker in most sea scenarios puts the burden of “doing something” on you, but it also usually gives you the weather gauge, forcing the Defender to fight their way upwind to board you. A Sharp-Eyed Lookout can drastically increase your odds of being the Attacker, especially if you’re considering a faction without a good bonus to the Attacker roll.
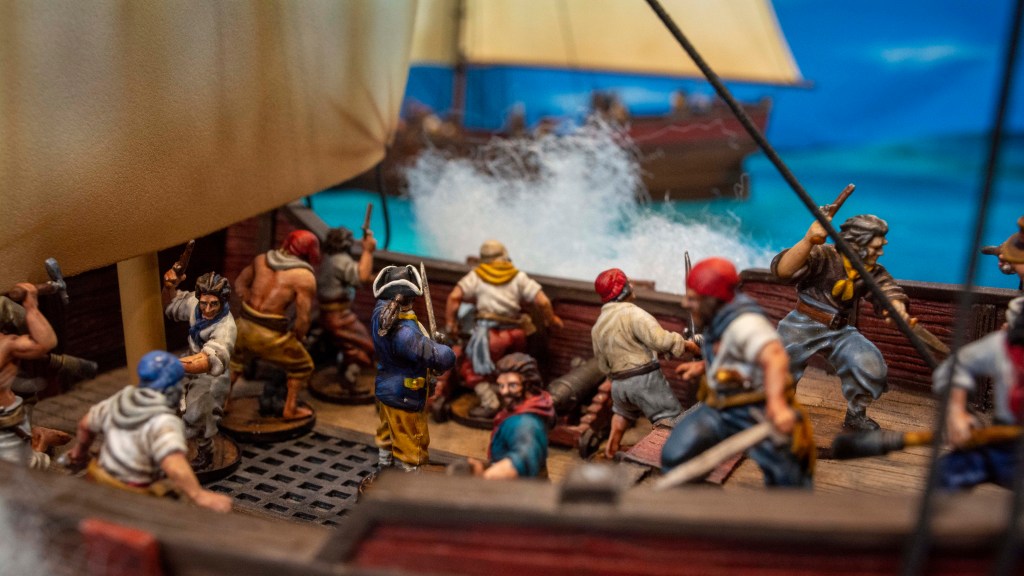
- Boarding lists are a major danger for you.
- When faced with a boarding list, do all you can to keep that ship away from you! Shoot, turn, and run while you reload. Sometimes stern chasers can be helpful here. Even while running you can hit a pursuing enemy. If faced with a faster ship that is using all the tricks to close distance as fast possible, watch for an opportunity to rake them. While focused on closing that distance, a player can forget about that and aim their ship directly at you. If you can come about enough to line up that shot, that’s going to make them less eager to close that distance.
- Another clever maneuver that might be unexpected is firing and quickly crossing the wind’s eye with a Tack+Ware, or or even more unexpected, a Box Haul, which can sometimes help maintain that safe distance from an aggressive melee focused ship. The Sailing Master can help can really help with these tricky maneuvers.
- Be smart about target prioritization.
- Sometimes you just have to shoot the deck that you can safely line up, but often you can graze another deck and actually hit that deck with the annoying swivel crew, or the jokers with Stinkpots ready to stink up your well-oiled cannon system. Try to wear down whatever is going to be most dangerous to your ship.
Strong Ship Choices for Great Guns Forces
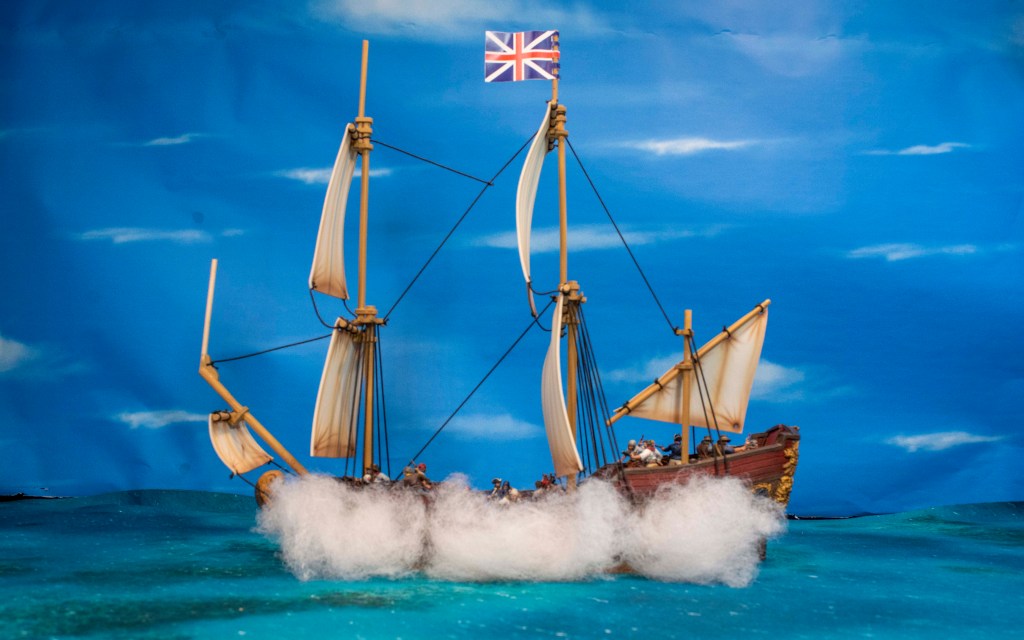
In general you want to use a 2-3 deck ship that can carry Medium Cannons for this style of force. I consider the Light Frigate an excellent choice as it has decks of 3 and 2 cannons per side that can be handily manned at the 200 point level. It can carry a sixth cannon but it can be hard to make an efficient use of points.
A Sloop with its main deck of 3 cannons per side can also be effective, but it is considerably more fragile and can’t hold as much firepower. The Fluyt is another possible choice. Its lacks the speed of a Light Frigate and it has a 2/2/2 distribution of cannons which feels a lot different than the Frigate 1/3/2. It’s more consistent, but lacks the punch you get with the larger main deck on the Frigate. The Brigantine can only hold 0/2/2 cannons, so I find it more appropriate for the “balanced force” that relies on a combination of small arms/swivel guns and the big guns.
If you’re really brave you can actually field a 6th Rate Frigate with 7 (or more) pairs of Light Cannons. This spreads out your firepower so it’s harder for the enemy to suppress, but it’s harder to focus fire with this set up that it is in a Light Frigate with Medium Cannons.
Galleons and Heavy Cannons are possible, but almost too much to fit into a 200 point game.
Strong Factions for Great Gun Forces
The various Navy factions are all clear solid choices for this tactic. The English & Dutch Navies stand out above the others since their gun crews have that Expert Artillery Crew Special Rule that helps those reloads fall off. The new Navy faction in Raise the Black open up some more fun possibilities, even for nations other than English and Dutch. It kind of goes without saying that Native factions are not really an option here. They can’t take cannons.
Here’s my top choices for Cannon focused factions:
- English Royal Navy (No Peace Beyond the Line)
- British Royal Navy (Raise the Black)
- Dutch Navy (No Peace Beyond the Line)
- Dutch Marine (Raise the Black)
- French Canadian Privateers (NPBtL, FotF)
- Spanish Armada (Raise the Black)
- Spanish Armada de Barlovento (No Peace Beyond the Line)
- Pargo’s Marineroes ((Raise the Black)
- French Royal Navy (Raise the Black)
- English Buccaneers/The Flying Gang/Brethren of the Coast (Core, Core, RtB)
Strong Commanders for Great Gun Forces
There’s a handful of Special Rules attached to commanders that can really improve your cannon game. We’ve already mentioned Broadside! and Expert Broadside. These help you score critical hits on your target which can apply leaks, rigging disasters, fires, explosions, steerage damage and destroyed guns. There are many commanders with the Broadside! or Expert Broadside! special rule, including some of the 0 cost naval commanders in No Peace Beyond the Line (English, French, Spanish). With the new Standard Commanders in Raise the Black, you can choose Special Rules off a list for each nation and I think Broadside! is on the list for every nation except Natives.
The Strict Special Rule is another valuable commander rule since you can apply a -1 bonus to either your ranging or damage roll when firing cannons (at the cost of a Fatiuge). But Strict is harder to find on comanders but it is on the Special Rule list for the English, Dutch and European Standard Commanders.
The new hot rule Motivated can supercharge a cannon list into crazy territory by giving two Command Points to the same unit, dramatically increasing how fast your cannons can load. Motivated isn’t on any list for Standard Commanders so you have to find Historical Commanders and they are rare. Only Colonel Edward Morgan (NPBtL), Pieter Schuyler (FotF) .John Quelch, Stede Bonnet, Subercase, and Pieter Stool (all RtB) have the Motivated Special Rule.
Low Cost (0-10pt)
- English Navy Untested (0)
- Spanish Armada Untested (0)
- French Navy Untested (0)
- Any Nation’s Experienced Standard Commander (10)
Medium Cost (11-20
- Experienced Dutch Navy (15)
- All Experienced Navy Commanders (15)
- All Nation’s Seasoned Standard Commanders from RtB (20)
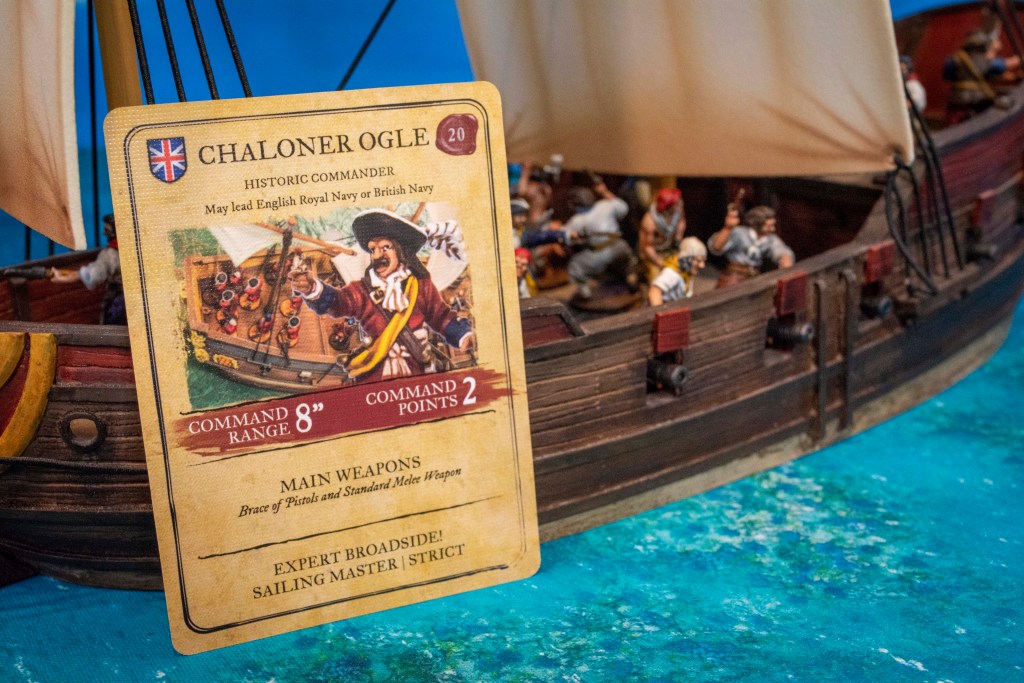
- Chaloner Ogle (20)
- John Quelch & Stede Bonnet
High Cost (21+)
- All Seasoned Buccaneer Commanders
- Many 25-30
- Pieter Stool (37)
- Barnard Speidryke (25)
- Charles Carlile (25)
- William Kidd (32)
- Laurens de Graff (42)
- Jacob Binckes (30)
- Admiral Crimson (30)
- Laurens De Graff (42)
Examples of Great Gun Lists
Ogle is the Professional

The British Royal Navy is one of the best options for a heavy cannon strategy, and Chaloner Ogle amps it up that much more. With Strict and a Master Gunner, you can two potential bonuses to use every turn. If you use Strict on the “to hit” roll, your chance of making contact with the enemy ship becomes very good. You could use the Master Gunner’s bonus on the “to hit” roll and the Strict on the “to damage roll” and just be flat out better than pretty much anyone shooting back at you.
The Sea Dogs all have Expert Artillery Crew so you’re reloading nice and quick, and that let’s Ogle use his two Command Points to shoot off all 3 decks with just 2 command points using the navy faction rule. If you manage to land a Critical or Lucky Hit, it you can reroll any 1’s rolled on the Crit Table with the extra perk from Expert Broadside!
Ogle also has Sailing Master to make sure you can position yourself for a good shot and there’s a musician to give him Inspiring just in case he causes too much trouble with Strict. The British Royal Navy has a very solid +4 to the Attacker roll, so this list will usually be upwind of enemies, making it more difficult for them to close distance and board.
Some players prefer to leave off that cannon on the front deck, but every little bit can help!
Stede’s Hot Cannons

This list is a little less cannon focused with a solid set of Swivel Guns and both Chainshot and Grapeshot for those 3 pairs of Medium Cannons on the Sloop’s main deck. Stede Bonnet’s main boon here is the motivated Special Rule which lets you reload a little faster than most other players. With this force you a least have a unit with long arms (Pirates with Buccaneer Guns) to defend from a boarding attack and take potshots with.

Great Guns and the 5 Core Scenarios
The 5 scenarios found in the core rulebook are still the most likely to see in use at a tournament. Let’s look at how the Big Cannon list would fare in these 5 scenarios.
- Breakthrough – This scenario gives the Attacker the weather gauge which is what you want as a Big Cannon list. A force with a high Attacker bonus should have a good start. You will be penalized if you don’t close distance with the Defender so you have to win through combat. Medium suitability.
- Raid – Again, the Attacker has the weather gauge so you need to be the Attacker. This scenario rewards capturing the opponent’s flagship. That’s pretty much a win in a tournament anyway, so this is almost Encounter this setting. Medium to low suitability.
- Control the Field – Again, the Attacker has the weather gauge so you need to be the Attacker. This scenario rewards the player who is upwind. Start as the Attacker, shoot the enemy to pieces, and don’t let them close with you. You could bring the Chainshot equipment to slow their ability to sail upwind. Setup is very flexible. High suitability.
- Take and Hold – Another “take he enemy ship” scenario. The scenario Strike Point bonuses don’t help this type of list, but ship start with broadsides presented to each other, making suitability high (at least in the beginning of the game). But, it’s really easy for your enemy to swing in hard with a 4″ turn and board really quickly. You should shoot, the turn hard yourself, forcing the board to scroll to stay away from an aggressive boarder.
- Encounter – This is probably the worse scenario for the Great Gun list. The Attacker/Defender goals are the same: kill each other. The main issue with this scenario is ships start facing each other. This does two bad things. You have to turn a lot before getting off a broadside. And ships start a lot closer to each other, making it that much easier for an aggressive boarding list to ruin your day. Suitability – Poor.
Article by Joseph Forster
Additional Recommended Reading
Watch for an overview of the several primary styles of sea forces currently in Blood & Plunder coming soon.
- Check out Force Building I which goes over some basic guidelines for building a force.
- Force Building II – Building for Land Games
- Force Building III – Building for Sea Games
- Force Building IV – Building for Amphibious Games
- Check out an entire article on ways to use Fortune Points in Blood & Plunder
- Tips, Tricks & Tactics for gameplay from Guy
- Video discussion on Fatigue Management
Pingback: Small Arms Sea Forces - Blood & Plunder Sea Tactics Pt 3 - Blood & Pigment
Pingback: Adepticon 2023 Blood & Plunder Tournament Report
Pingback: Low Profile Boats - Blood & Plunder Sea Tactics Pt 4
Pingback: 18th Century Bermuda Sloop - Blood & Plunder Ship Overview
Pingback: Swivel Mania - Blood & Plunder Sea Tactics Pt 5 - Blood & Pigment
Pingback: Rackham to the Teeth - Historicon 2023 Tournament List - Blood & Pigment
Pingback: Balanced Sea Forces - Blood & Plunder Sea Tactics Pt 6 - Blood & Pigment
Pingback: Fast Boarding - Blood & Plunder Sea Force Building Pt 2
Pingback: Fire at Sea! Golden Age Pirates 3rd Place Tournament Force - AdeptiCon 2024
Pingback: Blood and Plunder Ship Overview- The Barco Luengo - Blood & Pigment
Pingback: 6th Rate Frigate - Blood & Plunder Ship Overview - Blood & Pigment
Pingback: 2025 Adepticon Sea Tournament - Blood & Pigment
Pingback: Blood & Plunder at GenCon 2025 - Blood & Pigment