How I Stopped Making Horrible Messes and Learned to Love the Render Powder
I’ve been working on a lot of 4Ground terrain lately and I wanted to share some technique and tips that I’ve picked up along the way. Much of the Ports of Plunder line of product comes with a “Render Powder” that has to be applied to the buildings to get the stucco effect that’s looks so “Caribbean.” When finished, this looks awesome and I consider it a great product. That said, my first attempts were very messy, not very productive and a little frustrating. Hopefully But there is a bit of a learning curve and I had some very messy and non-productive sessions with it and I’ve heard more than one similar story.
I’ve used this product on the Port Houses, Hovels and Dock Set so far.
The instructions that come in the packaging didn’t work too well for me so I started experimenting. I’ll show you what worked for me, then go over a couple methods I tried that didn’t have good results.
Quick hint: I recommend wearing some sort of face mask or filter so you aren’t breathing this powder in while working with it. I don’t know if it has anything that could be harmful in it, but after working with it, I had a dry and dusty nose and throat so you might as well wear something. You probably have a face mask in your house right now! I also recommend working with this either outside in a place you can easily clean or working with it in a tub with walls so it doesn’t make a huge mess everywhere.
Mixing up a glue/powder paste turned out to be the most successful basic method for me. I completely assembled the buildings before plastering the outsides with the render powder. You could do pieces before assembling and I’ve seen people do it. I didn’t do it because I was afraid all the joints would be obvious and unsightly.
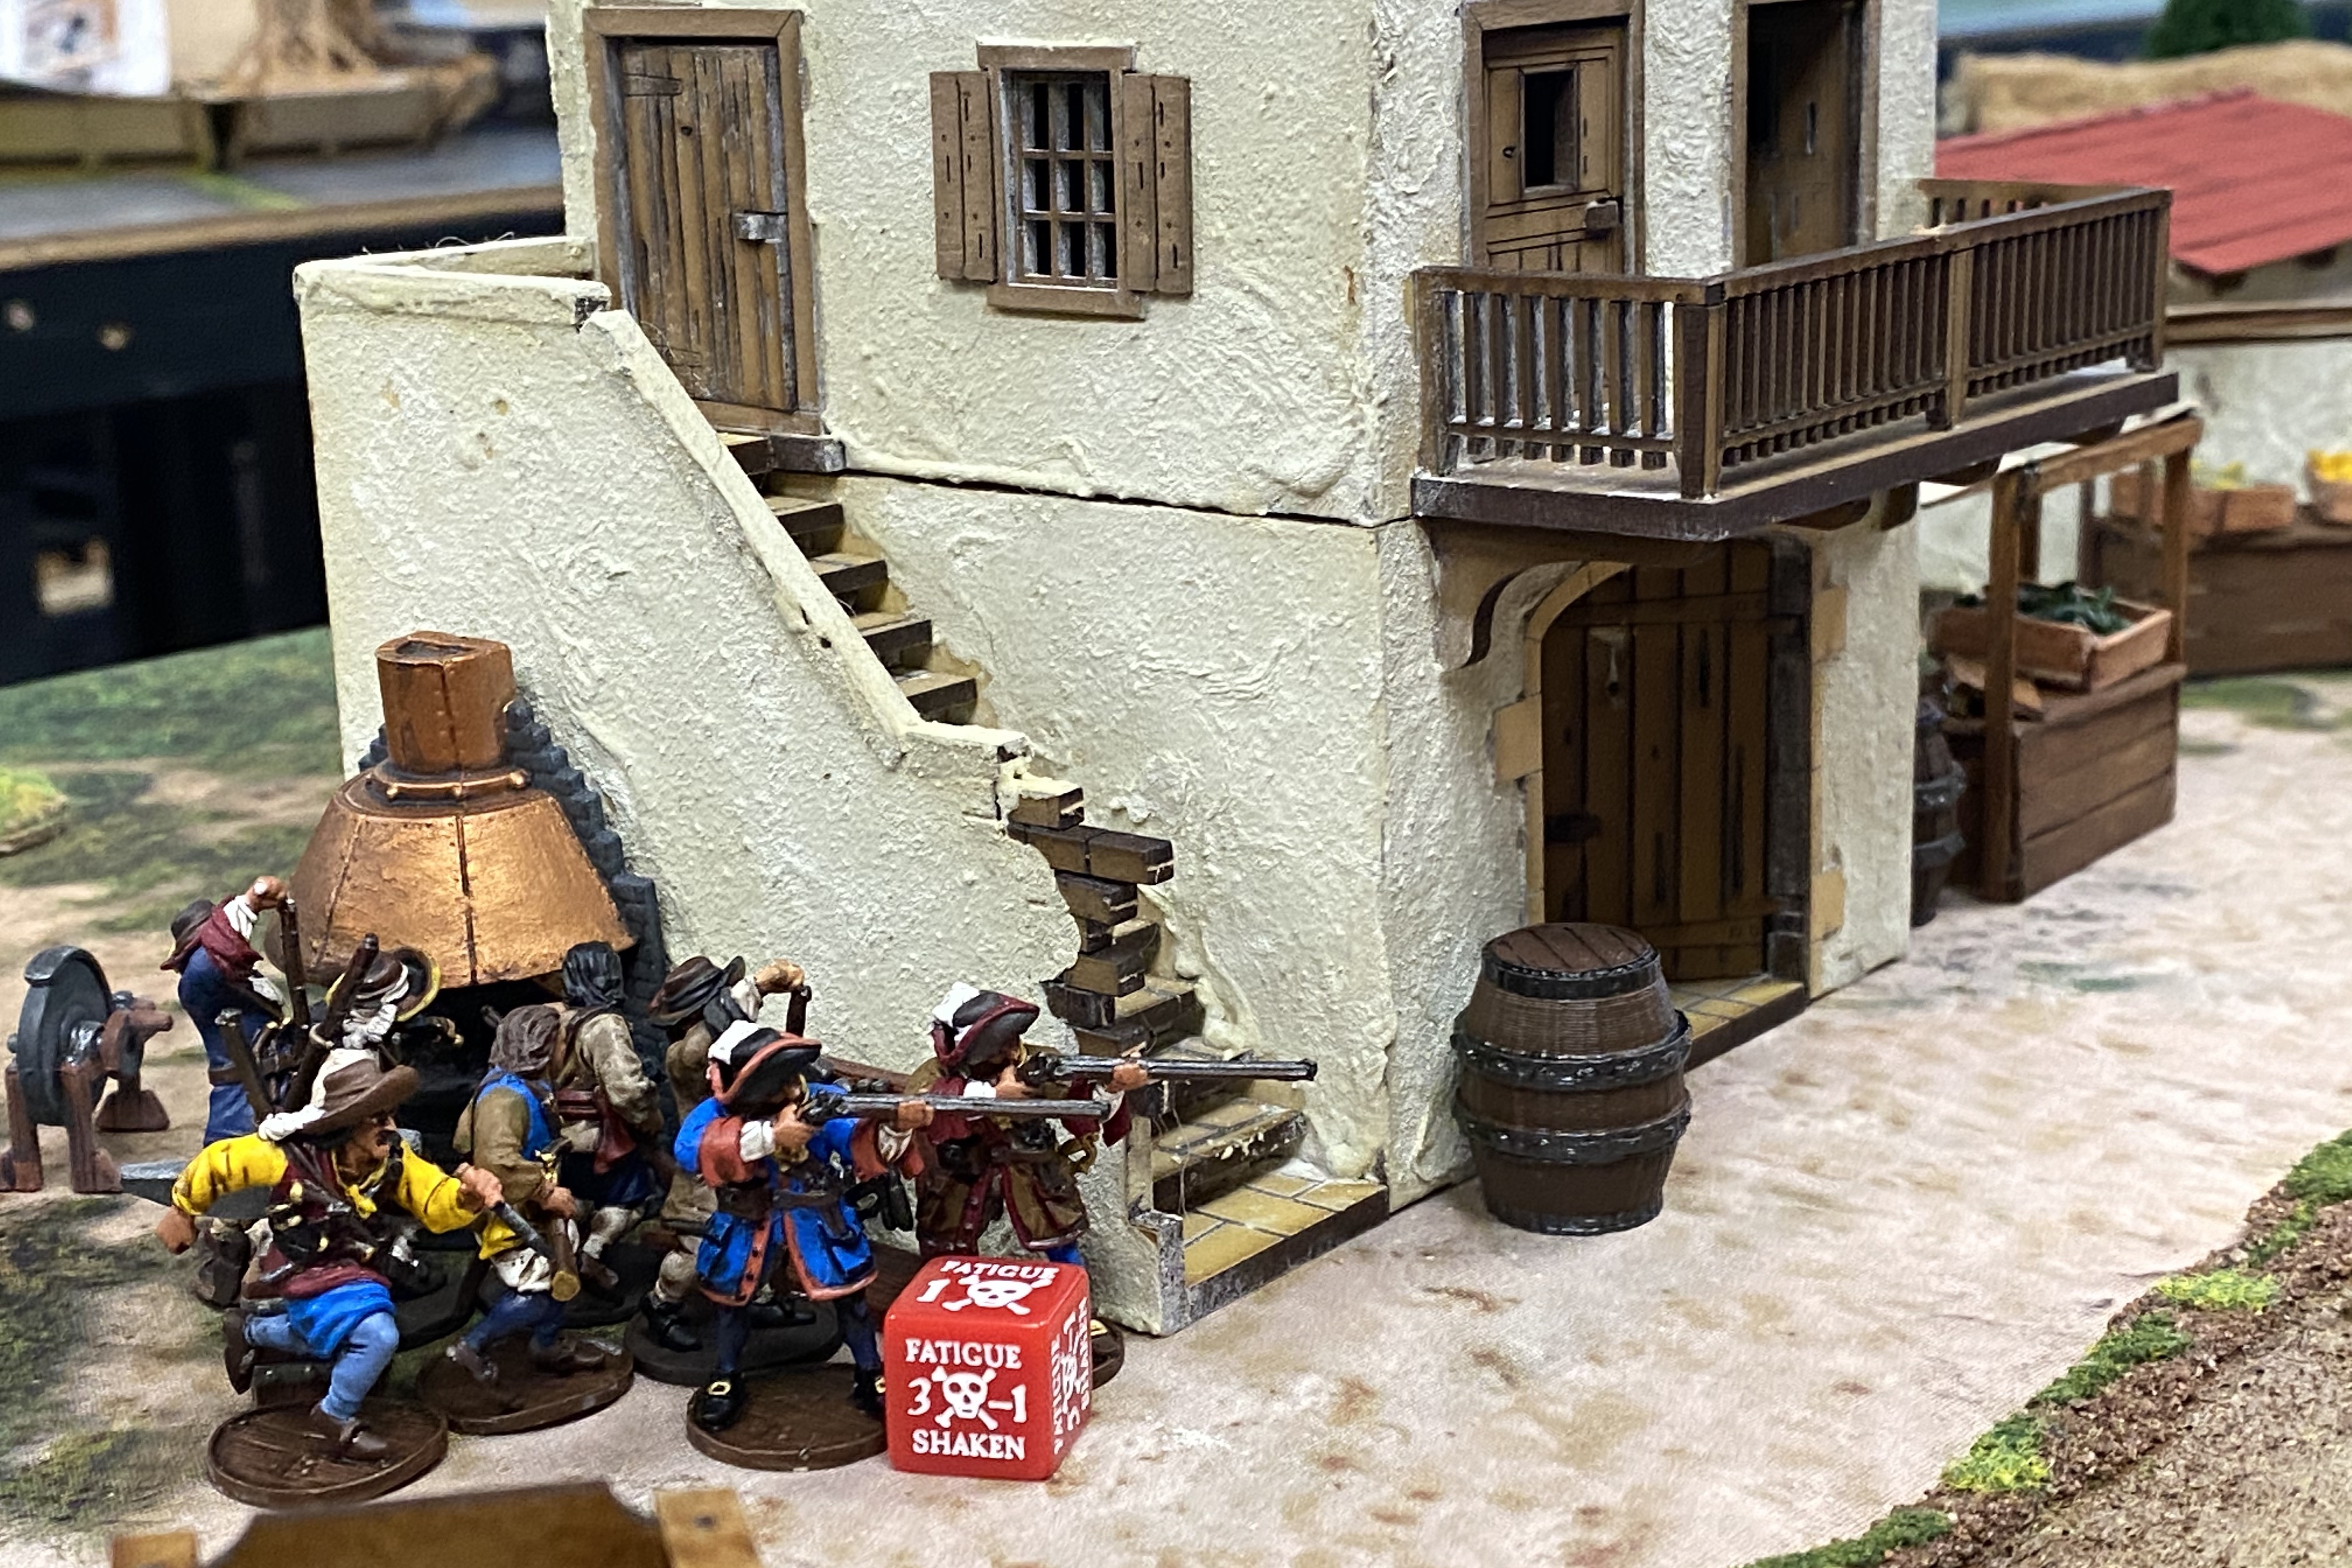
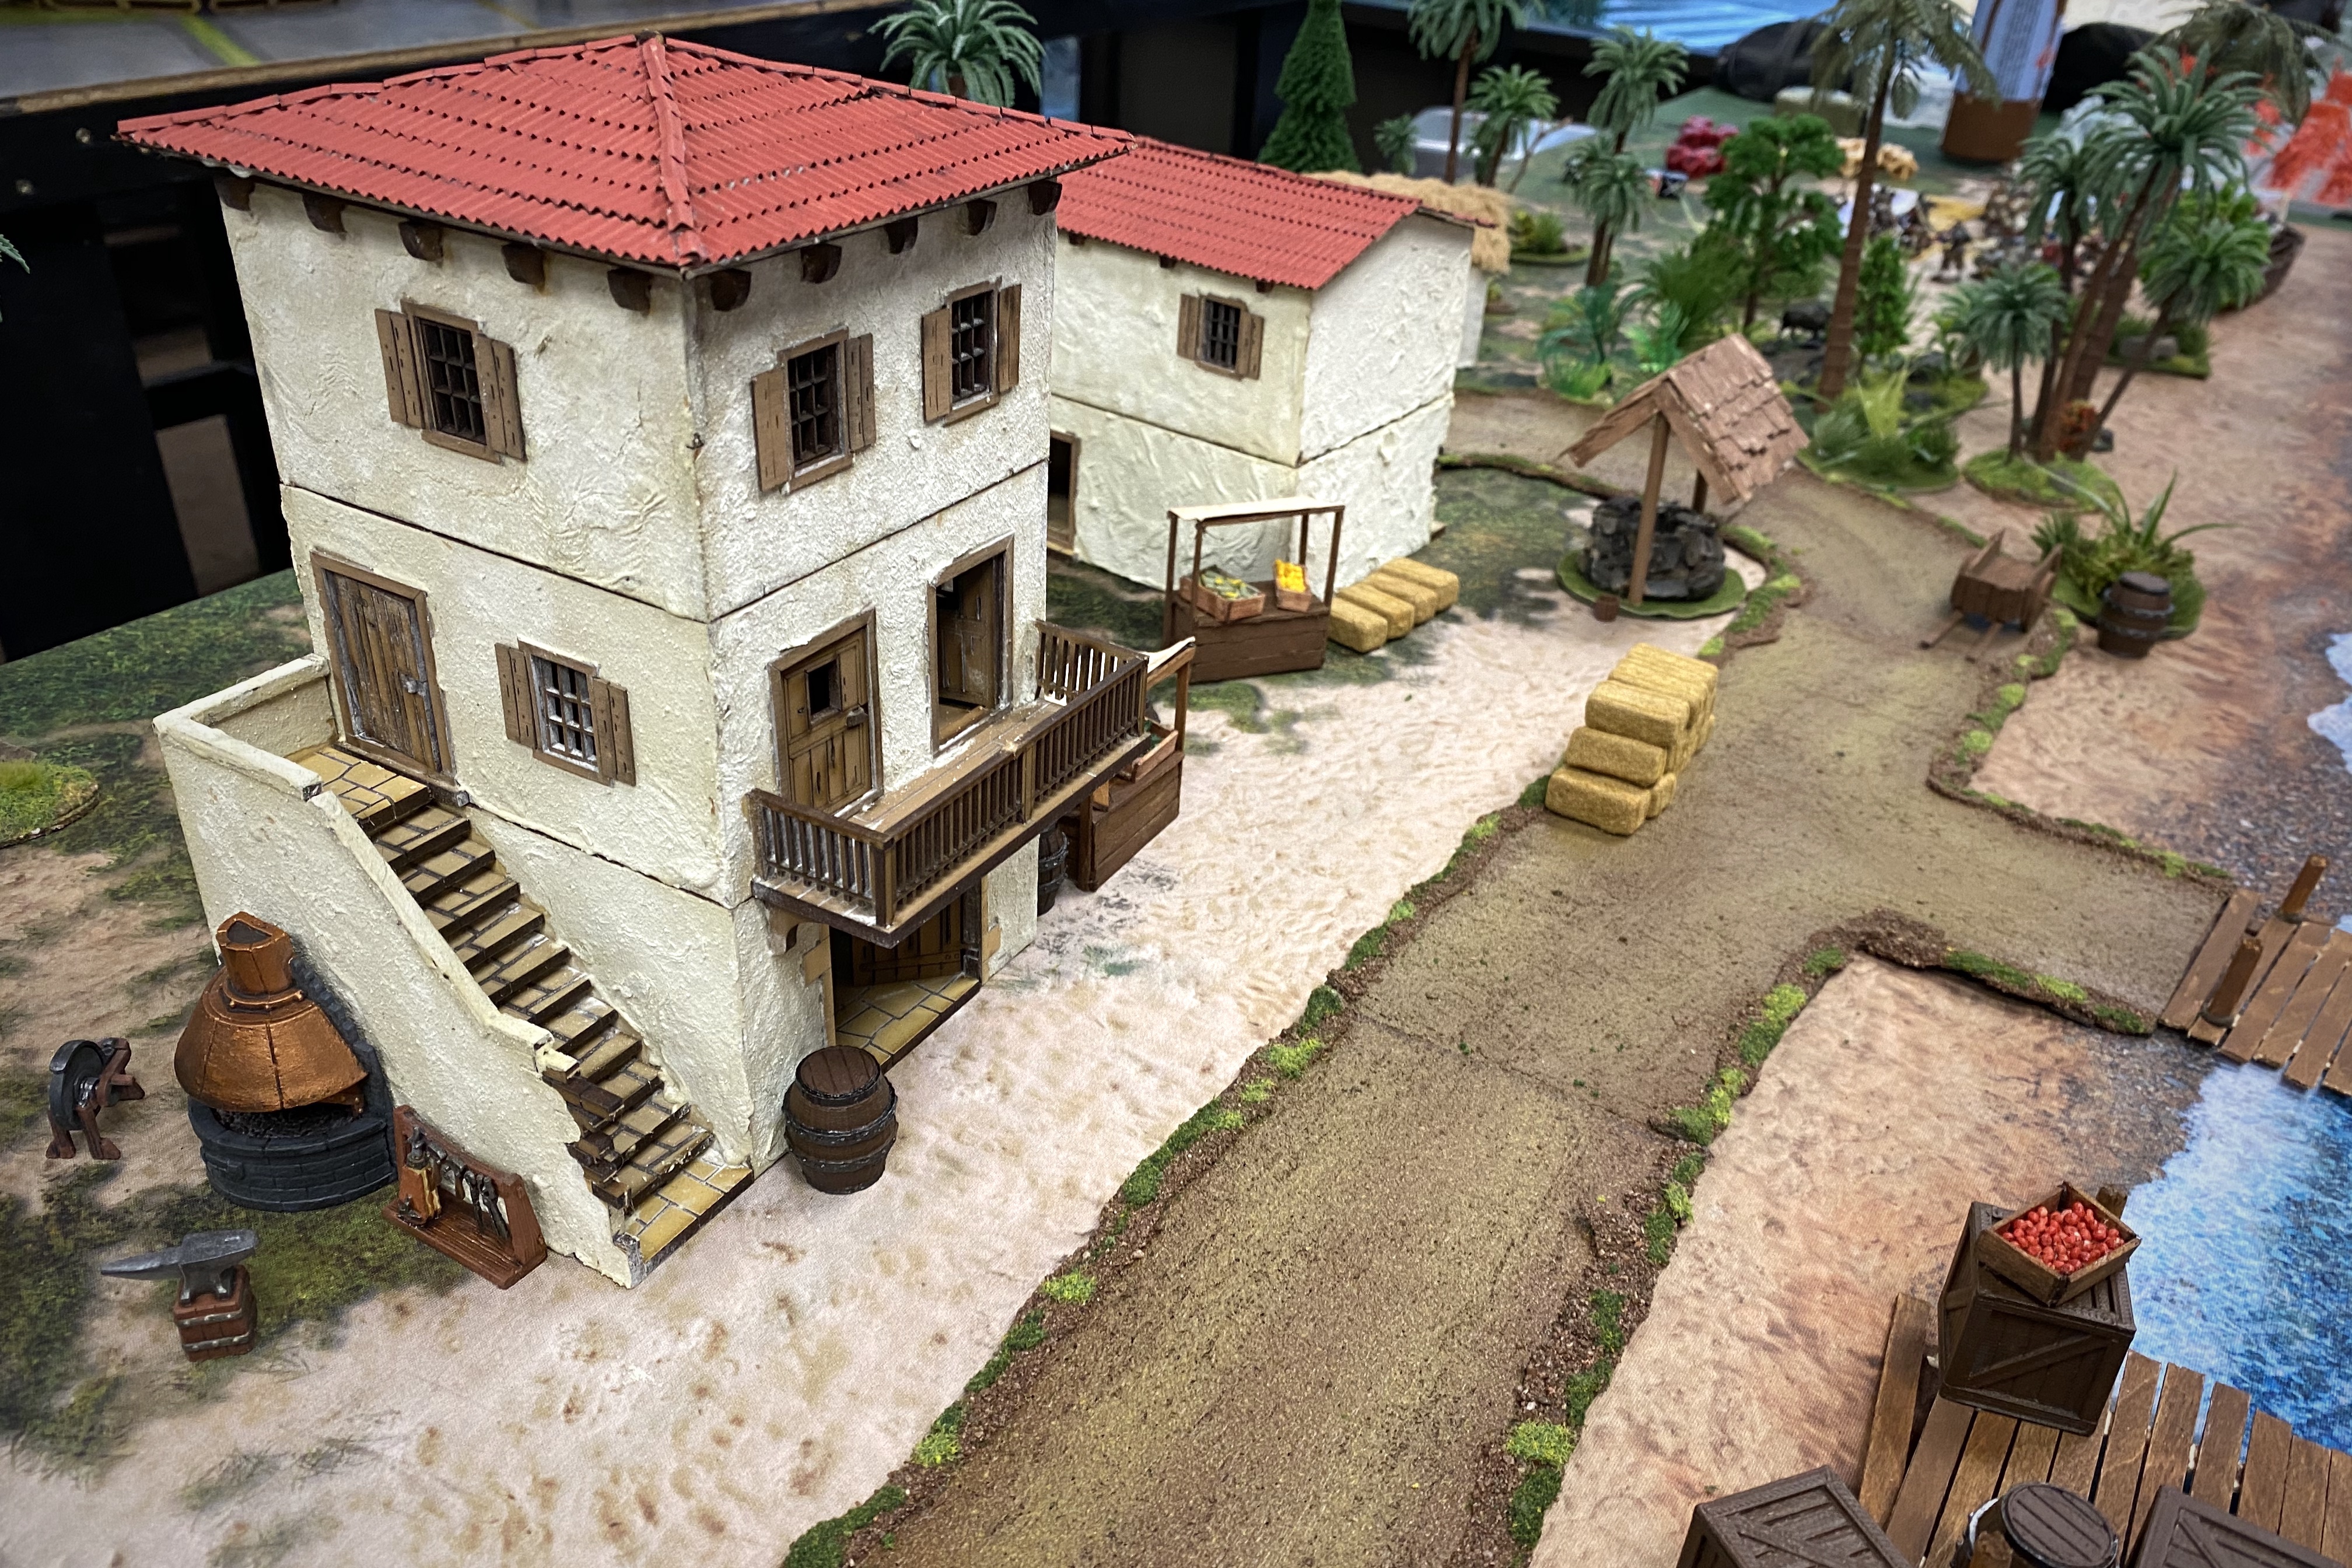
Buildings
Here’s some pictures and details.
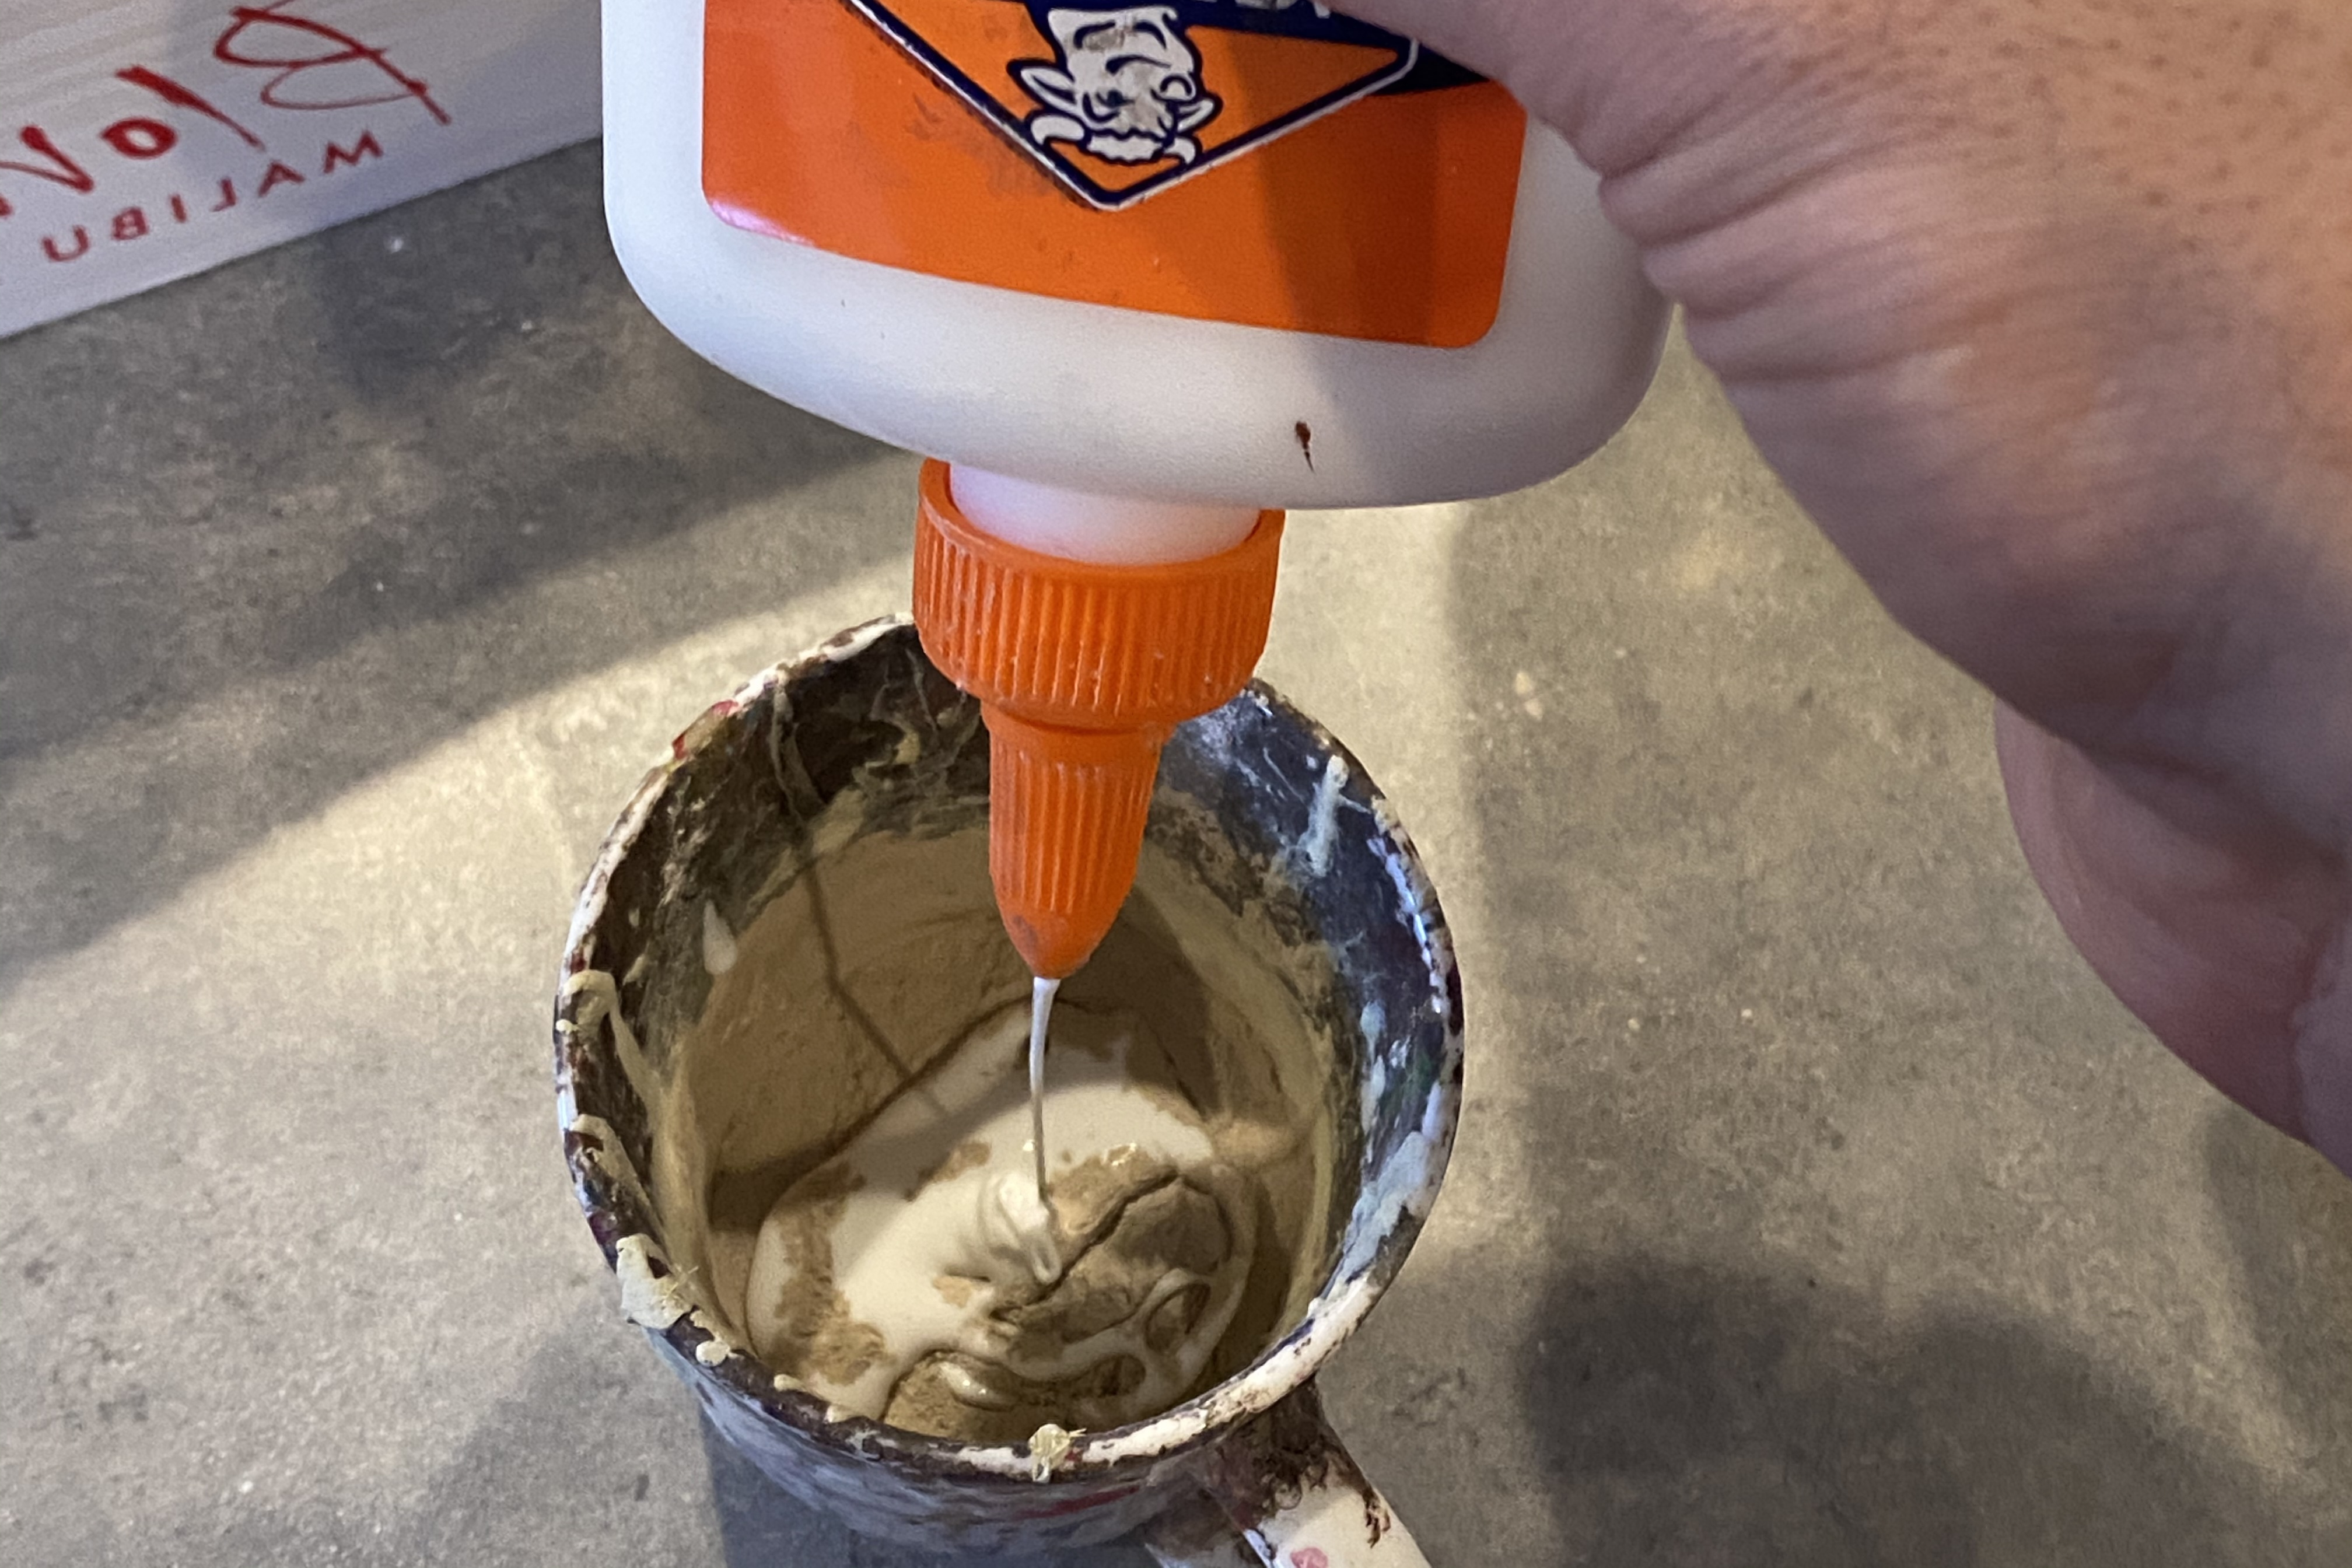
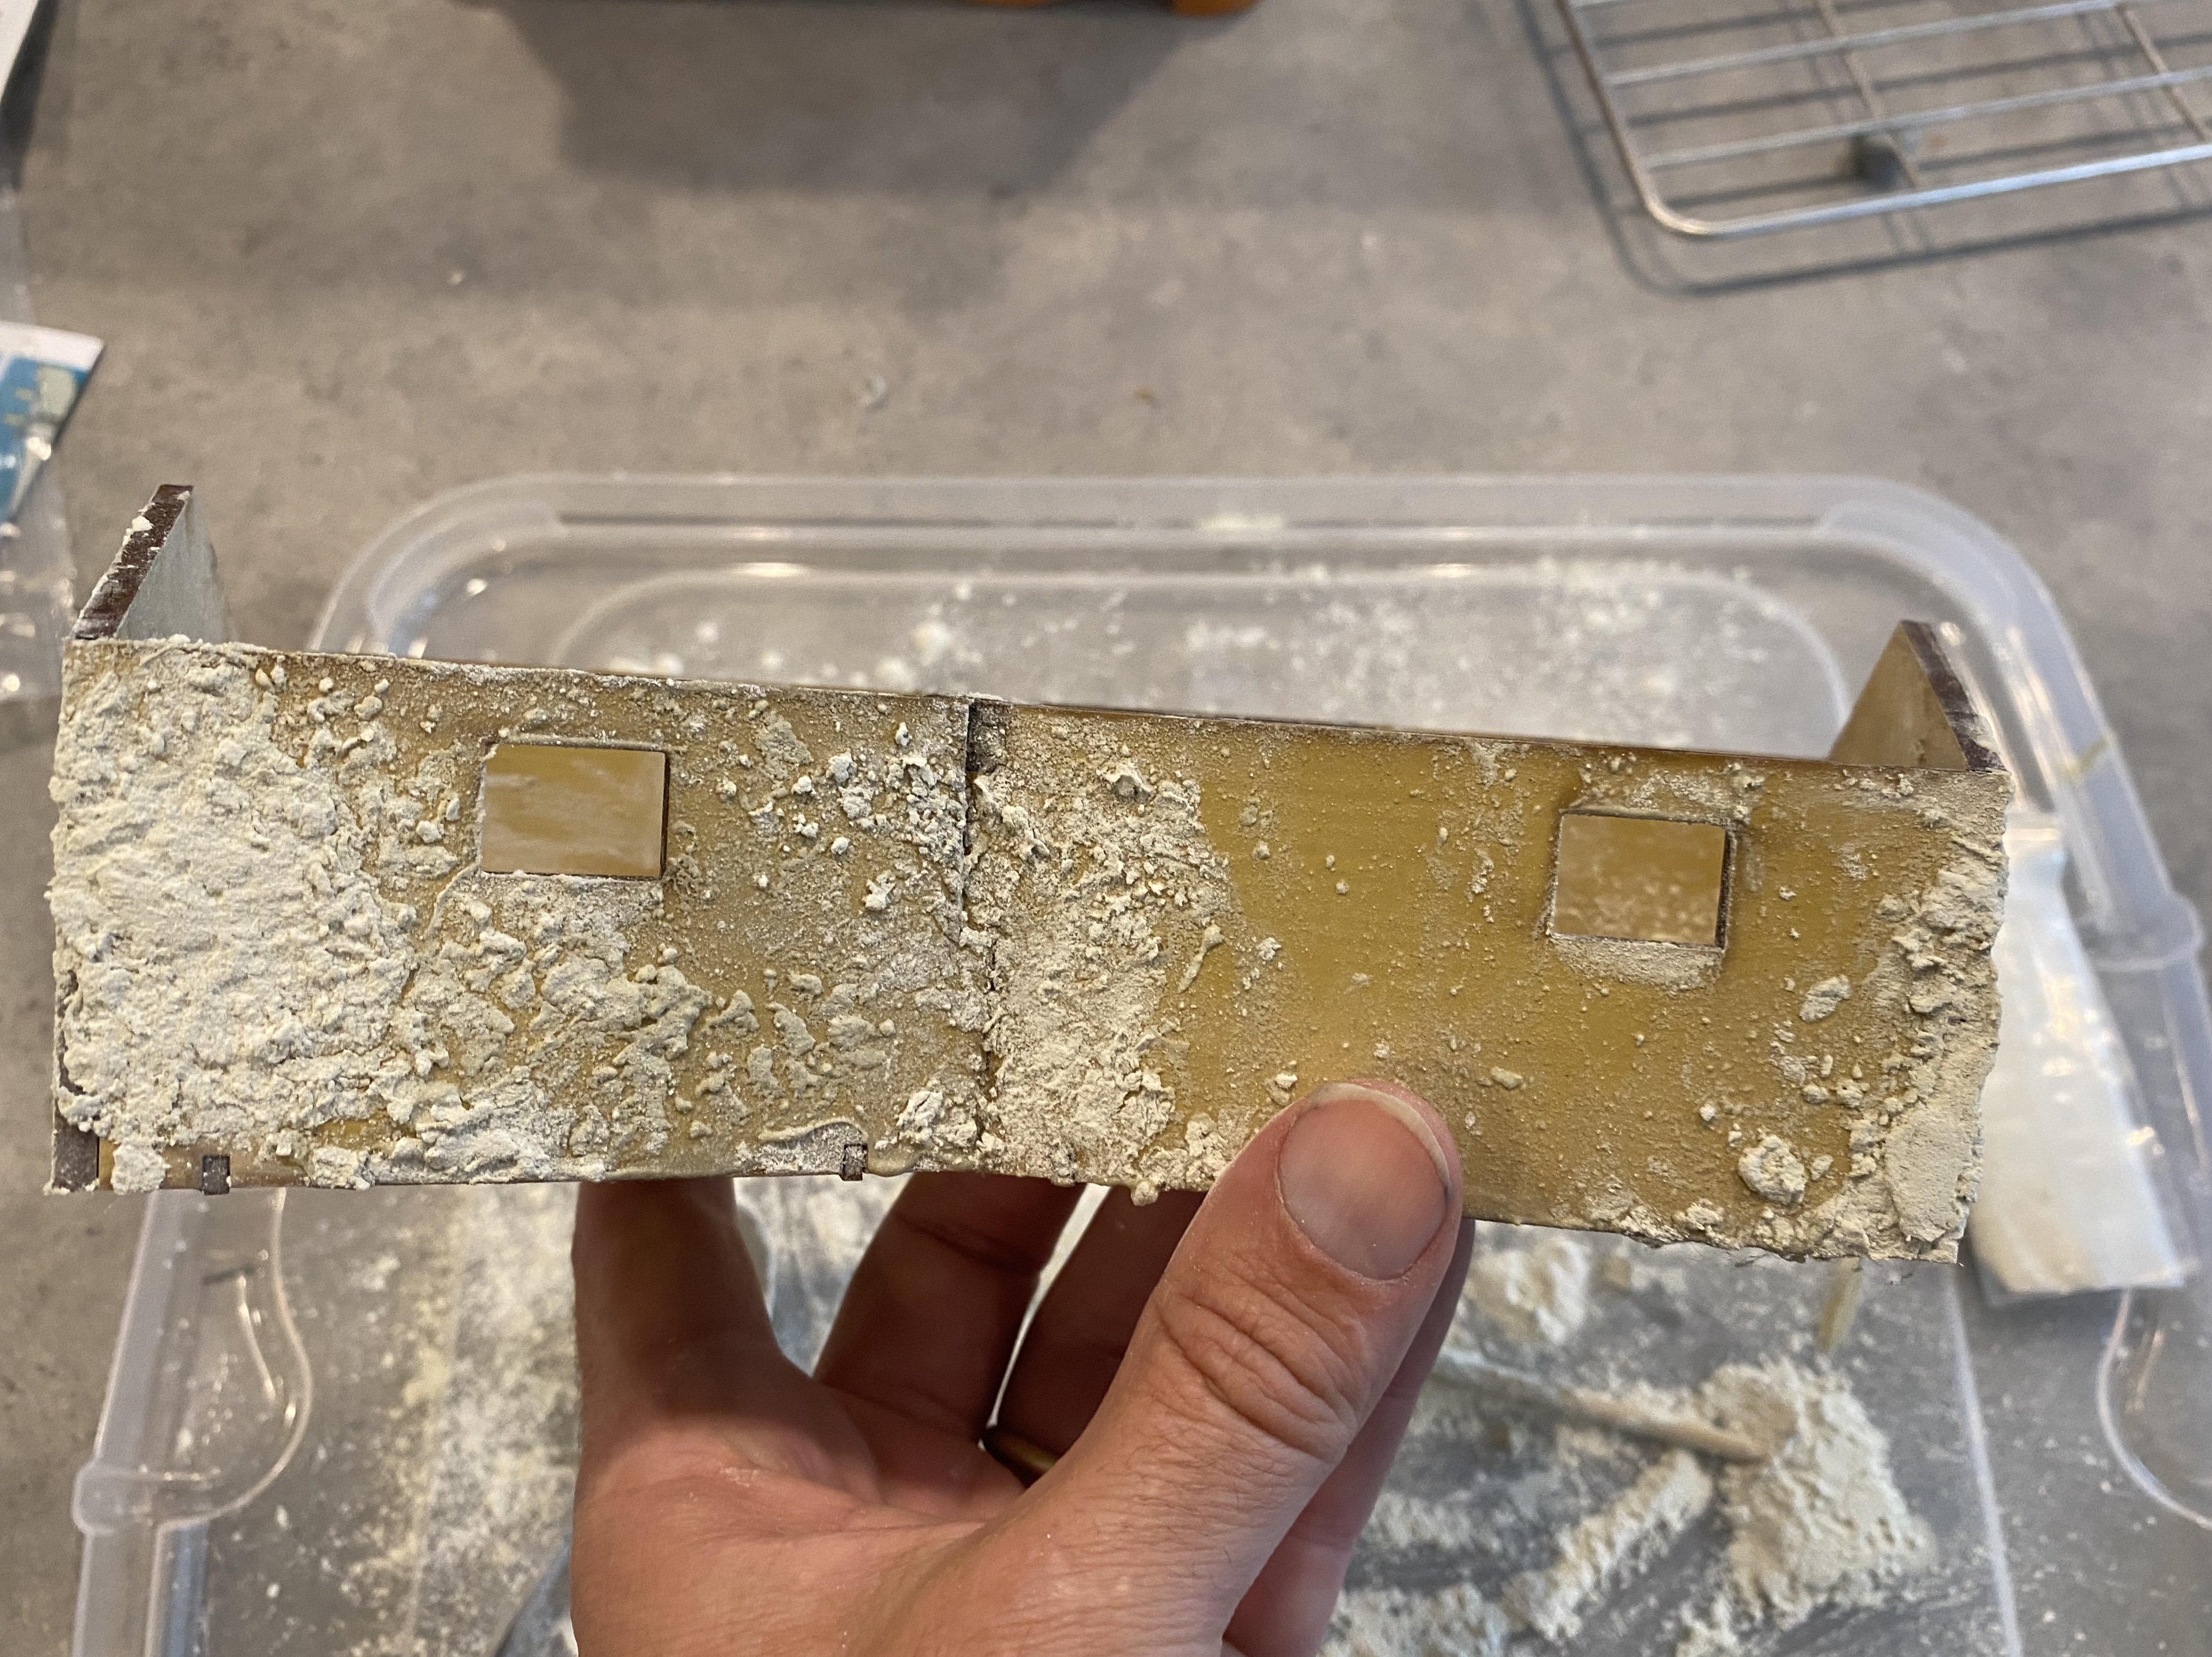
Put a couple tablespoons of the render powder into a cup (that you don’t care if you destroy). Add glue and mix it up until a little thinner than cement. I added a little water to make it a little thinner after the glue was mixed it but it still felt too thick to spread.

Use a medium cheap paintbrush to spread it over one wall face. This example below is too thin and it came out a little transparent which is not optimal.

Spread a nice thick, even coat over the entire wall. The example below is what worked best for me.

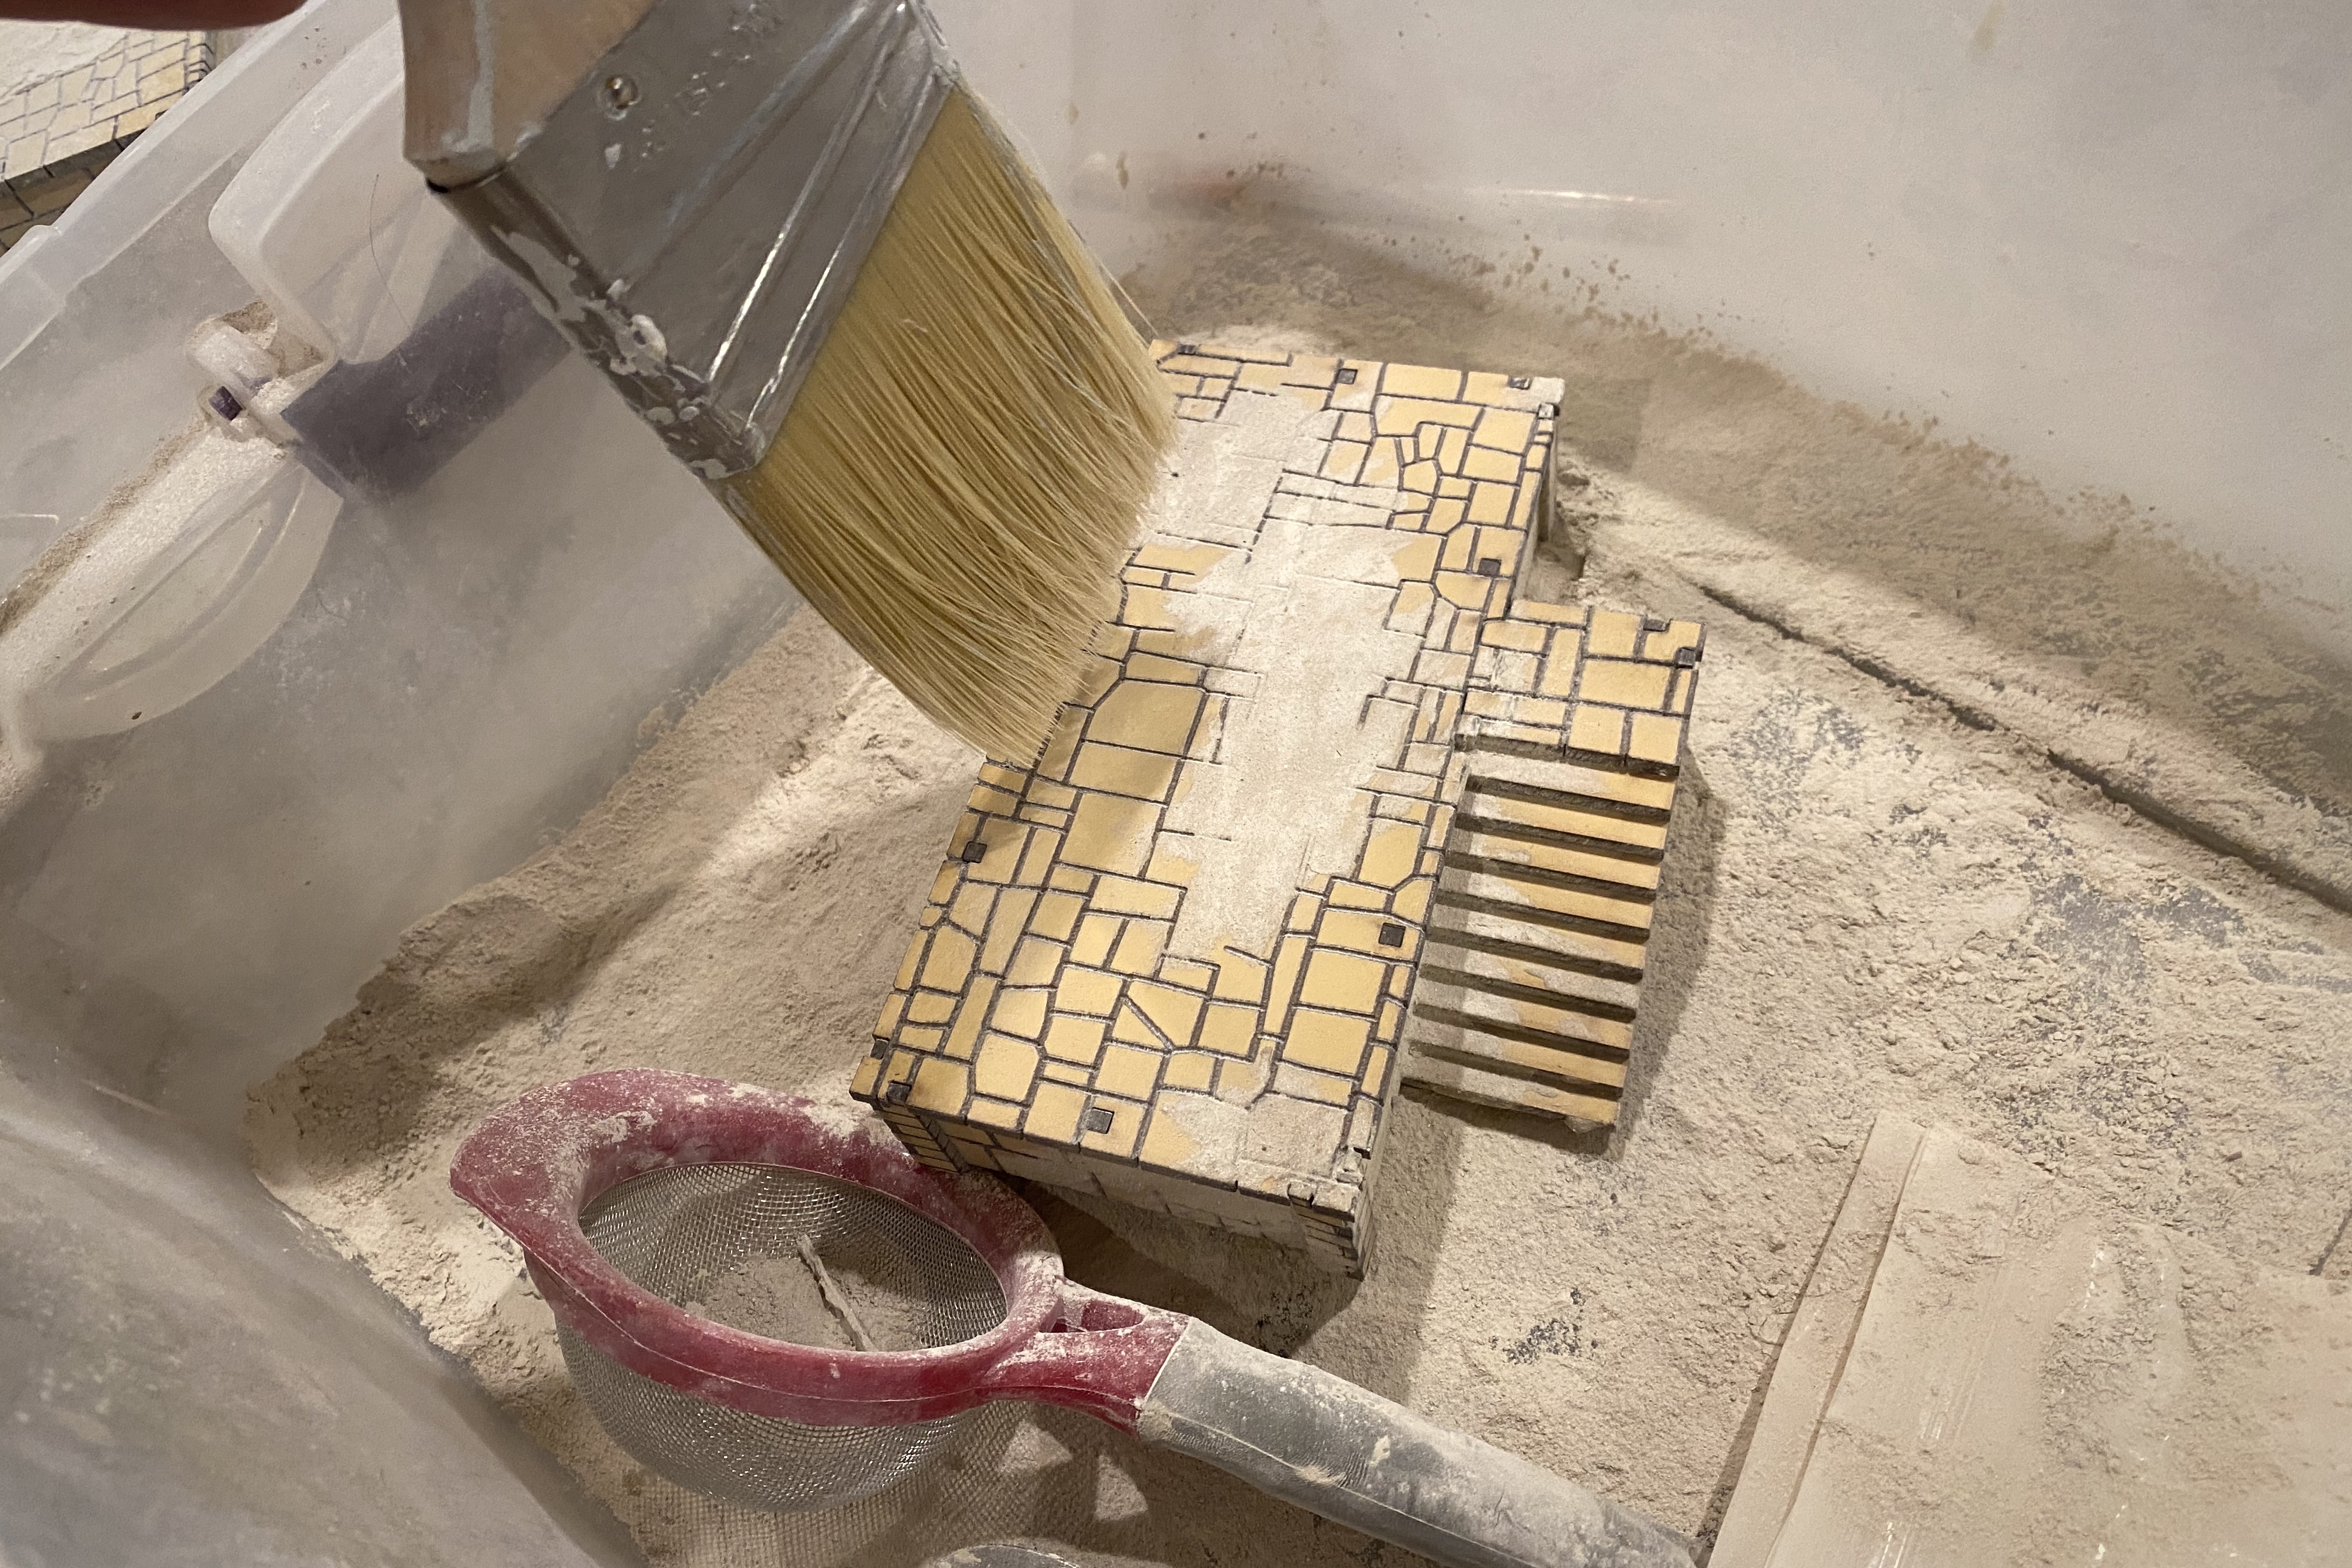
Then scoop, or sift (works much better) dry powder over the entire wet wall.

I gently pressed the dry powder into the wet paste, let it set for a few minutes, then shake off the excess powder.
This was the example above that was too watery and you can see the yellowish brown tone of the wood underneath. A thicker paste is more opaque.
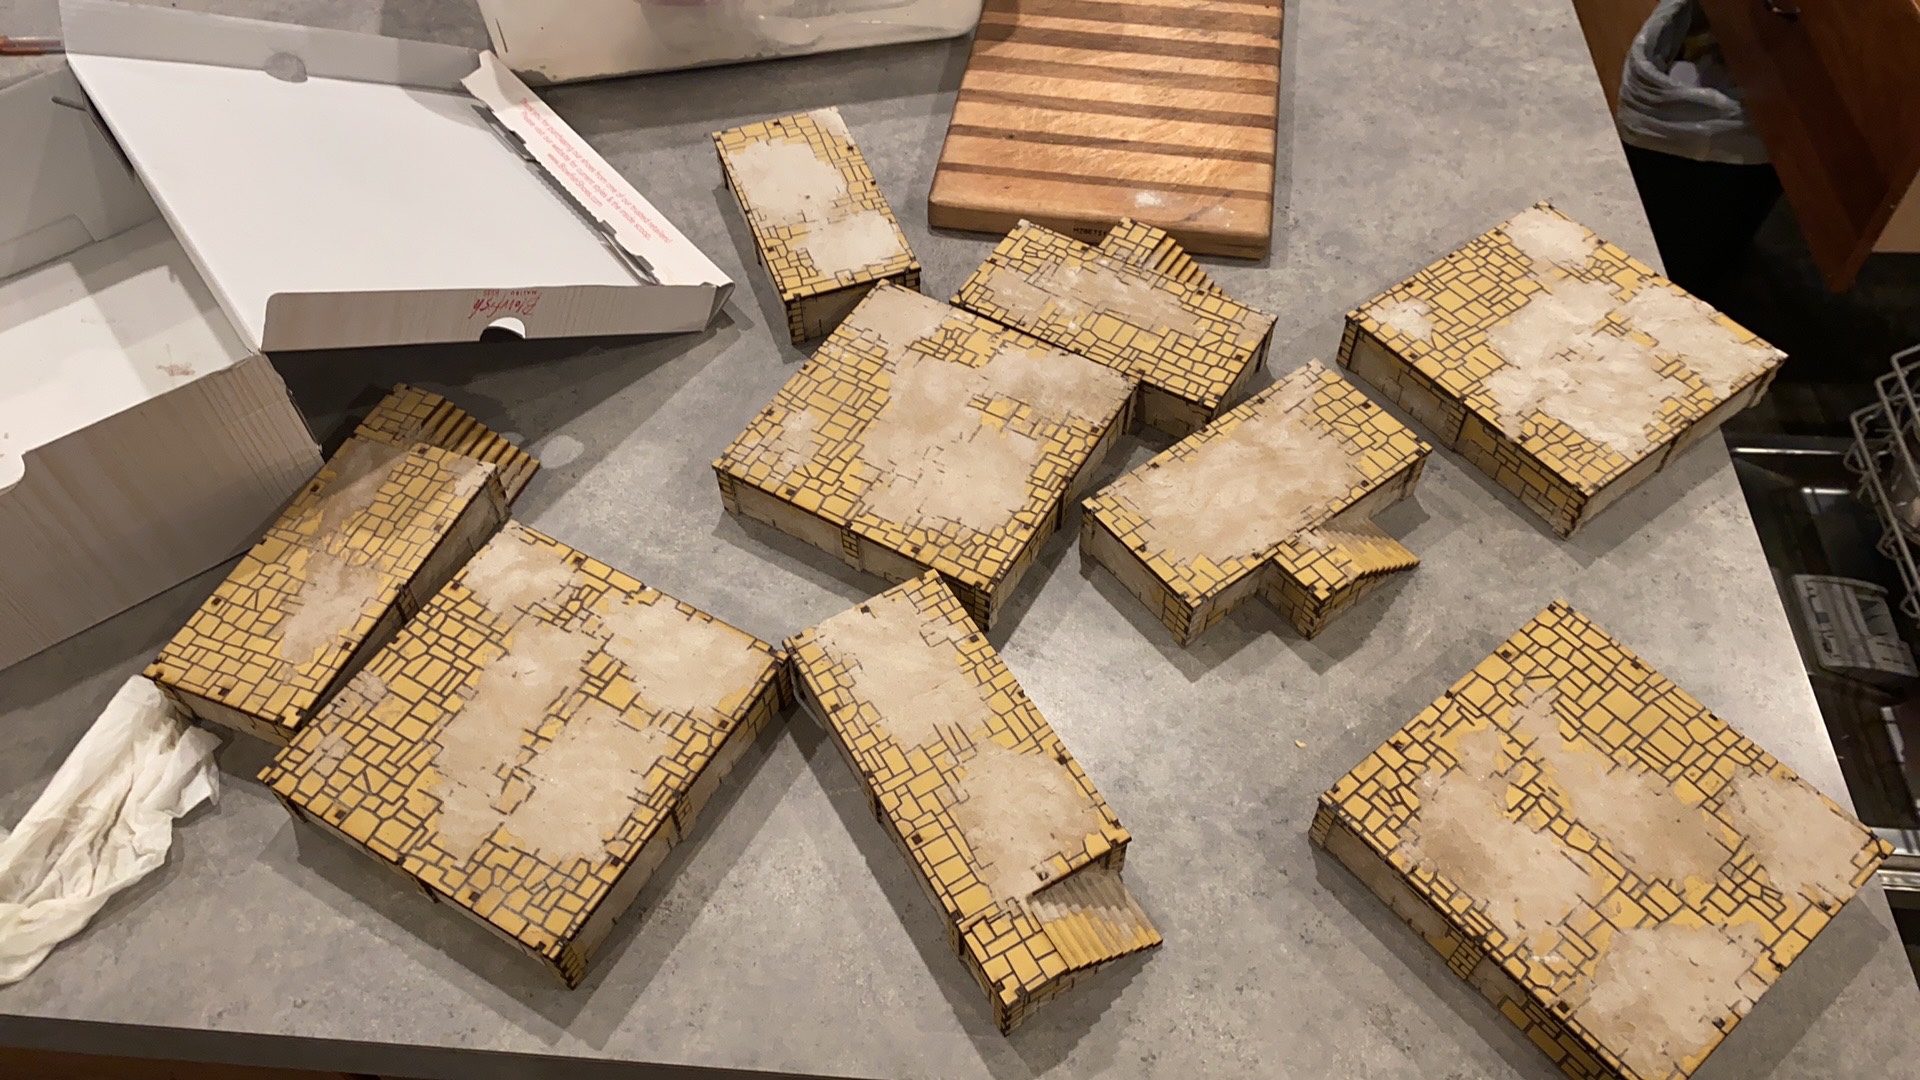
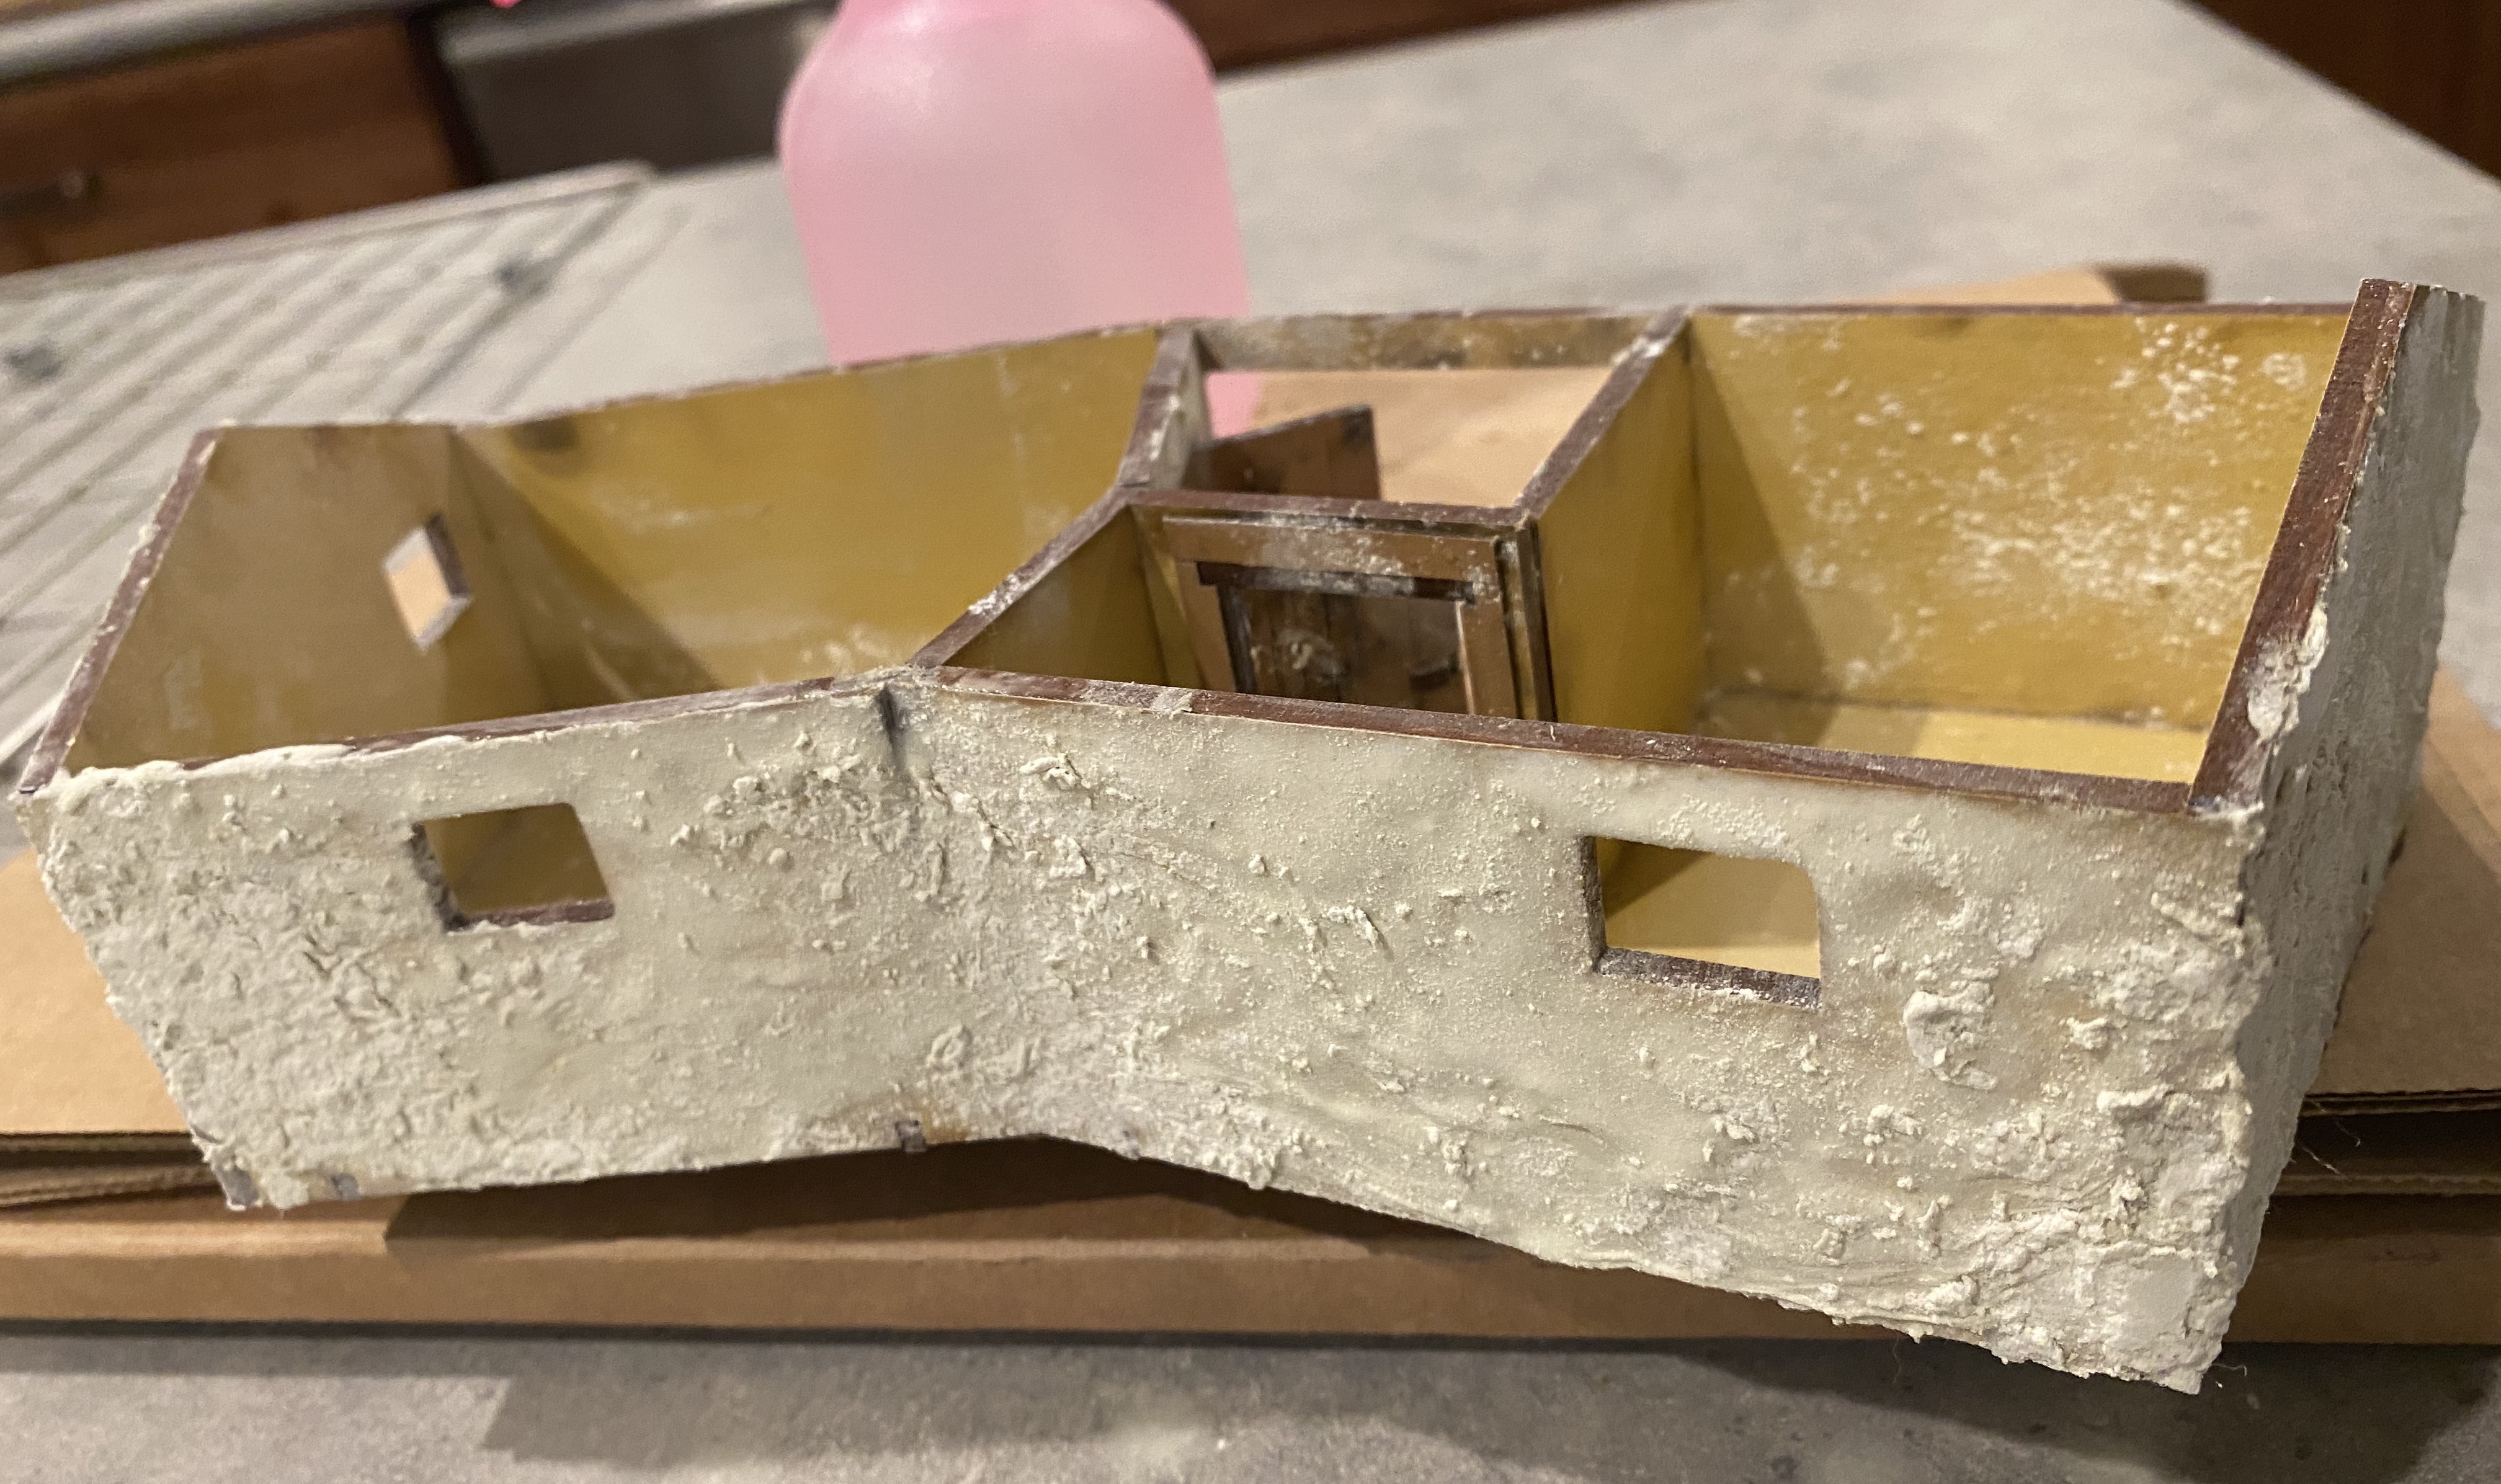
Once you’ve shaken off the extra dry powder, let the section dry for a good 20 minutes or so in a horizontal position. If the past was either spread heavily or mixed thinely, the whole wall can slide down and pool at the bottom if you let it dry vertically in its normal building orientation.

Repeat for each building side. I found it convenient to do several buildings or building sections at a time so I could do a wall and set it aside to dry while I worked with another piece and by the time I had worked through 3-4 pieces, I could come back to the first piece and do the next wall.
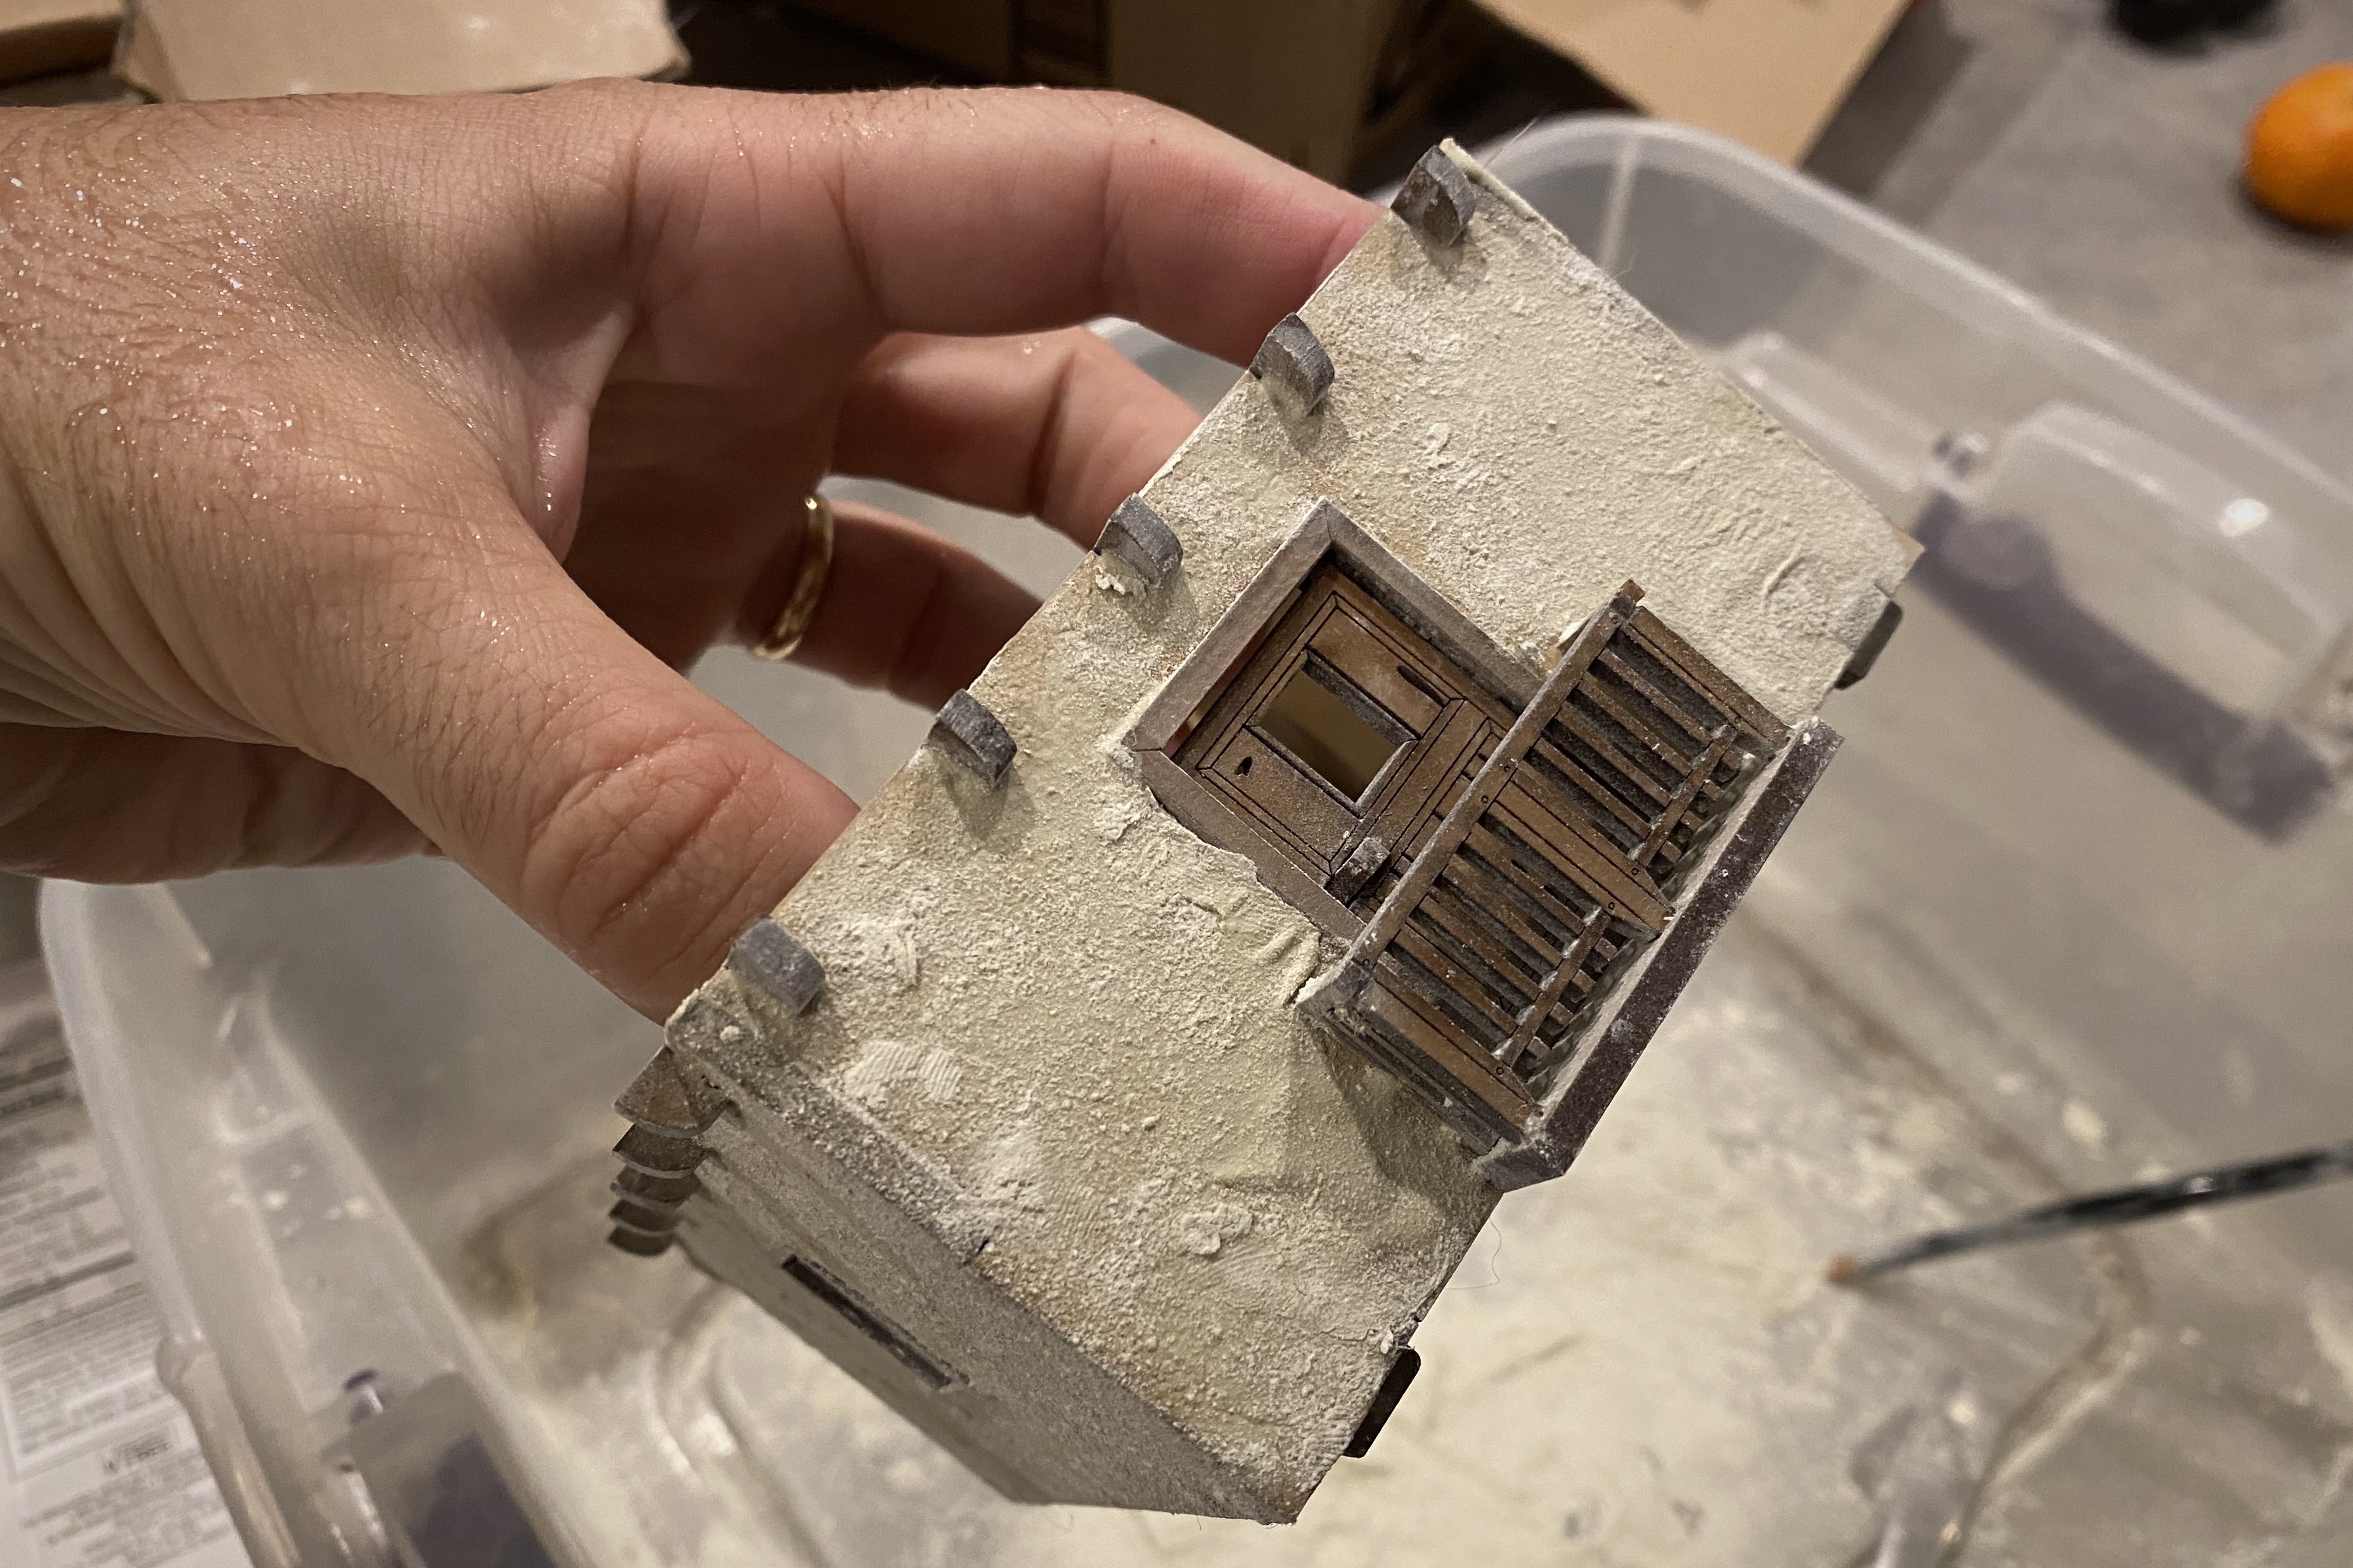
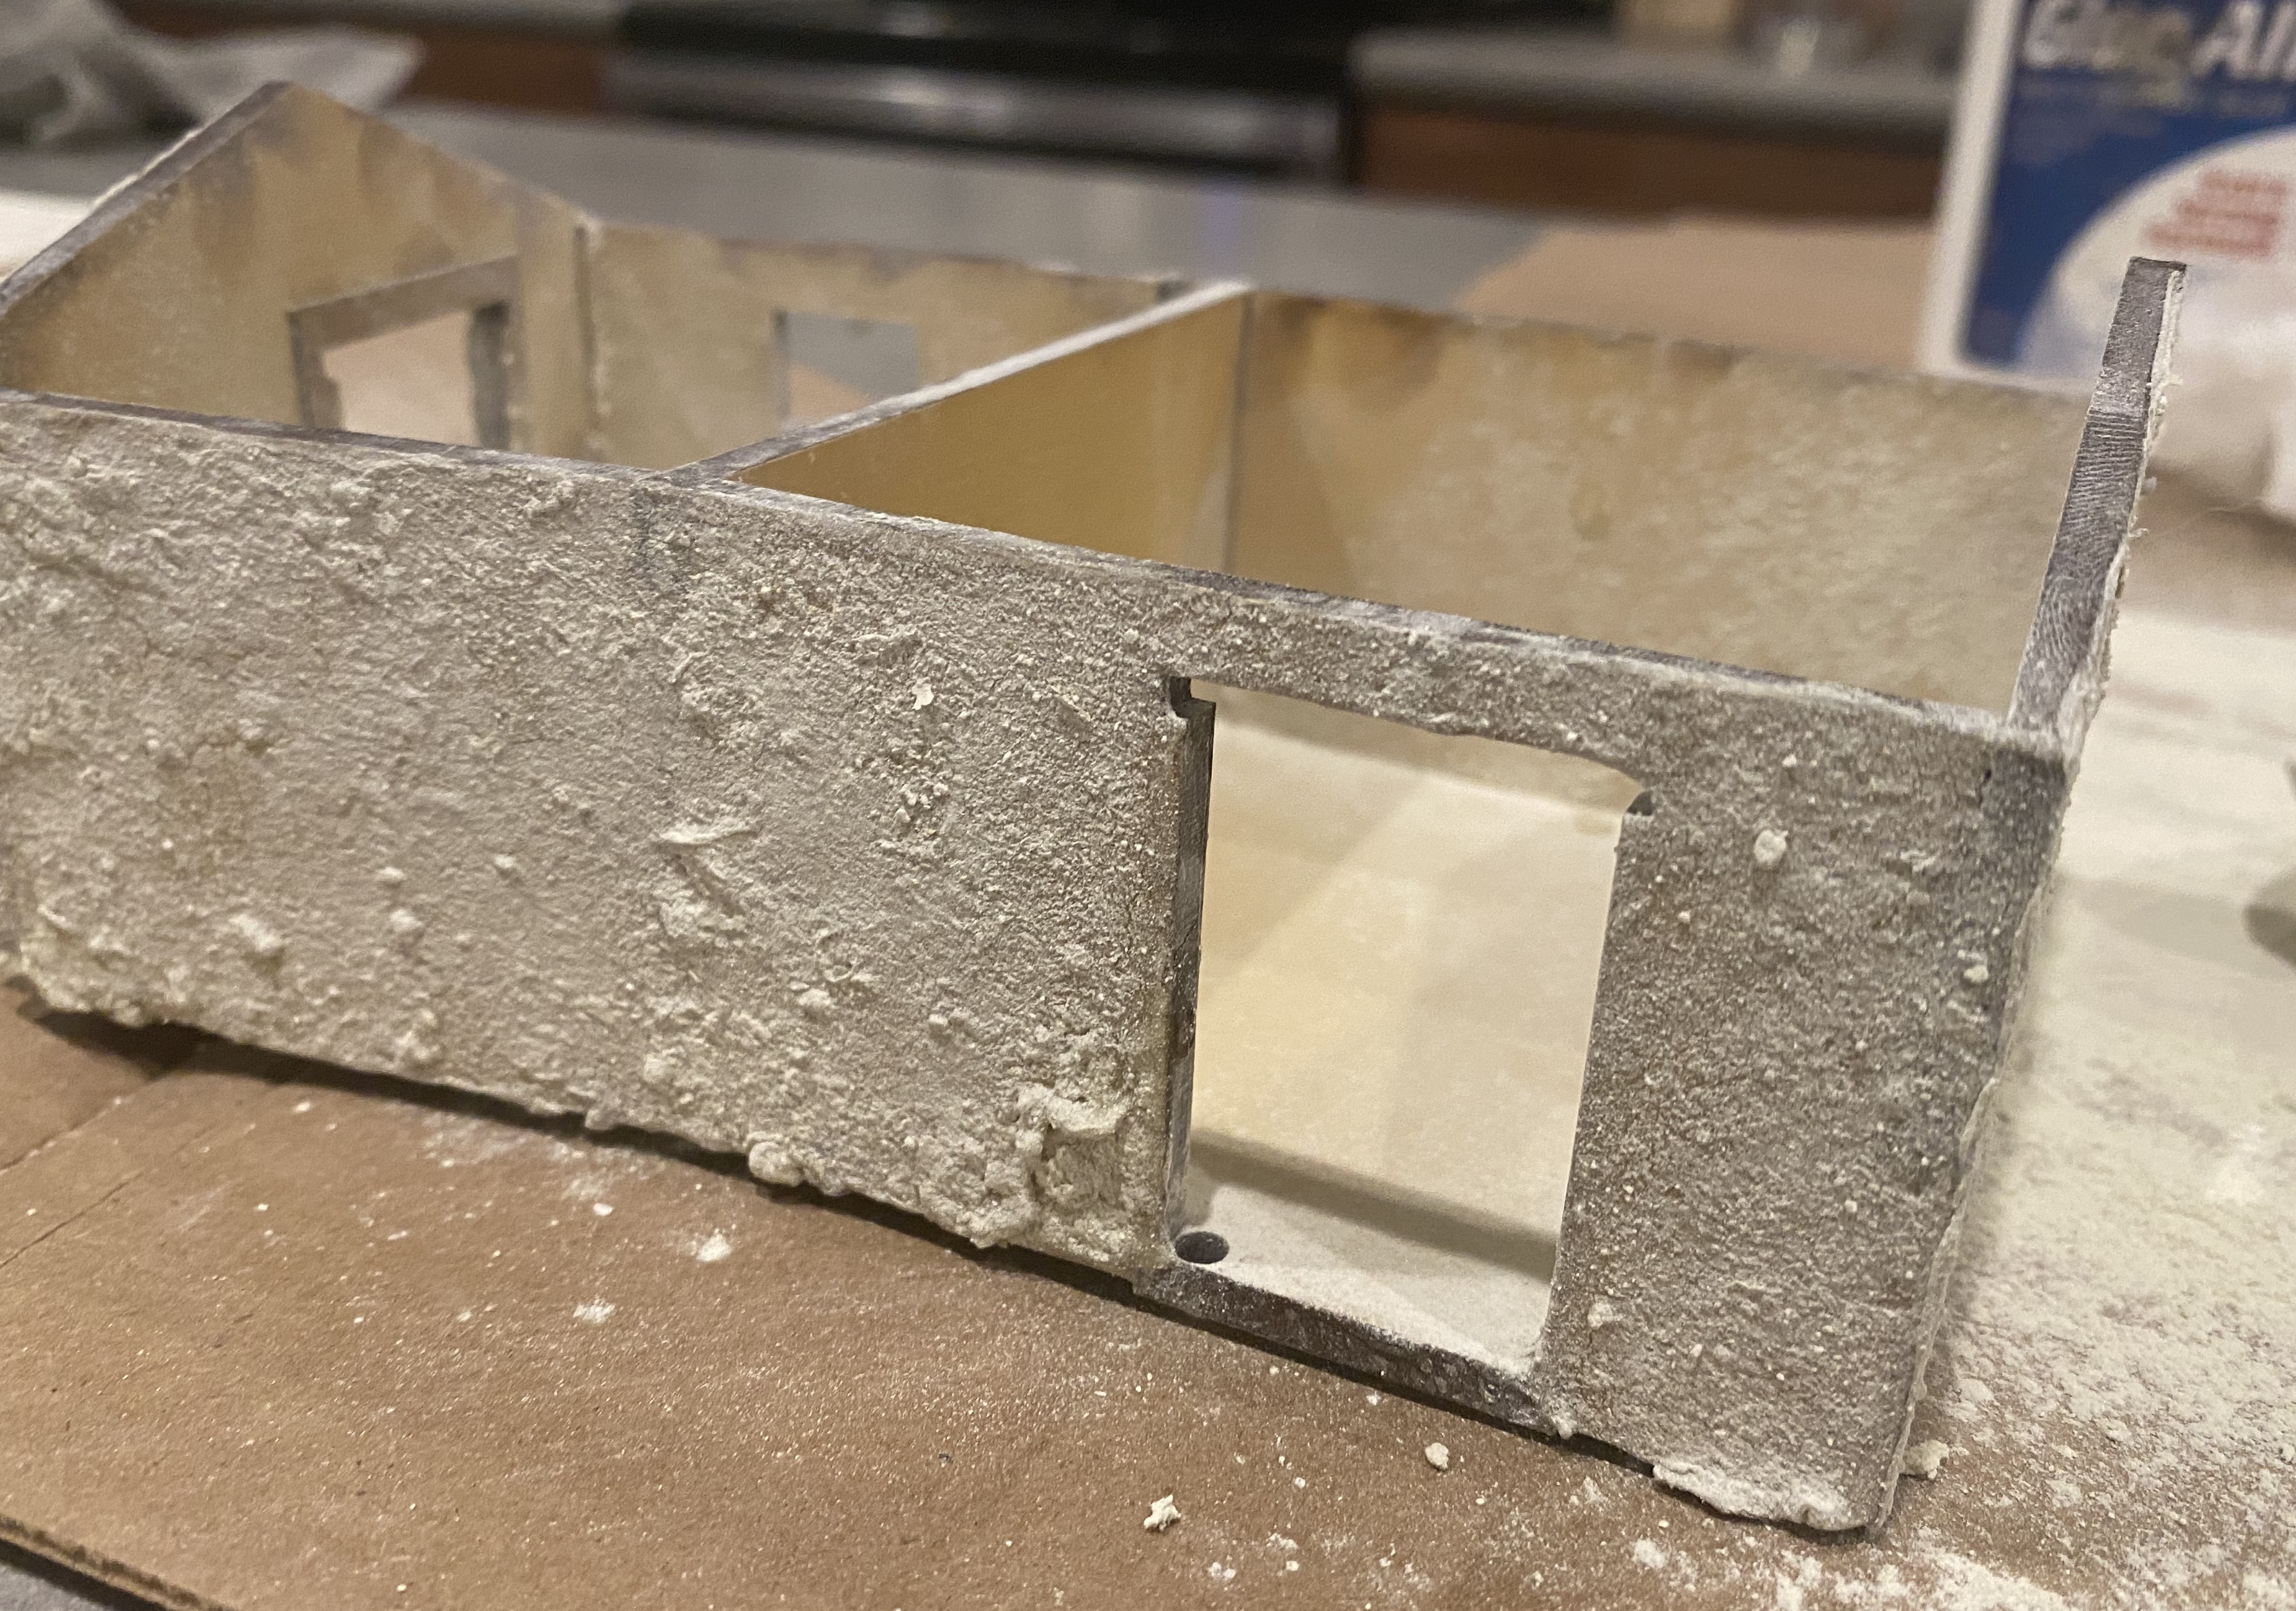
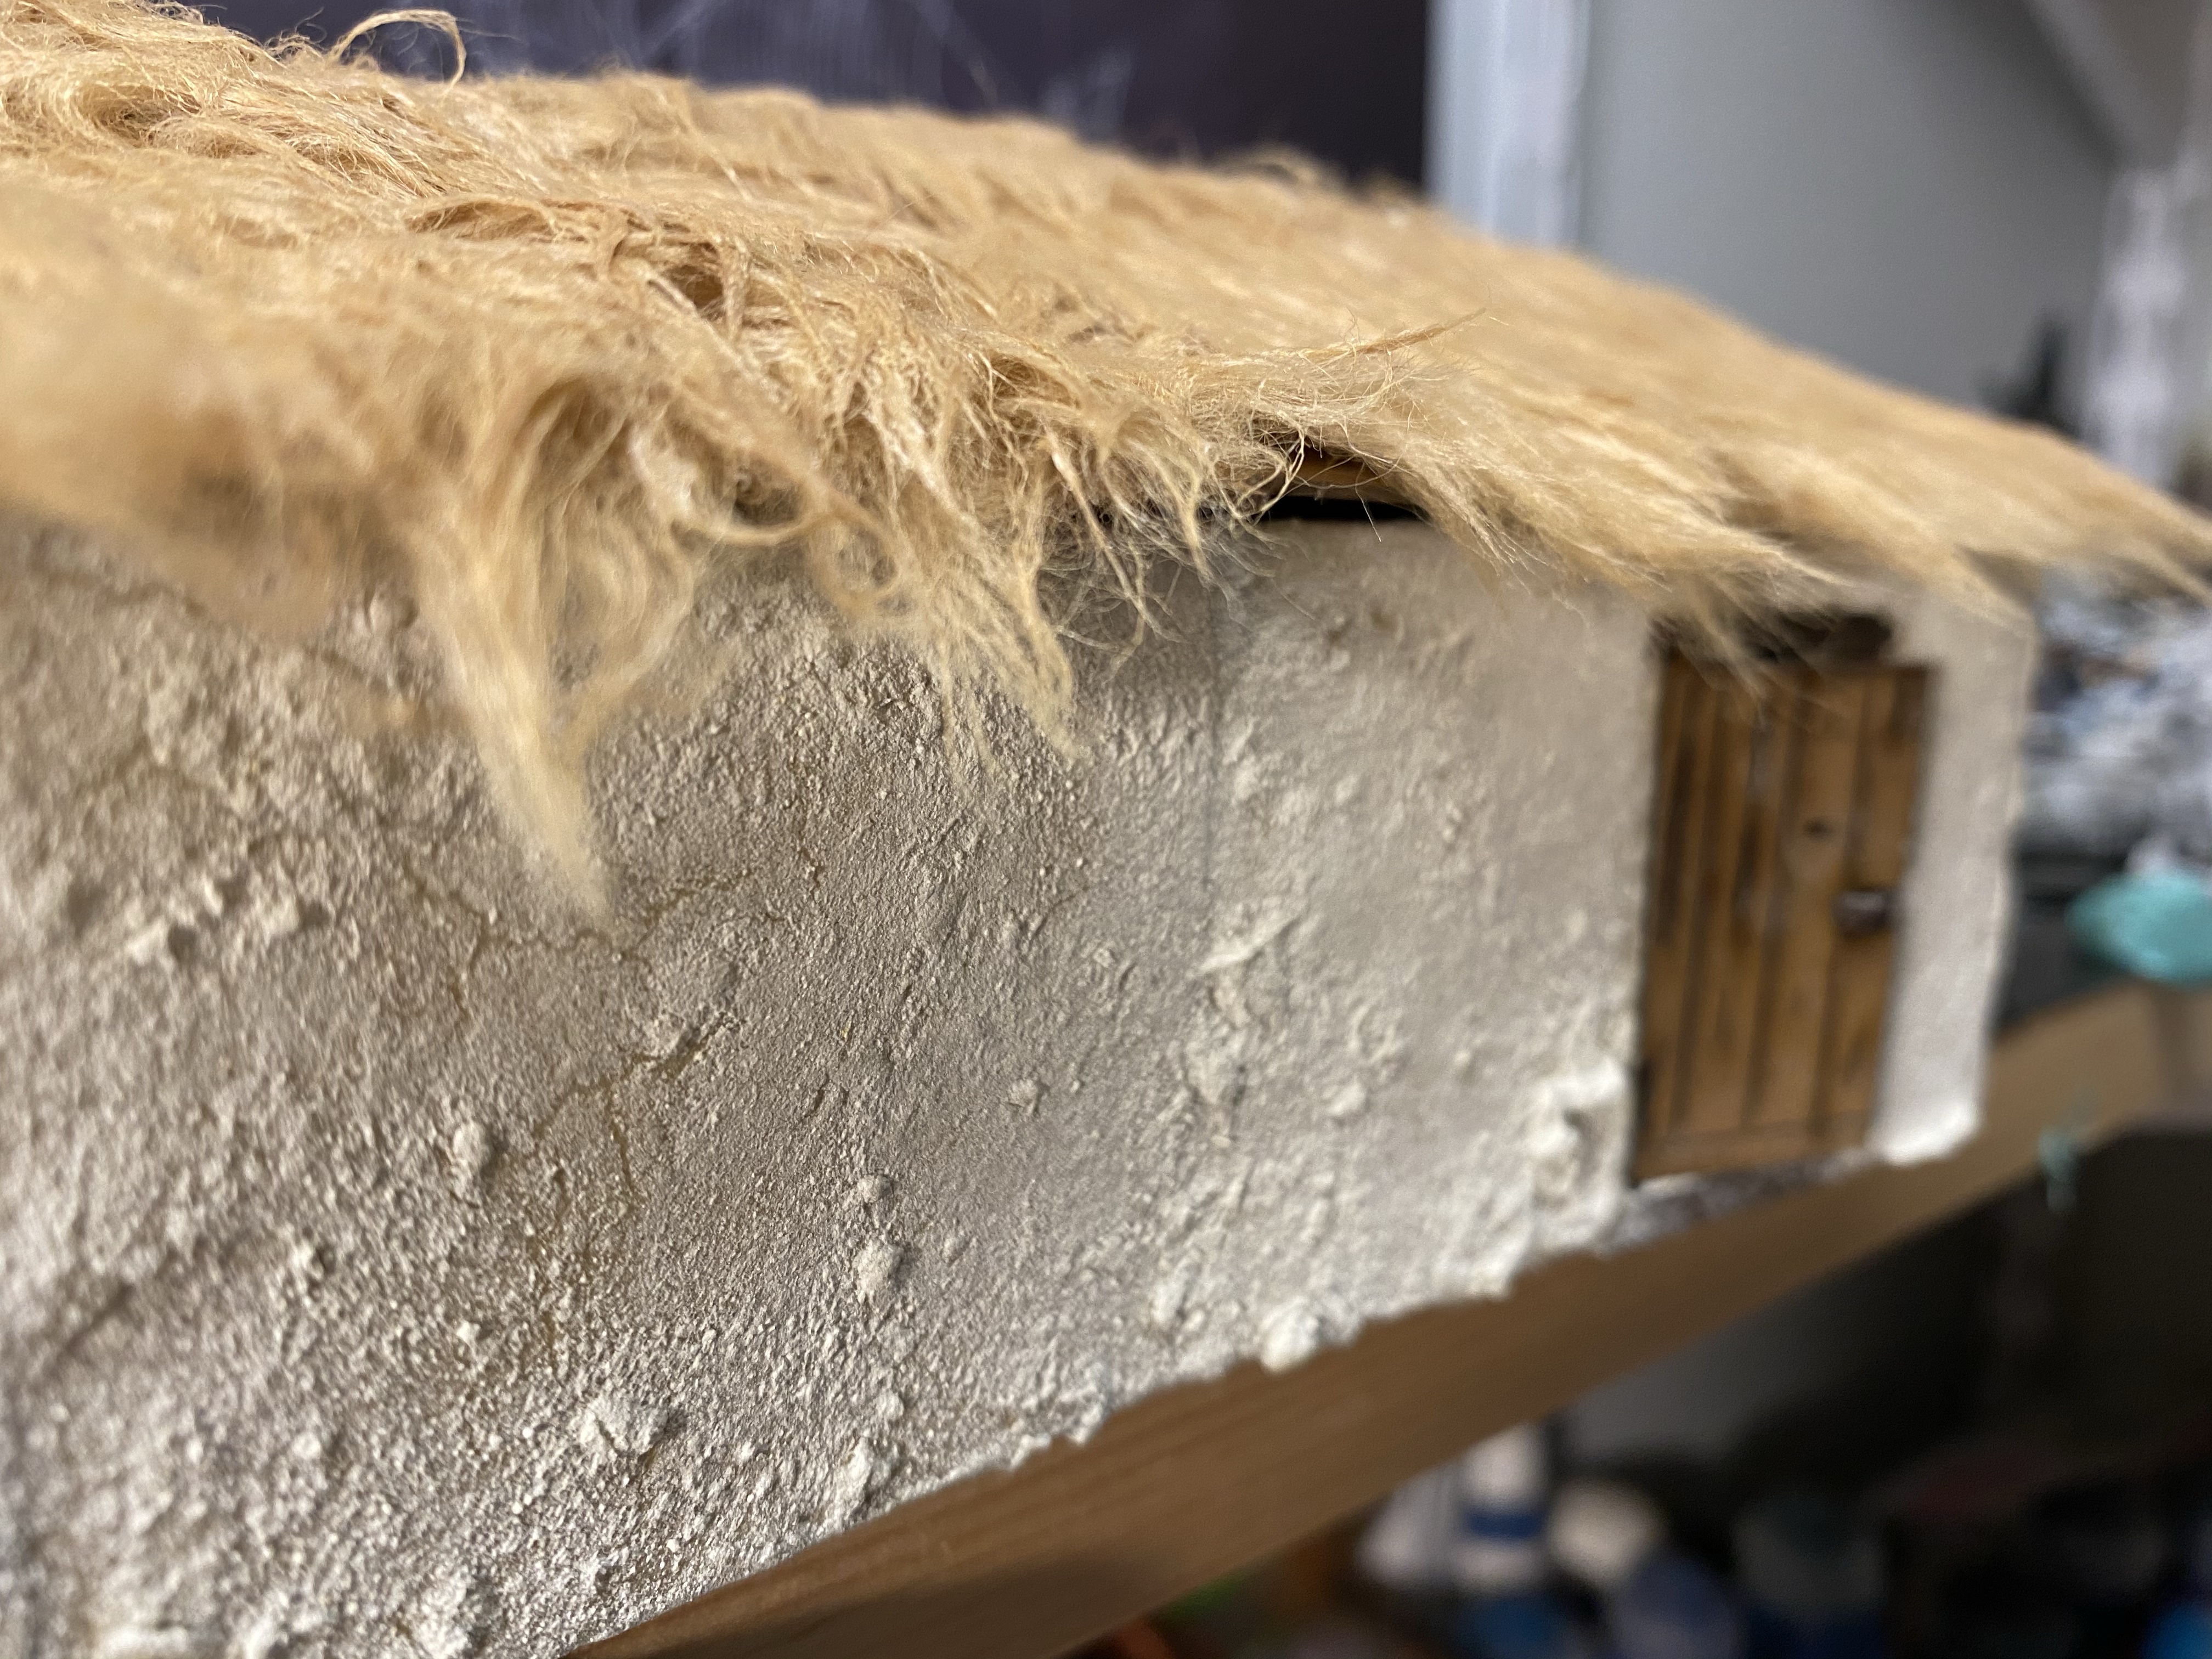
After all is dry, I used a large 2″+ paintbrush to brush off any loose powder. Everything still looked dusty and the darker wood pieces like the doors looked especially messy. A good spray of varnish fixed that issue while also giving the walls a good protective coat. I used Vallejo Matte Varnish and it smells like a male goat but it works well!

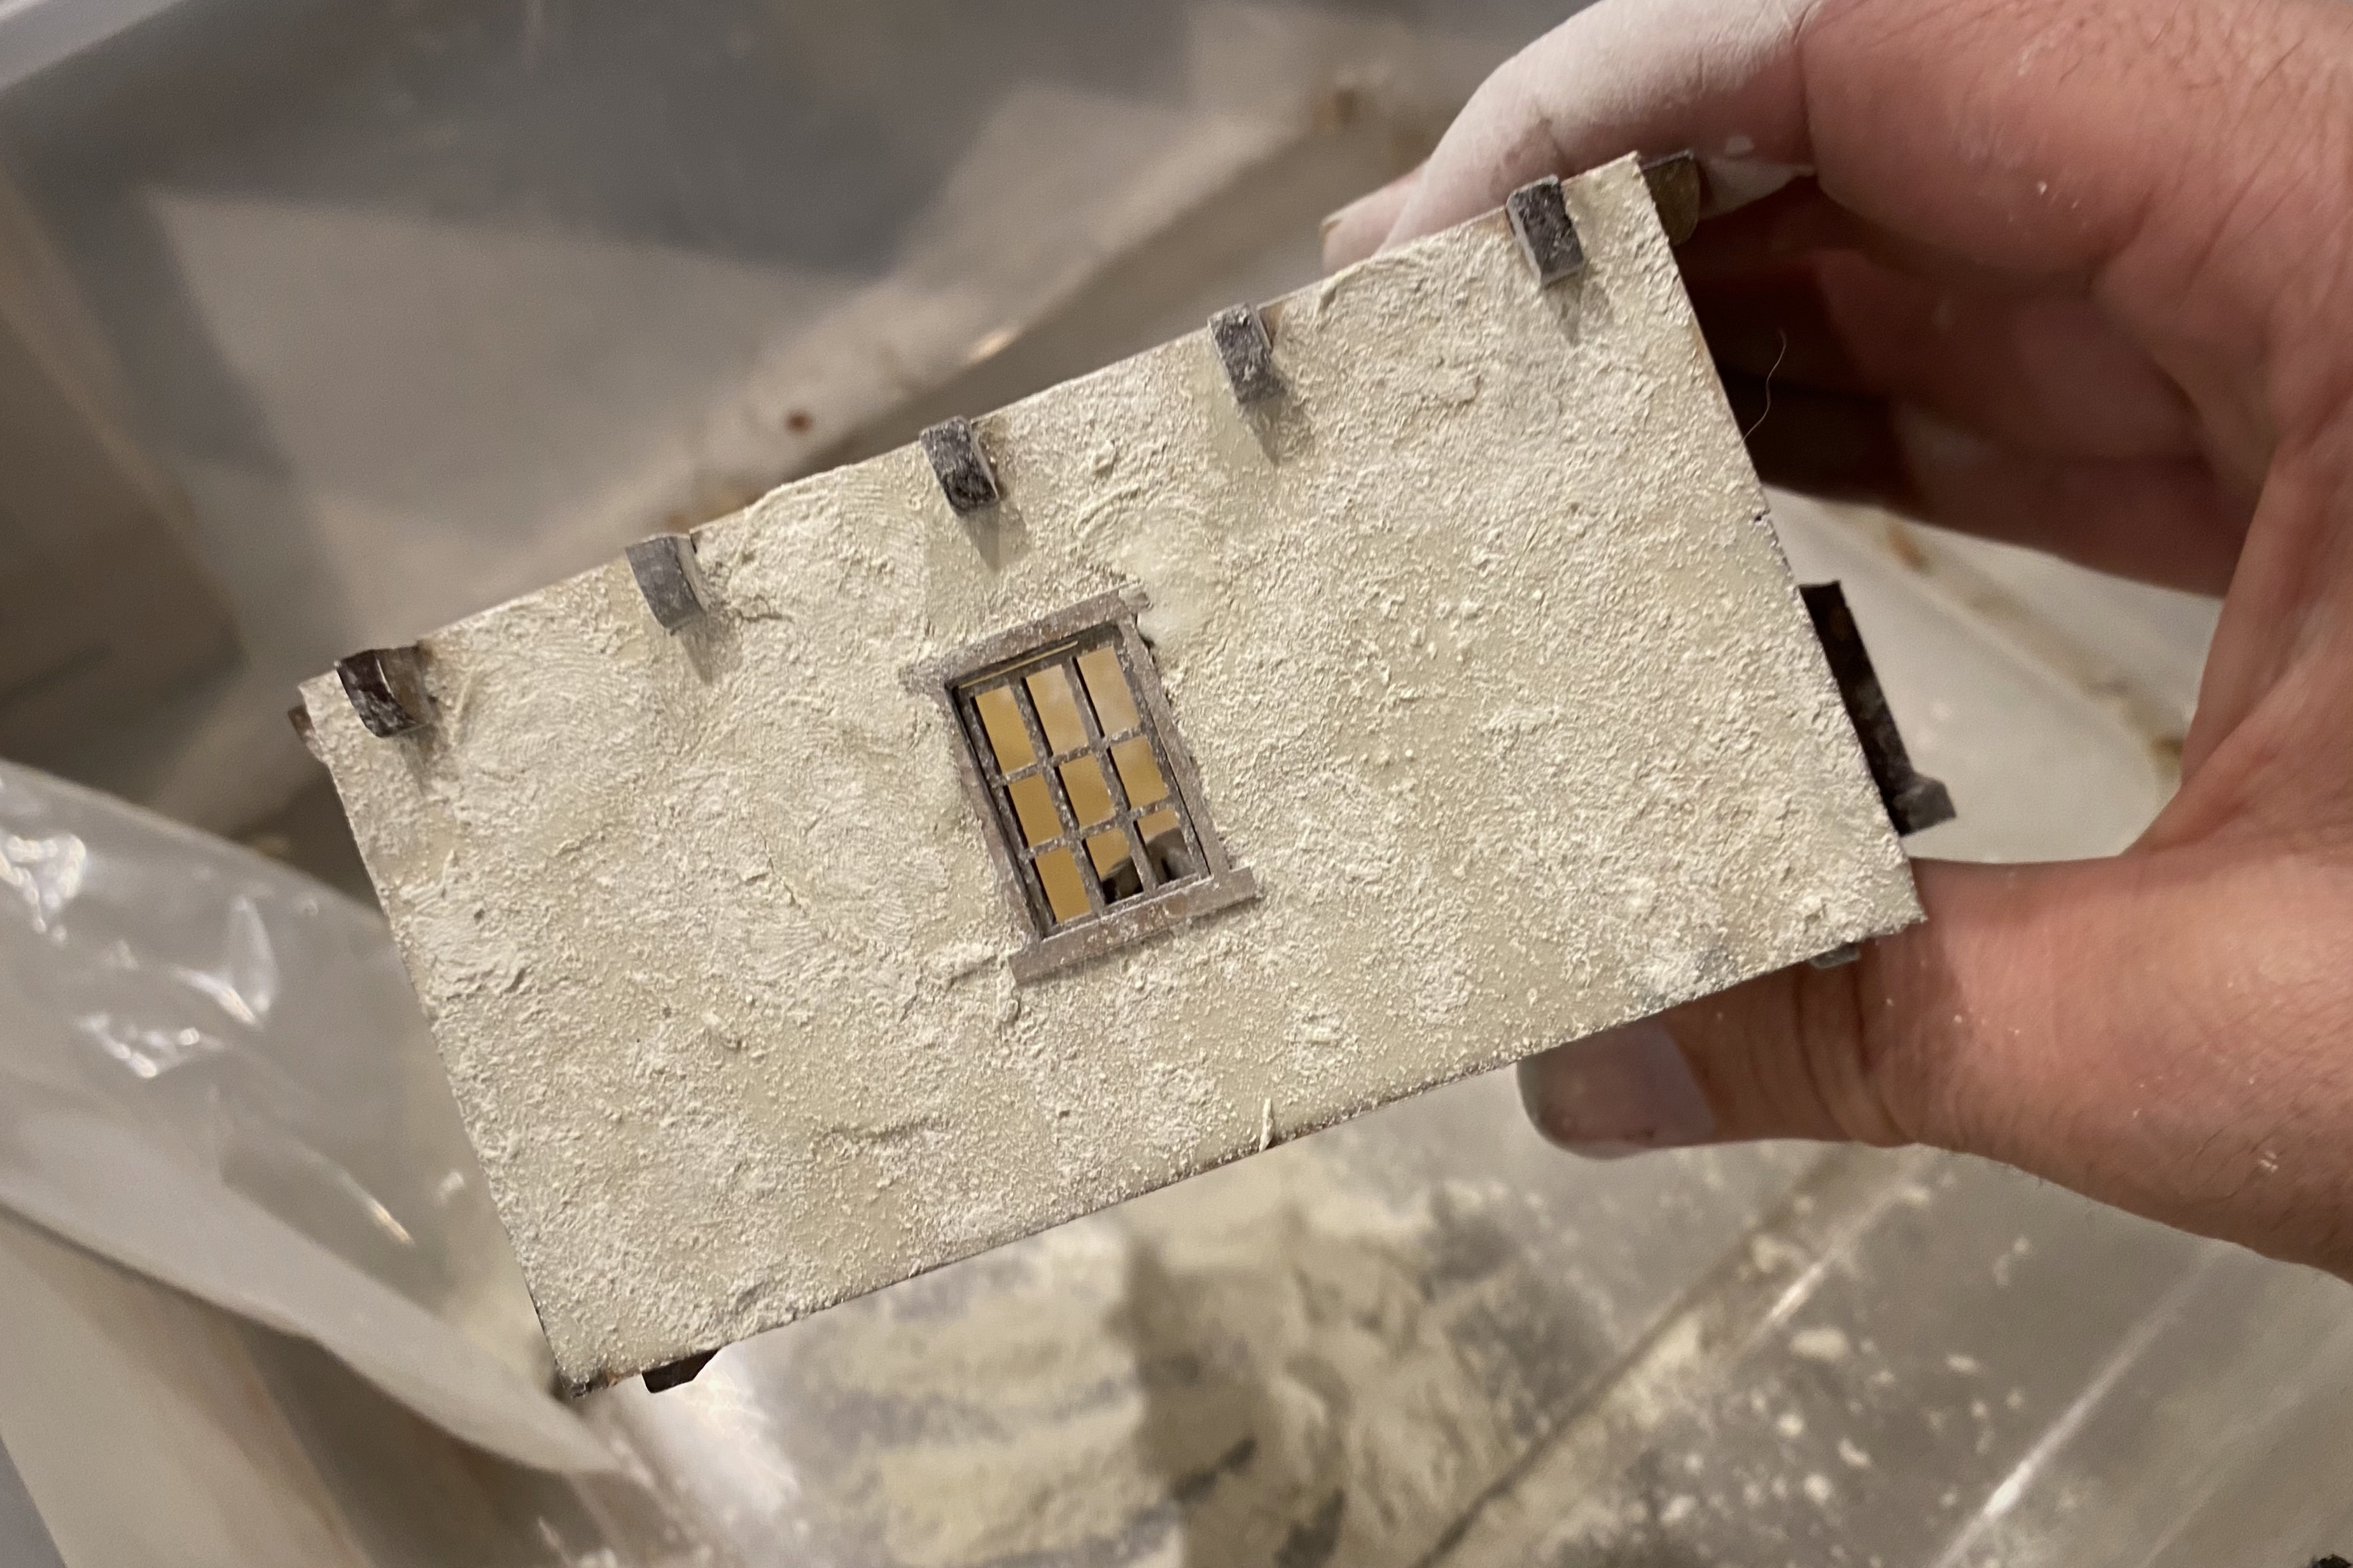
Finished product.
And a closer look. You an see a few thin patches so I could have applied the paste thicker on this piece but it really looks great for gaming purposes.
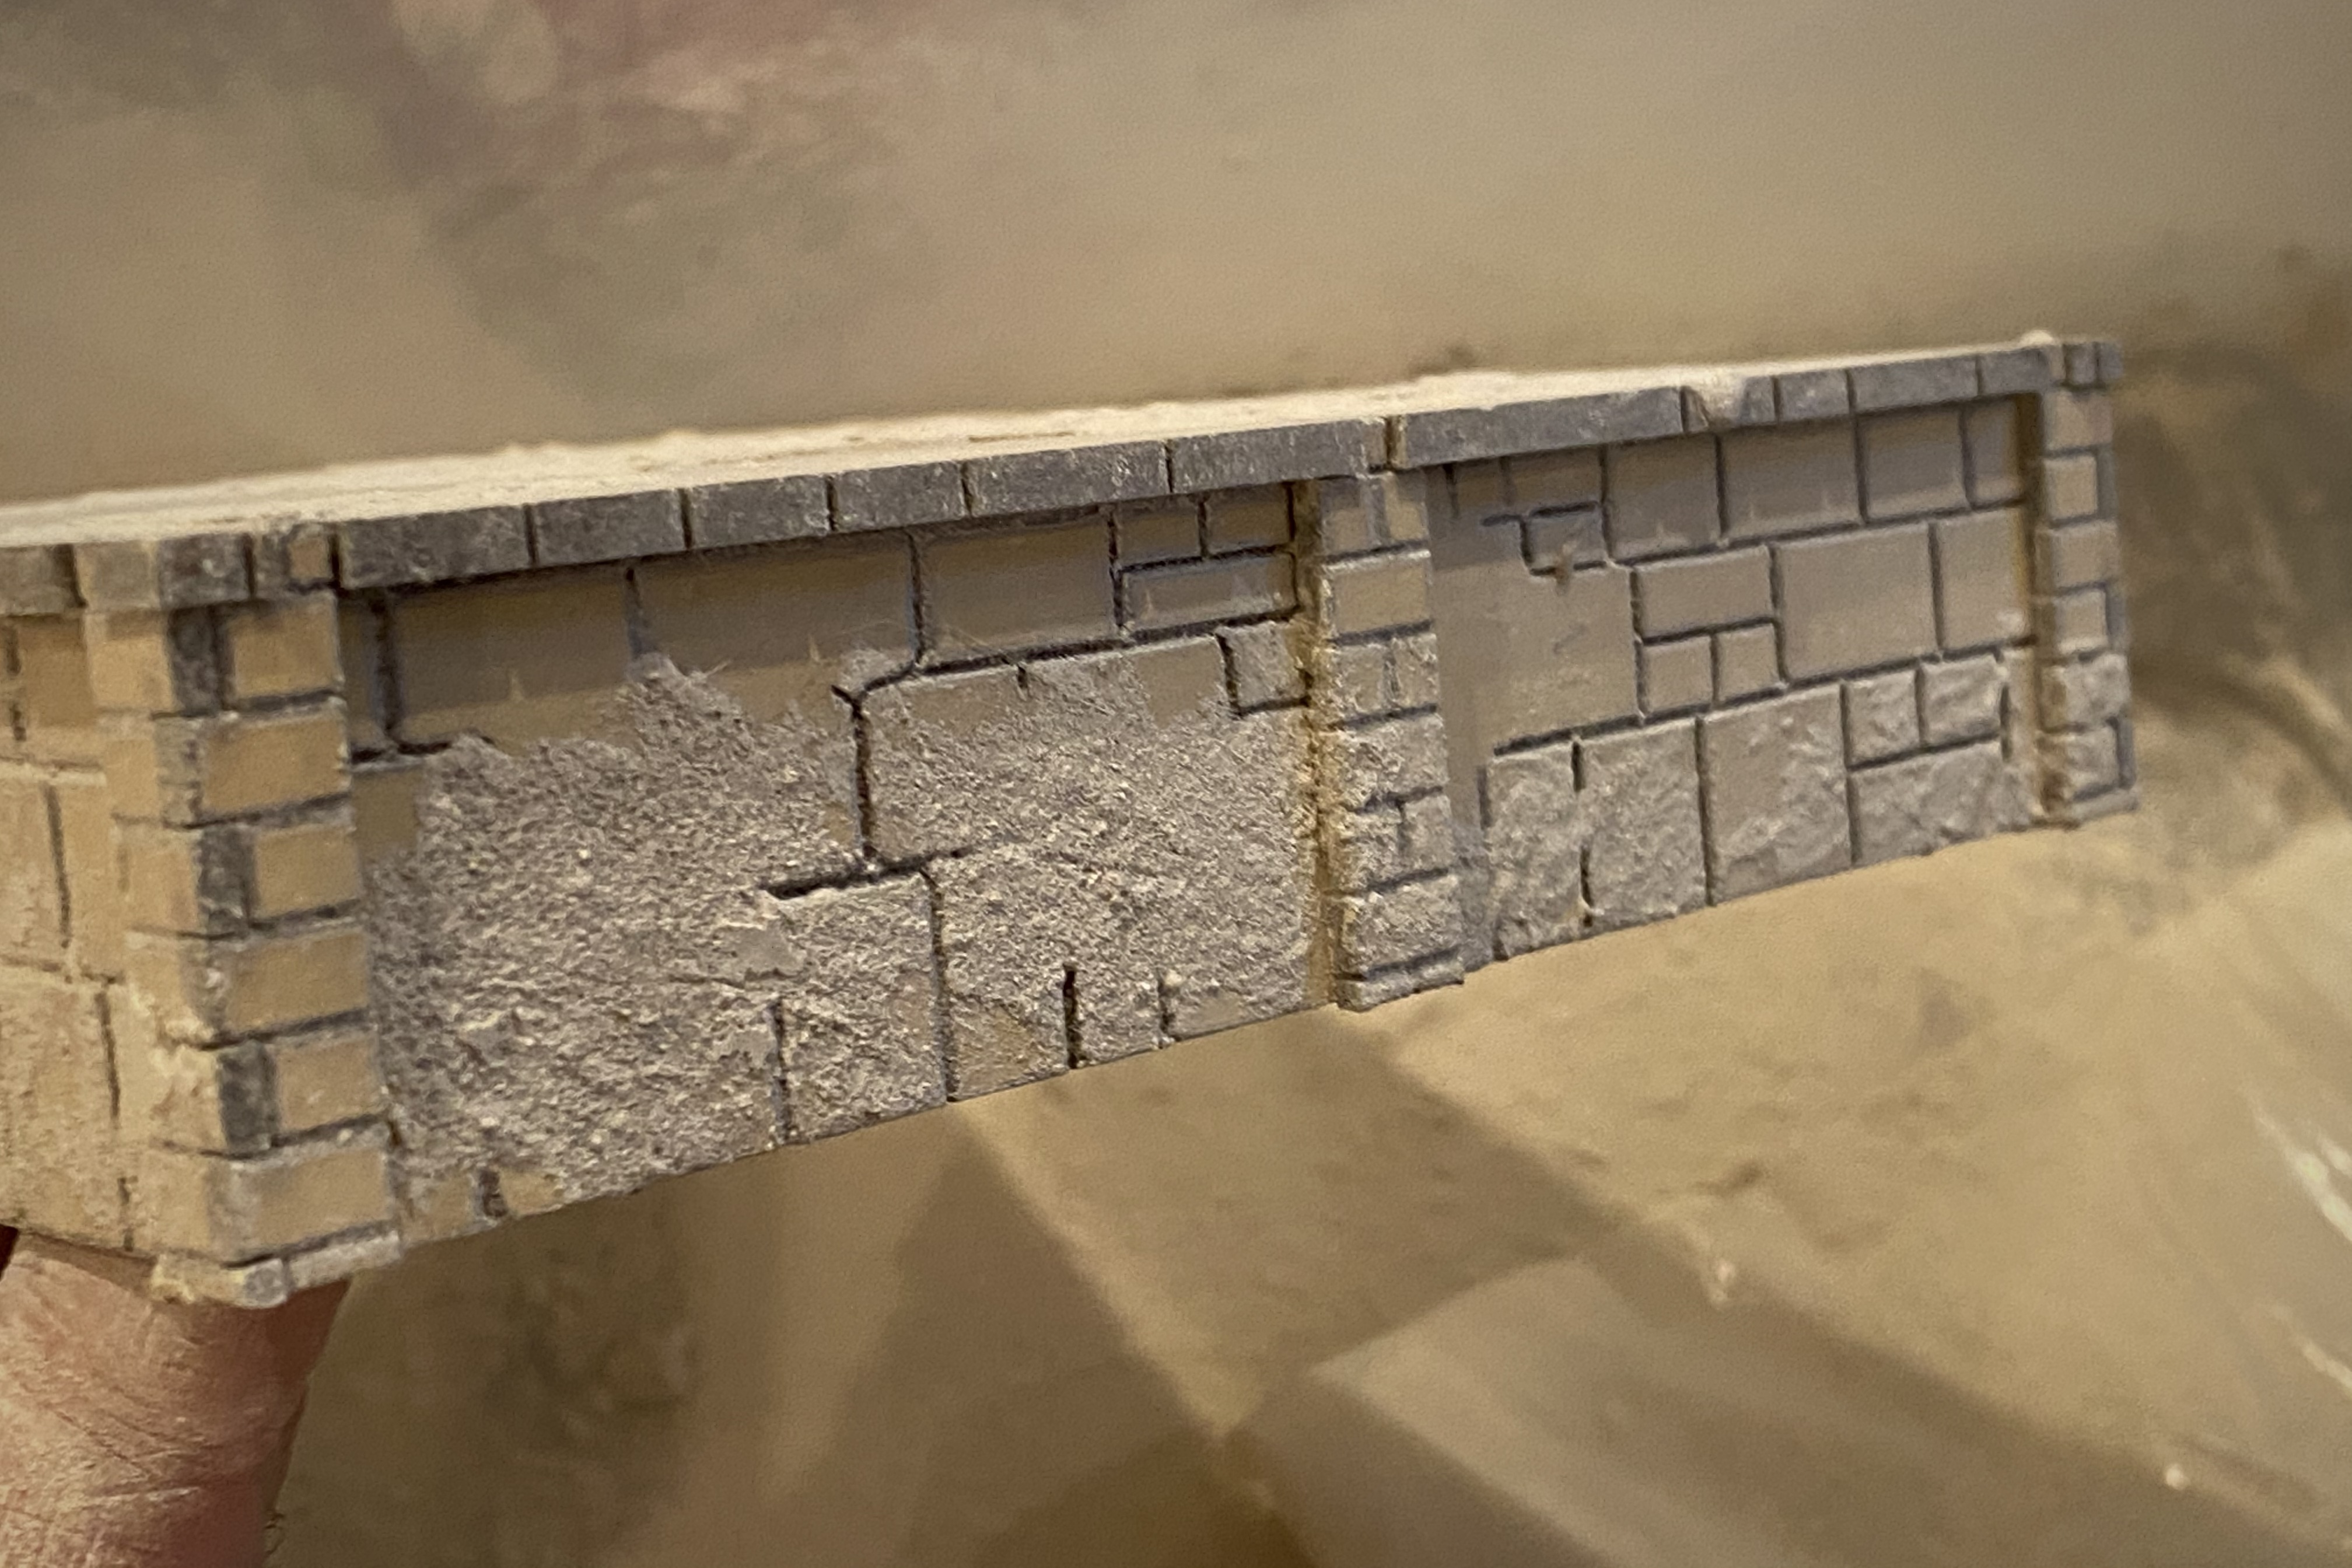
Docks
The dock kits from 4Ground come with the same style of render powder but in a darker, sandier color. I used the same technique but since I didn’t want a fully coated plaster look, I altered my approach a little. My goal here was to make it look like drifts of sand or dirt were covering part of the sandstone docks.
Powder in a cup.

Add PVA glue.
Mix with a low value brush.

Too thick. Add a few drops of water.

Just about right.

Apply to any area you wish. There are large sections without any stone definition that need to be covered but you could do more or less as you please.

In the example above I applied it pretty heavily like I did on the buildings. I later decided less volume was better for making it look more dirty and dusty and less like stucco.
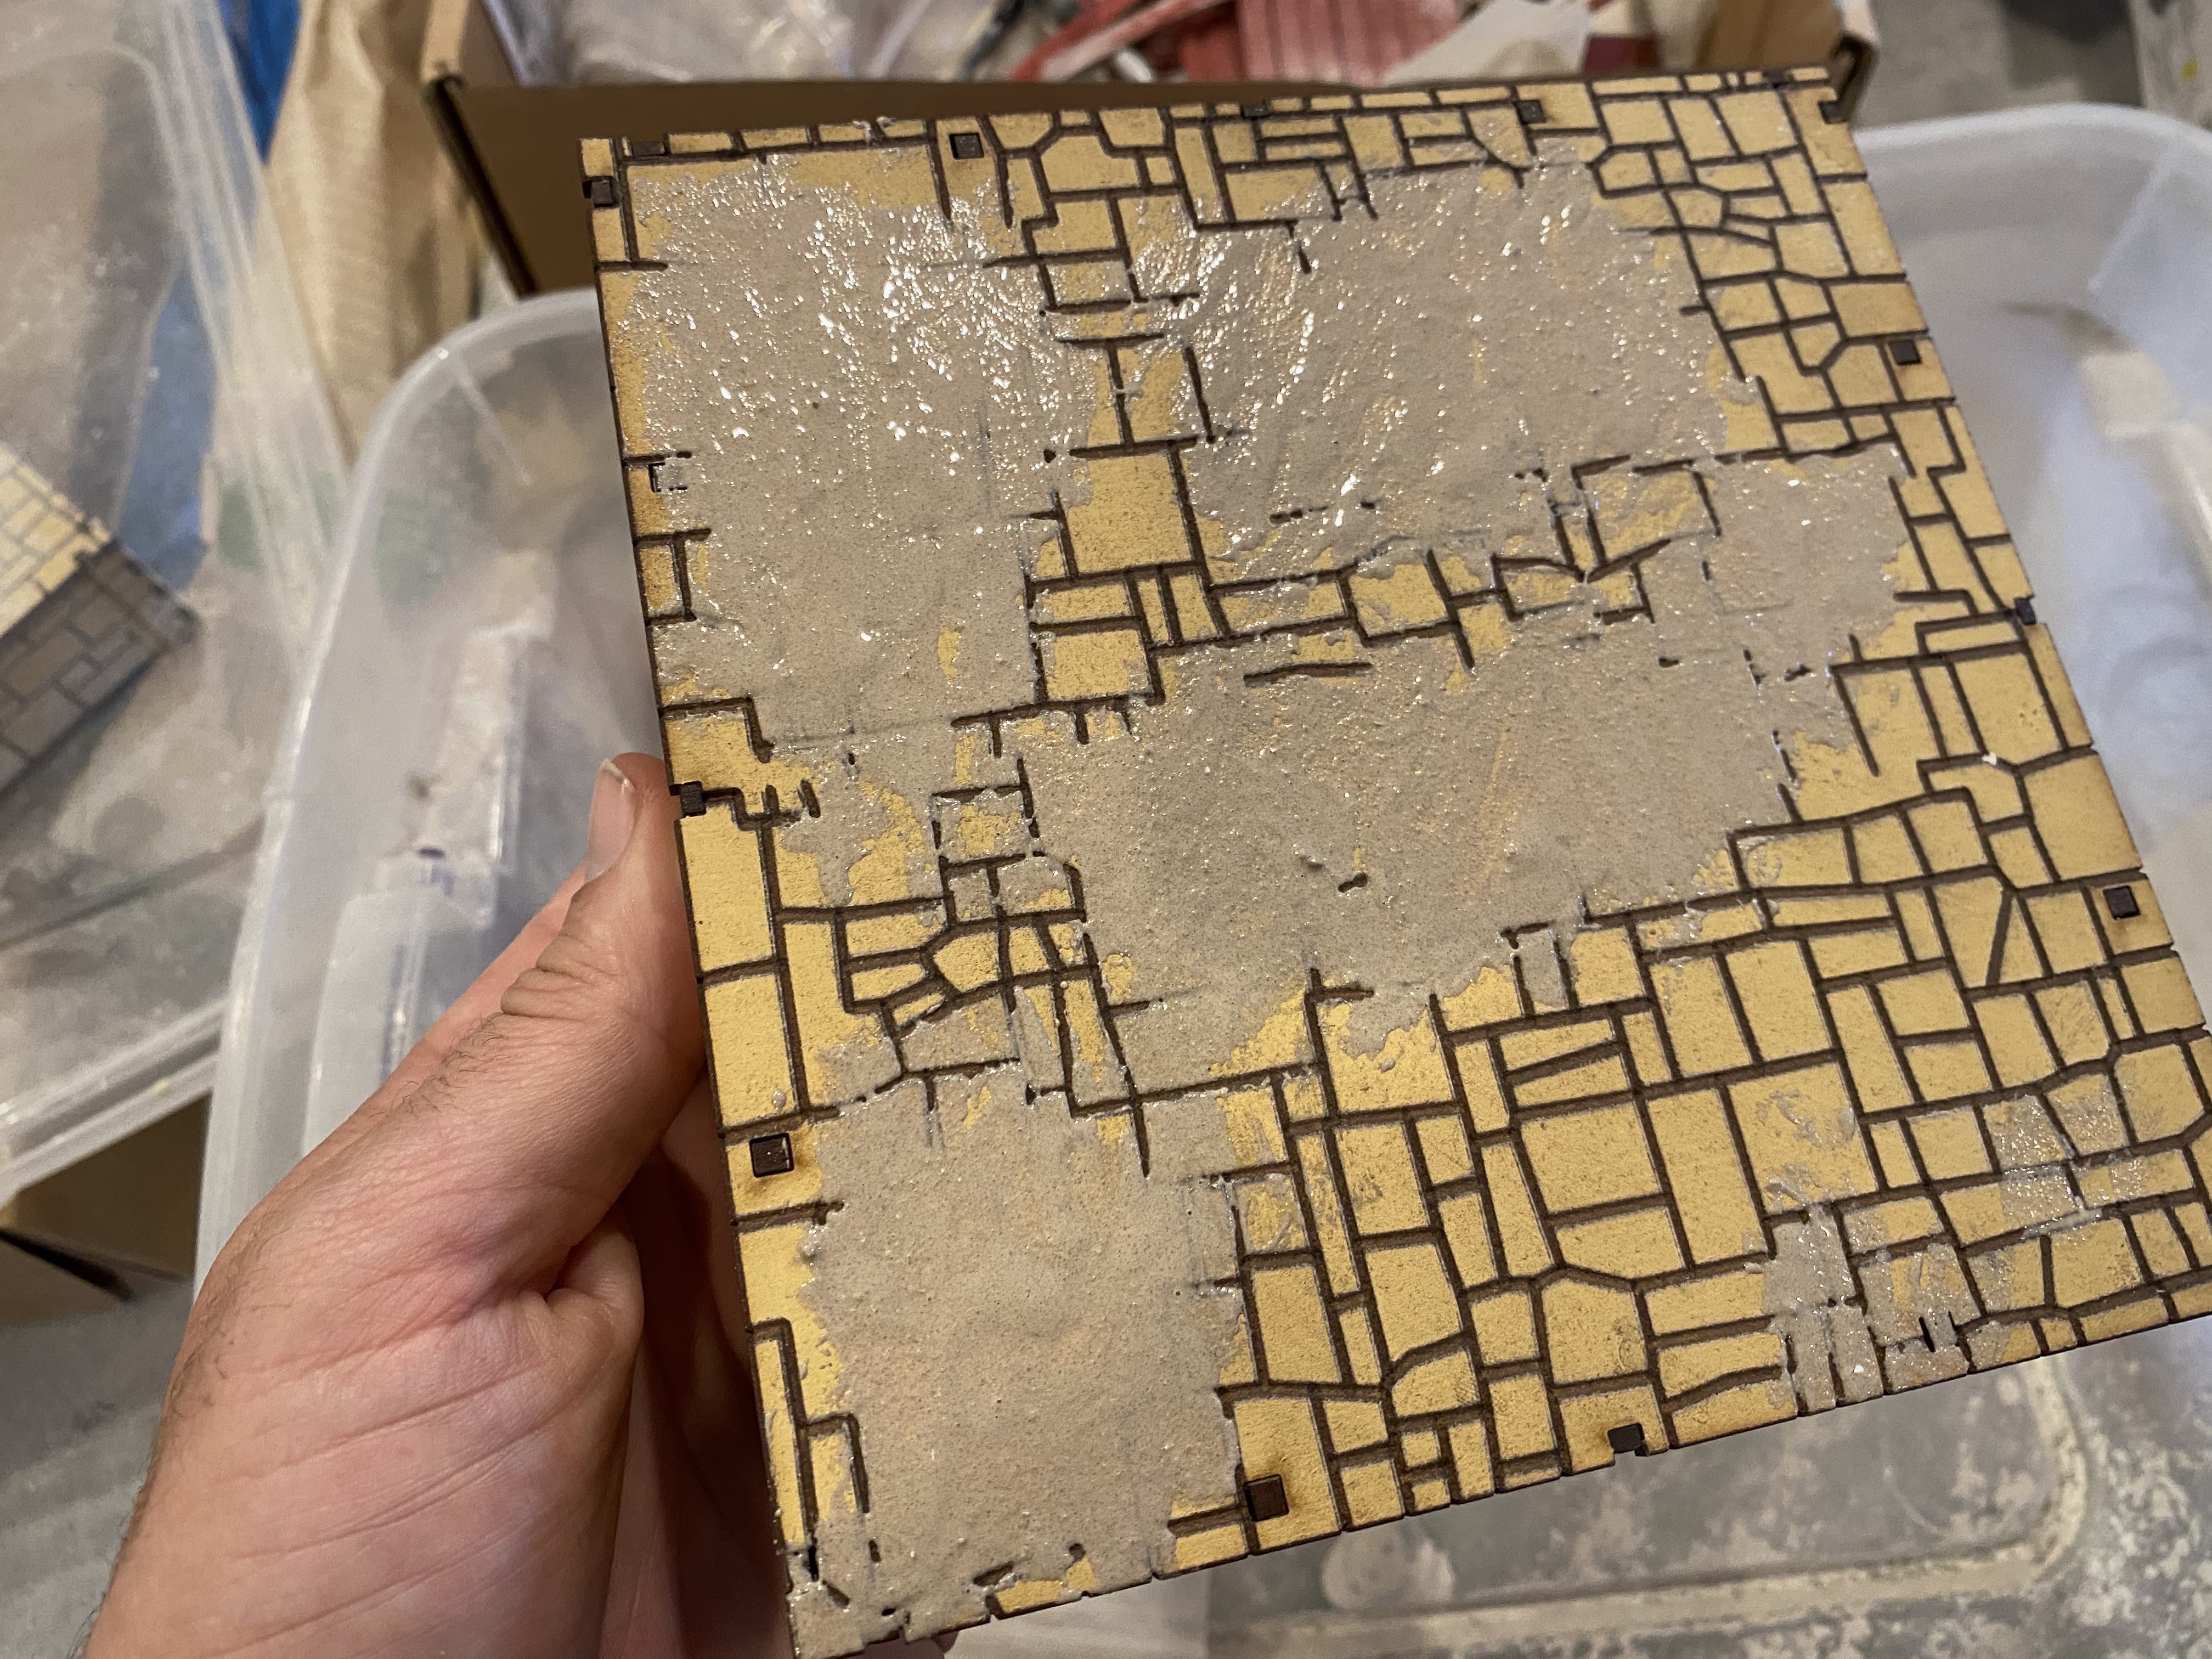
Just spreading less past further like in the photo above turned out better.
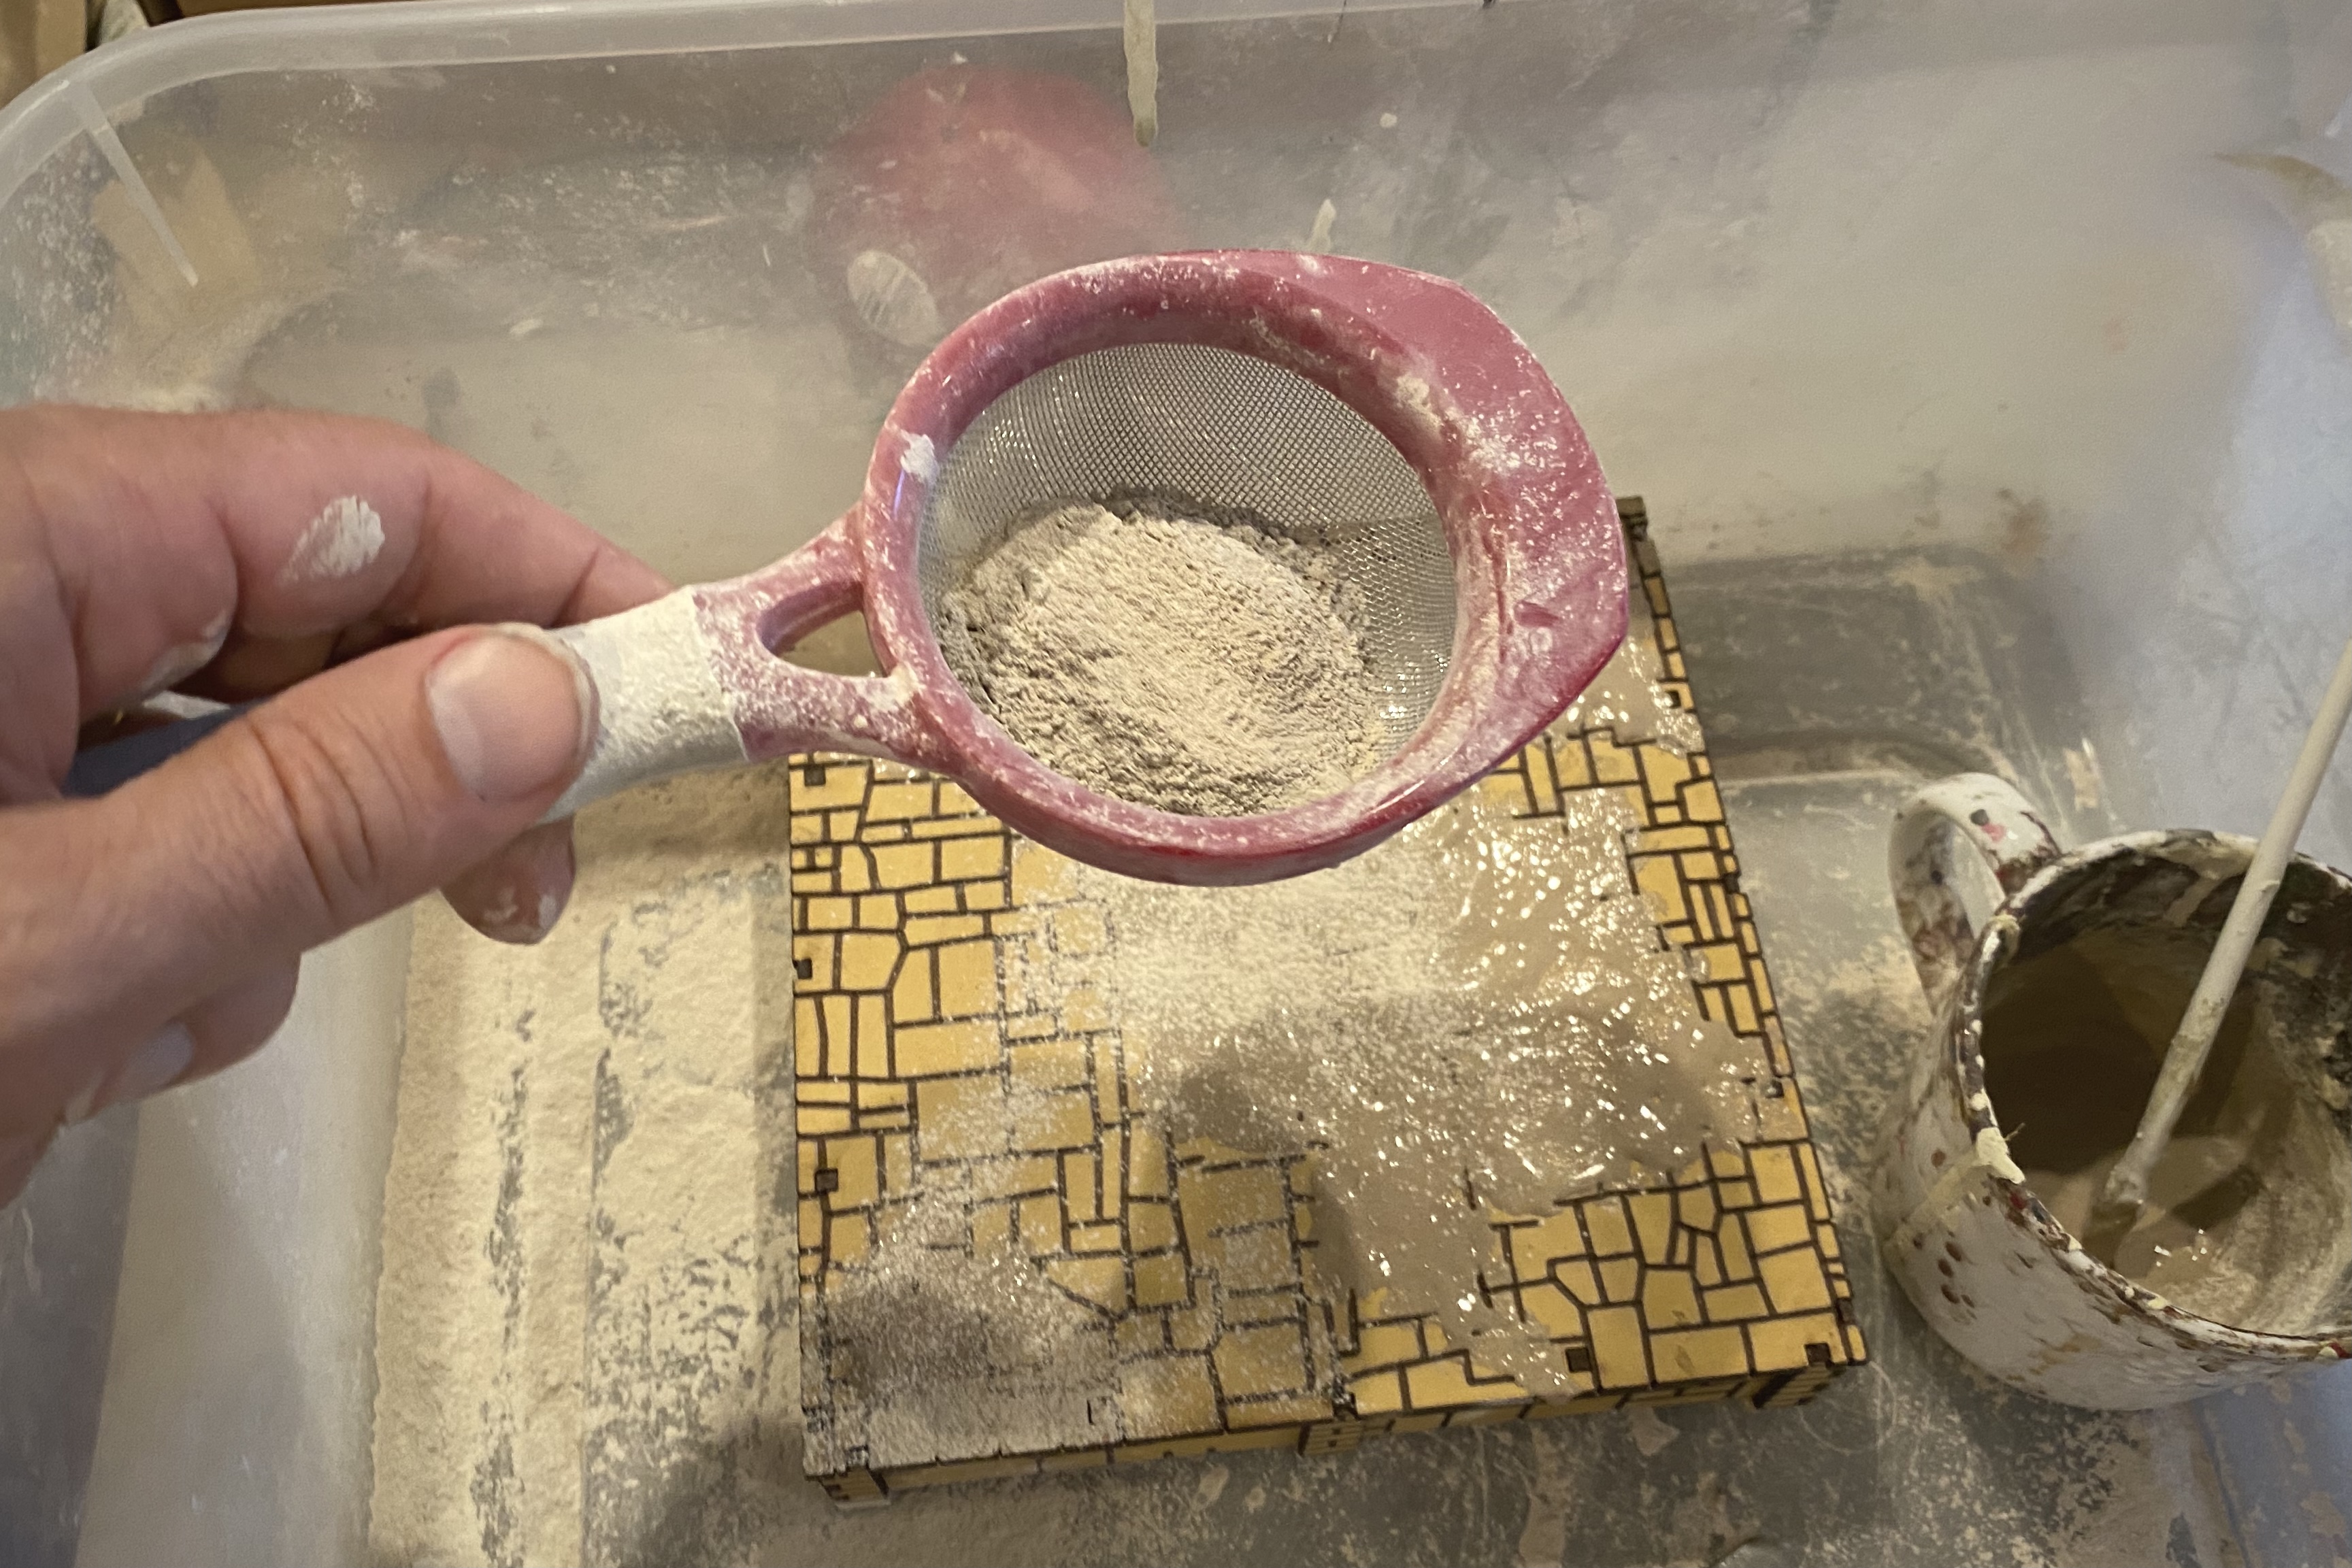
I picked up this flour sifter in the kitchen utensil section of my grocery store and it helped a lot in getting a nice even coat of dry powder over the wet paste.
Nice even coat.
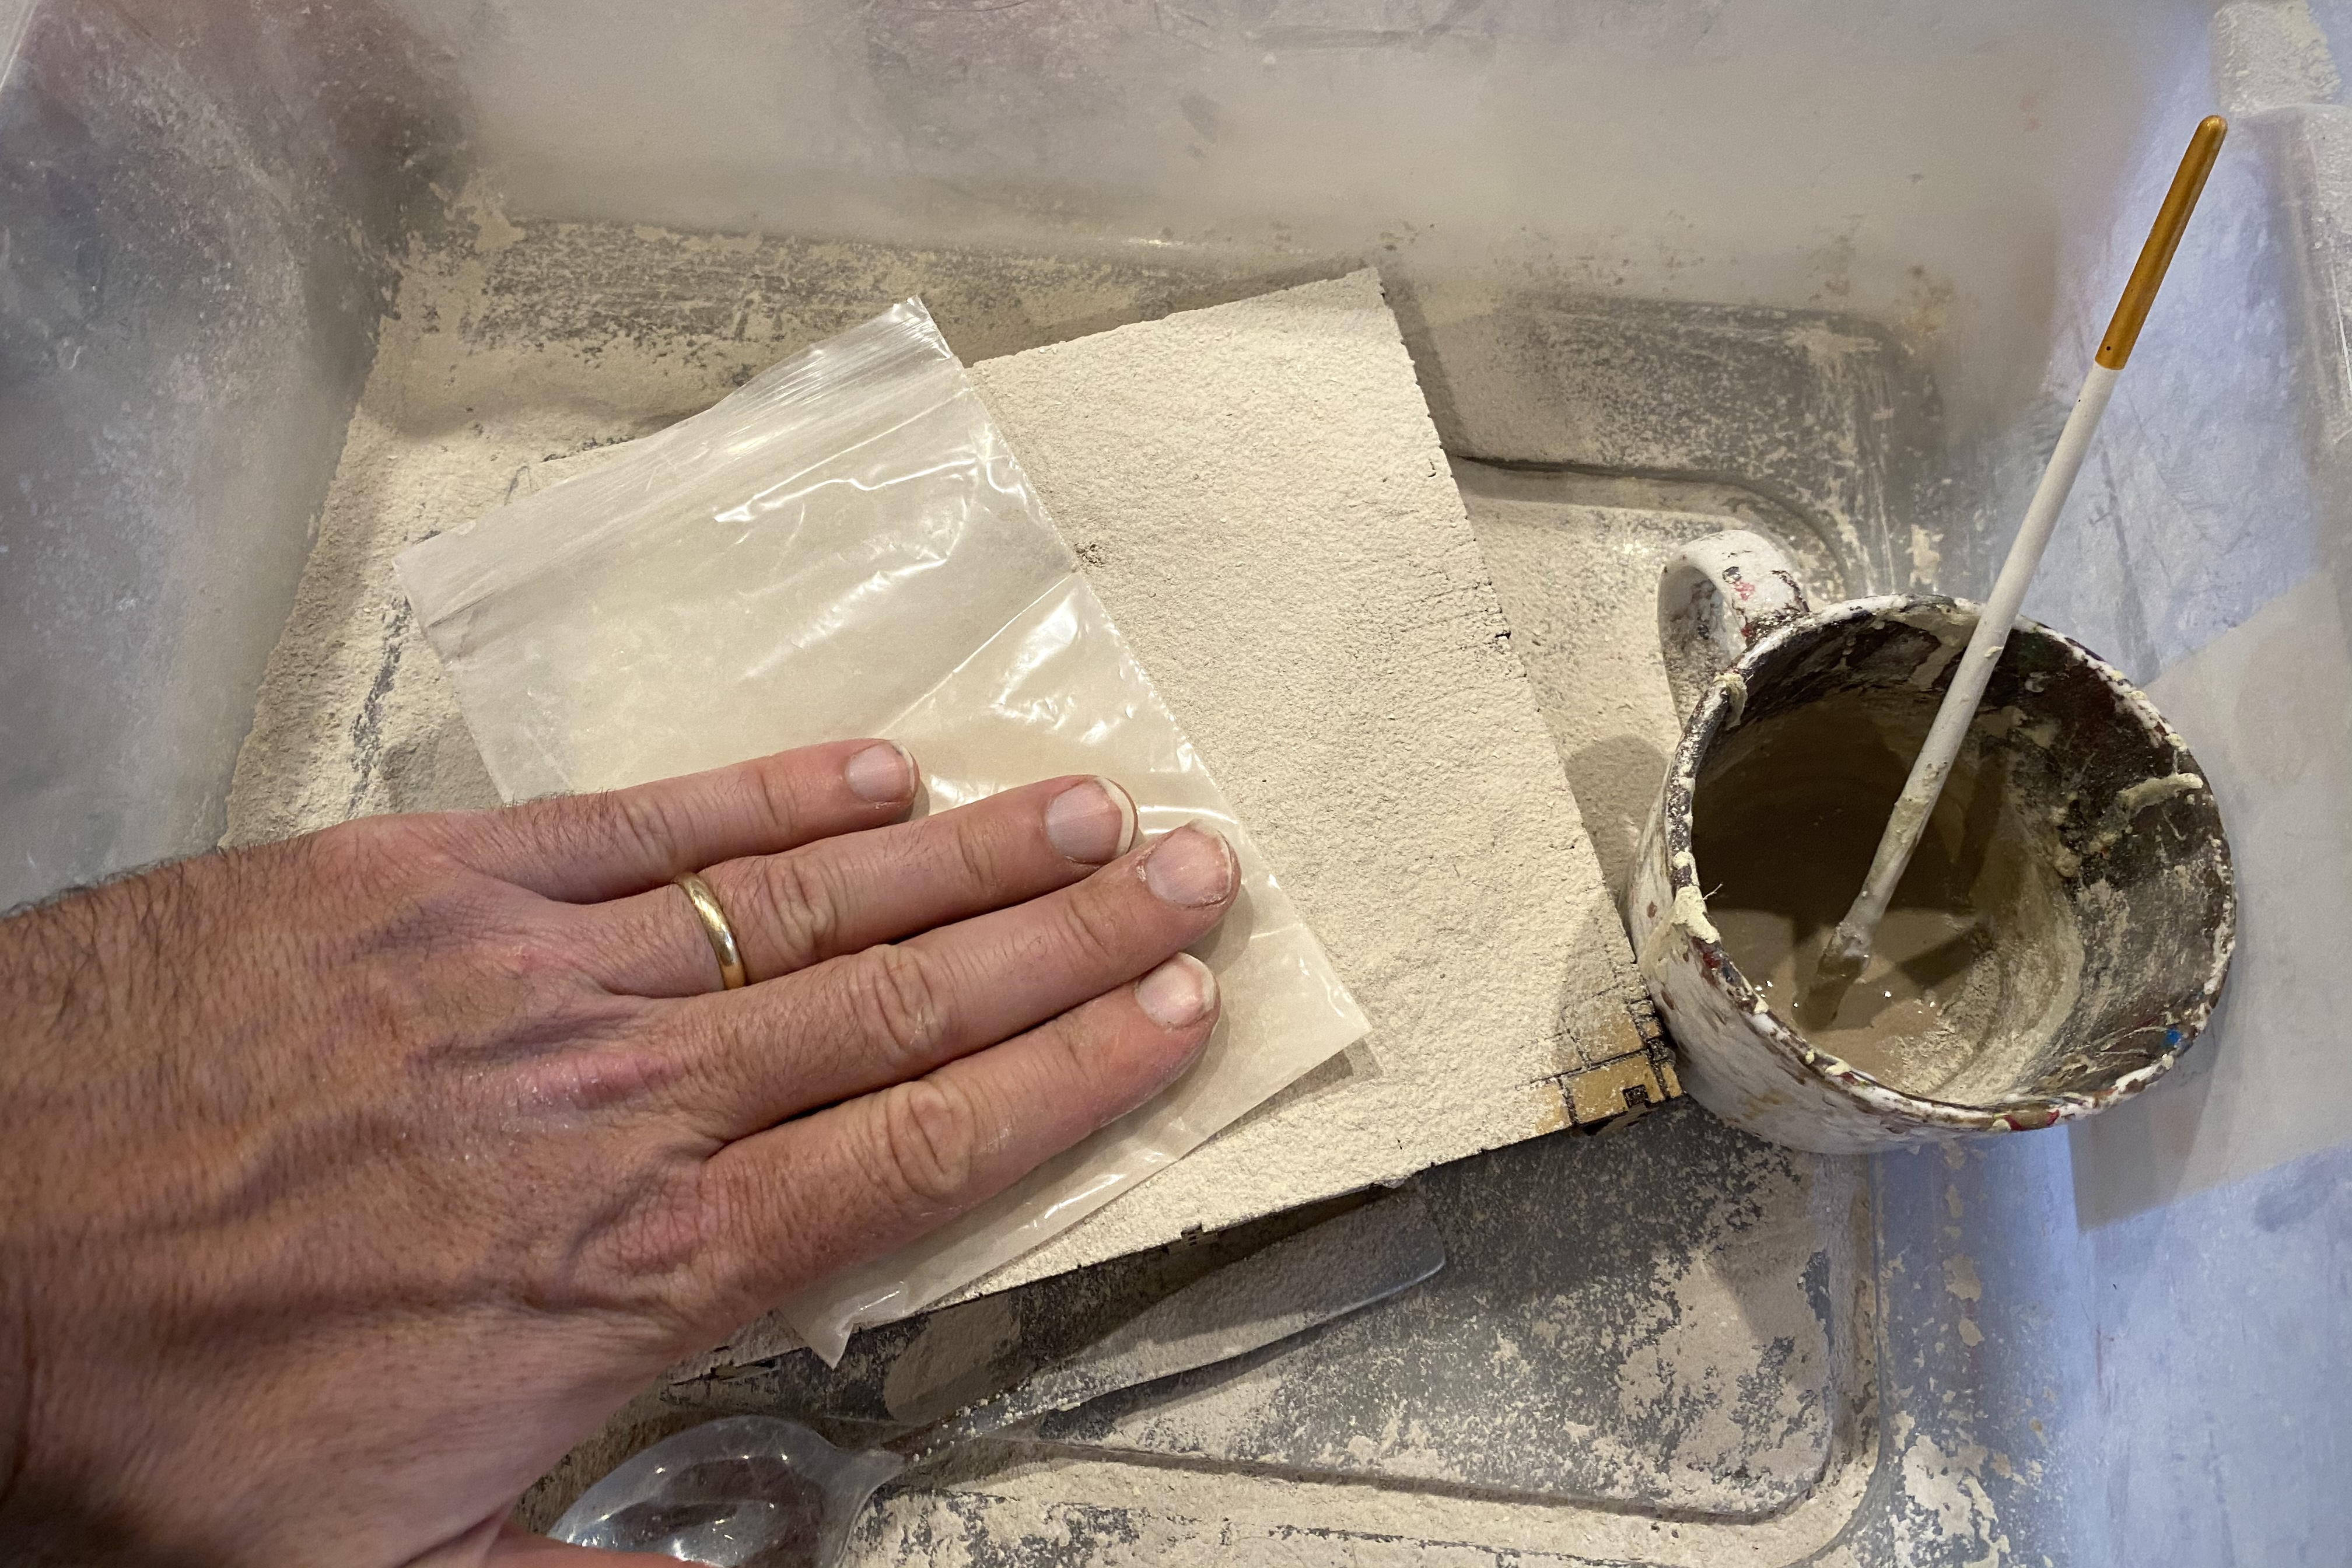
Gently push it down with the plastic bag.

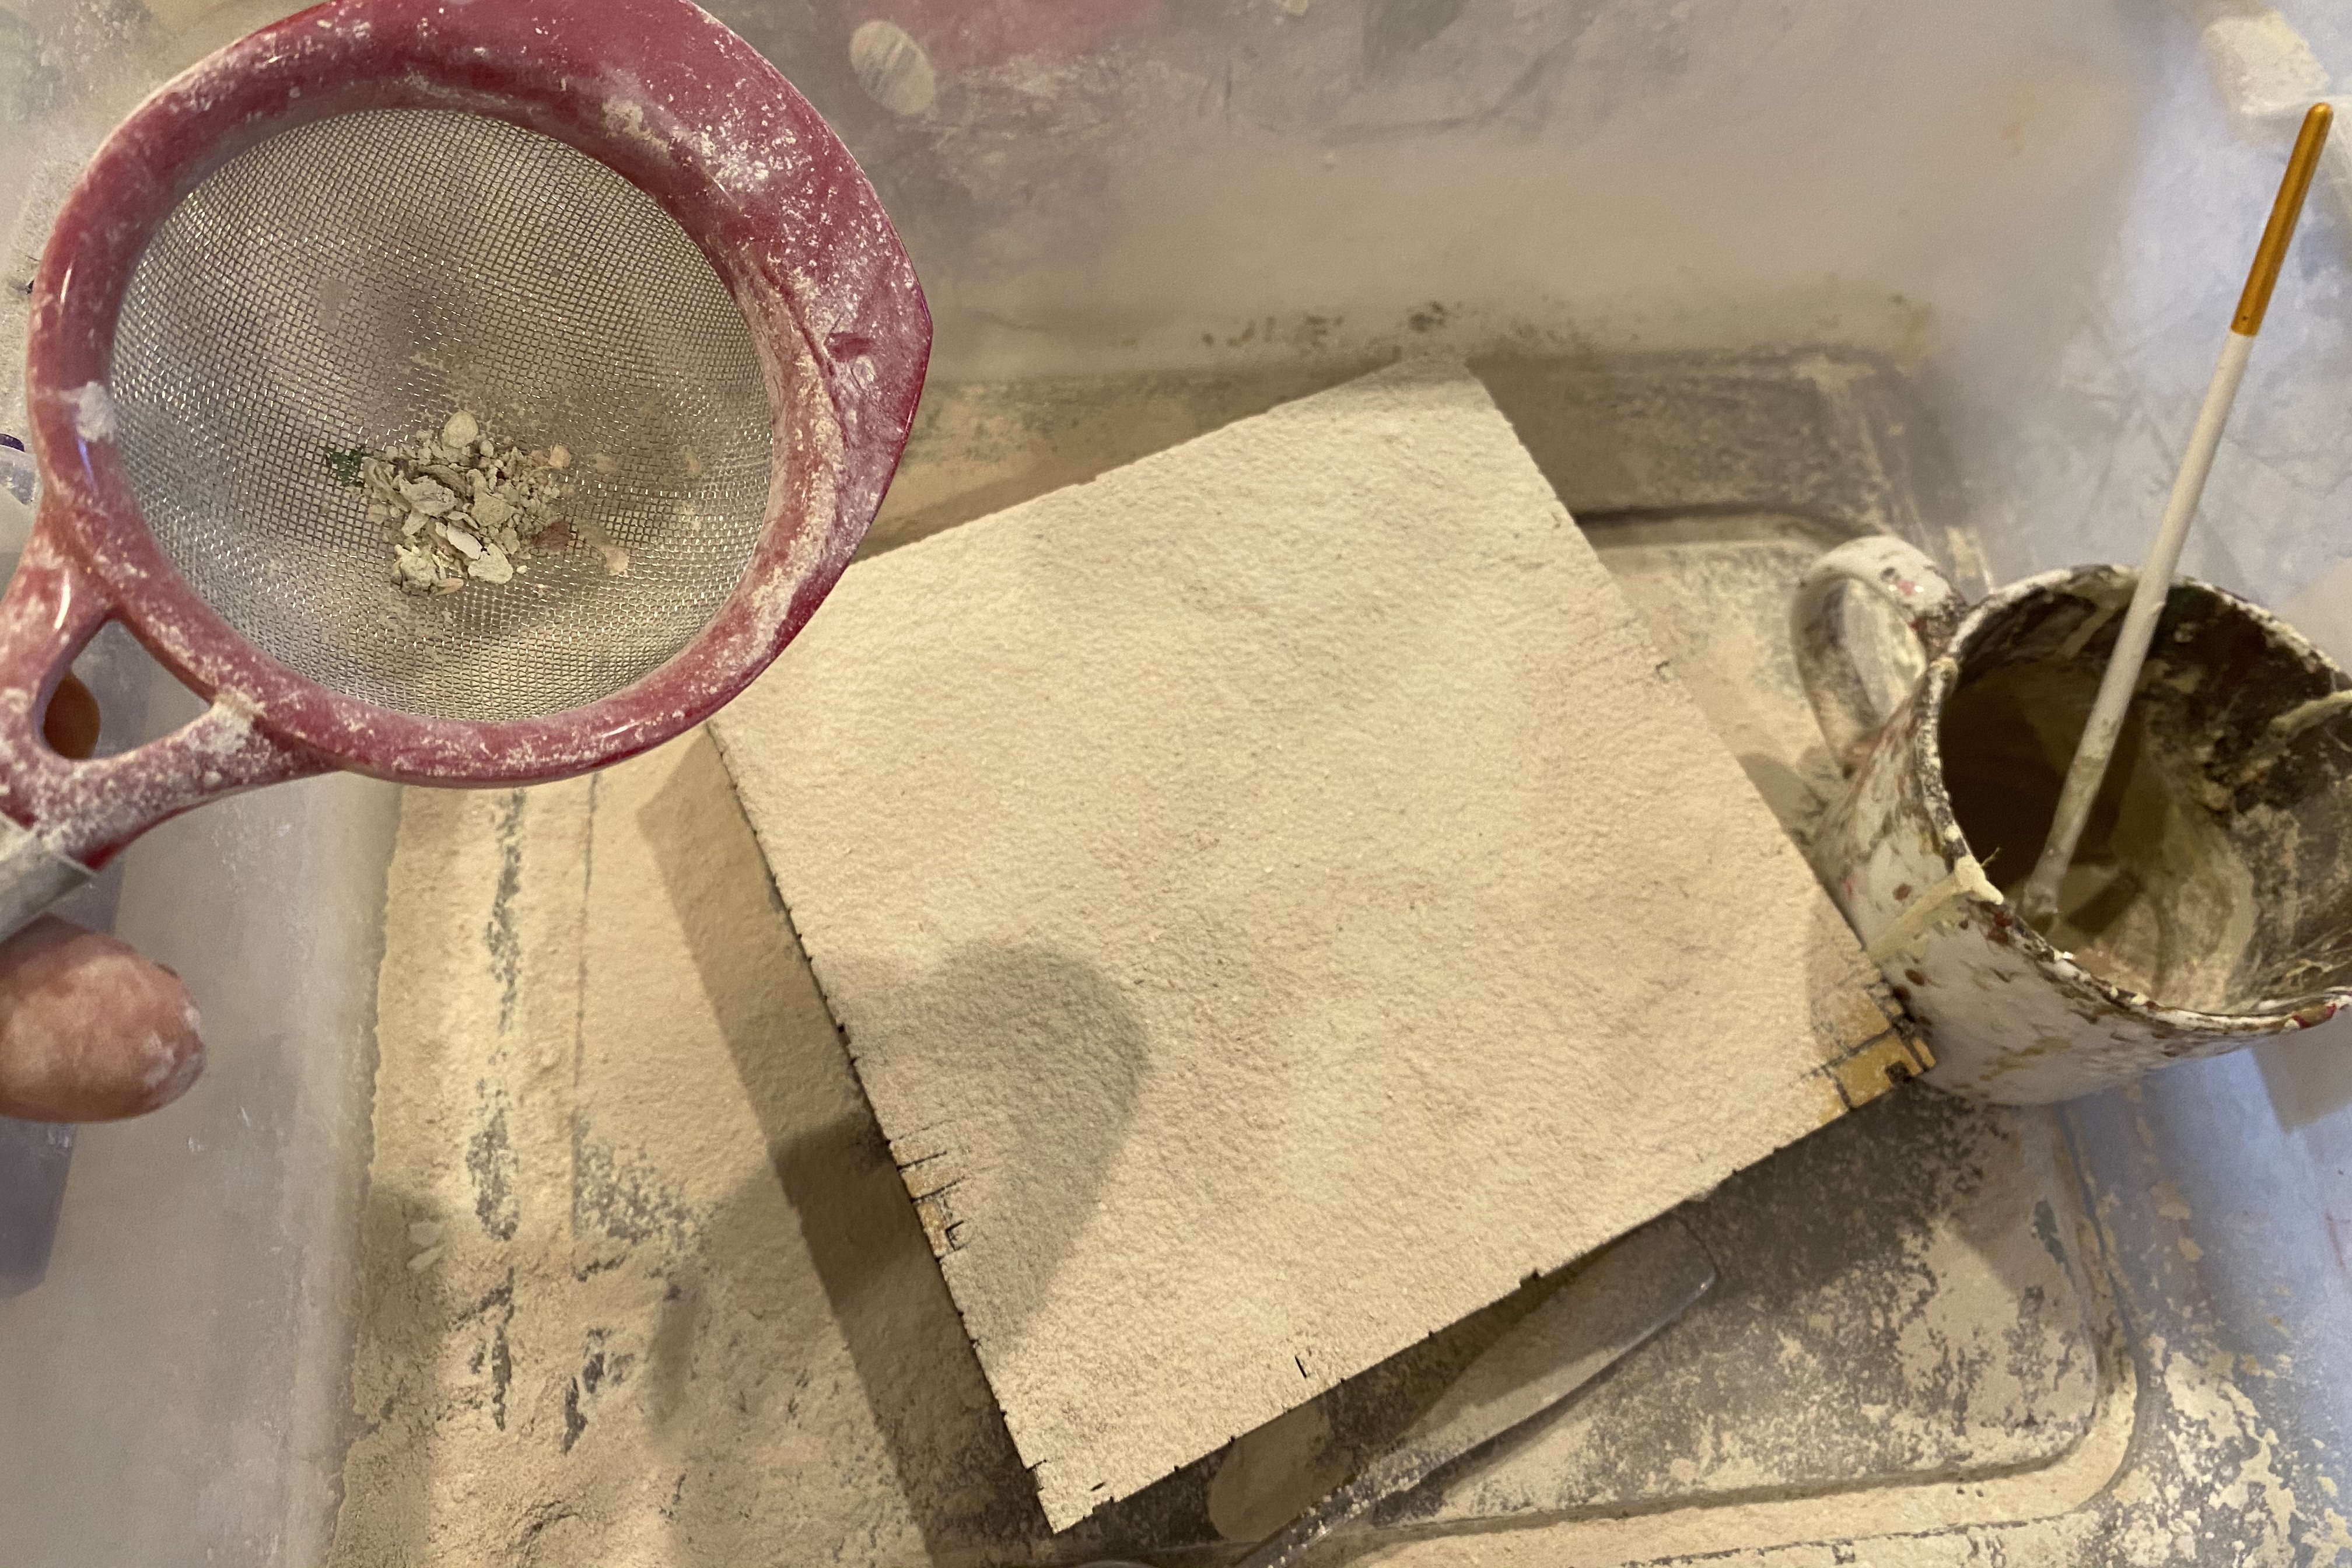
Let it set for a few moments.

Shake off the excess. The picture above was the piece with thicker paste I decided was more than enough. You can see some areas have some real depth. A lighter coat was better.

Repeat for the 4 sides. I found I could work pretty fast and do all 4 sides at once on the docks.
Shake off the excess. Let it set for a while.
Then brush them over with a large brush to remove the last of the mess.
I let them set for a day to fully dry before applying the varnish.

Spray them with the varnish when they’re fully dry and you’re ready to game!

The docks took considerably less time than the structures. You can work fast and don’t have to worry as much about even coats, consistency and perfect drying.
I think it took me about an hour to do all 10 of the pieces in picture above.
Failed Attempts
The instructions that came with the buildings had a bit more complicated sequence.
These are the stops I followed, imperfectly I’m sure.
Apply some glue over part of the wall.
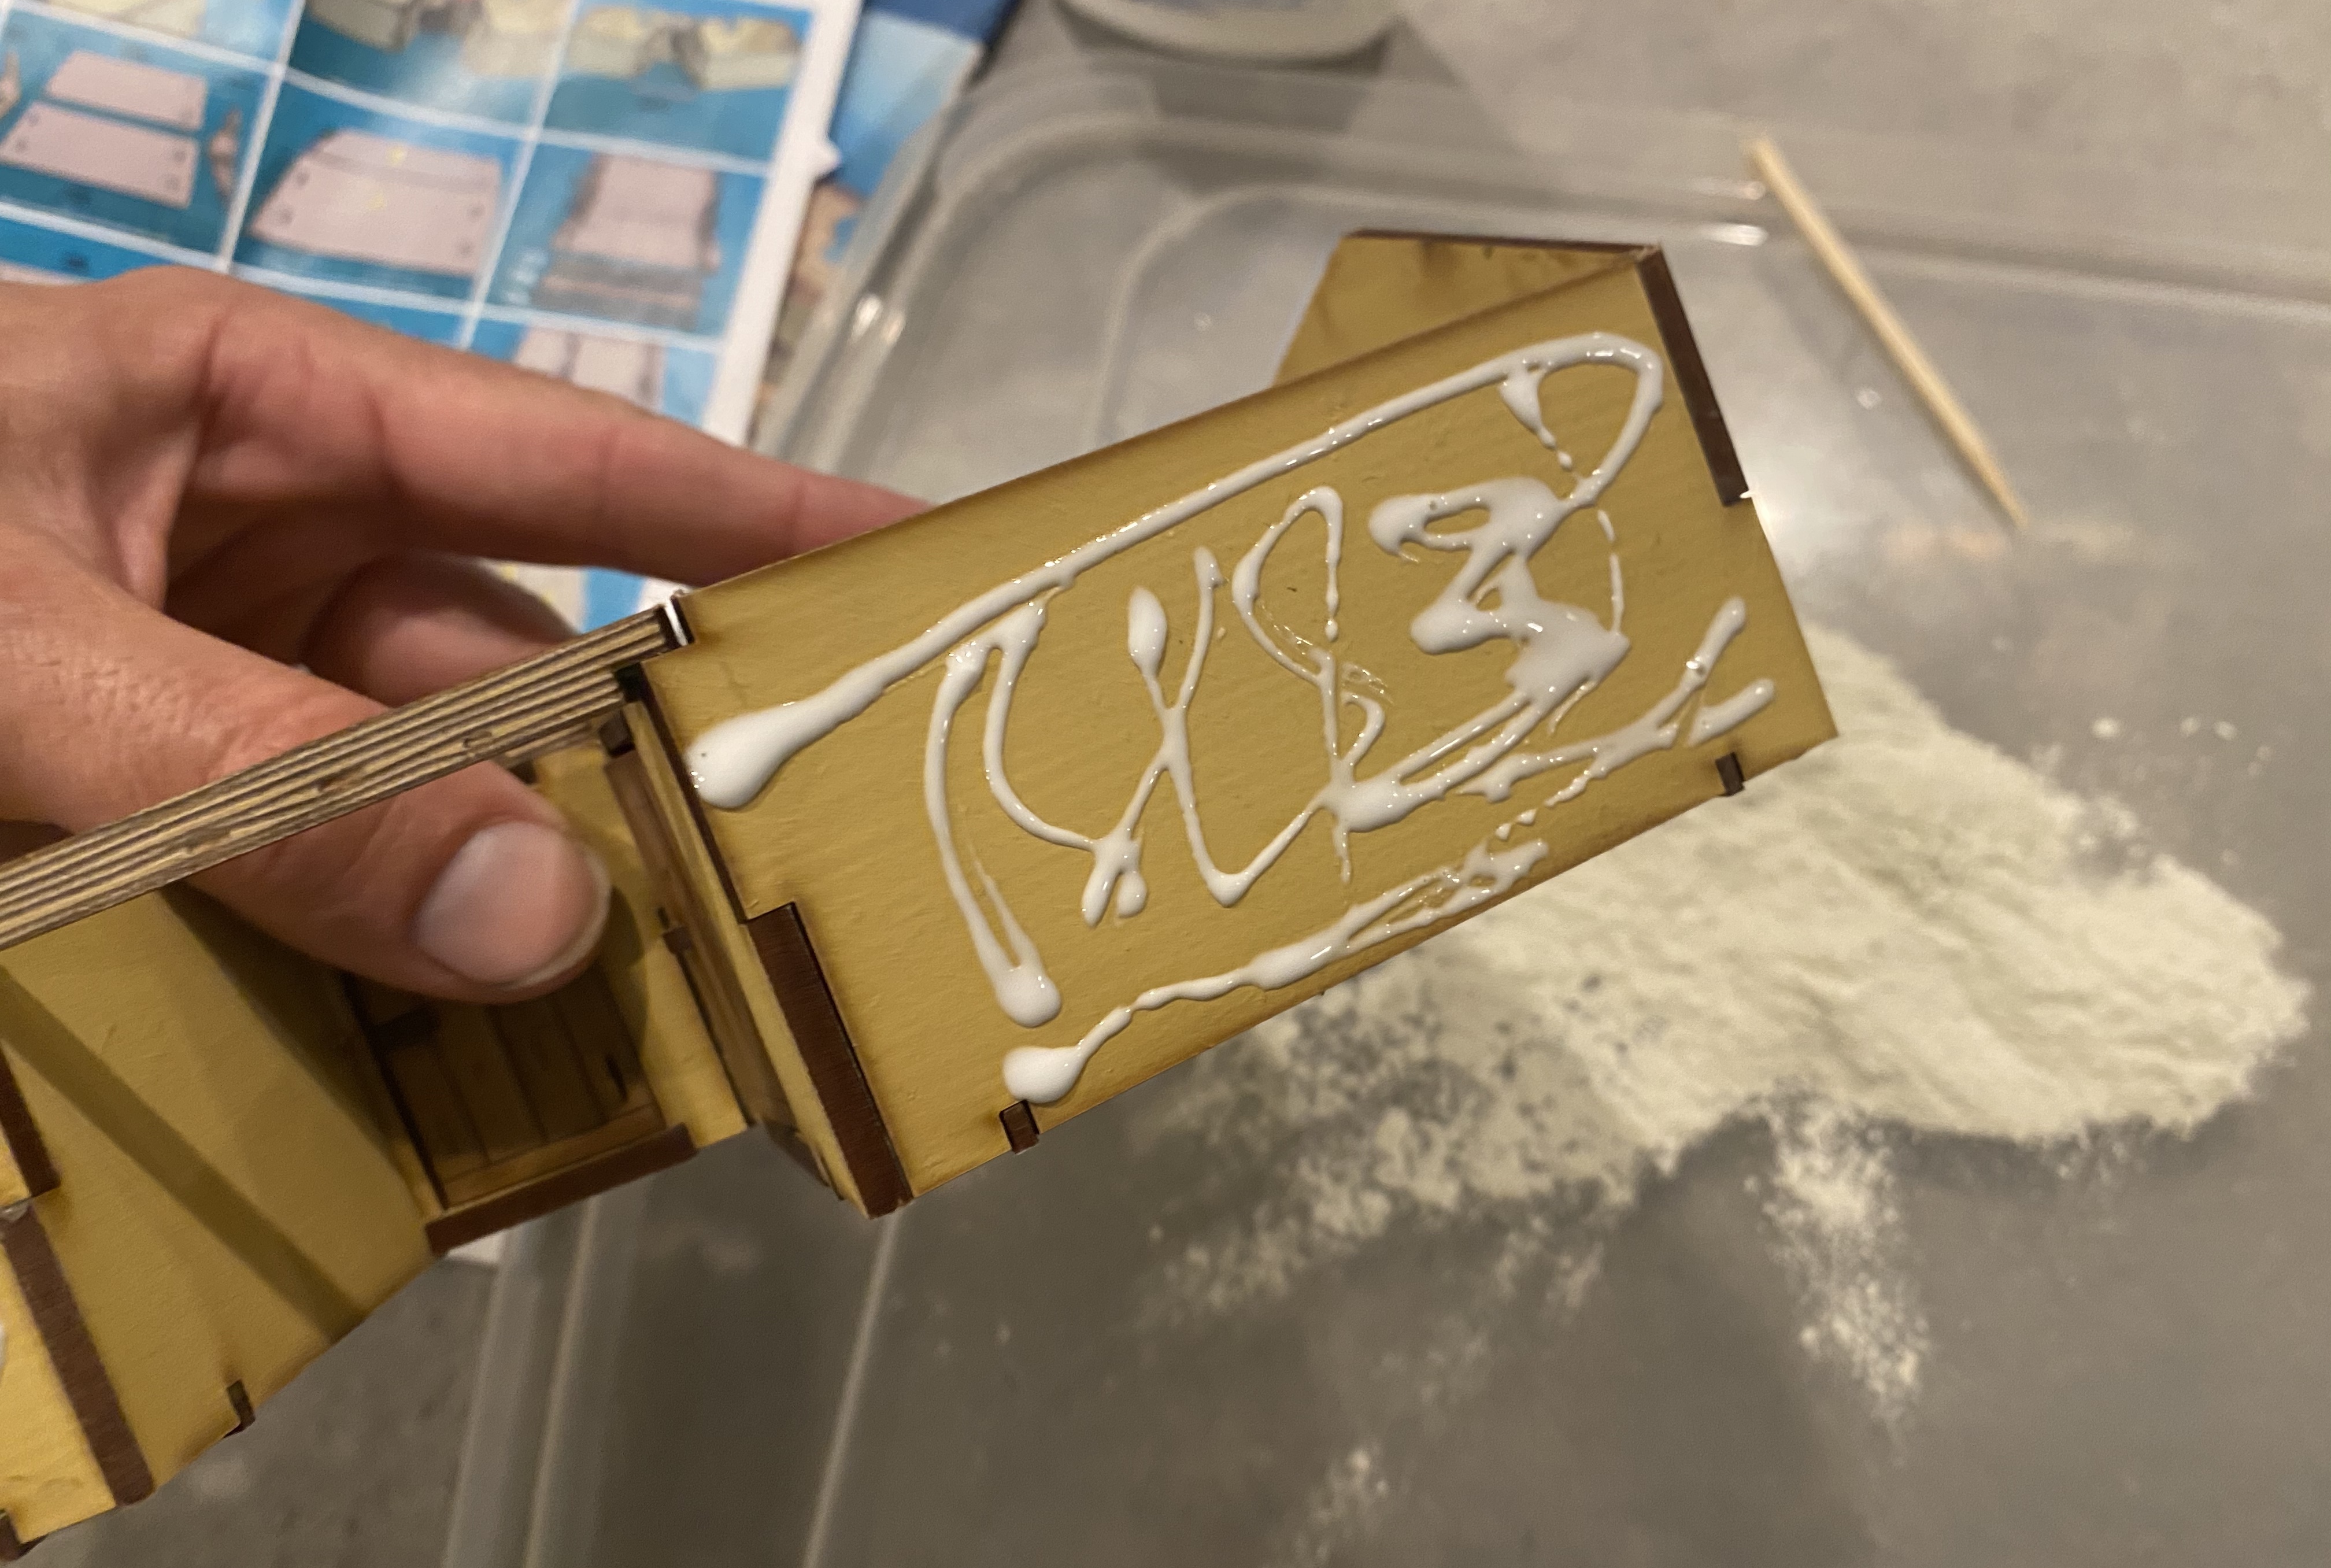
Press the wall into the render powder.

Then it said apply a coat of water with a spray bottle. This knocked off most of the powder that did stick to the glue.

Then press it into the pile of render powder again. The water just didn’t grab enough of the render powder for me.
I must have done something wrong, but I couldn’t make the spray bottle trick work at all.
I had to add more glue and spread it around and press it into the pile again.
This came out OK after a few tries, but making the paste and applying it directly proved much easier than pressing a wall into a pile of the powder for me.
Eventually, I started spooning on the powder instead of pressing the wall straight into the pile.
The uneven result is kind of cool, especially for a poorer looking building like this hovel, but the more even look of the paste method looks better for the nicer Port buildings.
Recap:
- Mix a paste of glue, powder and possibly some water
- Spread over area with a brush, thicker for nicer buildings, thinner layer for docks
- Sift dry powder of the top of wet paste
- Press the dry powder down
- Let dry for a couple minutes
- Shake off excess
- Let glue completely dry and set
- Brush off last excess with a large brush and then spray varnish
It does take some effort and it’s a little messy, but once you have a good technique and sequence of application, its pretty fast and gets great results! I love this set of terrain from 4Ground.
I would try to do one or two larger sessions with this rather than doing one building or dock at a time. Prepare as many buildings and pieces as you can, then do all the render powder work in one session so you don’t have to keep mixing up paste and letting whatever you don’t use go to waste. Even with all precautions taken, it’s a bit of a messy project.
Great post again Joseph, I have tried a few methods at rendering so it was interesting to see your way! thanks mate.
Pingback: 4Ground Terrain – Mediterranean Village and Scatter Terrain | Blood & Pigment
Thanks so much for this. I just picked up several 4Ground buildings; and, the instructions for the render powder just didn’t make a lot of sense to me. Your way seems a lot easier, and looks fantastic. Appreciate it!!!
Pingback: 4Ground Terrain - Spanish Church - Blood & Pigment
Pingback: Top Suggestions for Pirate Wargaming Terrain in Blood & Plunder
Pingback: 4Ground Terrain - Spanish Town Hall - Blood & Pigment
Pingback: 4Ground Ports of Plunder Colonial Houses Set - Blood & Pigment