By Guy Rheuark

Ships are one of the most striking things about Blood & Plunder. Being able to play out an epic duel between two captains, brought to life on a tabletop, is one of the things that brings people into this hobby and this game. The ships serve the purpose of a grand centerpiece for your force, and are customizable and functional, covered in details like wood grain, cannon ports, and hatch grate.
These ships can also be intimidating. It feels like that much blank canvas stares back at you. Taunting you. Where do you start? What if you mess up? What if you don’t like it? What to do.
To those ends I cataloged myself painting and rigging, as a sort of How-To. The Sloop is the most versatile ship in Blood and Plunder, and is the one I believe most people should start with. Joseph Forester wrote an excellent overview of it, that highlights its flexibility.
Disclaimer: I have no such awards, merits, accords, or prizes for my painting skill. If you know a better, easier, cooler way to do something I do here, I would love to hear about it, as I am always trying to be better.
How to Prep Your Blood & Plunder Sloop
Step 1: Opening the Box
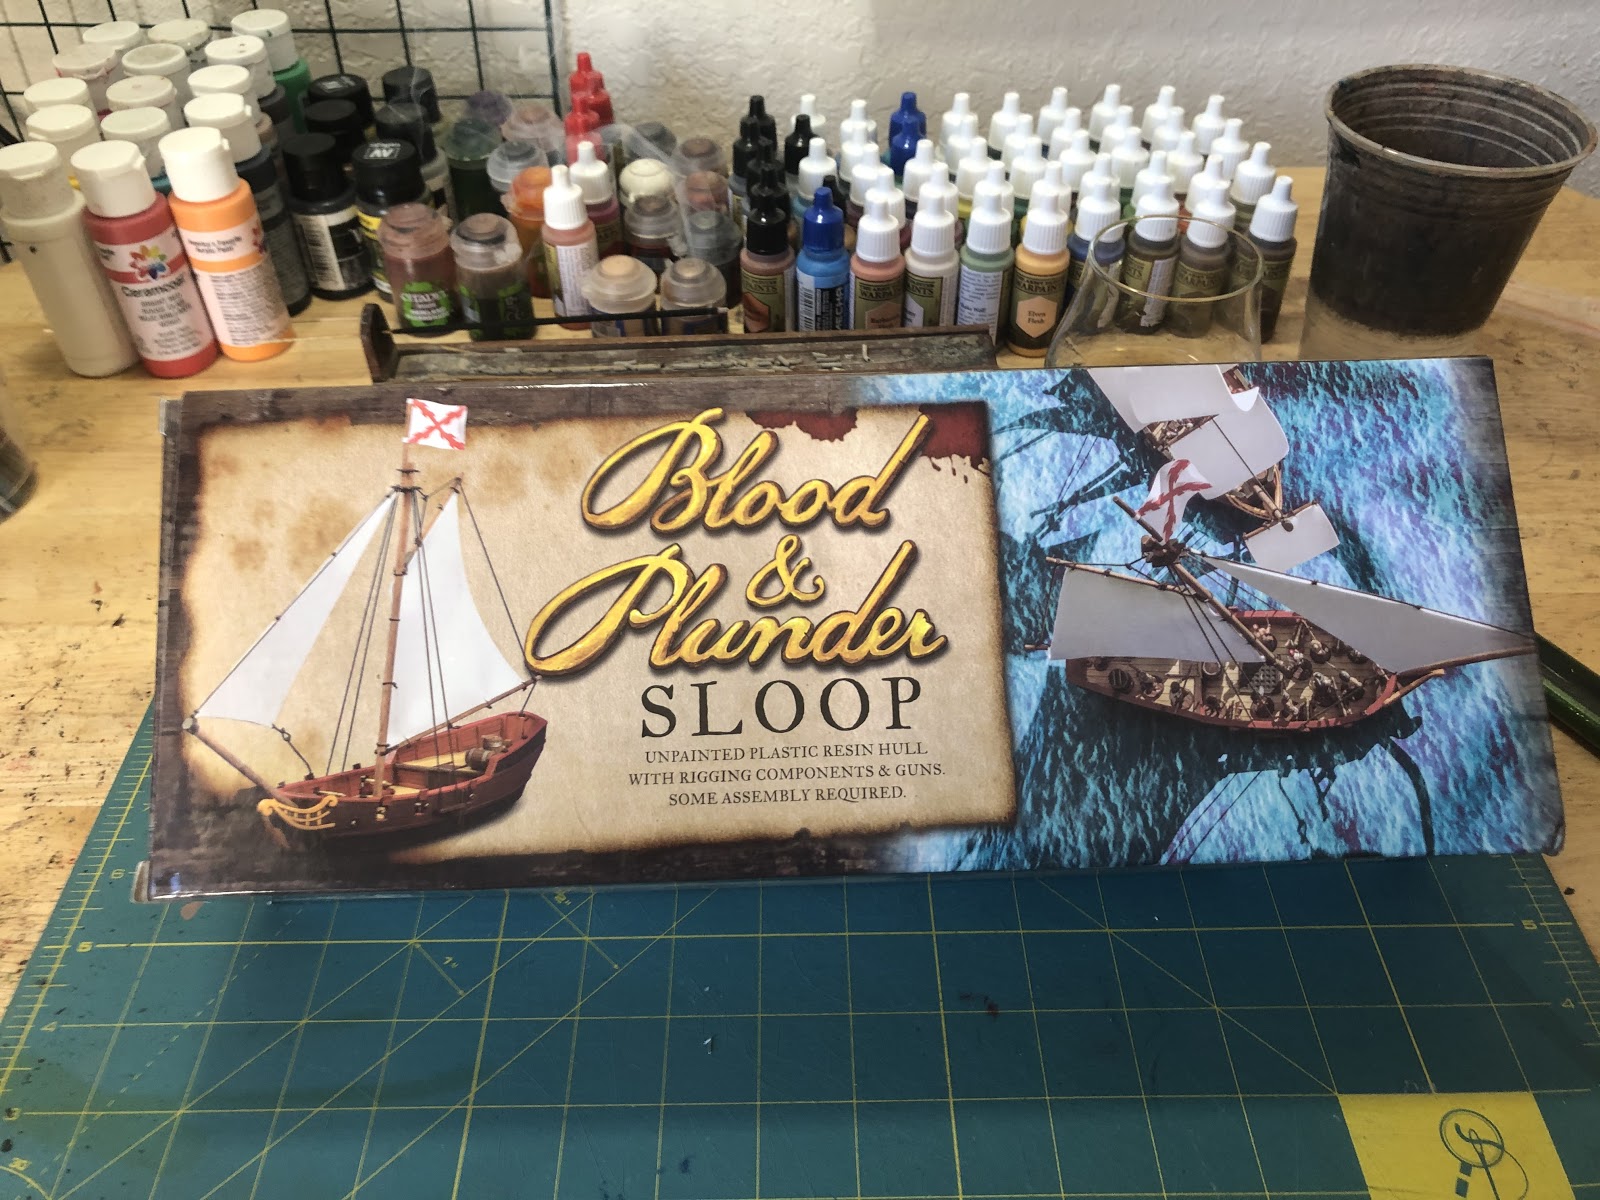
Open up the sloop box, and gently remove the contents.

At this point you are just checking to make sure it is all there.

The paper items are an important part of rigging the ship, and playing the game. Put them somewhere safe, and do not throw them away.

You should inspect your hull. I’ve never gotten a bad ship from Firelock, as their quality control is very high. Each ship will have minor imperfections, such as bubbles or bends. As you handle your ship, make a mental note of those areas.
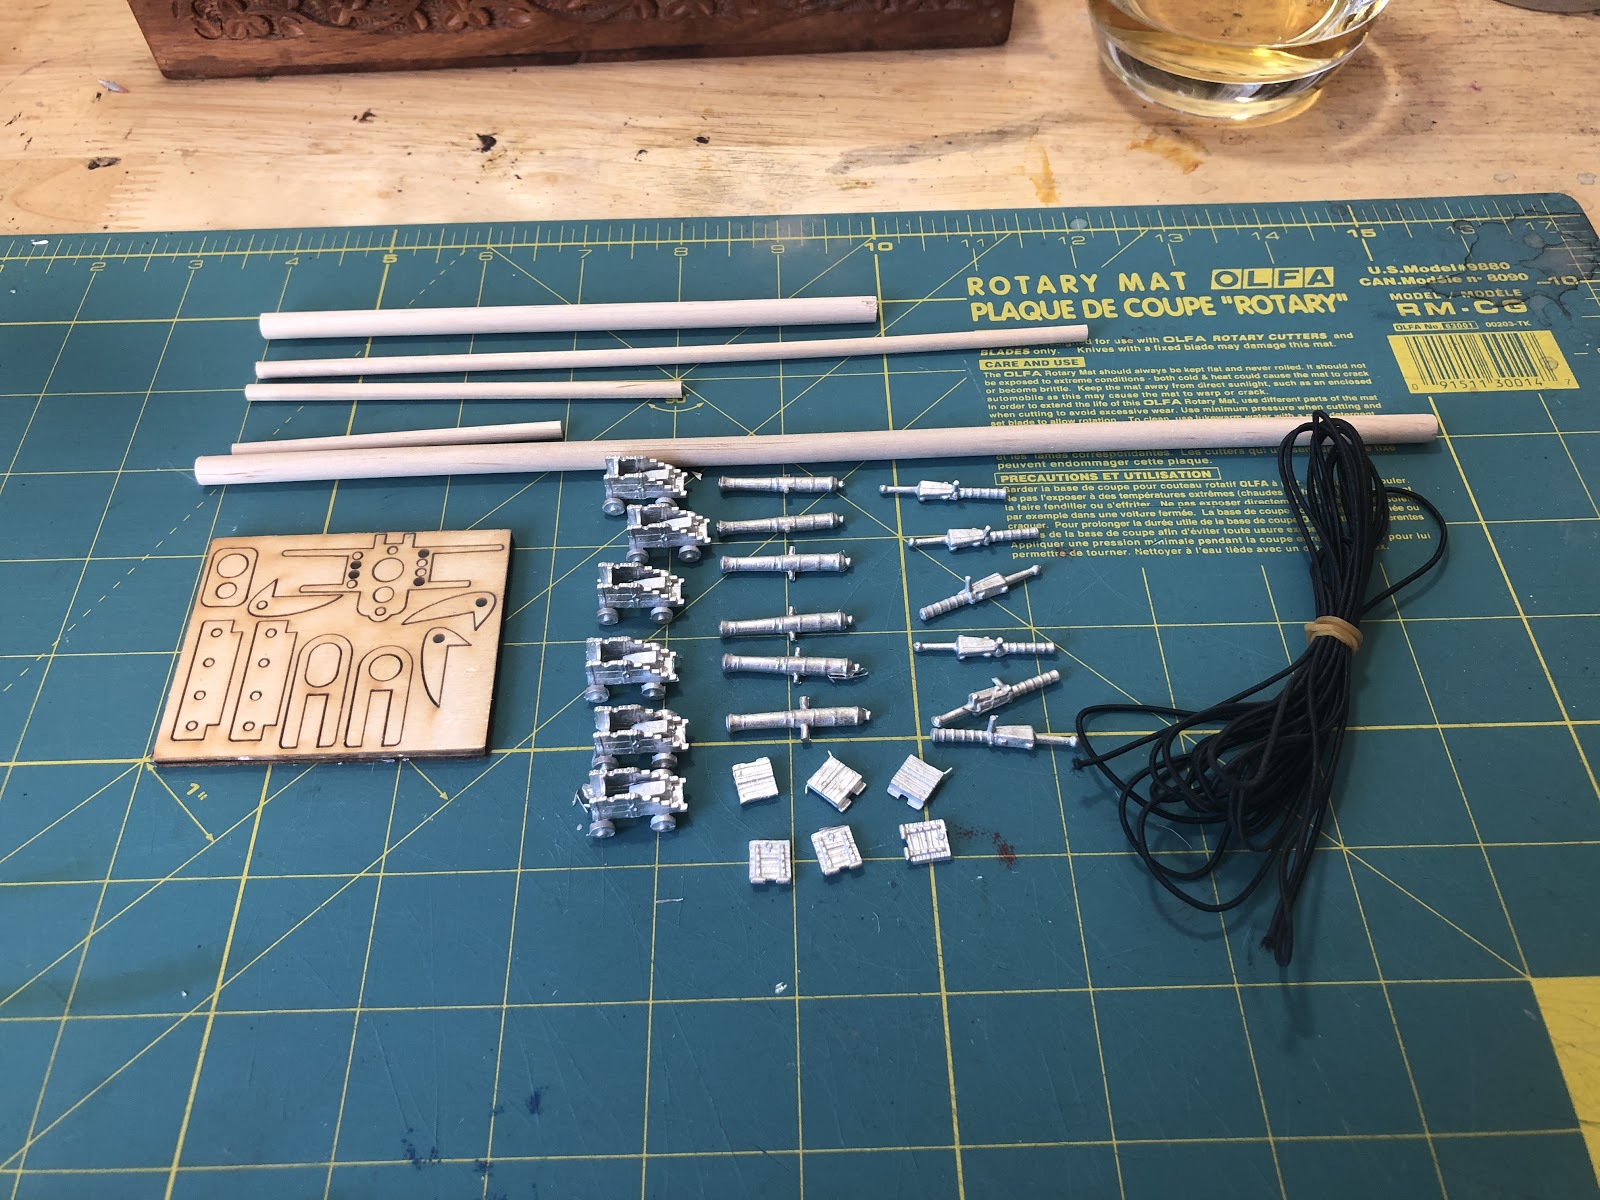
Next look over the accessories you got in the kit. The back of the box tells you what comes with your ship. Take a moment to count your dowels, laser cut rigging, cannons, and swivel guns. Make sure they are all accounted for. Next find your mast and bowsprit. These are the two largest dowels. Fit them into your sloop deck, to make sure they will attach later on.
Step 2: Cleaning

Tools Needed:
- Hobby Knife
- Old Glove for Left Hand
- Rag
- Sandpaper
- Hand Soap
- Optional Tools:
- Files
In this step you will get the sloop hull ready to paint.

When sanding, cutting, or filing, make sure any open containers are far away from your work area.
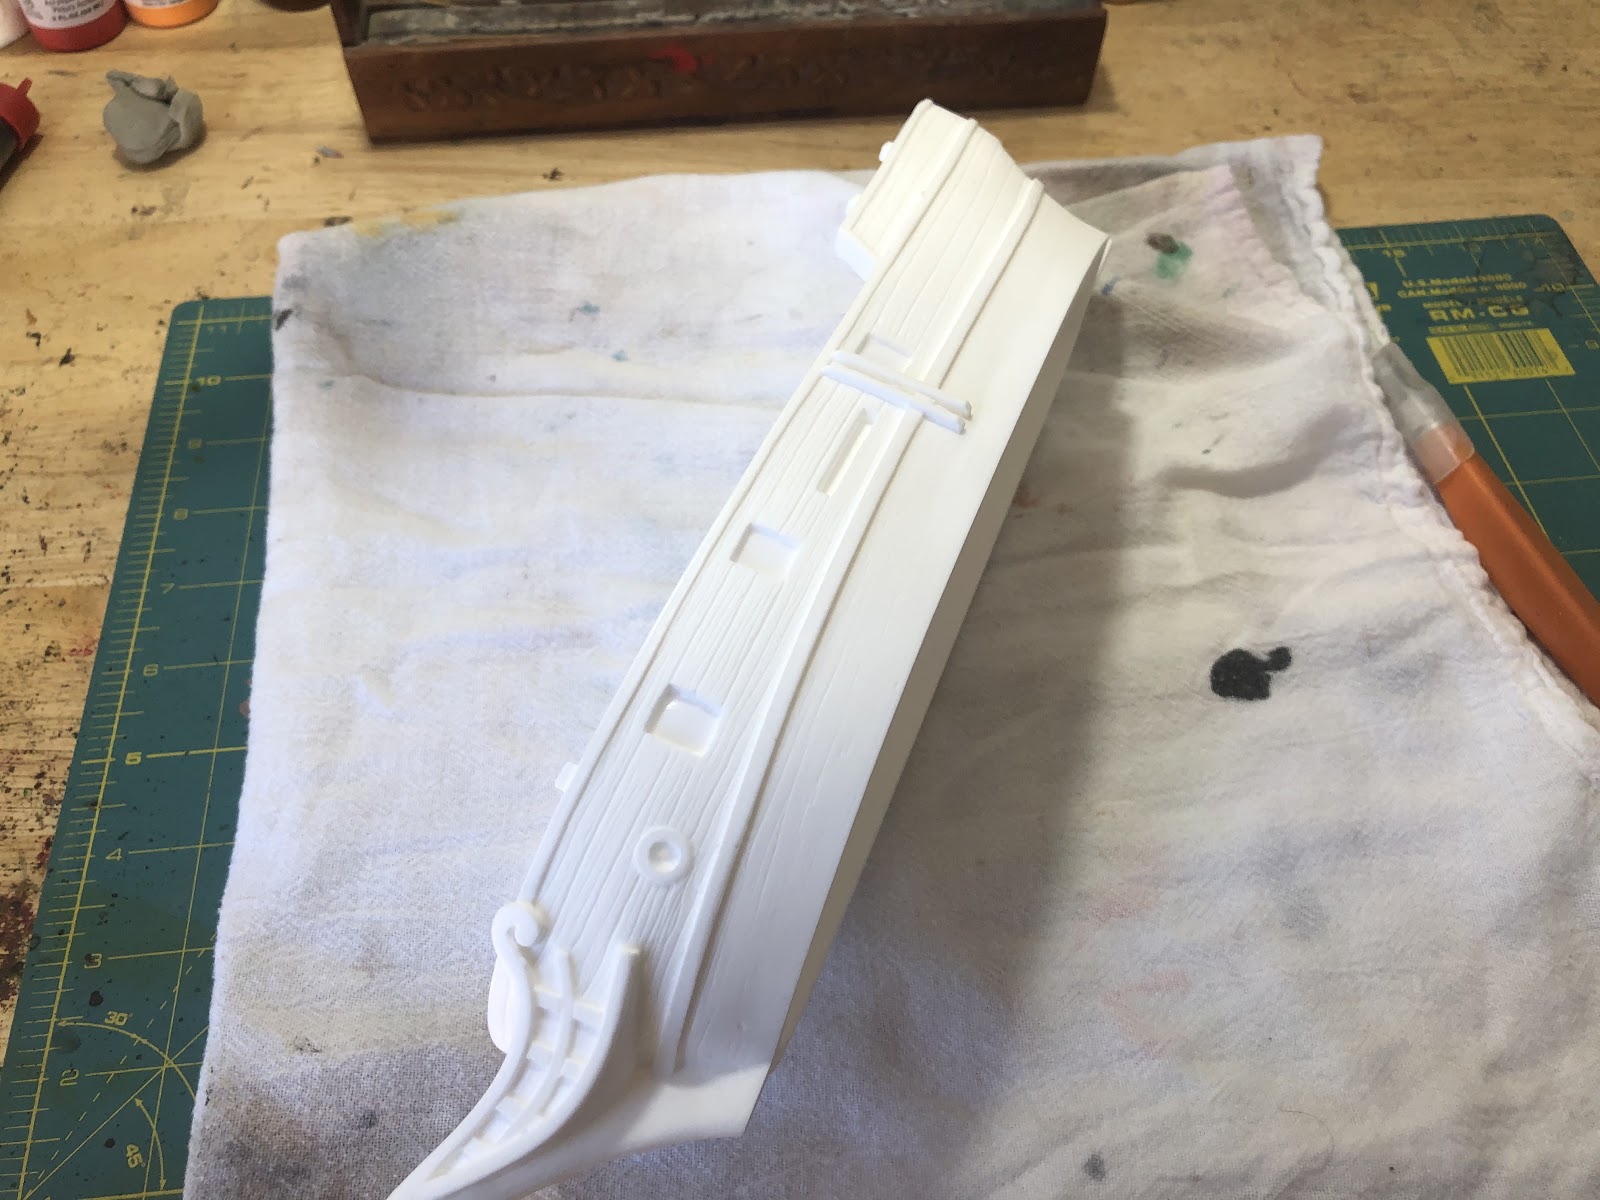
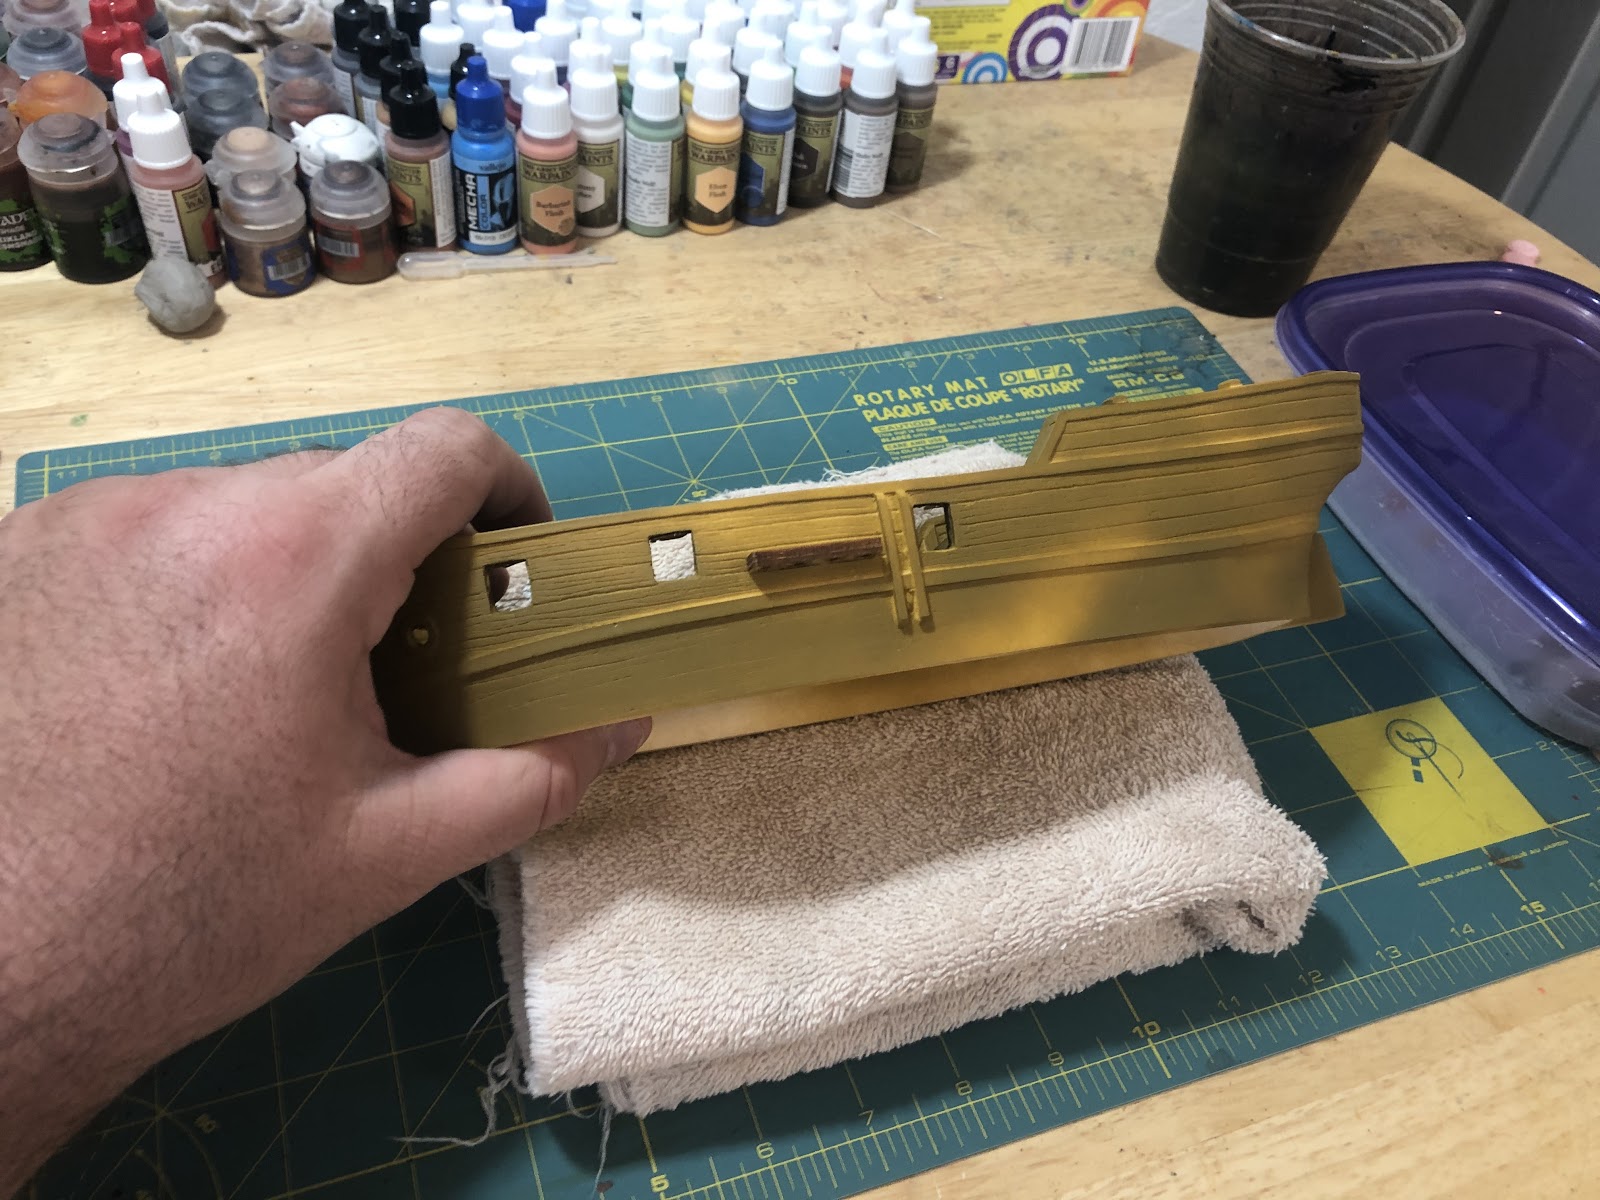
After putting on your glove(s) choose a side to work on. Here I chose the larboard side.

Cute any thin resin from the gun ports. Do not apply too much pressure, as you do not want the knife to slip and mar your hull. If you are filing, you will be able to smooth out the gunports.
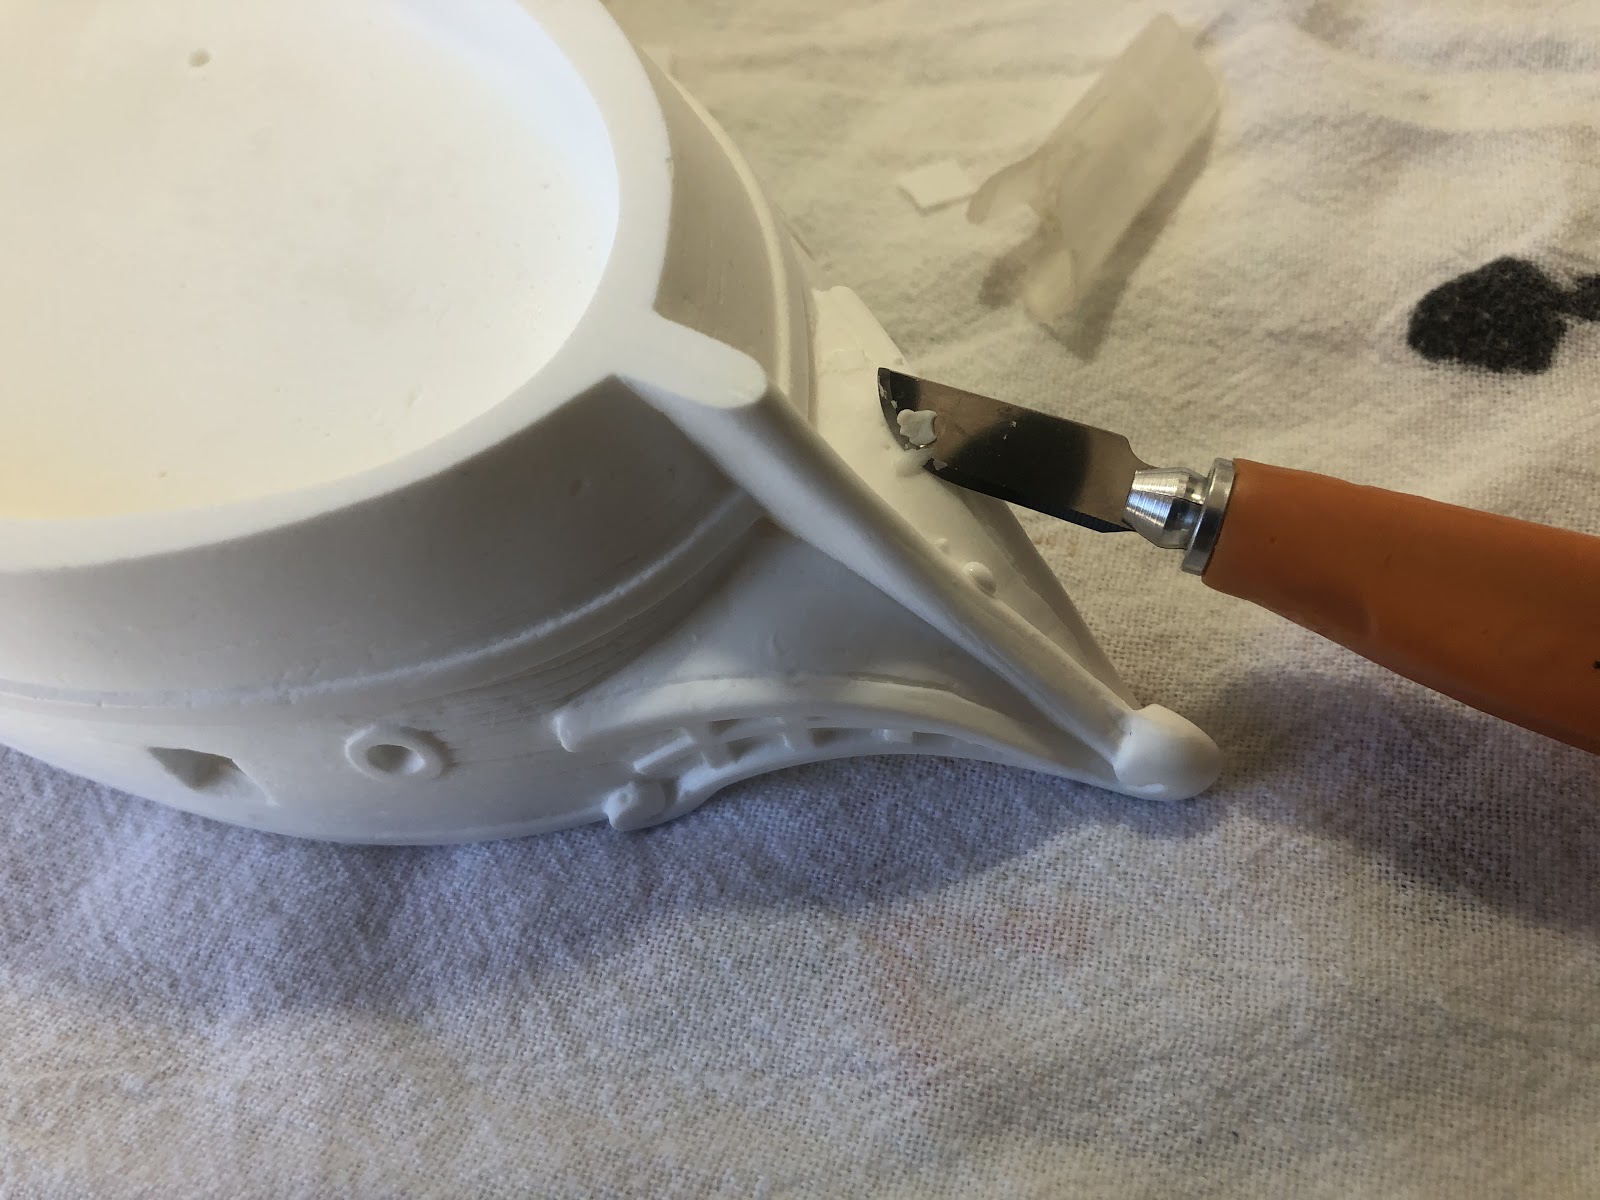
Refer to your mental notes about the bubbles on your hull. While I didn’t photograph it, I use my gloved left hand to hold things that I have to apply pressure to to cut. Nothing stops a person from hobbling for a day like a flesh wound.

Remove any bubbles in your chain guard holes and mast holes. Have the parts that go in these holes in hand so you can make sure they fit.

Always put the guard on when you are done using the knife. Not only does this prevent wounds, but helps keep the blade sharp.

This is the assortment of files that I use for most projects. You can also use an emery board, as resin is quite soft. If your knife work was skilled enough, you can skip the filing.

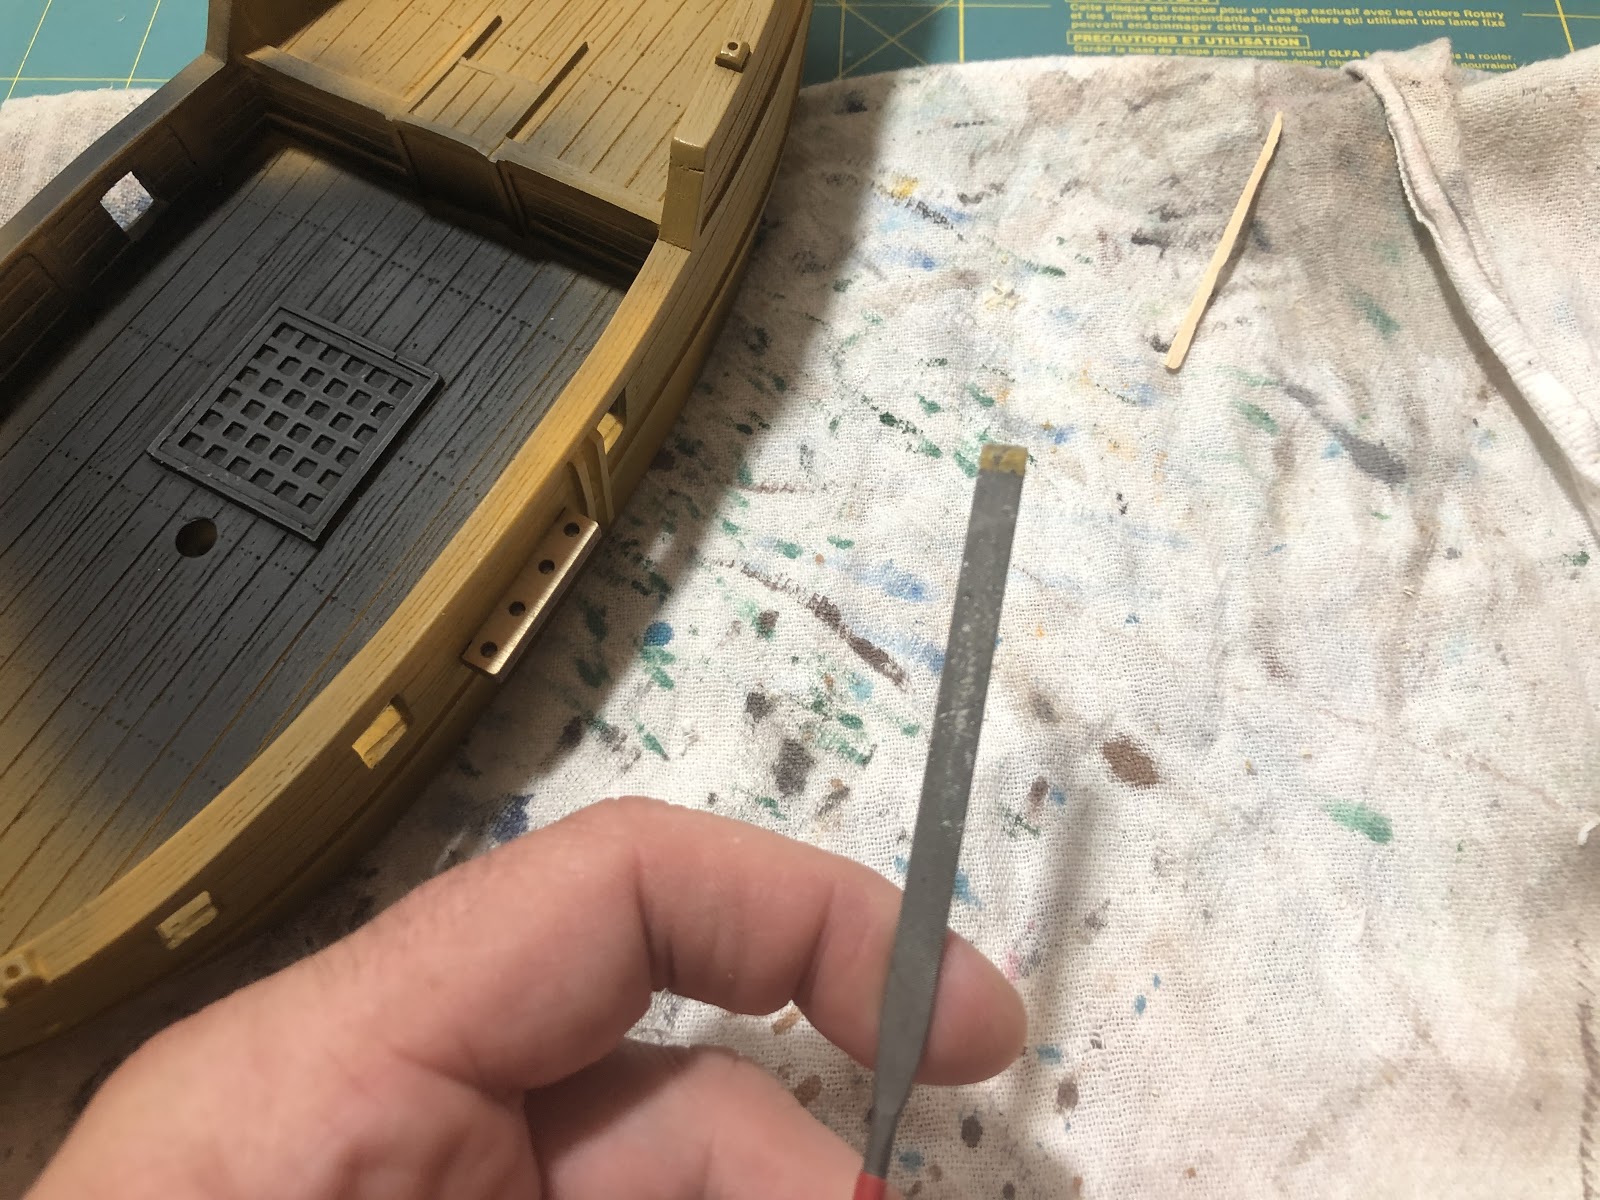
Use a large flat file for the gun ports. File the resin down from what you cut out. You do not need them to be perfectly smooth, just get rid of the sharp edges and clean up the corners.
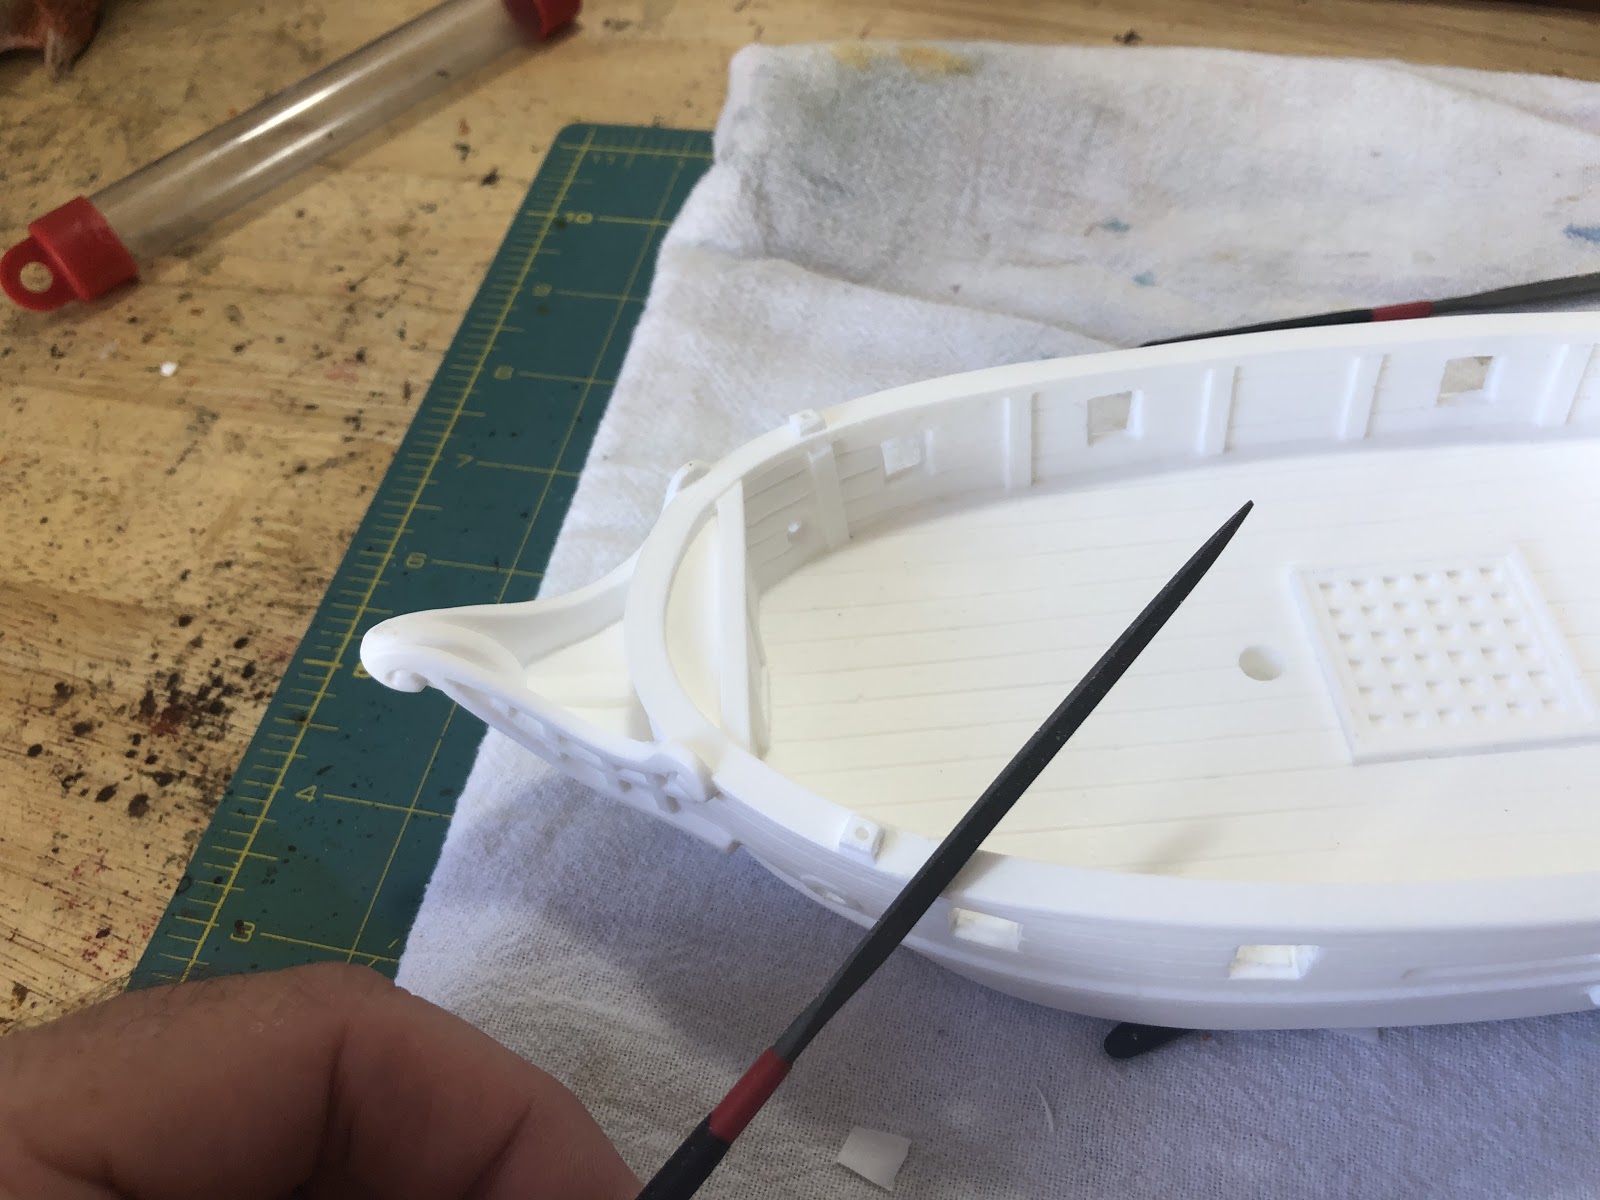
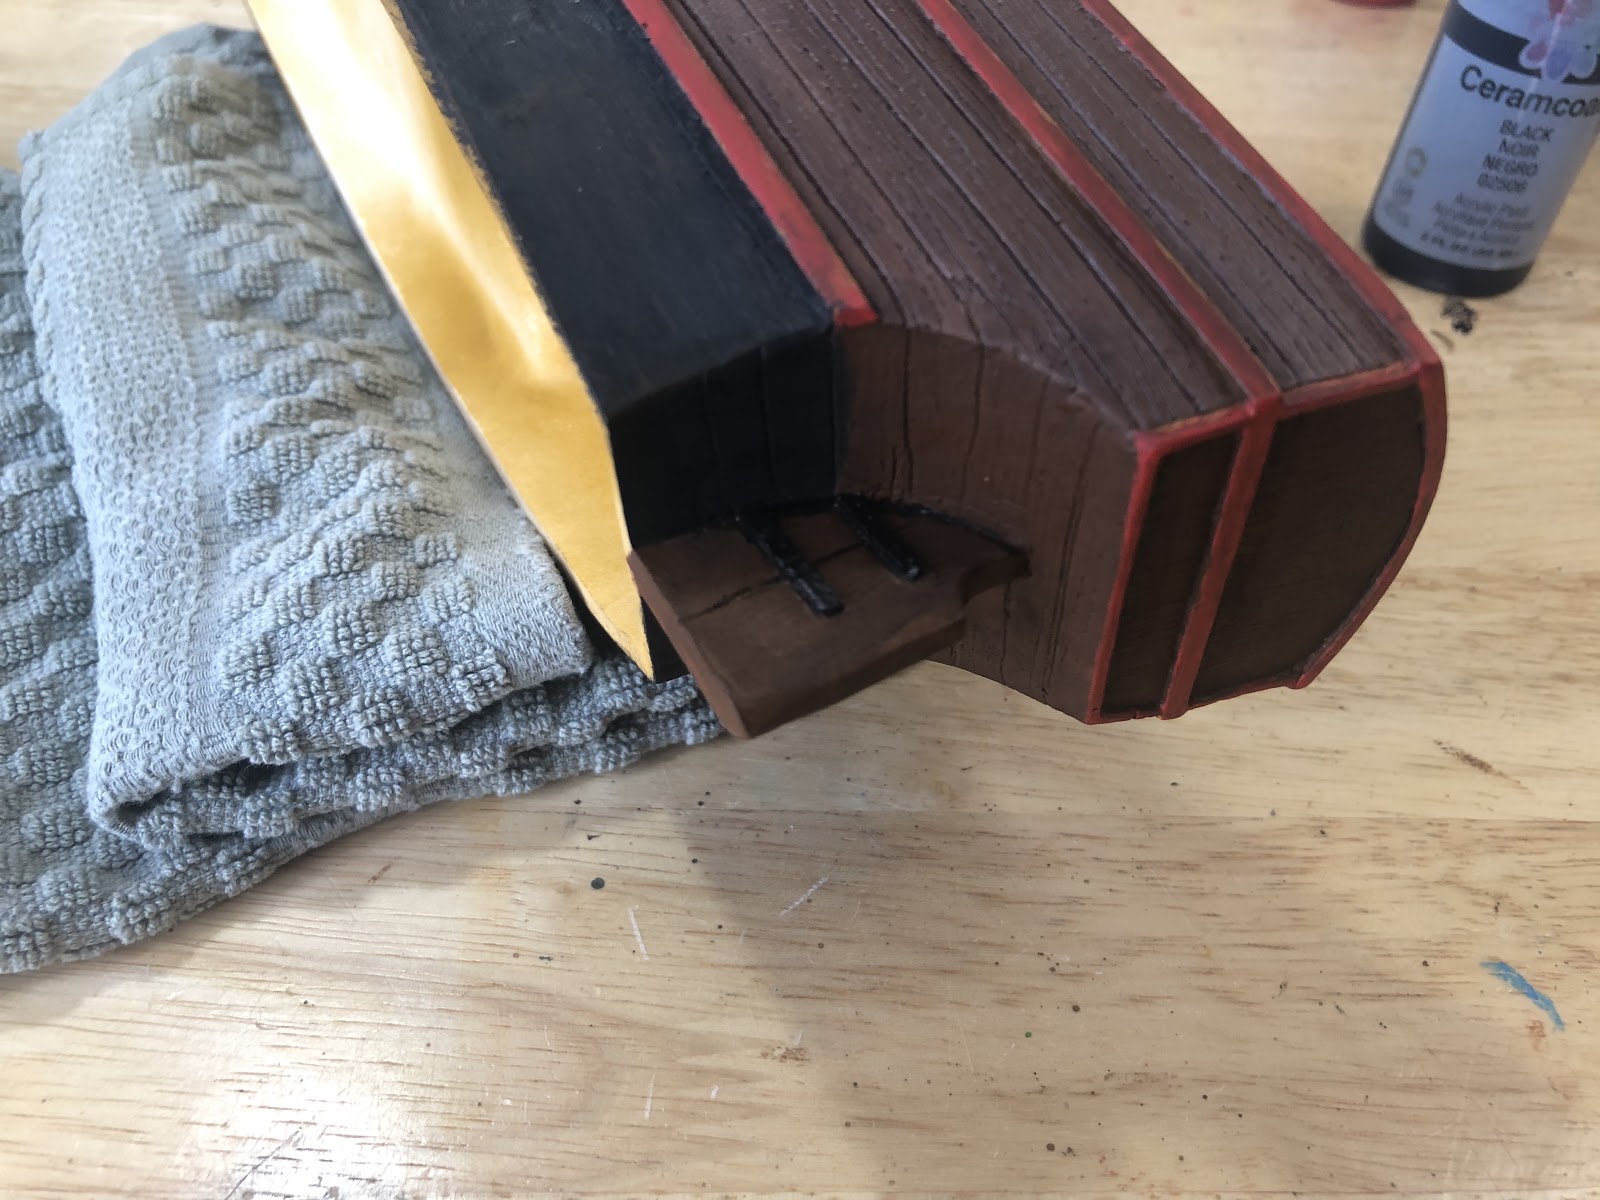
Use a round file for the hawsepipe. This is the small round hole near the bow that’s intended for the anchor chain to go through.
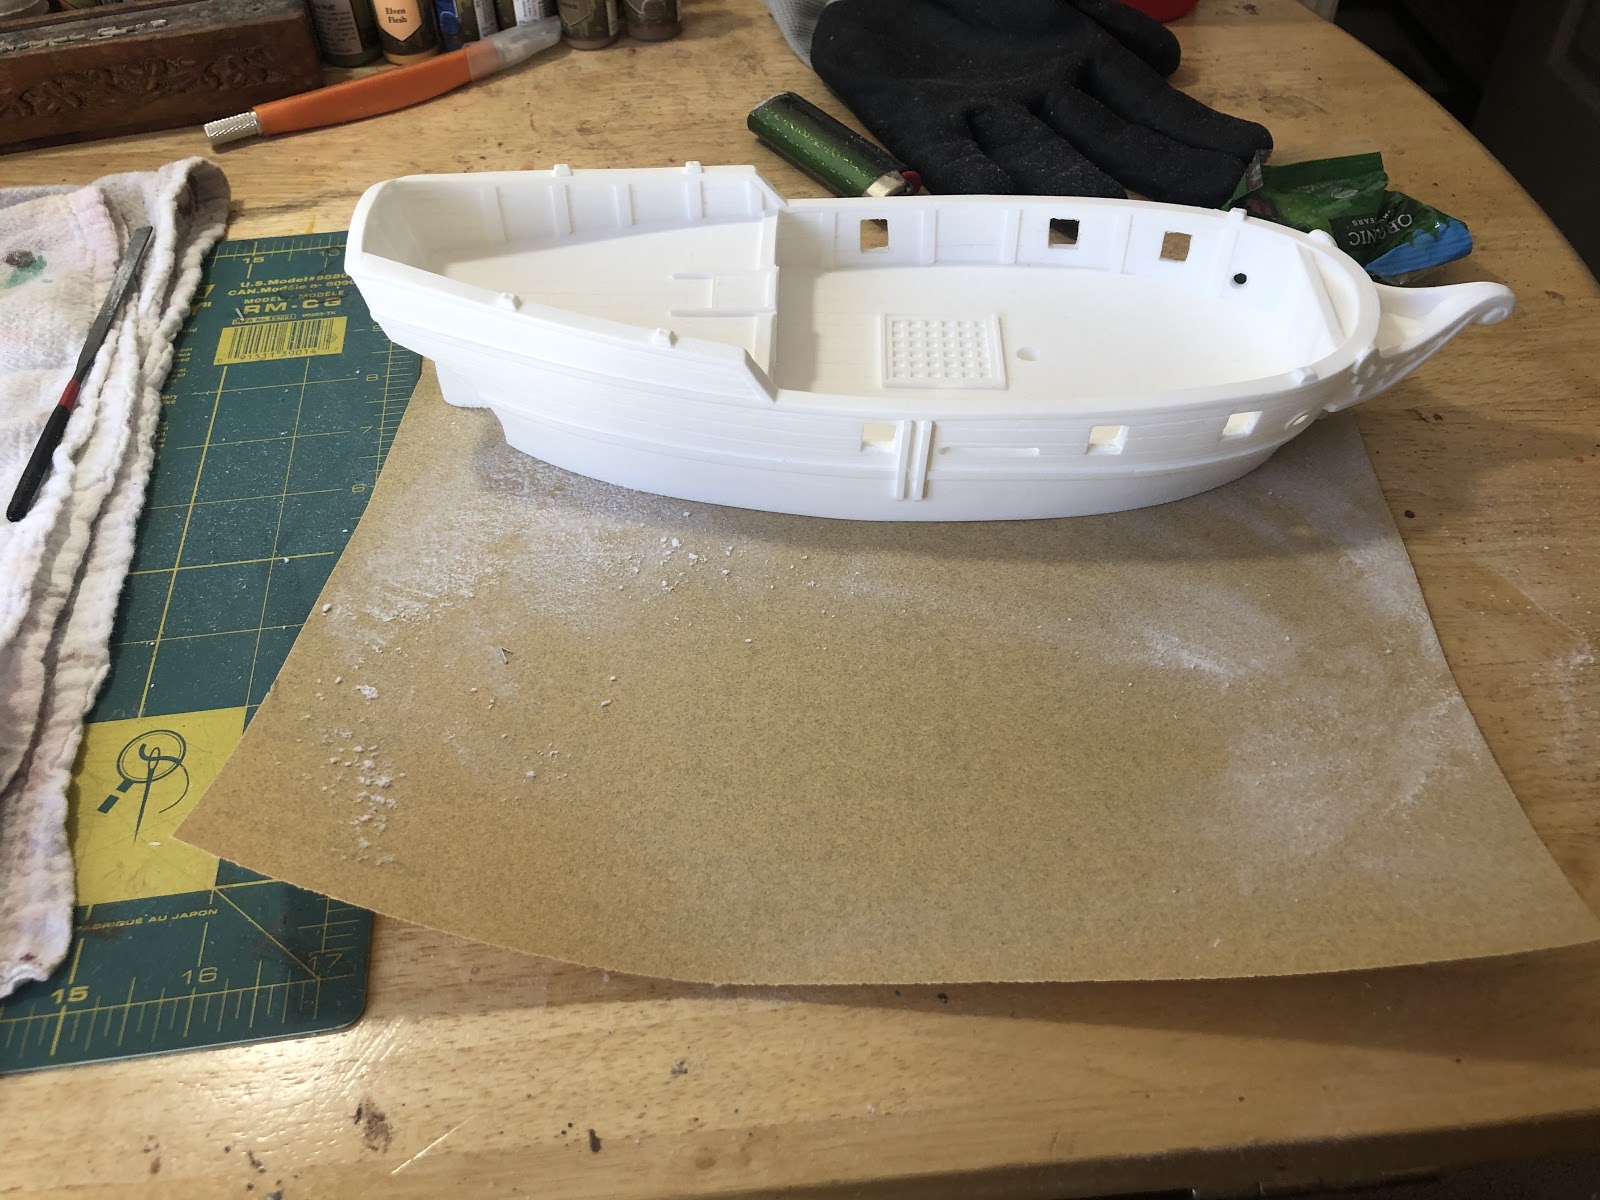
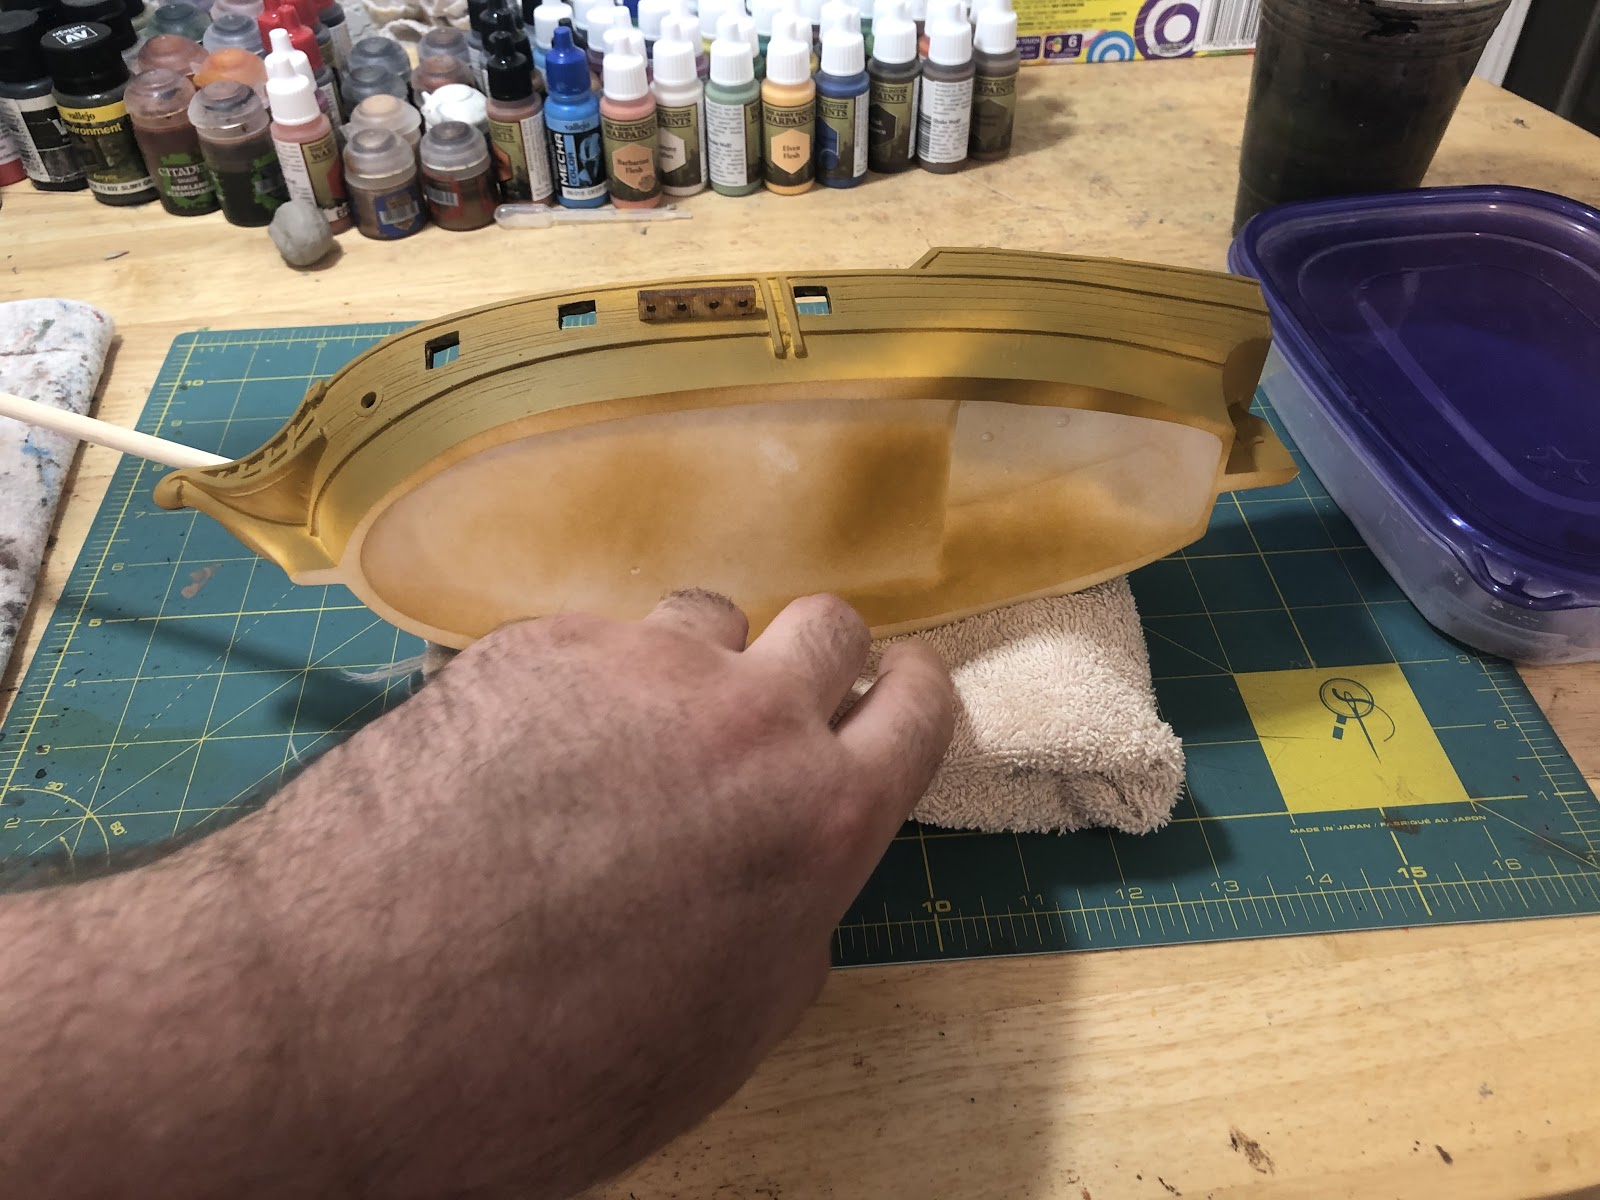
Because of small imperfections during casting, most ships rock slightly. To Correct this, to place sandpaper on a firm, level surface. Find the point that your ship rocks from, and apply pressure, sanding the bottom of your ship. Only run your ship over the sandpaper five to eight times before checking if the rocking is gone.

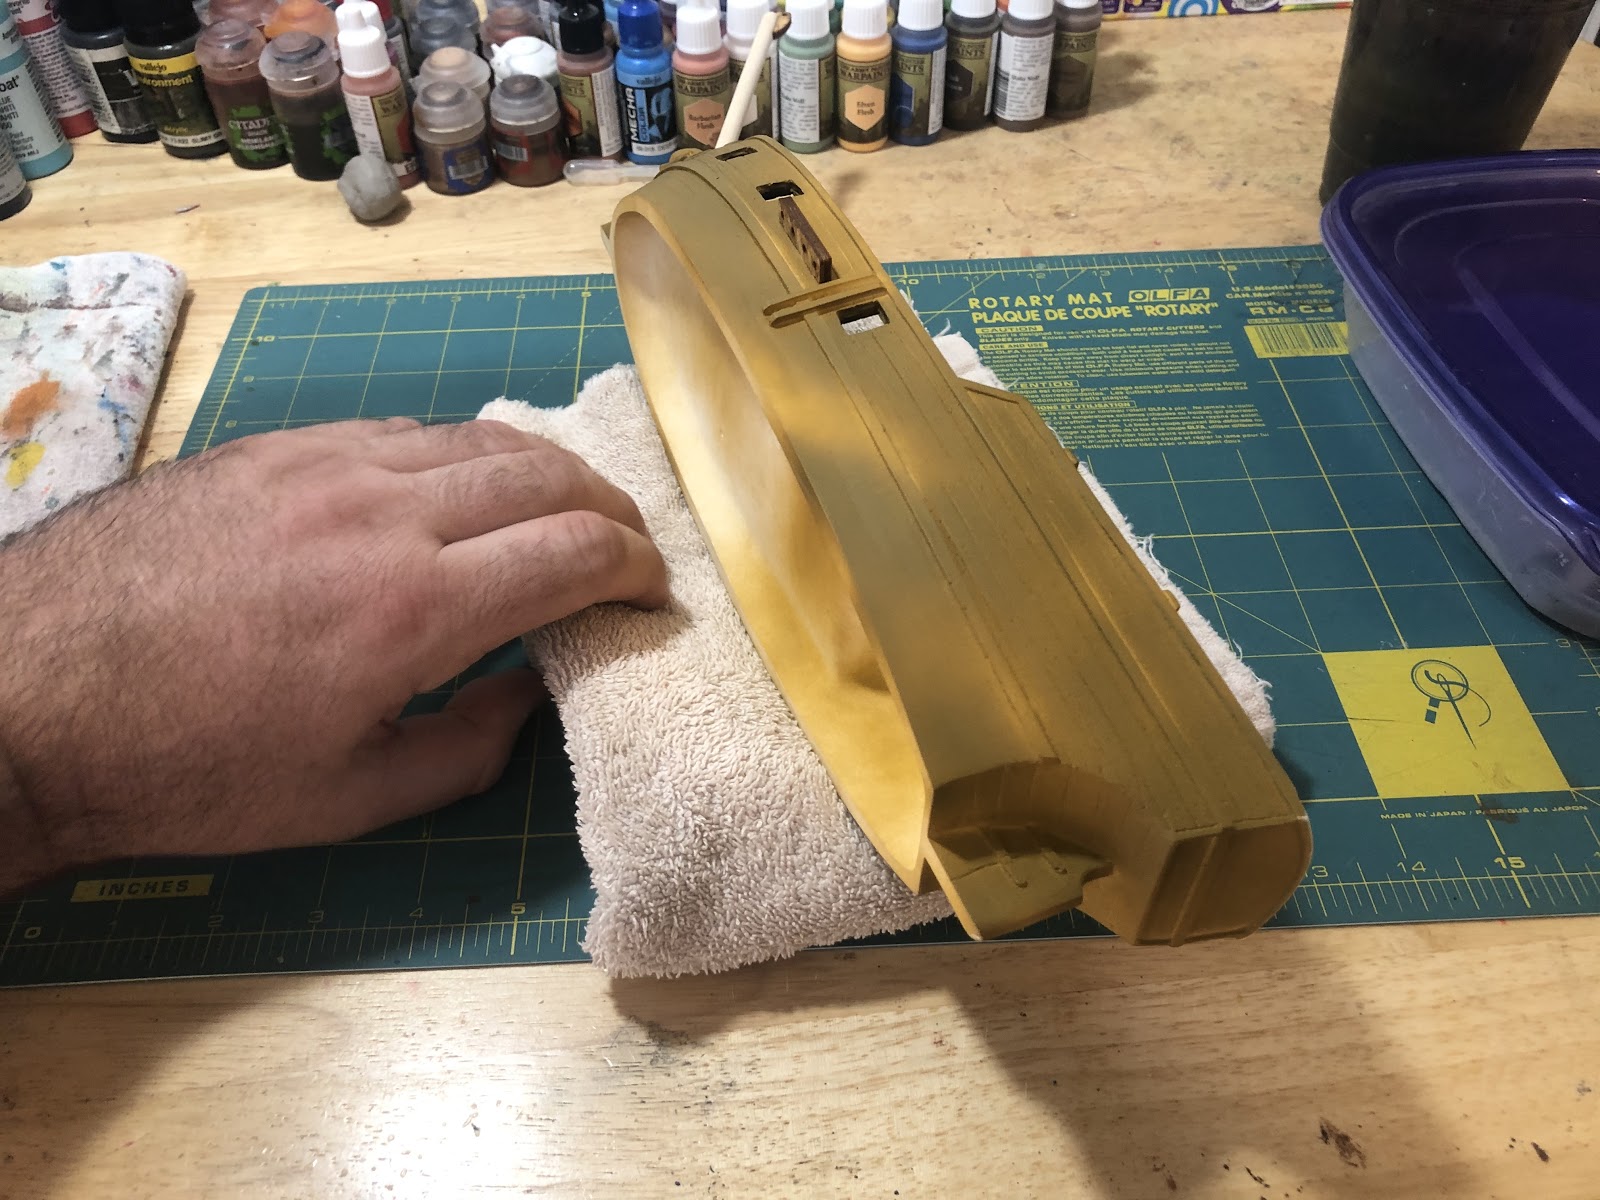
Wash the resin ship with hand soap and warm (not hot) water. Use a rag to lightly scrub all surfaces.
If part of your ship is bent, now is when you will correct that. After washing the ship, set the water to hot. Run the bent part under the hot water for a while, being careful not to burn yourself. Immediately after taking it out of the water, slowly bend the part to the correct position. If it doesn’t bend, the water isn’t hot enough or it hasn’t been under the water for long enough.
After washing the hull, towel it off. Set it in a dry place for about a day. Do not place it in direct sunlight. If you notice any water beading in it during the day, shake it off. You need it completely dry for the next step.
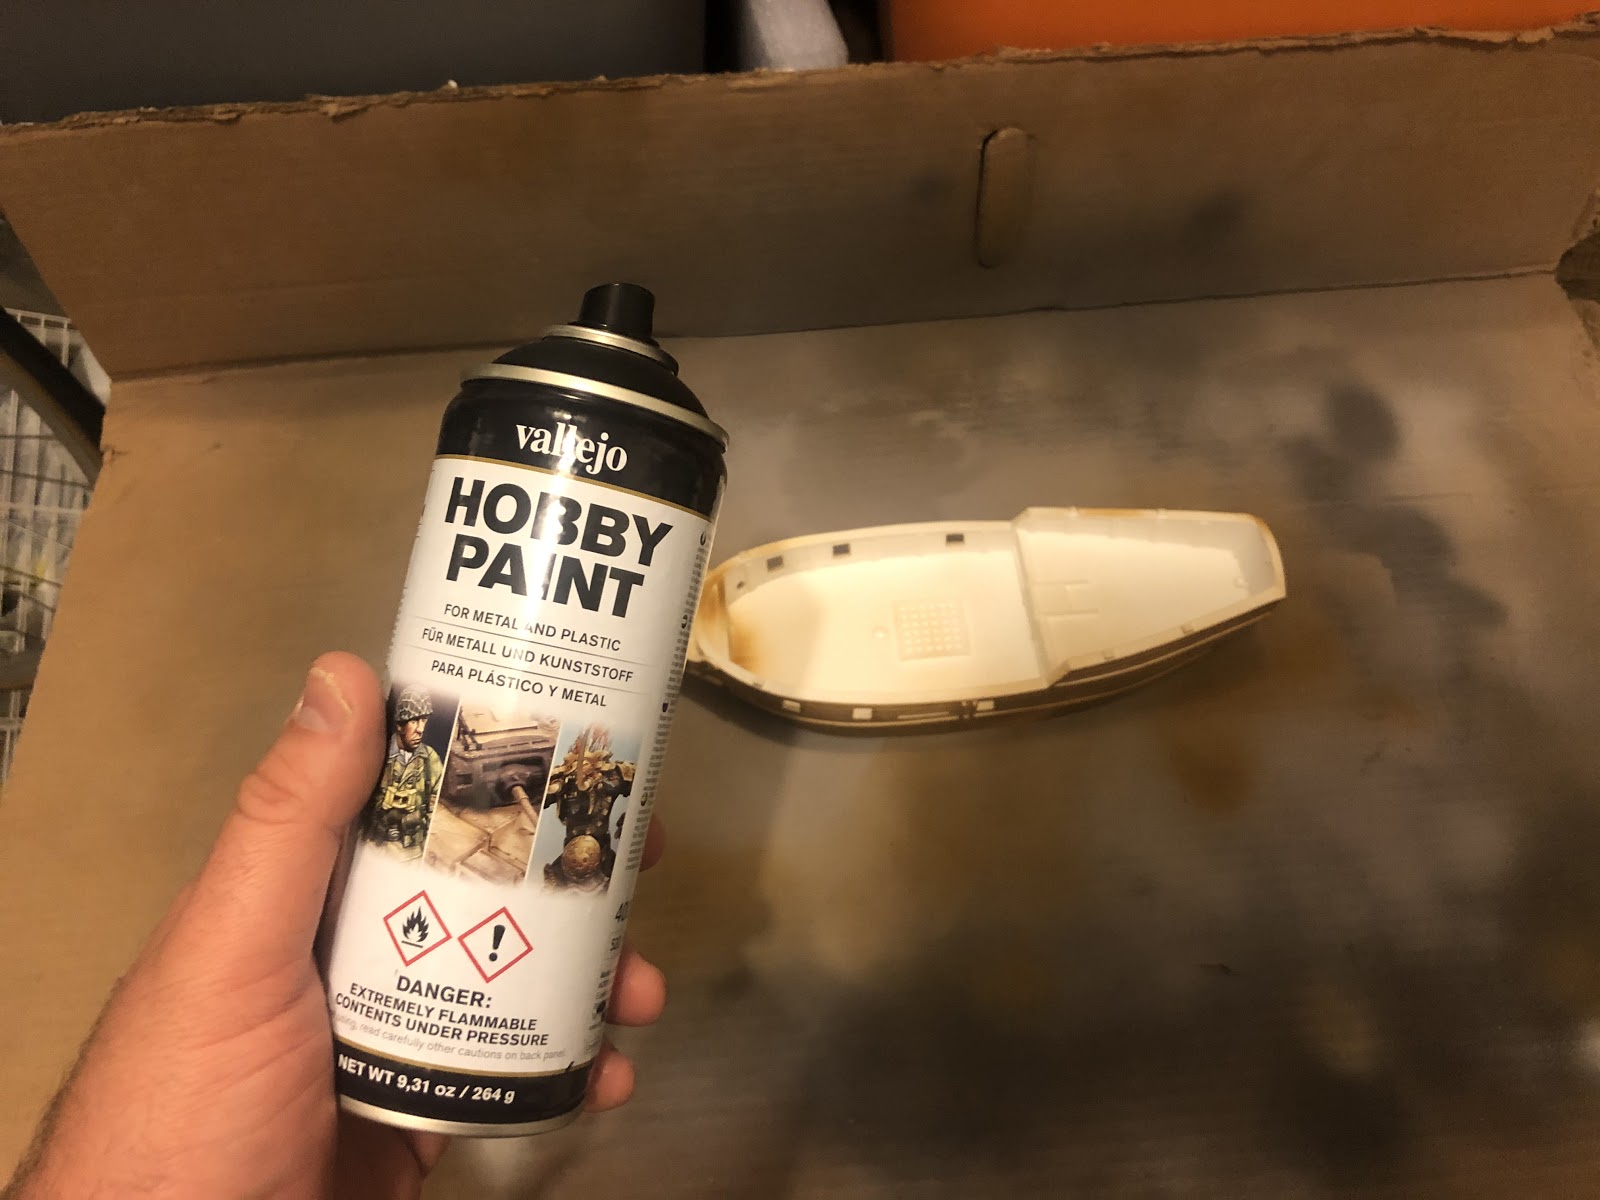
Step 3: Priming

Tools Needed:
- Neutral Hobby Spray Paint
- Well Ventilated Low Humidity Area
- Large Scrap Cardboard Sheet
- Optional Tools:
- Black Hobby Spray Paint
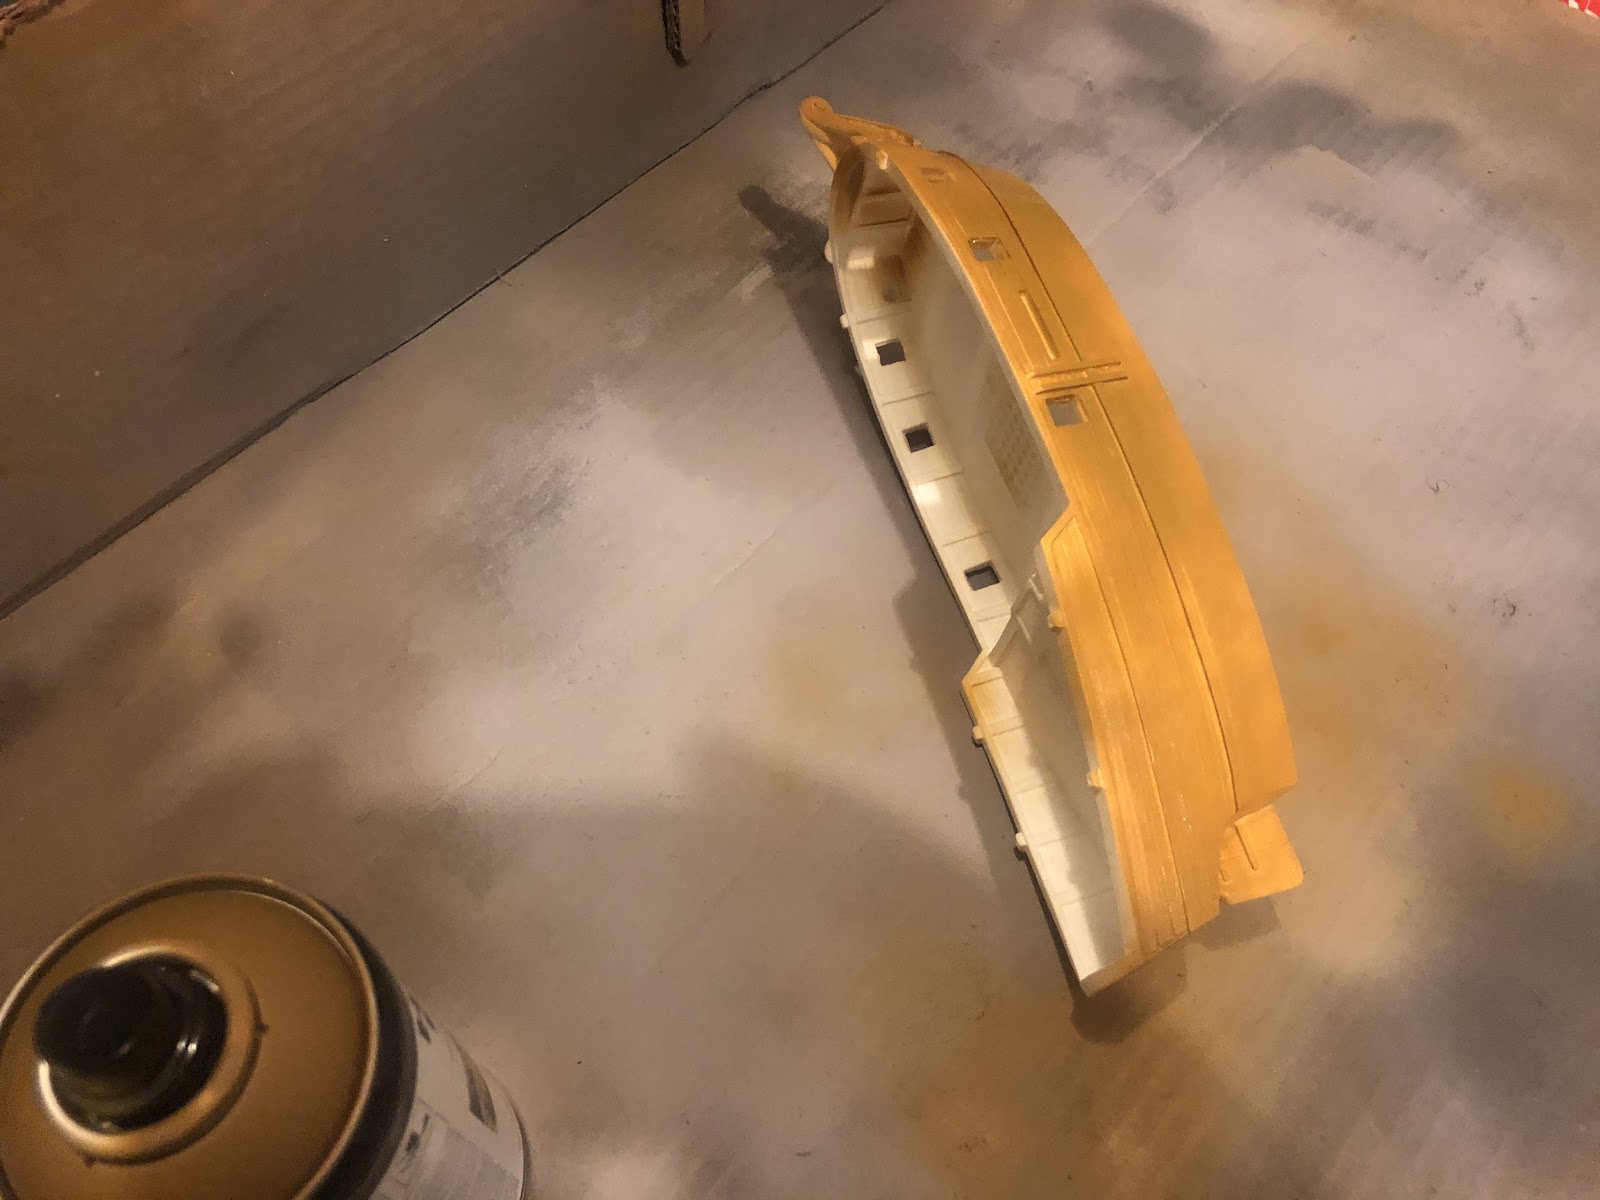
Place the Sloop on its side, on the cardboard. Vigorously shake the spray paint can for 45-60 seconds. Immediately after shaking, spray the hull from about 6” away, in a quick even sweeping motion. After about three passes, shake the can again and admire your work. Do not touch the sloop. Keep spraying until the entire upper side is painted. It does not need to look perfect, just painted.
After waiting about an hour, flip the ship over and repeat this process for the other side.
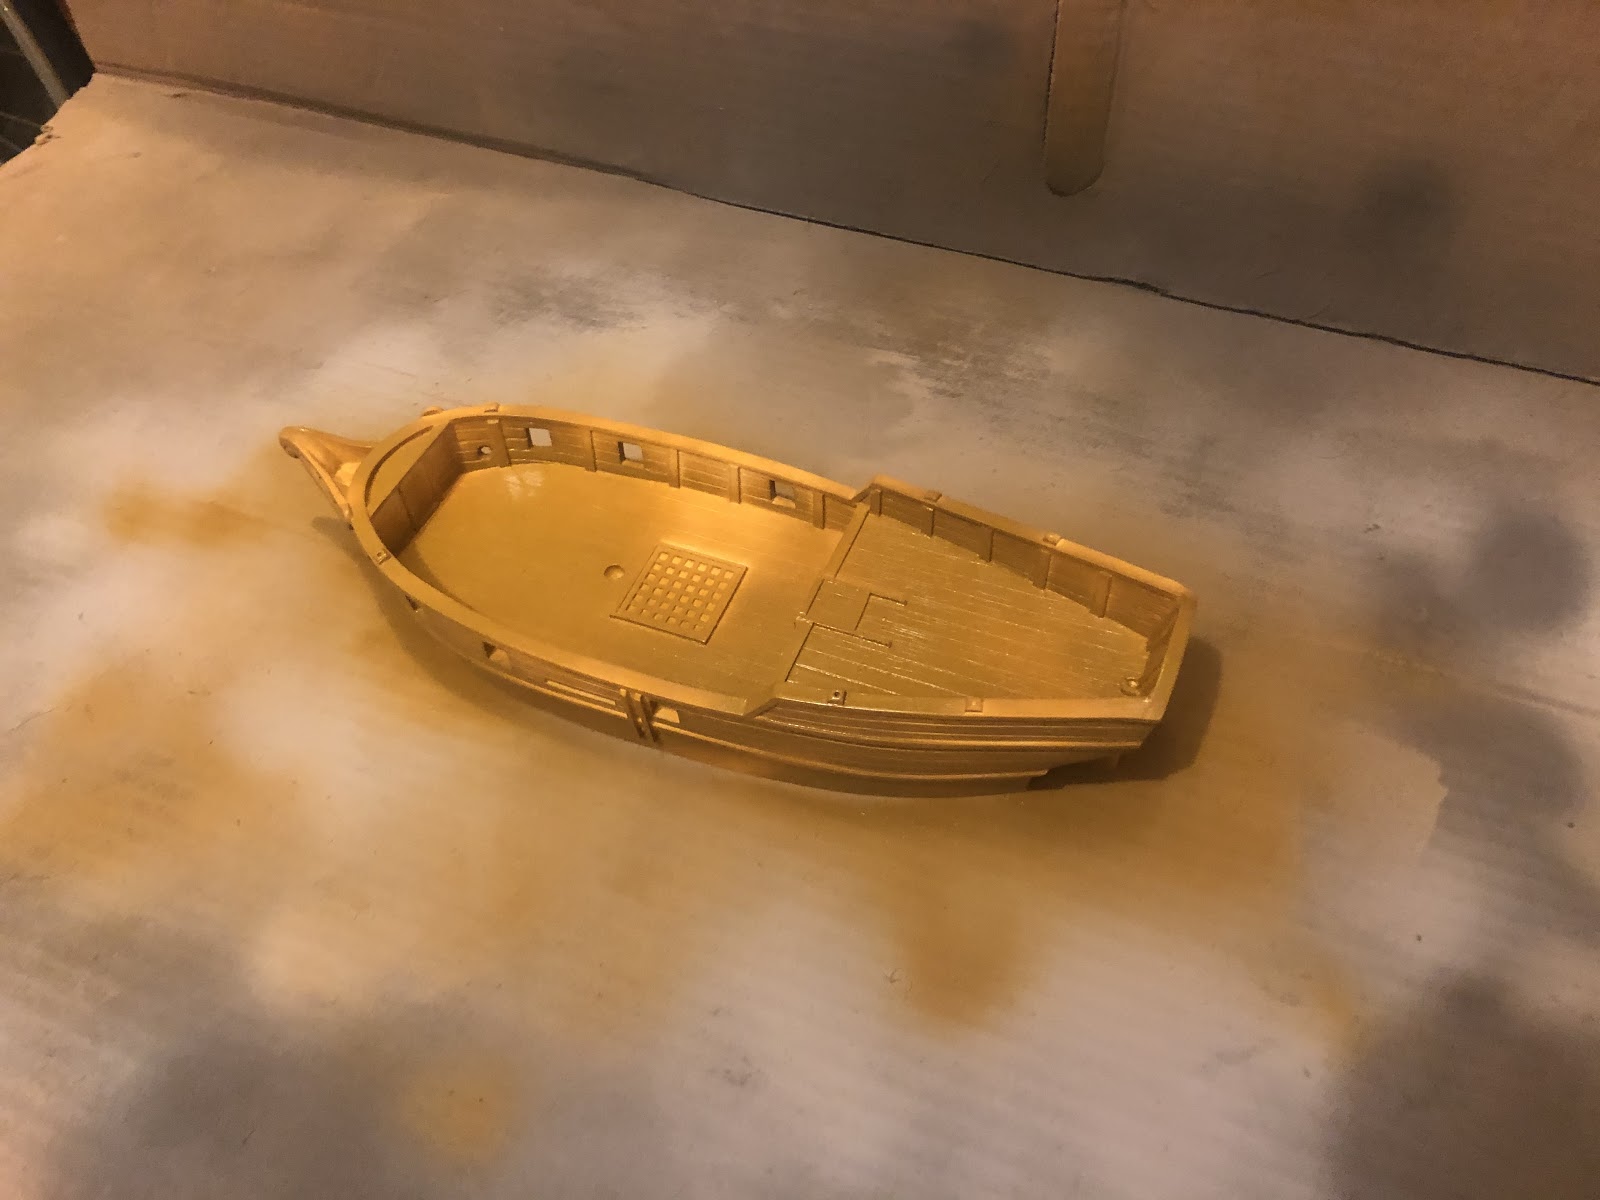
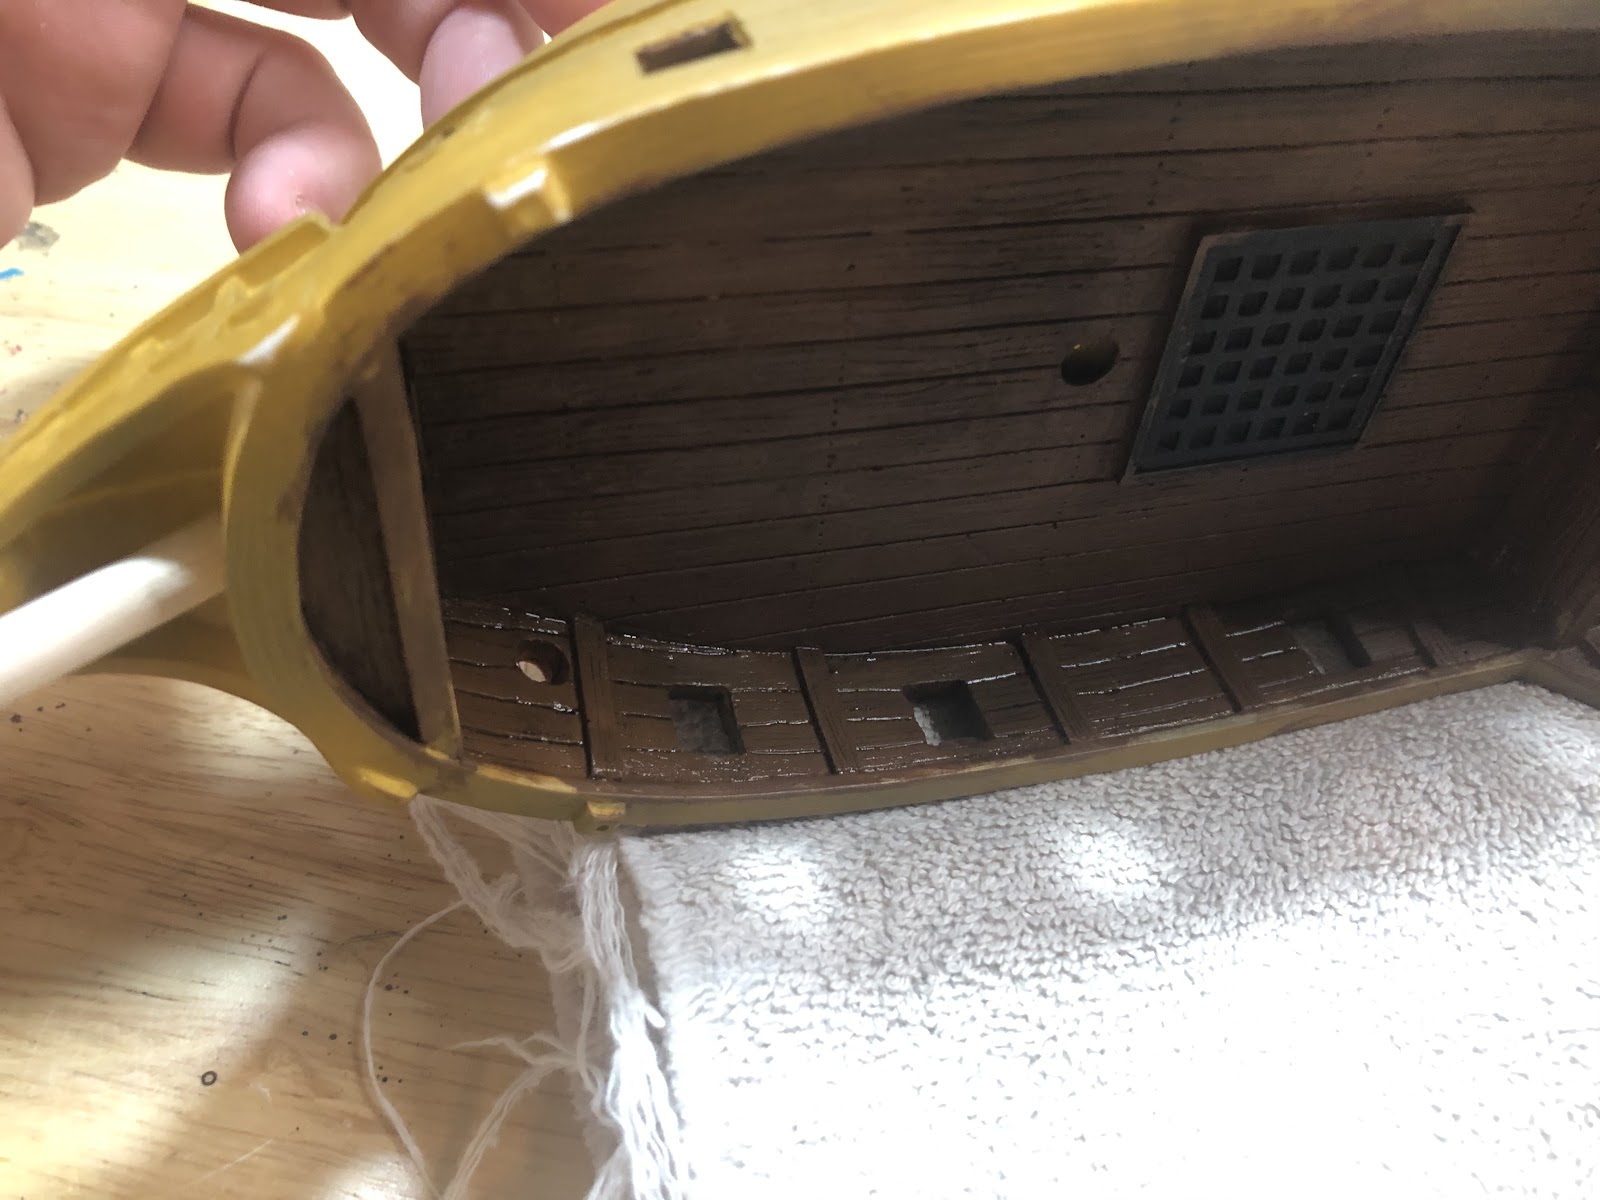
After waiting about an hour, put the sloop right side up. Using the same process as above, paint the deck and the inside of the gunwales. Gunwales are the upper edge of the hull. You might need to turn the ship to paint both sides.
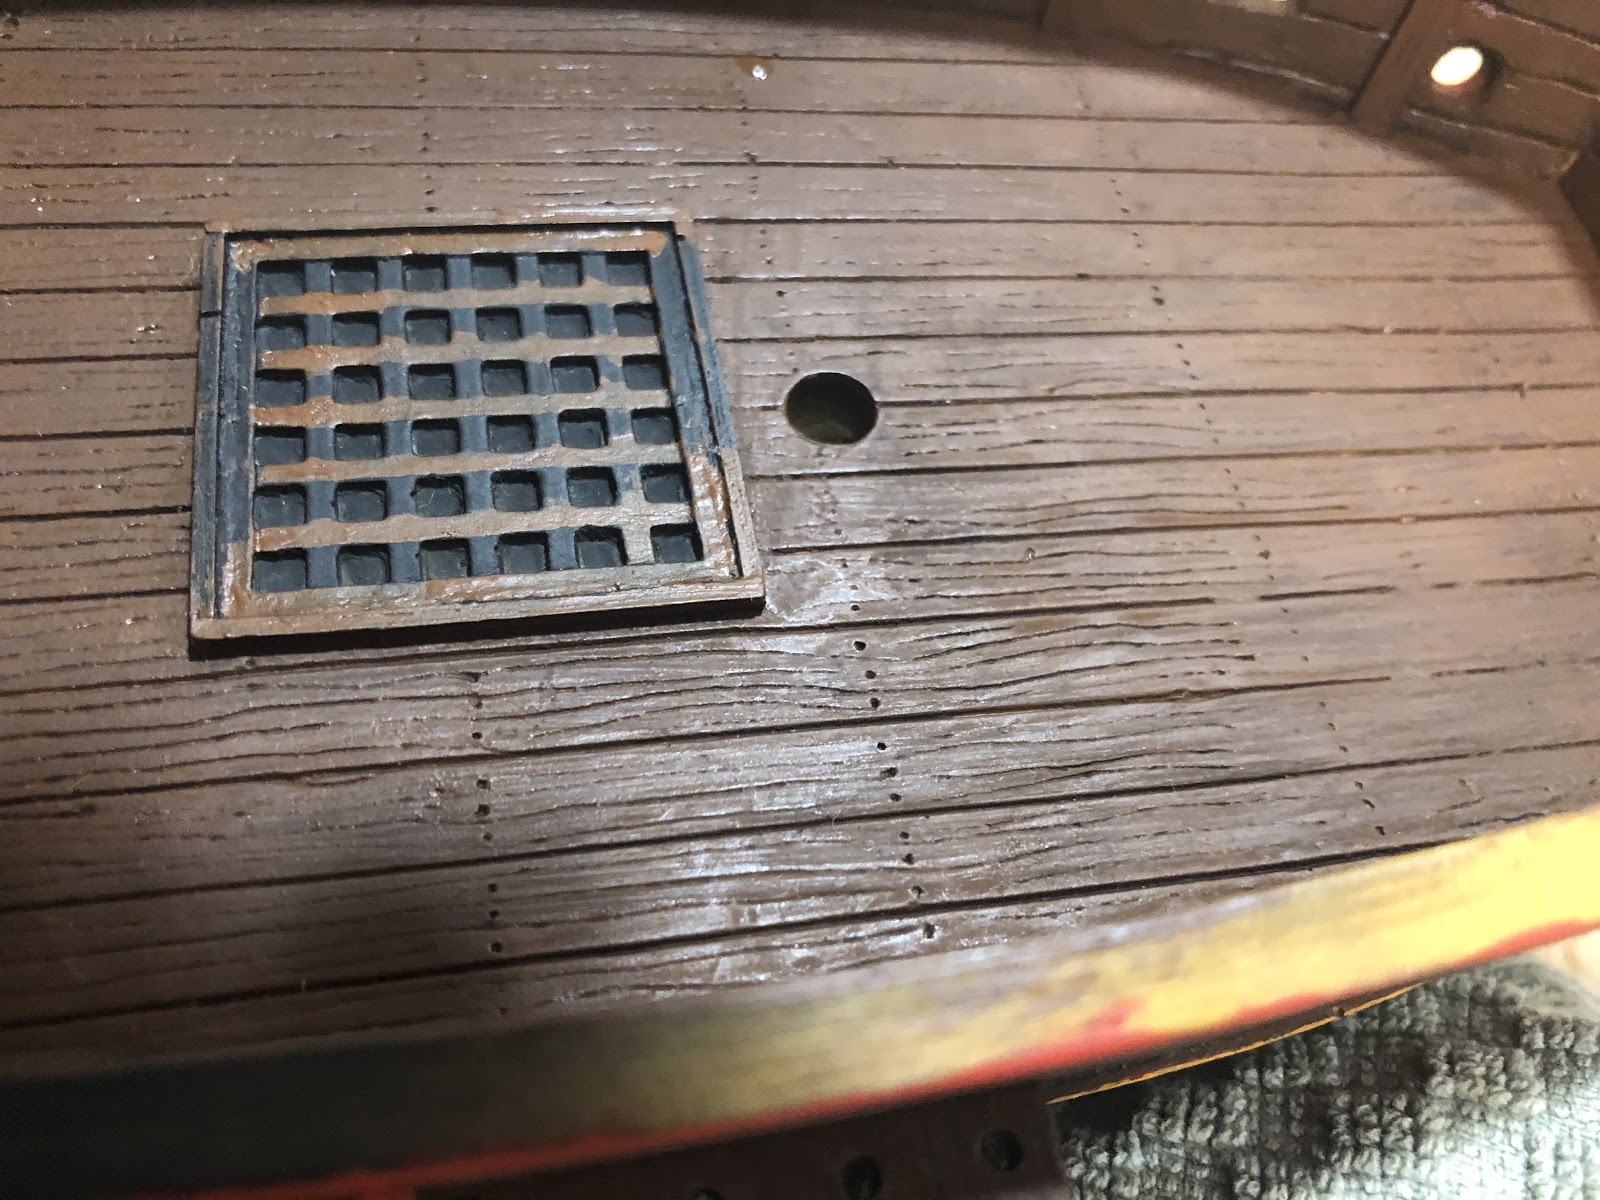
If you have black spray paint, you can save yourself some time by painting the hatch grate. The hatch grate is the checkered square in the middle of the main deck. The low parts are meant to represent the inky black of the hold. Painting them by hand is a pain, as each little hole has five sides to paint, and if you miss one the high contrast black makes it very noticeable.
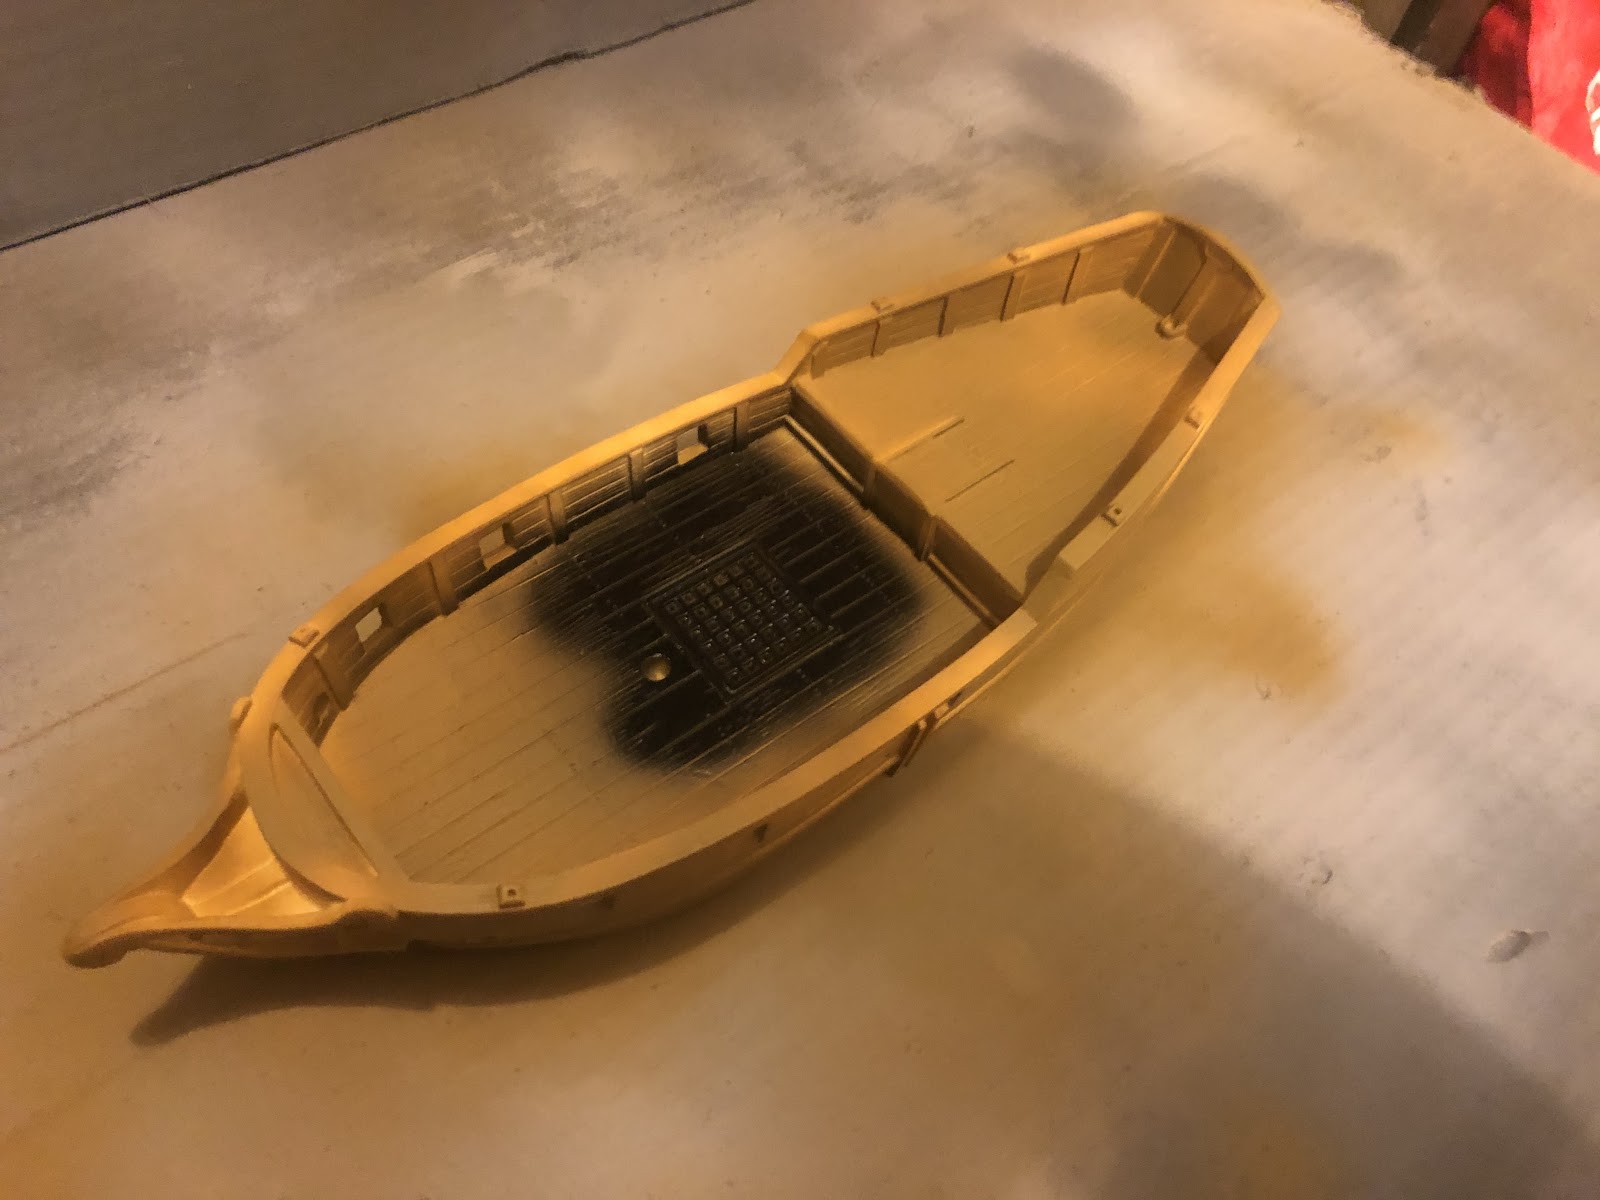
Spray the hatch grate in the same manner you sprayed the hull. Spray the paint from directly above for the best coverage. Again, it doesn’t have to be perfect, and it is ok to spray more a little outside of the hatch grate.
After waiting for the black to dry, your ship will be ready to detail!
How to Rig Your Blood & Plunder Sloop
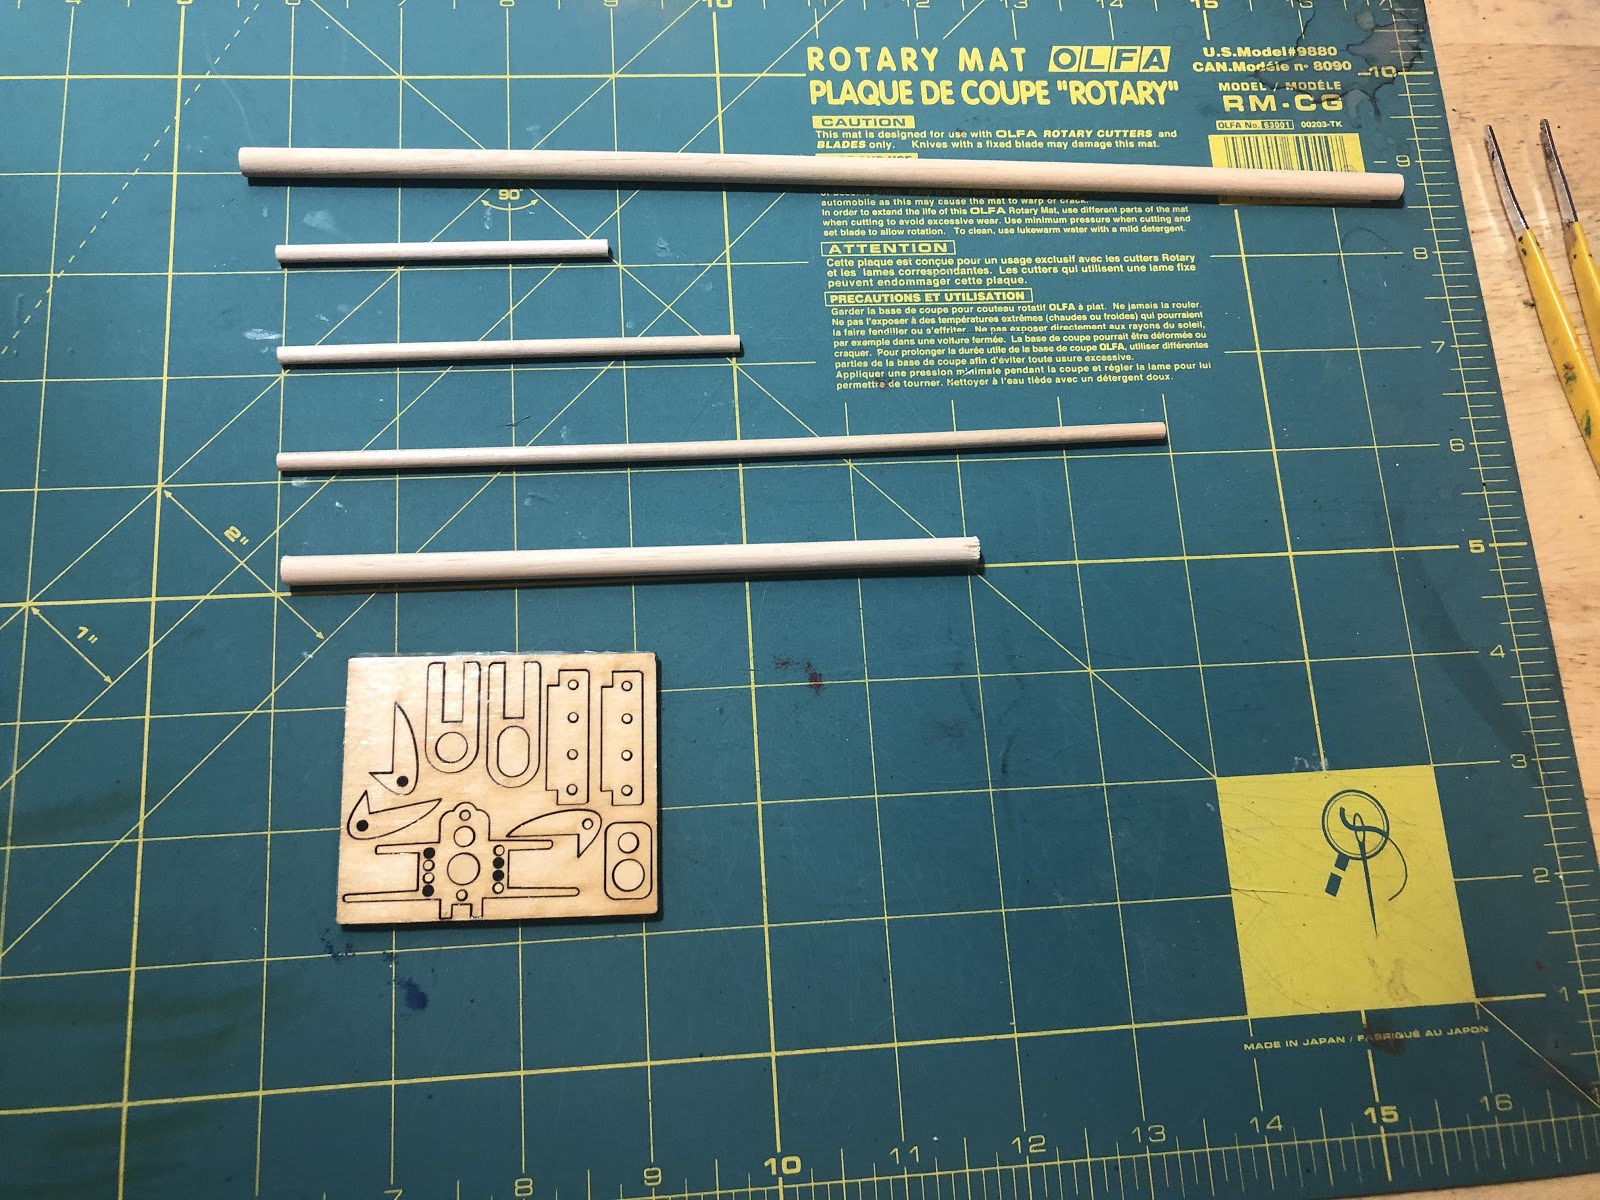
Step 4: Assemble the Mast, Bowsprit, Boom, and Gaff
Tools Needed:
- Wood Glue
- Paper Towel
- Non Porous Drying Area
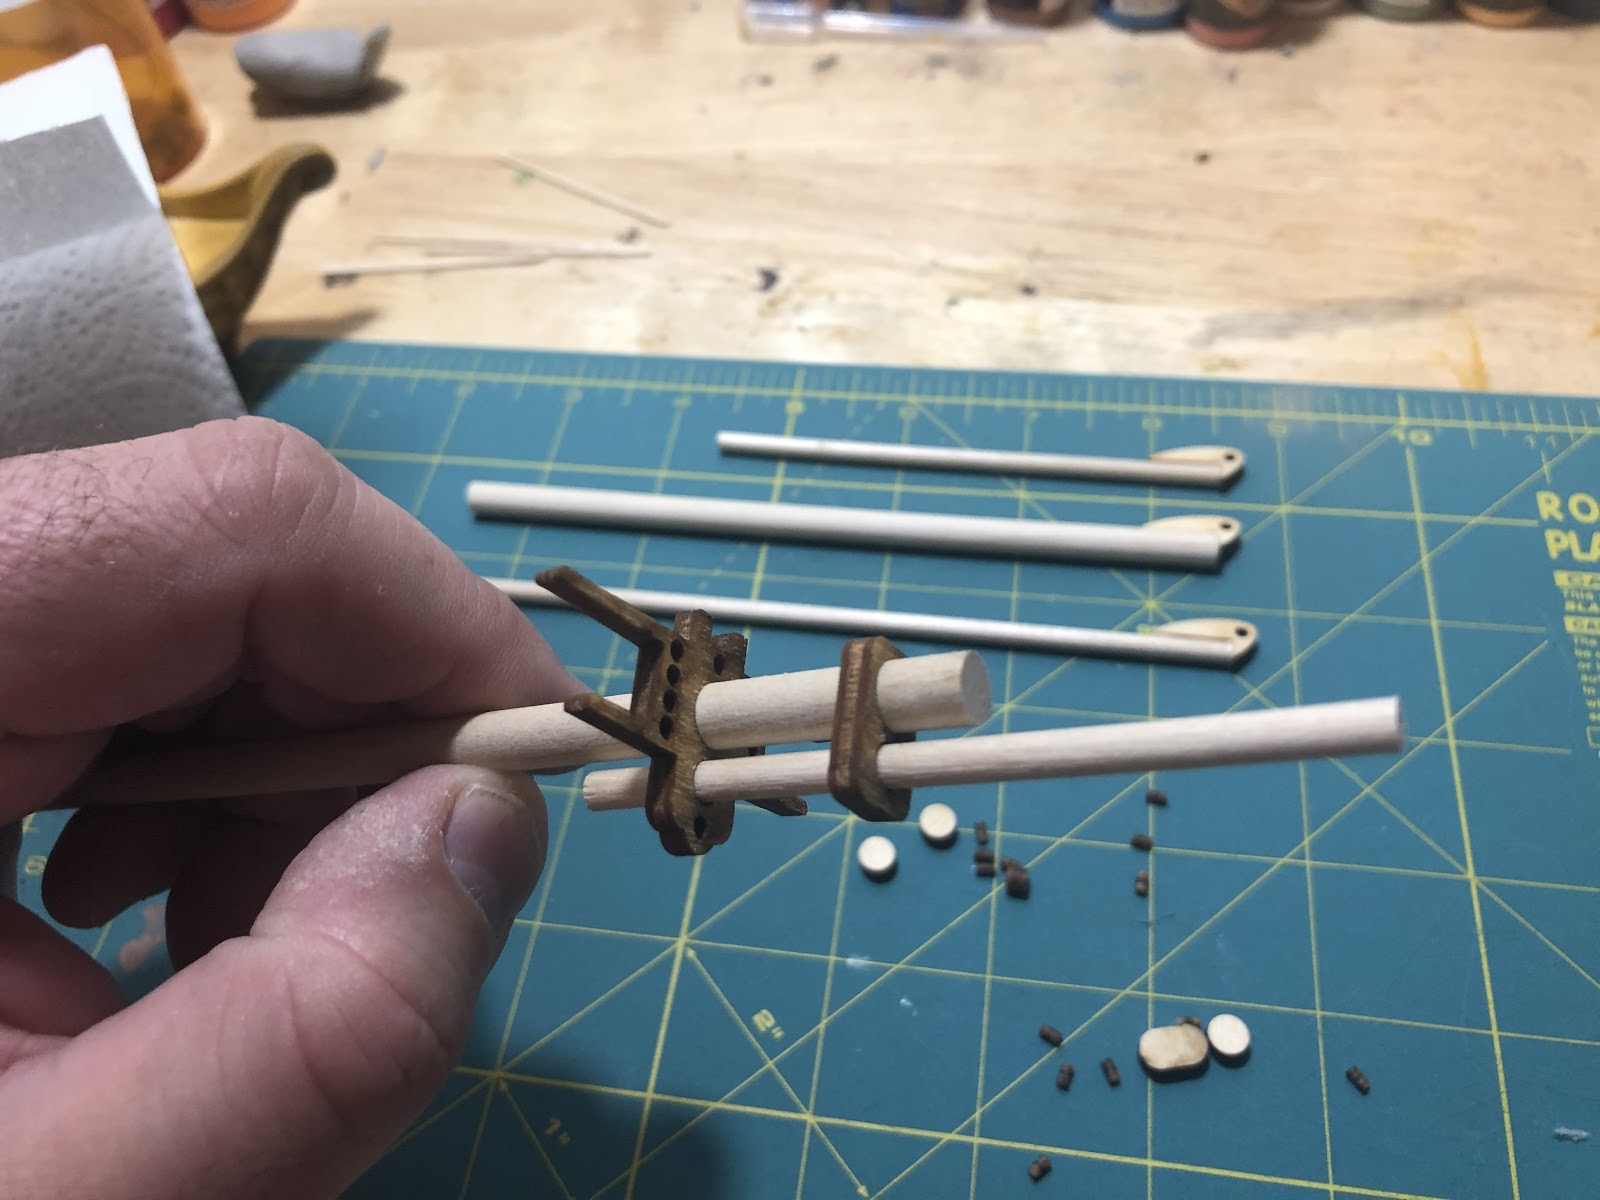
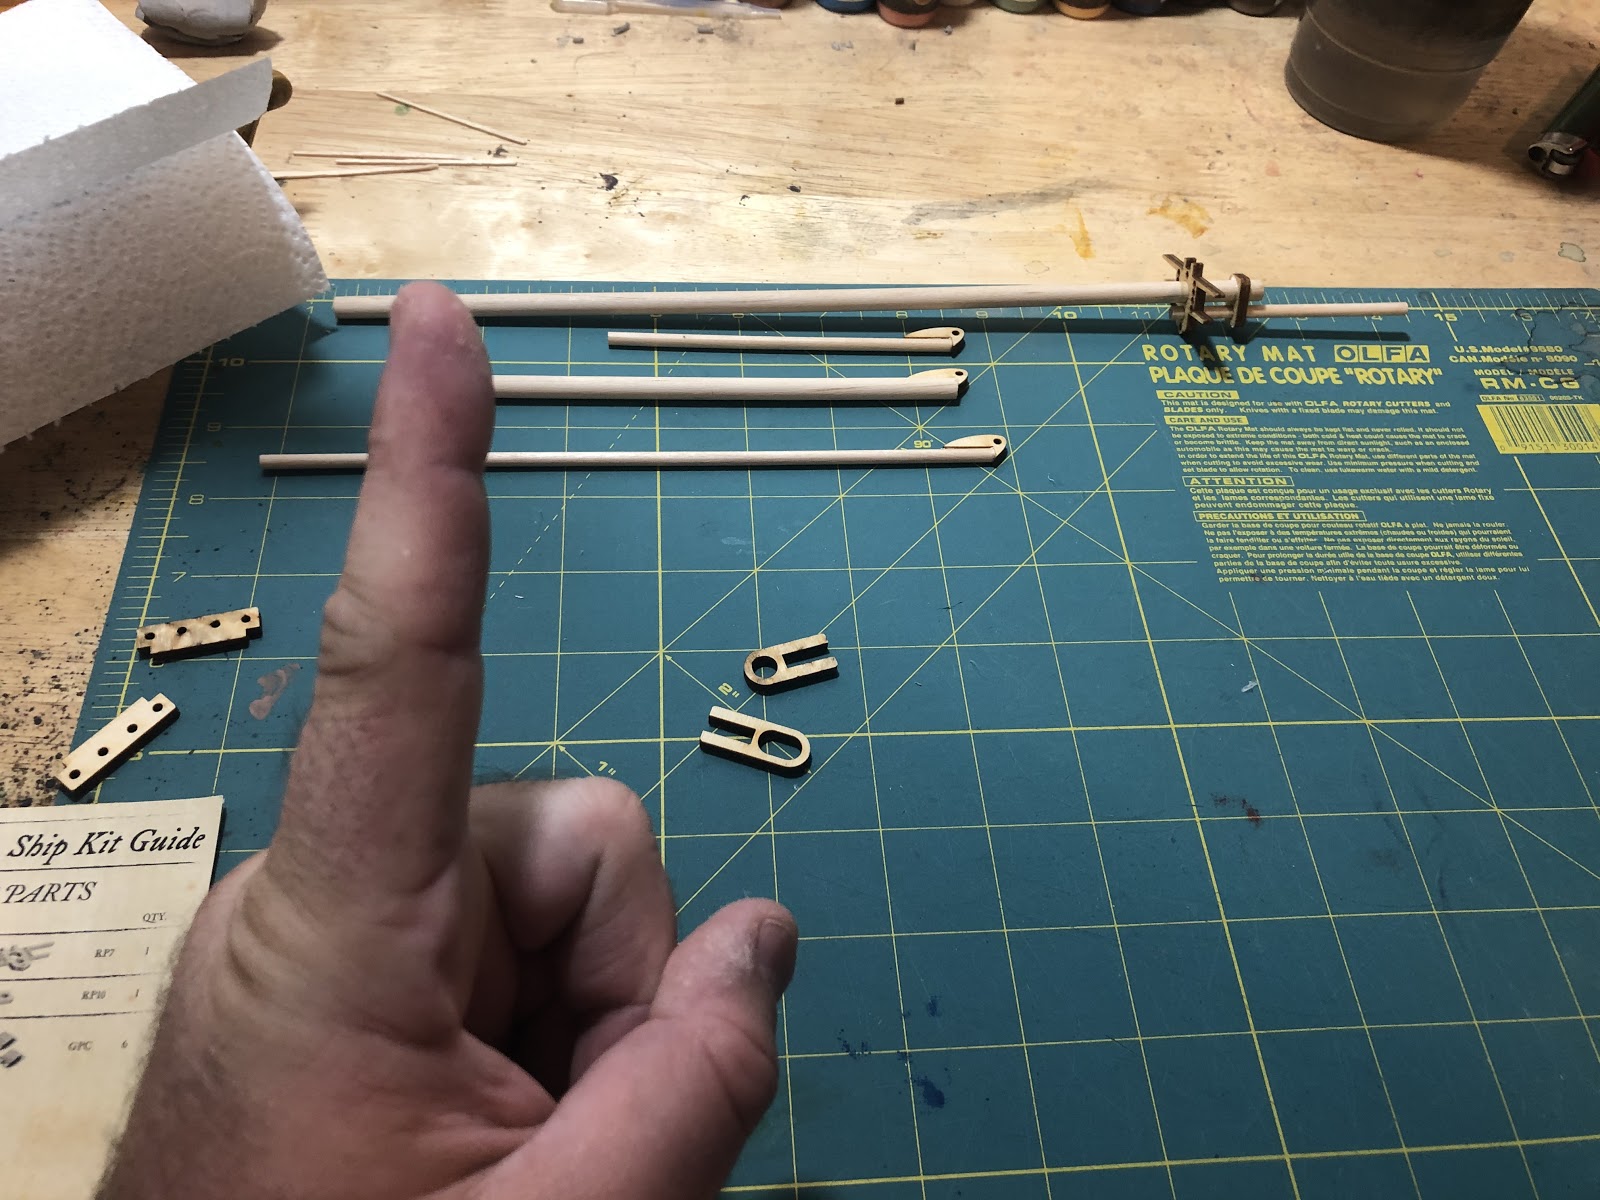
- Dowel Guide:
- (From top to bottom in the above picture)
- Main Mast
- Flagstaff
- Gaff
- Boom
- Bowsprit

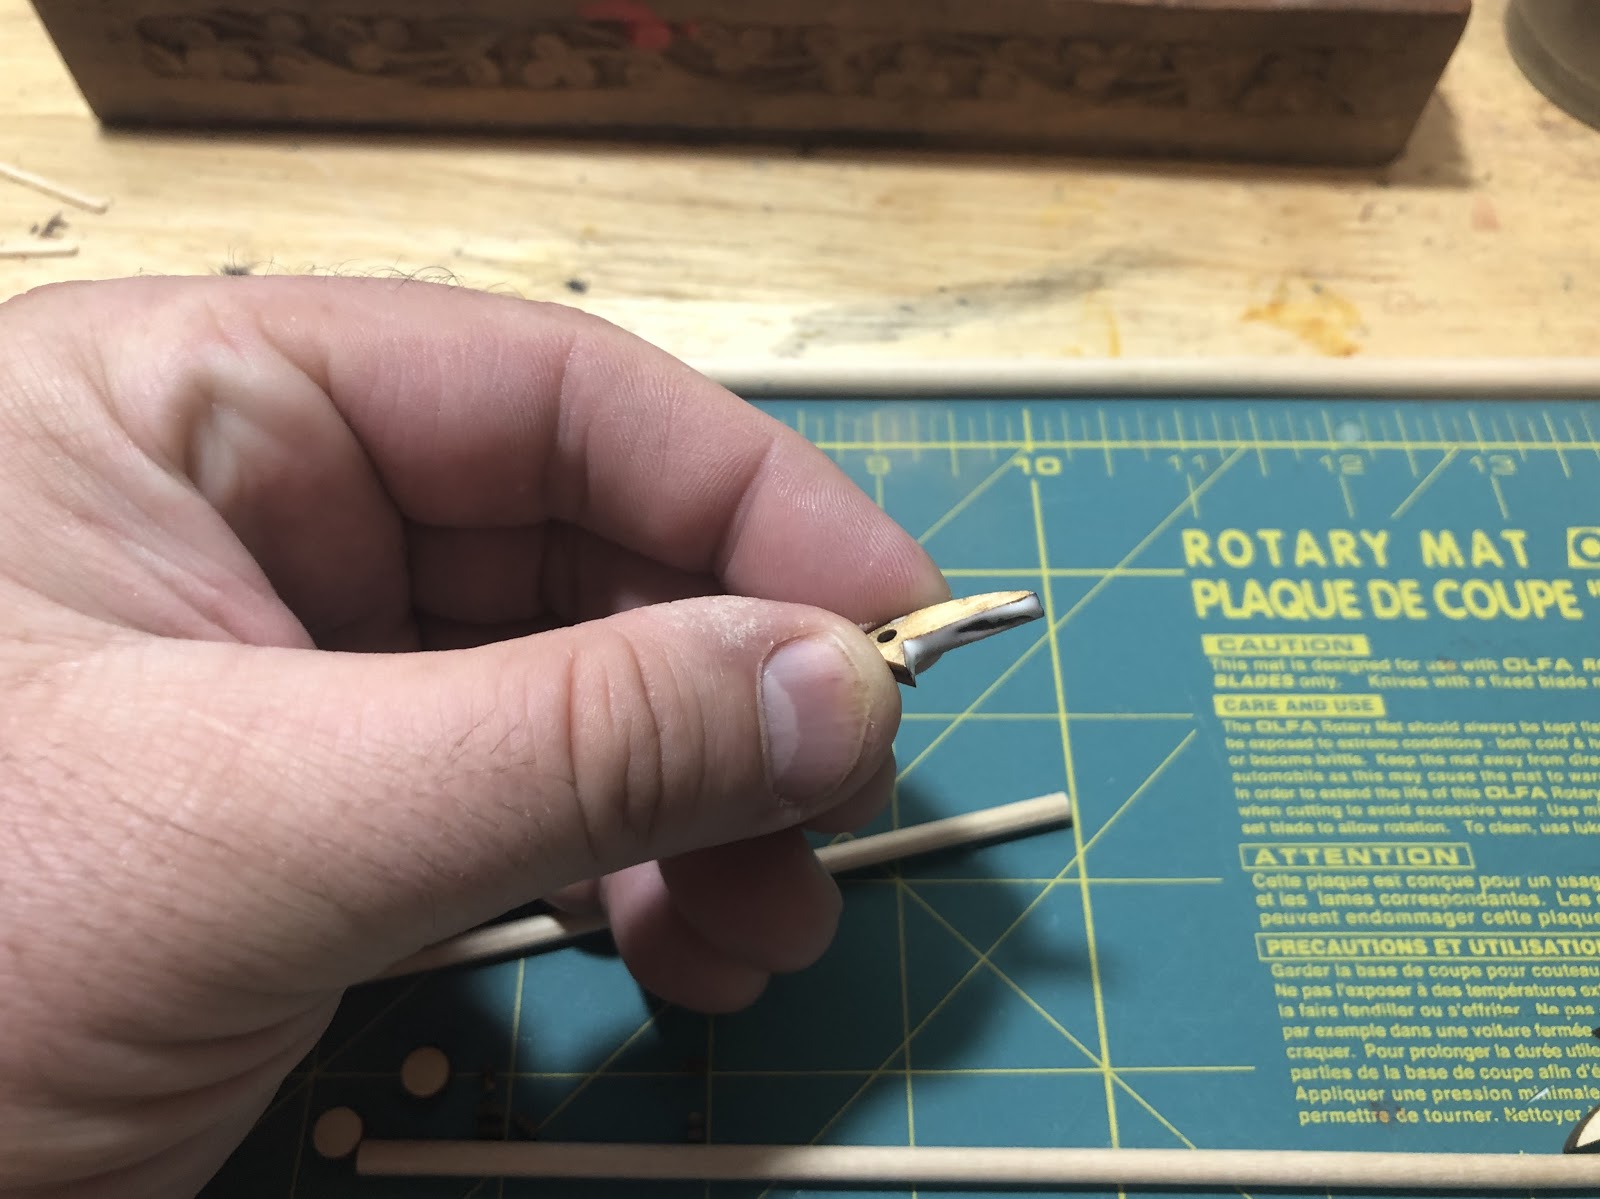
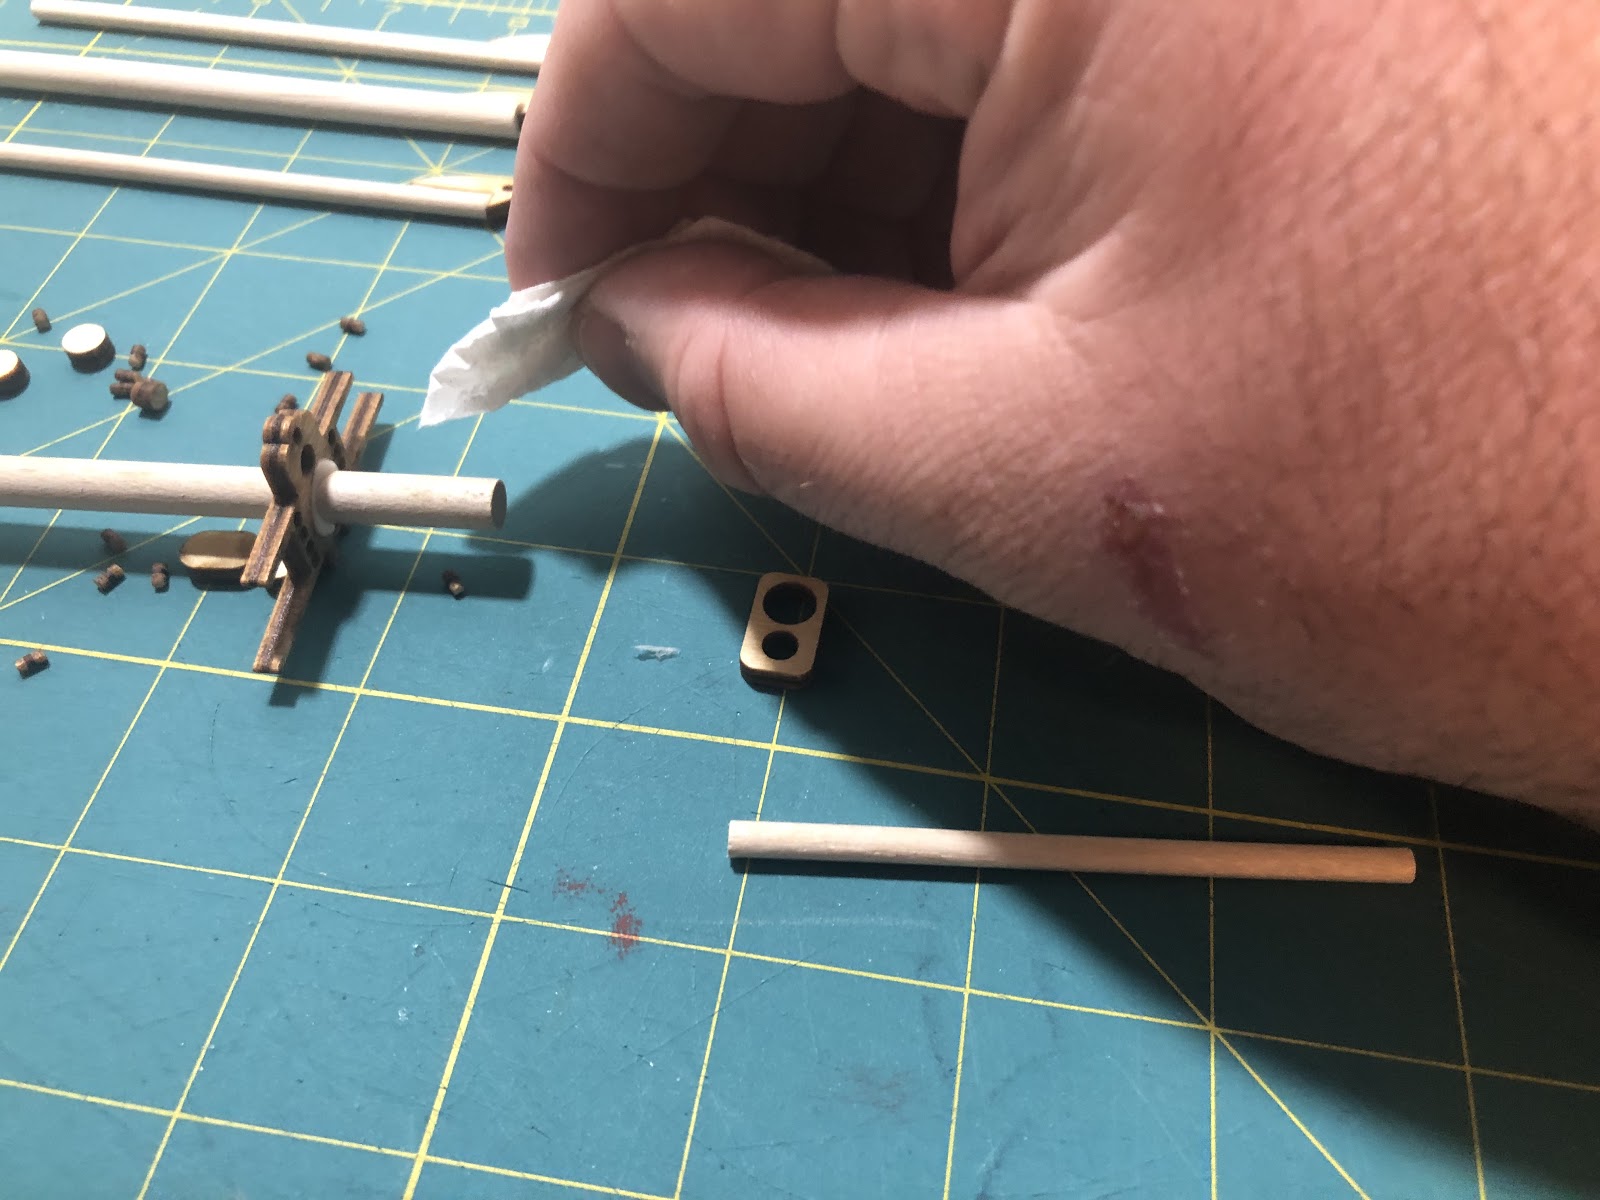
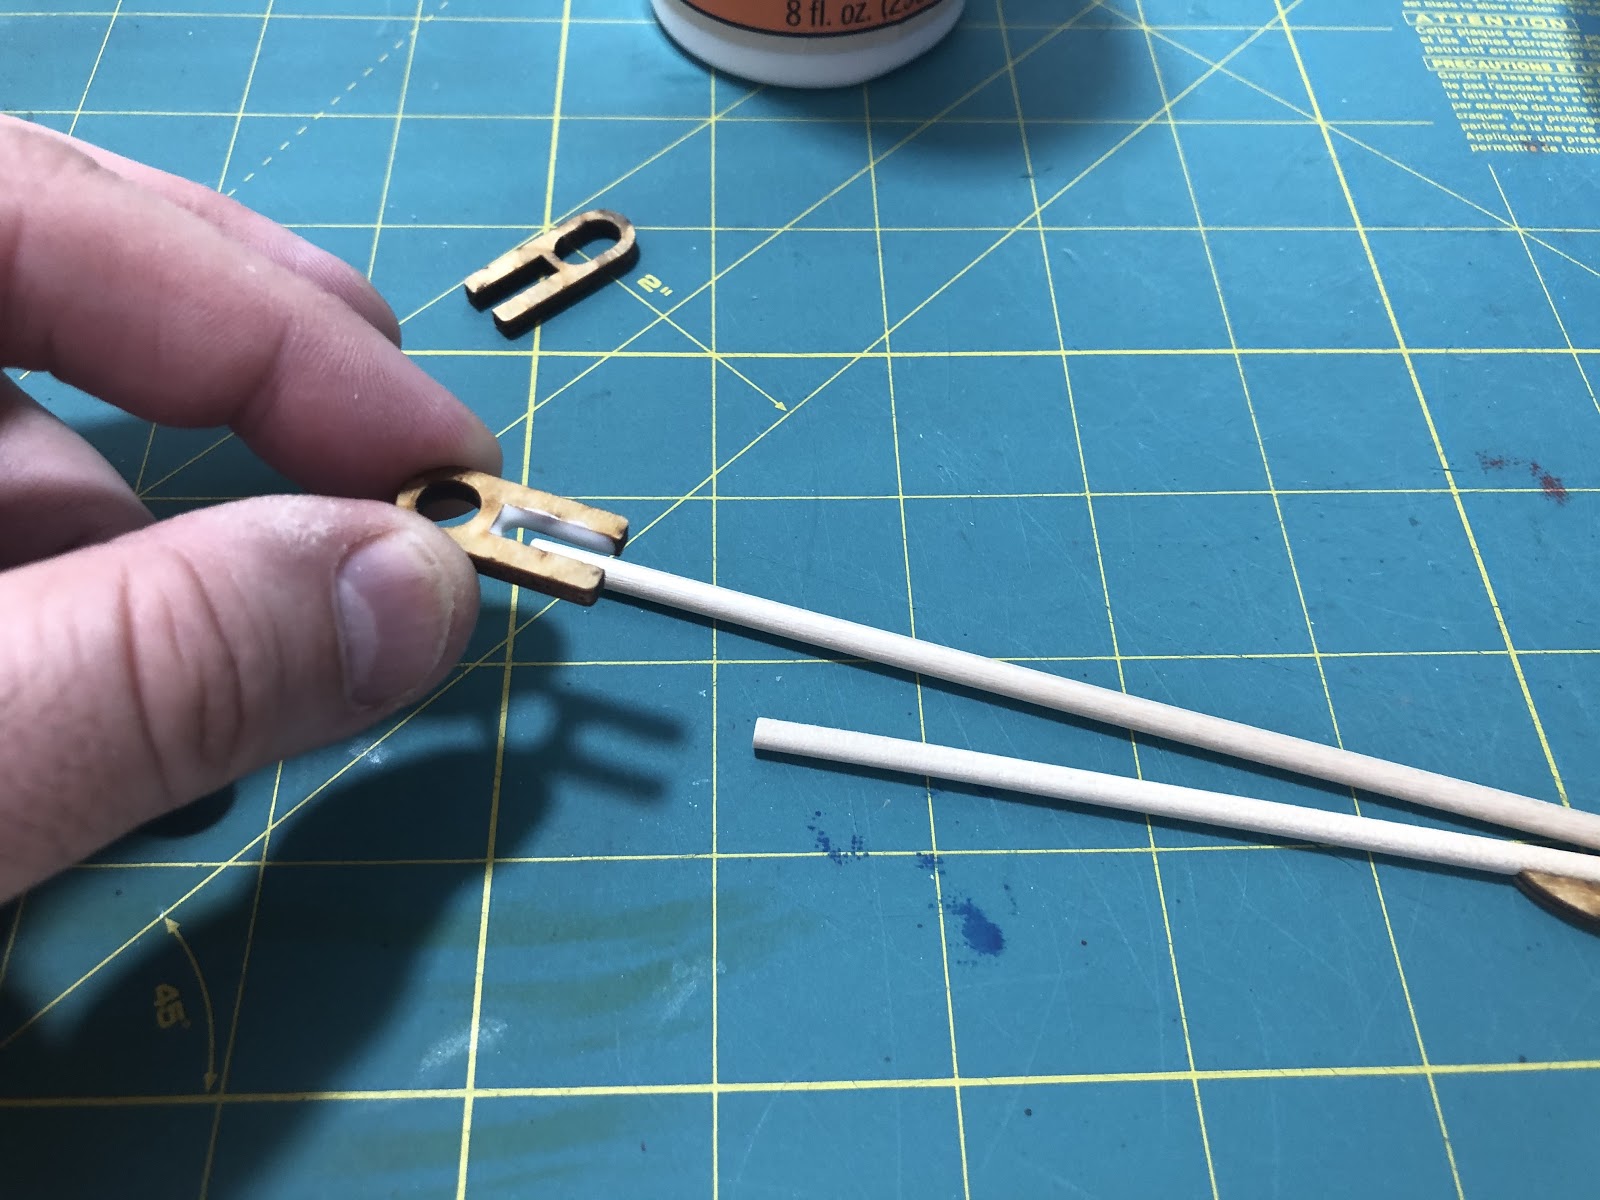
Peel the plastic carefully from both sides of the rigging components. These can sometimes break easily, so don’t bend or force them.
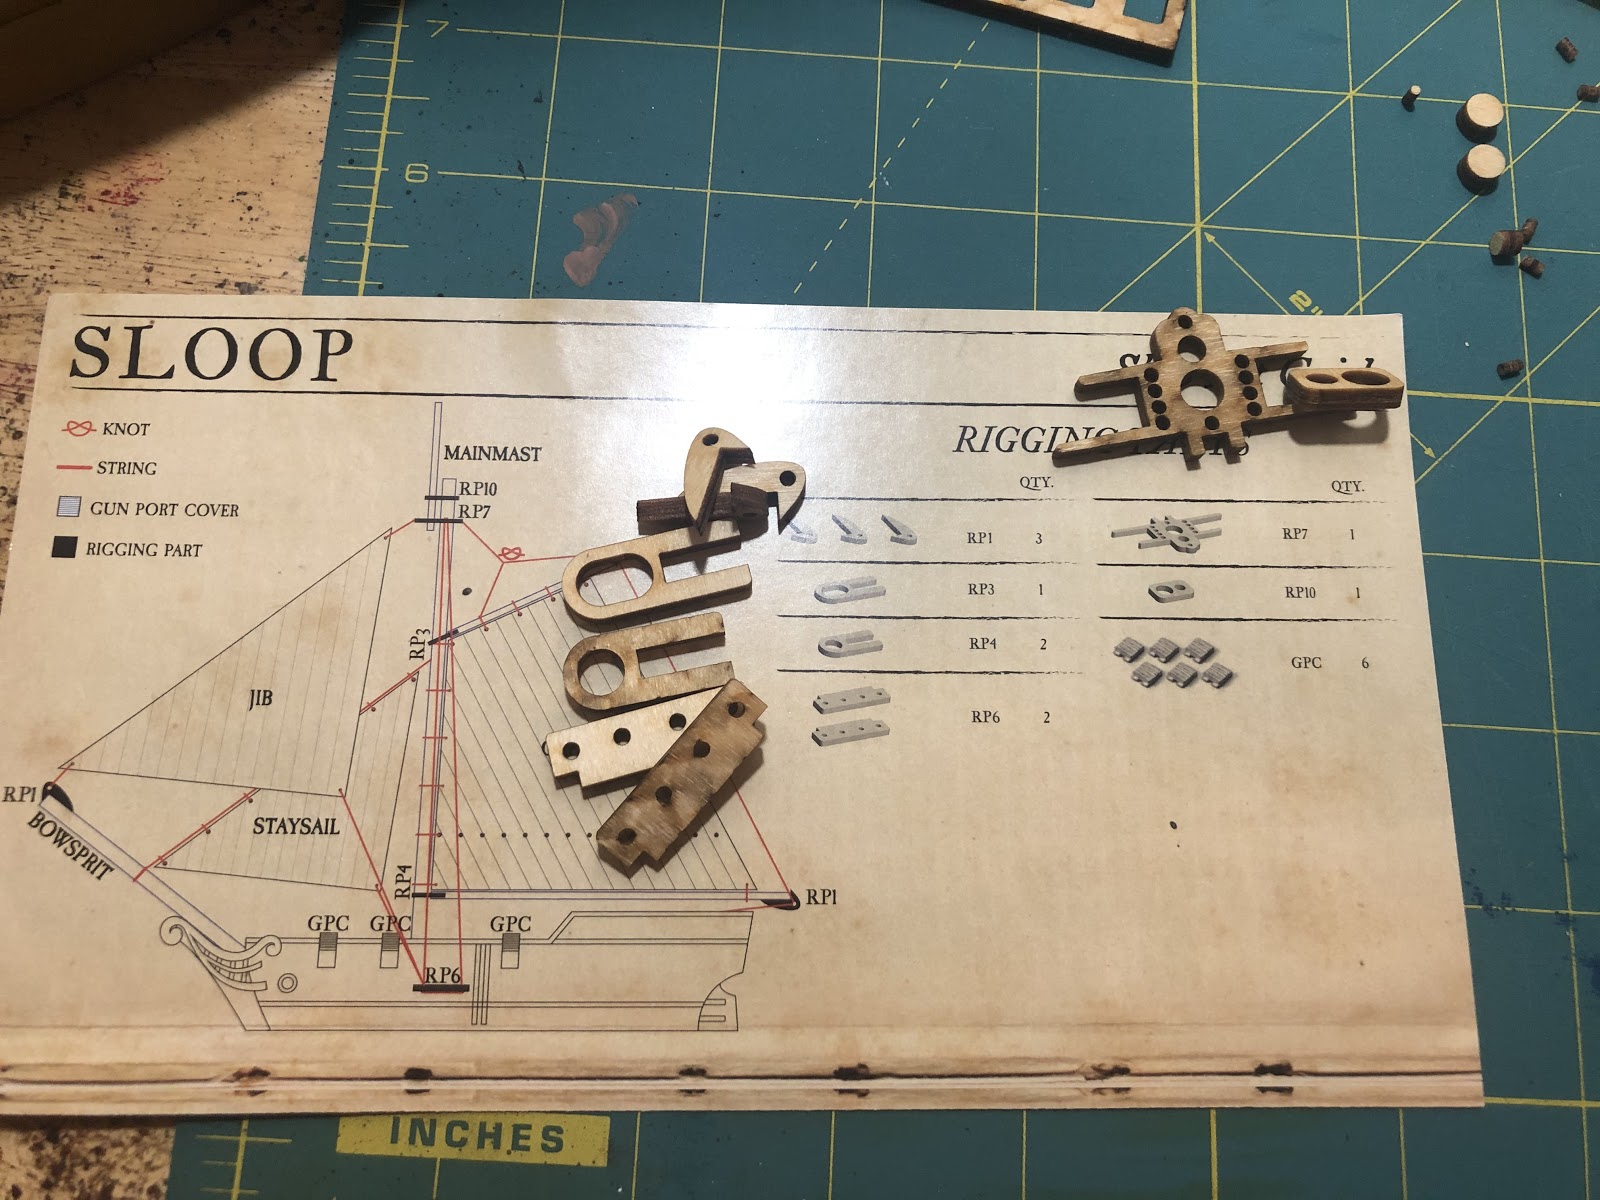
Get out the rigging guide that you got in your box. Note the name of each and where it goes.
Start with RP1. Apply glue to the inside edge of RP1. I like working with wood glue when I can. It gives one of the best holds for wood parts. Parts do not need to be joined immediately, so you can move them to where you want, or correct a mistake. It’s a slow glue though, taking about a day to cure.
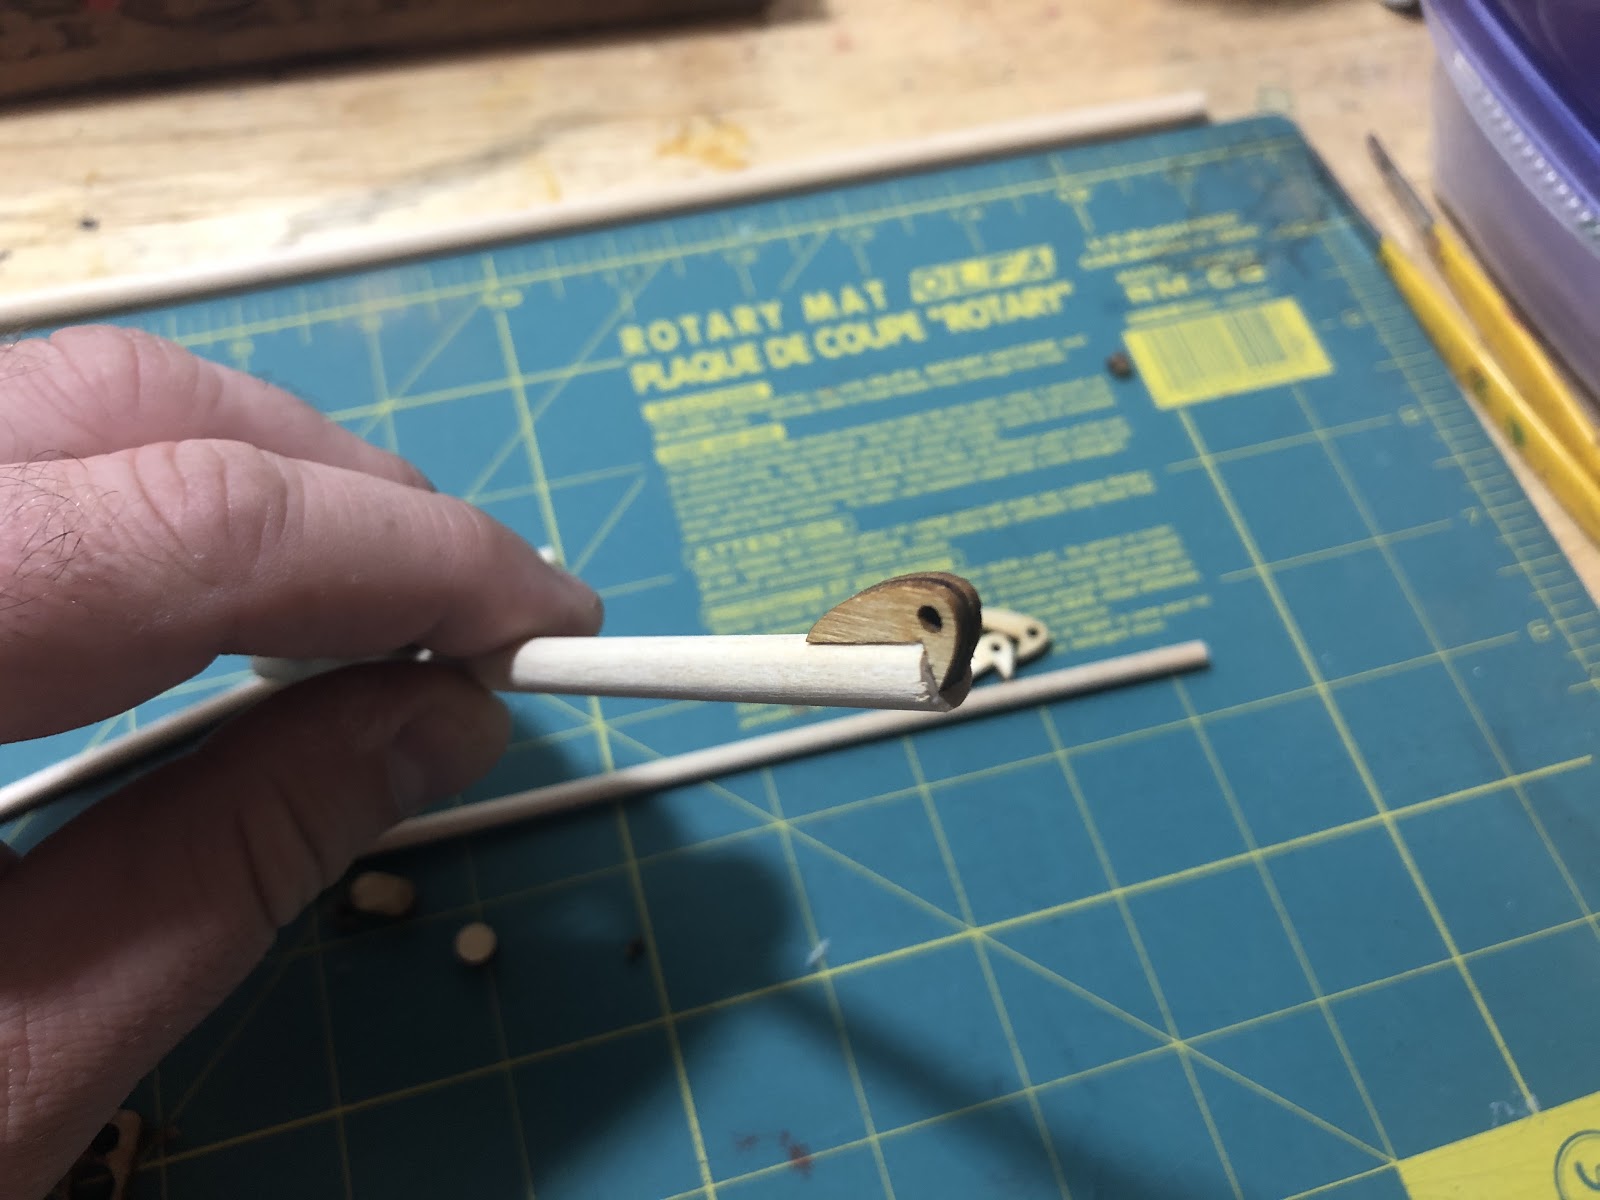
Attach RP1 to the bowsprit. Use a paper towel to remove any excess glue. I will not be priming these, and paint does not stick well to glue. Make sure RP1 is centered on the dowel.
Repeat the same process for the Gaff and the Boom. It is a good idea to towel off excess glue, even if you intend to prime the rigging.
Set the glued parts down on a non porous surface, like plastic. Even with the most care, they will “stick” slightly. Do not let them dry on a wood table.
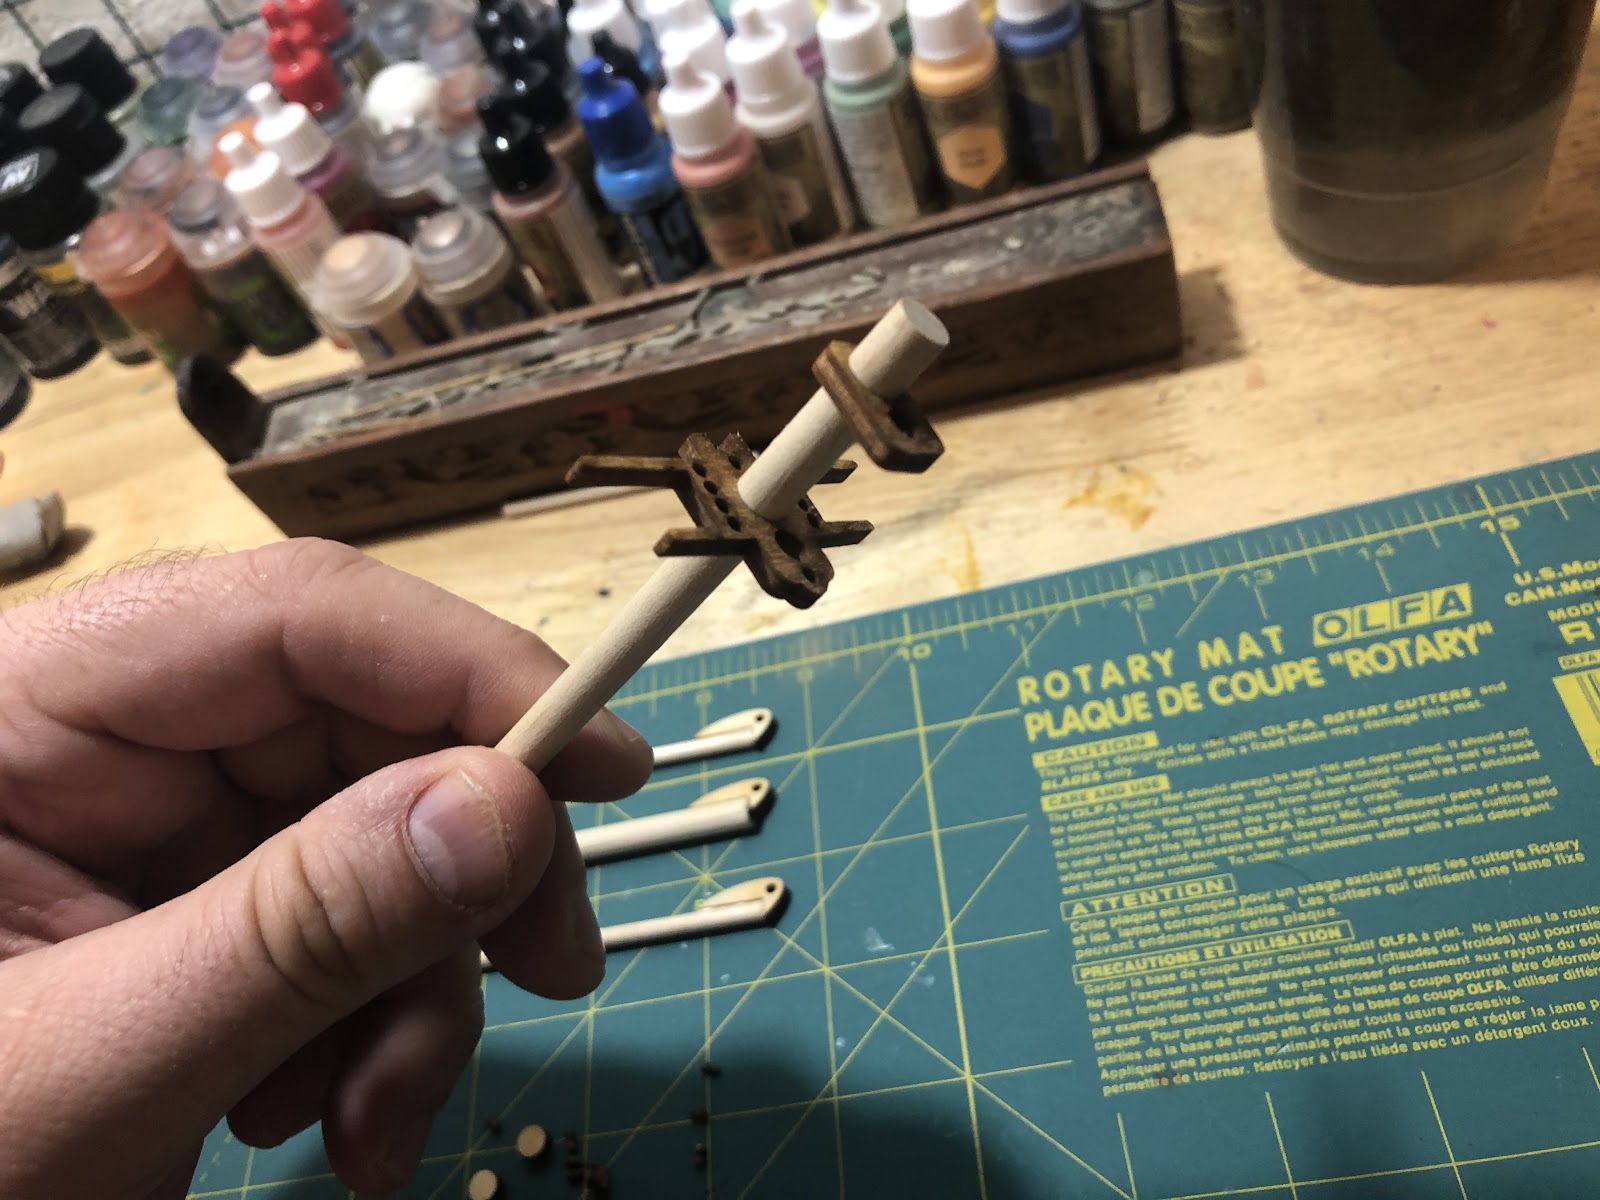
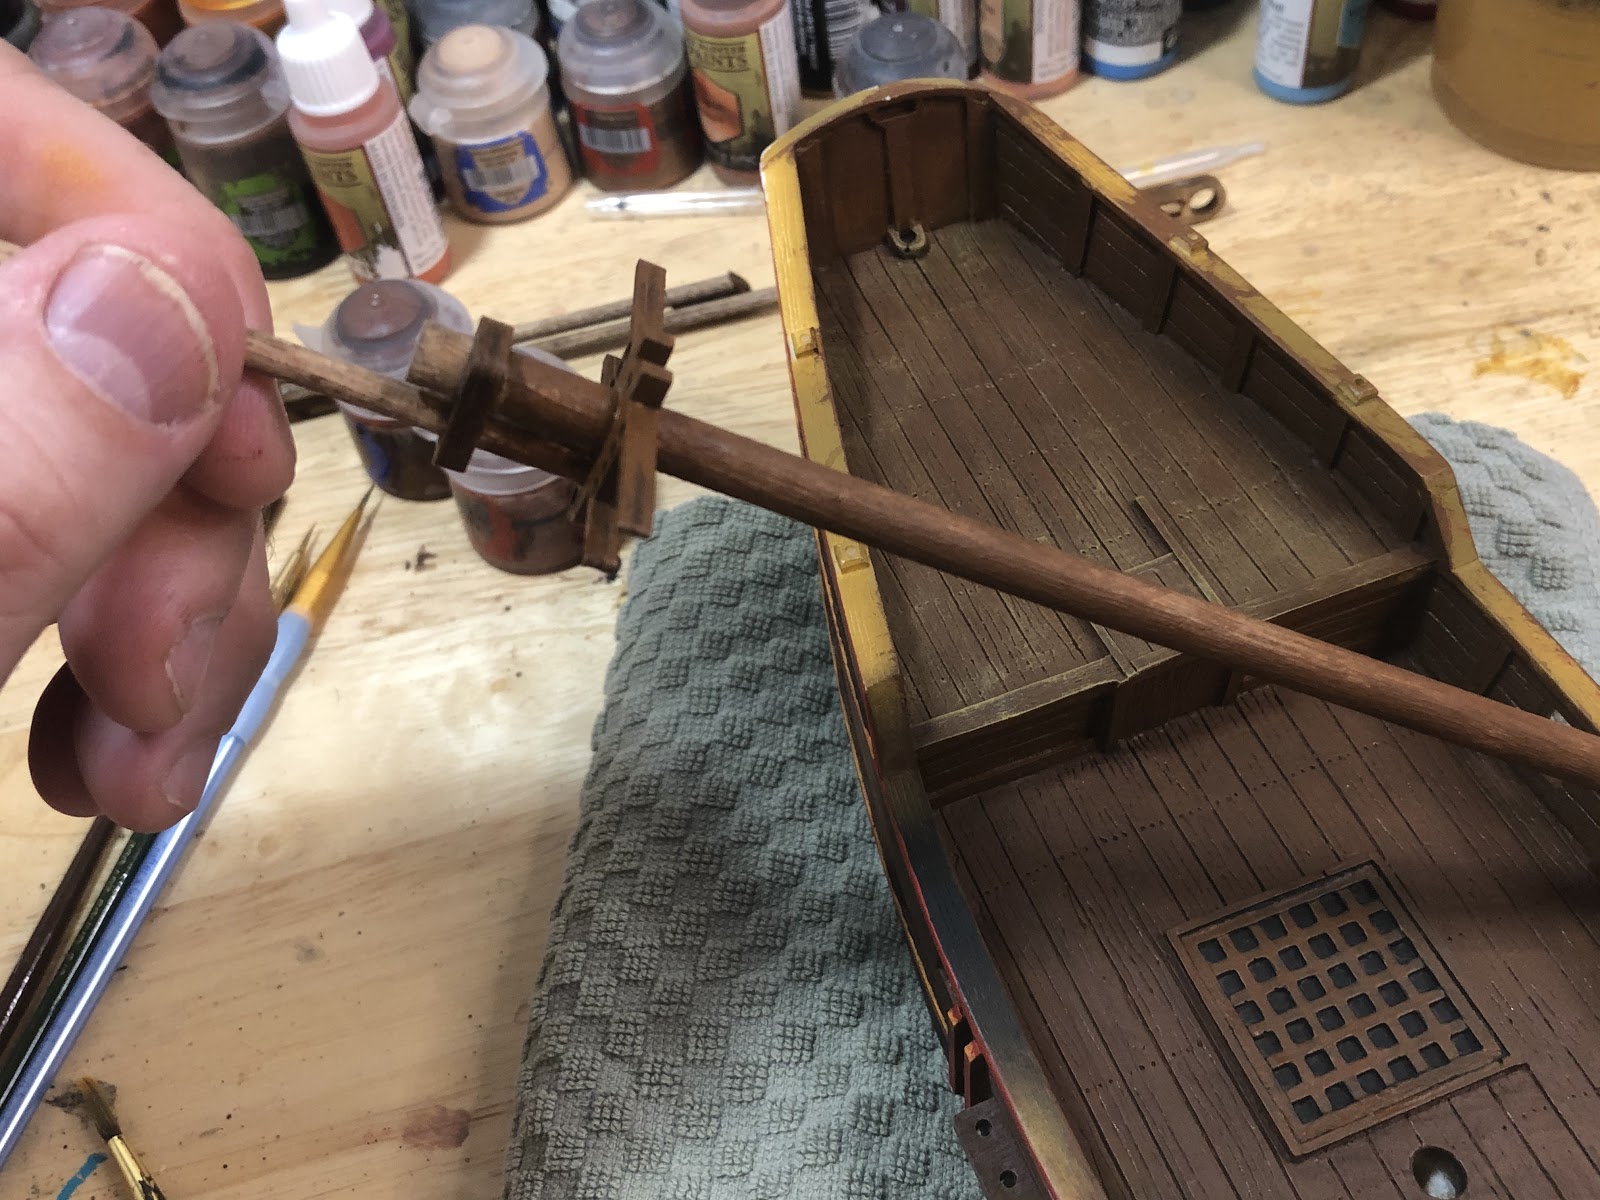
While those are drying, fit RP7 and RP10 to your mast, without any glue. If they do not fit, use sandpaper to smooth the dowel till they do.
Next, fit the Flagstaff into the RP7 and RP10, without glue. You are making sure they fit, and eyeing where you want them.
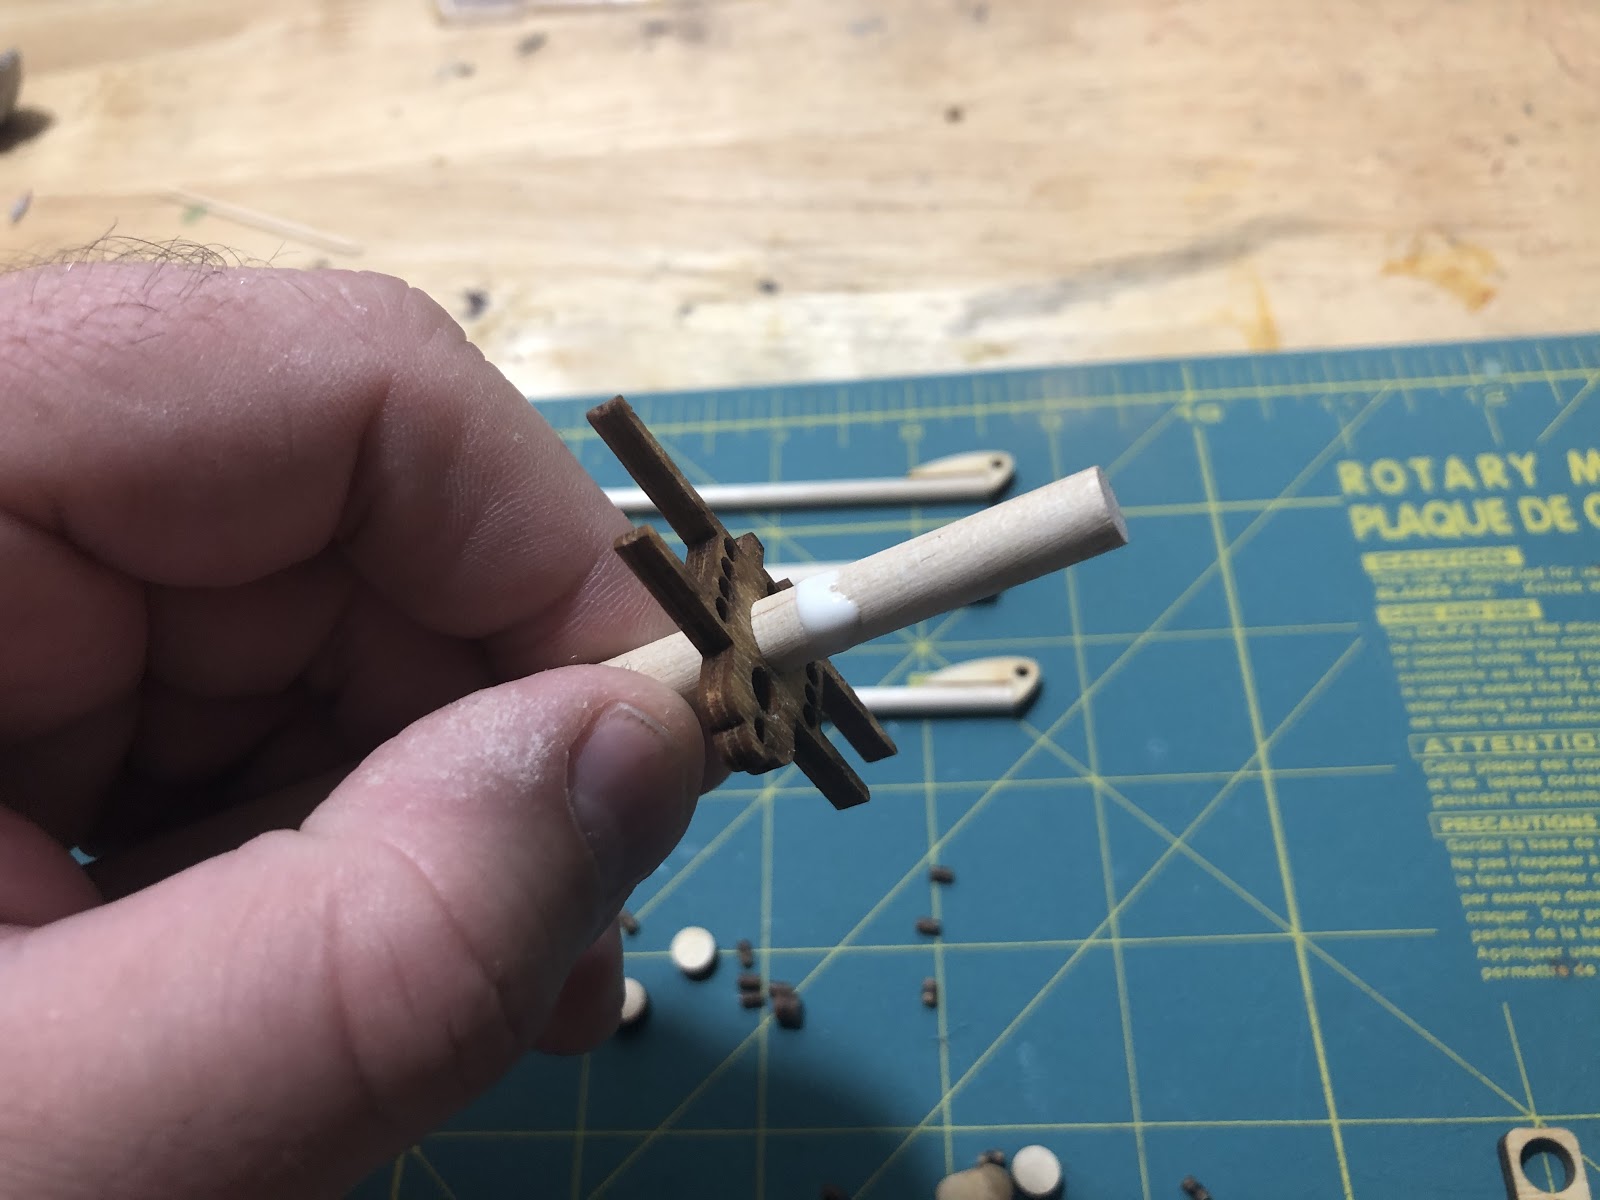
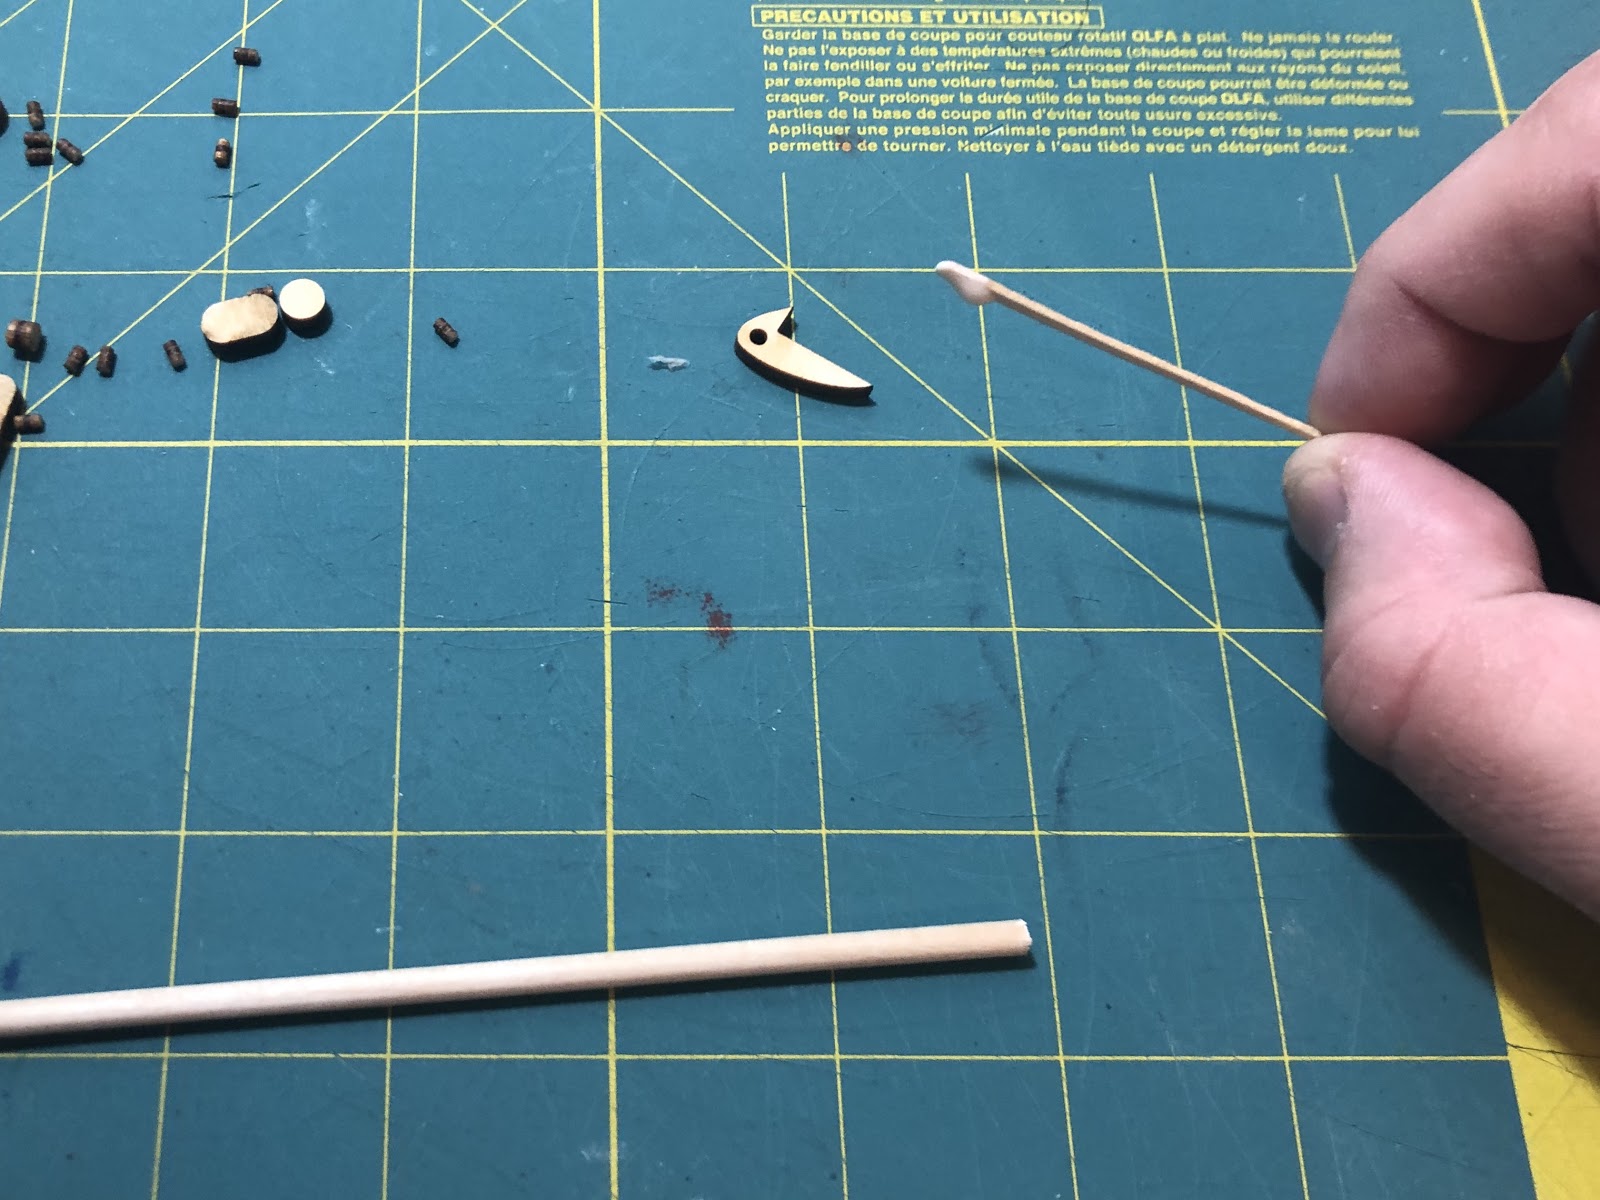
Remove RP10. Push RP7 down the Mast slightly. Apply a thin layer of glue where you want RP7 to be.
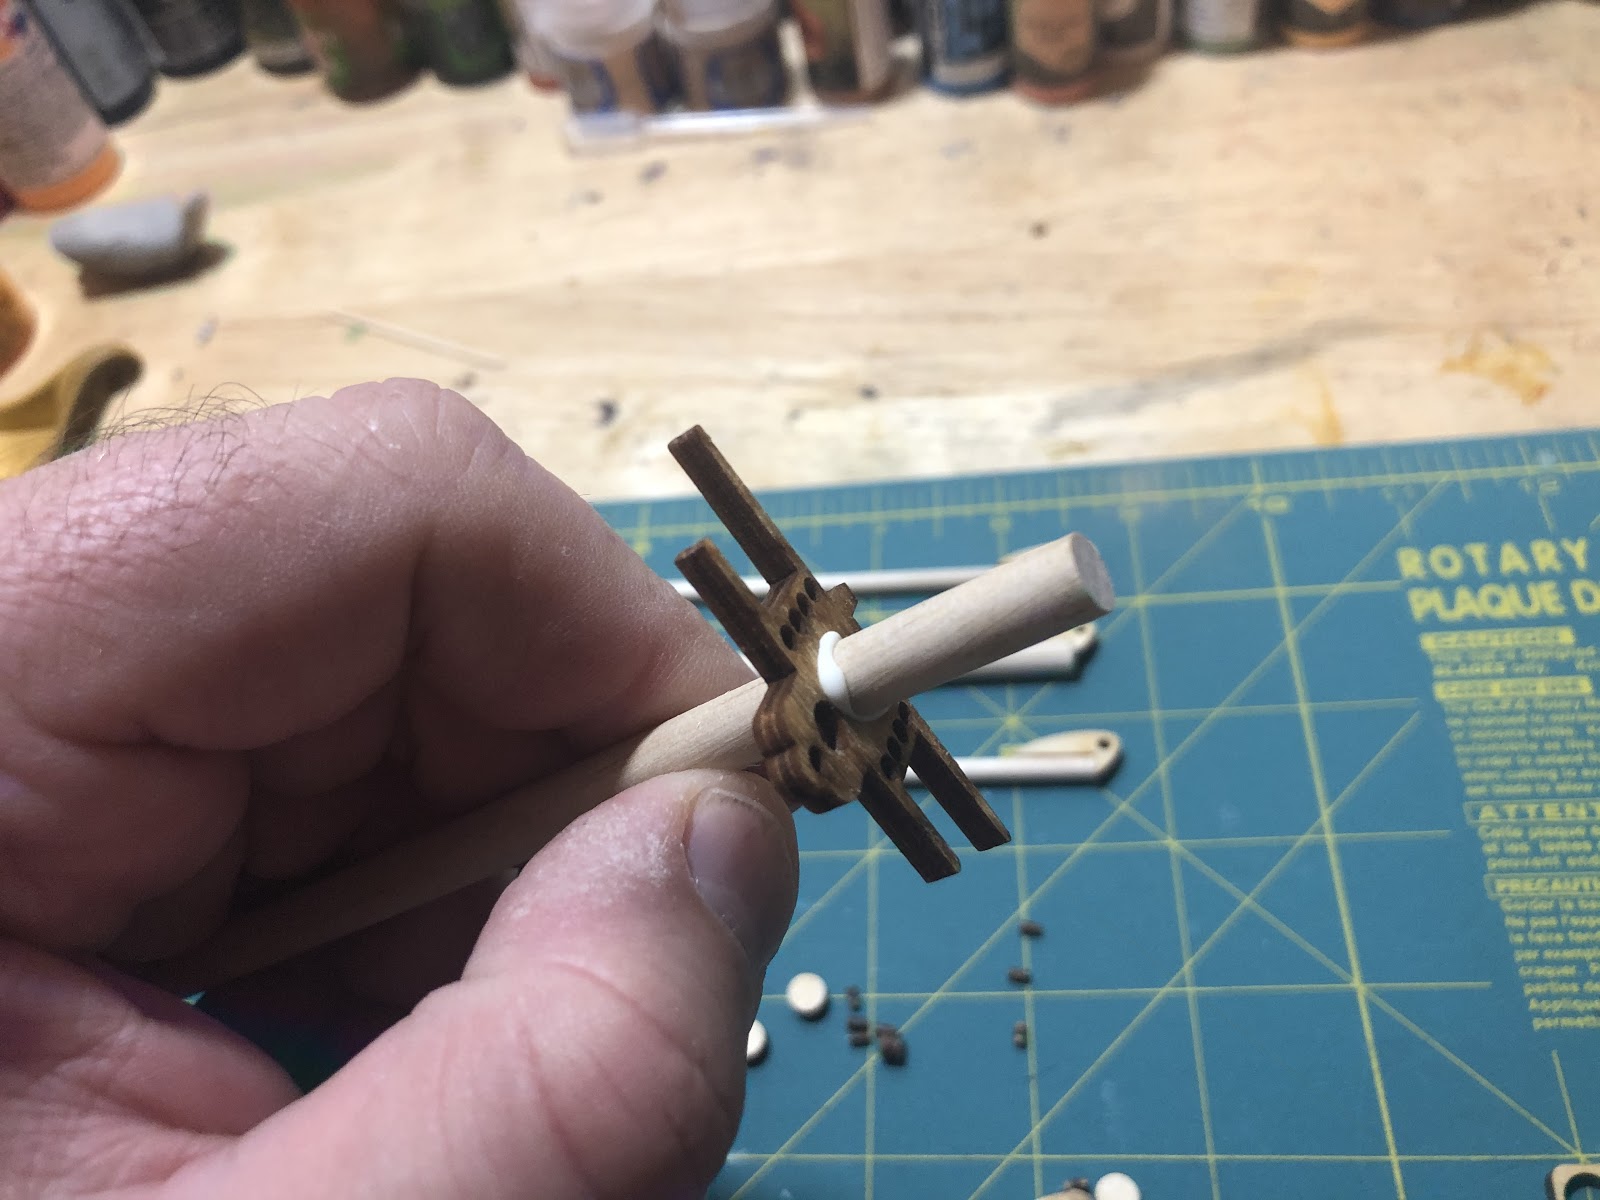
Push RP7 up over the glue, to where you want it to be.
Use a paper towel to remove the excess glue. This is especially important here, because the glue can glob over the holes intended for the rigging.

Apply another layer of glue for RP10. Attach it in the same way you attached RP7.

For the flagstaff, apply a layer of glue to the intended holes instead of the flagstaff.

Gently push it in, and towel off the glue that is smeared on the flagstaff.
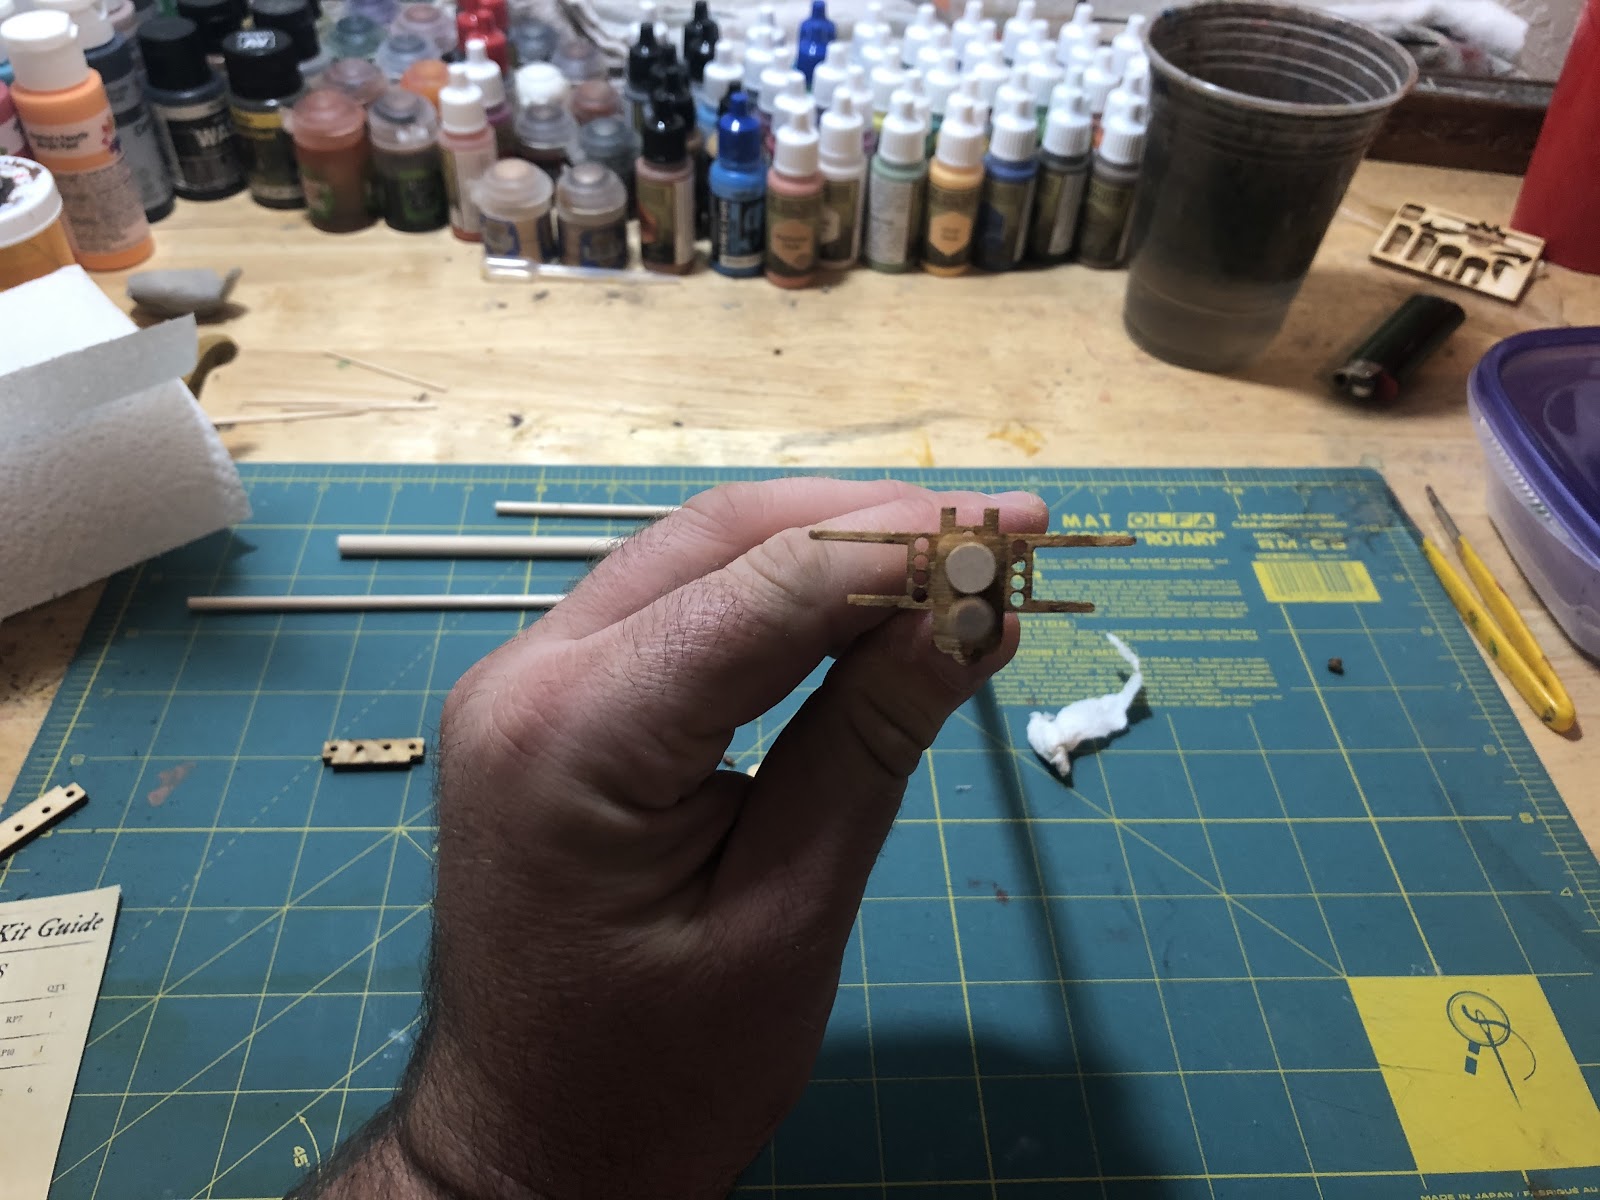
While it’s still wet, look at your mast from the top to make sure everything is straight. Set it down to dry with the other parts you glued.
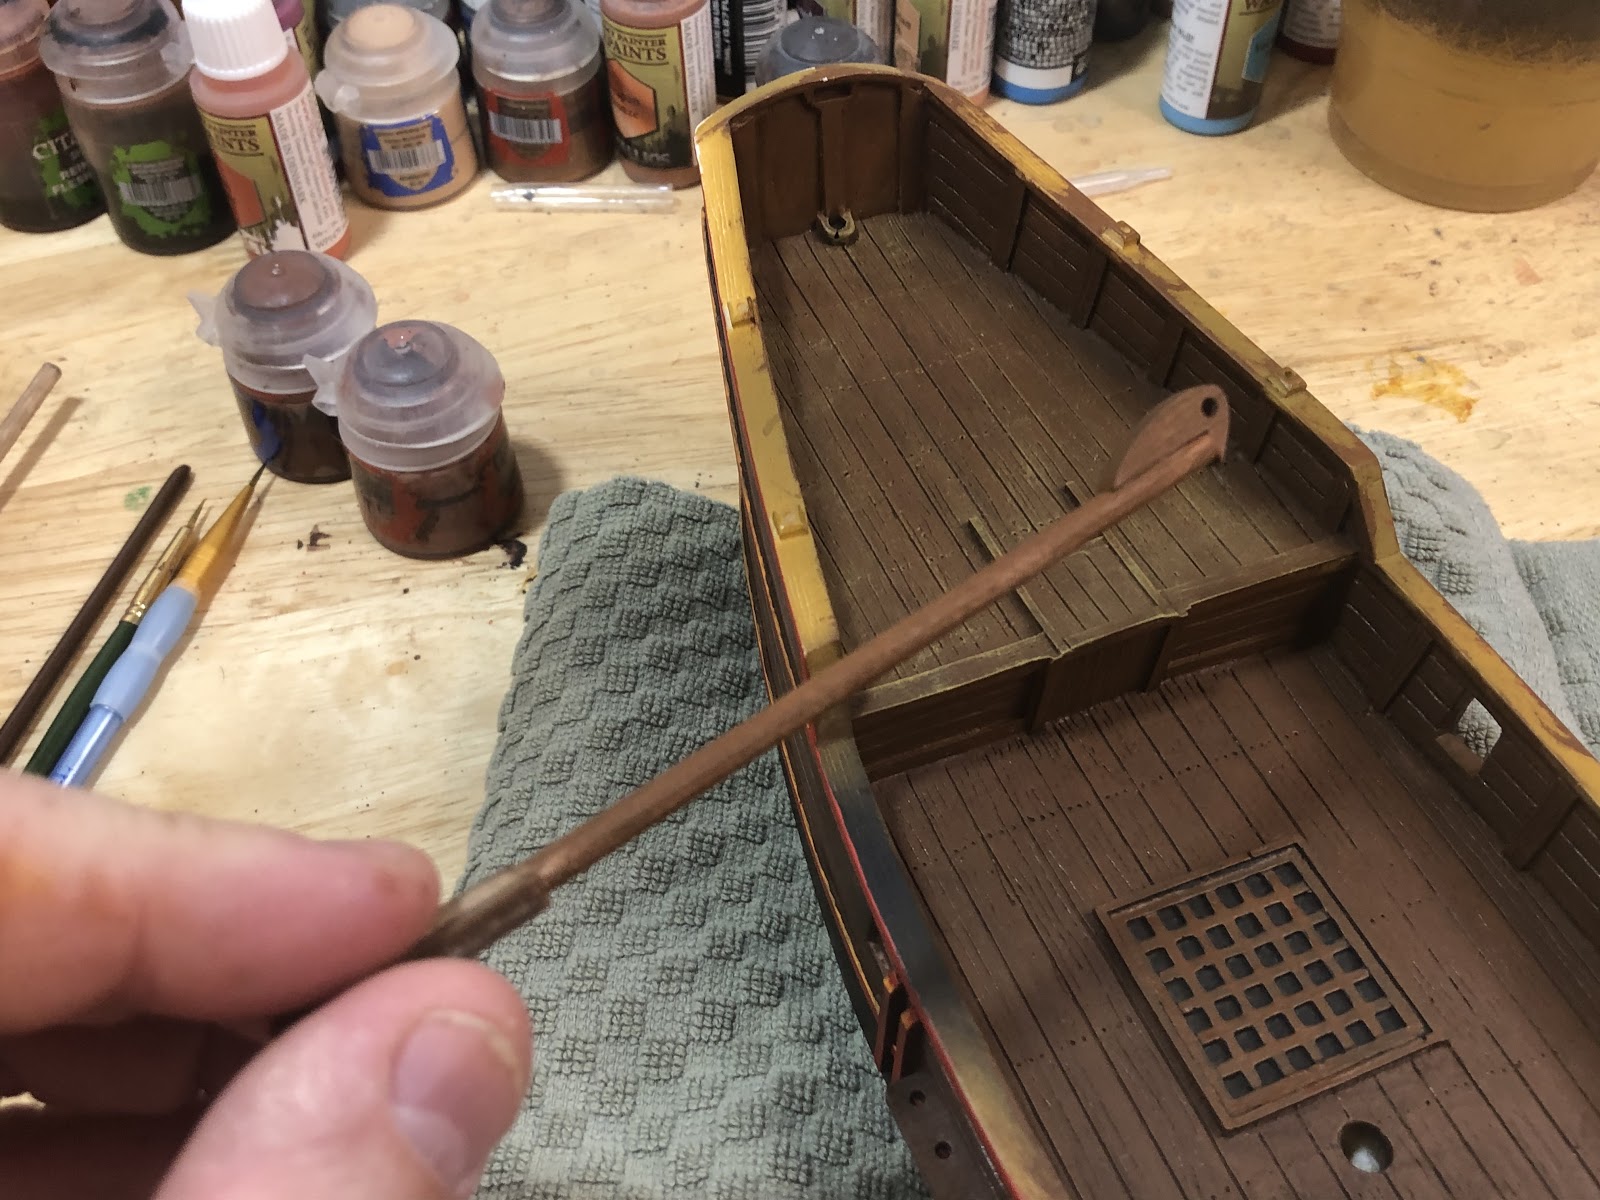
Let those pieces cure for a day.

While you wait, dry fit RP6, the chain guard, to the hull of the sloop. If they fit, take them out and apply a layer of glue. Put RP6 in the slot, and clean any excess glue off the outside.
If RP6 doesn’t fit, use your files, or a knife, to carve out the space.
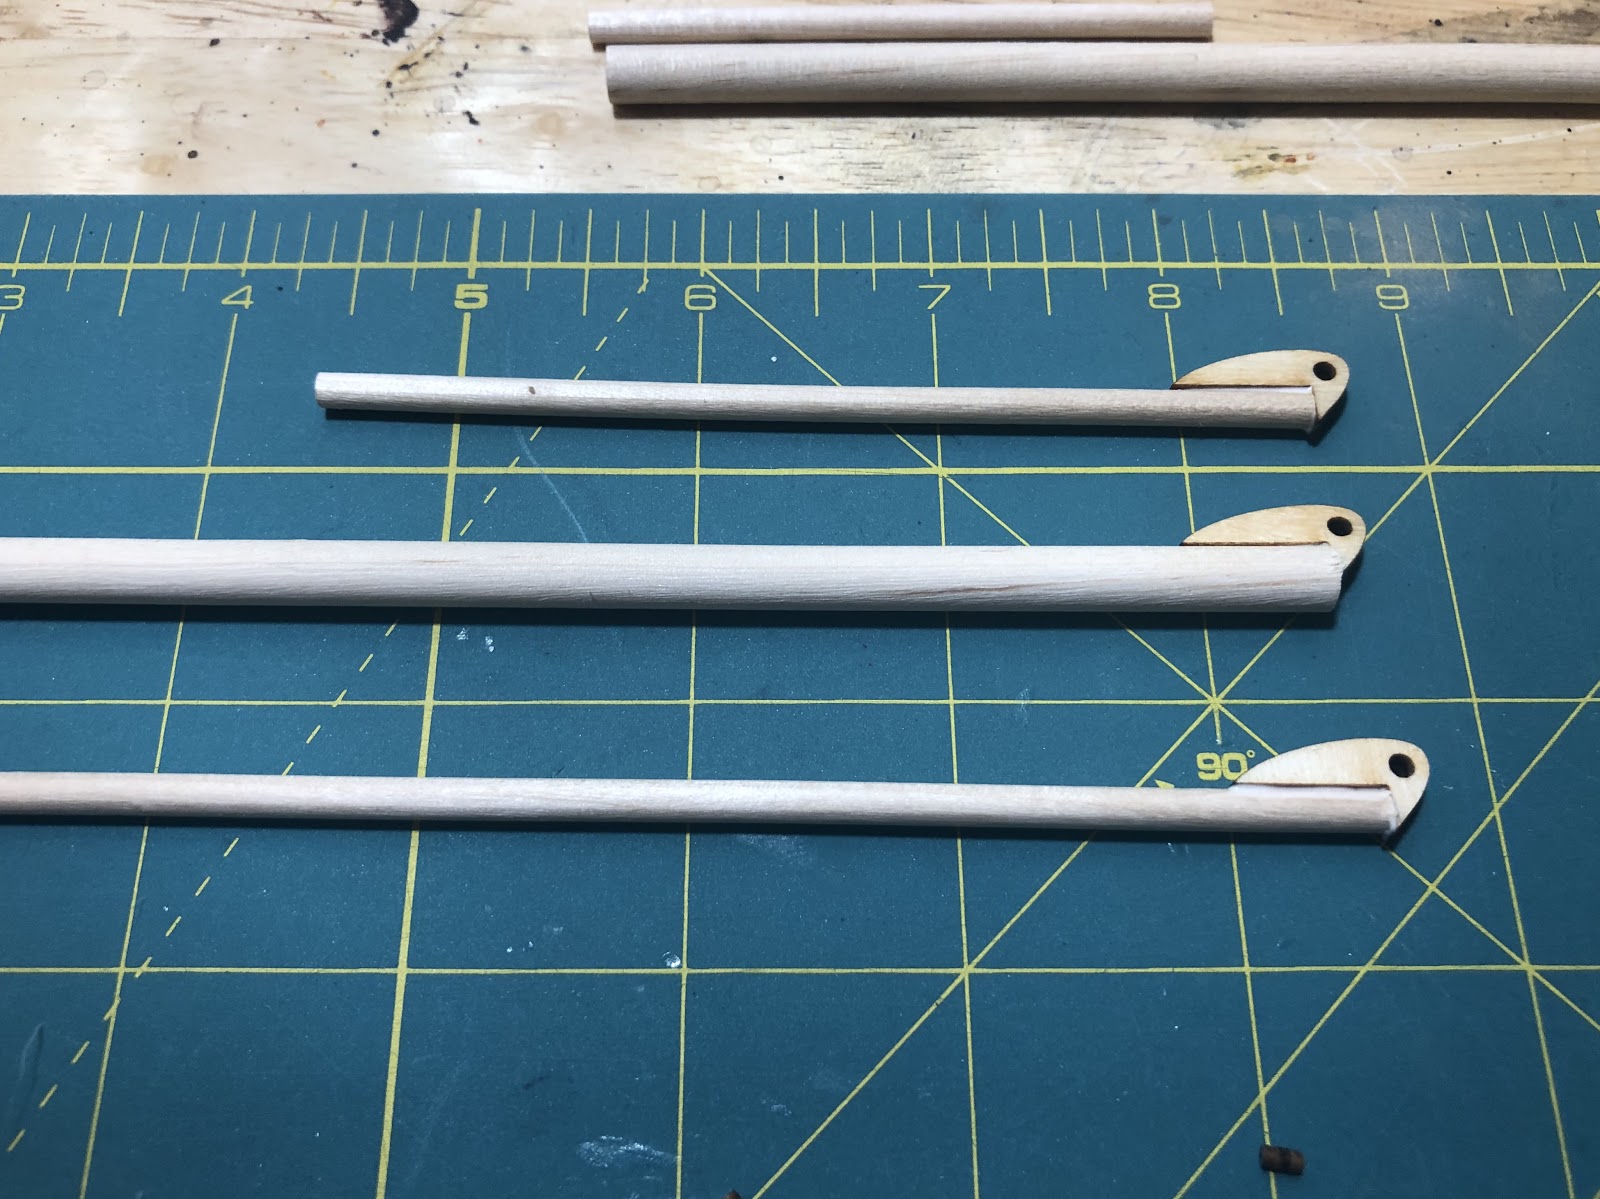
The next day check your work. Attach RP4 to the boom by adding glue to the inside of RP4. Make sure that RP1 on the opposite side of the Boom is facing up. Set it aside to dry and attach RP3 to the Gaff in the same way, making sure to clean any glue off.

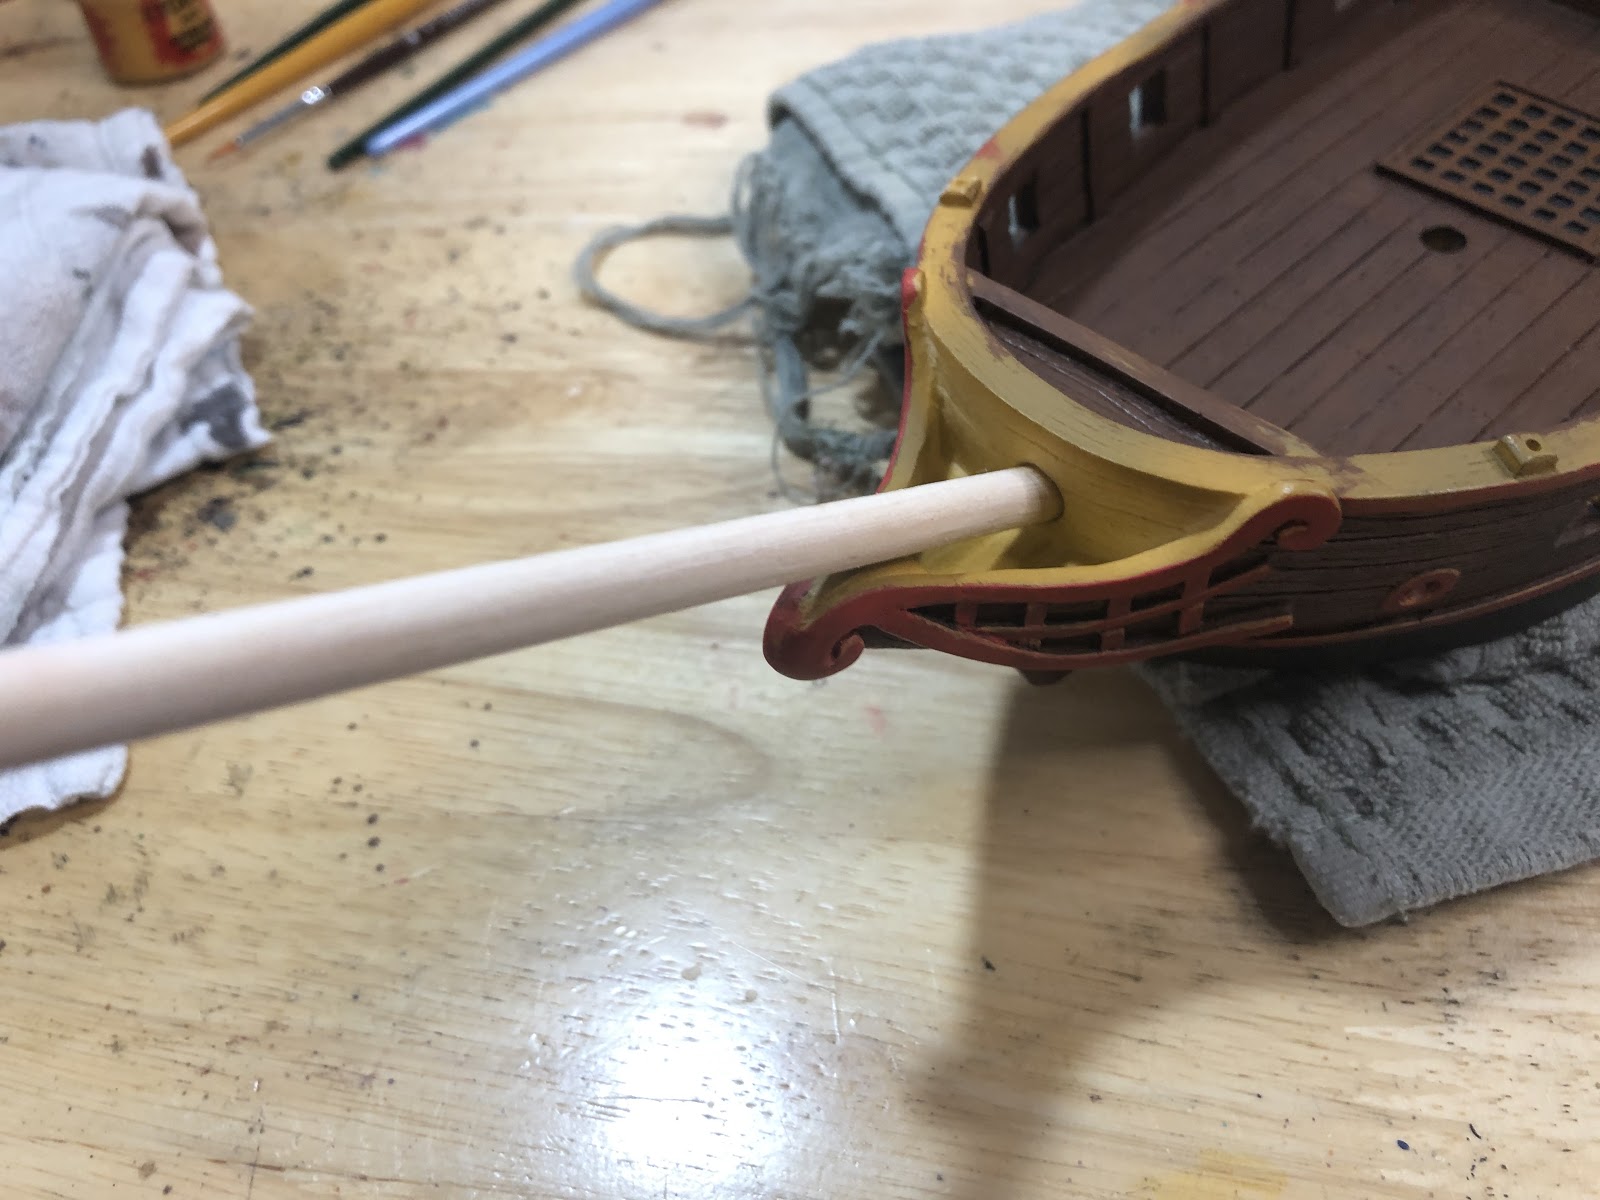
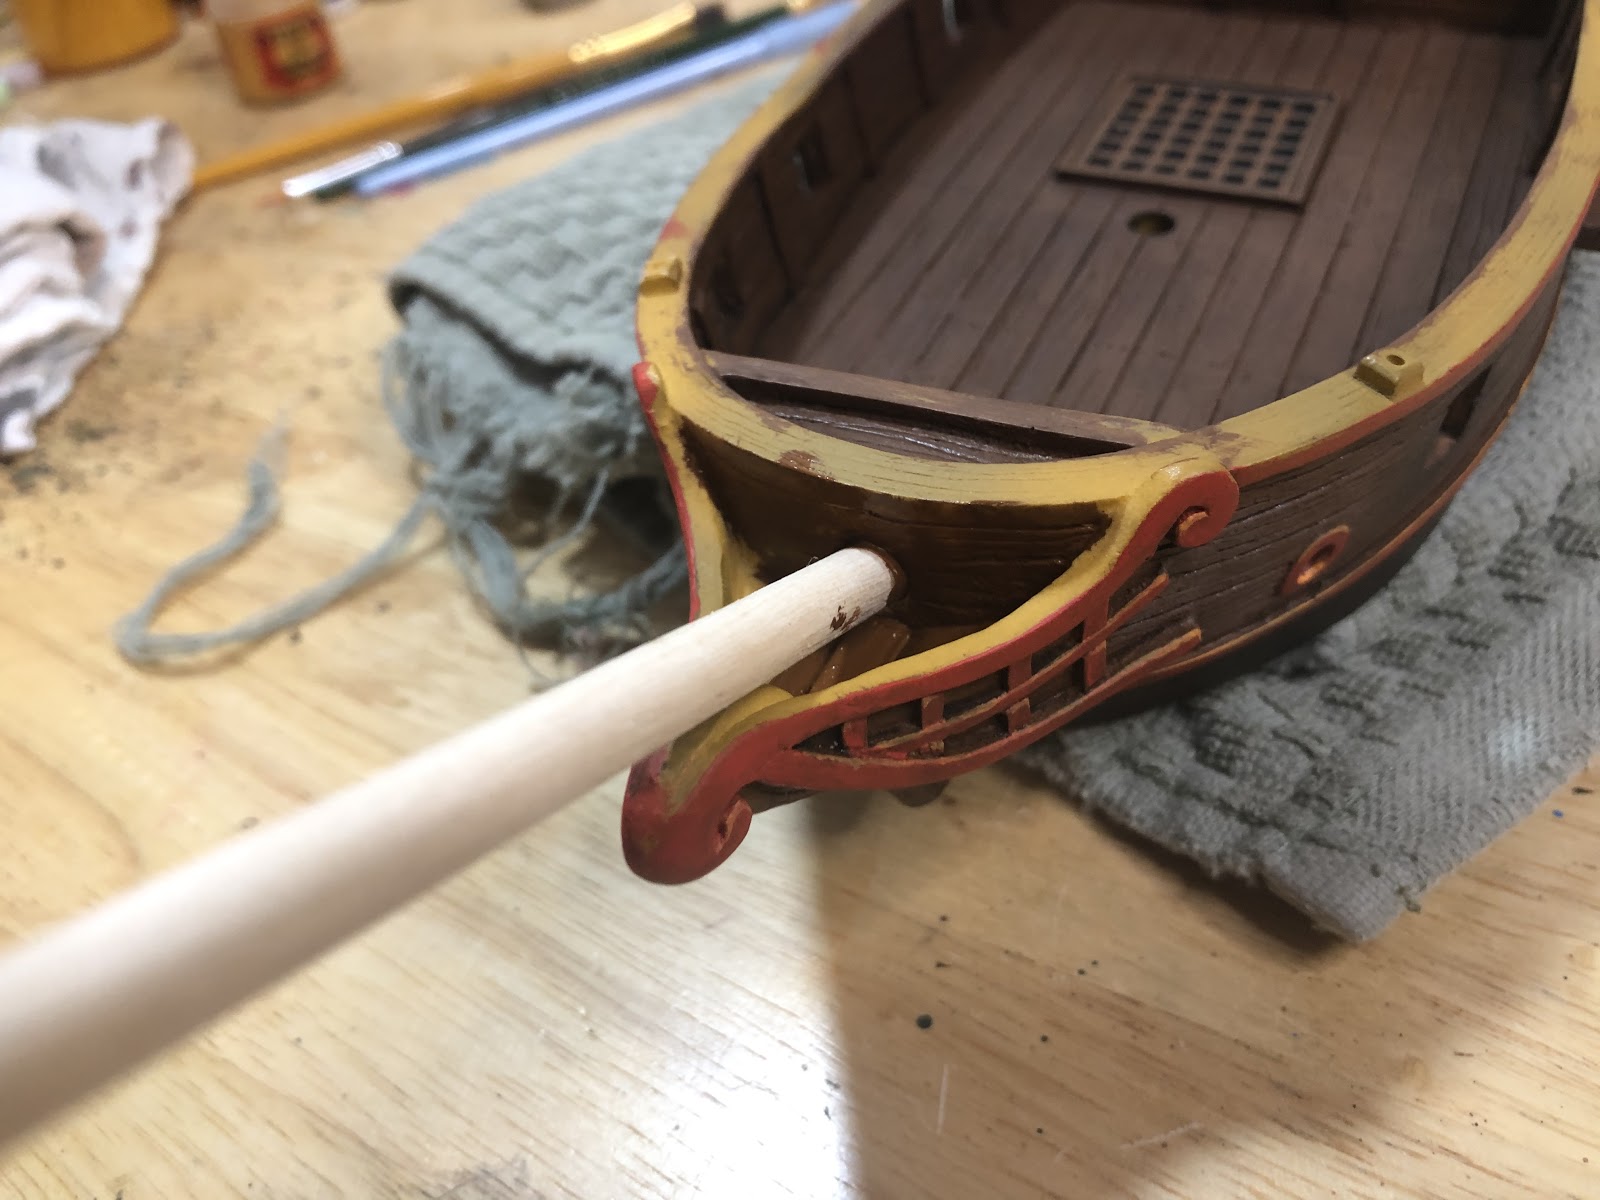
While they dry, pick up the bowsprit. Apply glue to the end and fit it into the hull. Make sure RP1 is facing up.
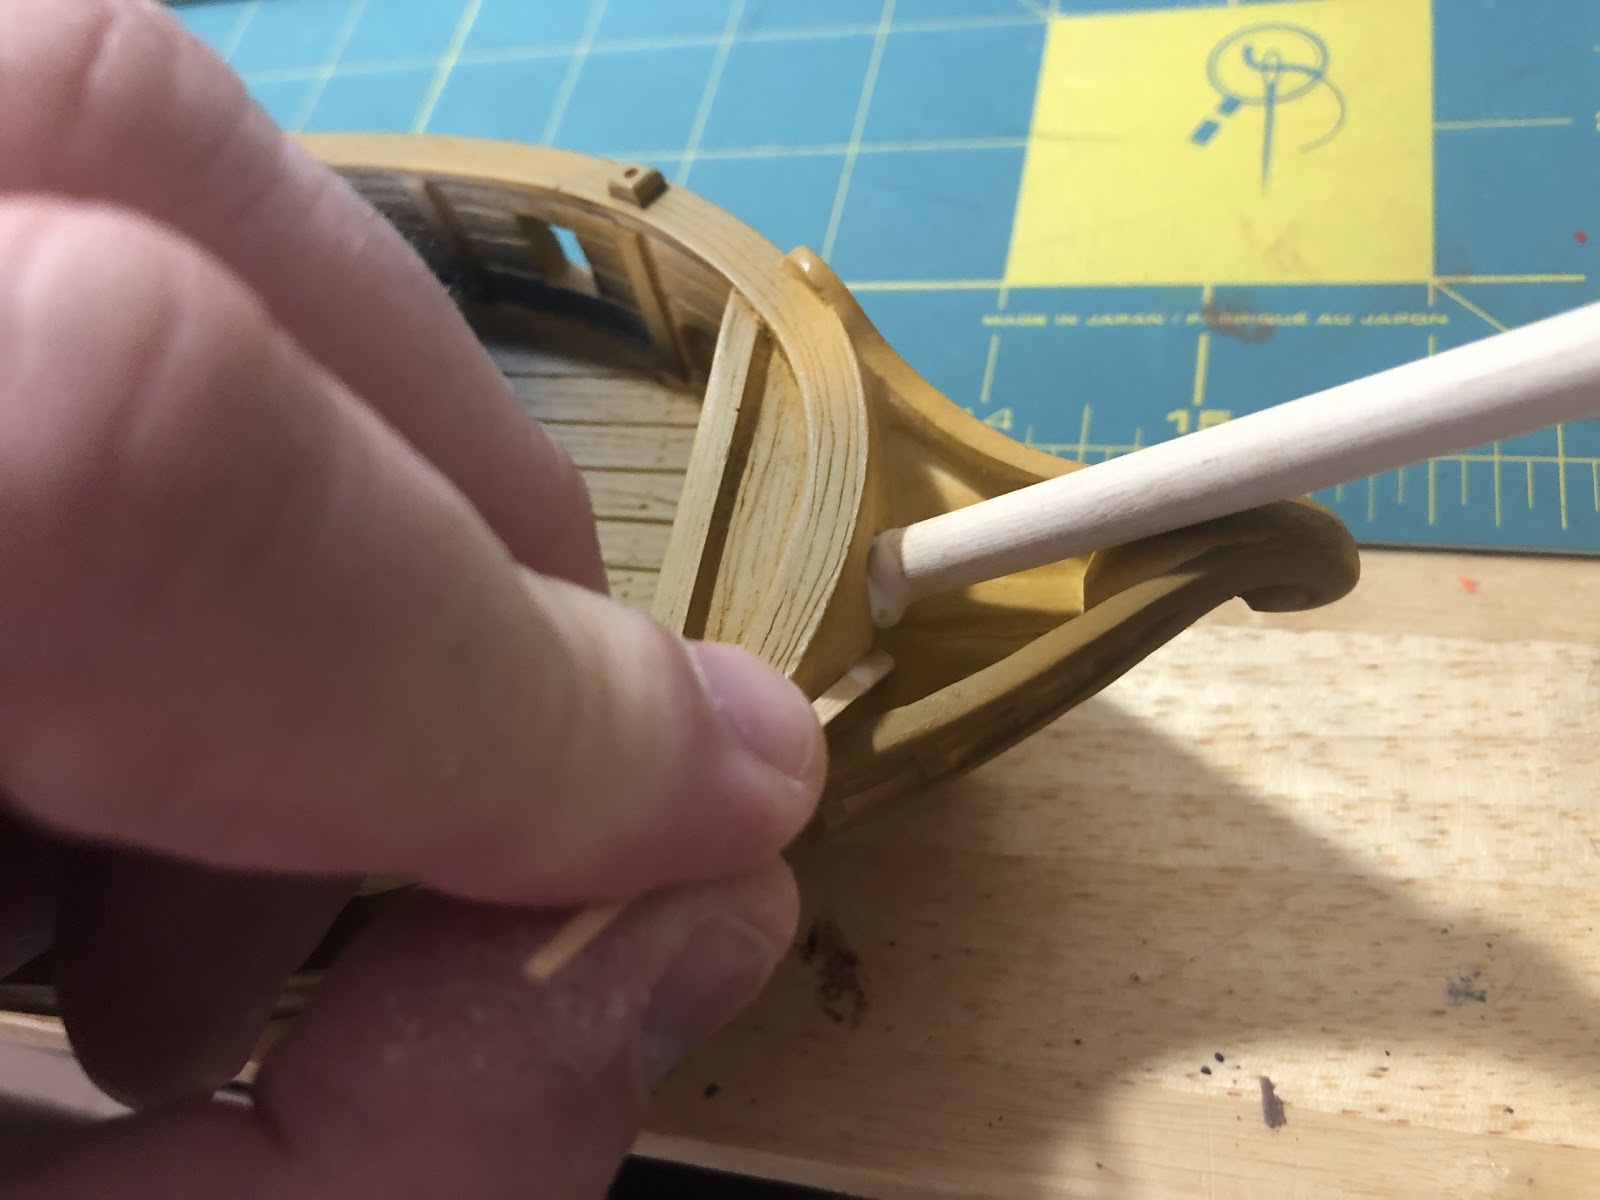
You might have to use a stick to clean the glue off the hull.
Look at the ship from the front to make sure it is straight.
Check the bow from the back as well. Set the rigging parts aside to cure for a day.
Step 5: Painting the Larboard Side
Paint Supplies Needed:
- Paint
- Brushes
- Non Precious Cup for Water
- Wet Pallet
- Paint Rag
- Poster putty
- Optional: Large Old Towel
I used to mount my ships on a large paint jar of gesso. It was inconvenient, and they fell off often, sometimes ruining the coat. I started using a large folded old towel to hold the ship while painting.
The towel can be rotated, letting you easily get the ship to the right angle for your wrist.

Using a towel also saves the paint on the other side, as long as you don’t move the ship around on the towel often.
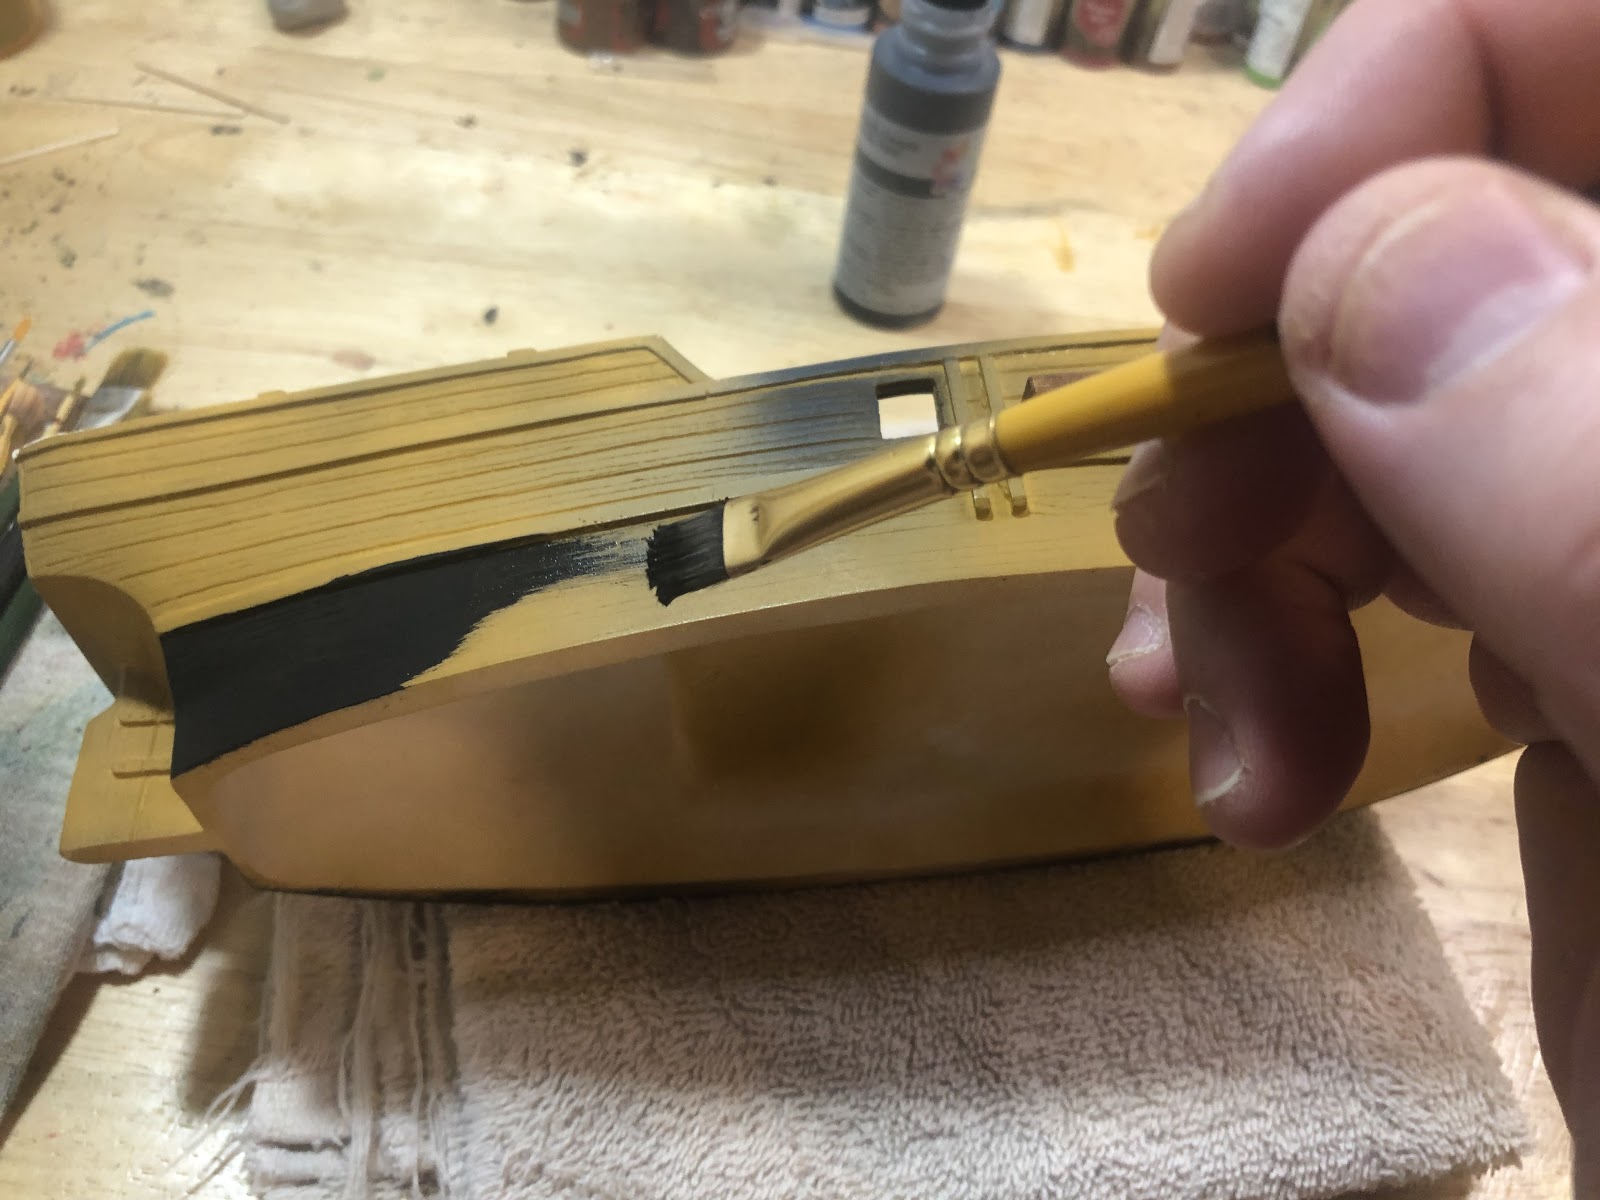
Start at the hull below the gunwales. Most hulls of the era were painted black below the waterline, to stave off shipworms. Choose whatever color you want.
I use cheap, craft store paint for my basic colors. I can shake them to mix the paint, with few consequences, and paint out of the cap. I will sometimes have to apply multiple coats with lighter colors. For the sake of you following along, I limited my color selection to Delta Ceramcoat paints, and Citadel Paints and Washes.

When you first start painting your ship, save yourself some time and choose a larger brush for the base coats.
Use the wet pallet to thin your paints. The entire ship is covered with wood grain details, and a thick coat of paint or primer will erase that detail.
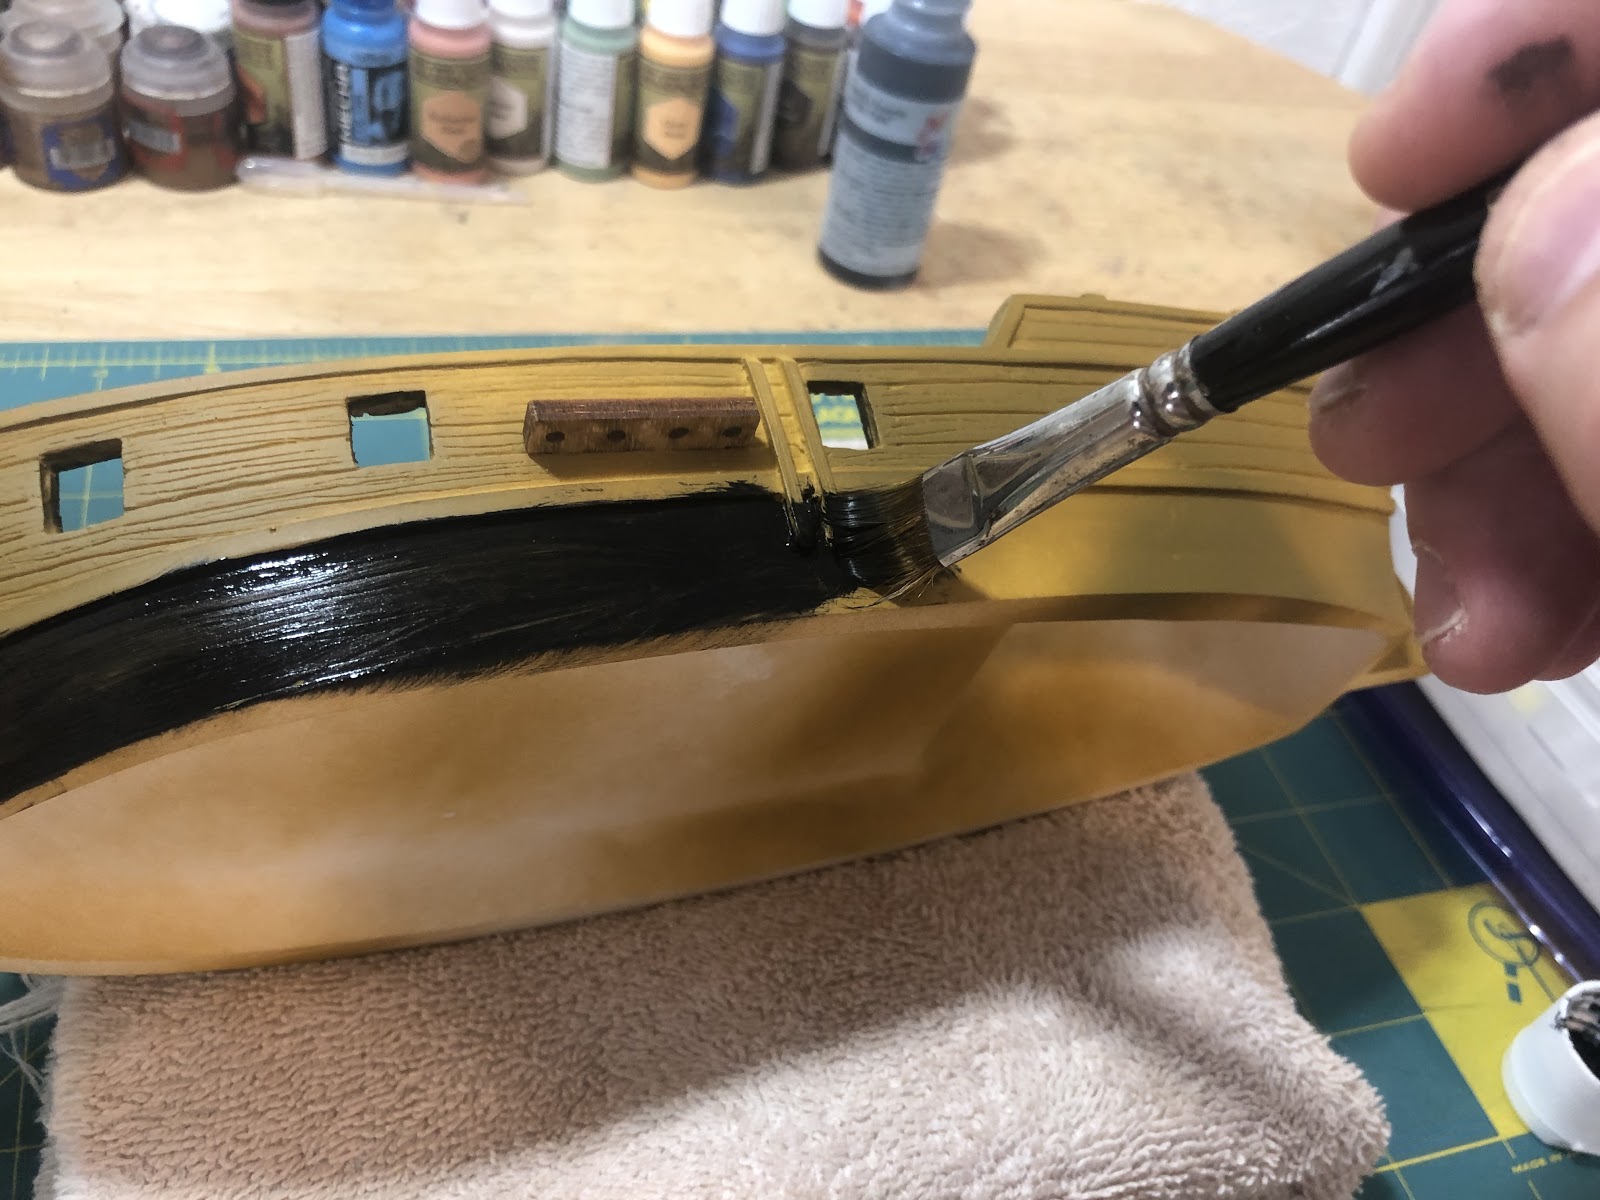
Apply the paint in thin even strokes. Don’t worry about “going over the line”. Use this step to paint the underside of the waterline. The waterline is the moulding that separates the lower hull from the gunwales.

When you get to the stern use a smaller brush. Follow the waterline from the larboard side and paint everything below it.
Once done, clean off your brush. Go over the area again, with your clean brush, to smooth the paint out. Make sure the paint hasn’t welled up anywhere.
Check out your work from different angles, to make sure you painted everything.
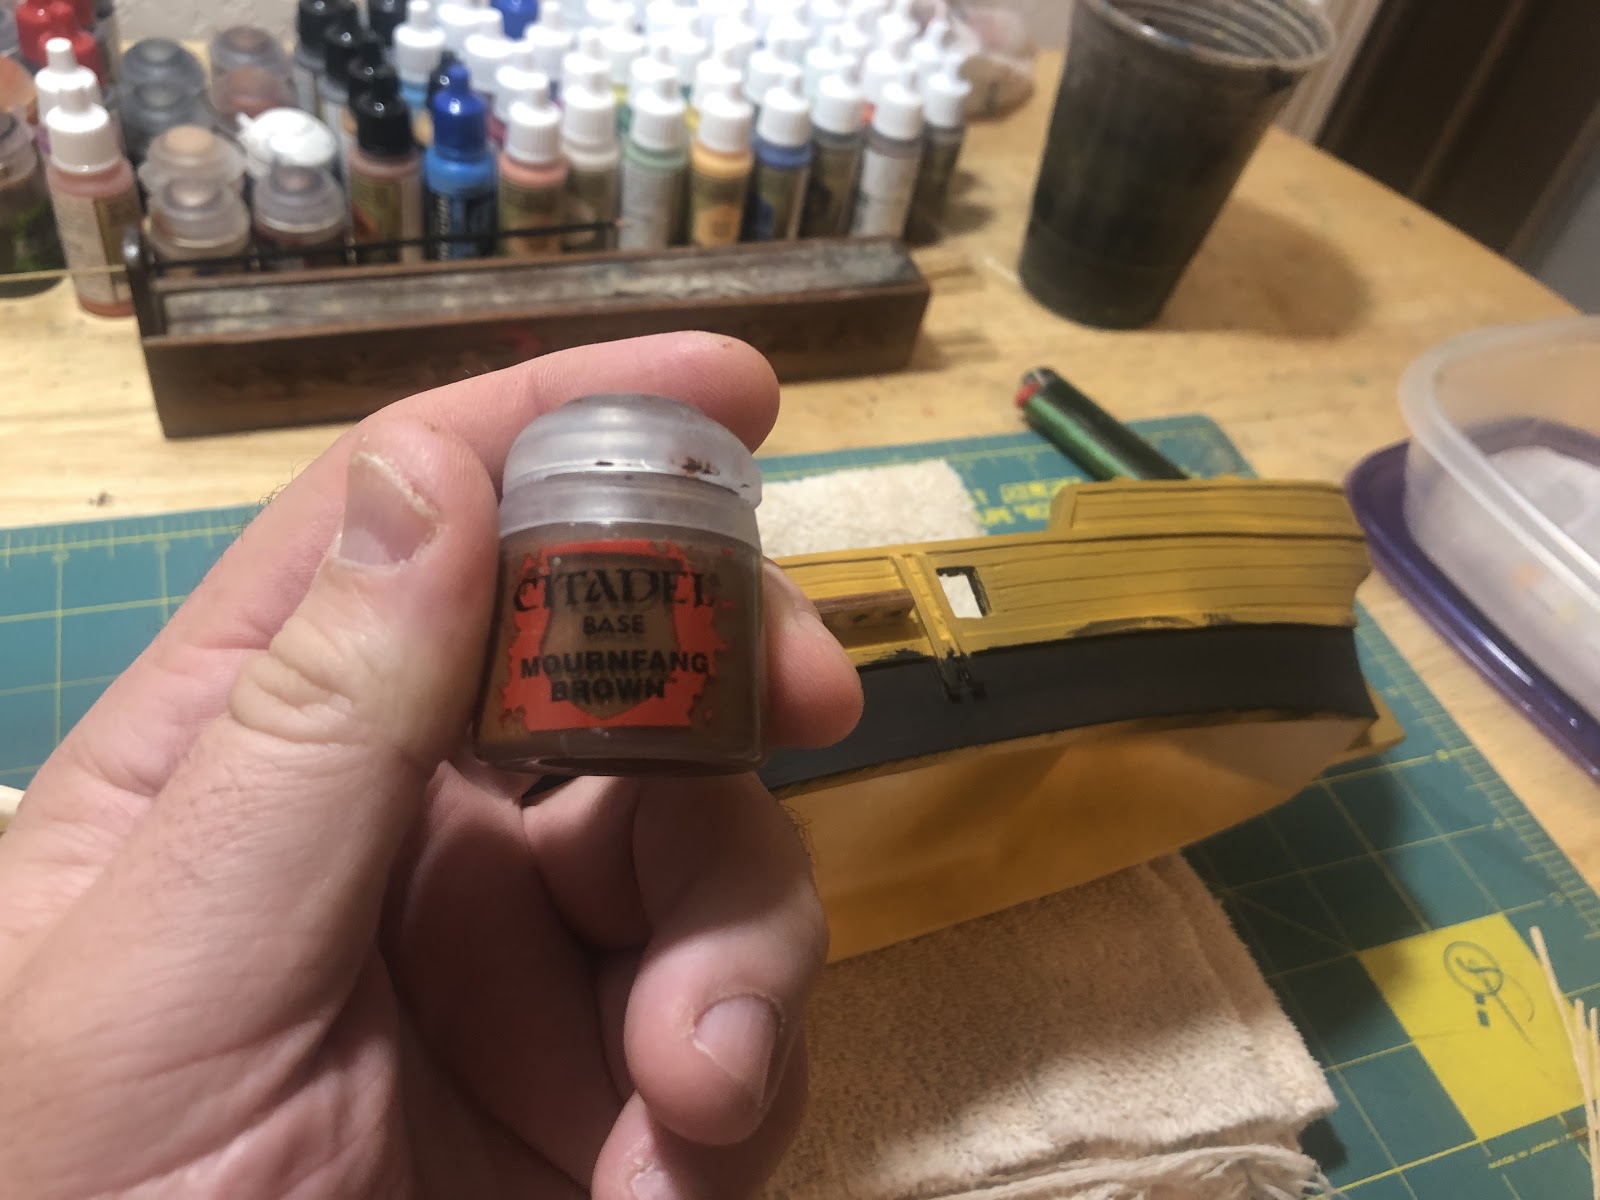
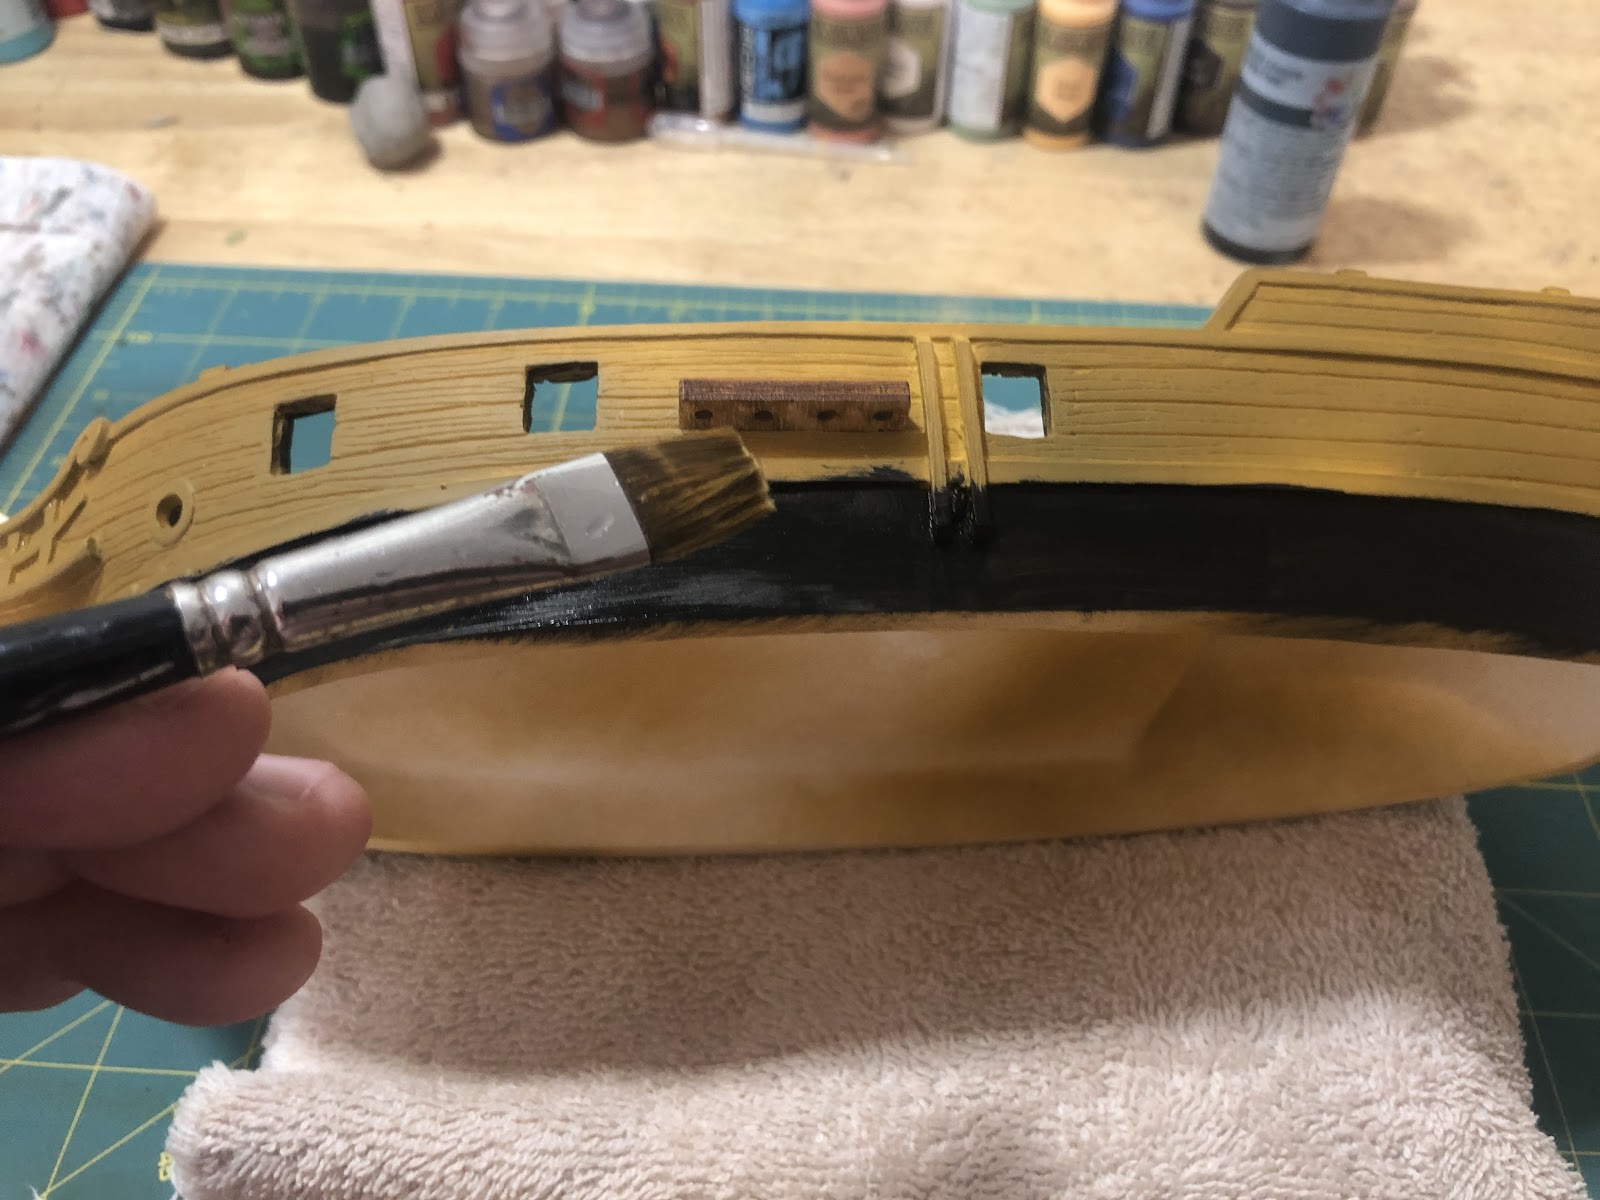
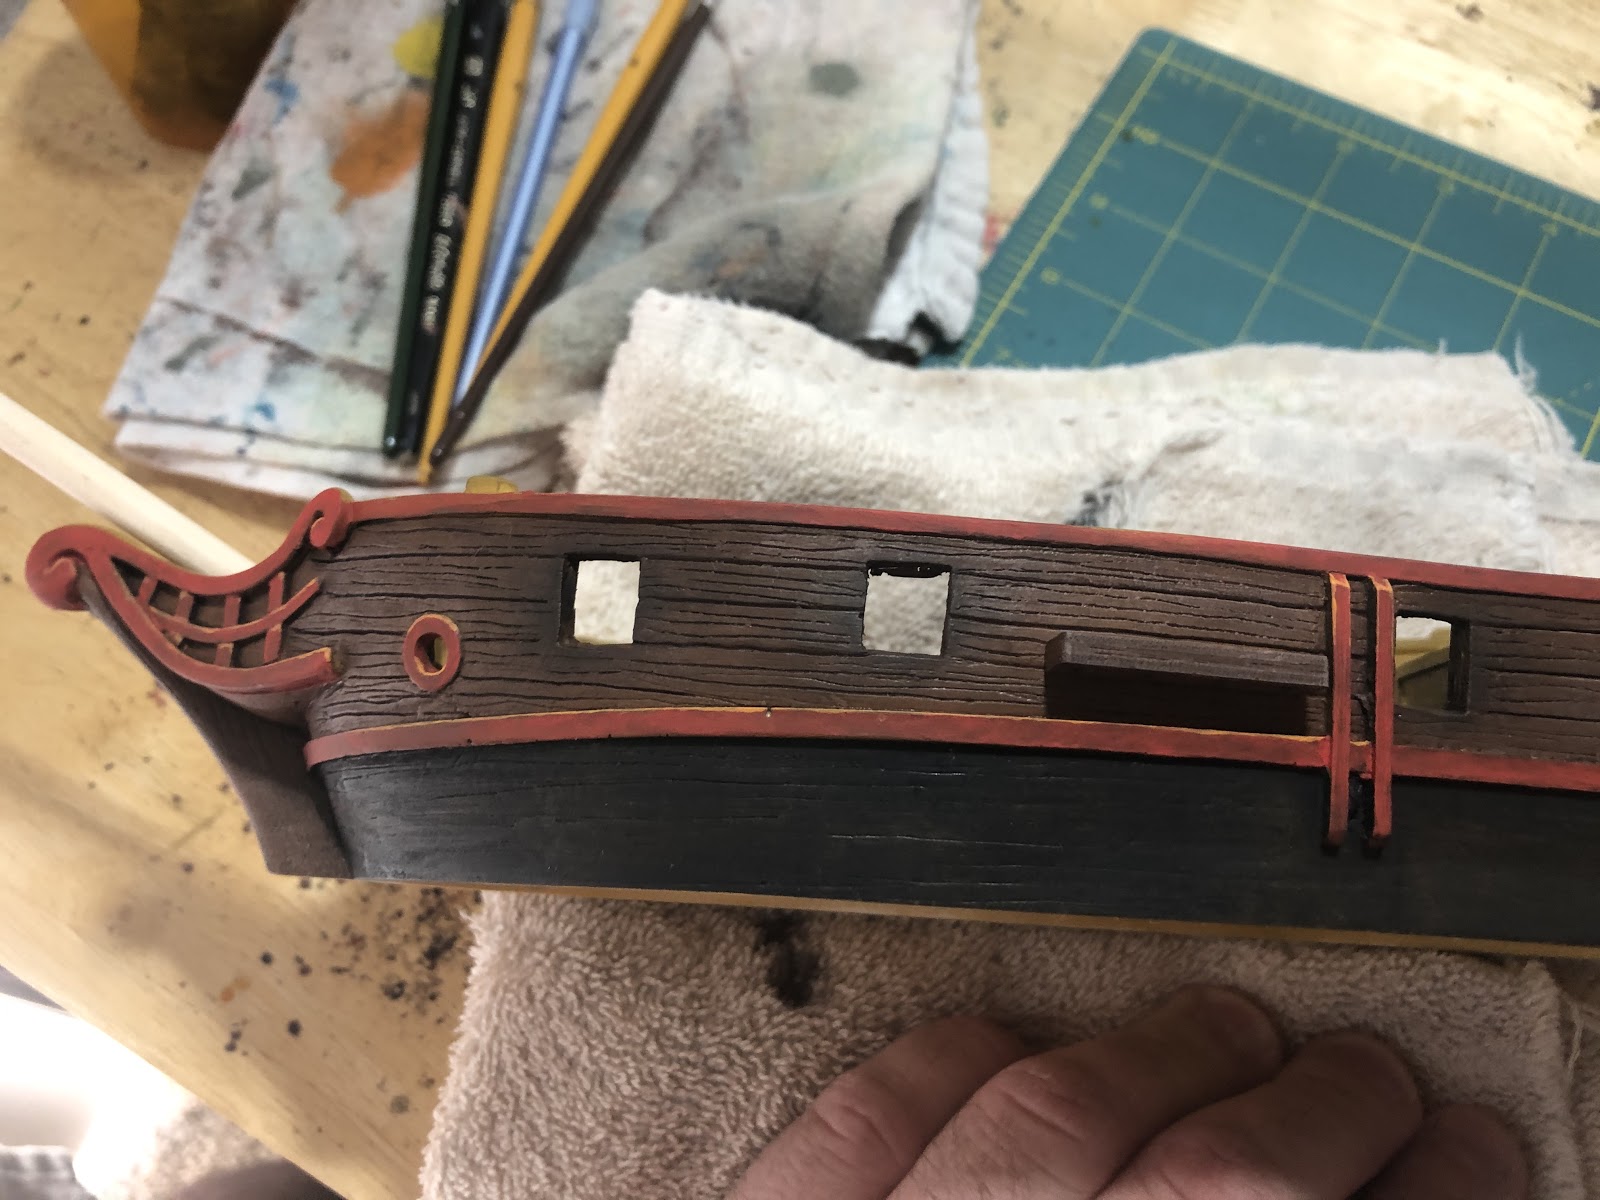
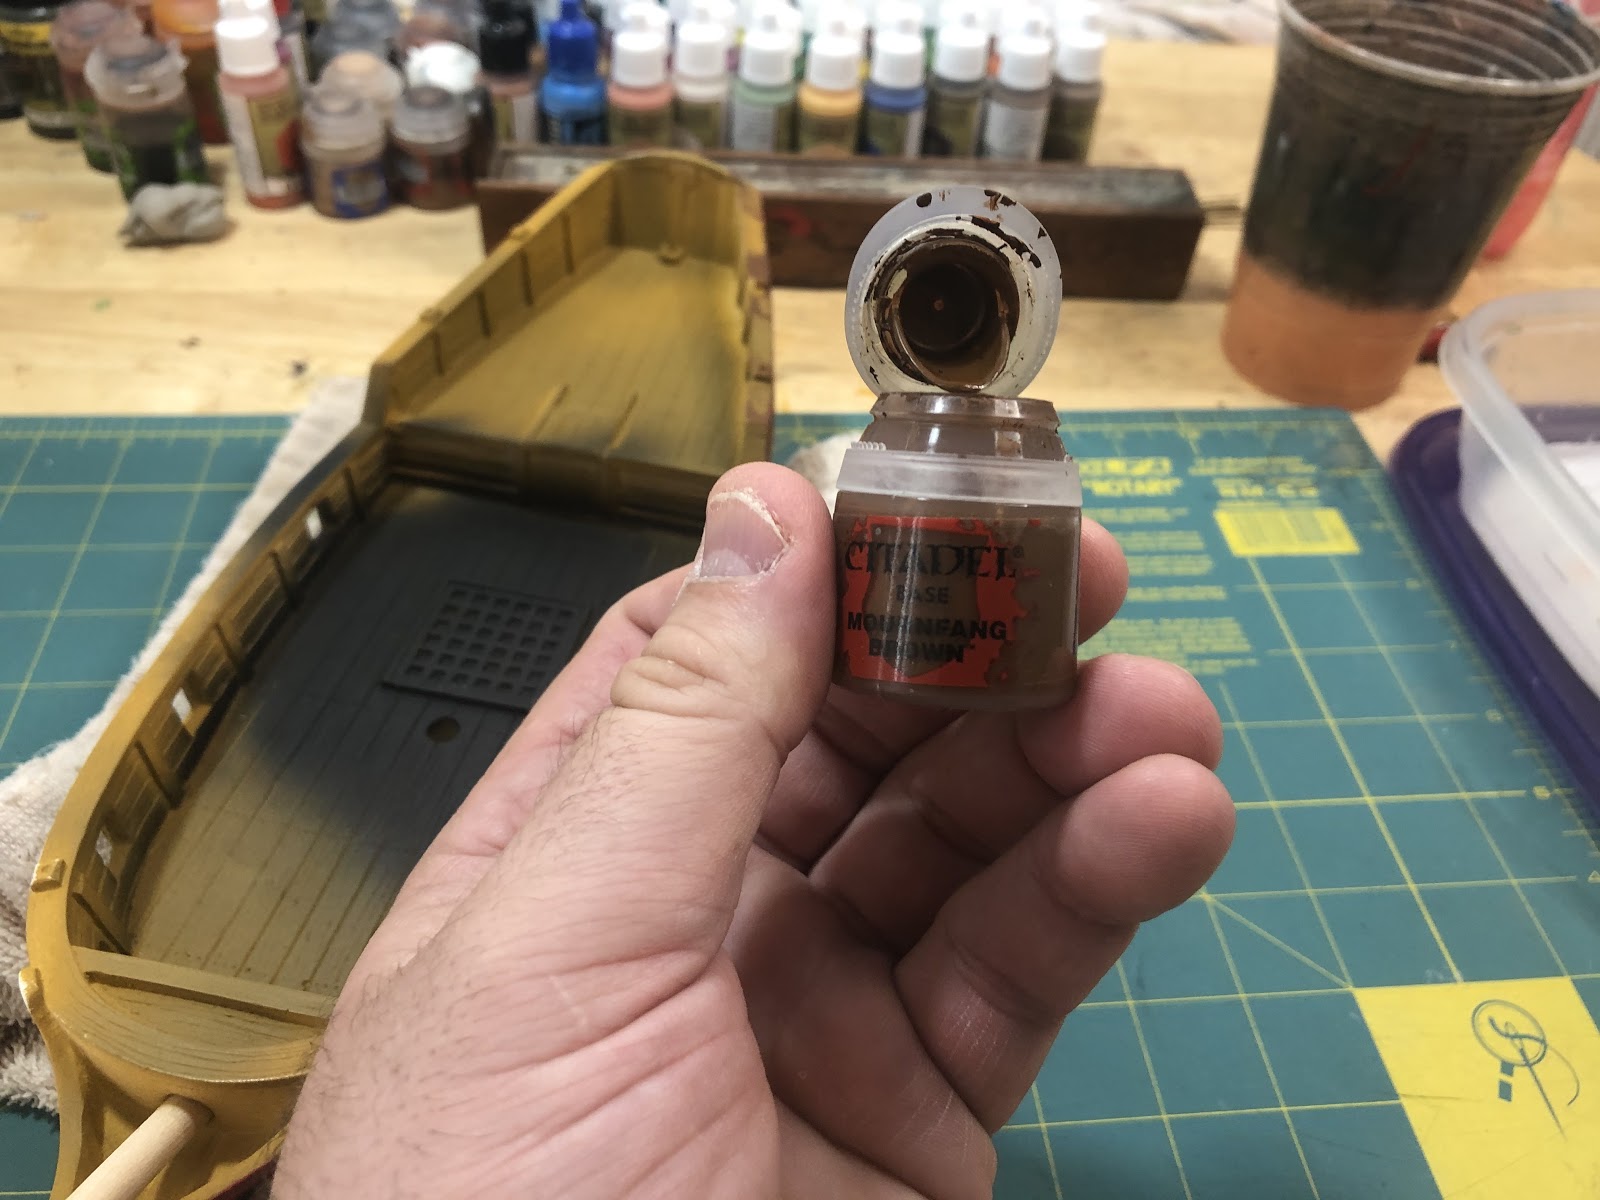
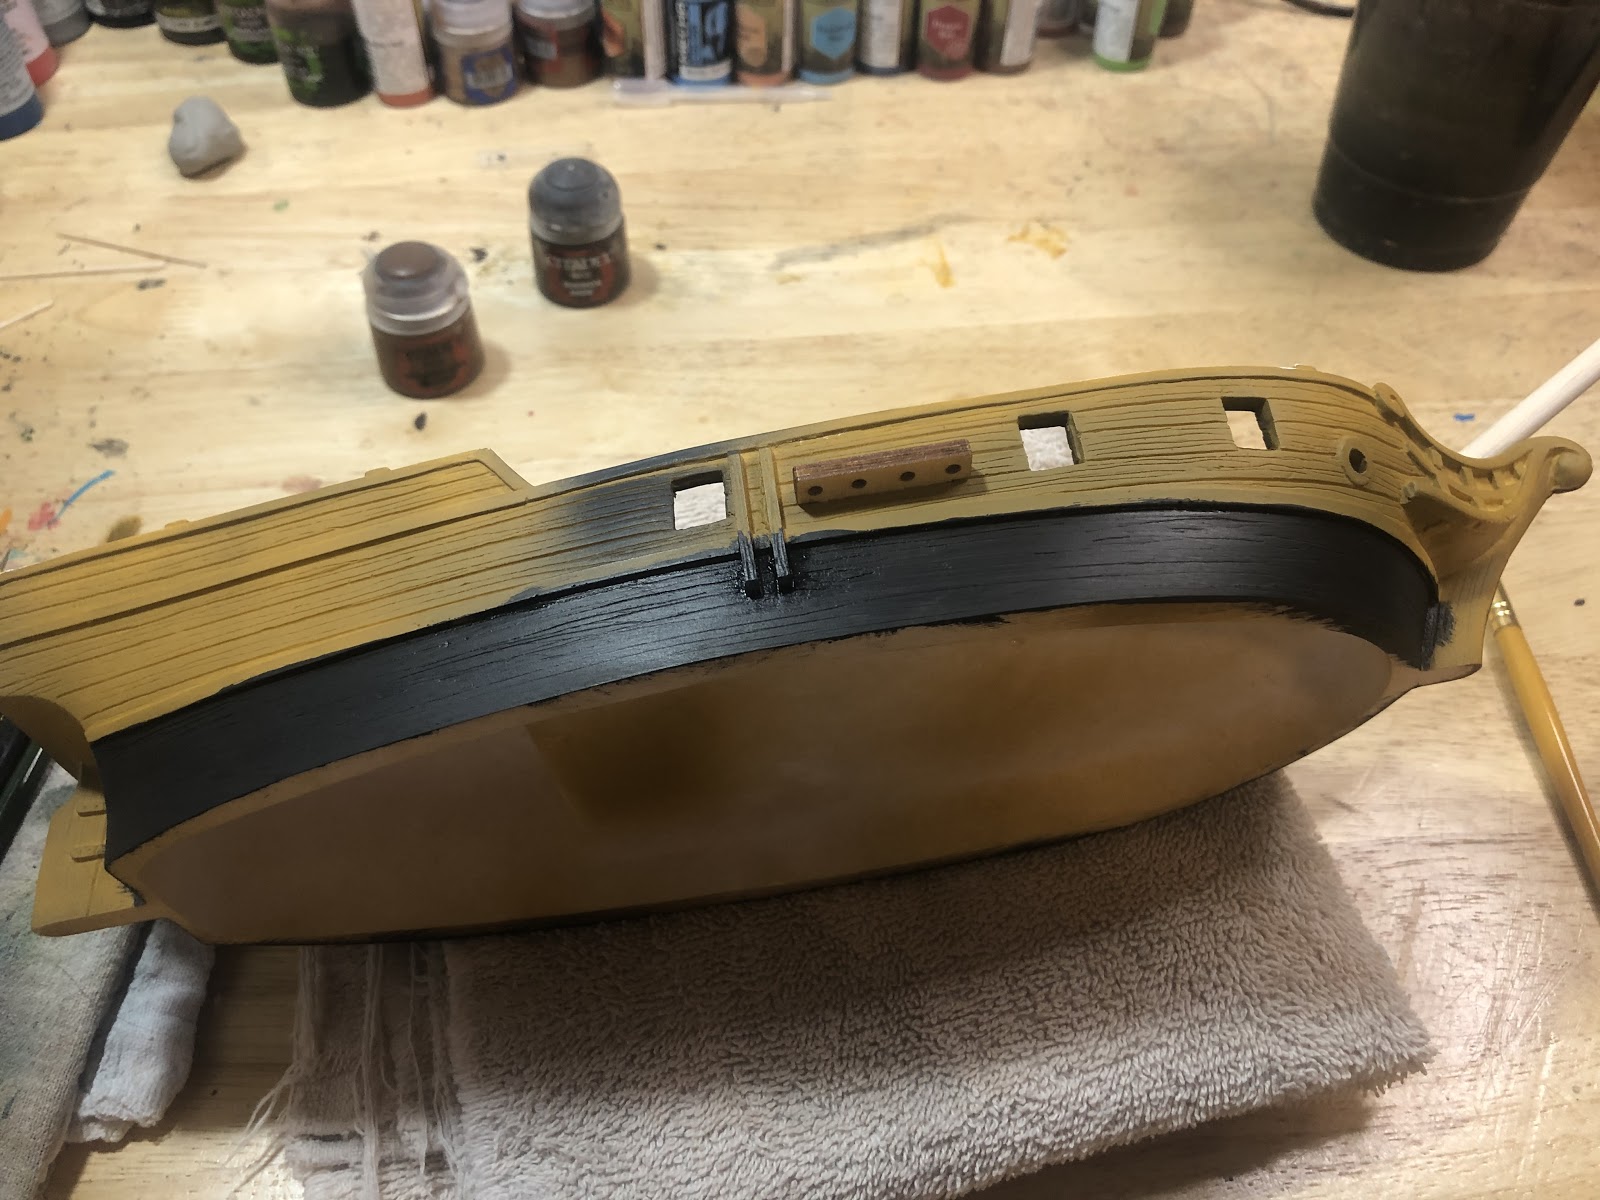
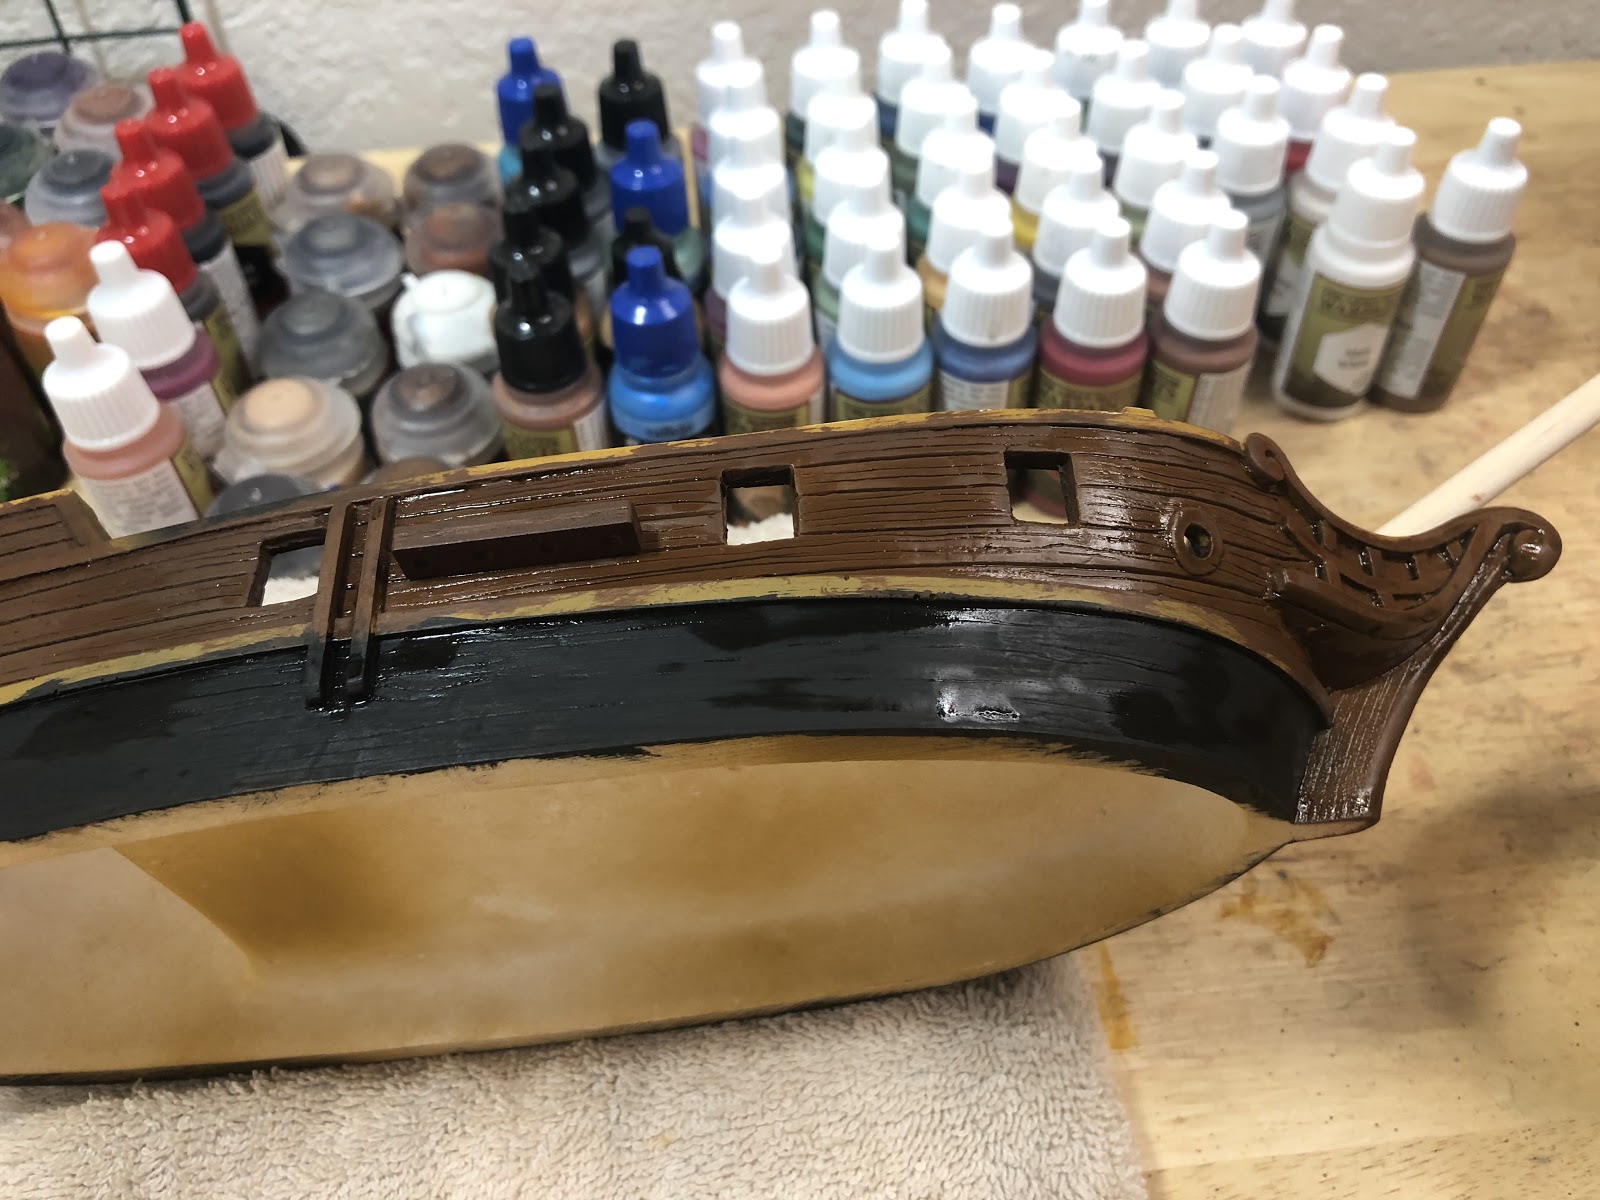
Next, choose a brown paint. I went with Mournfang Brown, but any wood brown will work. Do not choose a color that is too dark if you intend to use a wash. Citadel paints, and most acrylic paints, need to be stirred before they are used. I use toothpicks to stir my paint.
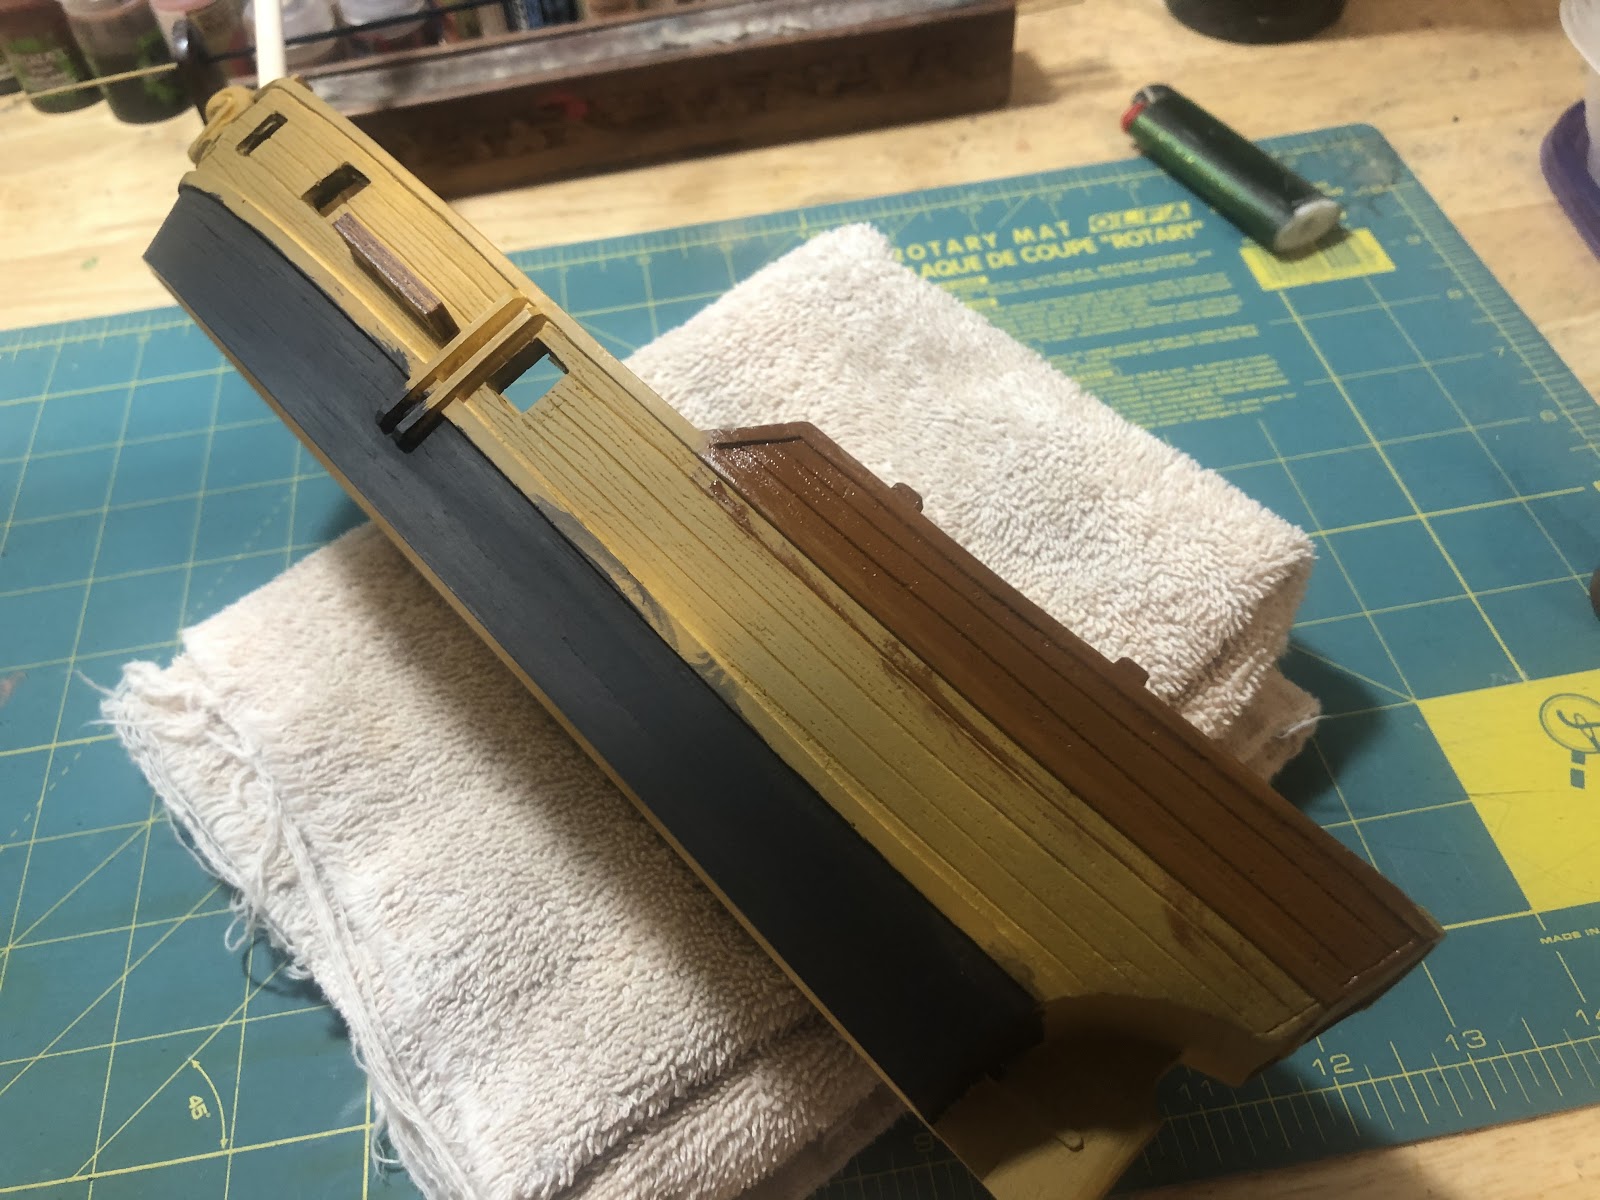
Using the same brush from earlier, paint the gunwales in broad, even strokes.
Paint the mouldings of the bow, the hawsepipe, the chainguard, the cannon ports, the skids, and the underside of the railing.
Go over the area with a clean brush like you did with the black hull. Citadel paint dries fast when thinned, so you can find thicker paint by looking for shininess.
With a smaller brush, paint over any brown paint you got on the black paint.
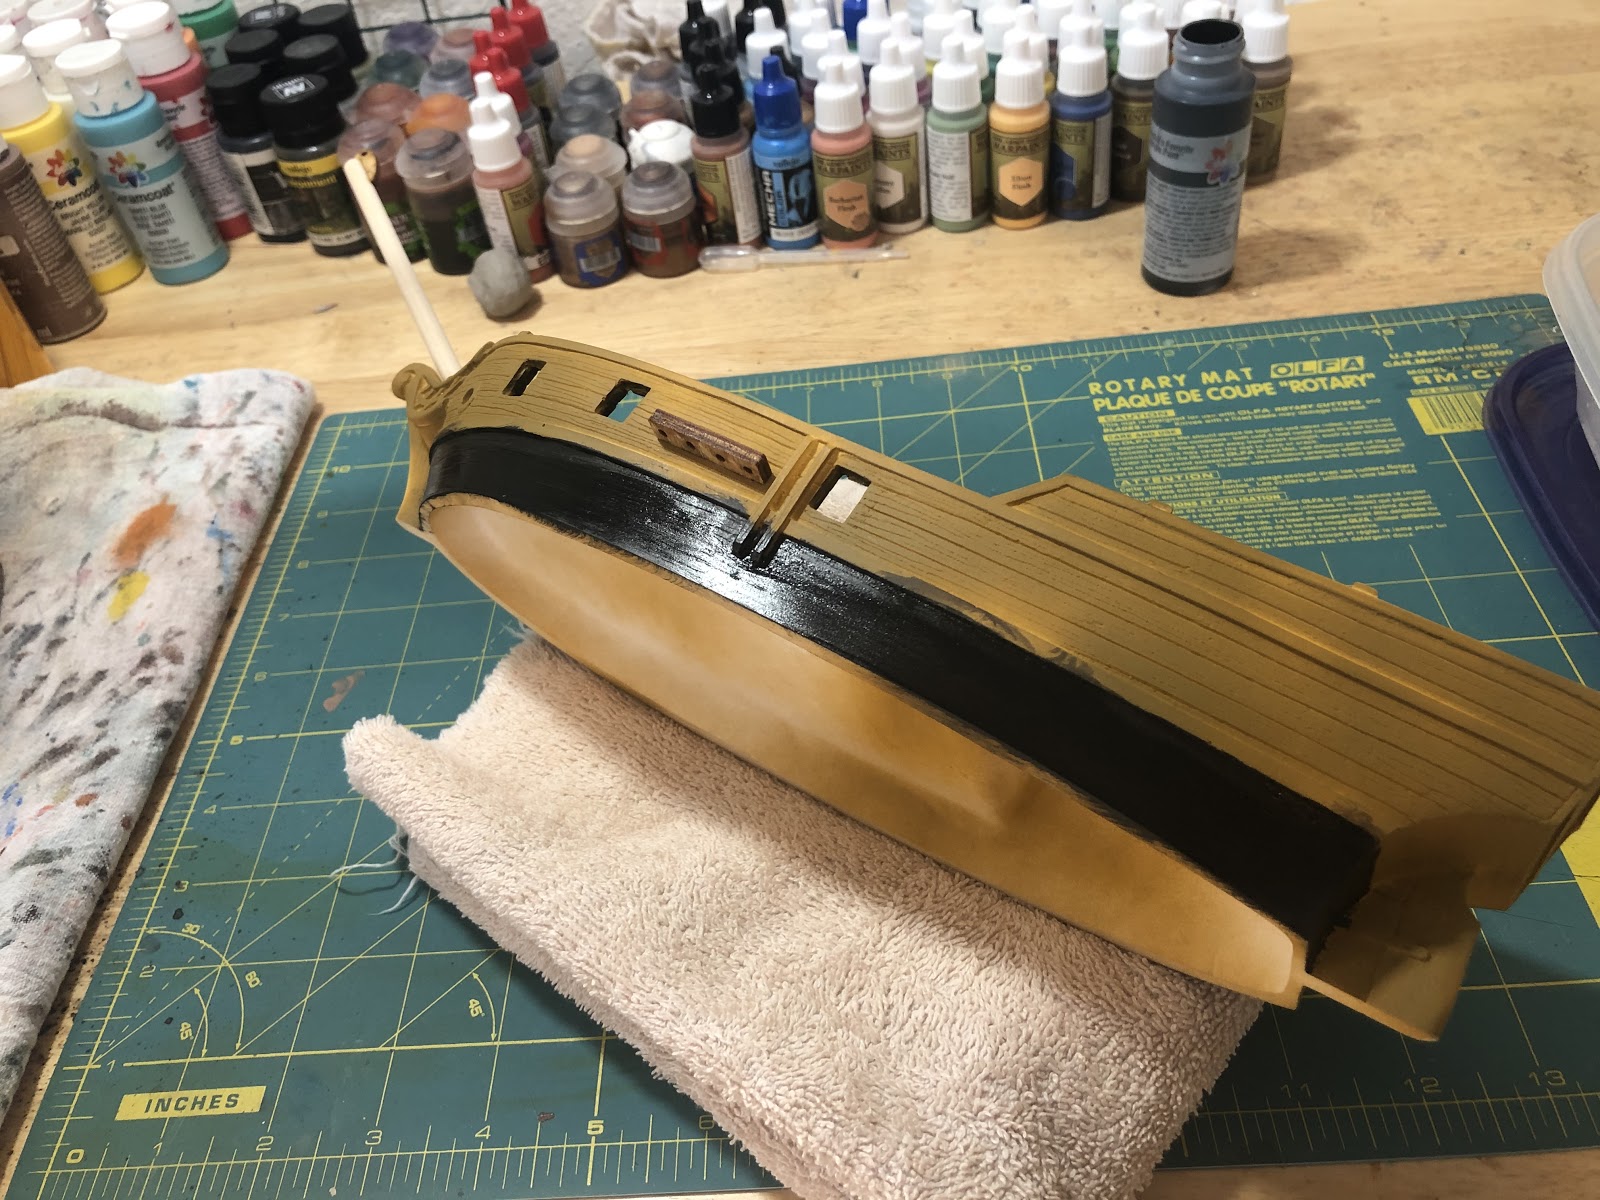
After you’re done, let the ship sit for 2-3 hours.
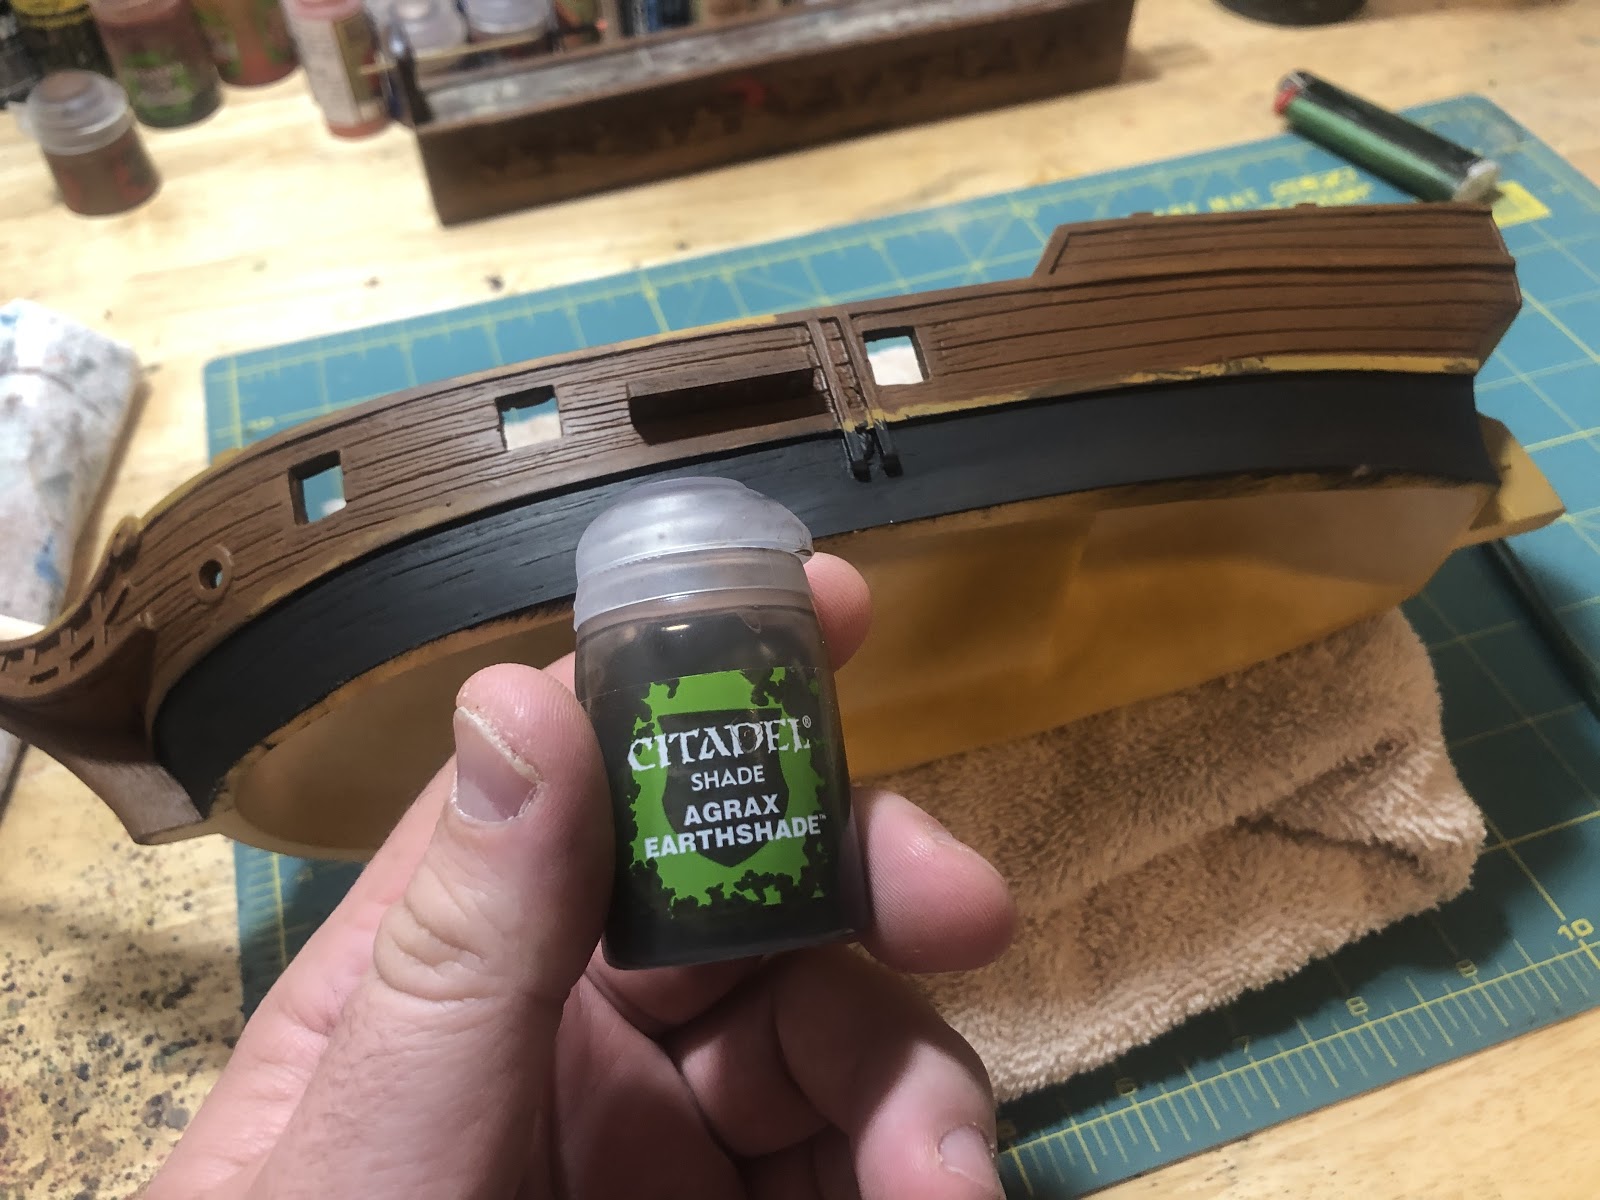
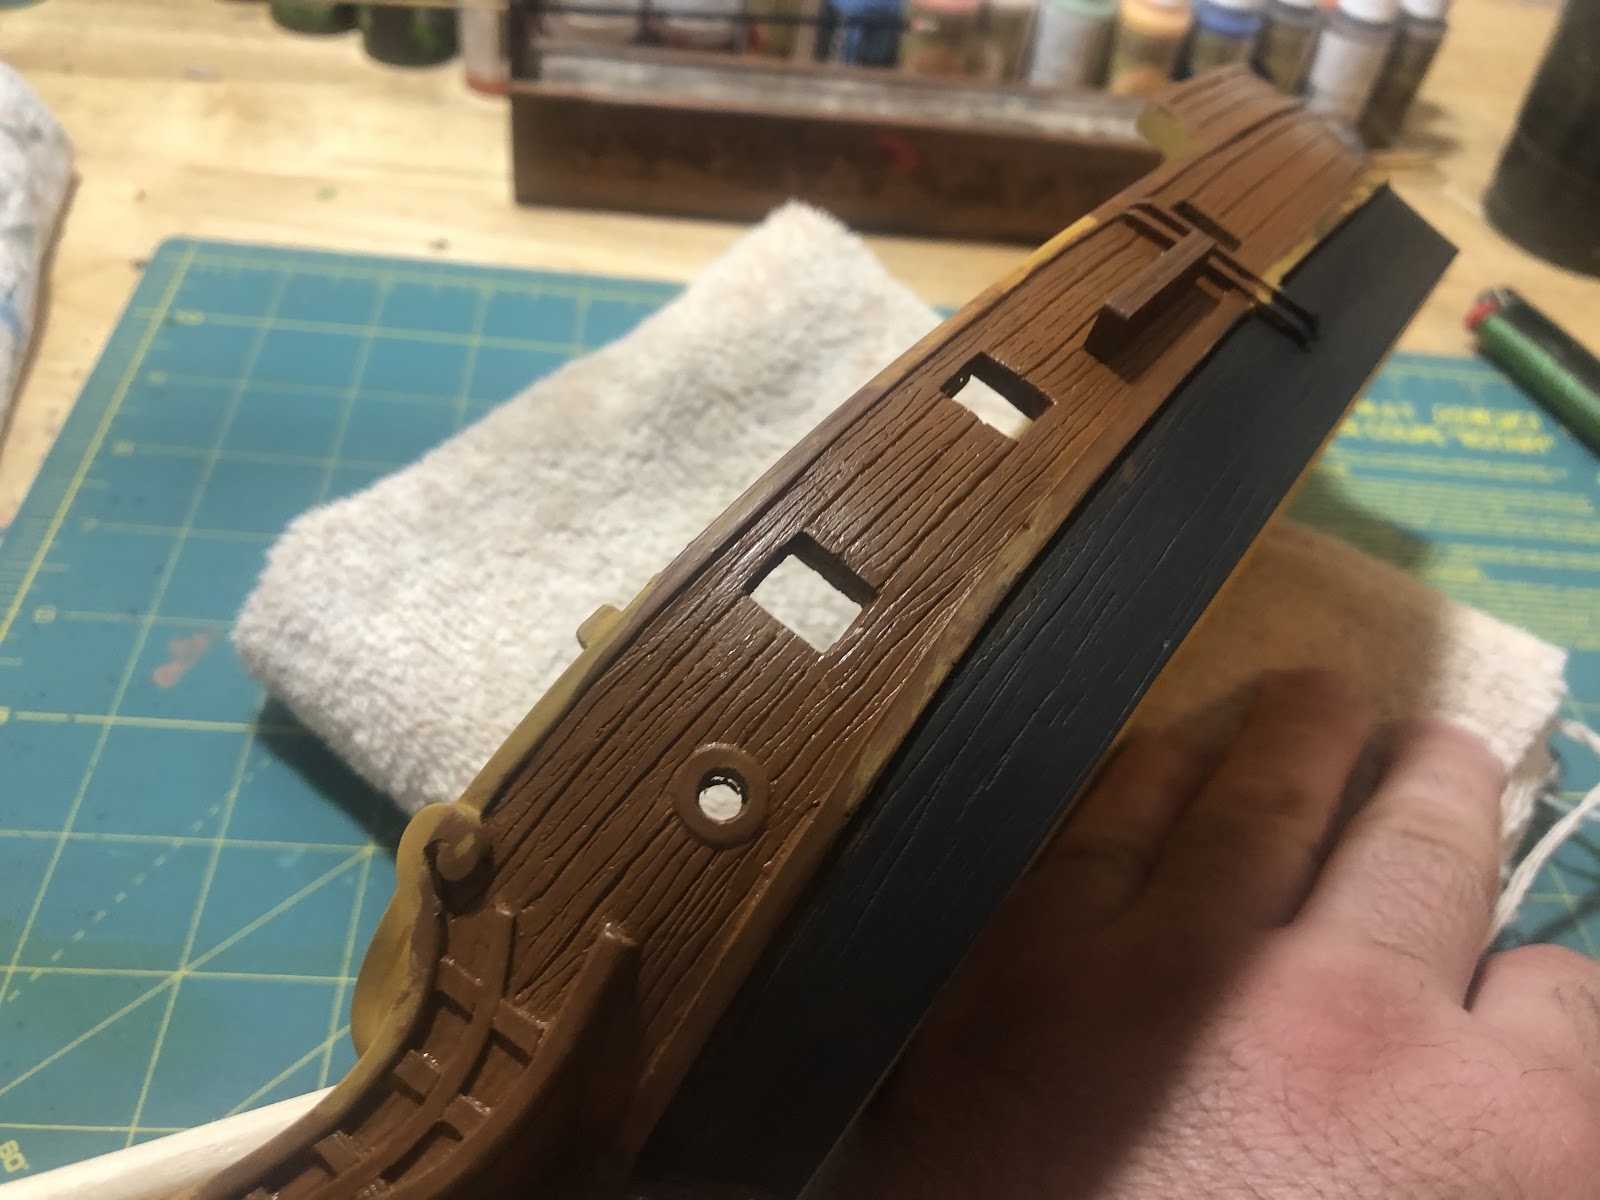
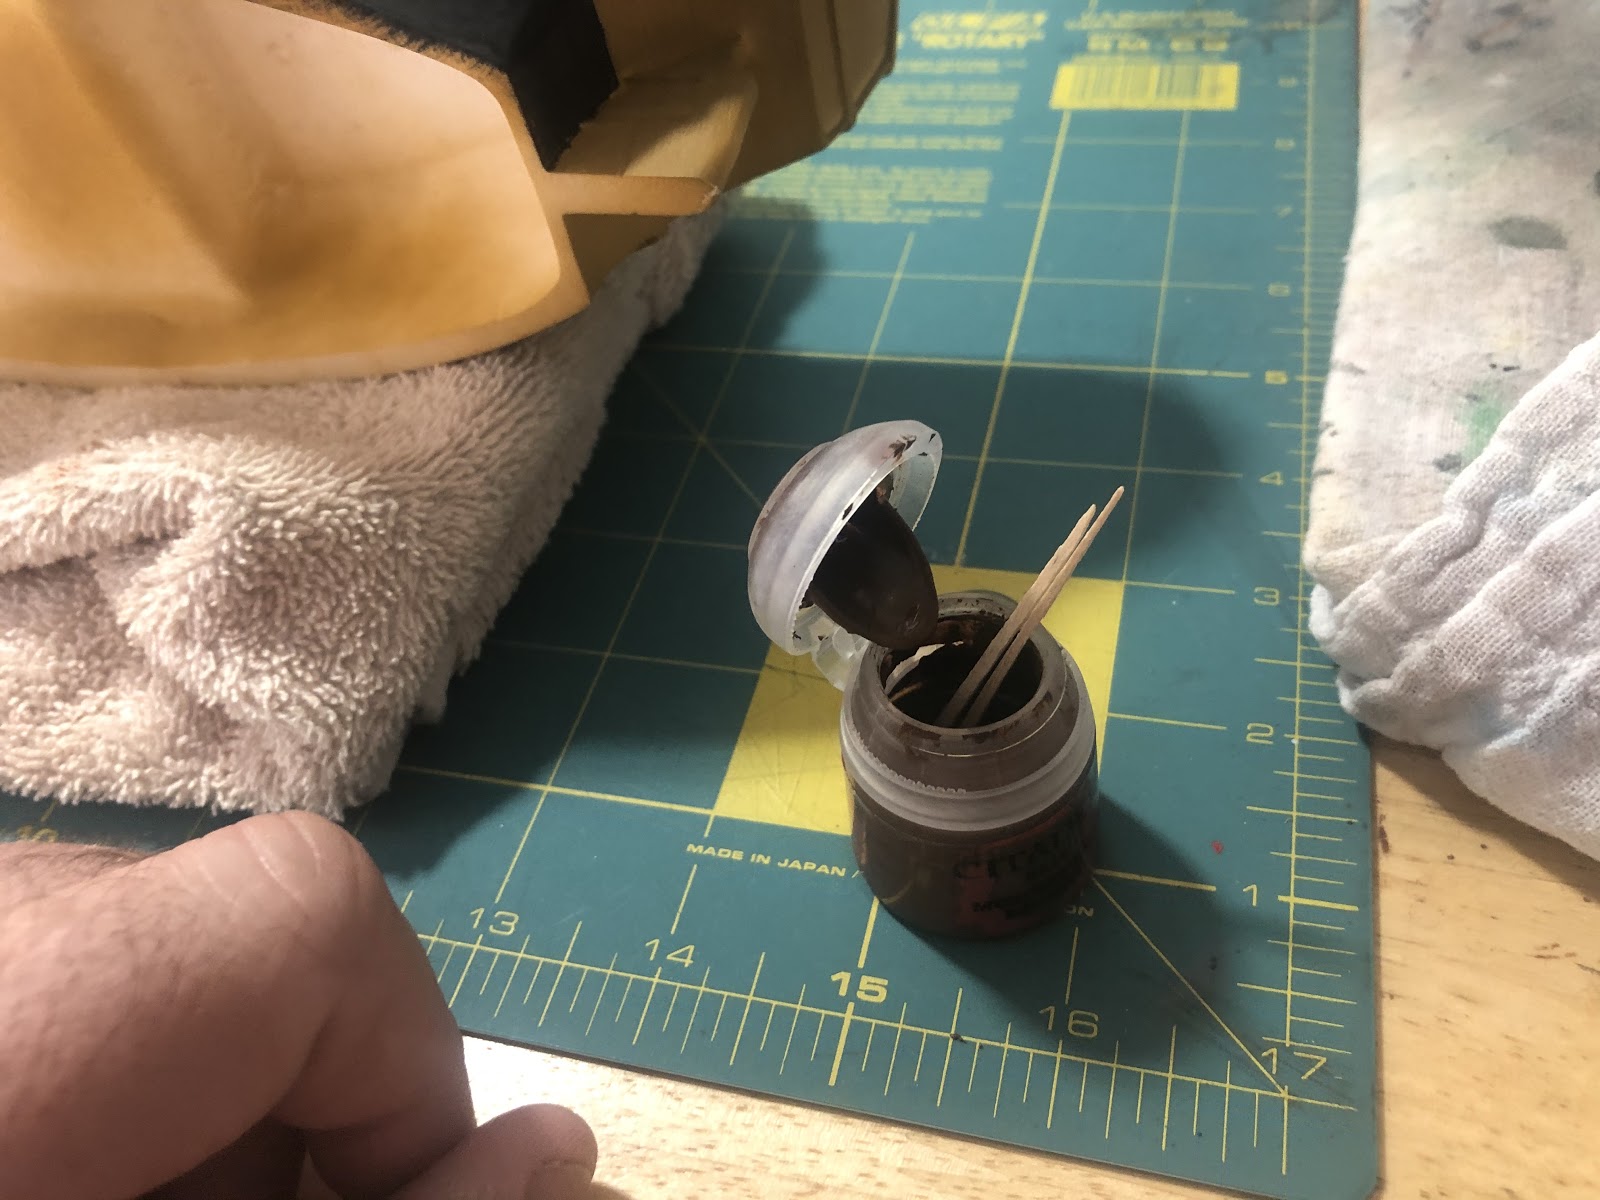
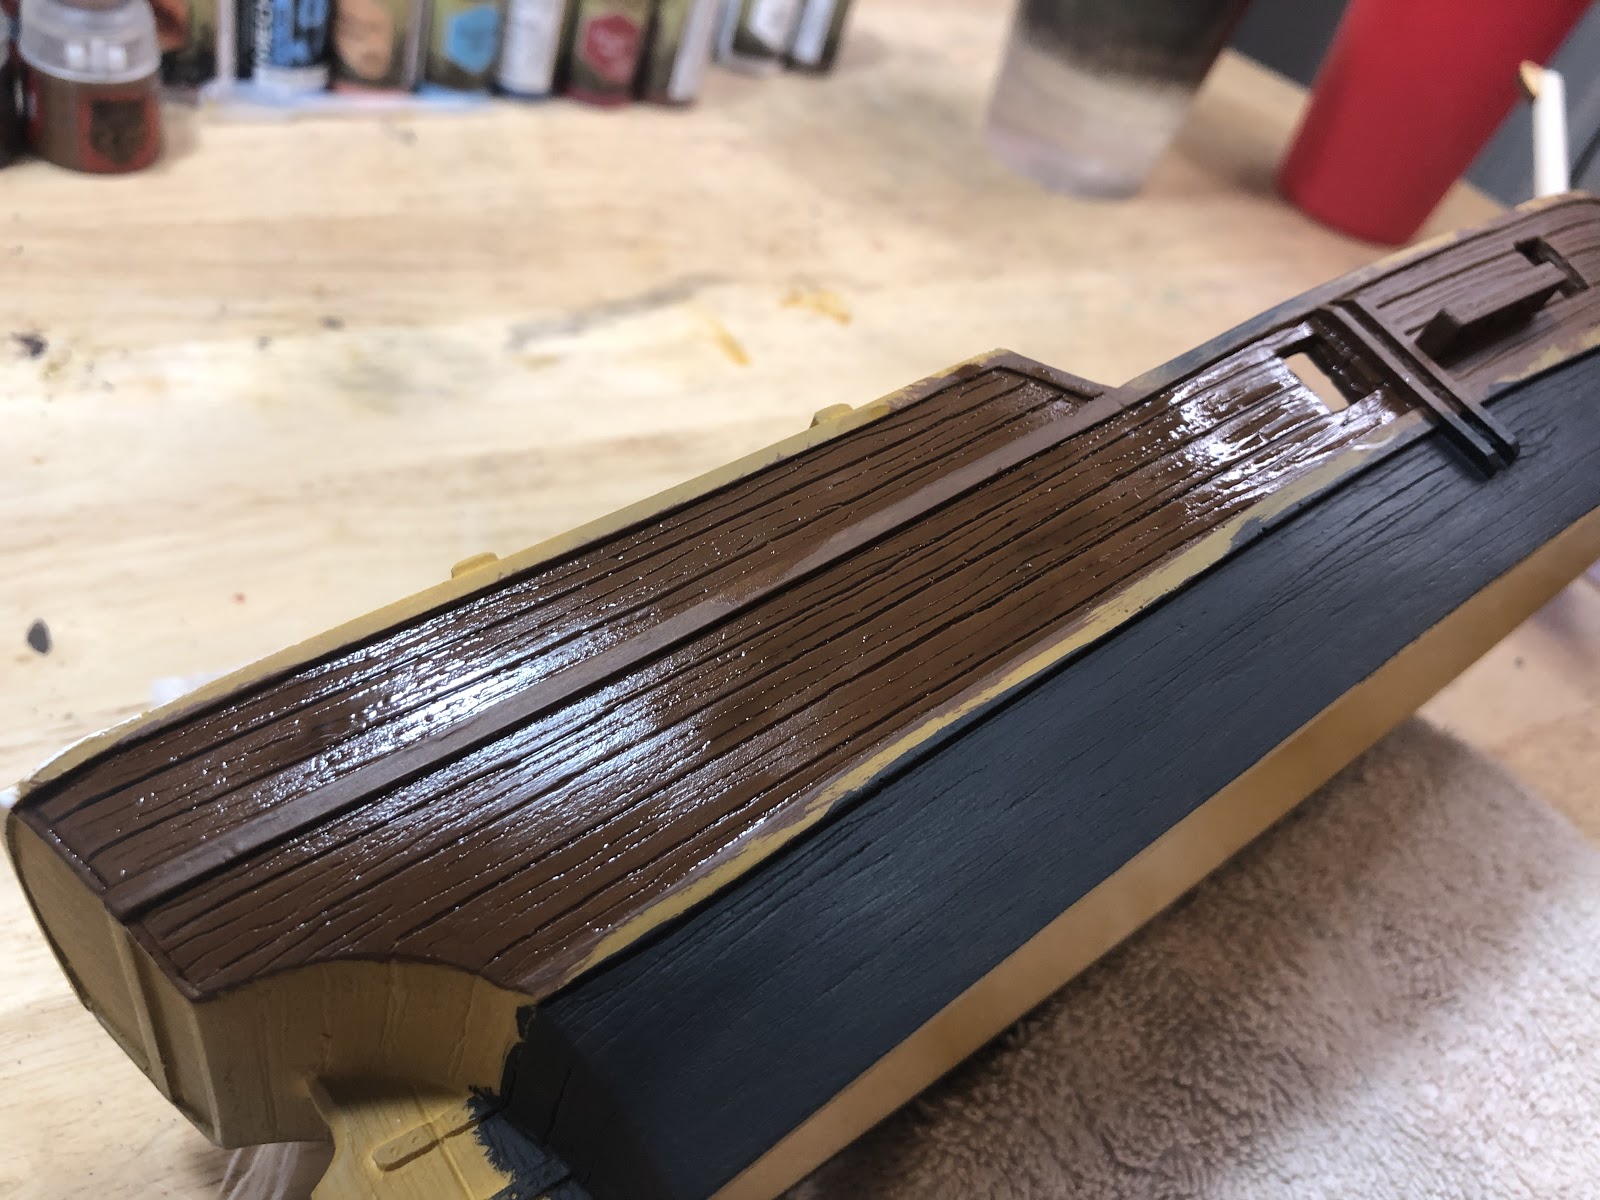
Use Agrax Earthshade for a brown wash. I will use this same wash for the entire ship. A paint wash is essentially watered down paint. It is useful when painting models because it can get into the crevasses and make them darker. As stated, the whole ship is covered with wood grain, and this wash will help that detail show.
Unlike regular Citadel paints it is ok to shake their washes instead of stirring them. Shake each wash a good 5 seconds before use.
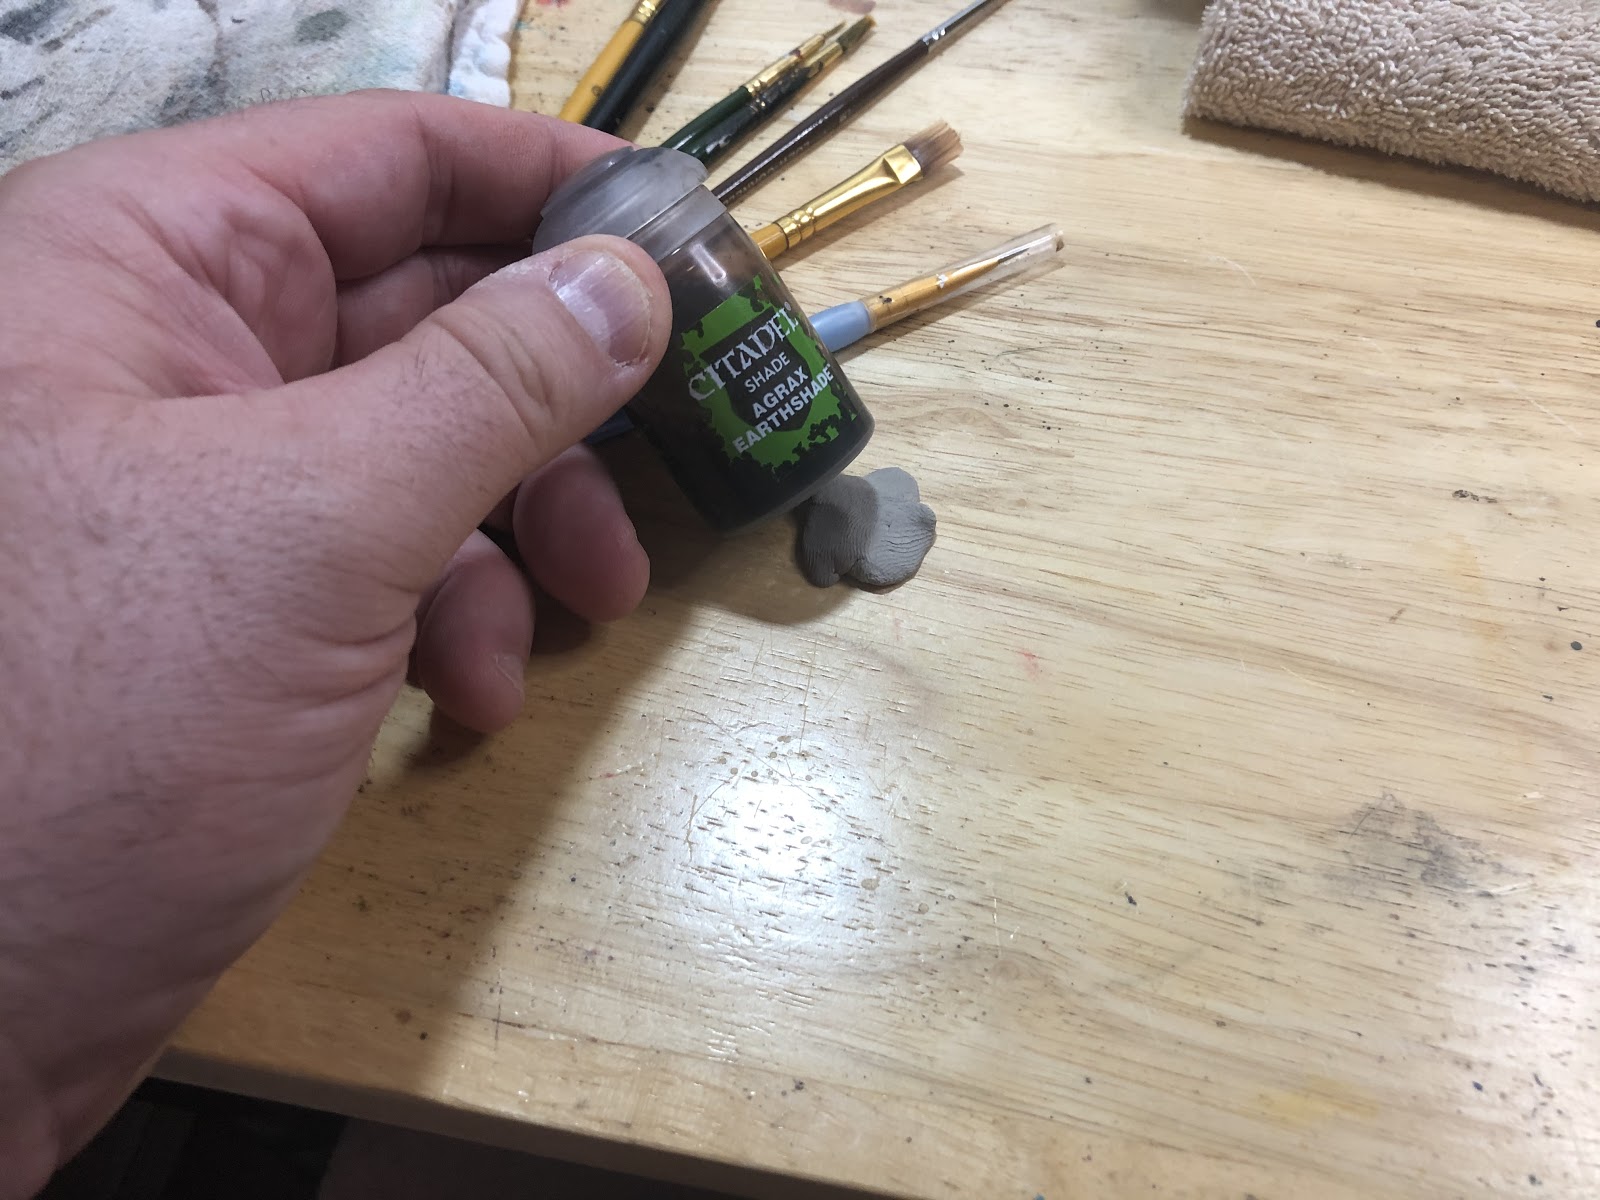
Attach a glob of poster putty to your desk and press the wash firmly into it. This is because it is very easy to tip over the very small pots these come in, especially when focused on painting.
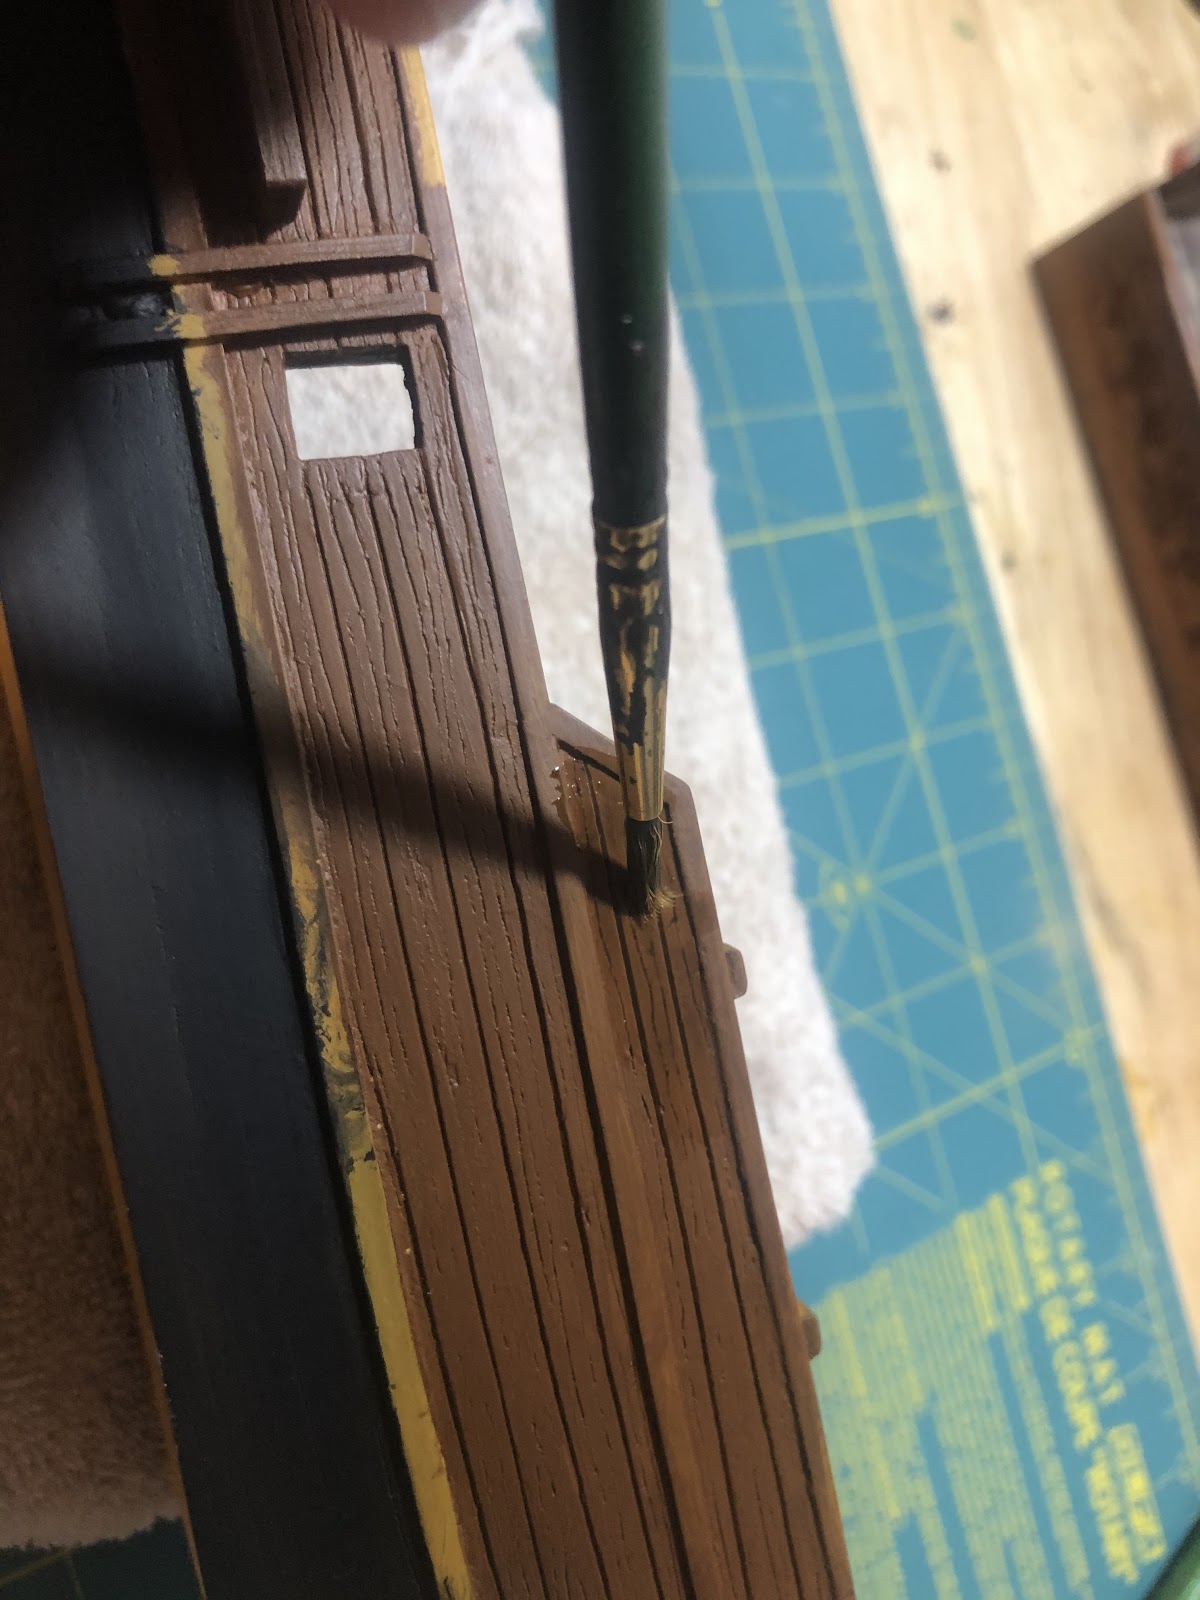
Use a brush you don’t care about to spread the wash. When putting wash on your brush, run the brush on the inside lip of the wash pot so you don’t put too much wash on at once. Make sure you methodically cover the entire larboard side, adding a heavier concentration under the trim to simulate shadows.
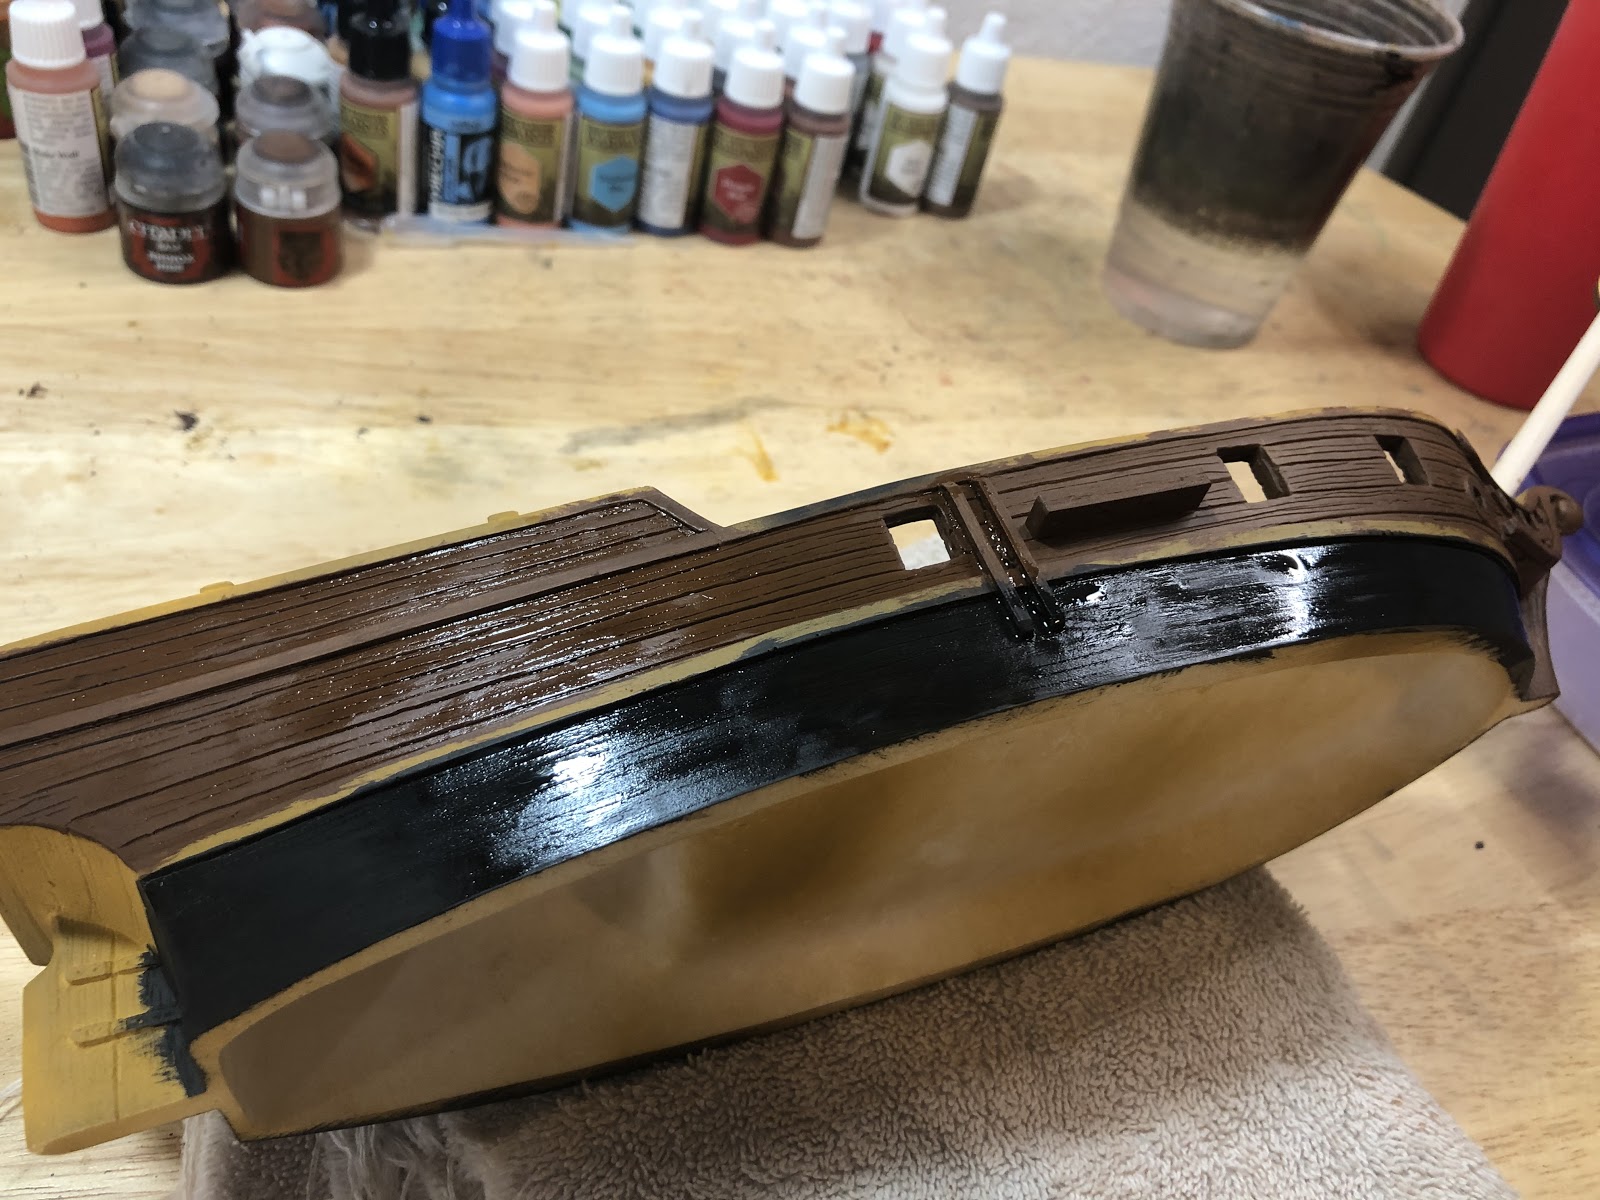
Wash the black of the hull as well. Wash takes a while to dry, so you can again check if you missed anywhere by looking for shininess.
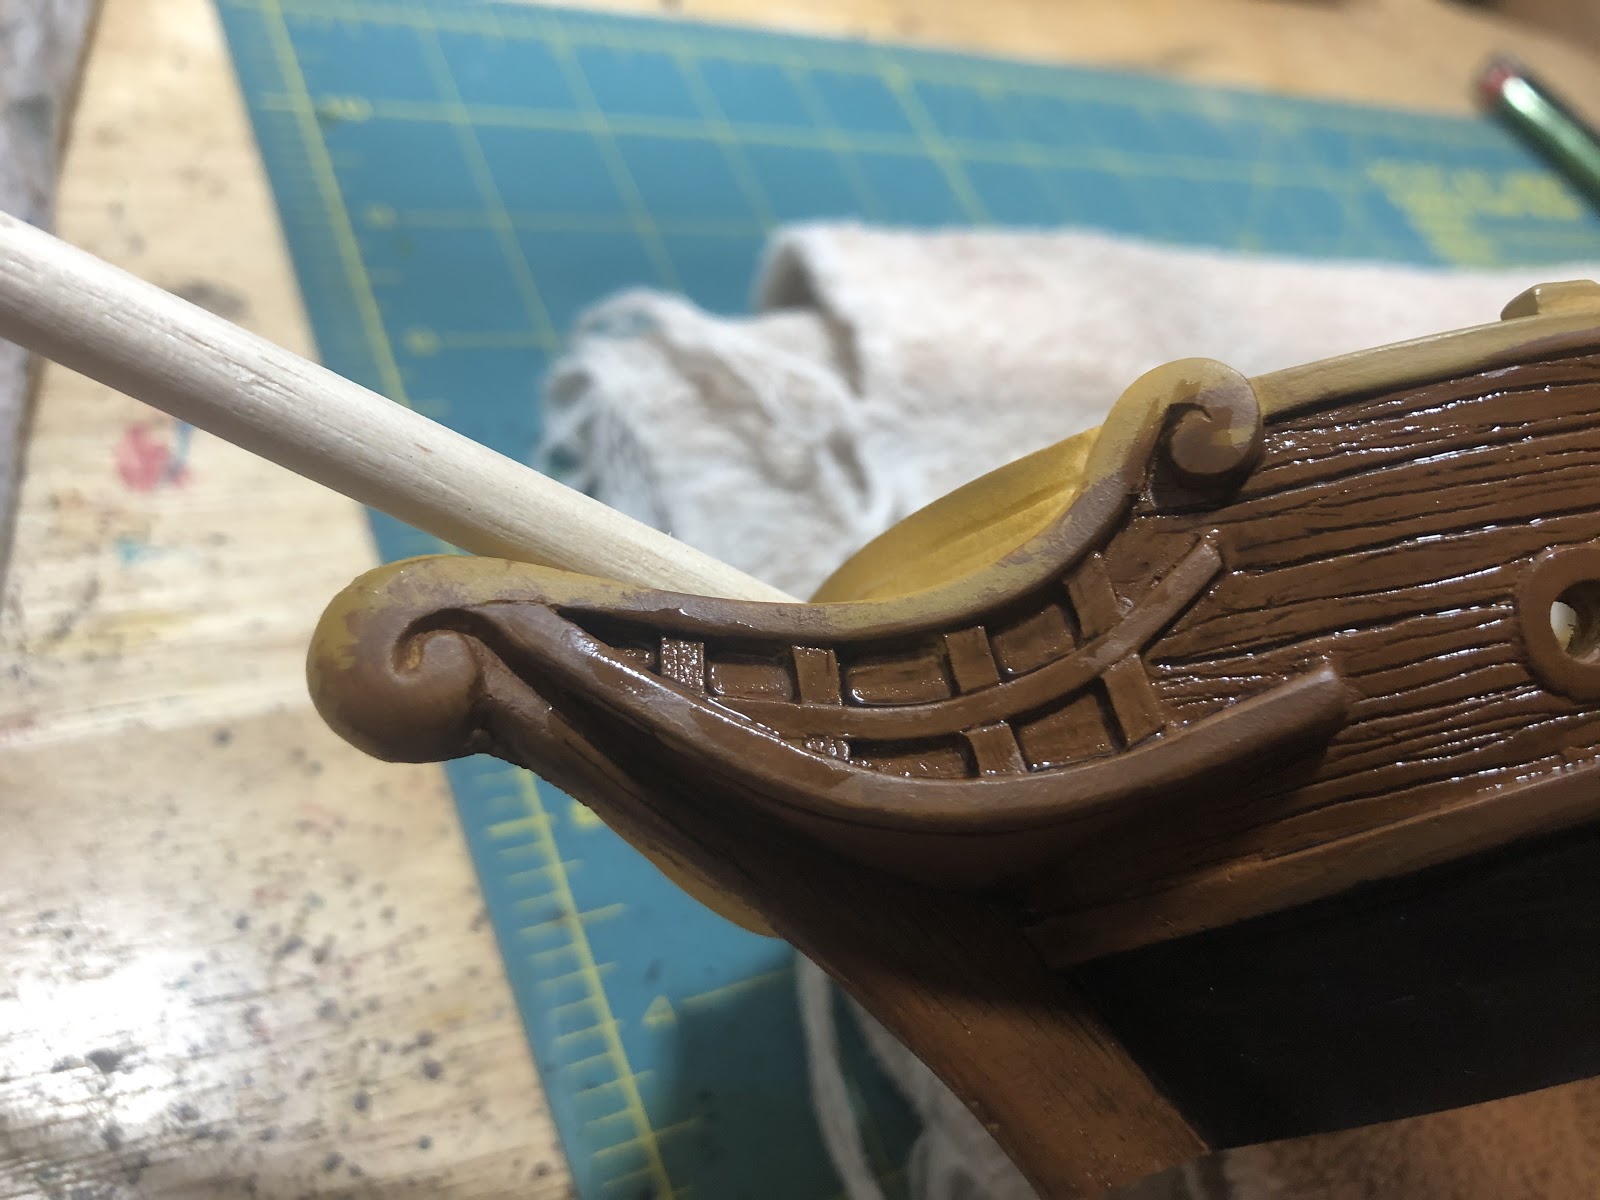
Add a heavy layer of wash to the bow. The ornate carving is called a beakhead.
After painting the entire side, let it sit for 2-3 hours to dry.

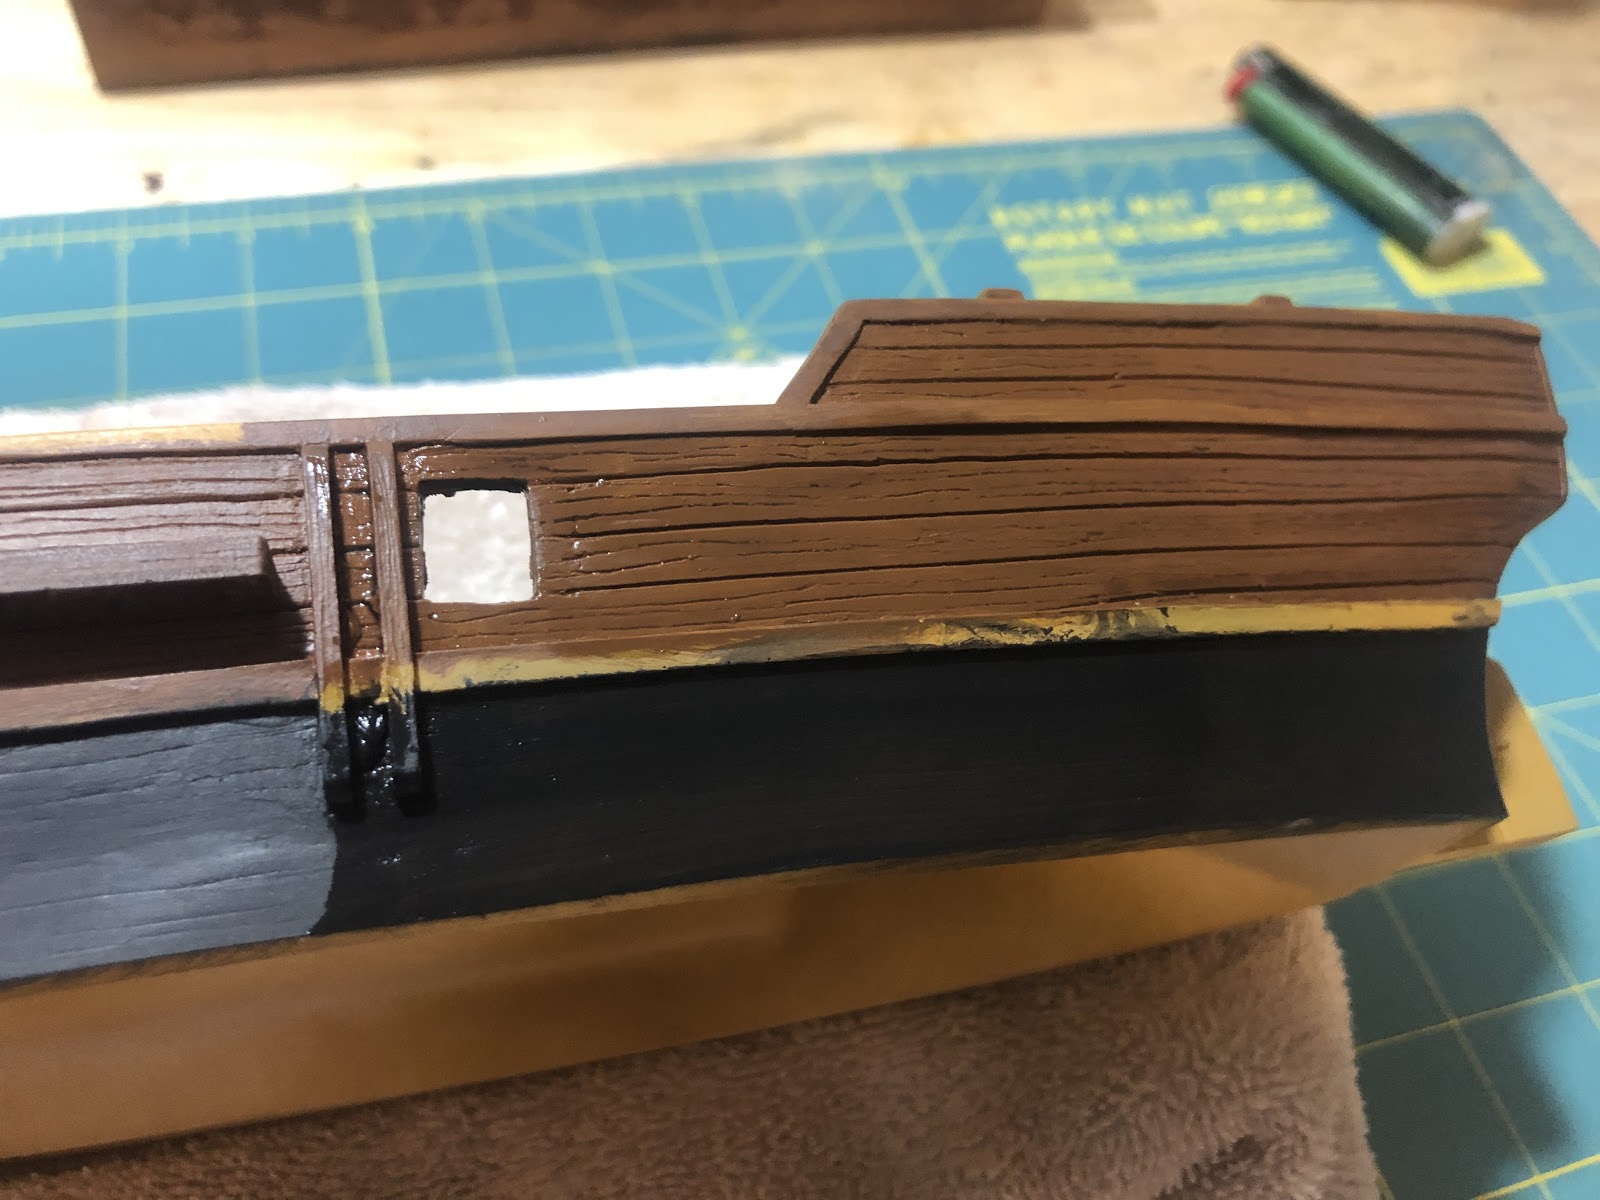
After it’s done drying, inspect your work.

The heavy layers of wash in the bow trim look like shadow and give the detail depth.
If you like the look of your model at this point, you can skip painting the trim.
Next we will be dry brushing. Dry brushing is an important feather in the amateur painters cap. When done well, it is an easy way to add highlights to a model.
The alternative to dry brushing is edge highlighting. Edge highlighting is where you apply a thin line of a brighter color to the areas the sun would hit at high noon. This can be time consuming.

Get out a paint rag. Dry brushing does not use a wet pallet, and a lot of paint will end upon your rag.
Choose a large brush that you don’t care about. Dry brushing destroys brushes over time. Do not wet the brush before using it.
Dry brush Mournfang Brown over the black of the hull. This is the same brown we started with for the gunwales and helps create the effect that it is naturally brown.
If you haven’t used your paint for more than a day, mix your paint. Do not shake Citadel paints. Also, do not use the paintbrush to mix the paint, as that’s a quick way to ruin a good brush.

After lightly dipping your brush in paint, use your rag to get most of the paint off. Test the brush on areas of the rag you haven’t painted, or even your hand. You want the paint to be barely on the brush.

Dry brush the entire black area. It’s ok if you think it isn’t showing up.
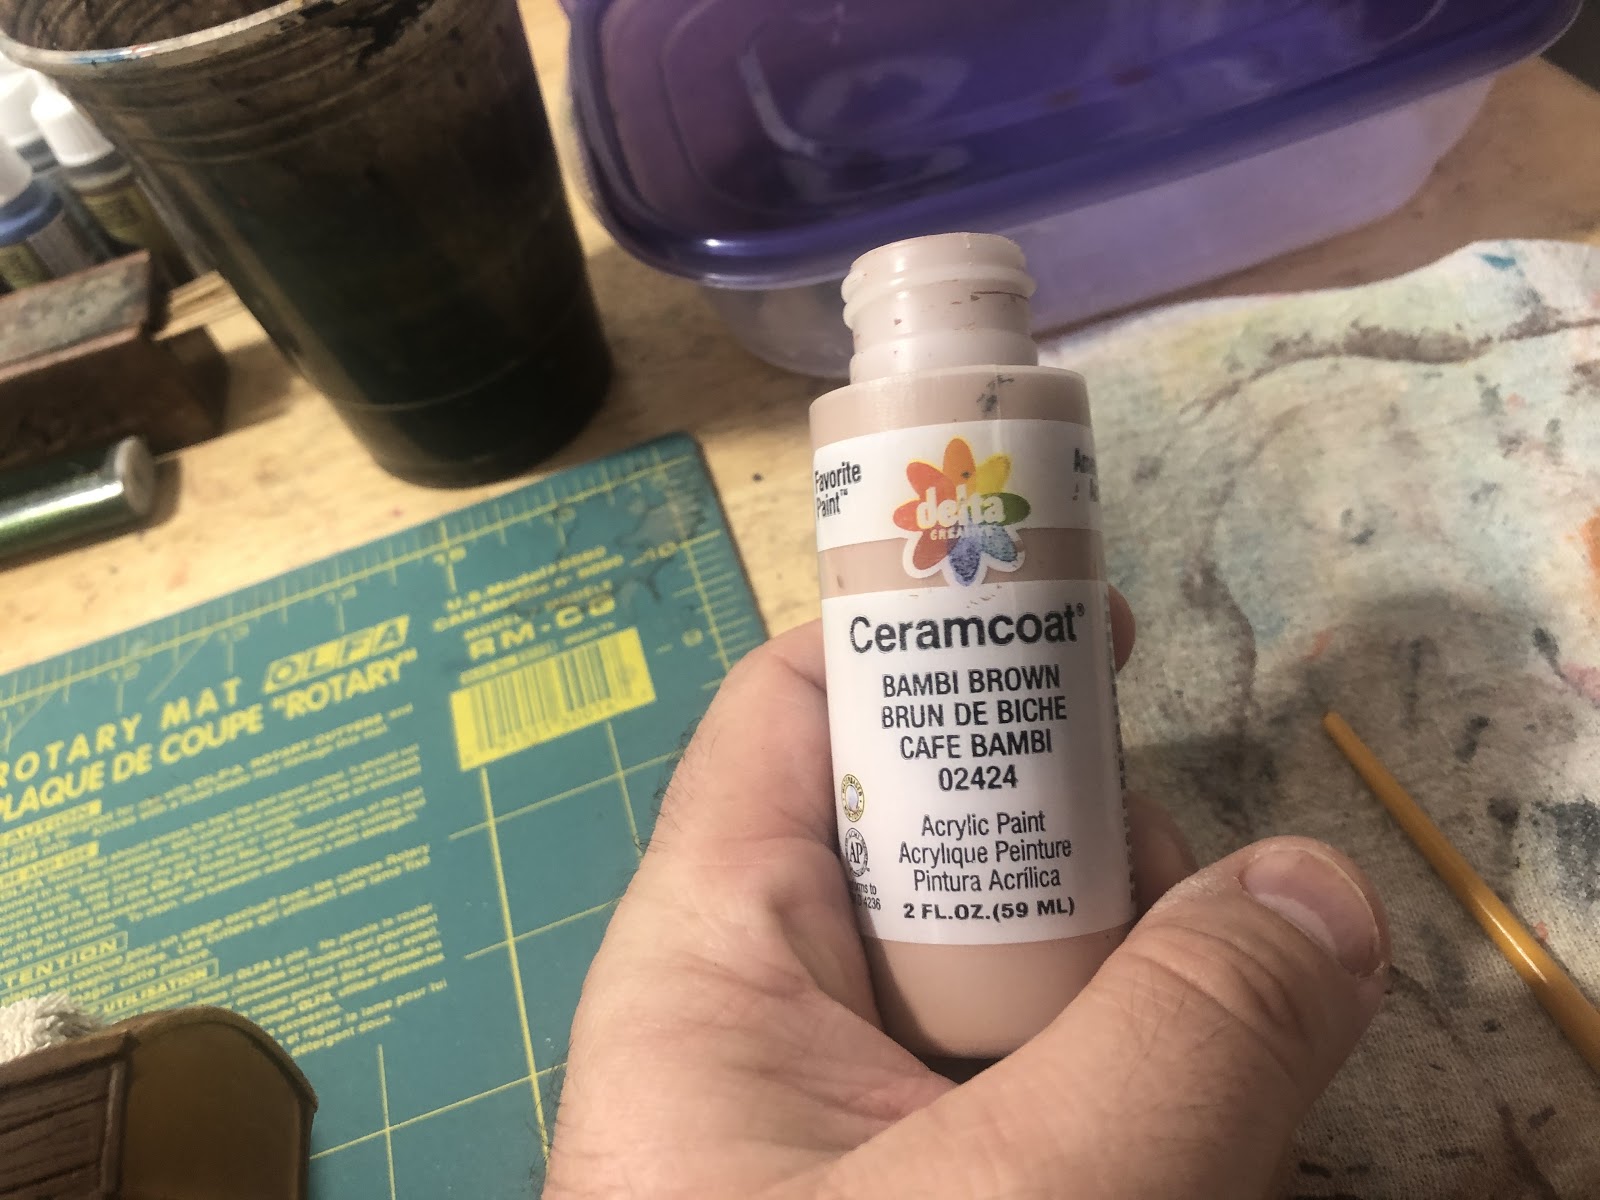
To dry brush the gunwales, use a much lighter paint than Mournfang Brown. I used Bambi Brown.

Dry brush the gunwales, using the same process as you did on the black hull. With a lighter color like this, be extra careful with how much paint is on your brush. Too much paint will ruin the effect.

Dry brush around all sides of the gunports and the chain guards. Go over the areas until you are happy with it. If you think you put on too much light paint, or you don’t like the look, paint it Mournfang Brown again.
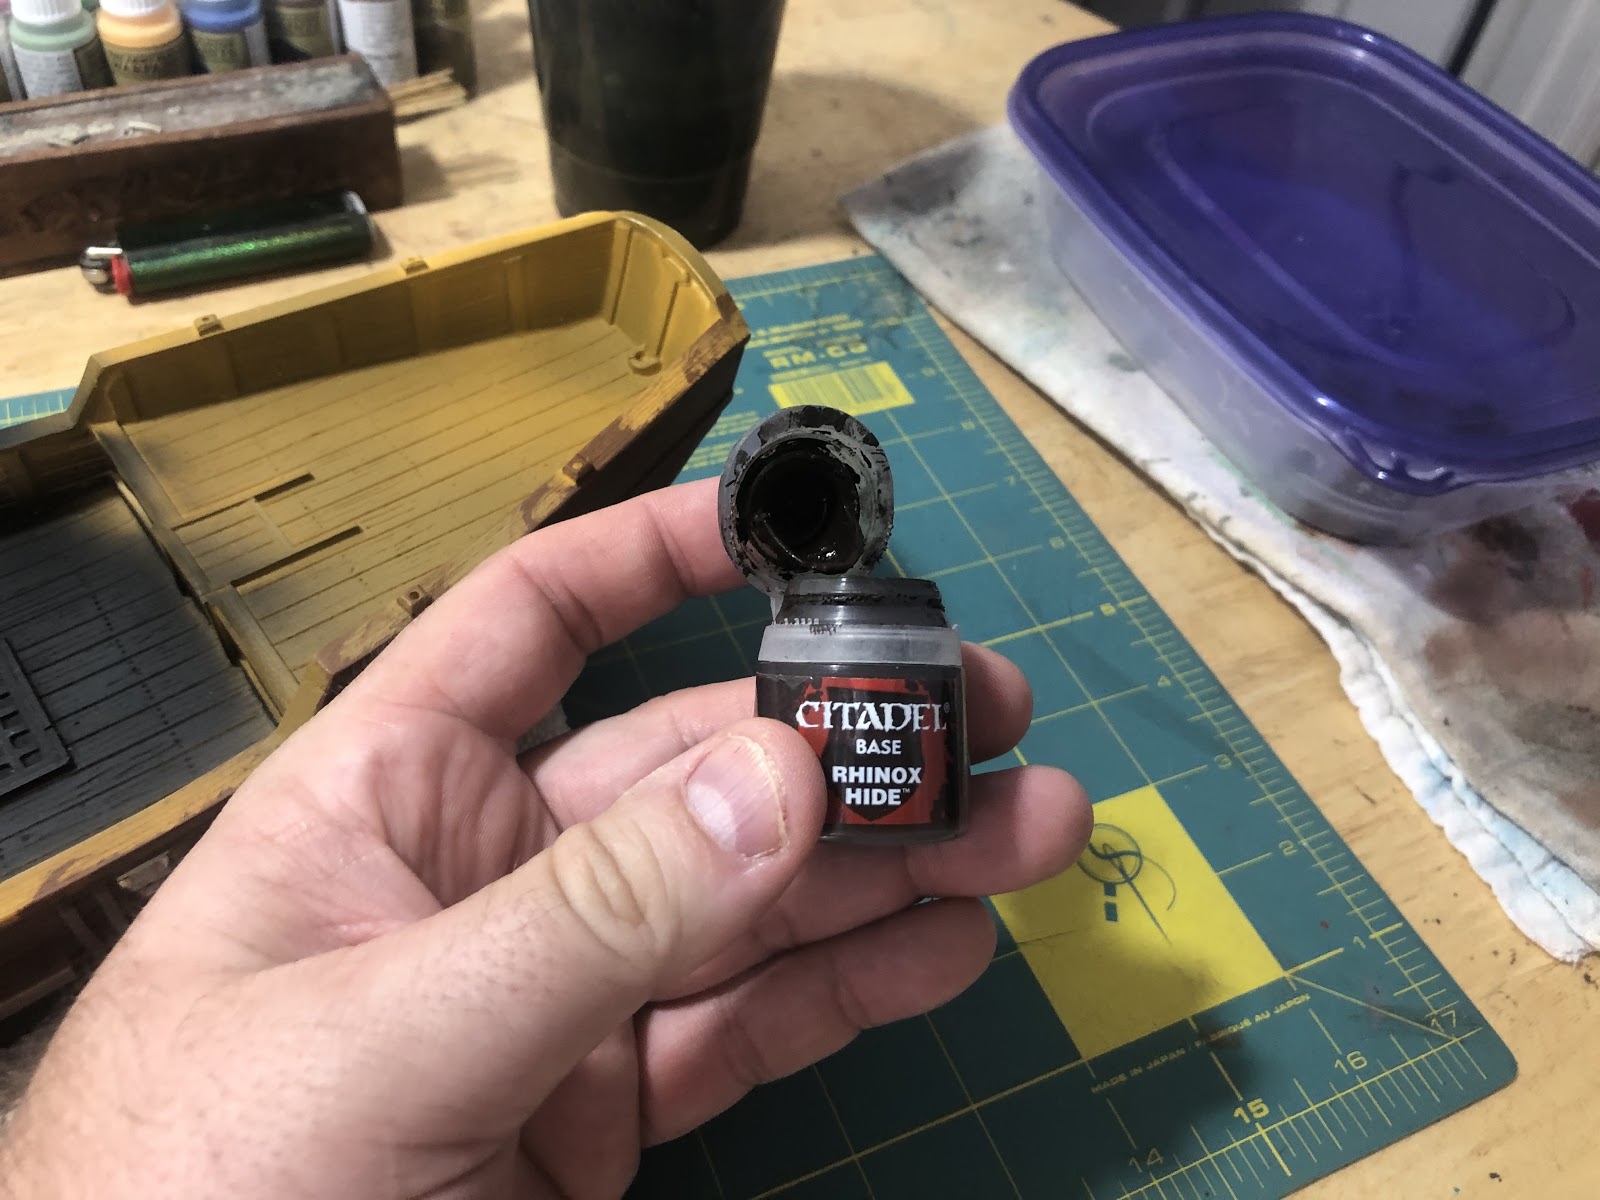
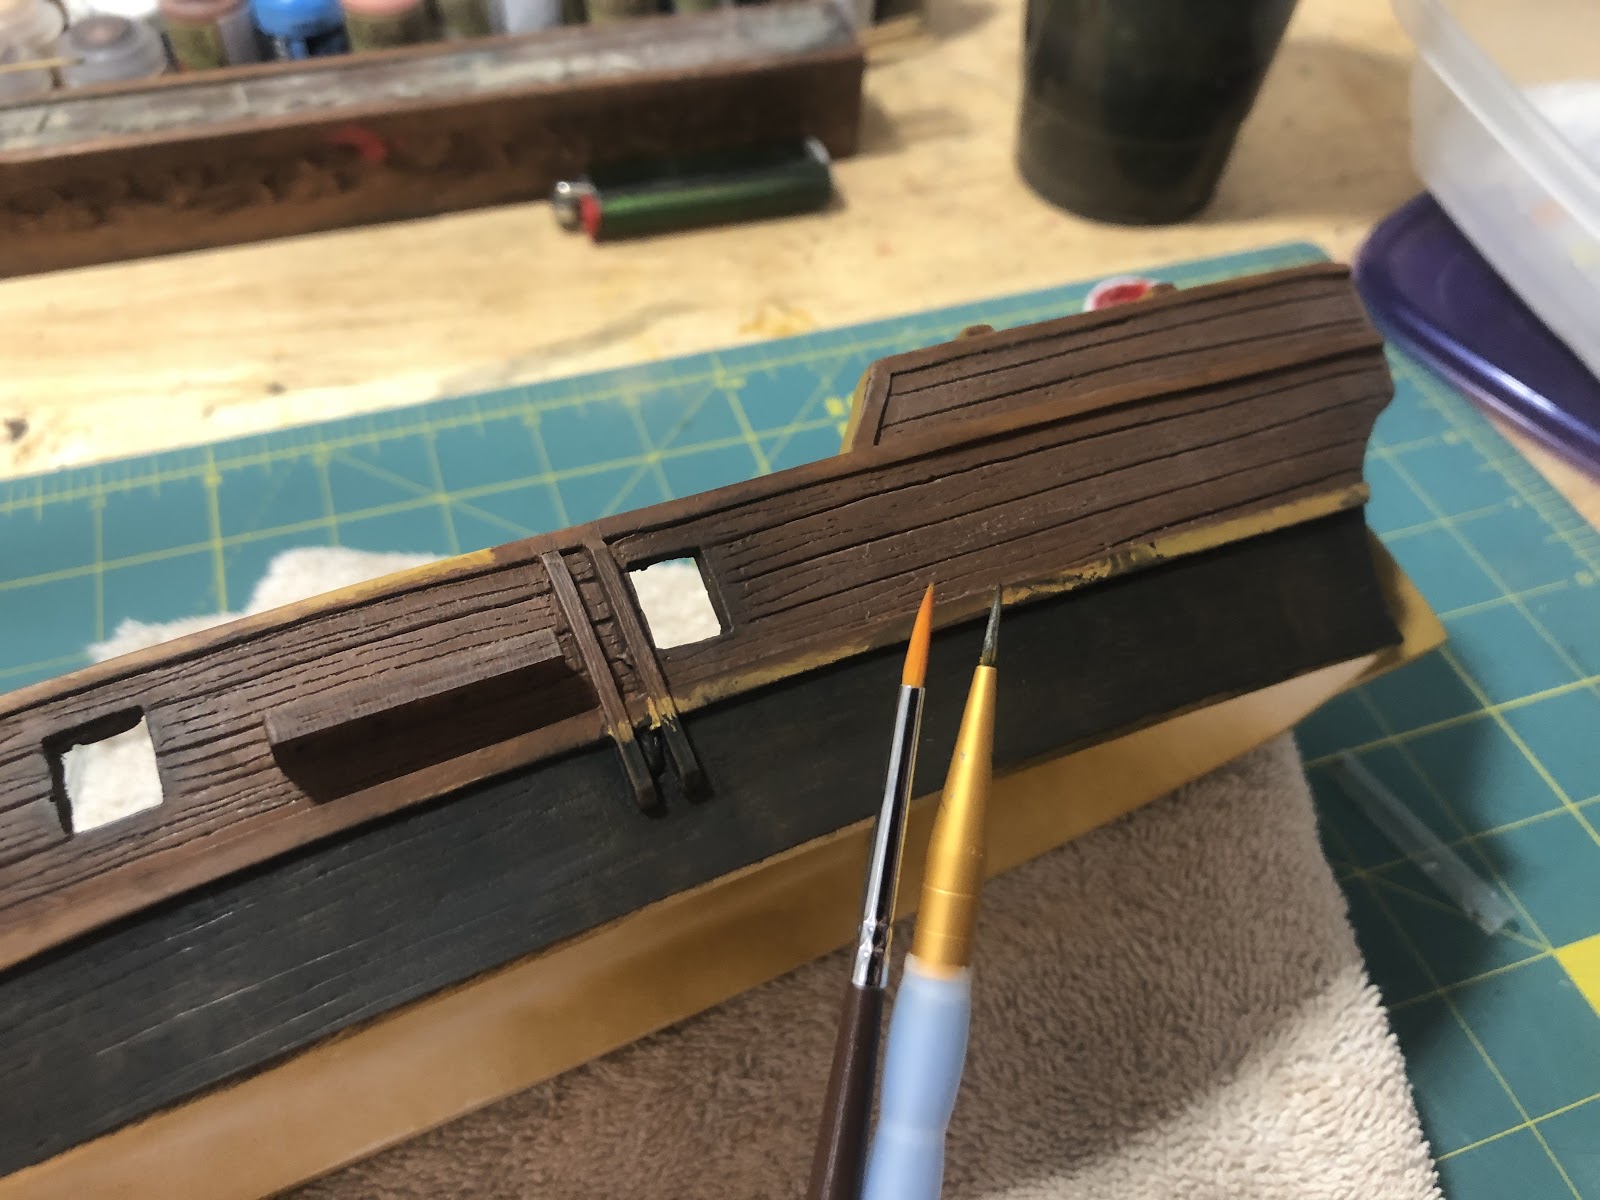
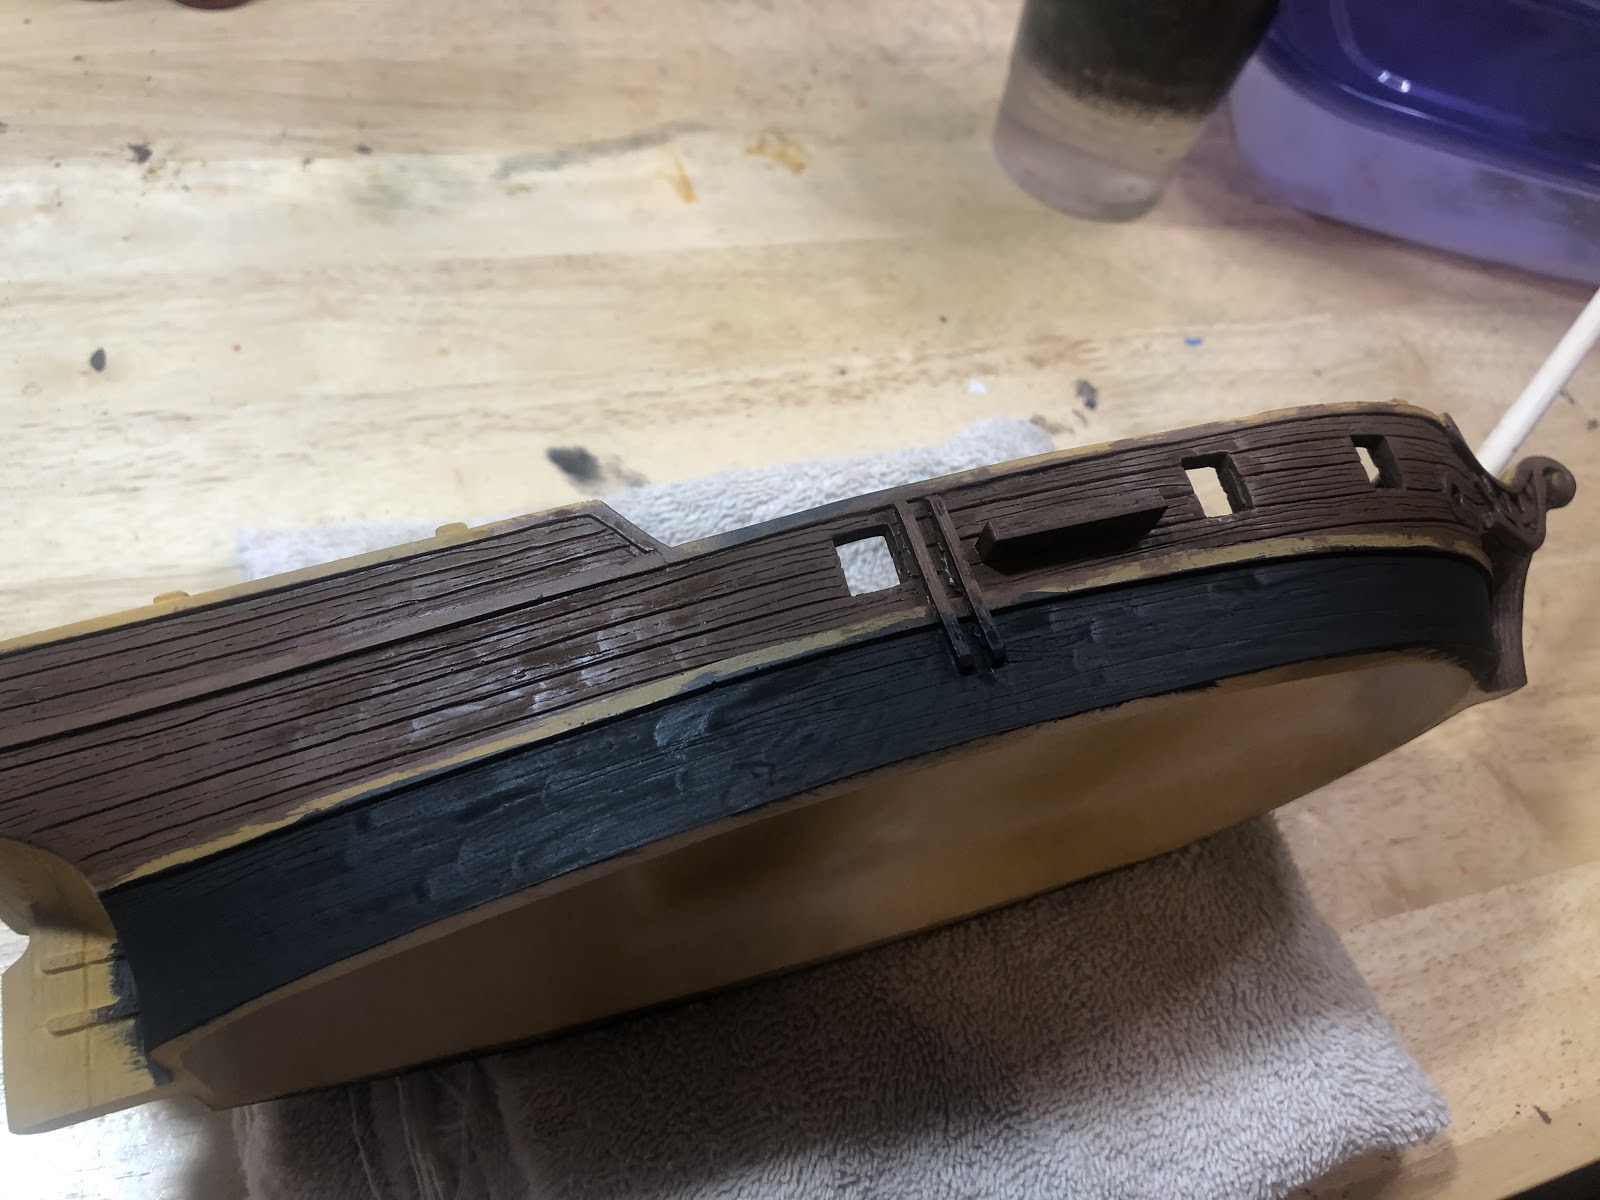
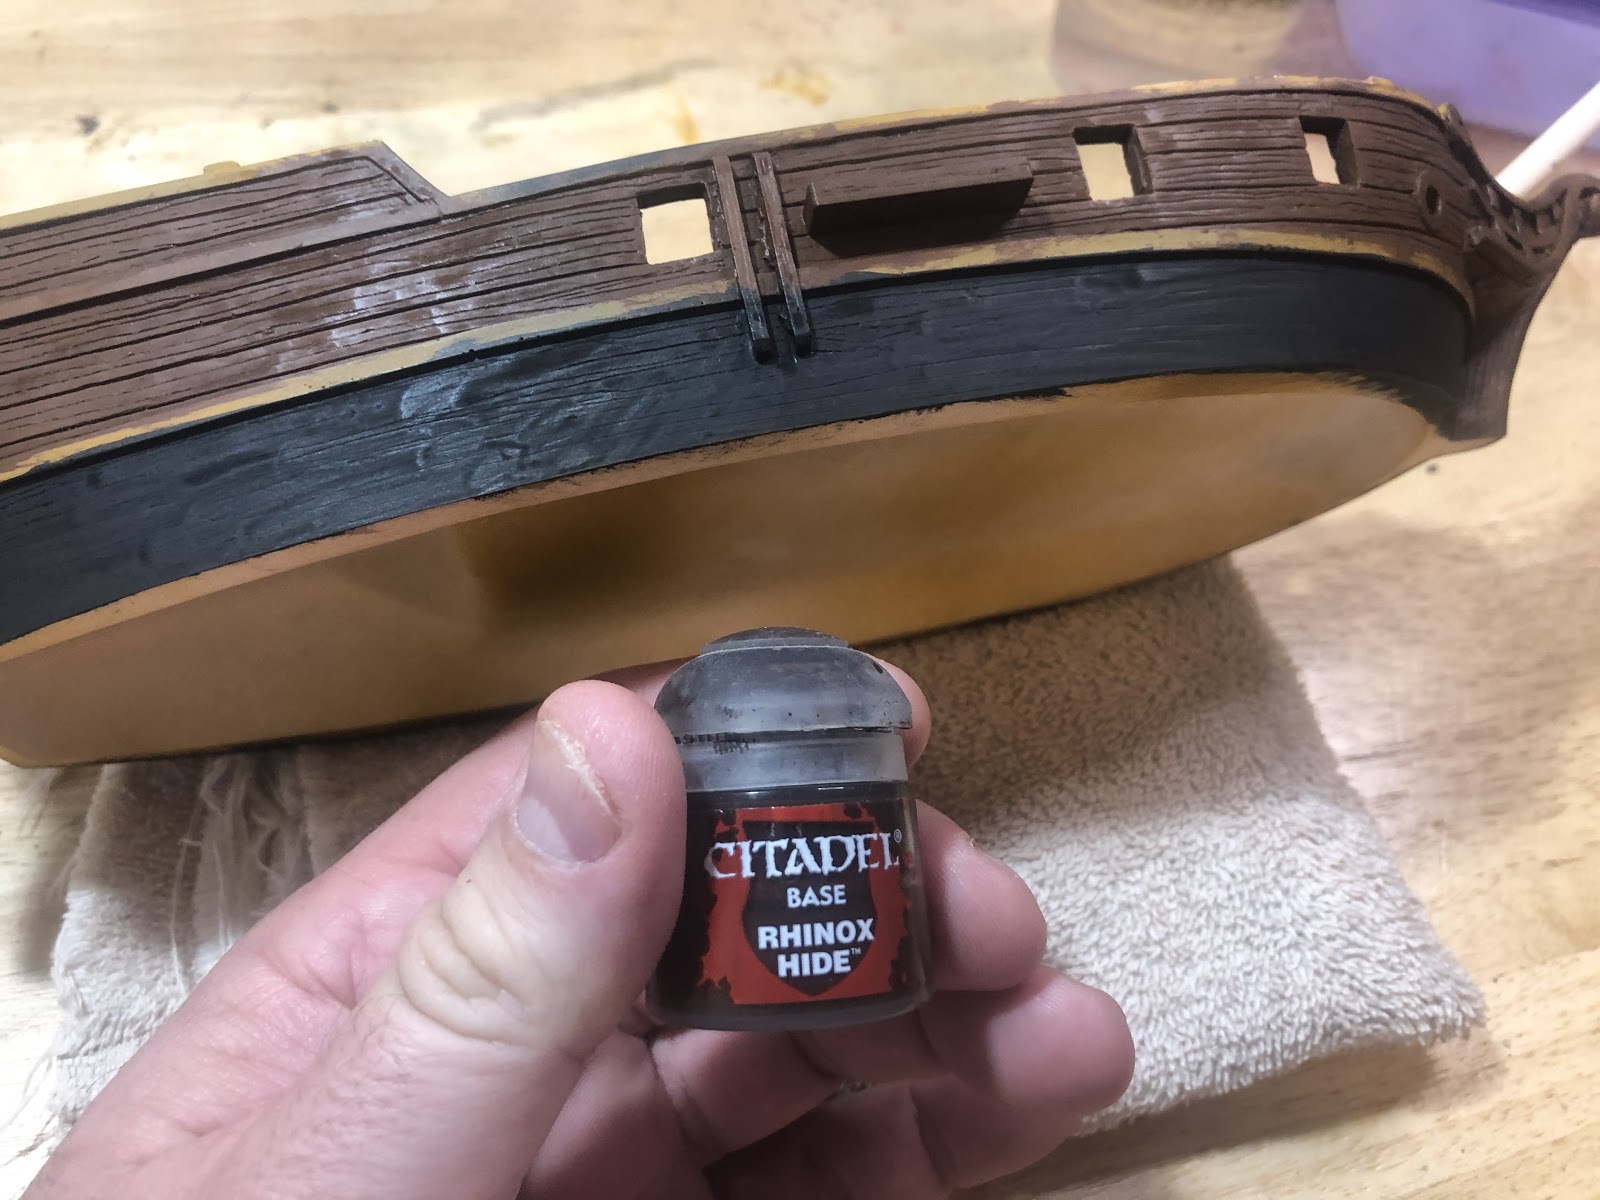
It is now time to add wear to the gun ports to make them look used. For the gun ports use a dark brown, like Rhinox Hide.
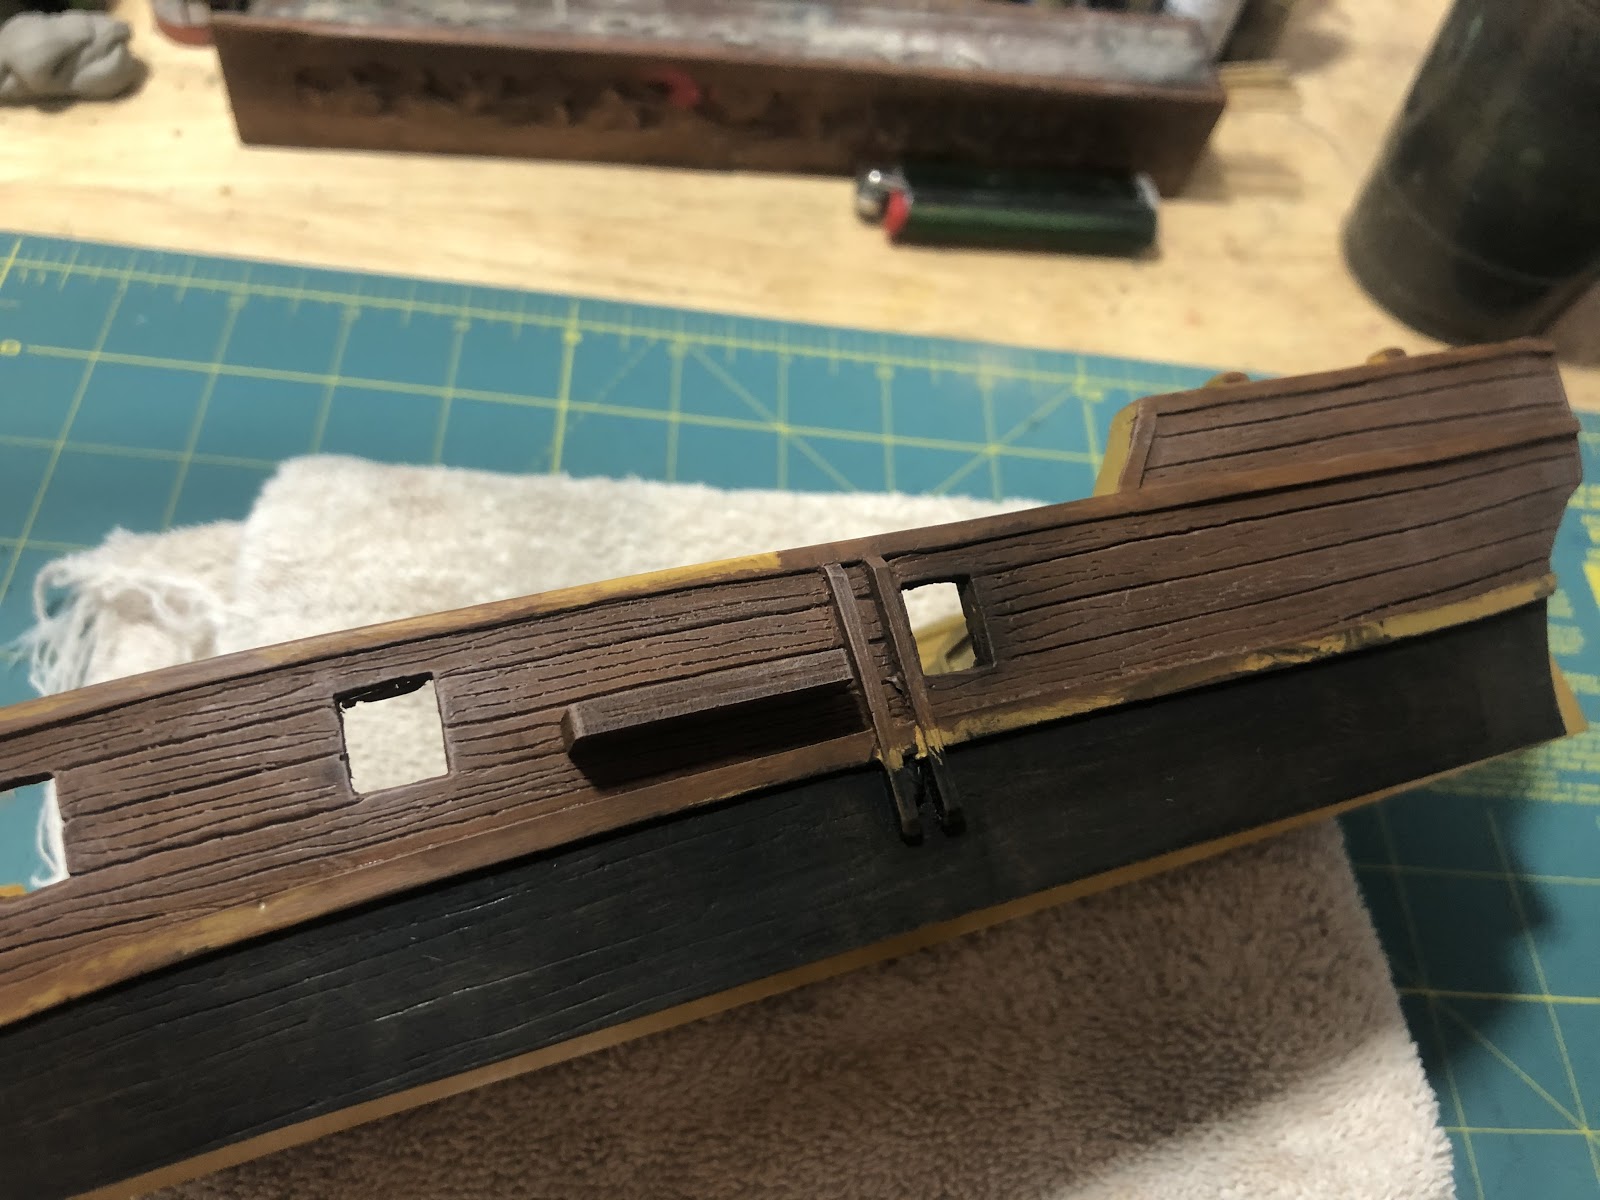
When dry brushing around the gunports, place your brush in the gun port and brush away from the center of the hole, to simulate the fire and smoke of a cannon being fired. Only add enough to be noticeable.
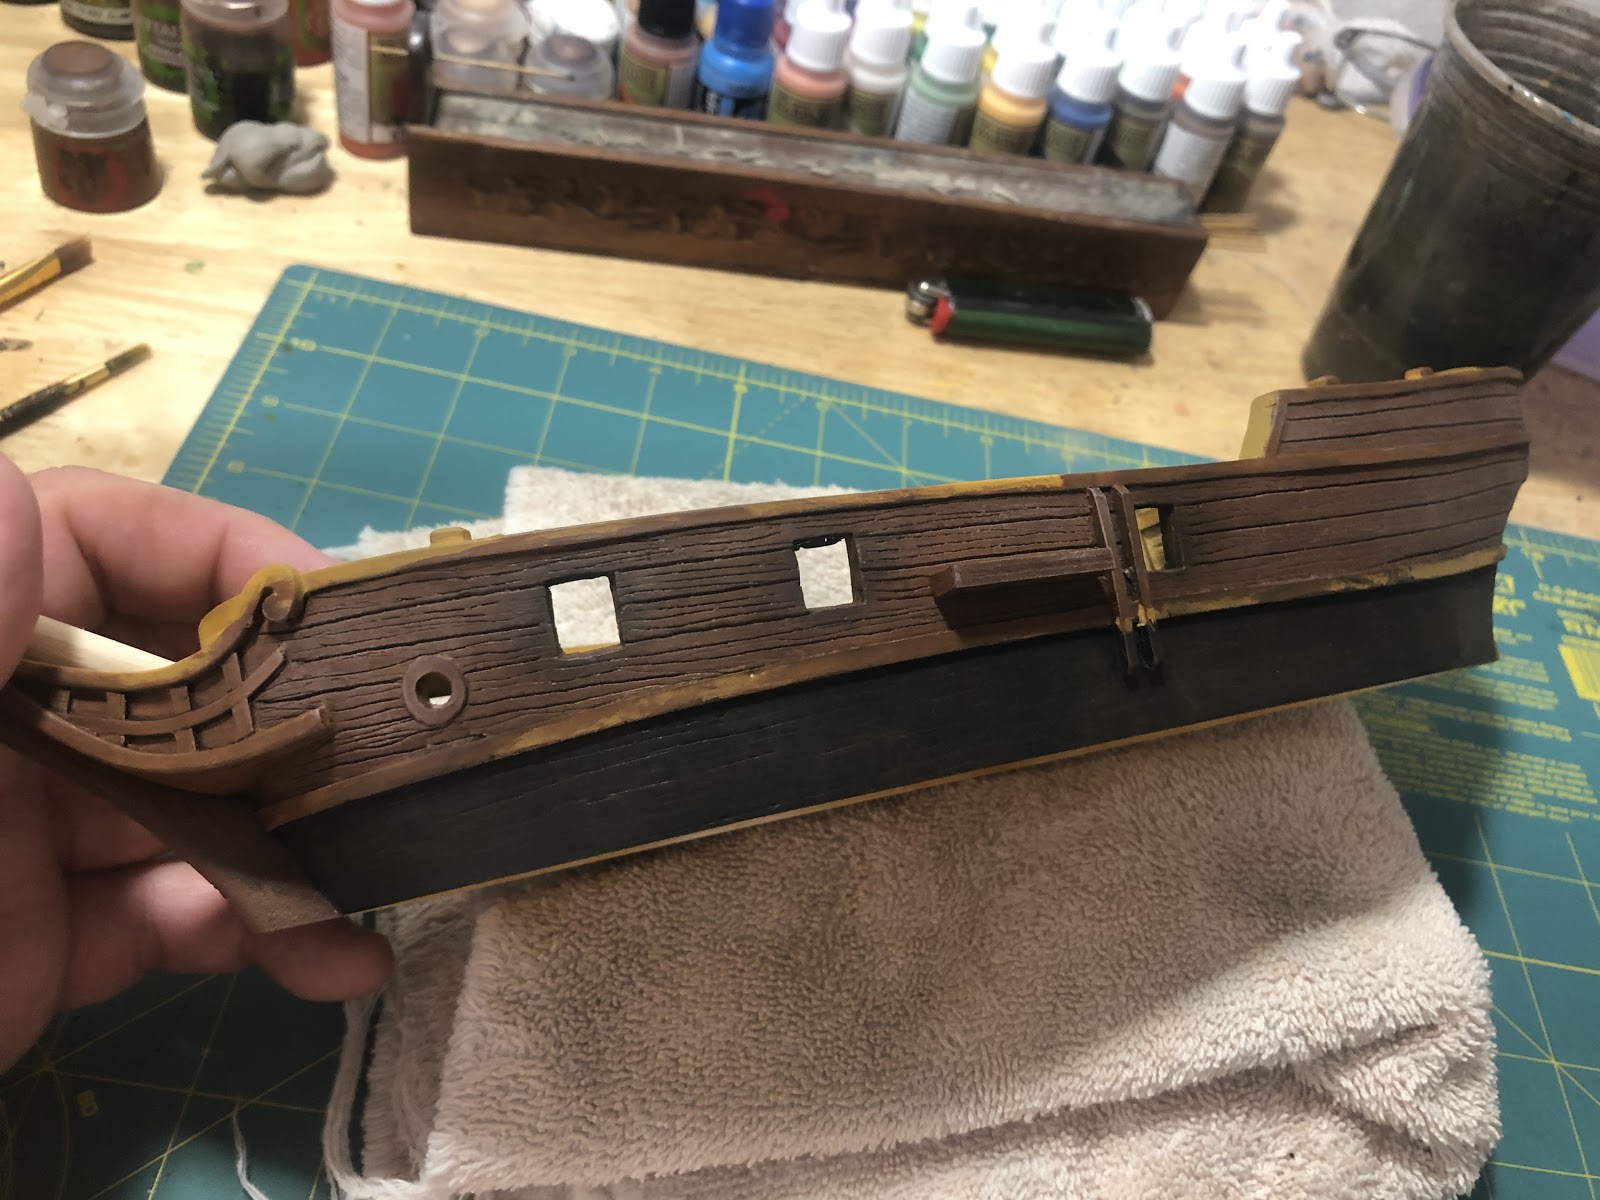
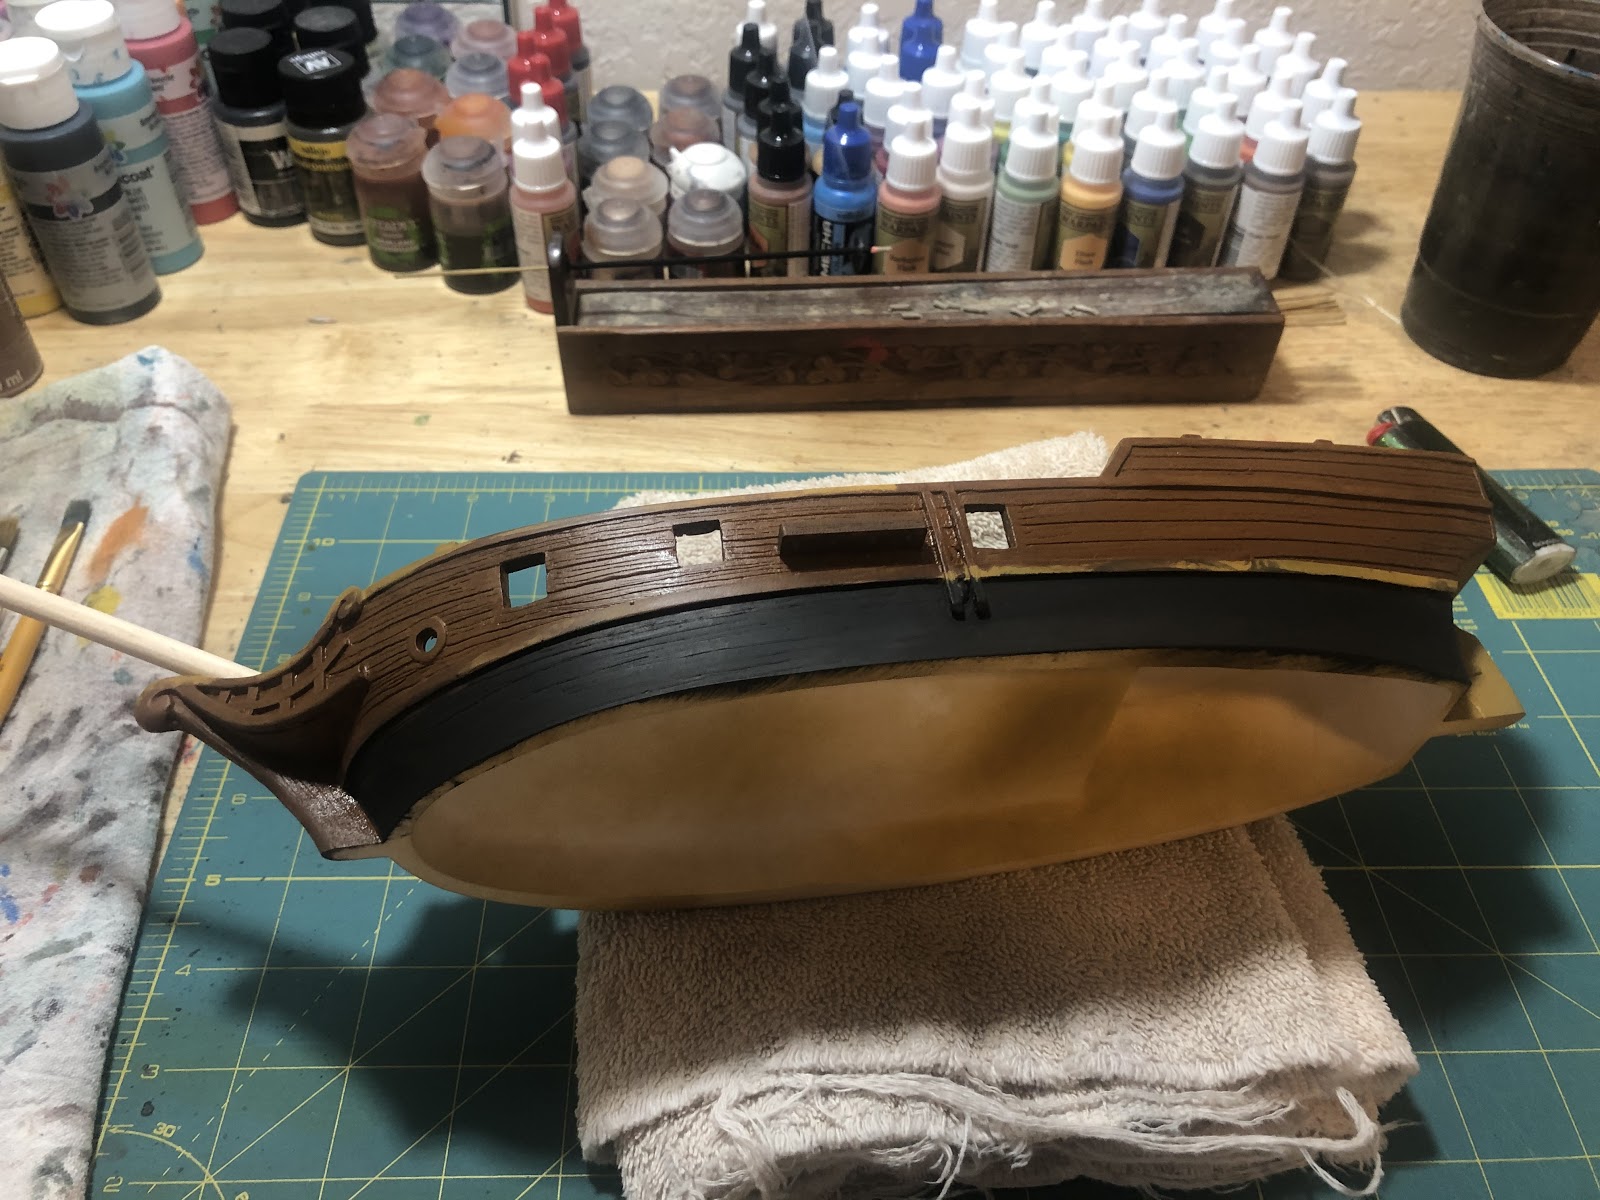
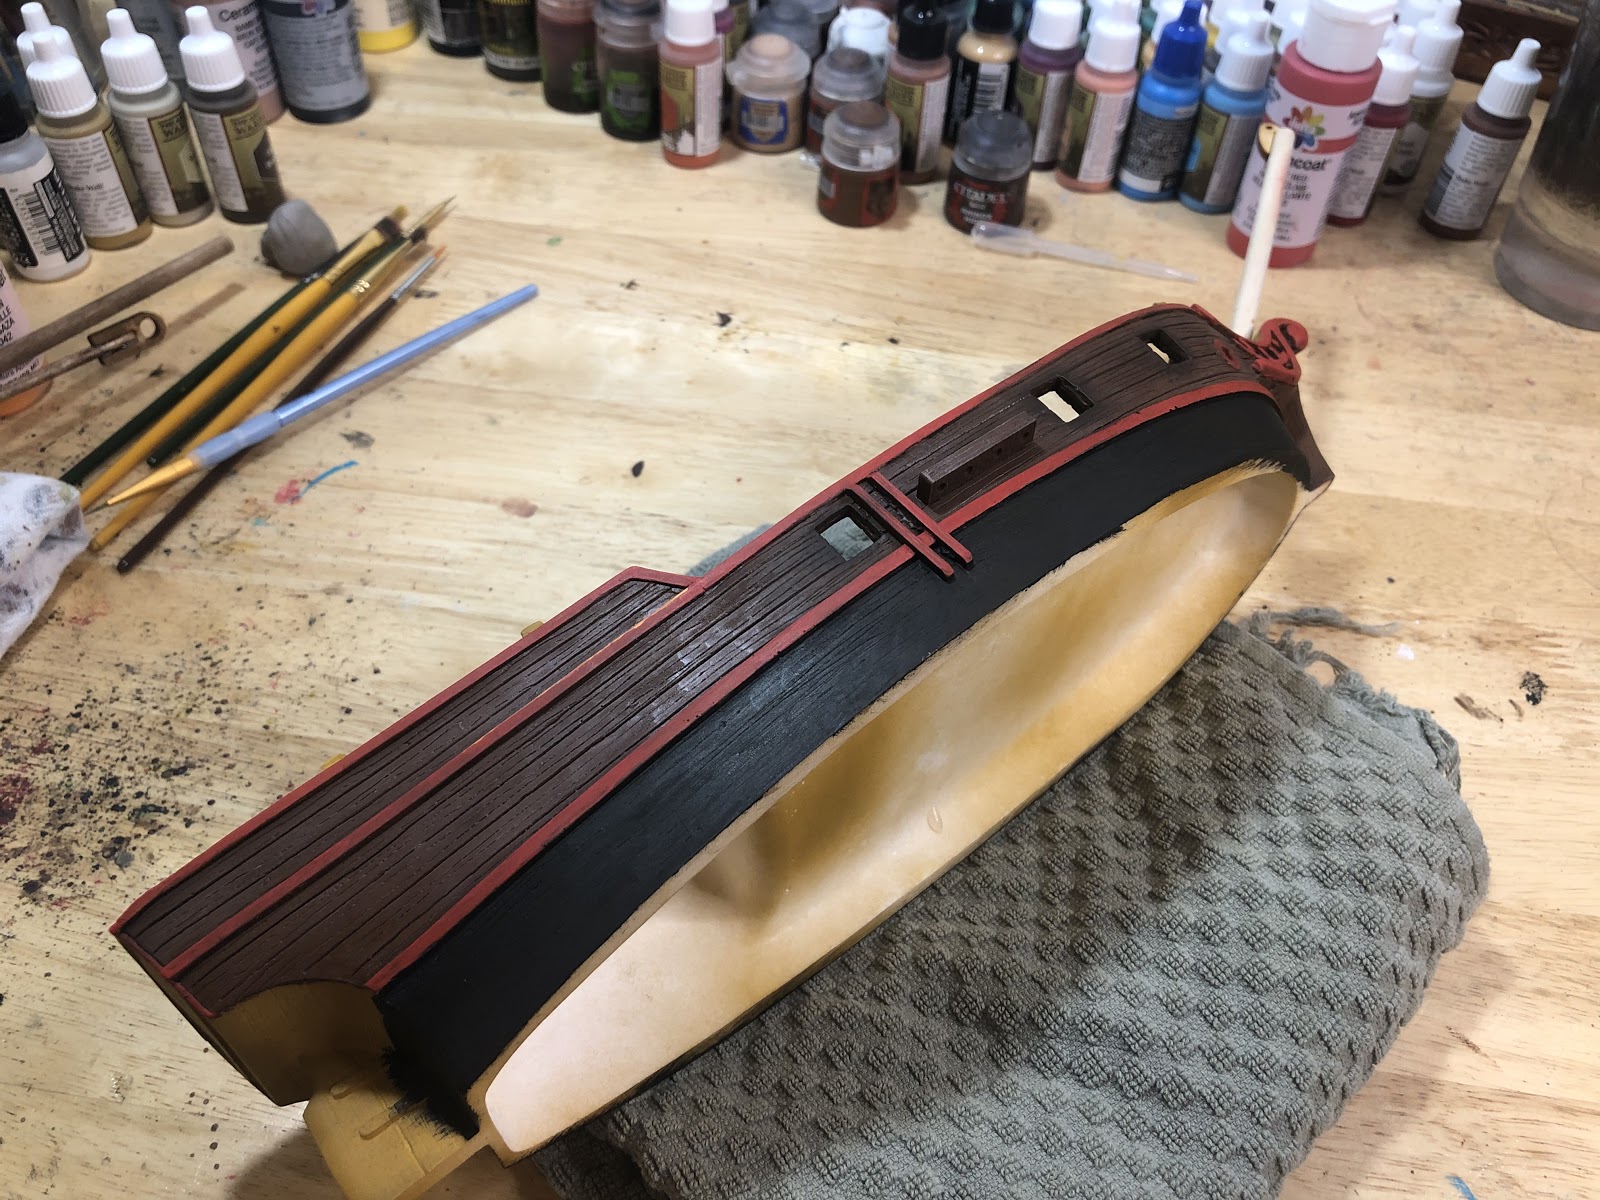
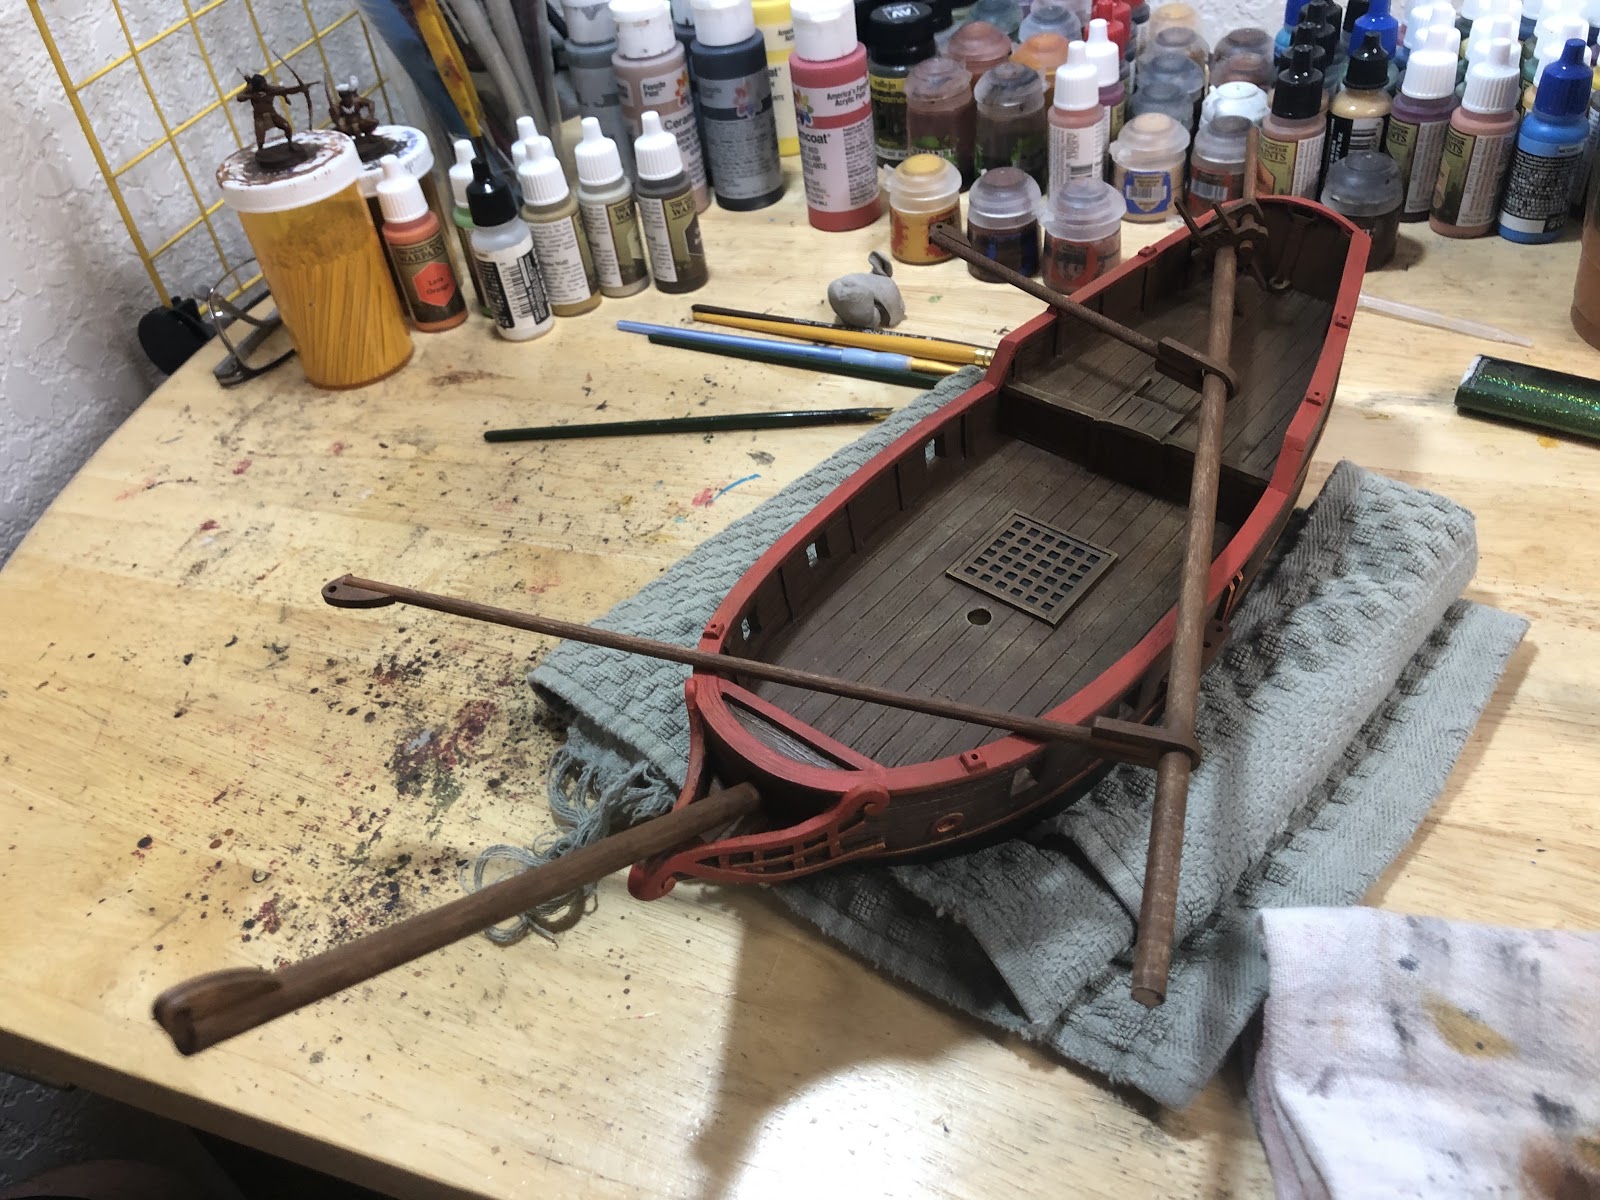
This is the larboard side after three stages of dry brushing. All that is left is to paint the trim, railing, and details.

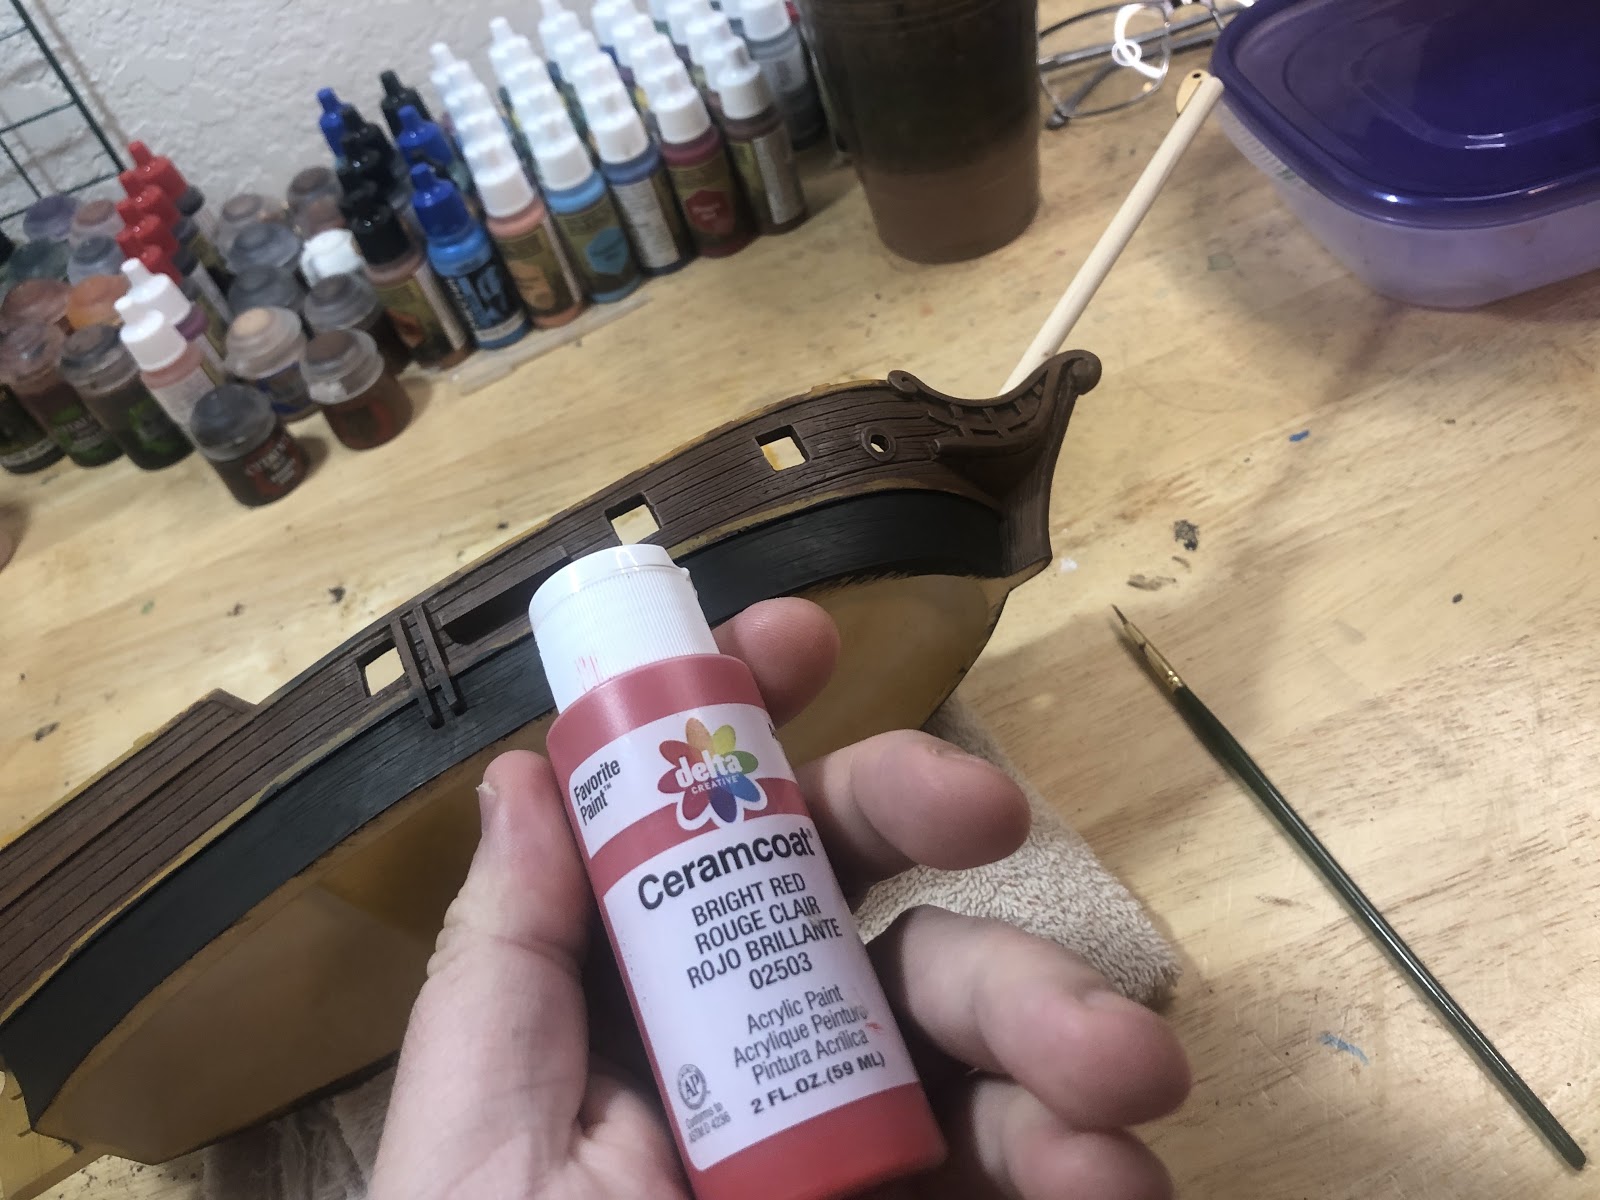
For the trim and railing use a Bright Red, or another color that you like.
For this process use a smaller brush. For line work like this, I like using a brush slightly smaller than the area I am painting.
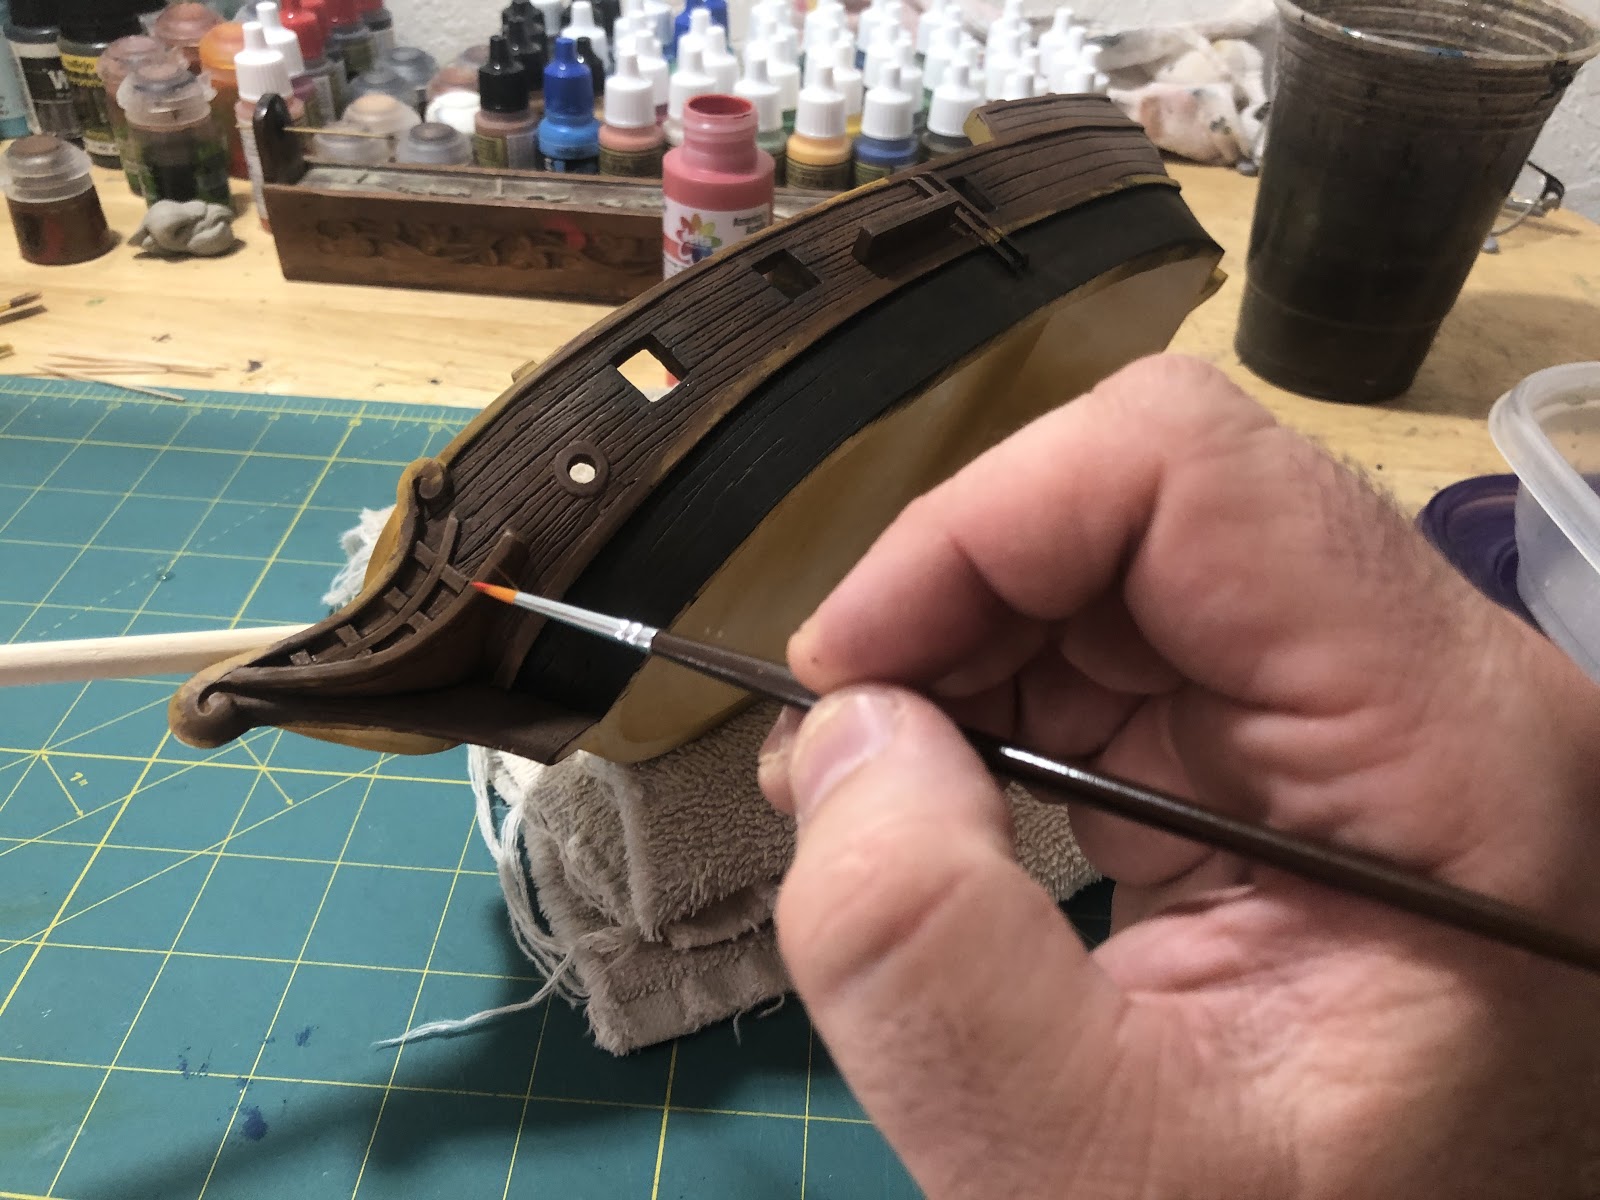
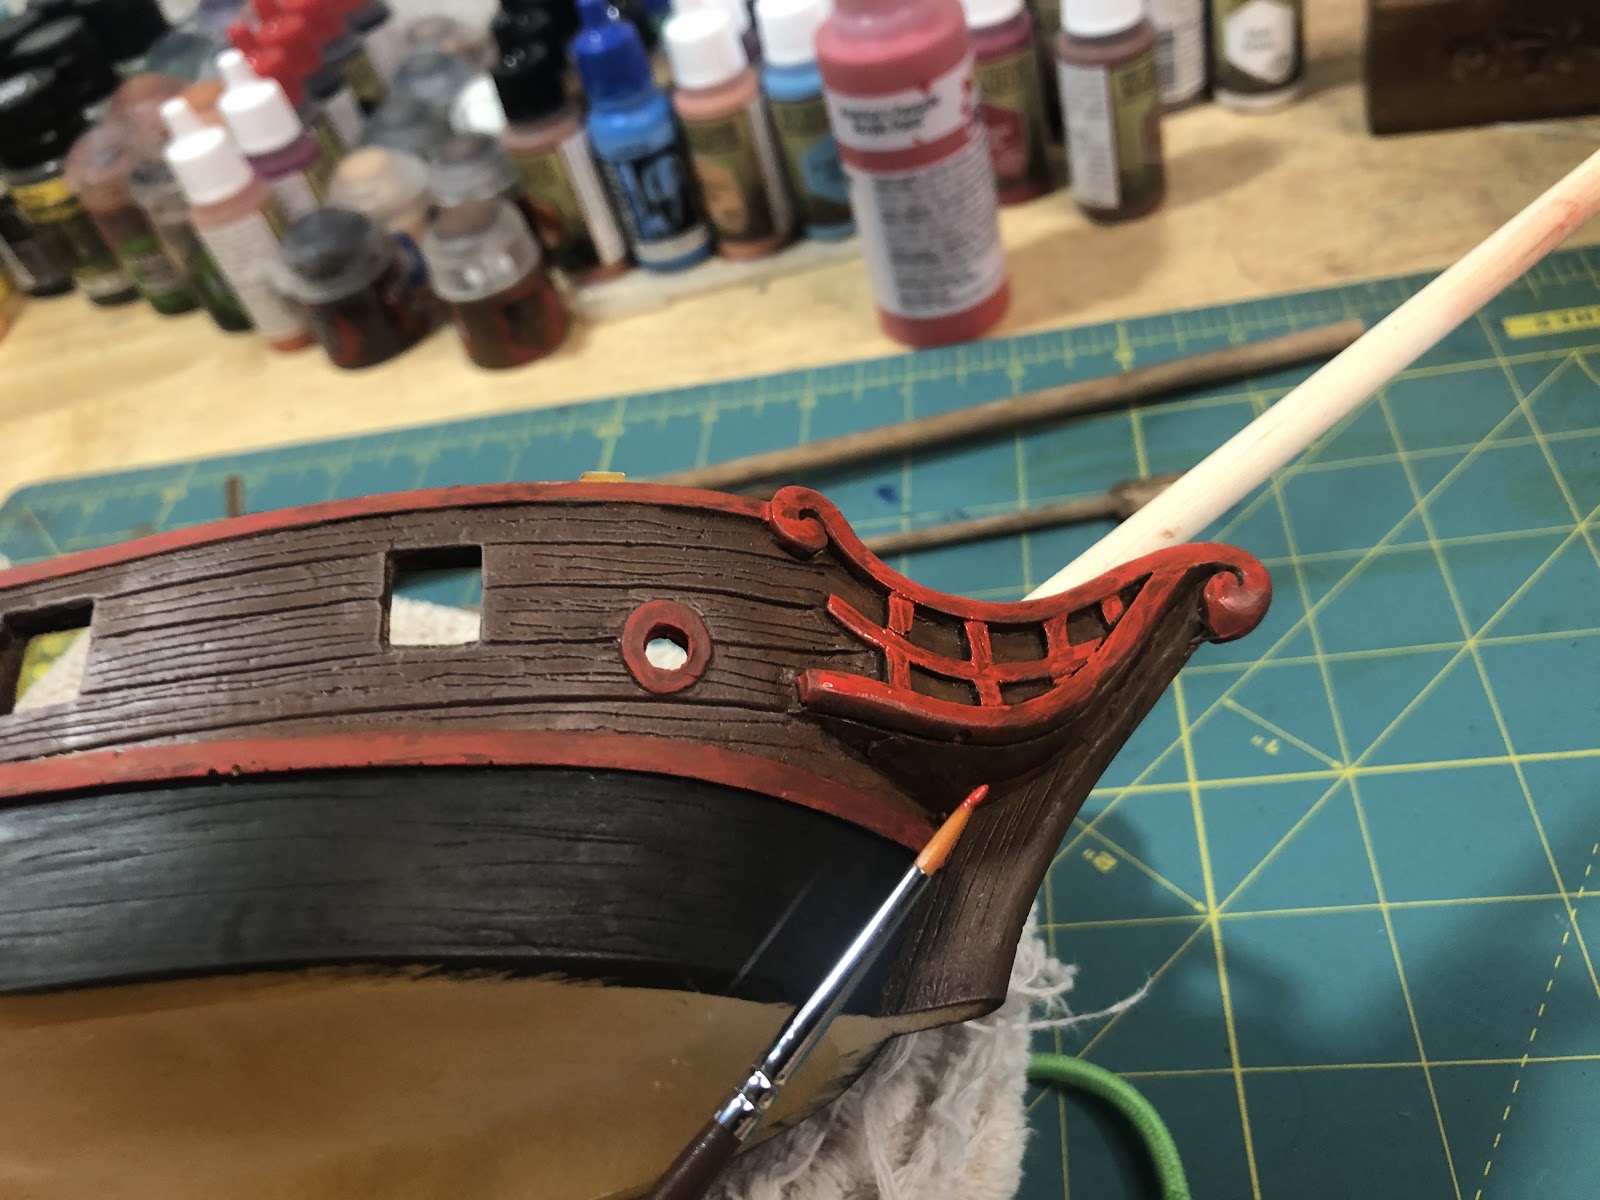
Start at the bow. The beakhead is going to take the most time to paint. Bright colors need several coats to look even, so do not be frustrated if the color doesn’t show up well after one coat. Only paint the top of the beakhead, leaving your wash below to help contrast the bright color. Also leave the keel brown. The keel is the wood beam that runs along the center bottom of a ship.
Once the beakhead is done, move on to the trim and railing. Don’t worry about painting the top of the railing, it will be painted when the ship is at a better angle.

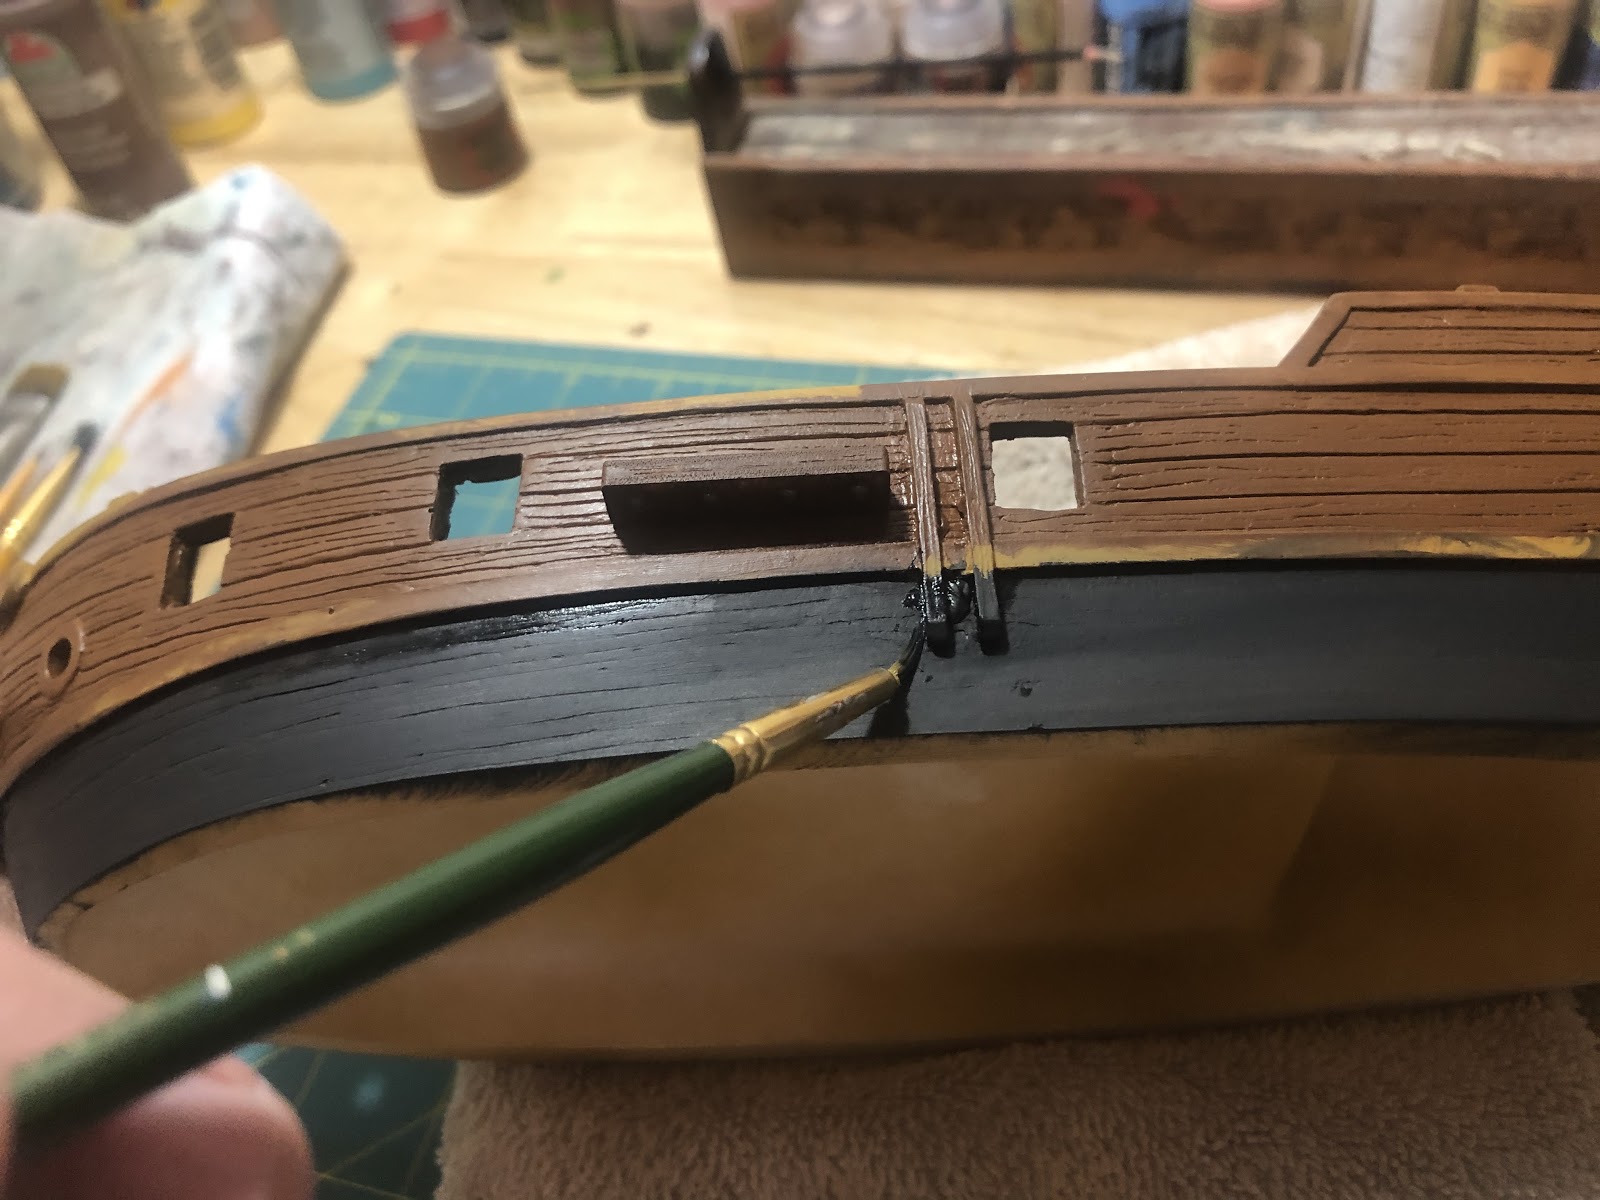
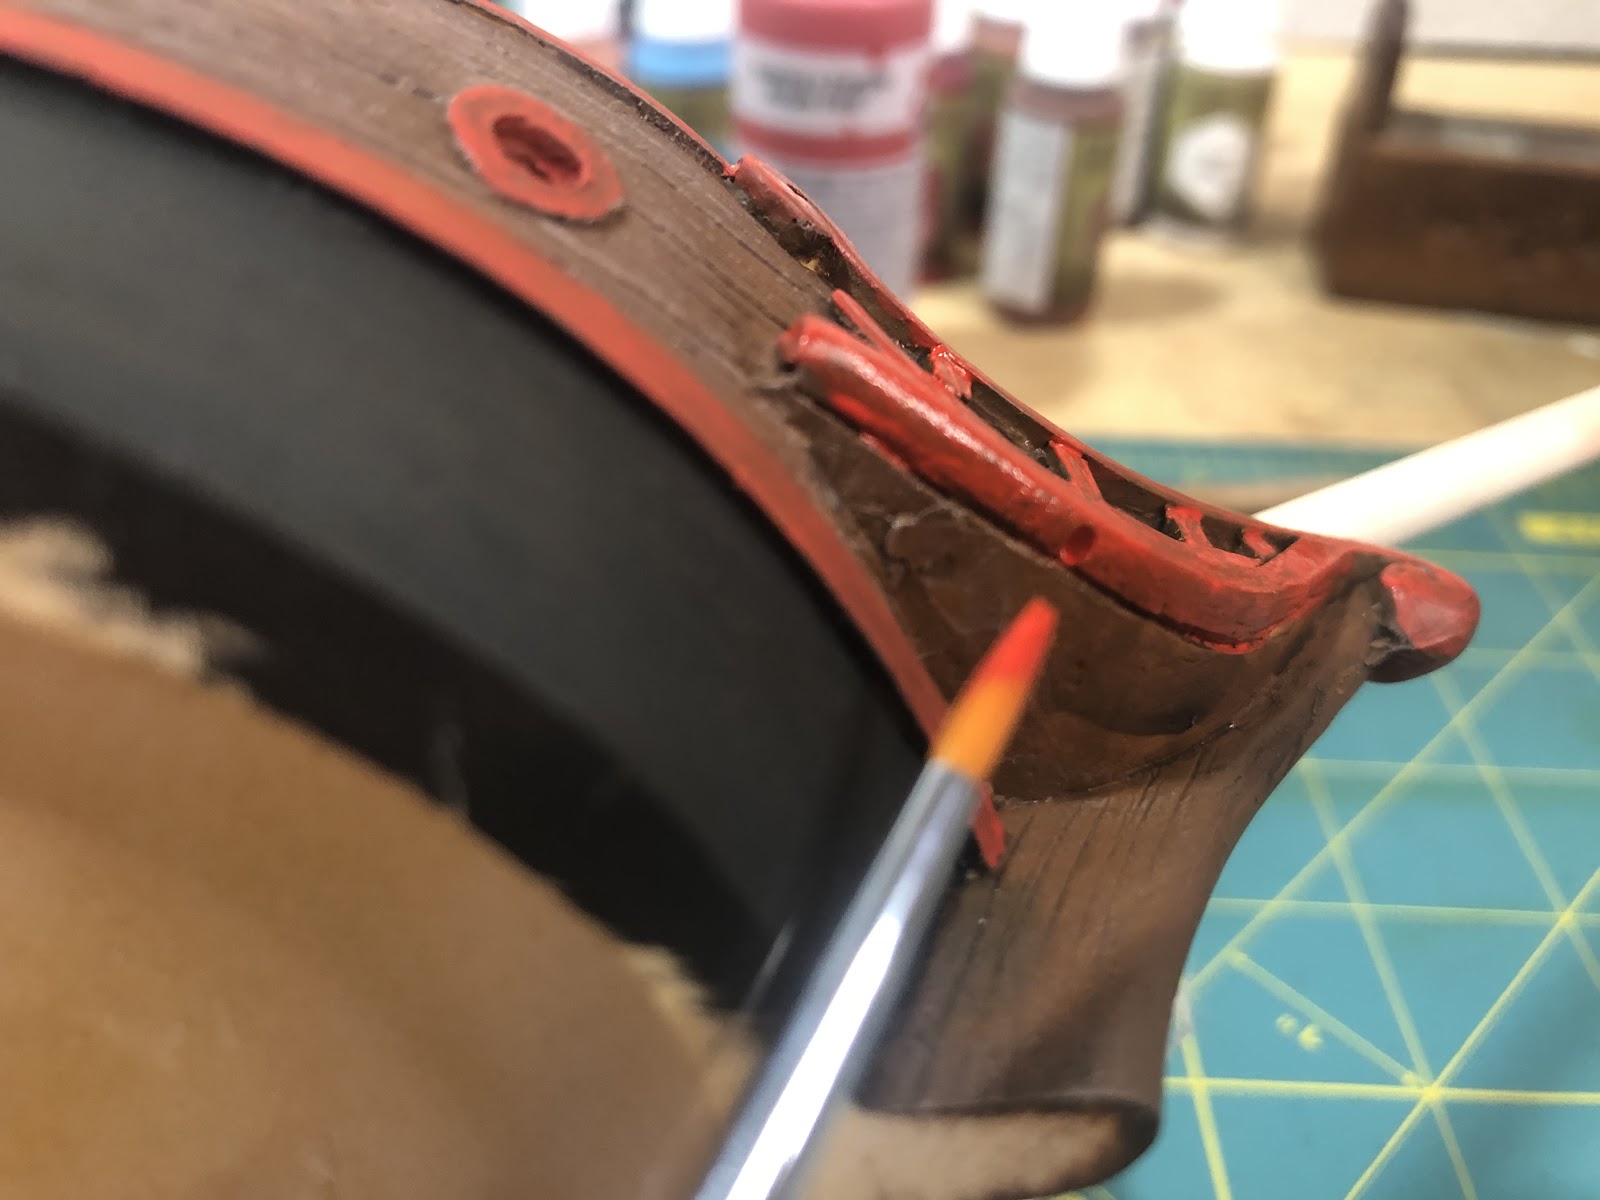
When you’re painting small areas like this, you will mess up occasionally and paint something you don’t want to paint, like I did here. When that happens, don’t panic.
Wash your brush in your water. Without drying it completely, use the brush to spread water on the area you didn’t want paint. Once the paint is diluted with the water, dry your brush, and use the brush to remove the water.
The top of the railing will be painted later.
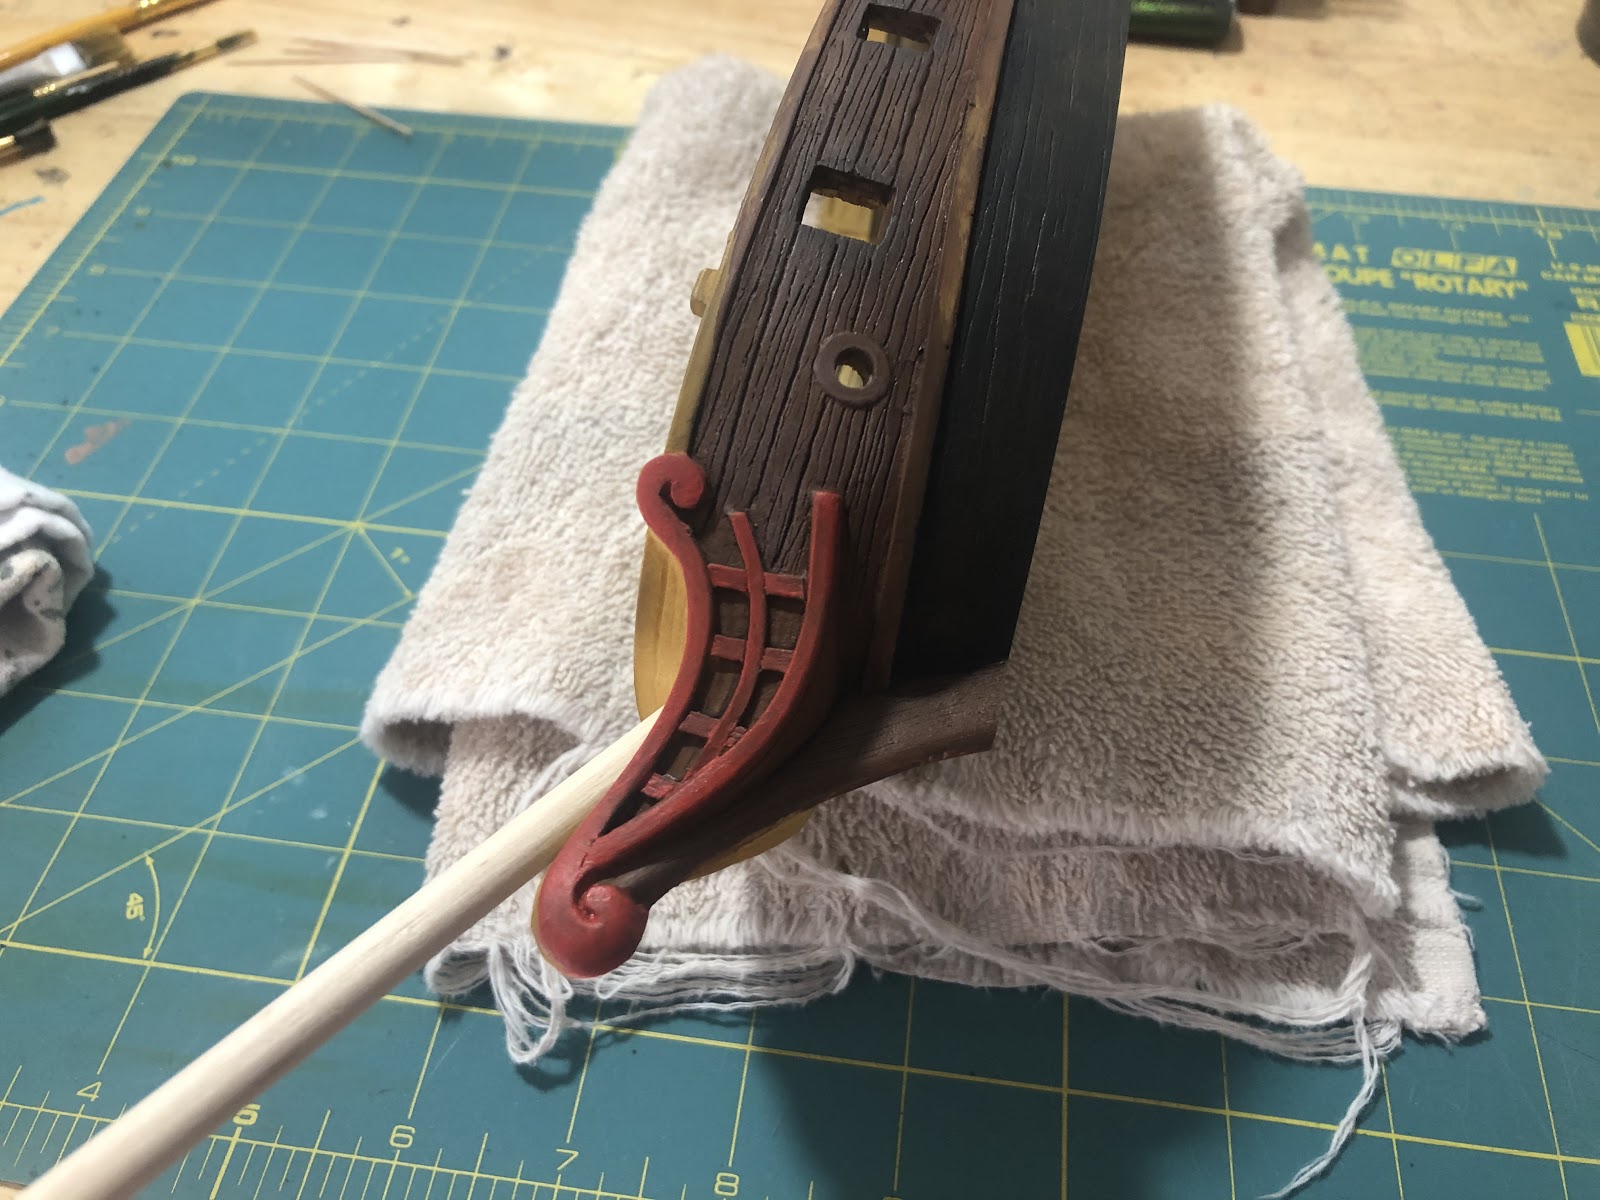
Paint the hawse pipe and the trim. It might take two to three coats for the color to be even. On the plus side, the red is supposed to look like paint, so if you like how it looks thin in places, leave it that way.

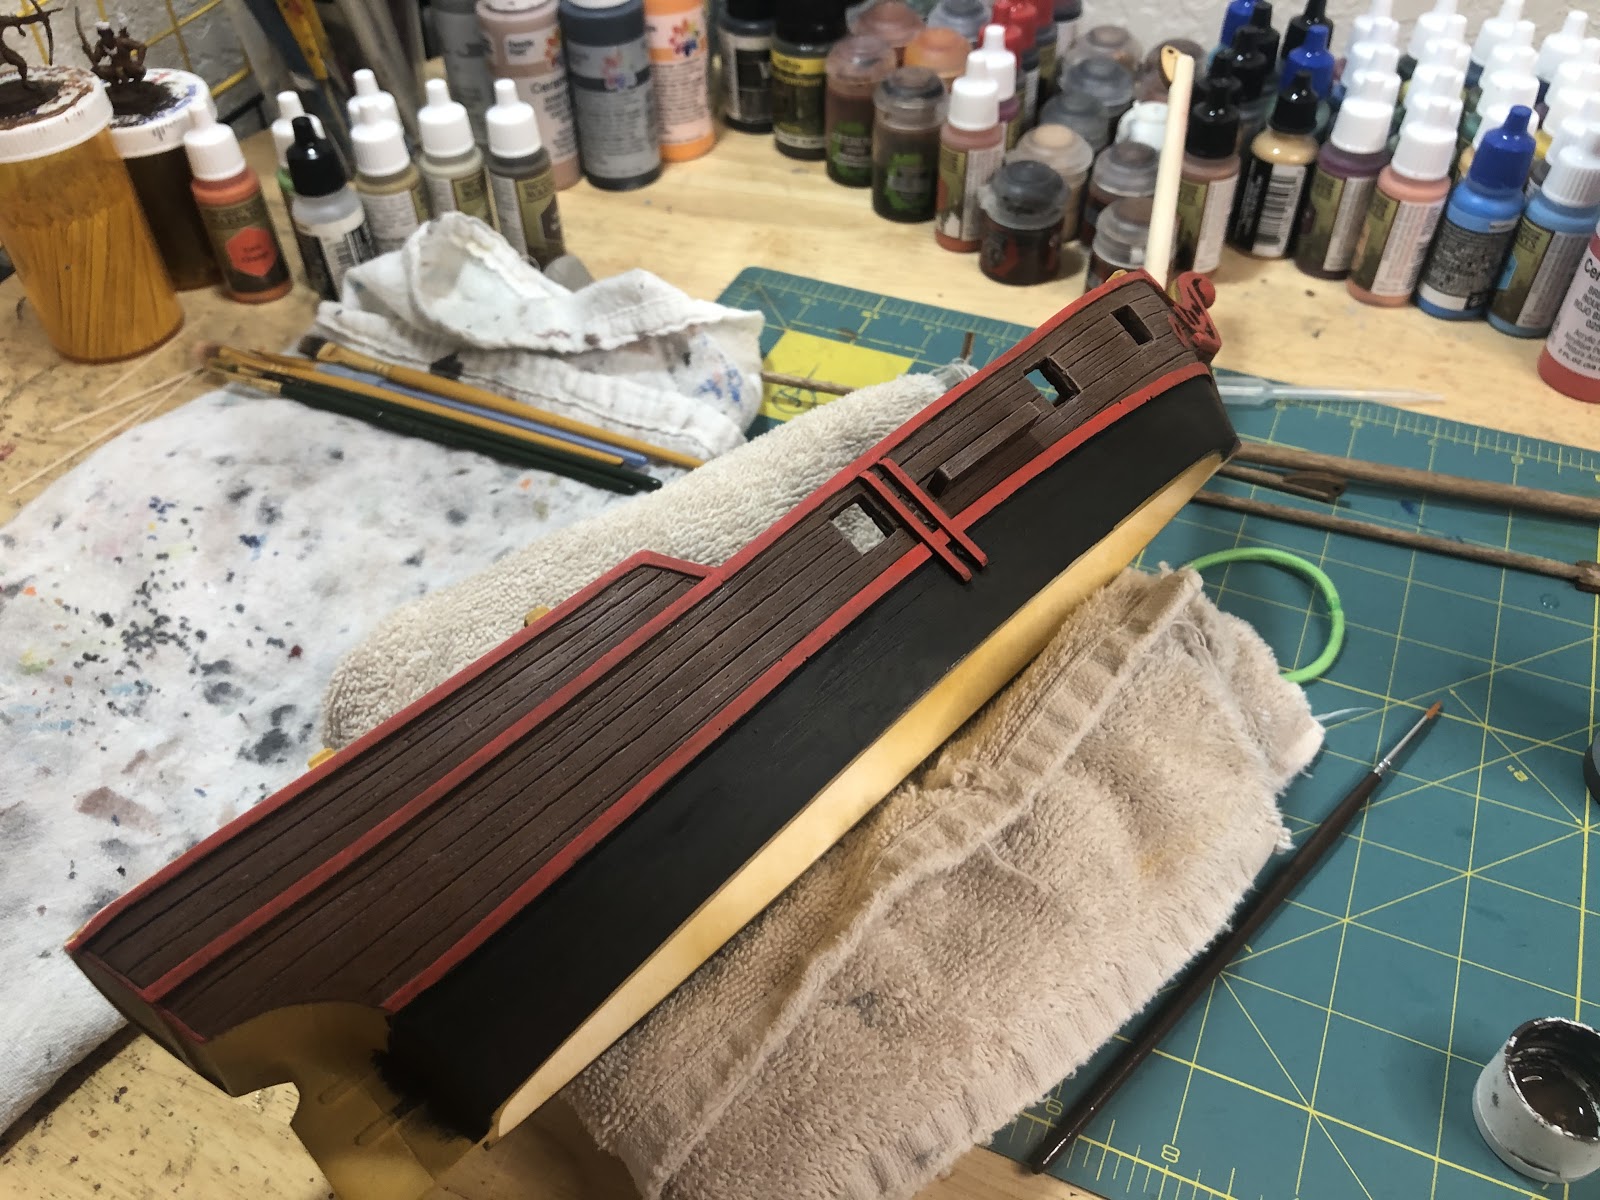
Paint the skids in the center of the larboard side red all the way into the black of the hull. The skids are where the ship turns from, and it’s important that they are noticeable.
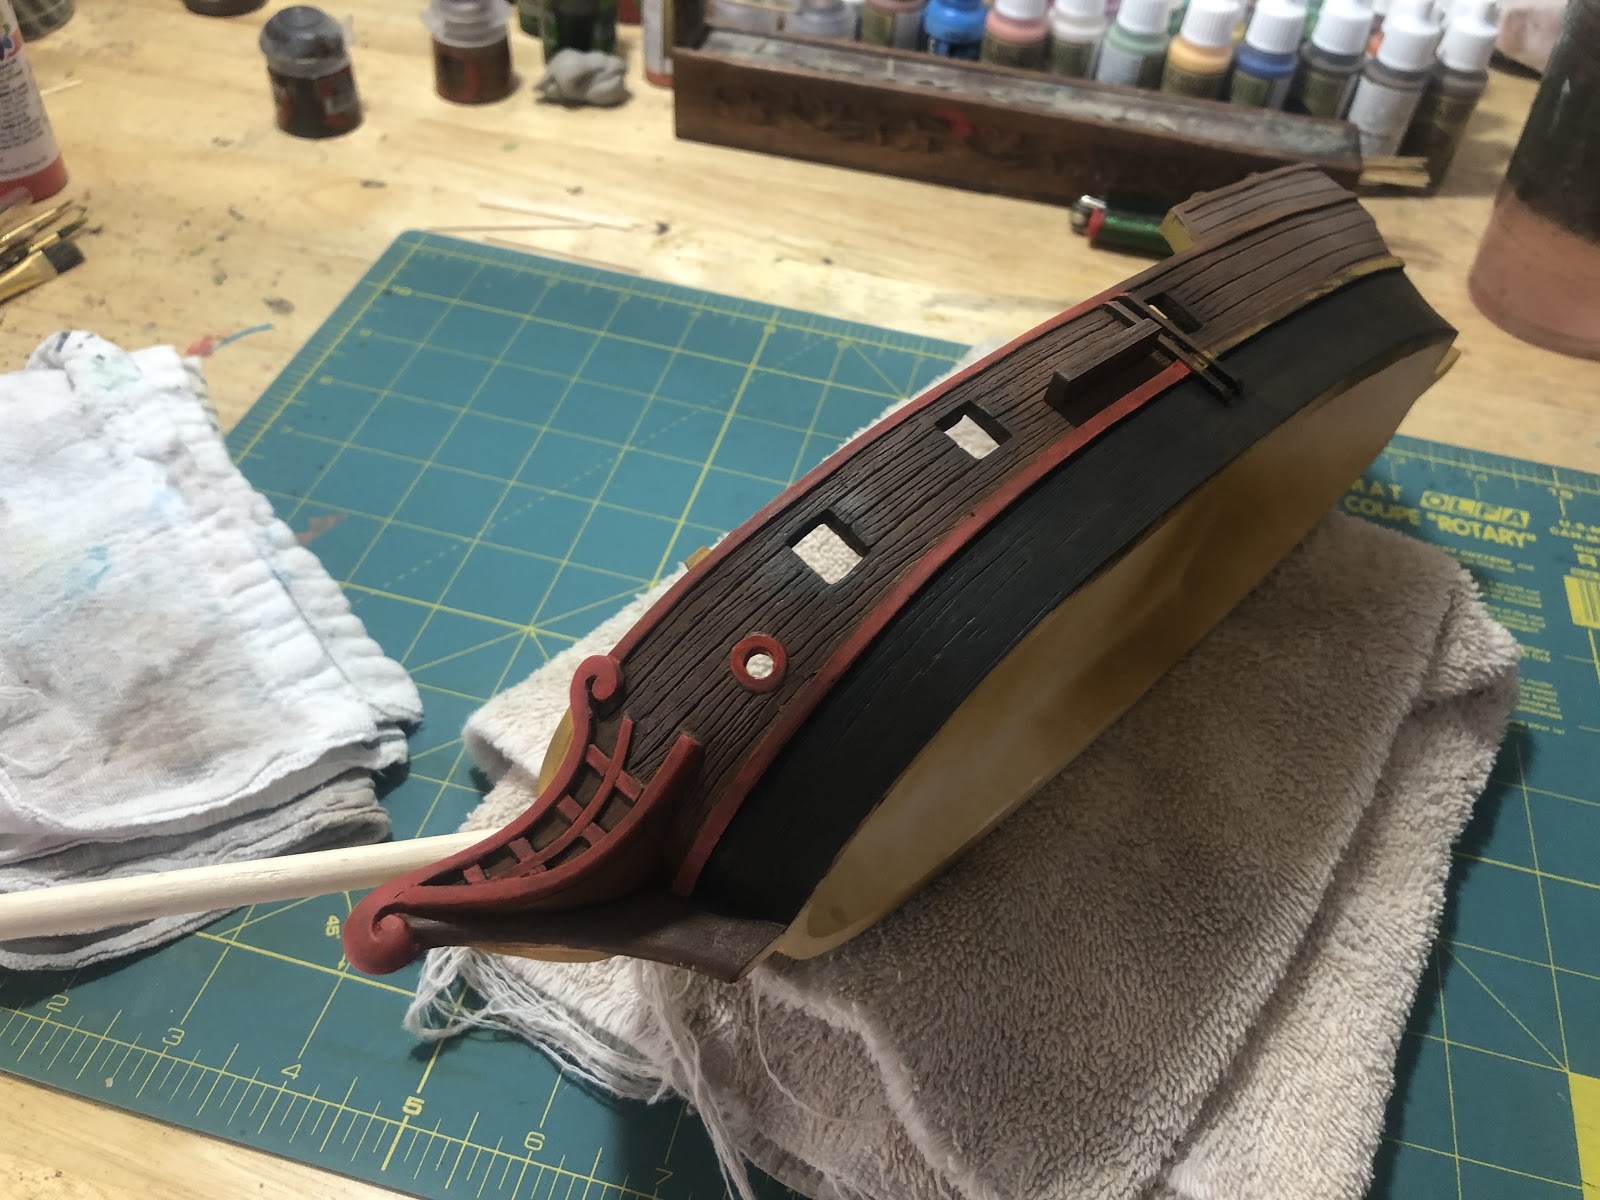
The last thing to do on this side is edge highlight the red. Edge highlighting is a slow process, and if you like how the larboard side of the ship looks, feel free to skip to step 6.
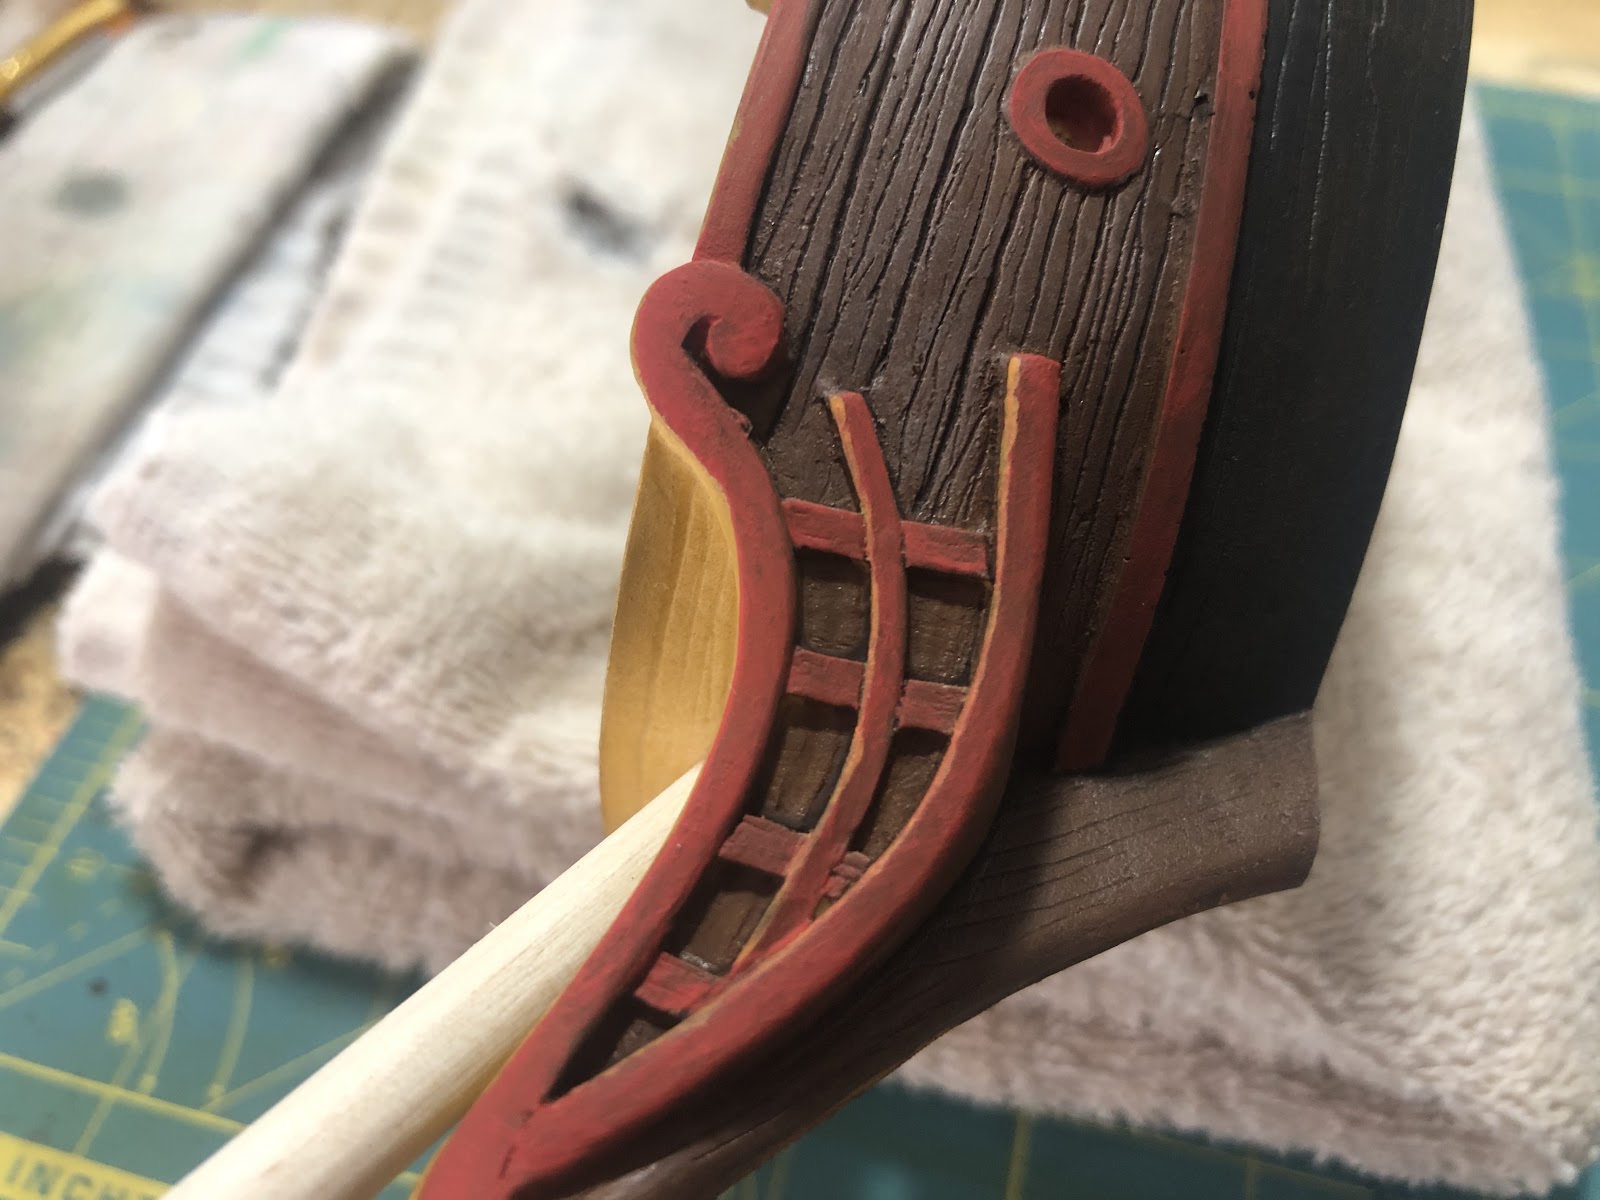
When adding a highlight, you usually use a lighter version of the same color, like you did on the gunwales. Light reds are usually pink, however, and don’t highlight well. So instead use an adjacent color to red, in this case, a very bright Pumpkin.
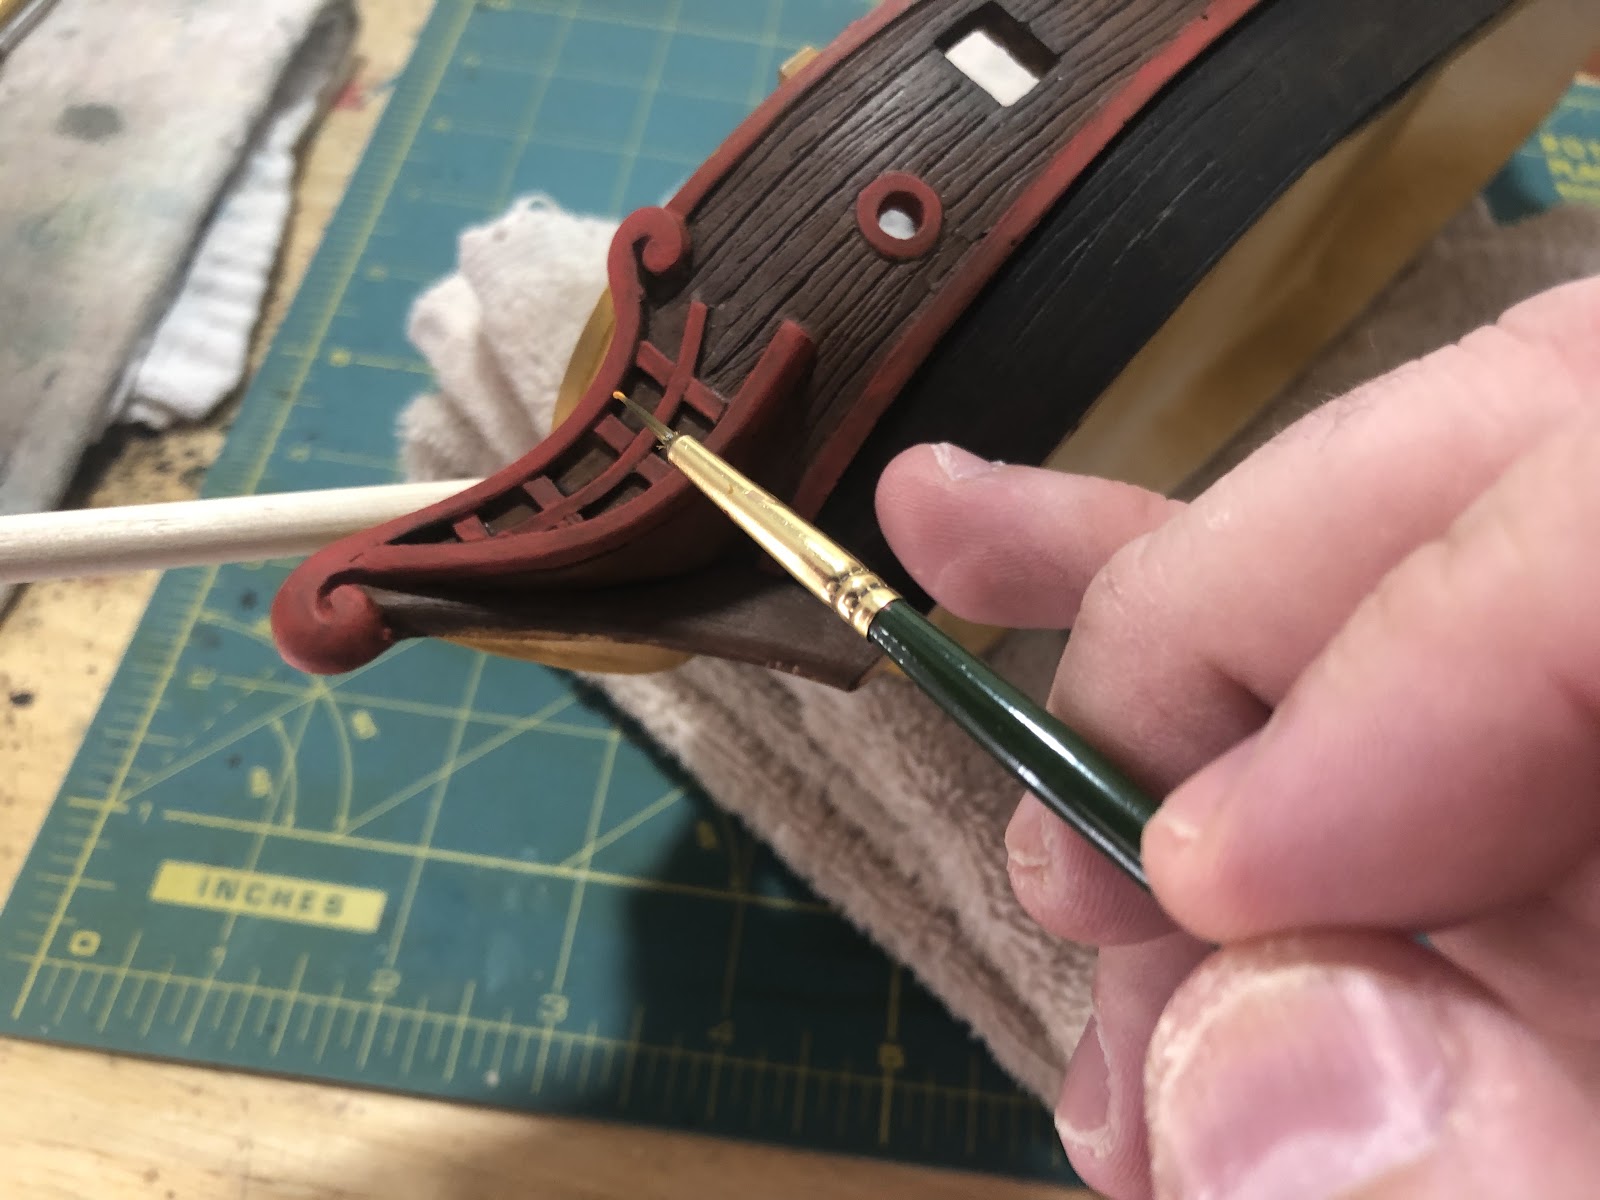
Add an edge highlight to the top of each part that is red. You are trying to simulate the sun coming from above and illuminating the top.
When painting such a small area, brush control is very important. Anchor your arm to the table and use your off hand to steady your wrist. Position the towel perpendicular to your arm.
Don’t edge highlight the top of the beakhead yet.

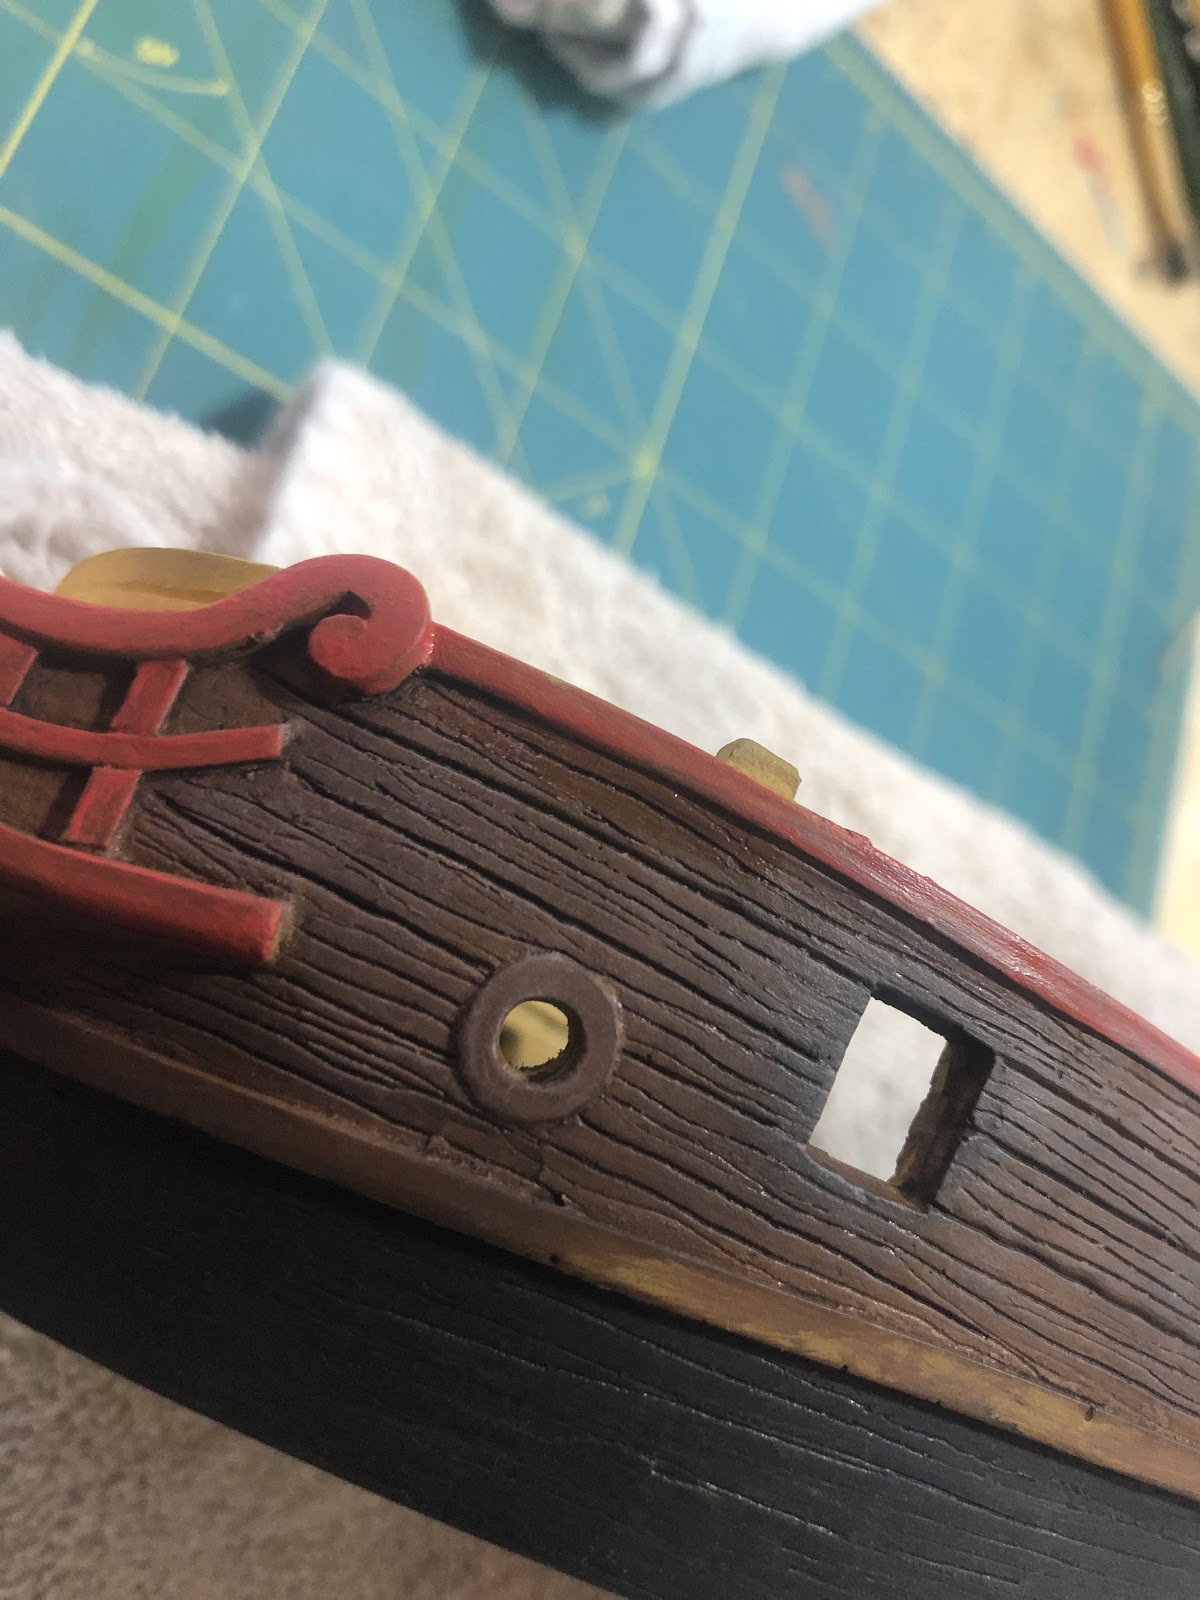
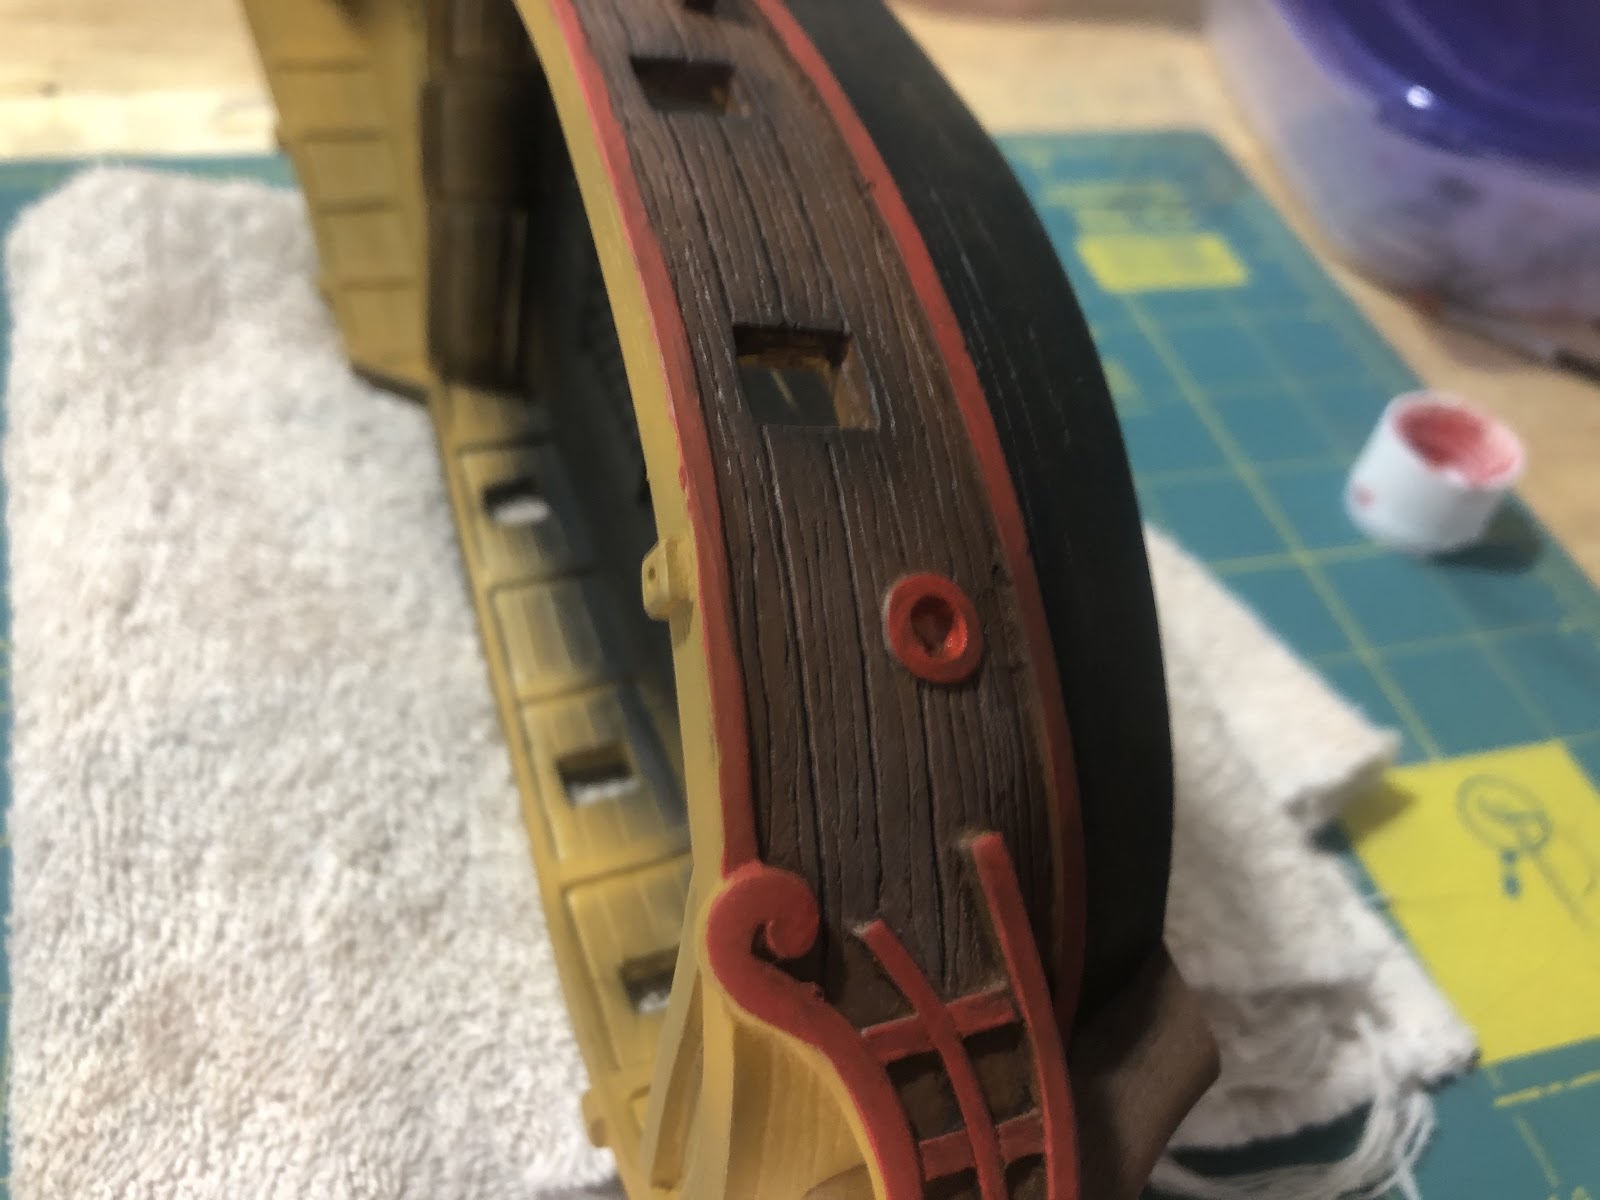
Even though they are slightly recessed, edge highlight the lateral support beams in the beakhead. When edge highlighting circular objects, like the hawse pipe and the curl above the keel, paint the top forty percent.
Edge highlight the top of the skids and the trim below the gunwales.

After edge highlighting the stern, the larboard side is complete.
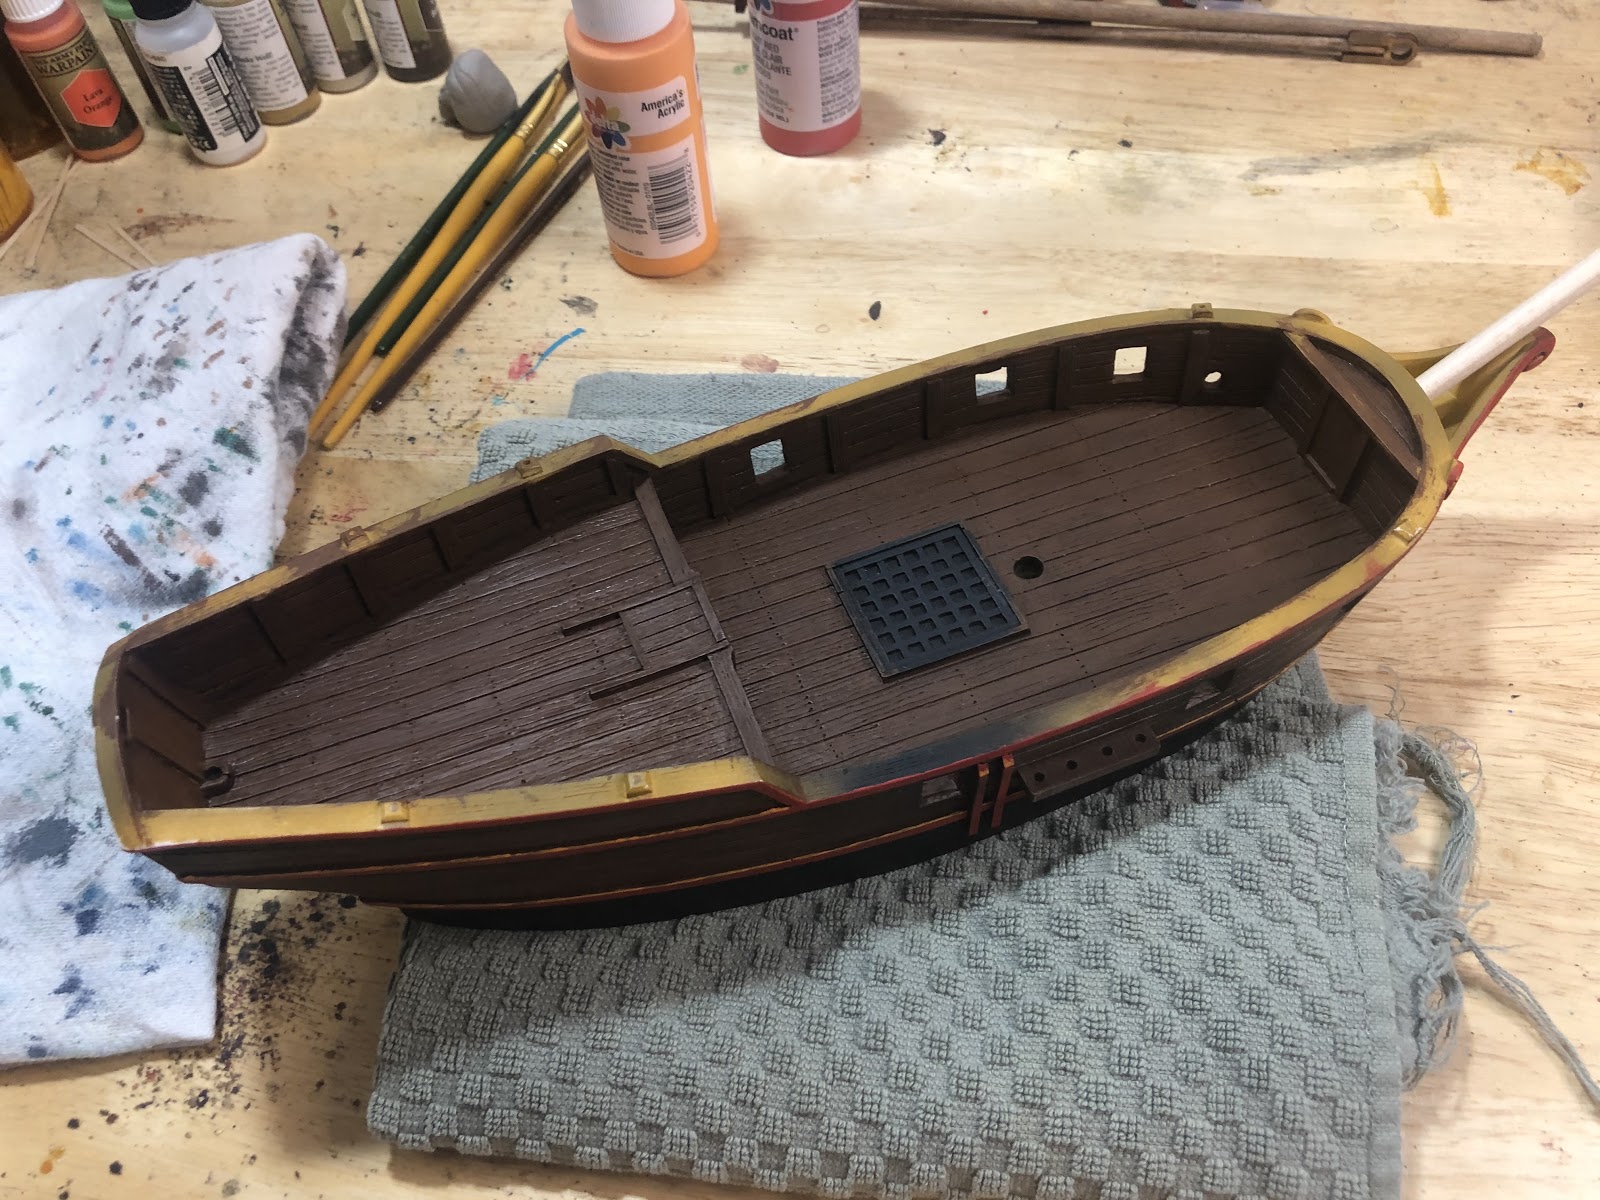
Next we will paint the weather deck. The weather deck, or just deck, are the parts of the ship your models will go on.
Step 6: Paint the Decks
Paint Supplies Needed:
- Paint
- Brushes
- Non Precious Cup for Water
- Wet Pallet
- Paint Rag
- Poster putty
- Optional: Large Old Towel
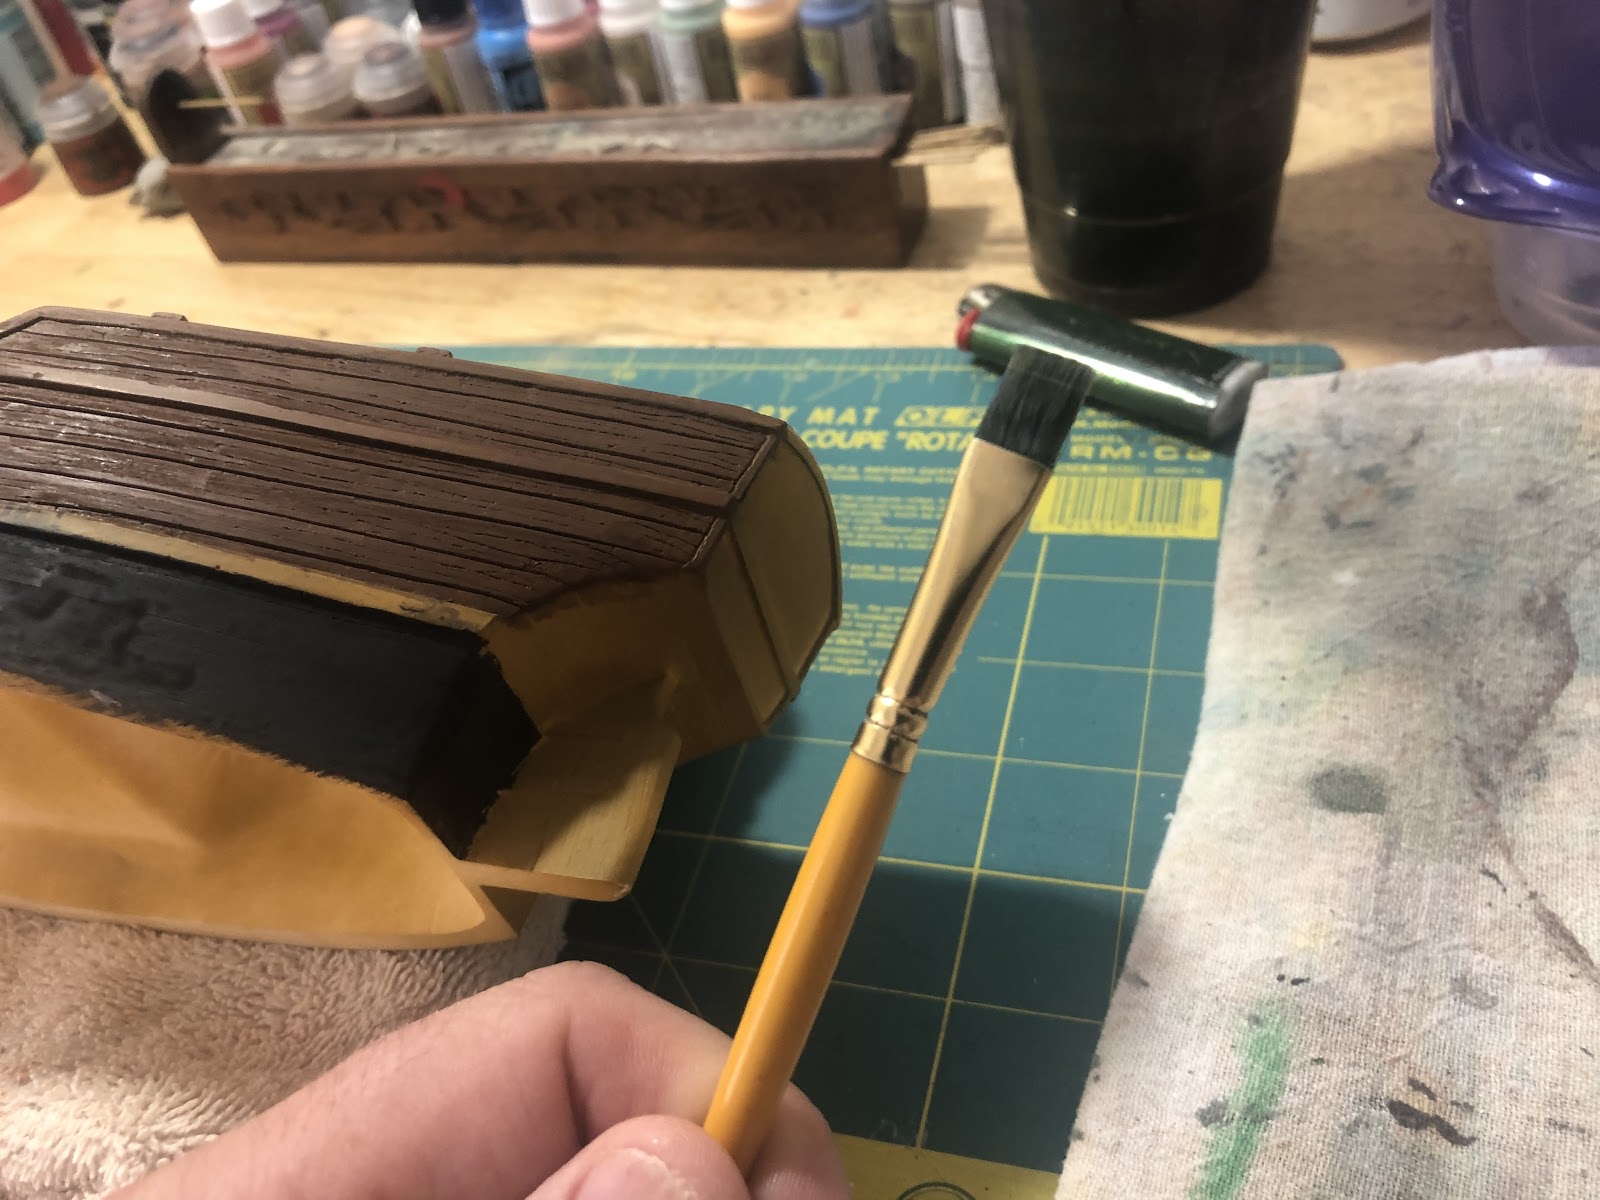
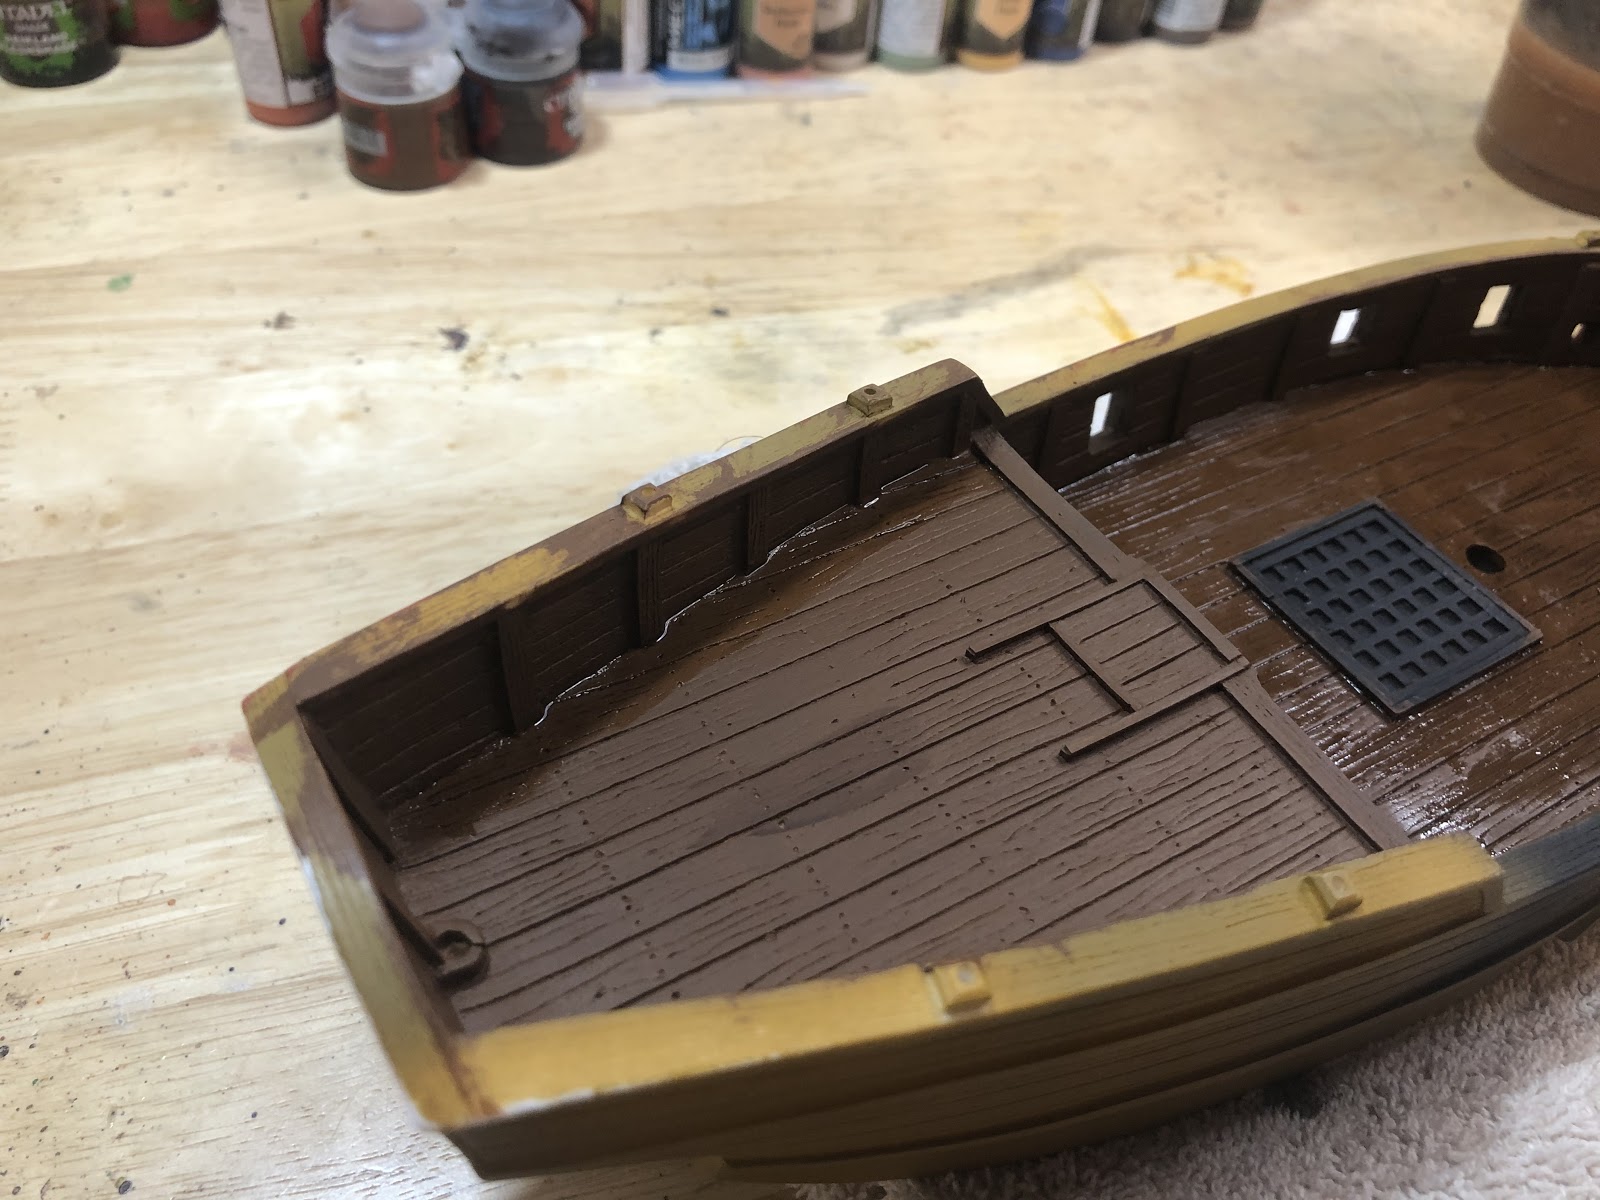
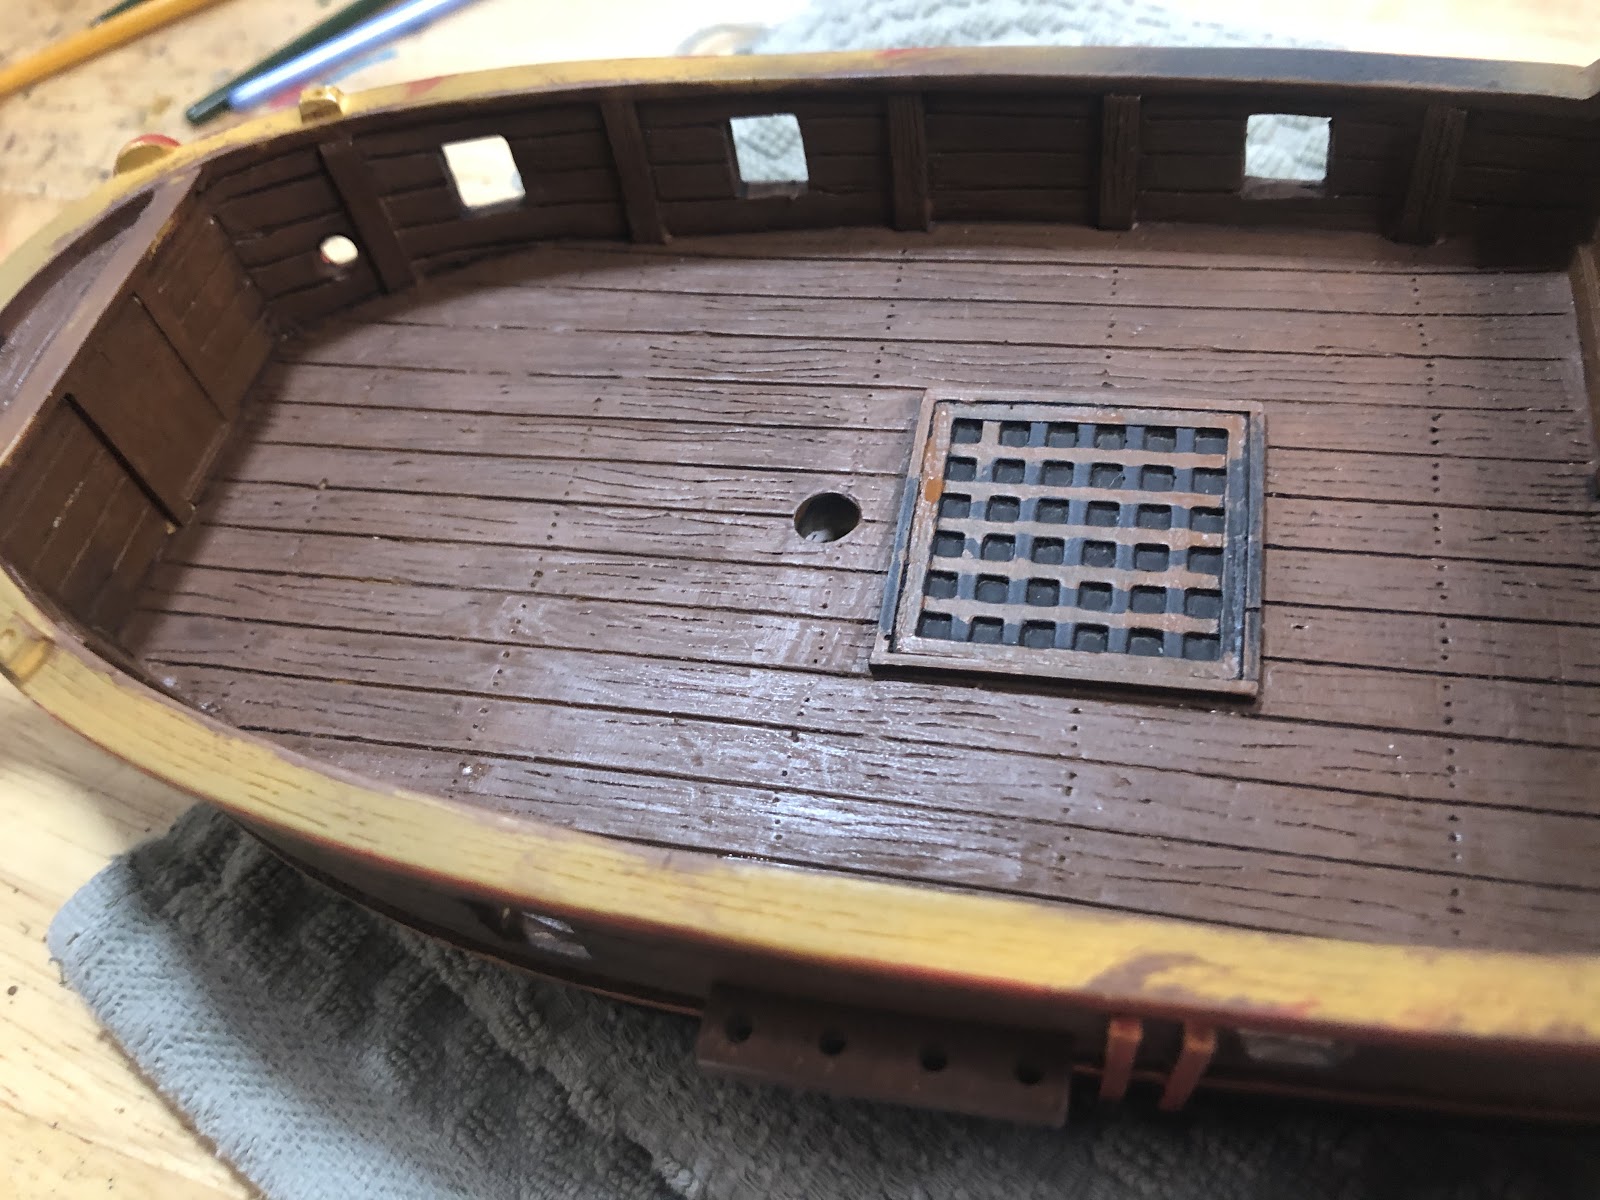
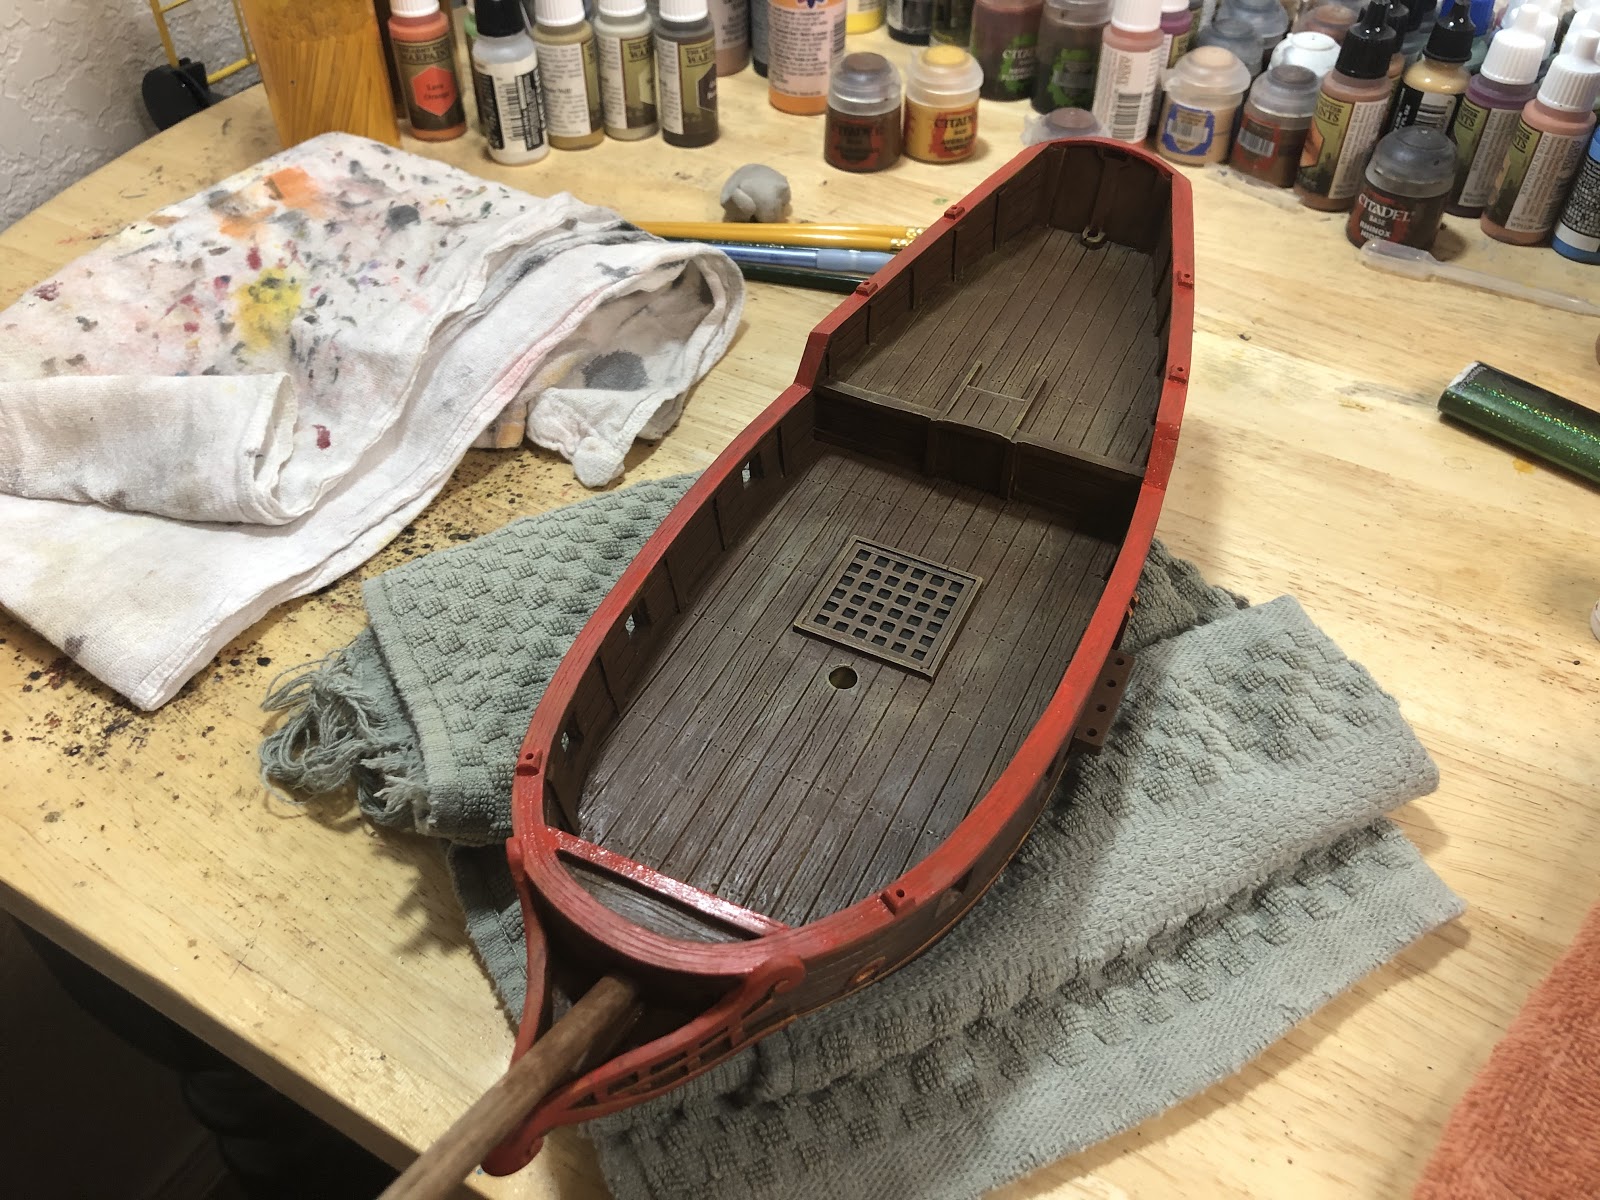
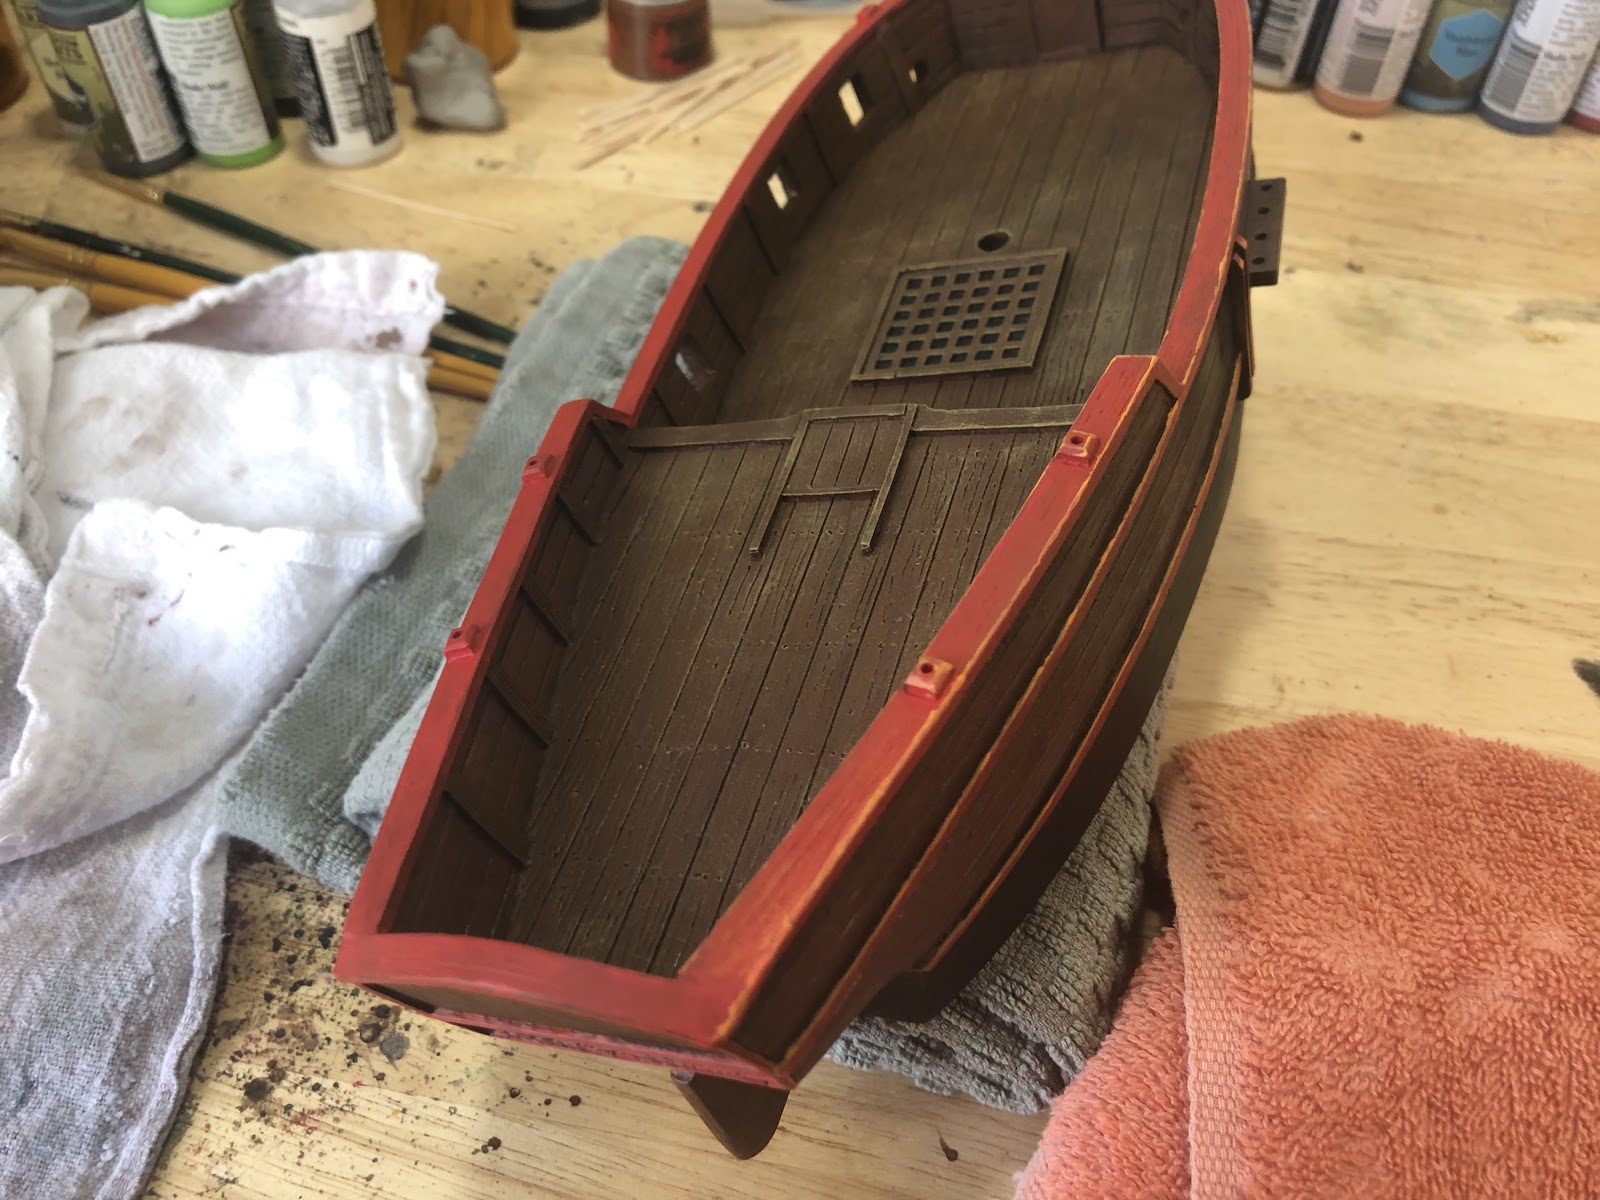
Use Mournfang Brown as the base wood tone for the deck. Use a medium sized brush to paint the deck, but do not paint over the hatch grate.
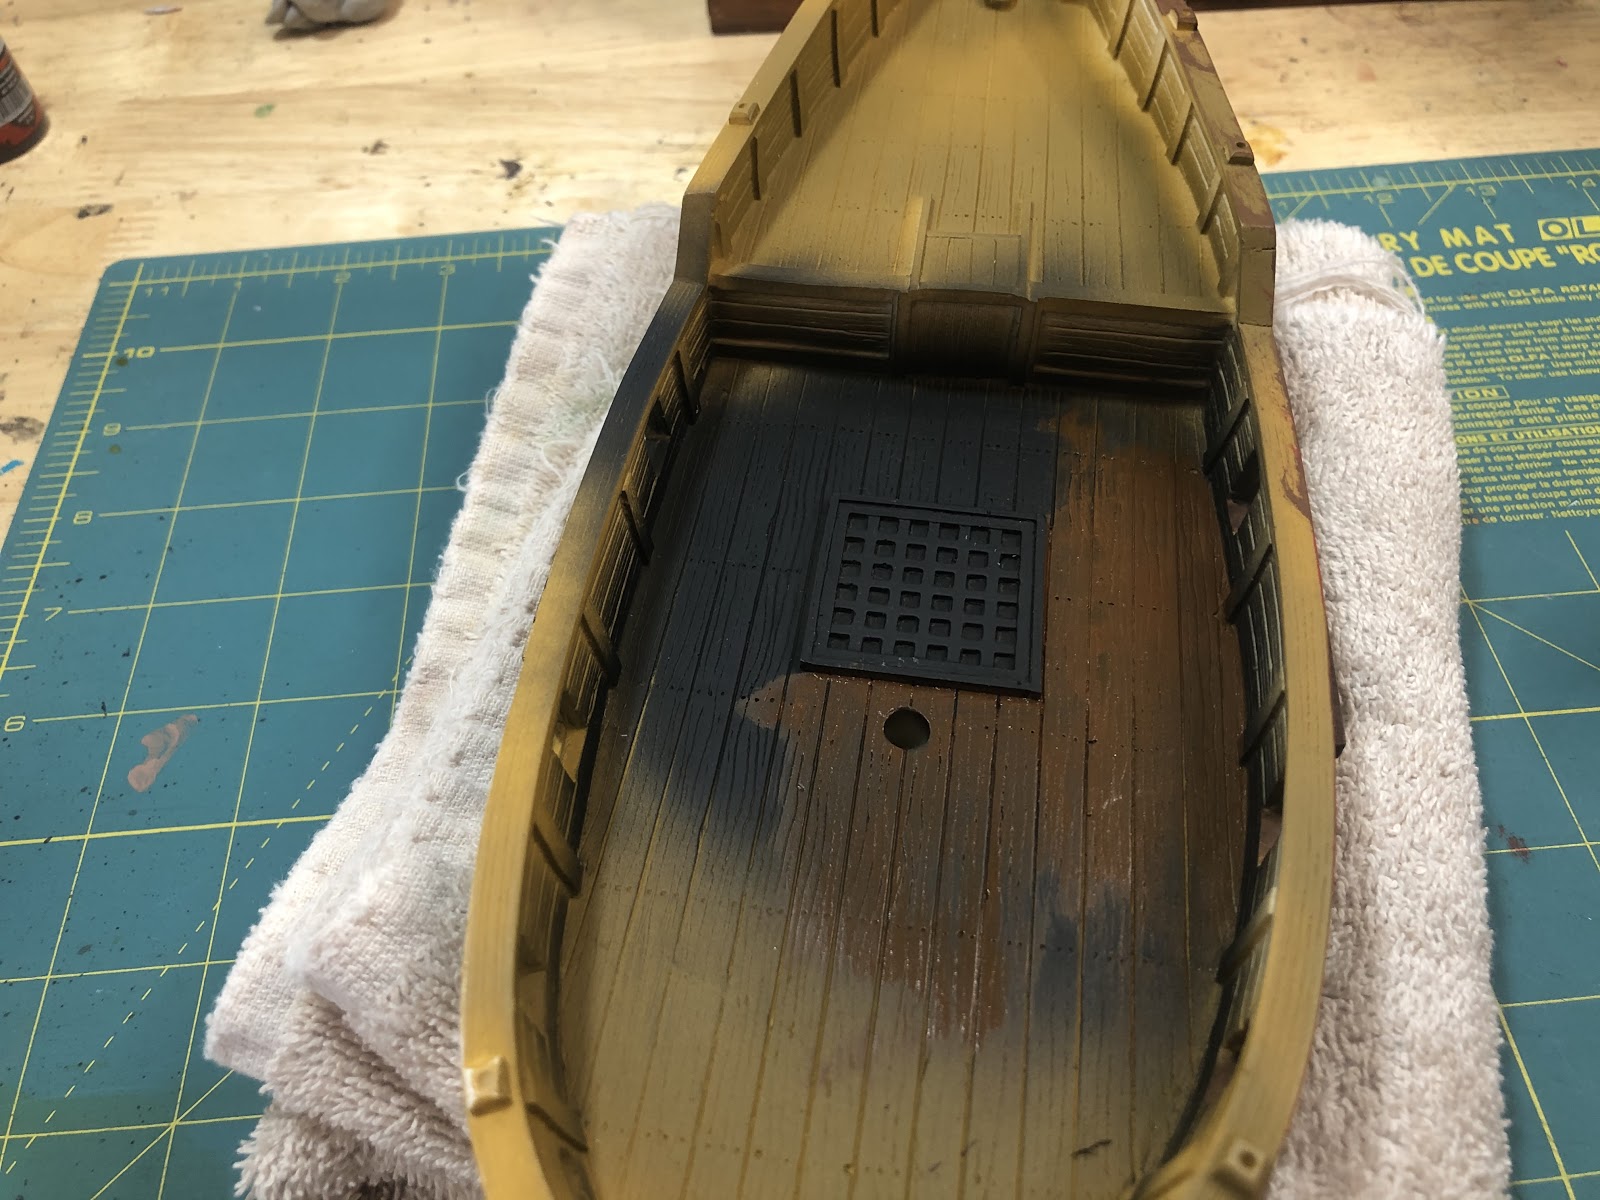
Paint an even layer over the deck, around the hatch grate. Once you paint the large main deck, paint the smaller poop deck behind it. Once you have painted the poop deck, if any black is showing through the brown paint on the main deck, put another coat of Mournfang Brown on it.

Use a cleaned brush to make sure there are not any places your paint was put on too thick, like you did on the hull.
Wait about an hour for the deck to dry.

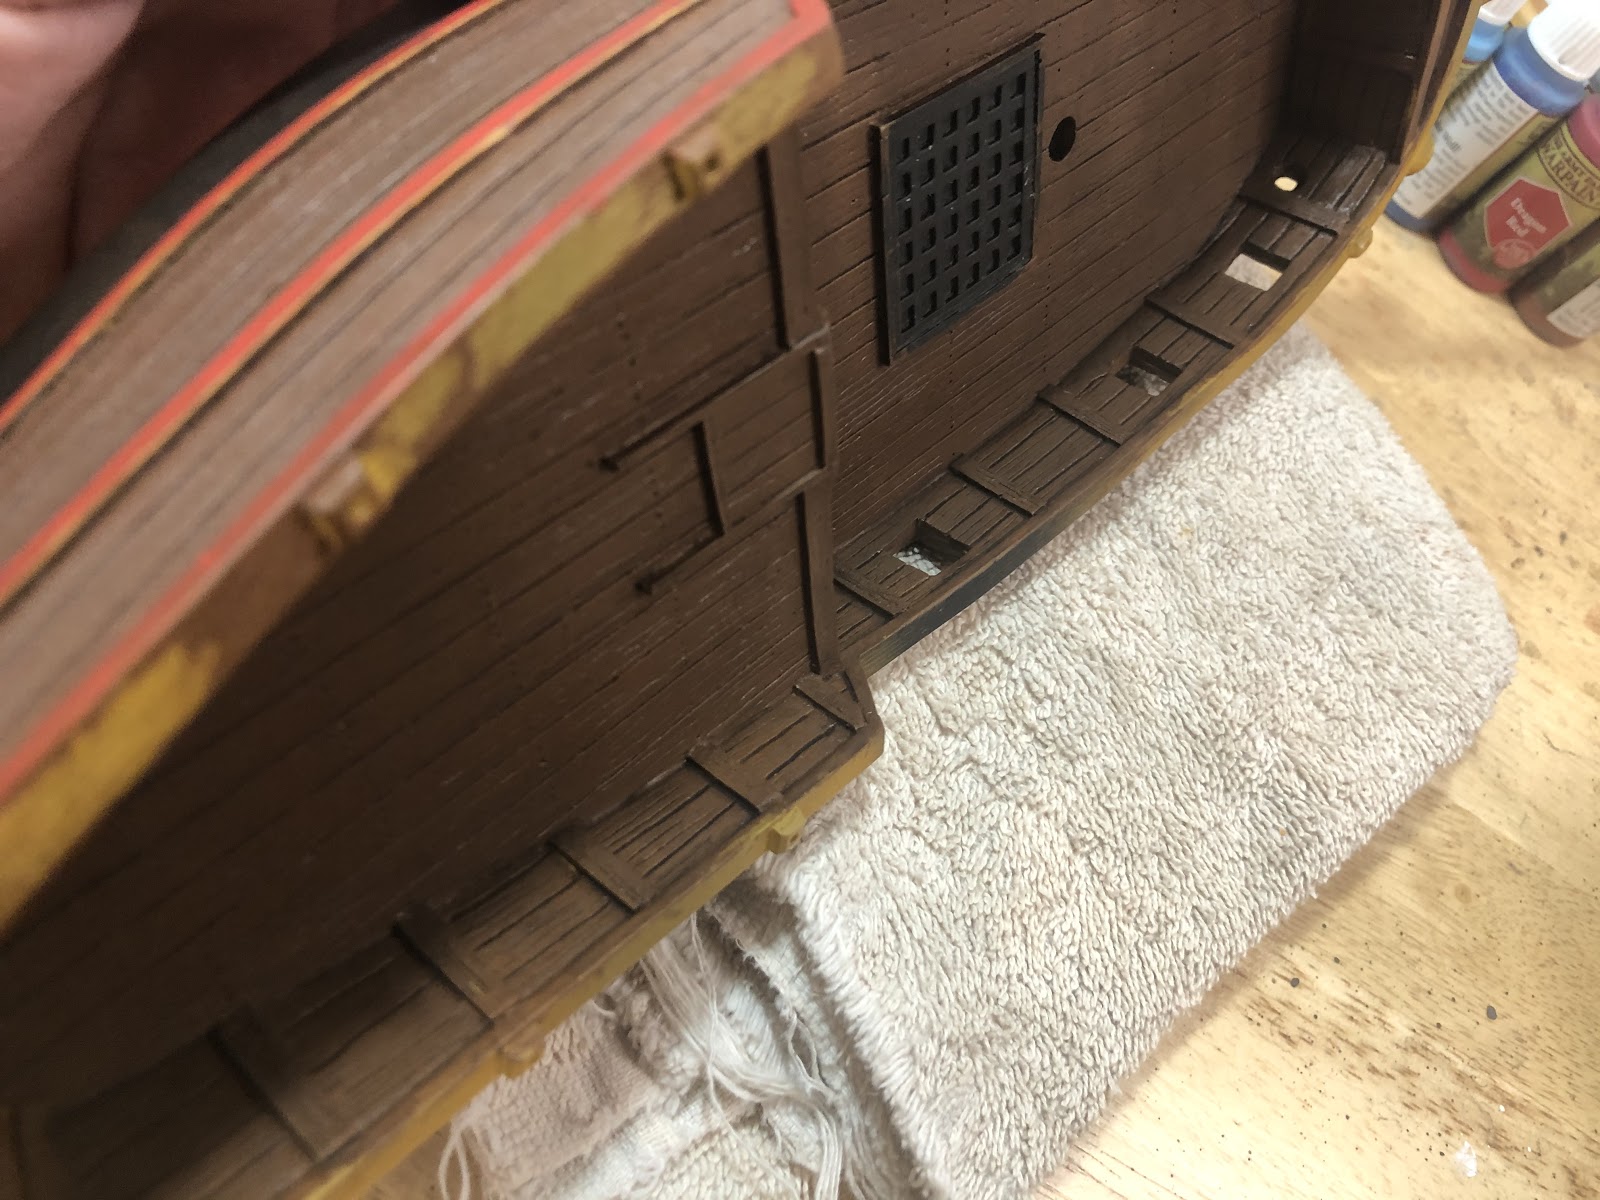
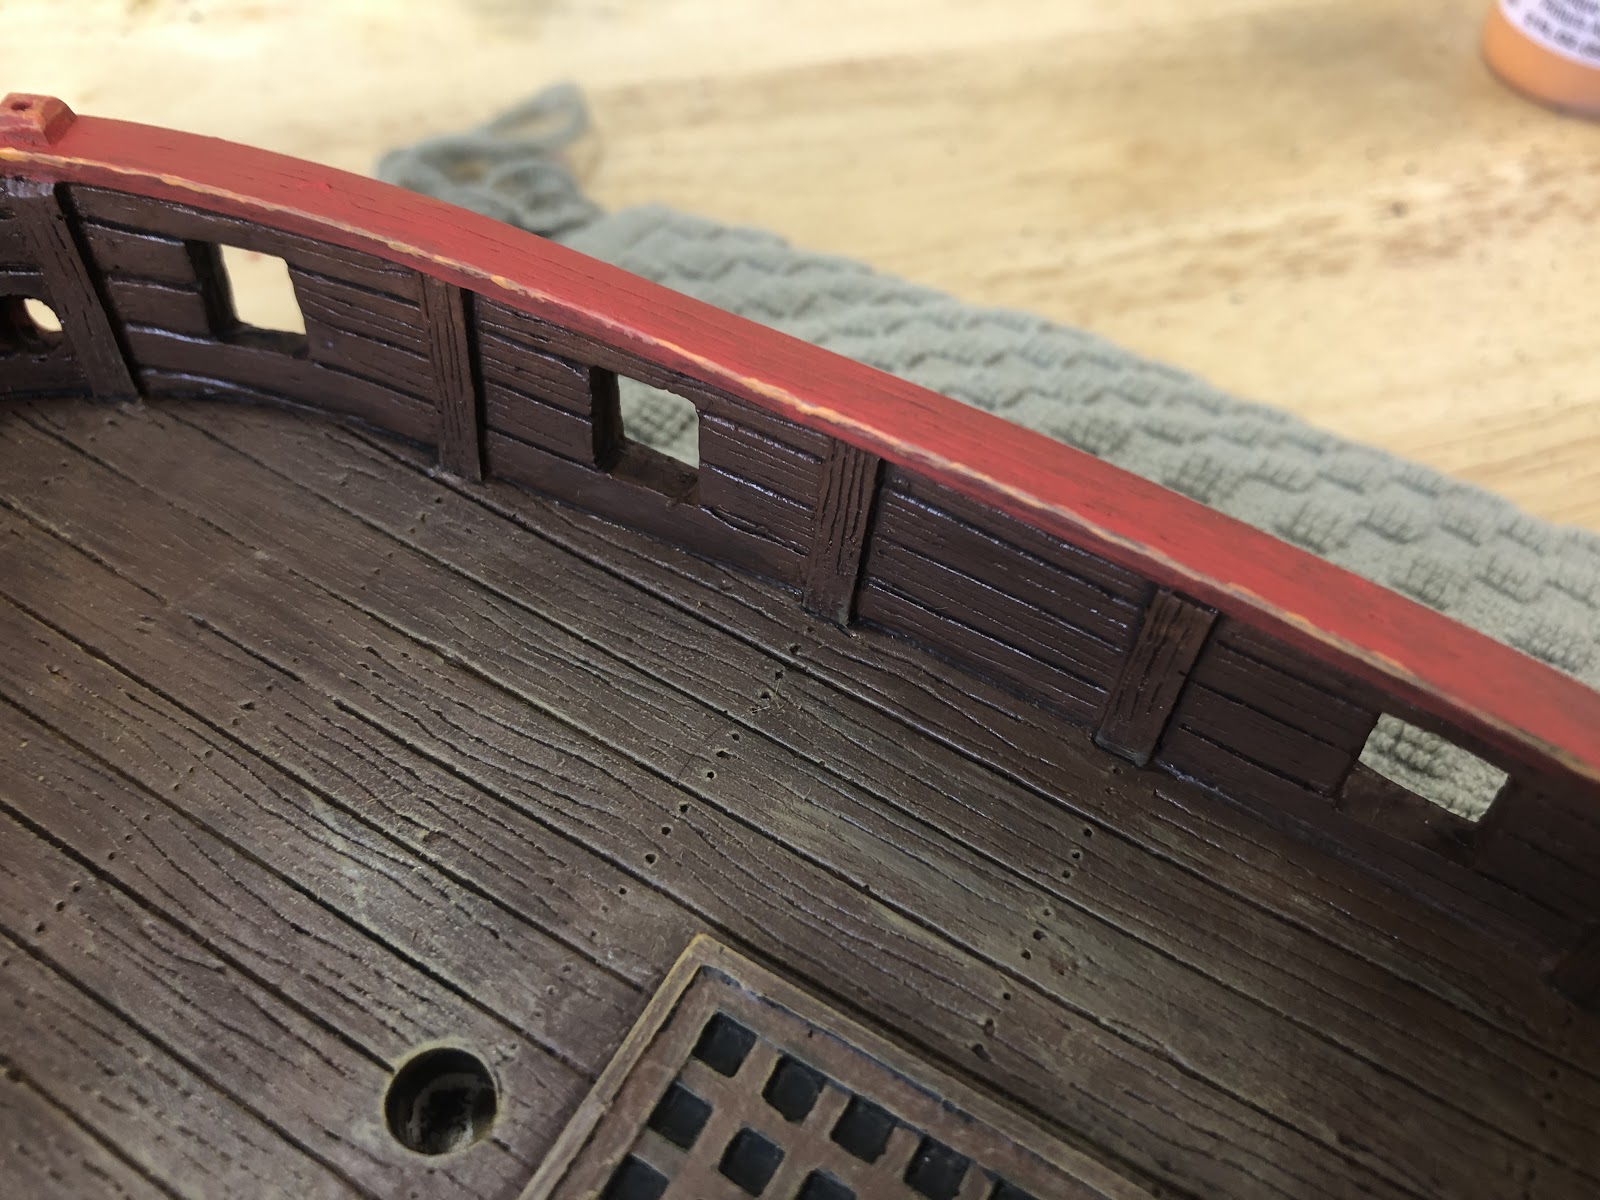
Paint the inside of the gunwales next. Roll up the towel the ship is on to prop up one side. Make sure you paint all the edges and beams..

Slowly make progress around the ship. The inner gunwales will only be painted and washed, so be as thorough as possible.
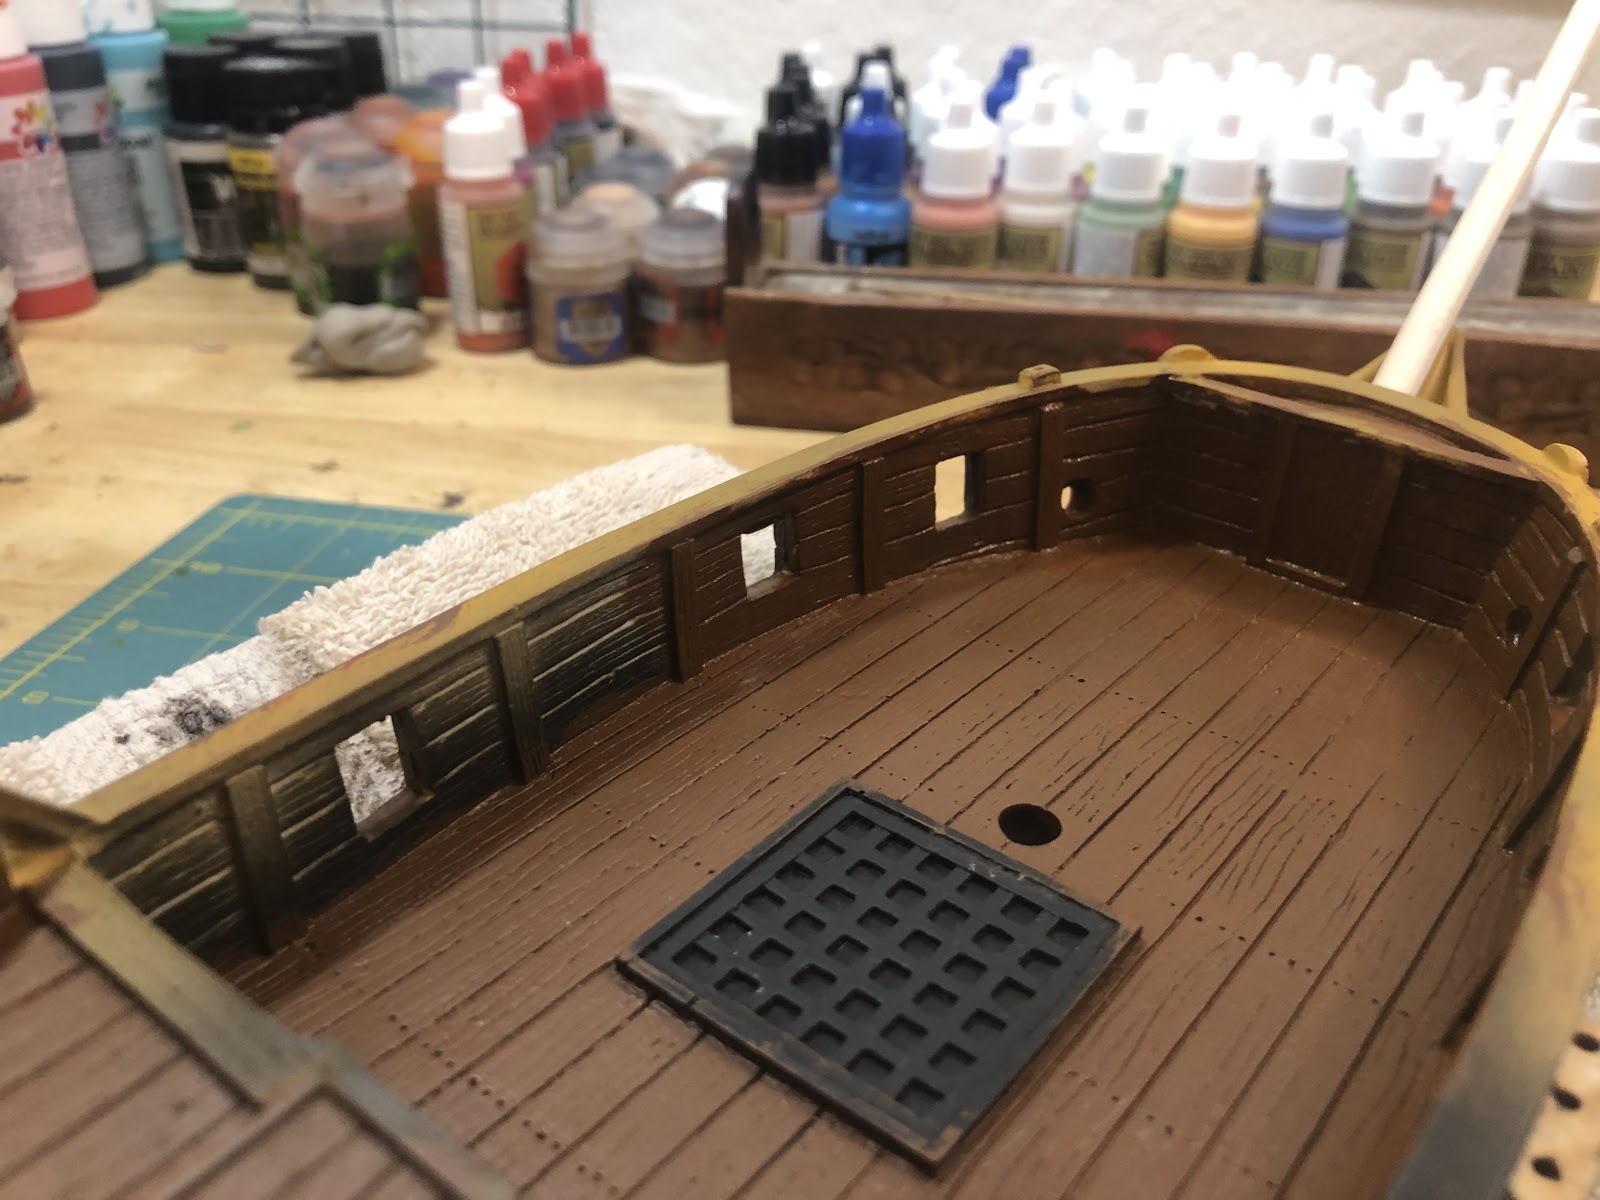
Continue around the interior of the ship. Paint the top of the top of the door near the bow as well.
After painting the main deck, paint the gunwales of the poop deck.
While the ship dries, move the ship with the towel to make sure you painted everything.
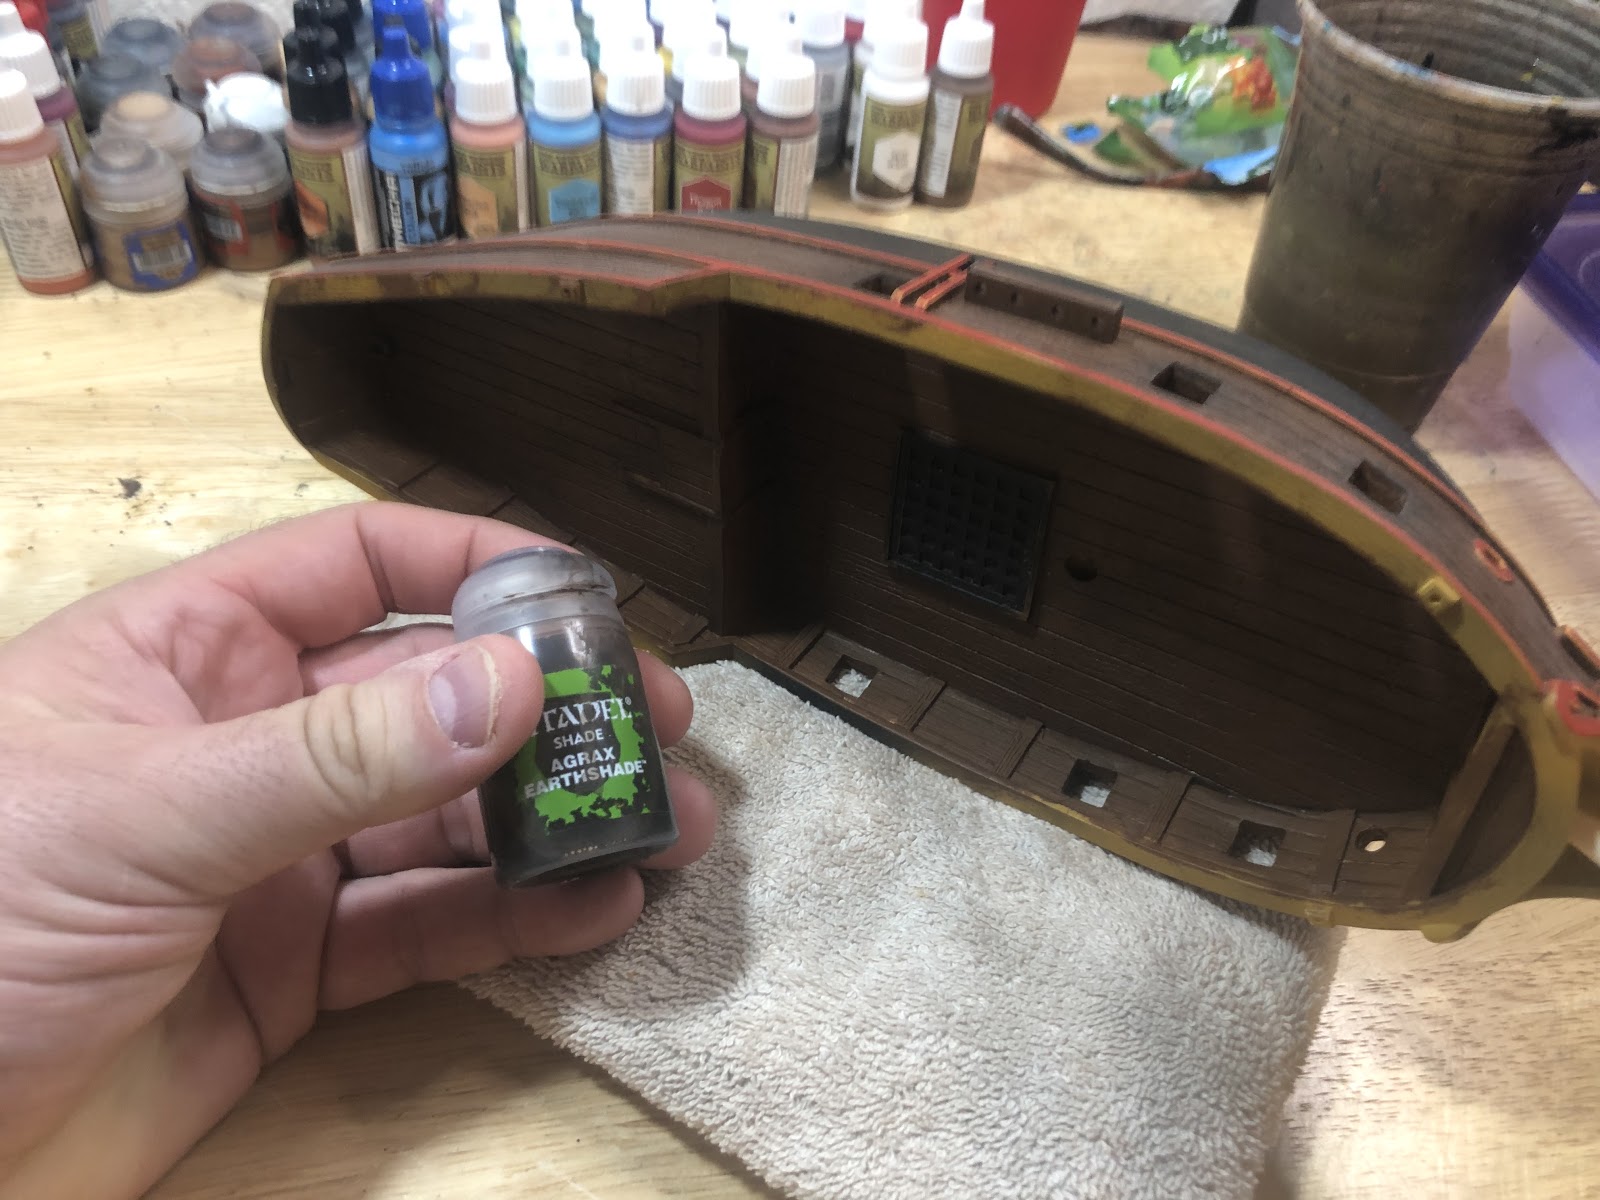
Let the ship dry for 1-2 hours. The next phase is to wash the deck; the gunwales, the bow, the stern, and the wall between the decks.
Check your ship to make sure the paint on the deck is dry.
Use Agrax Earthshade for the wash, using putty to attach it to the table like last time.

Start in a corner of the ship and start washing the deck.

One of the best parts about this stage is that it only takes a few minutes to do, but requires hours to dry between each stage. If you have several things to do in a day around or in your home, you can spend 5-10 minutes adding a wash, and then come back after and do the next wash after work/school/running your errand. Expert time management.
Make sure the edges of the poop deck are washed.
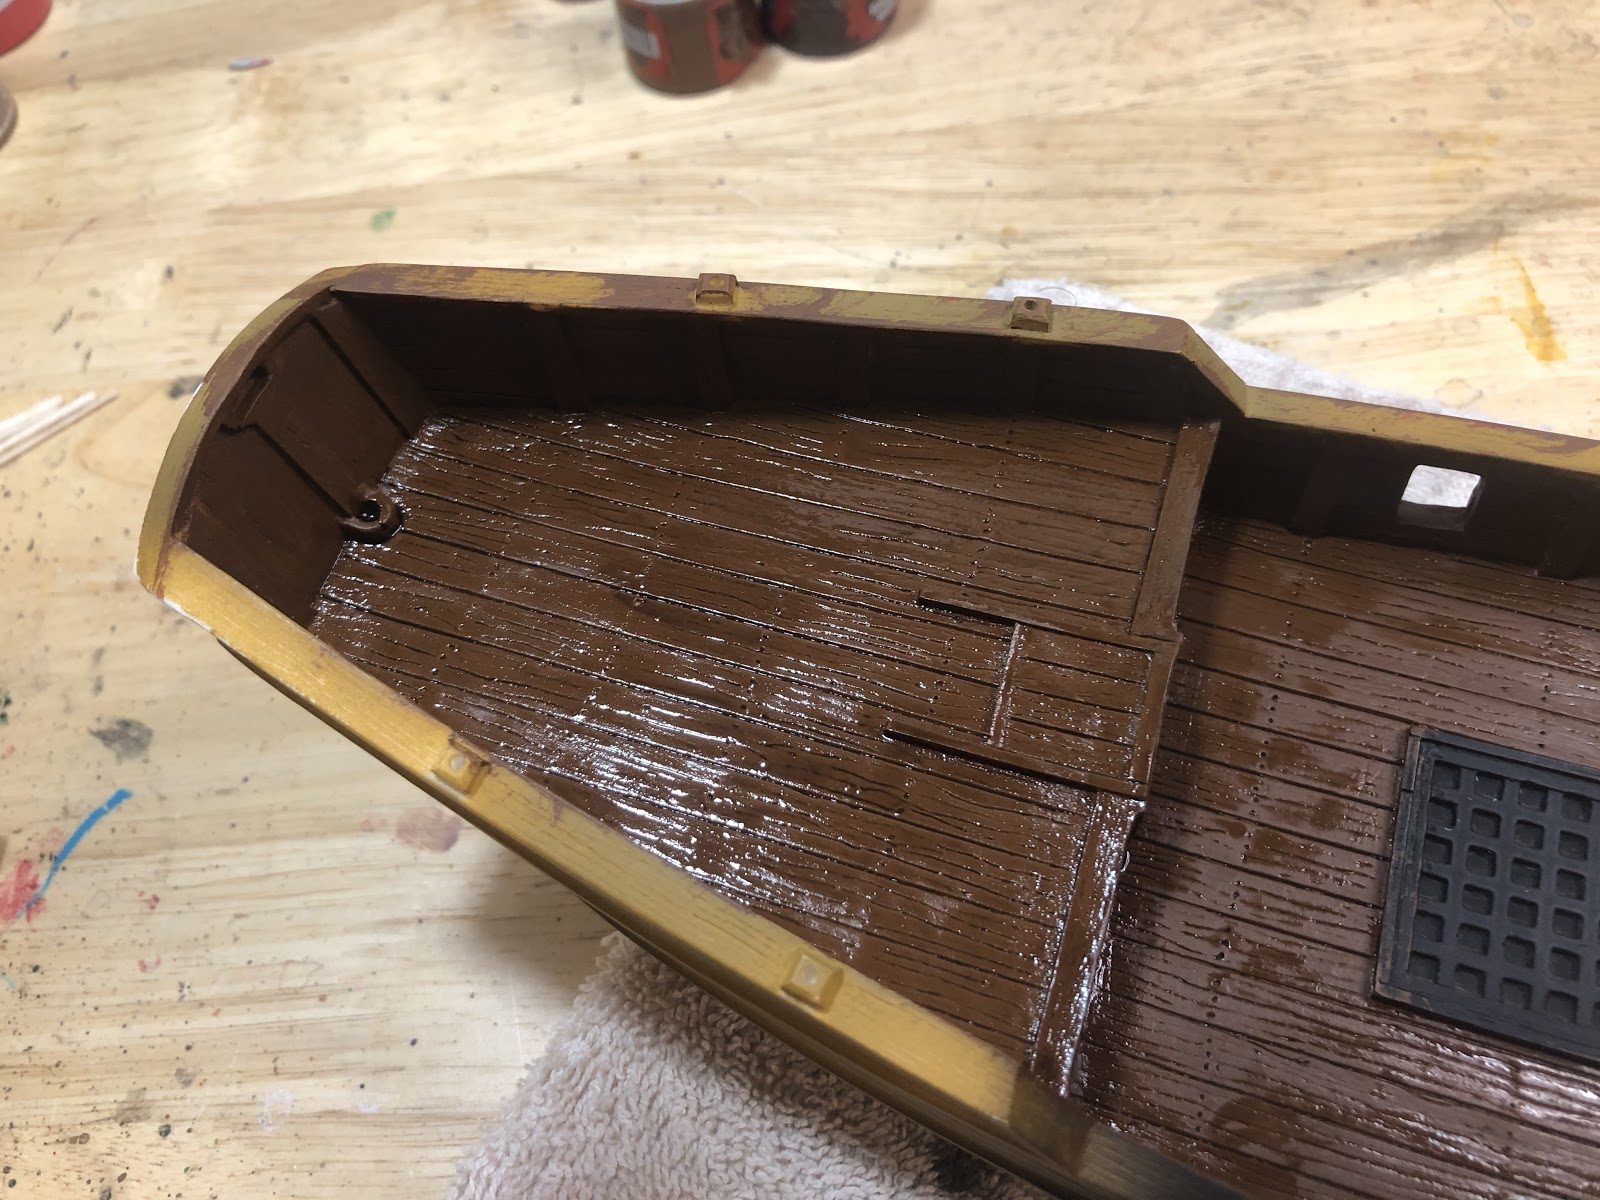
Add extra wash to the stern.

When you are done, clean your brush. Use the clean brush to thin the wash that is too thick, or has pooled.
Let it dry for 1-2 hours.
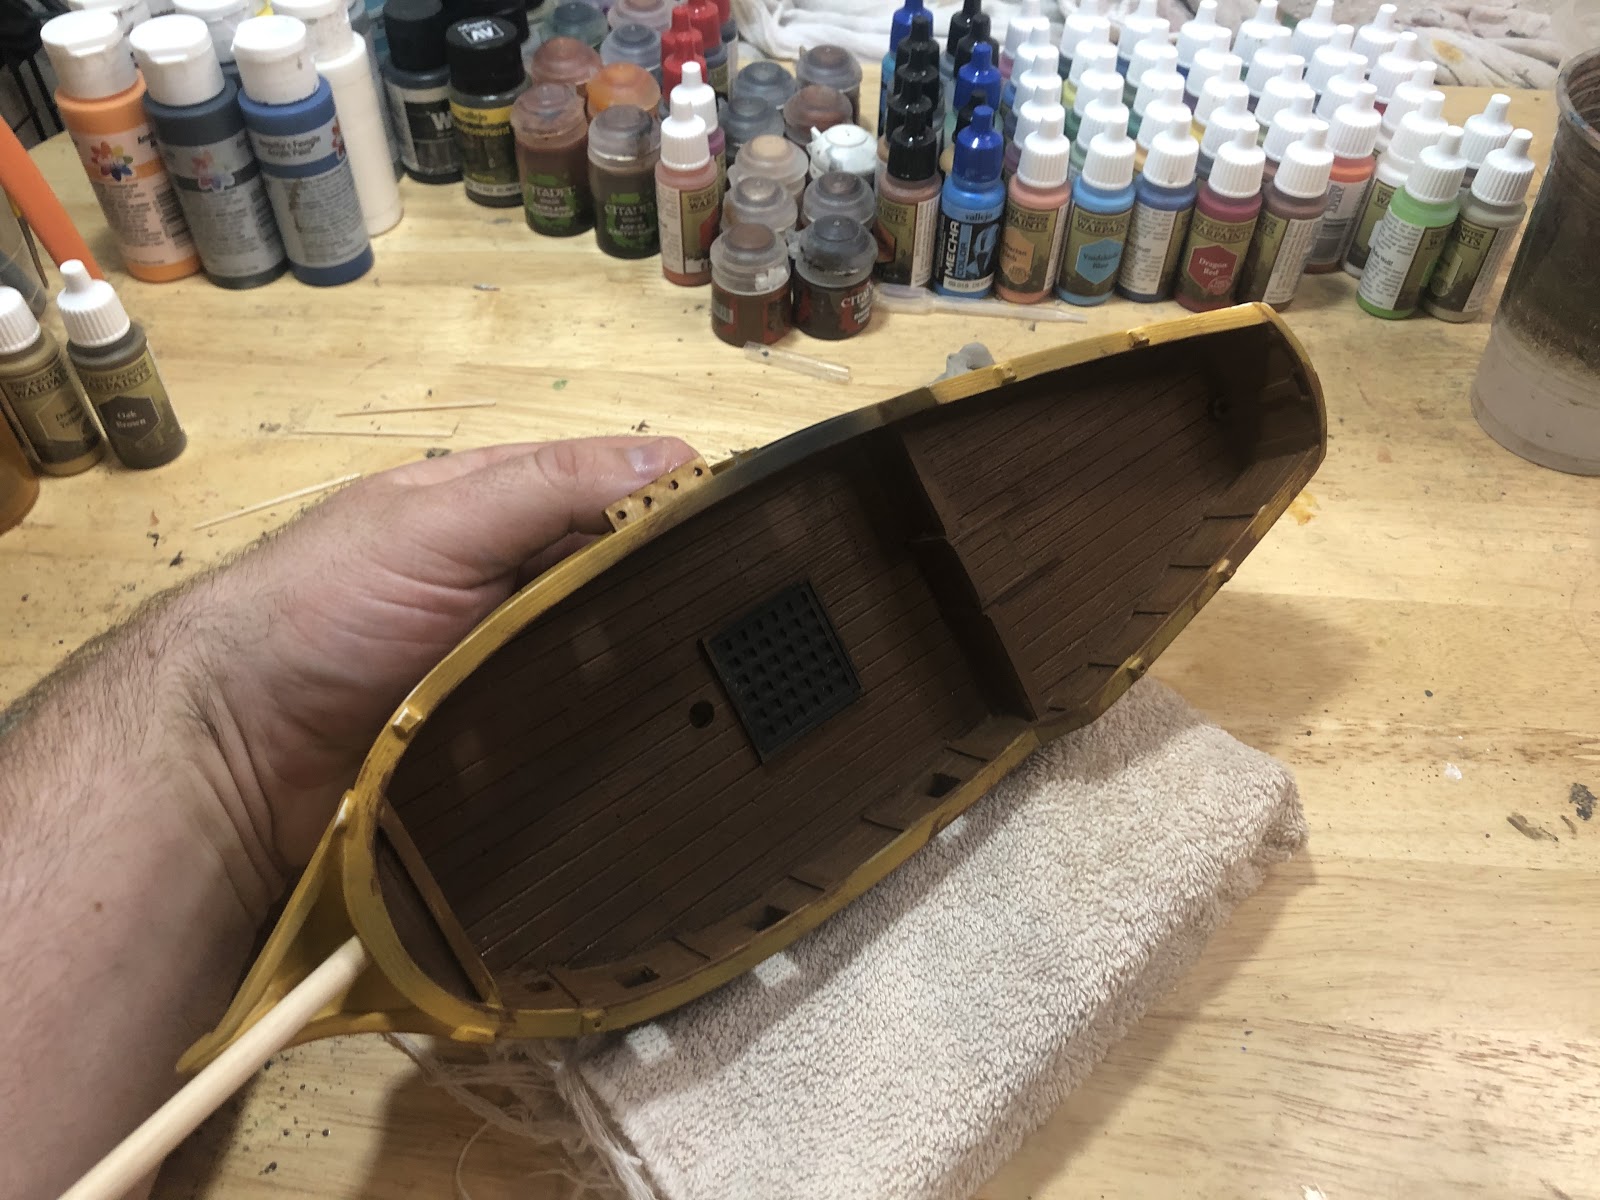
Once the deck is dry, turn your ship on it’s side. Add a wash to the gunwales.
You have the ship on its side so that gravity will help the wash fill the wood grain and beam details in the gunwales.

Add wash to the entire side, the bow section, and the wall between decks.
Wait 1-2 hours for it to dry, then flip your ship over.
The last area in this step we need to add wash to is the starboard gunwales.

Repeat the same process you used for the larboard side.
Let it dry for 1-2 hours.
Once you are done with all the washes, look over your ship for any large section you missed with the wash. Missing small spots is ok, but if you missed any large beams, add wash to it and then let it dry.
The inner gunwales should look like they are in shadow. The wood grains and beams of the deck should be visible. If the wash seems too dark in any spot, or the deck looks like it was stained with coffee, that will be corrected when dry brushing.
Before that, you have an entire side of the ship to paint.
Step 7: Paint the Starboard Side
Paint Supplies Needed:
- Paint
- Brushes
- Non Precious Cup for Water
- Wet Pallet
- Paint Rag
- Poster putty
Put the ship back on its side. Be careful when it’s on this side, and don’t move it on the cloth that much, because you don’t want to ruin your work on the other side.
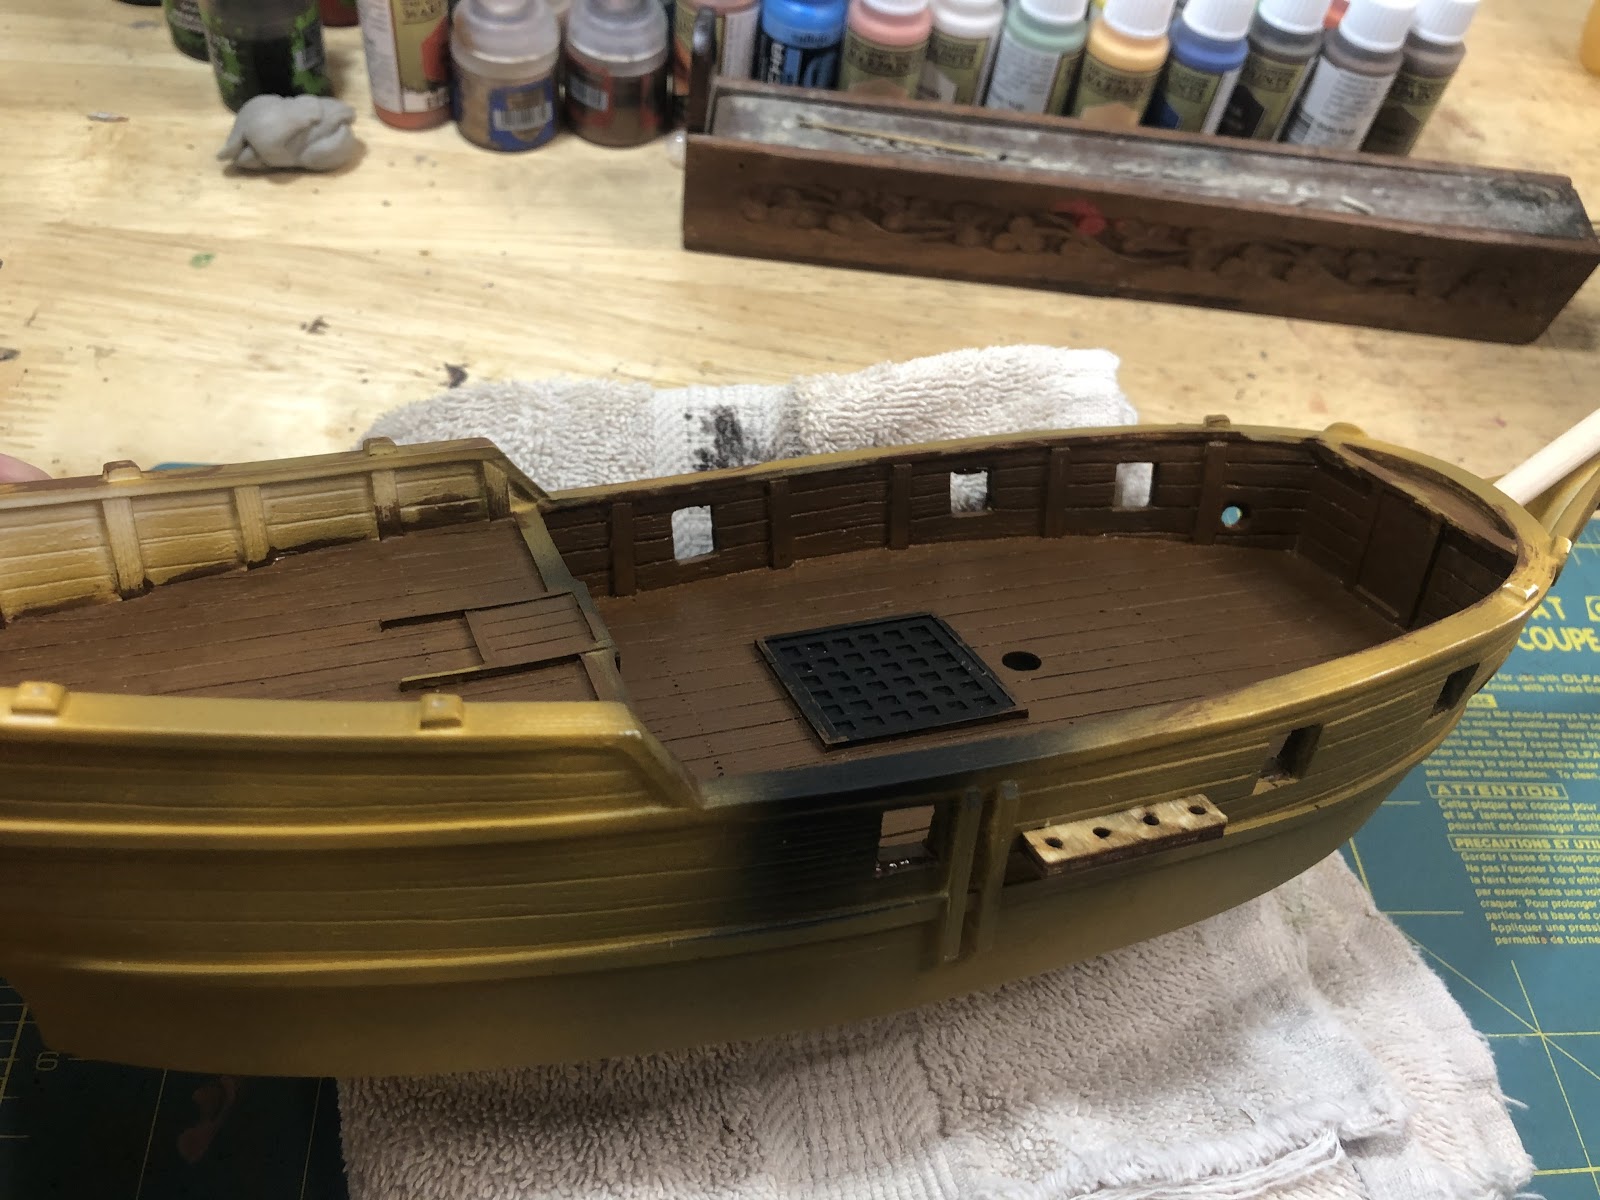
For this whole side you are going to do the same things you did on the larboard side. Start with the hull and paint it black.
It always seems easier when you already have one side done.

Next, use Mournfang Brown to paint the gunwales.

Get inside the details on the beakhead.

Paint the keel as well.
Let the starboard side dry for 1-2 hours.

Like before, add a layer of wash to the starboard side.
I have not mentioned it before, but this way of painting miniatures, base coat-wash-dry brush/edge highlight, is often called the games workshop paint method. This was before they came out with contrast paints.
The wash will go on easily. Add wash to the same areas you did on the larboard side.

Check your work from multiple angles.
Once you’re done with the wash, set the ship aside to let it dry for 1-2 hours.
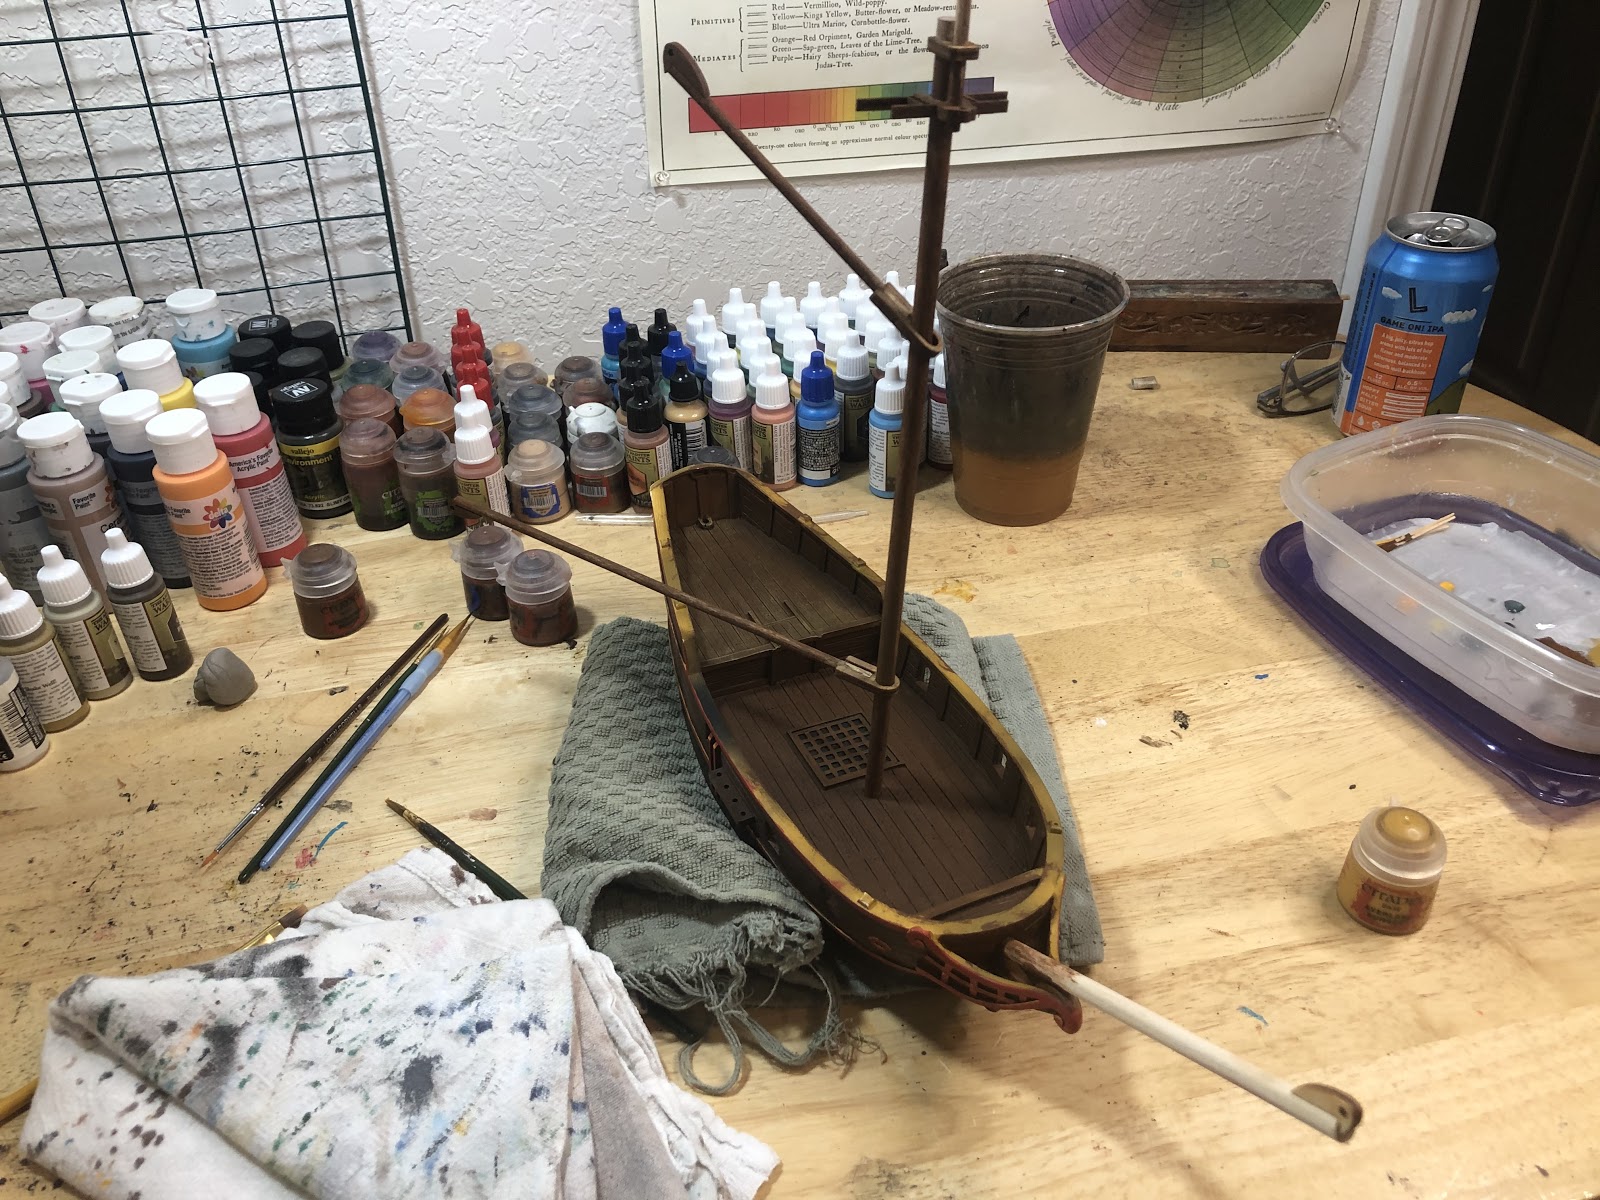
Intermission
Step 8: The Mast, Gaff, and Boom

Paint Supplies Needed:
- Wash
- Paint
- Brushes
- Non Precious Cup for Water
- Wet Pallet
- Paint Rag
- Poster putty
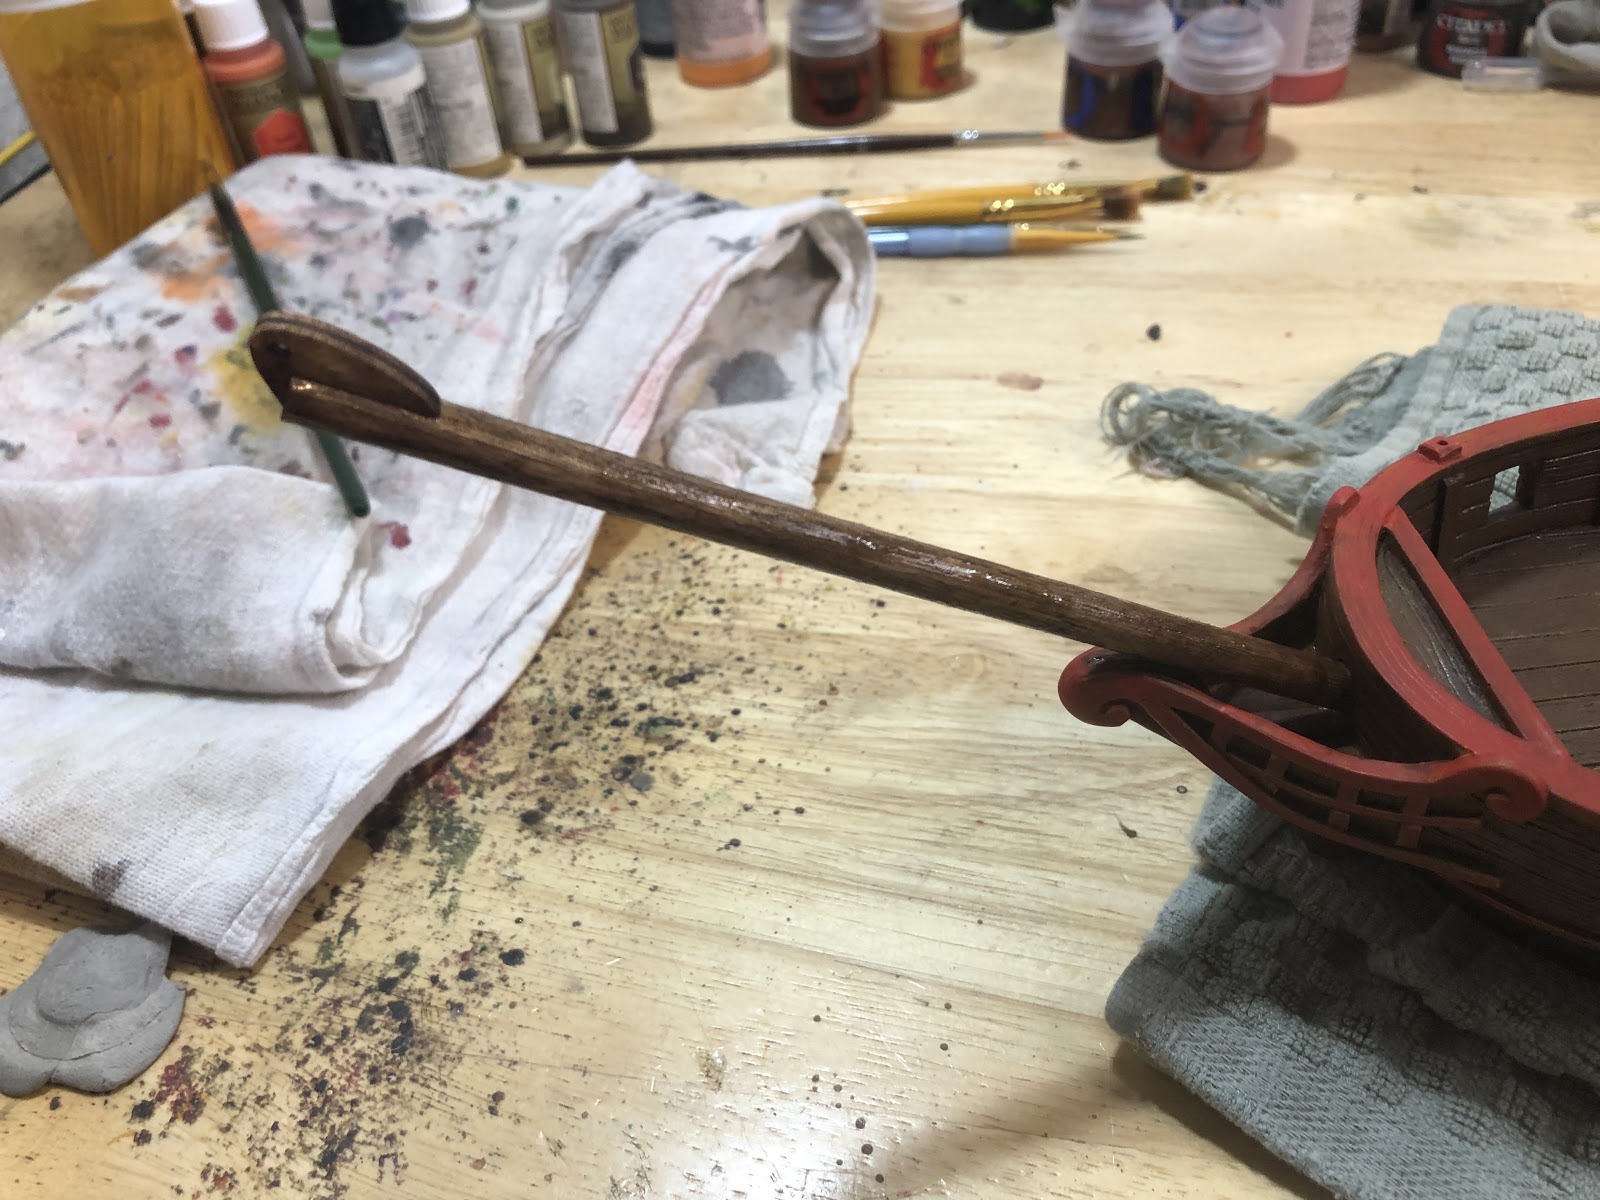
I mentioned before that I didn’t intend to prime the wooden rigging parts. This is because these pieces are made of wood and have a natural wood grain. If you prime them the wood will be sealed and the grain will disappear. This is ok if you want to paint them black, and black masts look great and are historically accurate. For “wood” color wooden masts, it is quite easy, and requires the same thing you’ve been putting on the entire ship.

Wash the rigging parts in Agrax Earthshade. Hold one end of the mast, boom, or gaff as you apply the wash to the other side. As you wash it you should notice that the wood is absorbing the wash.
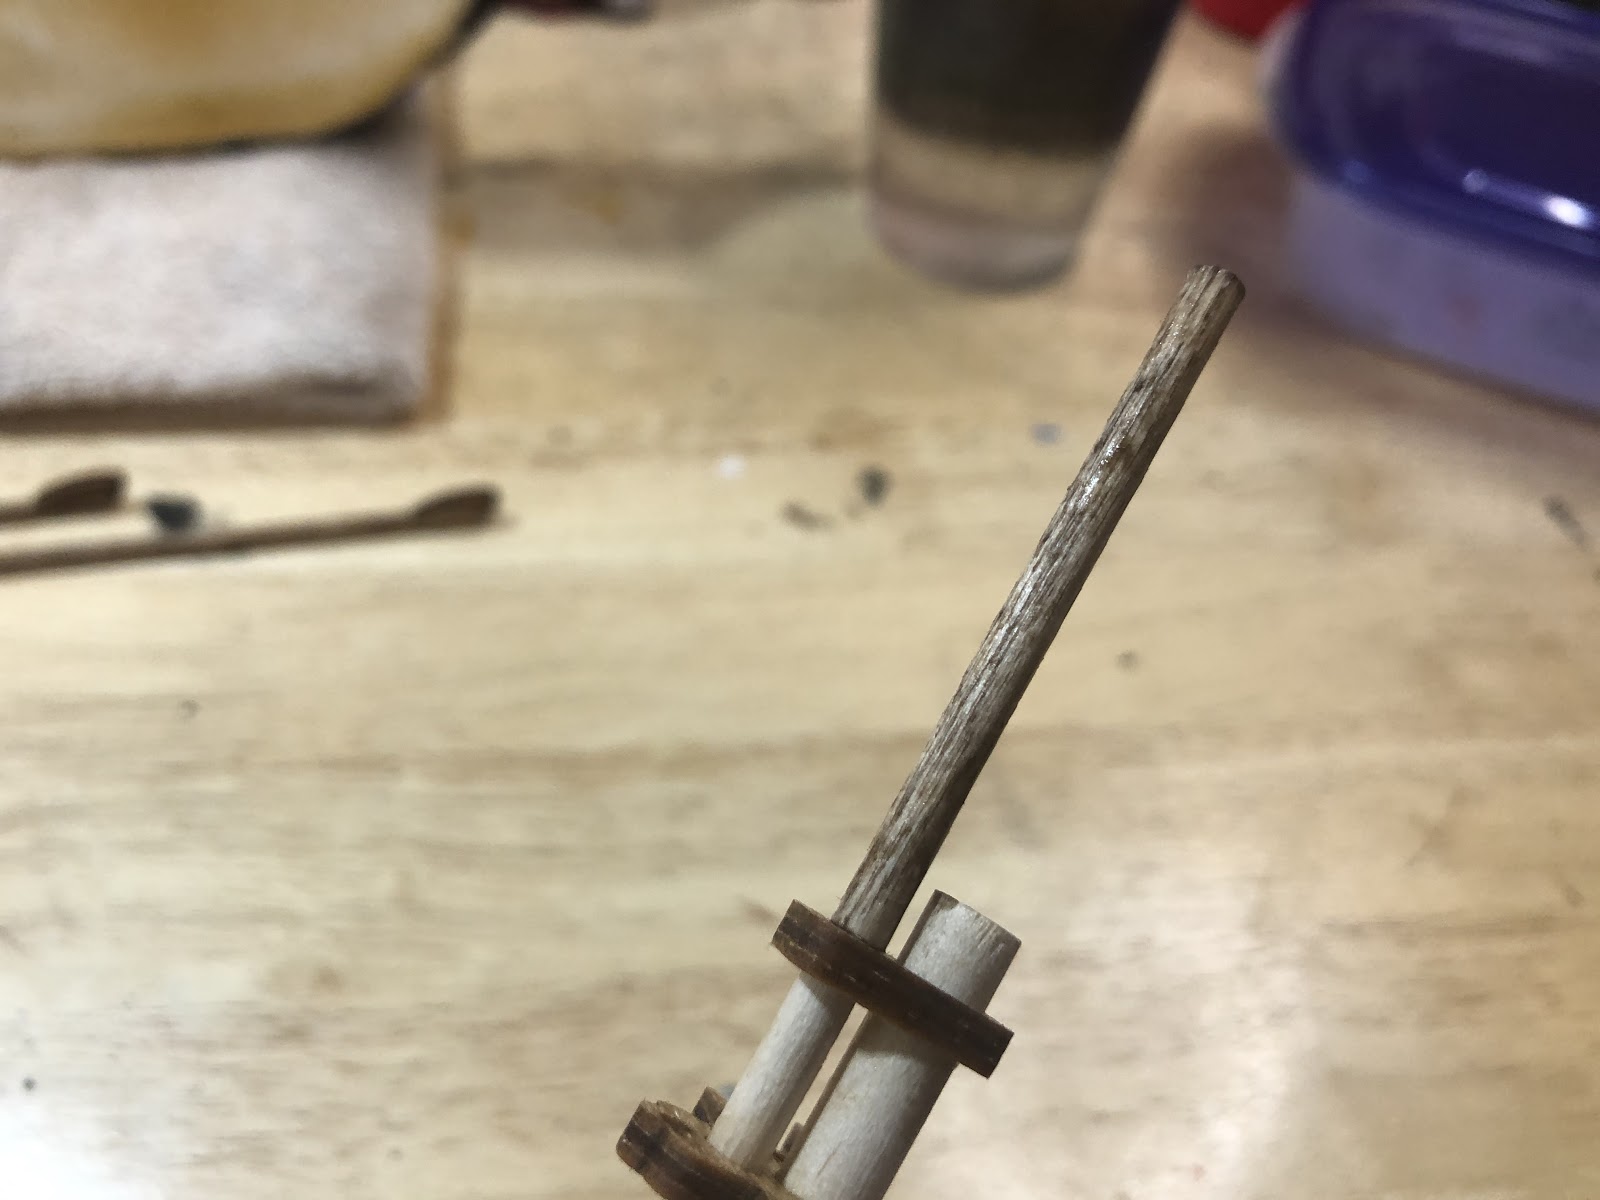
This is a close up picture of the wood grain of the flagstaff. Add extra wash to the underside of the rigging components.

As you finish the last piece, the first one you washed should be mostly dry. Add wash to the area you held it on each of the rigging parts.
Repeat this step after the parts have dried.
A return to…
Step 7: Paint the Starboard Side
 Always make sure your ship is dry before dry brushing. Not only does dry brushing not work on wet paint, but the vigorous motions of dry brushing and wet paint can tear the primer, striping whole portions of paint.
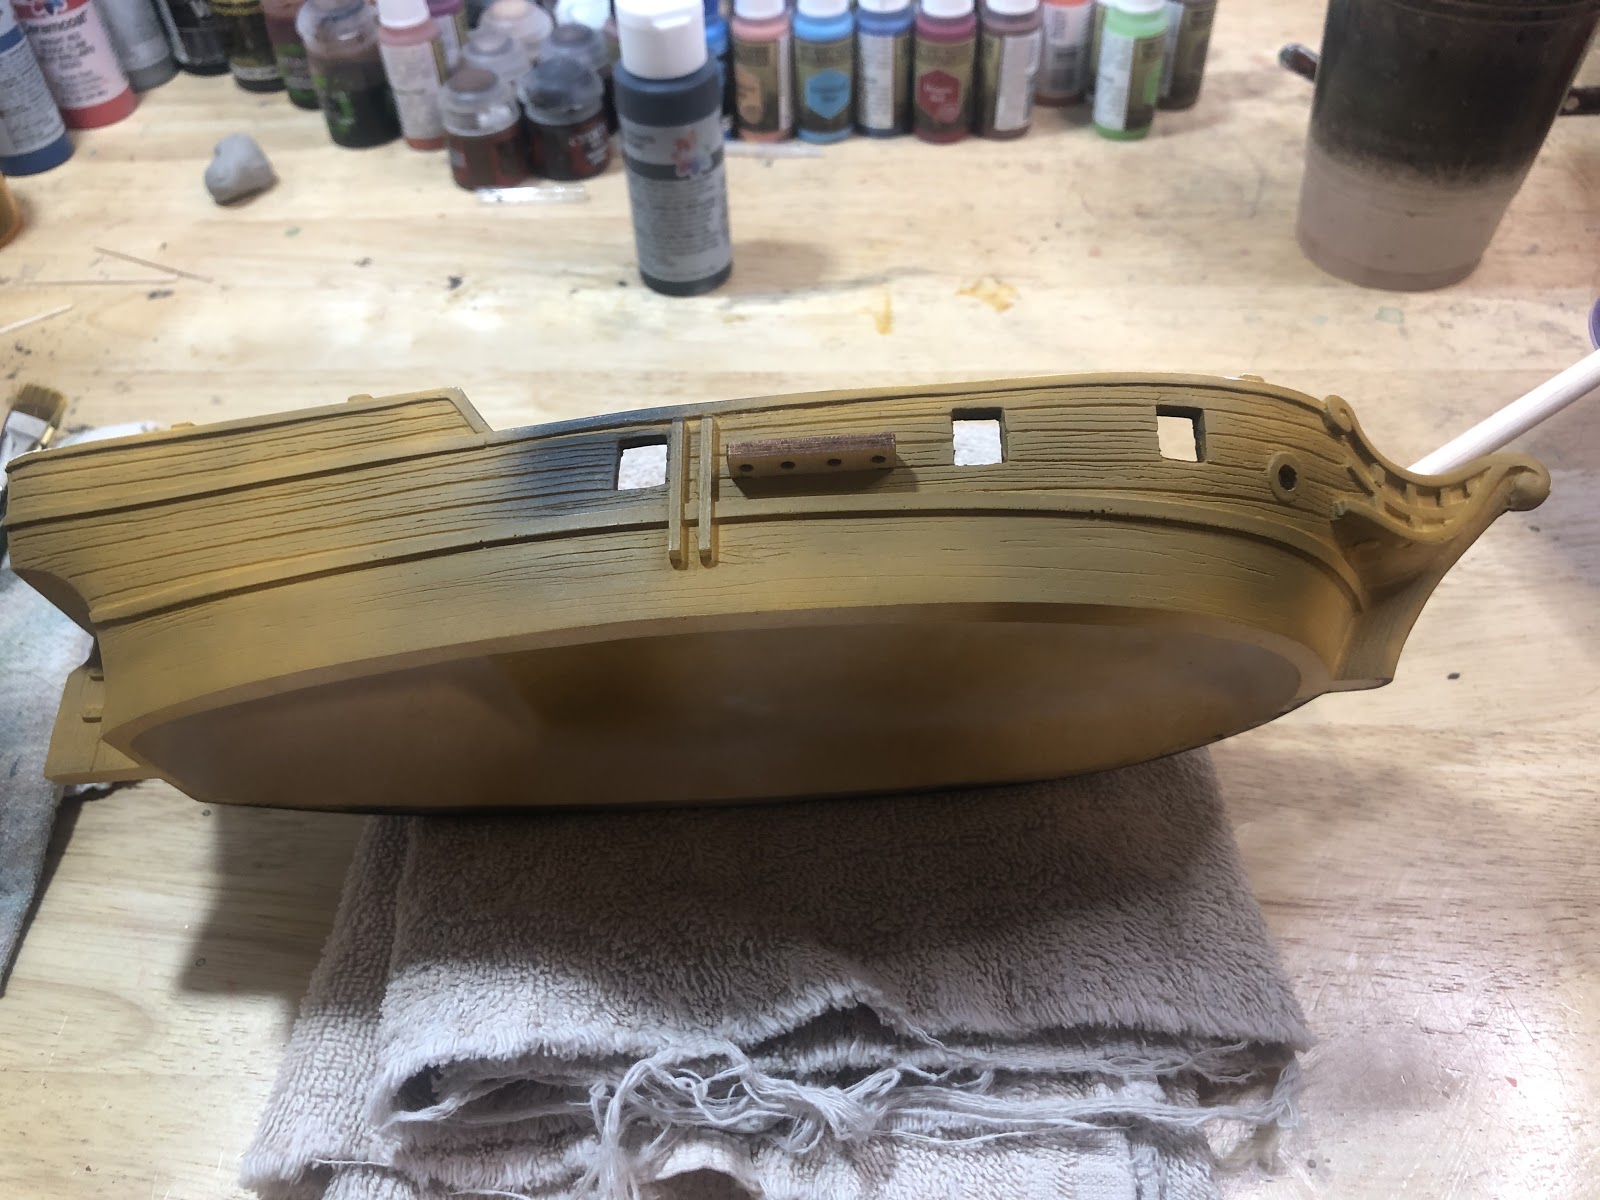
Start dry brushing the lower hull with Mournfang Brown.
When painting a big project, like this ship, keep notes on how you paint each section, so you can do the other sides the same way, and check your notes before you start painting. If you don’t you might paint a whole section the wrong color and not realize it until you’re writing an article.
Dry brushing also gets rid of the water marks and brush strokes from the dried wash.

Dry brush the gunwales with Bambi Brown or a light brown as well.
Use Bright Red on the Beakhead and trim.

Sometimes it helps to paint a whole section, then go over where you first started and add a coat to even it out.
Paint the beakhead carefully; and with as many coats as it needs.
If you have any hollows on any section, paint them the same color as the area around them, but don’t put wash in them. This will make them almost disappear most of the time.
I added another light to my right for these pictures, from this point on.
Oops! Go back and add the powder burns around the gunports using Rhinox Hide.
Using Pumpkin, start adding an edge highlight to the red areas.

With the starboard side done, the ship is almost completely painted.
Step 9: The Stern

Paint Supplies Needed:
- Tower of towels and rags
- Paint
- Brushes
- Non Precious Cup for Water
- Wet Pallet
- Paint Rag
- Poster putty
Hopefully I have convinced you about the Towel Method of painting ships. Using a gloved hand to hold the ship works equally as well. I like using the Towel Method because it helps stop paint from being rubbed off when handling the ship, and makes edge highlighting easier.
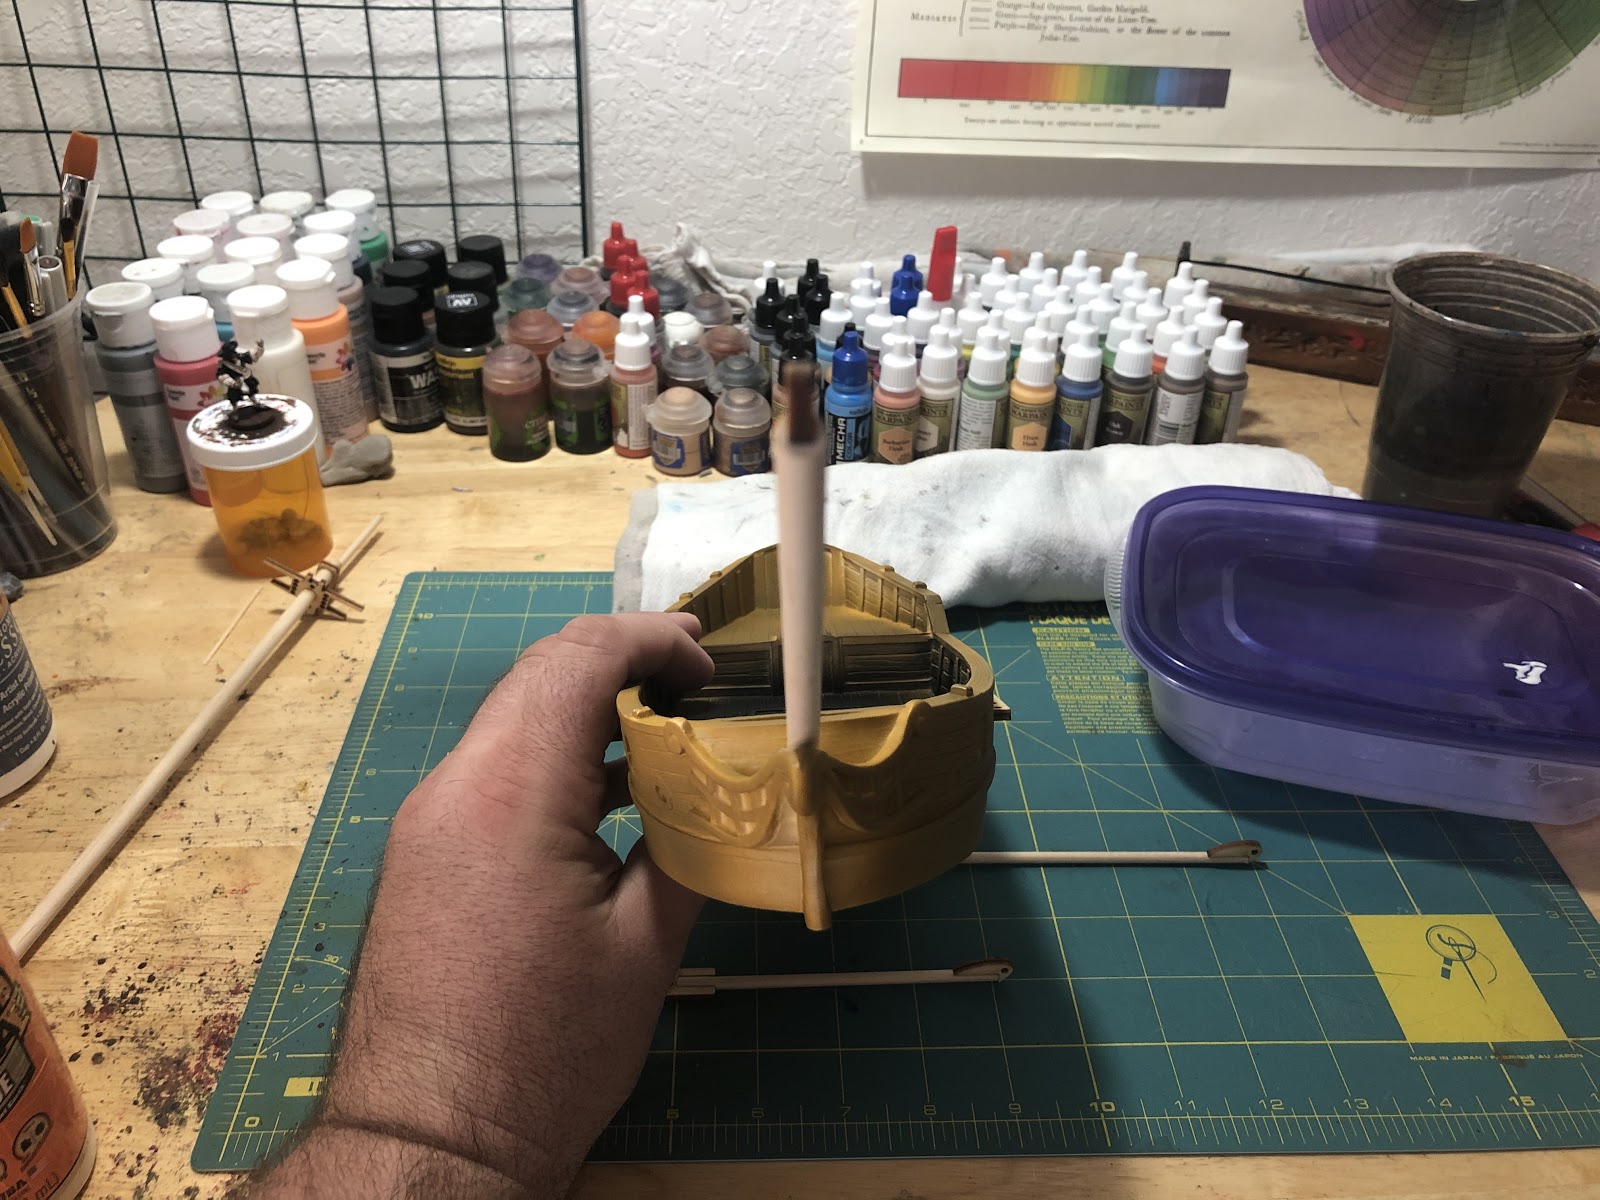
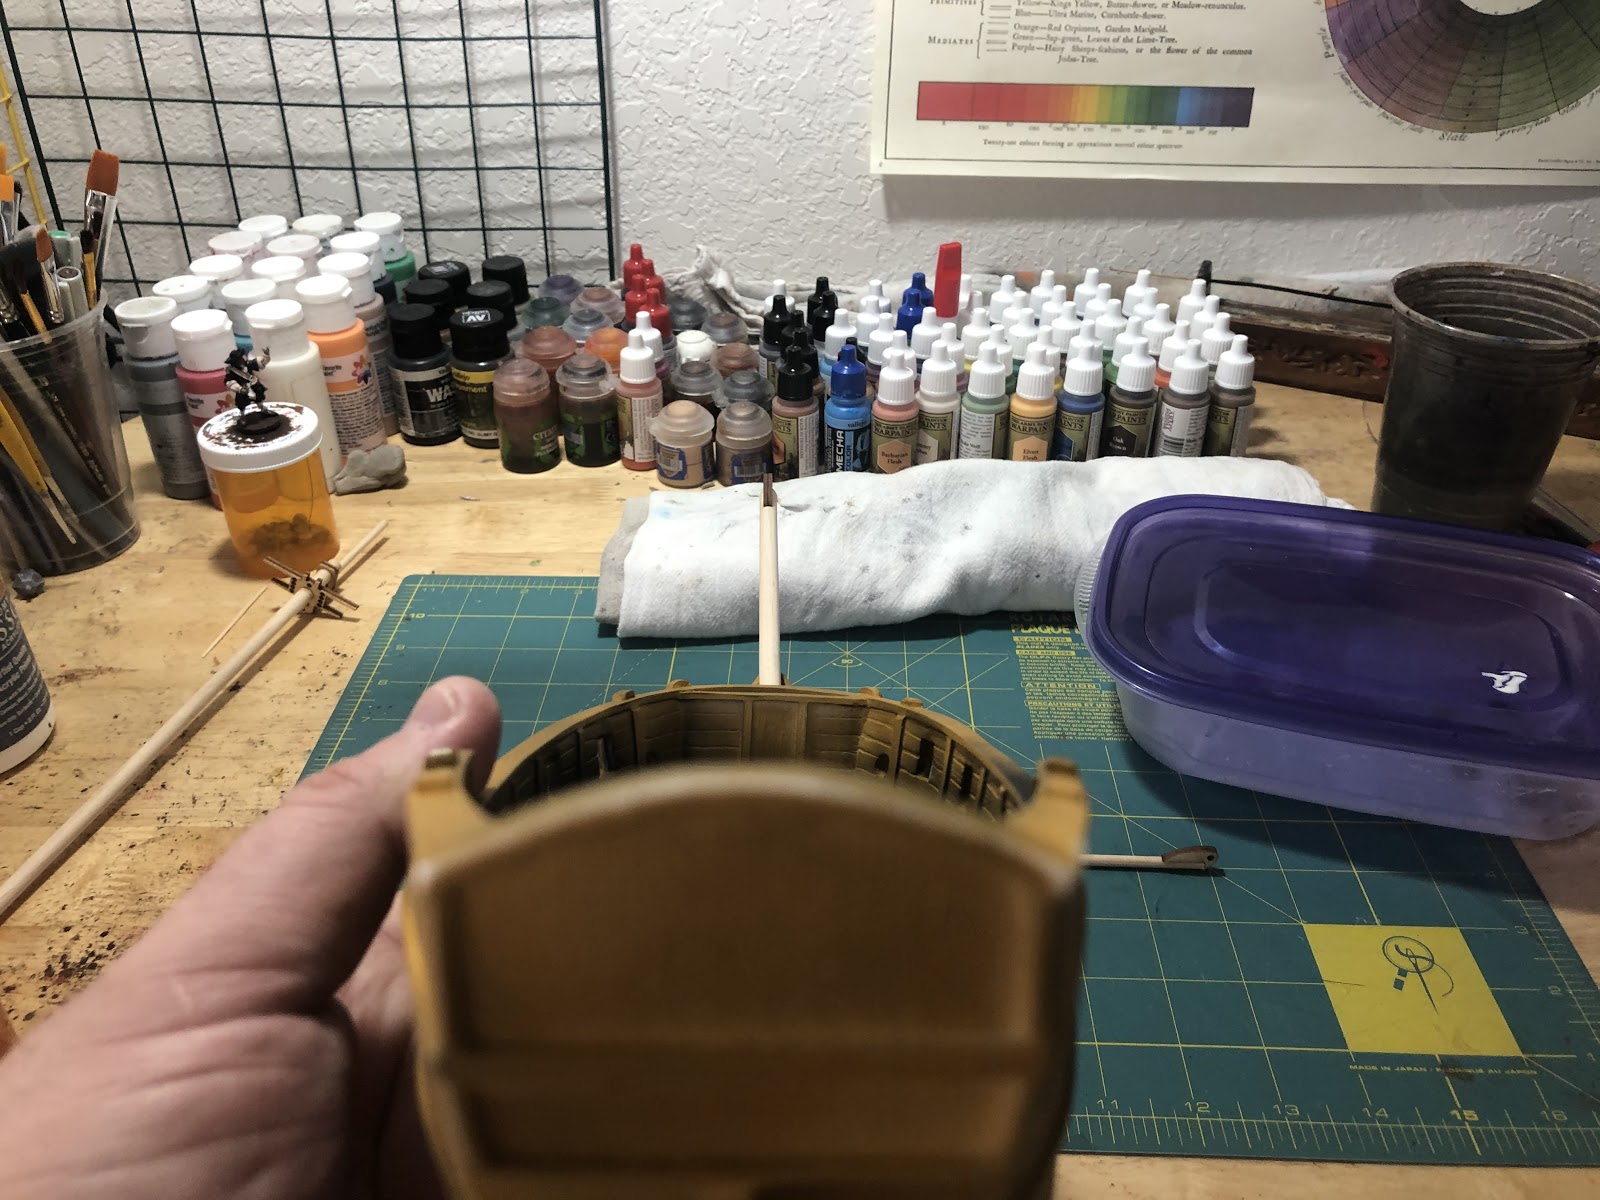
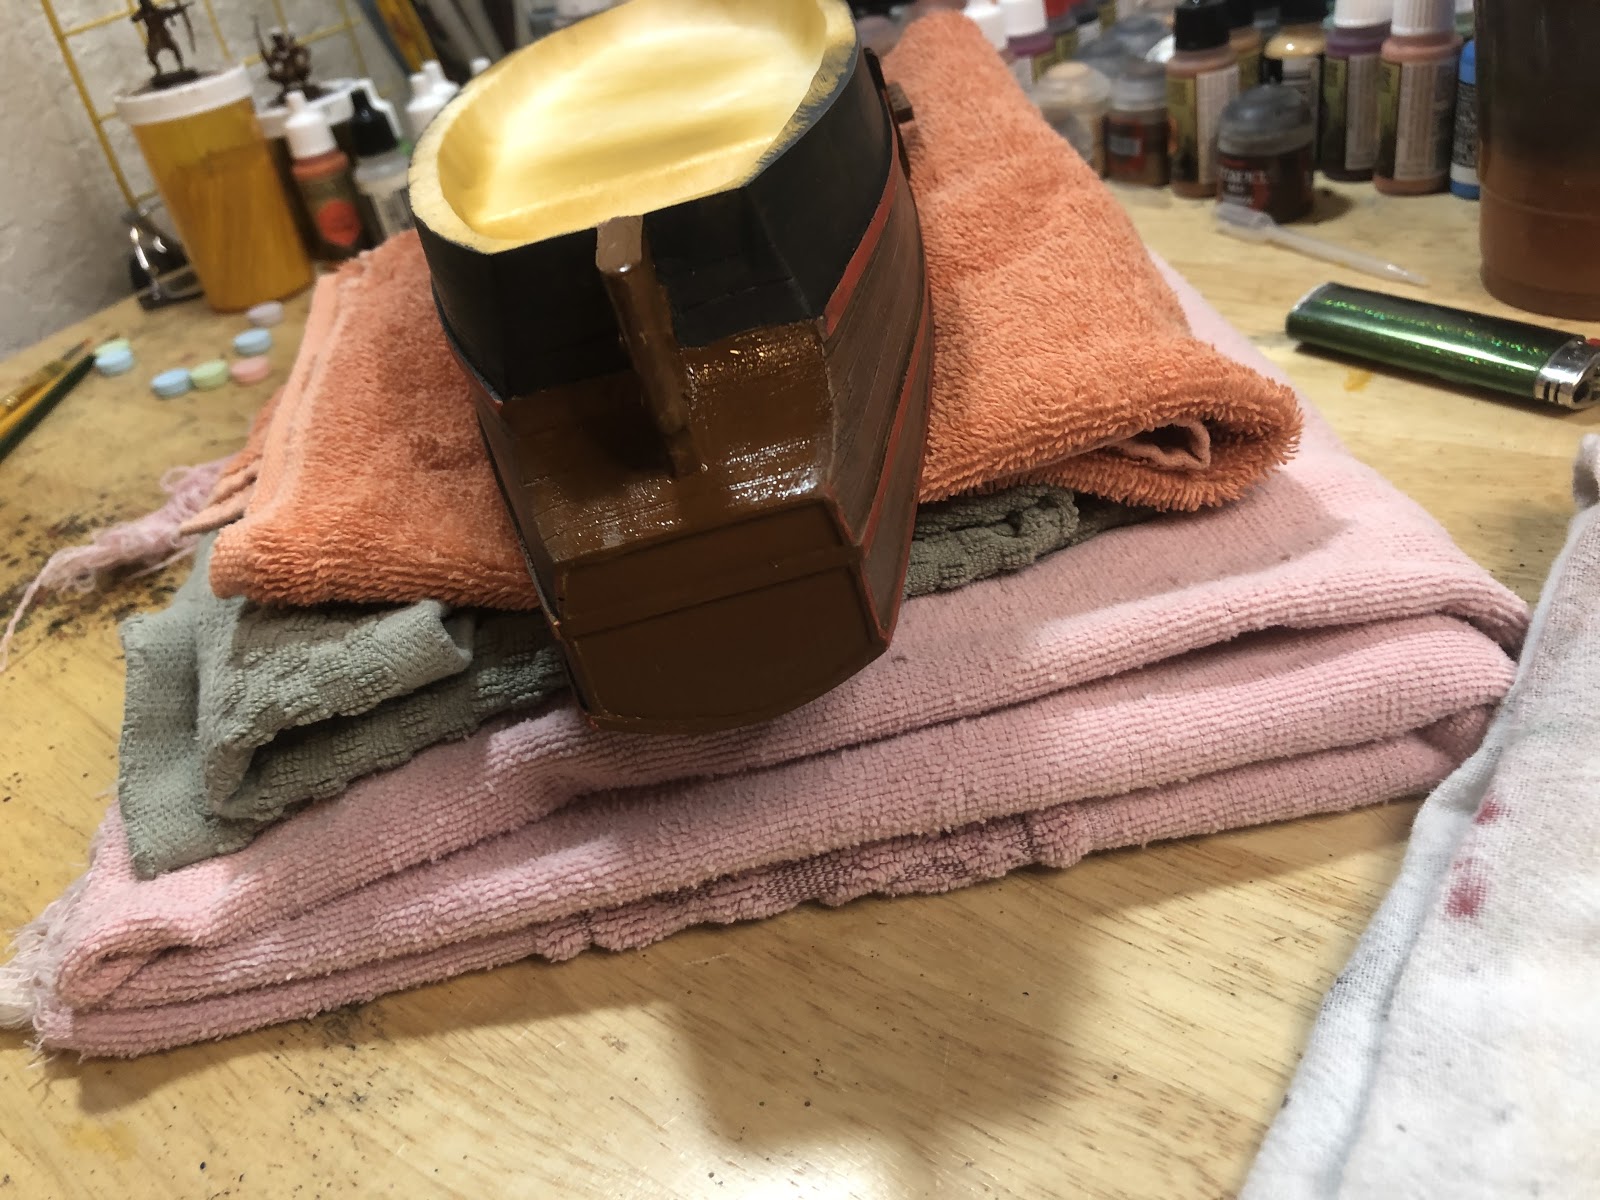
For the stern, because the bowsprit is glued in, you need to make a tower of towels to cradle the ship while you paint the stern. Flip the ship upside down and set it on the towels.

Paint the stern Mournfang Brown. Paint the rudder Mournfang Brown as well.
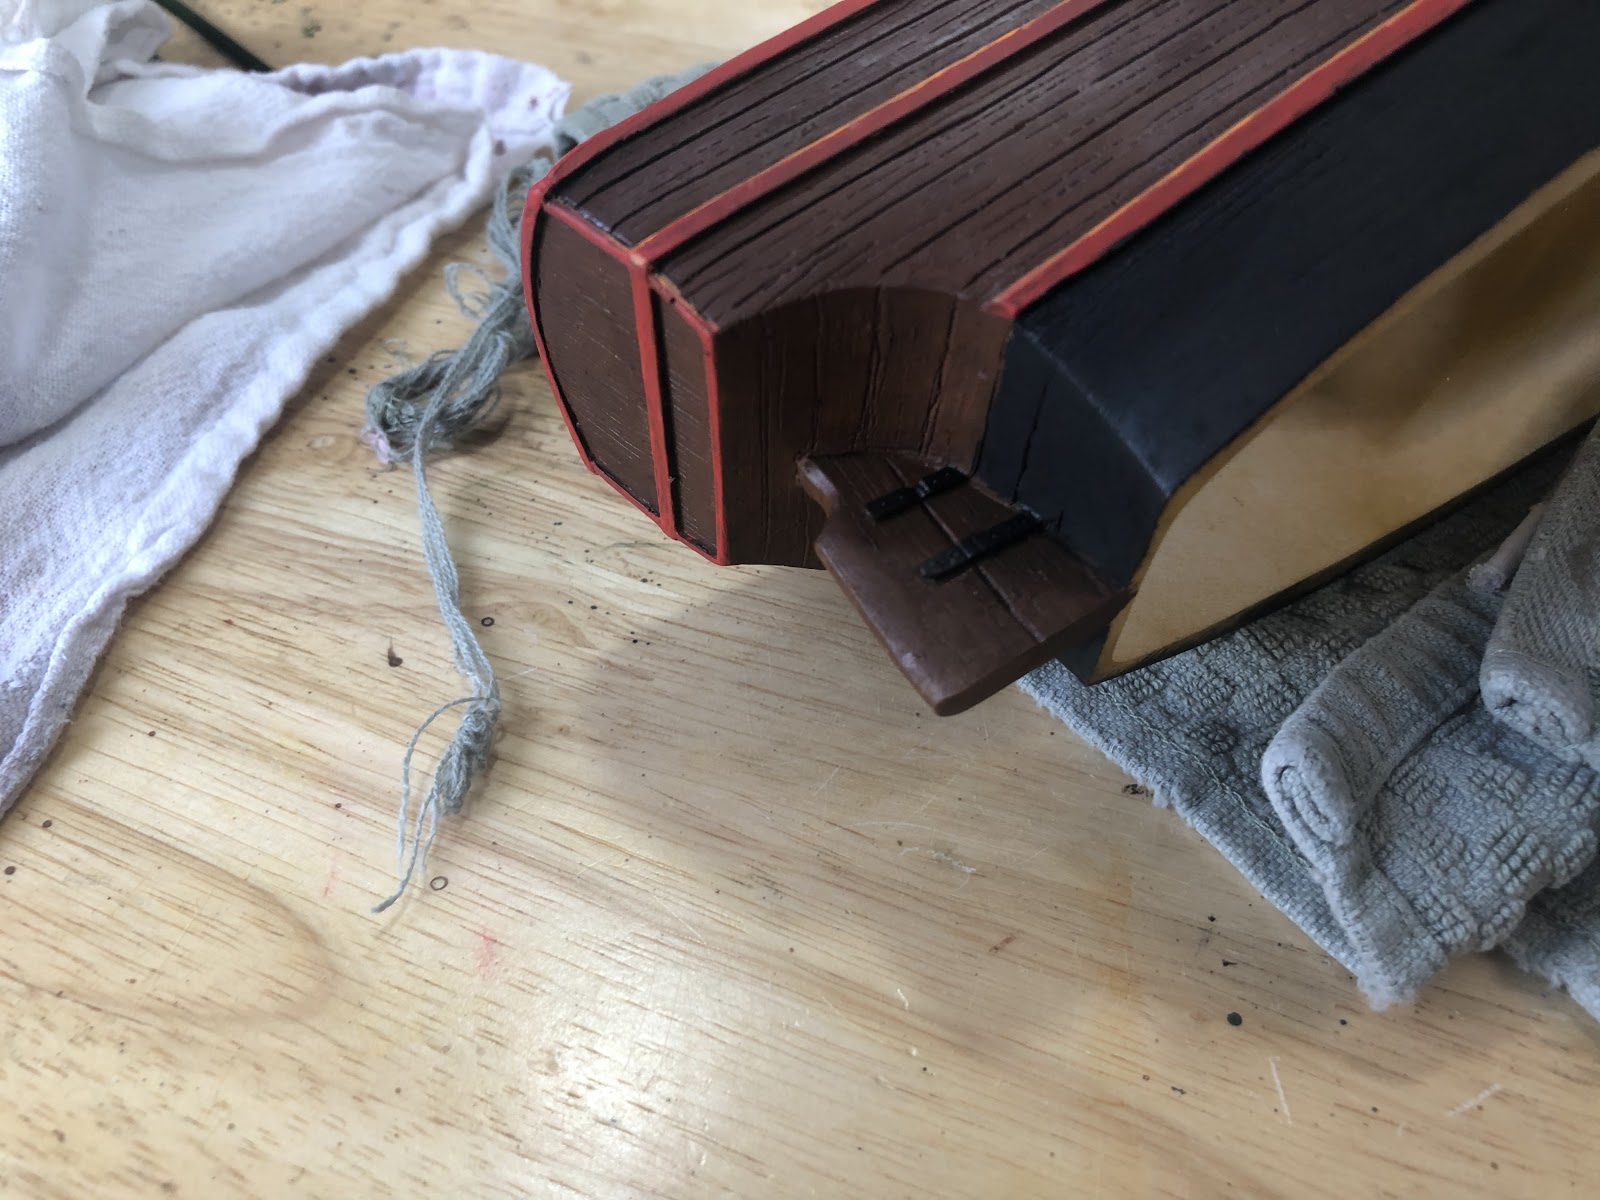
Keep painting until the entire stern is brown. You might need to touch up the black as well. Paint any edges that you missed when painting the larboard and starboard sides.
Let it dry for 1-2 hours.
After it dries, add a wash of Agrax Earthshade.

Once the wash has dried paint the trim Bright Red to match the rest of the ship. The angle of the stern means that it would spend most of its time in shadow, so it looks fine without adding a dry brush.
Once the trim is painted red, and a highlight of Pumpkin Orange.
The rudder has two large hinges on each side. Paint these black.
These would have been made out of iron surprisingly, though some pictures look like they were made of brass. They would have been covered in tar and black paint, however, to protect them from rust.
While you’re painting these black, look at any areas the wash or brown paint missed, and paint those areas black as well.
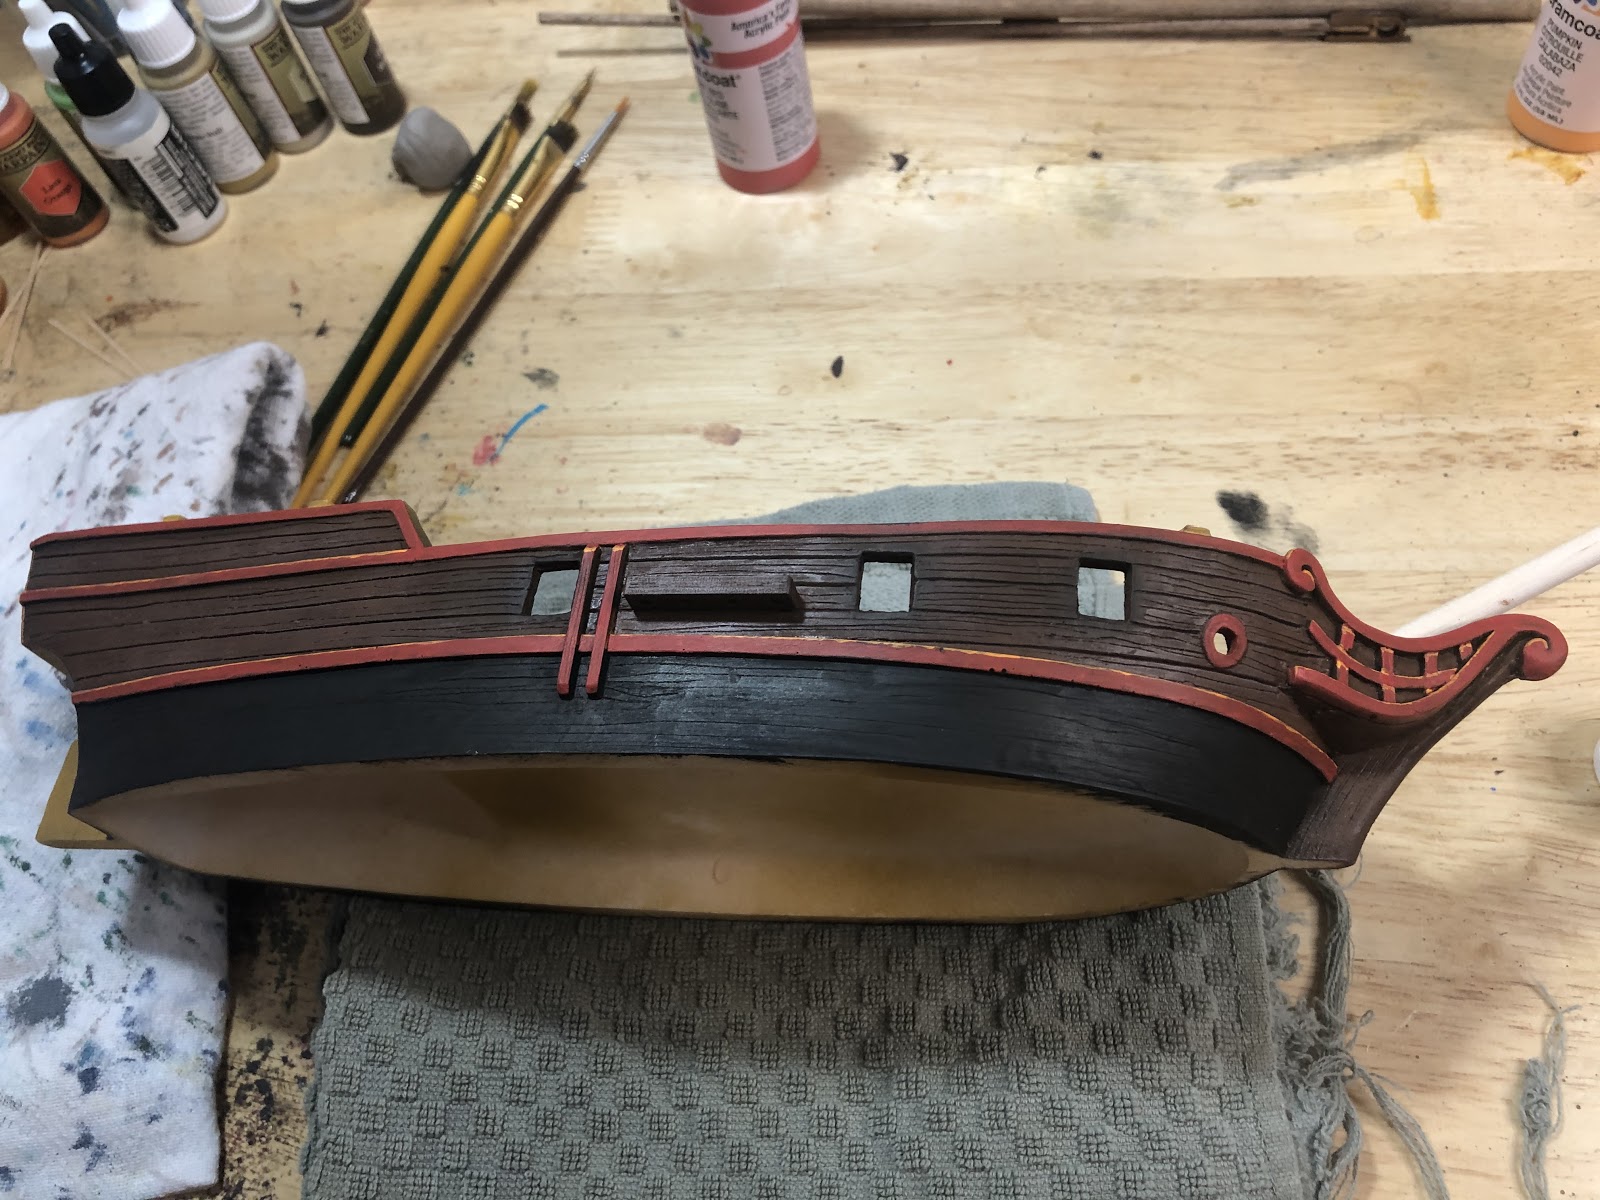
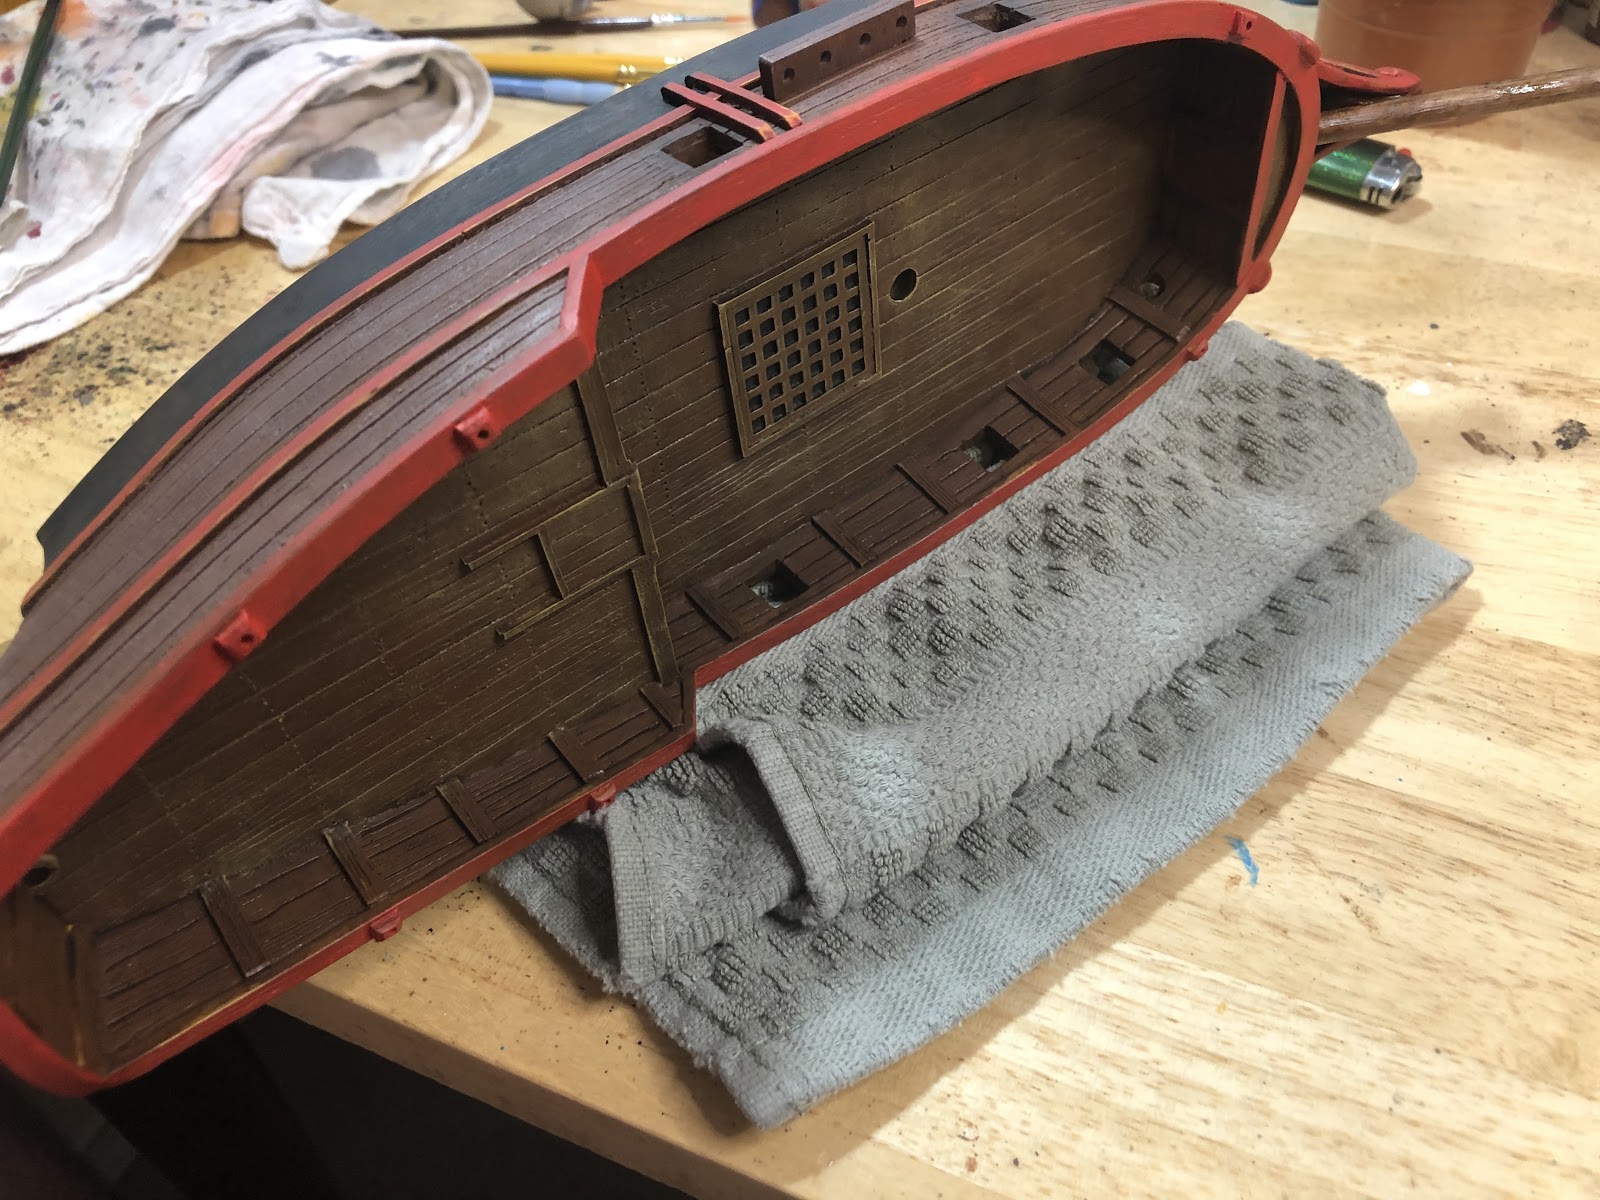
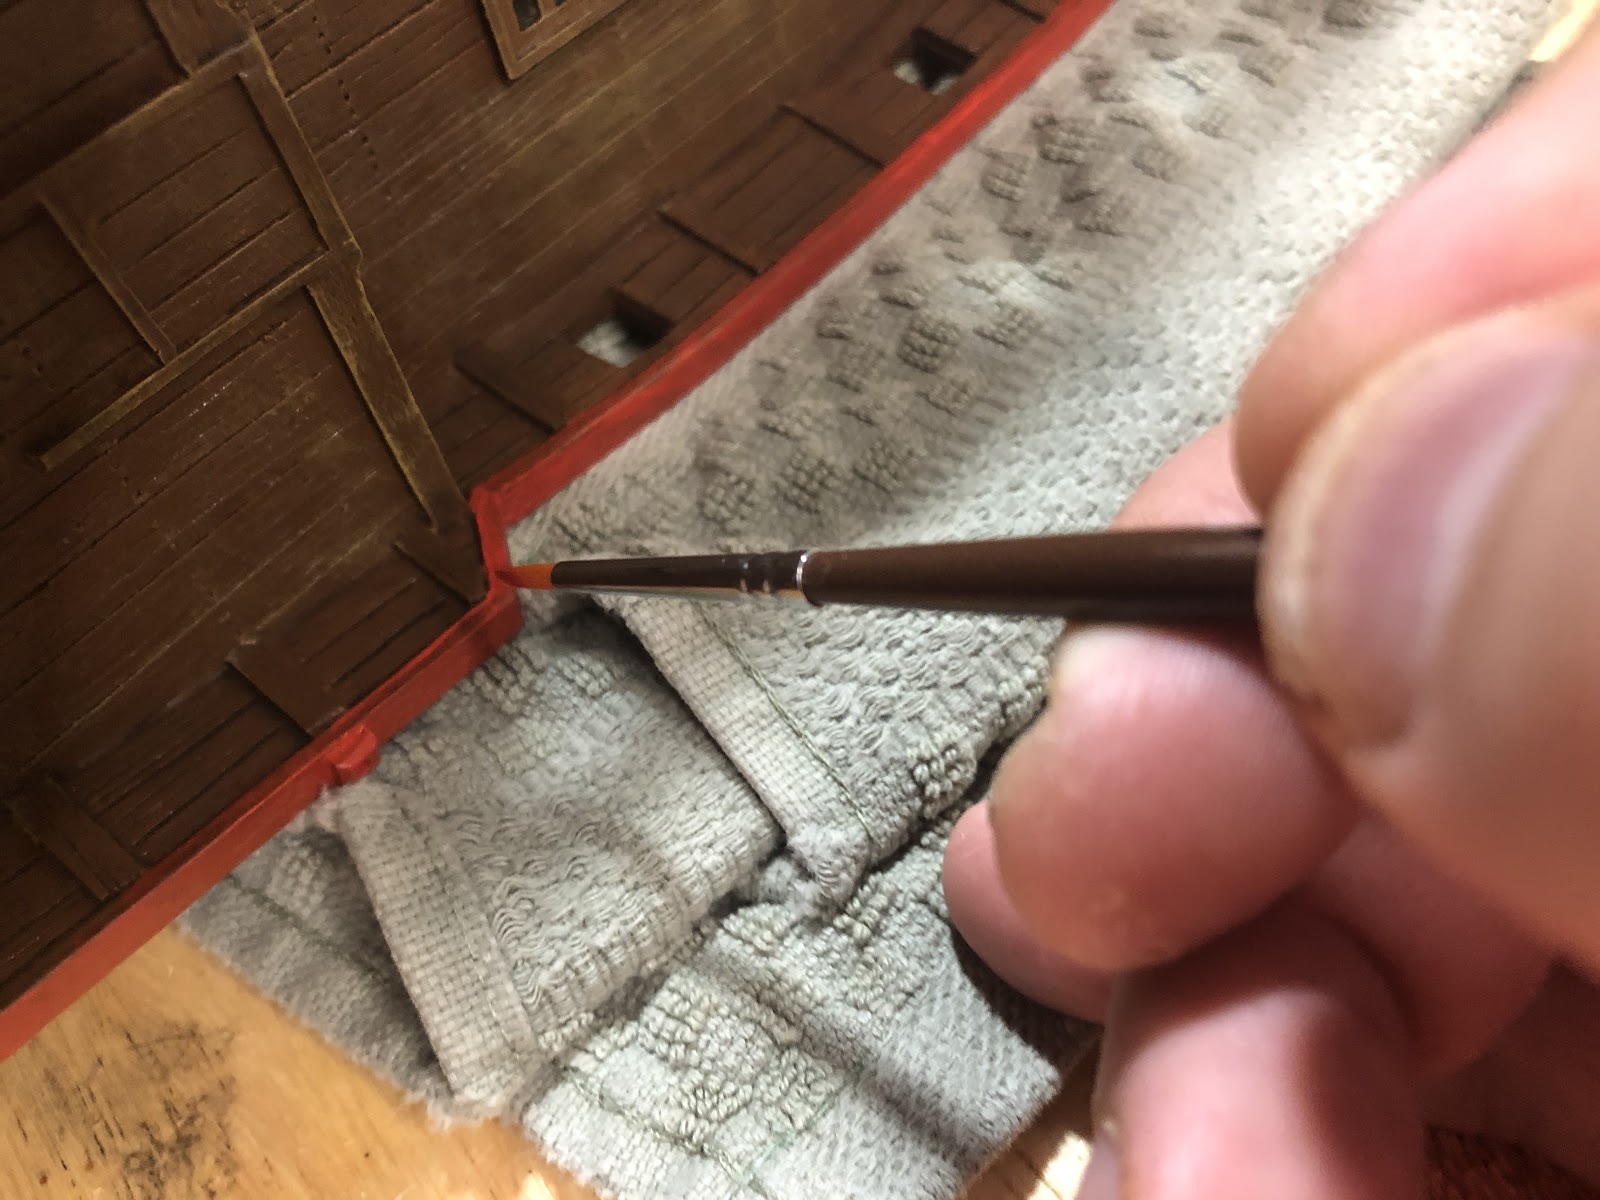
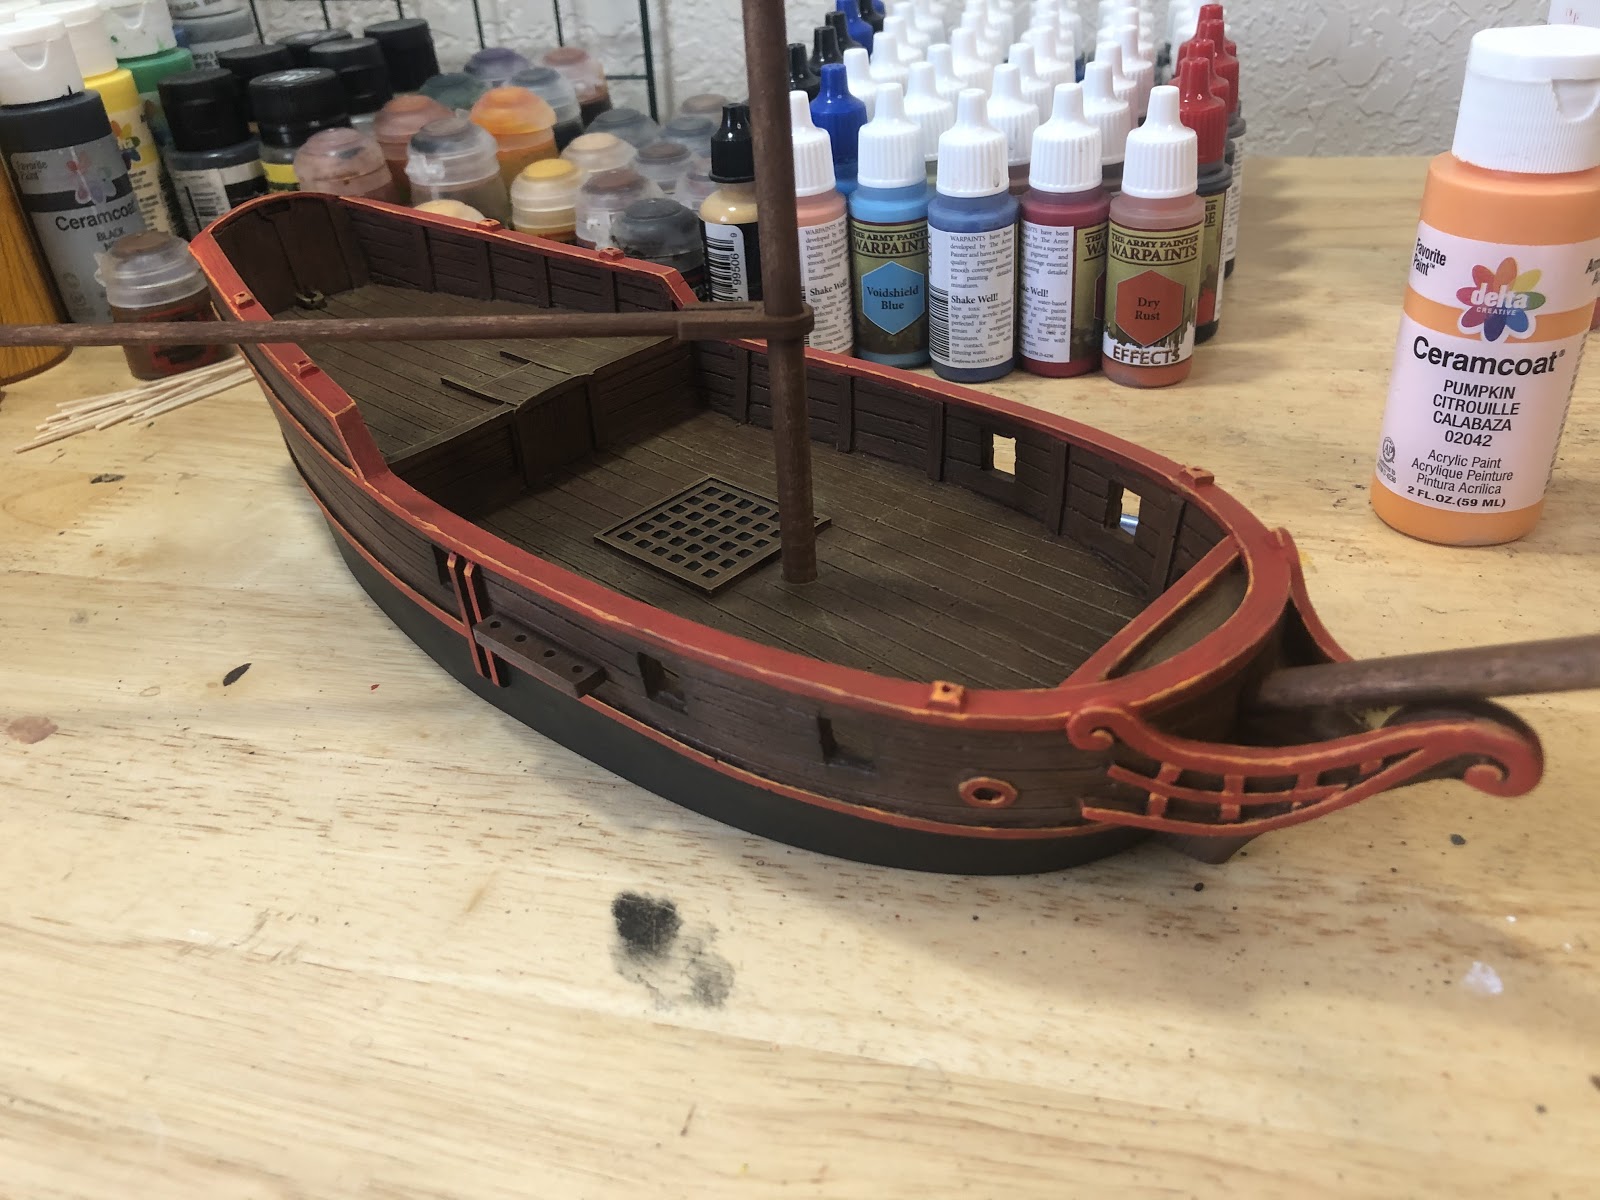
Step 10: Finishing the Deck, Bow, and Railing
Flip the ship right side up.
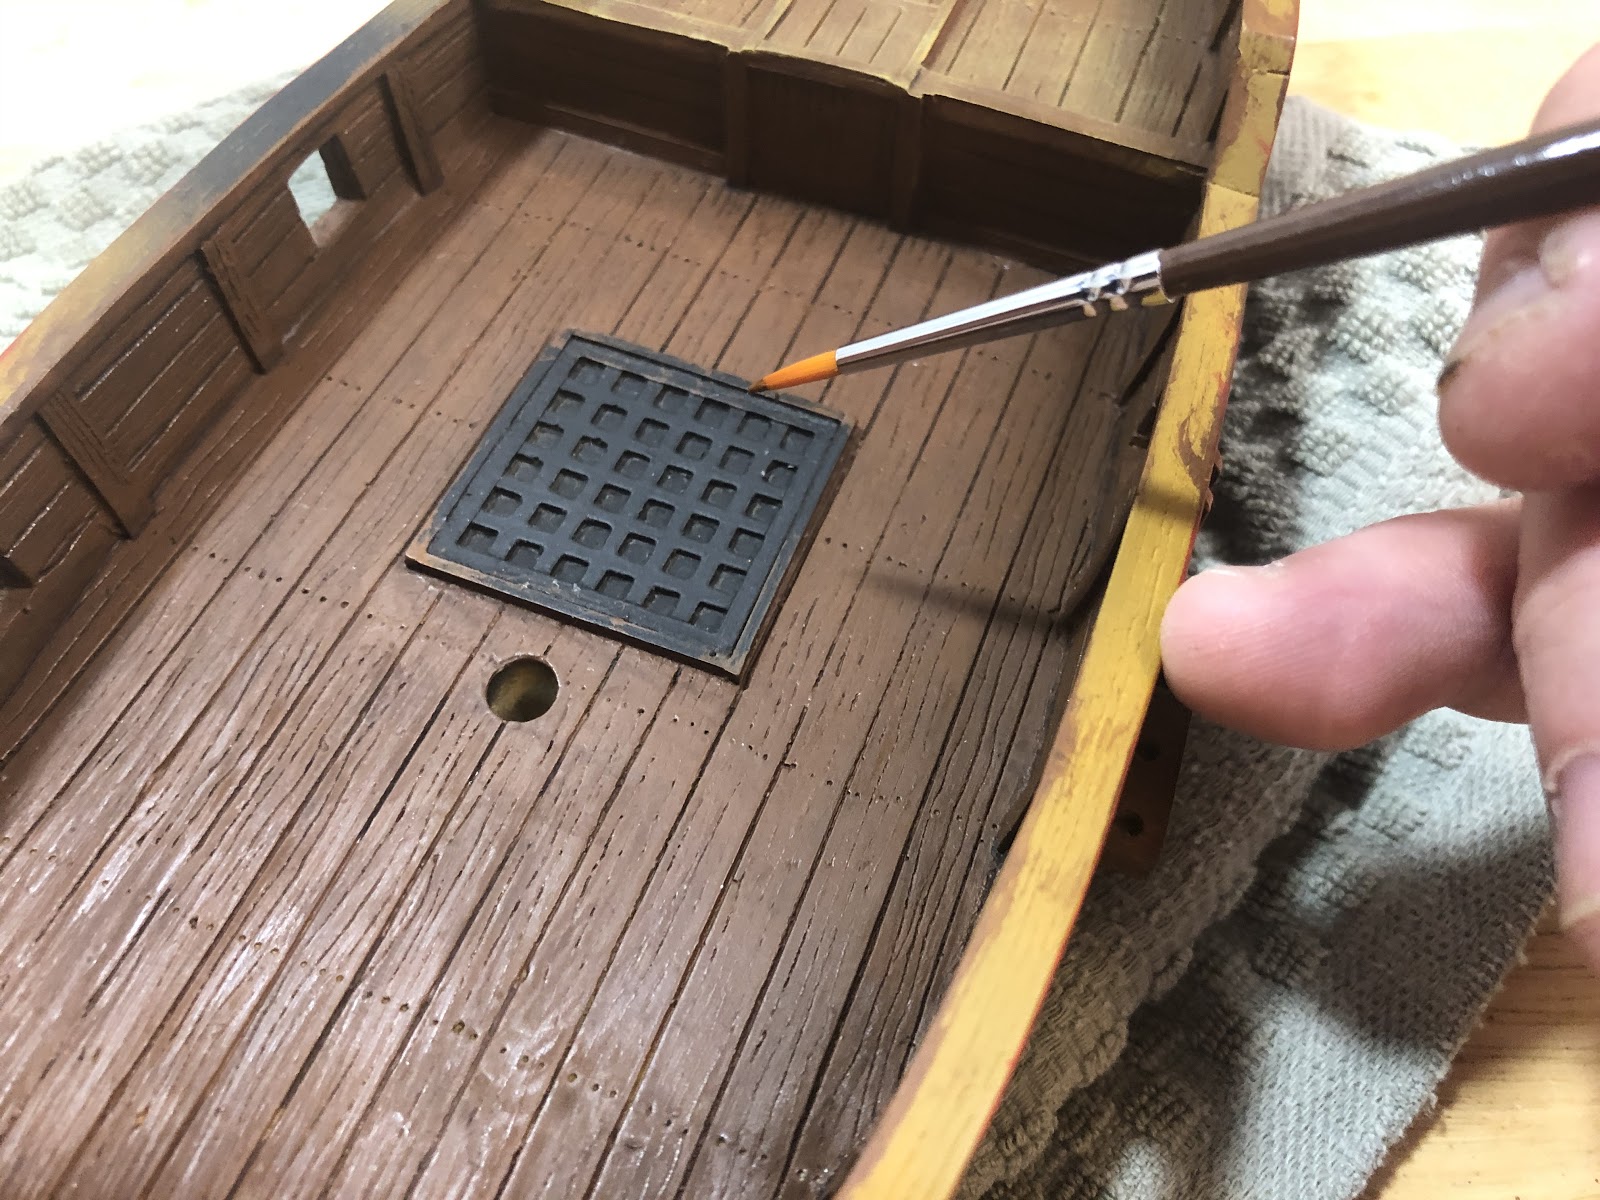
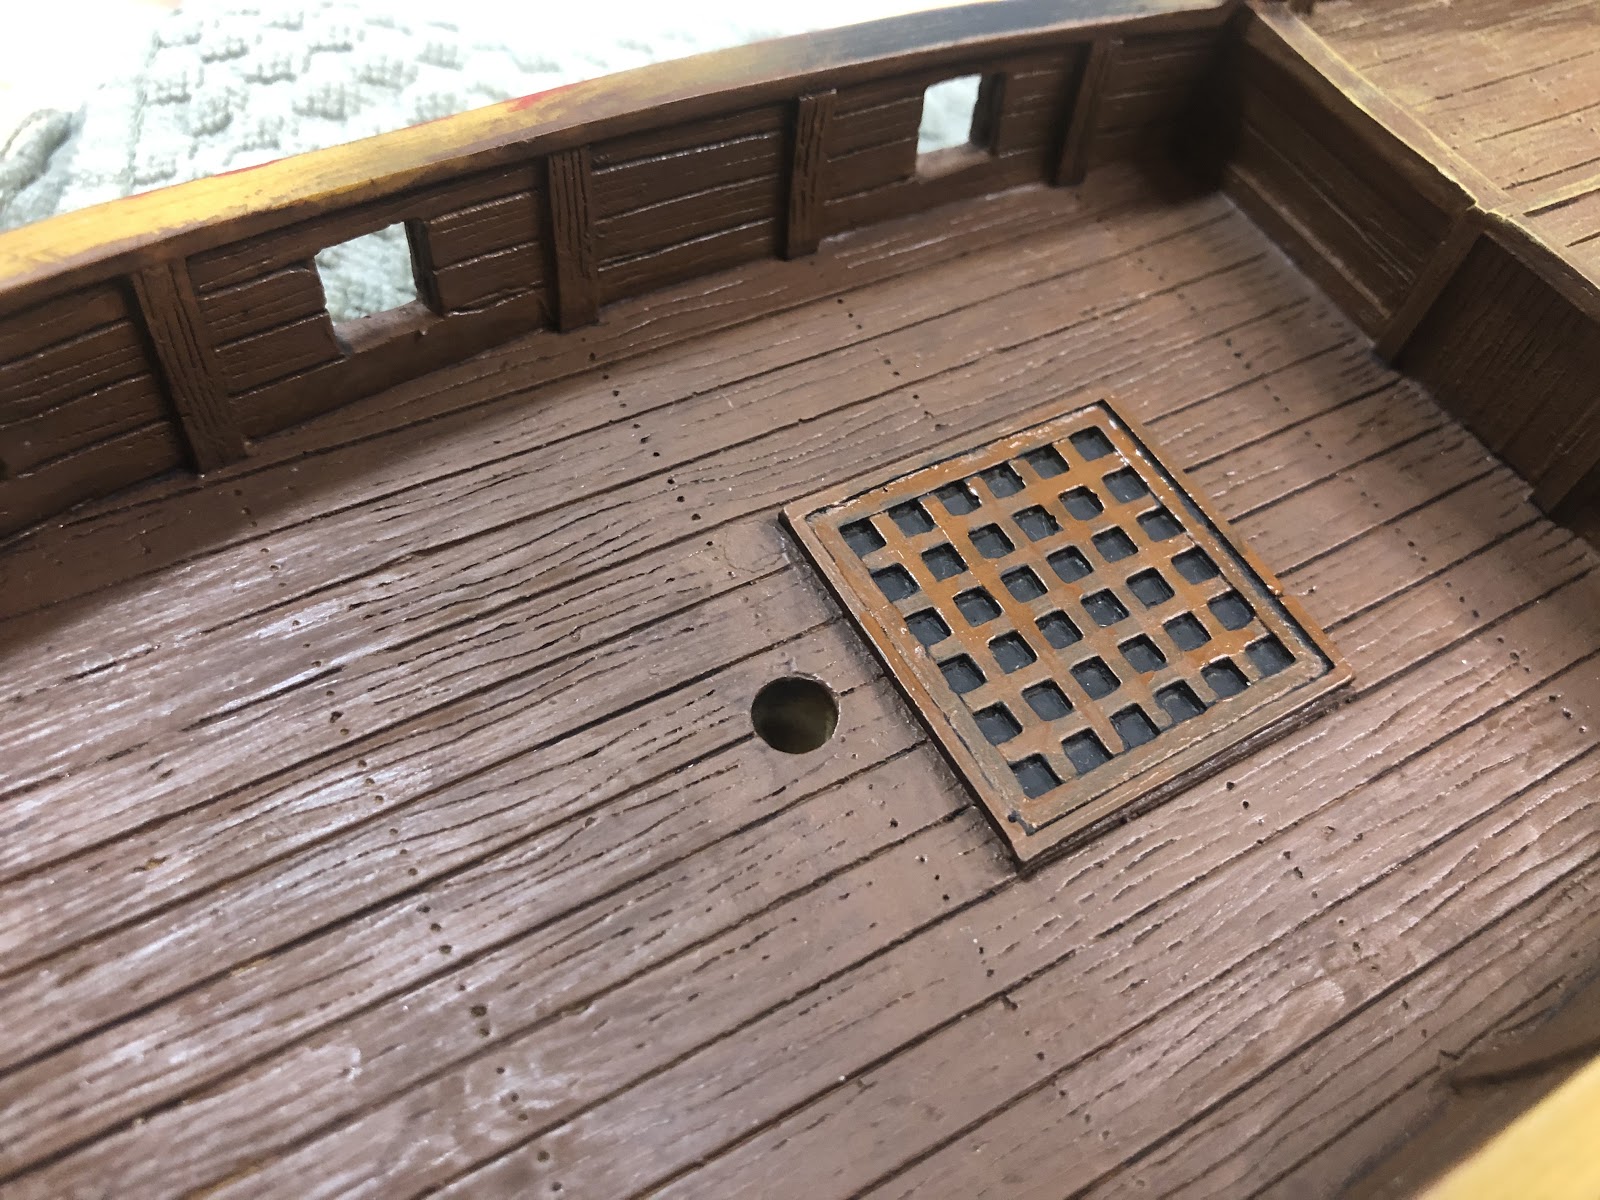
It is finally time to paint the hatch grate.
If you didn’t spray paint the hatch grate, paint the inside of each square black. Remember to paint it black from all four angles (bow, larboard, stern, starboard).
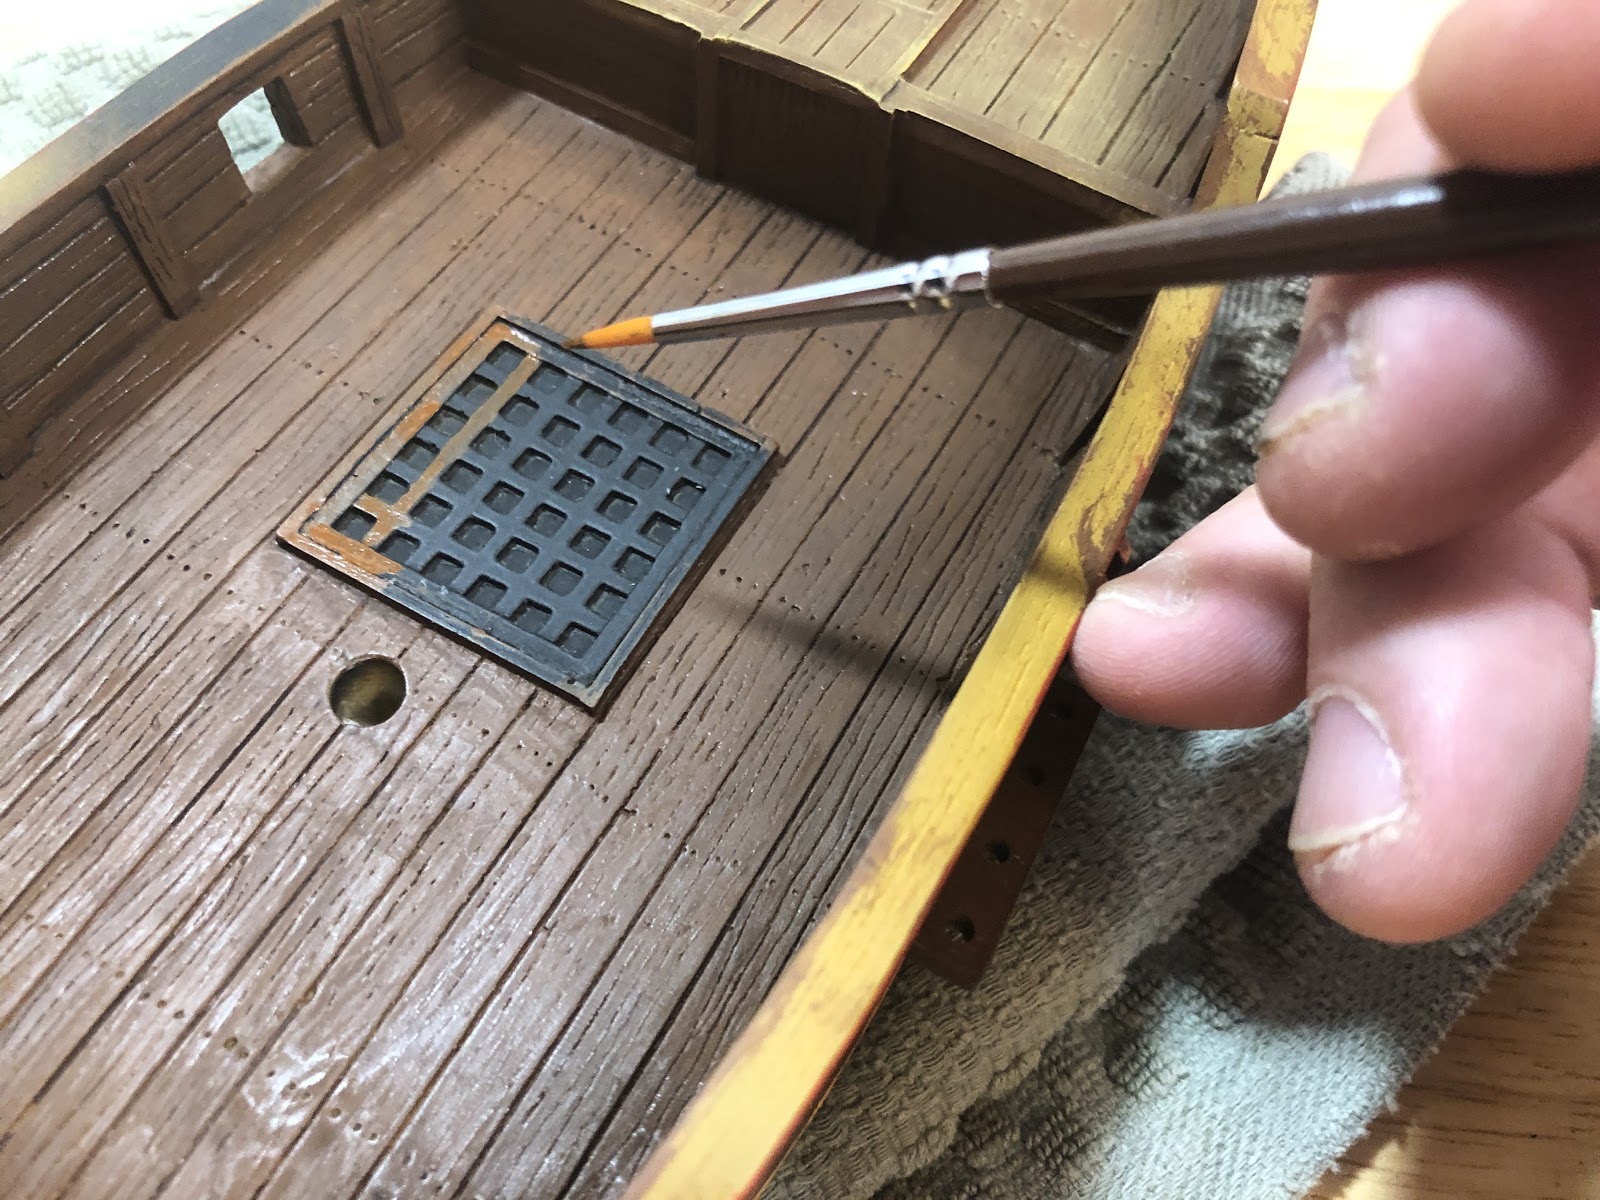
Use Mournfang Brown for the lattice work of the hatch grate. Instead of painting it one section at a time, paint it in stripes, following the natural movement of your wrist.
If you get any brown paint on the inside of the hatch grate, stop painting, clean your brush, and use water to get the paint off the black.
Move the ship with the towel to a good position for your wrist and start painting the rest of the hatch grate.
As it dries, add more layers of brown if the black is showing through.
While that dries, turn your attention to the bow.
Paint the interior of the beakhead brown.
While that dries, let’s look at the rigging components.

While the wash brought out the wood grain, it didn’t make the mast match our ship. To correct this, dry brush the rigging parts with the color most of the ship is painted: Rhinox Hide Mournfang Brown.
When you finish dry brushing the last piece, the first should be dry enough to paint the part you were holding the first time. This is the same method you did before to paint each rigging piece before.
They will not match the deck or hull completely, but will have a nice contrast to the rest of the ship.
Once each piece is painted assemble them together as shown. You can also refer to the rigging guide. The wood mast and rigging parts might fit tighter than they did before because of the wash they absorbed. Remember to be careful with them and not use considerable force as they might break. If the gaff and boom don’t fit down the mast, try rocking them back and forth. If the mast doesn’t fit, you can do the same thing. You can also try filing them down, but that will erase some work.
My mast on this ship was loose before painting it, and after painting it fit perfectly. The gaff slid on easily, but the boom was very tight, and I had to rock it back and forth to get it into position. On the plus side, none of these parts have to be glued to the ship.
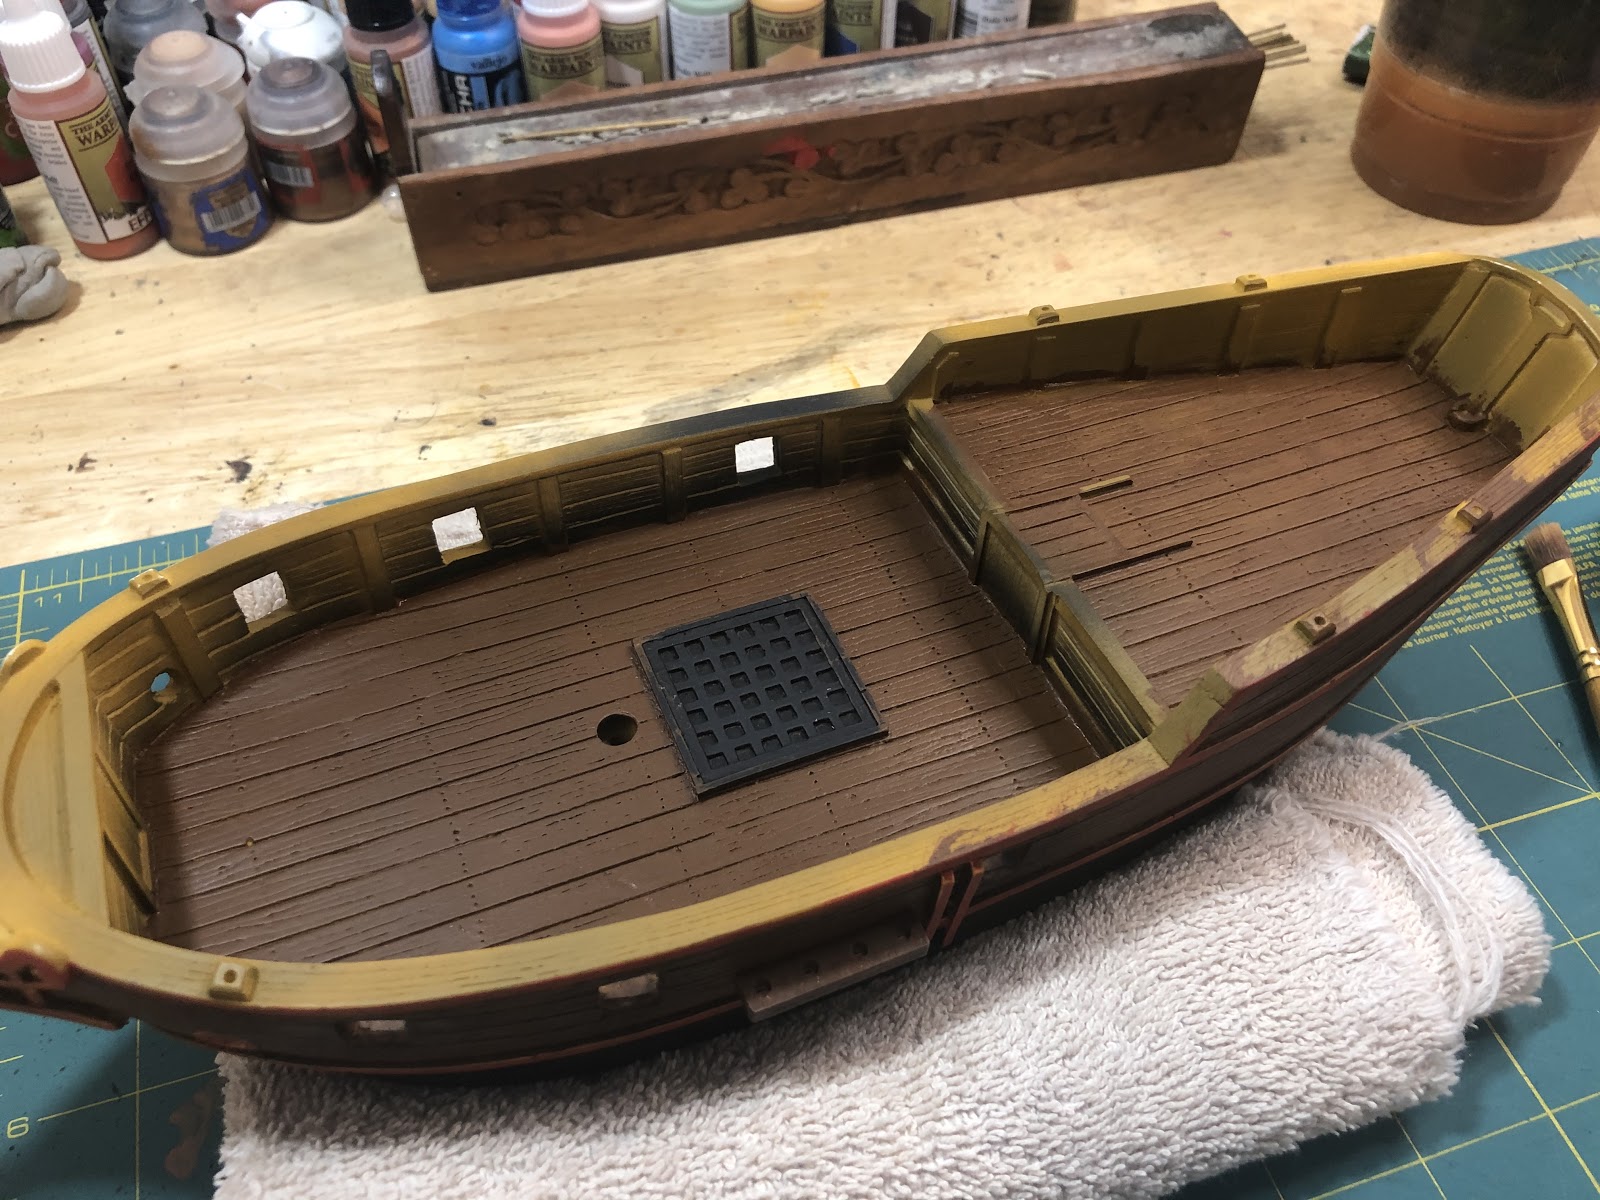
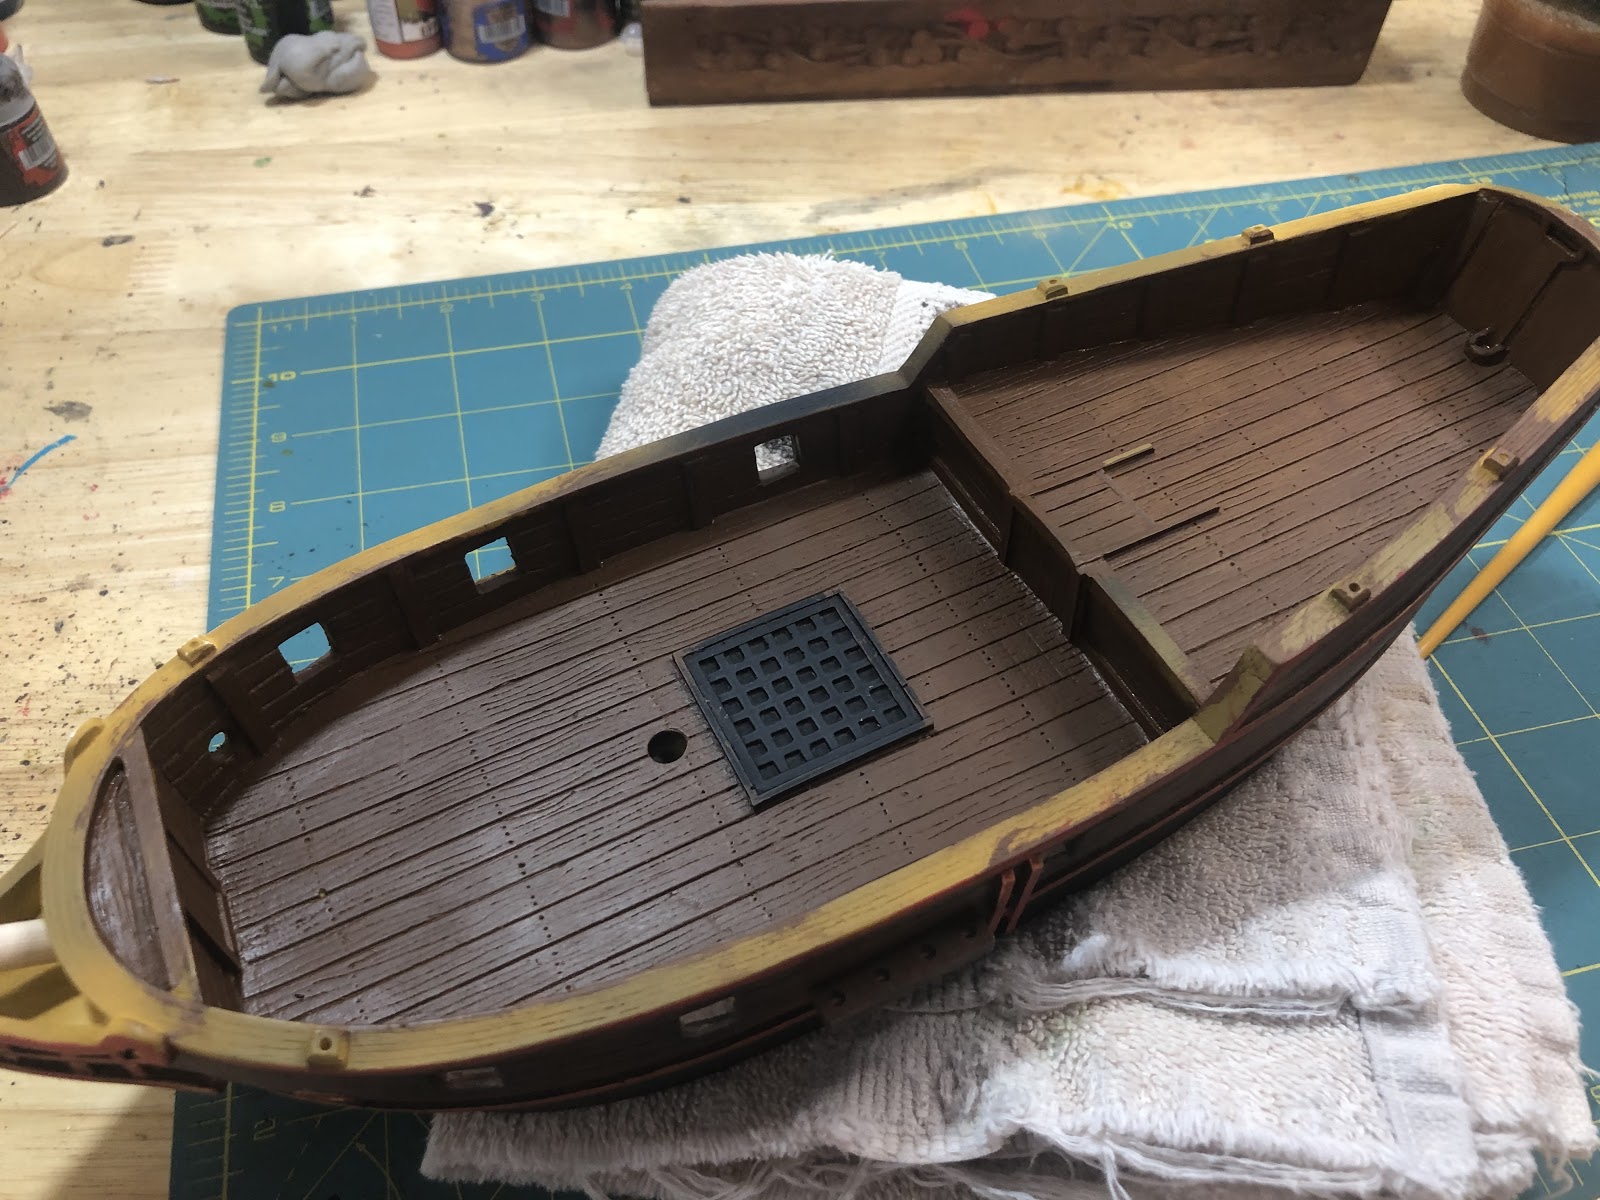
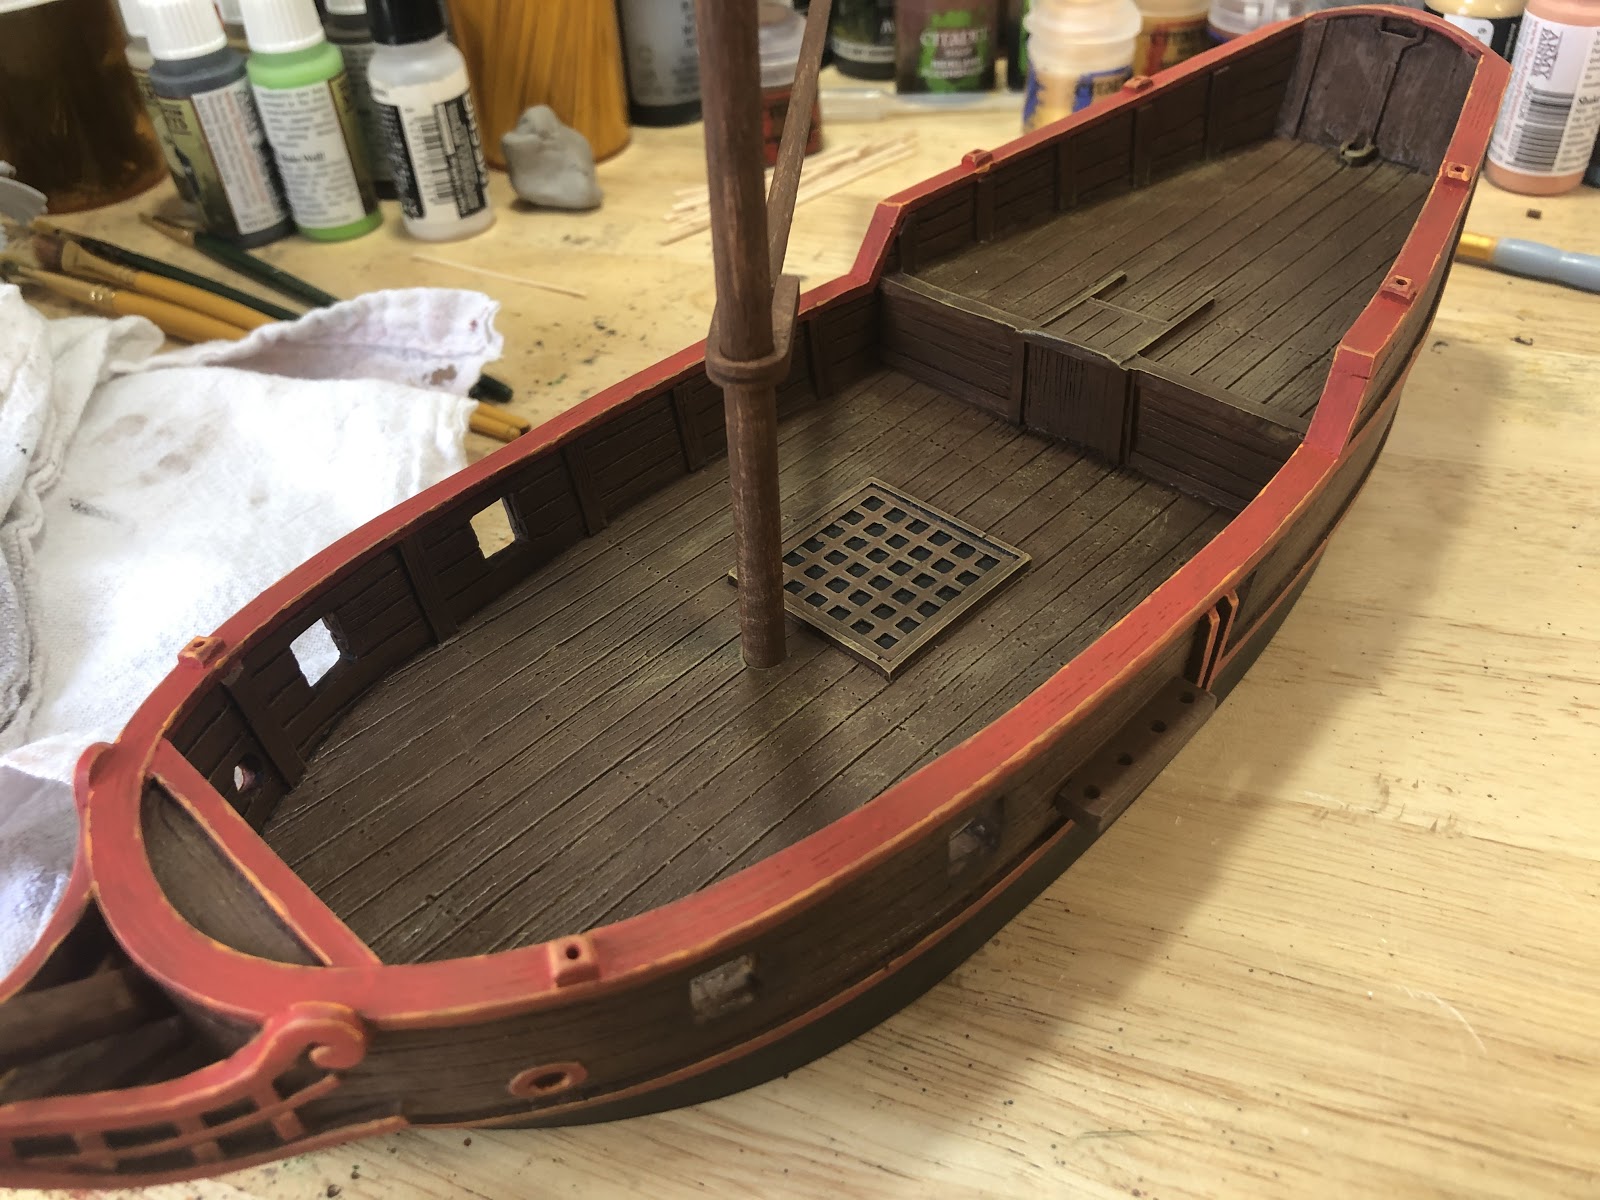
Next it is time to dry brush the deck of the ship and the hatch grate. Wood would have been stained and protected, even in the early 17th century, and usually with pine tar. The damage to the wood here is from being walked and being in the sun all day. I want it to look like it’s been scuffed with barrels, cannon carriages, and age.
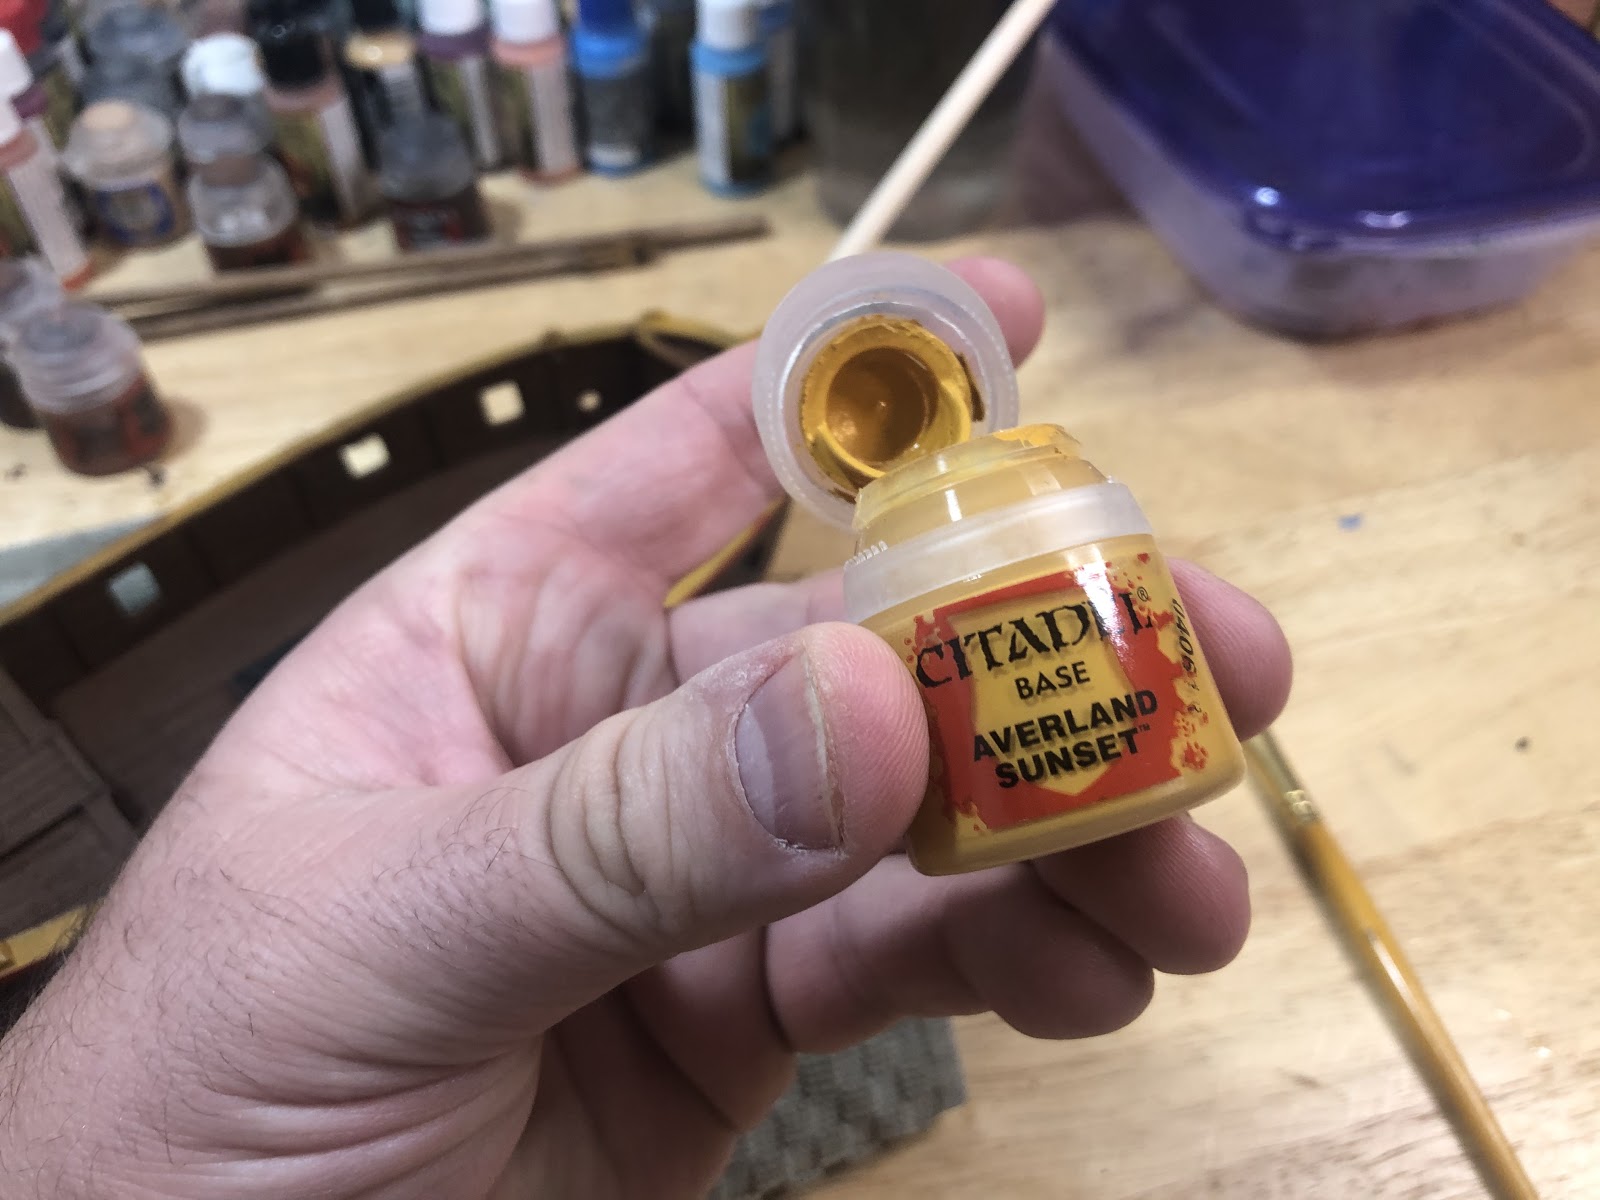
Use a dark yellow, like Averland Sunset, to dry brush the deck.
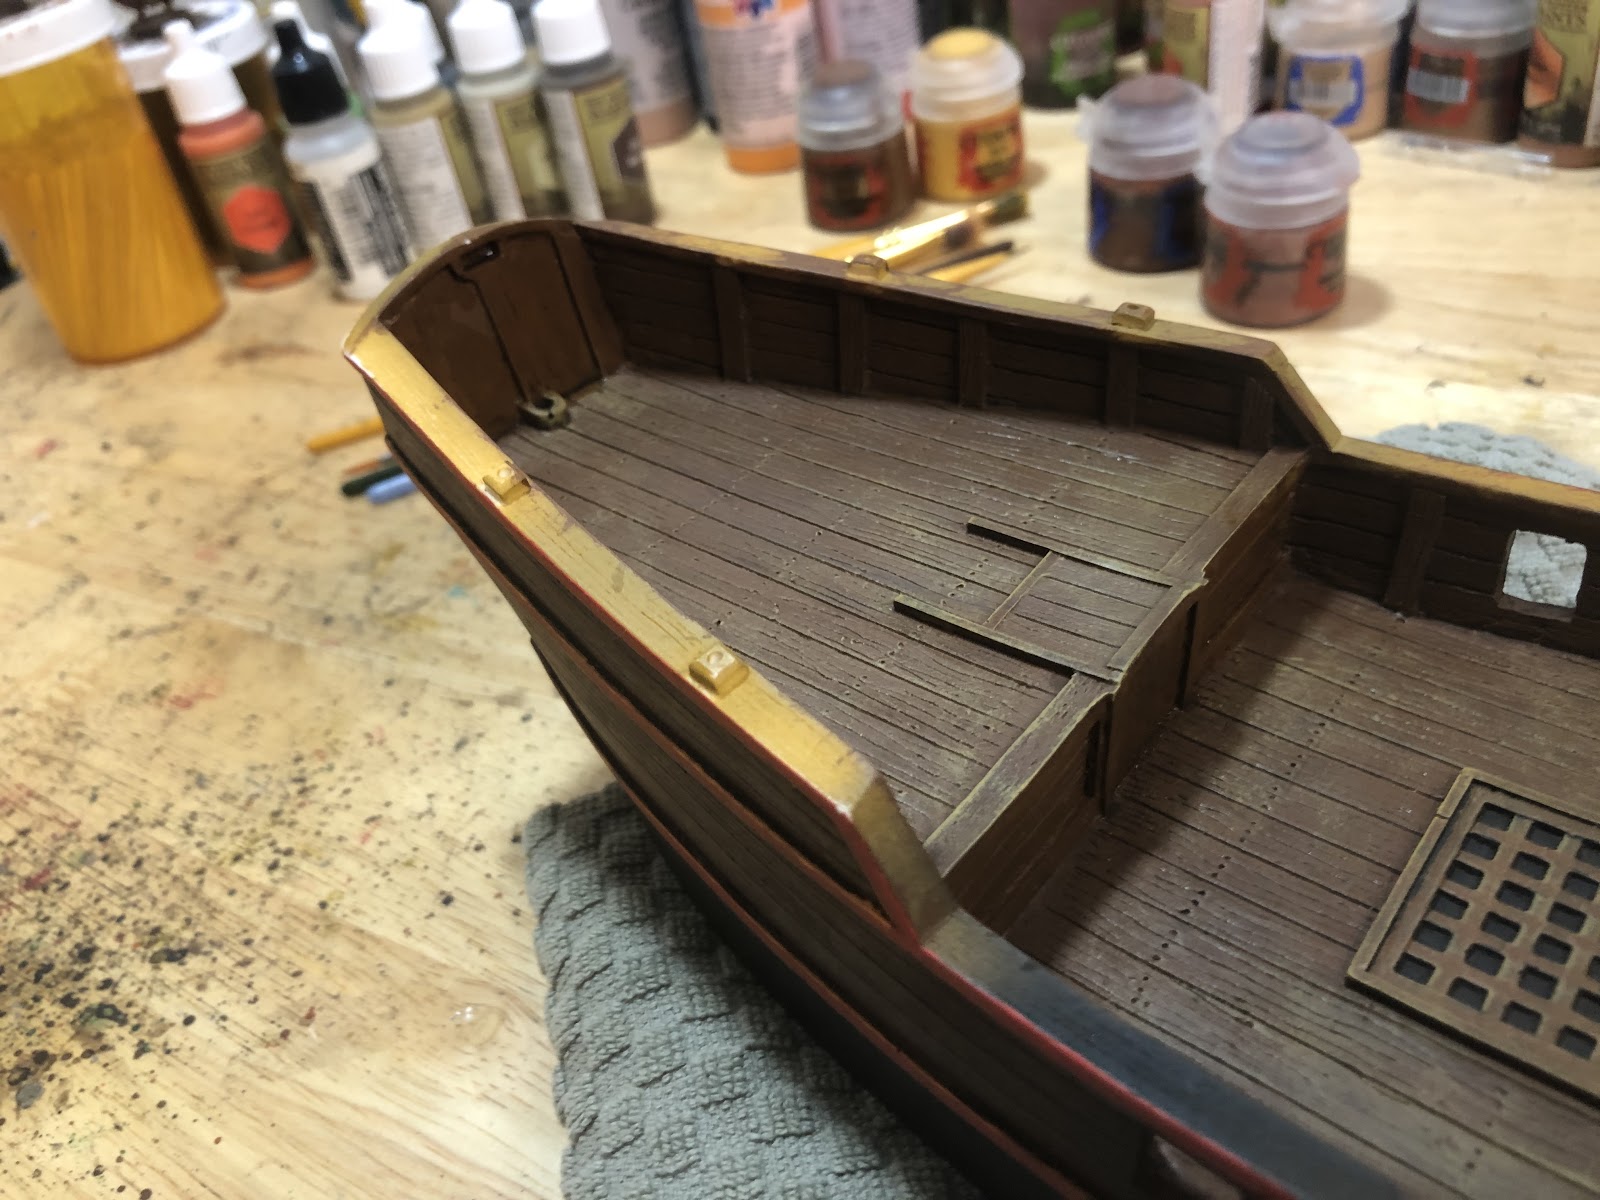
Start with the poop deck. Experiment with as little as possible on your brush before doing the entire deck. If you are happy with it, add extra wear around the hatch of the poop deck and the wall to simulate edge highlighting.

Move to the main deck. Add extra wear next to where the cannons are going to sit, and the mast post.
The hatch grate will be a little tricky. The best way to approach it is to start your brush next to it, and quickly sweep by it.
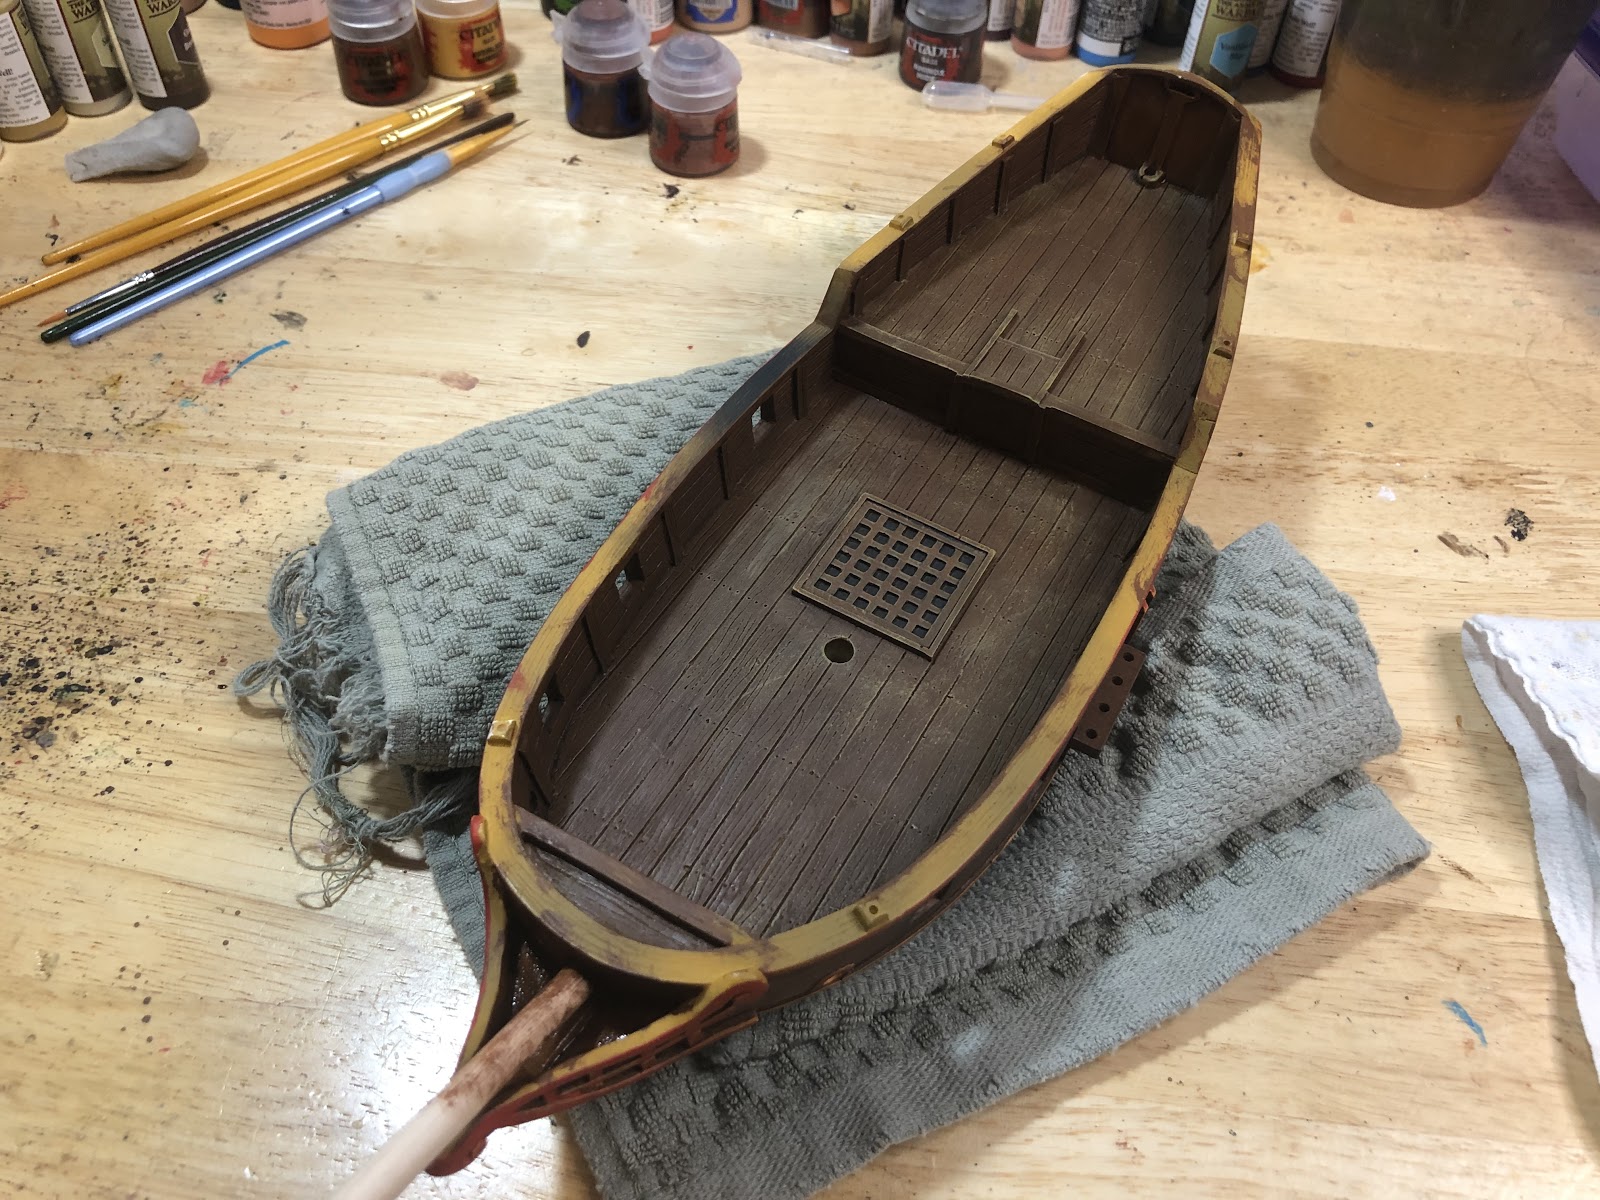
Keep dry brushing until you have painted the entire deck. Remember to dry brush the area right behind the bowsprit as well.
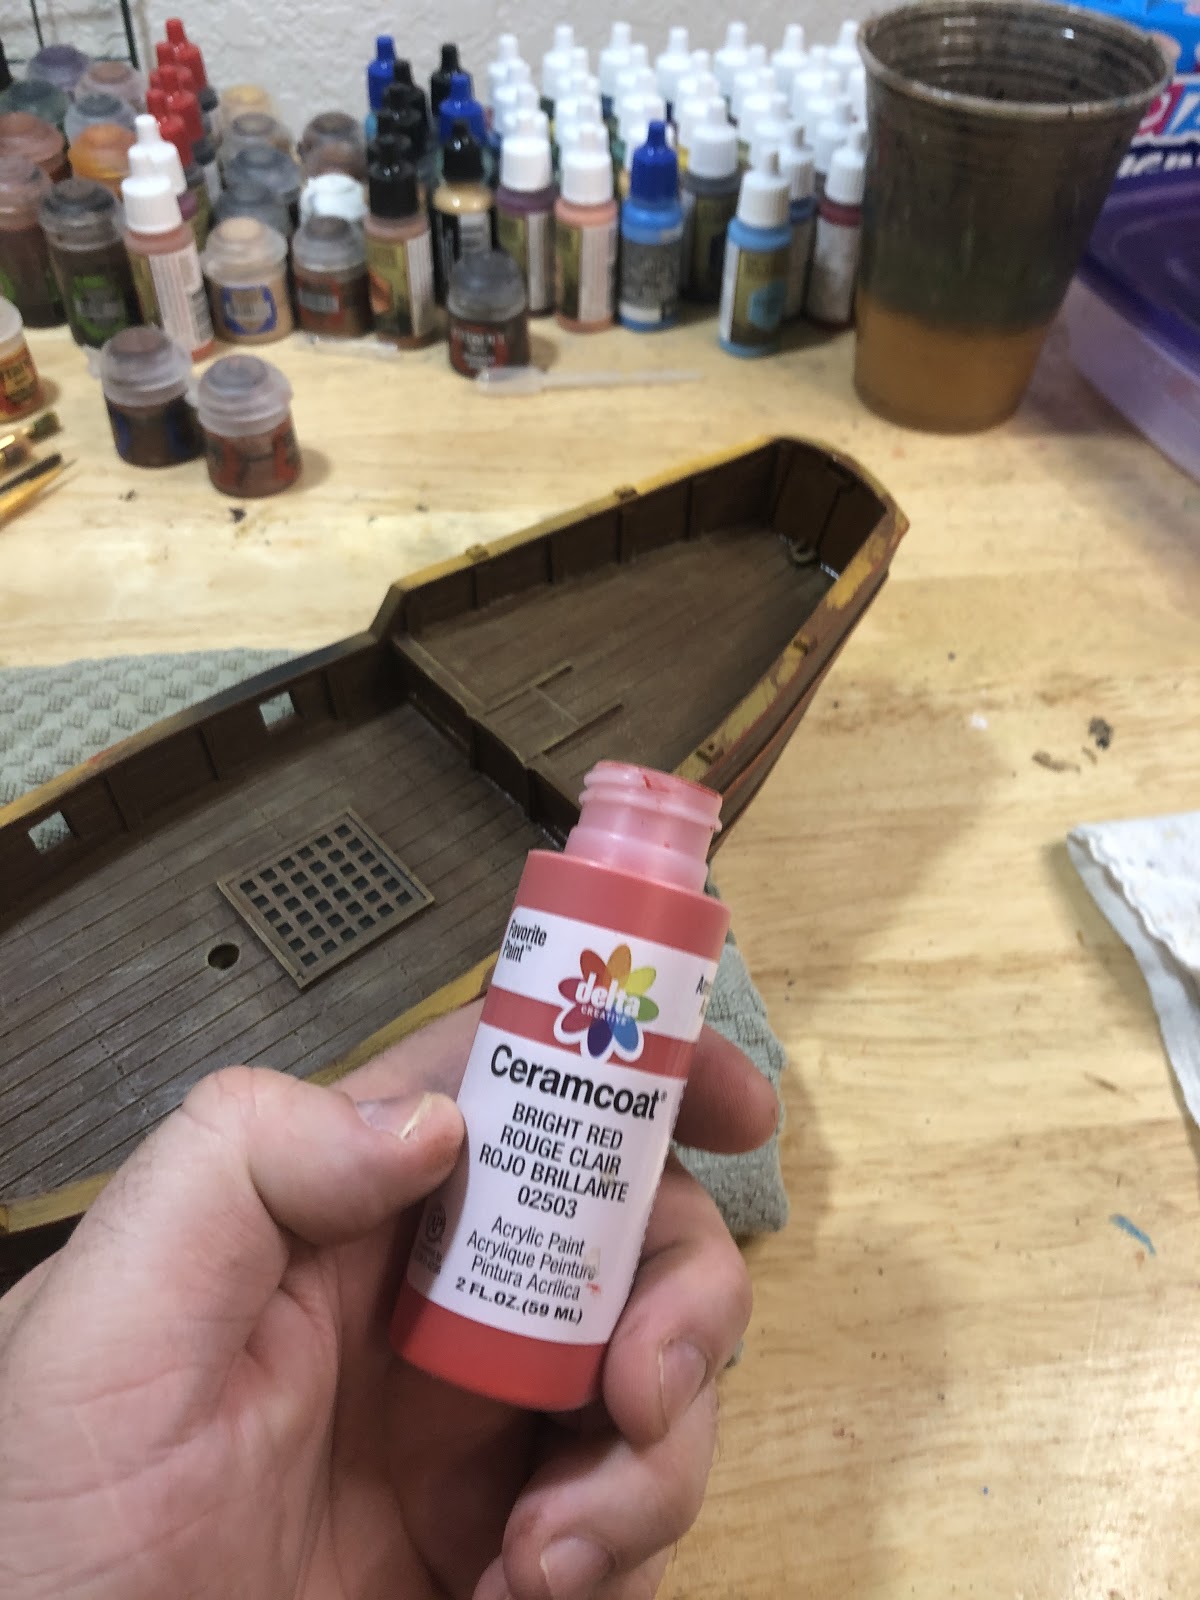
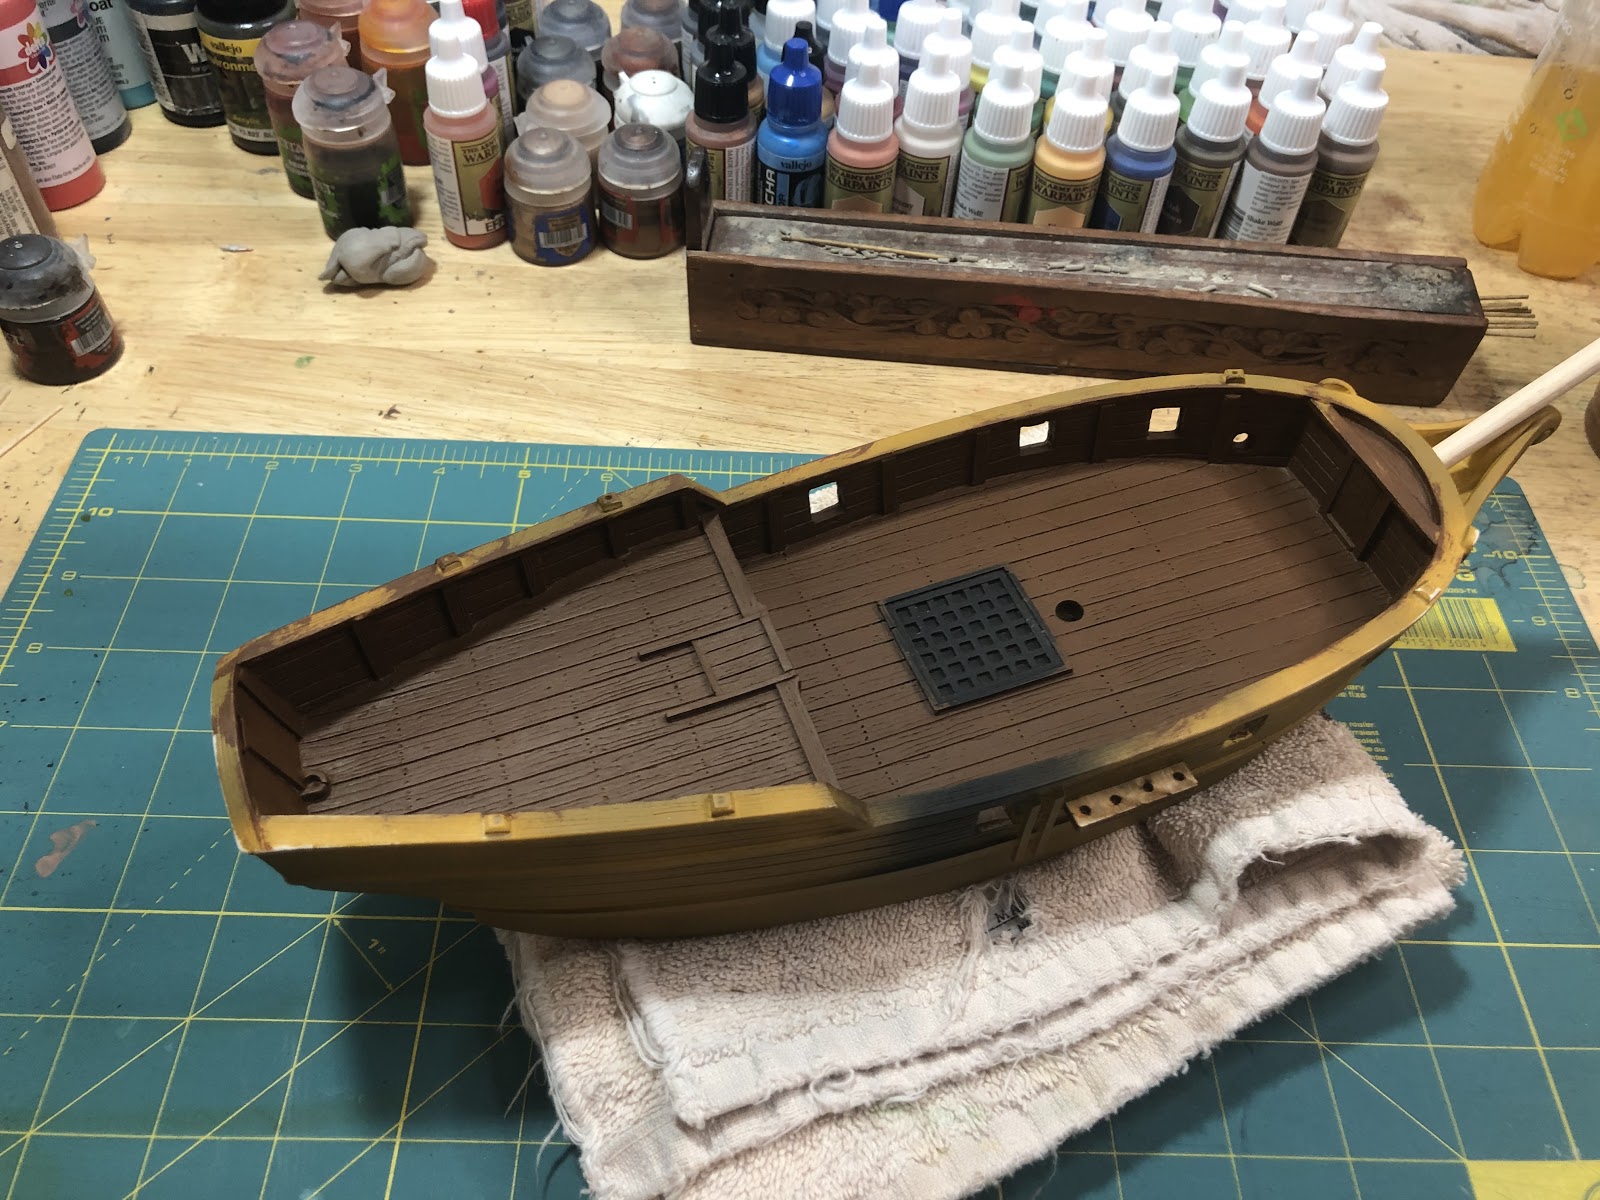
Get out the Bright Red paint for one of the last times.

Start painting the railing.

Blend this coat of red with the work you did on the beakhead and gunwales earlier.
With a little patience, and a few coats of paint, finish the entire ship’s railing.
While the railing is drying, add a wash to the bowsprit and the inside of the beakhead.
Turn the ship onto its side to paint the inside railing of the gunwales.

Slowly and carefully paint the railing, making sure that the paint watches the work you already did.
Use extra coats on areas that were darkened by the wash from earlier.

Once you’re done, flip the ship over and start on the other side.

This is a great picture to show the detail in the deck that the dry brush brought out in the model.

Take your time finishing up with the red paint.
Right the ship and dry brush the bowsprit. Try making it match the color of the mast.
Once you’re done with the bowsprit, it is time to add the edge highlight to the railing.
Start on the inside, and follow the movement of your wrist to carefully add the highlight. I usually paint with the side of the brush when adding highlights to edges like this.

When you get to the raise between the main deck and poop deck, highlight the top of the rail as well.
Add highlights to the entire swivel gun post.

Once you’re done on one side, move to the next.
With the last of the edge highlighting done, the ship is complete!
Step 11: Pride
She looks great.
Let it dry for at least 2 hours.
Use a sealer to protect your work. I use Vallejo Matte Spray Varnish. Do not use the varnish when it is humid, like after or during rain or snow. This can trap tiny water particles under the varnish and ruin your work.
Let the varnish dry for a day.
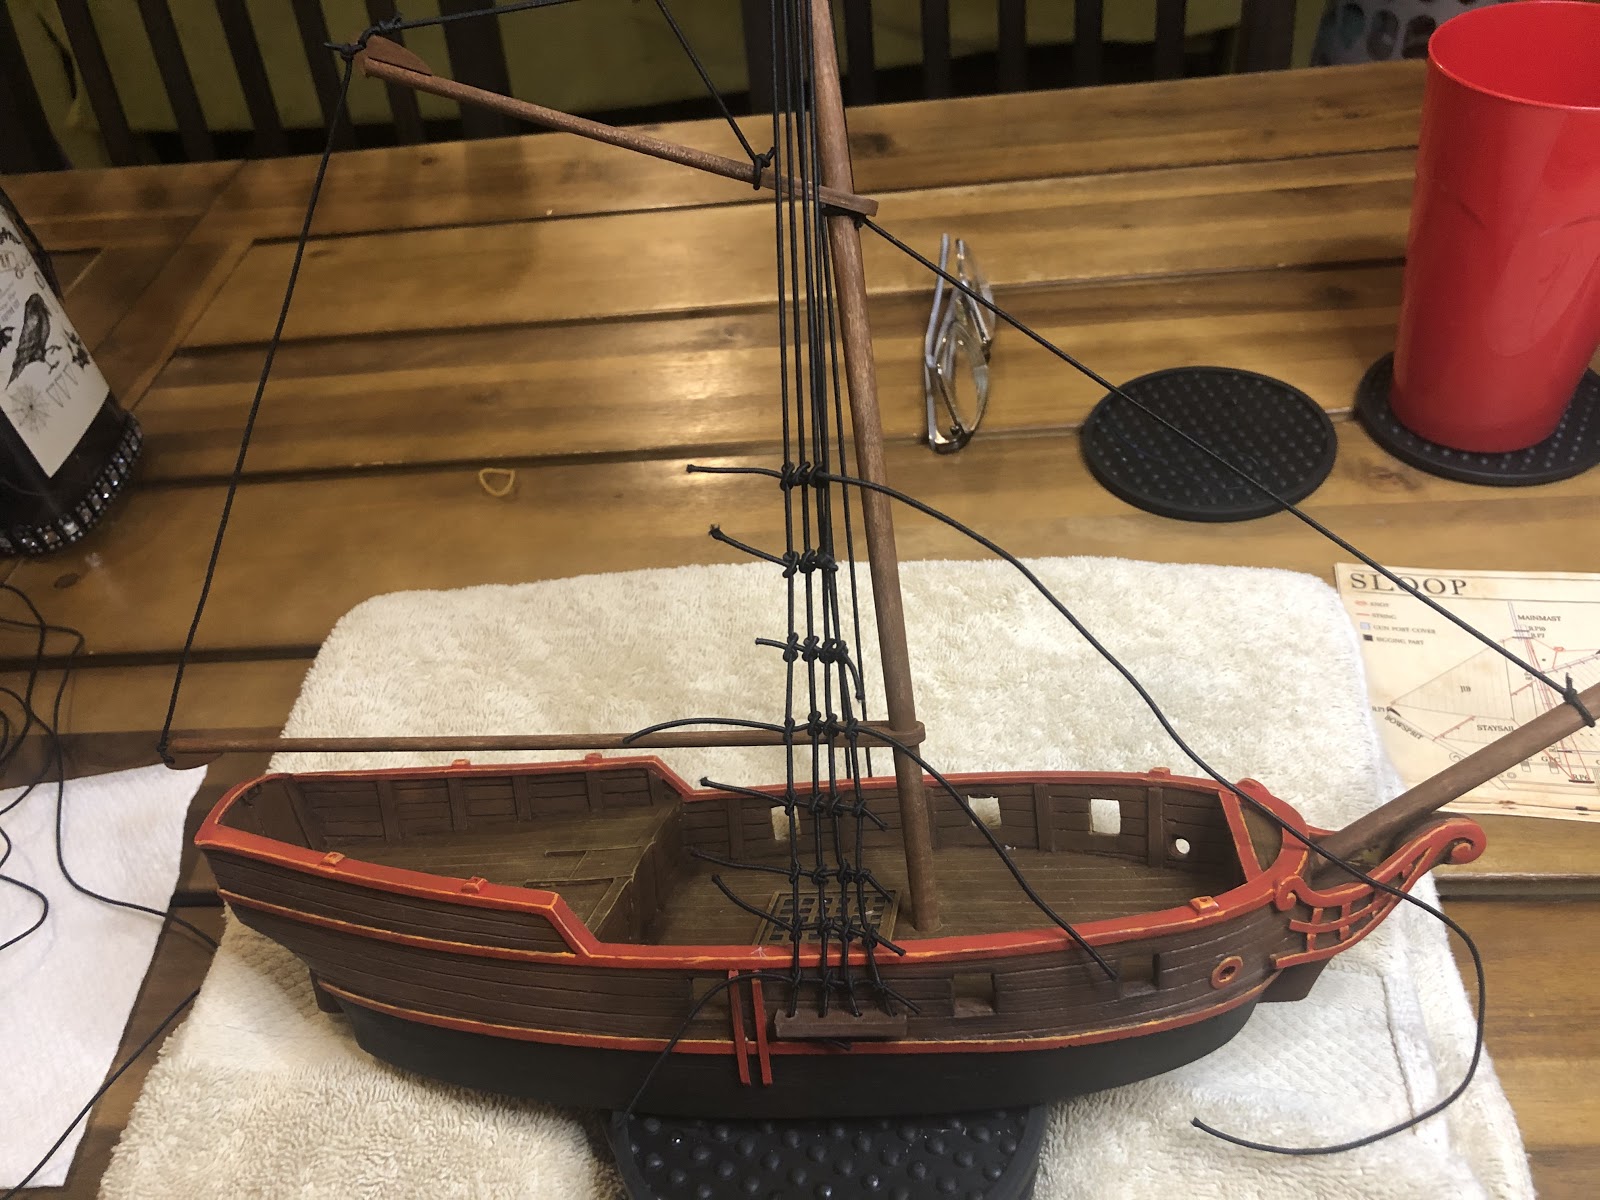
Step 12: Rigging
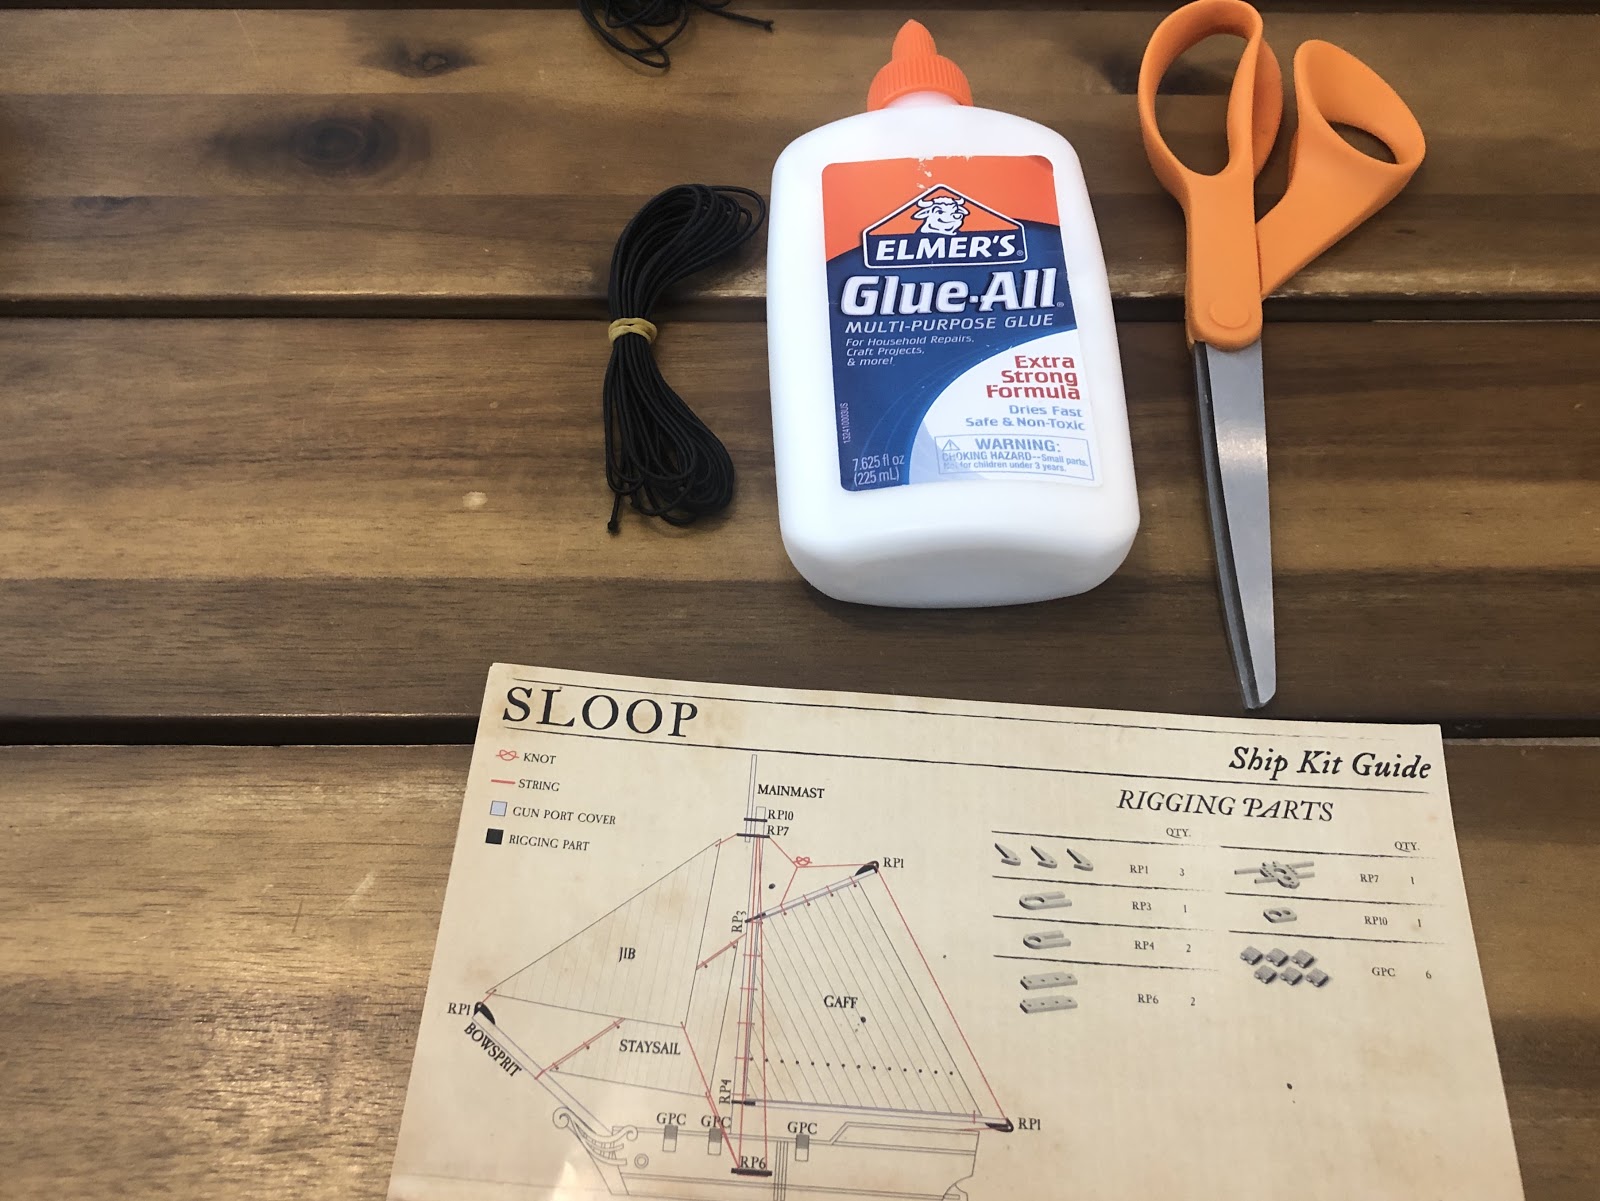
Tools Needed:
- Included Elastic Rigging
- Rigging instructions
- Elmer’s Glue
- Scissors
- Tweezers
- Towel
- Something Soft to Prop Up One Side of the Ship
- Optional Tools:
- Floss Threader
- Large Needle

I don’t usually use elastic rigging for my ships, so I have extra for this project. If you ever run out of elastic rigging, it is usually available at craft stores. Check the jewelry section.
When doing this step and the next, don’t throw away any elastic that’s 1-2 inches long. This can be used to tie the sails to the mast, lines, and gaff.

You don’t have to worry about paint getting on your towel if you are using the towel method. The ship is going to be moved constantly when adding the rigging and the sails.

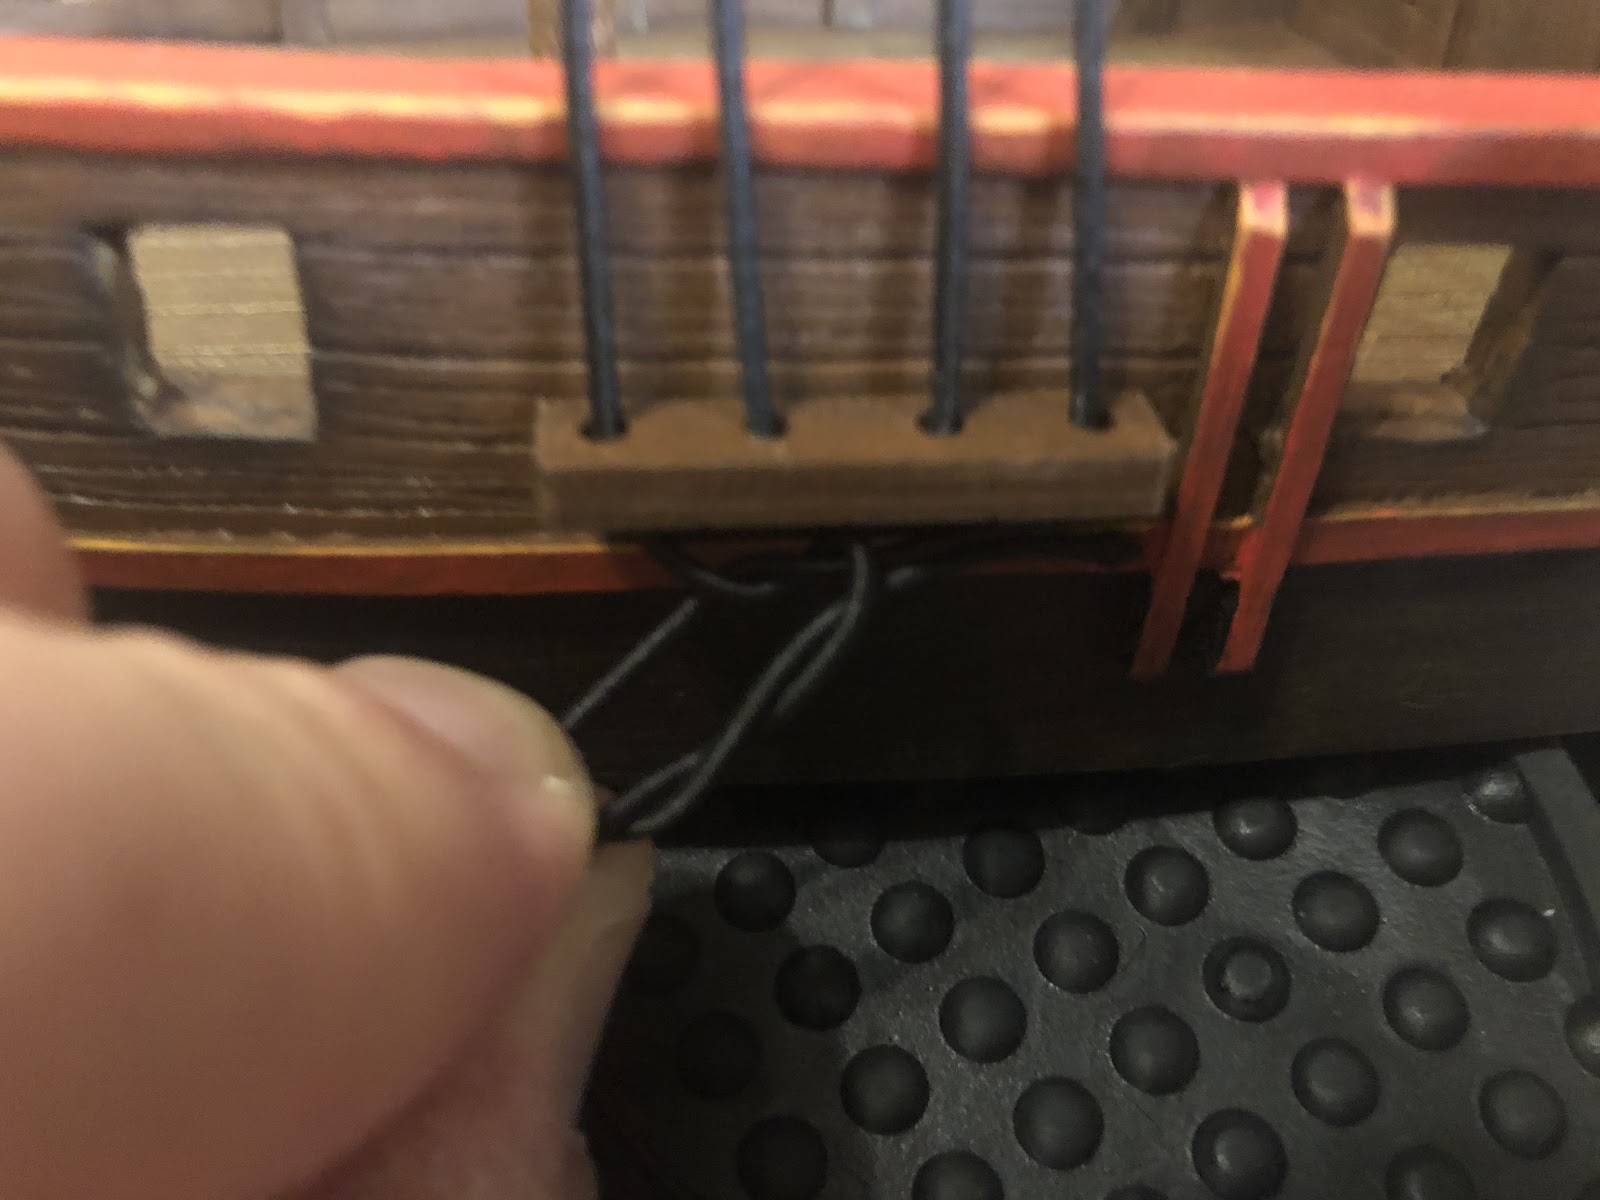
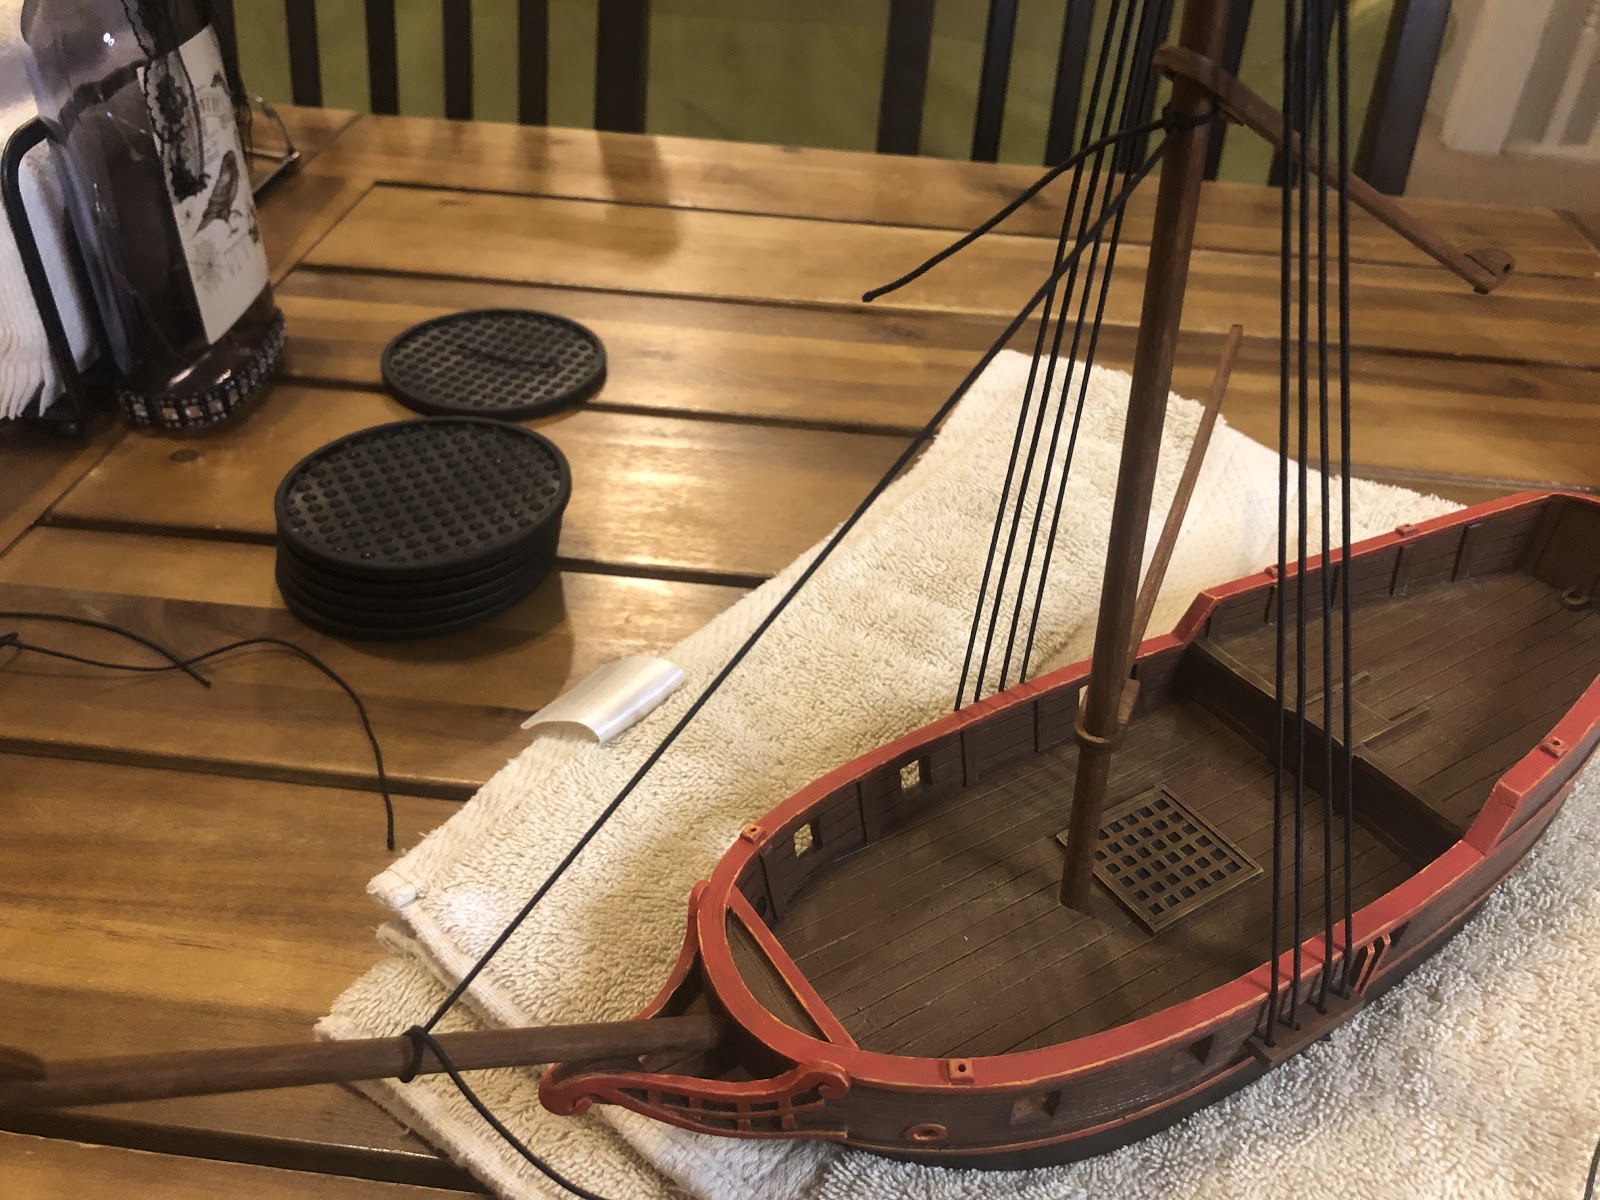
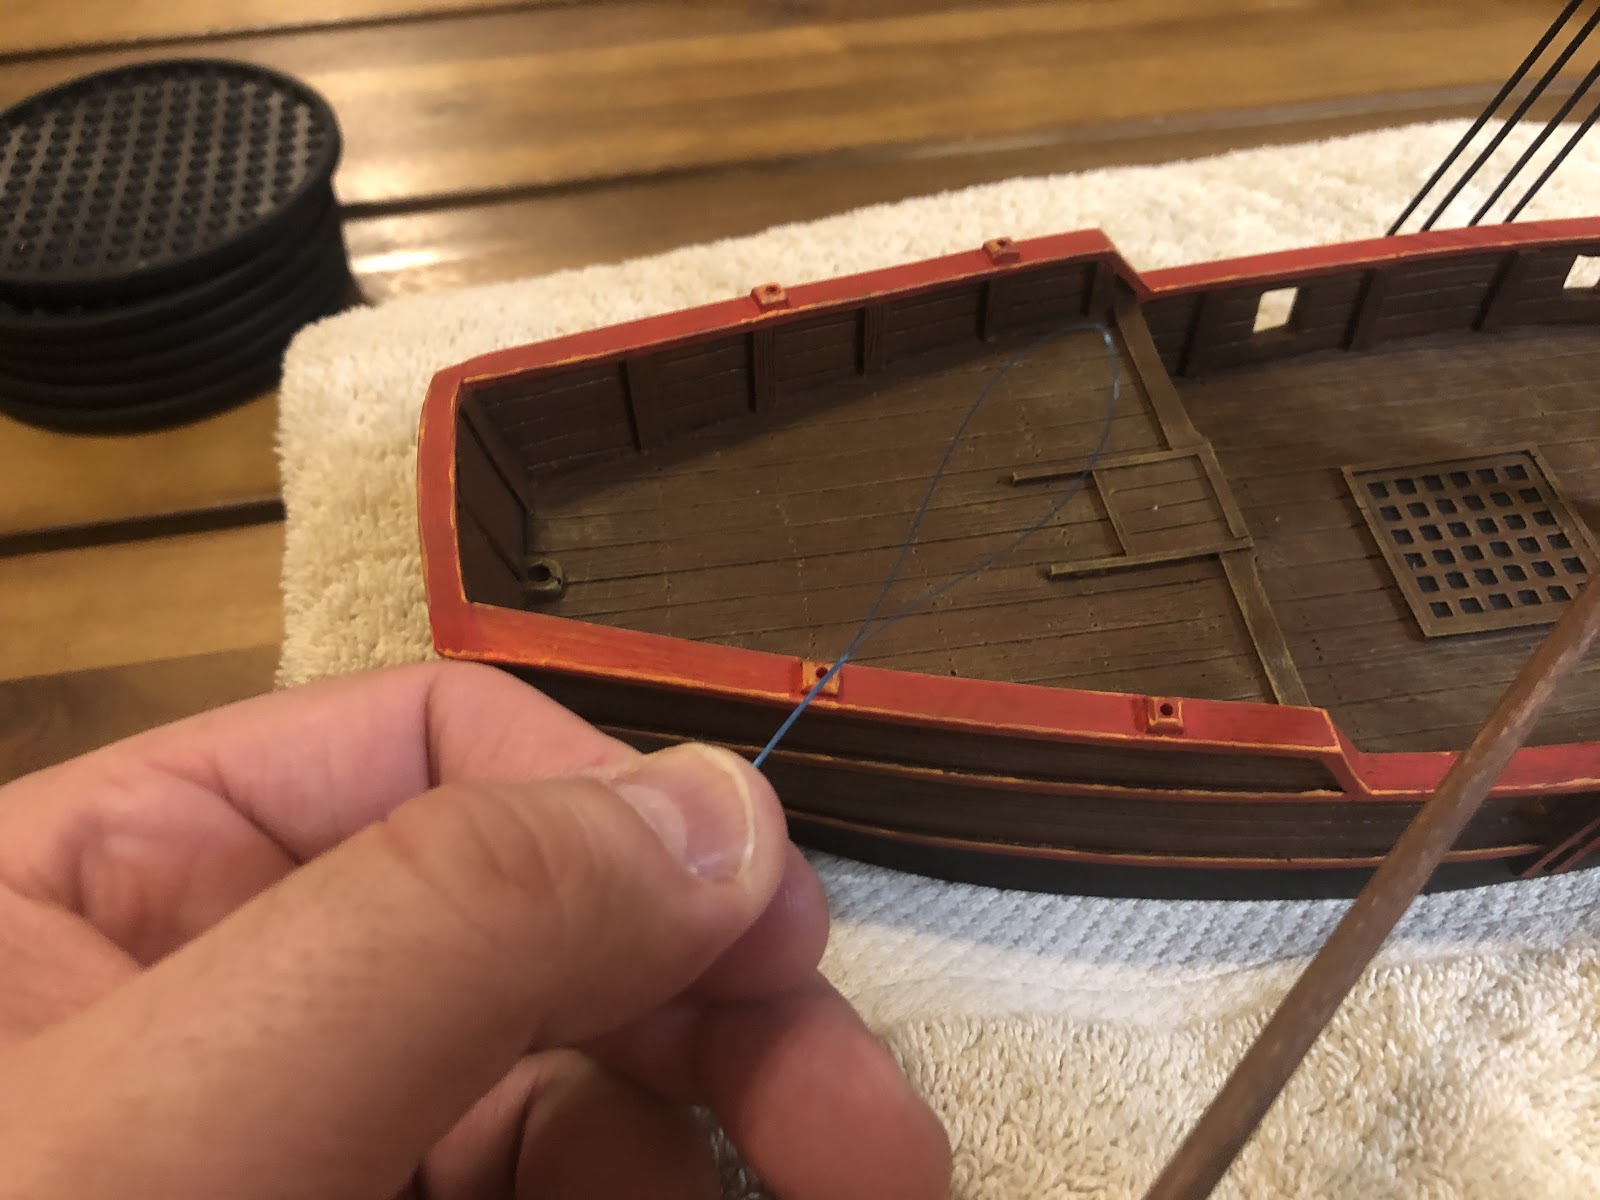
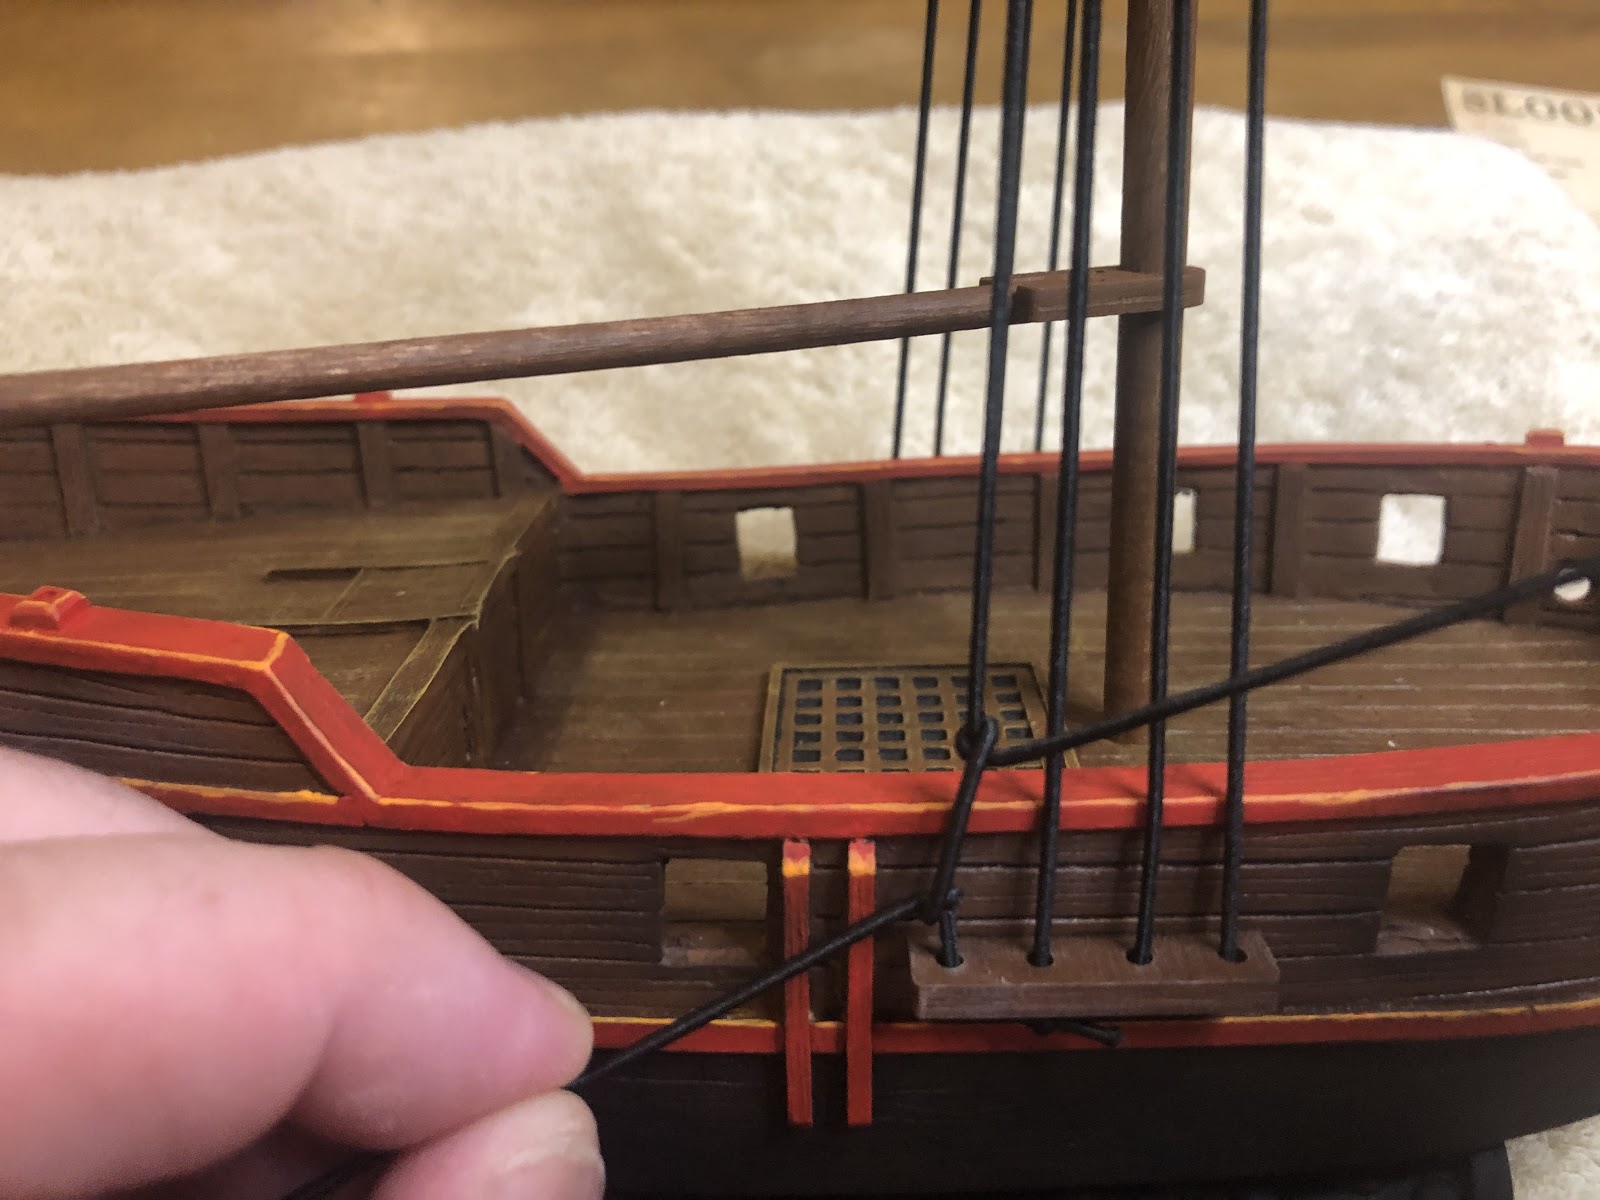
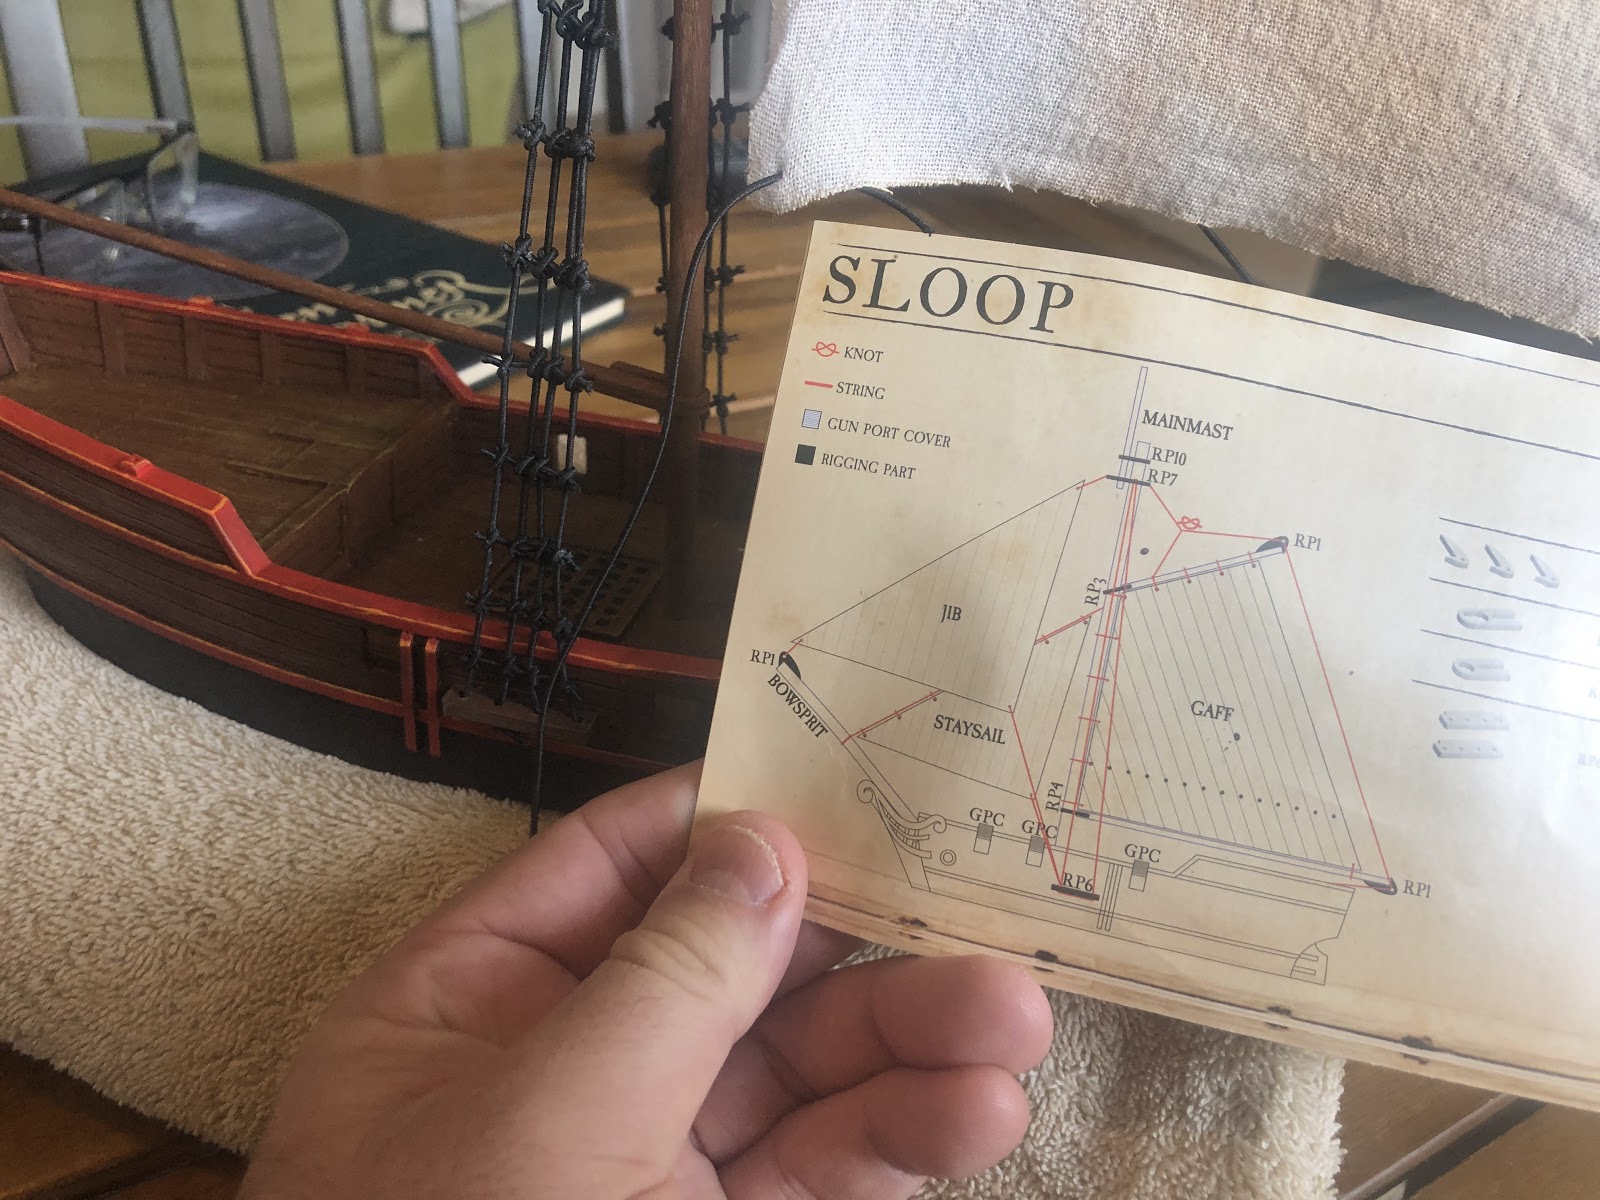
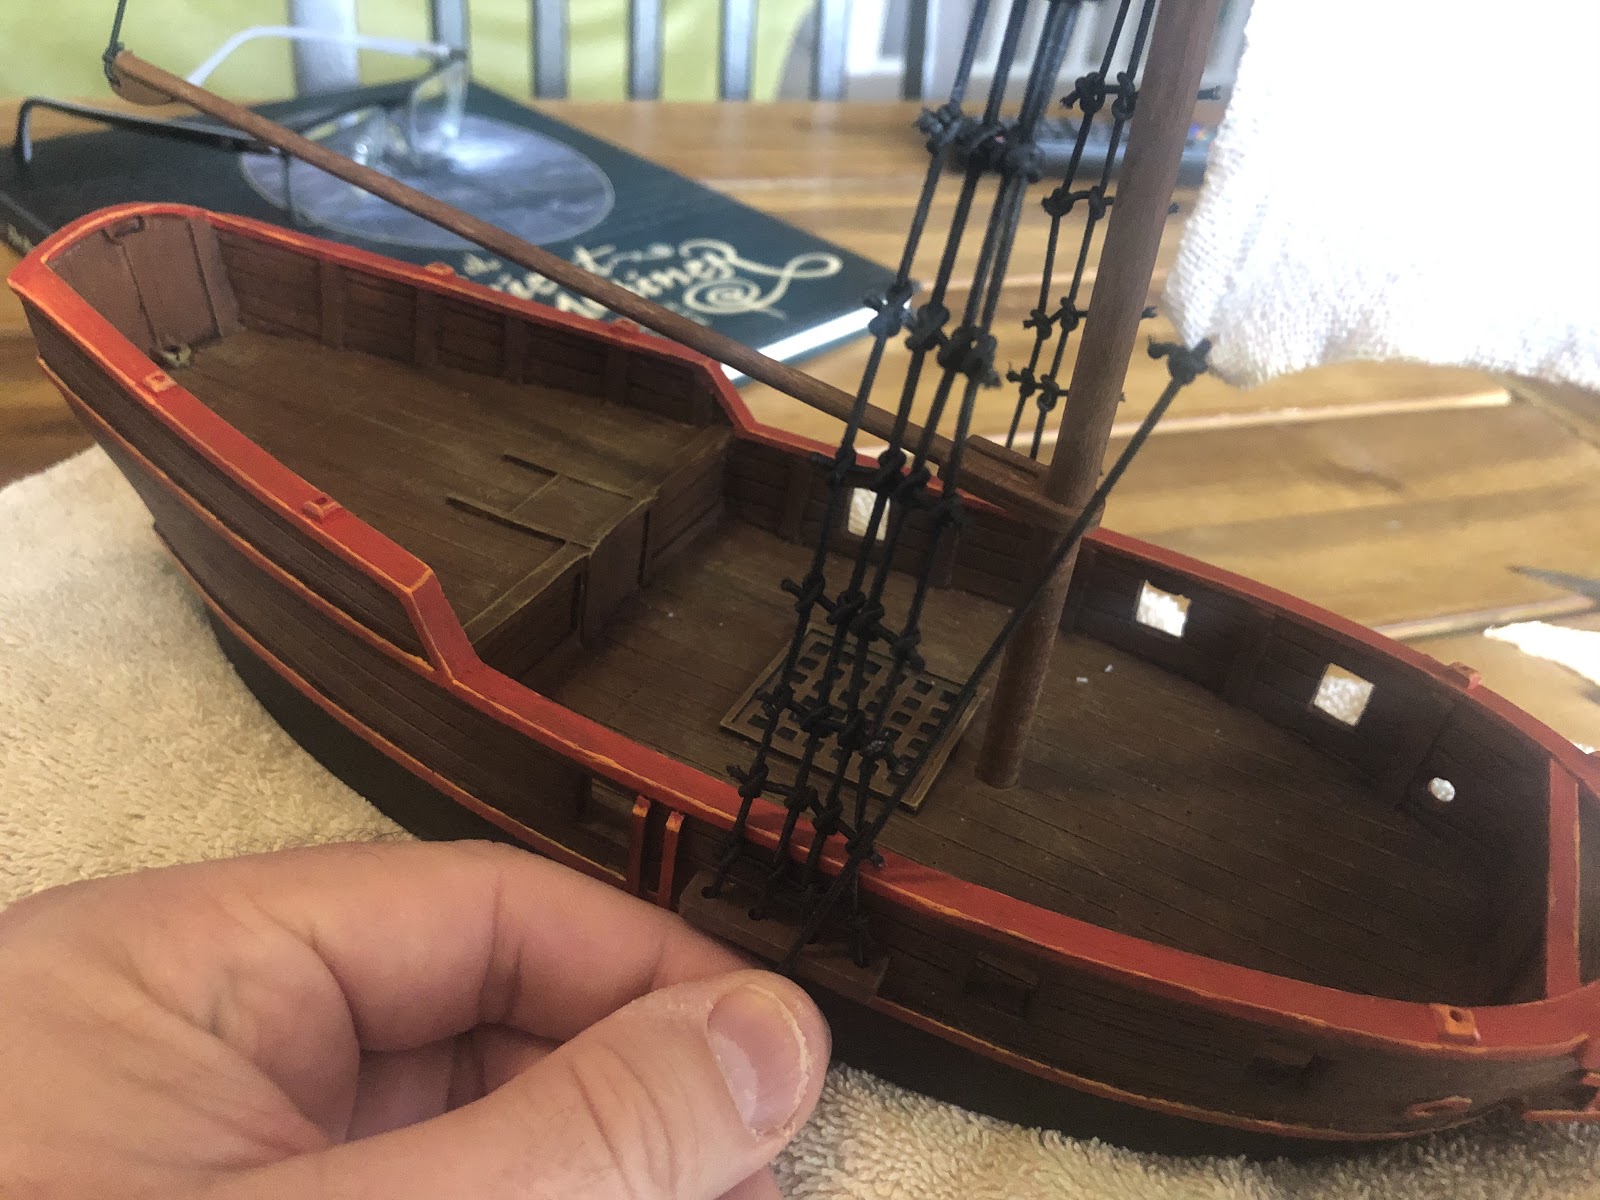
Take the rubber and off of the elastic. The first rigging you will add are the shrouds. Shrouds are the rigging that connects the chain guards with the top of the mast. The shroud’s purpose is to hold the mast in place. It’s good to start with the shrouds because friction is the only thing holding the mast on right now.

Prop up the starboard side with something soft. I used rubber drink coasters. Get your tweezers ready, as they make threading the chain guards easier.

Start with the leftmost hole on the chain guards and thread a good amount of elastic through it. You want to thread enough elastic through for the shrouds on this side.

Take the elastic up to the matching hole in the crosstree at the top of the mast. Once you thread it through the leftmost hole, put it through the hole next to it.
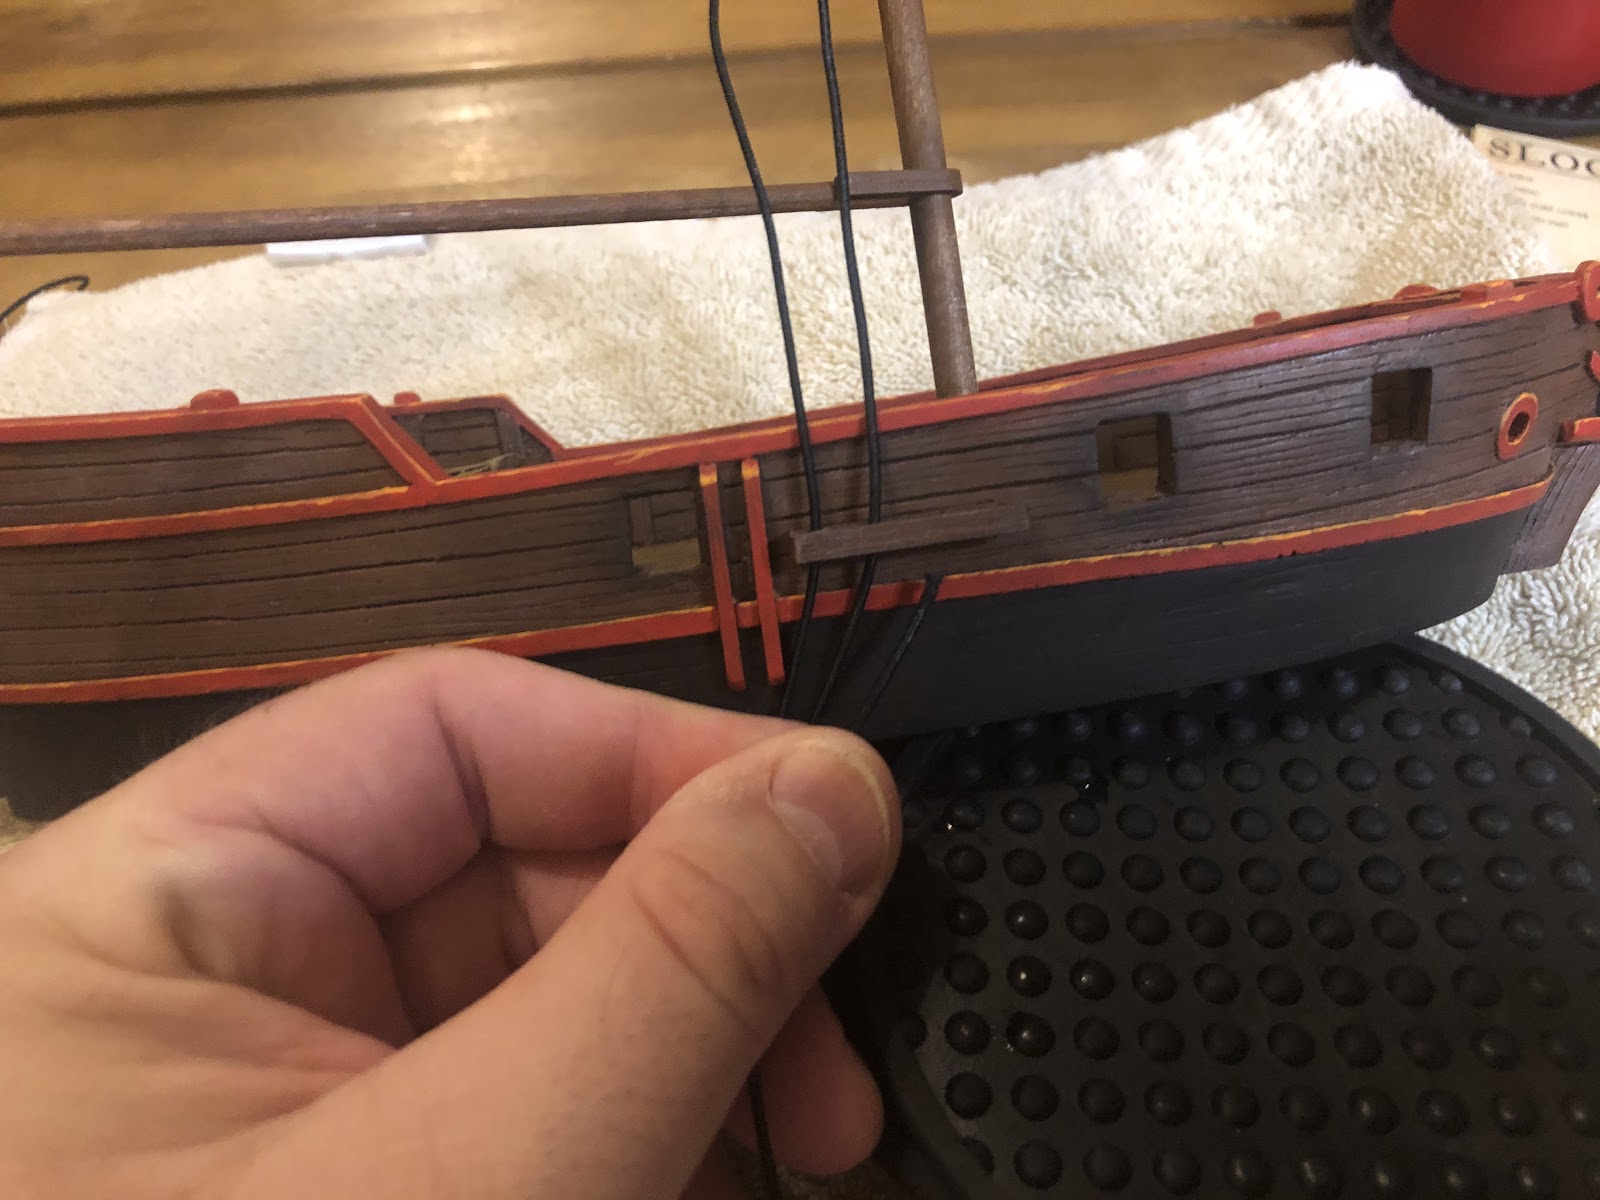
Pull the elastic through the adjacent hole in the chain guard. Don’t worry if the rigging is loose, it will be tightened later. After pulling it through the chain guard, push it up through the third hole and back up to the crosstree.

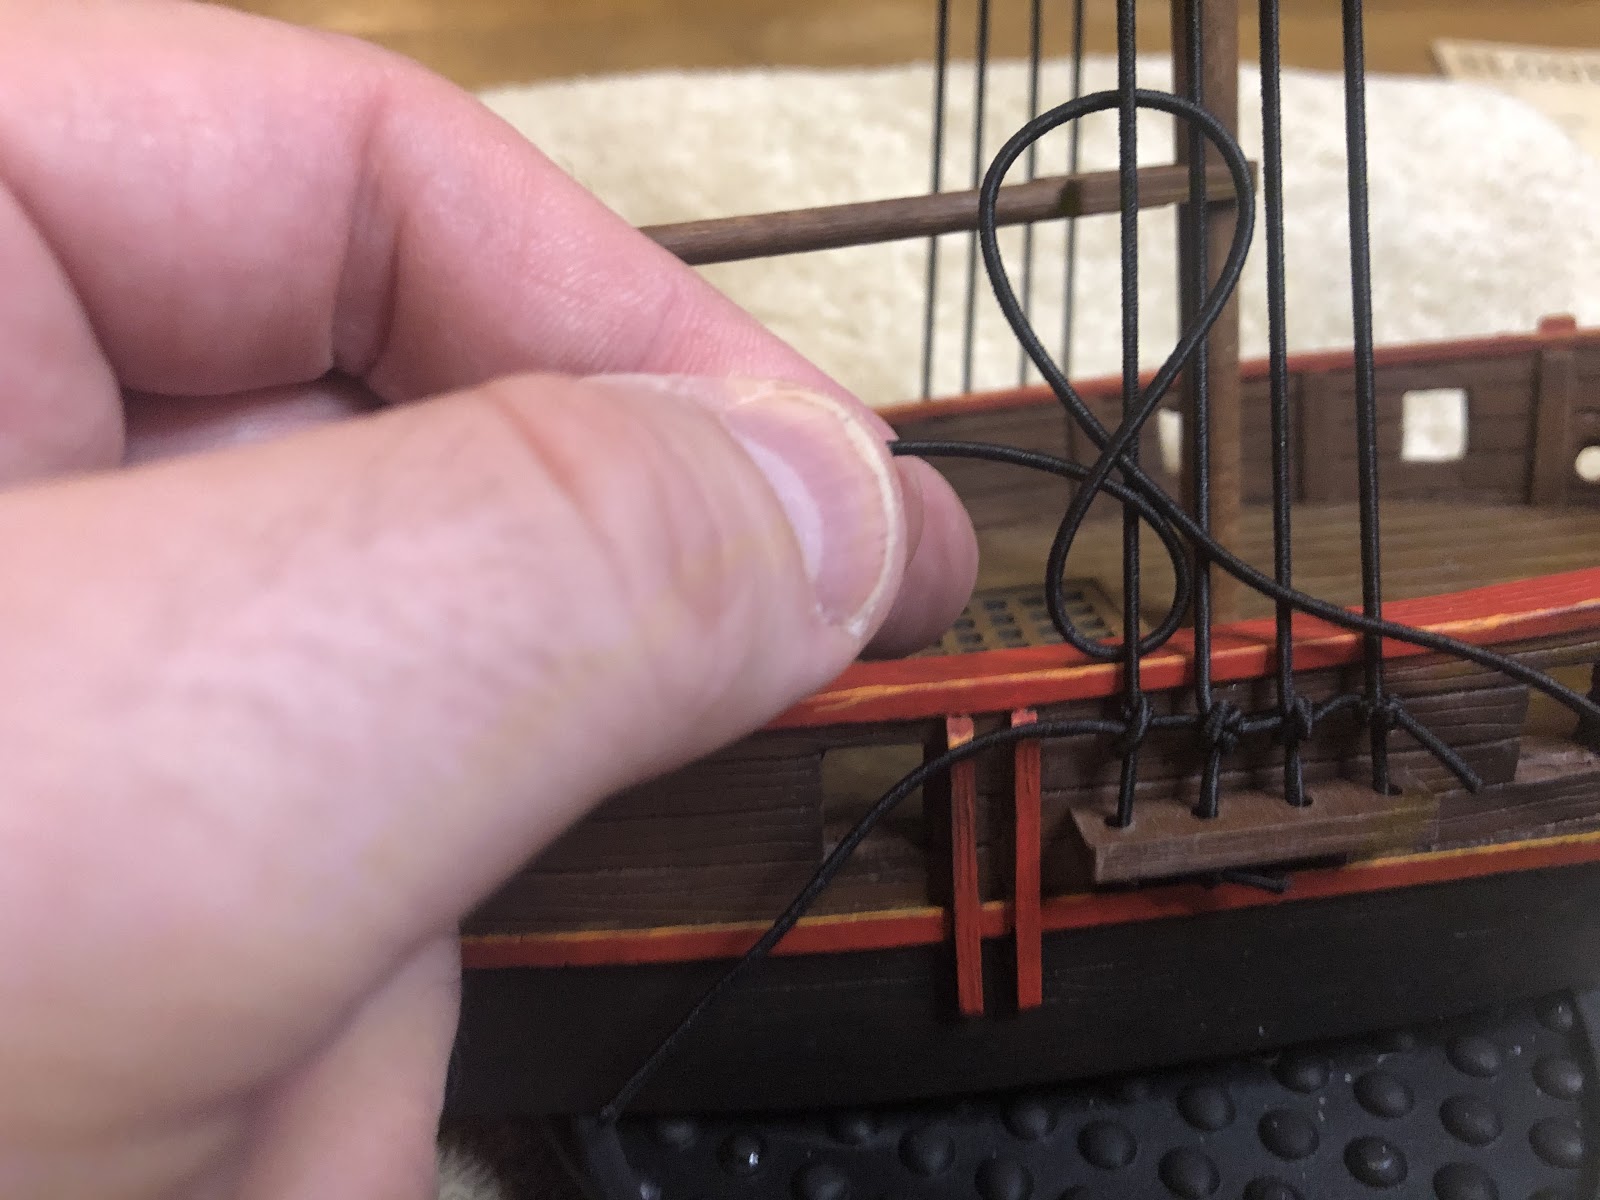
Finish threading the rest of the shroud.
Once it is all threaded, pull any slack out of the shroud.

I have a confession: I am not “good” at knots. For this shroud, I used a basic square knot. Use both hands to pull the elastic knot taut.
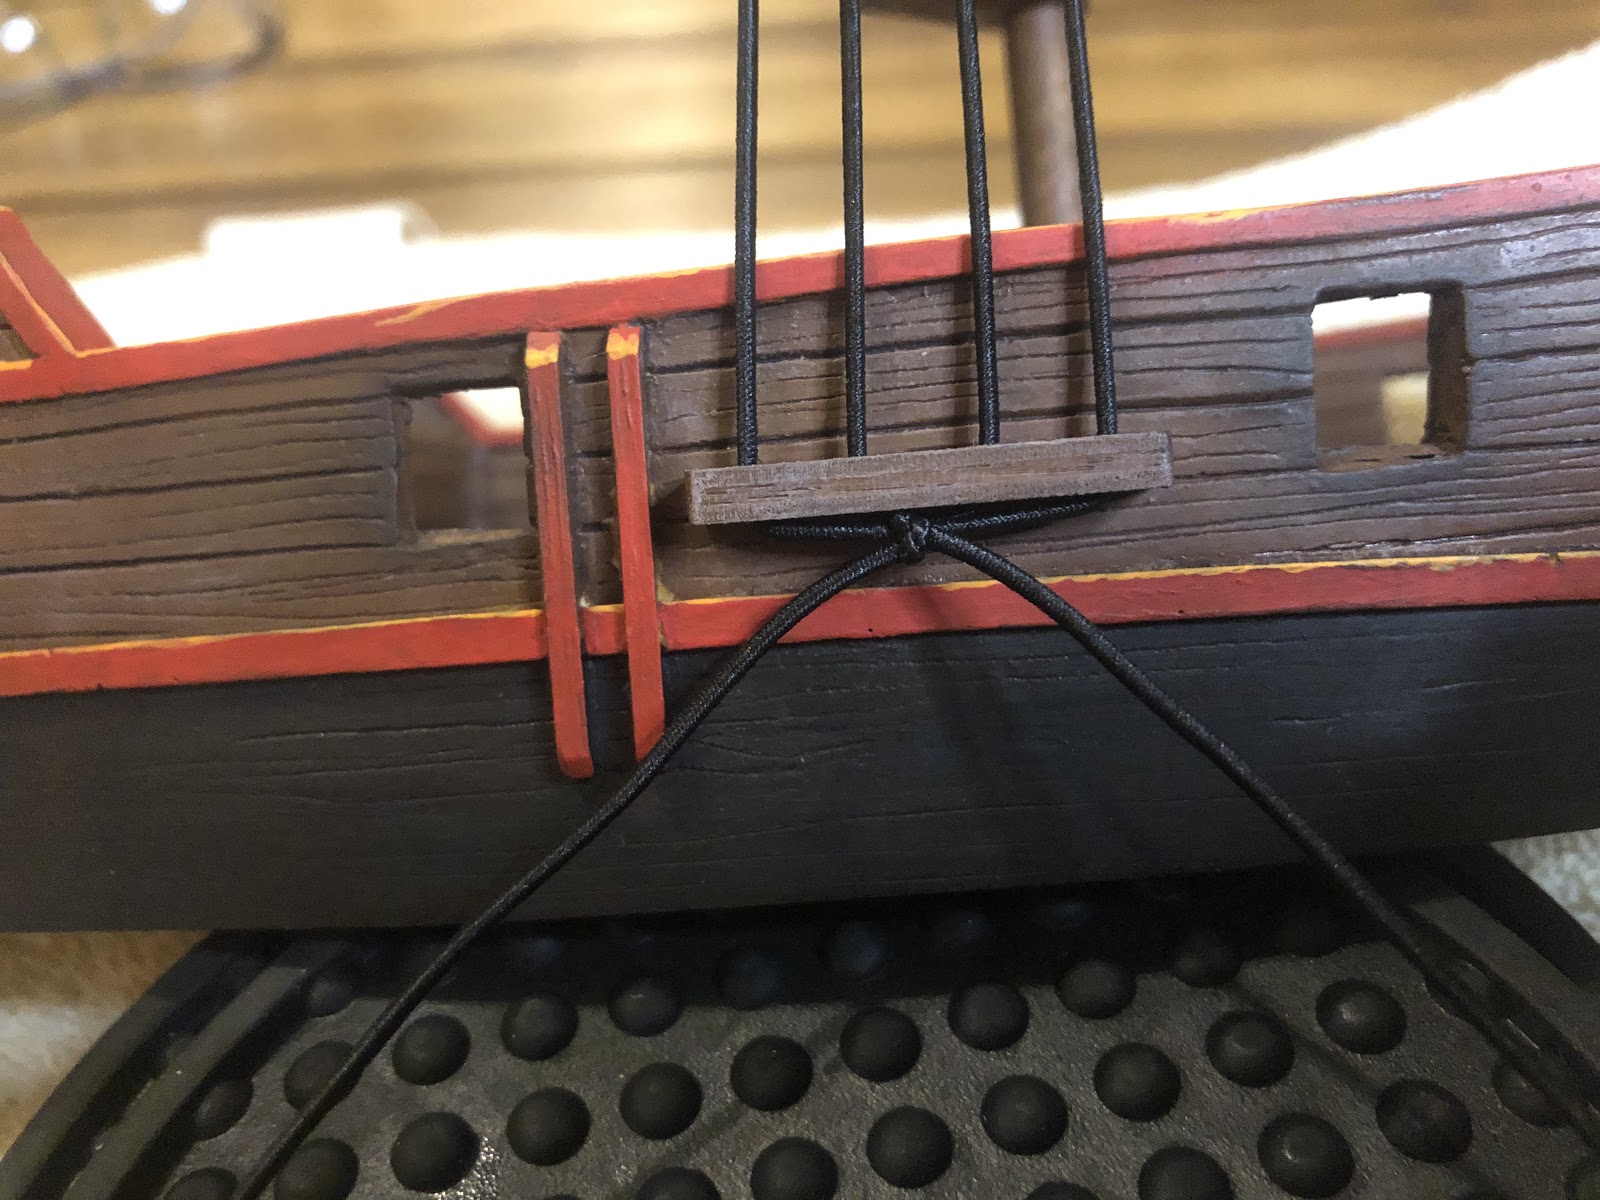
If the elastic is loose, use a push pin or the tweezers to undo the knot and try again.
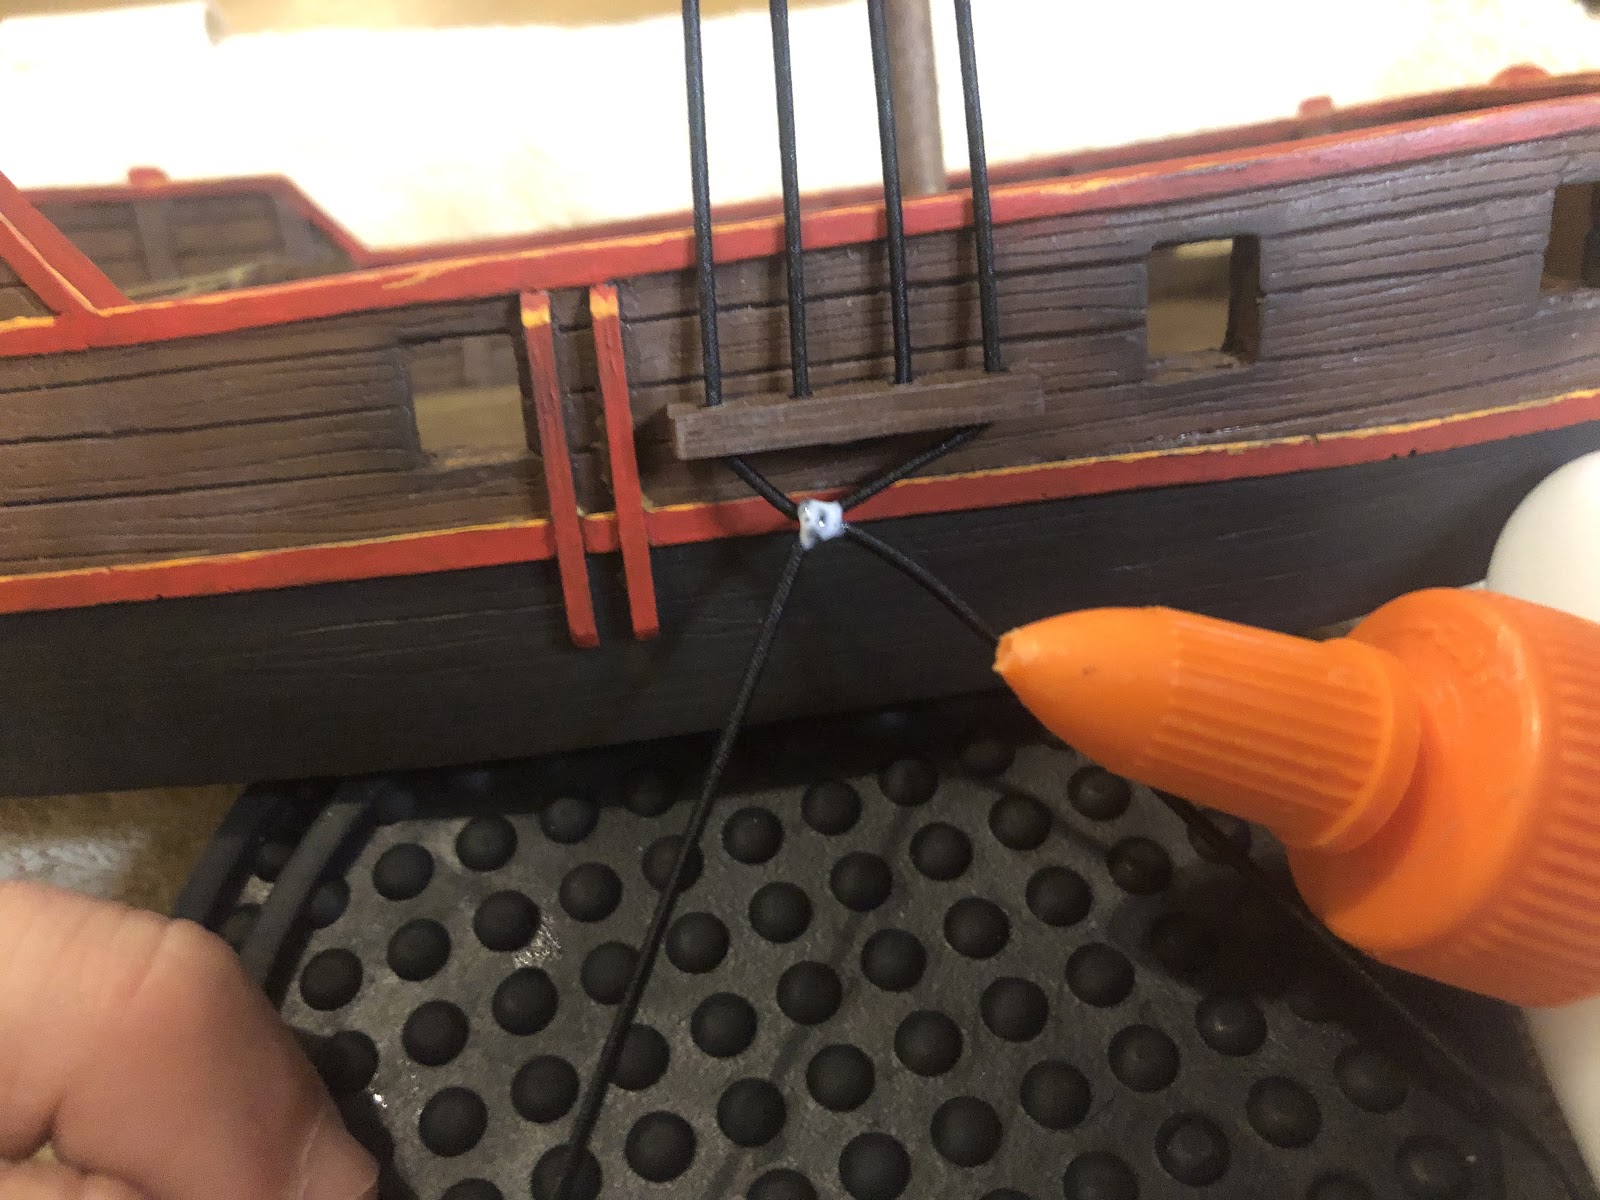
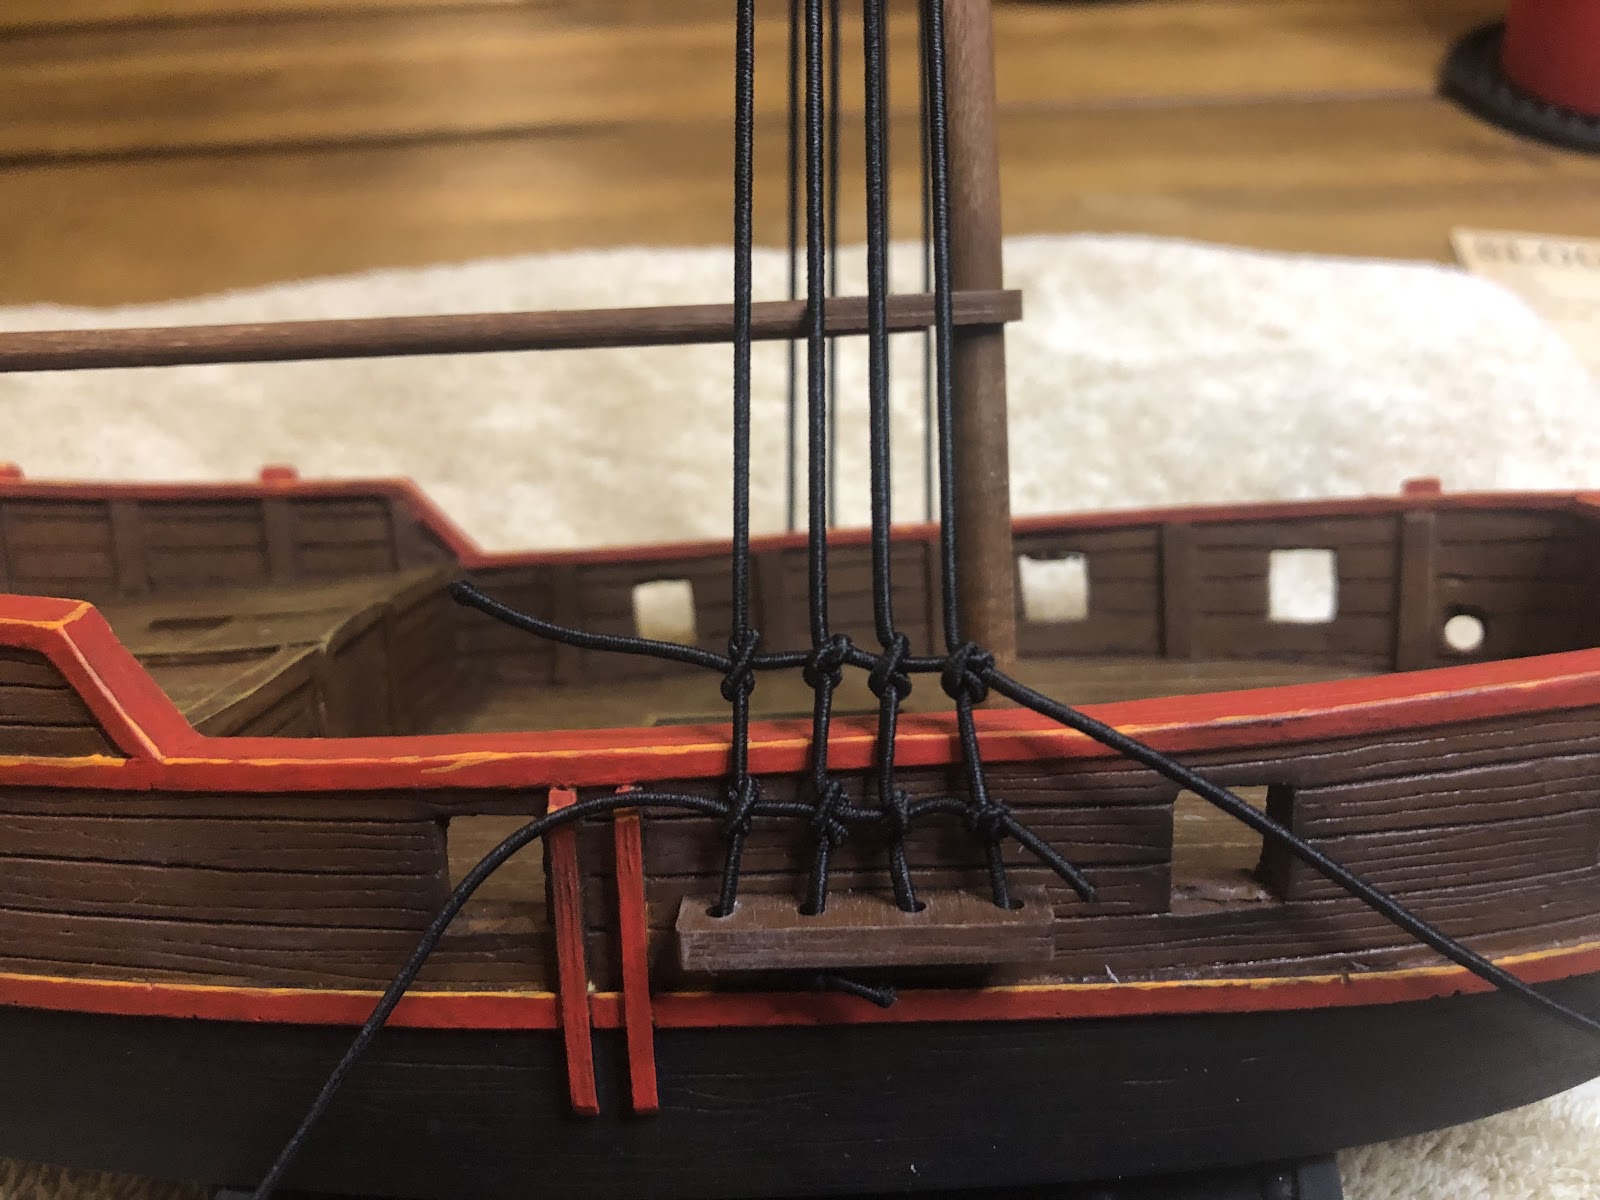
Add a small blob of glue to the knot. Few things are as frustrating as cutting around a knot, only for the knot to slip and waste a section of rigging.
Cut the elastic near the knot. This knot will be below people’s sight line, so it doesn’t have to be cut extremely close.
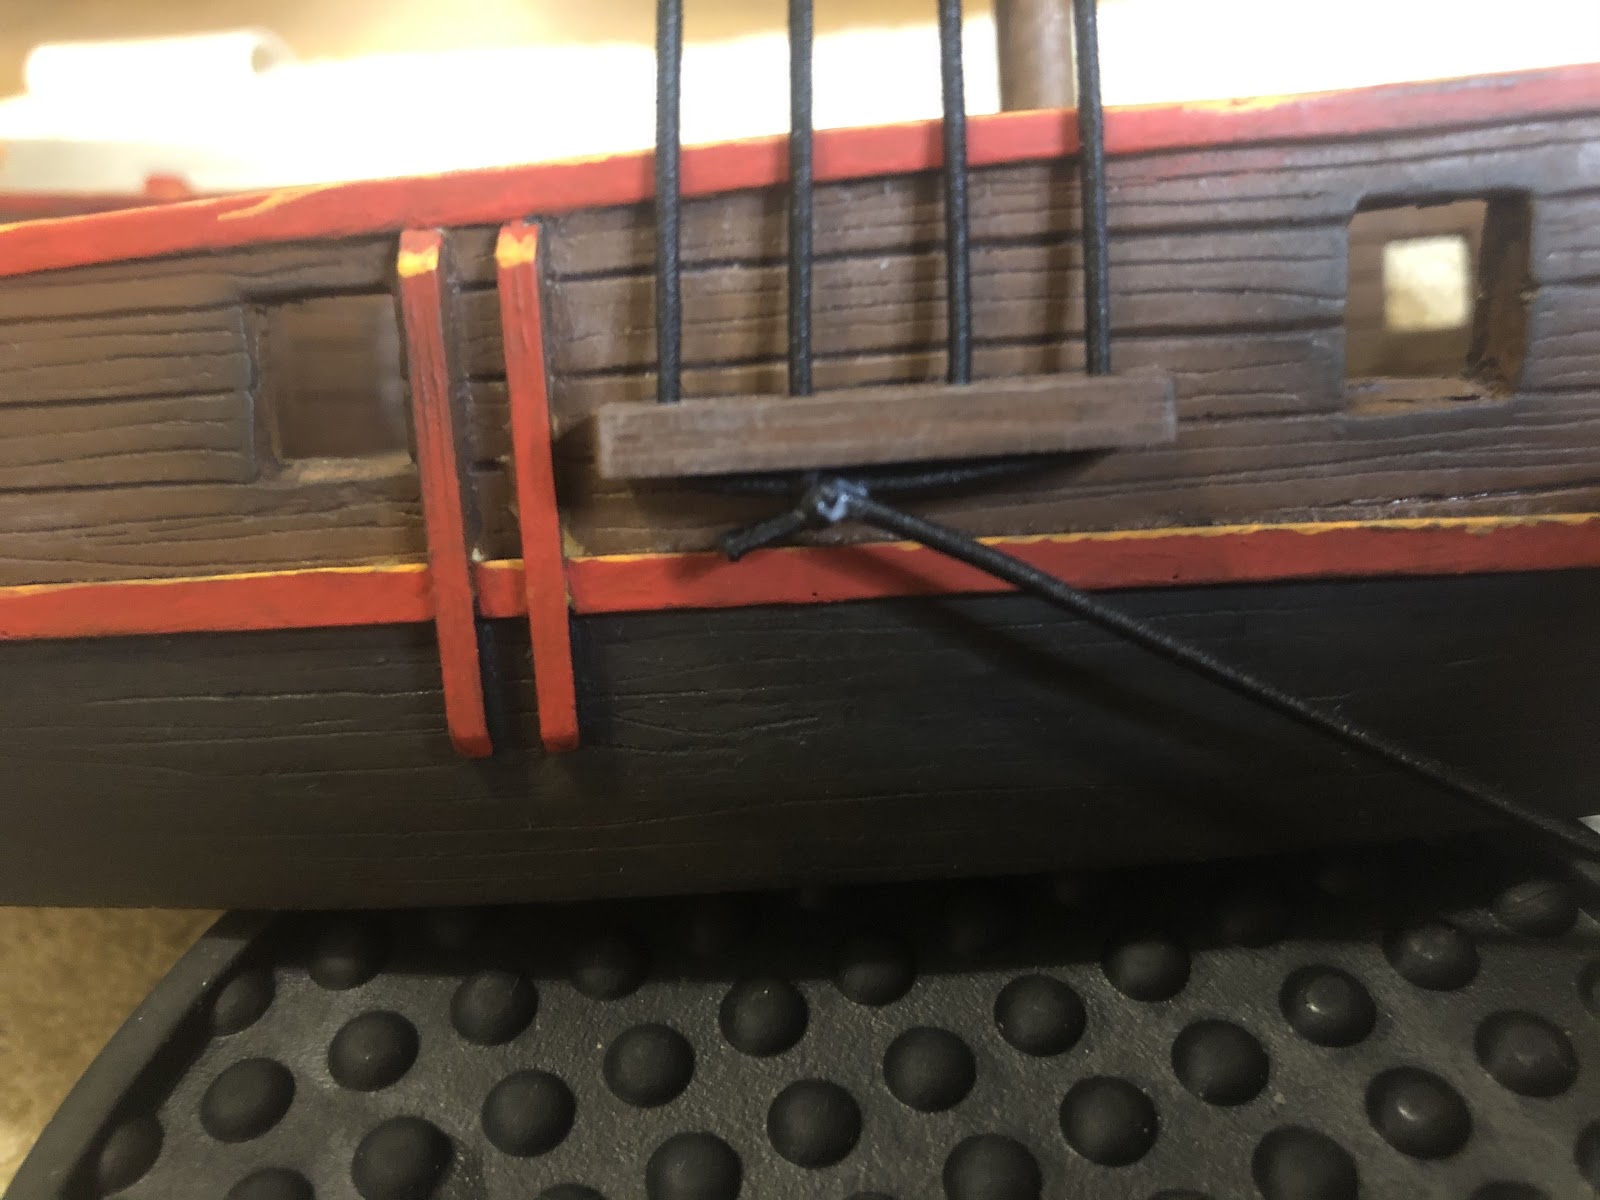
Flip the ship around and start on the larboard shroud.
Thread the aground just like you did on the other side.
When you’re done, tie a knot below the chain guard as well.
Glue the center knot, then cut the extra elastic.
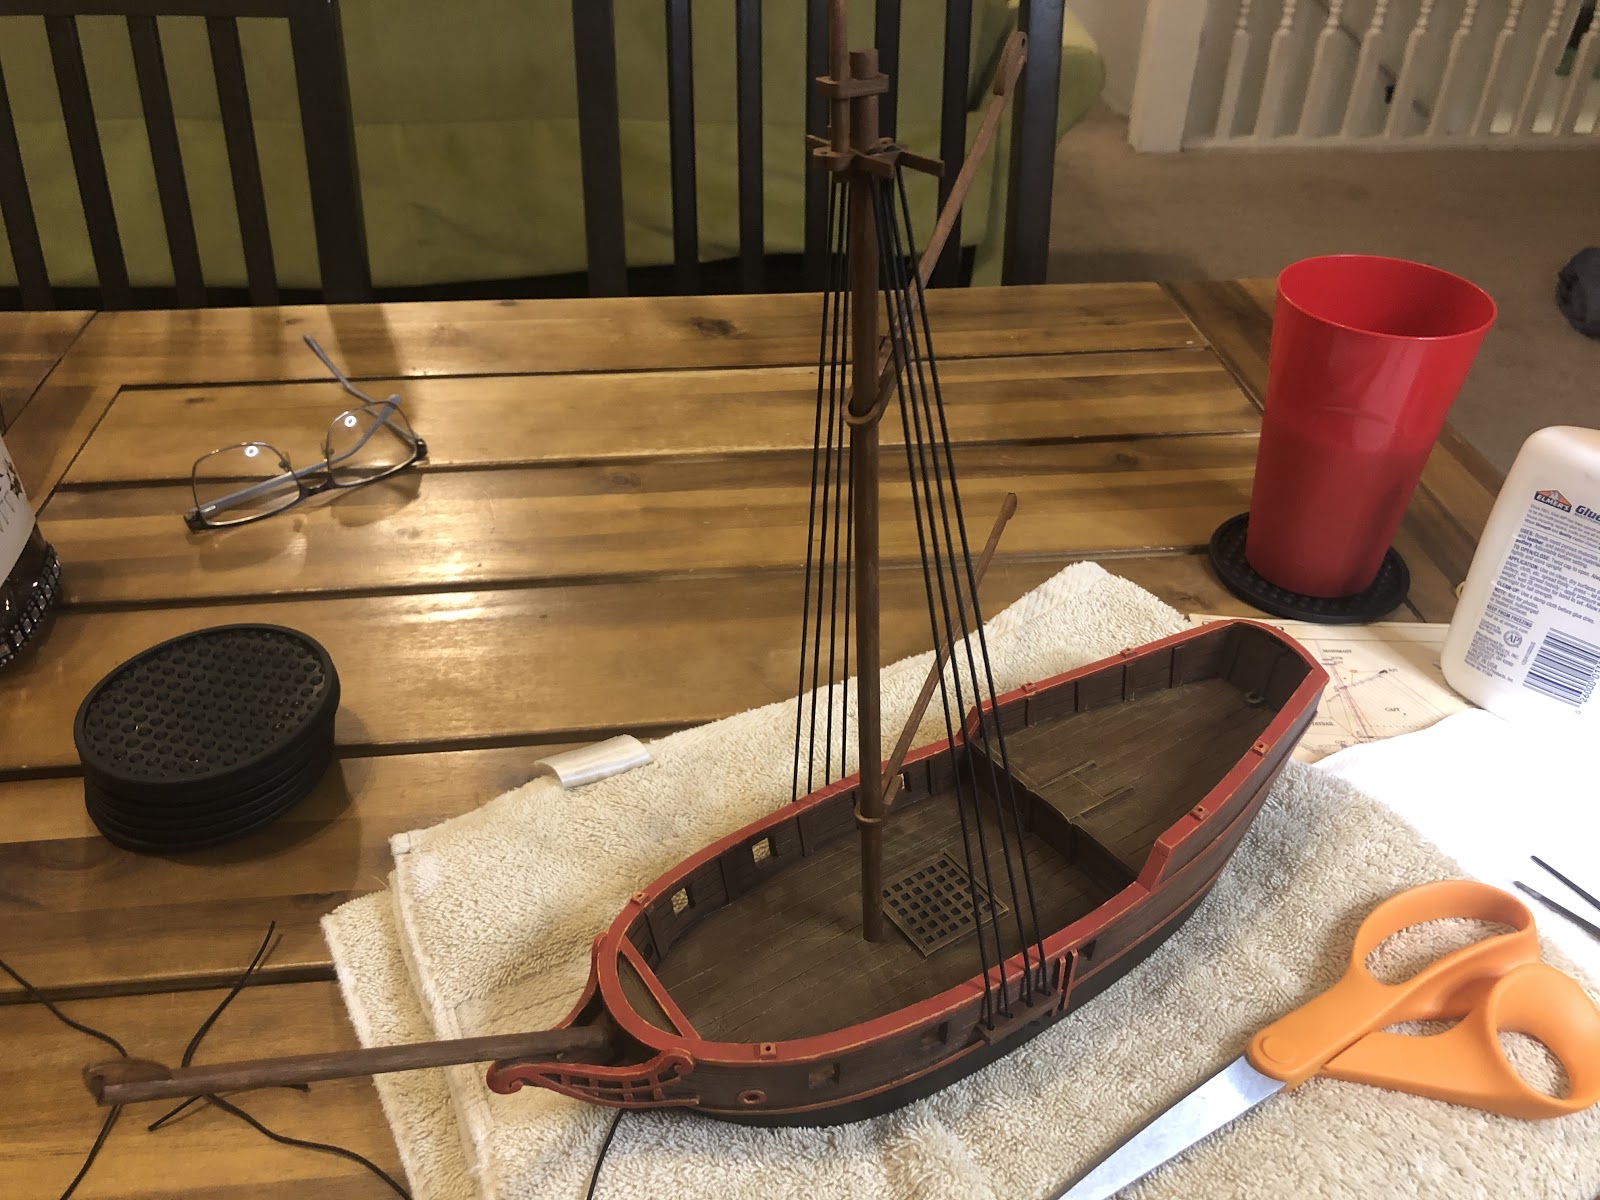
The shrouds are done!
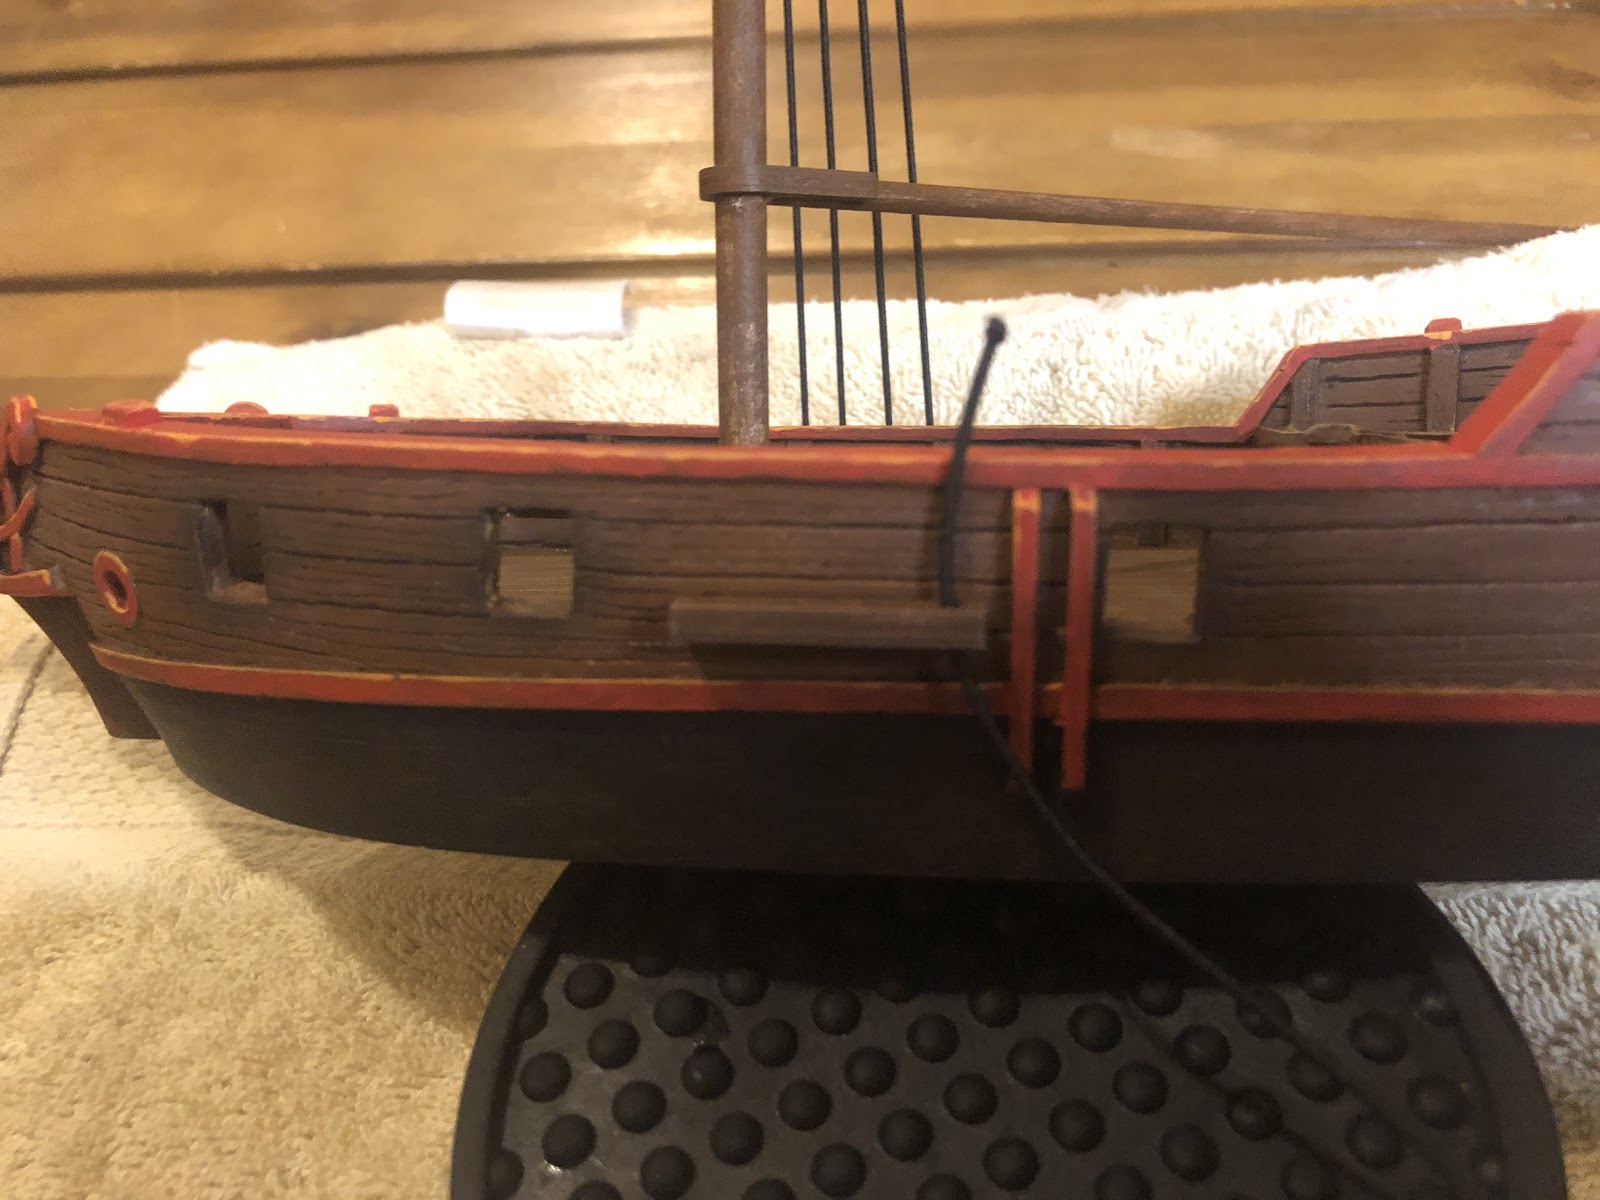
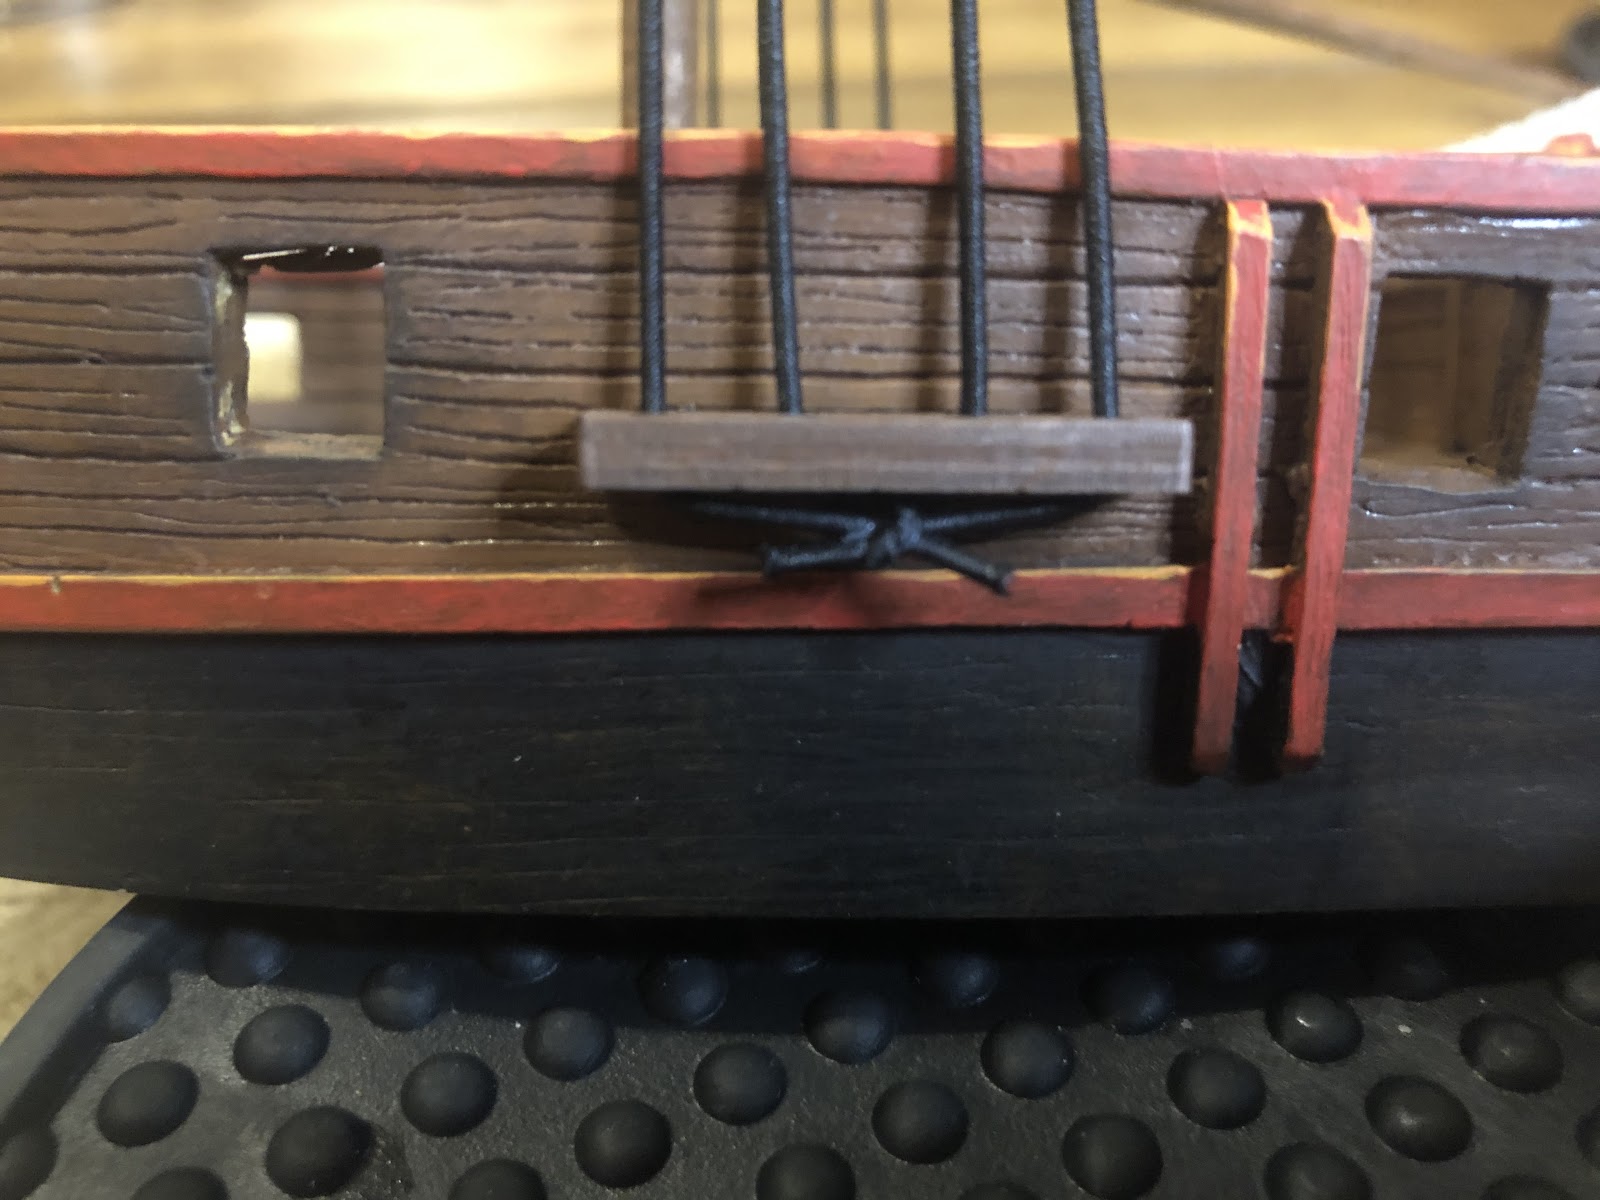
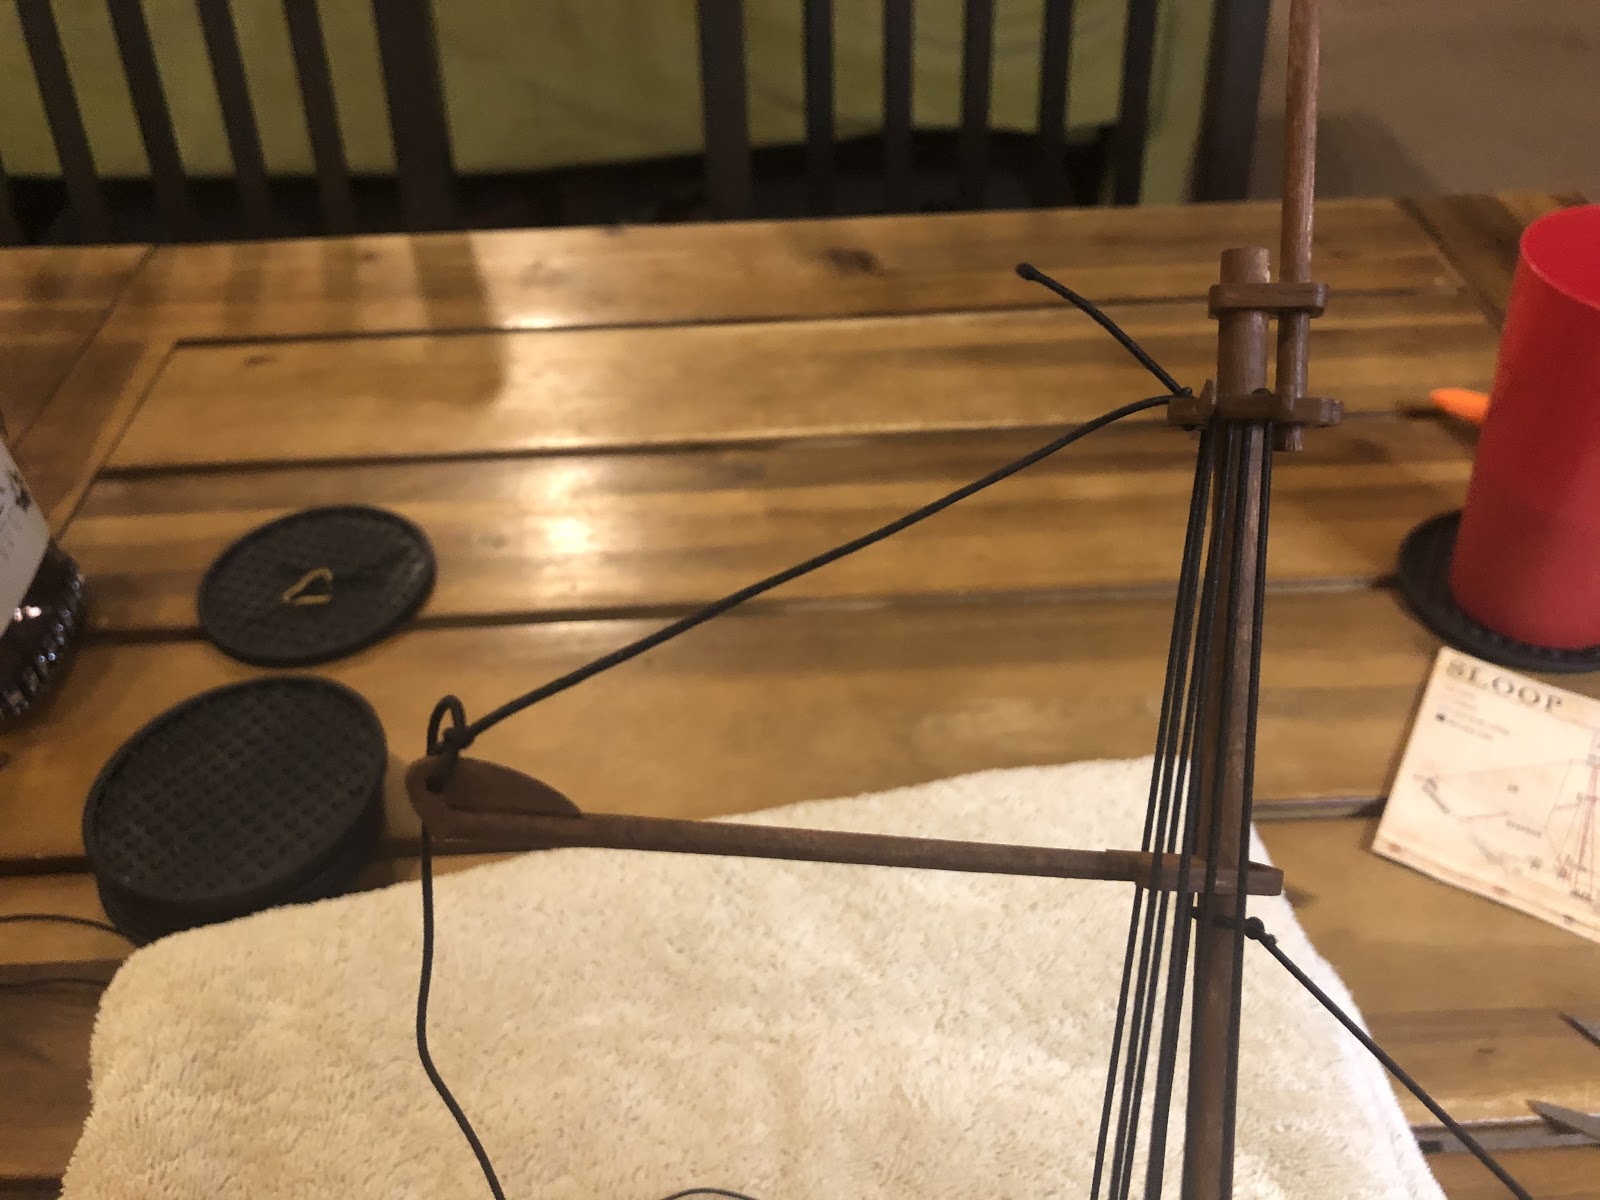
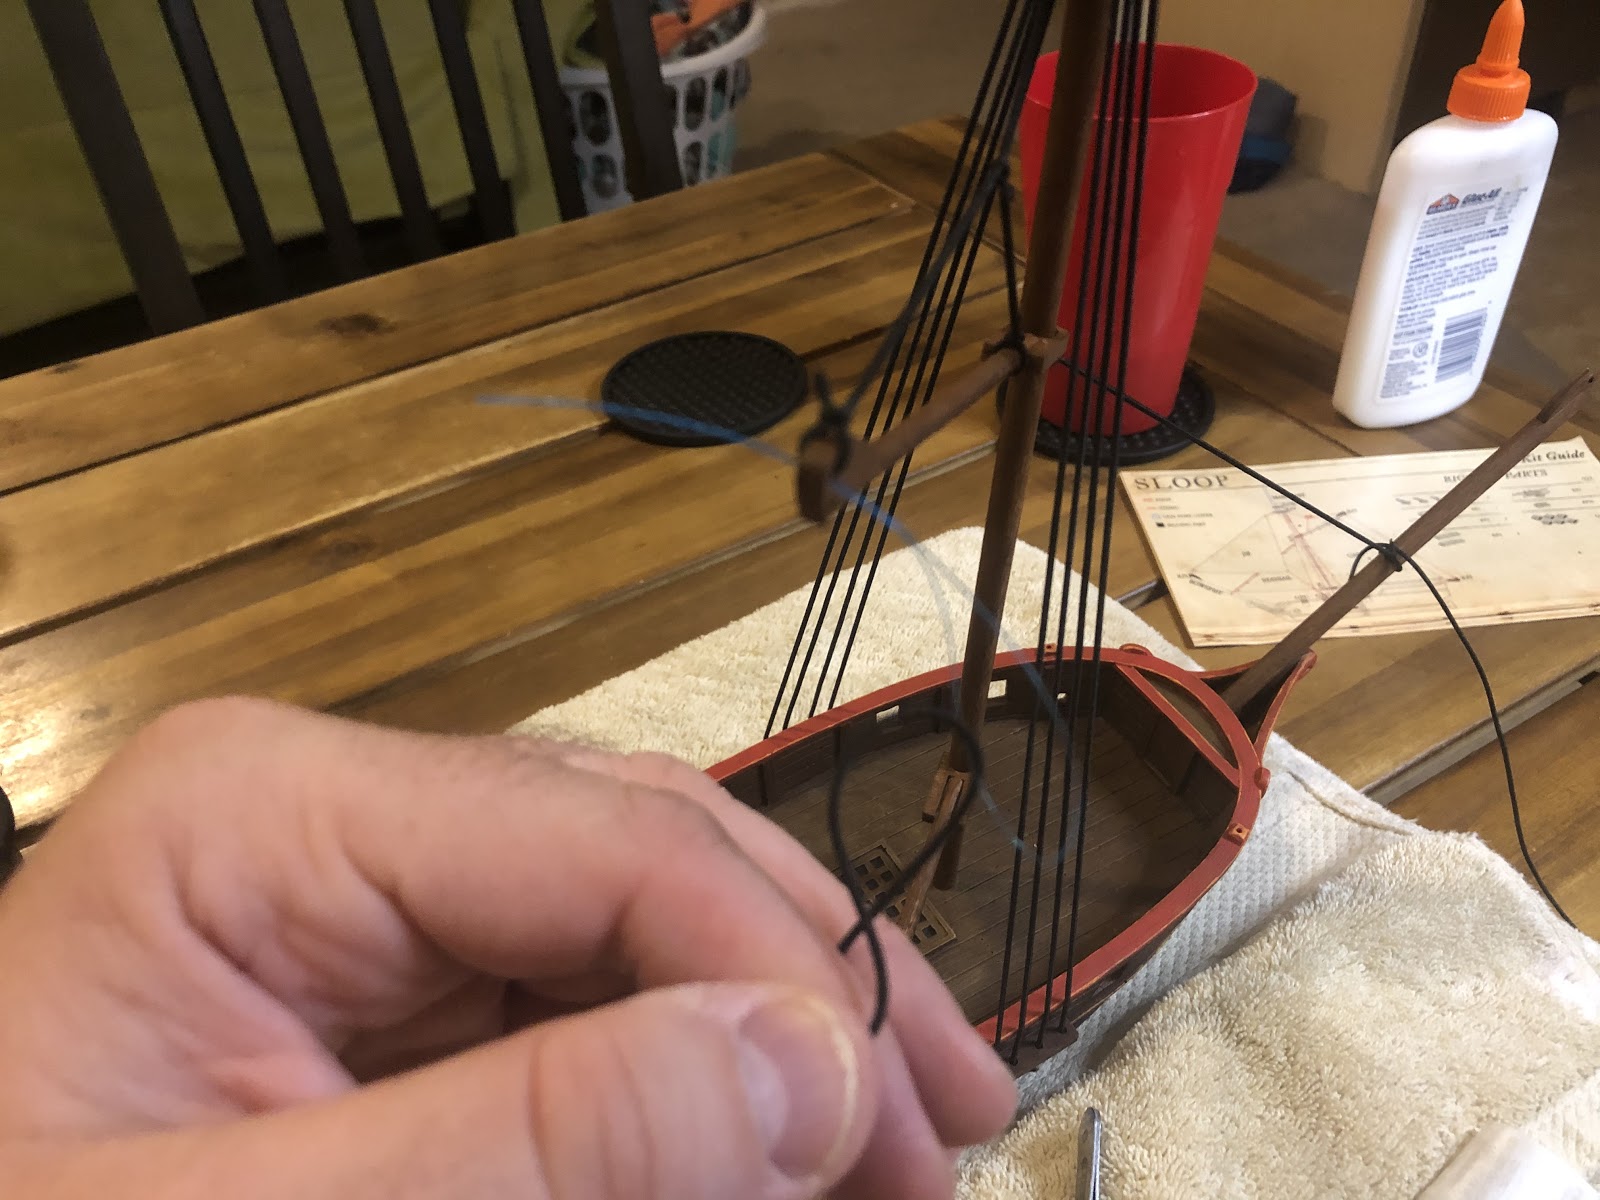
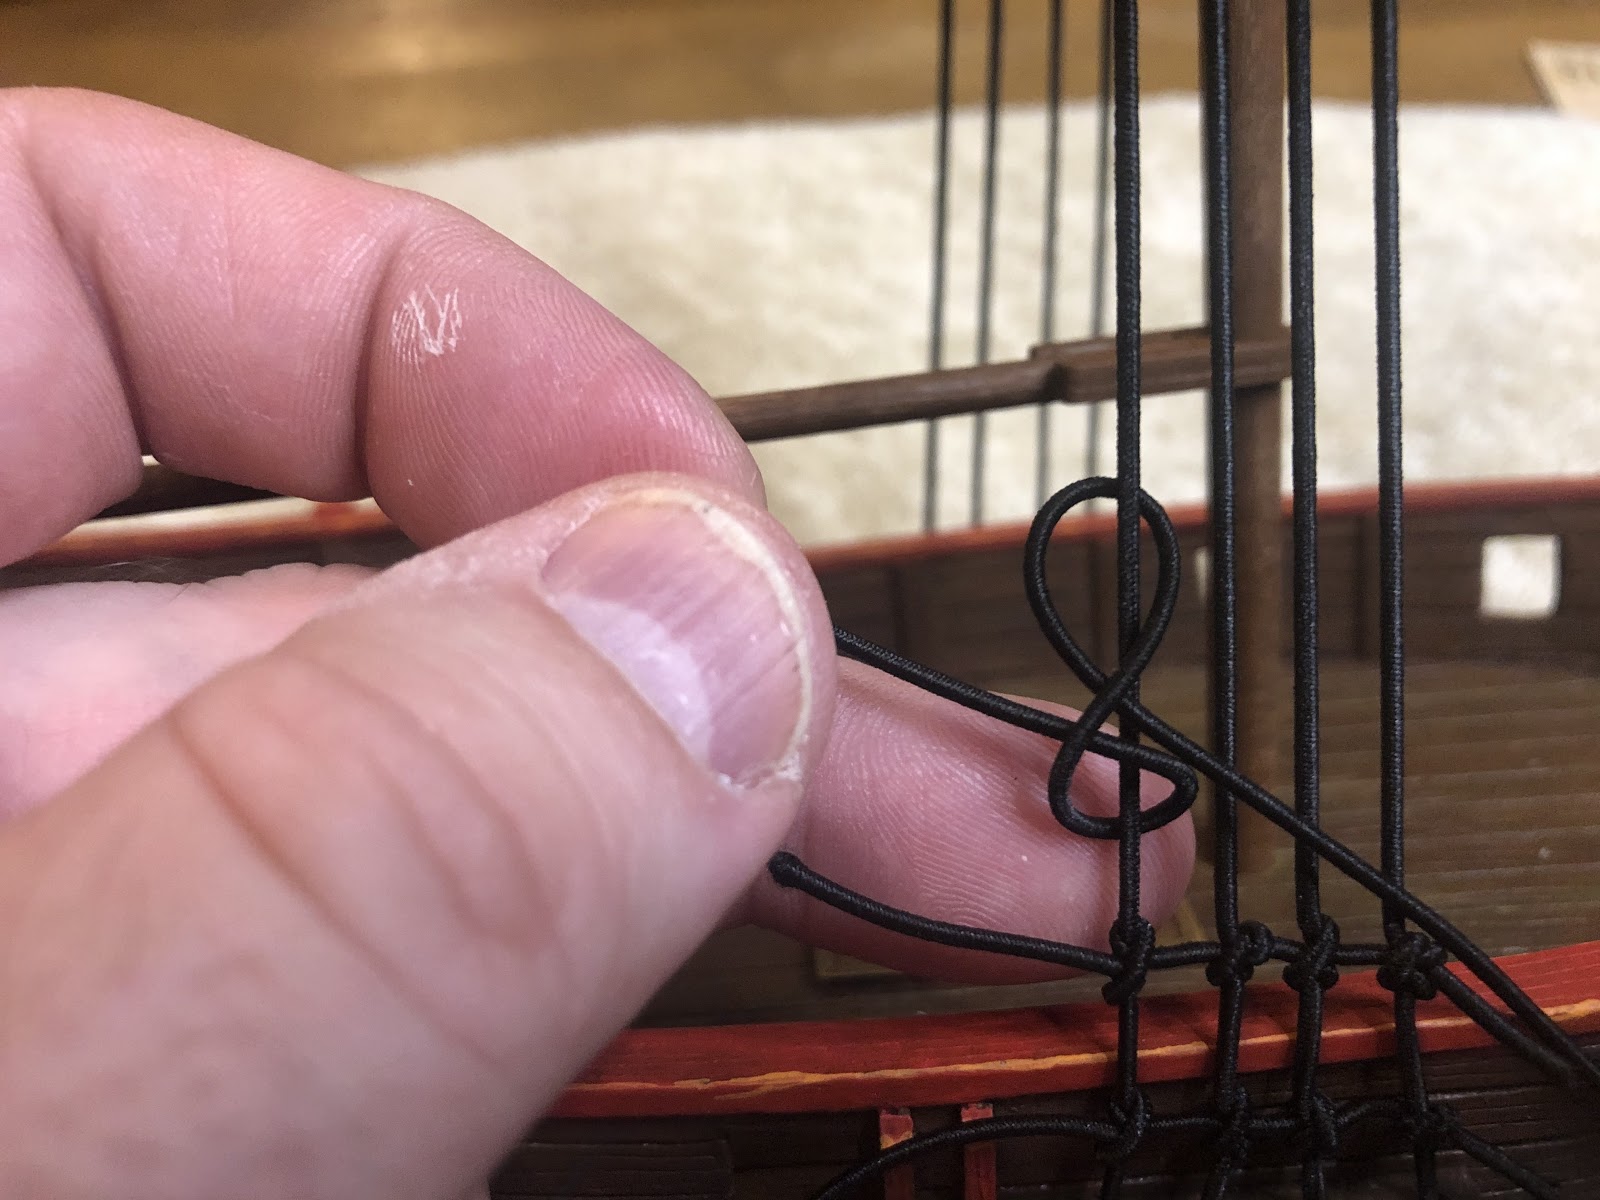
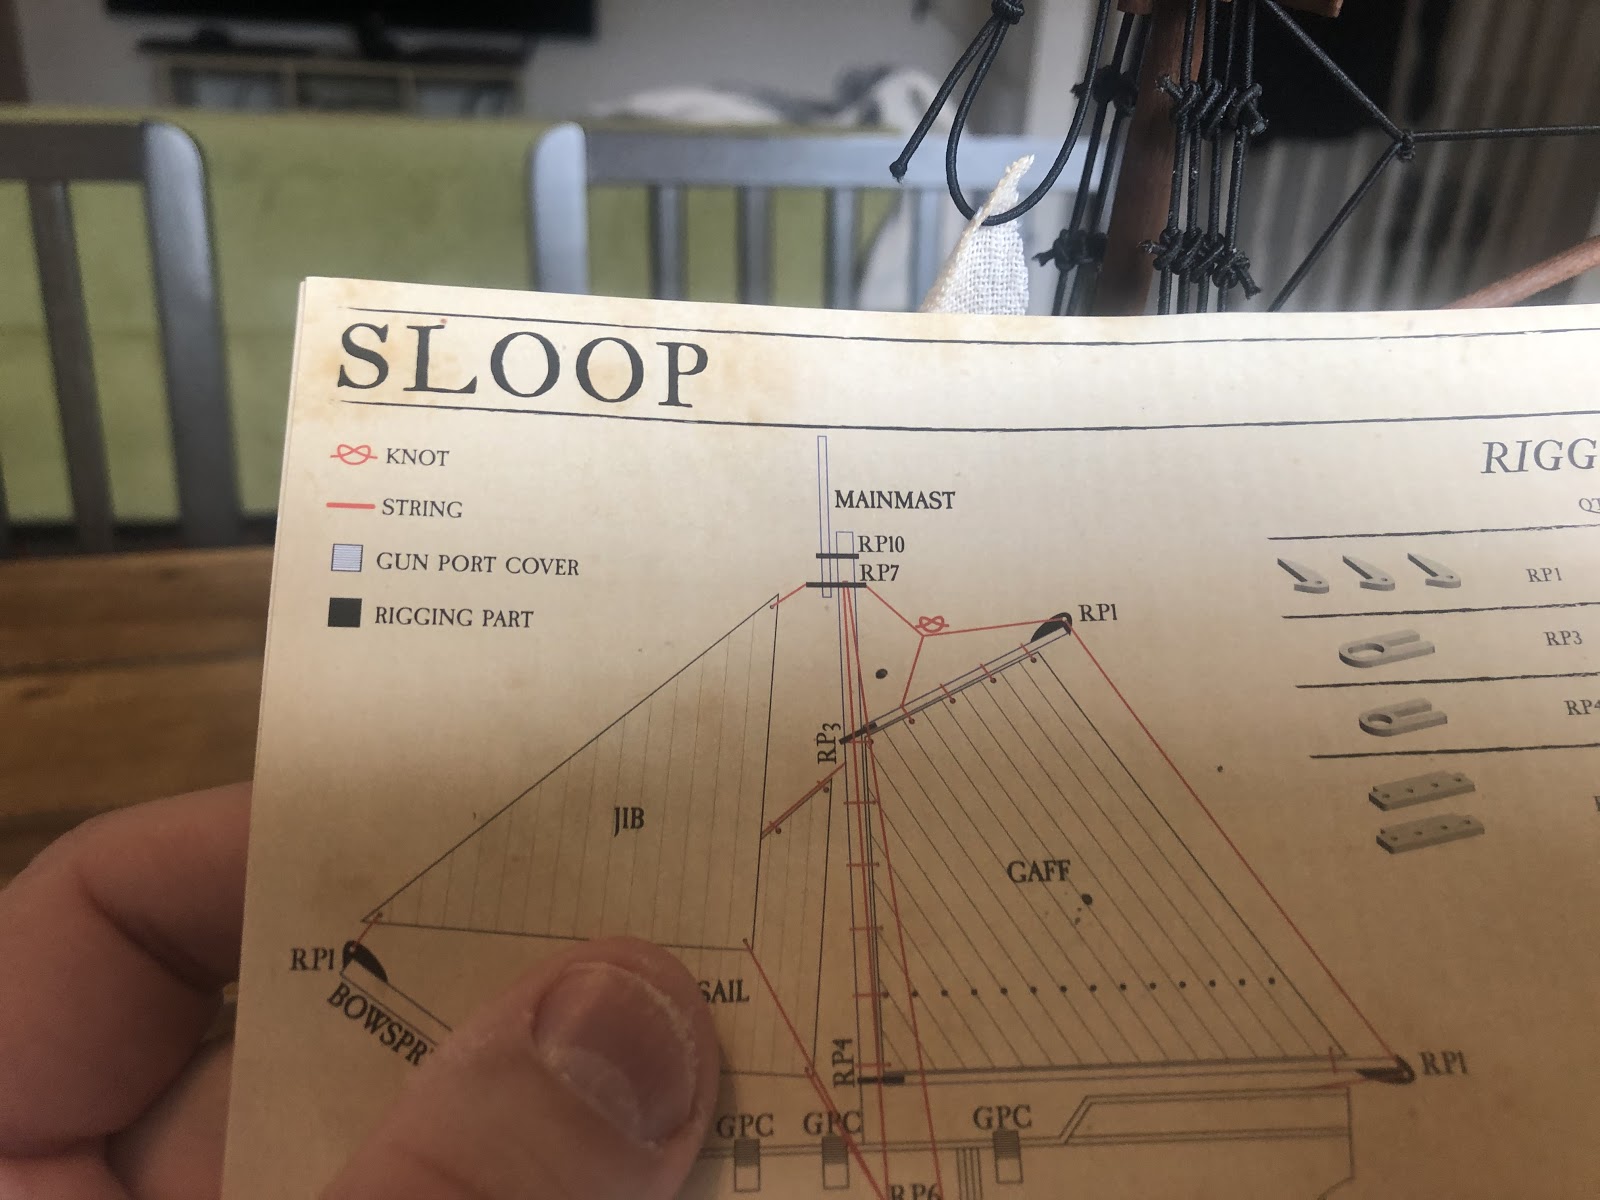
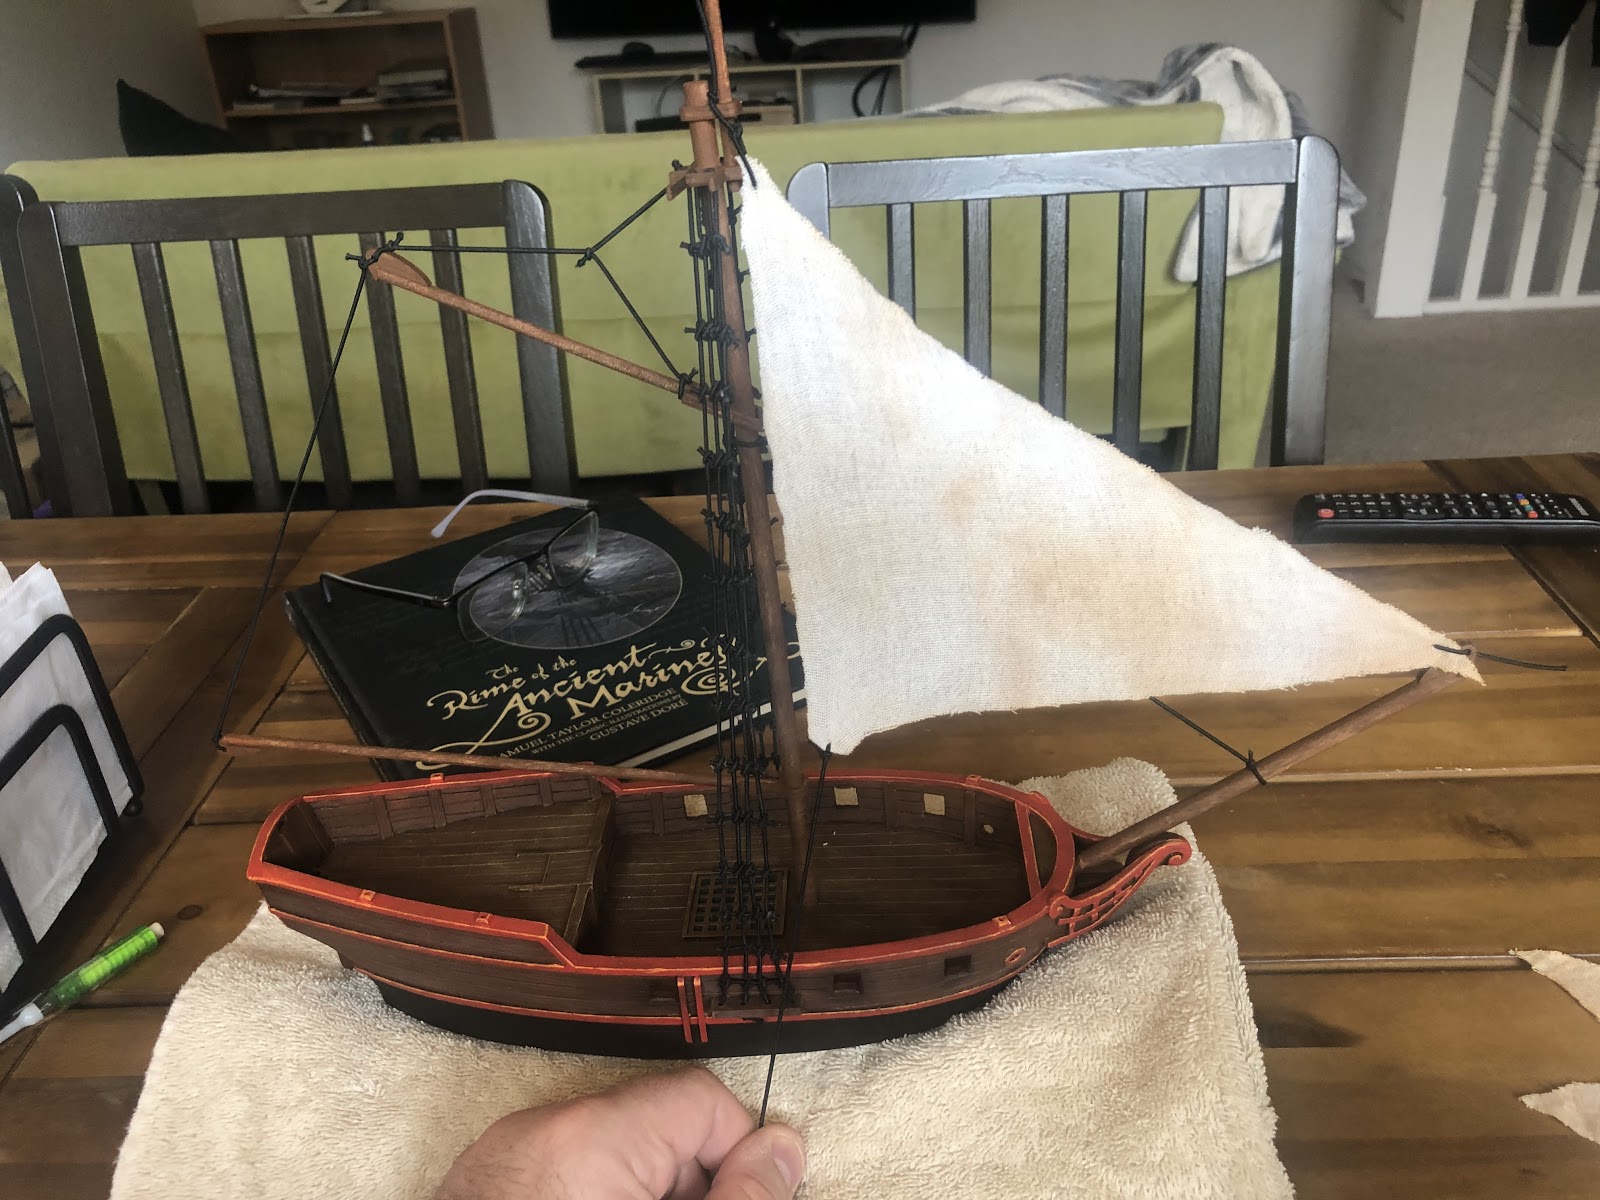
The next thing to do is add the staysail line.

Use a slip knot to attach the elastic to the mast, right below where the gaff is.
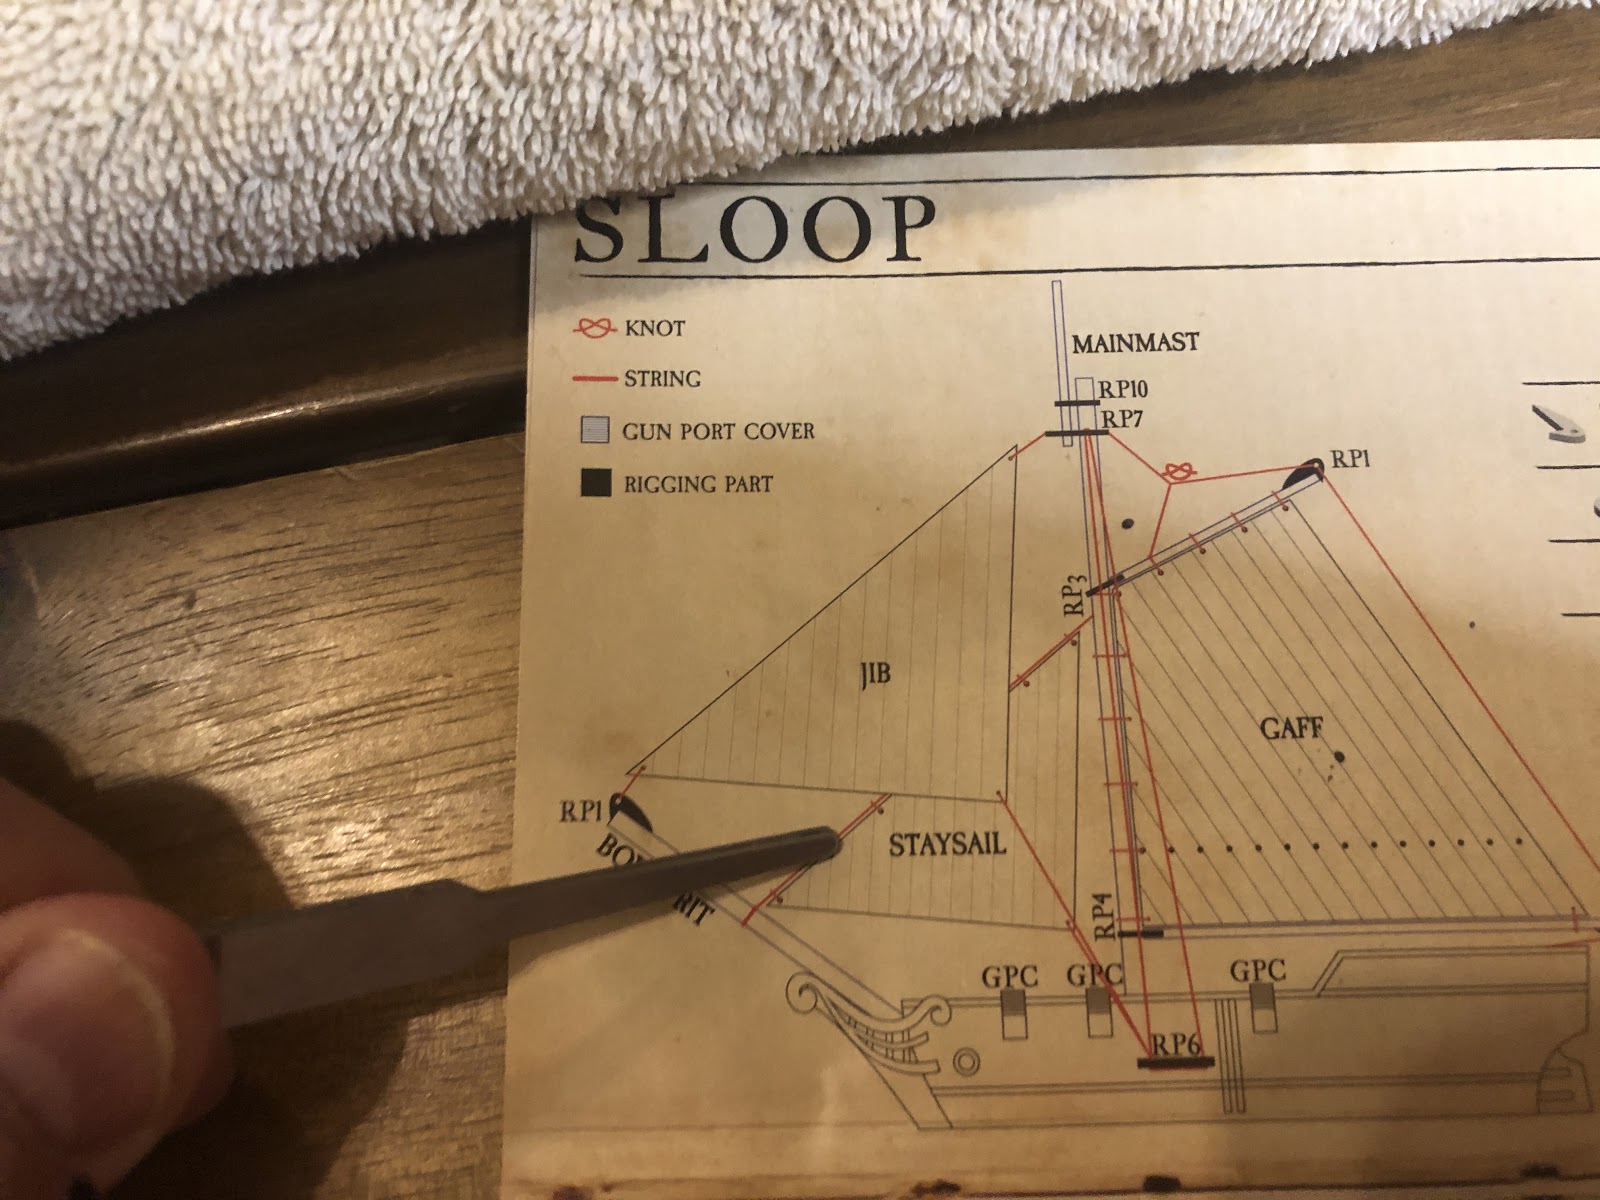
Stretch the elastic to the bowsprit. Use the rigging guide for where on the bowsprit you attach this line. This line will be parallel with a line from the crosstree to the end of the bowsprit.
Use the tautness of this line to position the mast where you want.
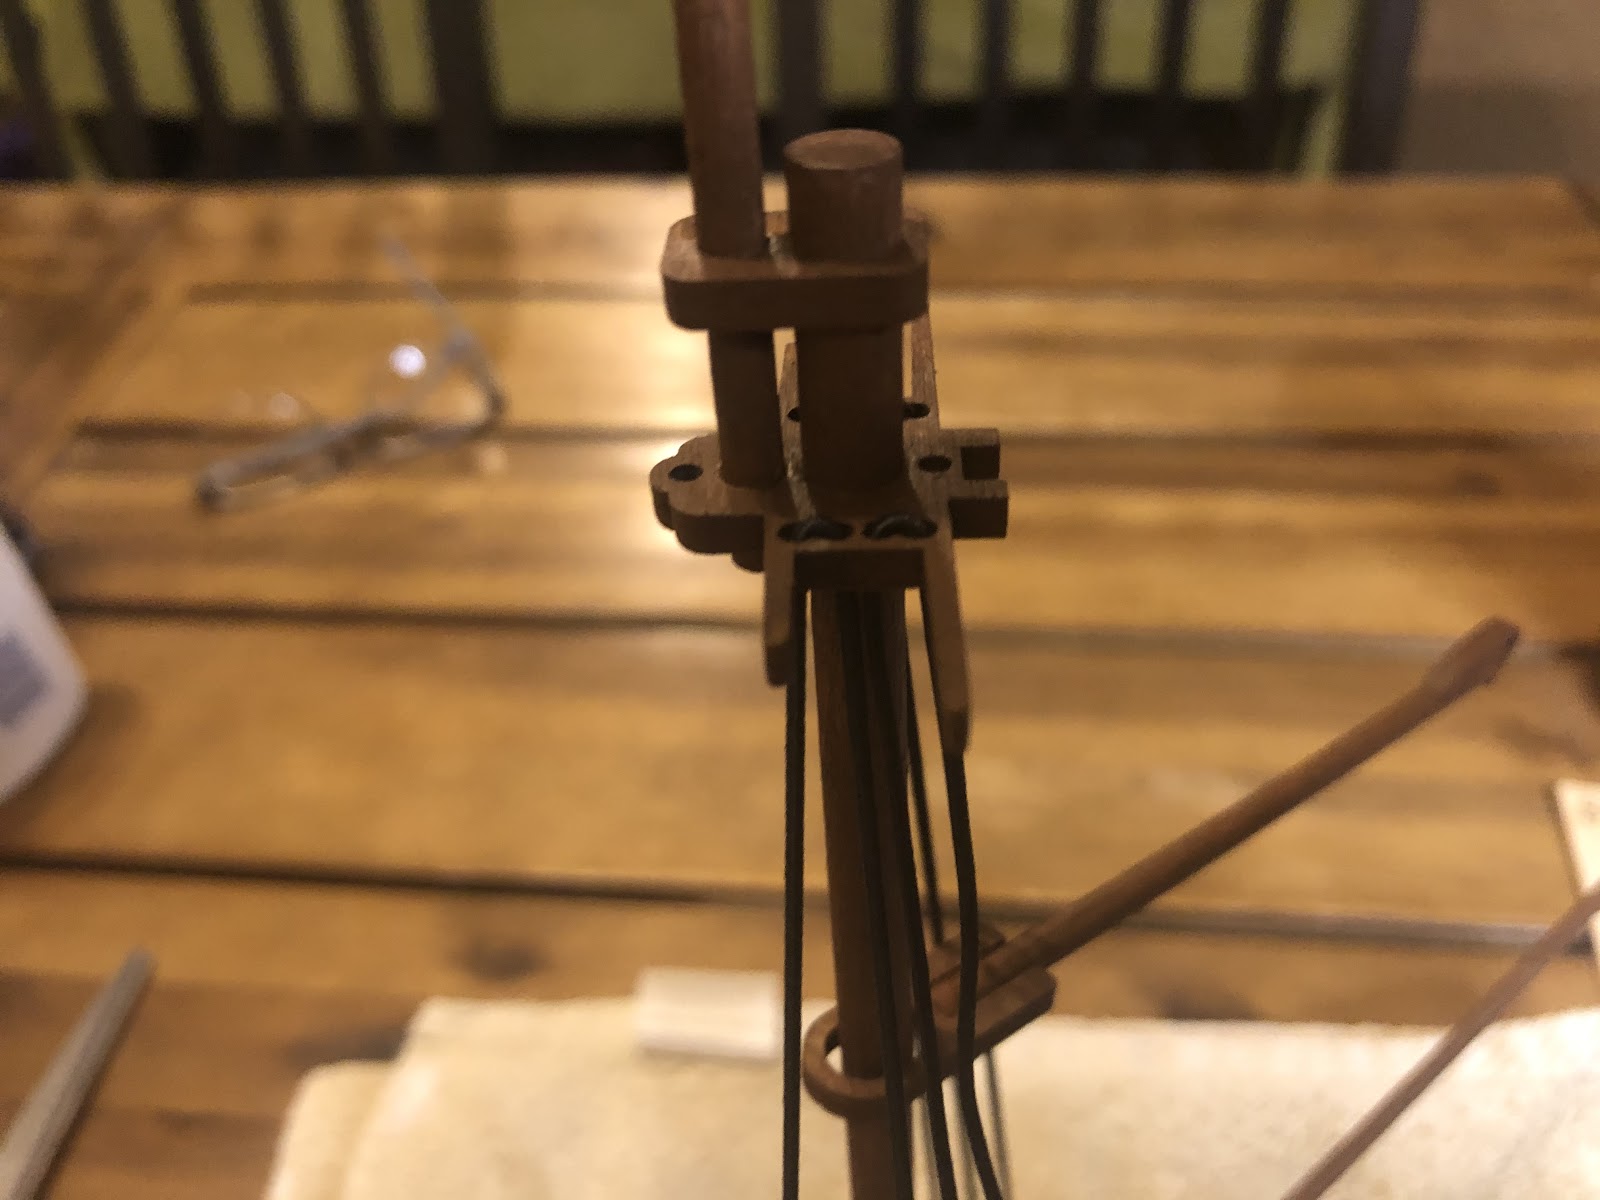
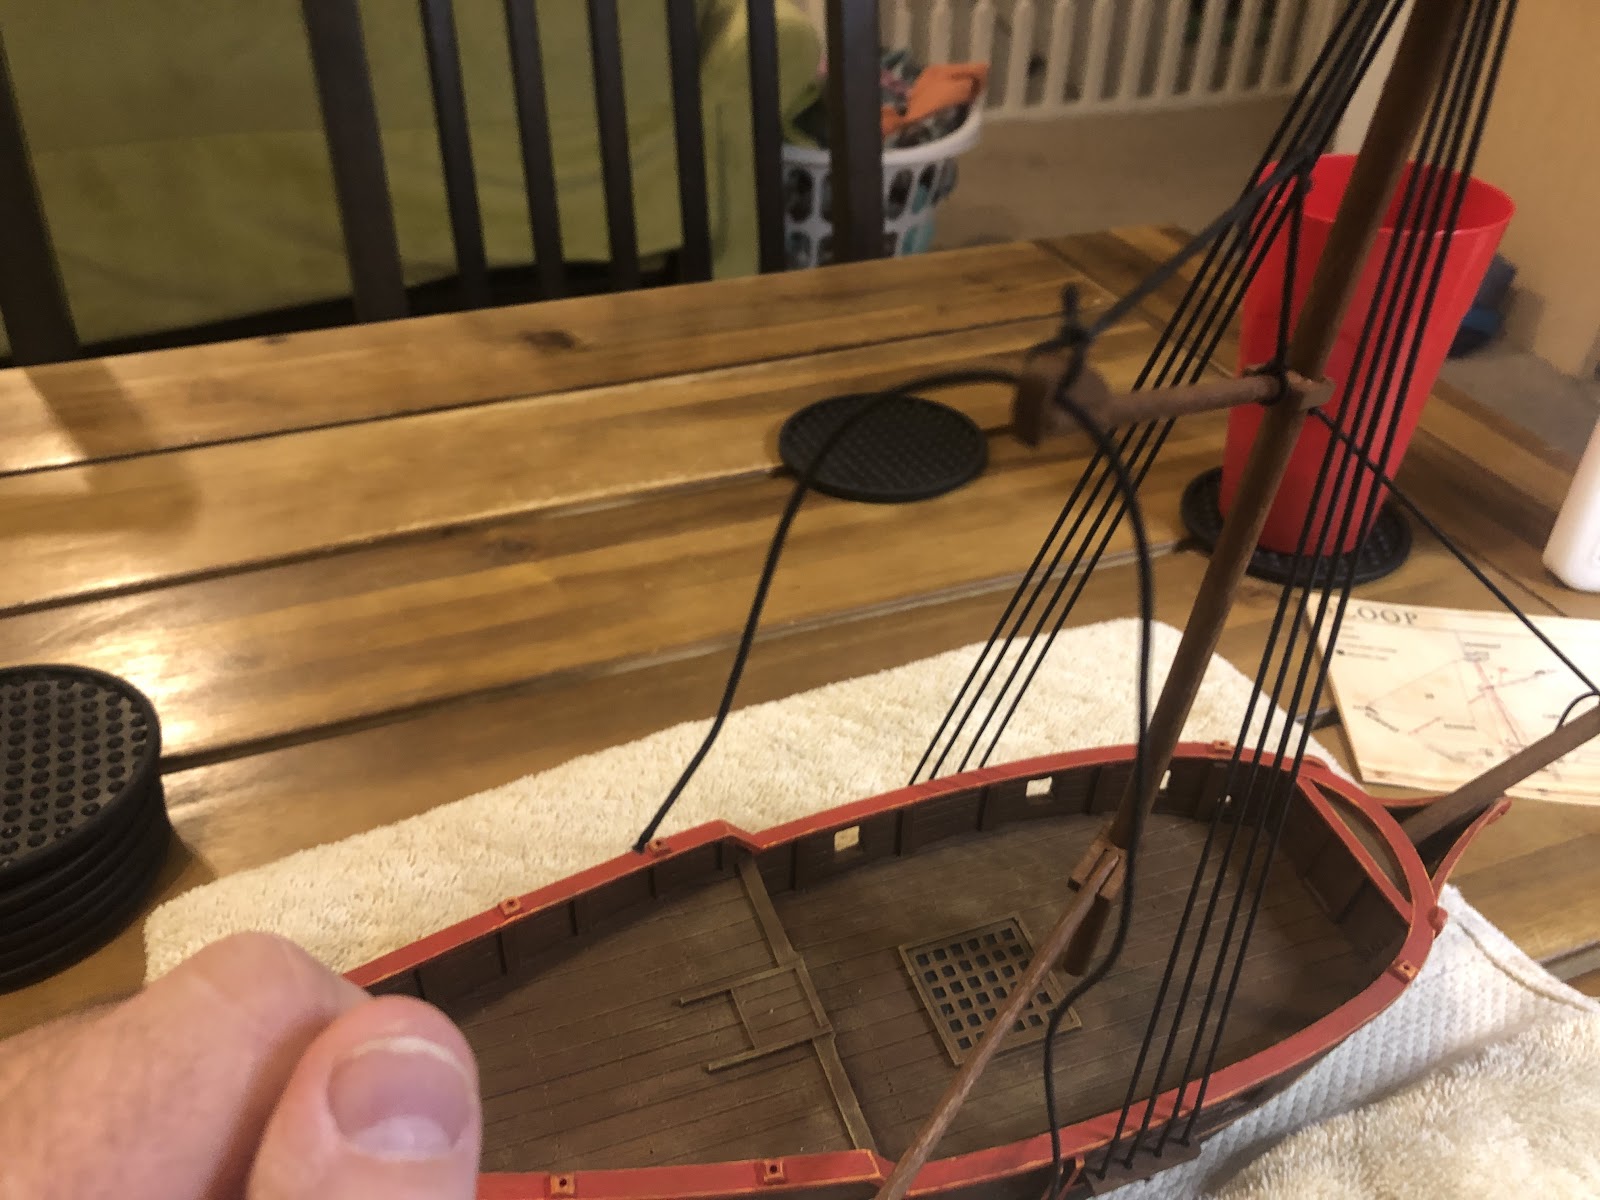
Next, you are going to suspend the gaff. Tie the elastic to the stern hole of the crosstree. Pull the line to the gaff, and thread it through the hole at the end. Hang the gaff so that it is level and tie it off.
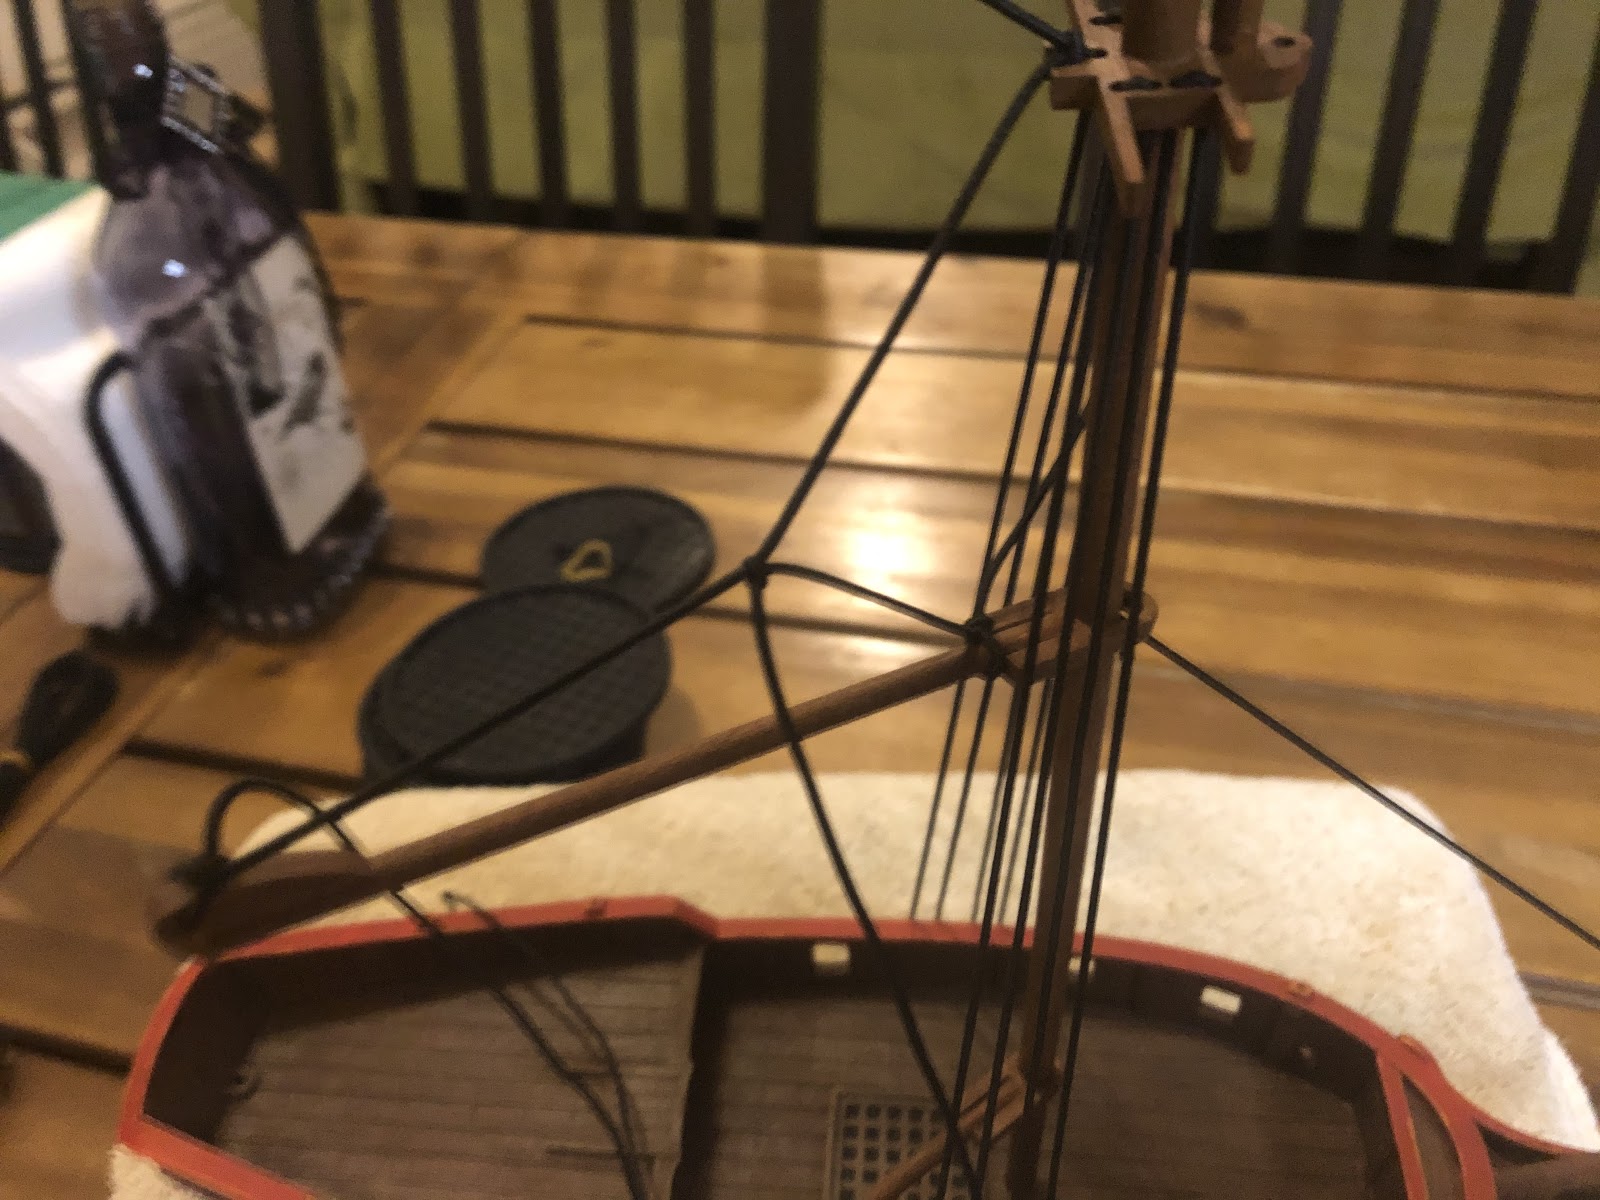
Next tie the elastic to the gaff near where it attaches to the mast. Pull the elastic up over the other gaff line and experiment pulling it towards the bow. You want the gaff to be at about the same angle as the staysail line, like on the rigging guide. Once you have it in a good spot, tie a slip knot. Don’t make the slip knot very tight until you are happy with the position the gaff is in.
When everything is tied, glue the knots and then trim the elastic. Careful to not cut the elastic too close to your knots.
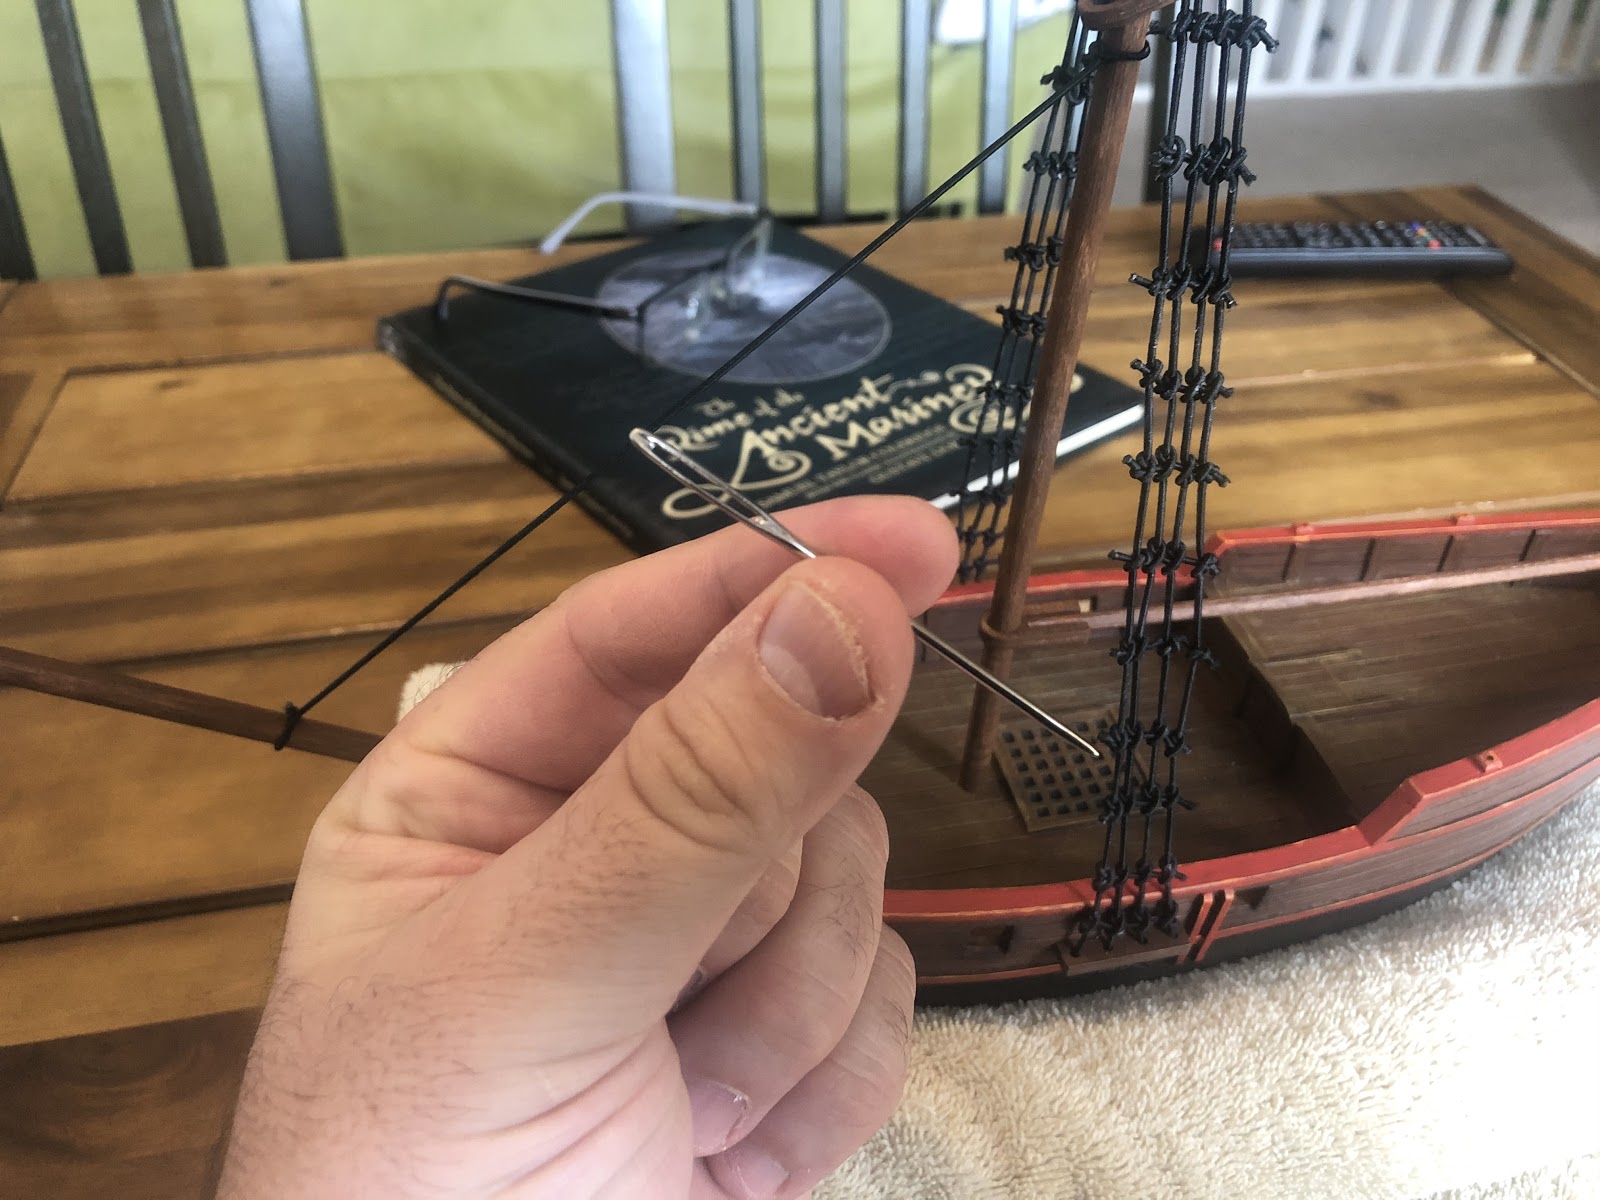
This is a floss threader. Fifty of them, a lifetime supply for hobbying, cost about five dollars. It is used in rigging to pull thread through the wooden rigging components when there is already elastic in the hole.
In this out of focus picture, you can see how the floss threader is used. Put the floss into the gaff hole and then put the elastic into the hole of the floss.
Pull the floss through, and with a little effort, the elastic will pull through as well.

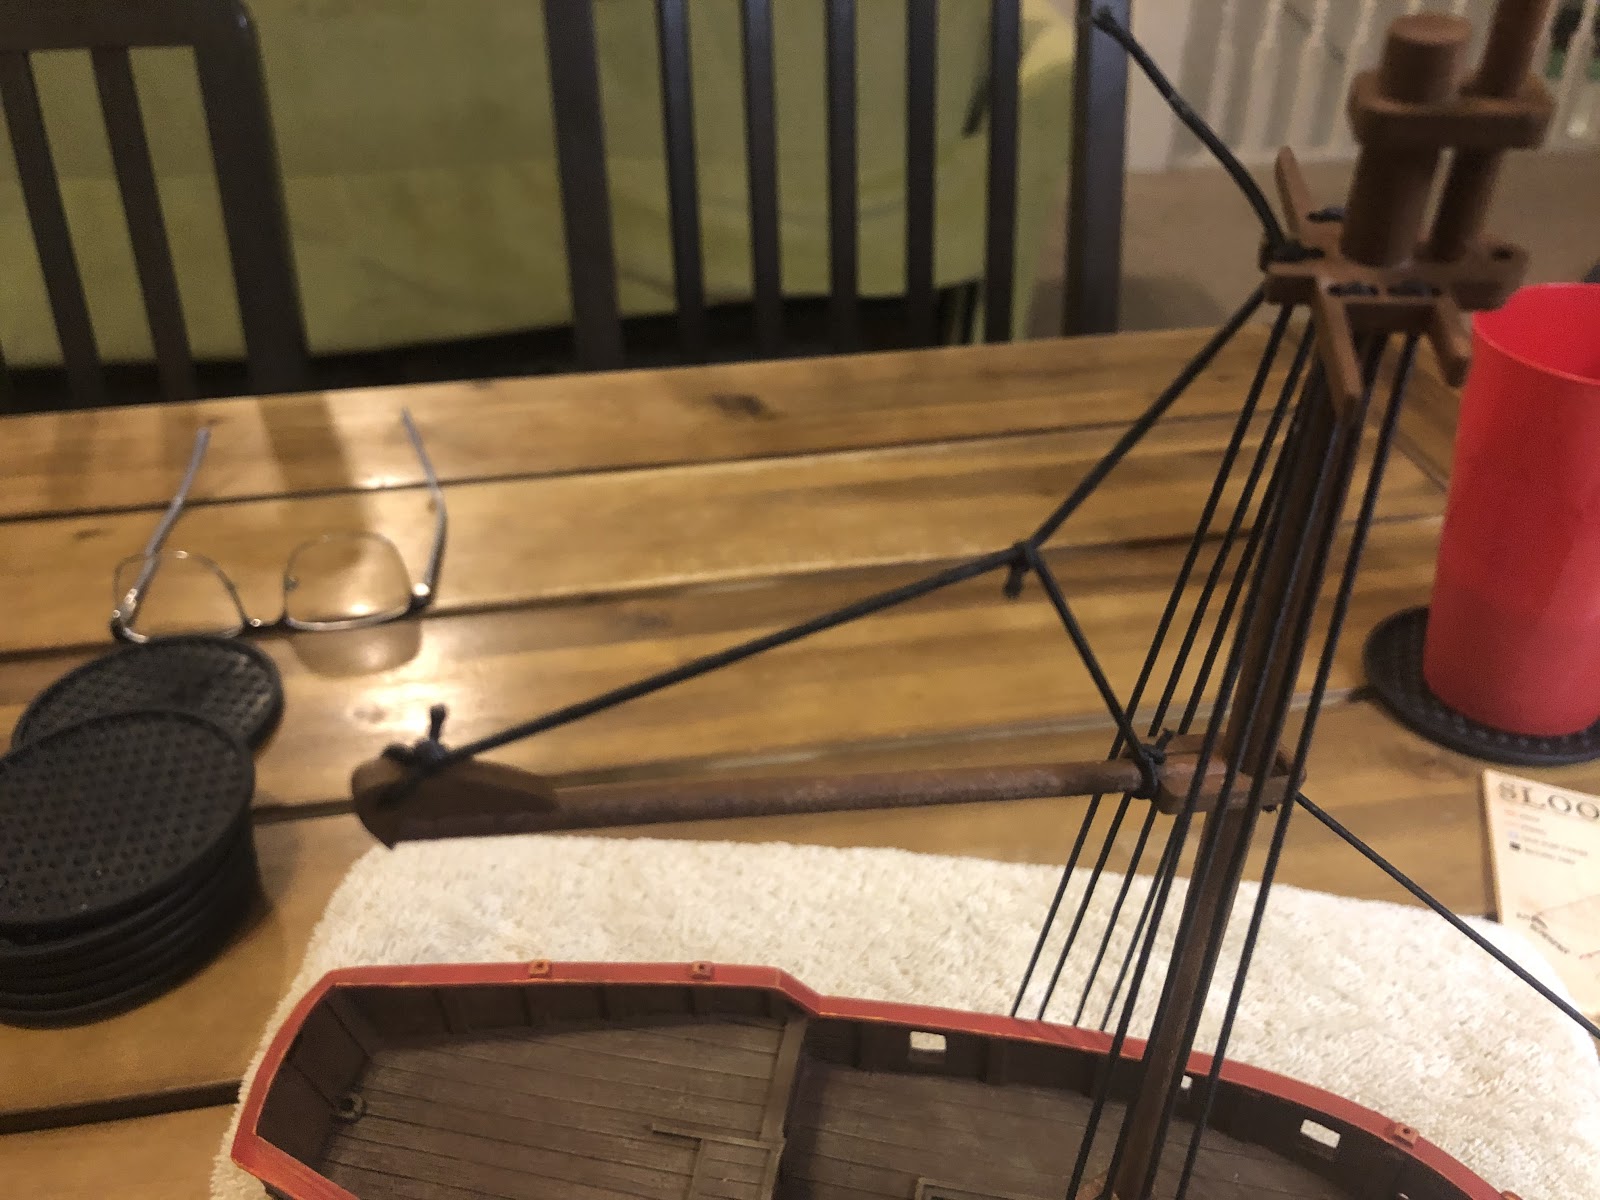
Tie a slip knot to the gaff, positioned pointing down to the deck.

Pull the line to the boom and thread the hole at the end of the boom. When positioning the boom on the mast, make sure the boom clears the poop deck railing. Don’t make this line too tight, you don’t want it pulling the gaff down, or the boom up.
Glue and trim the elastic after you have it where you want.
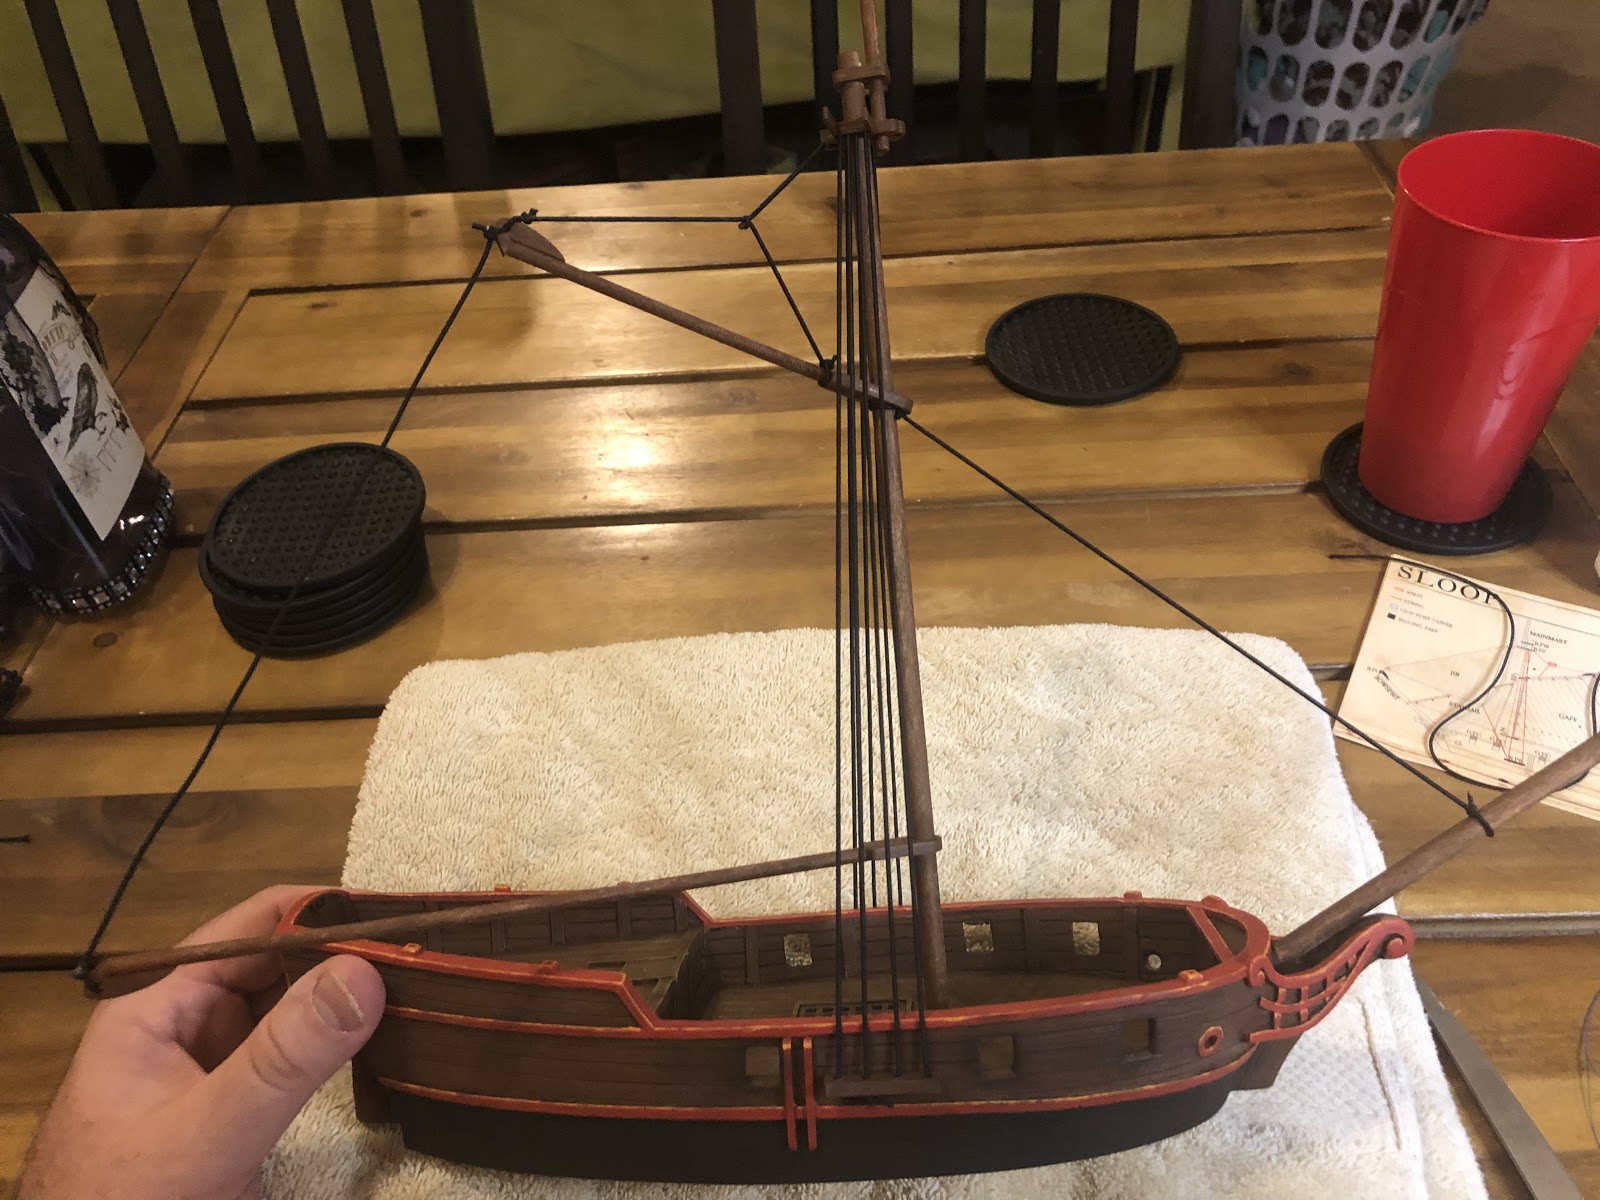
With that last line the rigging is done!
Optional Step You Shouldn’t Do
Ratlines
Ratlines are the horizontal rigging on the shroud that makes a ladder up to the top of the mast. They look very striking on other ships, and are not hard to do with crochet yarn or model rope.
I wanted to try them with elastic. As you will see it didn’t turn out that good, but it was worth the effort.
There are several ways to attach ratlines. The way I use to by tieing a simple knot.
Start a new row about every half inch.
This is the expanded knot that I tie. I use tweezers to pull it easily through the shroud.

You don’t want a lot of slack between each knot, only as much length to get to the next line. To help with this, you can pull the elastic up after you thread the top. Use tweezers to keep the bottom where you want it.
This was the look I was going for.
This is another example of the knot I use.
Slowly work up the shroud. Do not trim or glue any of the knots until the whole side is done, because of the stress you will be putting on the shrouds. It is ok, though, to cut the excess off after finishing a line, but leave about 1-2 inches just Incase.

After about one hour per side, the ratlines are done. Glue and trim each side in sequence.
I didn’t like it, and don’t recommend adding ratlines with elastic. The reason I don’t like it is because near the top the tight knots of the ratlines made the shroud curl. The knots are also too big and don’t look like a ladder.
If you like this look, go ahead and try it. It at least looks striking.
Step 12: Sails
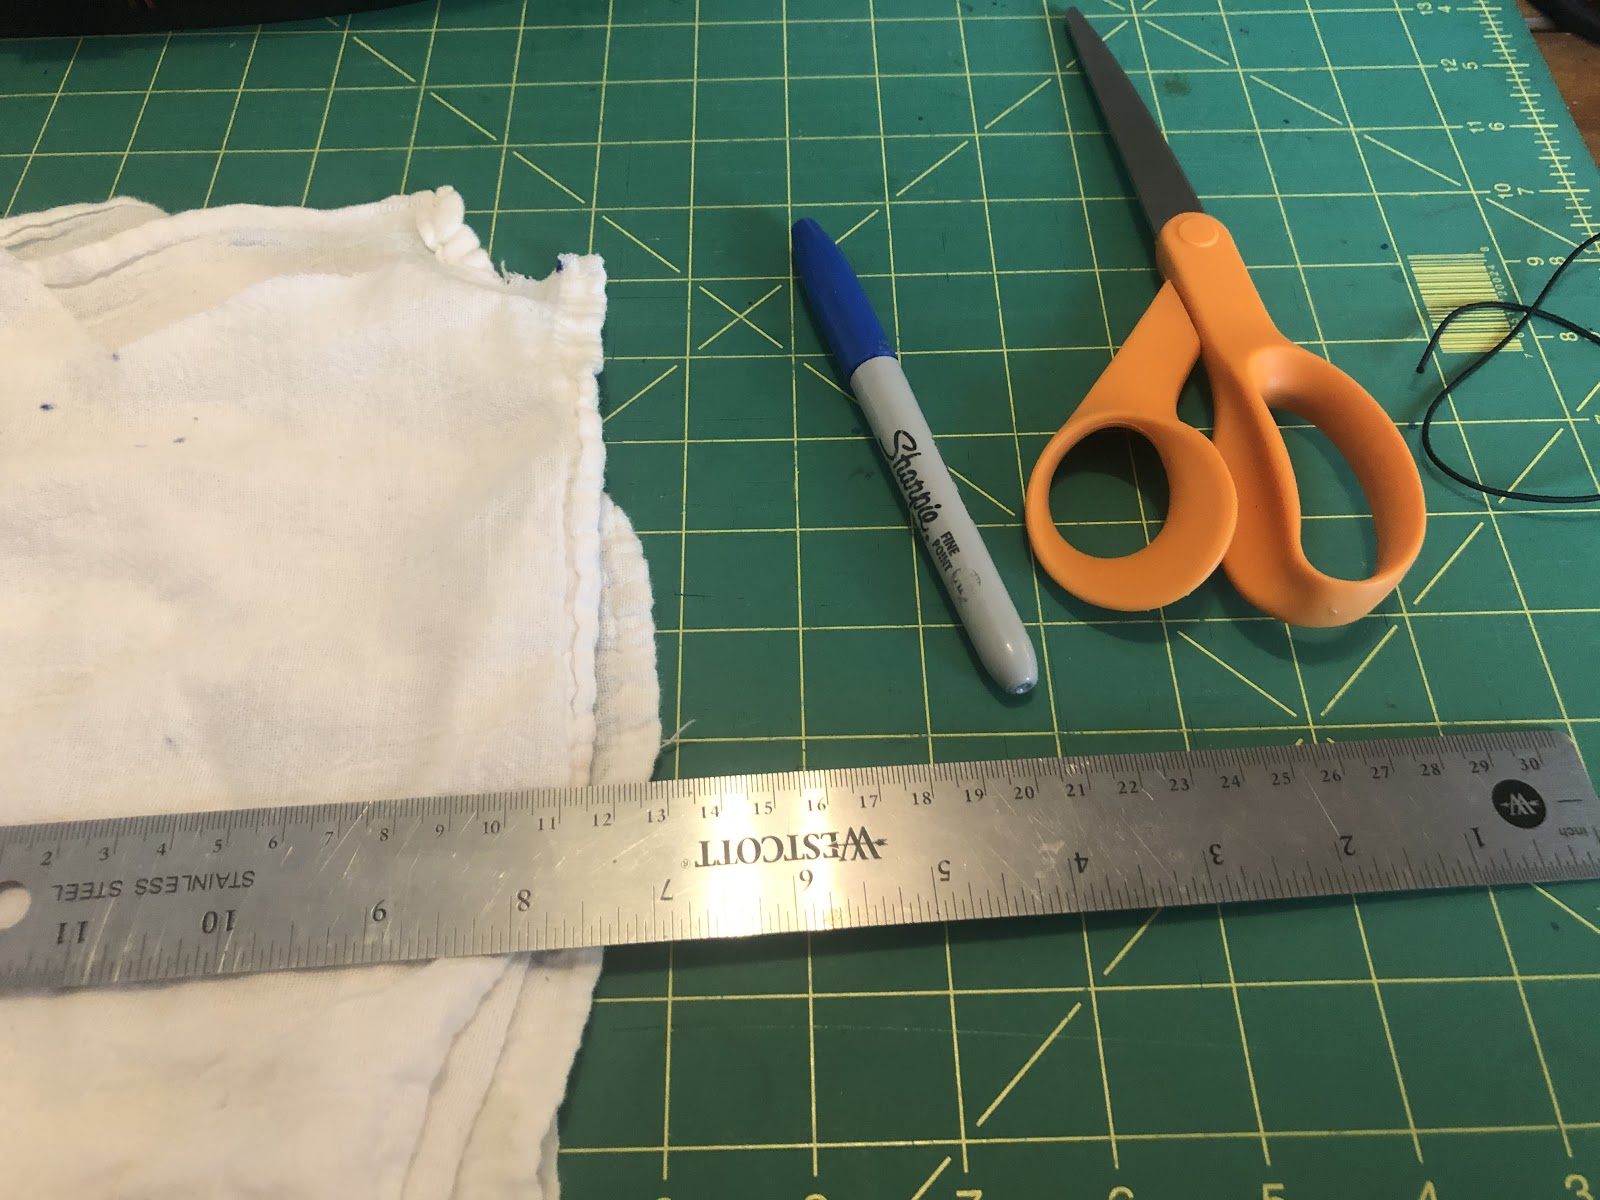
Tools Needed:
- Rigging Guide
- Flour Sack Cloth
- Ruler
- Scissors
- Permanent Marker
- Left Over Elastic
Something to Write On That Will Stop the Marker From Bleeding Through to the Table
Note: when measuring distances in this step, exact measurements are not needed. It is ok to round up or down to the nearest ½ or ¼.
This step will show you how to make cloth sails. You can use this same process of measuring and cutting with foam, or even paper.
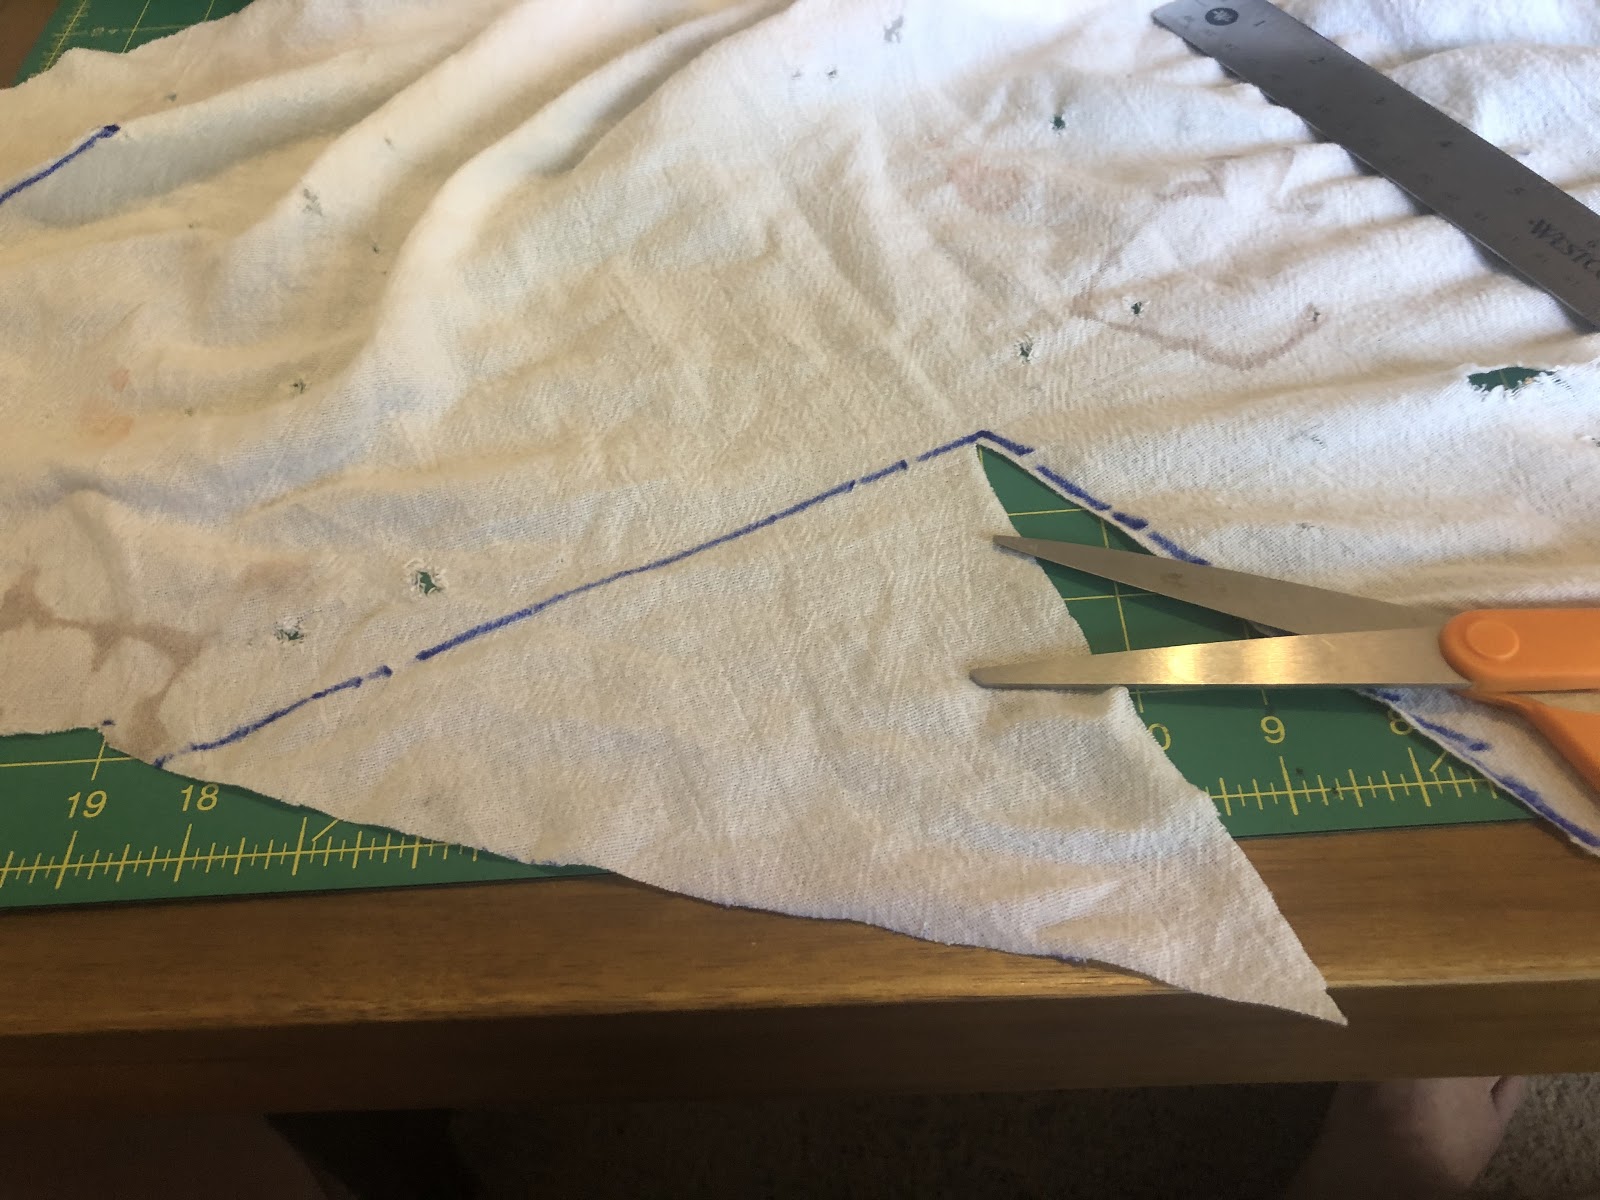
The gaff sail is a weird shape. Here is how I tackle it.
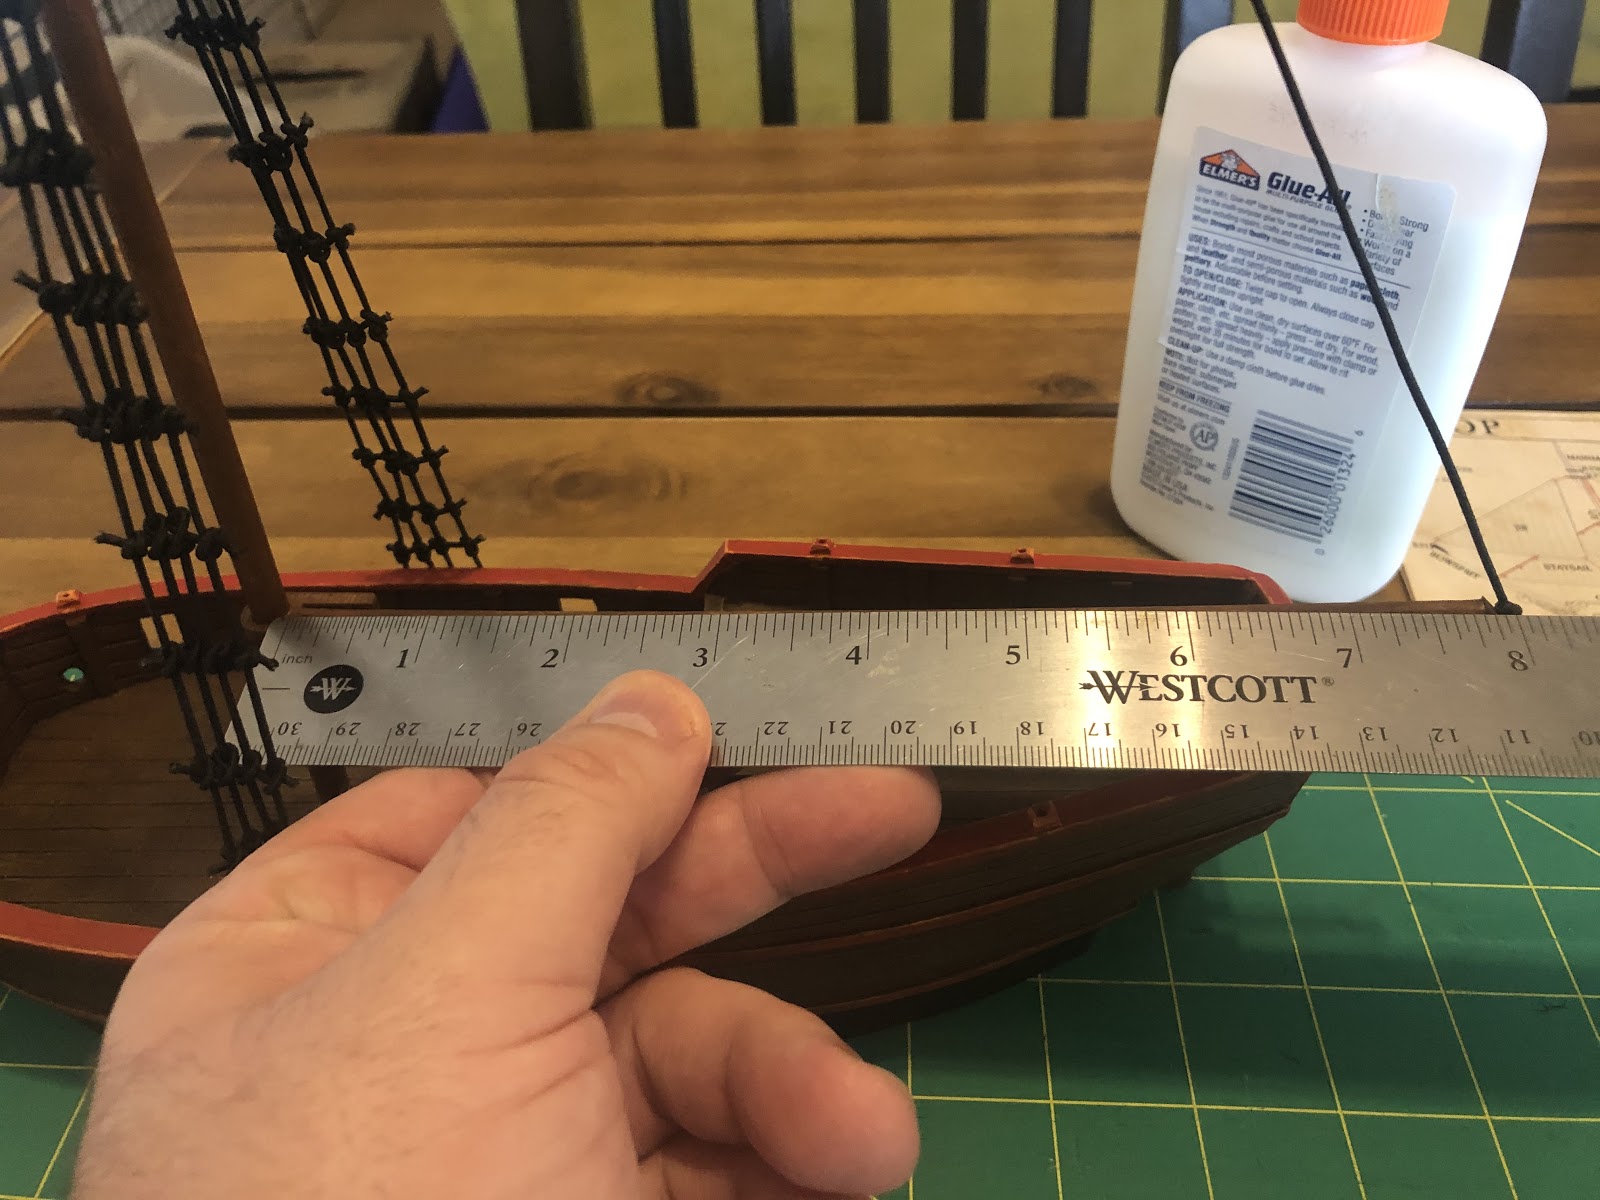
Measure how long you want the gaff sail to be. Here, it is going to be 7”.
Then measure how high the top of the gaff is. Not to where the gaff is attached to the mast, but it’s max height.
My gaff height is 7” as well.
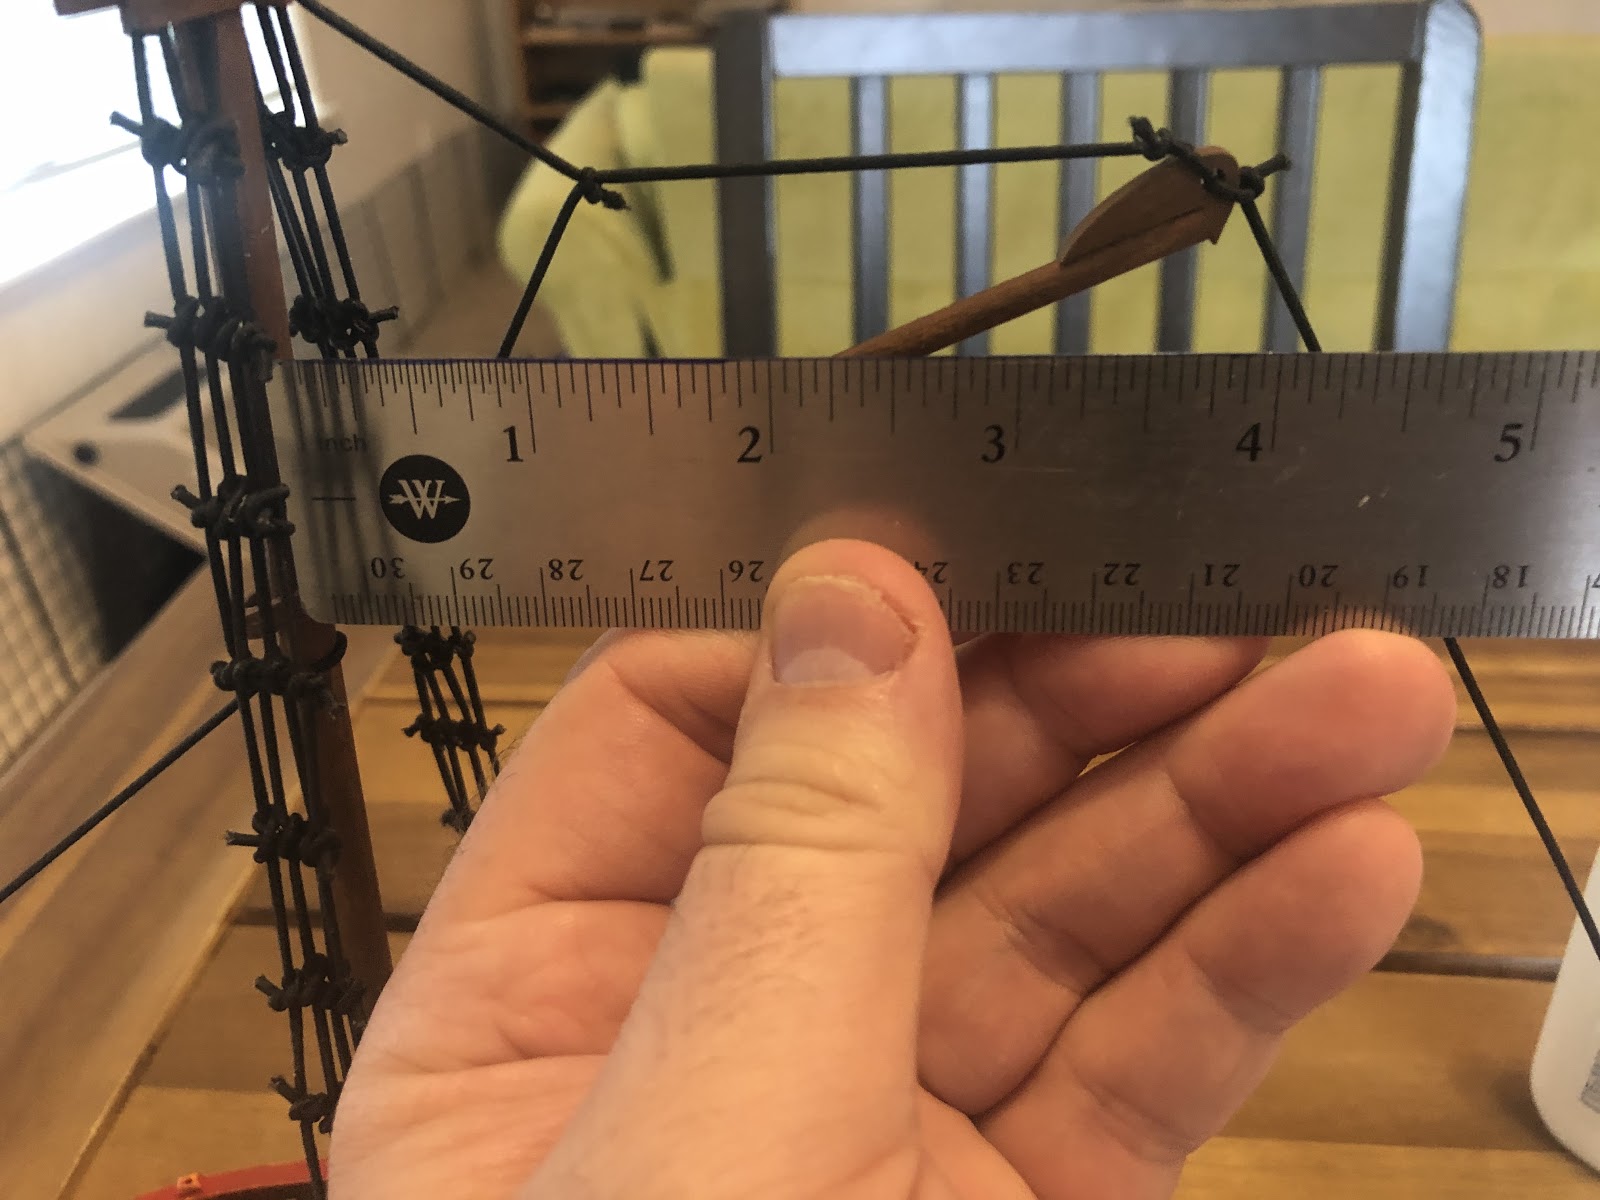
Measure the distance the end of the gaff is from the mast, in a horizontal line. Referring to the rigging guide, the gaff sail isn’t meant to extend to the end of the gaff.
We will call this 3.5”.
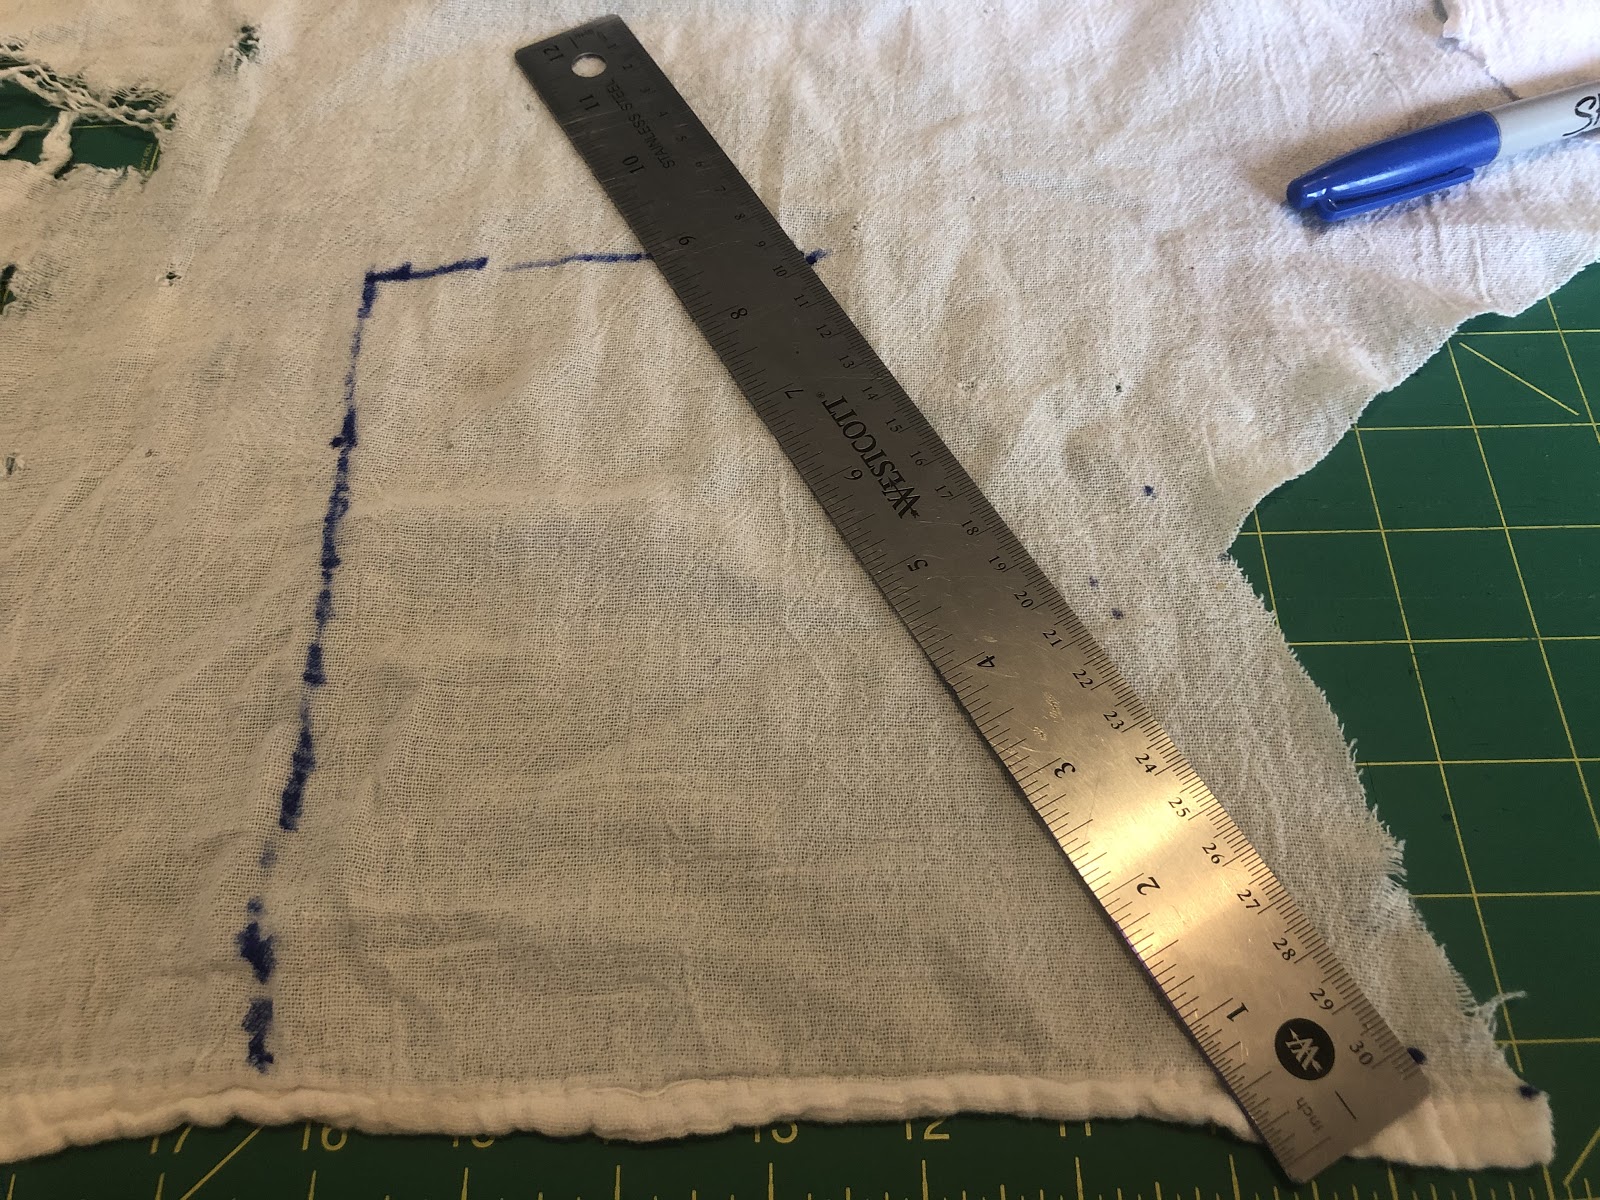
With all those numbers in mind, draw out a gaff sail, but with a squared top.
Use an edge when You can for one of your lines. When drawing using a marker, draw the line ⅛ of an inch outside of the sail. This is so when you cut the sail out, you can cut next to the line instead of on it.
Draw a line from the bottom right corner of the sail to the top right corner.
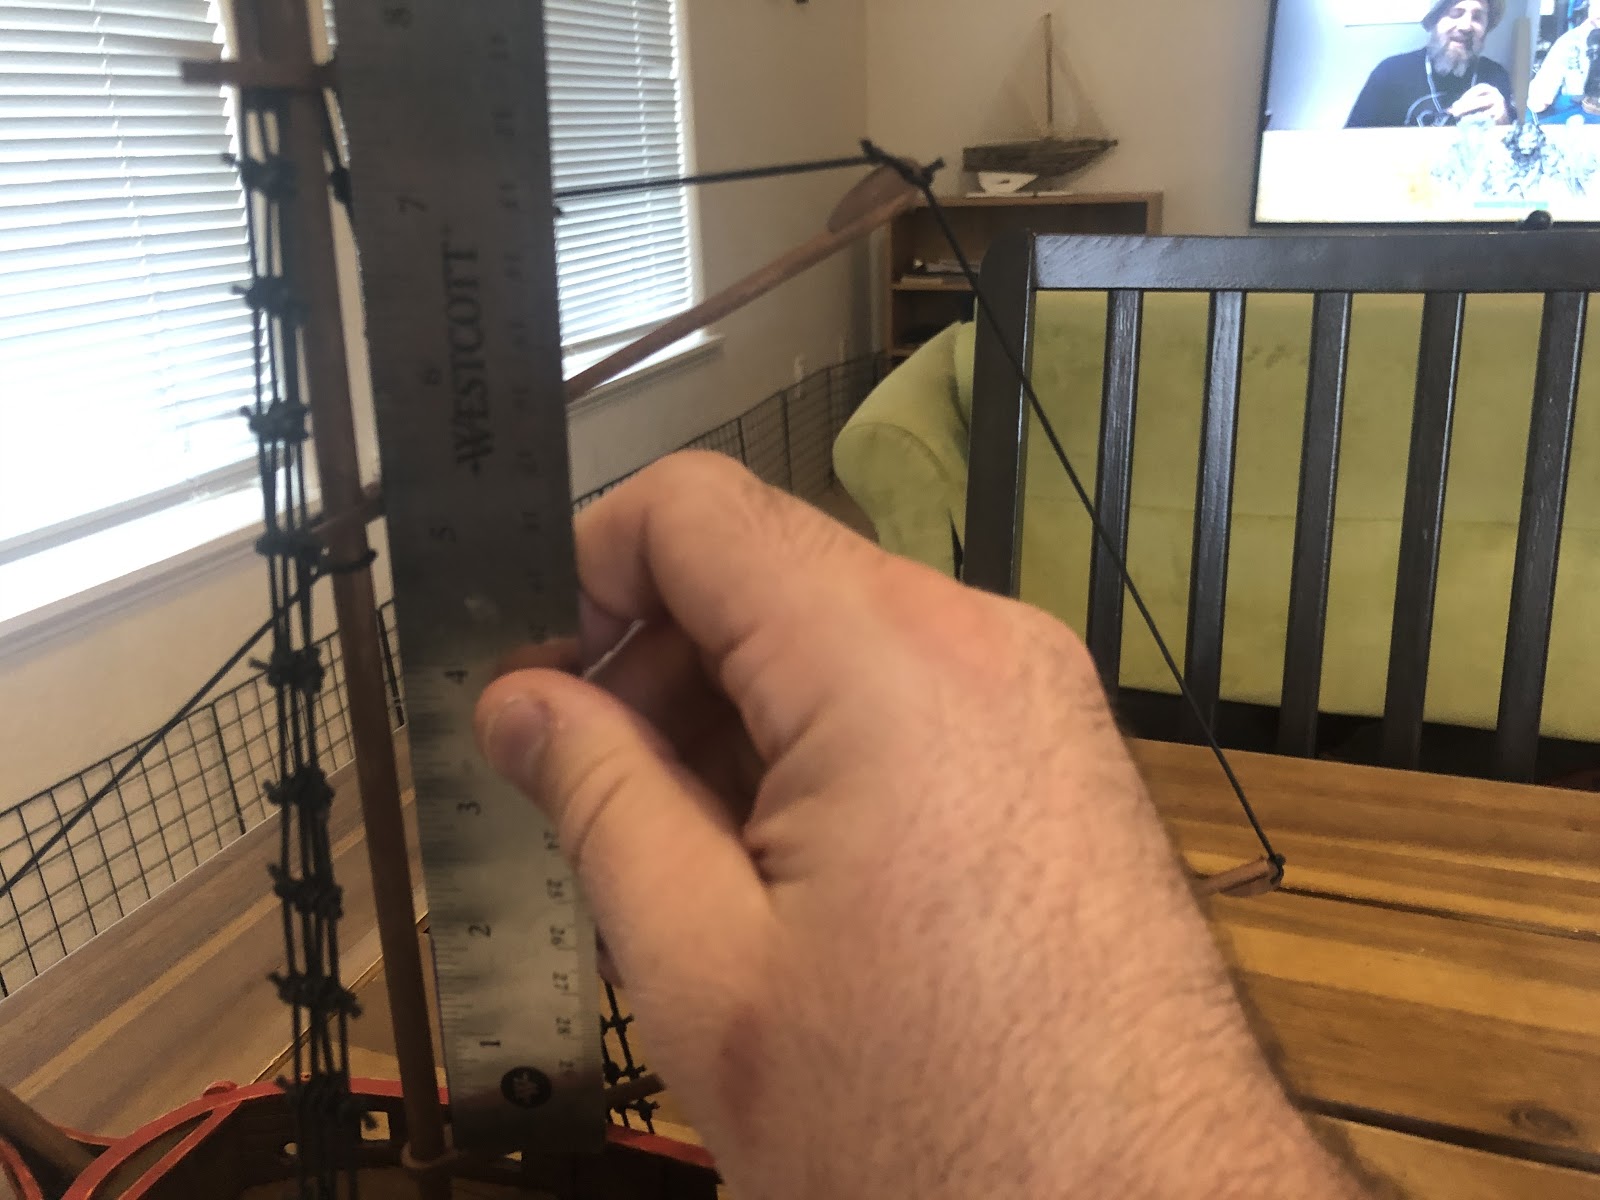
Next measure how high the gaff is to where it connects with the mast. From the picture, it is 5”. Mark the sail 5” up on the left. Next, draw a line from the top right of the gaff to the spot you just marked. This will give you the iconic gaff sail shape.
After that, cut the sail out.

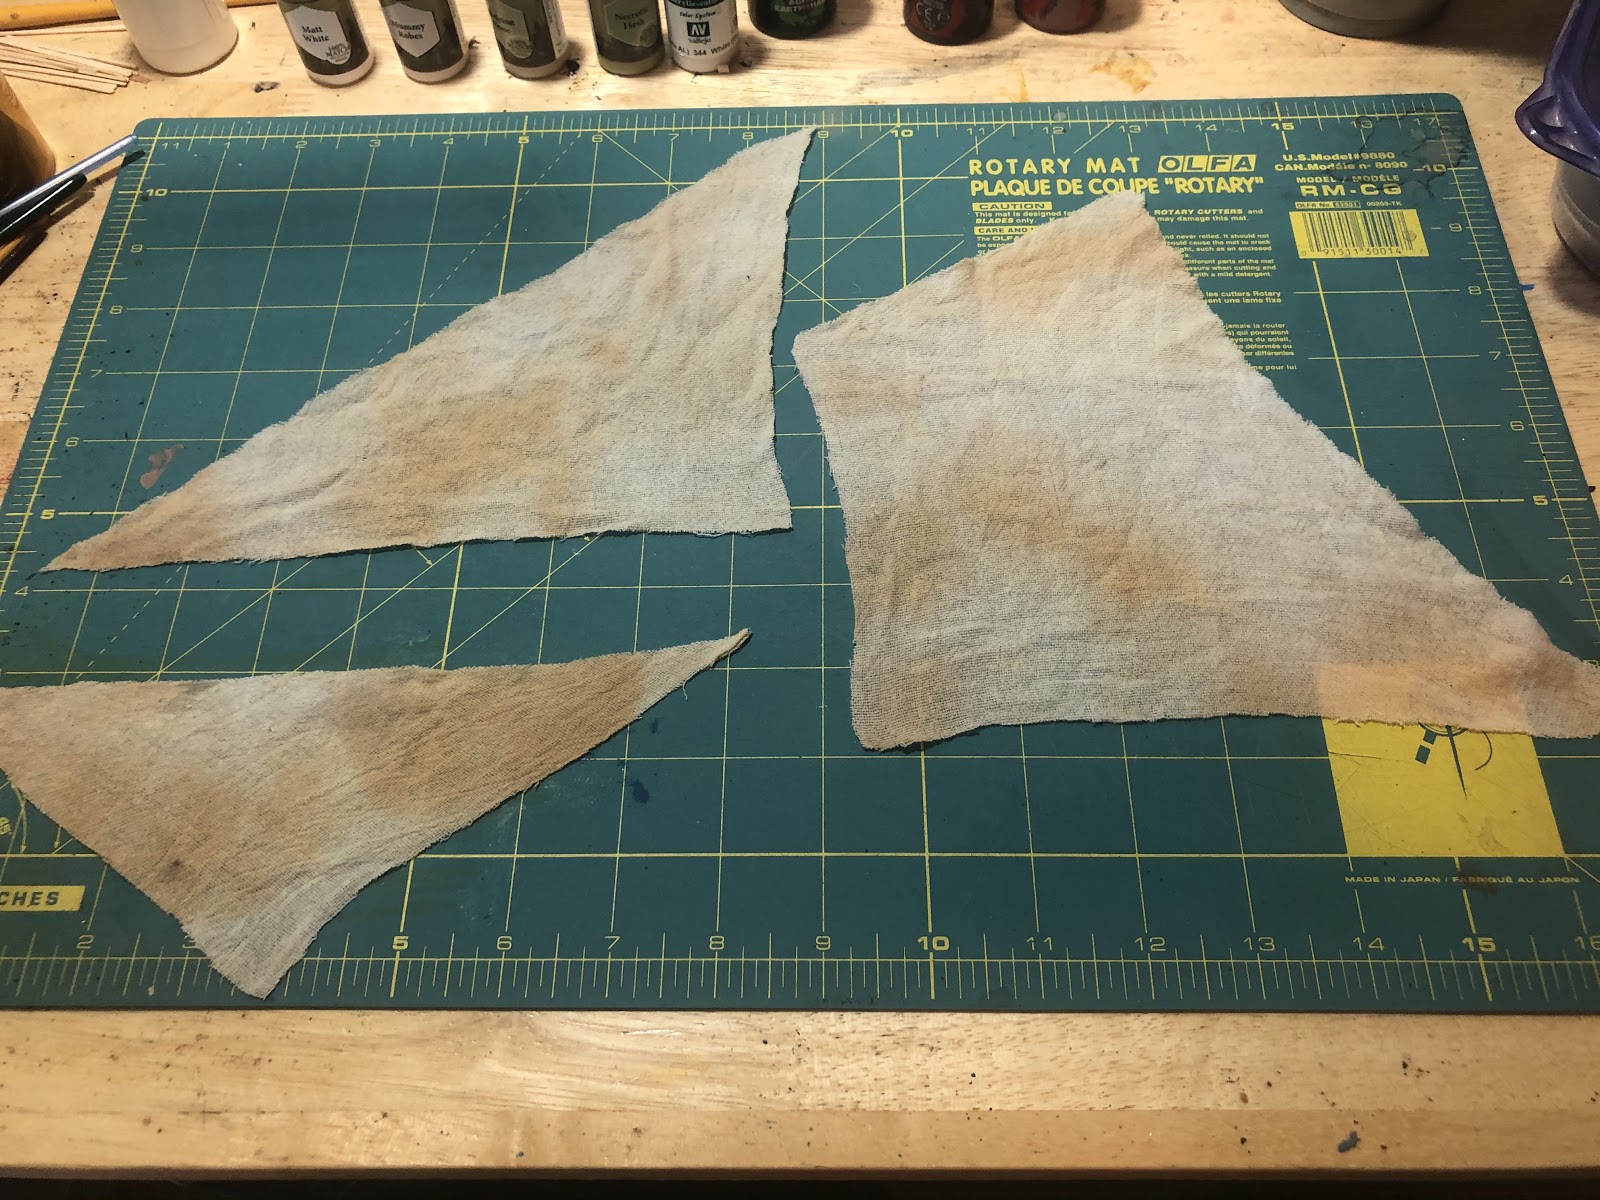
The next sail is the staysail.
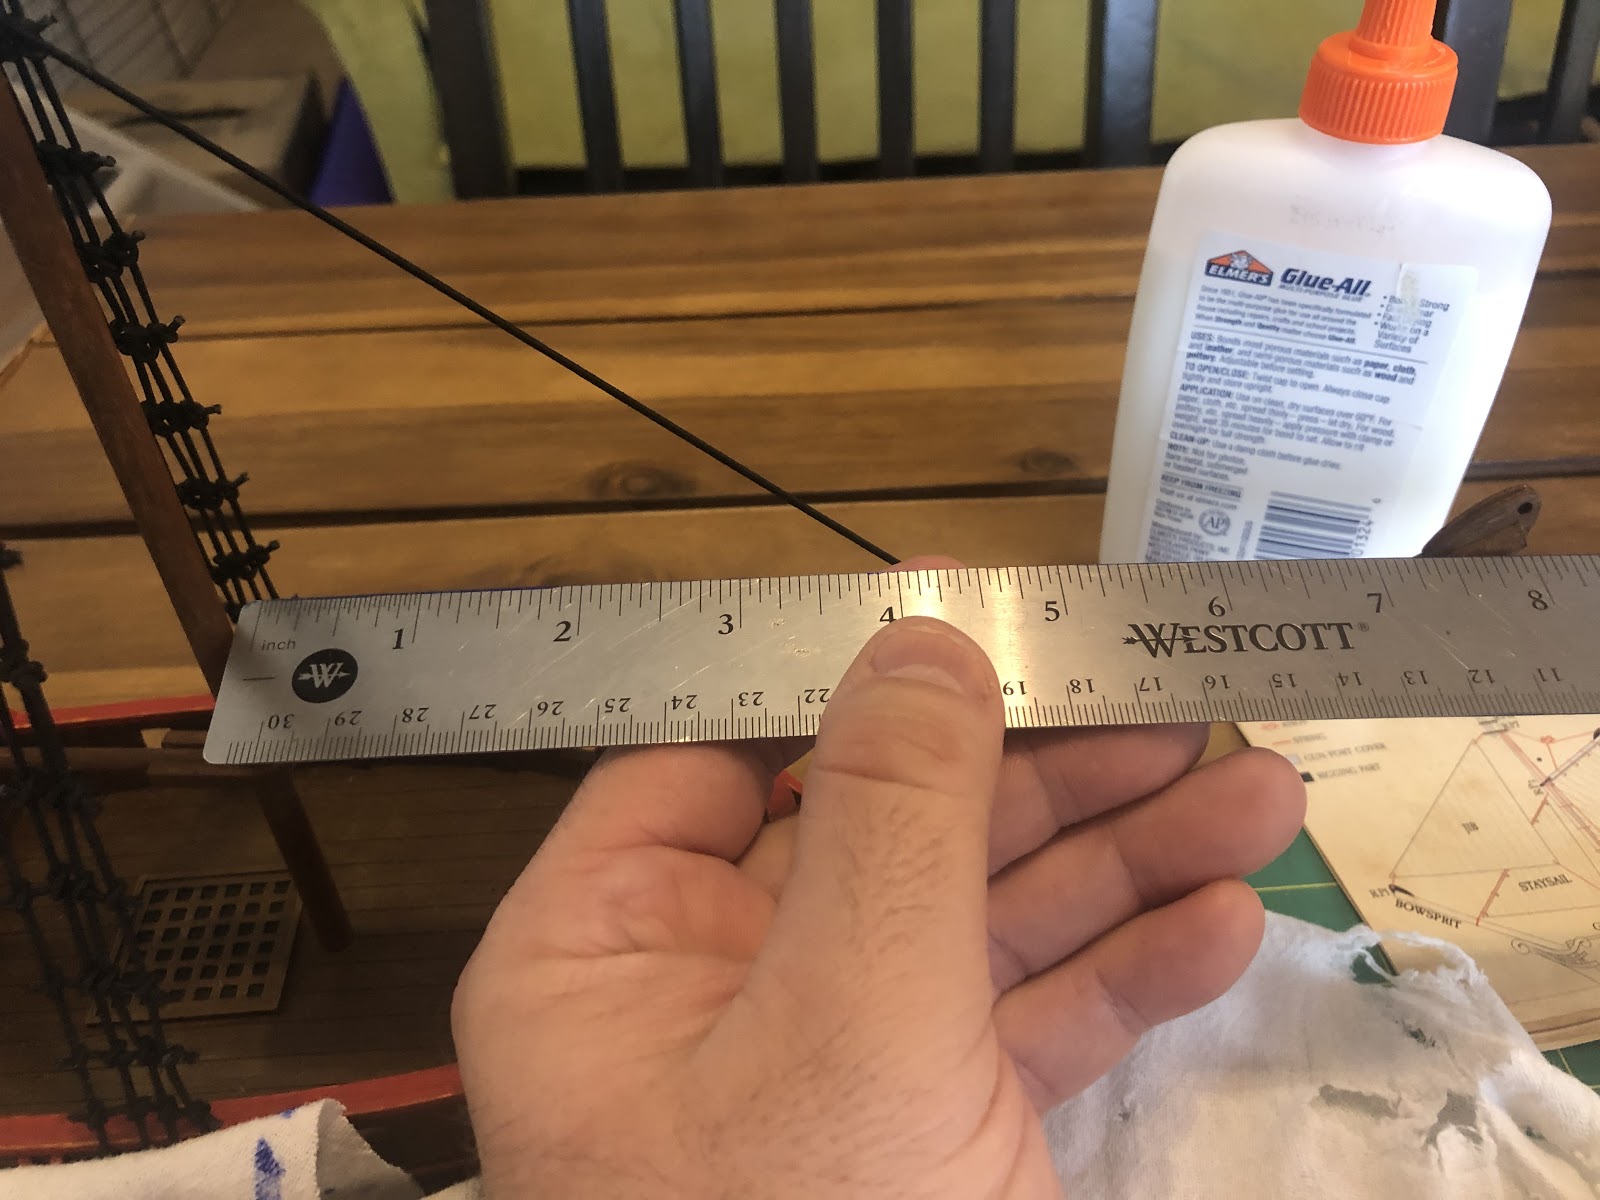
Measure the distance from the mast to where the staysail line is attached to the bowsprit. This is 5 ½”.
Measure how high the staysail line is from where the boom connects with the mast as well. For simplicity we are going to call it 5”.

Using the edge of the flour sack cloth, measure out the square edges of the staysail.

Draw a line from the top left of the stay sail to the bottom right.
Cut out the staysail.
Onto the last sail, the jib.
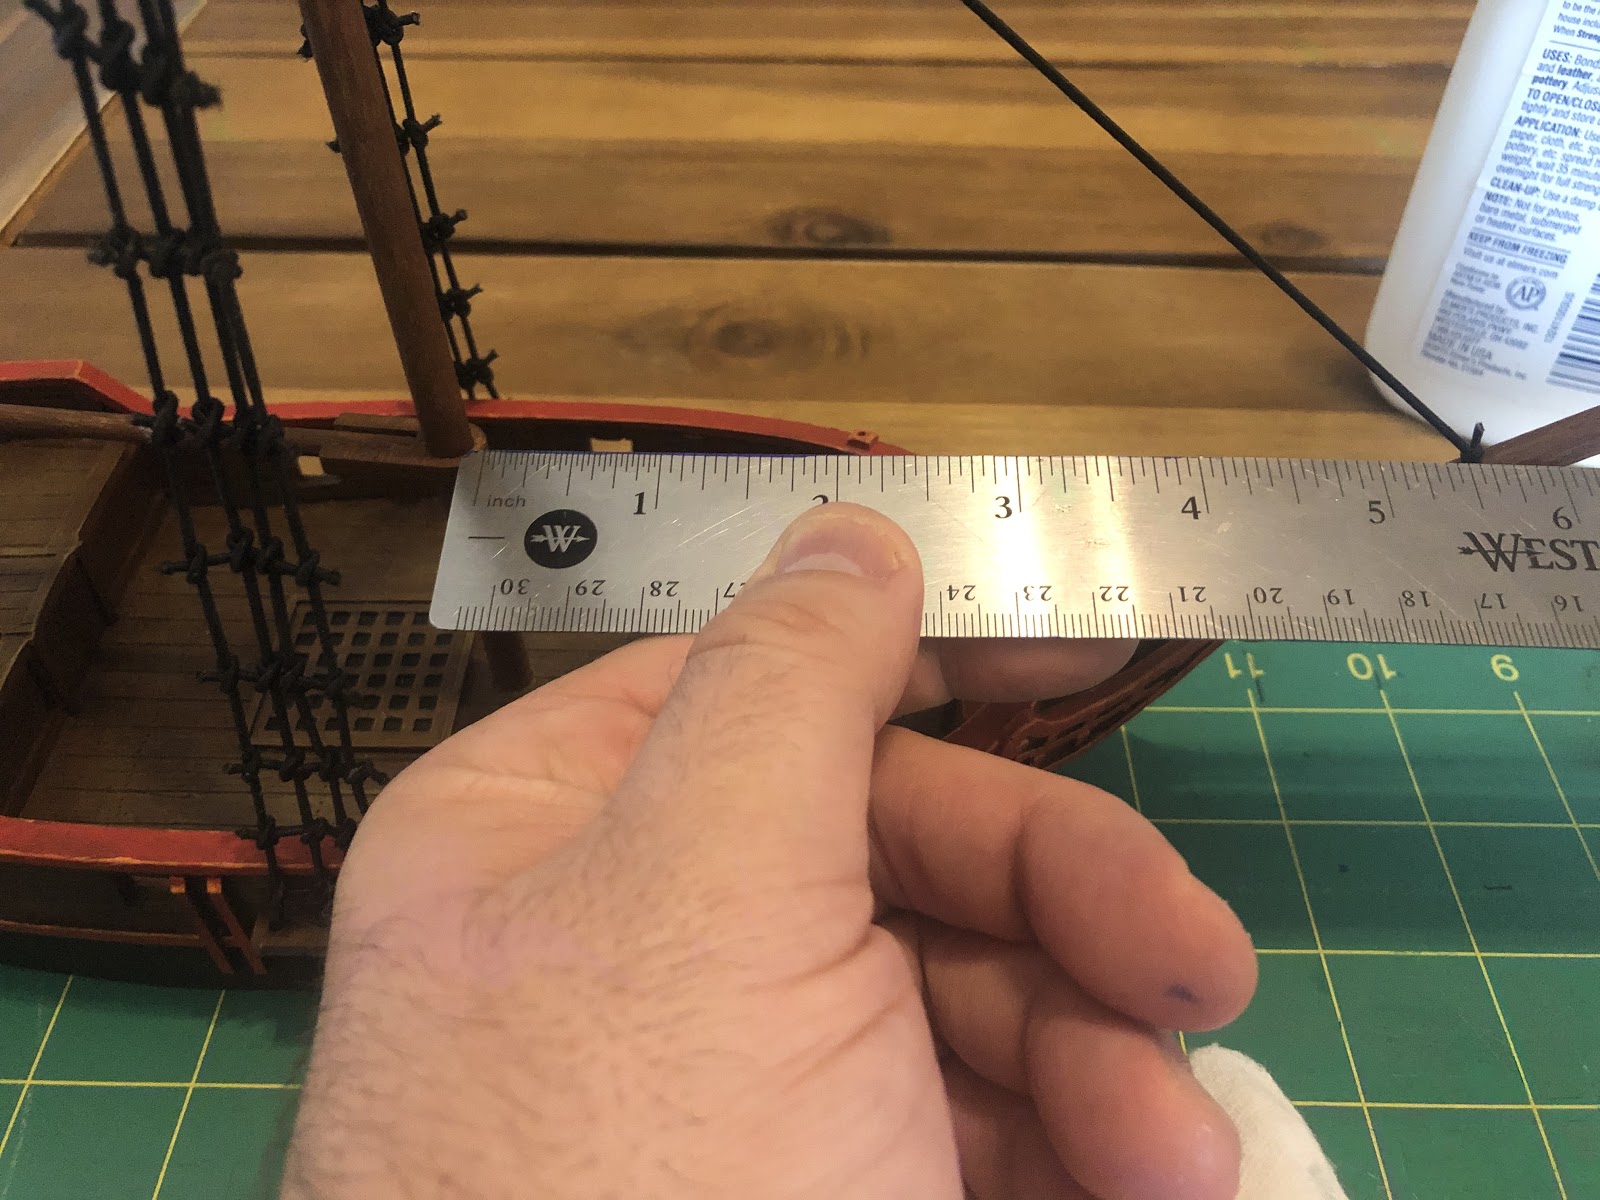
Measure the distance from the mast to the tip of the bowsprit.
Here it is 8”.
Measure the distance from the crosstree to where on the mast you measured from the bowsprit. For the sake of simplicity, we are going to call it 8”.

Lien the other sails, draw out the jib.
Cut out the jib.

Here are the completed sails.

I use black tea to dye the cloth. If you like the bright white look, go ahead and skip to where you attach the sails to the ship.

Put the cloth at the bottom of a mug. Put the tea bag above it, and use a spoon to weigh it down.
Nothing we are doing in this step is going to ruin your mug, though I don’t recommend drinking the tea we will be making.
Boil water and then add it to the mug, just like you would if you were making a cup of tea.
Let the tea steep for at least 5 mins. The longer you let it steep the darker spots it will get.

Arrr!
These sails steeped in tea for about an hour. The dark spots are from where it was next to the tea bag.
If you don’t like this look because you want the ship to look like a well kept Navy vessel, steep the tea and remove the tea bag before adding the sails.
Set the sails somewhere warm or near the sun to dry. Make sure they are flat and not touching. This can take awhile. You need to have them completely dry before attaching them.

Once they are dry they should have a nice texture and color, and be a little stiff. At this point you could paint them.
This is a special purpose needle called an upholstery needle. It is great for threading the elastic through the sails.

Trim the edges of the sail and cut off any loose strings.
Check the jib against where you intend to add it. Cloth will expand when put through dyeing and drying. Cut the sail down to the right size, a little bit at a time.

Thread the needle.
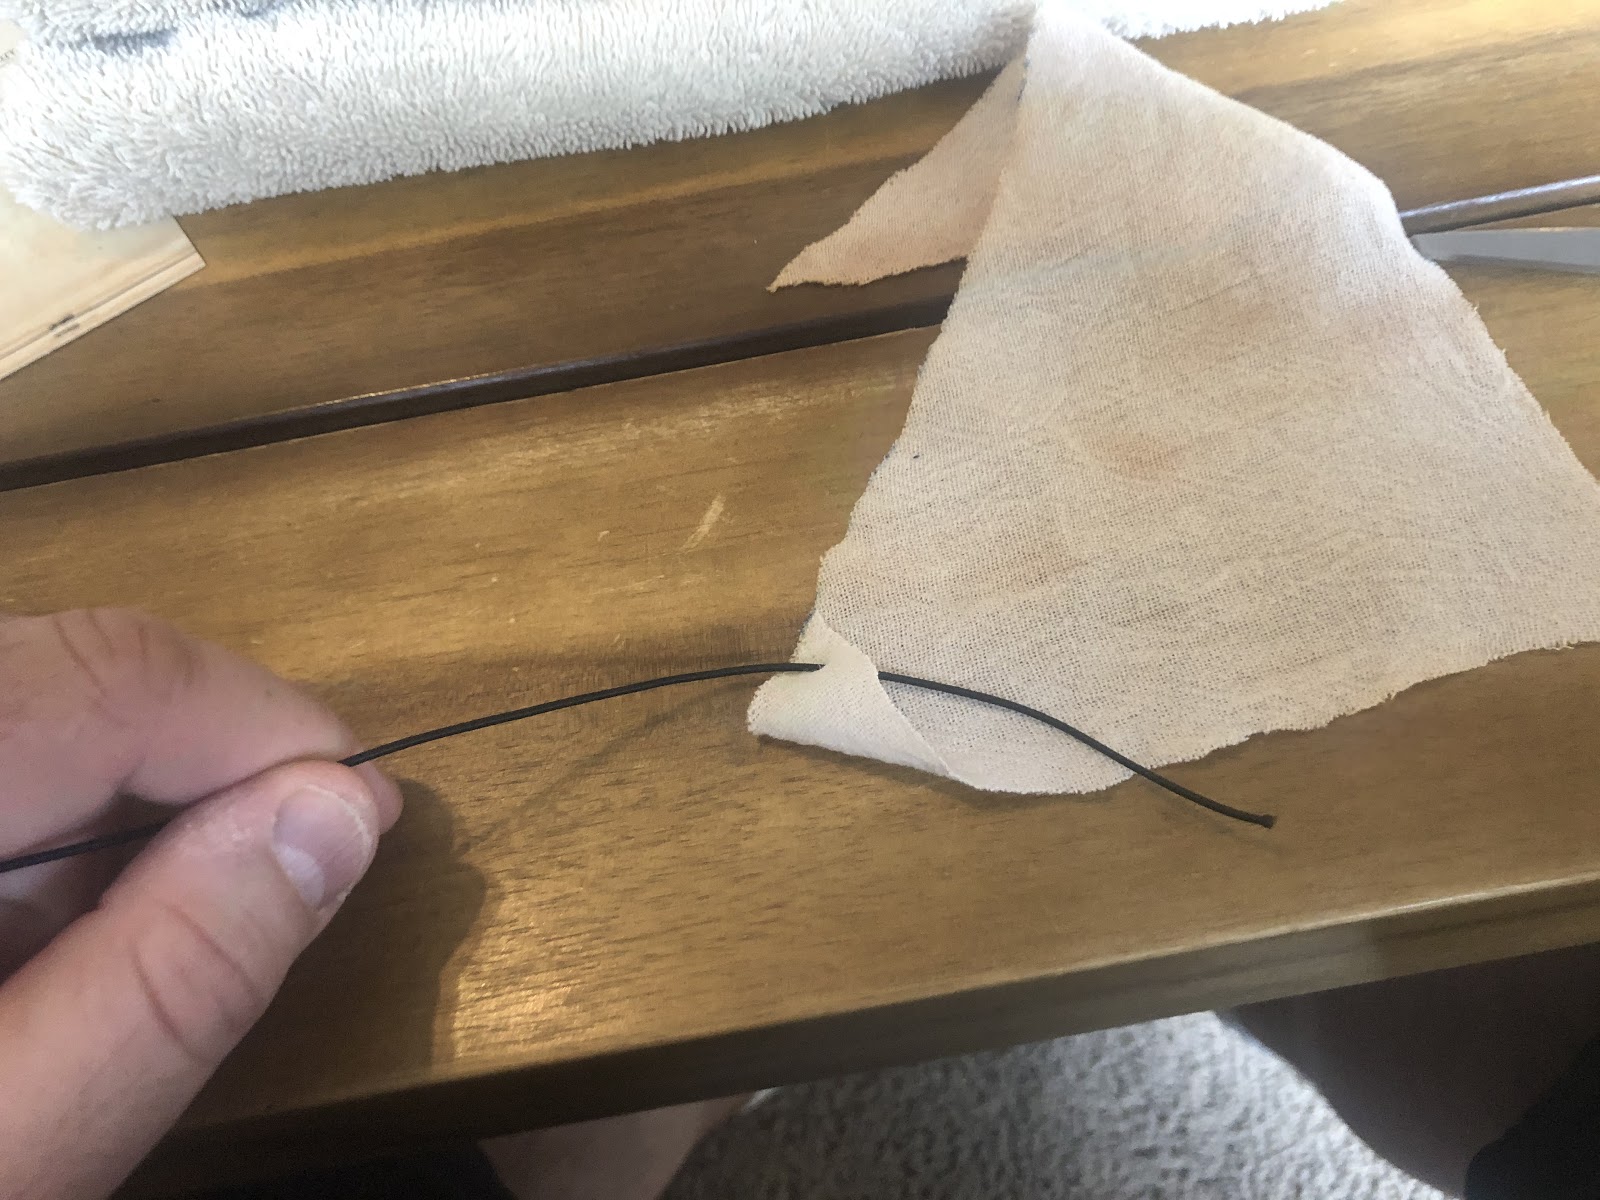
Put the elastic through the forward tip of the jib. Set your hole at least ¼ to ⅛ back from both edges.
The jib is set very high on the ship, and has a little lead on both the mast and bowsprit.

Attach the jib to the crosstree with elastic. Notice that the crosstree hole is vertical, and the jib’s is horizontal. Loop the elastic in the direction that you are going to attach the jib to the chainguard.
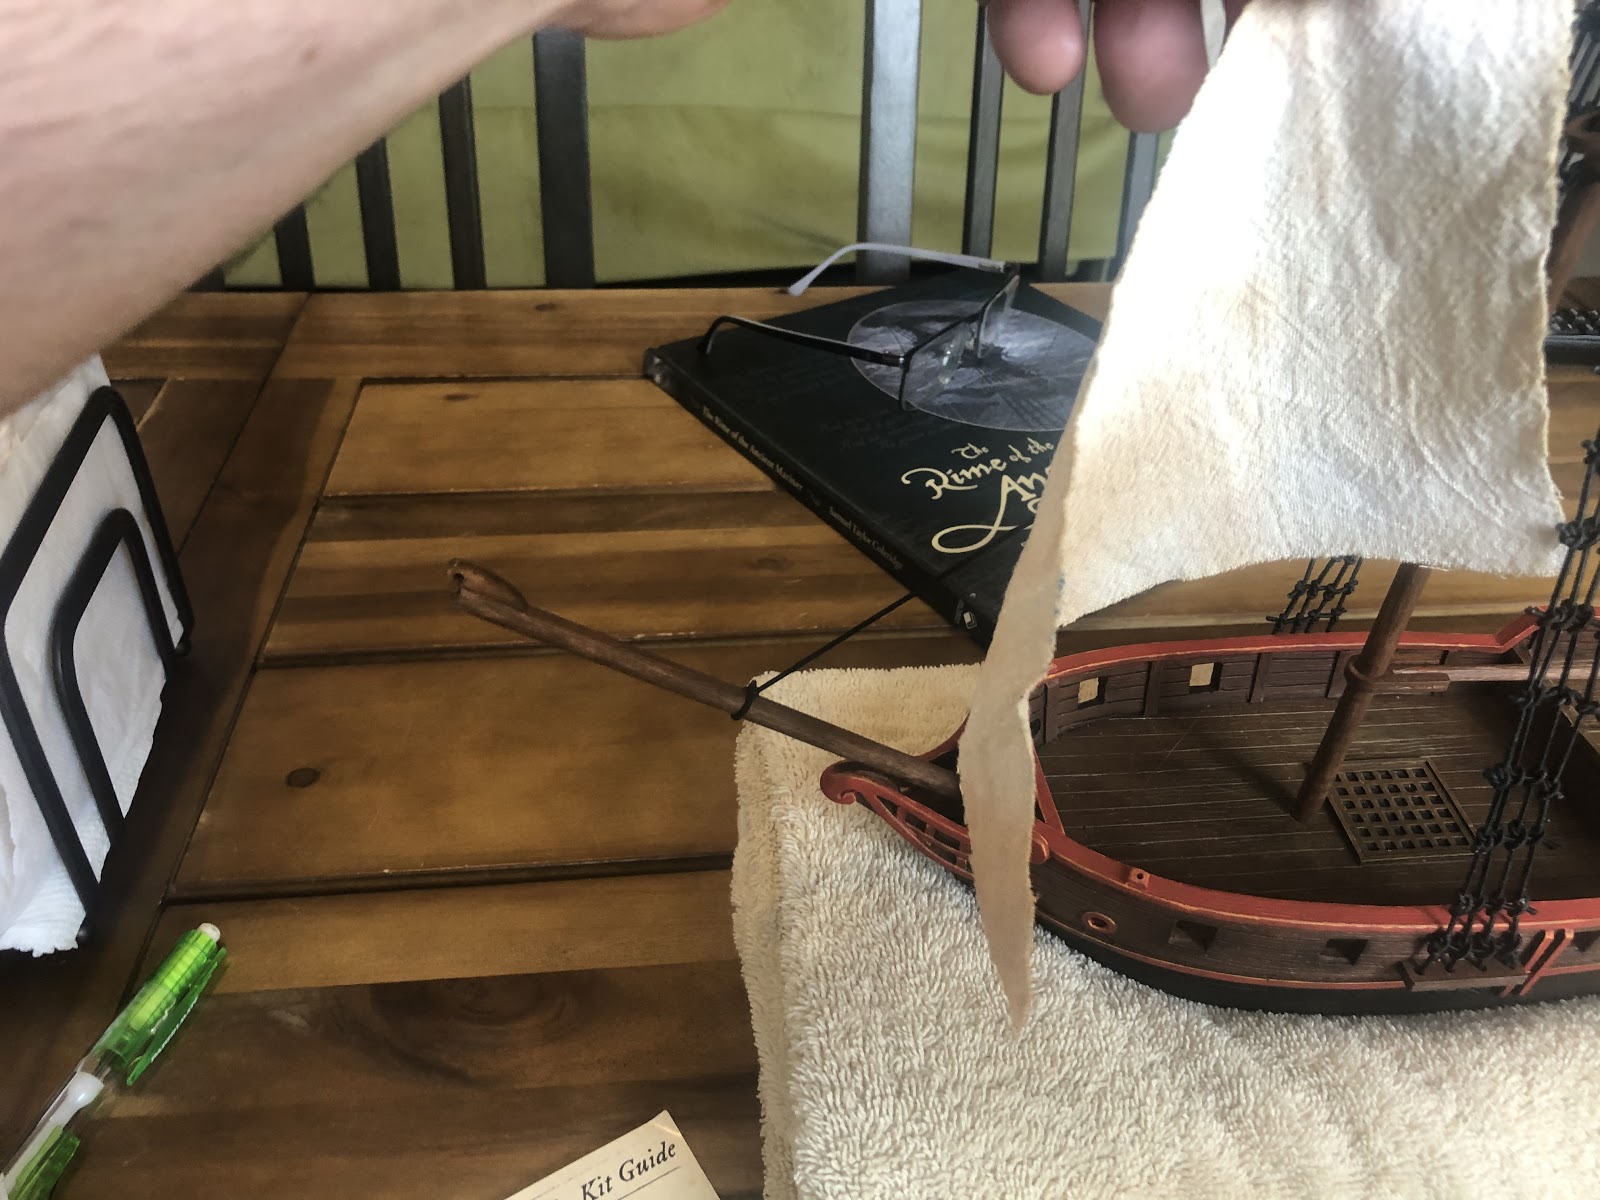
Attach the jib to the end of the bowsprit.

Make a hole for the elastic in the bottom of the jib, in the corner of the sail, ¼” in on each side. Tie a slip knot.
The rigging guide had this line attached to the front hole of the chainguard.
Stretch the sail to the chainguard, until the sail looks taut. You might have to go back undo some knots, and trim the sail, to make it look just right.

Once you are happy with where the jib is going to be, measure double the length from the corner near the chain guard, add about 2”, and cut the elastic. You are going to use this line for the staysail as well.
With that the first sail is done.
Next start on the staysail.

Use the same process with the staysail of measuring and trimming to fit. Attach the staysail to the staysail line, not the bowsprit and mast. Once it is attached to the line, thread the corner near the chainguard with the same elastic that’s attached to the jib. Stretch both sails tight, then knot the staysail.
If it looks right to you, glue the knots and then trim the elastic.

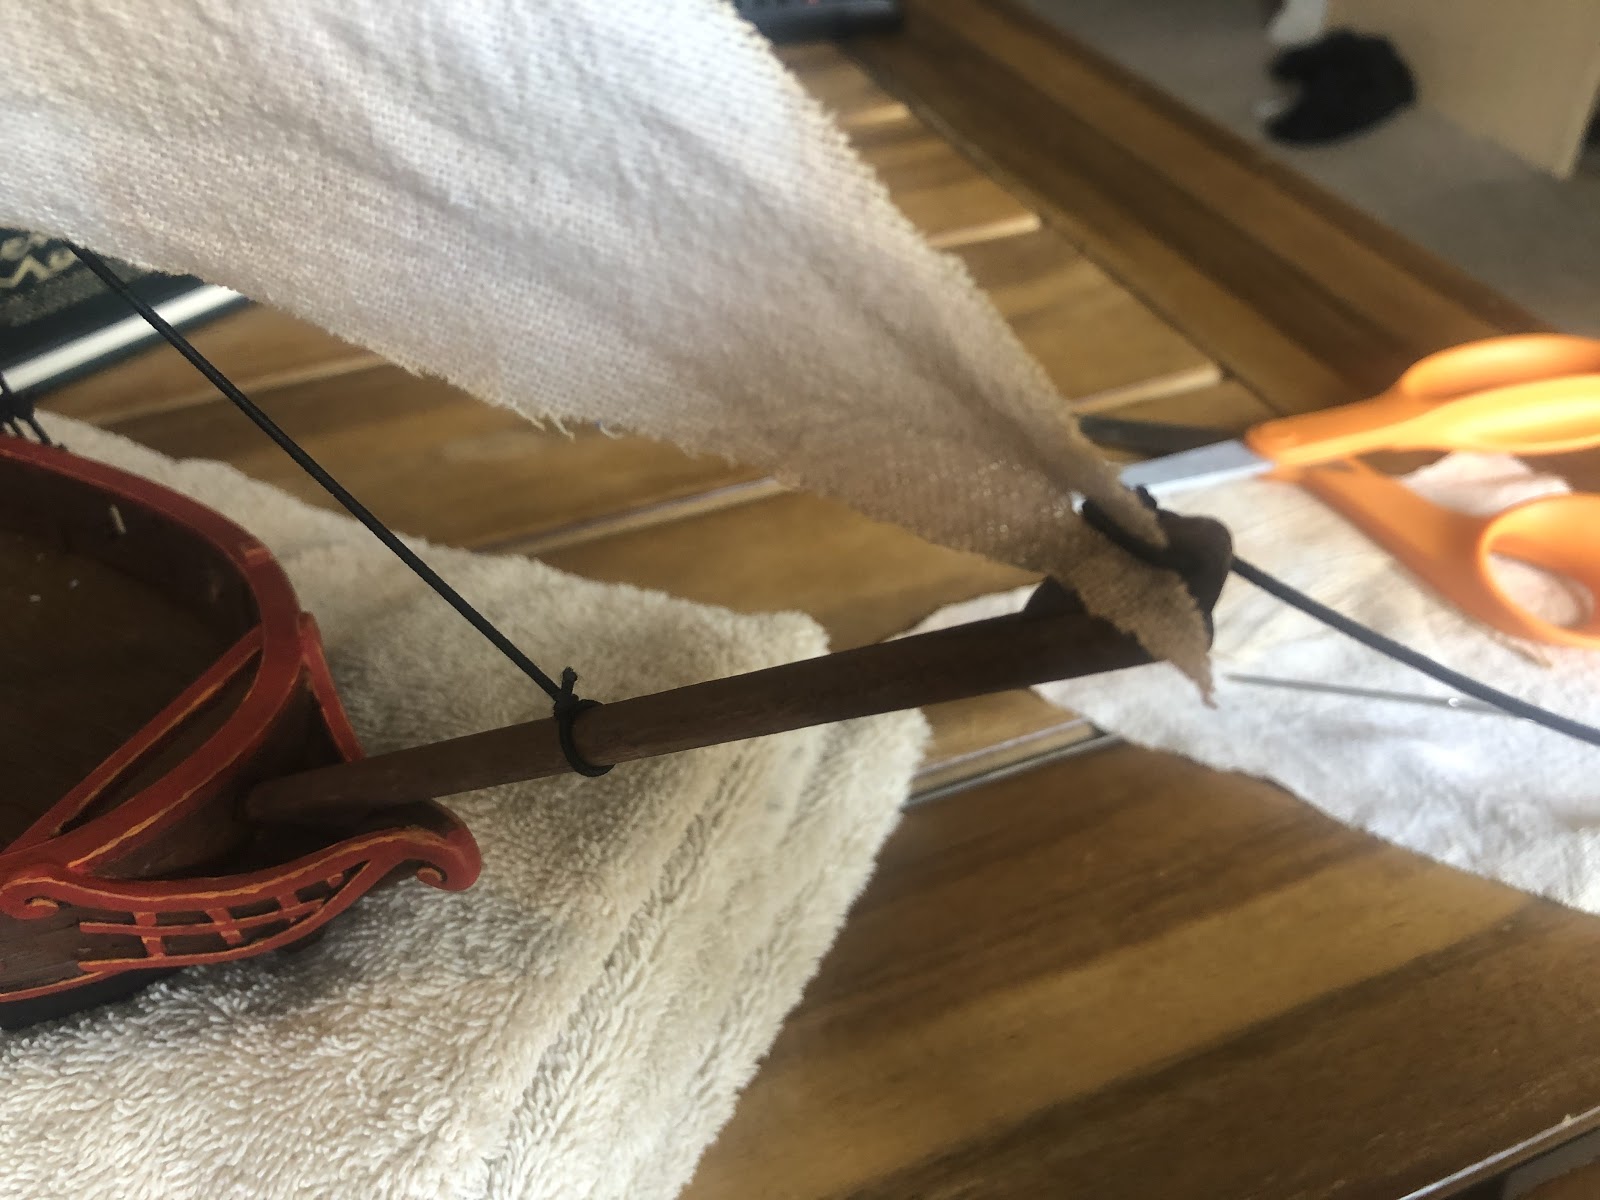
Repeat the same process with the gaff sail of measuring and training.
The gaff sail is tied to the mast and gaff at several points. The easiest way I’ve found to do this by eye is to put a hole in each corner, then one in the center, between both edges. Then, thread elastic between the hole you made in the middle and the hole you made in the corner.
Repeat this for the gaff sail along the mast and the gaff. The sail is only tied to the boom once at the very bottom.
Remember that the gaff sail doesn’t have to extend to the very end of the gaff or boom.
When you’re done, glue the knots and trim them.
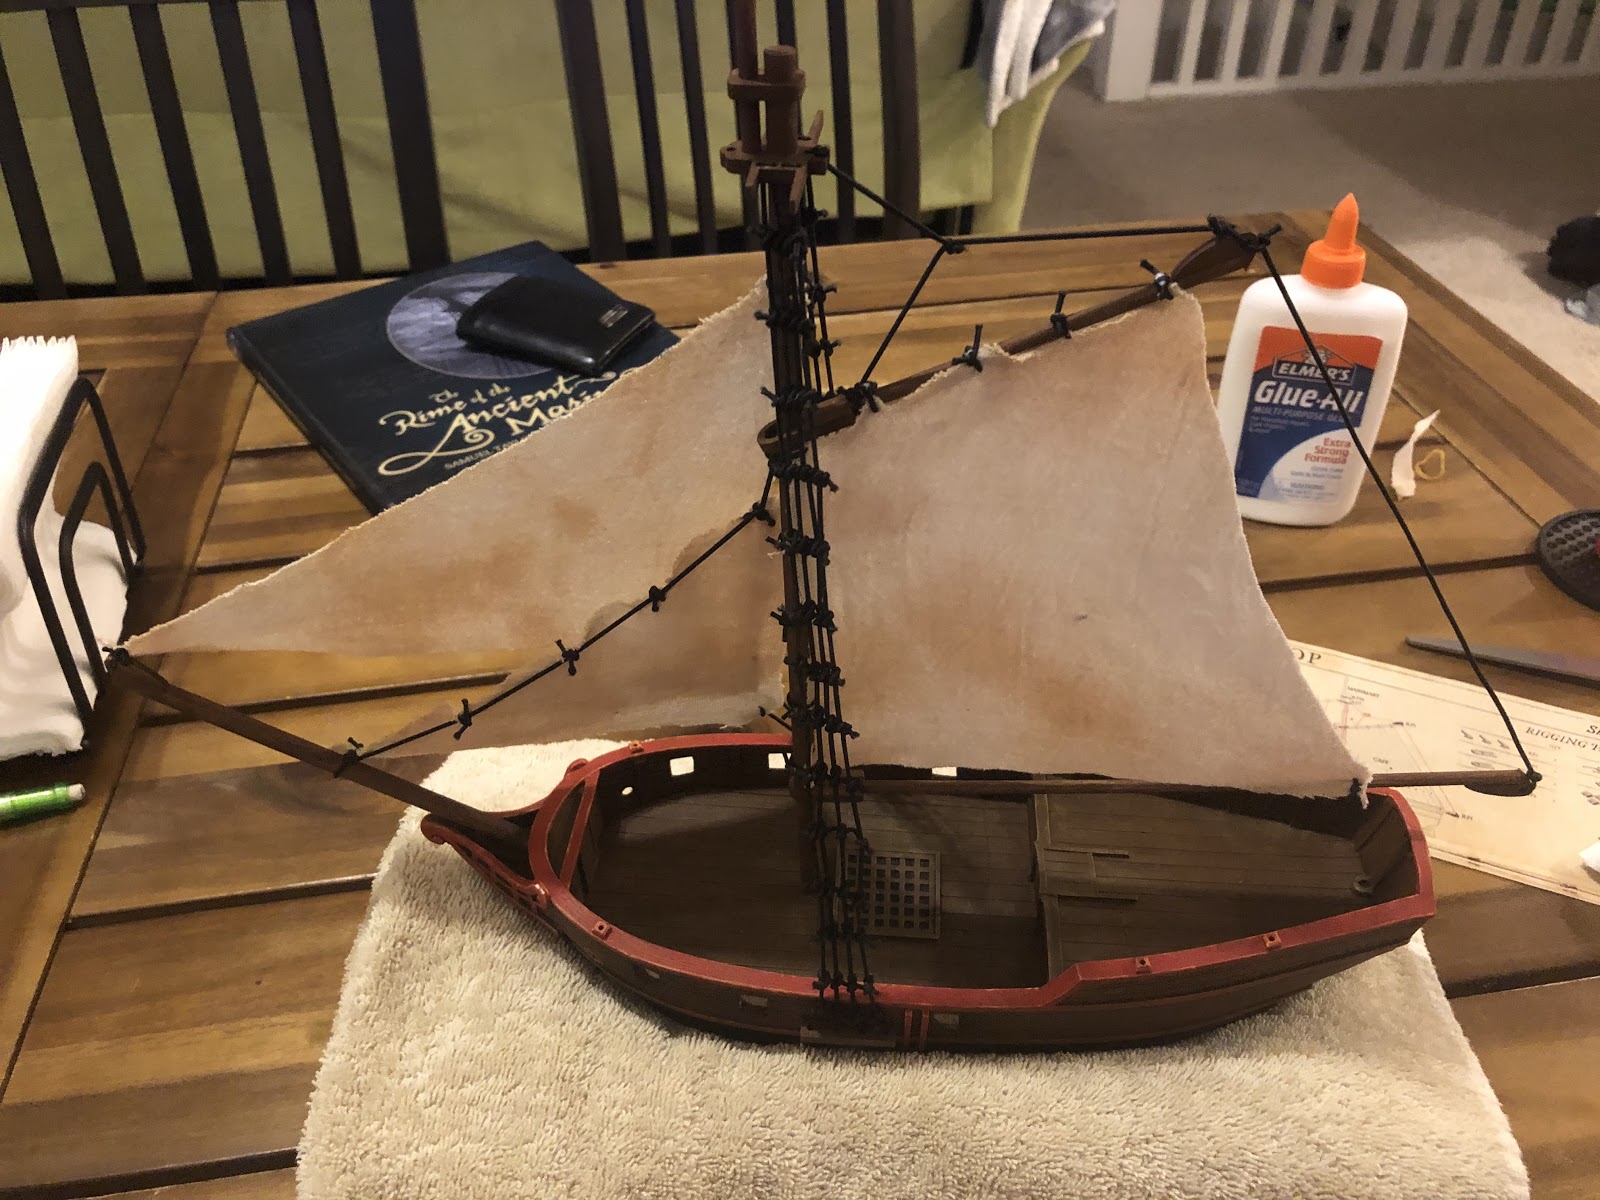
Once the gaff sail is attached, the ship is done and ready for combat on the high seas!
And here is me thinking they came beautifully painted when you bought them!! absolutely brilliant post Joseph, very informative, give yourself a big pat on the back mate!!
Pingback: Blood & Plunder Global Community Campaign | Blood & Pigment
Pingback: Blood & Plunder Global Community Campaign Rules | Blood & Pigment
Pingback: Attaching Sails to the Blood & Plunder Balandra & Bermuda Sloop - Blood & Pigment
Great article especially for those of us having yet to take the plunge! Seeing this I was inspired to get cracking on my own sloop. One suggestion I would like to toss out: I used orthodontist rubber bands (the tiny ones, 3/8″ & 1/4″) to temporarily hold the joints in place before gluing. This not only helped me to space them correctly but also helped to hold the joints in place while the glue dried. When done, simply snip!