A Hitherto
Undiscovered Description
of the
Battle of El Real Santa Maria,
Where in the Well Trained
Spanish Militia
Fought Against
the Vagaries of the English Buccaneers
and their Traitorous Allies
By Guy Rheuark
This is a battle report for the third battle of the Buccaneer’s Companion Vol. I, a free expansion that Firelock Games releases in 2020. You can read part 1 here. After that you can read part 2 here.
Each scenario in the Buccaneers Companion has three ways to play it. You can use the 200 point force they made. You can make a Historical Force using the Army Scale rules. Lastly, you can make your own Freeplay Force of any point level, using the guidelines they give.
After playing two games with the historical forces, Joseph and I were ready to make our own forces. We decided to use the Army Scale rules and try getting each side close to the historical account. I have played about four army scale games, but all of them have been with ships. We decided on 500 points, and got to work researching what sort of troops we should bring.
In an army scale game each side splits their points between a minimum of three companies. Each company has to have at least 100 points in it. During game play, you only draw a single card for each company, and a whole company activates, one unit at a time, when you play your card. This is a fun way to do large games, as it speeds up your turns quite a bit.
The Spanish Forces
After reviewing the Historical Background I gave myself a couple guidelines to the type of force I had to build. The Spanish at Santa Maria were rotated in from Panama, and about 18% of them were natives armed with bows. I planned to have two companies of Spanish Militia, and one company of Natives.
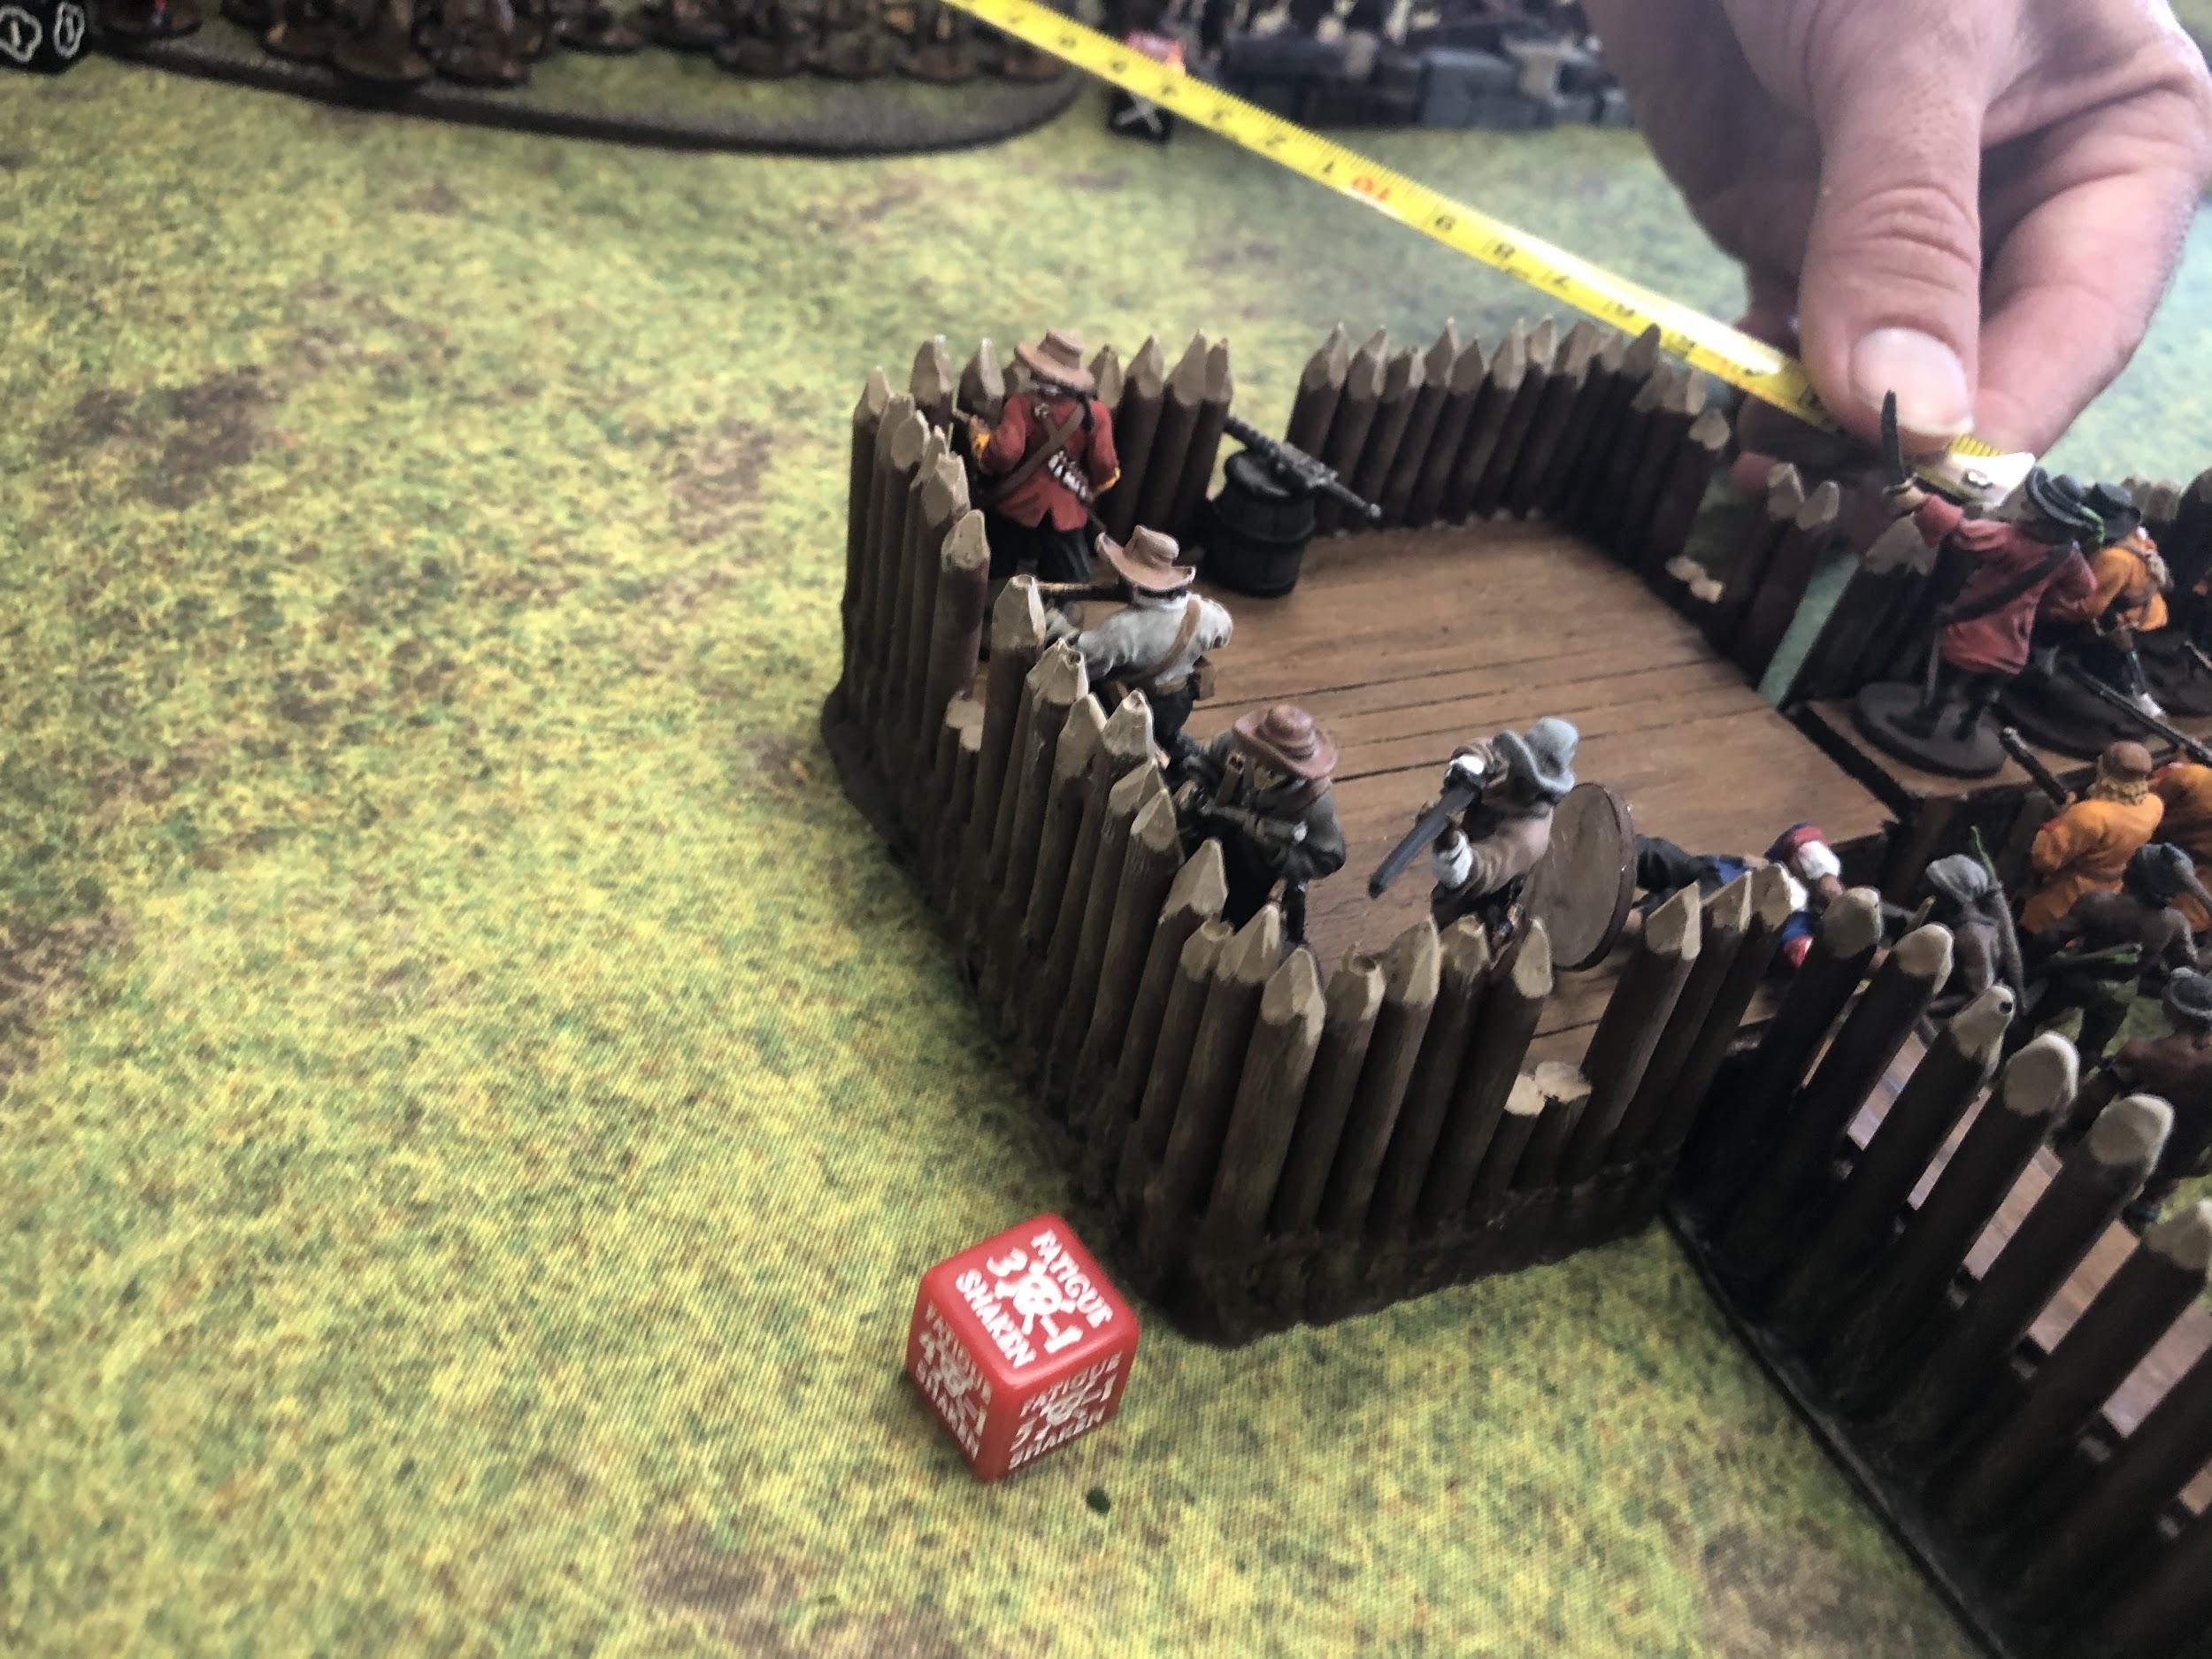
I was also going to get to use fortifications. Although I do have some watchtowers I built, and a painted stone watchtower, the Spanish in Santa Maria used a Palisade fort. Luckily I knew someone with a fort I could borrow.
I then made a plan to make a square fort using four bastions and two wall segments between each bastion. After asking Joseph if I could borrow his fort, I set down some other limitations. The Spanish didn’t have any cannons, so I decided to arm each bastion with one swivel gun. I also didn’t want to use Hostigadores, as these troops were from garrisons.
Company 1 Spanish Militia

Experienced Spanish Militia Commander
8 Lanceros
9 Milicianos – trained with Officer
8 Milicianos – trained
8 Milicianos – trained
4 Swivel Guns
4 Bastions
Company 2 Spanish Militia
Experienced Spanish Militia Commander
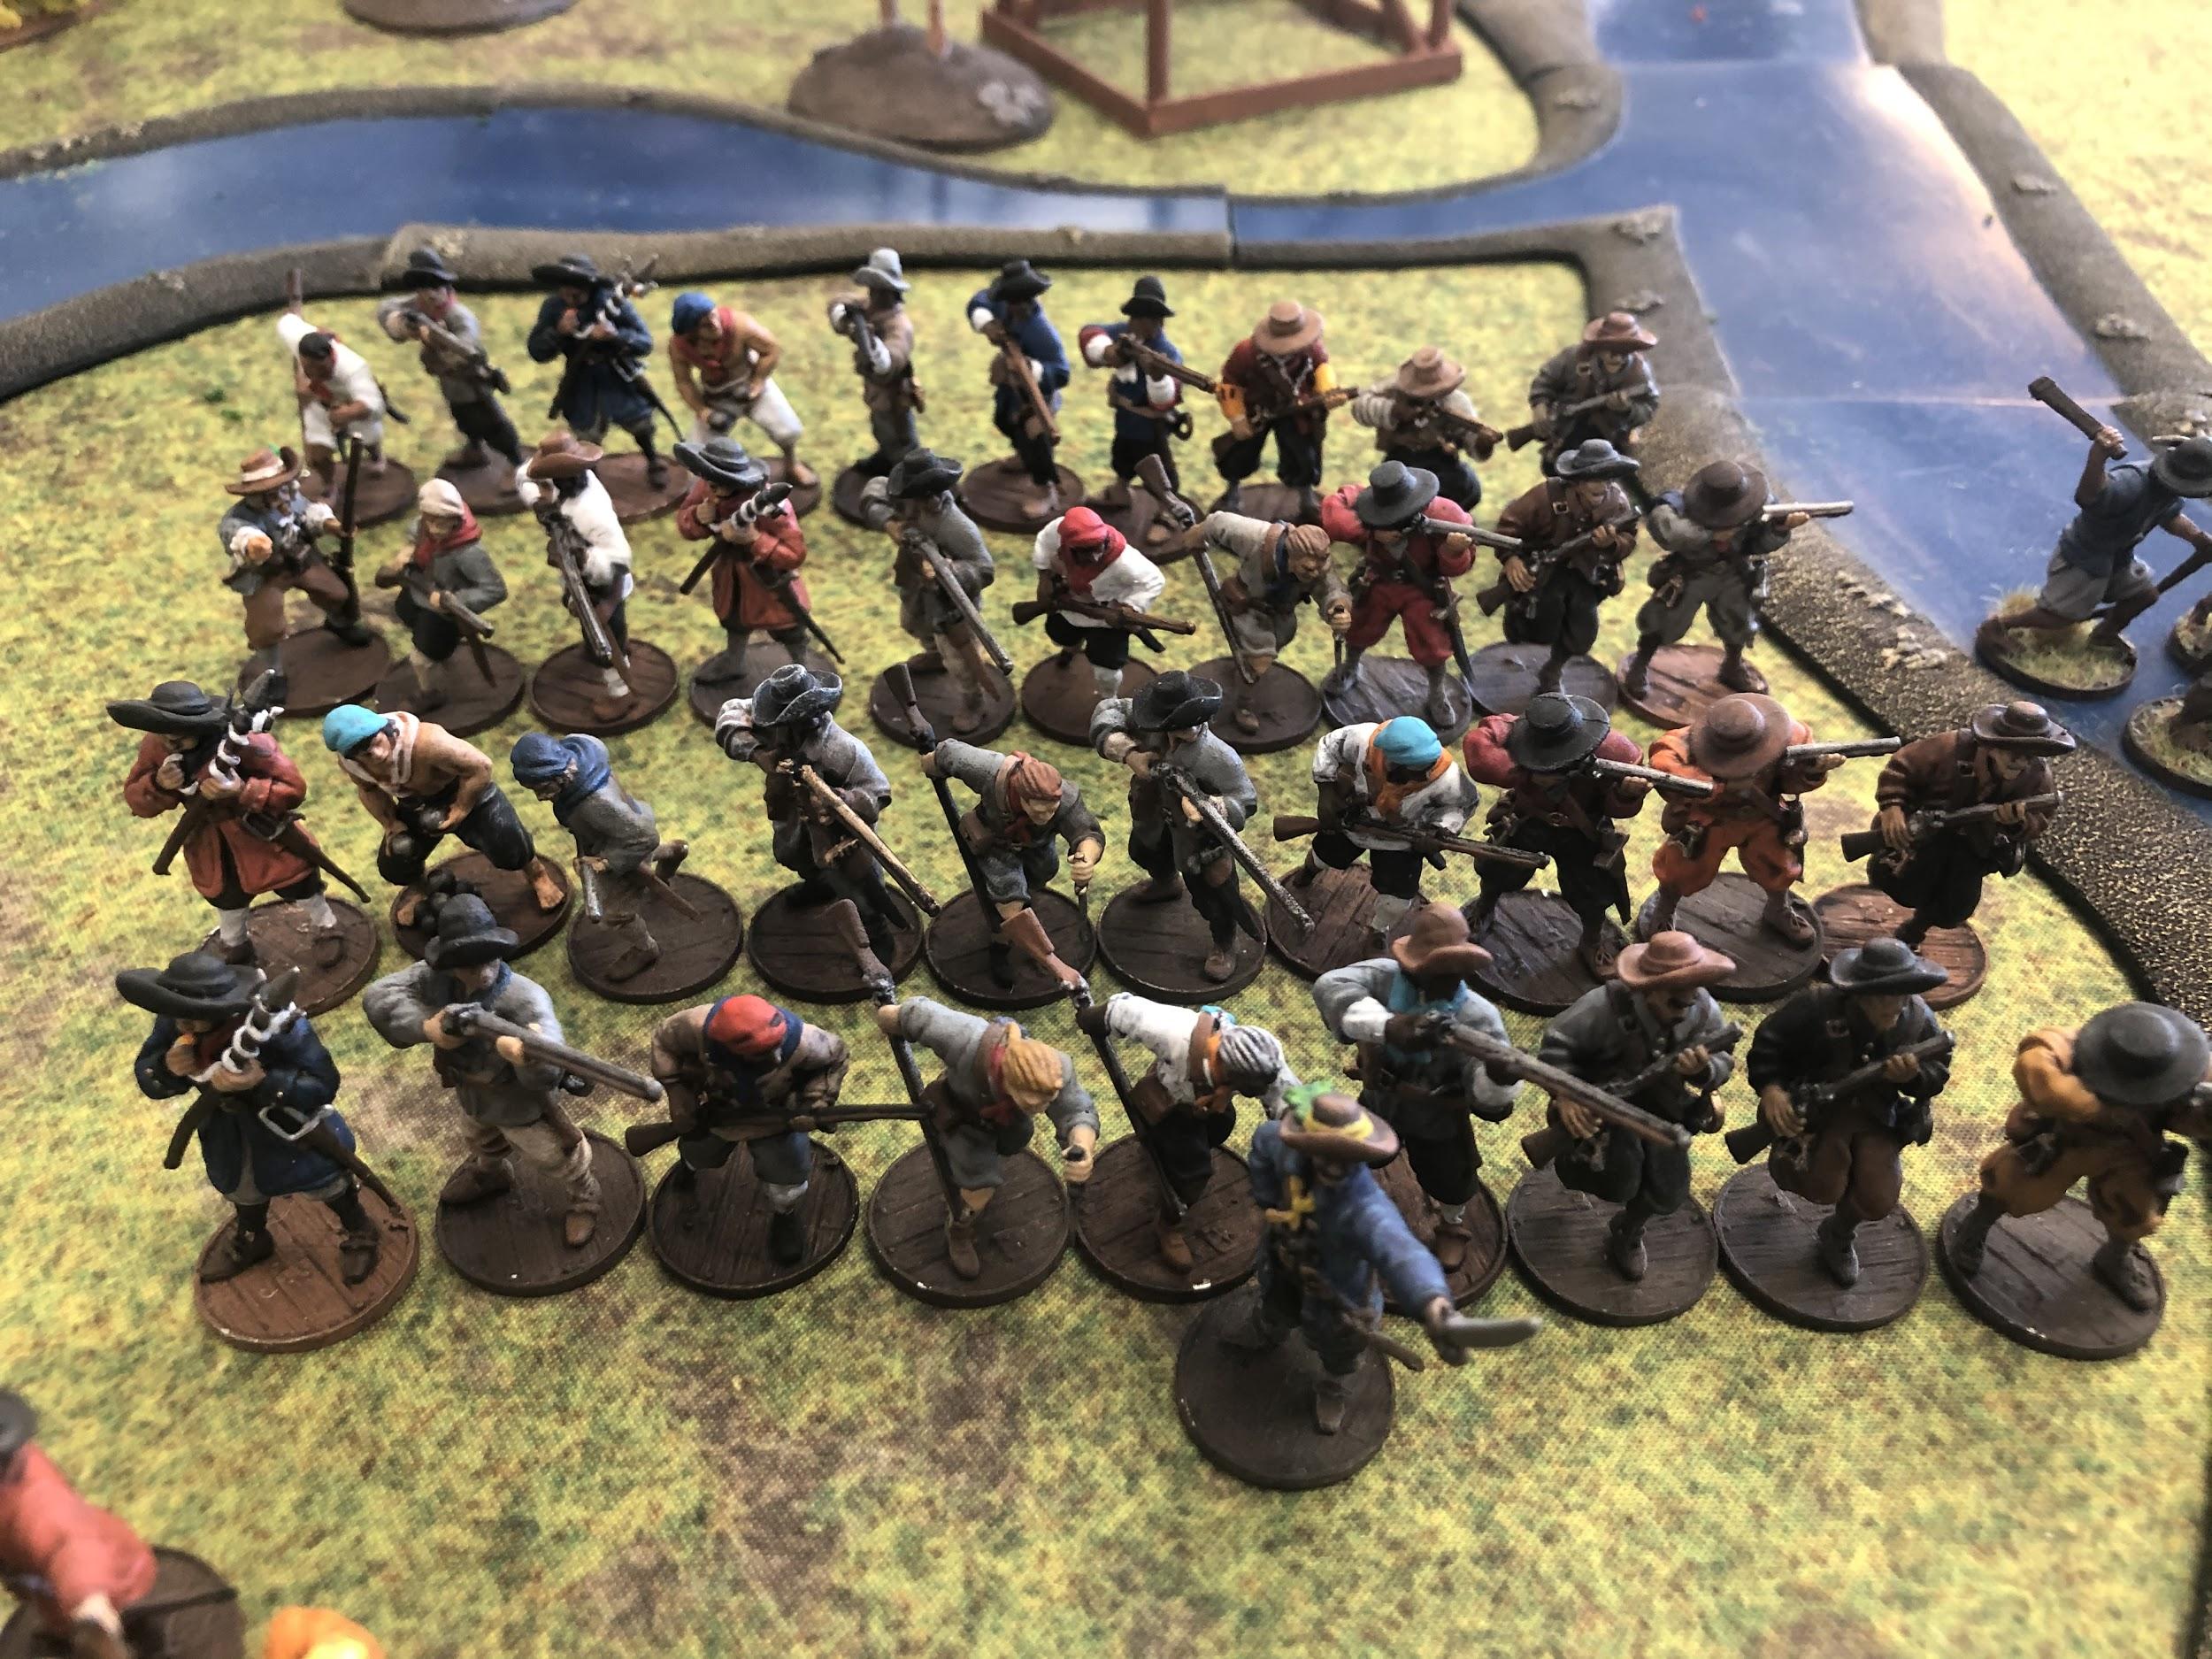
9 Marineros – with Blunderbuss and Muskets
10 Marineros – with Blunderbuss and Muskets
10 Marineros – with Blunderbuss and Muskets
10 Marineros – with Blunderbuss and Muskets with Grizzled Veteran
5 Palisade Wall Sections
Company 3 Caribbean Tribes Allies

Untested Southern Tribes Commander
8 Warrior Archers – War Captains with Poison Arrows
8 Warrior Archers – with Poison Arrows
3 Palisade Wall Sections
The Buccaneer Force
Richard Sawkins led the attack on Santa Marina at the behest of King Golden Cap and the Cuna people. In this battle King Golden Cap joins him, as does Bartholomew Sharp, John “Zombie” Coxon, and the Unknown African.

Company 1 – English Buccaneers
Richard Sawkins
8 Forlorn Hope – Veteran
9 Flibustiers with the Unknown African
6 Sea Dogs
Company 2 – English Buccaneers
Untested English Buccaneer Captain
6 Kapers
6 Freebooters with John Coxson
9 Boucaniers with Bartholomew Sharp
Company 3 – the Golden Island Tribe Allies
King Golden Cap
9 Warriors – with bows and thrown weapons
6 Warriors – with bows and thrown weapons
6 Warriors – with bows and thrown weapons
5 Warriors – with bows and thrown weapons
6 Young Warriors – with thrown weapons

Like most English Buccaneer lists, the first and second company is filled with deadly muskets. Joseph decided to use his King Golden Cap force from our earlier Battle.
While it might look similar to the historic force from Portobello, both company 1 and 2 have large French support units and a character in almost every unit.
The Scenario – Santa Maria
This scenario is a modified version of Rescue from No Peace Beyond the Line. In it, the general of the Spanish forces gets a hostage, King Golden Cap’s daughter. She works just like a Captured Merchant, with the added bonus of not allowing Native units to fire on the unit she is attached to. At this point, I think she was most likely “married” to a Spanish soldier, so we used the Spy model from the Civilian Character Pack.
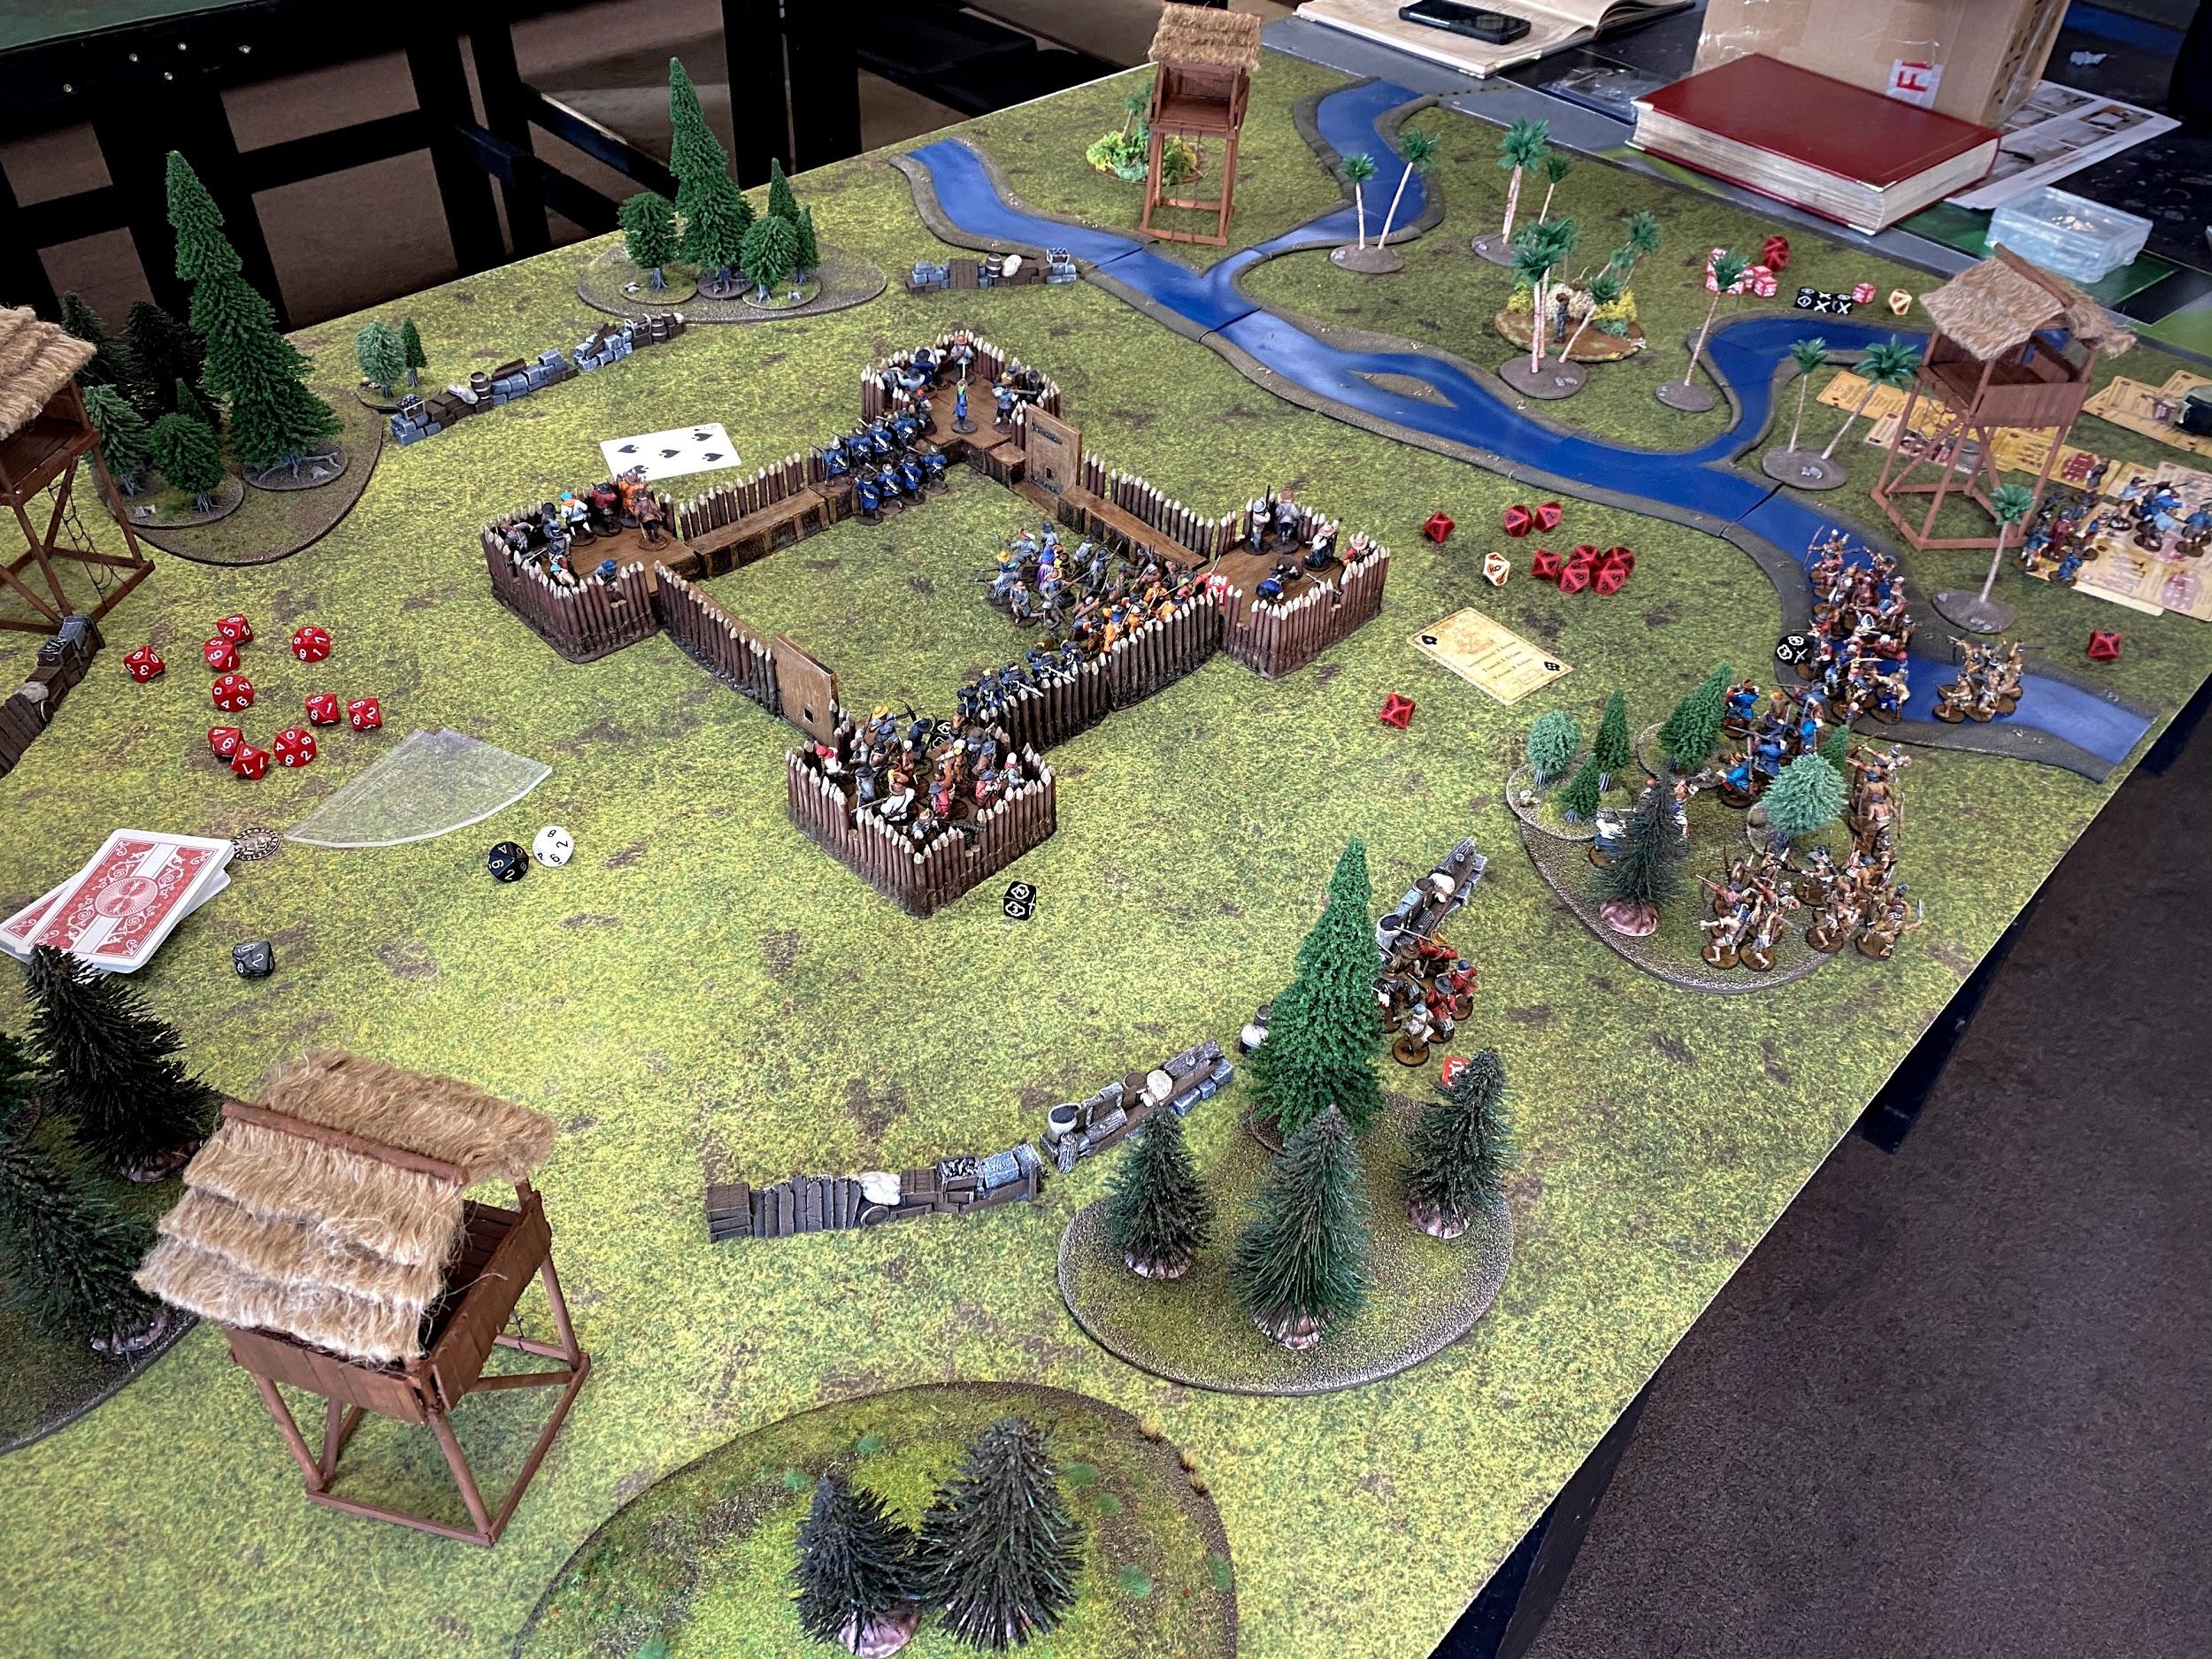
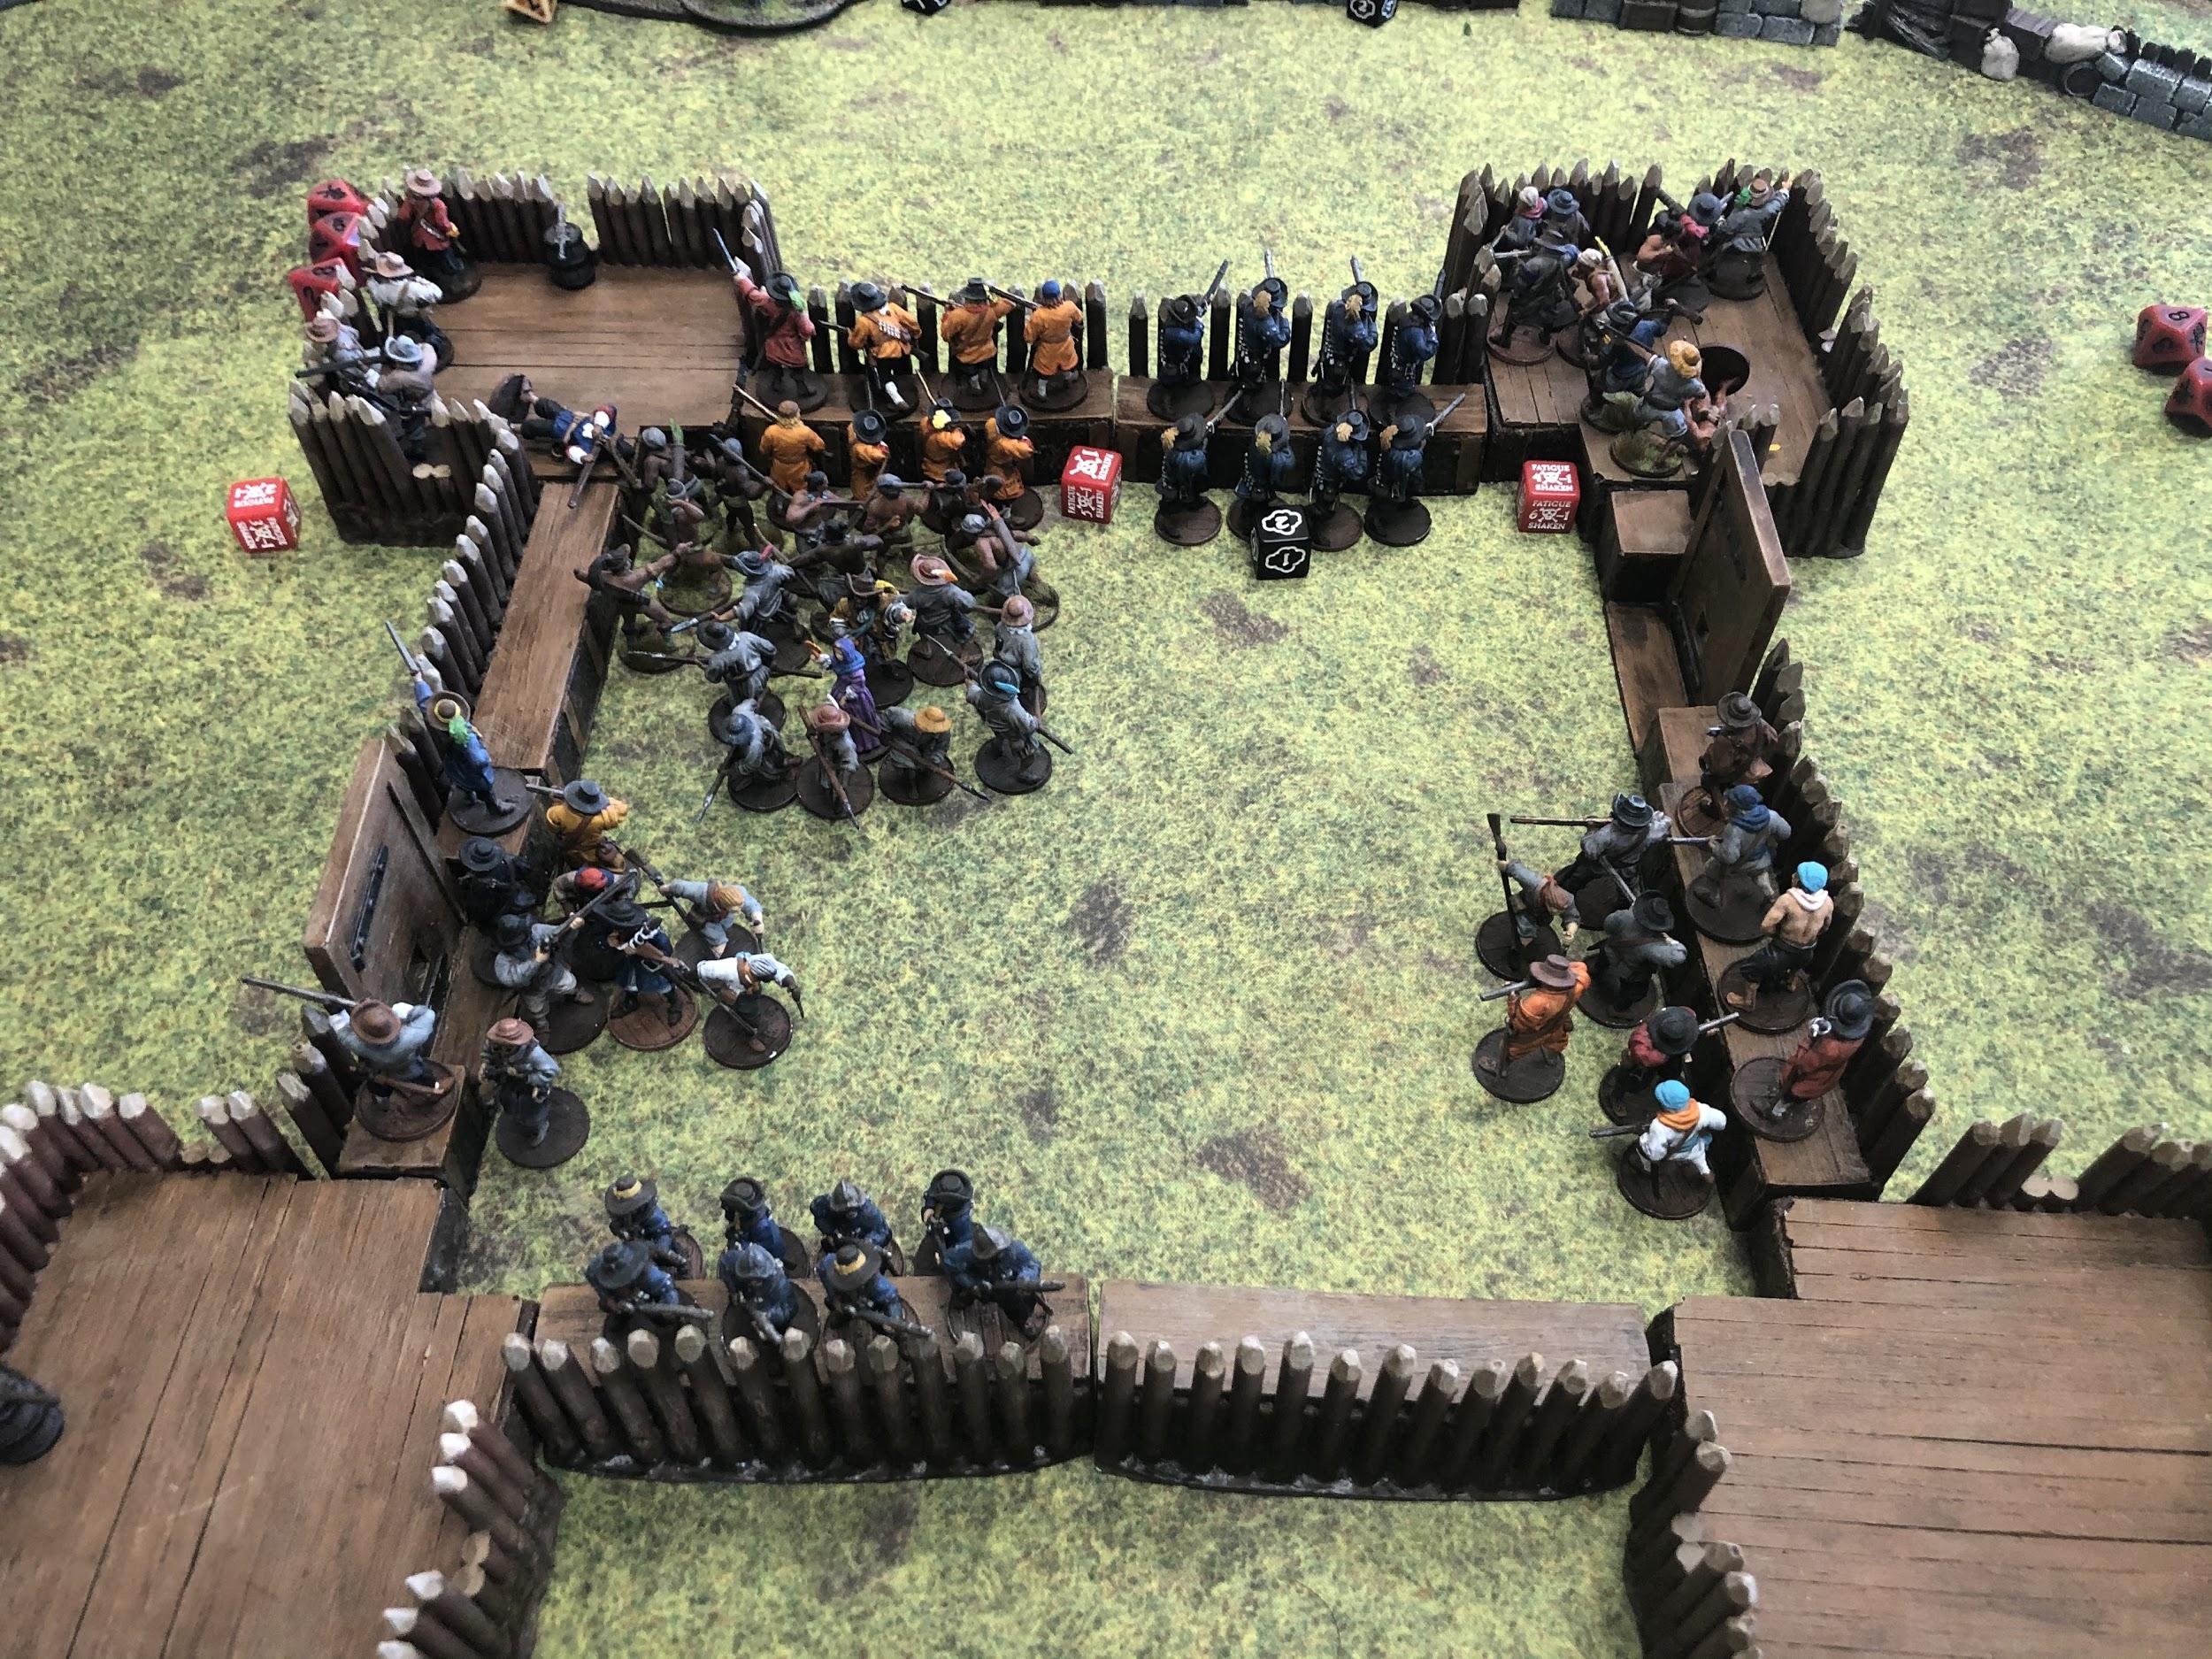
Usually this scenario is hard for the defender, because they deploy in the center of the board, and the attacker moves in from either edge during the first turn. This is where having a fort comes in handy. With four bastions, 6 wall segments, and two doors the fort offered an unrivaled defensive area. We decided that instead of the oblong defender deployment area I could use the whole square of the fort as my deployment area.
I got to Geeks & Games early and set up, including several abandoned watch towers and low walls around the palisade fort. I wanted it to look like the Spanish had given up some defenses for the safety of the fort. A fort that would soon be a grave for so many.
Turn 1
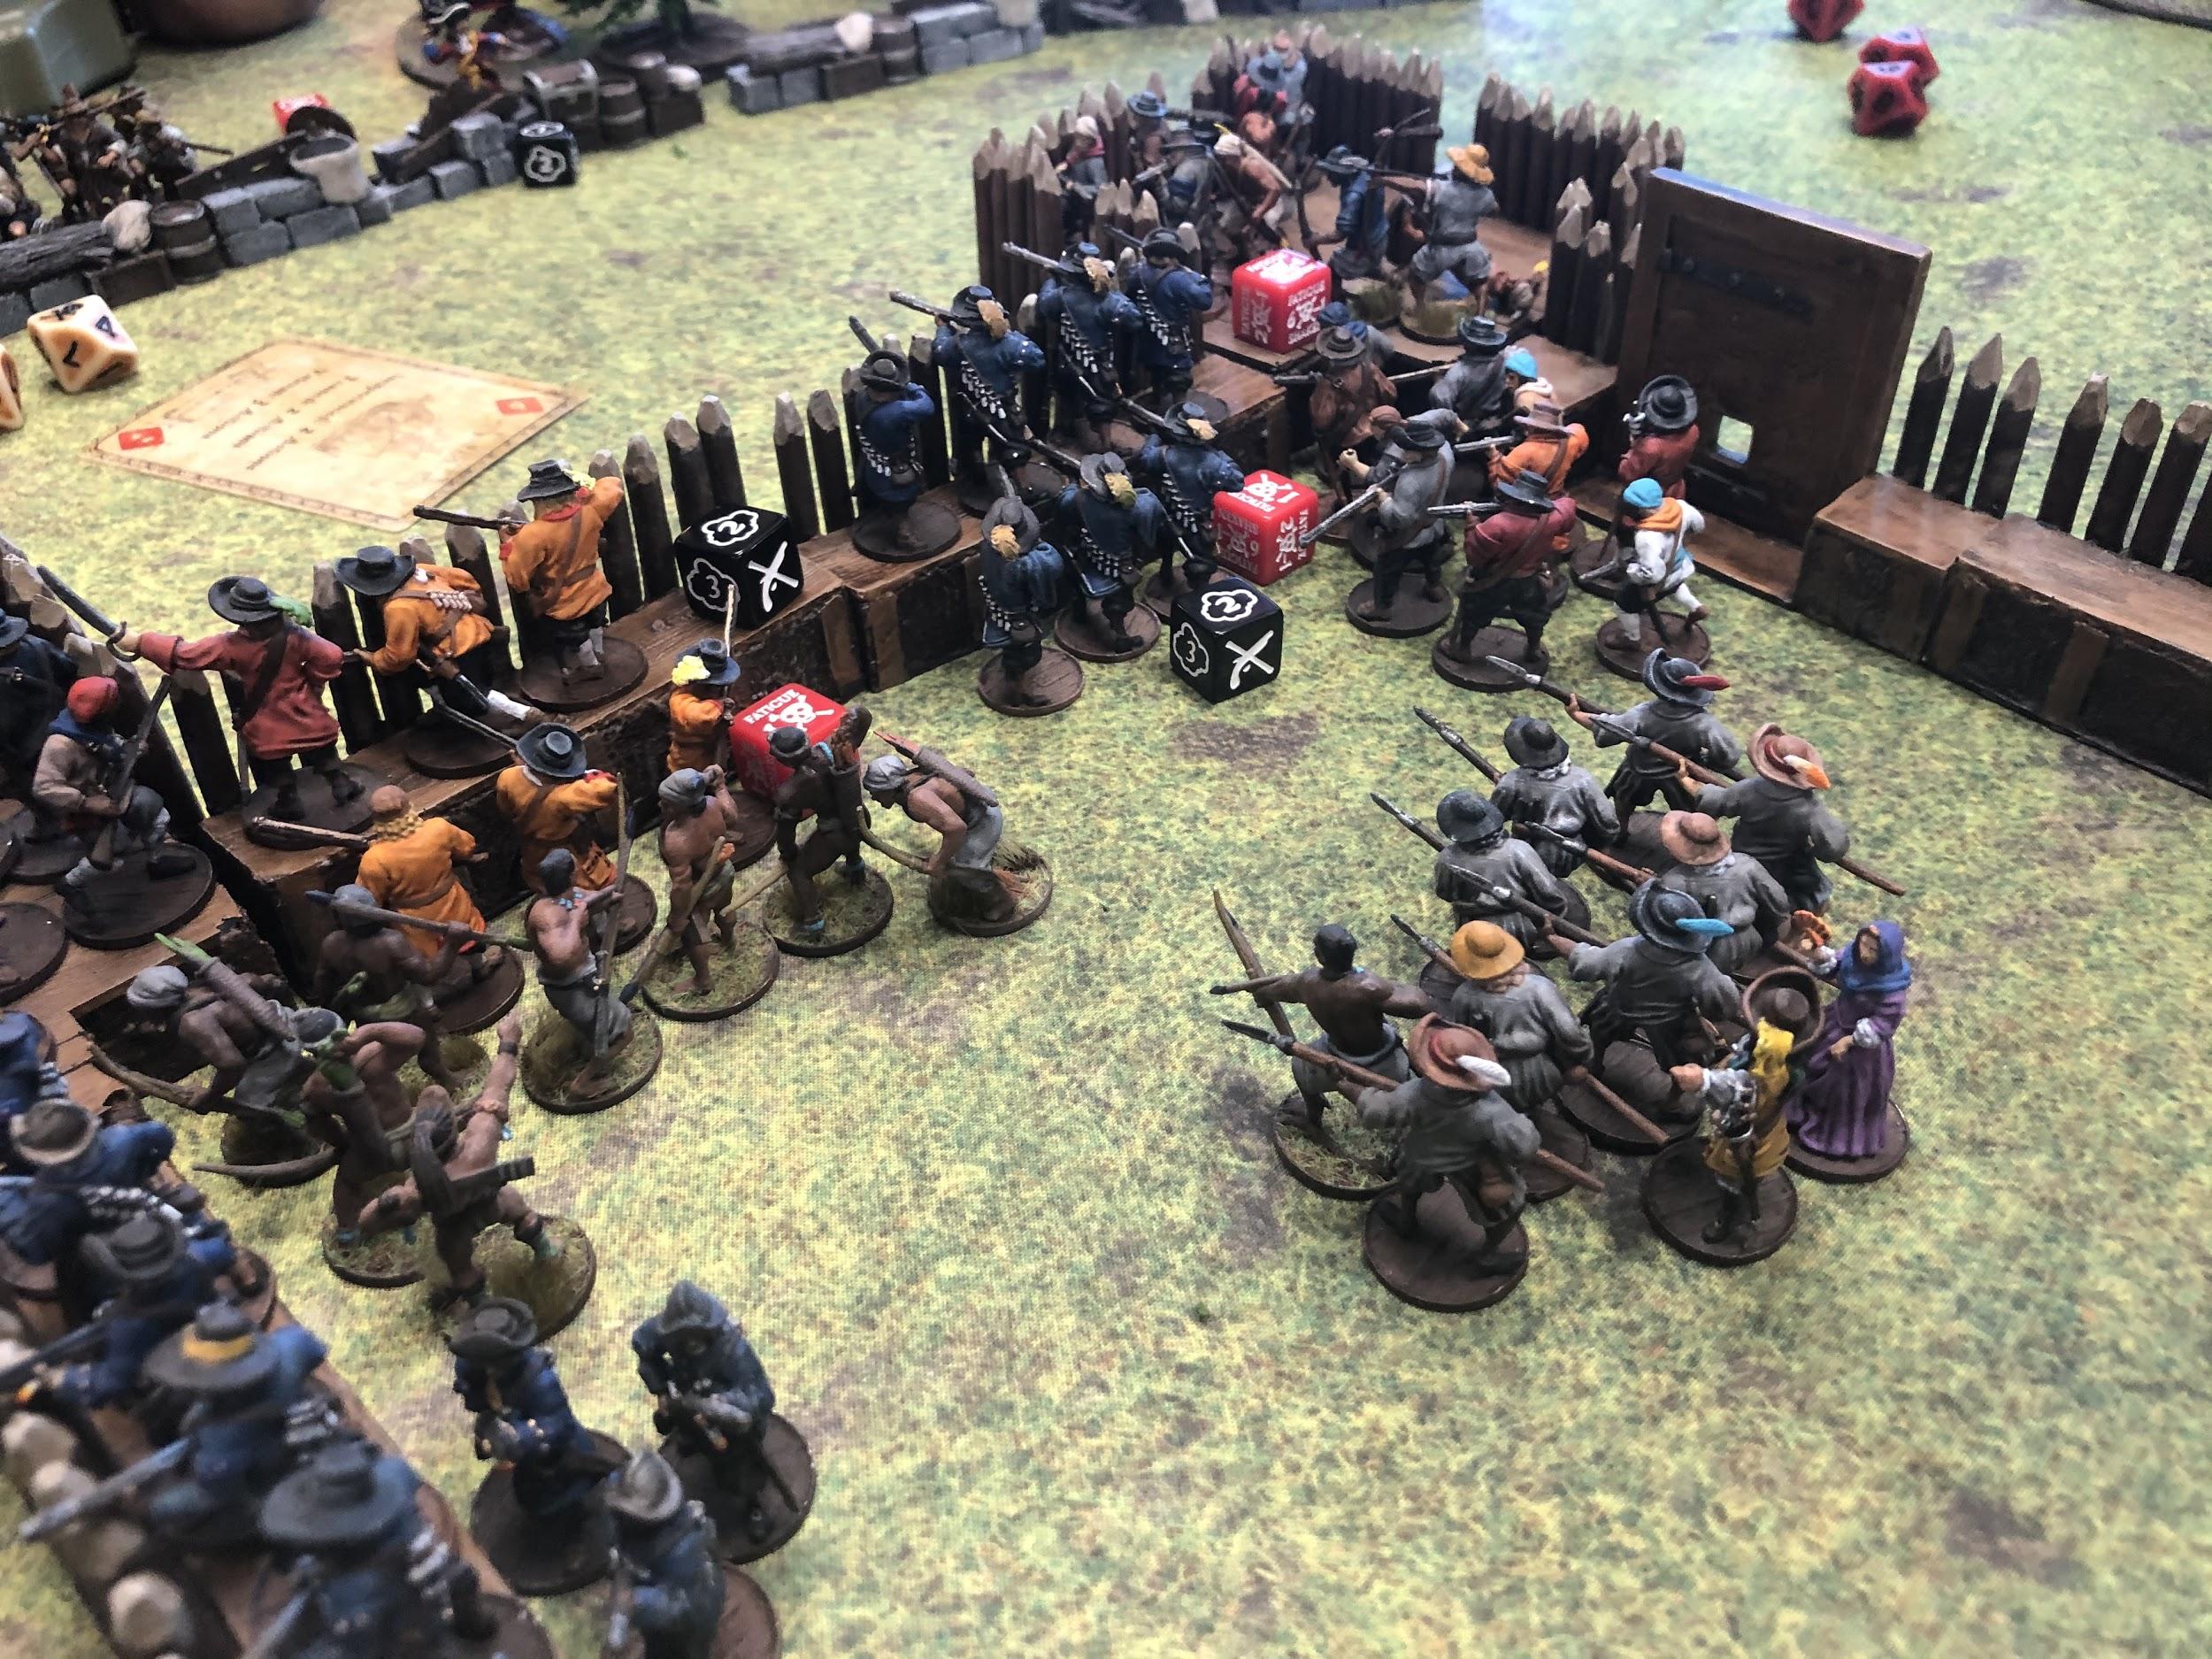
I deployed my units to cover all sides of the fort. Even with 92 men, the fort seemed empty. My native allies stayed close to the center. I wouldn’t be able to communicate to them clearly in the thick of battle, but trusted they would move to protect this fort.
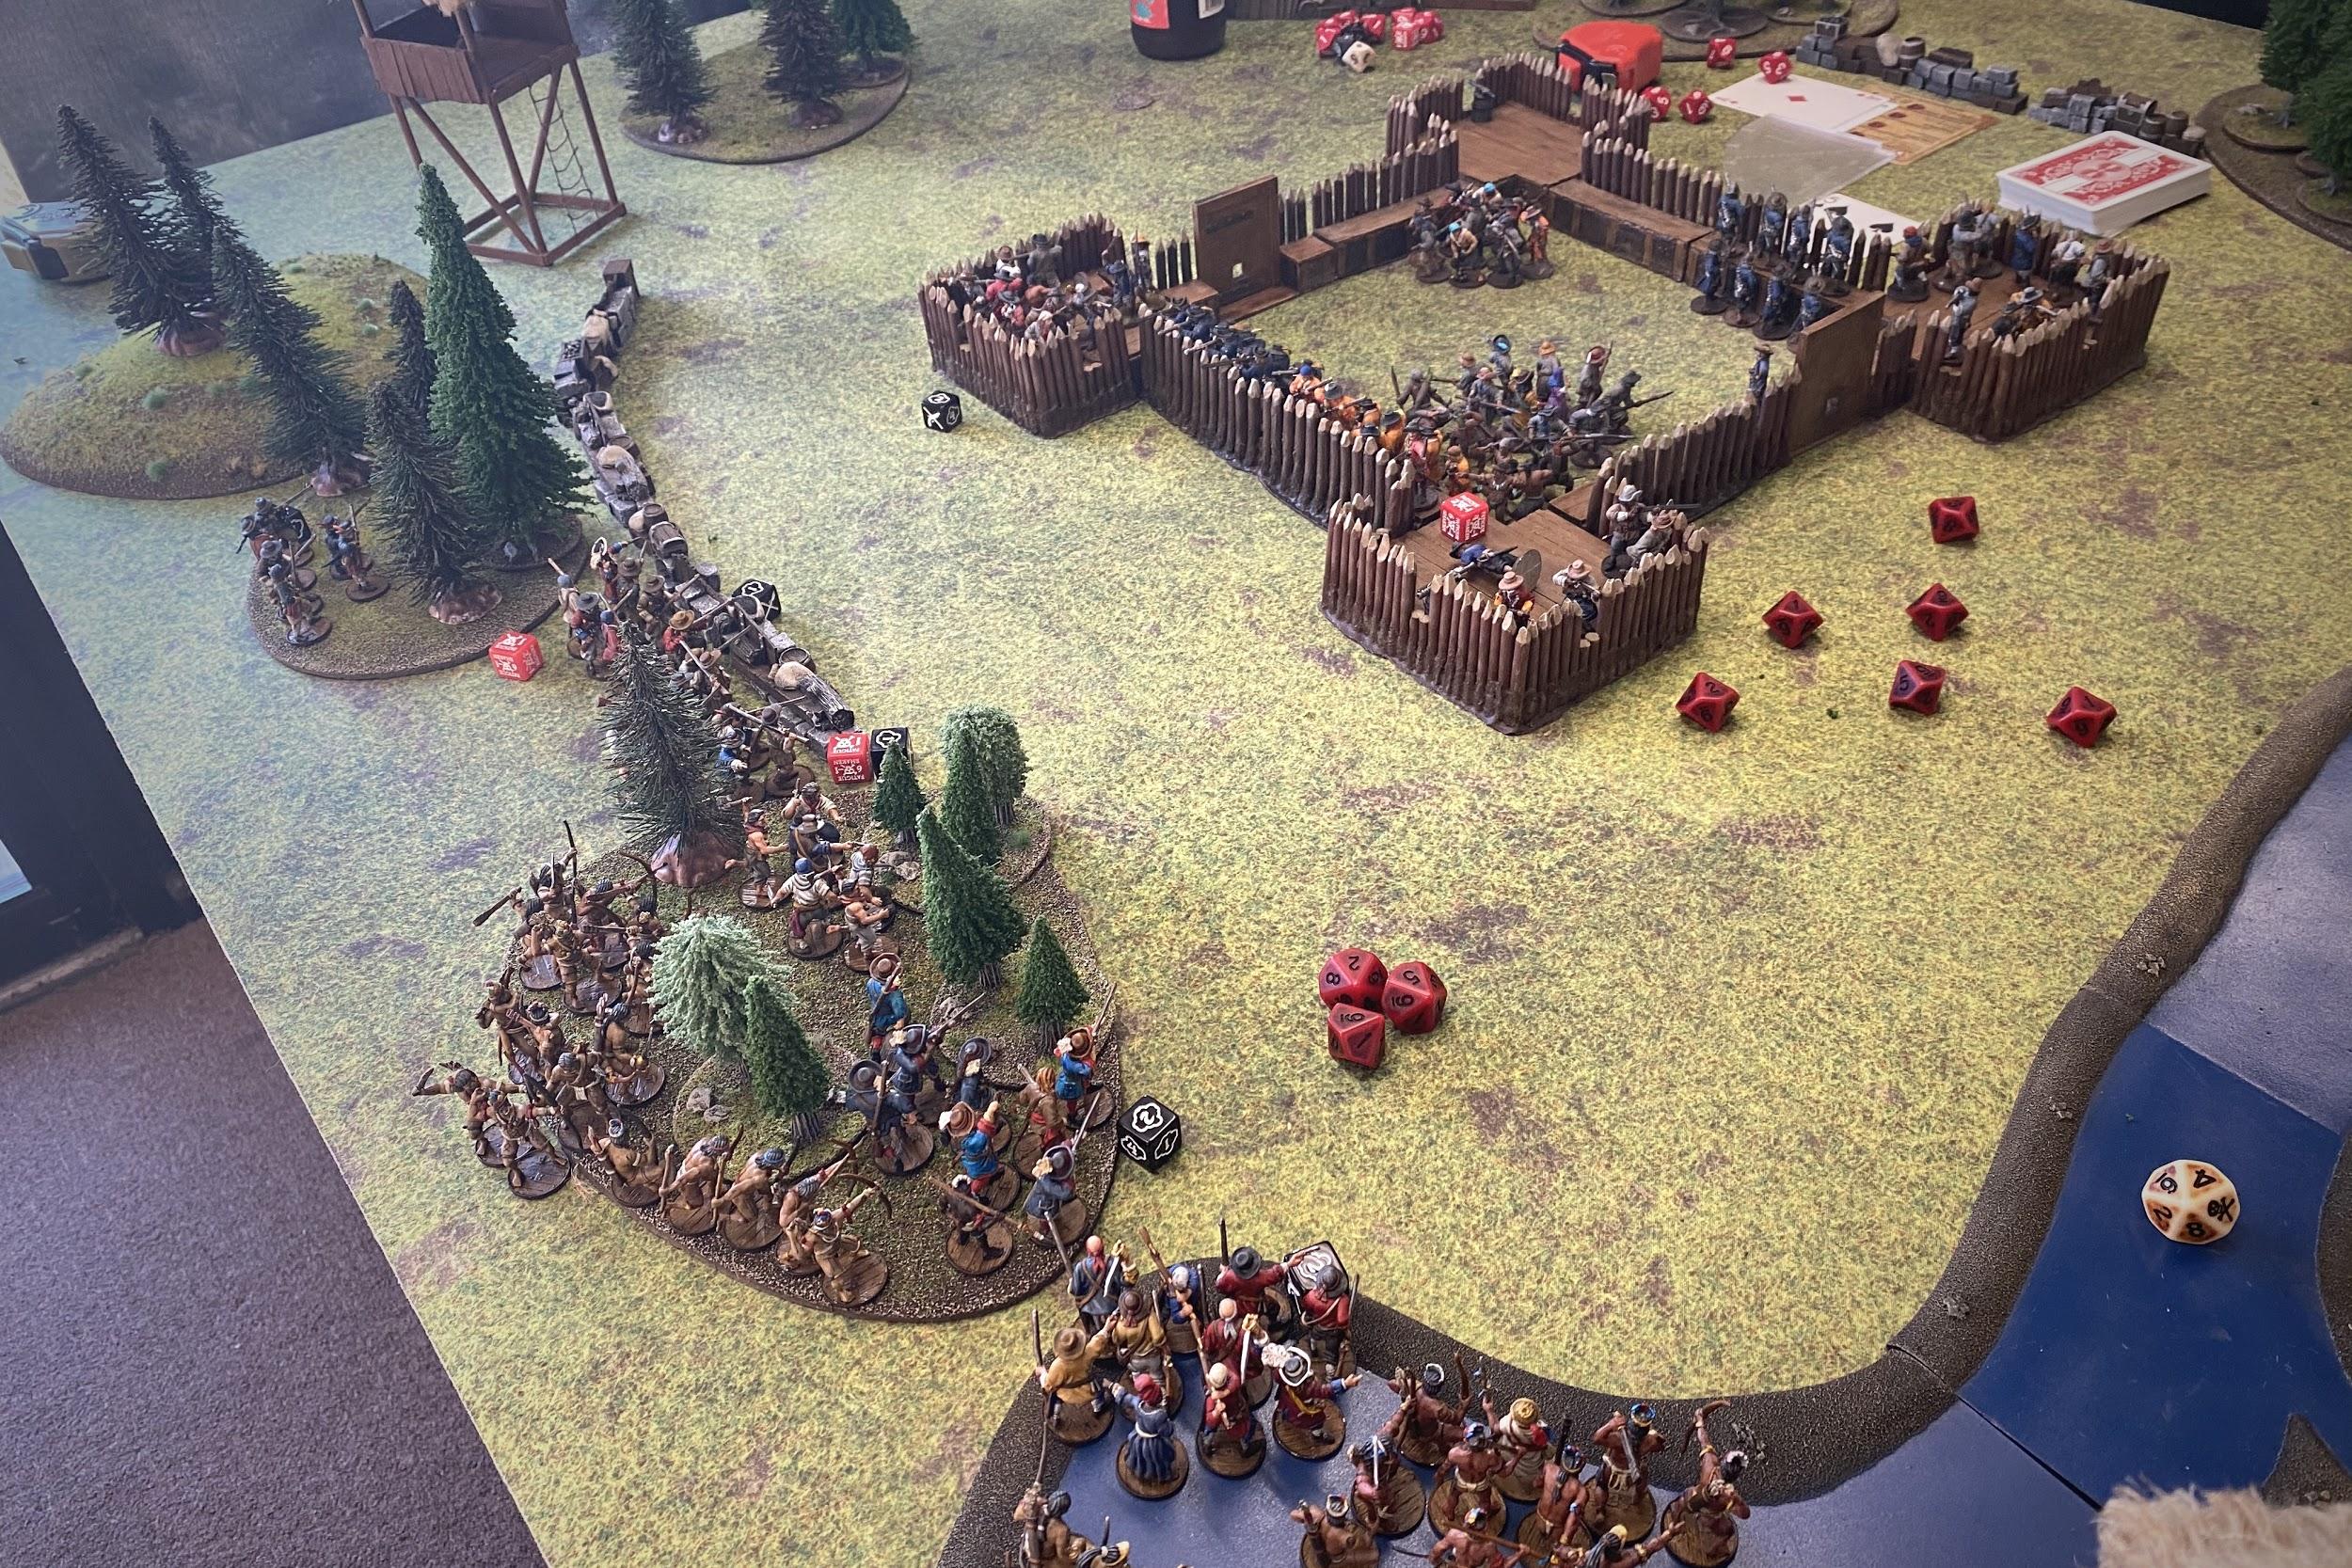
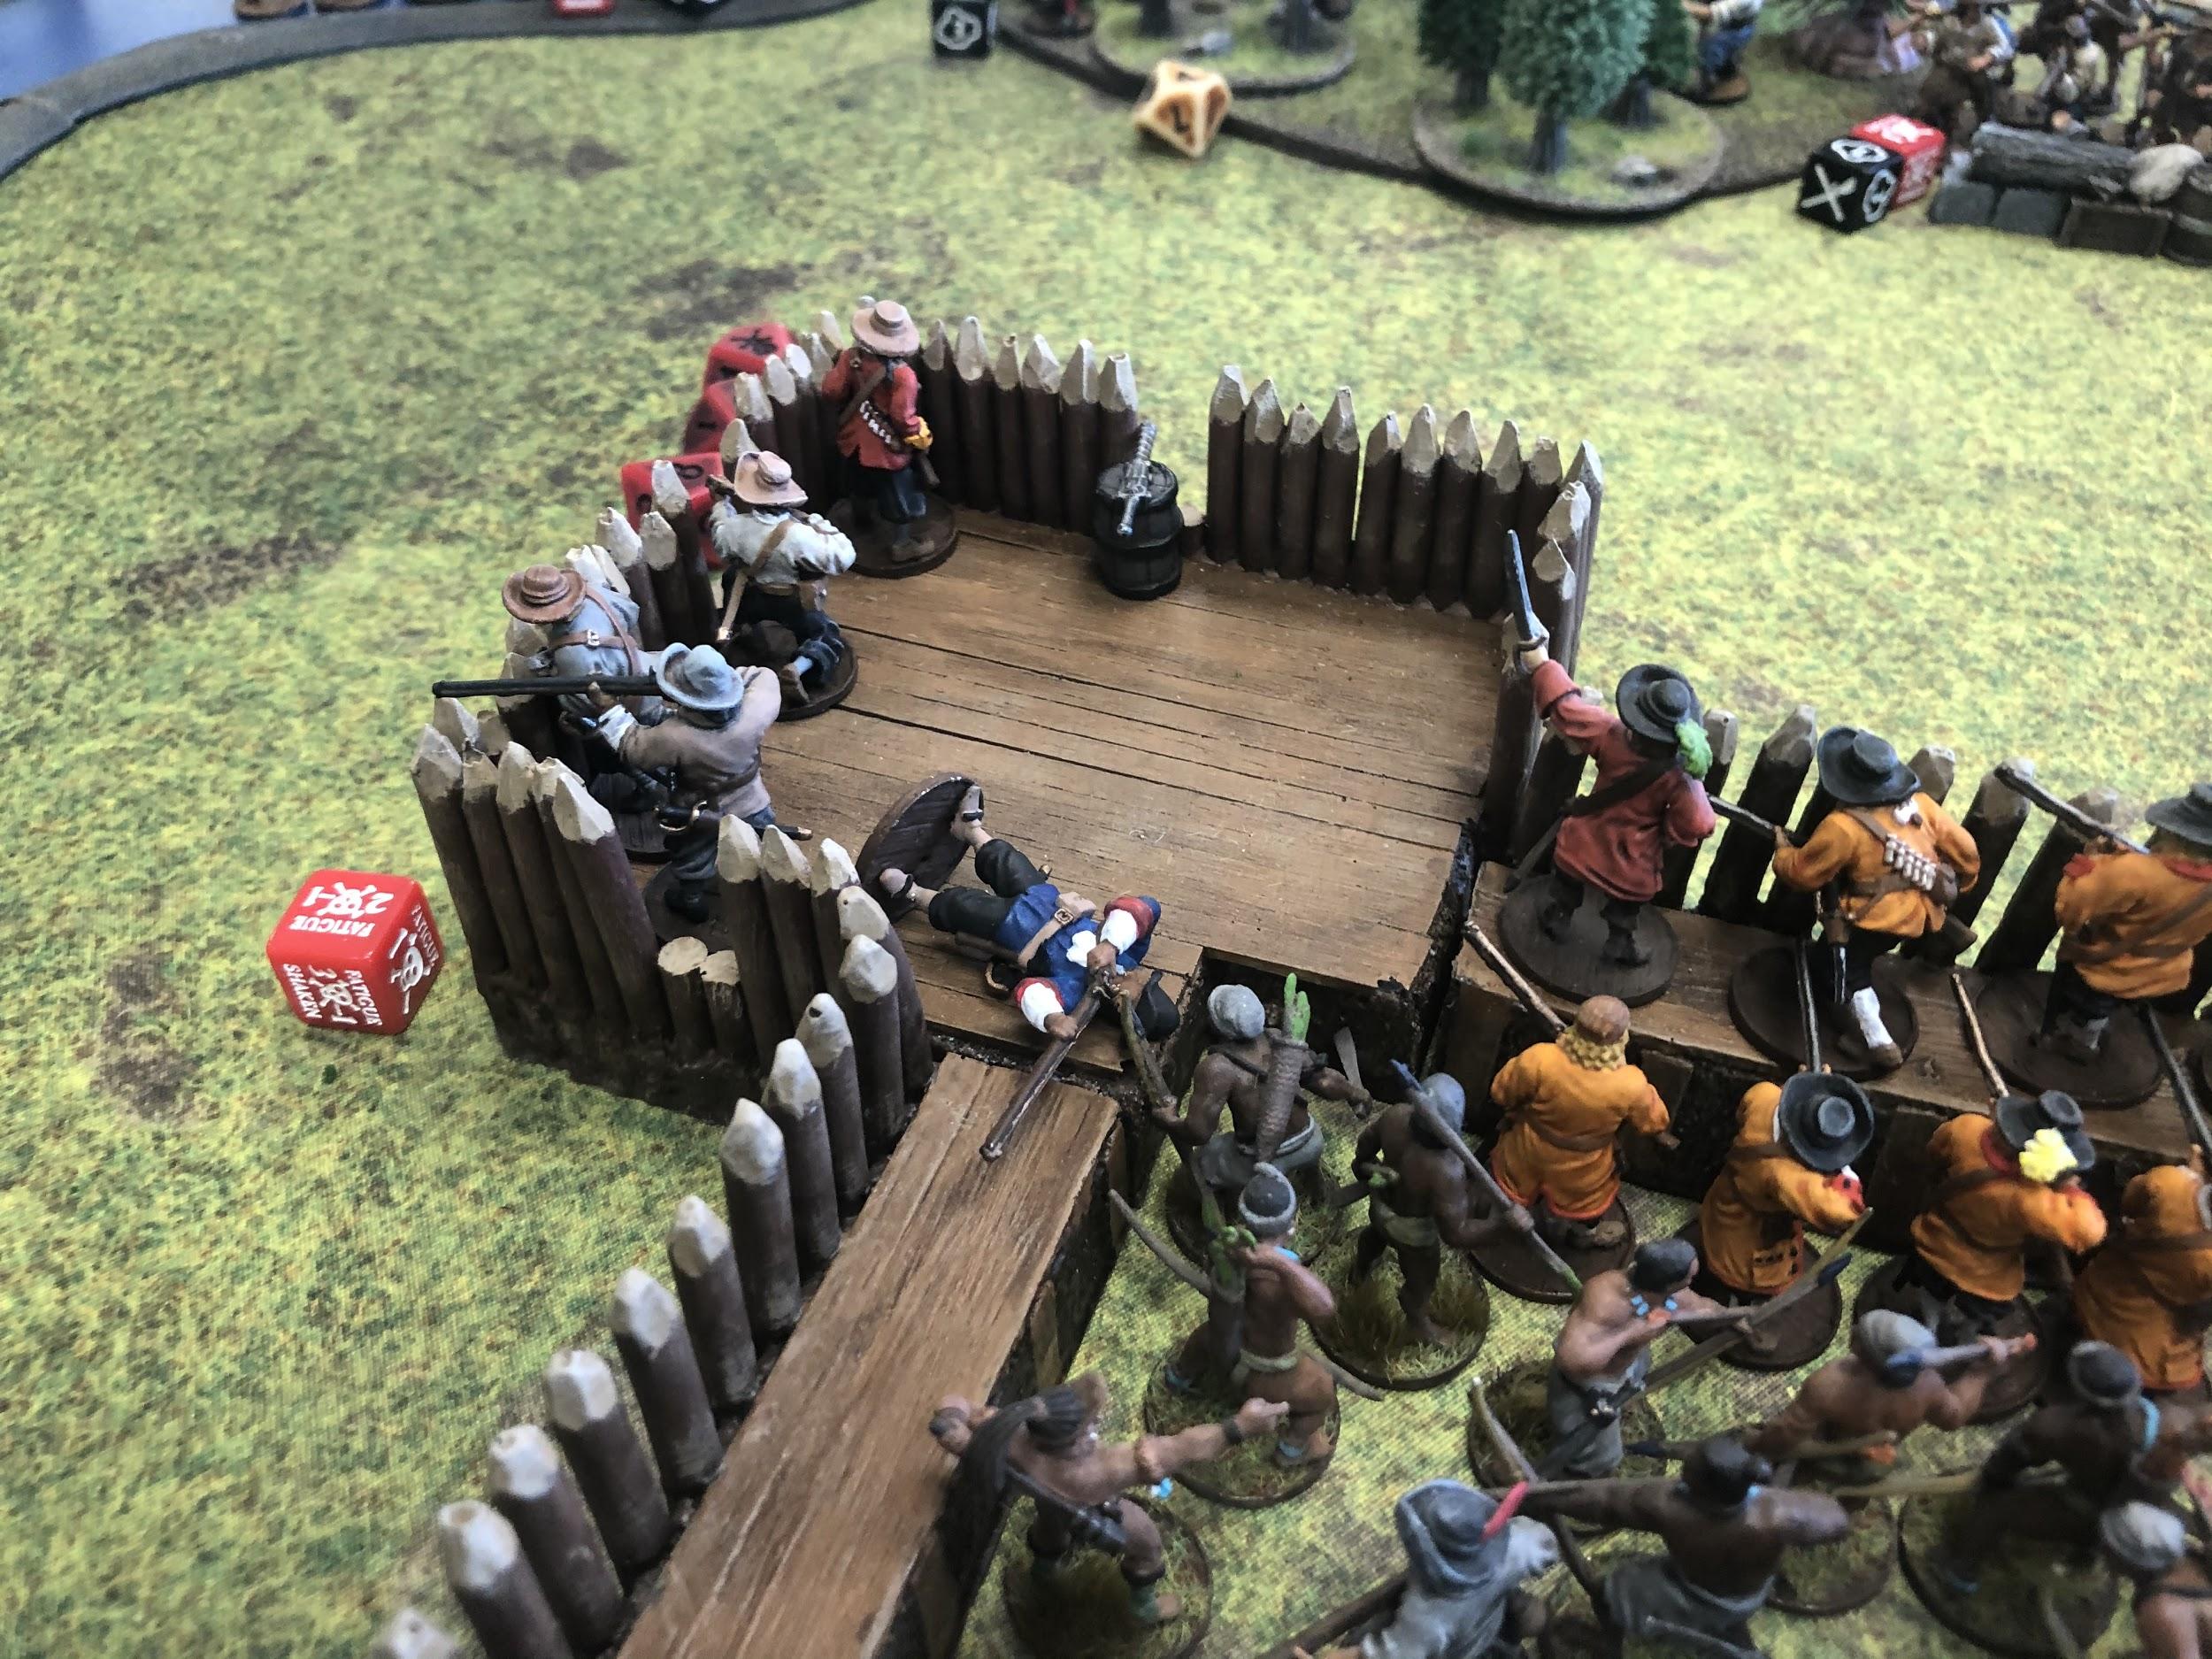
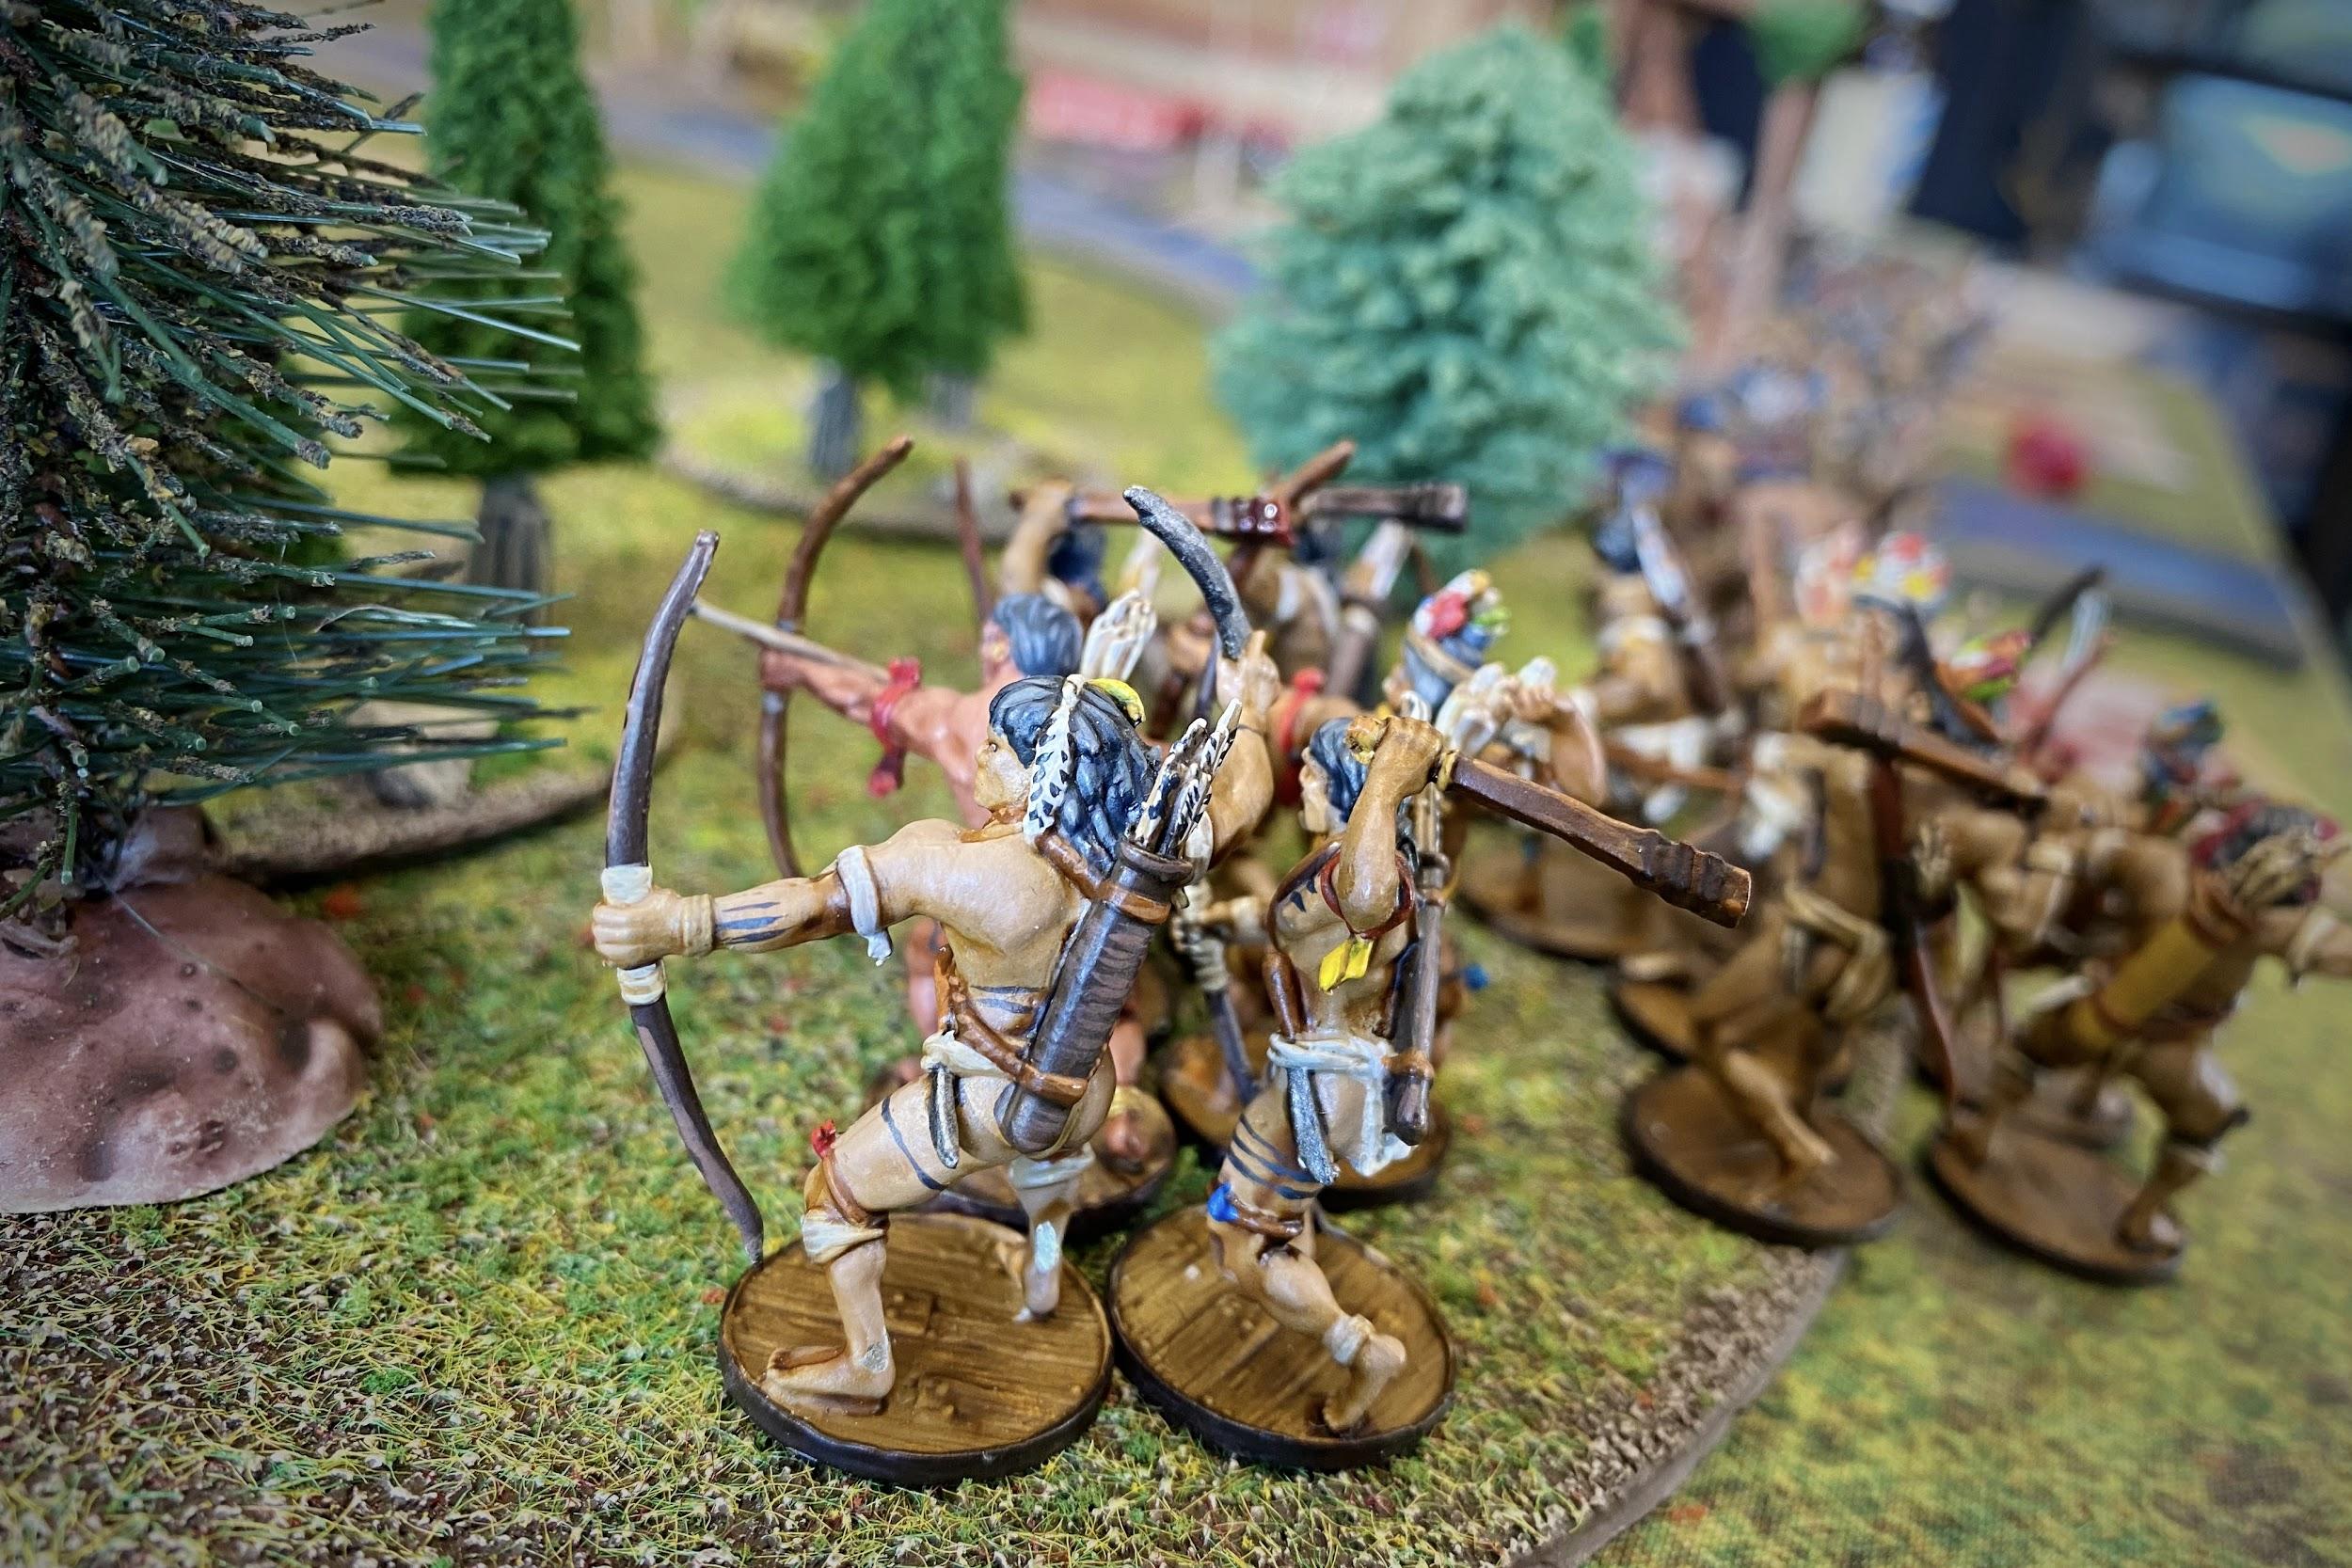
The Cuna led by King Golden Cap appeared first. Moving along the stream that many of them had been forced to pan, they hid in the brush along the stream and loosed arrow after arrow at the Marineros in the Northwest bastion.

Two Marineros in the northwest bastion were slain by arrows in the first few moments of the assault. My Caribbean Native allies quickly responded, moving towards the bastions on the northern side of the fort. The rest of my defenders stayed in place, thinking the native attack was a ruse, and expecting an attack from the south as well.
My Milicianos climbed the wall and took aim at the Natives, while my commander rushed forward. The natives were too well hidden, however and my commander could only order the swivel gun to fire in the direction the arrows had come from, while keeping a weary eye to the south.

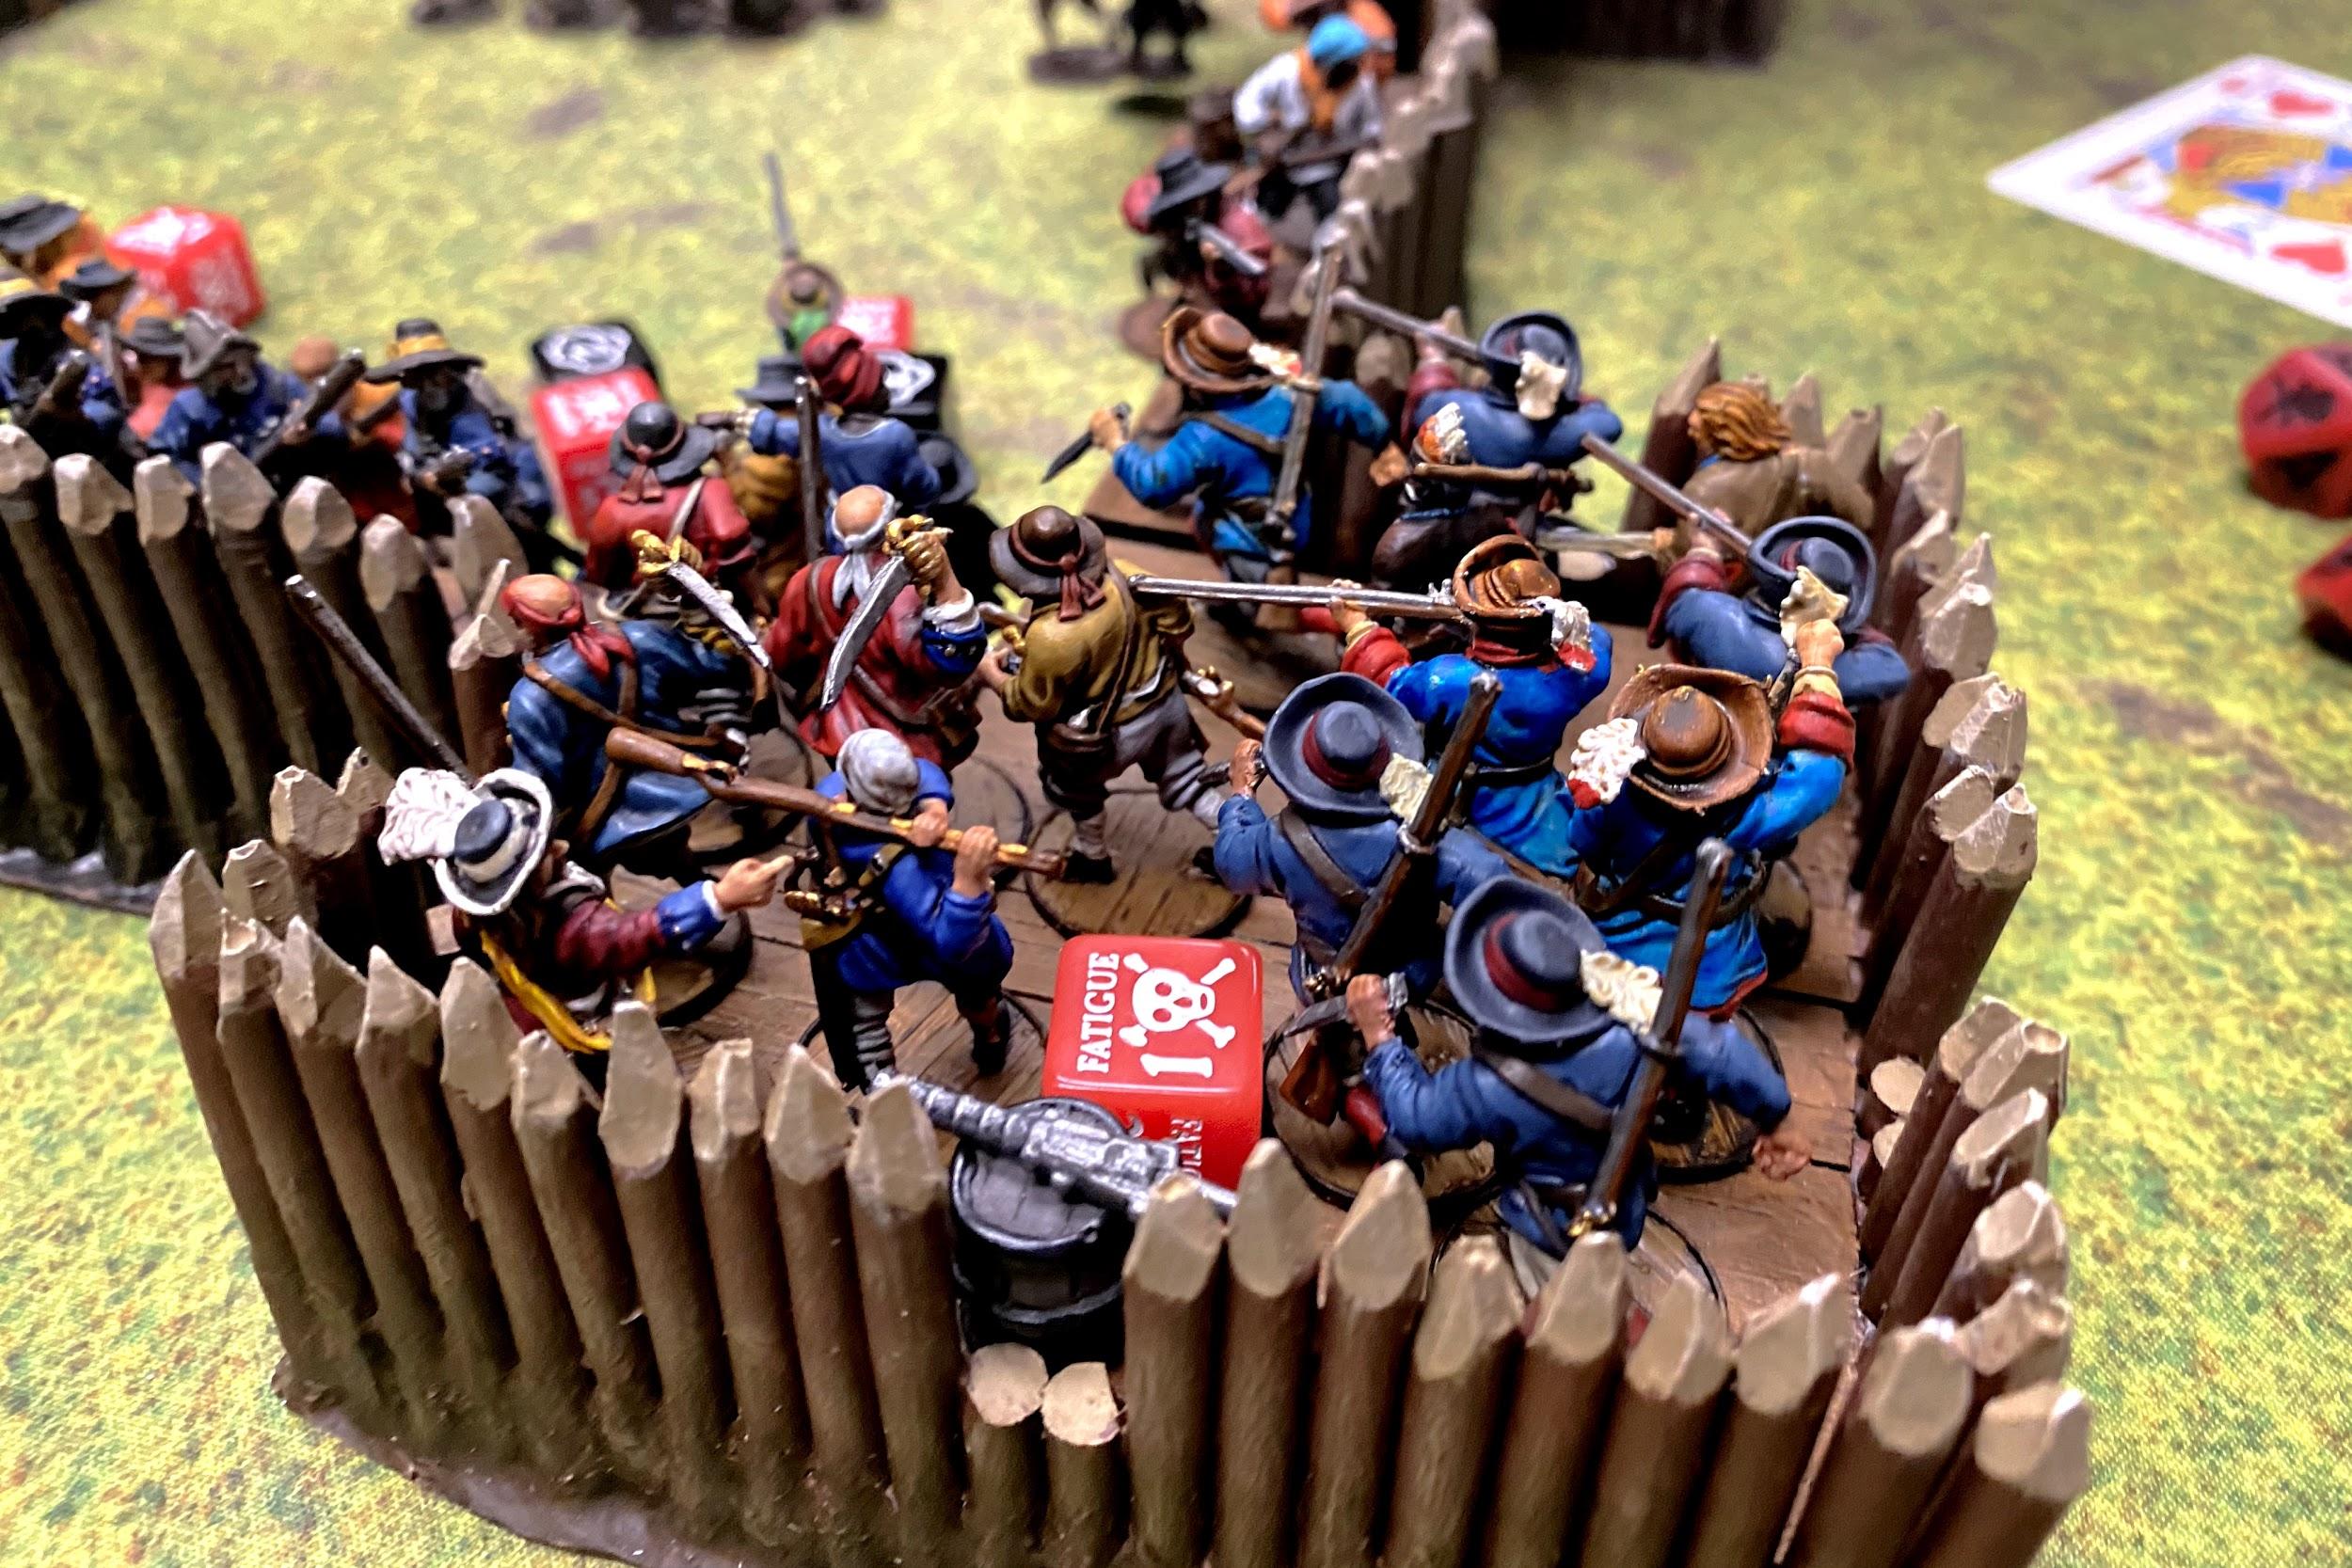
Buccaneers then emerged through the trees to the north. Taking up positions next to a makeshift wall my Milicianos had abandoned minutes ago, the Boucaniers and Freebooters concentrated fire on the northeast bastion. This sudden attack shattered the resolve of my native allies, and killed half of the Marineros manning the swivel gun.

In that first flurry of gun fire nine of my defenders died. I struggled to respond, with ten dead I still had yet to draw English blood.

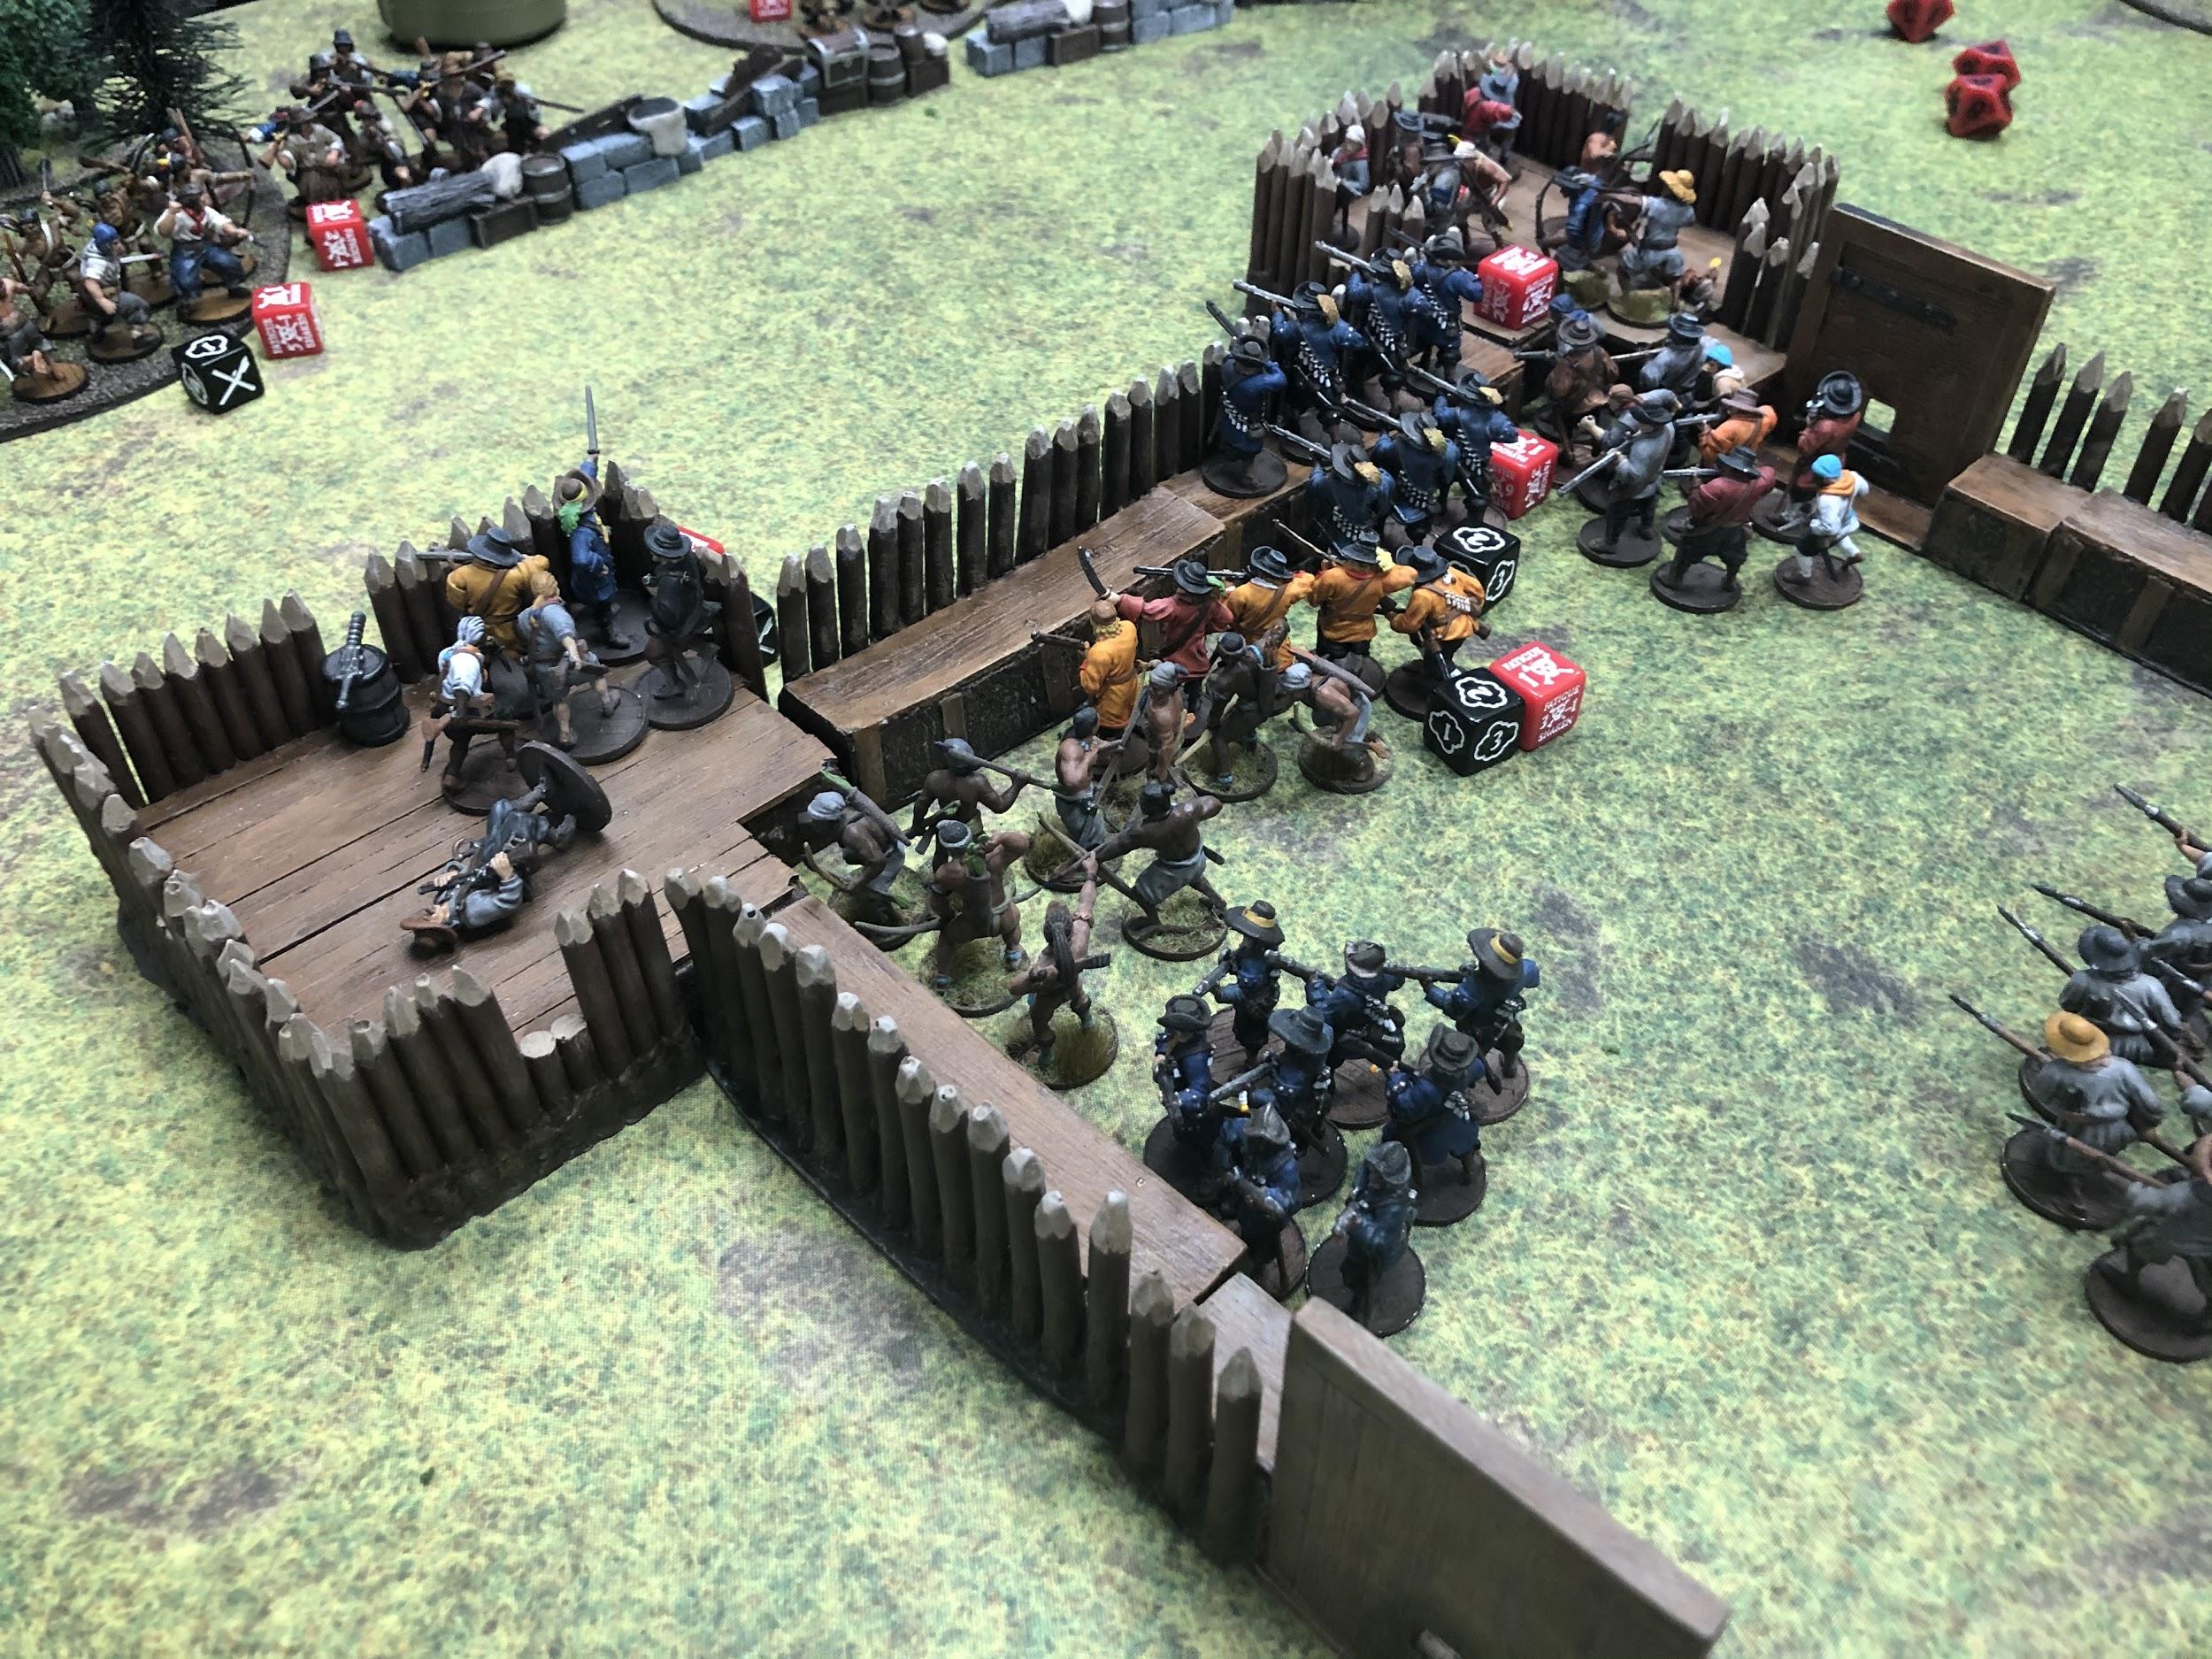
It was then that the other English shoe dropped. The final company of Buccaneers emerged, led by the general Richard Sawkins, along the same creek King Golden Cap had followed. My Northwest bastion was the point of attack!
Three more Marineros died to a hail of musket shot, their cowardice saving them from more death as volley after volley shook their will.
Still reeling from the death of so many, I ordered the Marineros in the south bastions to reinforce their battered compadres. The Marineros in the northeast bastion pushed a dead man off the swivel gun, quickly reloaded it, and fired it at the Freebooters that had just emerged from the tree line. The scatter shot bit into the brush, but the stubborn English refused to die.
Turn 2
Without any hesitation, the English assault continued. The Freebooters and Boucaniers aimed at my defenders, swiftly reloaded, and peppered my defenses in ball and shot.
This continued attack broke my defenders, making the Marineros join the natives on the floor, but luckily only cost me a handful of lives.
Fearing that my native allies would rout, I gestured wildly. The natives in the northeast bastion rallied, getting the sound of thunder out of their minds. The other native group, this one all war chiefs, jumped into the bastion and loosed eight arrows at their rivals in the trees. Again, all failed to find a mark, and they dropped off the bastions, not wanting to join the dead they had climbed over.
Then, just as the gun smoke from the Boucaniers and Freebooters cleared, King Golden Cap struck. A wave of arrows sought the beleaguered defenders, crashing against the palisade walls. More Milicianos died, and those that remained hugged the timber fort tightly.
With every defender in the northwest of my fort prone, I rushed my fresh defenders into the gaps. My command group of Marineros stepped over the dead in the northwest bastion, rallied the defenders on the swivel, and those with muskets fired at the nearby natives.
My general, after coming to his senses, had his Milicianos on the wall focus fire on John Coxon and his Freebooters. English Blood was finally spilled and the living Freebooters dropped to the mud.
Fearing for his life, my general ran to the center of the fort and ordered his Lanceros to protect him, and keep King Golden Caps daughter safe.
The rest of the Buccaneer forces moved up at that moment. They moved right to the edge of the creek and again shot the northwest bastion, killing more defenders.
Turn 3
Trying to gain the upper hand, I seized the initiative. Concentrating fire on the Freebooters that had gone aground in a well drilled manner, my Milicianos managed to reduce them to only two!

I then ordered my hardest hit Milicianos off the wall so I could push forward a fresh reserve unit.
My Marineros half fired again, this time at some Seadogs that had run forward, causing one more death.
Richard Sawkins, in a paradoxical rage, jumped out of the creek and ordered all of his men to concentrate fire on the closest bastion, with King Golden Cap following suit. Nine Marineros died in that gore filled bastion.
Recovering from the previous trauma, my Native allies shifted around and those that were prone stood up.
Turn 4
Moving through the dead and dying on the bastion, my native allies finally proved their worth and loosed a rain of arrows on the nearby Forlorn Hope, slaying two of them. In the same moment, a smaller storm of arrows in the other bastion finished off John Coxon and his Freebooters.
Returning fire, my opponent shot the northeast bastion, causing more casualties and the natives to go to ground again.
My fresh Milicianos climbed up to the wall and loosed shot towards the nearby Boucaniers and Seadogs, trying to break them, while those behind reloaded.

Sensing that now was the time to end this, King Golden Cap spurred his forces forward. The young Warriors on the tree line shot at the Milicianos on the wall, while the rest of the force ran forward, dumping a barrel of arrows into the bastion.

My native allies were shaken and dropped prone. I rallied my Marineros and they stood up. A still fresh group of Marineros ran next to the bastion and braced their will for the coming assault while the northeast bastion shot its swivel at the Kapers, killing one and panicking the rest.
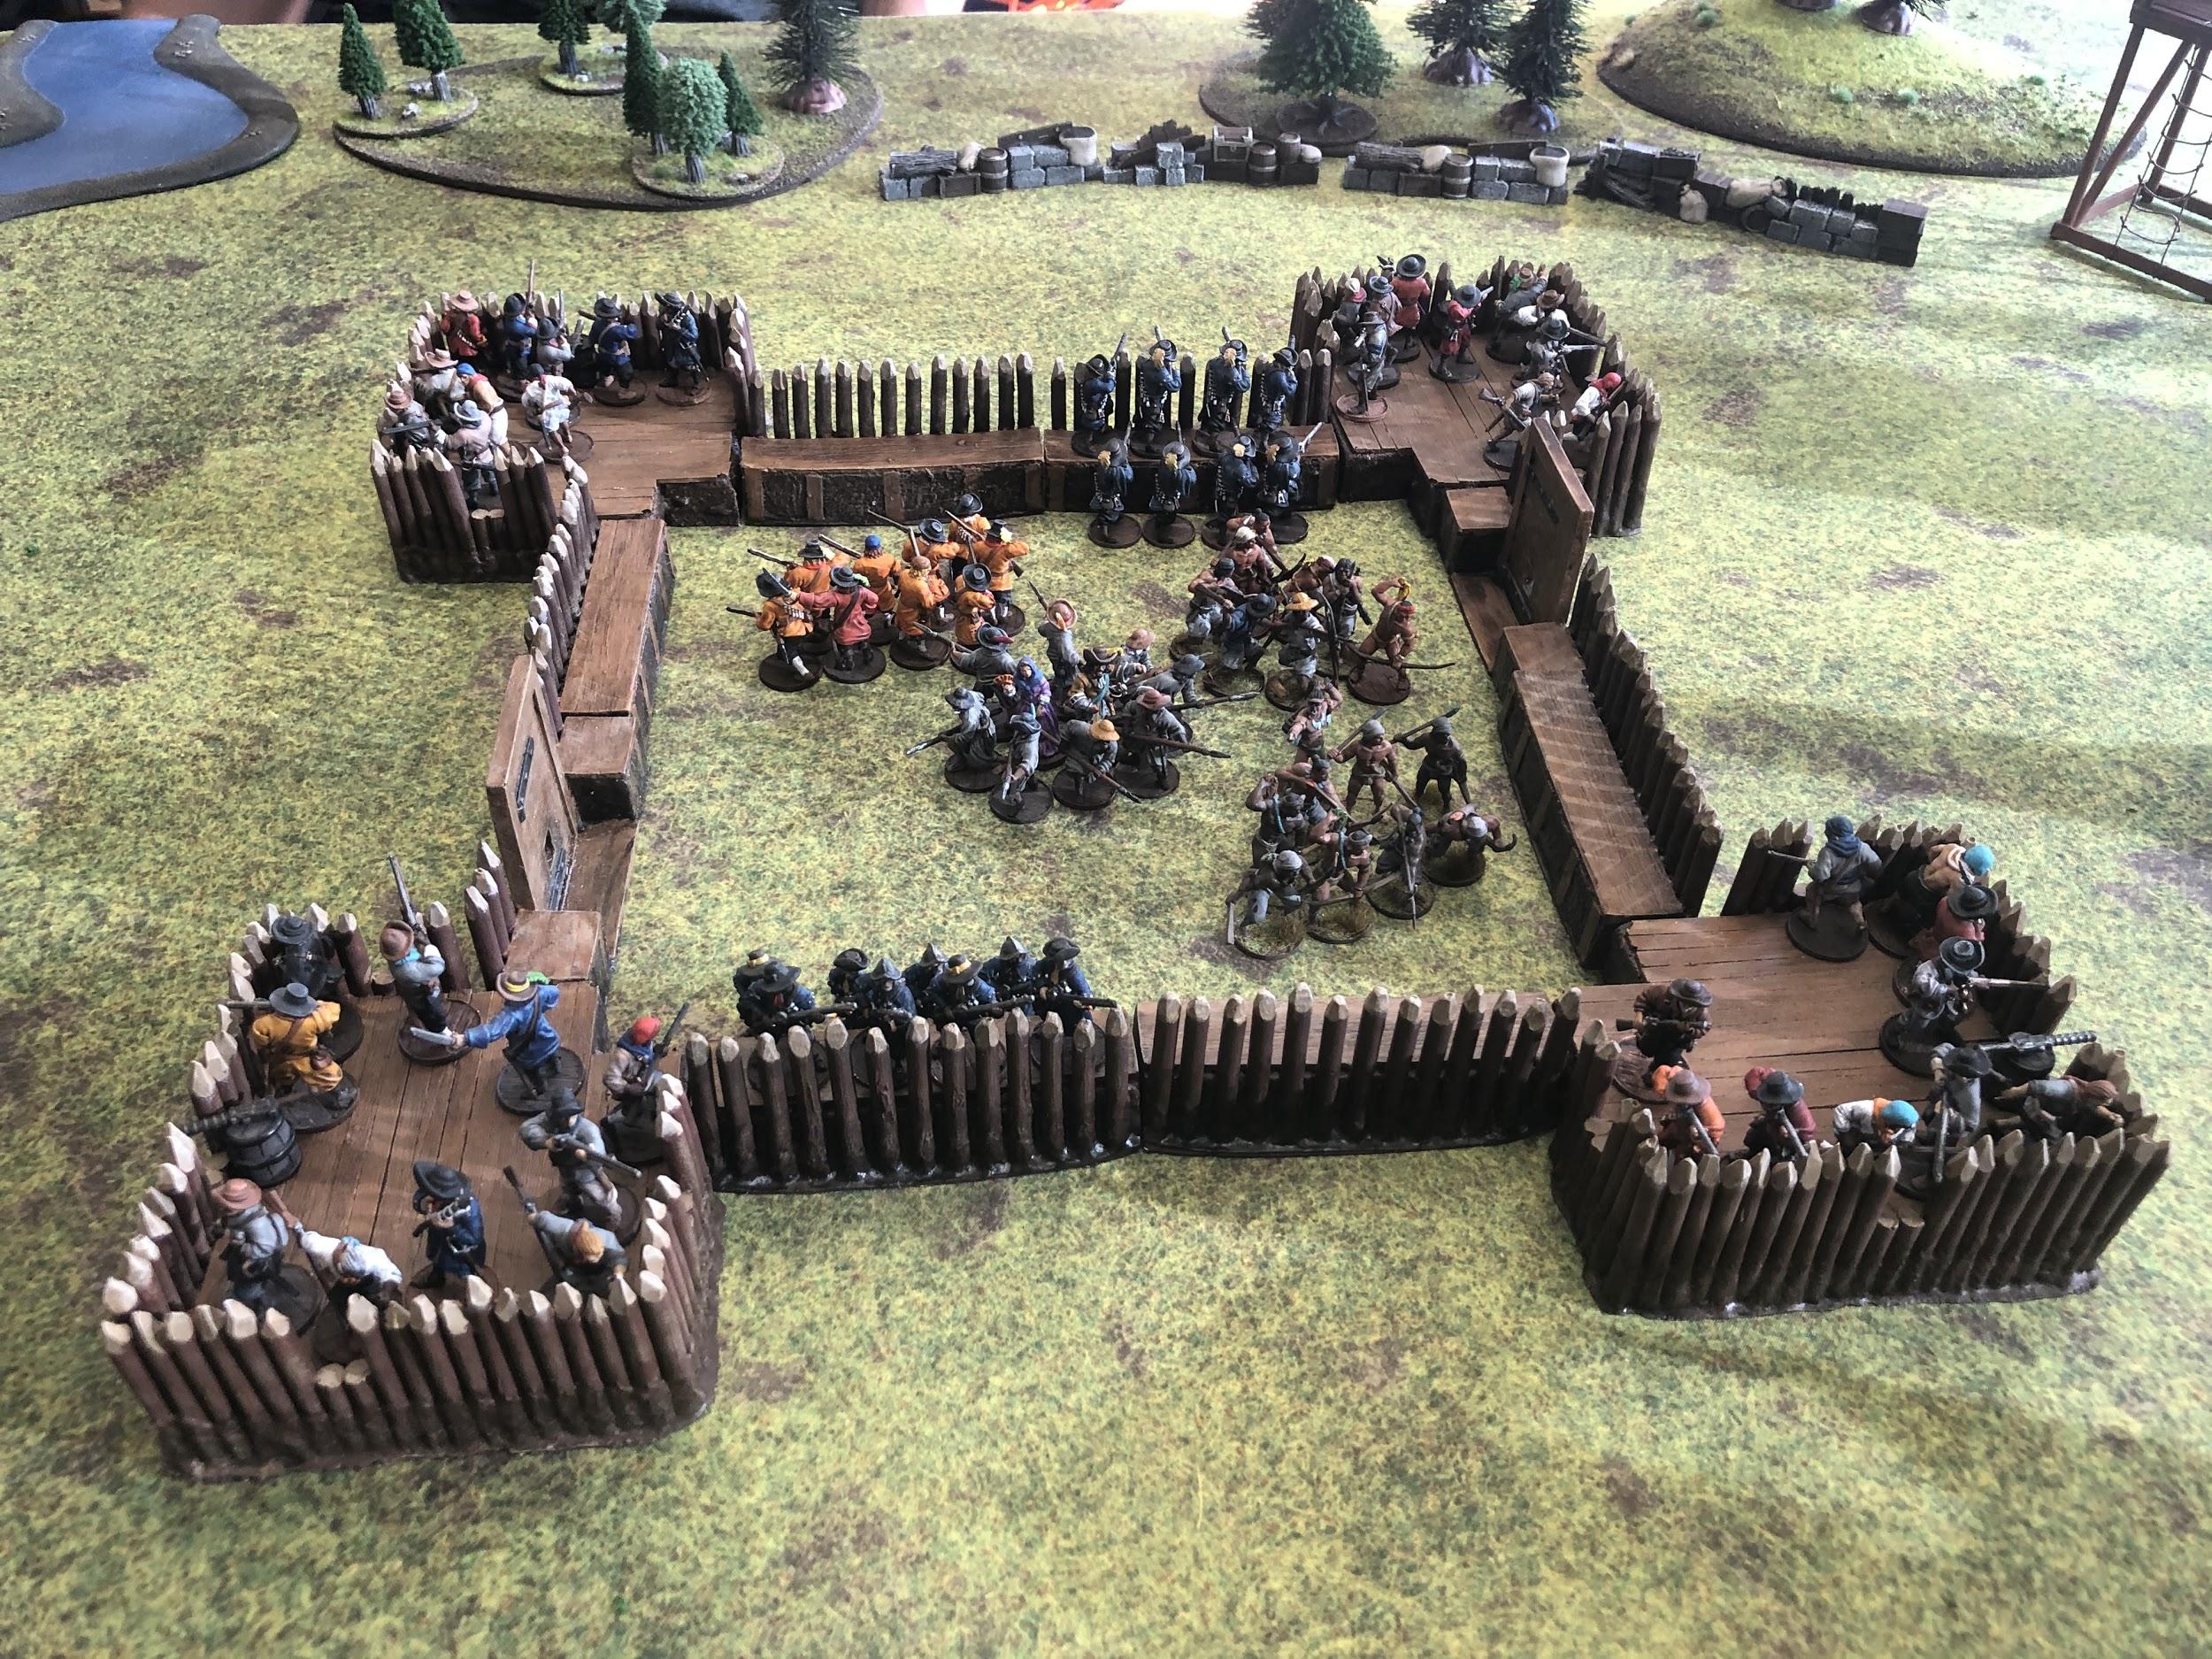
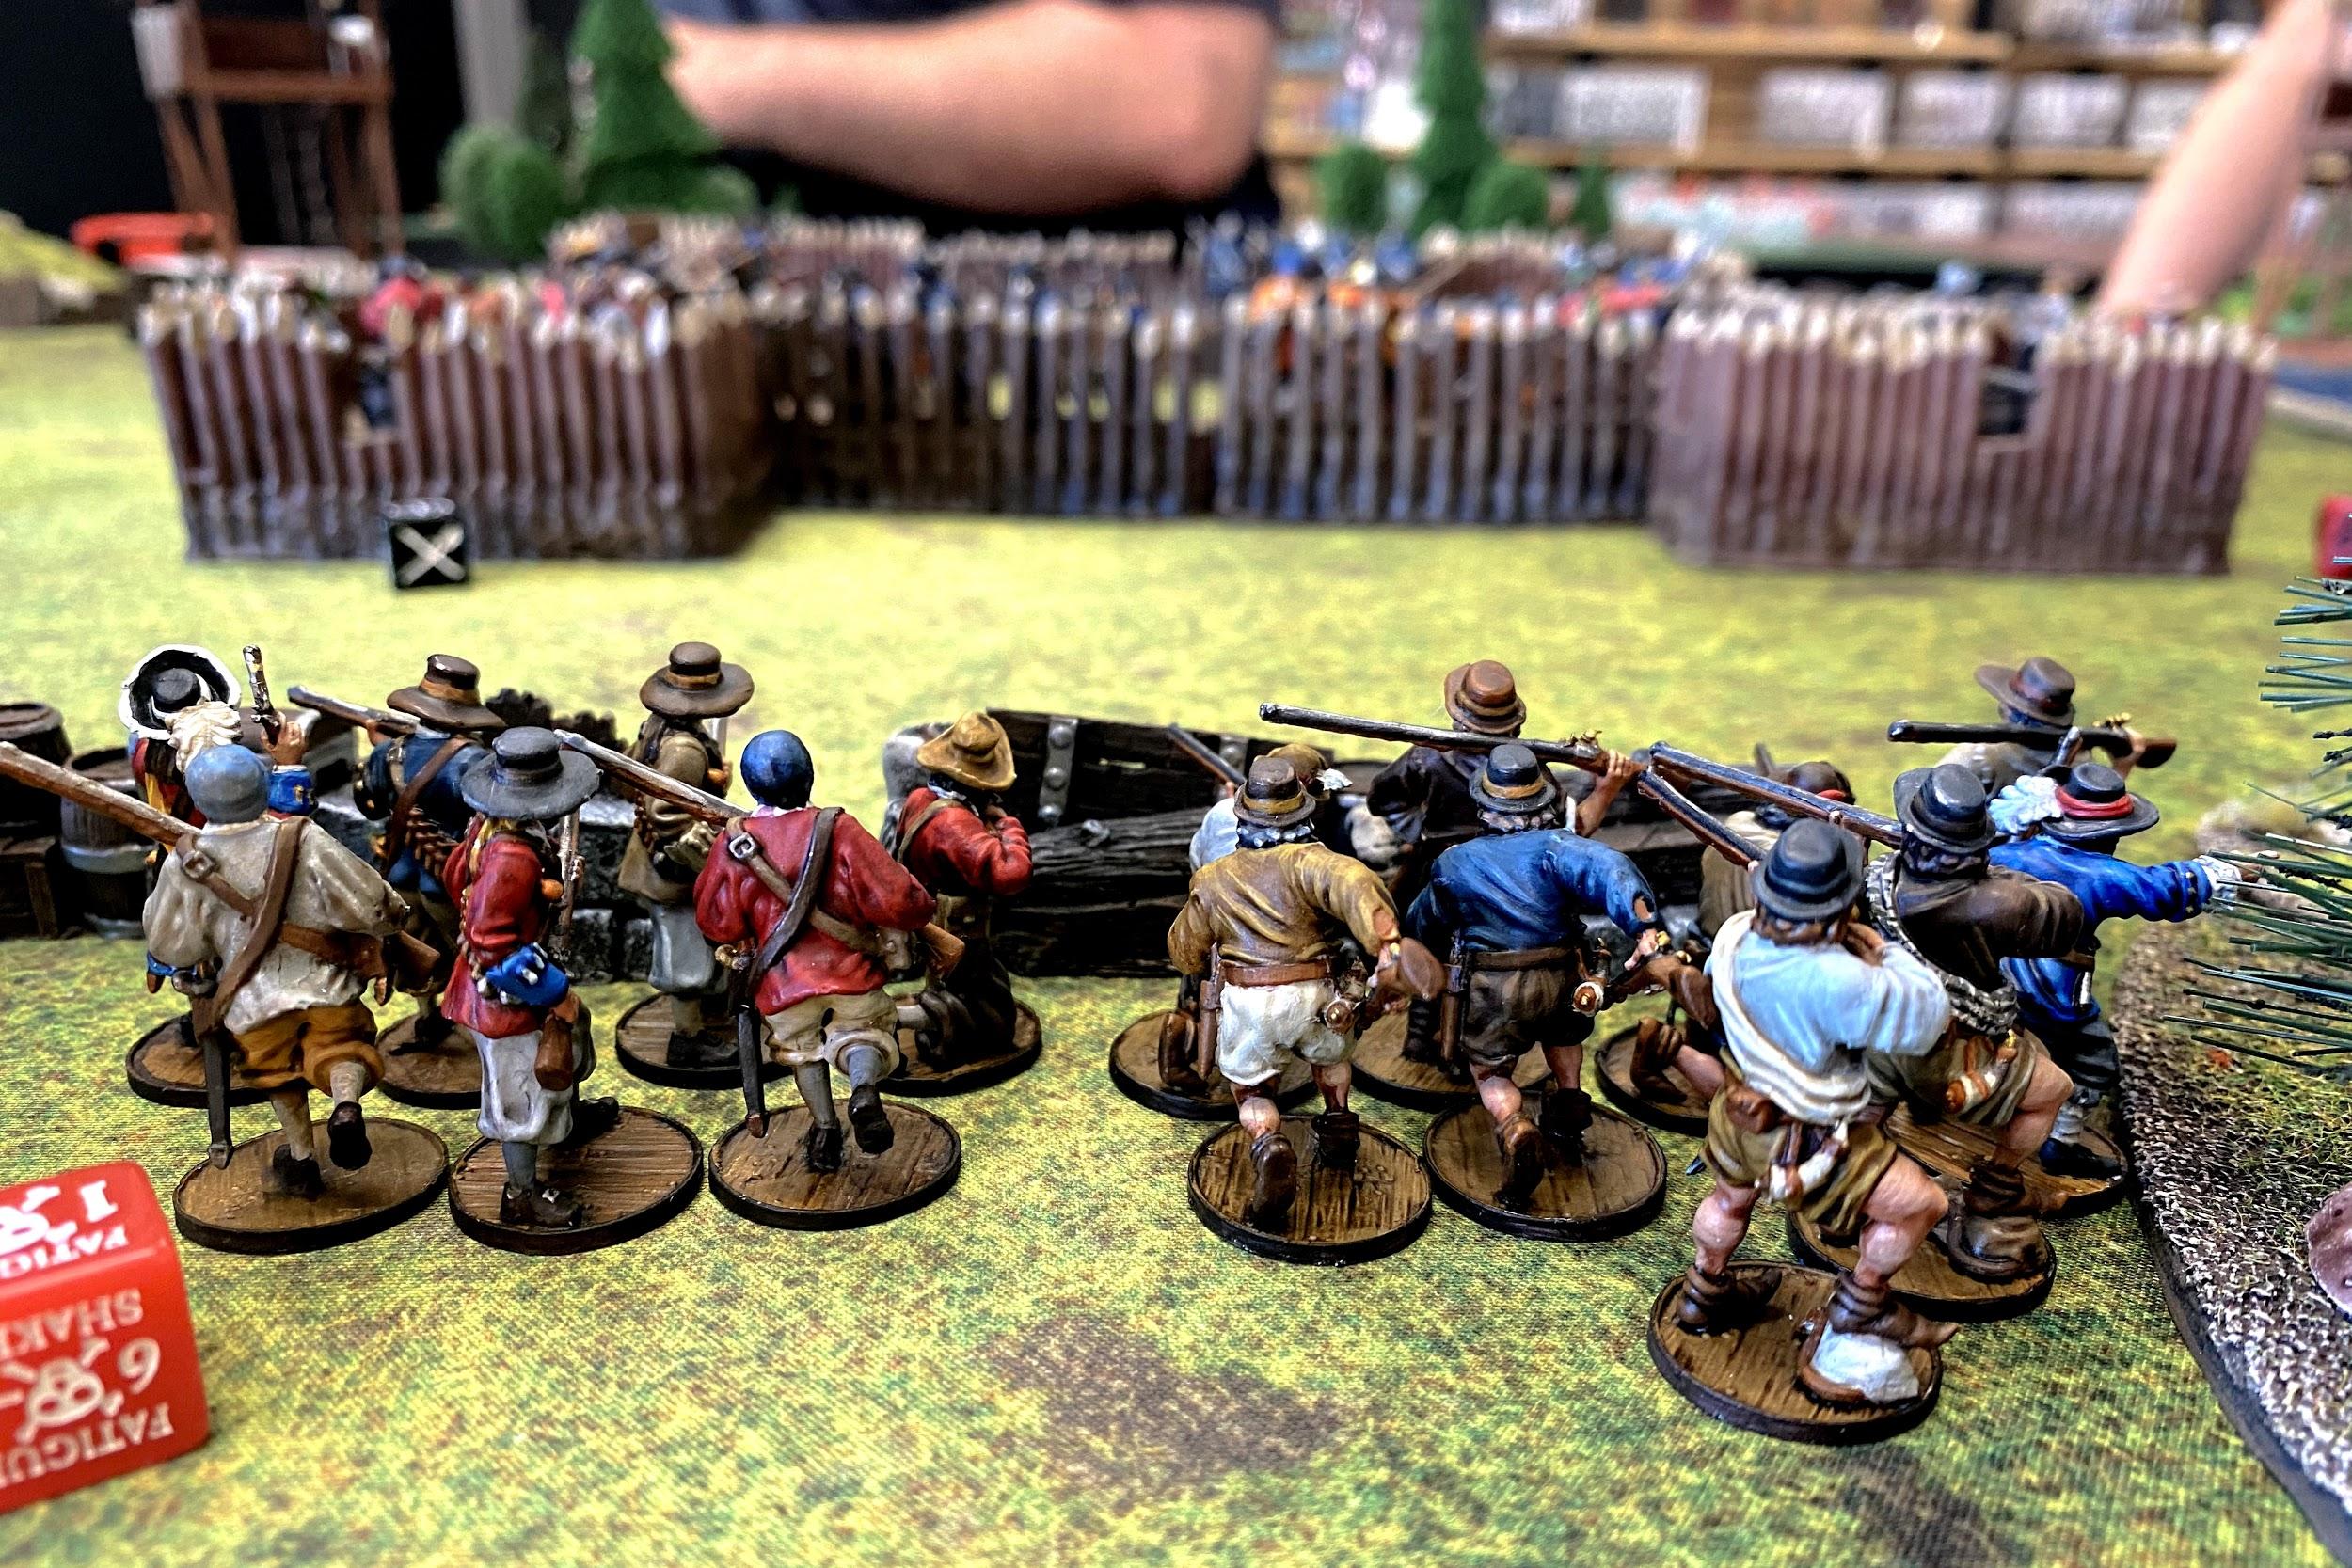
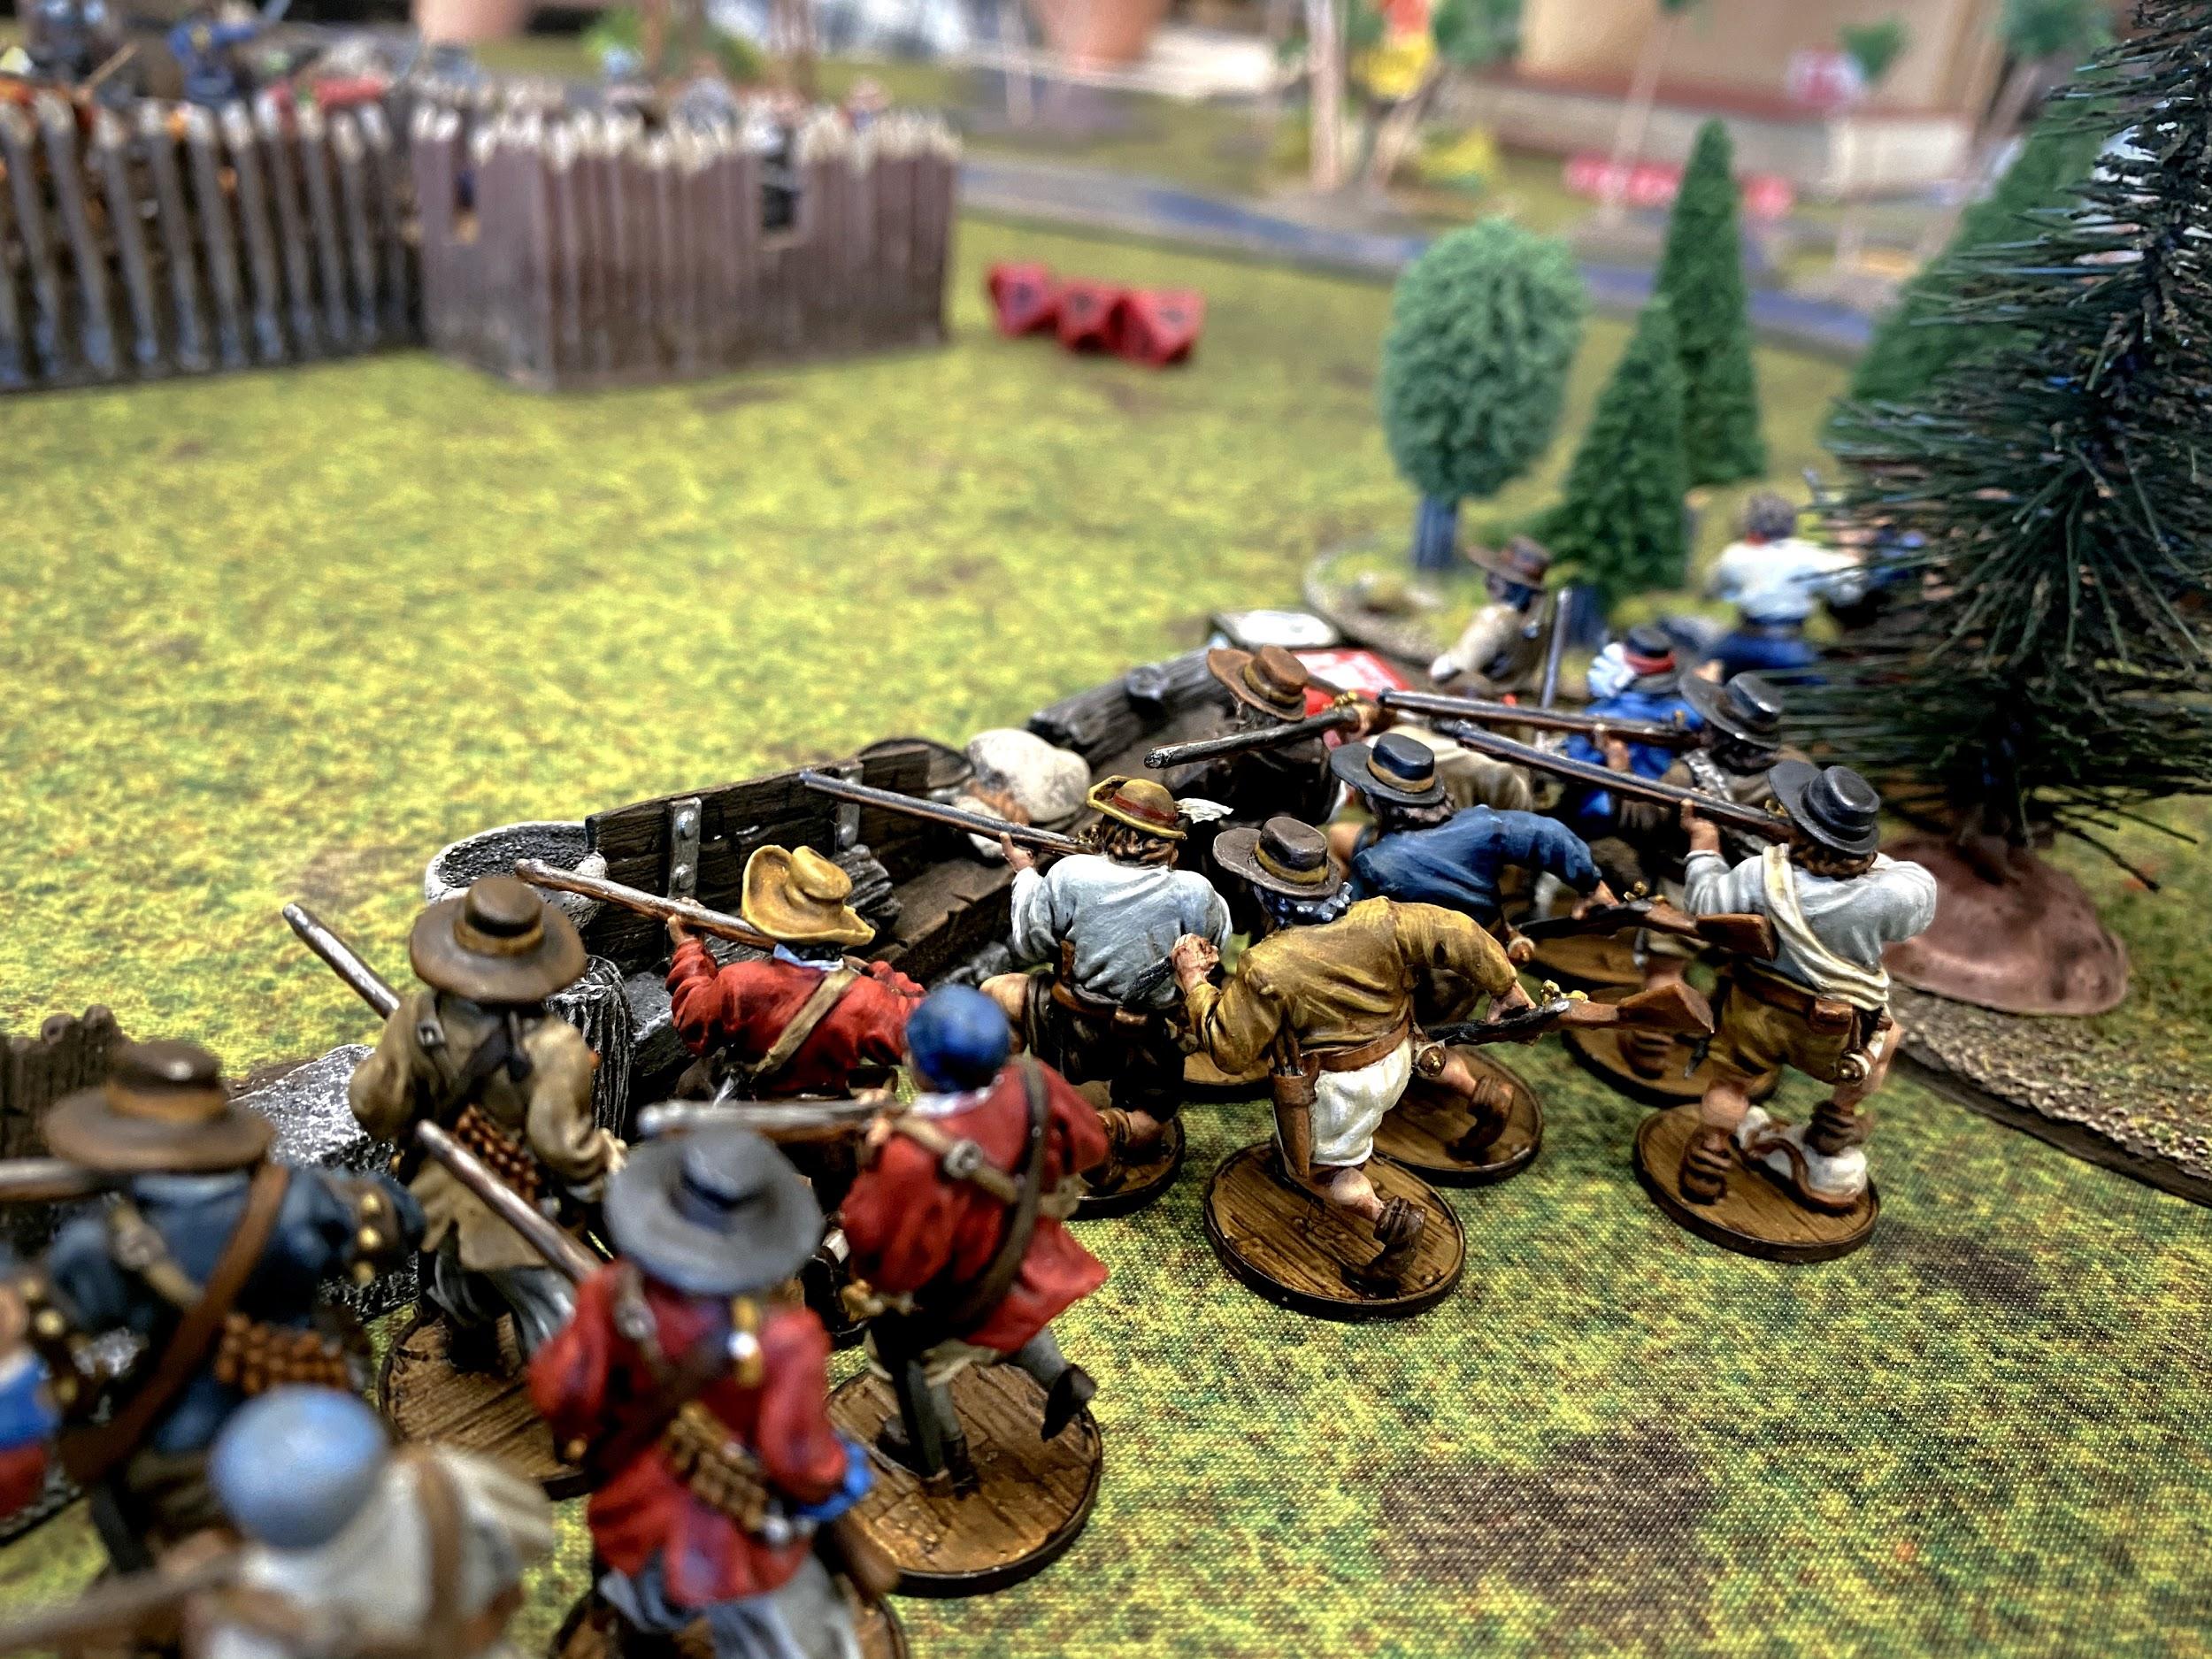
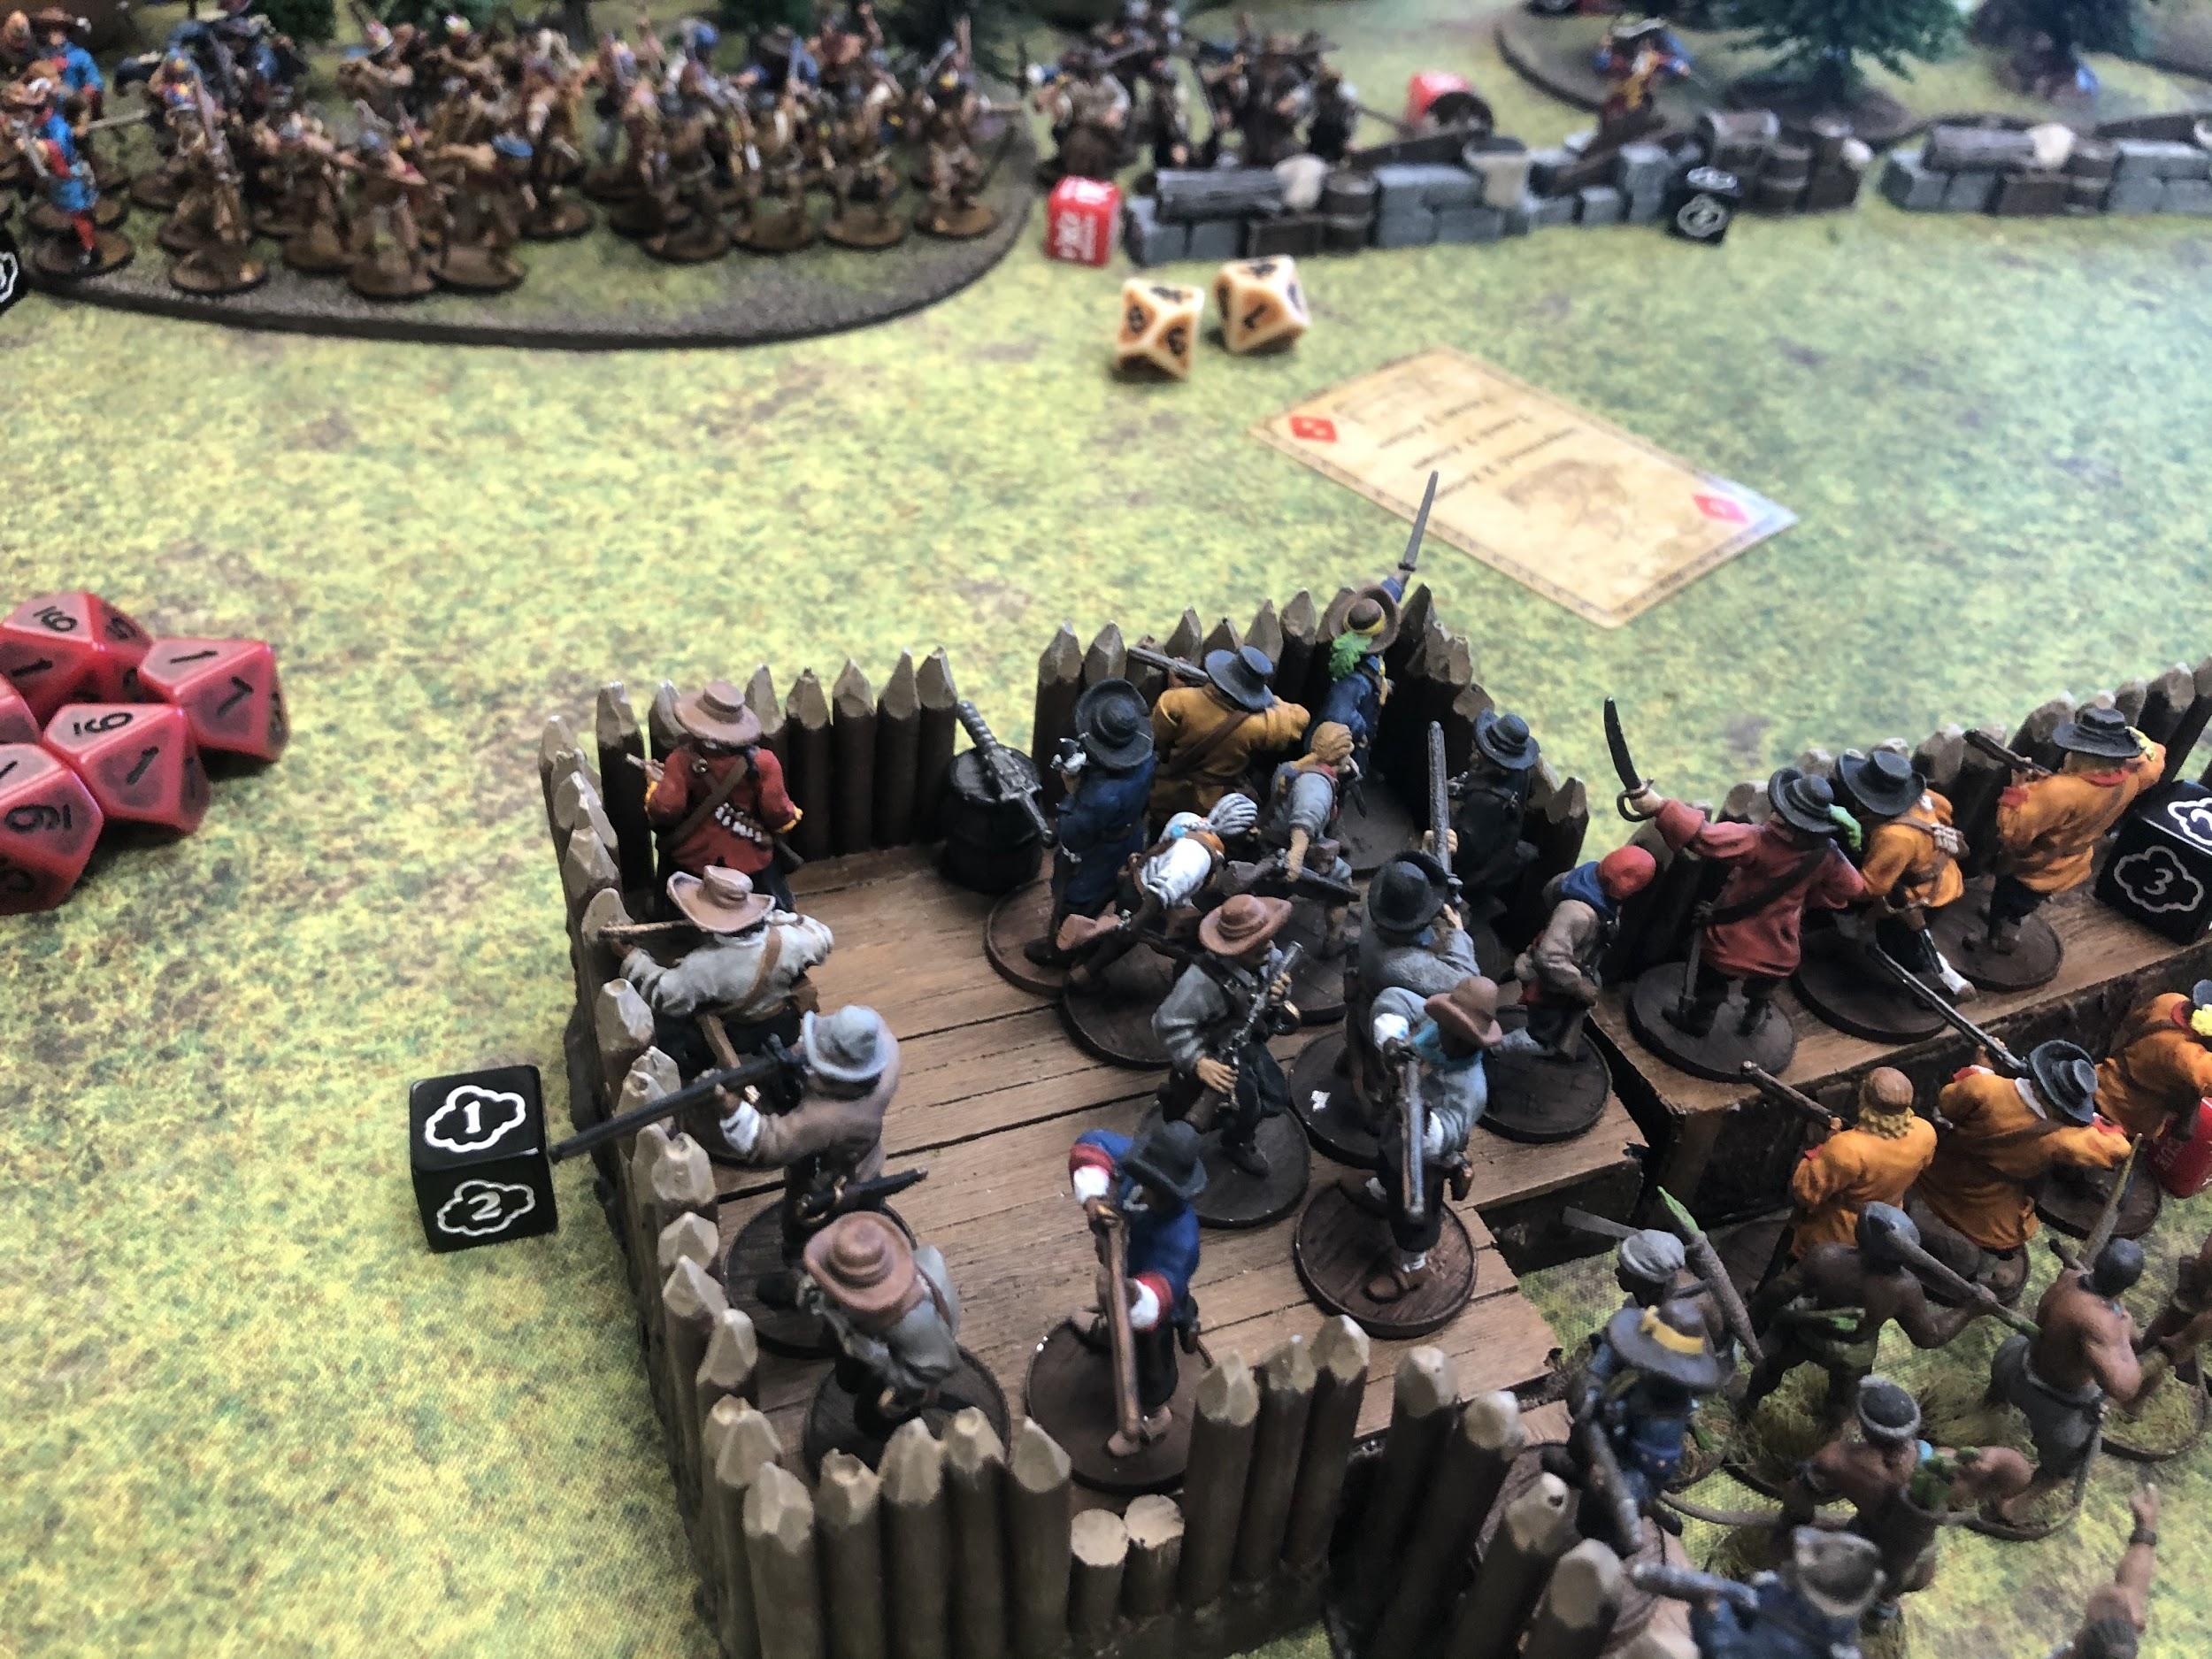
It was then that the Unknown African ran forward to the northwest bastion with his Flibustiers with Richard Sawkins behind him. In a terrifying instant, the Flibustiers climbed the wall, and blasted the defenders with their pistols.

My native allies jumped to their feet, but it was too late. They were all killed. The Marineros, after losing two of their number, jumped off the Bastion, running away in a blind panic.
The real battle was now under way.
Turn 5
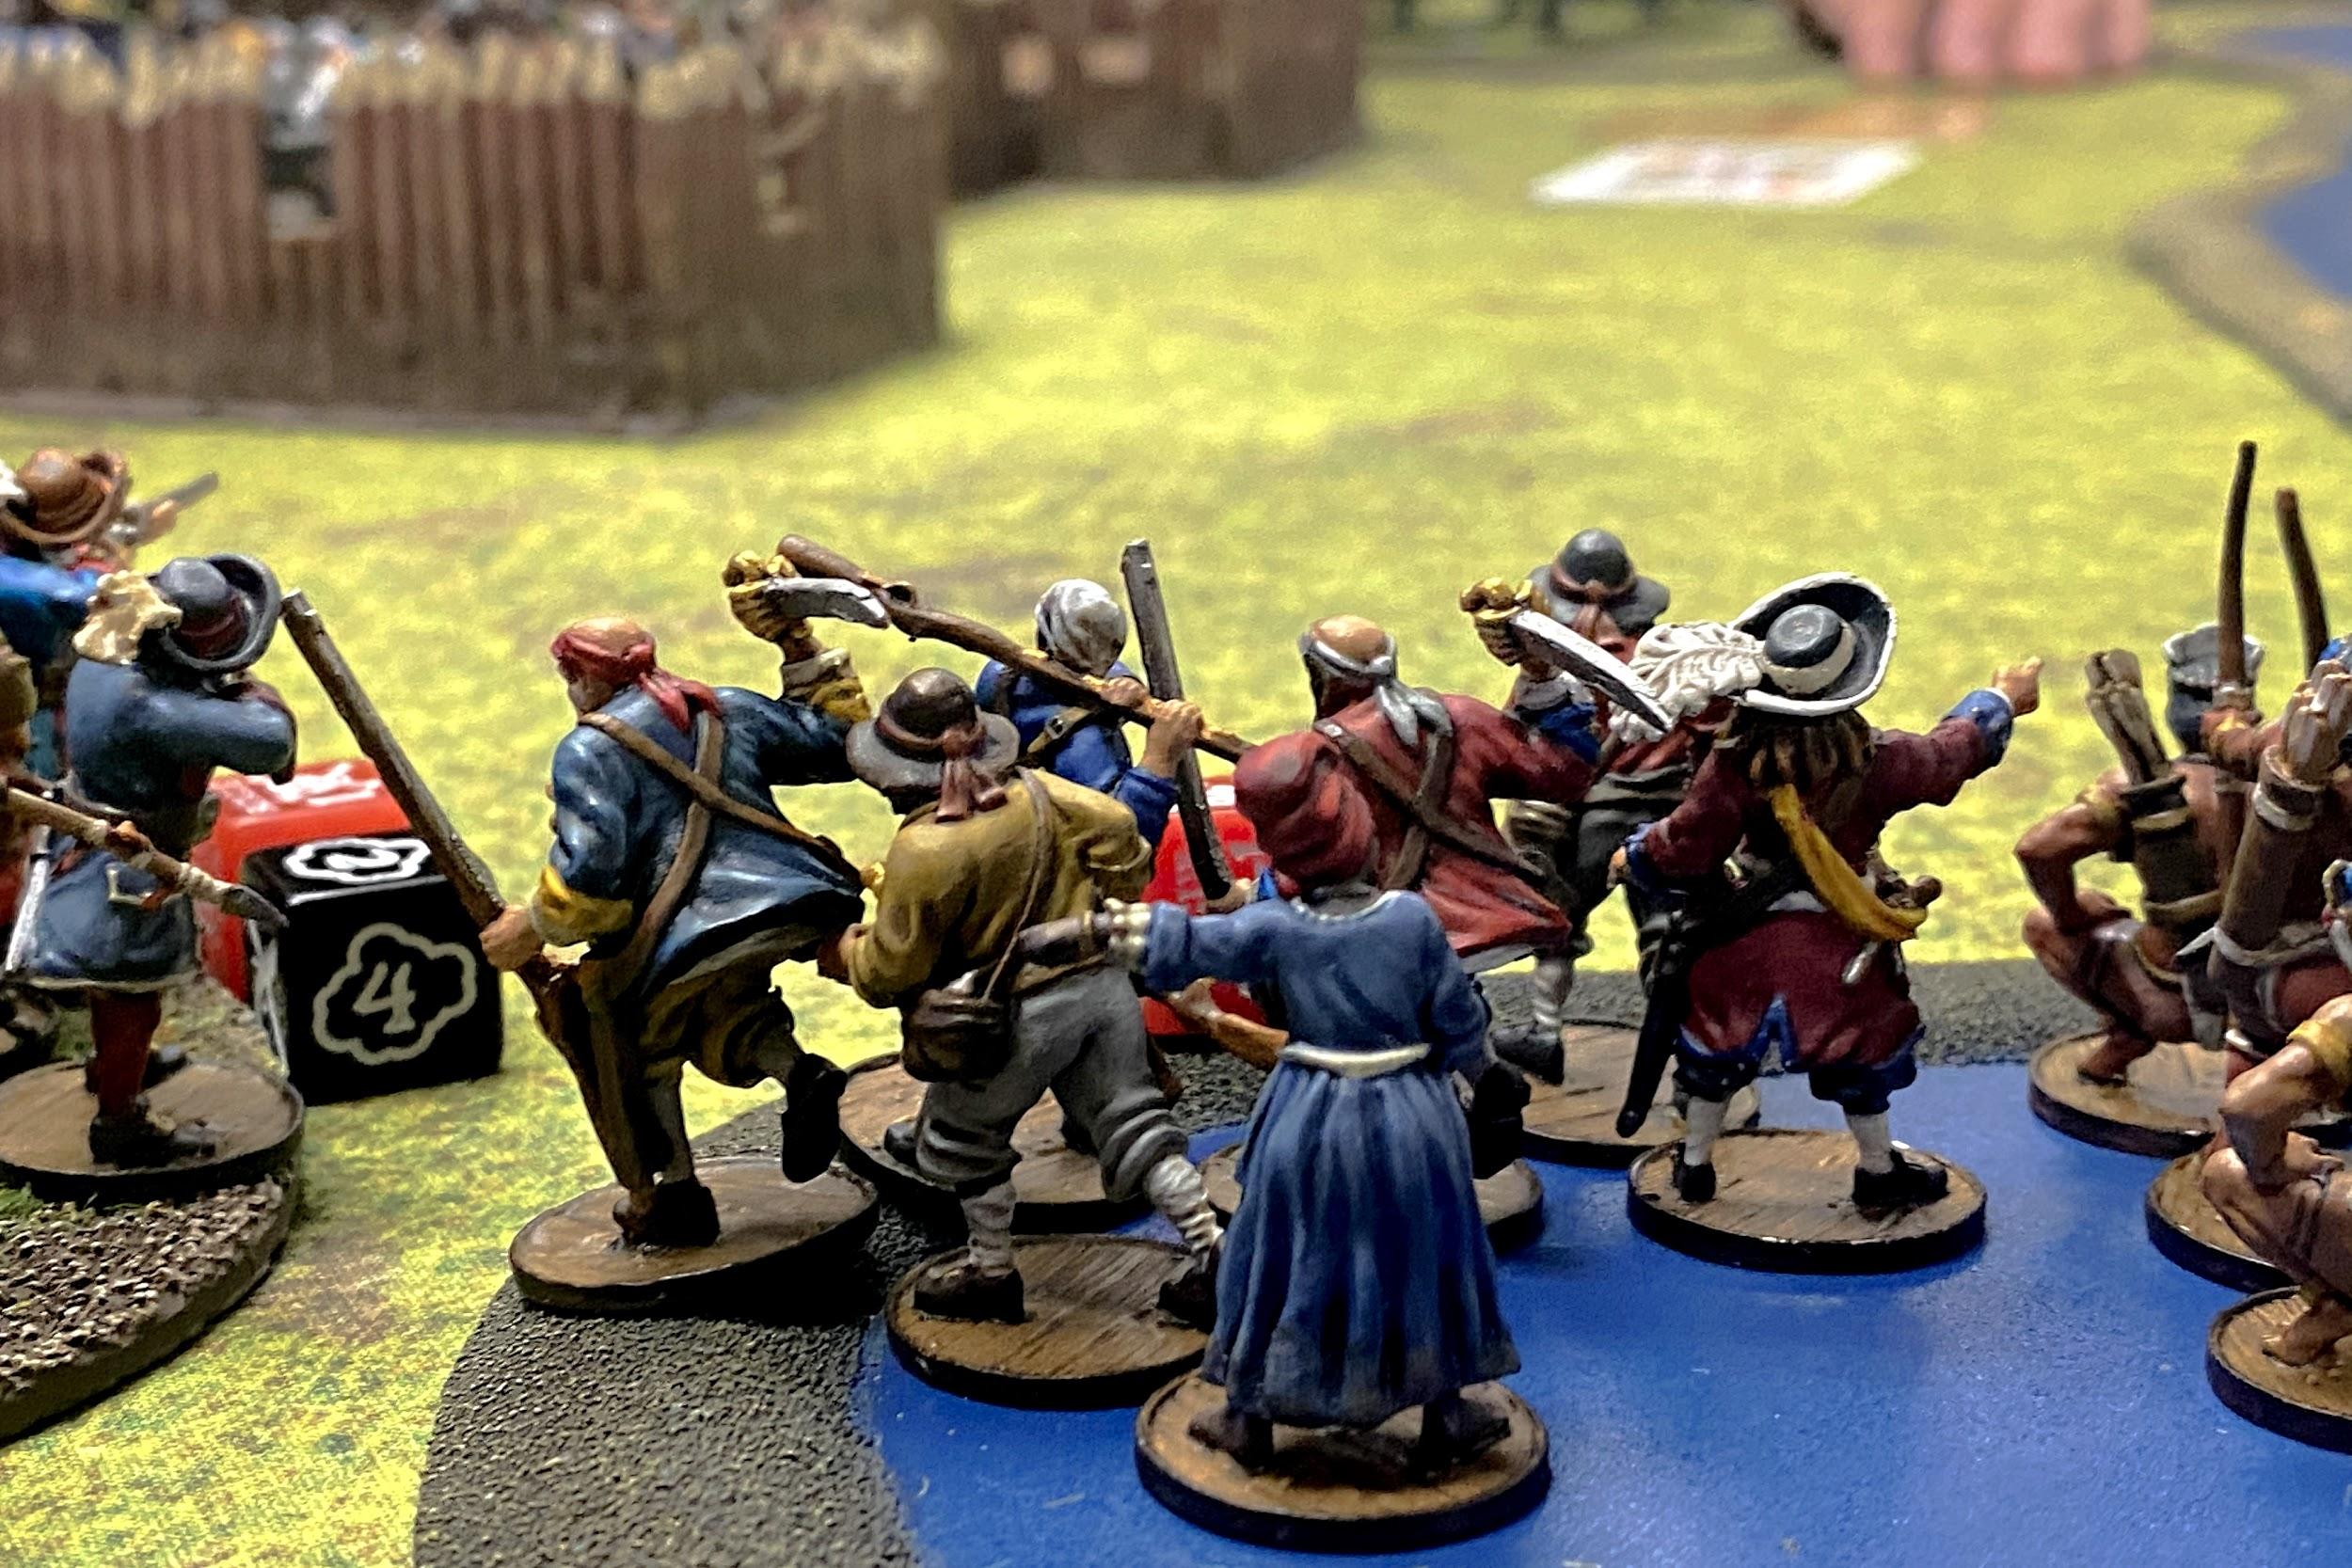
Richard Sawkins and his English Forlorn Hope then climbed the wall. The Unknown African and the Flibustiers, without any hesitation, fired into the nearby fresh Marineros with their pistols, killing 3 of them.
The Filibusters pulled out another pistol and shot into the nearby Marineros. They then charged them, sword in hand. The Filibusters pushed my Marineros back to make way for more allies on my walls.

The Spanish were shaken, they had seen so much death in such a short amount of time. Luckily my commander had watched it all, safely, behind a wall of lances. He rallied the shaken Marineros and Milicianos, and then ordered his Lanceros to charge the Flibustiers.
The Filibusters defended themselves with a spurt of pistol fire, killing two Lanceros. Unshaken, the Lanceros drove their lances home and pushed the Filibusters back to the bastion. A heartbeat later, a group of Milicianos jumped into the bastion. Two of them died to the Forlorn Hope, but they stayed strong and finished the charge. Then, another wave of Milicianos rushed into the fray, finishing off the Filibusters, panicking Richard Sawkins, and pushing the Buccaneers off the bastion.
It was a pyrrhic victory though, as more than half the defenders layed dead, and Richard Sawkins was only the first company over the wall. King Golden Cap himself and a company of warriors scaled the wall, scattering the Millicianos defenders before him.
The rest of the Cuna ran up to the wall and got ready to climb. Nearby, my Marineros rallied, and those on the bastion loaded their swivel gun.
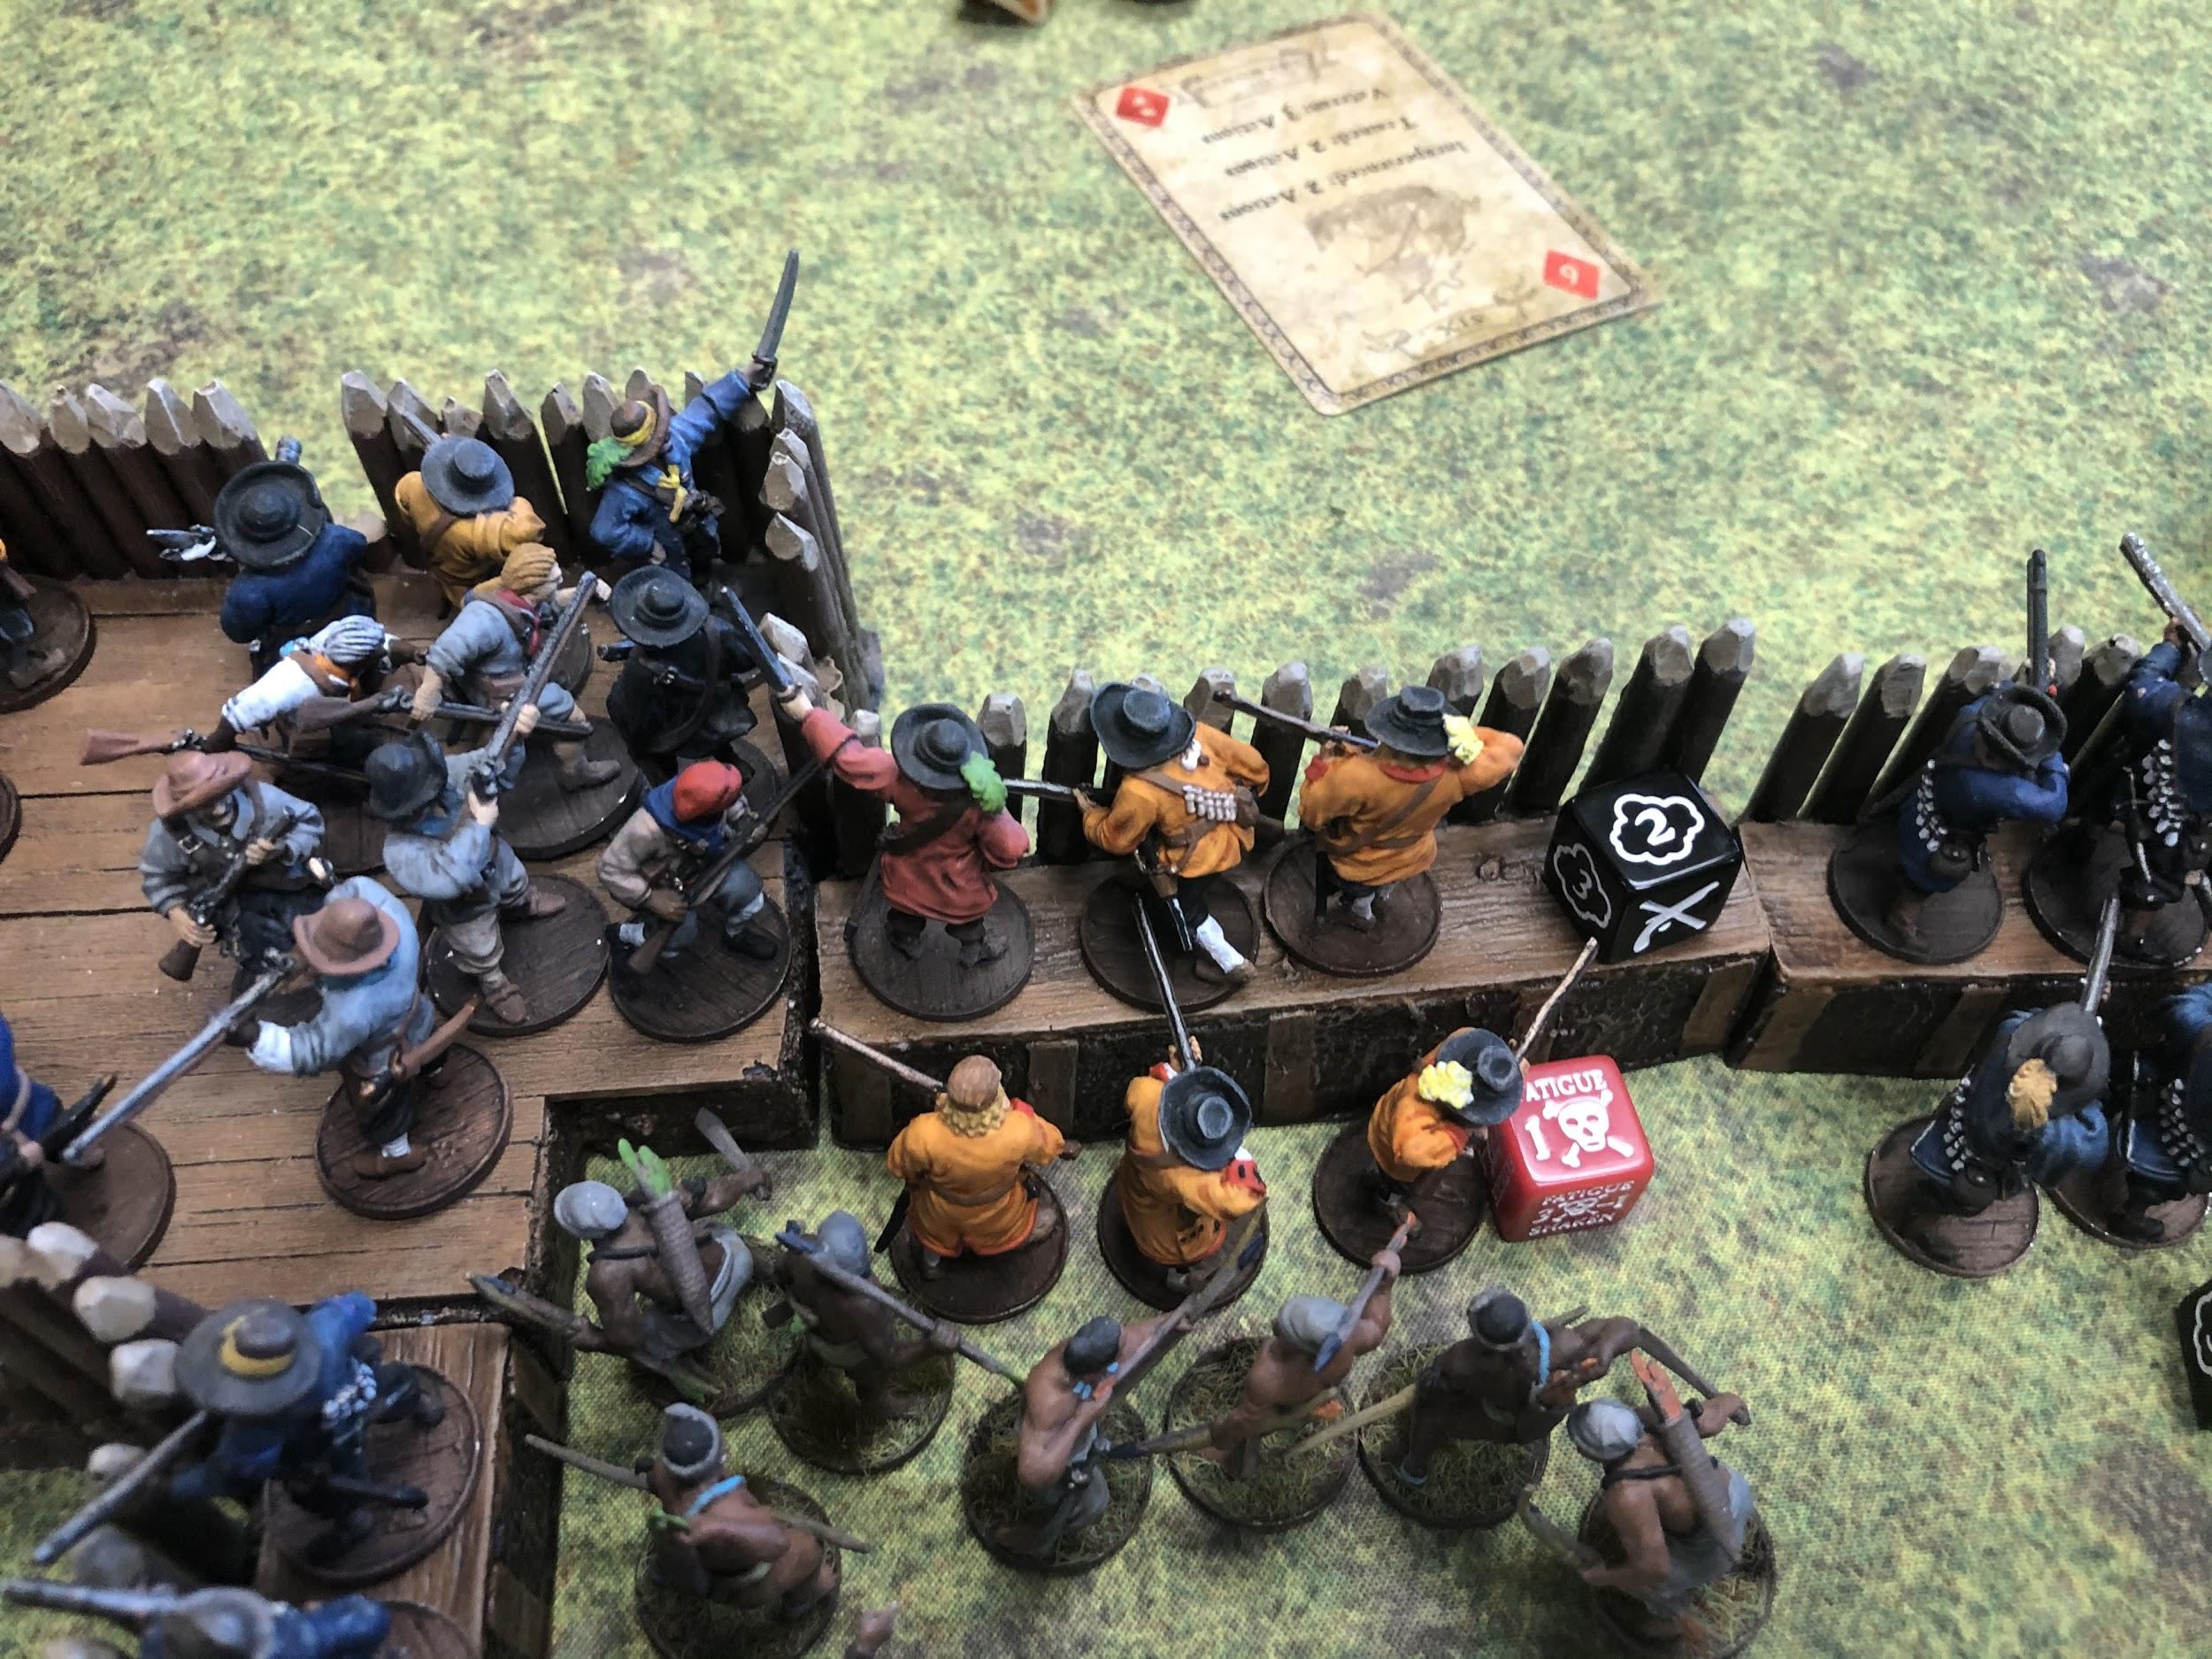
Bartholomew Sharp and the Boucaniers, enraged at the loss of Richard Sawkins and the rest of the Buccaneers, finally stepped out from behind the wall and shot at the seven Milicianos they had been trading fire with for the last half an hour. Their ball and shot ricocheted off the palisade walls, killing all seven of the defenders in that fiery blast. The Kapers then ran forward, getting ready to climb the bastion of walls.

Turn 6
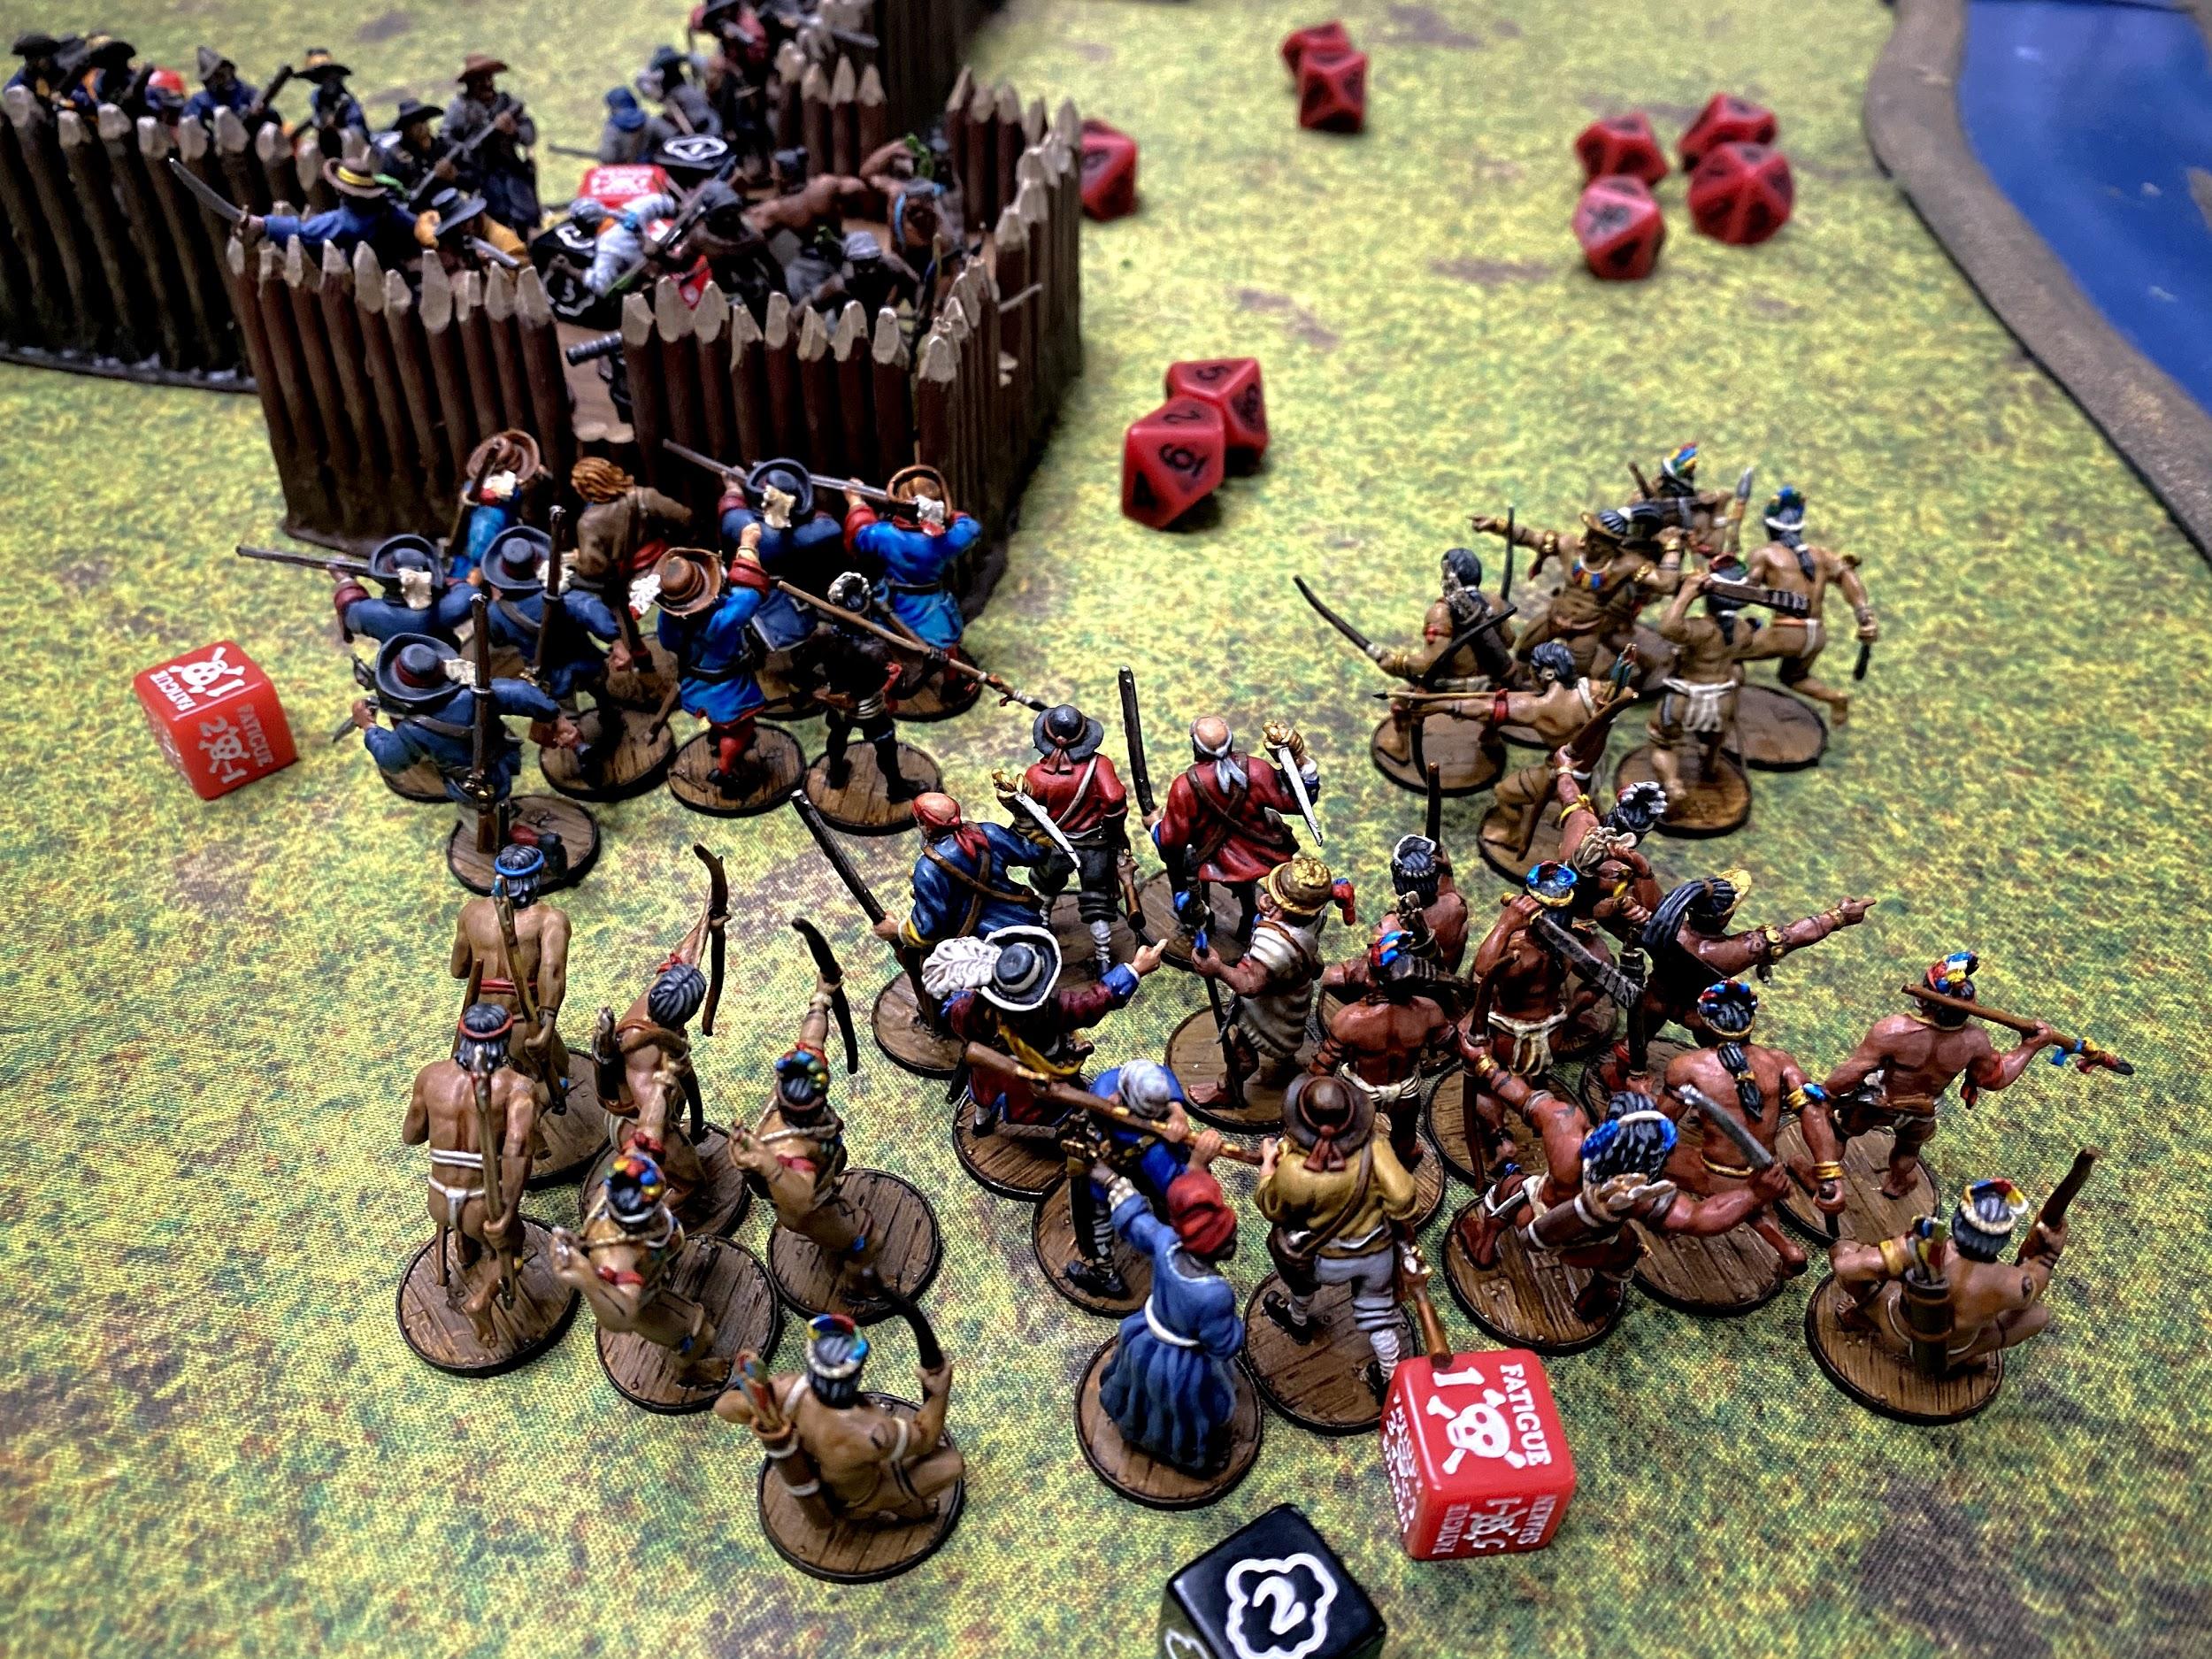
Through gritted teeth my commander and his Lanceros ran along the wall, straight into King Golden Cap and ten warriors. They set arrows to bow, but their hands were stayed when they saw my commander was dragging King Golden Cap’s daughter by the hand, behind the Lanceros.

My lances found flesh again, and the warriors were shaken. Seeing the terror in their eyes, my commander ordered the Lanceros to fight on, and they did, ruthlessly, before retreating back to the wall. Then the newly rallied Milicianos attacked, using their empty muskets as clubs. At the end of the bloody attack, King Golden Cap was gone, and all his warriors were dead.
While that attack was under way, the Kapers climbed the other Bastion and easily dispatched the three remaining defenders. The Boucaniers slowly moved towards the fort while reloading their Buccaneer guns.
The remaining Cuna natives climbed the wall and attacked the worn Milicianos, killing an officer and pushing the last four Milicianos off the bastion.
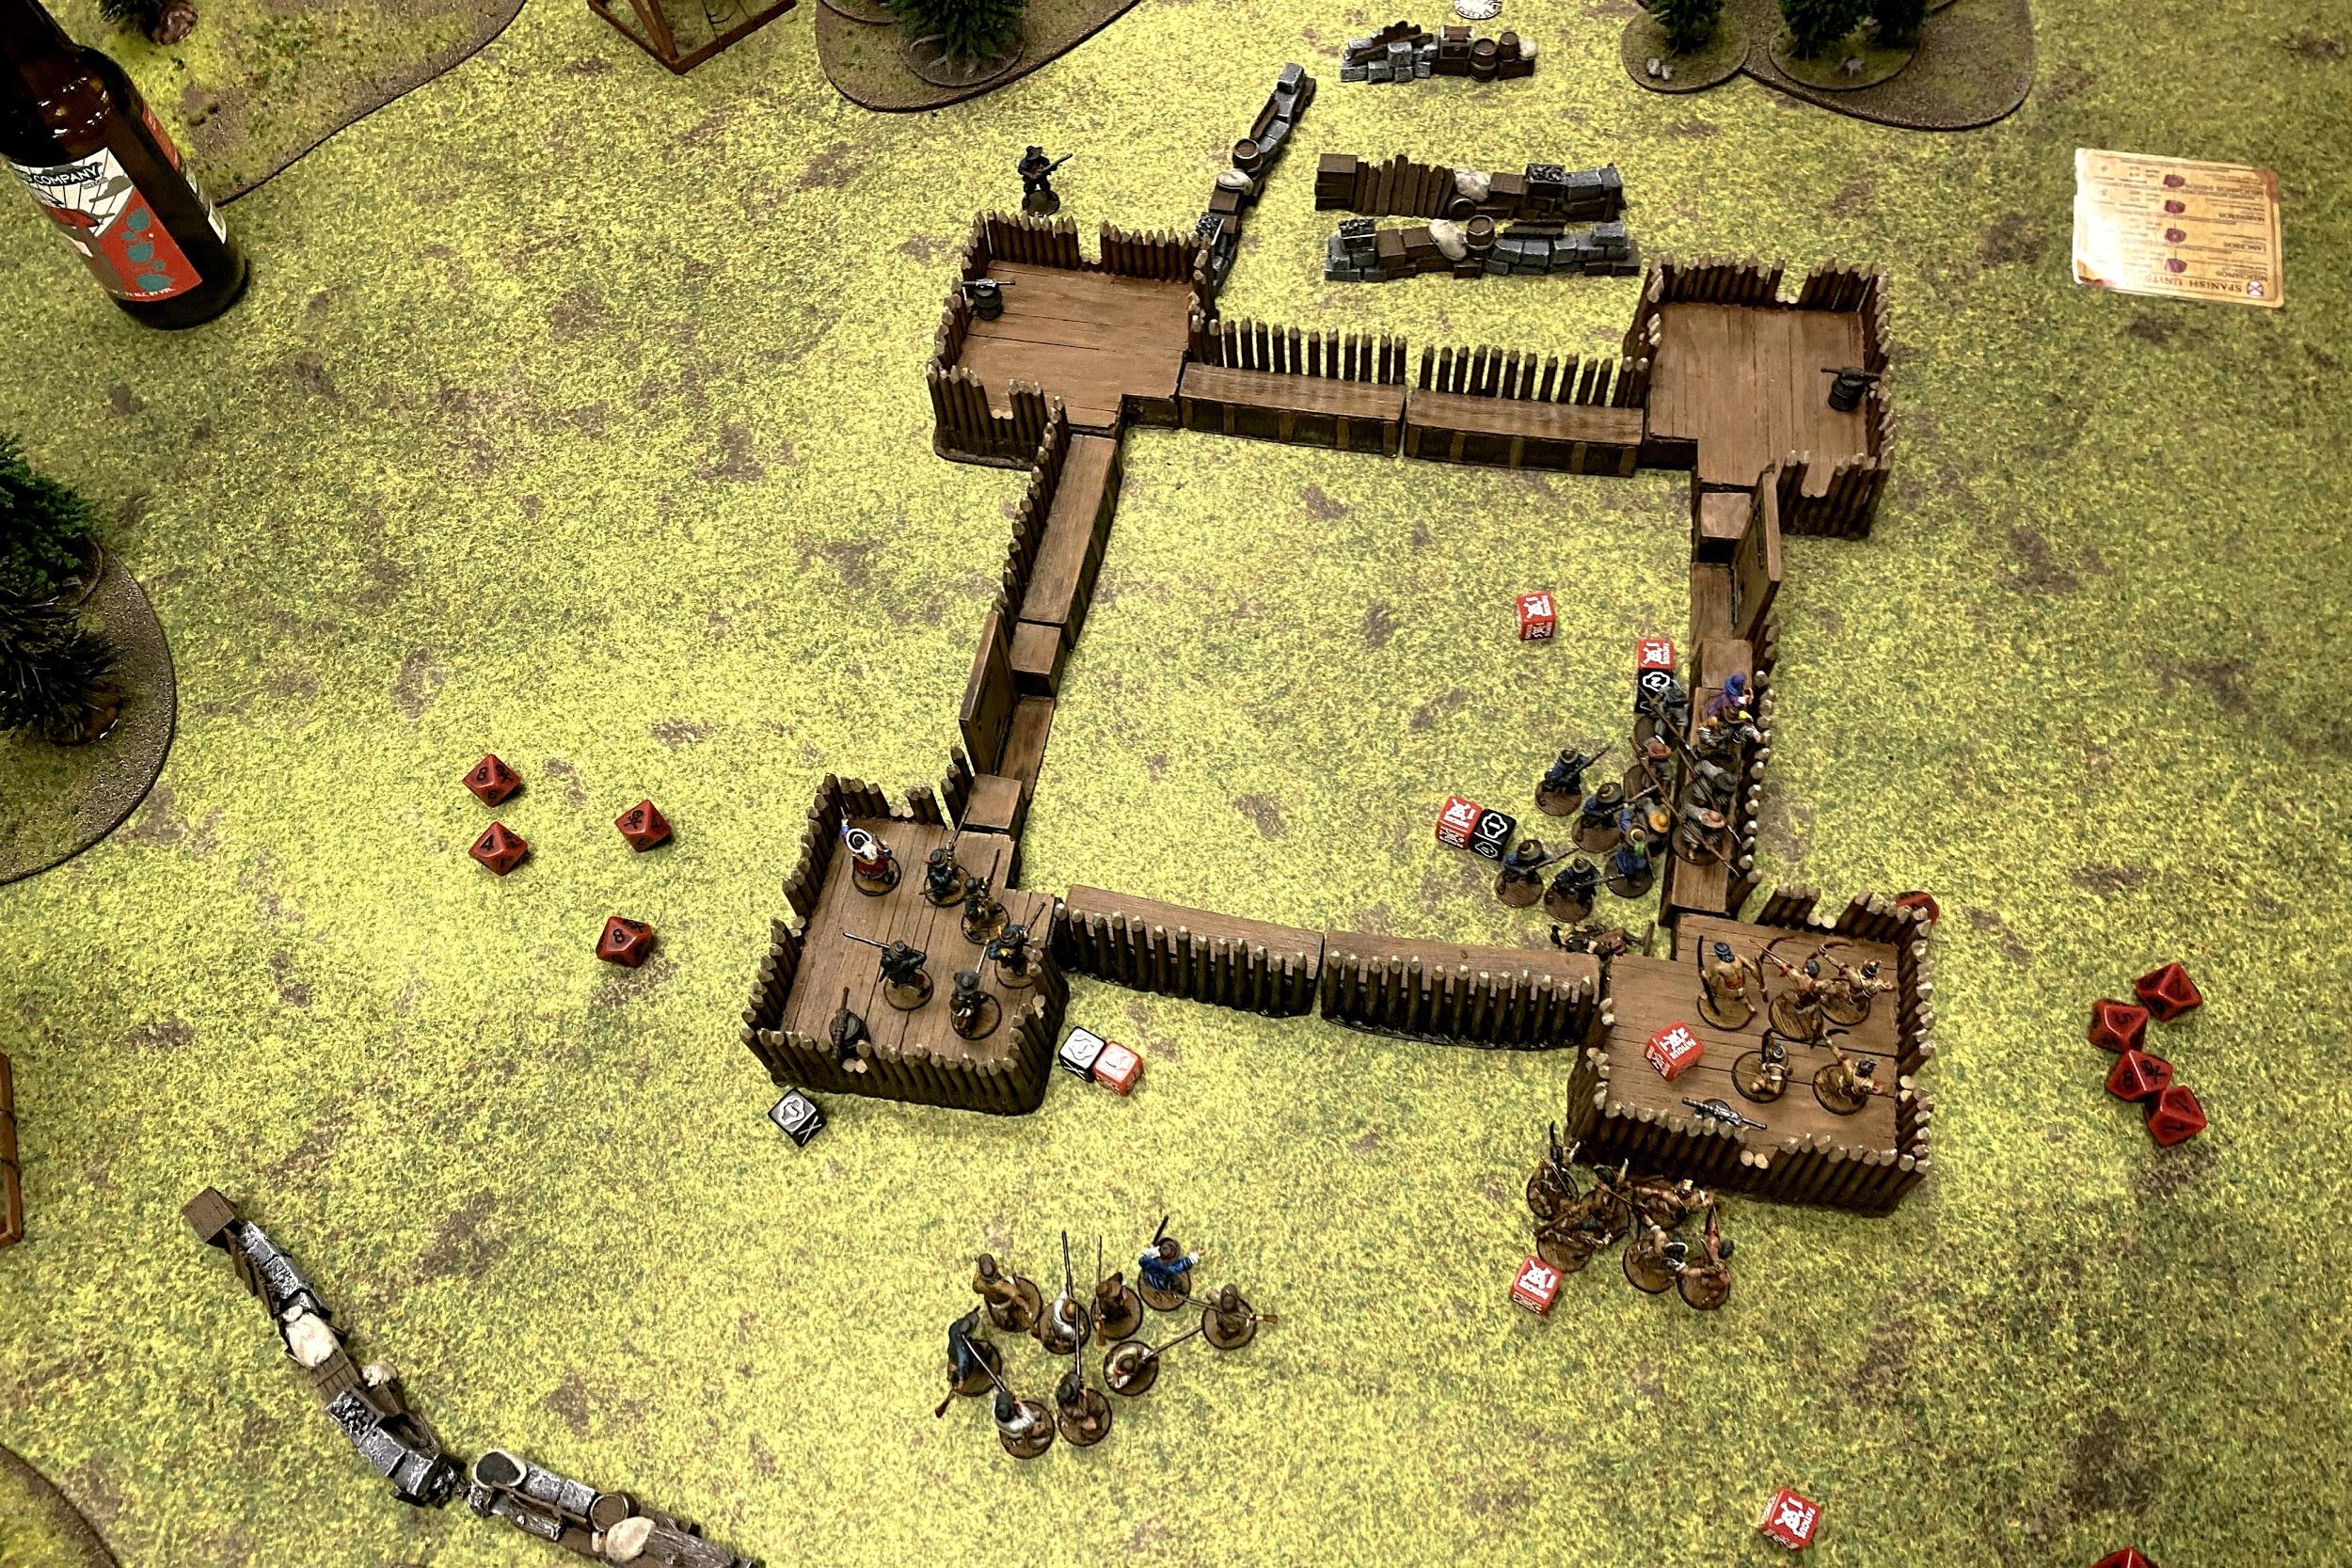
And with that the sun began to set. Over sixty men had died in the northwest bastion alone. The fort was overrun. I could do nothing but surrender.
End Strike Points
Here are how the strike points looked at the end of the game. Figuring them out in an army scale game is a little tricky because you have to keep track of three different forces. This game also took four hours to play, and we were both weary from it. By the end, we knew the Buccaneers had won, but we didn’t know by how much.
Spanish – 12 Strike Points
Company 1
2 from casualties
1 from invaded fortification
Company 2
3 from casualties
1 from invaded fortification
Company 3
4 from casualties
1 from invaded fortification
English – 10 Strike Points
Company 1
4 from casualties
1 from scenario
Company 2
2 from casualties
1 from scenario
Company 3
1 from casualties
1 from scenario
Closing Thoughts
- This was my first Army scale land game. While I had played several army scale sea games, it was exciting to play a huge land game. I used some tricks to make it easy to track who was in what company, such as not having any of my companies have the same type of units. The game also went faster, and each card felt more dynamic than it would usually.
- On the other side of the coin, activating while companies with one card made the game feel very swingy. Several of my defending units were reduced by half before I could do anything with them. Other units spent the whole game in a cycle of being shaken then rallying then standing up then being shaken. Once the palisade walls were scaled I saw the same problem but from the other side. Being able to charge the same bastion with multiple units obliterated over 150 points of models in one turn, and is not something that would usually be possible at the top of a turn.
- Forts are fun to play with, but also have the same disadvantages that buildings do. My opponent chose the best range for their guns and bows, but not for my Marineros and Milicianos. In past games I had made the mistake of leaving a good defense to try to attack, and been slaughtered, so I was loath to repeat that mistake here. Instead I made other mistakes!
- I think this is going to be one of my last times trying to take a Sailor unit with a mix of Blunderbuss and muskets, unless they are European Sailors. It costs 56 points compared to Marineros without pistols, and I only fired four muskets and two Blunderbuss over the course of the game.
- Caribbean Natives are an interesting faction. Rain of Arrows is a great special rule, and a lot of fun with Warrior Archers. The 16 Natives were the best ranged units I had, and got as many kills as the two swivel guns on the bastions. On the other hand, Sound of Thunder was debilitating, effectively pinning down one unit of archers for the first half of the game. I can’t wait to try out a force of just them.
- Don’t take Millicianos when you can take Hostigadores. Lesson learned.
- I like to think that one of the marks of a good game is that it is fun to lose. I felt I could turn things around almost up to the very end, and I almost did.
- This was my second time killing John Coxon! I’m sure that zombie rouge will be back though.
The Story Will Continue…
Thank you for reading this chapter out of Buccaneer’s Companion. I hope you’ll join me next time as the Buccaneers fight one of their most famous battles.
Best title ever
Pingback: Blood & Pigment Blog Update and YouTube Launch | Blood & Pigment
Pingback: Buccaneer’s Companion Vol. 1 Review | Blood & Pigment
Pingback: King Golden Cap - Blood & Plunder Miniature Showcase & Painting Guide - Blood & Pigment