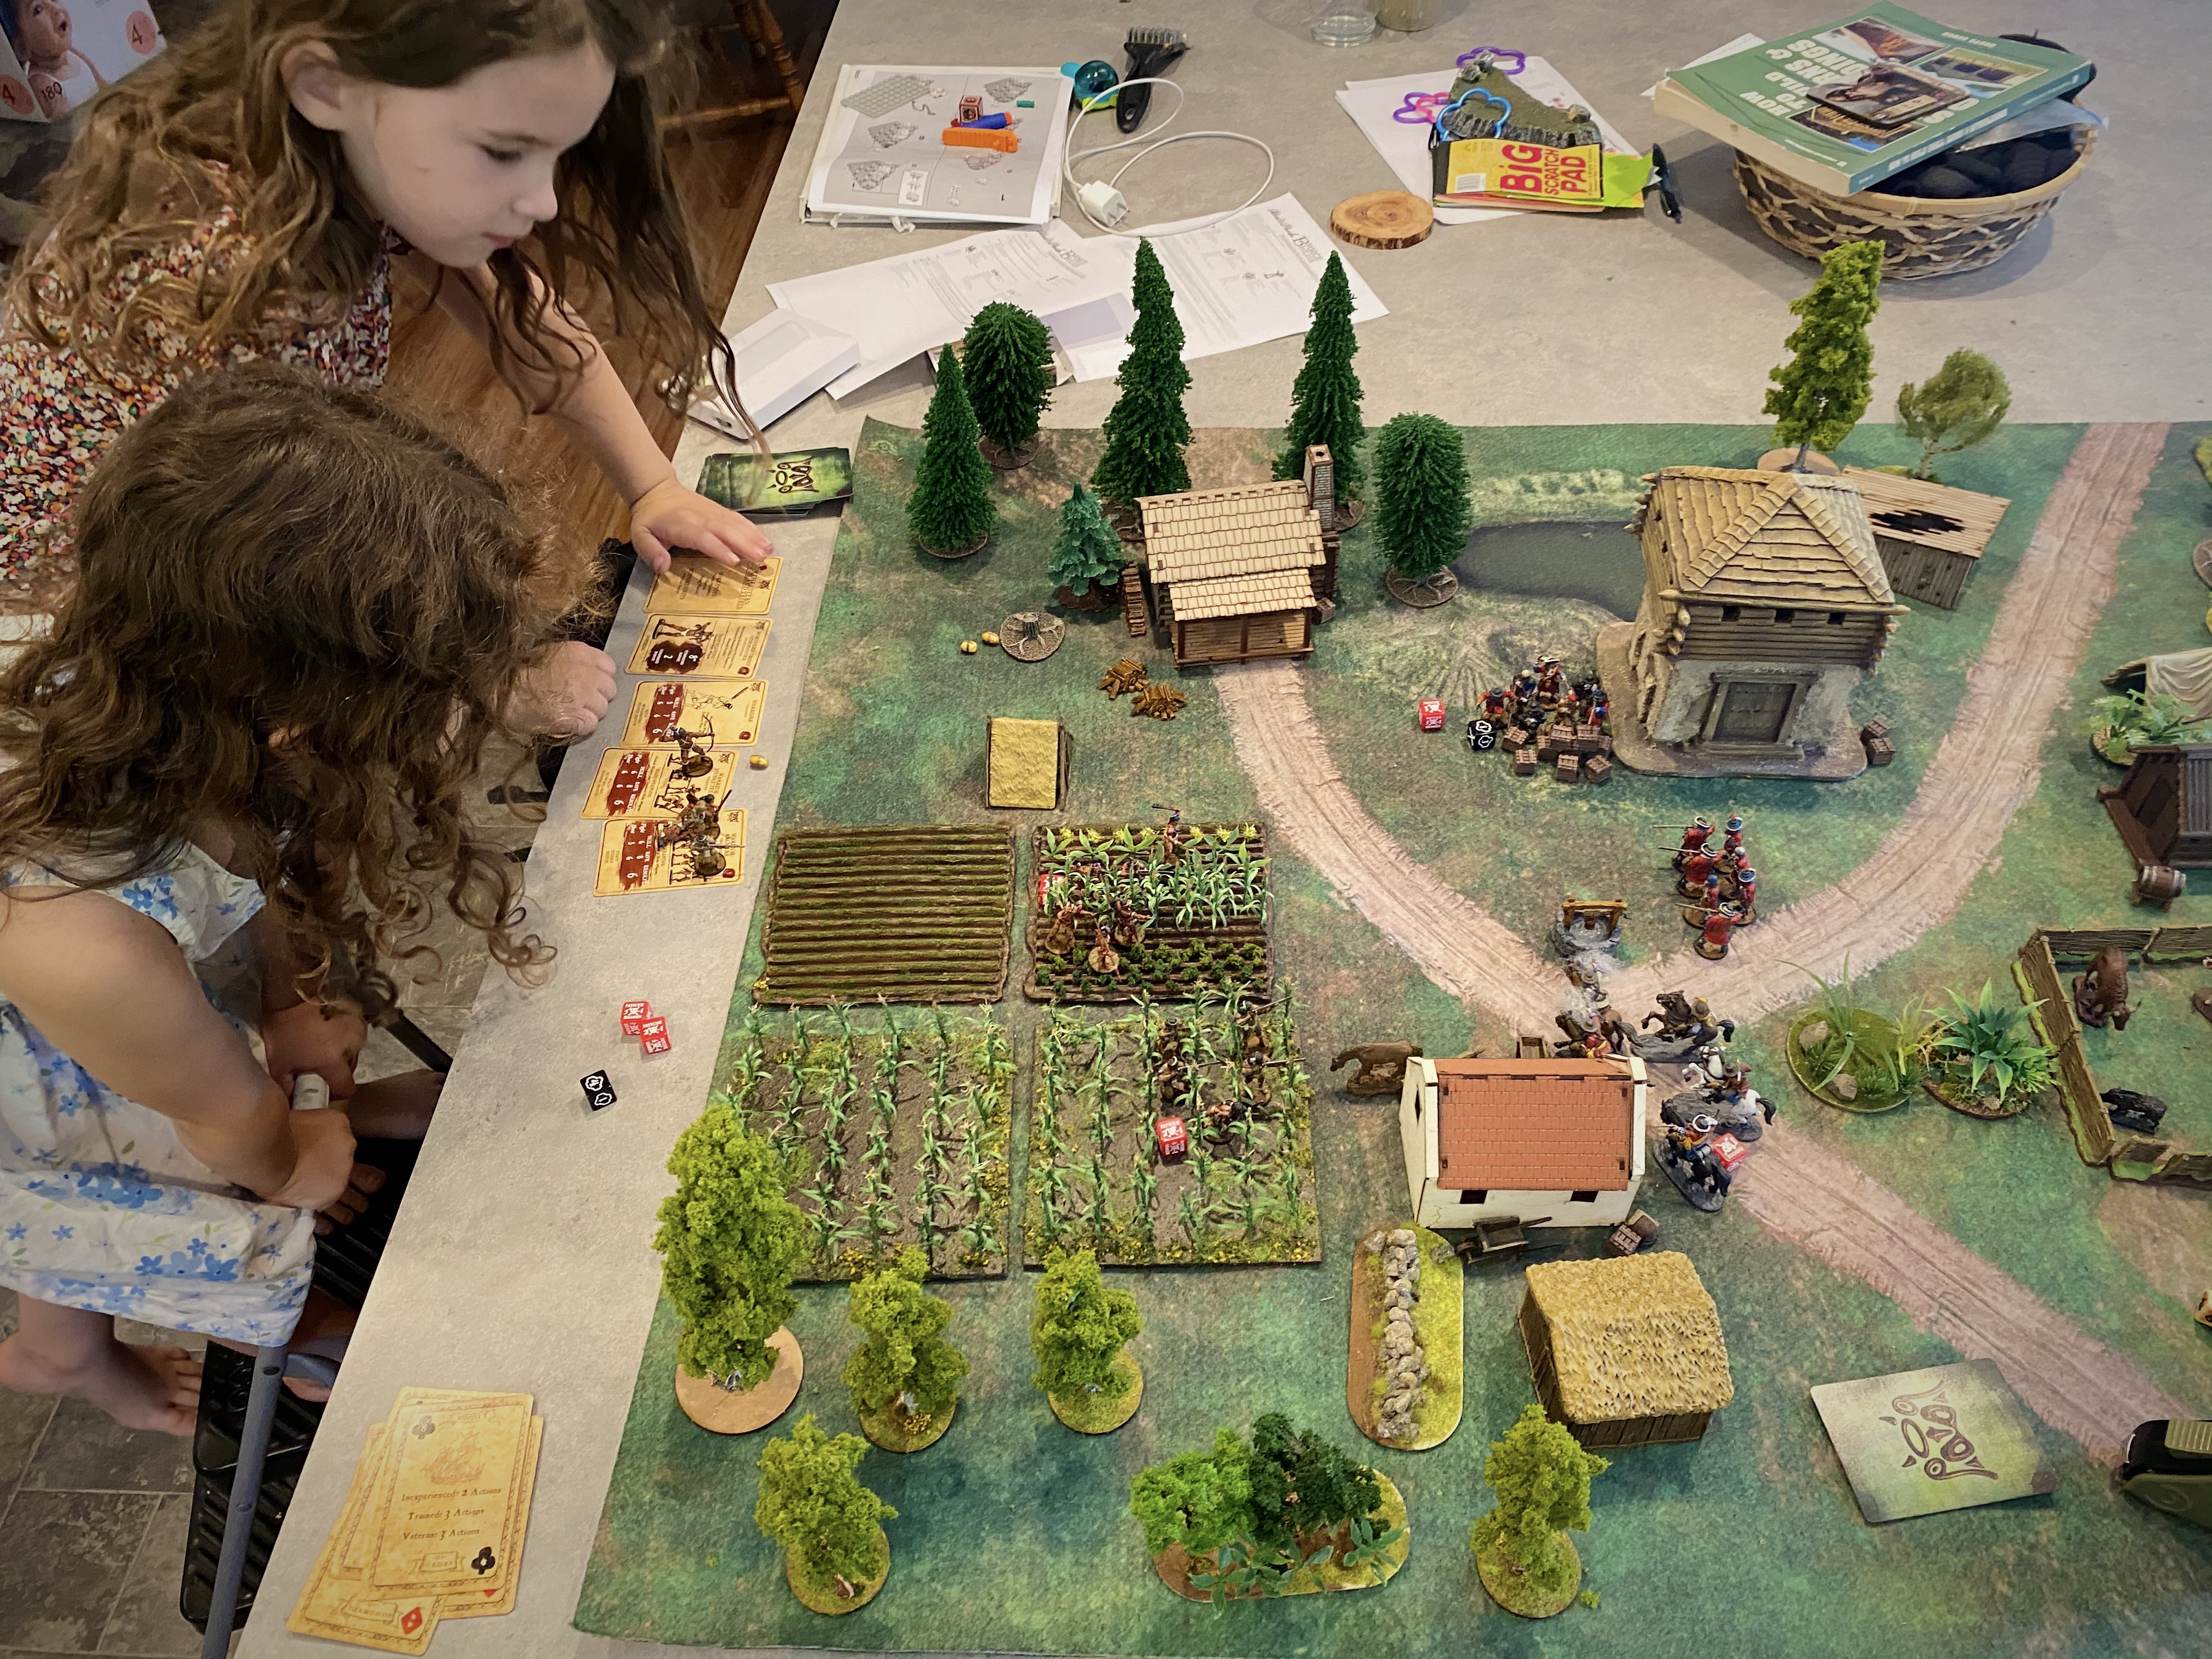
This was a solo game testing out a new scenario from the upcoming Queen Anne’s War expansion. This scenario is still a work in progress and feedback is still relevant and helpful at this point (August/September 2020) so please chime in if you have any thoughts!
For this solo game I basically of used the official solo game rules but I stretched things a little to try to best mimic a real player for the purpose of testing the scenario. I gave both sides Fortune Points and I counted the Natives as my own force and used the AI rules and played initiative cards off the top of the deck for the English.
The Forces
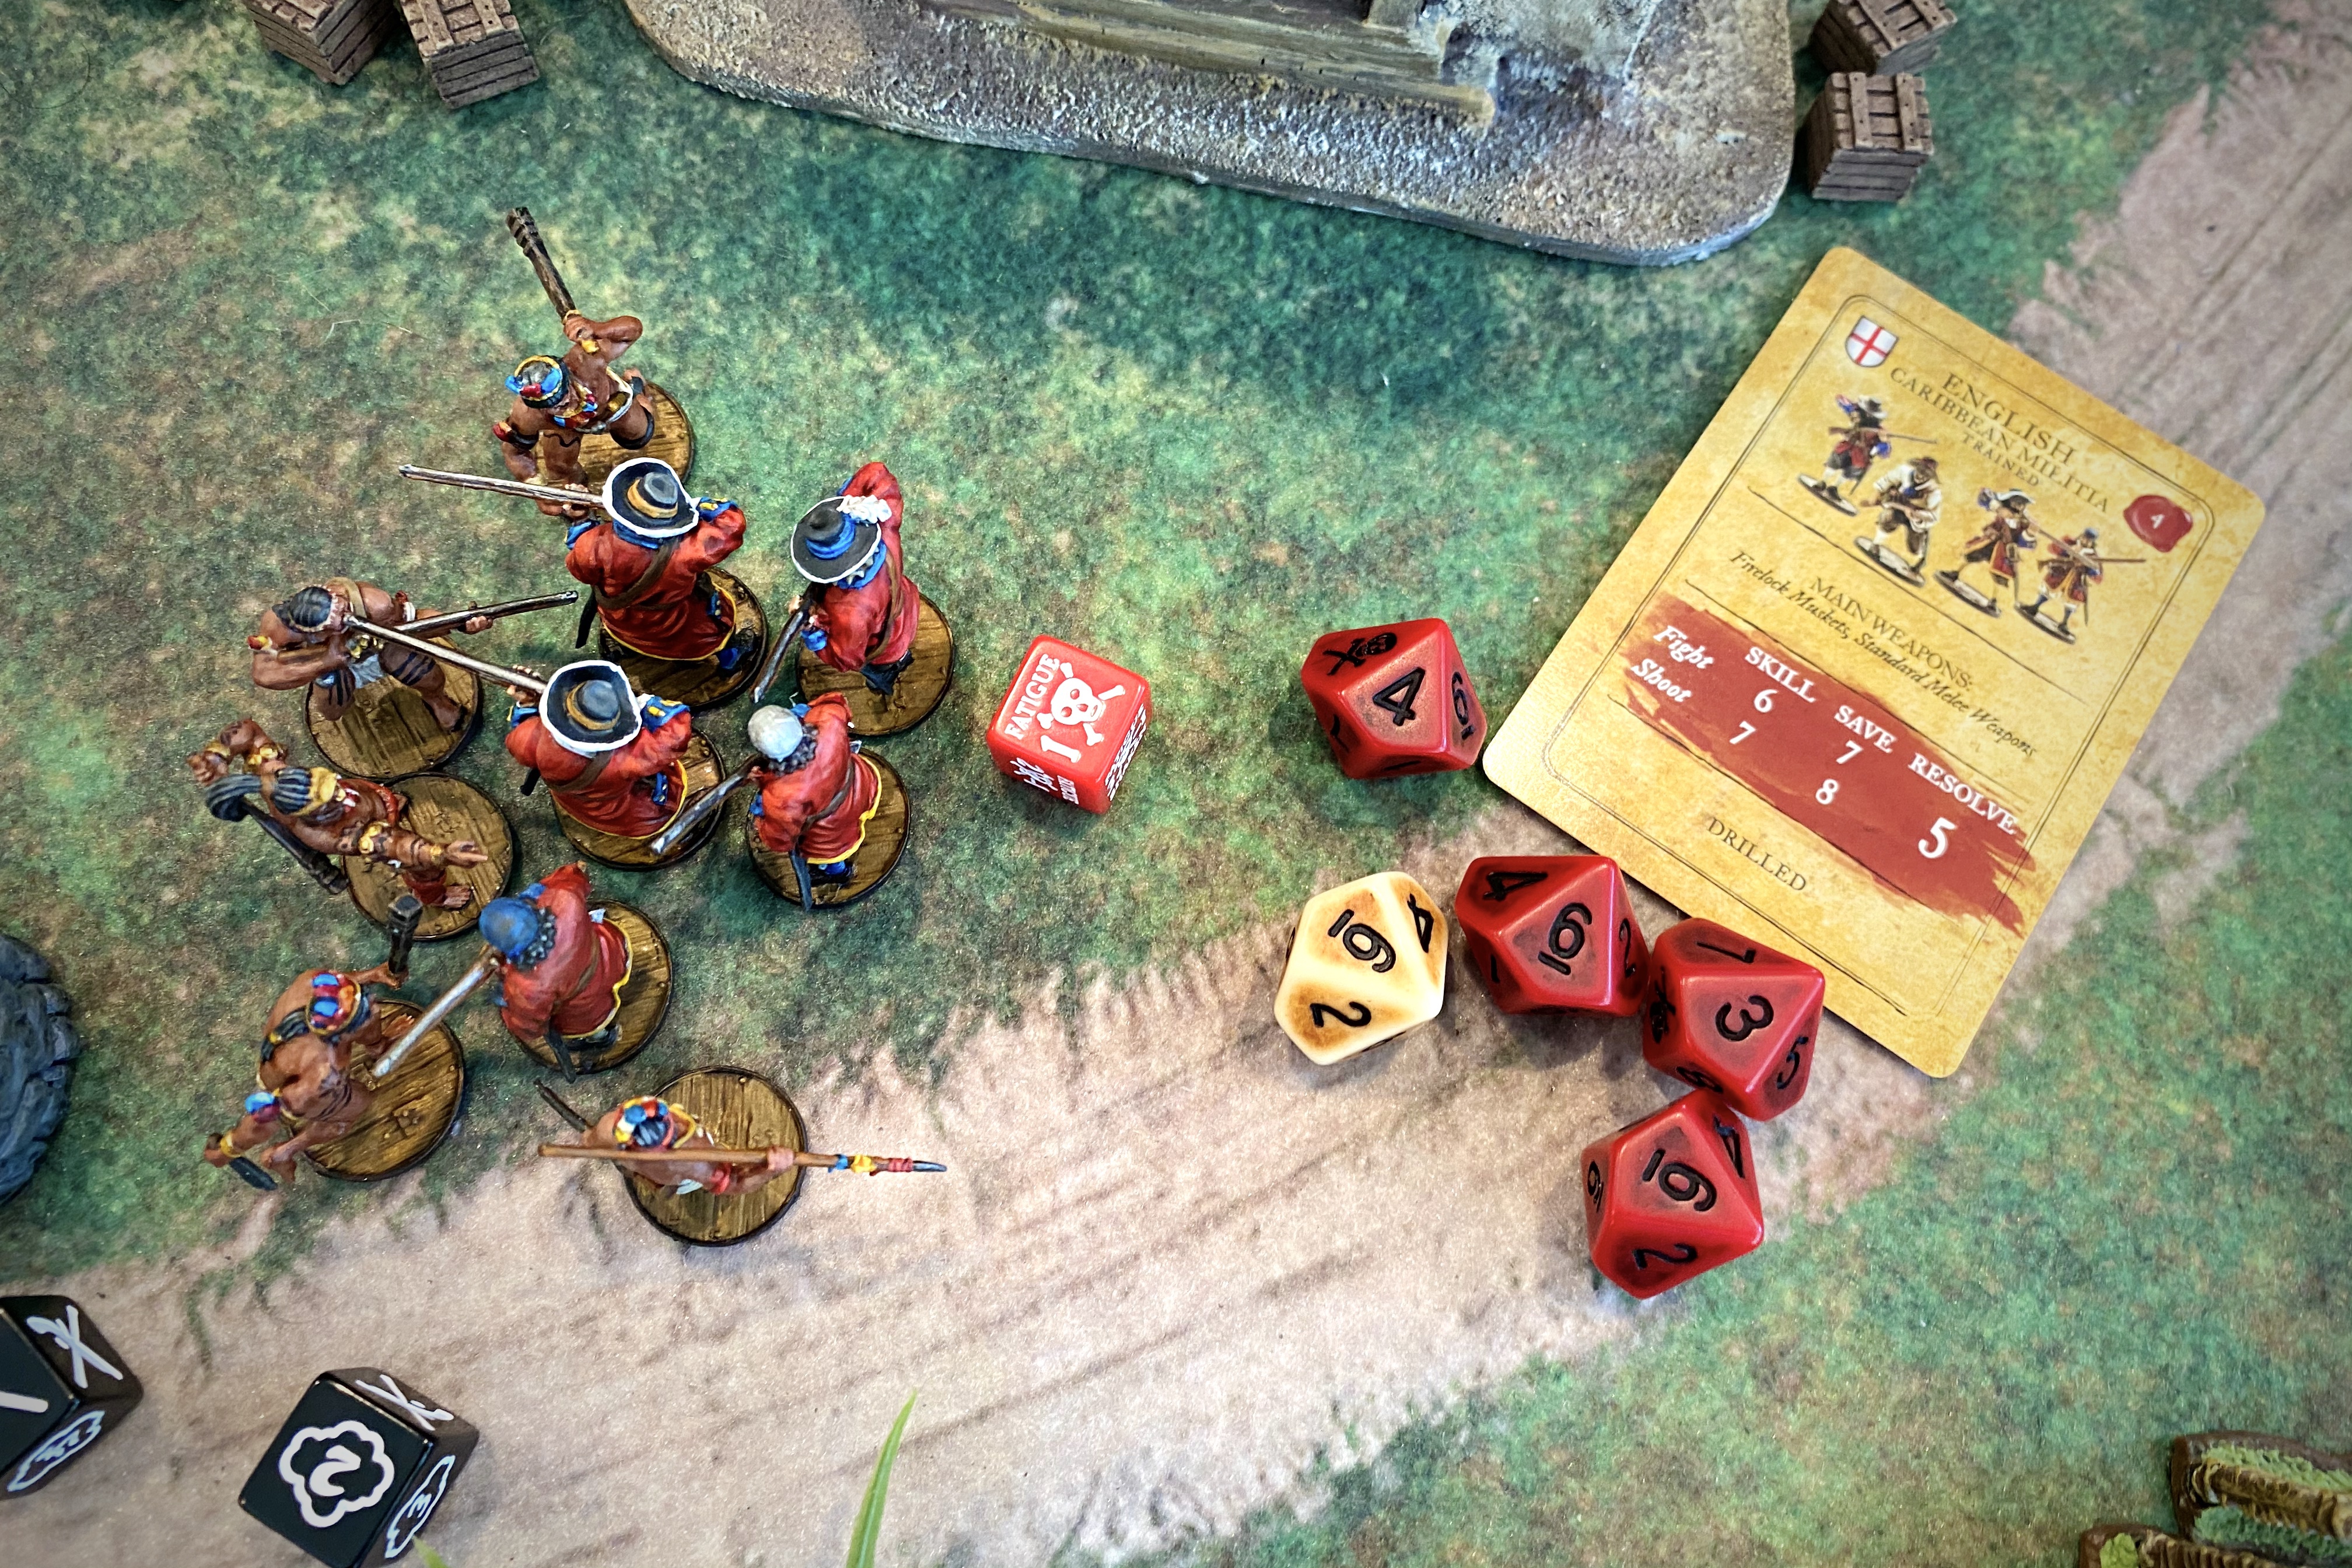
With Indian Fighters hot off the painting table, I chose to use the English North American Militia as the Defending player for the scenario.
I played this scenario at a 100 point level and each force had only 3 units.
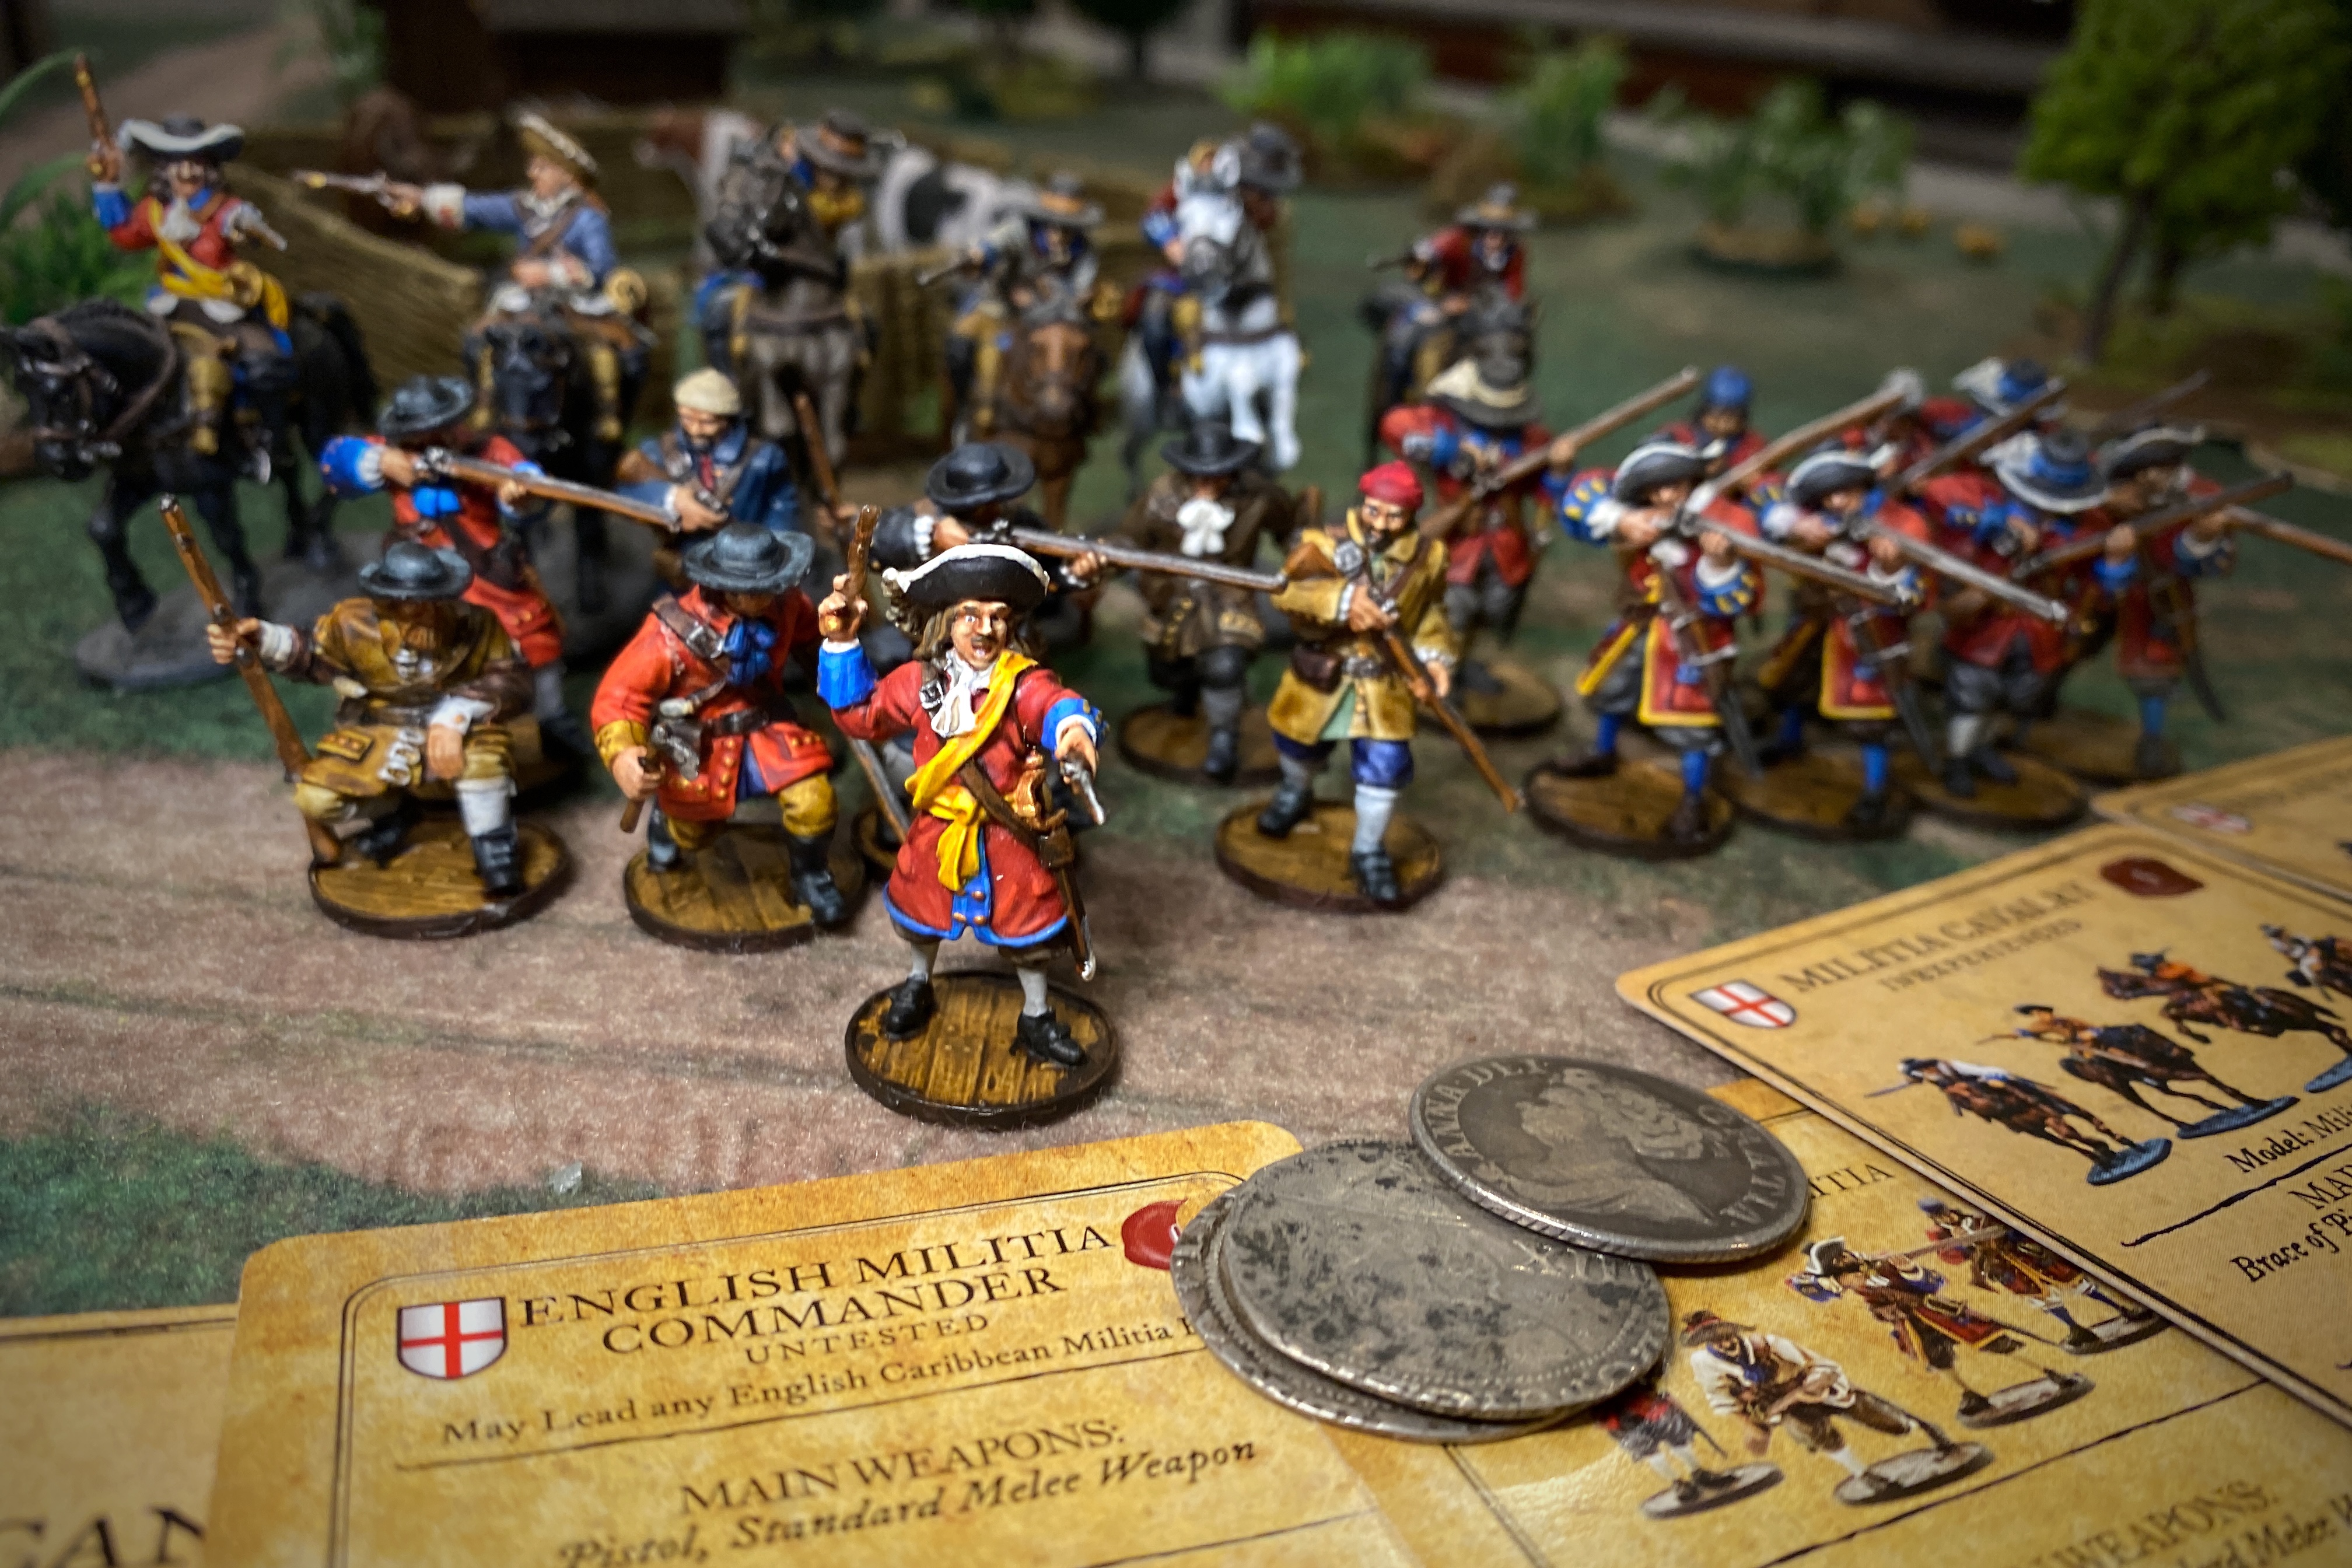
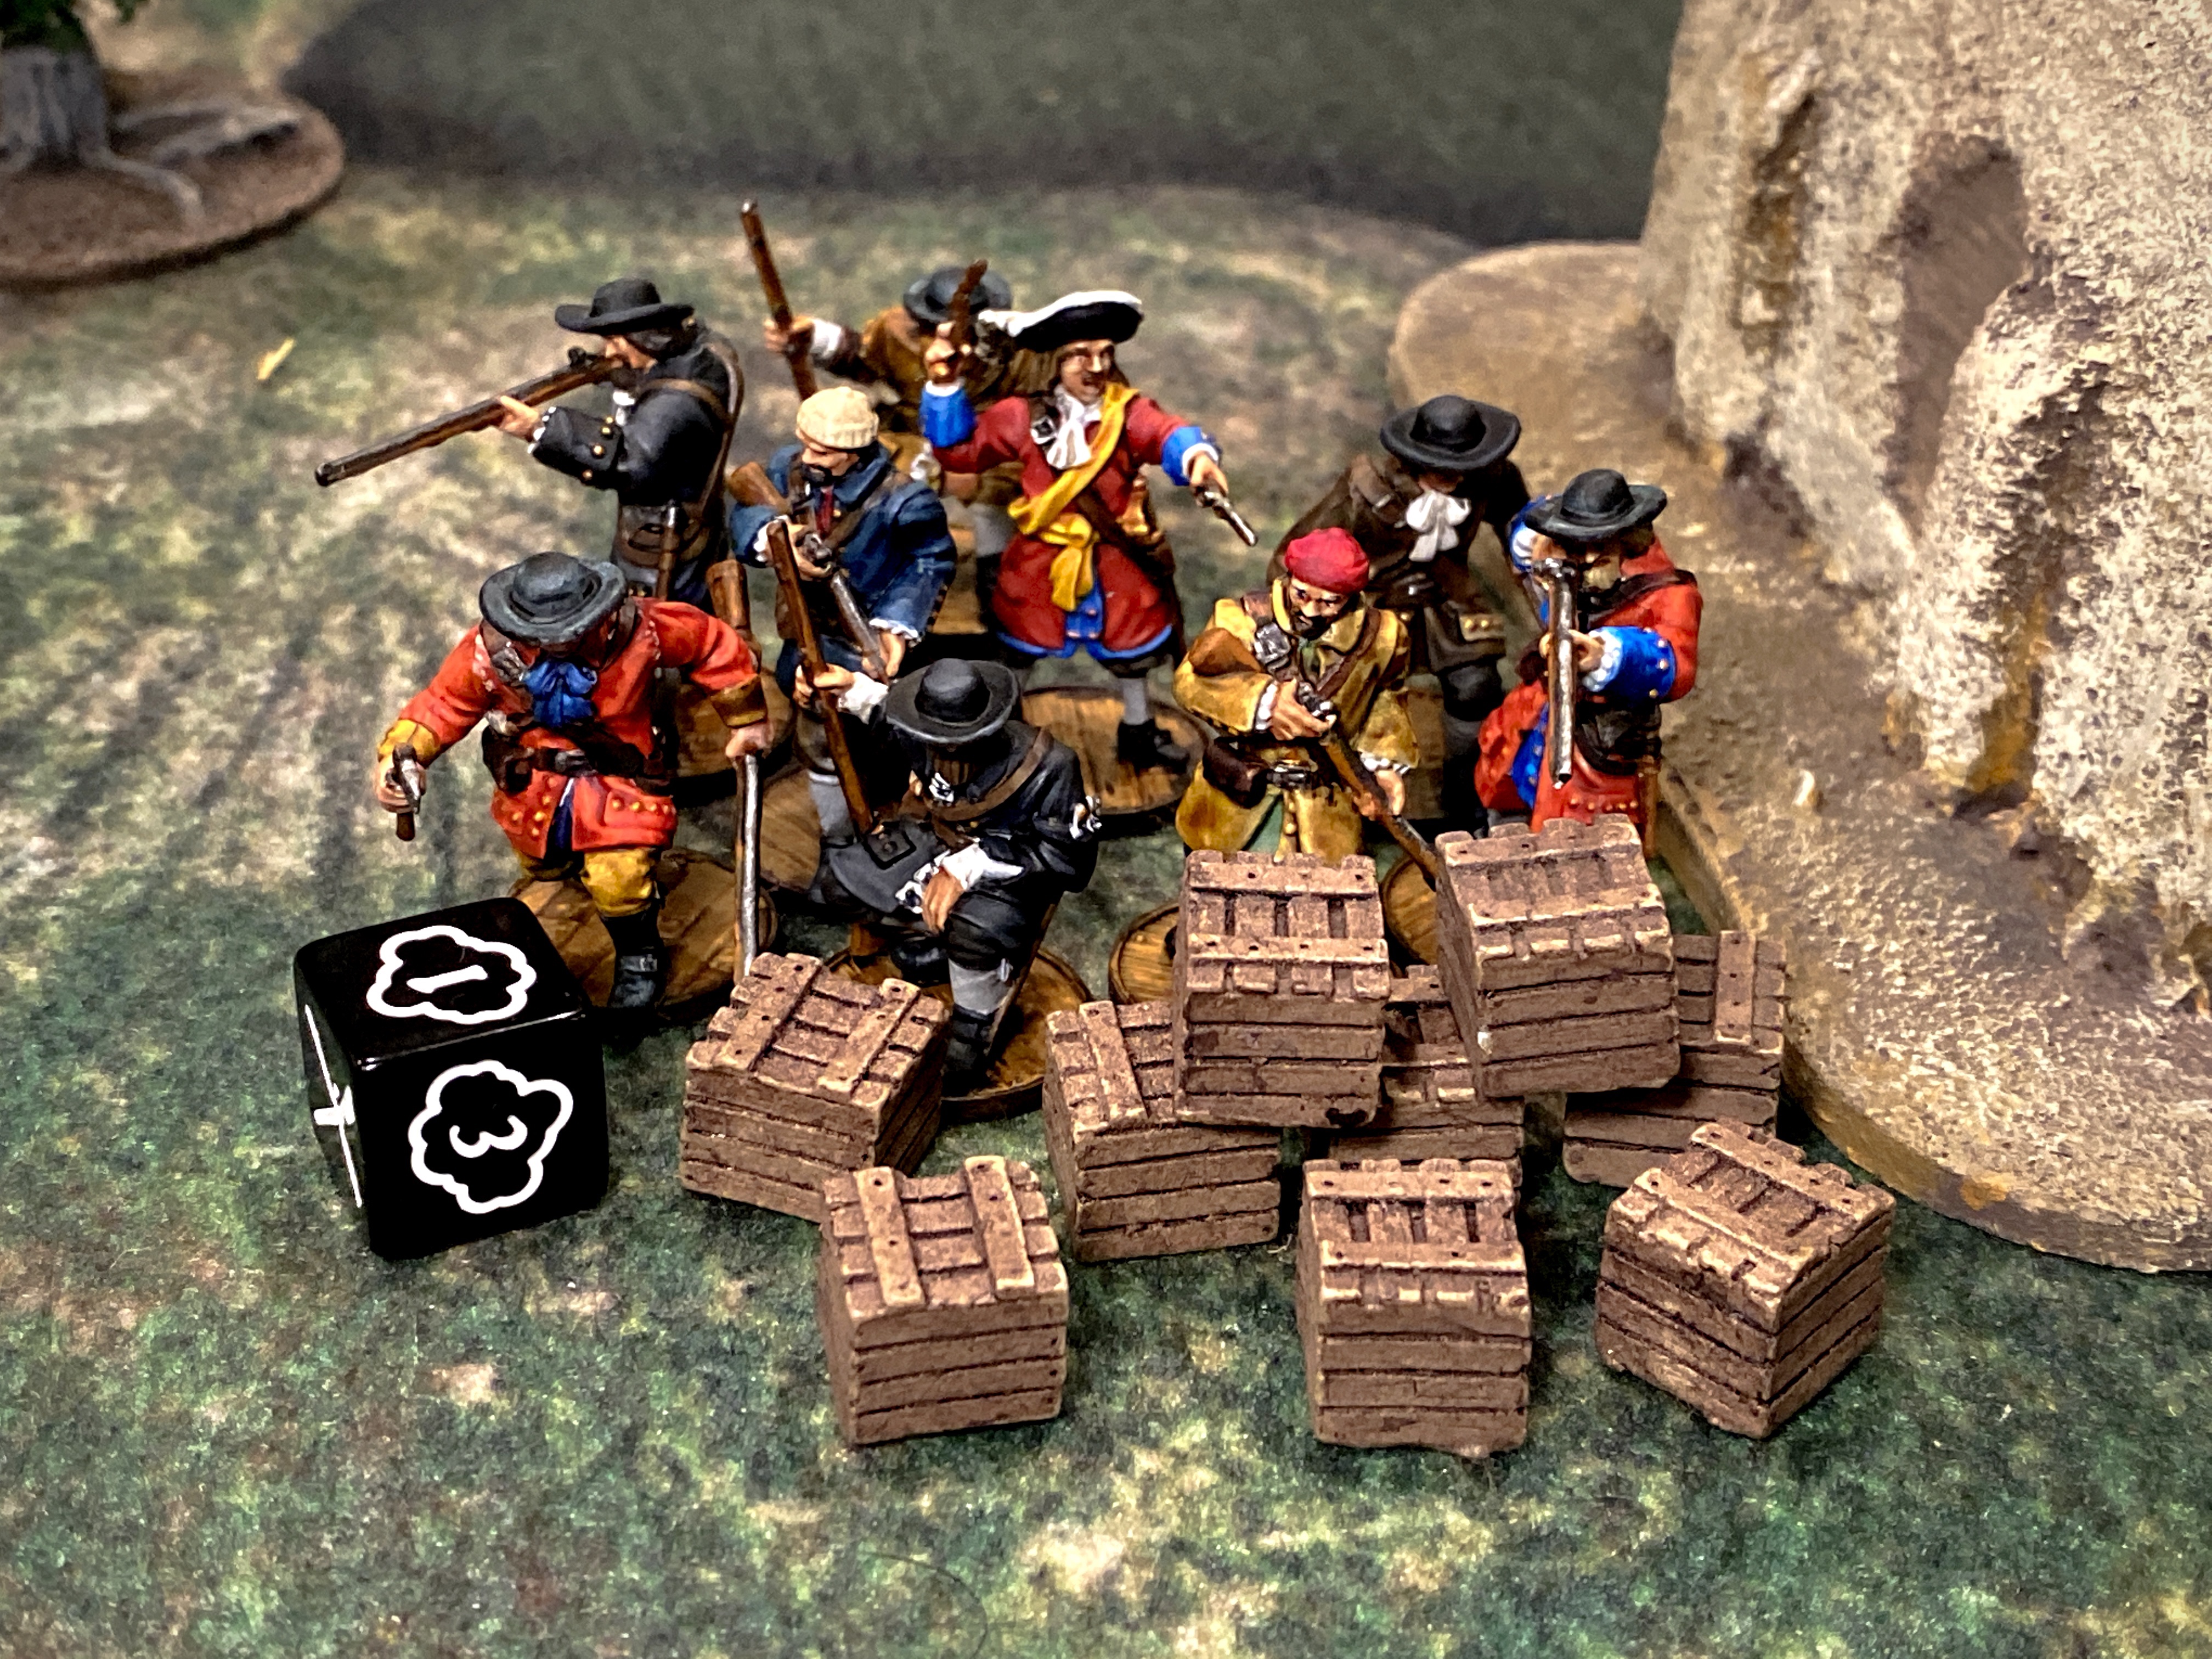
The North American English Militia force used the Ranging Party faction option and contained:
- Untested English Militia Commander attached to…
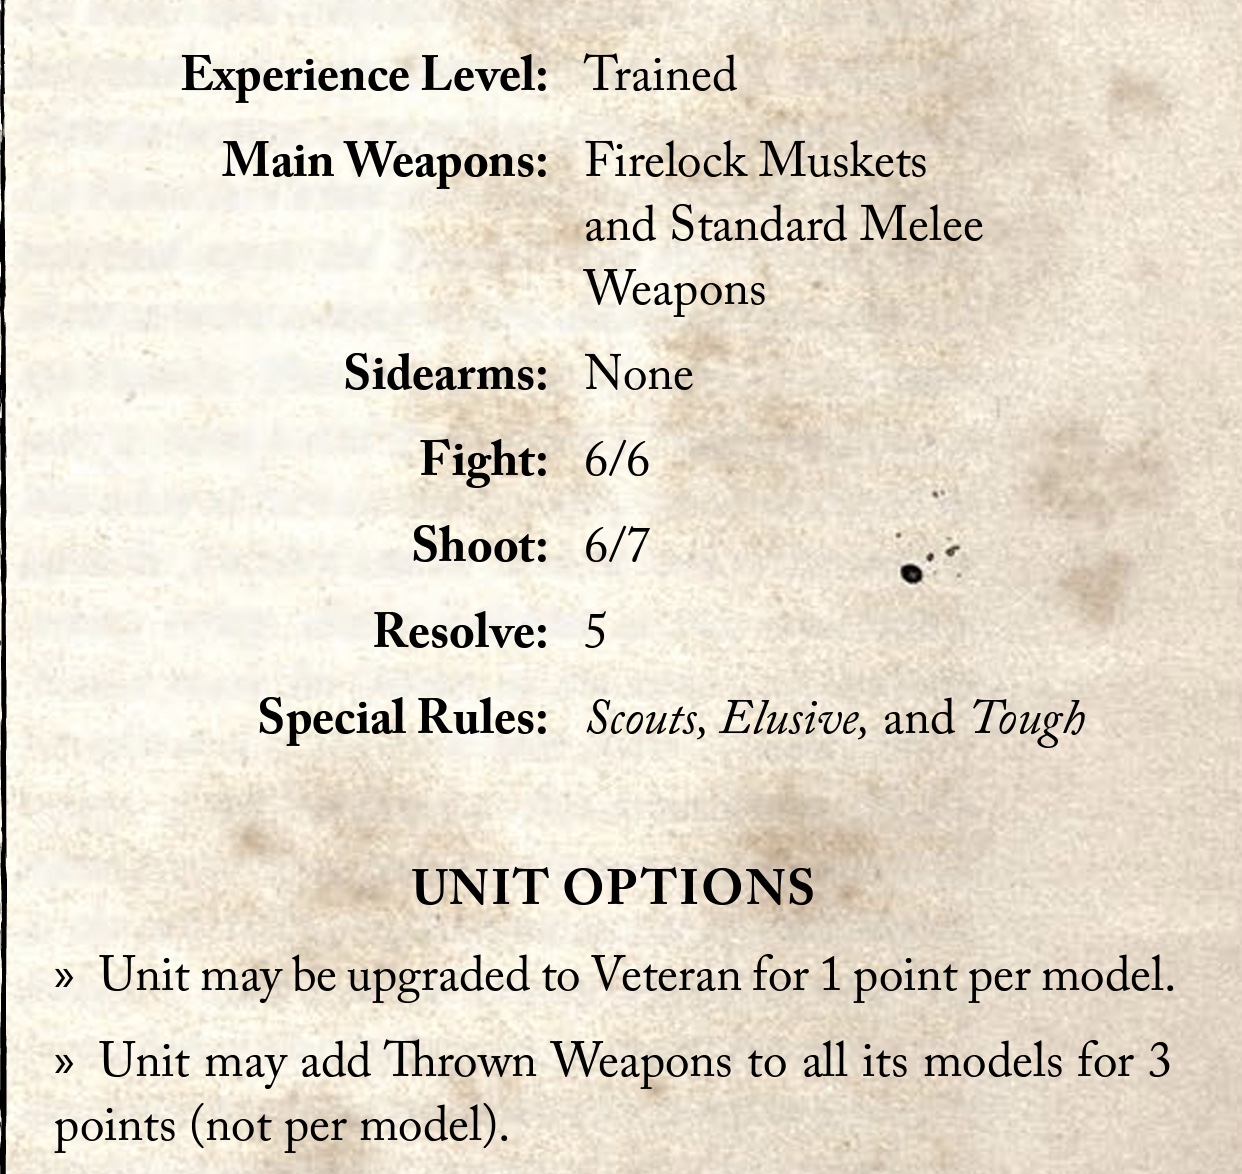
- 8 Indian Fighters with Thrown Weapons
- 8 English Militia
- 6 Militia Cavalry with a Grizzled Veteran
At 23 models this 100 point force takes a Strike Point at every 5 casualties.
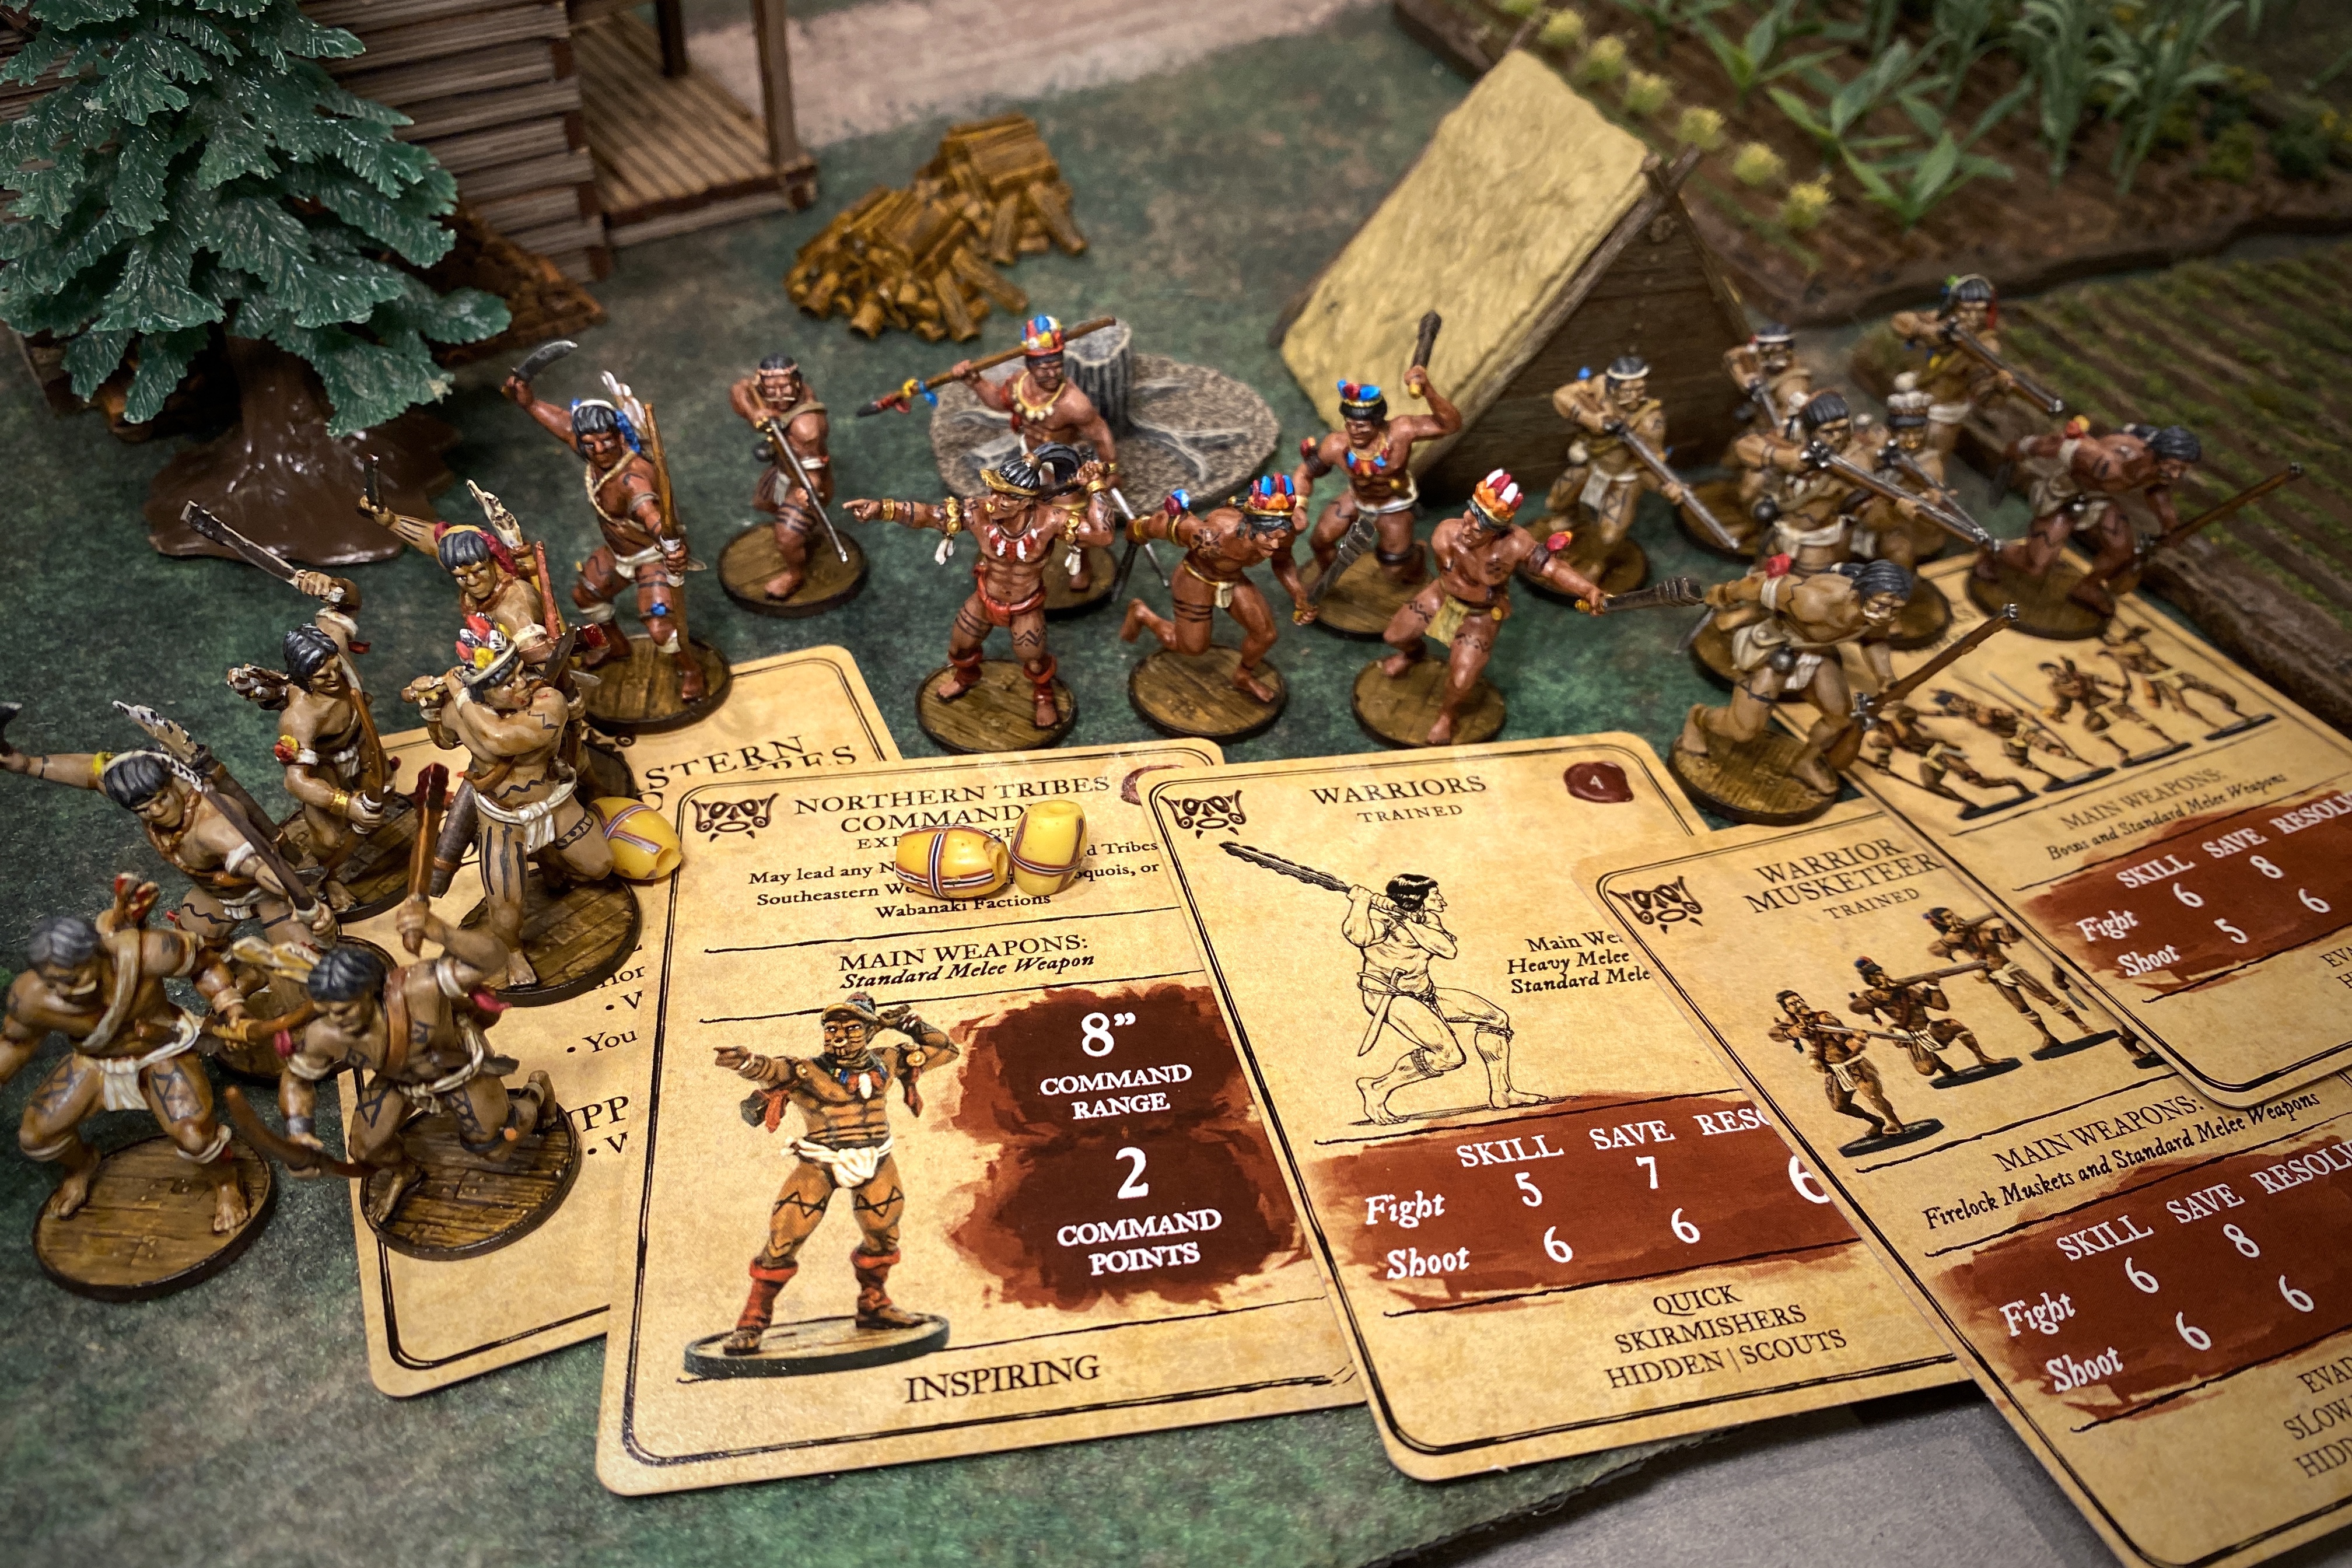
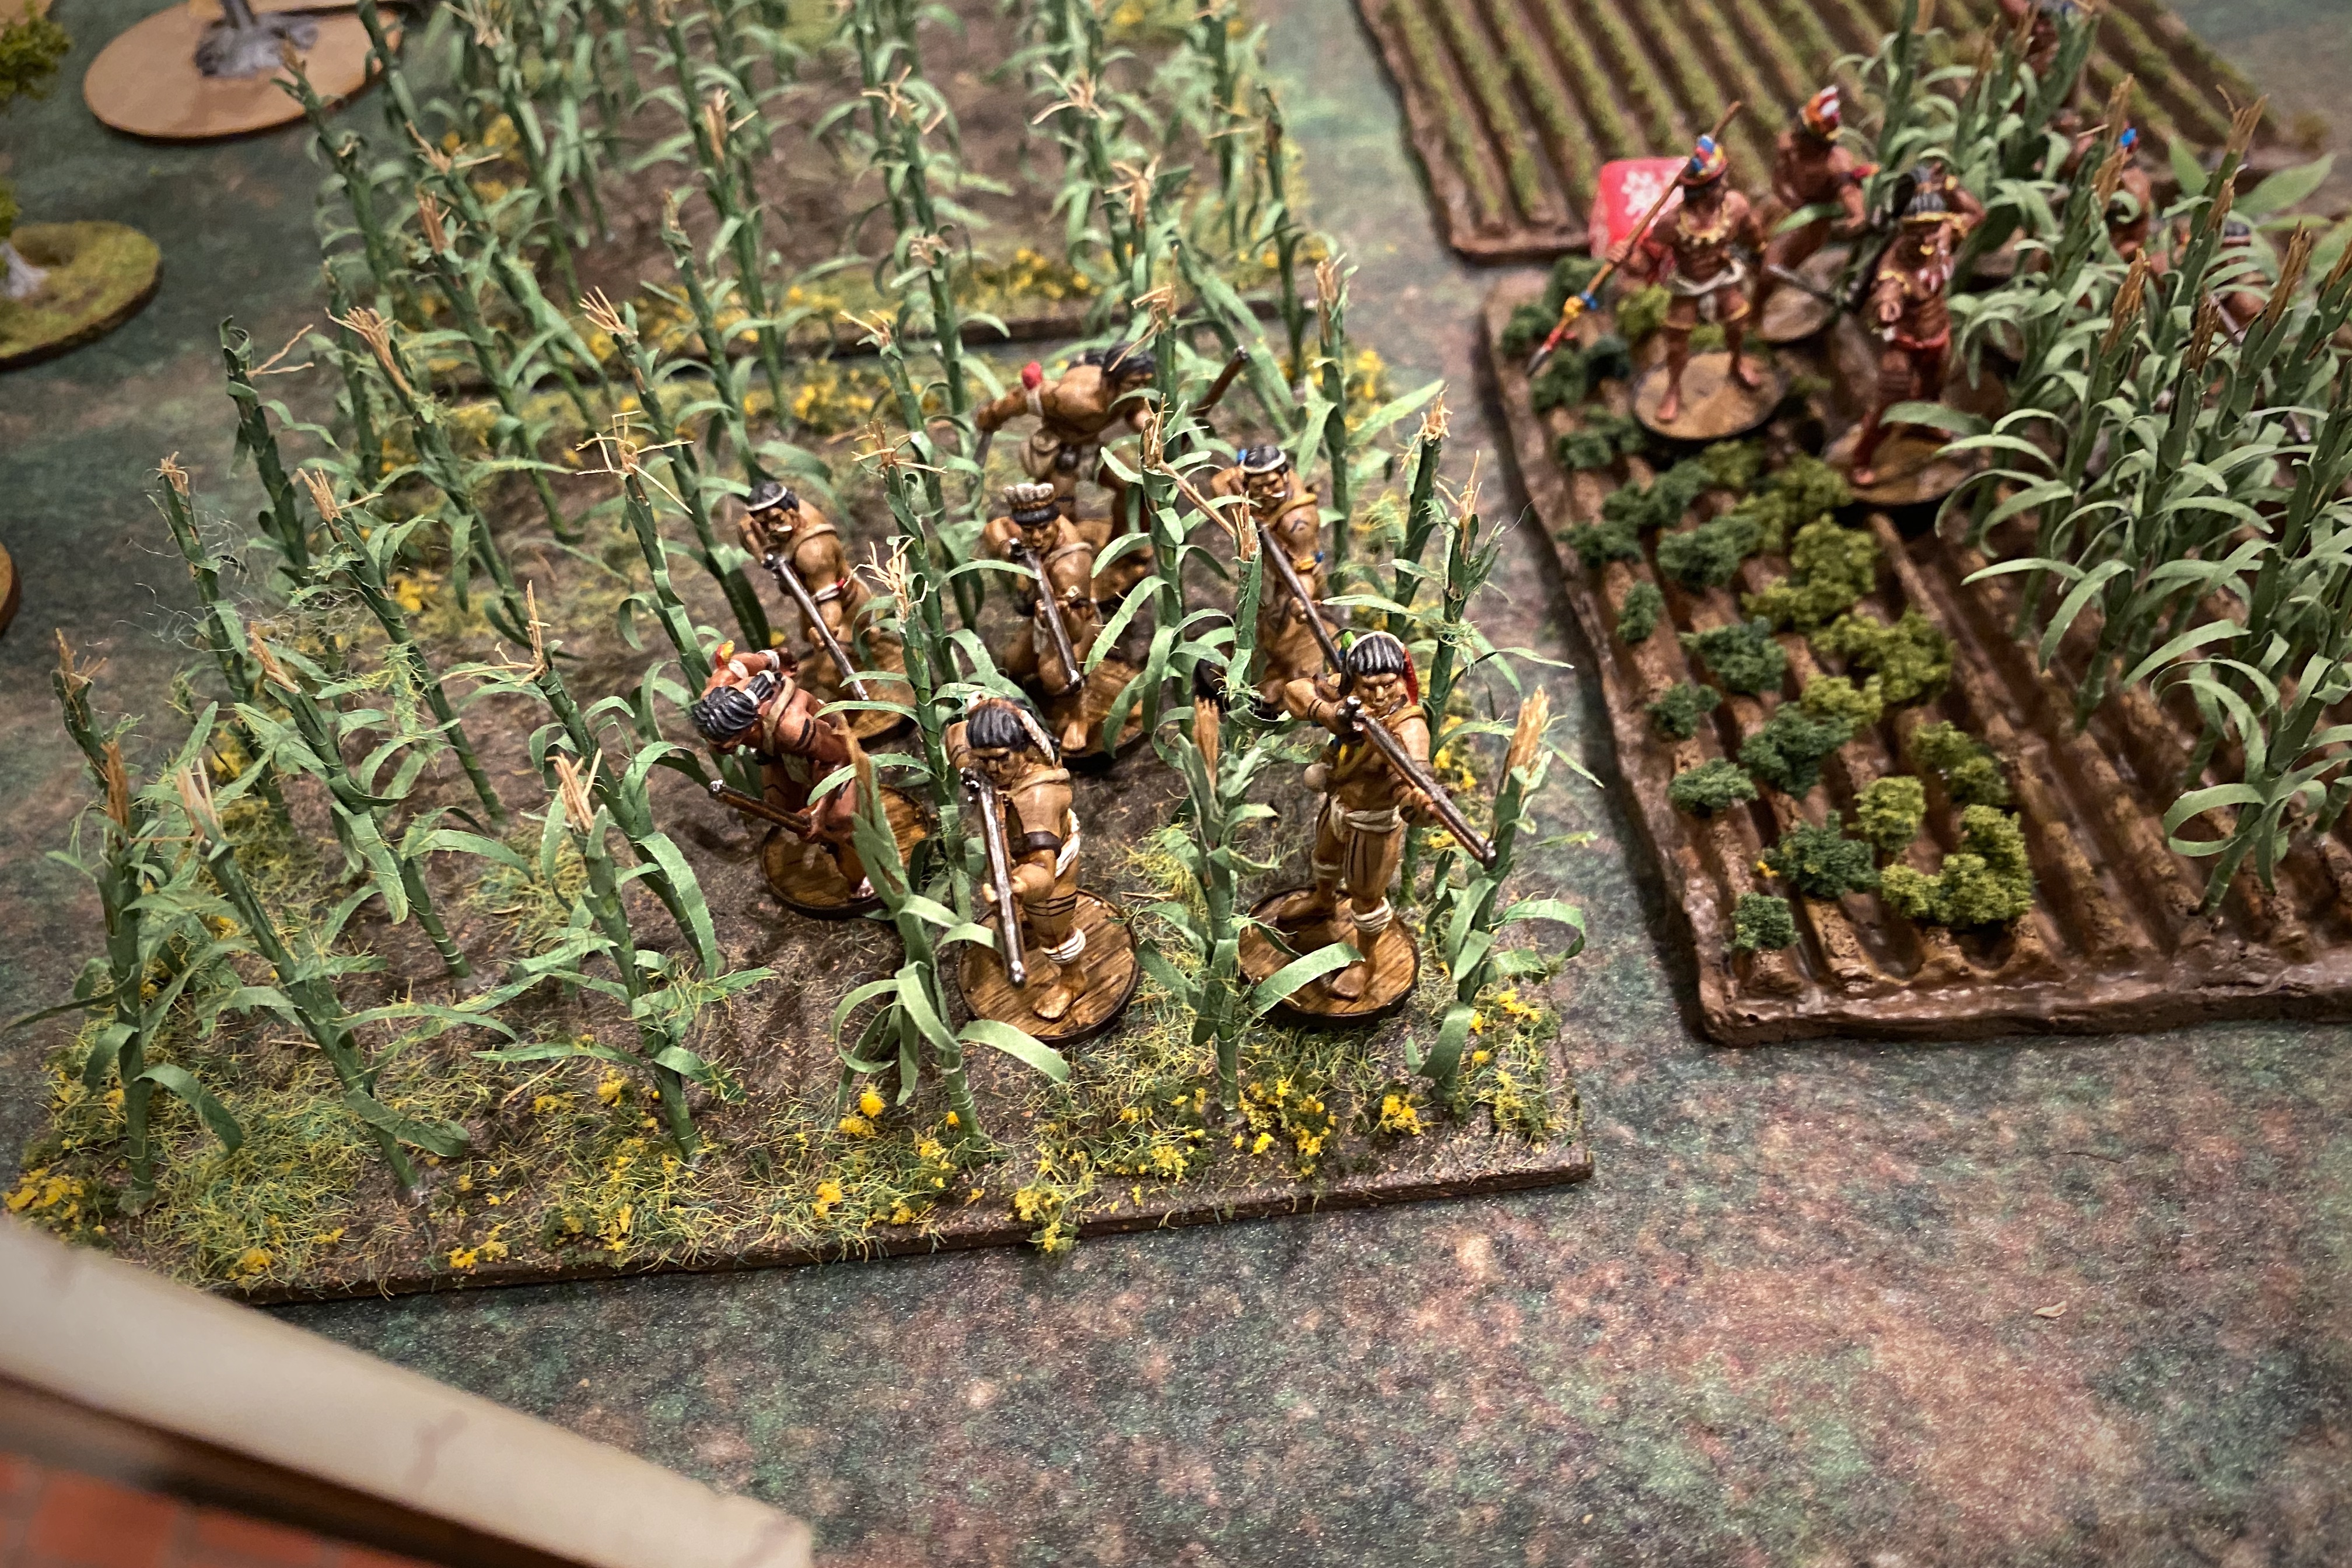
For the attacking force I used the Northeastern Woodland Tribes Native faction. This faction has the least emphasis on bows and more emphasis on melee combat compared to most Native Factions.
My Northeastern Woodland Tribes force contained
- Untested Northern Tribes Commander attached to…
- 7 Warriors with Bows and a Musket sidearm
- 7 Warrior Musketeers
- 6 Warrior Archers with a Grizzled Veteran
At 21 models this force was even smaller than the defenders but would still take Strike Points at every 5 casualties.
The Scenario
Here’s a preview of a new scenario! Capture the Settlement is scheduled to release “soon” with the upcoming small expansion which moves Blood & Plunder into the 18th century while focusing on Queen Anne’s War.
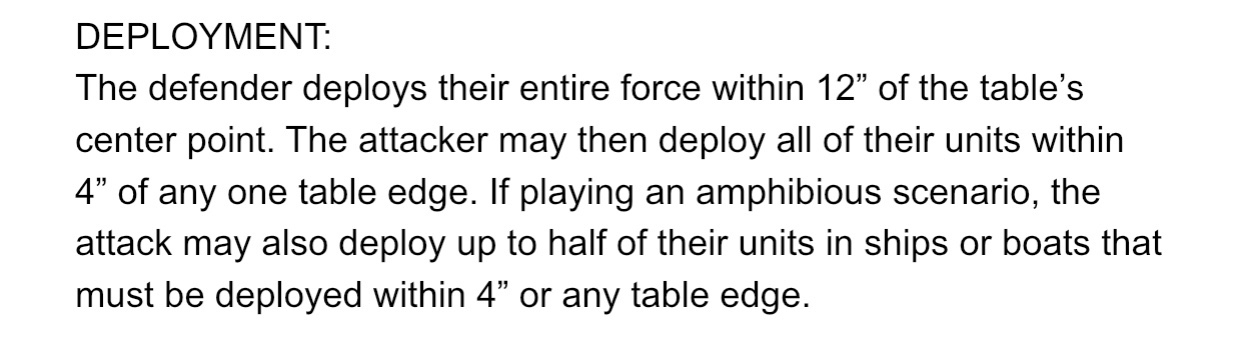
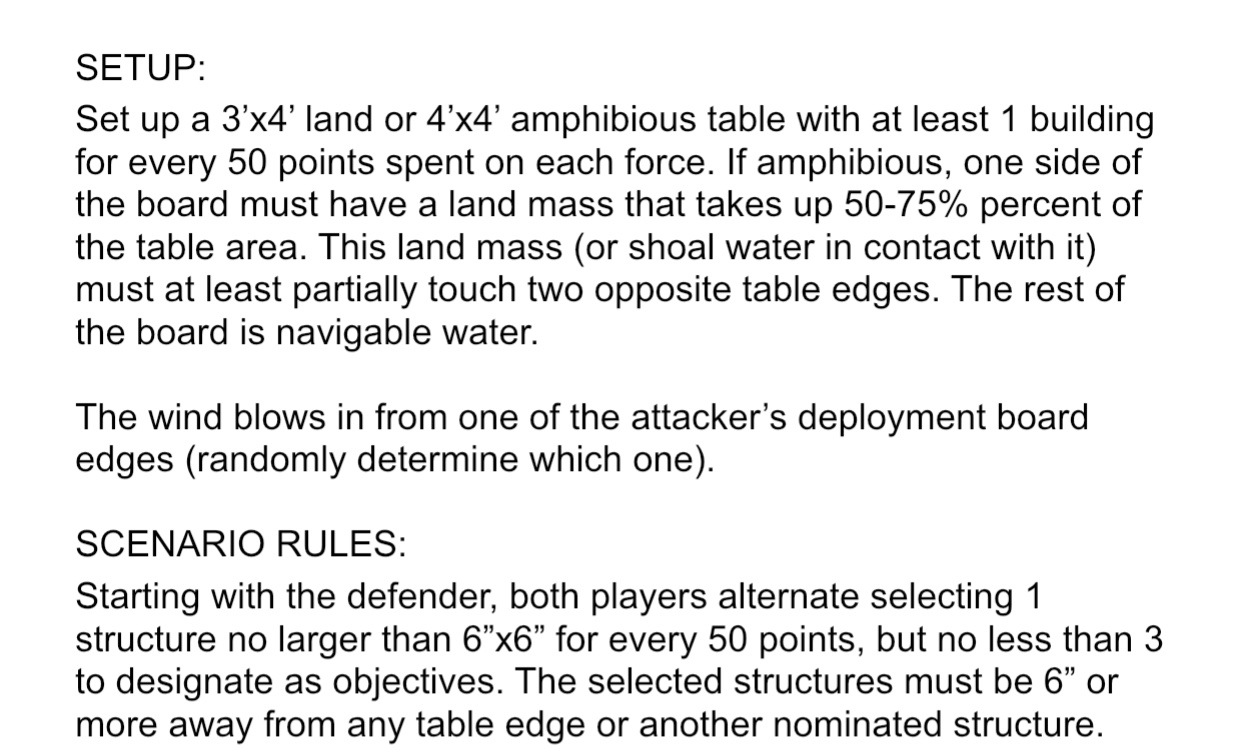
This is a building-focused scenario. Setup requires at least three buildings (3 +1 for every 50 points above 150 per side) on the board. These objective buildings have to be at least 6″ from each other and any board edge.
The Attacker’s goal is to control as many buildings as possible while the Defender’s goal is to keep them out of the buildings. Currently the objectives look like this (this is still a work in progress):
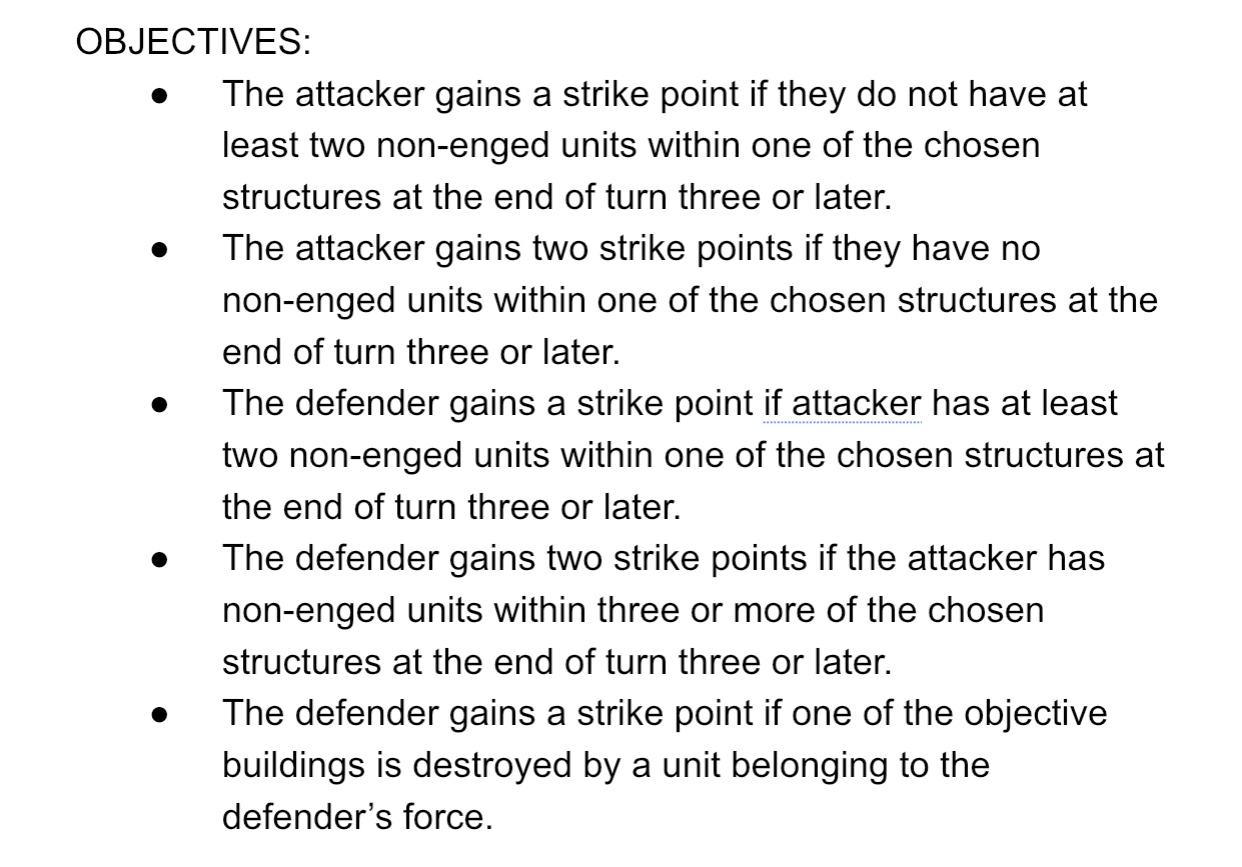
That last bullet point is to discourage the Defender from destroying their own buildings to keep the Attacker out of them.
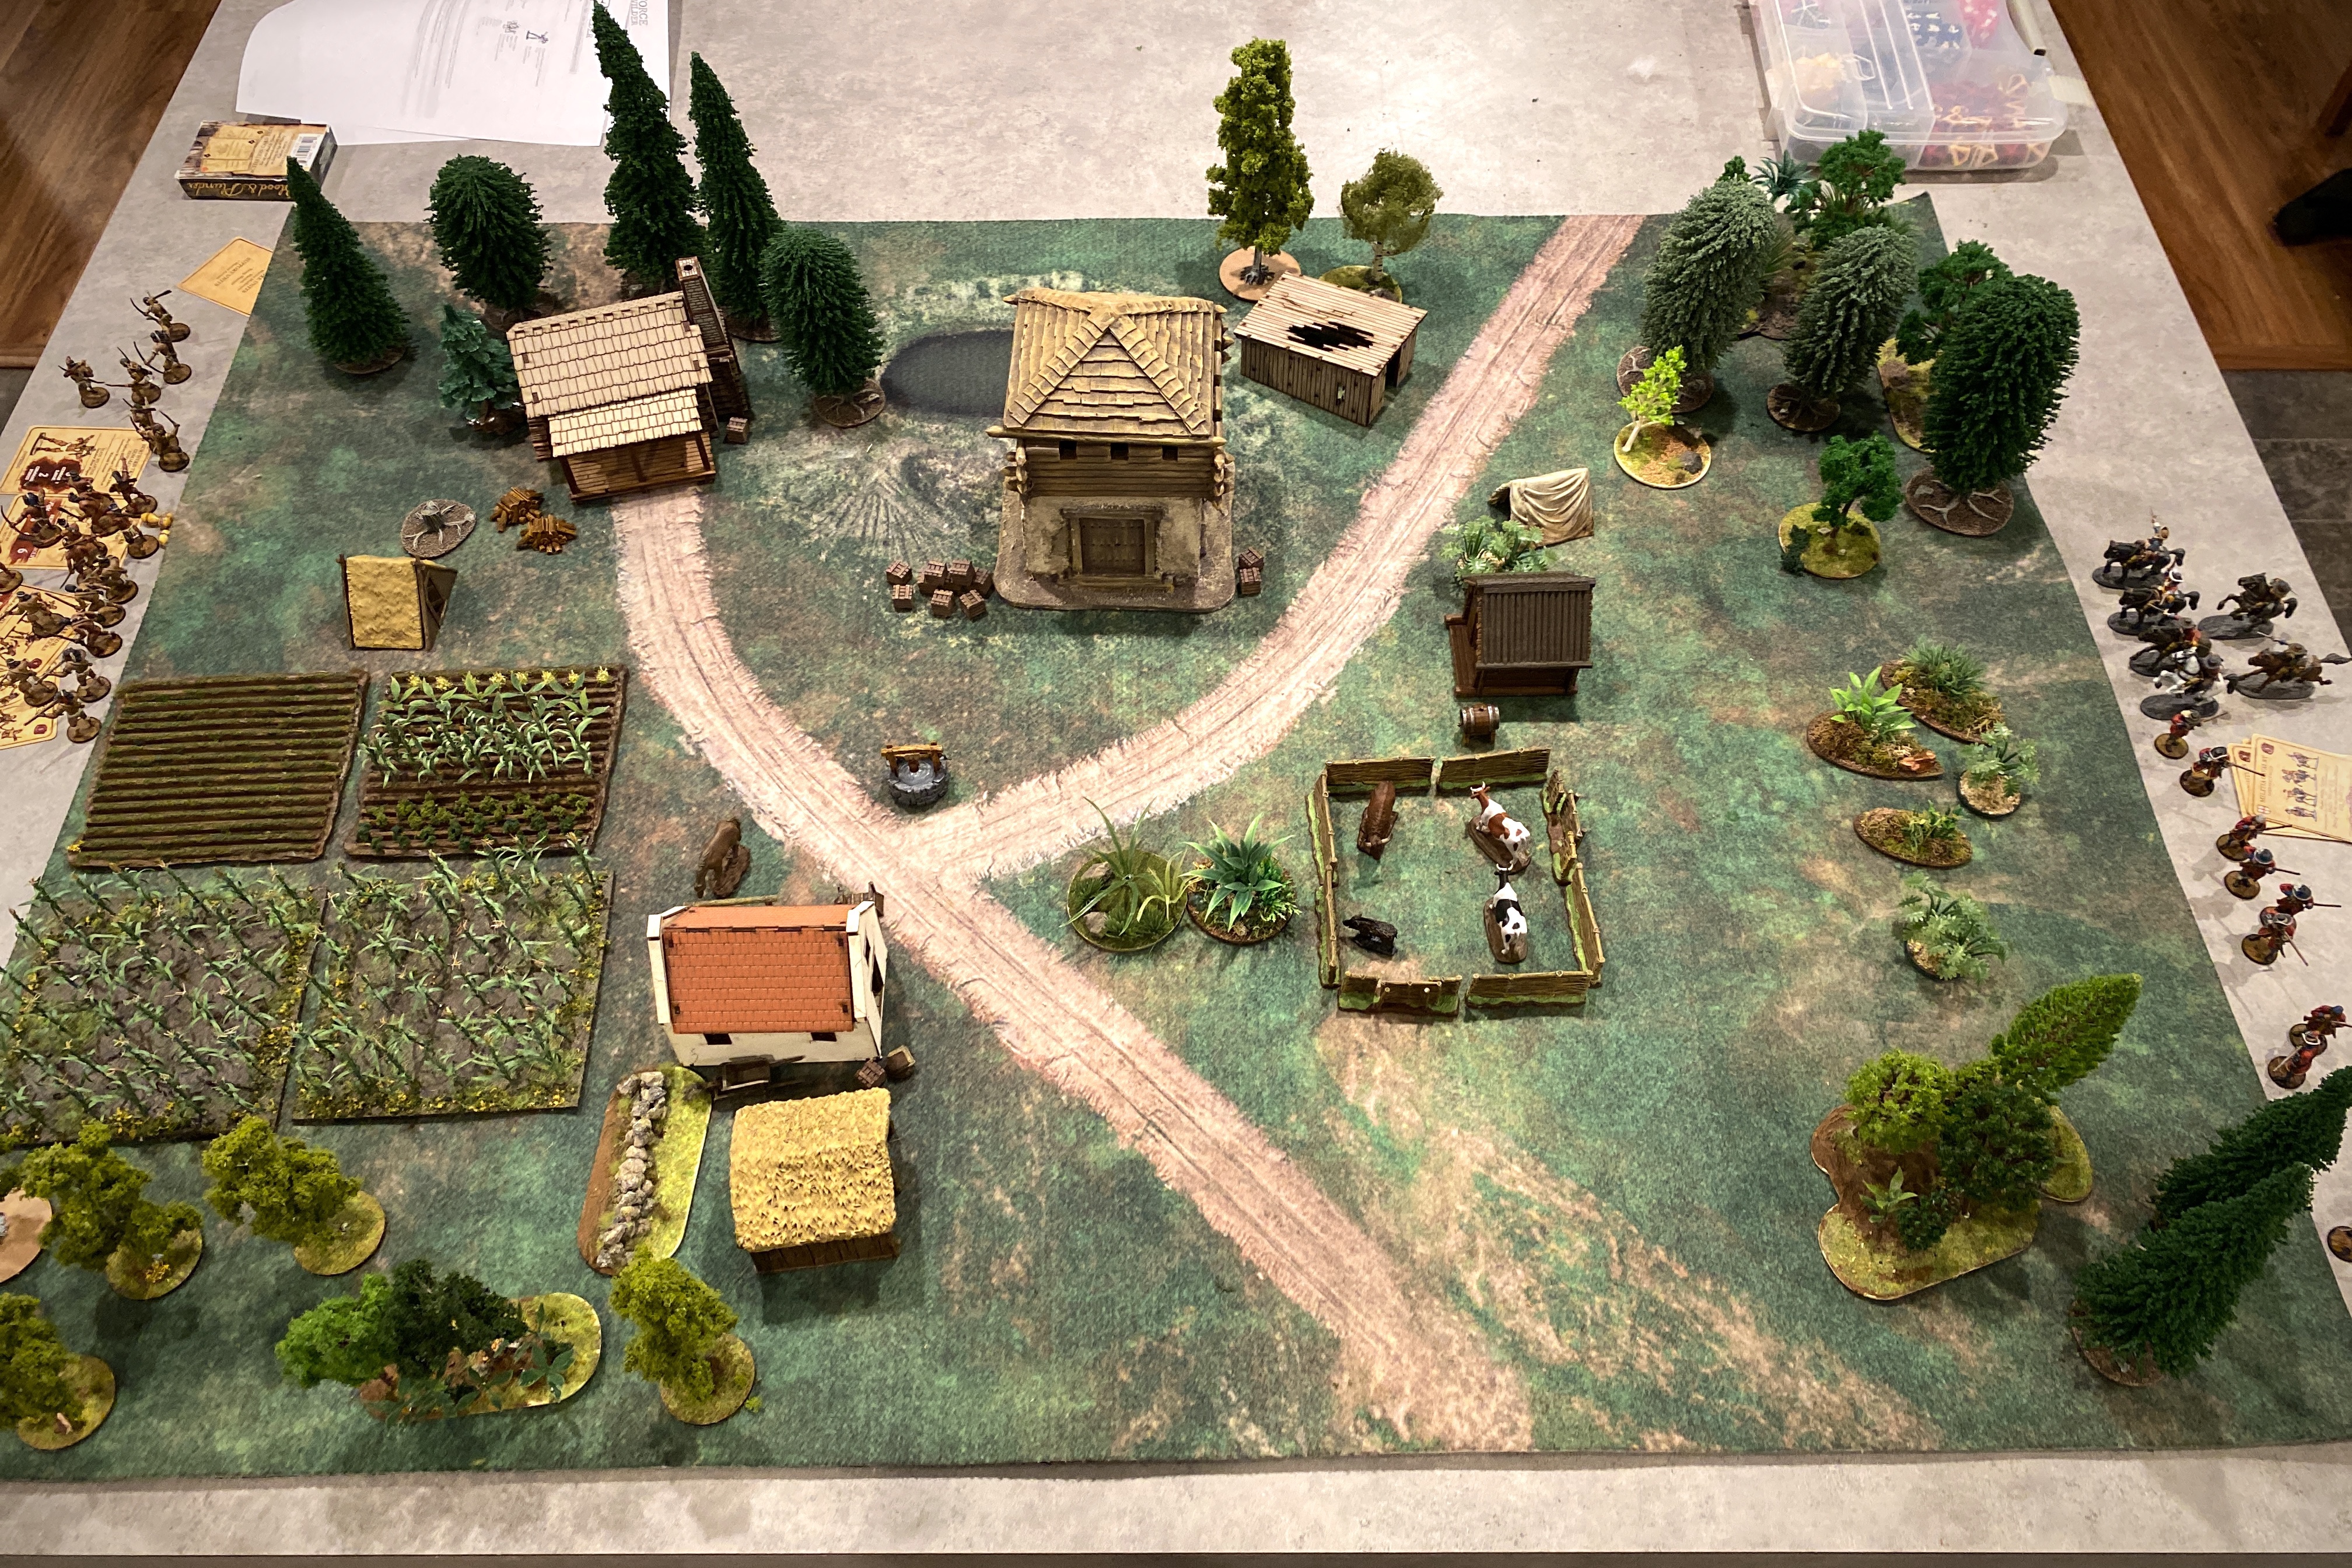
The Defender has to deploy their entire force within 12″ of the center of the table and then the Attacker deployed their entire force within 4″ of any one table edge.
My first reaction to reading this scenario was assuming it would be very difficult for the Attacker. Raid has been notoriously hard for the Attacker in my experience and this appeared to be a similar sort of scenario. This was my first play and I was eager to see if I was correct or if this was more equal in roles than something like Raid.
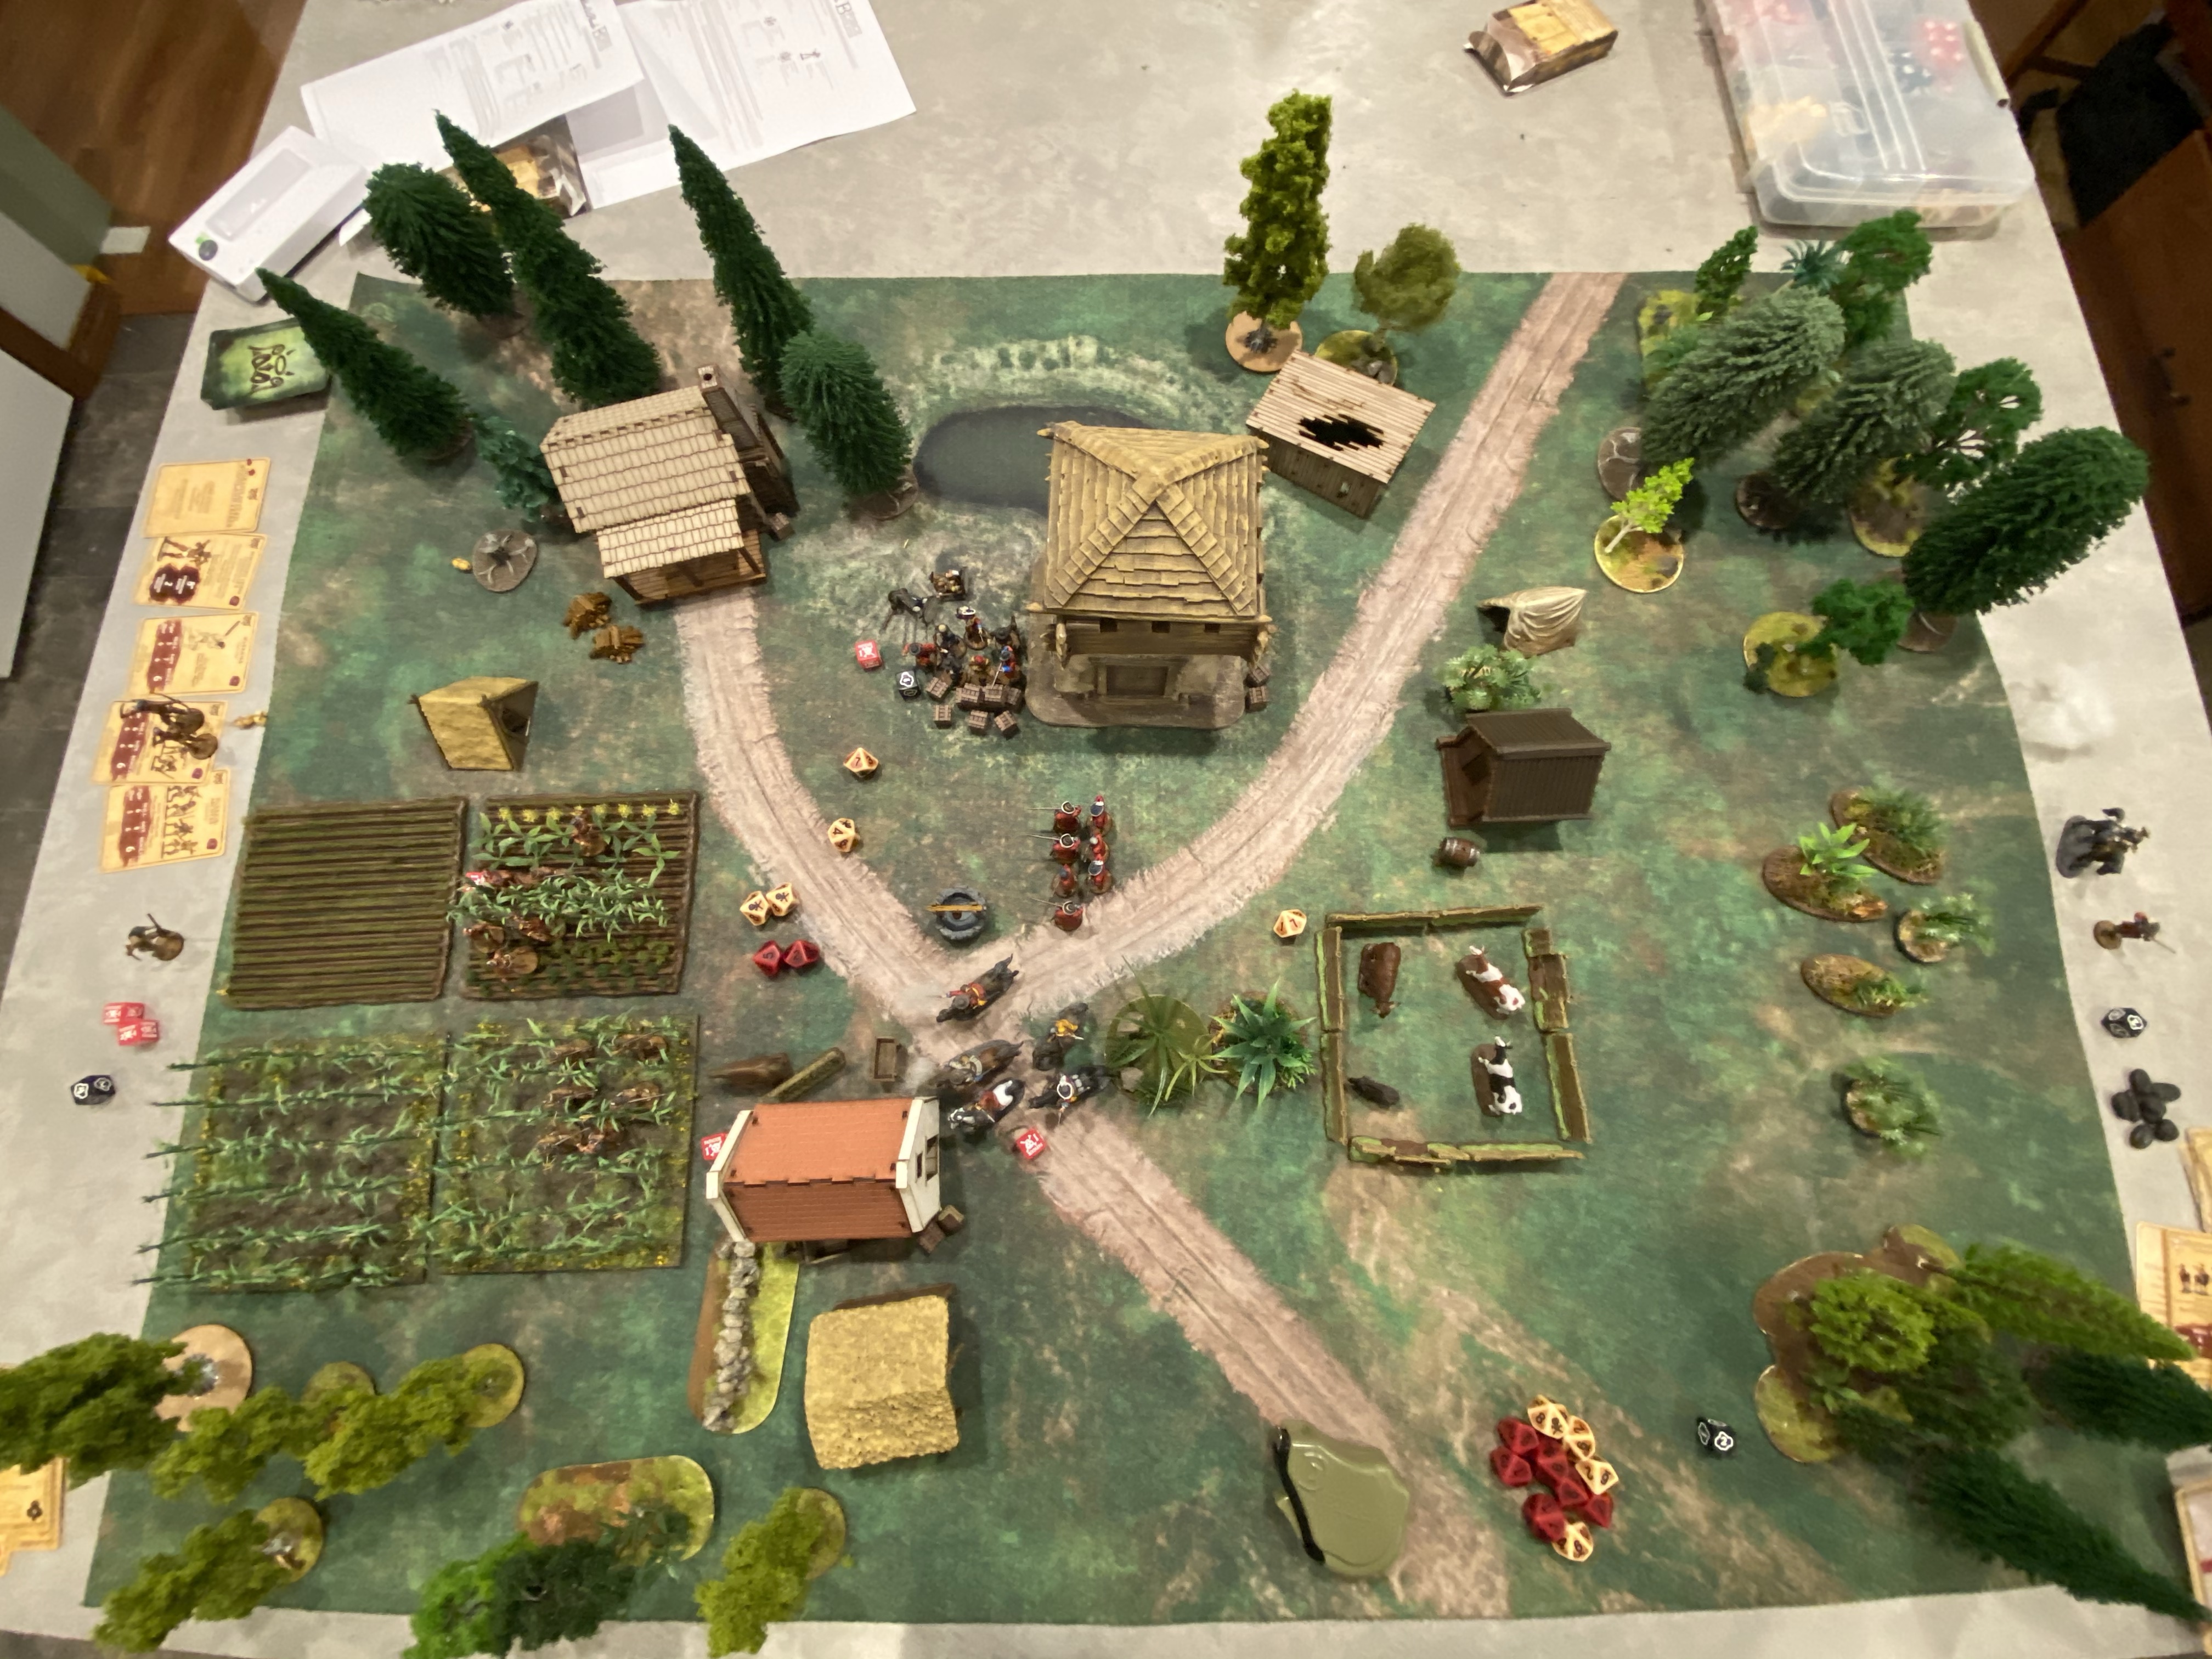
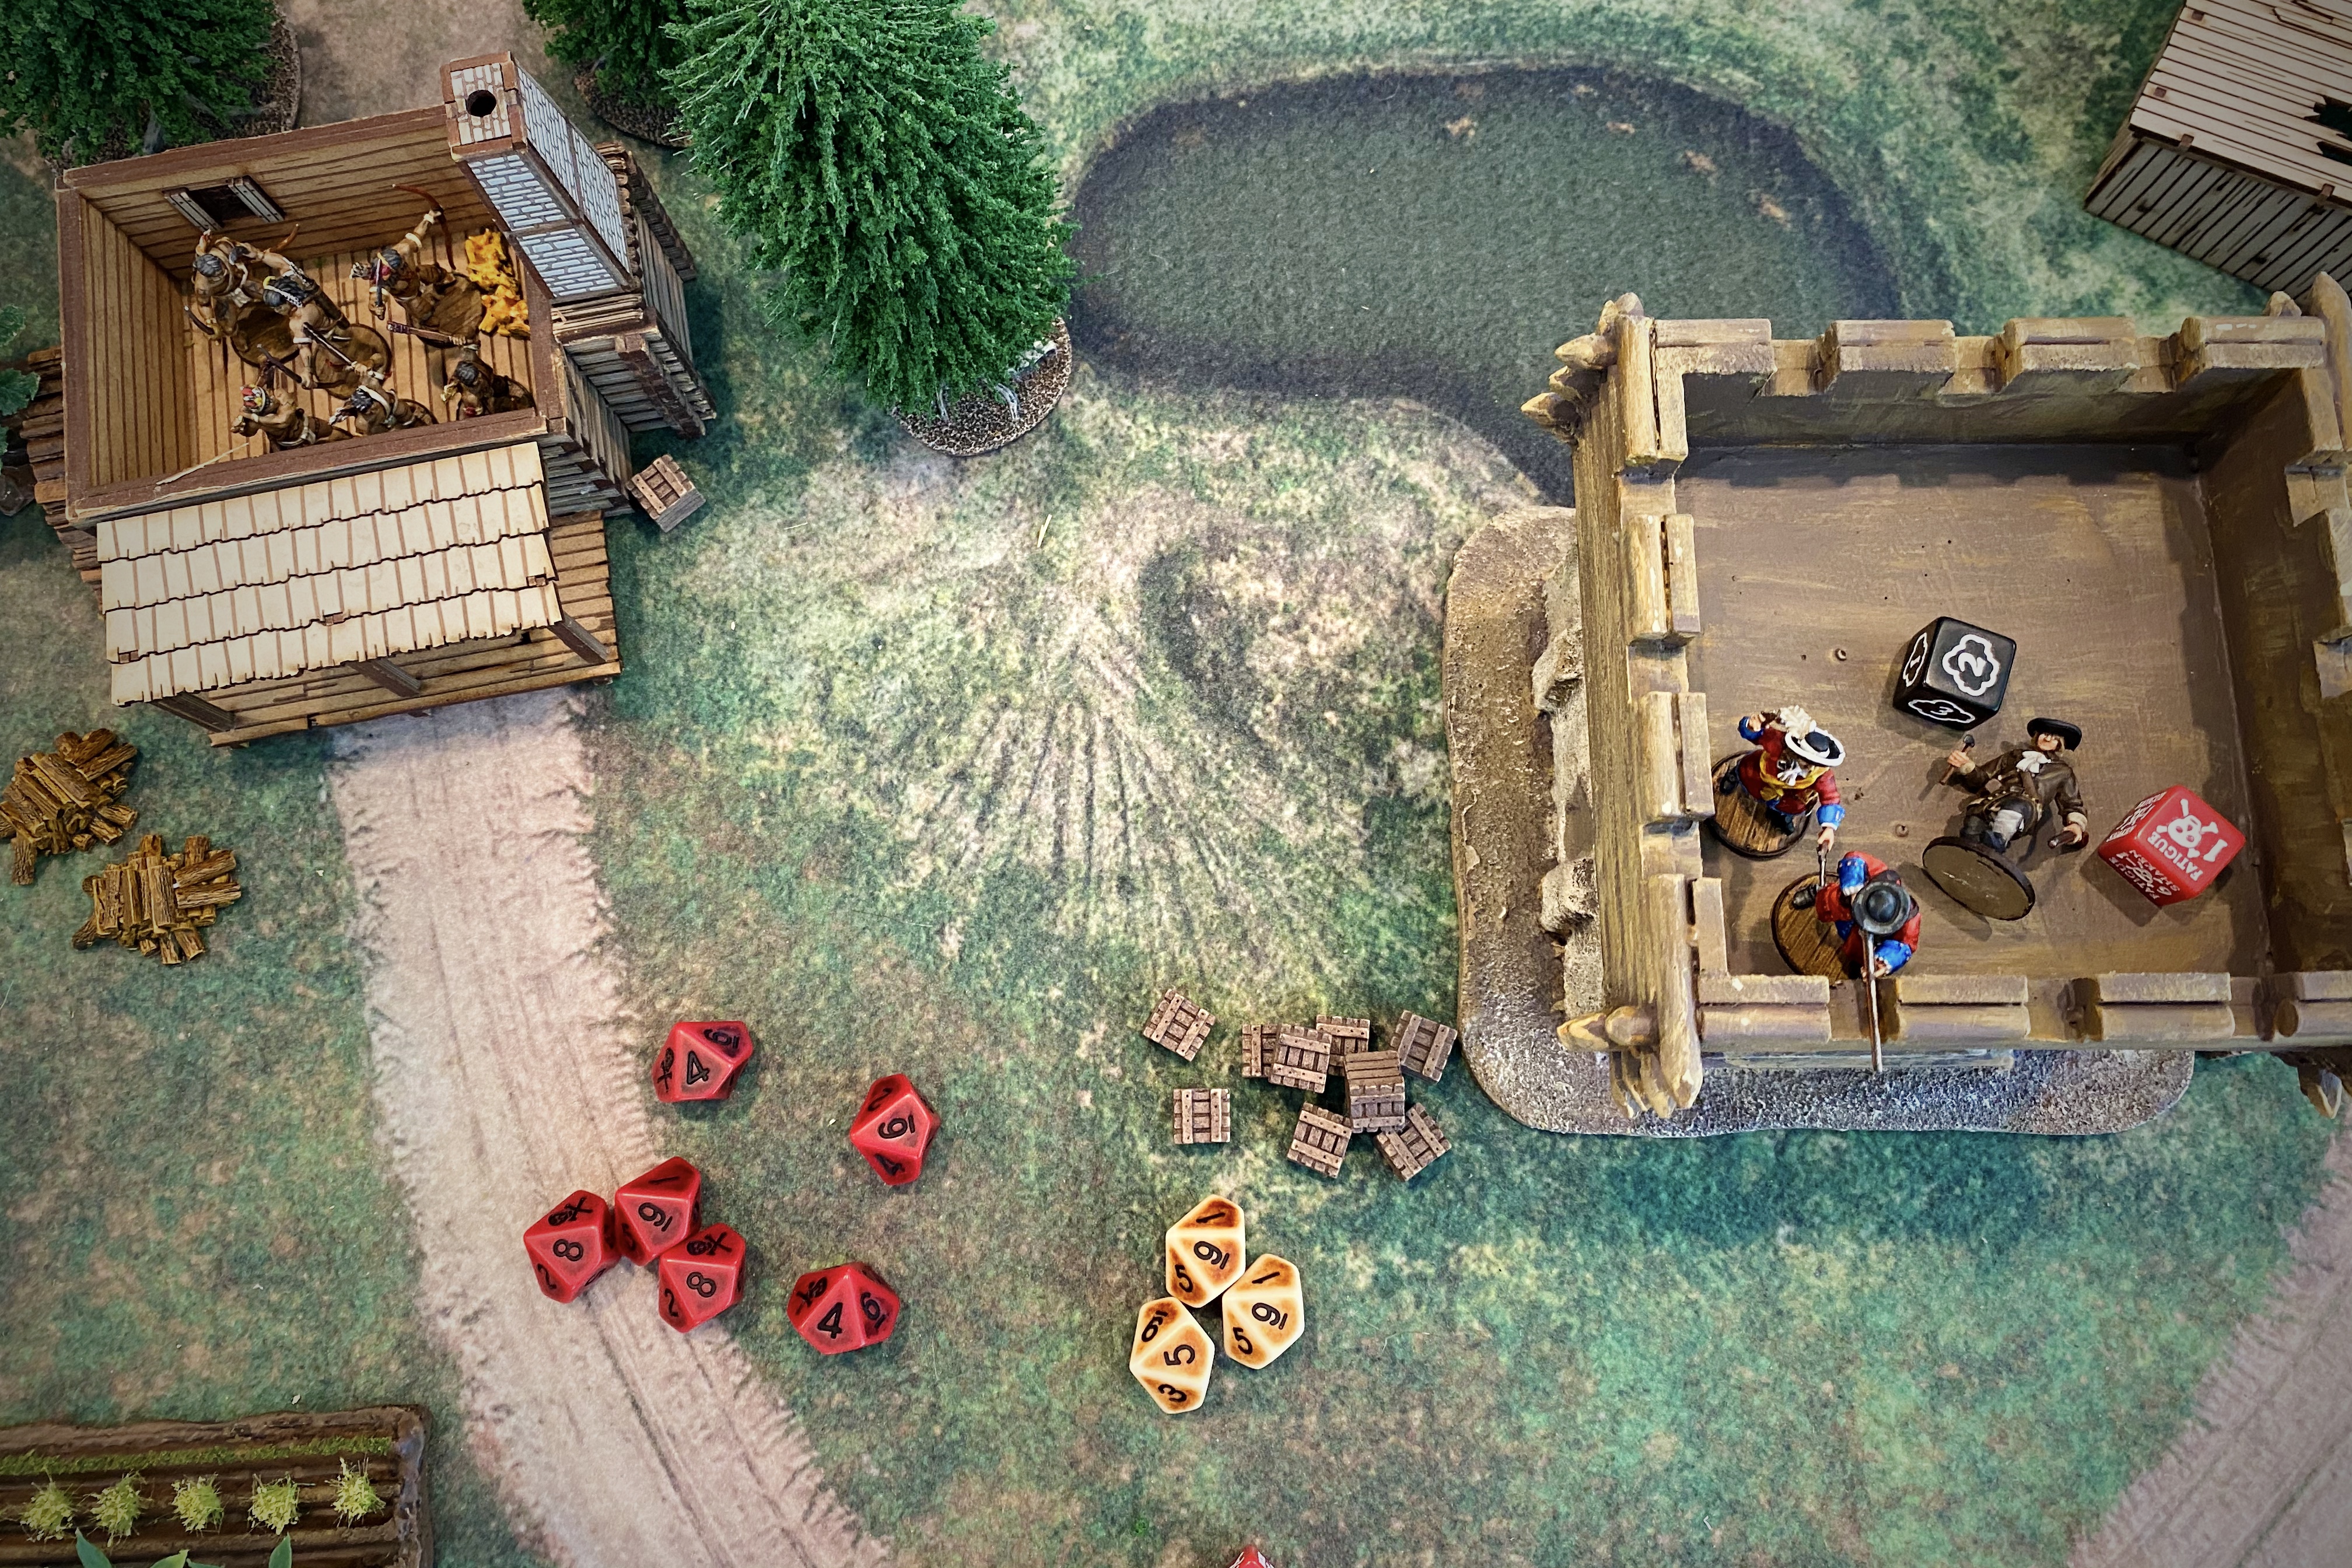
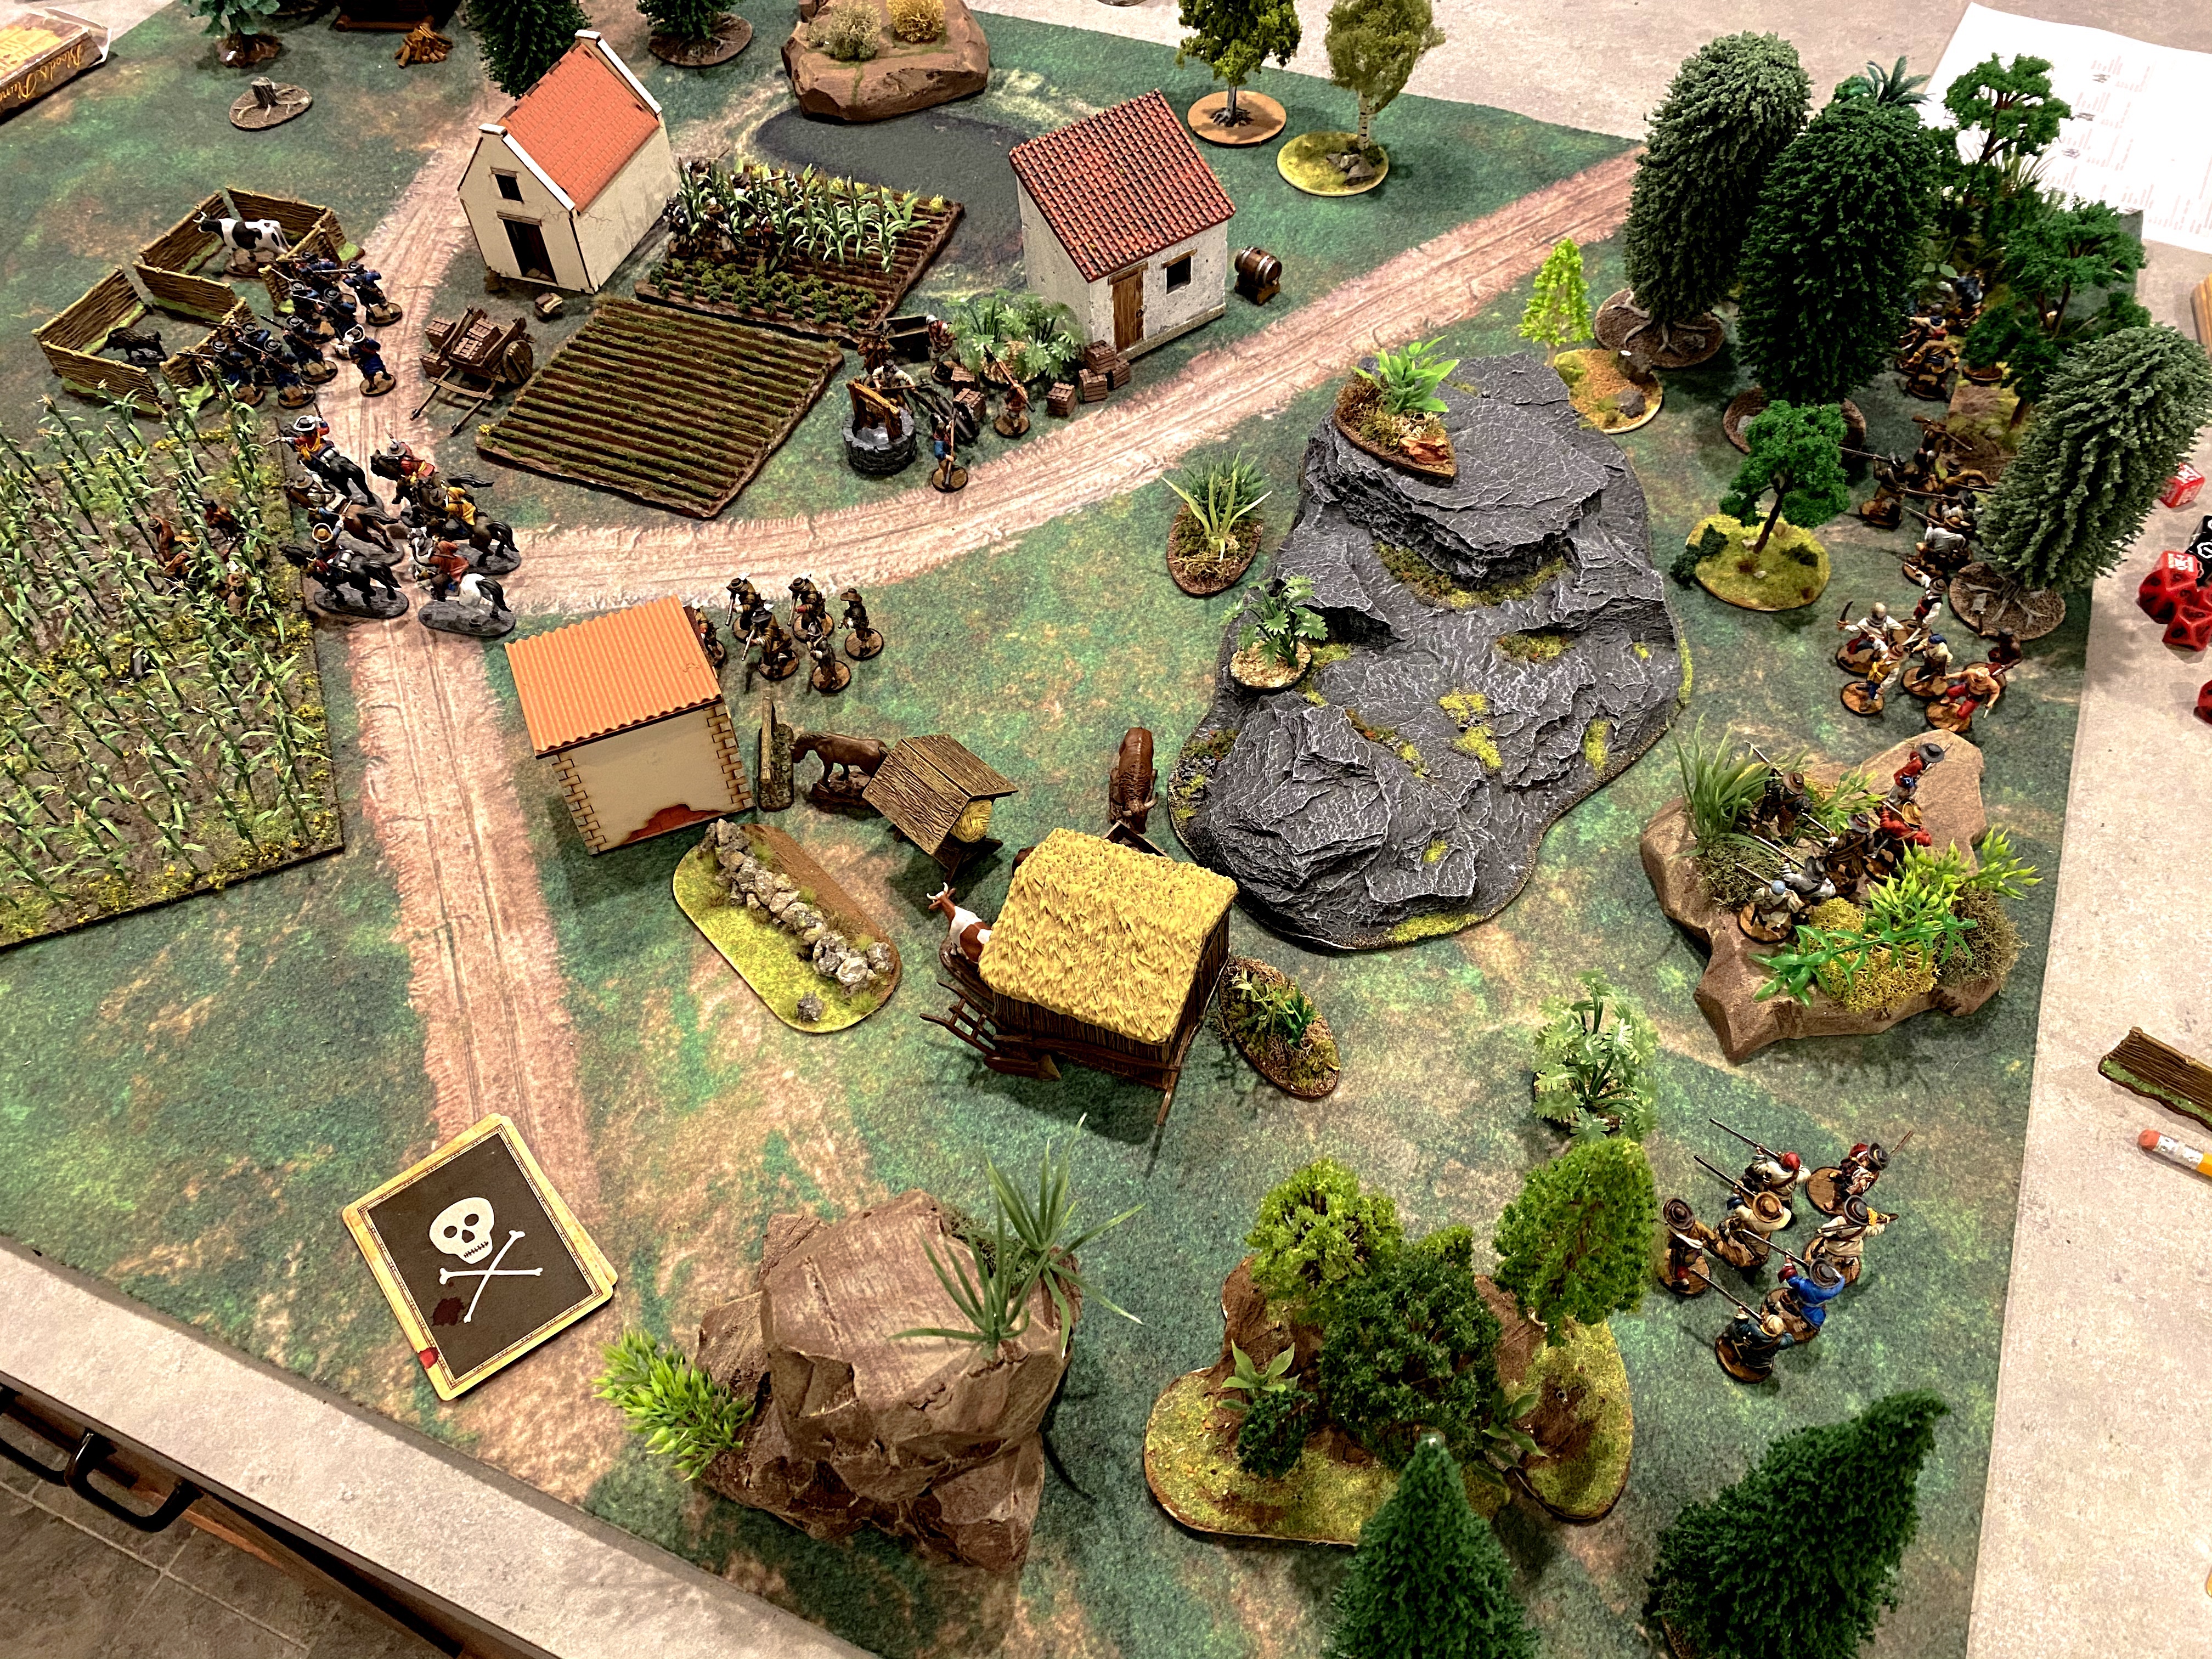
I used these three buildings as the objective structures. I counted the blockhouse as a standard structure rather than a fortified structure. I just wanted to use it to make my board look more North American.
The black pebbles mark the deployment circle in the center of the board.
The first thing I noticed while placing the English was that the deployment zone is actually pretty large. 12″ from the center is a 24″ circle which is a good third of the entire board. The Rescue scenario in No Peace Beyond the Line uses a 6″x24″ which is very constricting but this deployment zone gives the Defender a little more flexibility. Placing in the center comes with some real dangers for the Defender so having a little more space to work with seems smart to me.
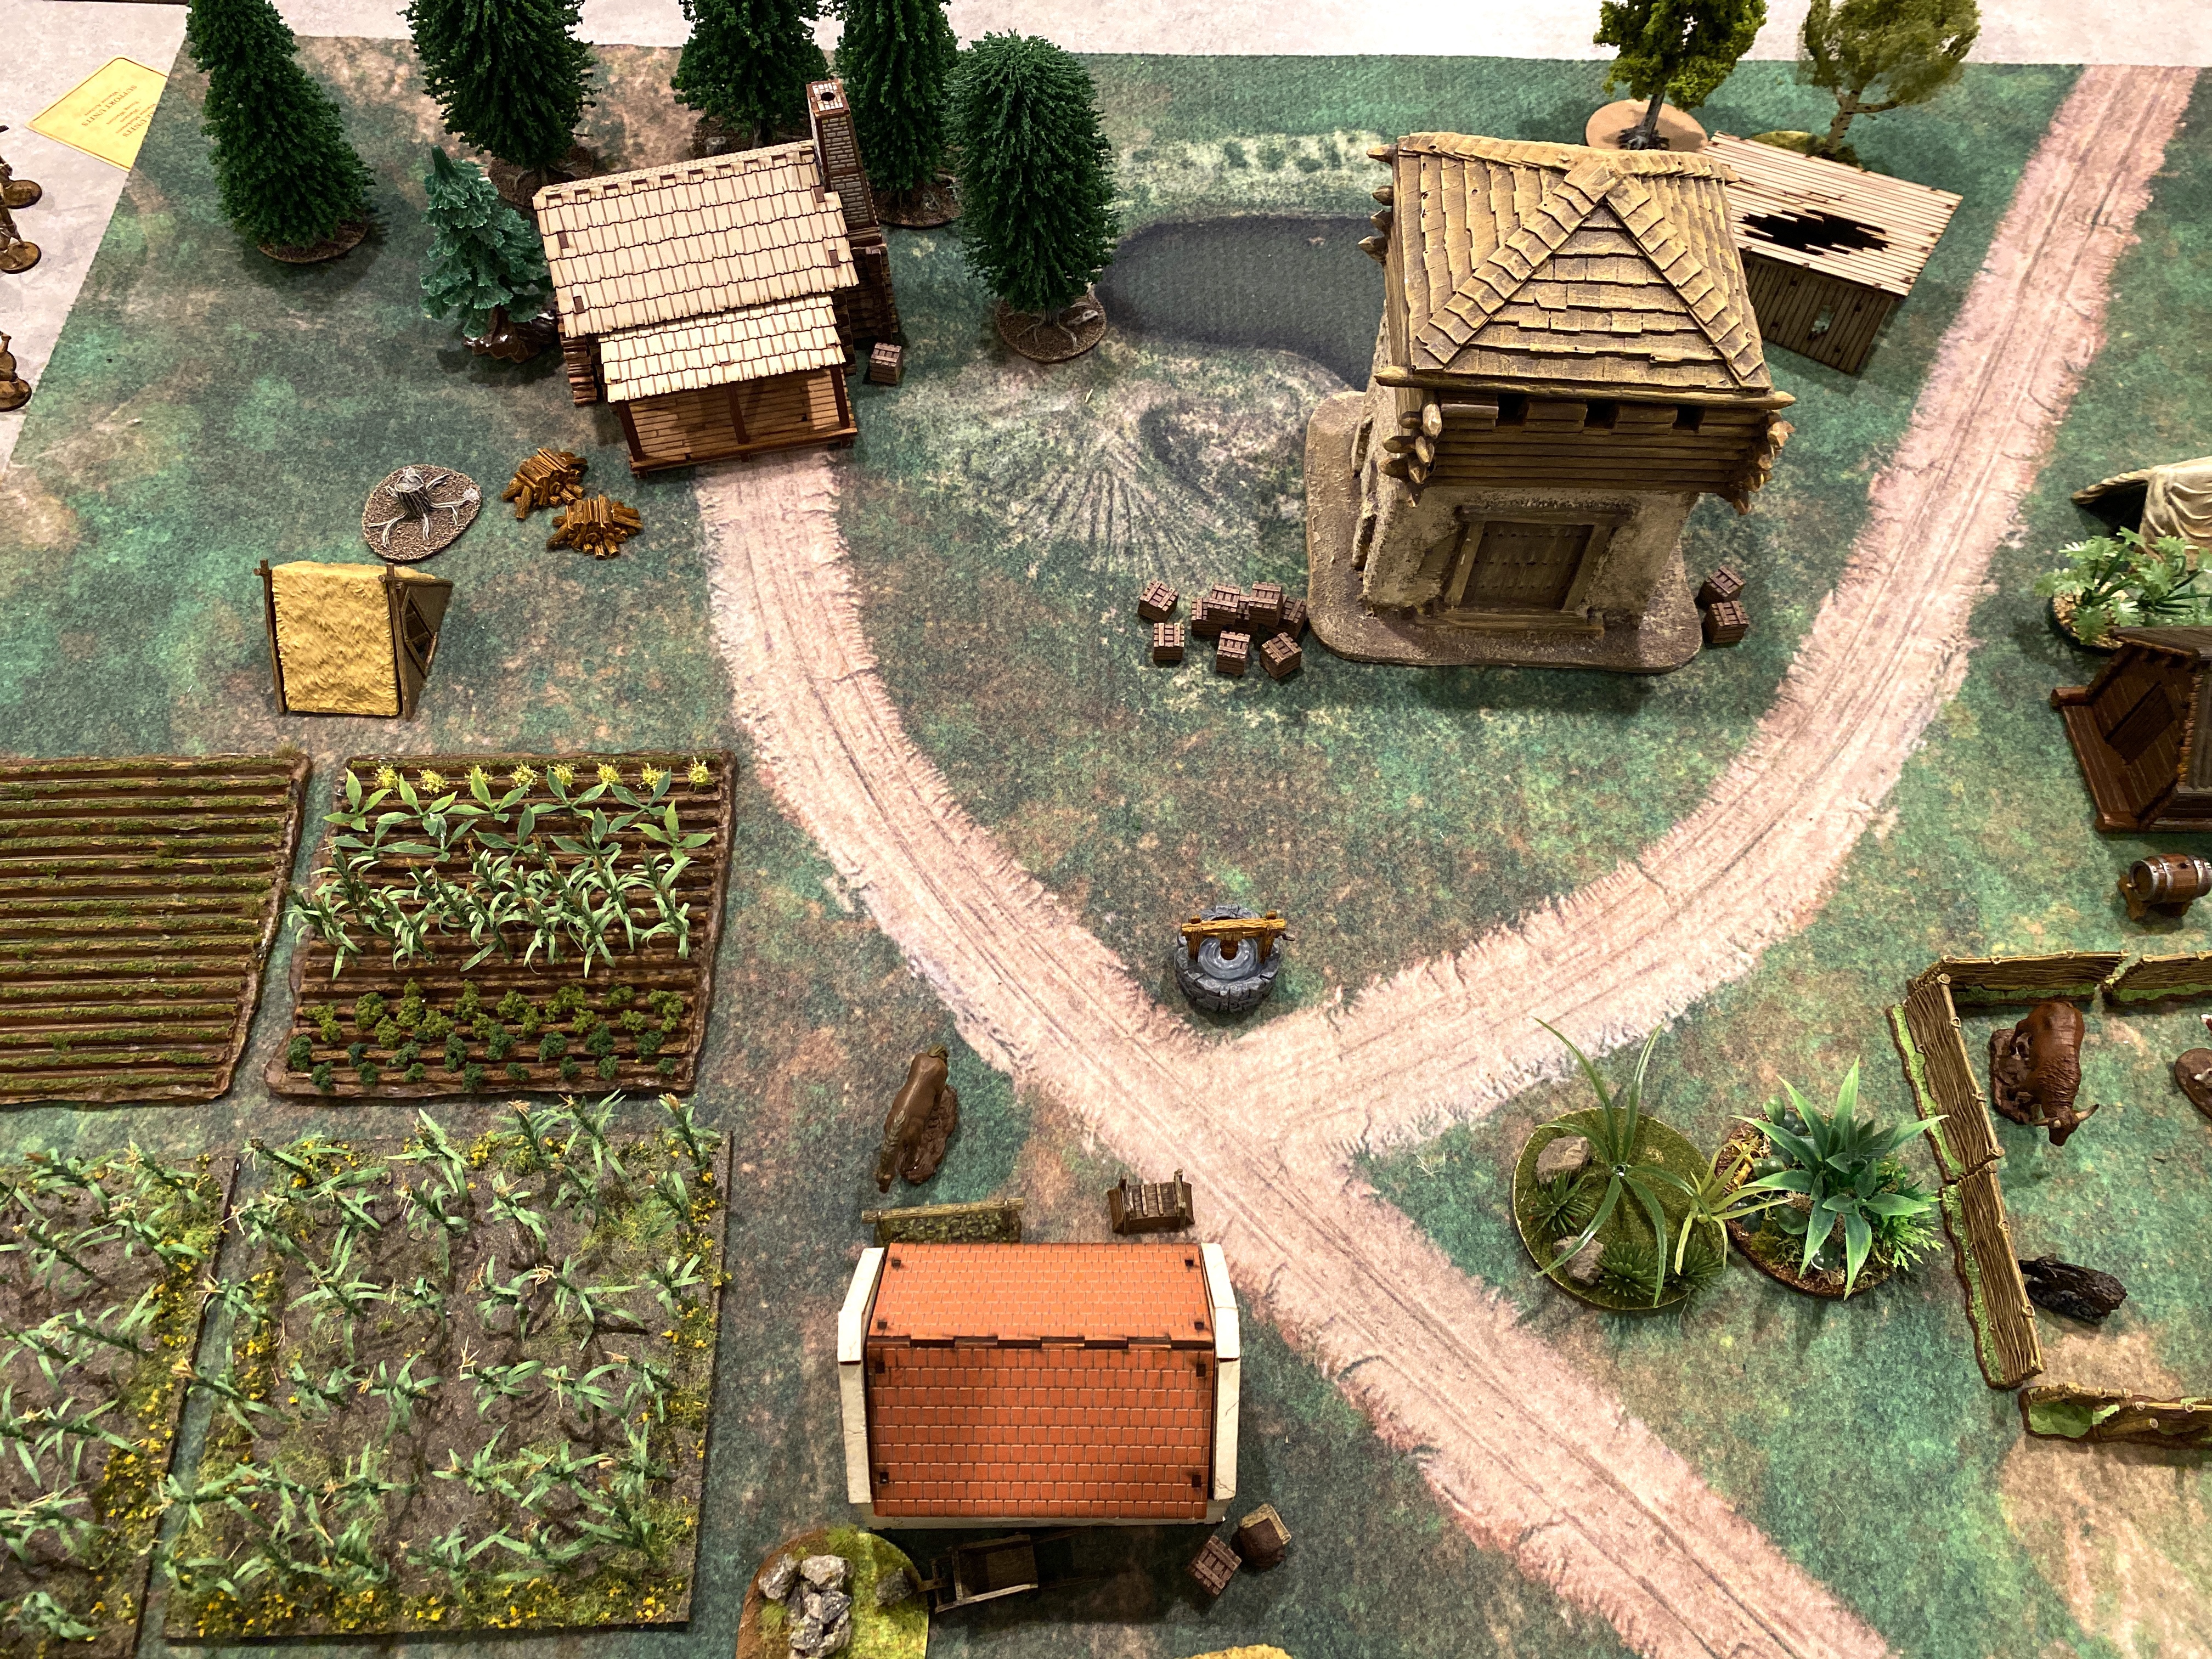
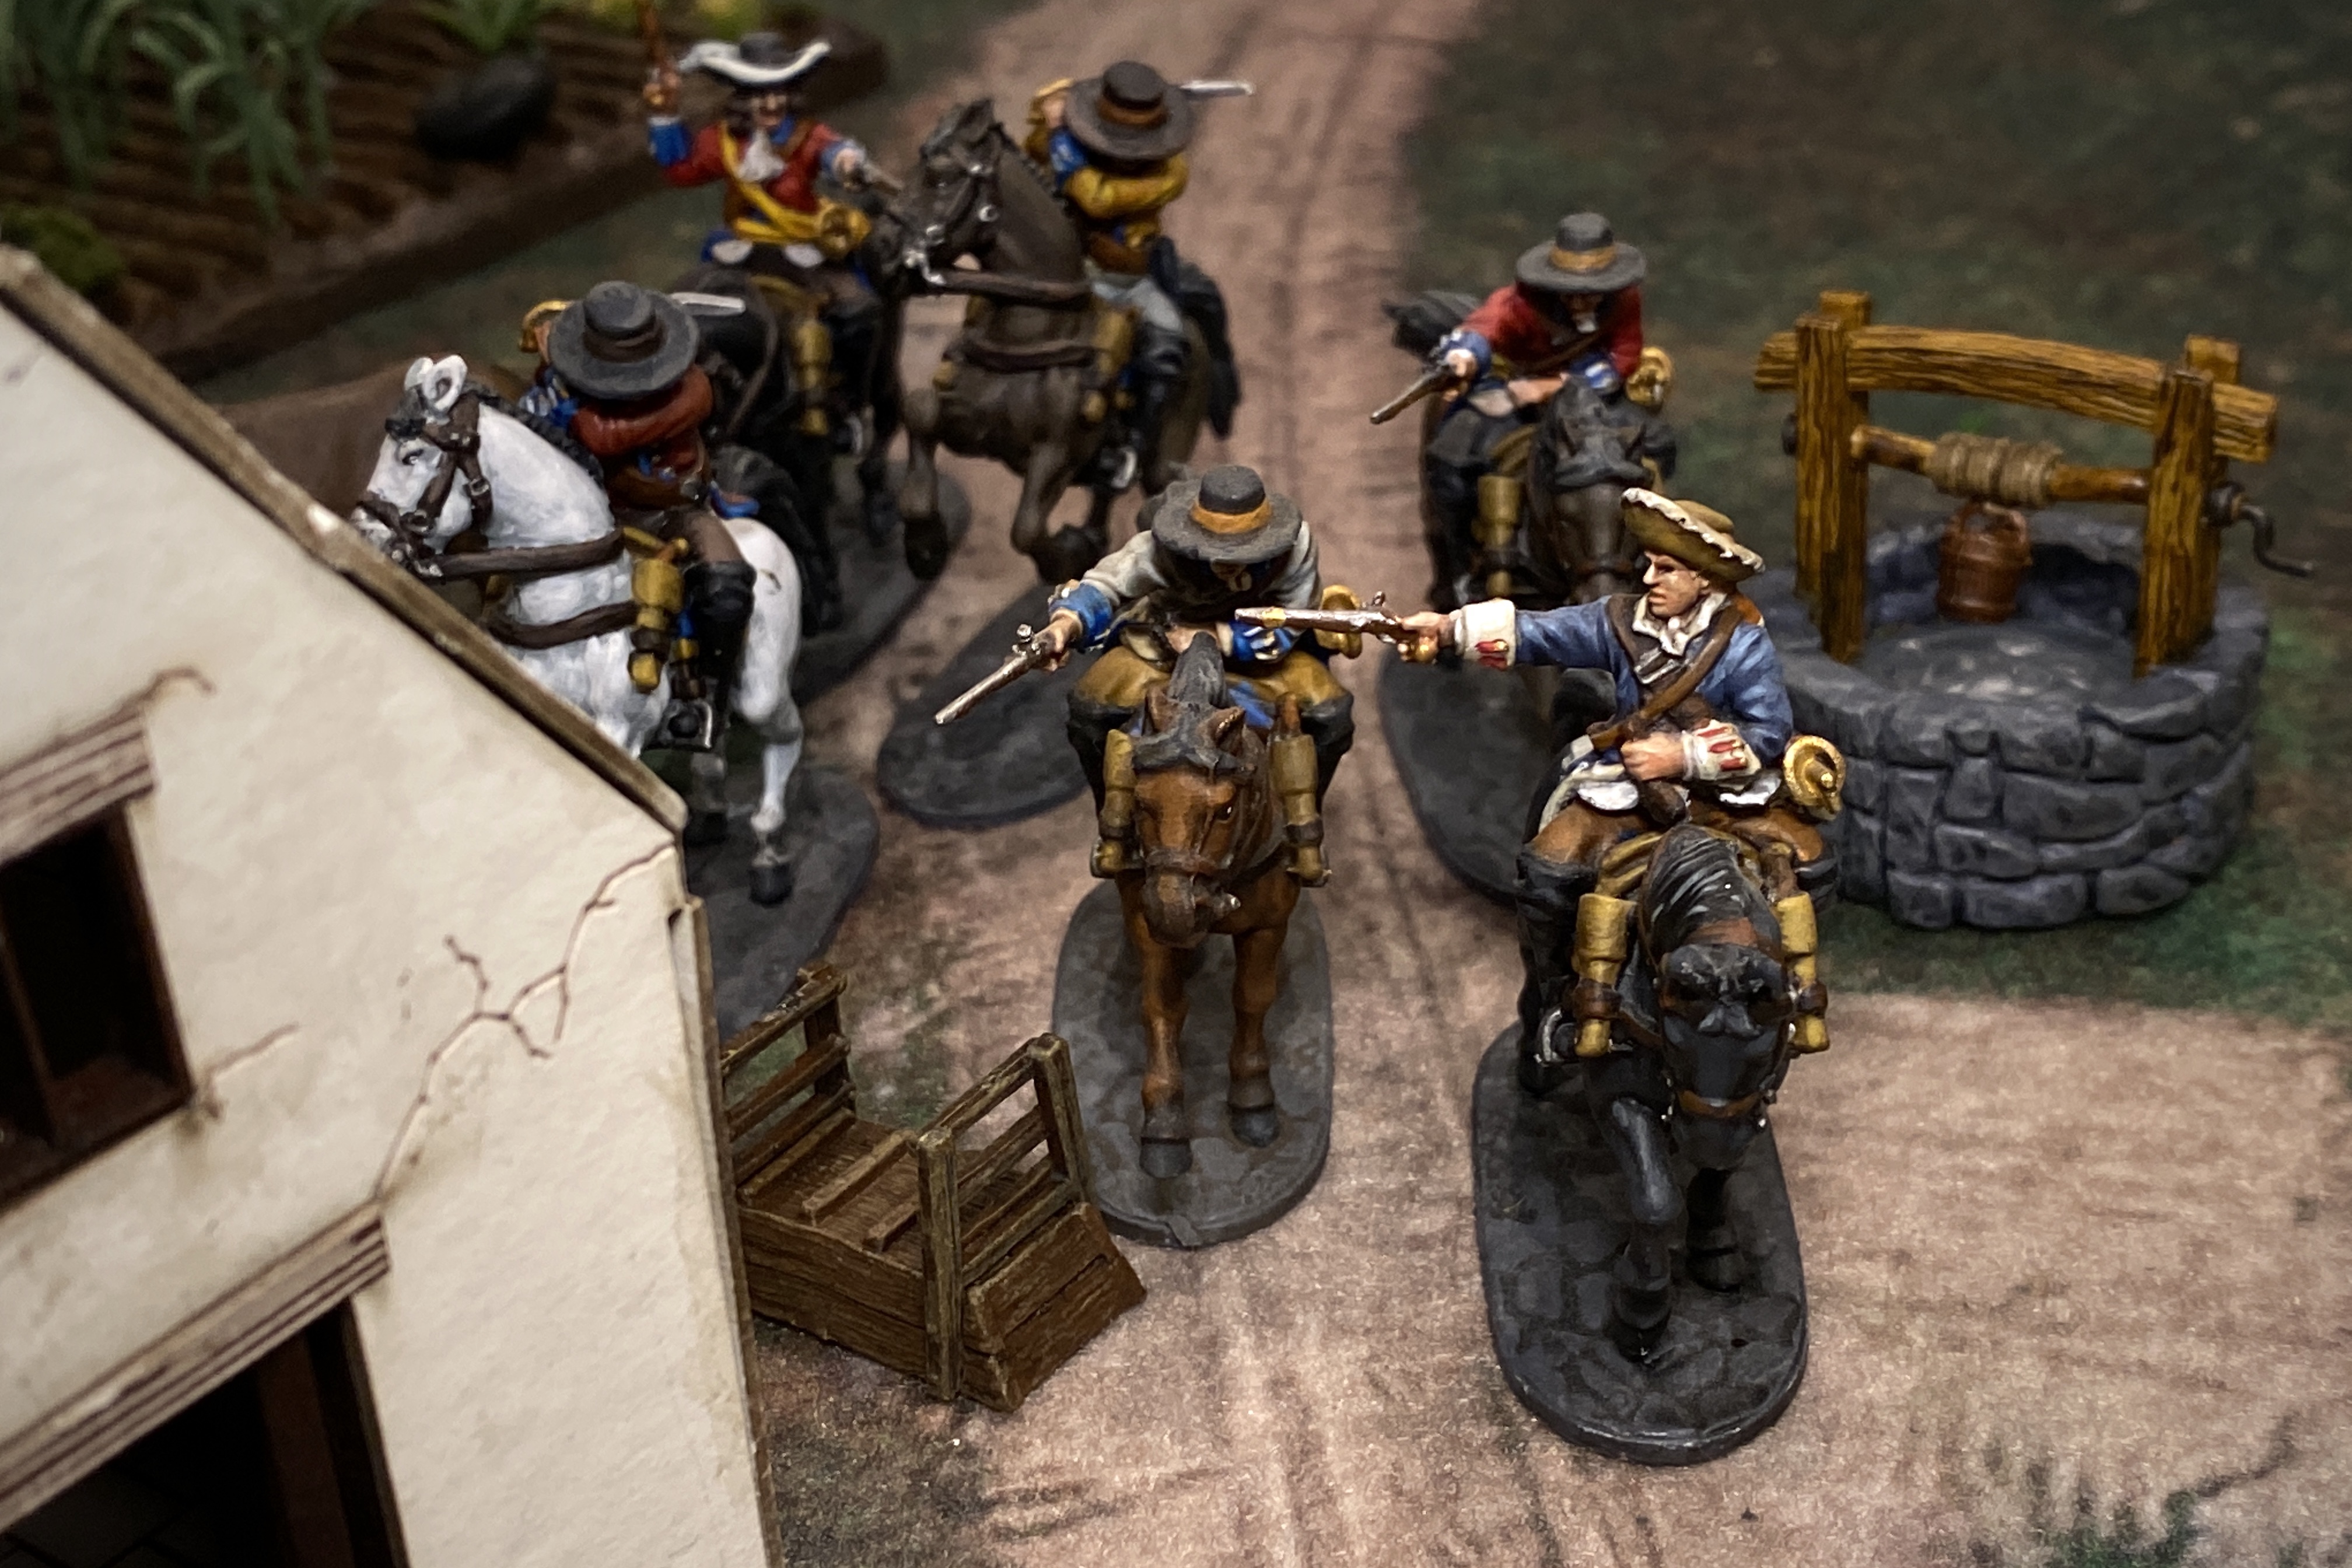
Placing cavalry in the center is double dangerous as they always seem to draw the first fire. I found a nice corner with cover on two sides for the horsemen hoping they would survive more than 1 turn.
After placing the English, I chose the short Left side of the board for the Natives and placed them along the edge with the command unit in the center.
As the Attacker, I could have placed one of these units somewhere else using the Lay in Wait rule but with cavalry on the board, I didn’t relish placing a unit prone anywhere on the board.
With all the units on the board the game was all set to begin!

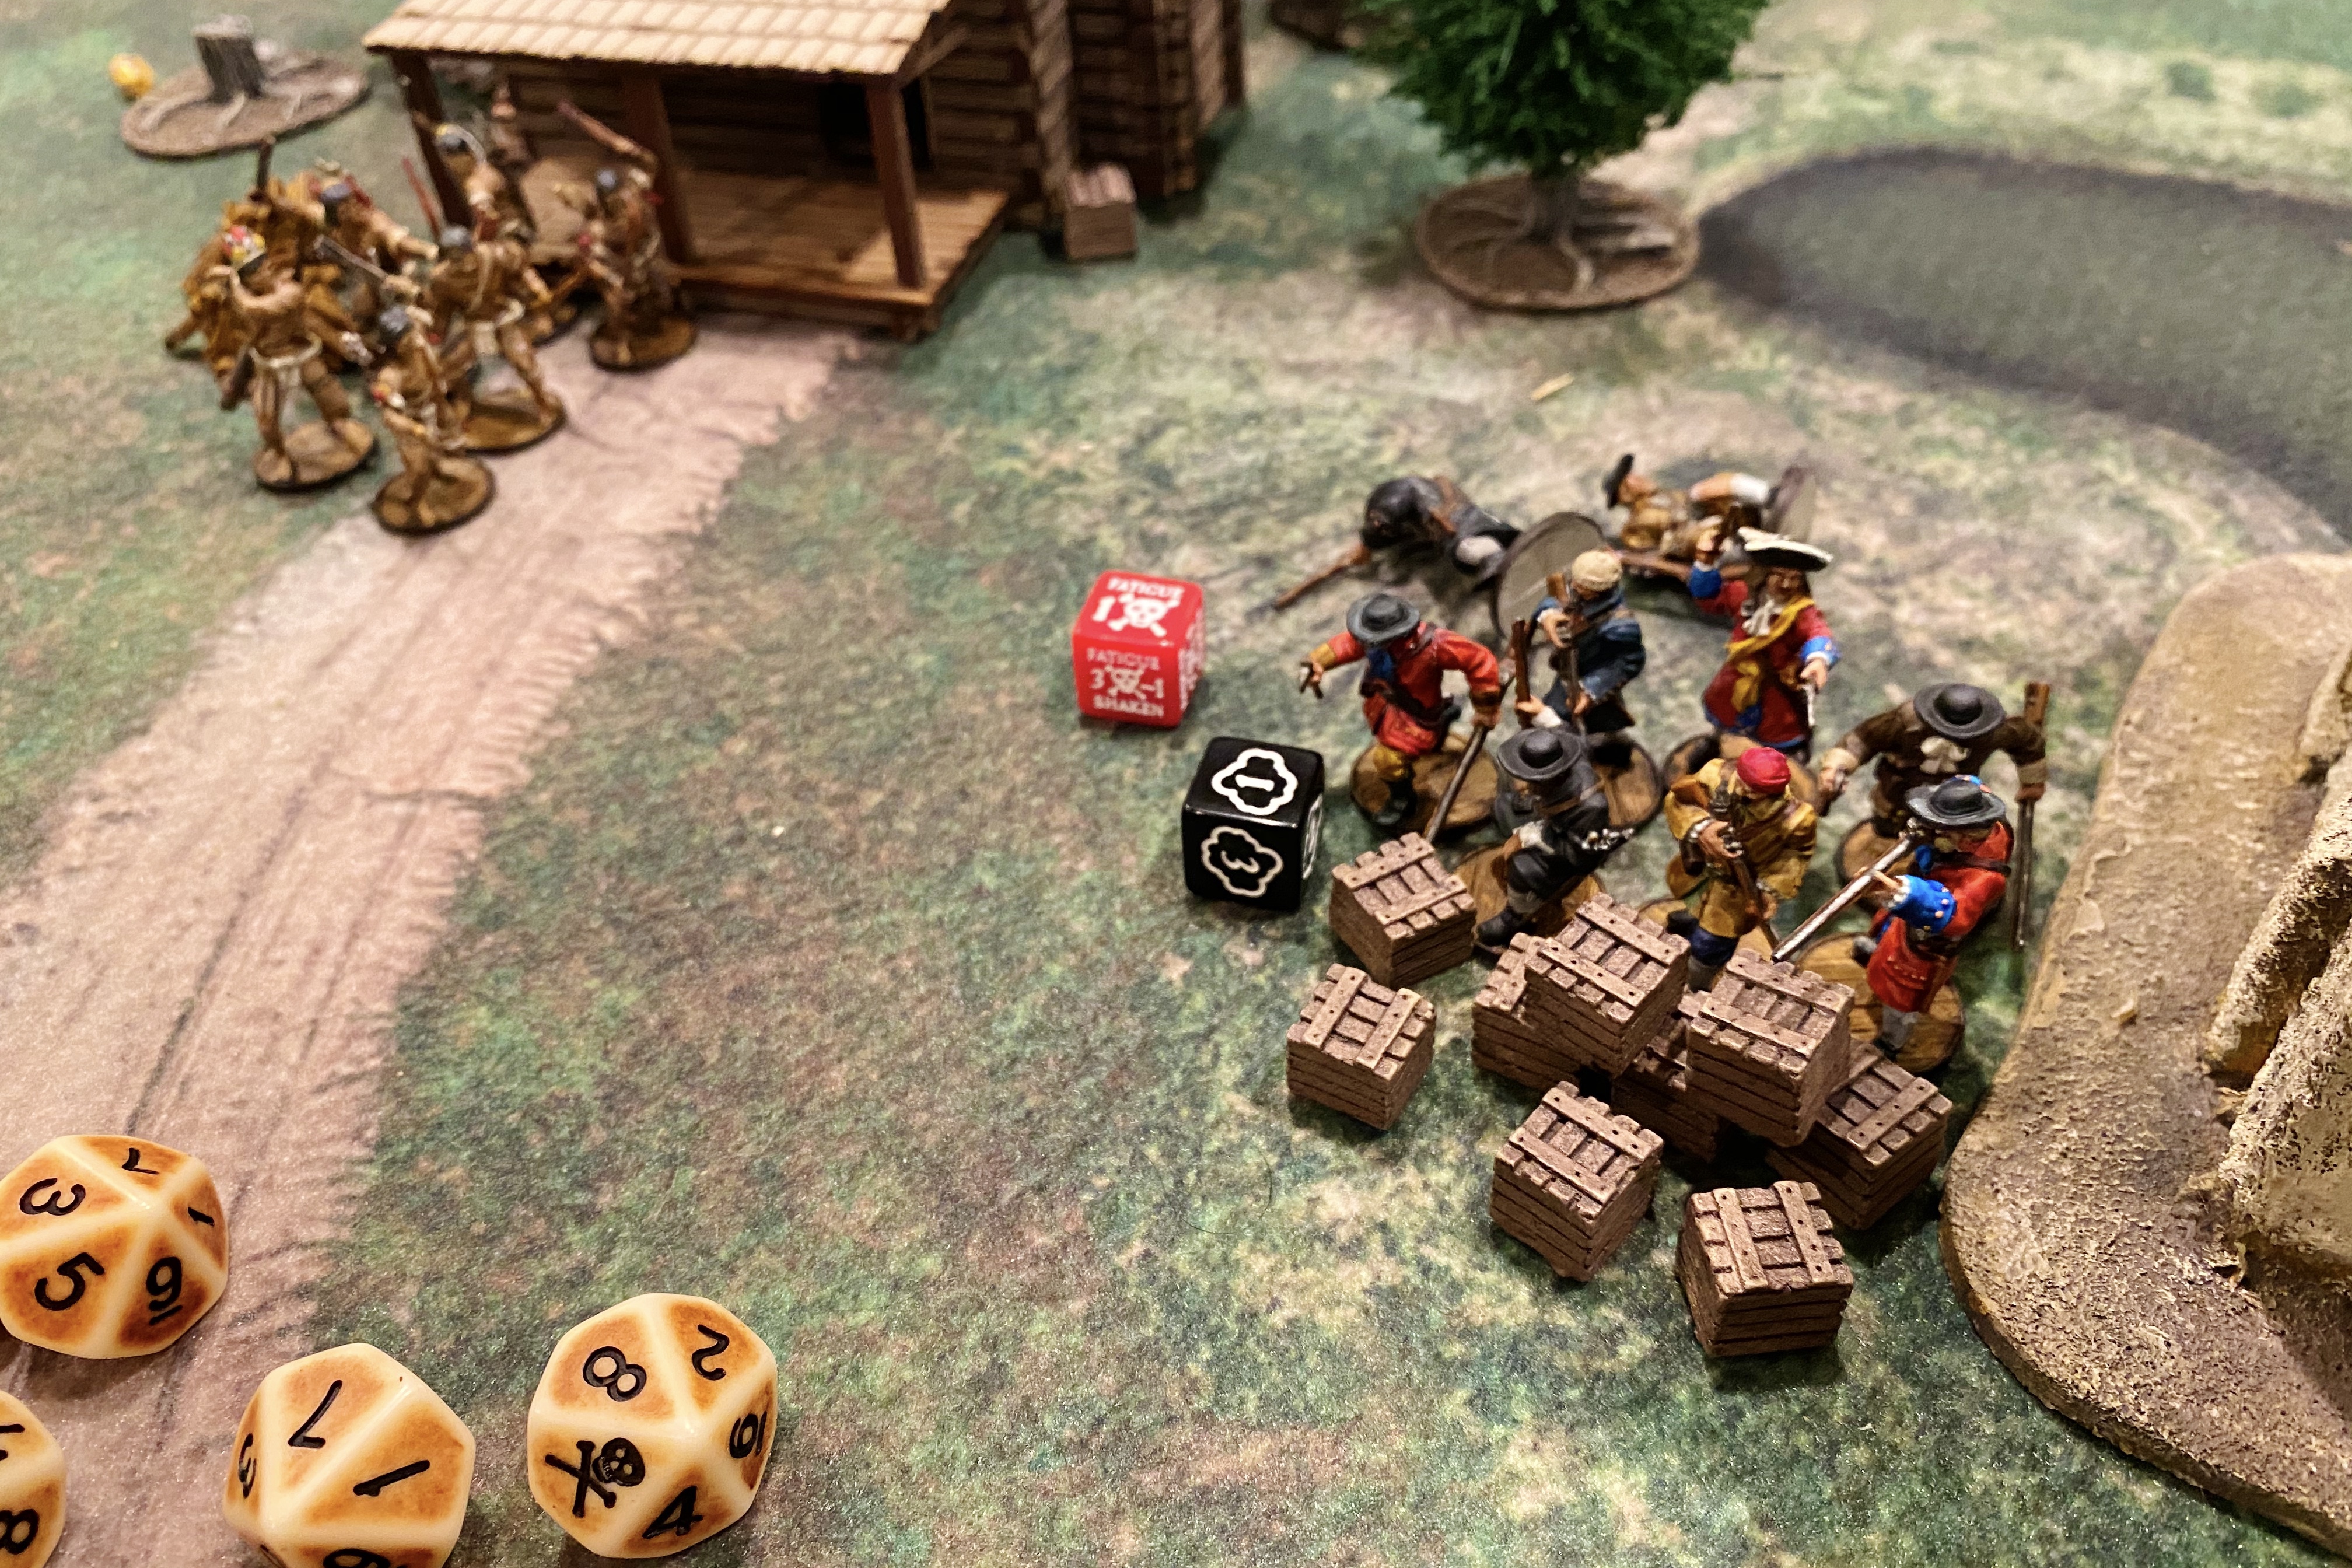
Turn 1
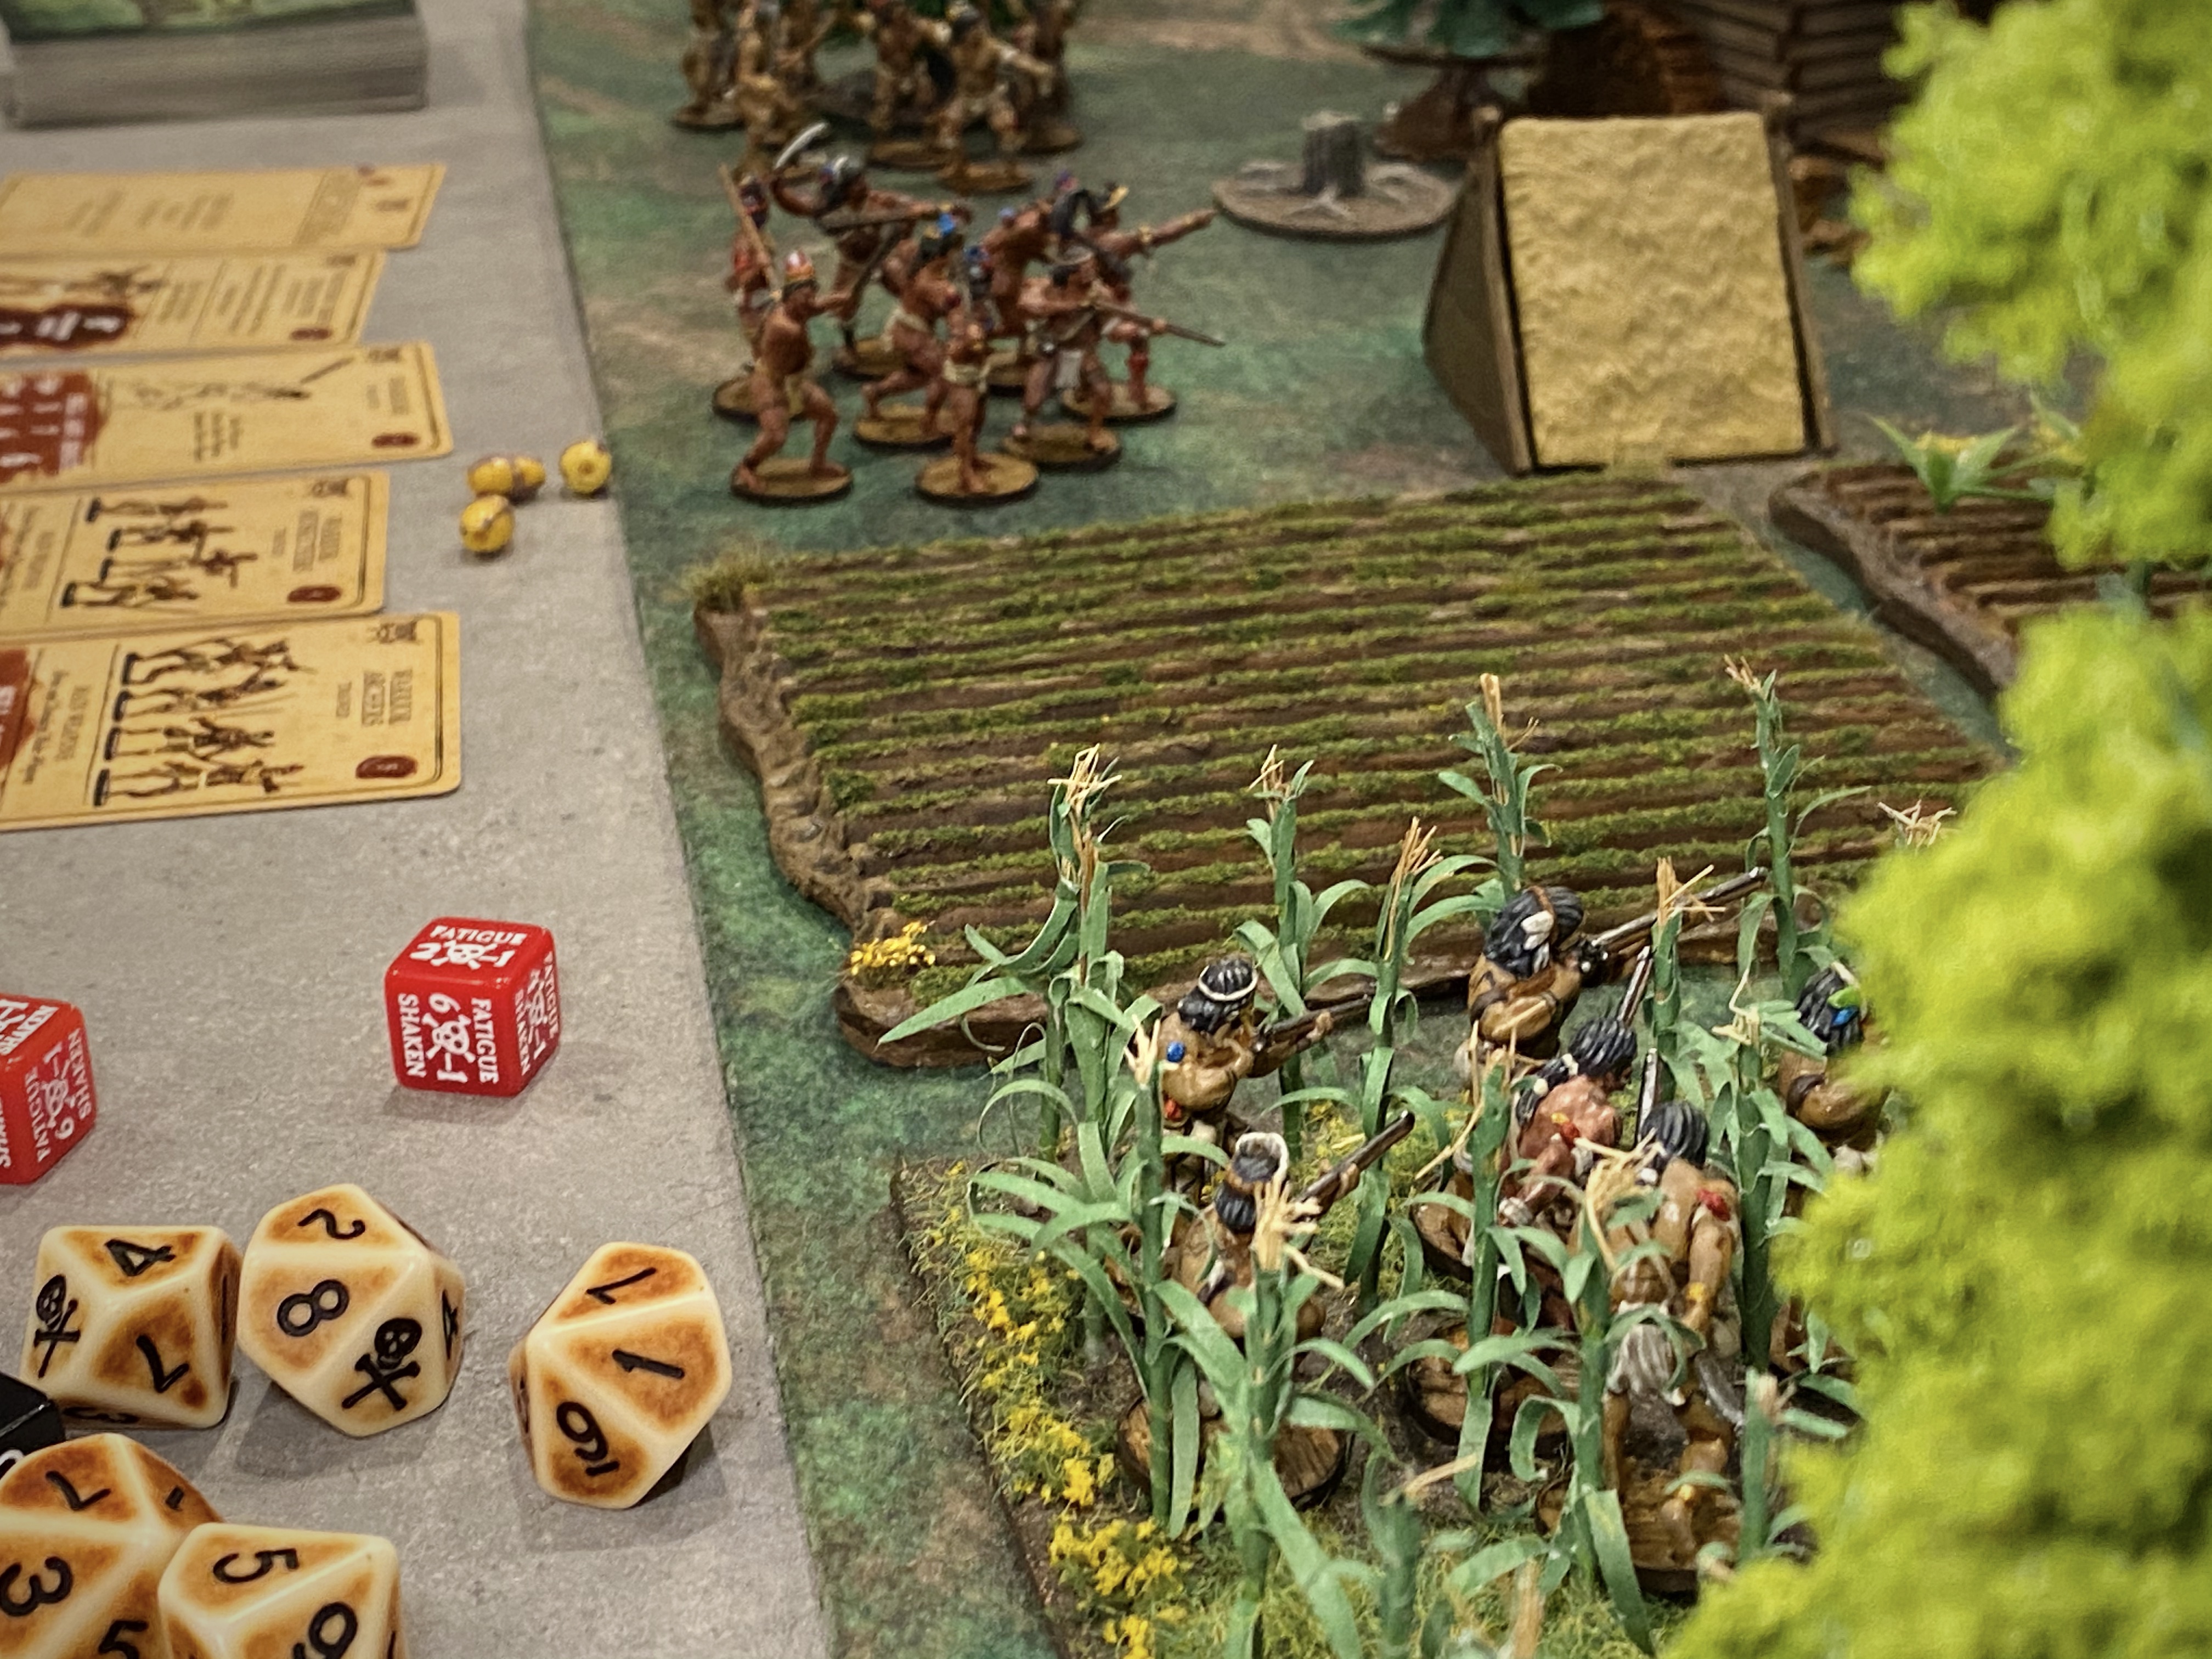
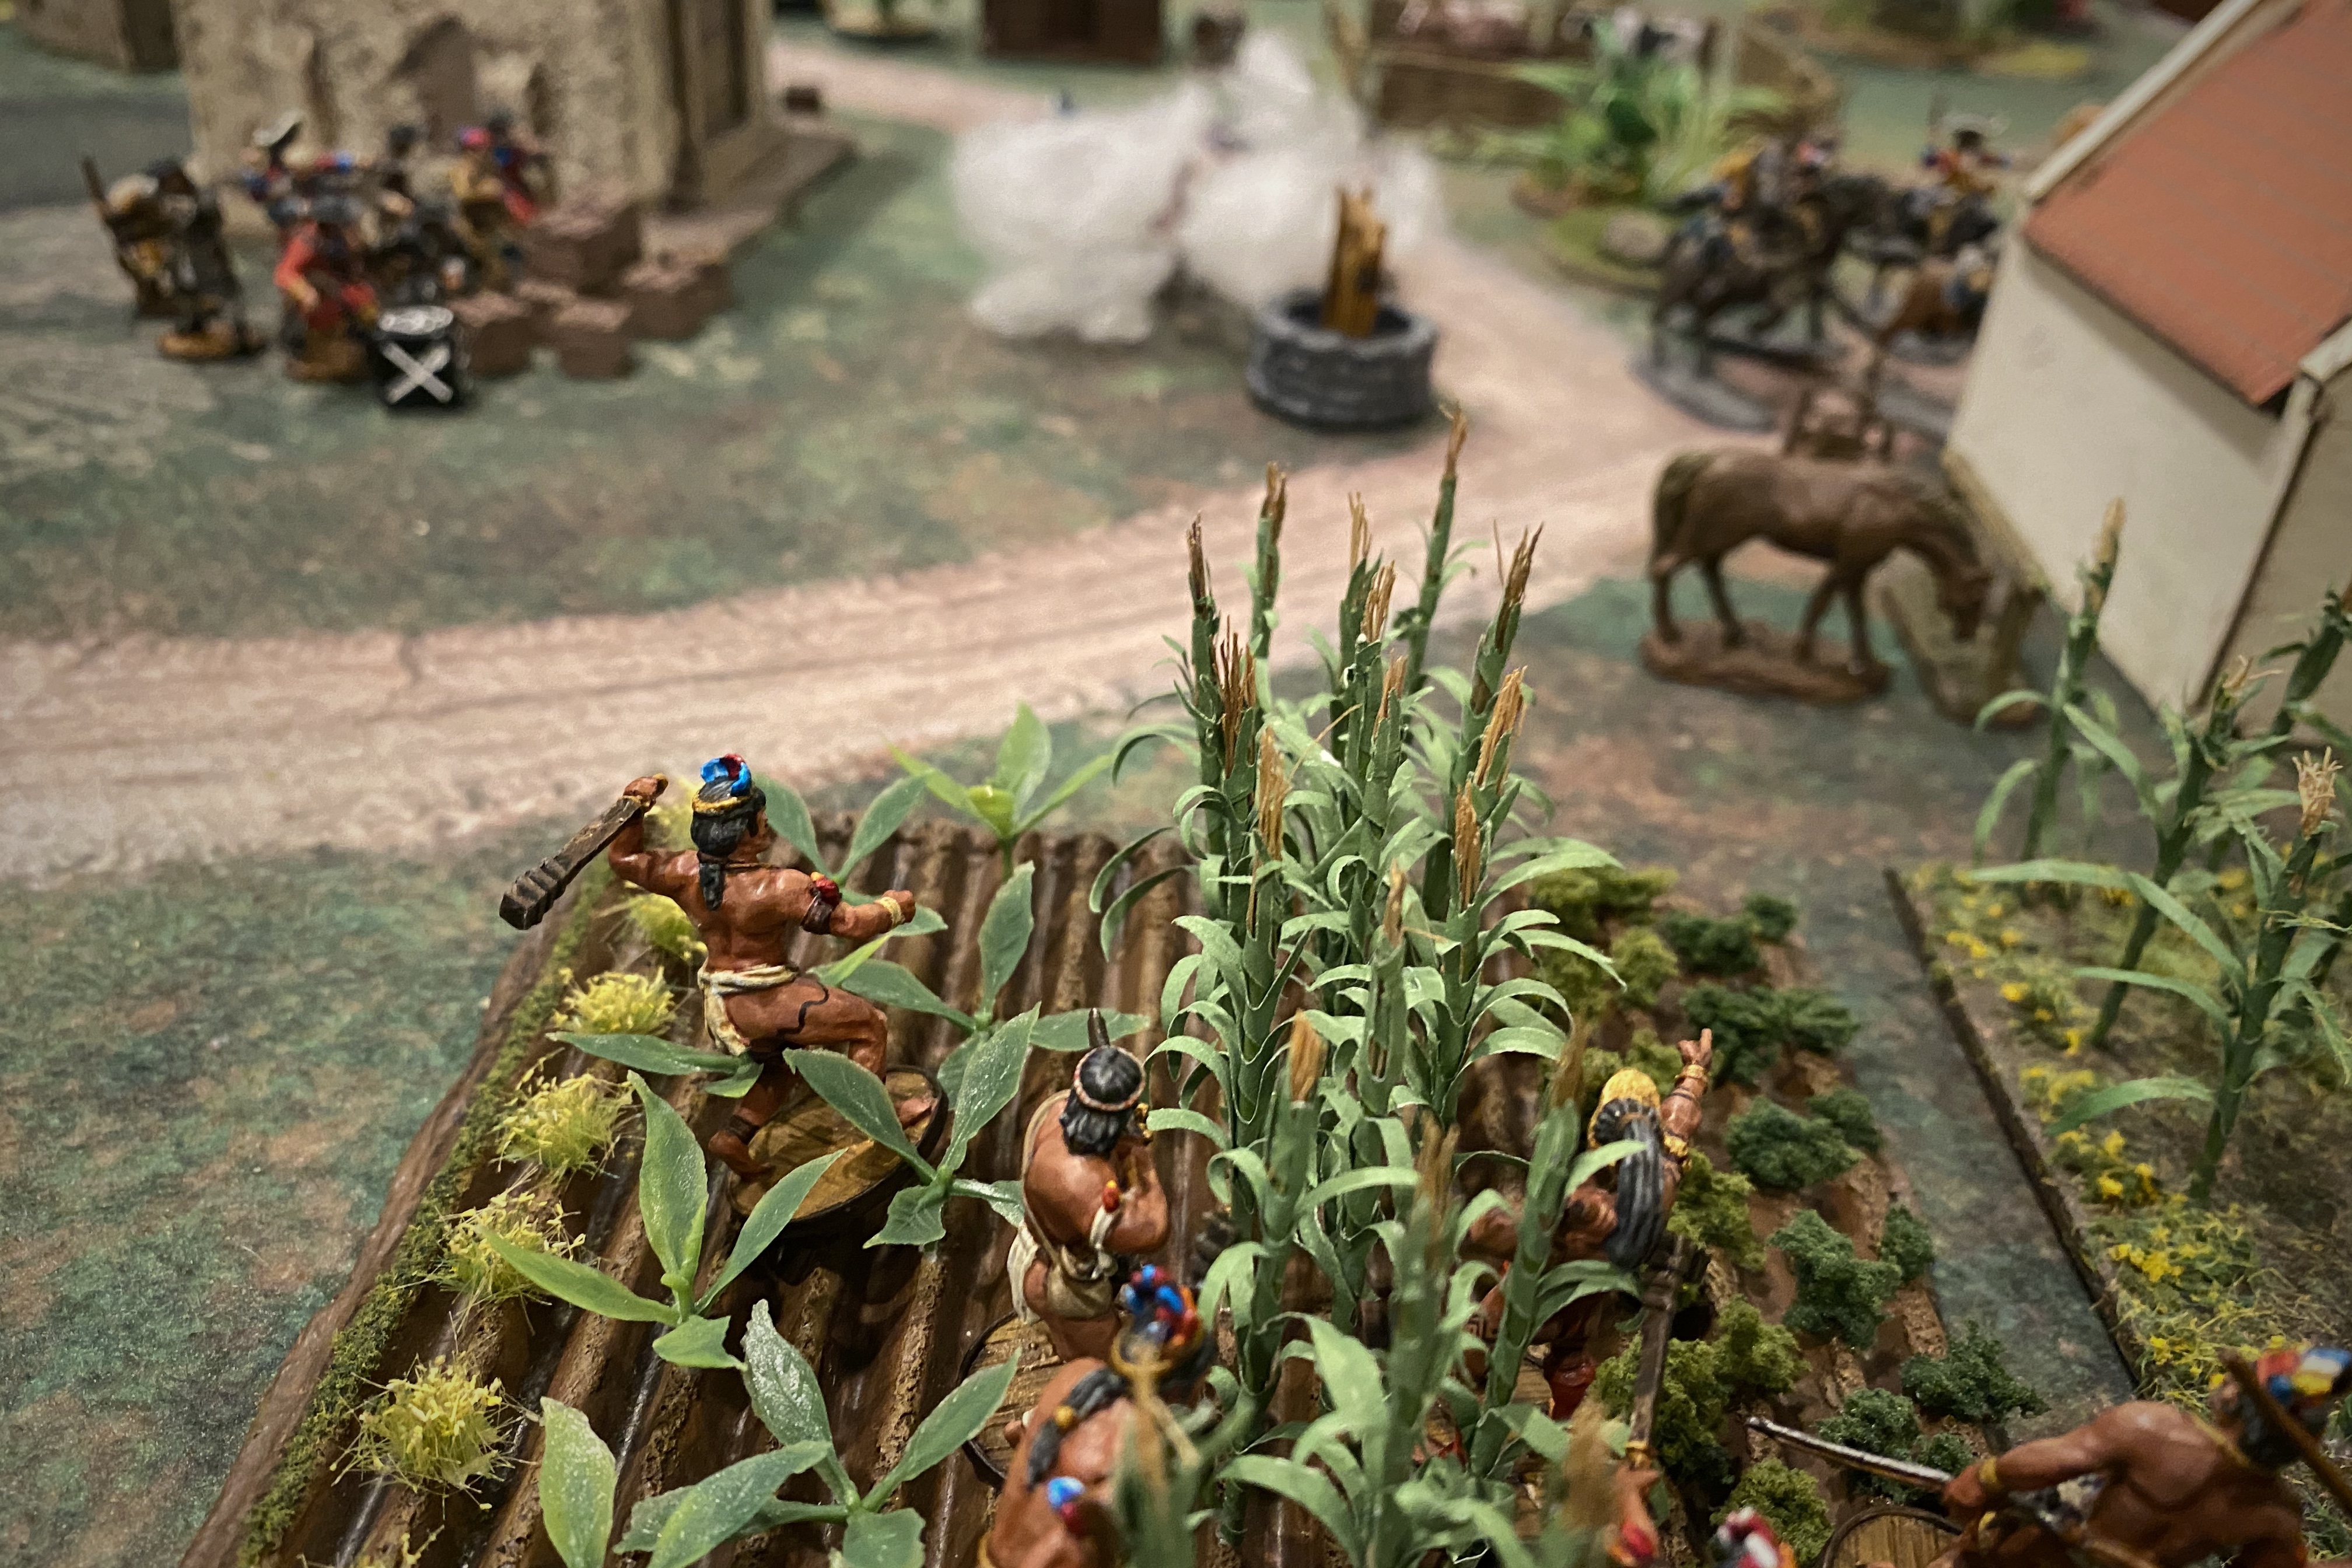
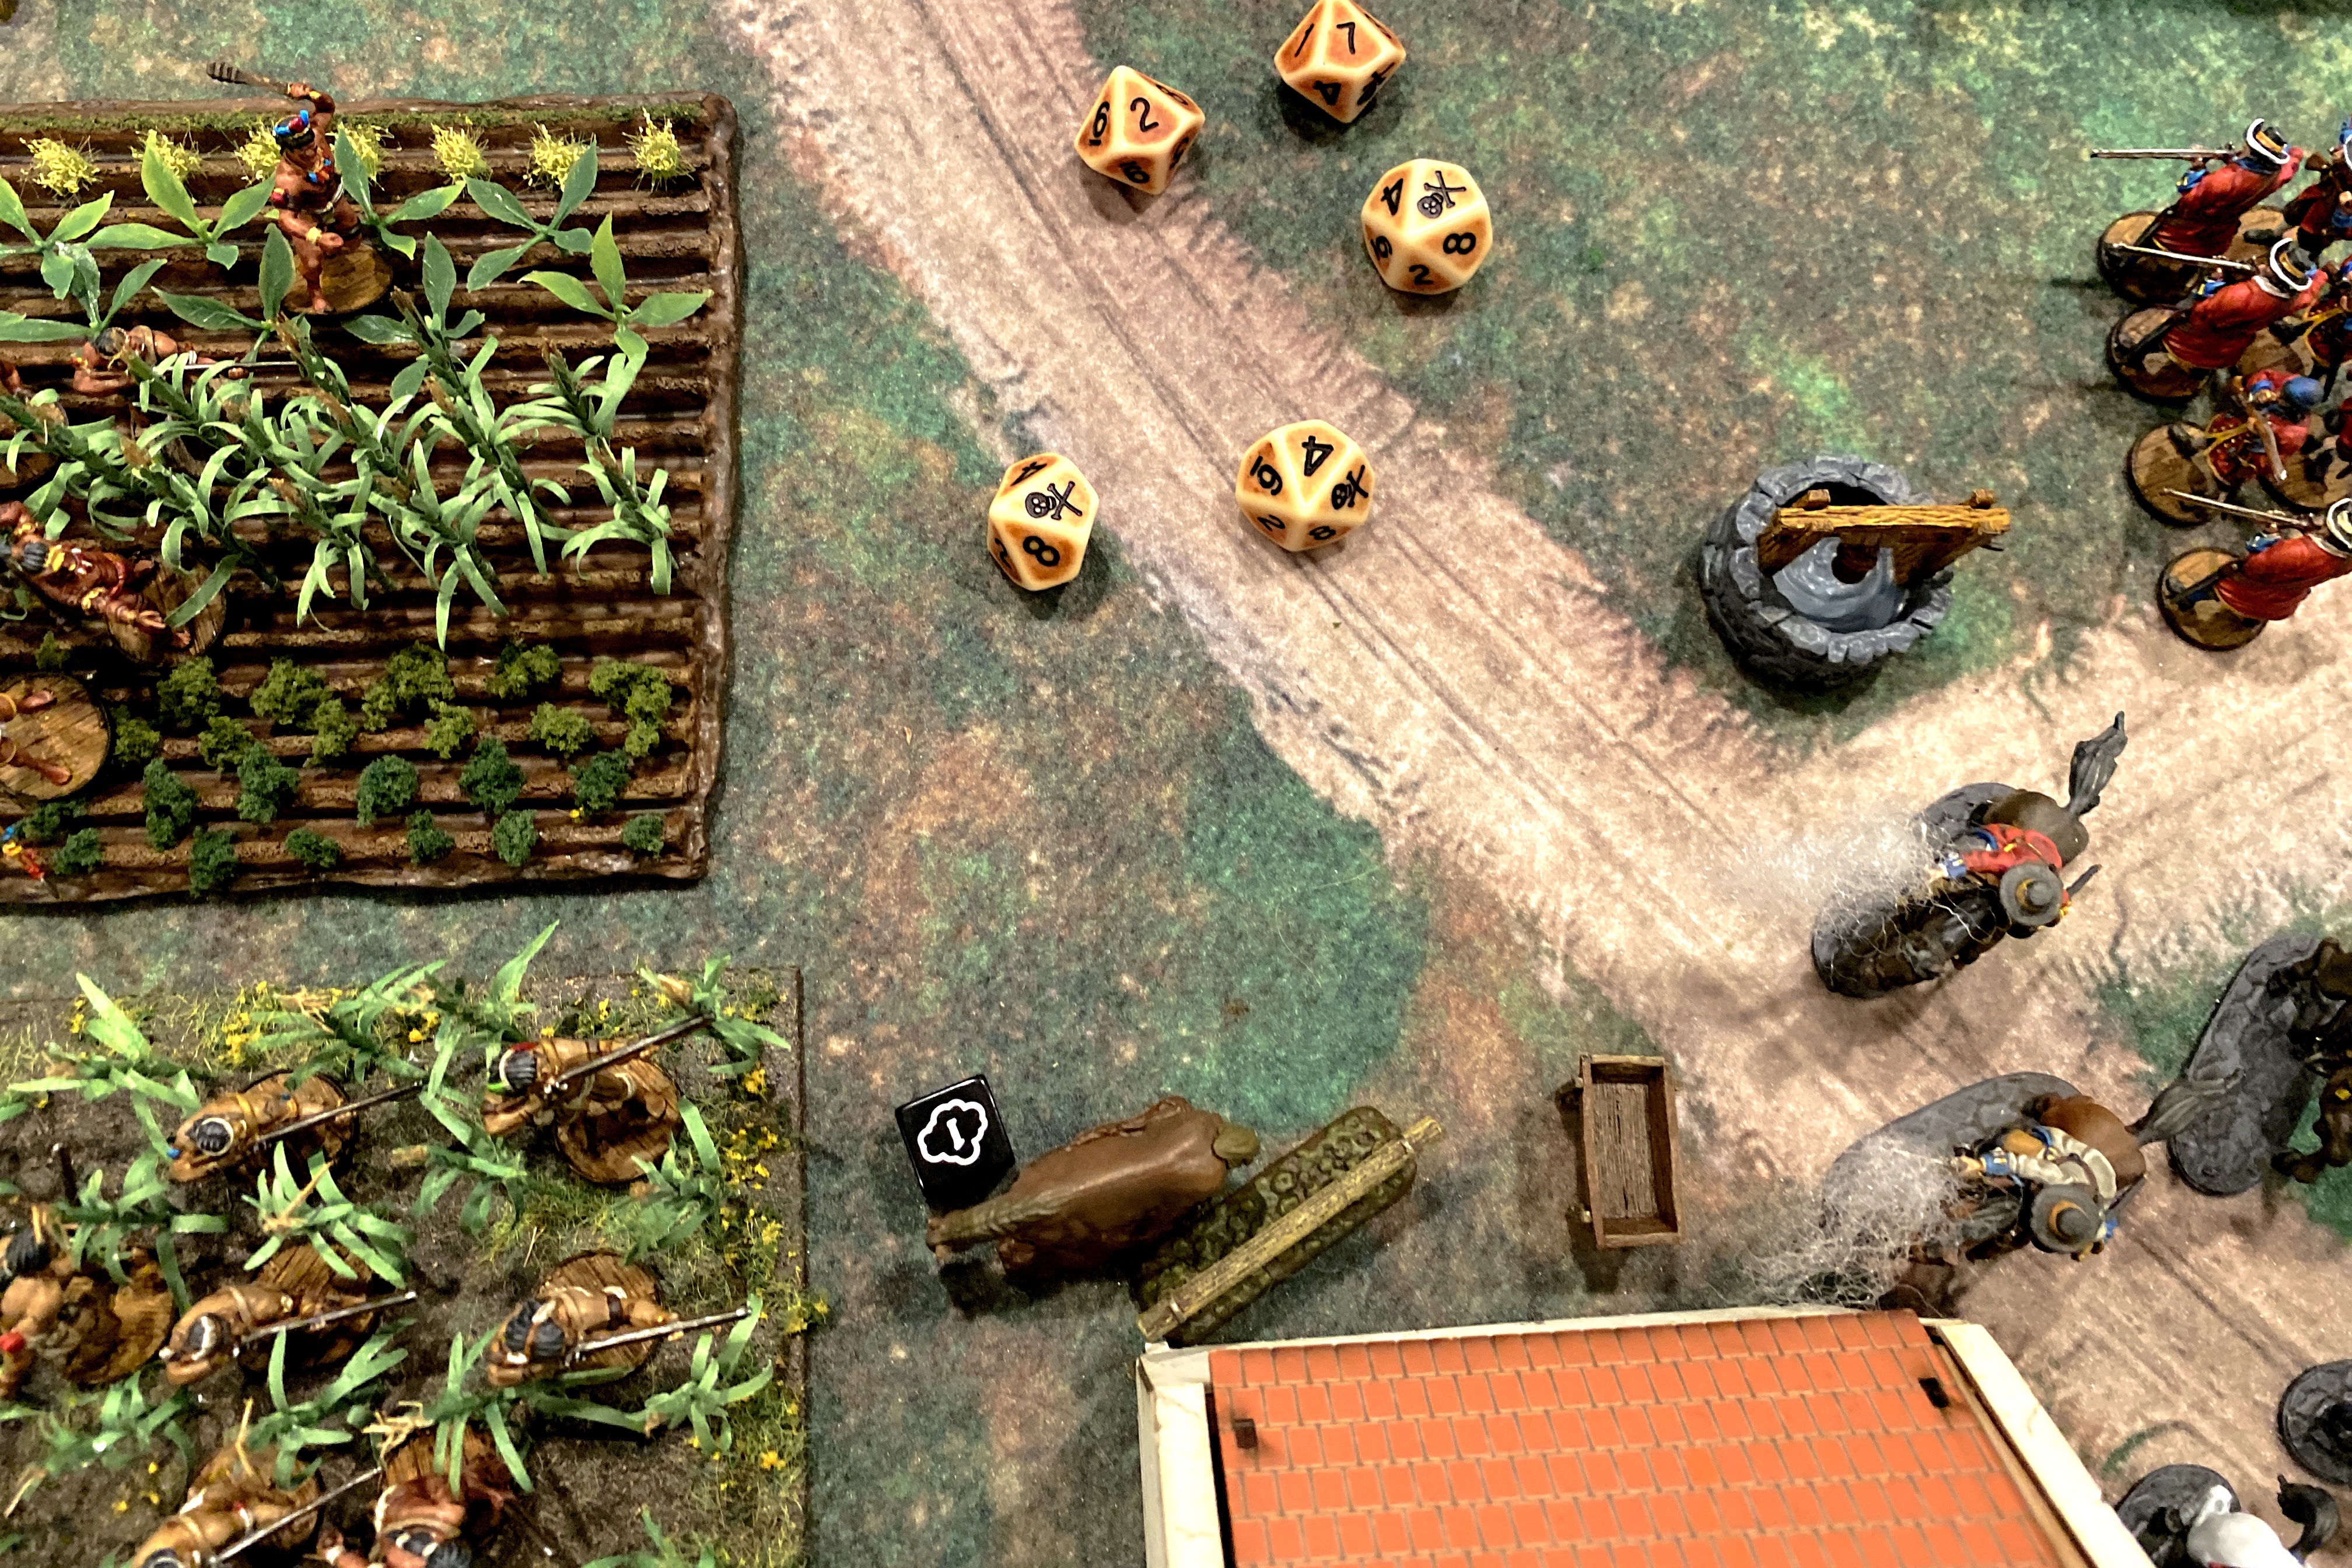
I moved up my natives command unit into the crop field, shot at the cavalry and used a command point to move up the Warrior Musketeers.

At less than 8″ I got plenty of arrow hits but even cavalry in the open can save against arrows!

I got one kill out of three hits and then something happened that I rarely see! The North American Militia’s faction ability did something useful! The Militia Cavalry rolled double 1’s on their Fatigue check but their faction lets them re-roll all Fatigue and Rally rolls on turn 1. They re-rolled into two successes.

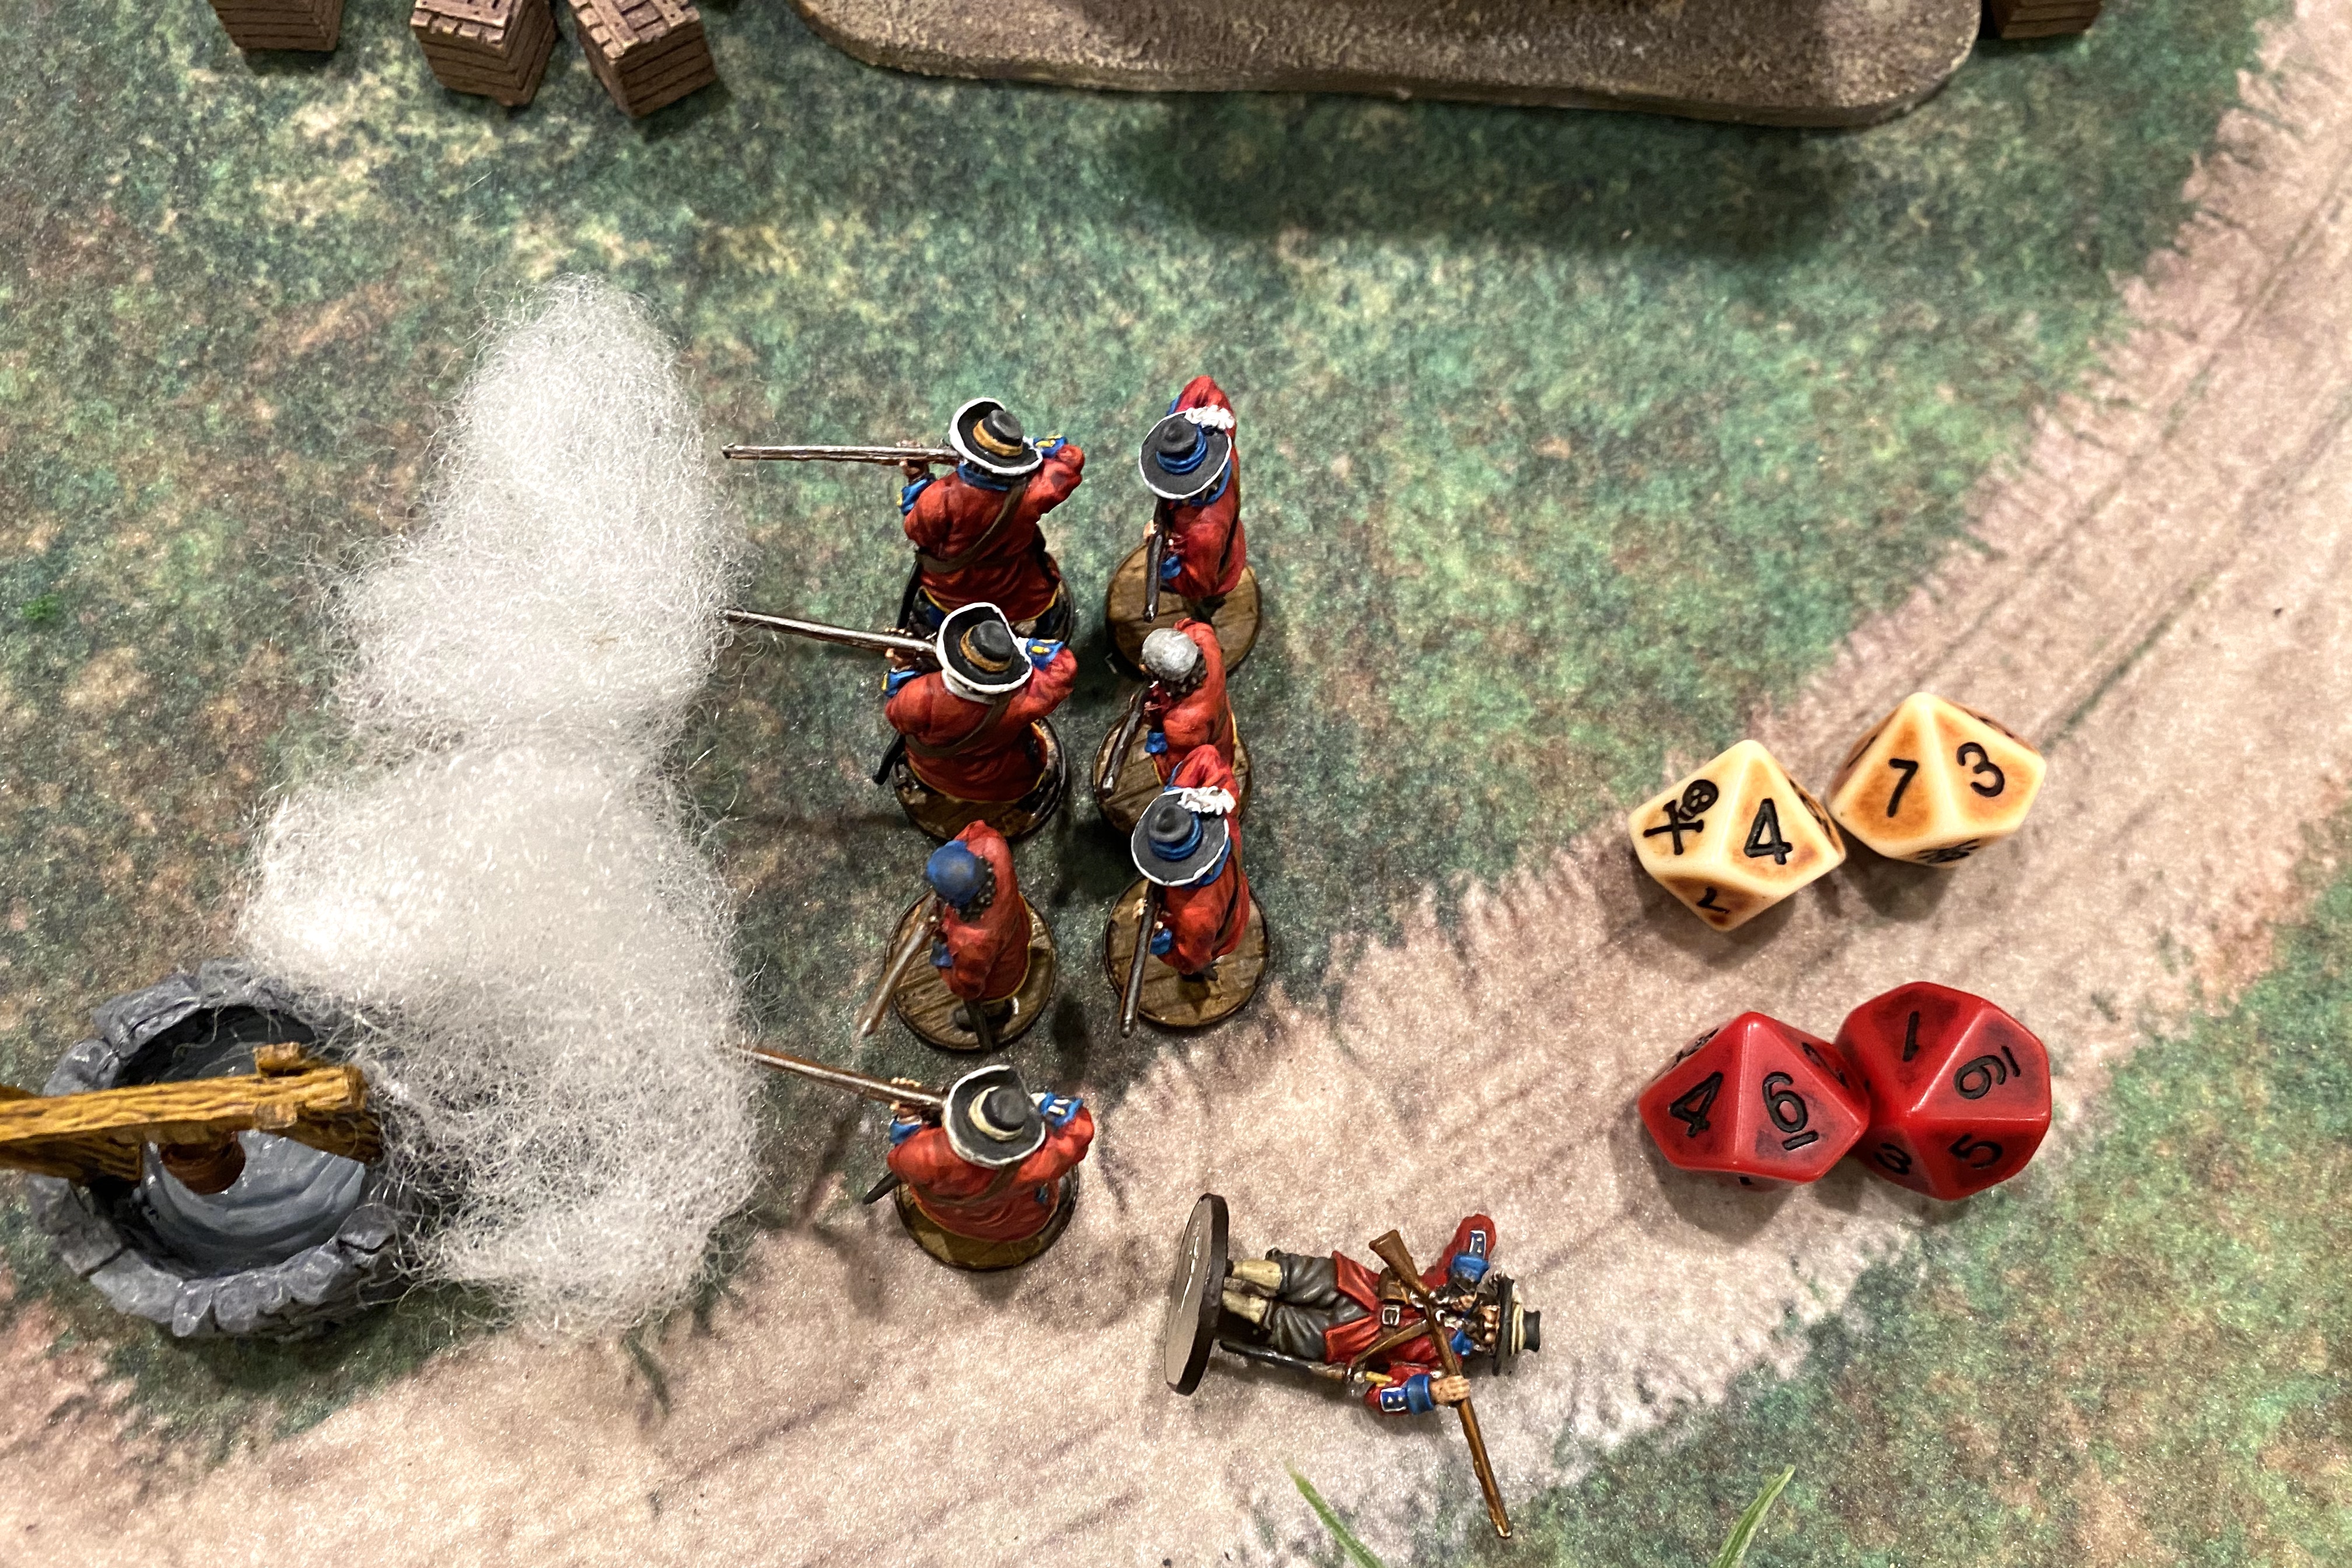
The Indian Fighters took cover behind some cover and shot at the Native Command unit but that crop field is pretty much a fort for Natives and they made their Saves.
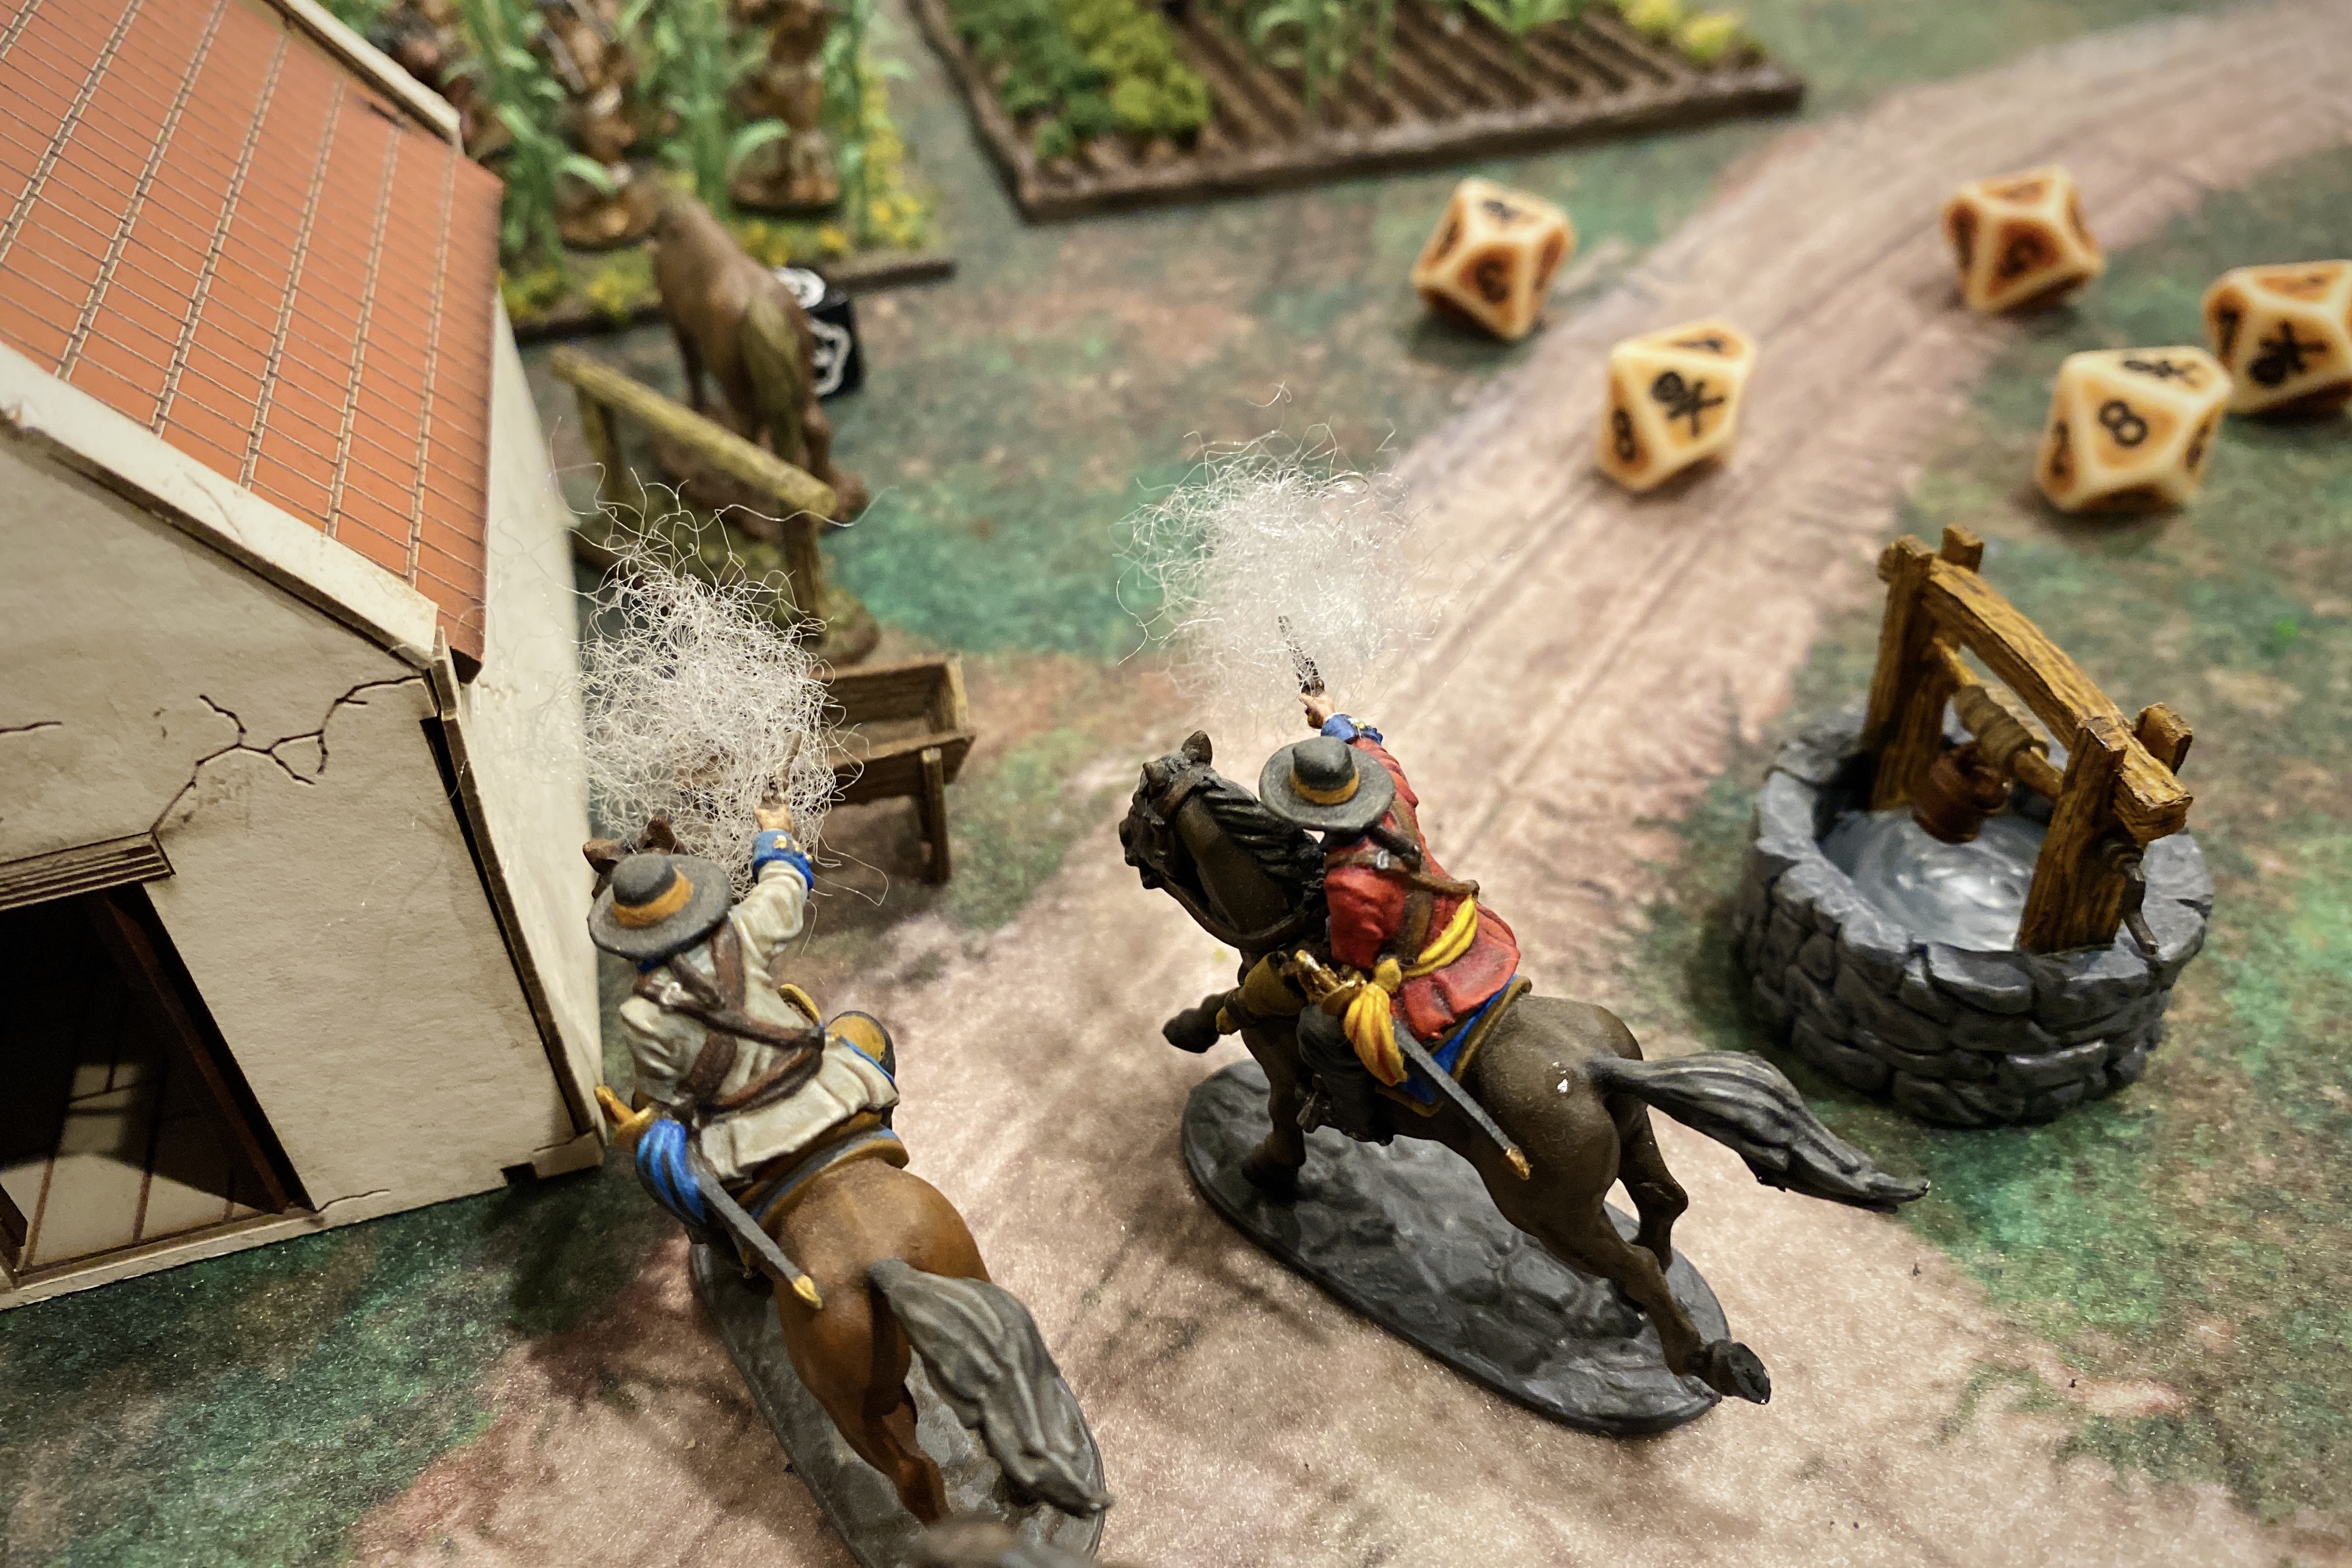
The cavalry shot off some pistols and then withdrew to behind one of the objectives houses to give them some cover.
Since the Militia only get a bonus of -1 for being behind cover, sometimes you might as well stand there and shoot!
They fired on the command group in the crops and left them with a Fatigue.
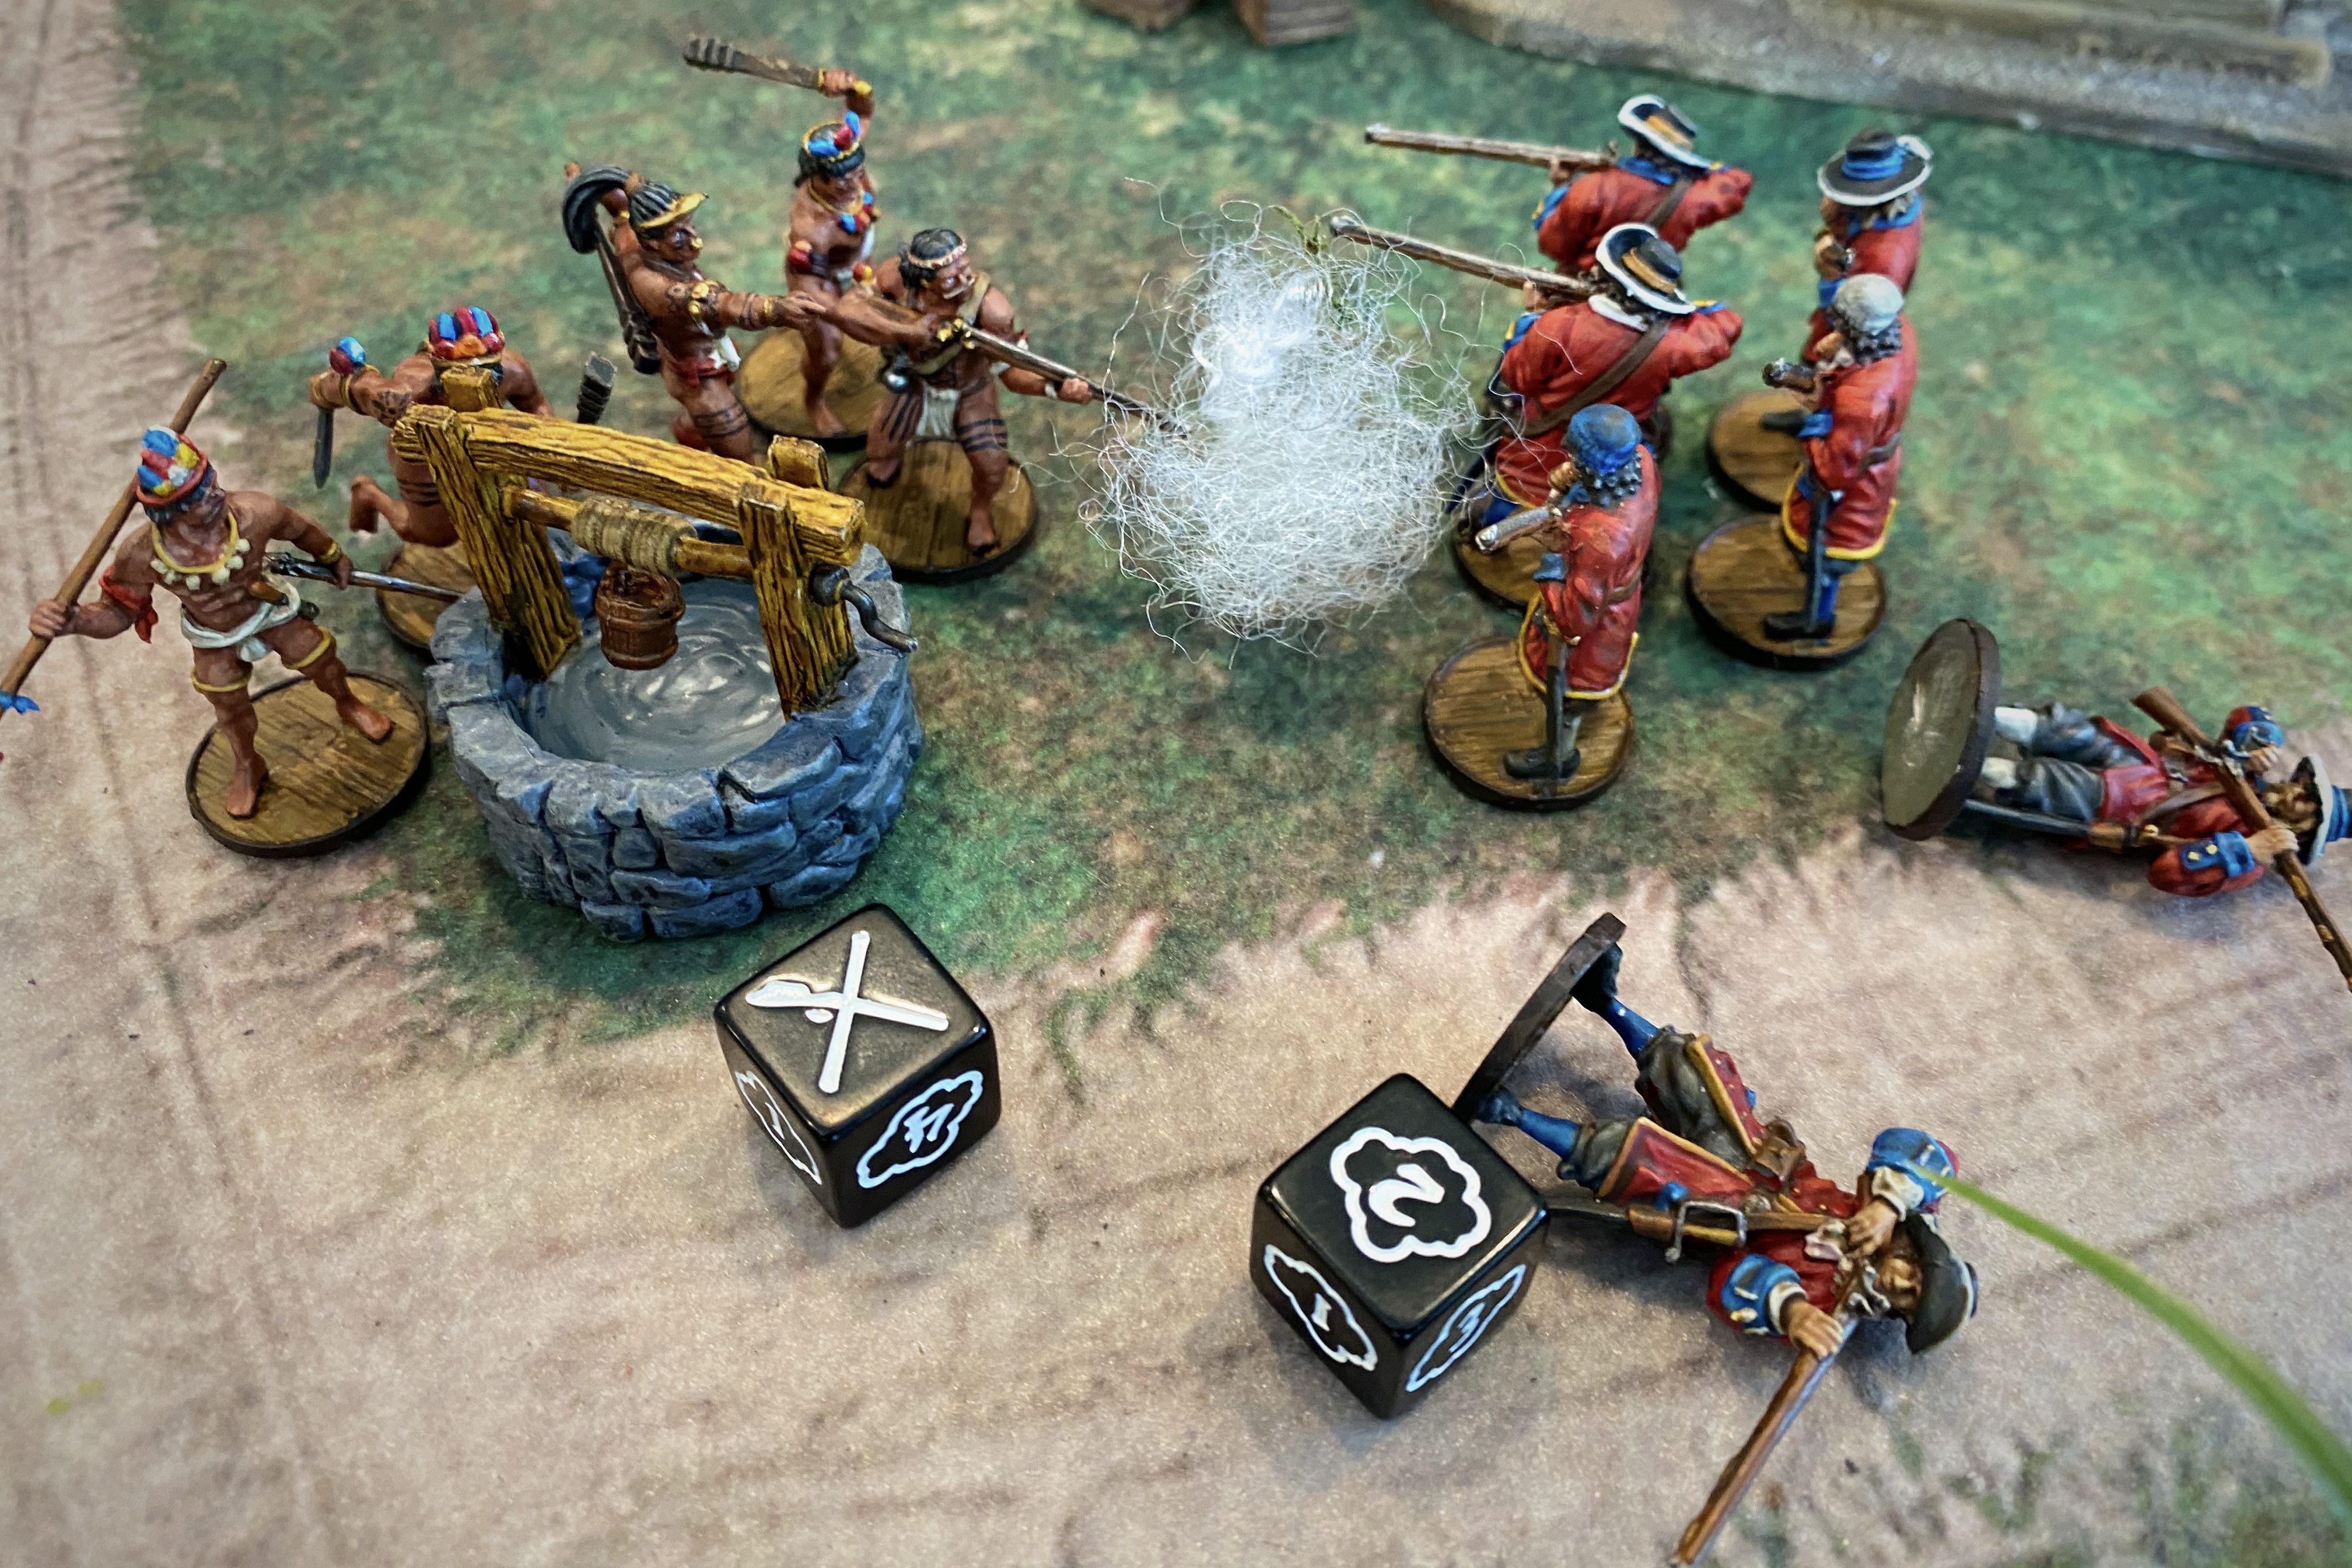
The Warrior Musketeers moved up and fired on the Militia in the open and killed one.
The North American Militia faction ability triggered again saving the Militia unit 2 Fatigue!
This scenario really threw everyone right into the action. All units fired on the first turn. The English lost a couple men but their faction ability prevented an impressive 5 Fatigue.
Turn 2
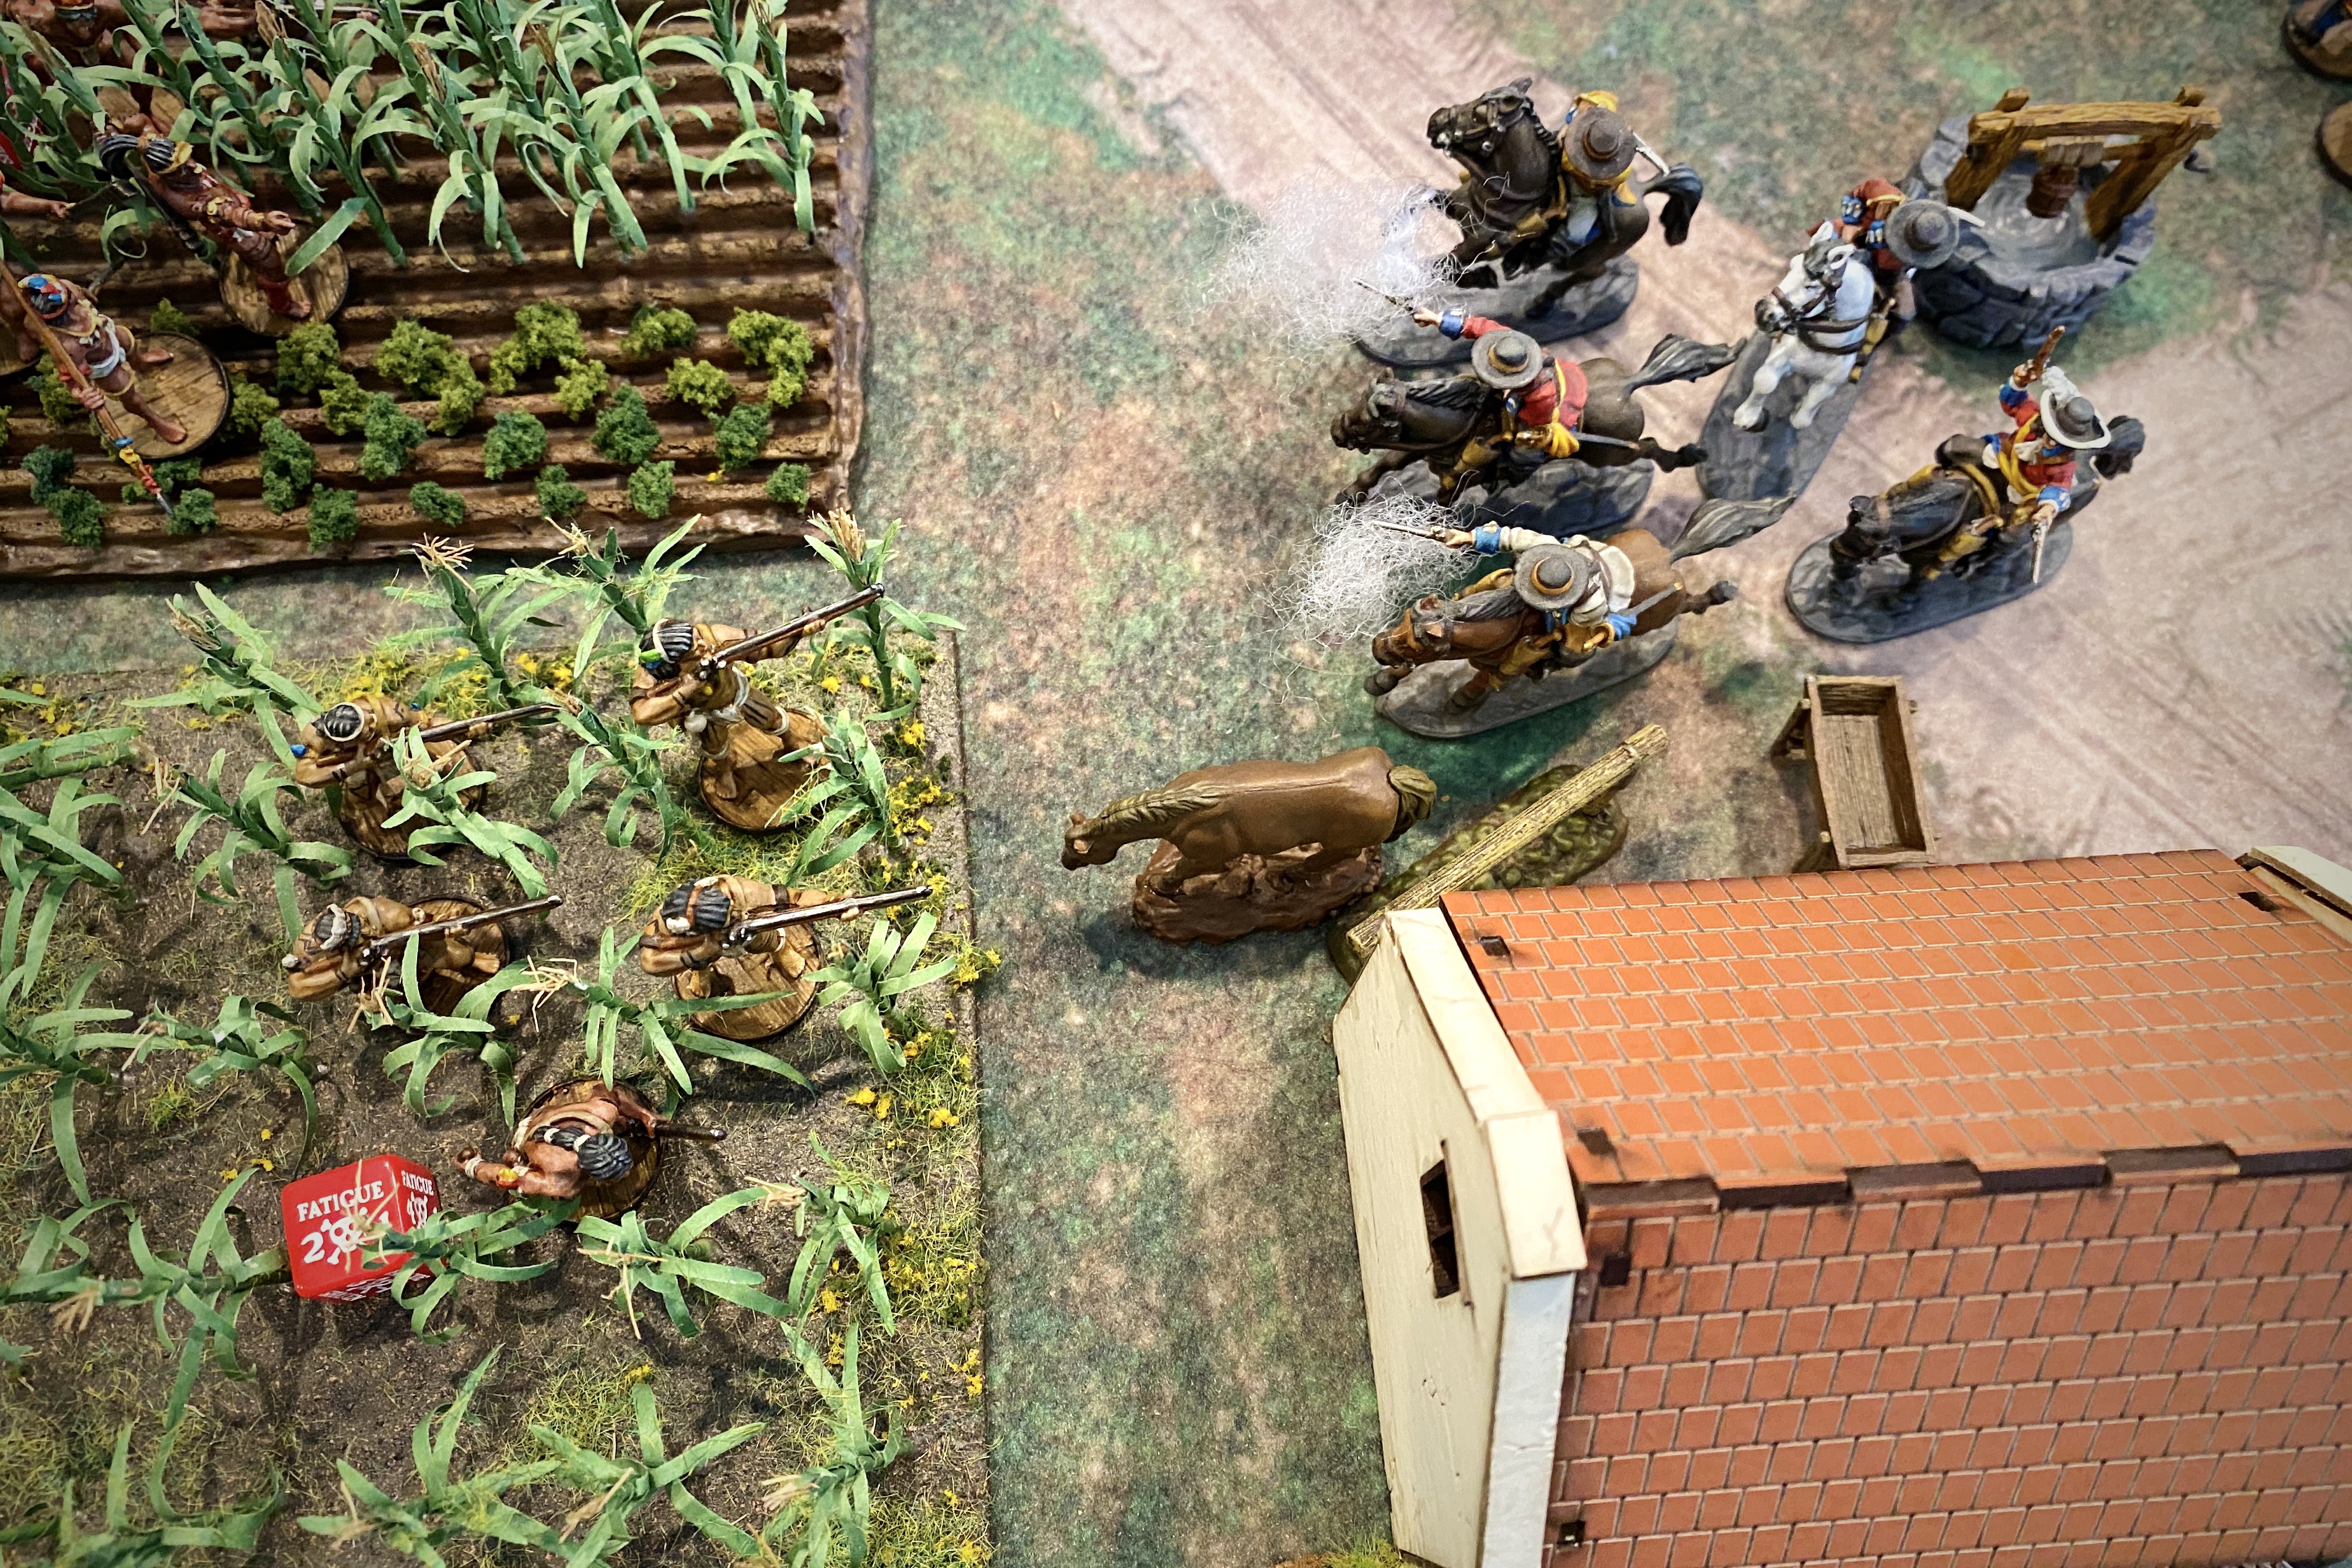
With my accurate Warrior Archers at close range, I flanked the Indian Fighters getting plenty of hits with two murderous volleys. I spent a Fortune to improve one of my rolls since I missed with all 6 dice while only looking for 7’s.
But the Indian Fighters lost 2 men!
Then the Warrior Archers moved into one of the Objectivce structures. Controlling one structure doesn’t give the Defender any Strike Points, but it stops the Attacker from taking a Strike.

The cavalry dashed out, took a shot at the Warrior Musketeers and dashed back.
Two tens with pistols left the natives in discomfort!
By the end of turn 2 battle lines were drawn with the Natives taking cover in the crops and cabin while the English took what cover they could while standing their ground so the Natives would have a hard time advancing and taking the other buildings.

The Natives were sending a lot of arrows into the English but their solid Resolve and the Tough rule on the Indian Fighters were keeping them in the game.
In spite of clashing early casualties were light so far with 4 English dead and 3 Natives.
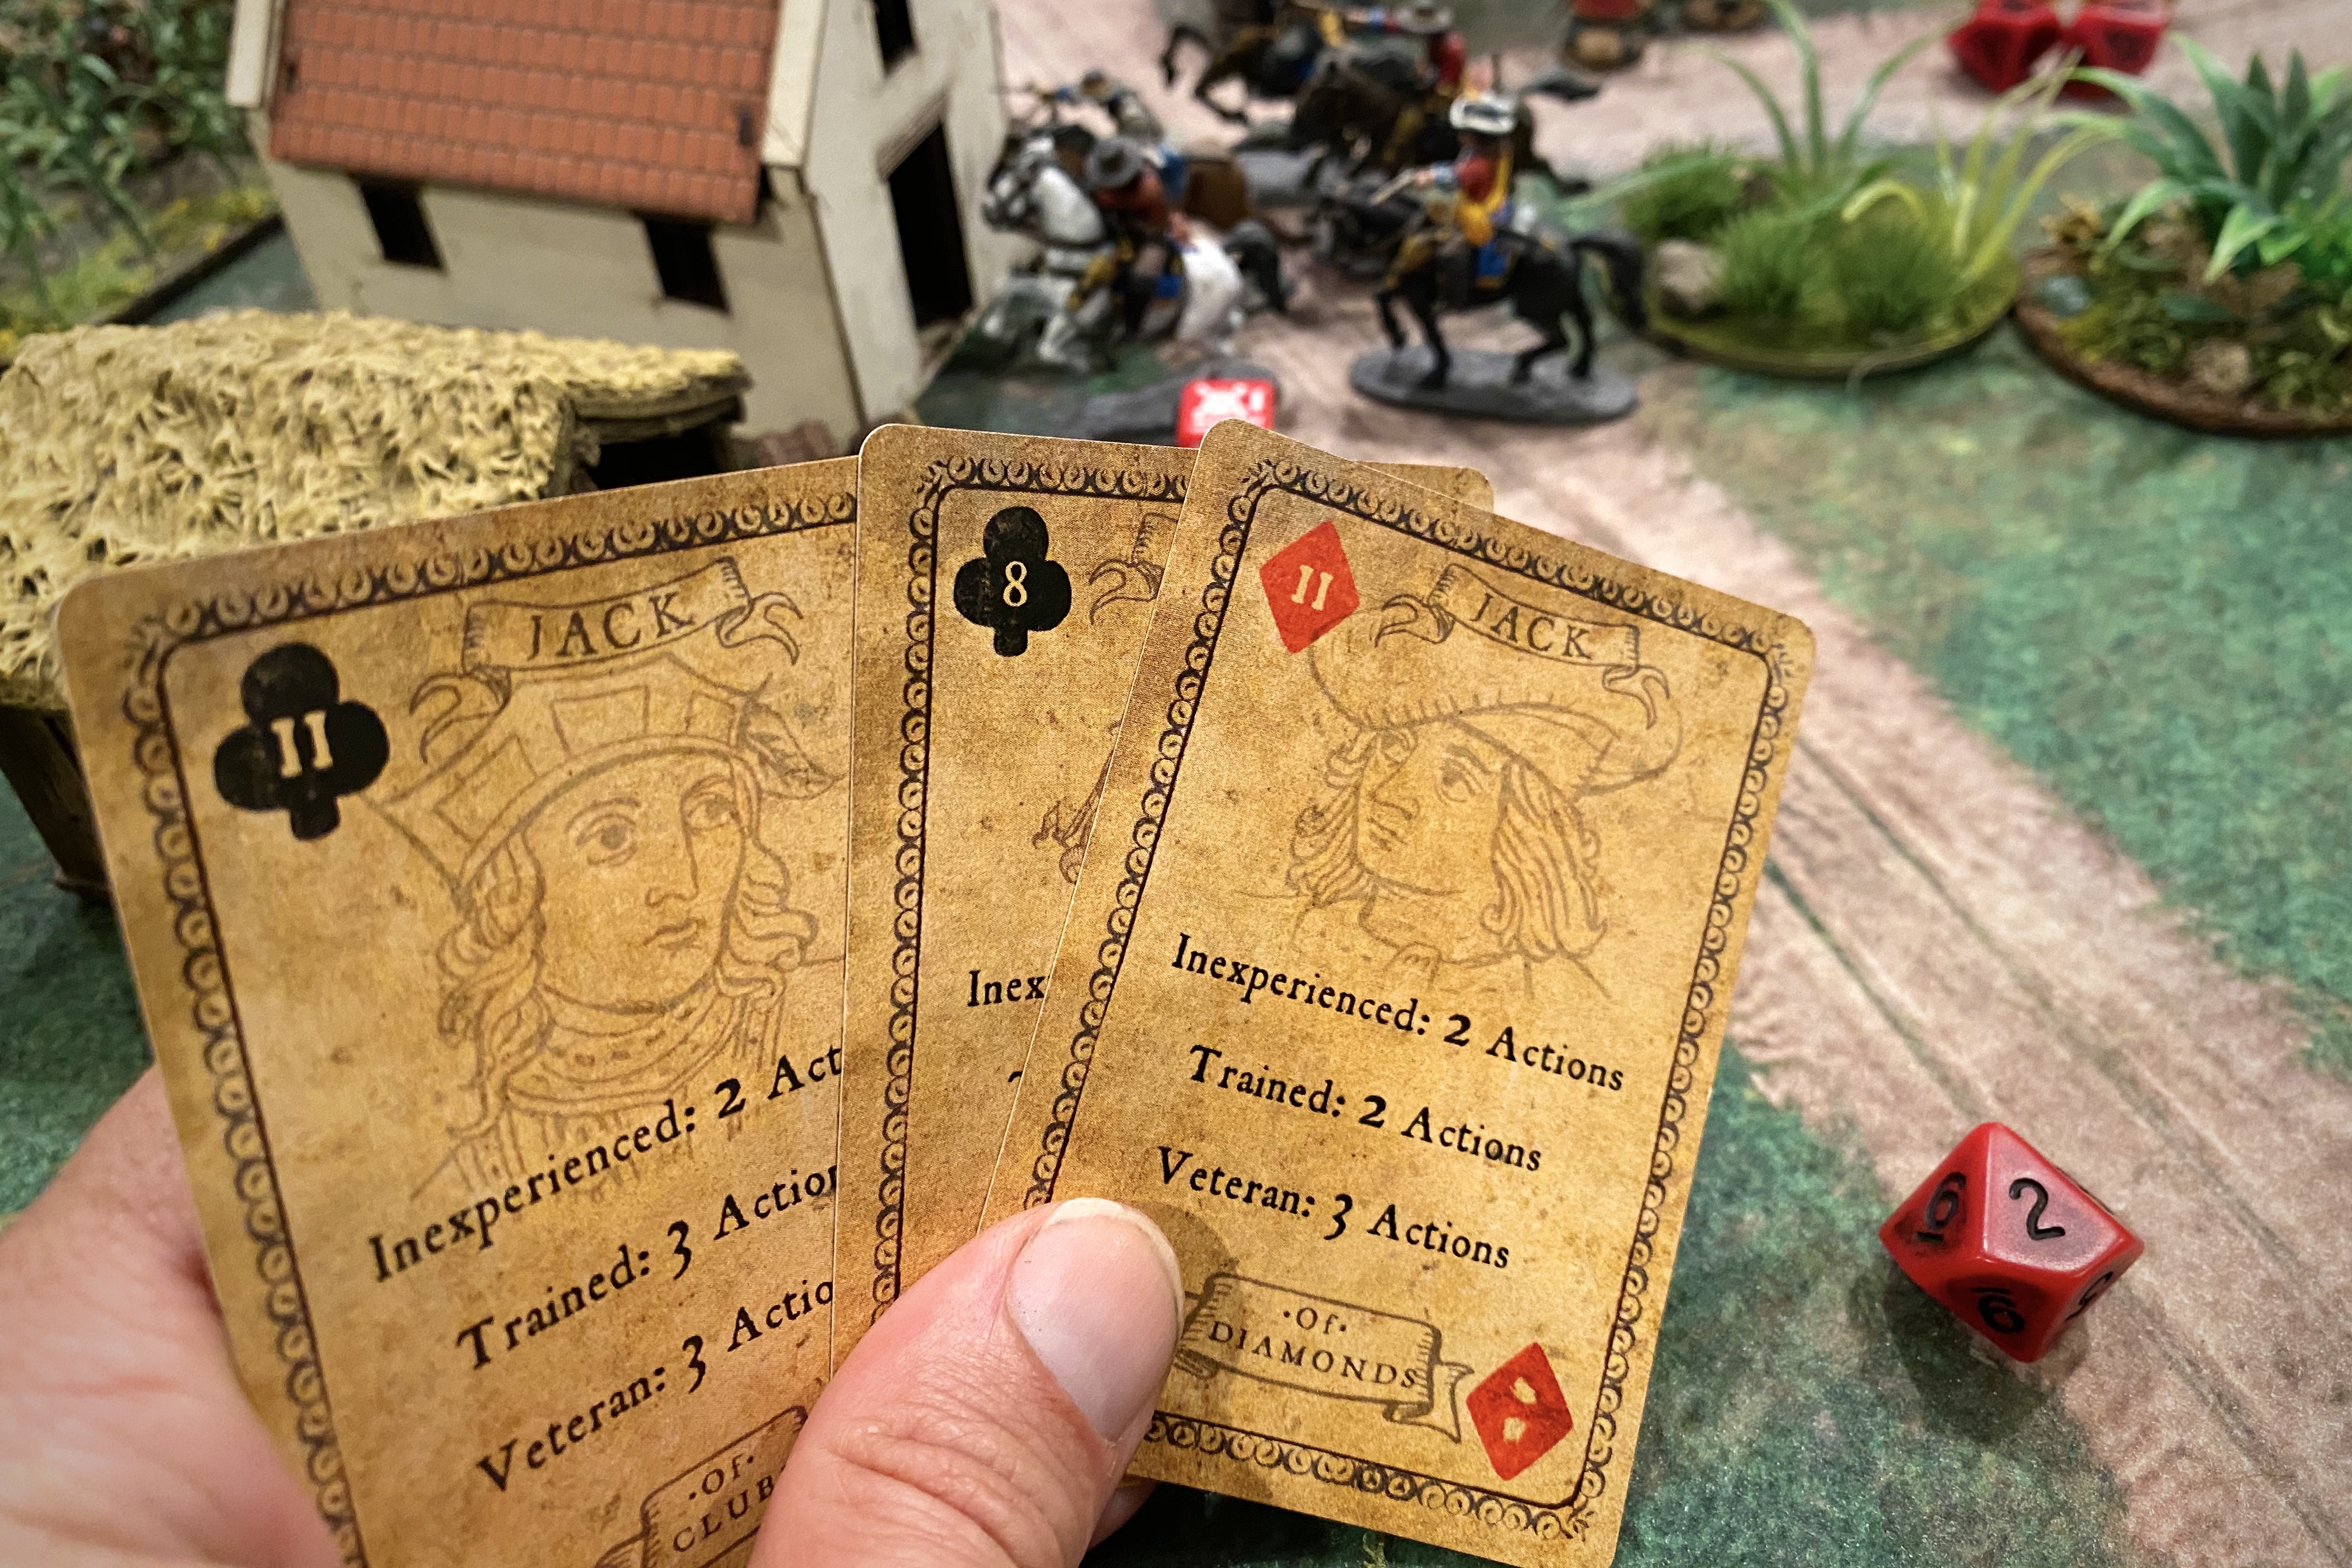
Turn 3

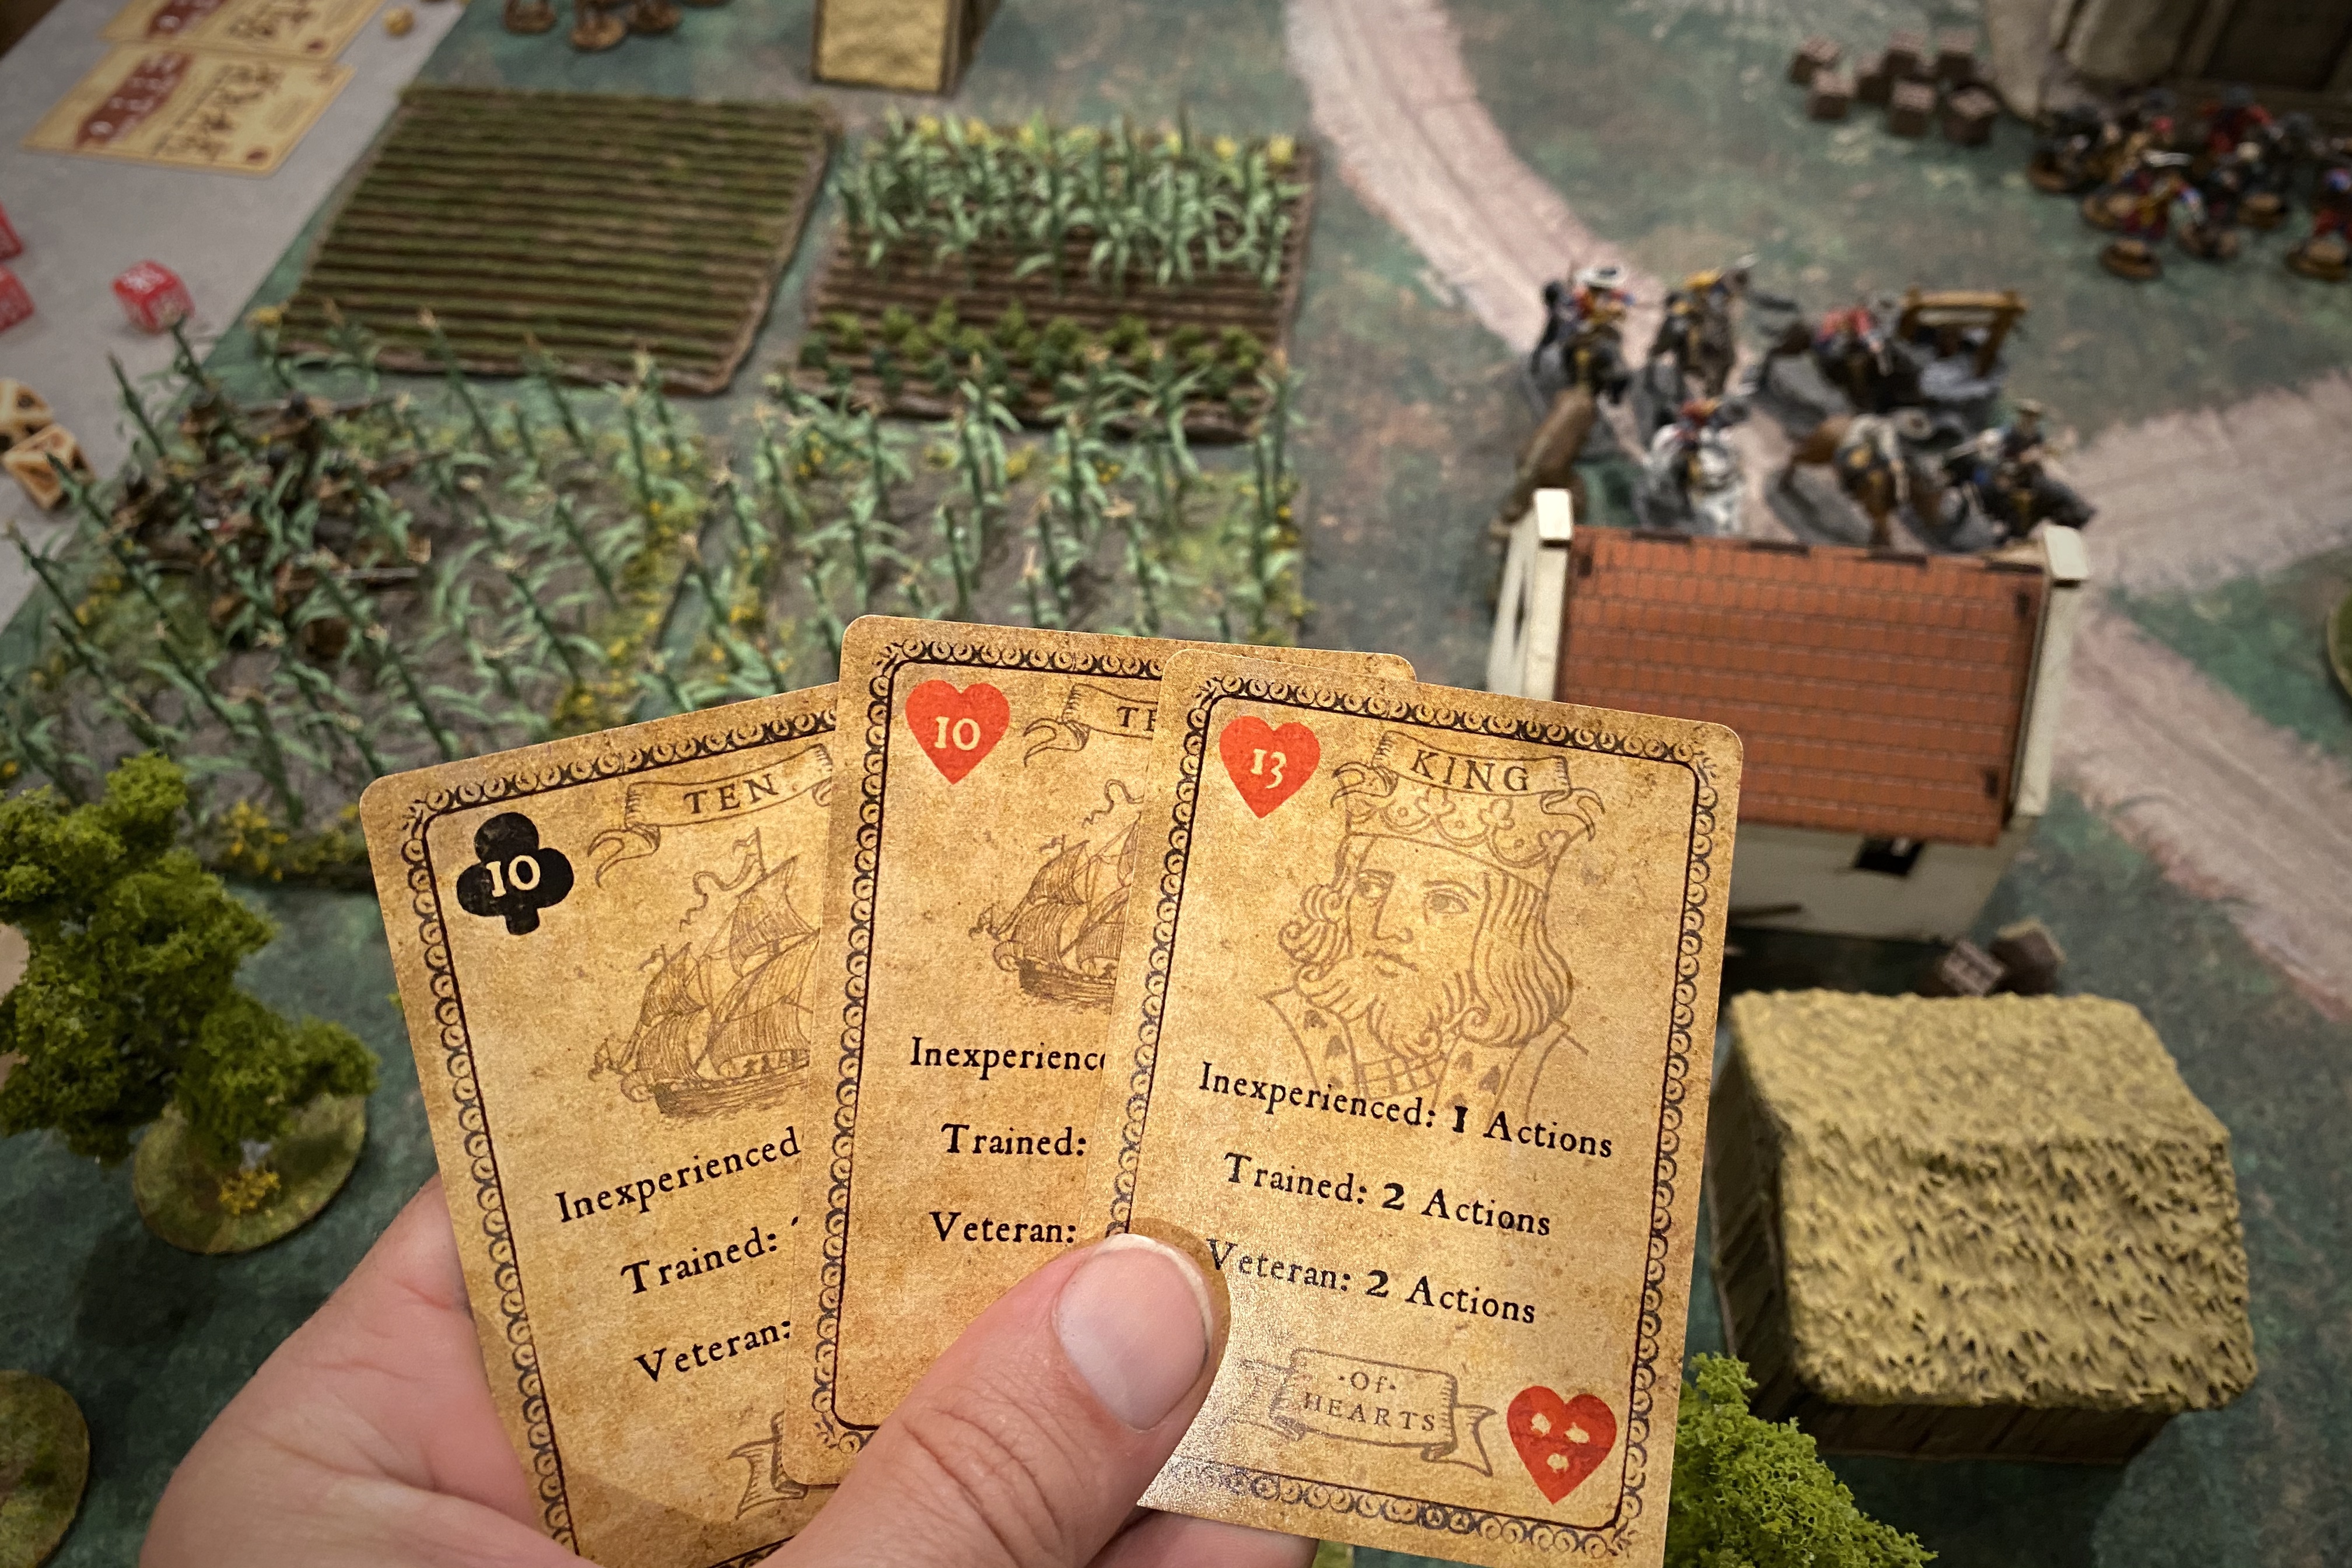
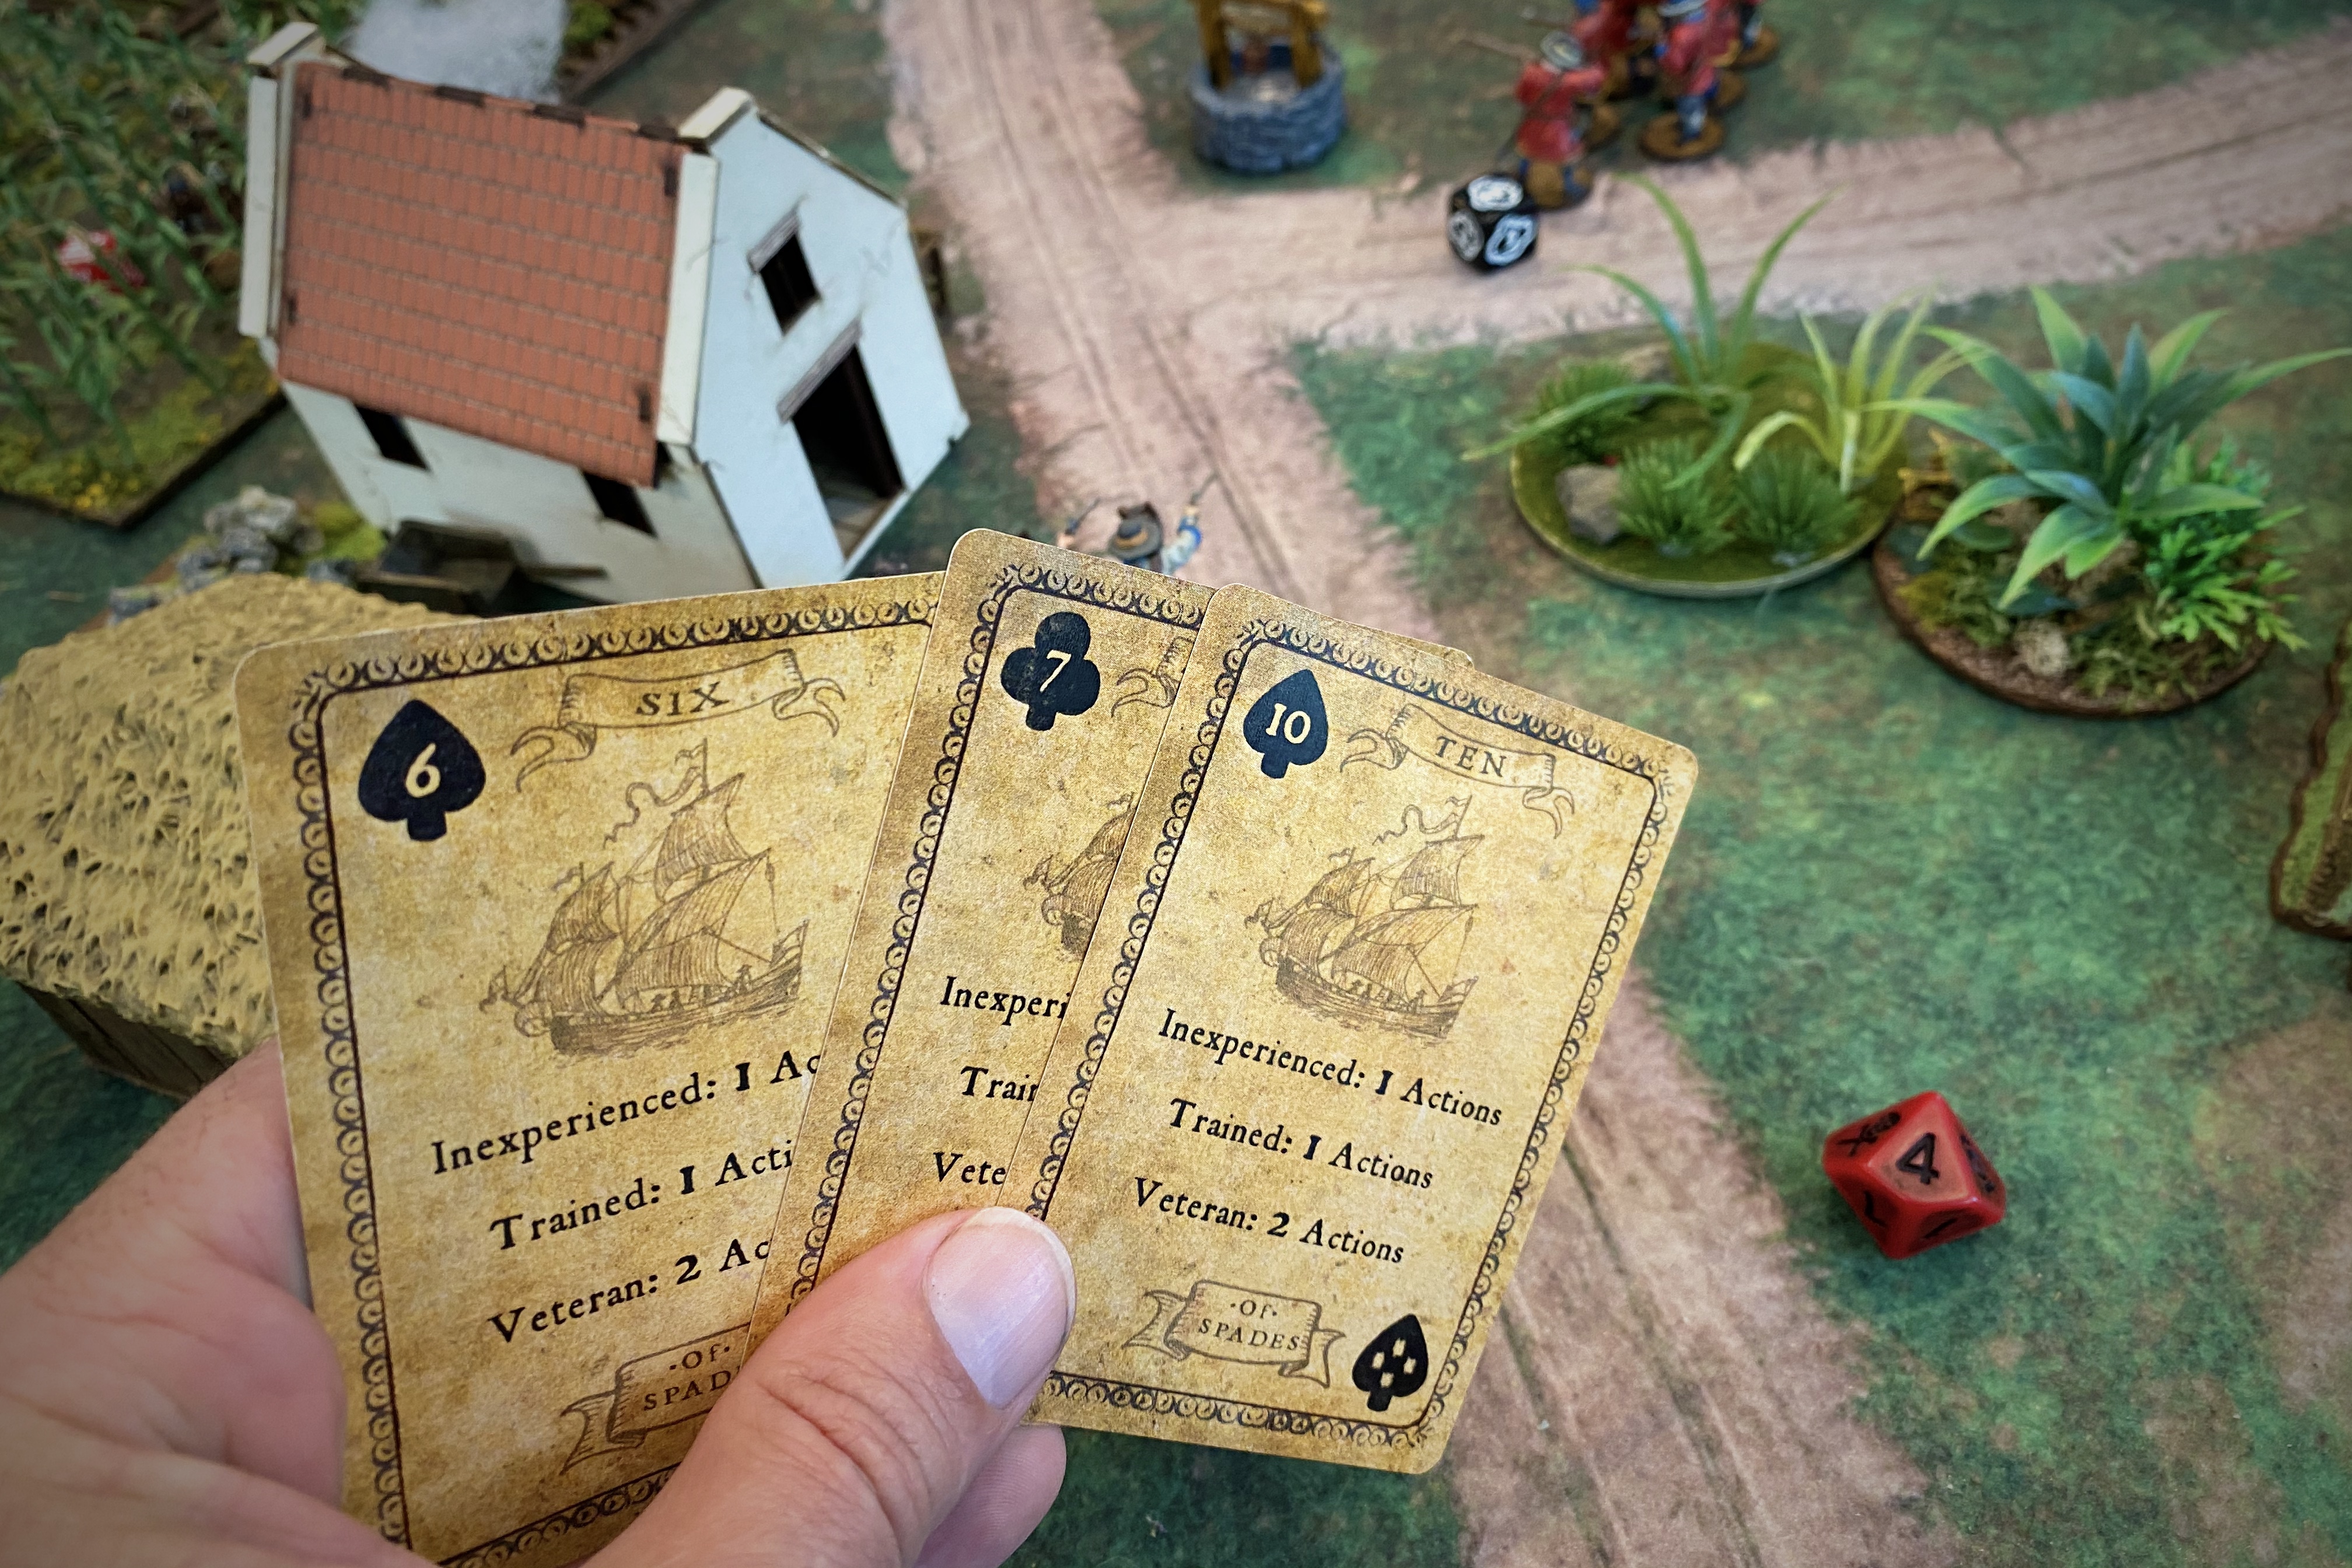
Drawing only 3 cards meant I didn’t get to draw as many of those sweet Spades that the Natives can use so well.
The English cavalry harassed the Musketeers in the corn again and put some Fatigue on them. Those Musketeers struggled! Having to move up and then take 3 reloads after shooting meant they wouldn’t shoot more than a couple times over the course of the game. But luckily for me the English cavalry lack the Quick rule so they weren’t as nimble as some other mounted units in the game.
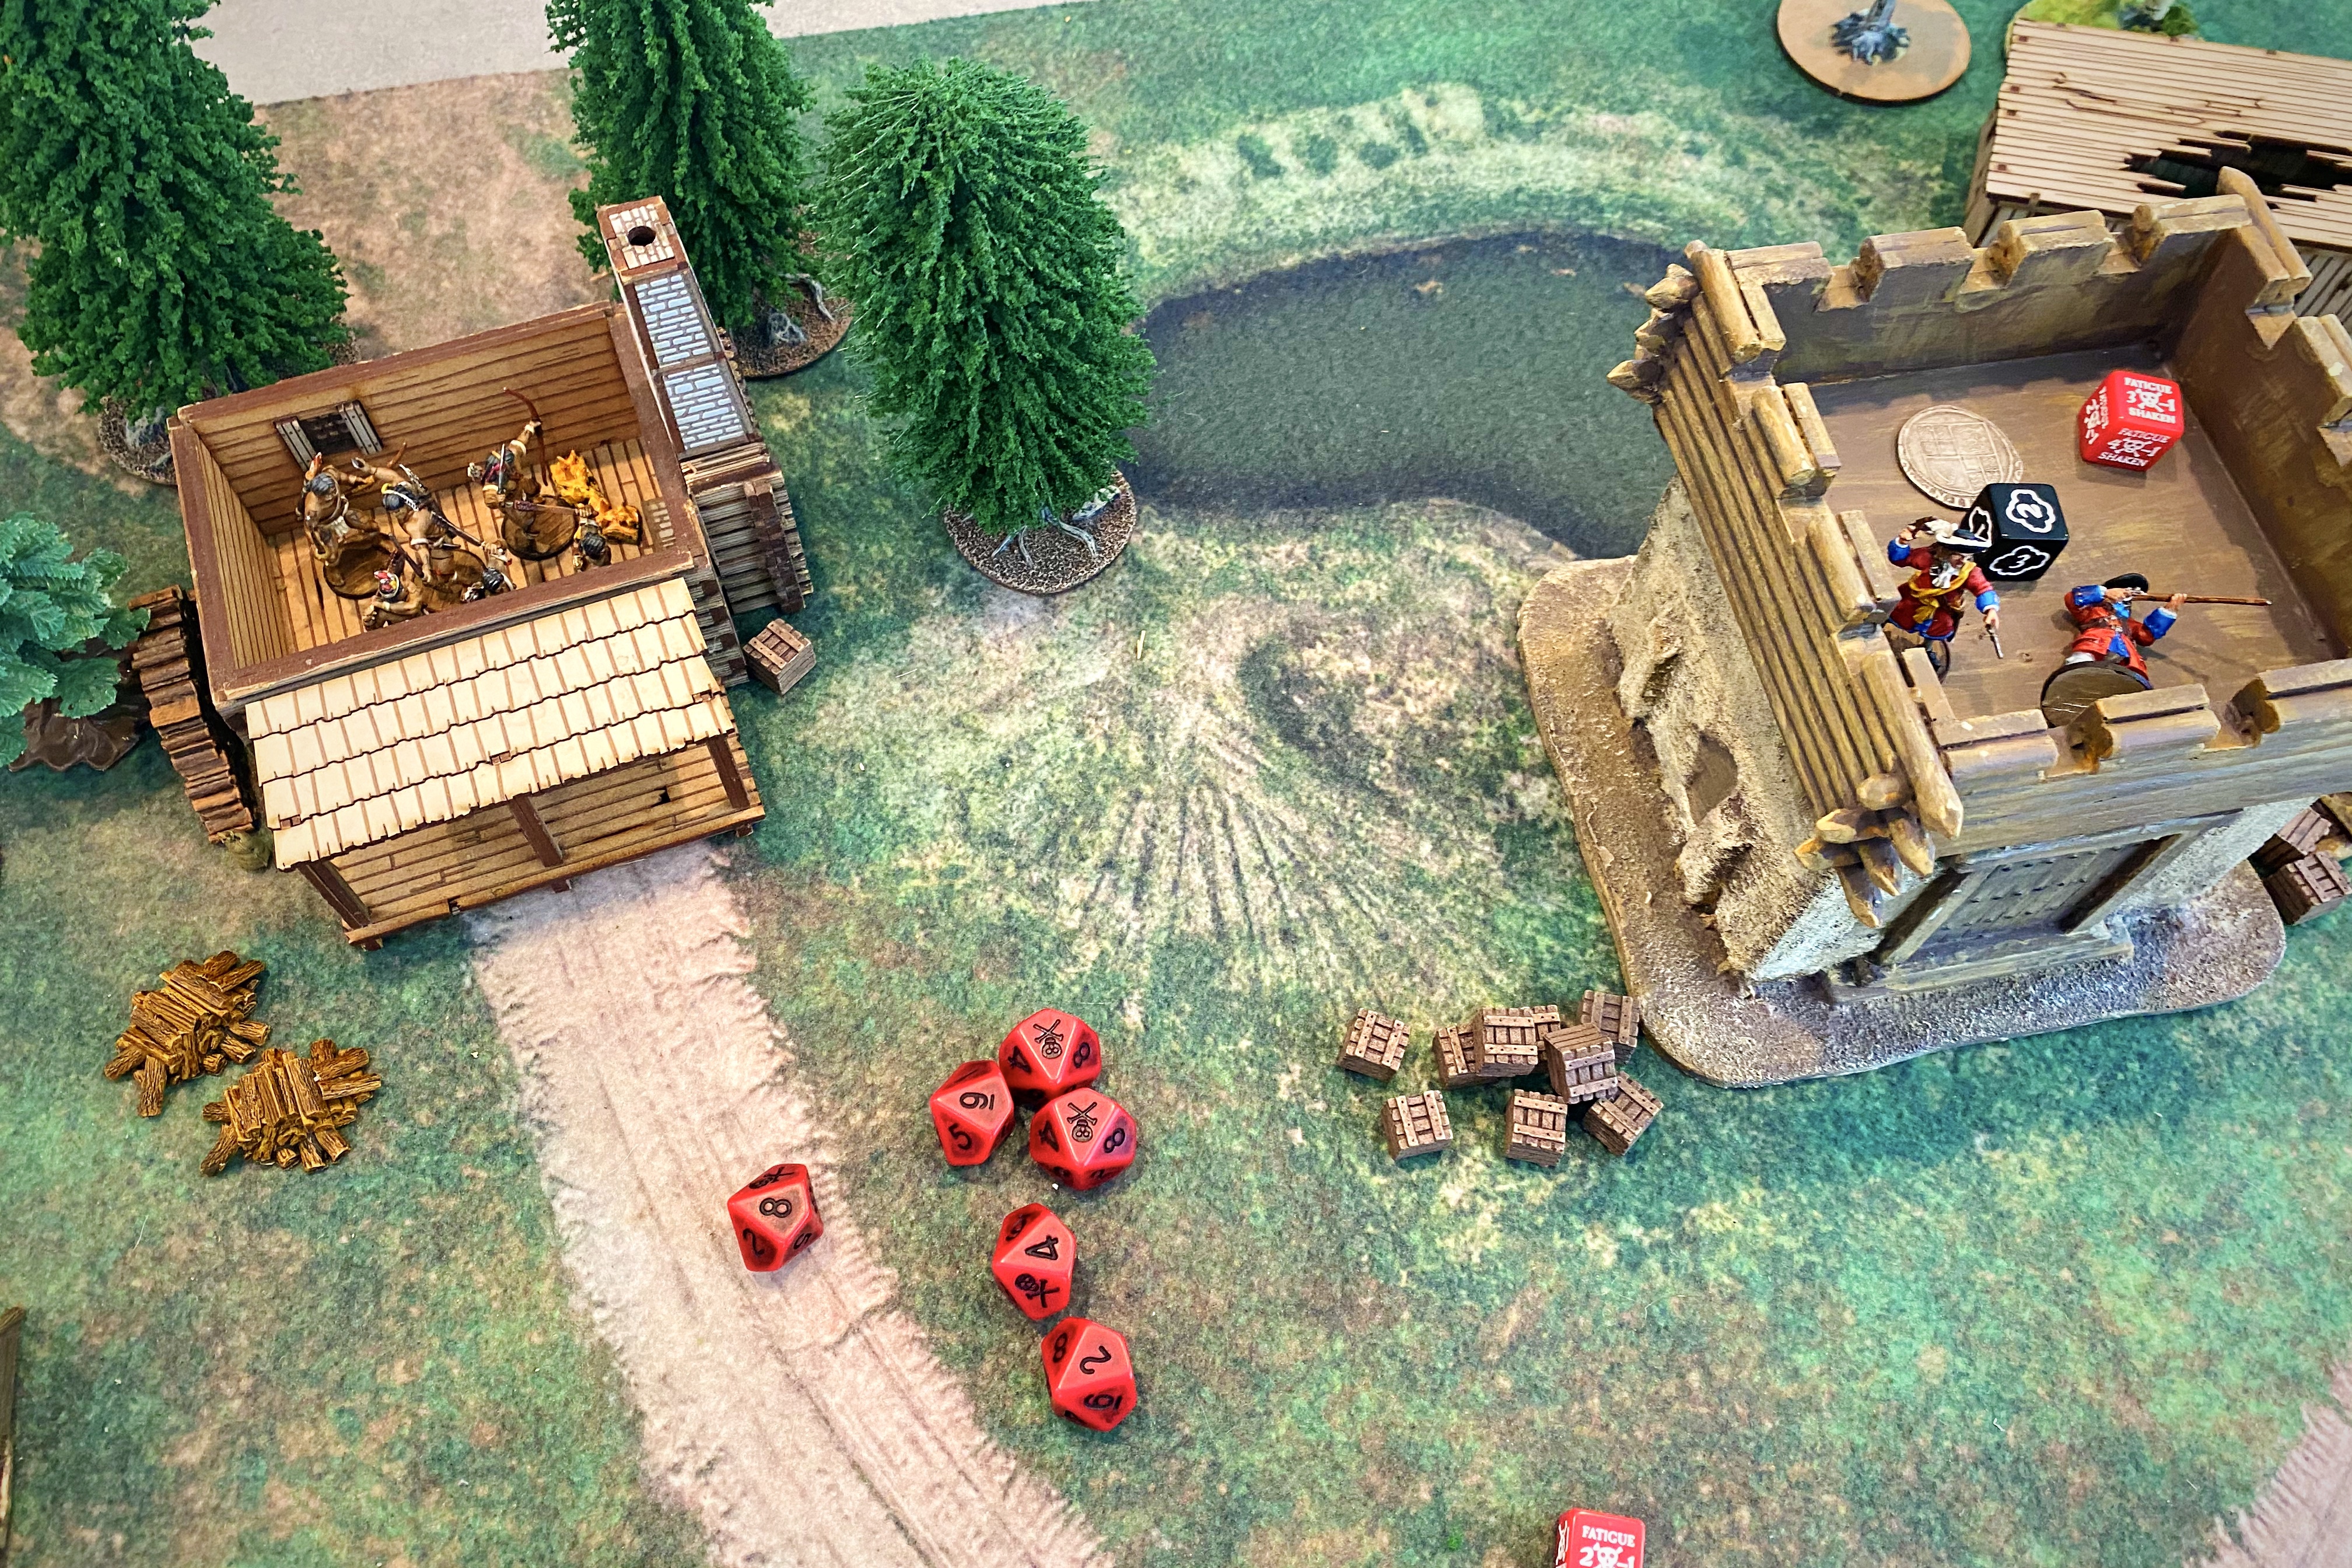
Battle lines remained pretty much the same through turn 3 but the English took some more serious casualties, most notably on the Indian Fighters.
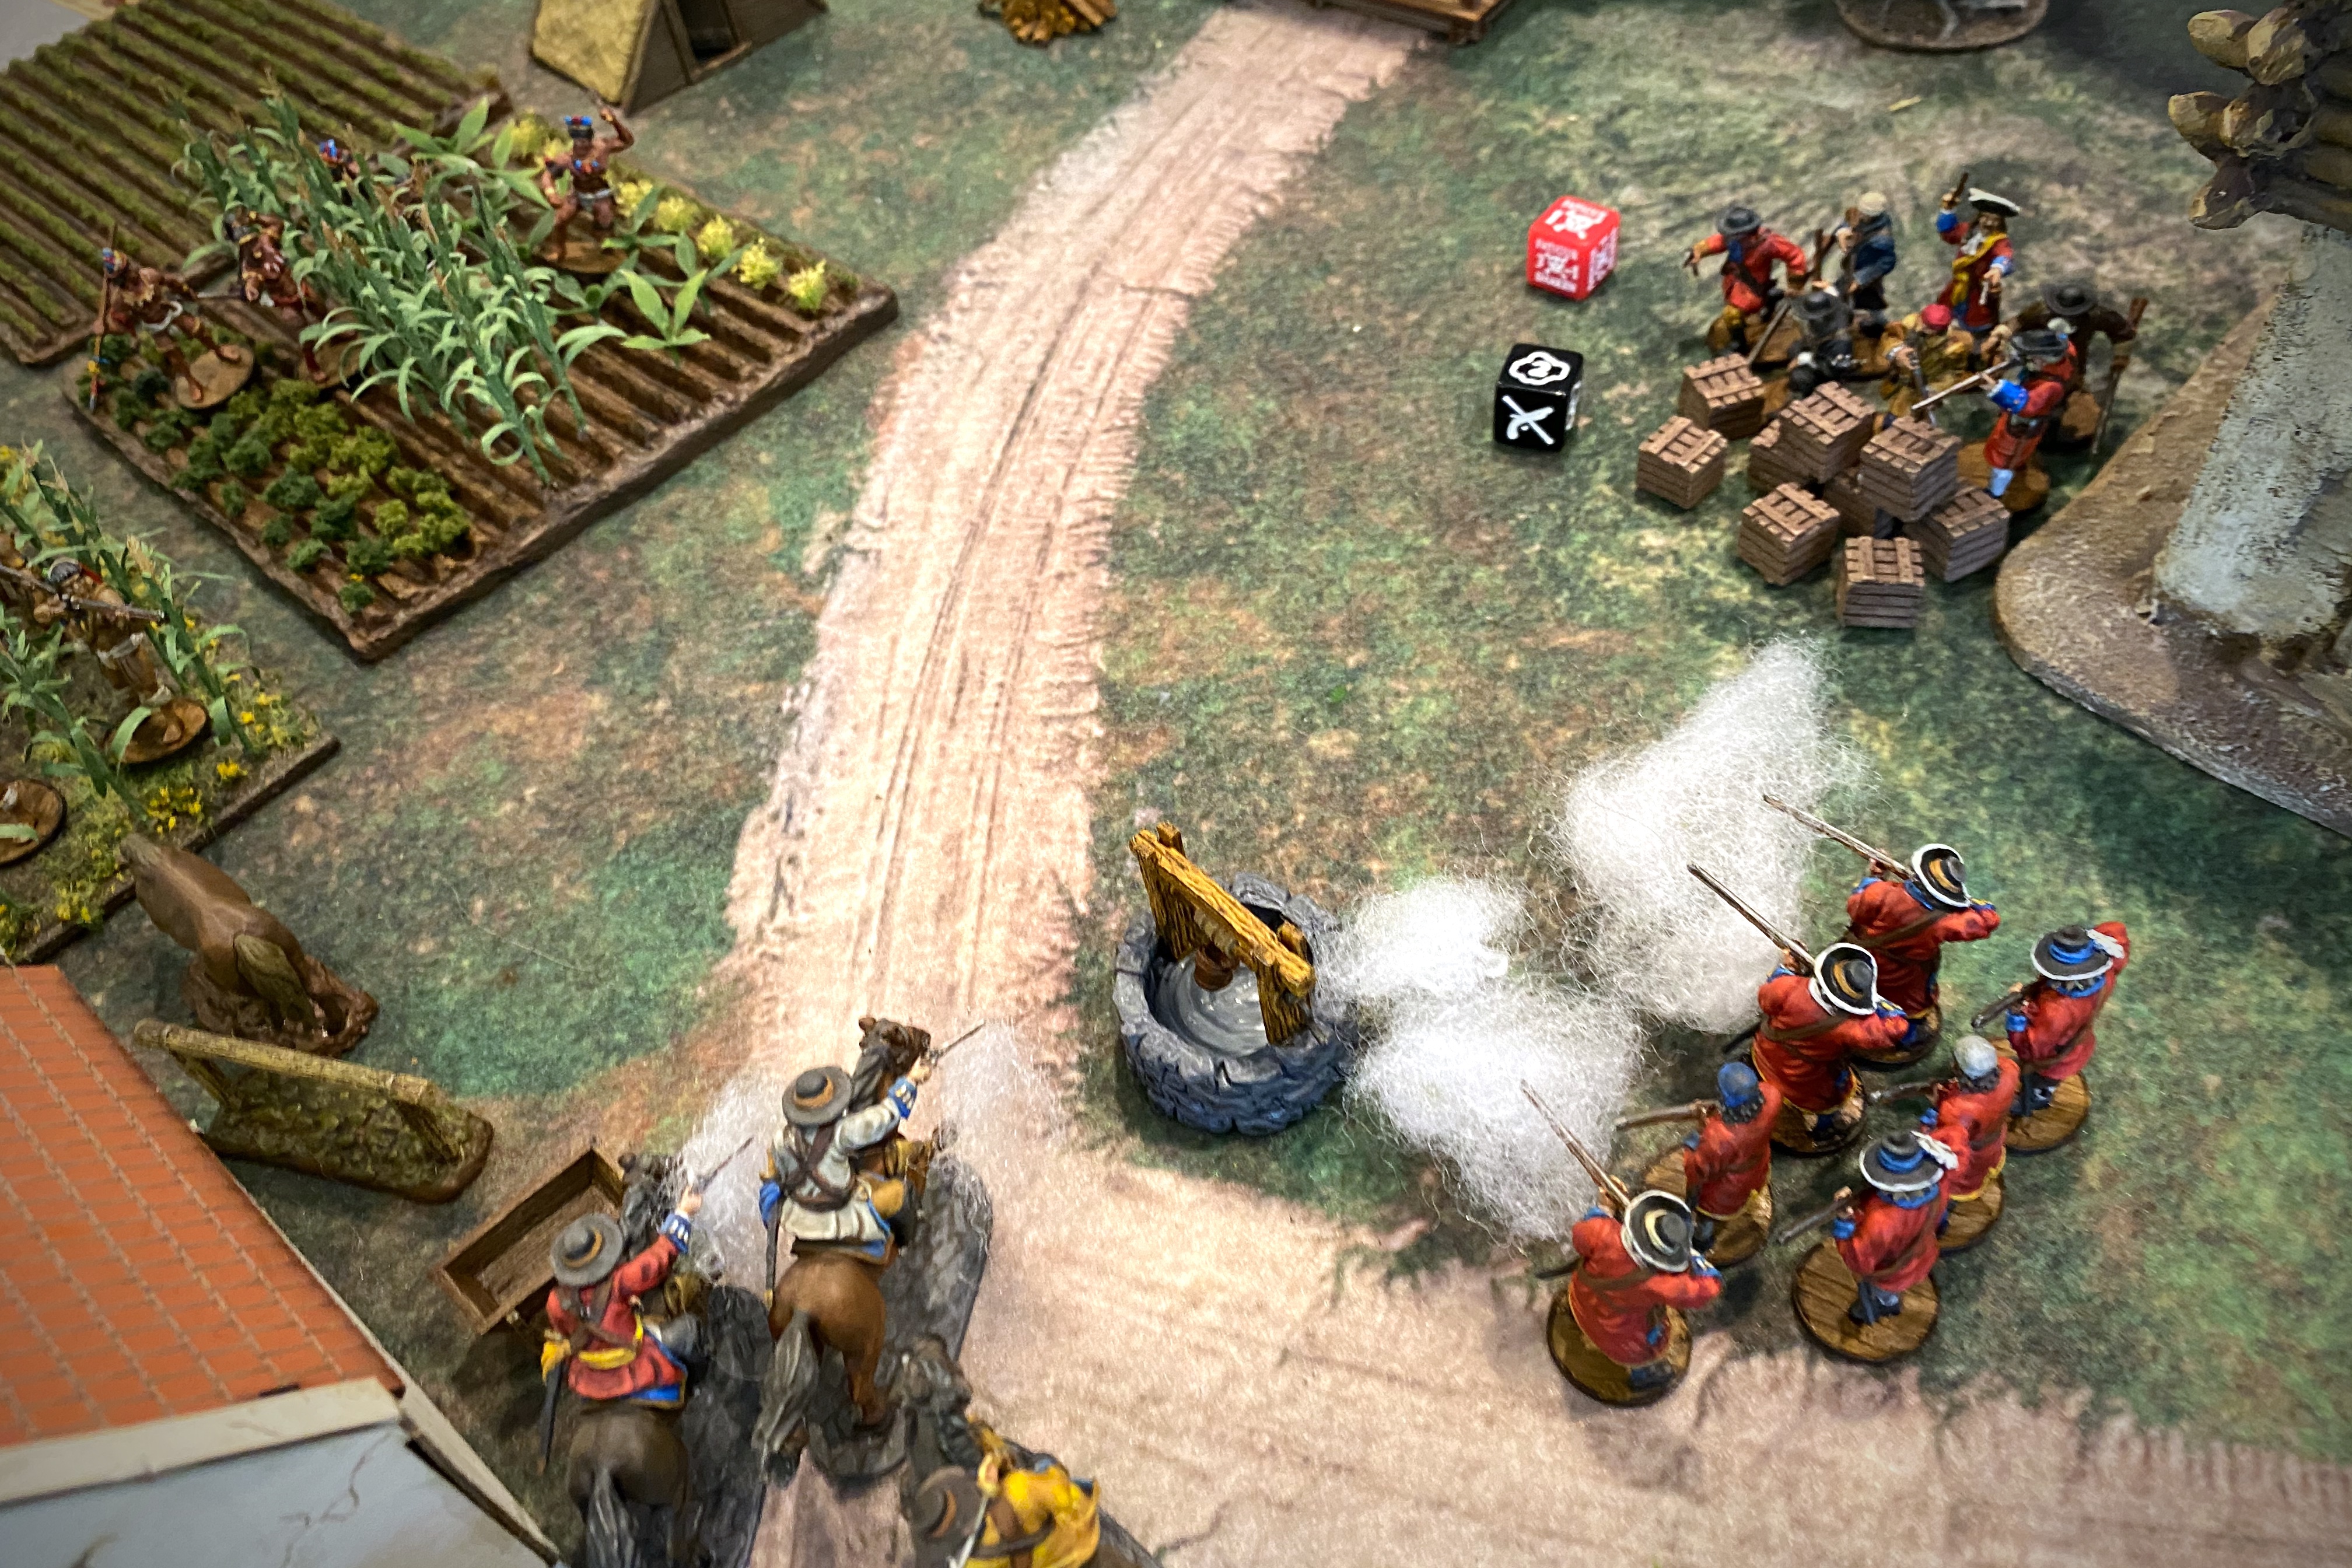
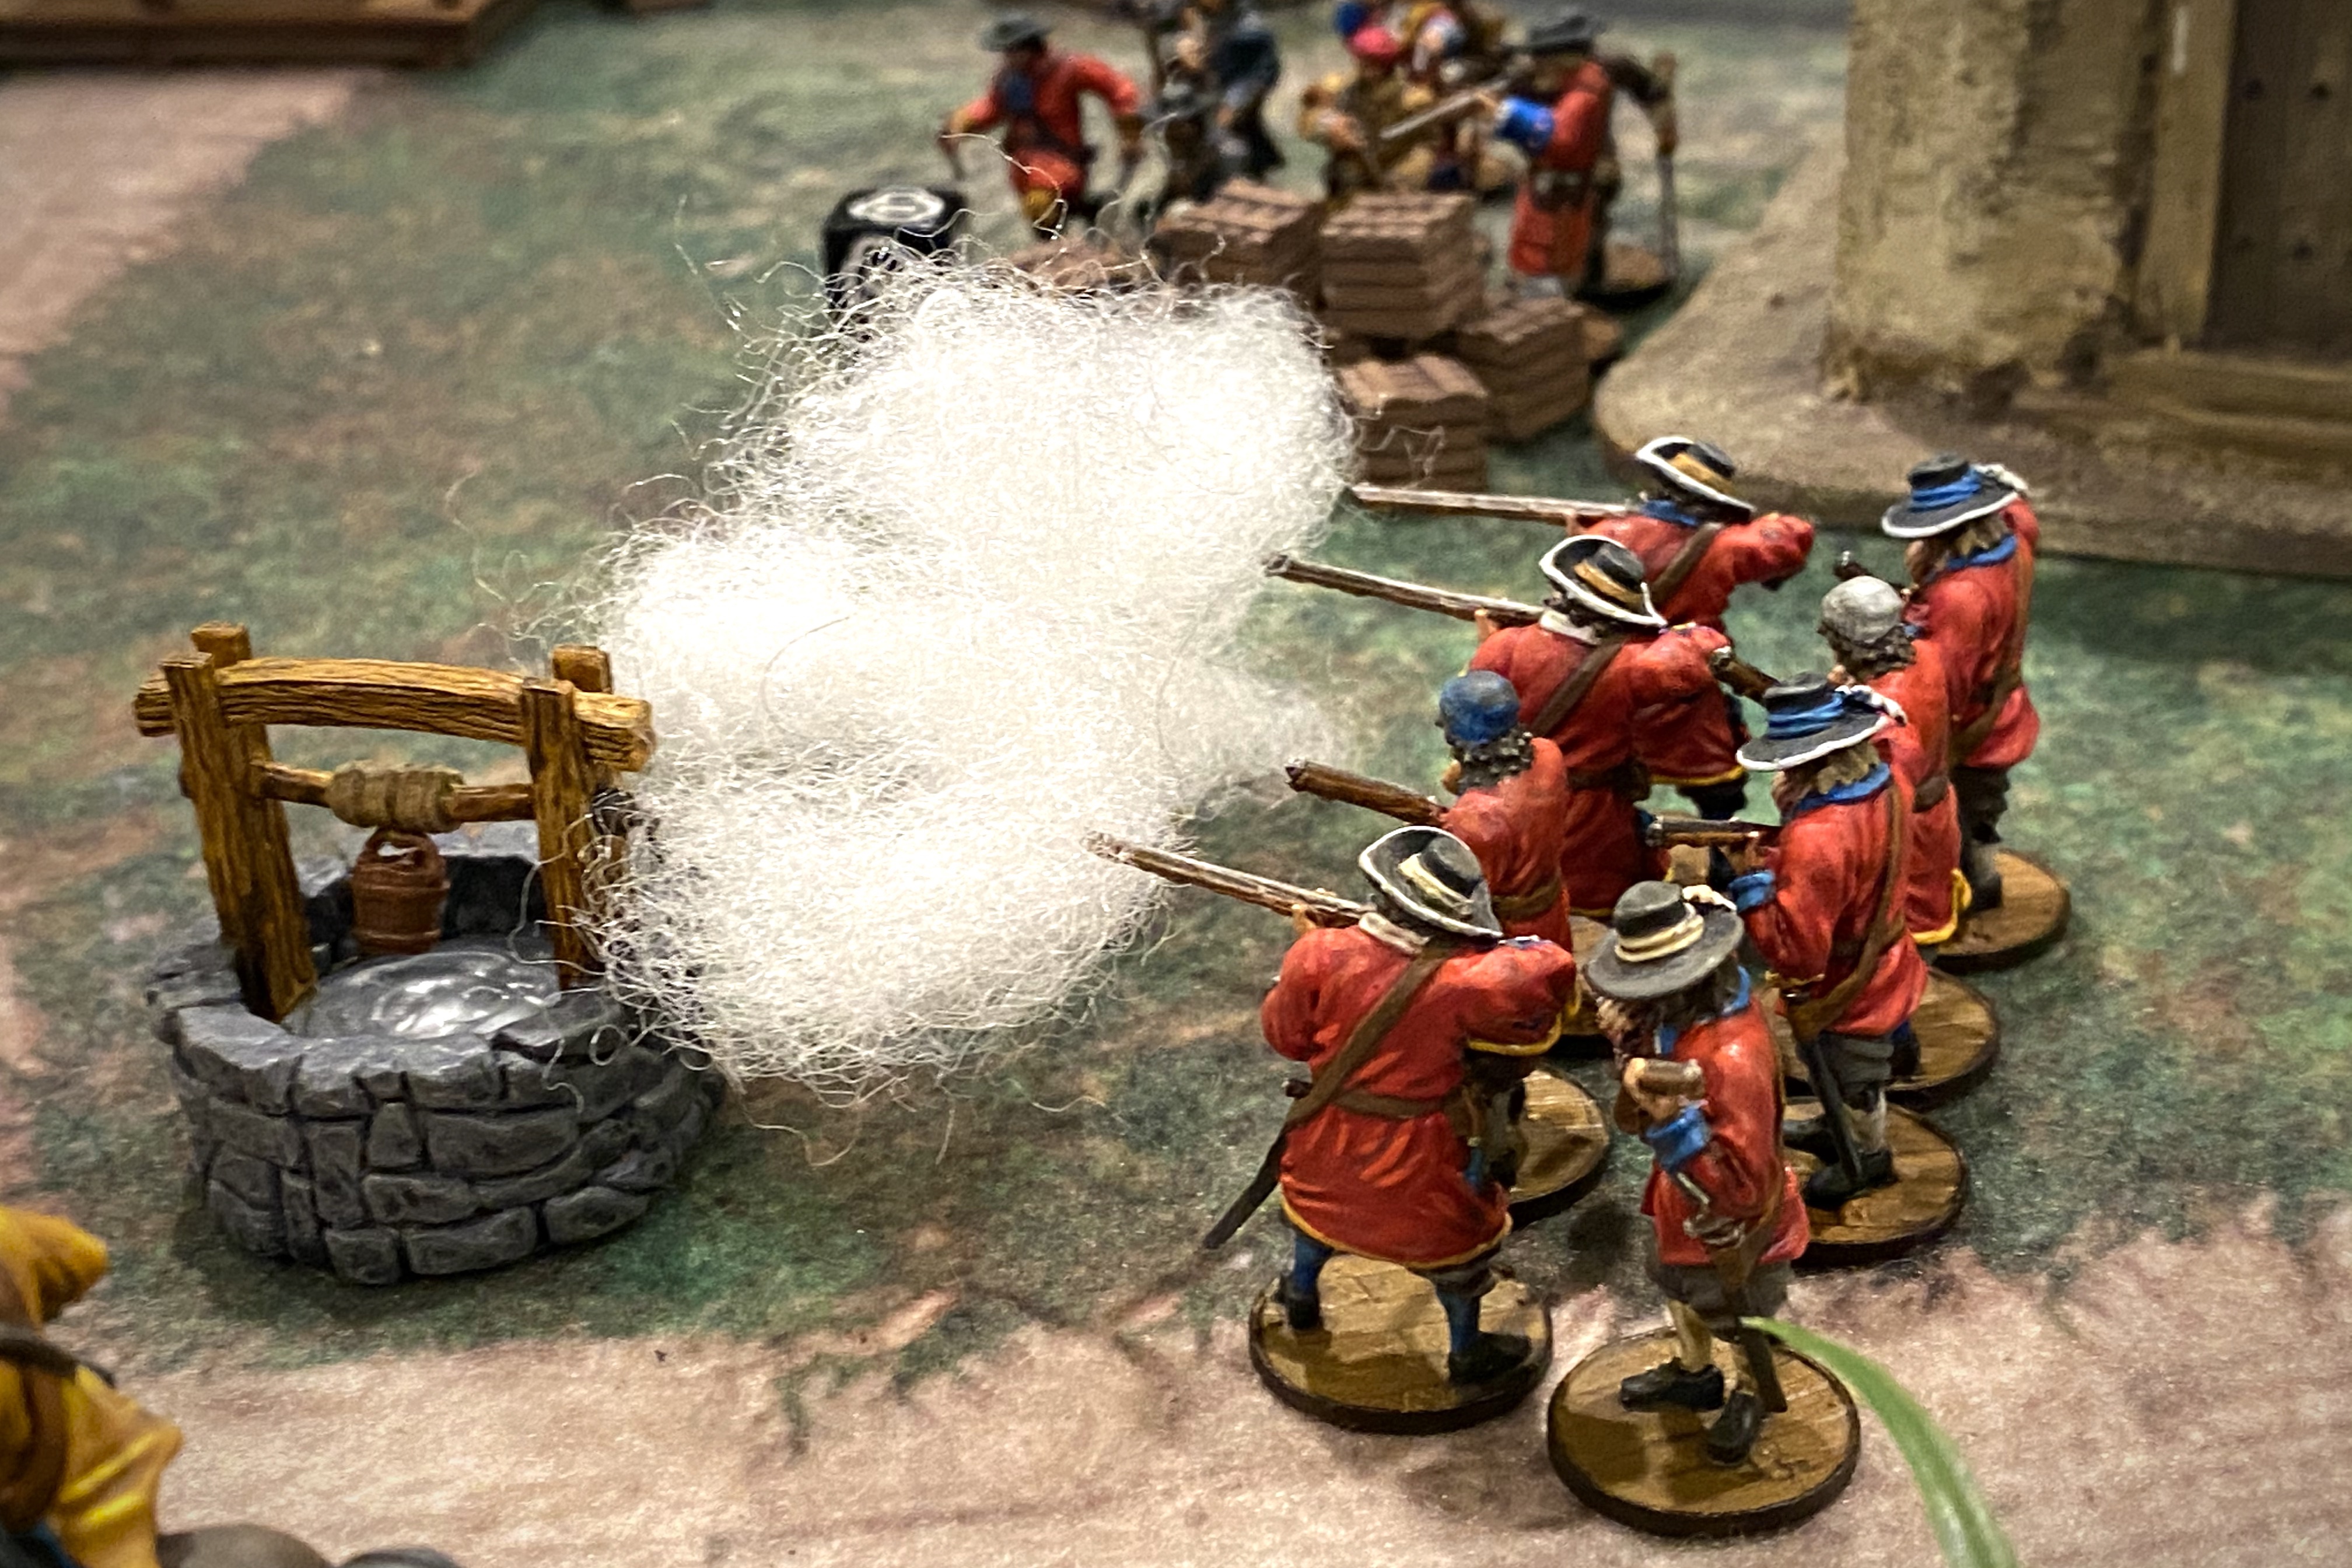
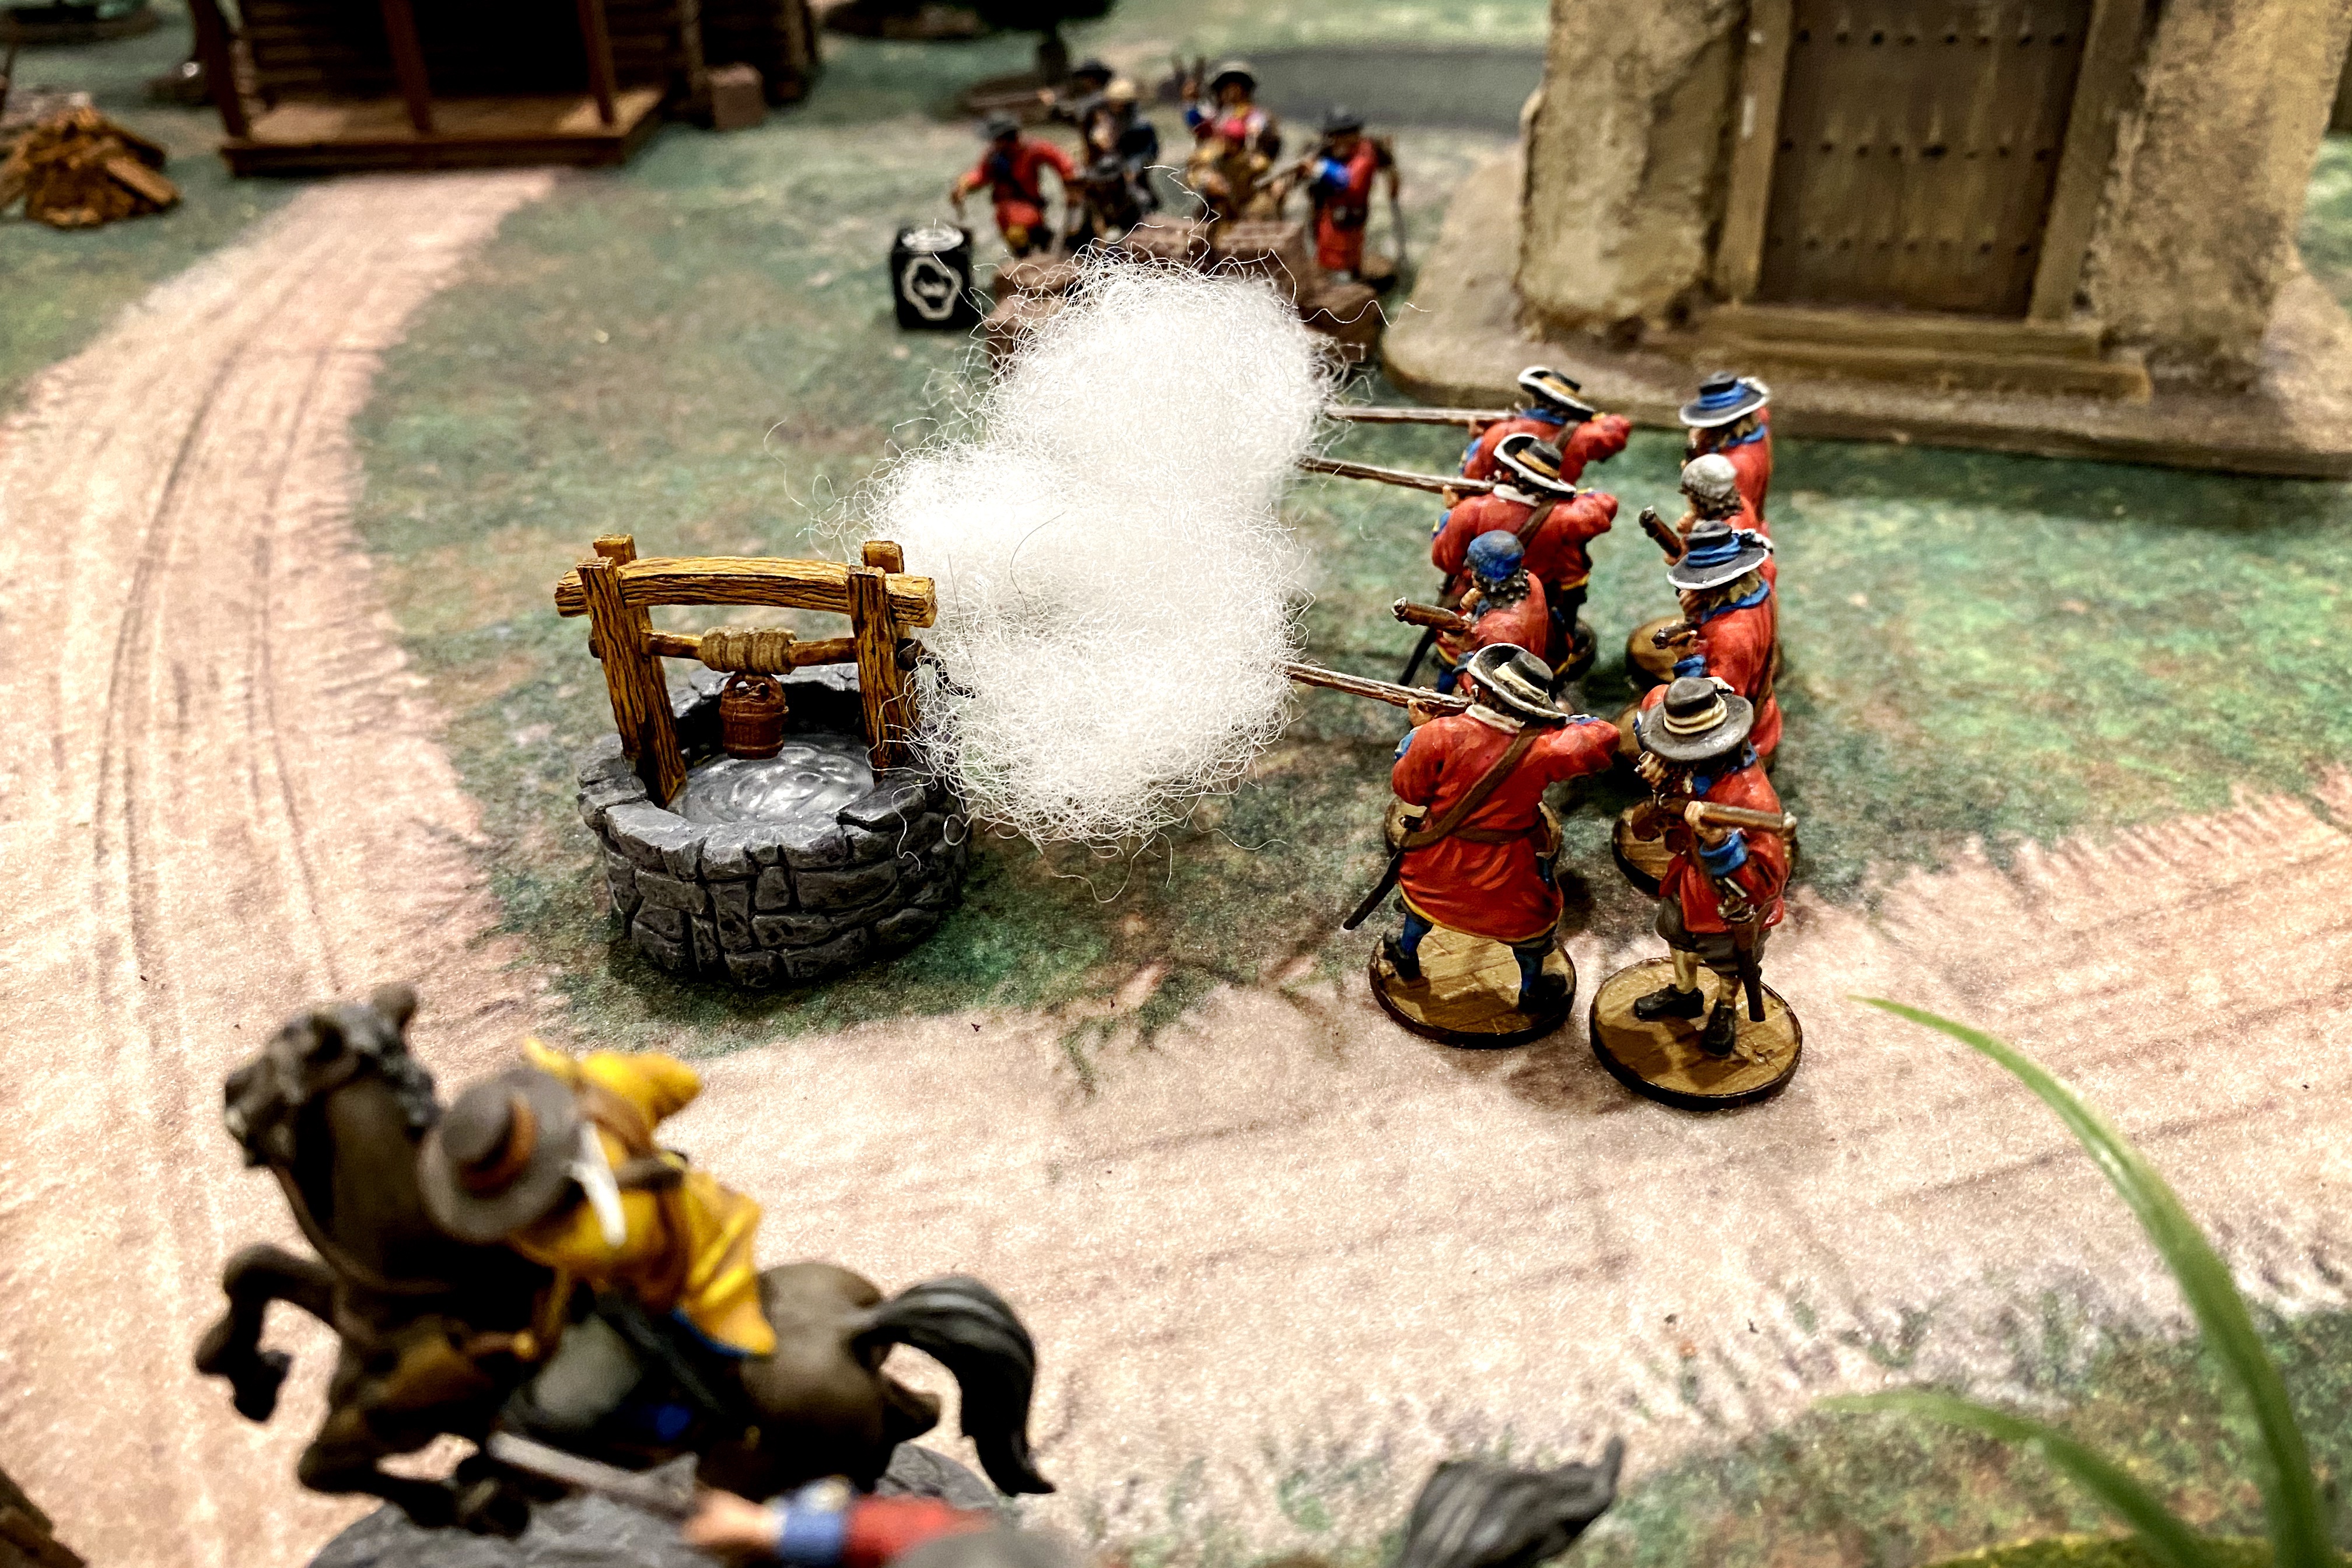
The Militia fired a volley in the corn again and the Indian Fighters moved into the second structure (playing a standard 1 story structure) to get more solid cover and stop the Archers from firing into their unprotected flank.
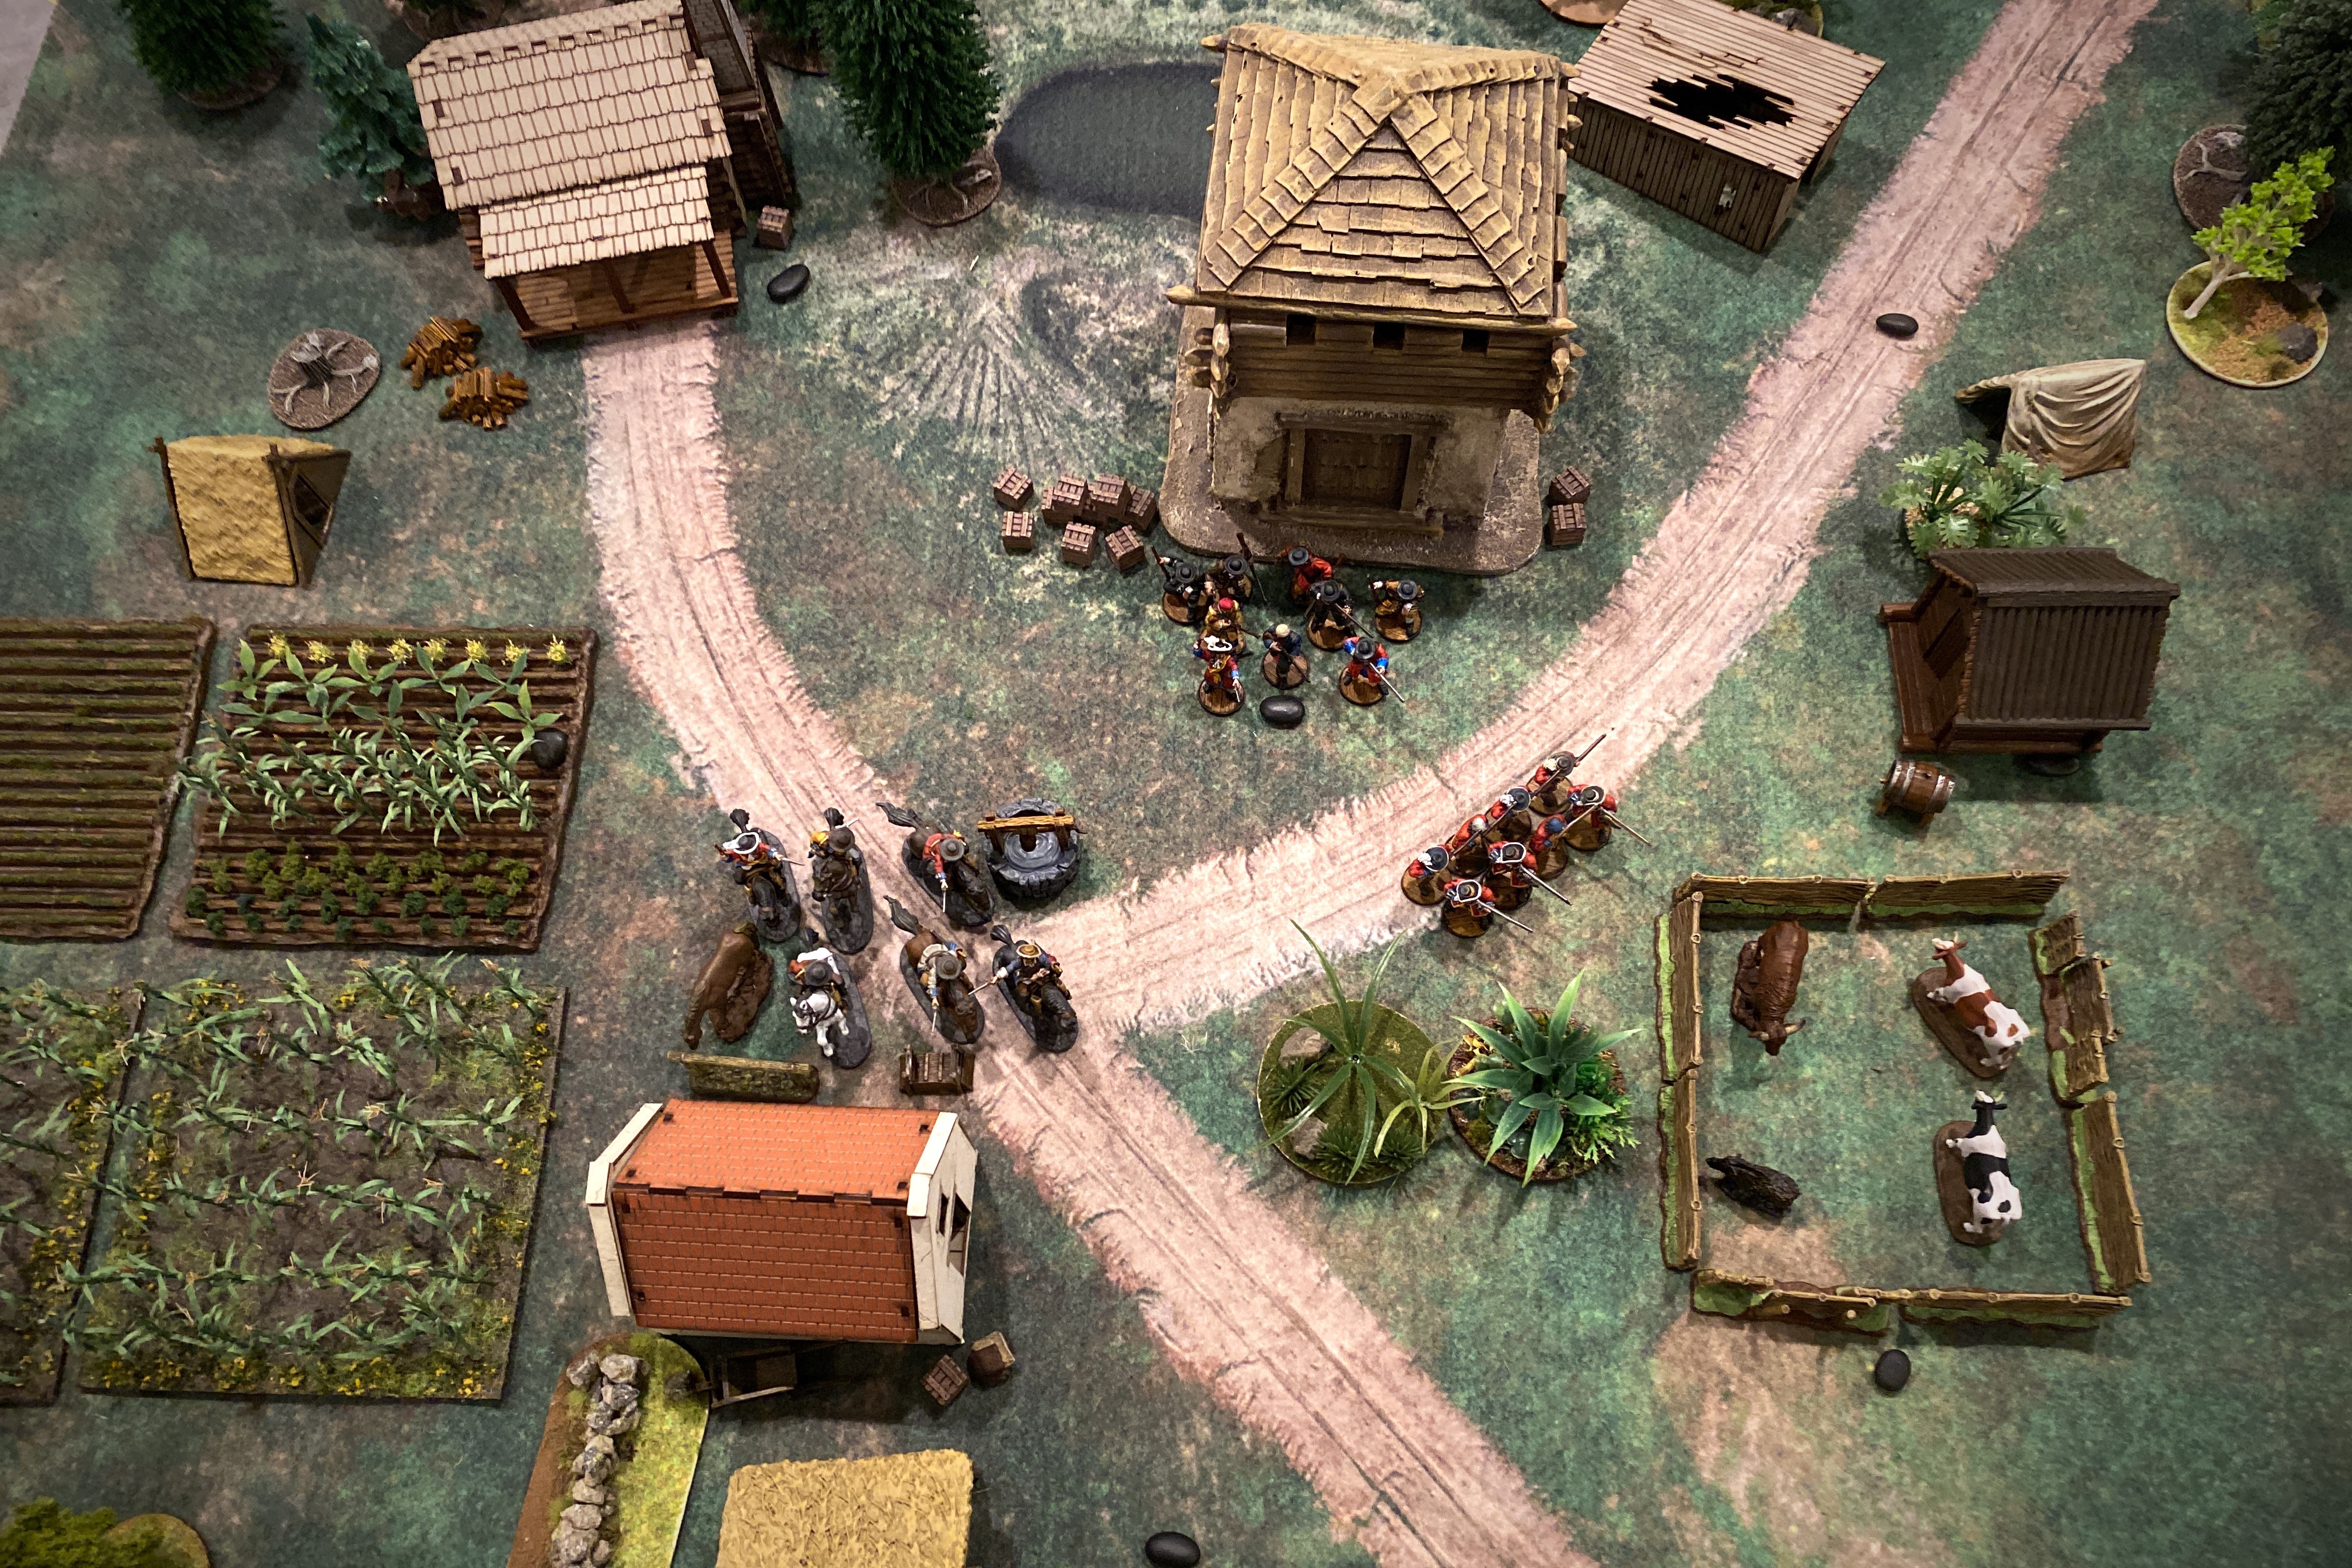
There’s nothing quite like a formation of soldiers in red uniforms firing a volley!

The Warrior Musketeers finally got off their second shot of the game, hitting the cavalry which was partially concealed behind a structure.

By this point in the game both command groups were seriously weakened but the Militia was still bravely holding the center of the board and the Warrior Archers were causing mayhem with constant barrages of arrows out of the cabin.

Turn 4
It seems like turn 4 is where games often get messy and bloody!
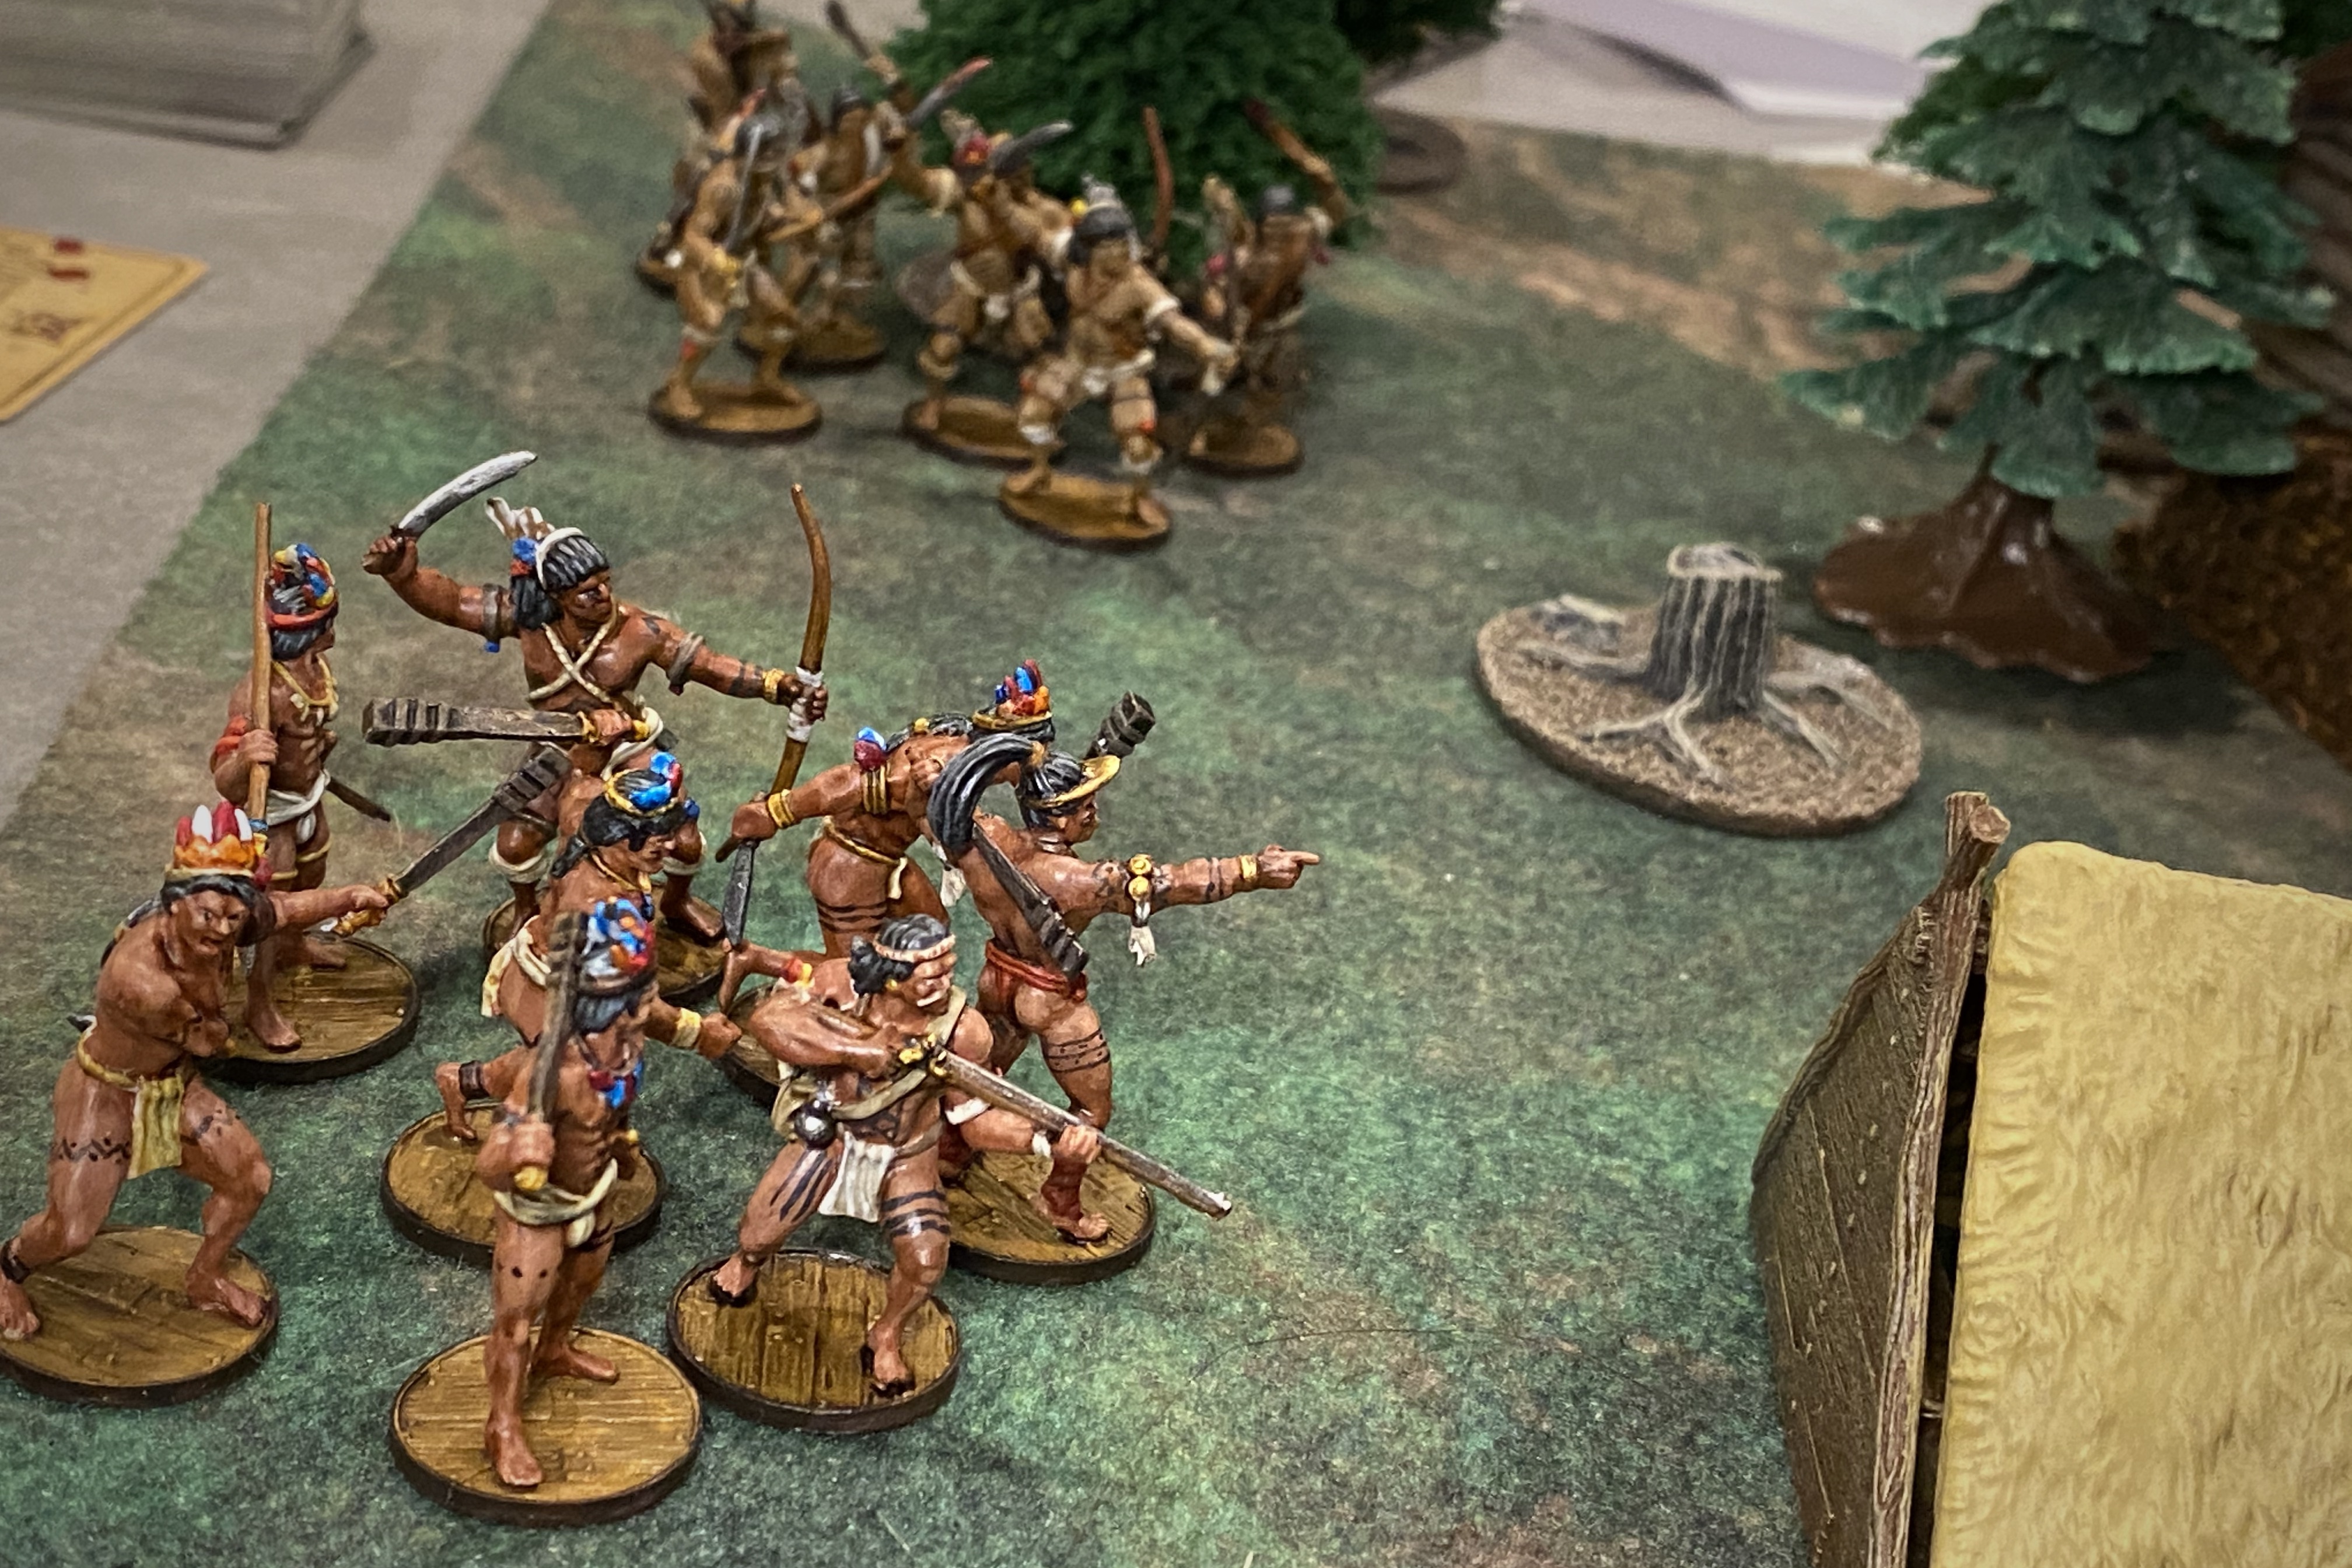
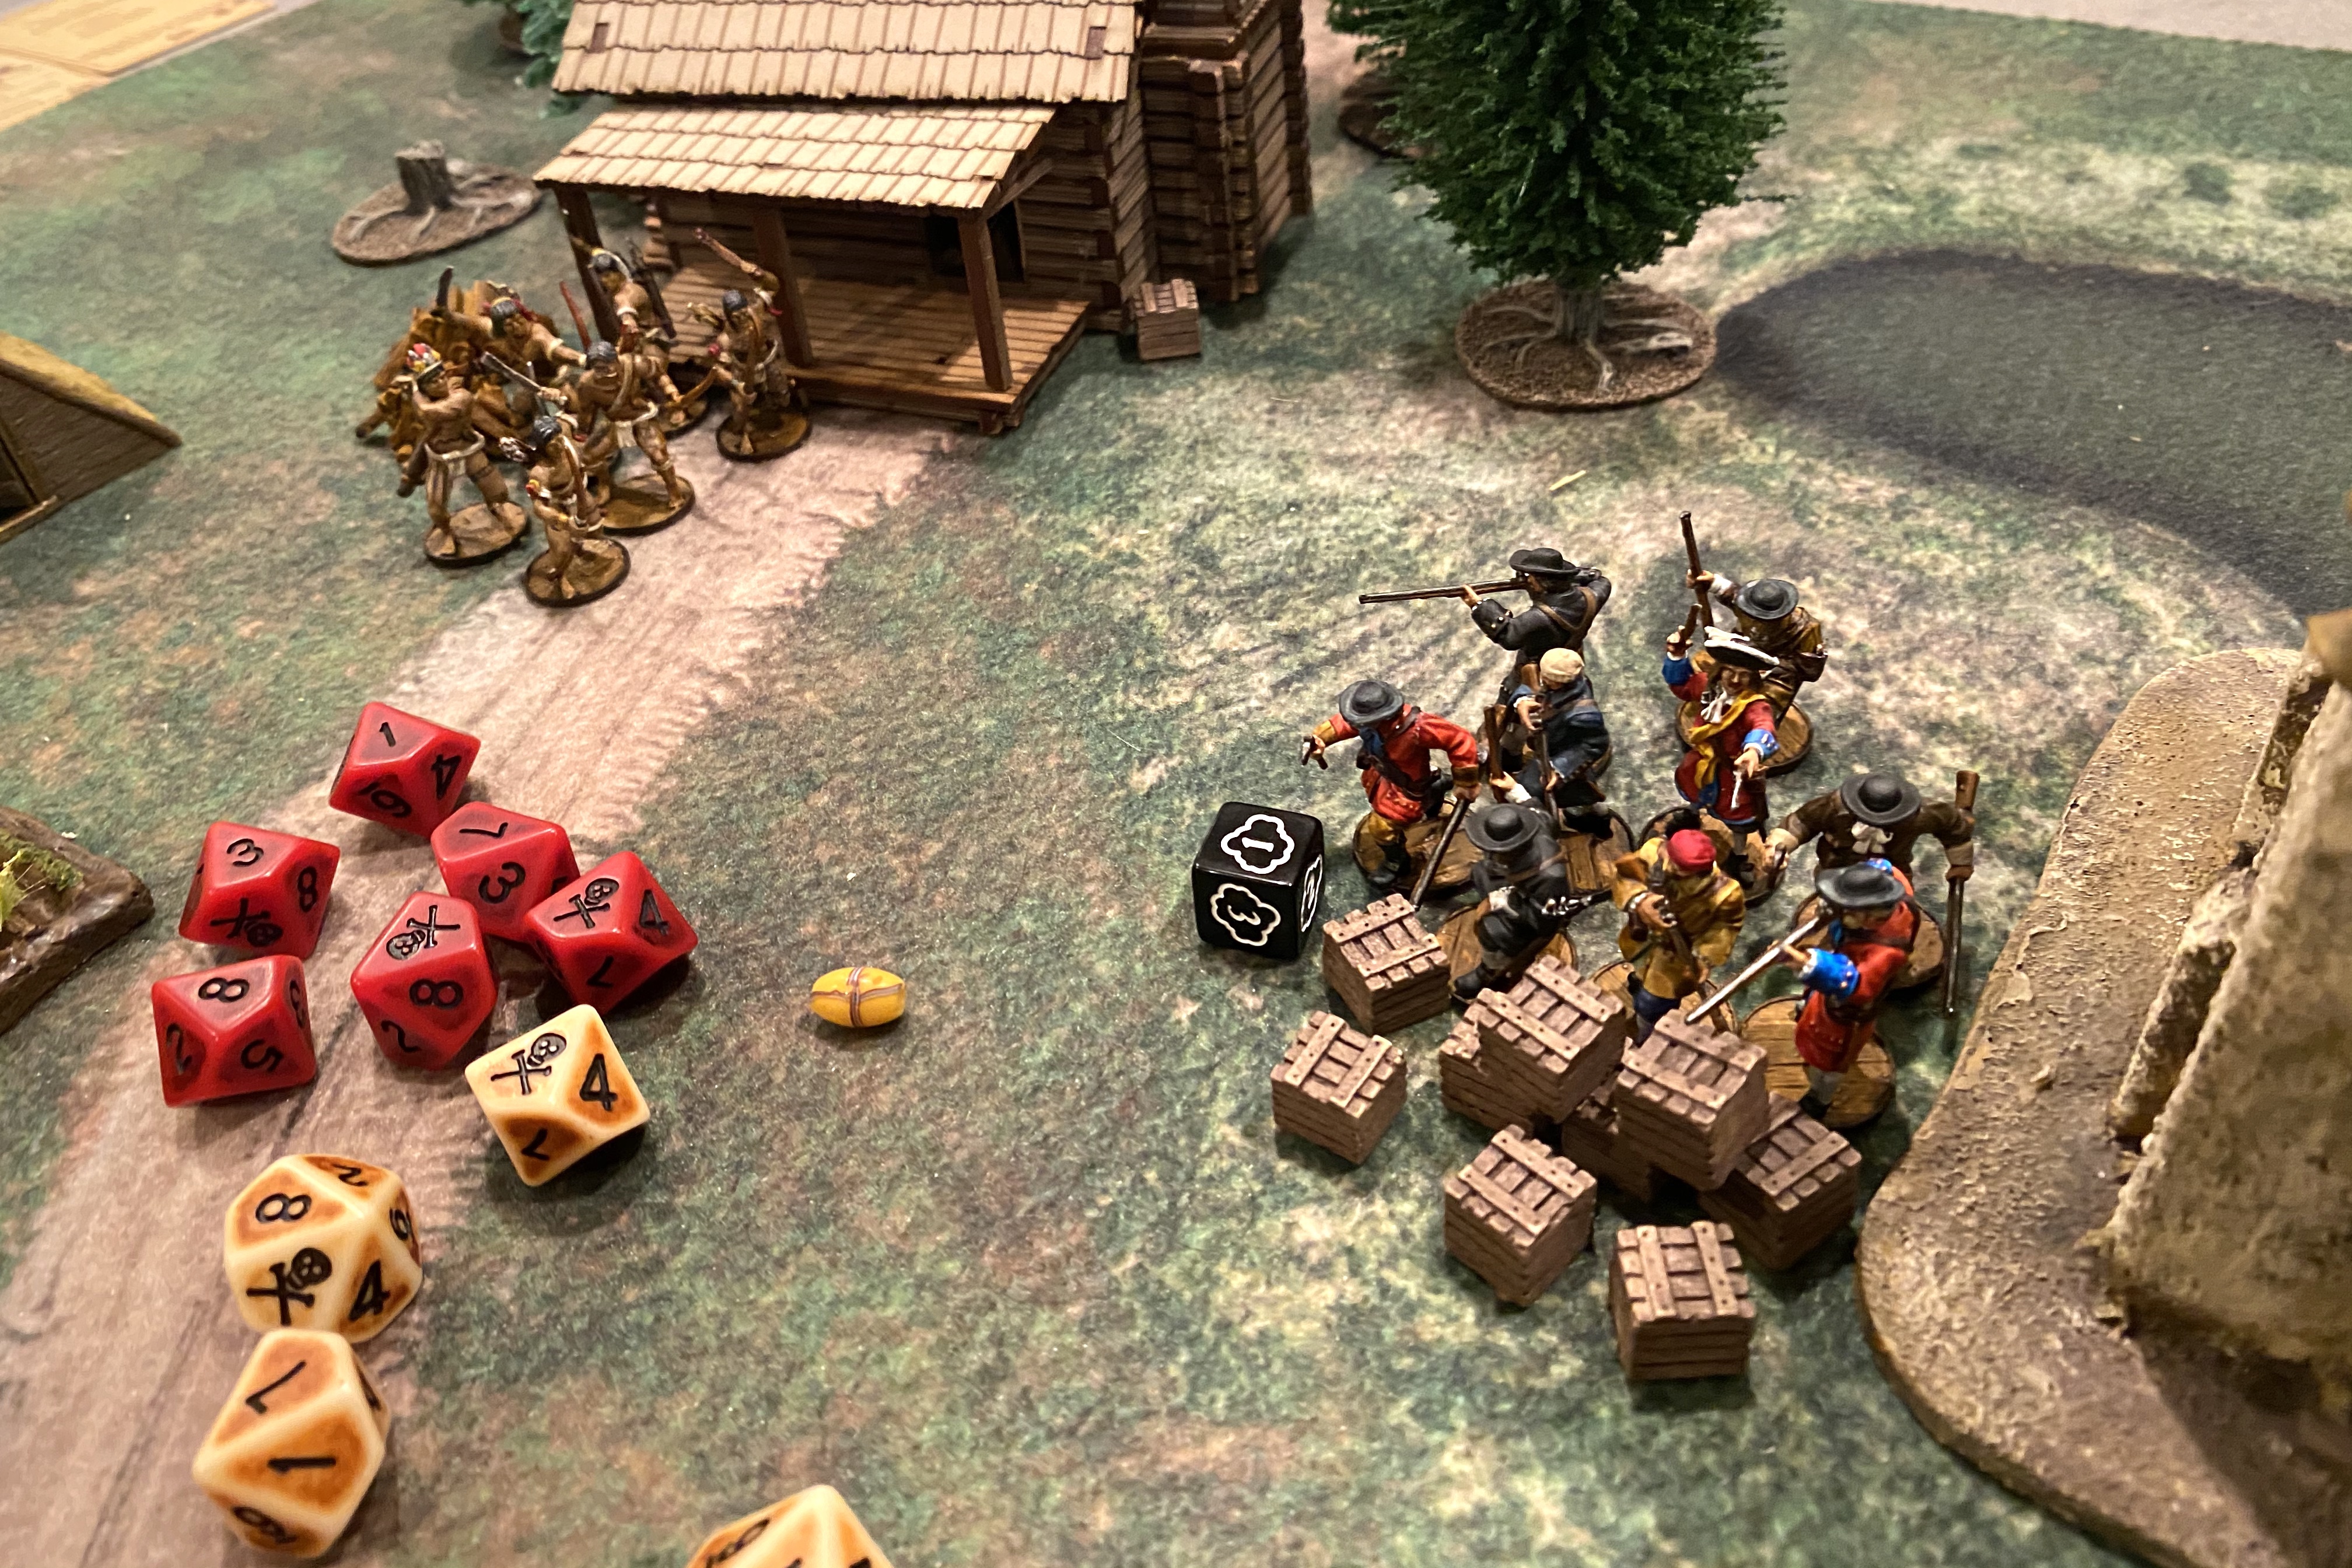
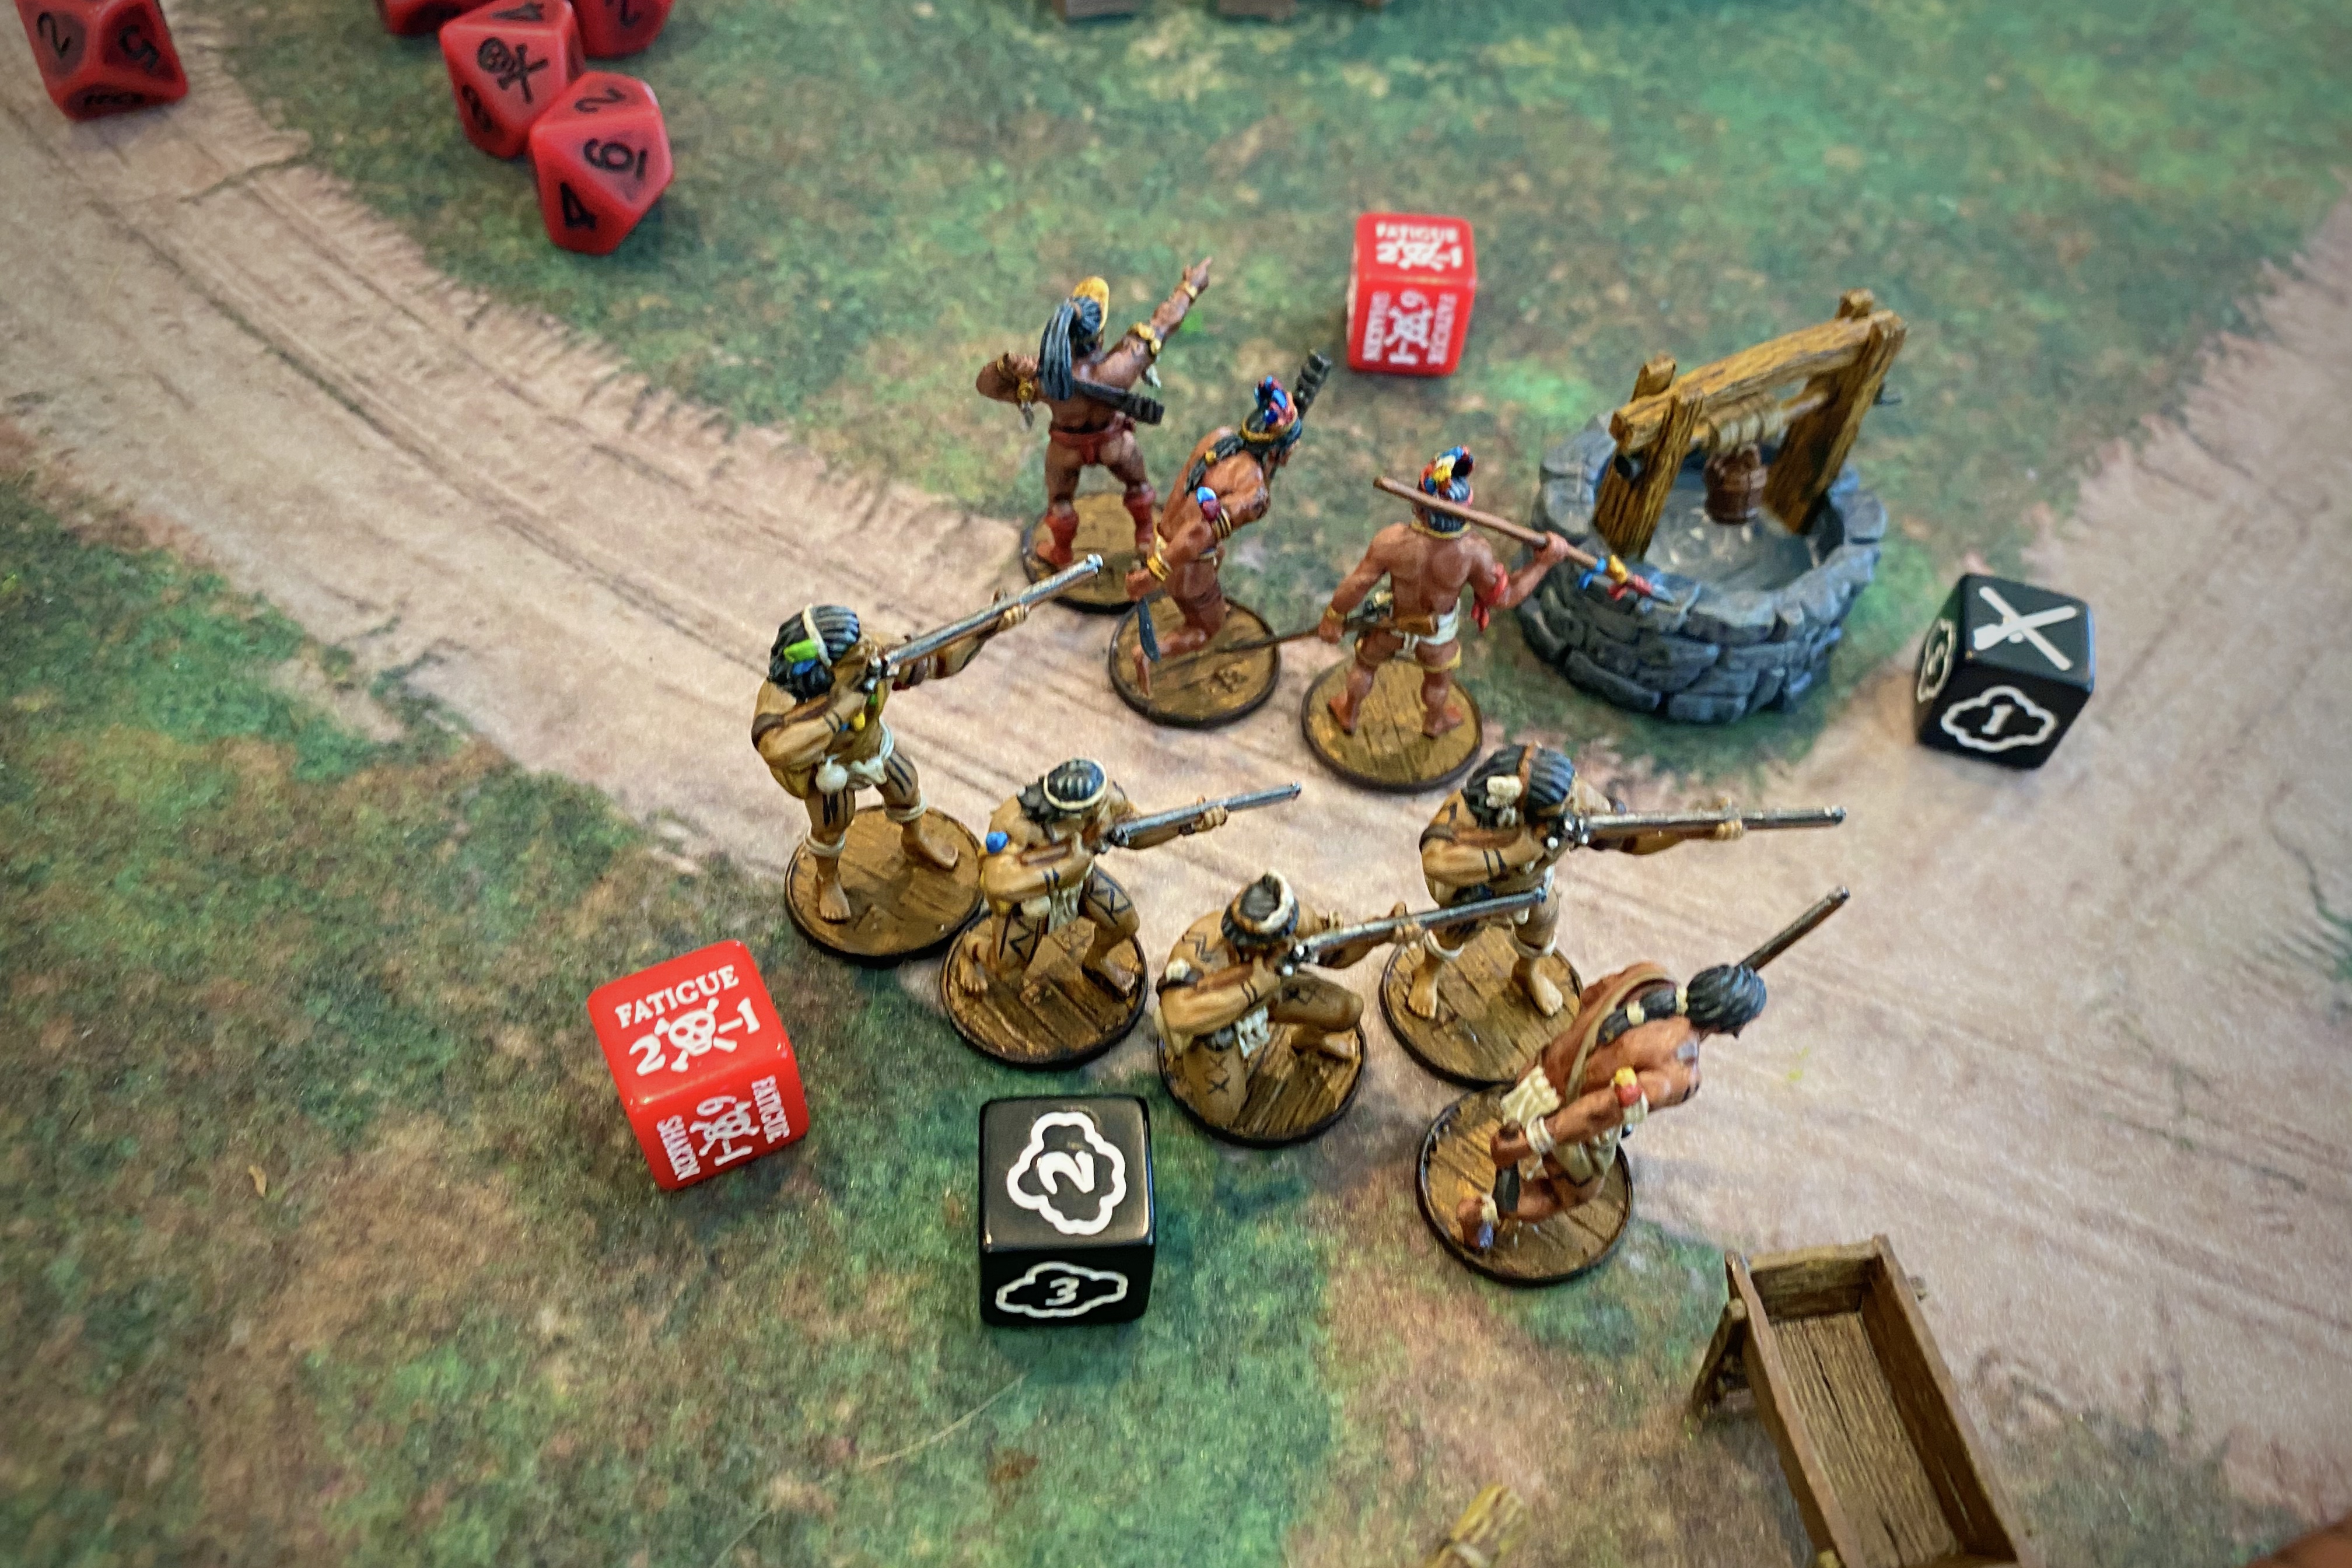
On turn 4 my Natives finally drew some Spades! That meant it was time to press the attack! With only 4 Warriors left accompanying my Commander, I rushed out of the cornfield, shot into the Militia at point blank range with their sidearm muskets.
The muskets dropped two of them and then came the inevitable Warrior charge with Thrown Weapons.

The re-roll with a Fight of 5 often results in 100% hits and that’s what it did here!
And those poor English Militia have a Fight Save of 7. They failed every Save and were eliminated from the game! Natives love their Spades!
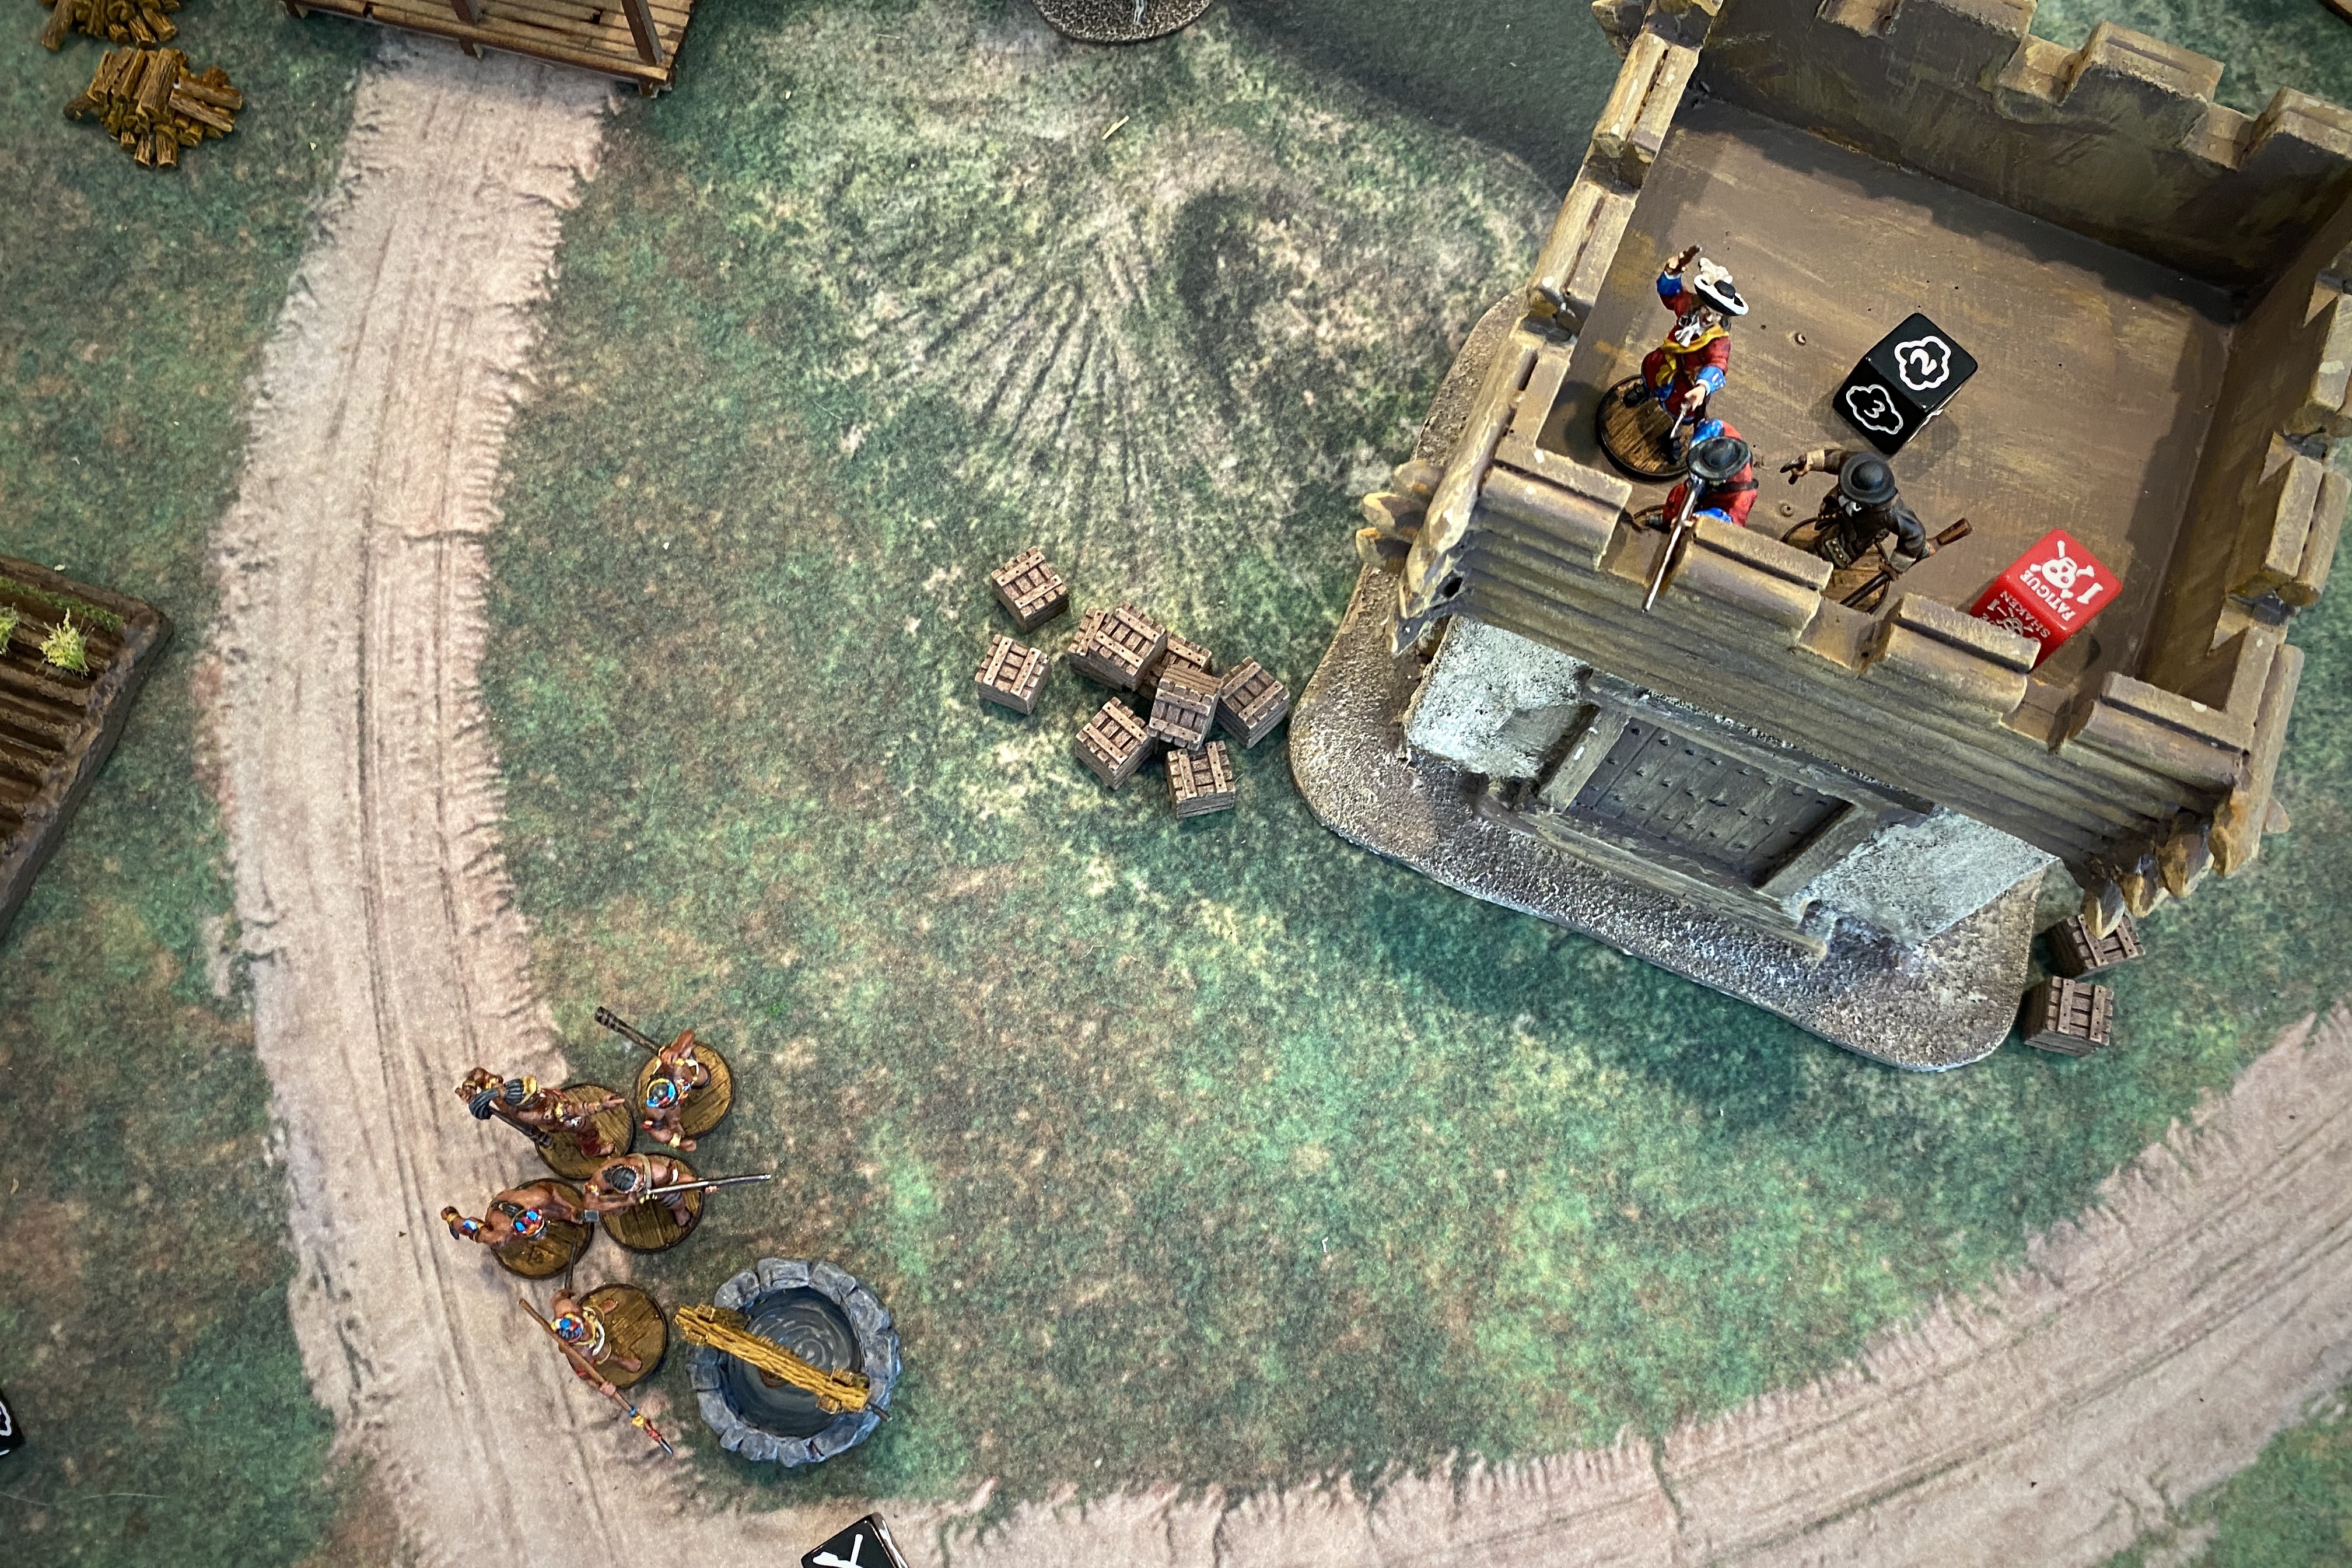
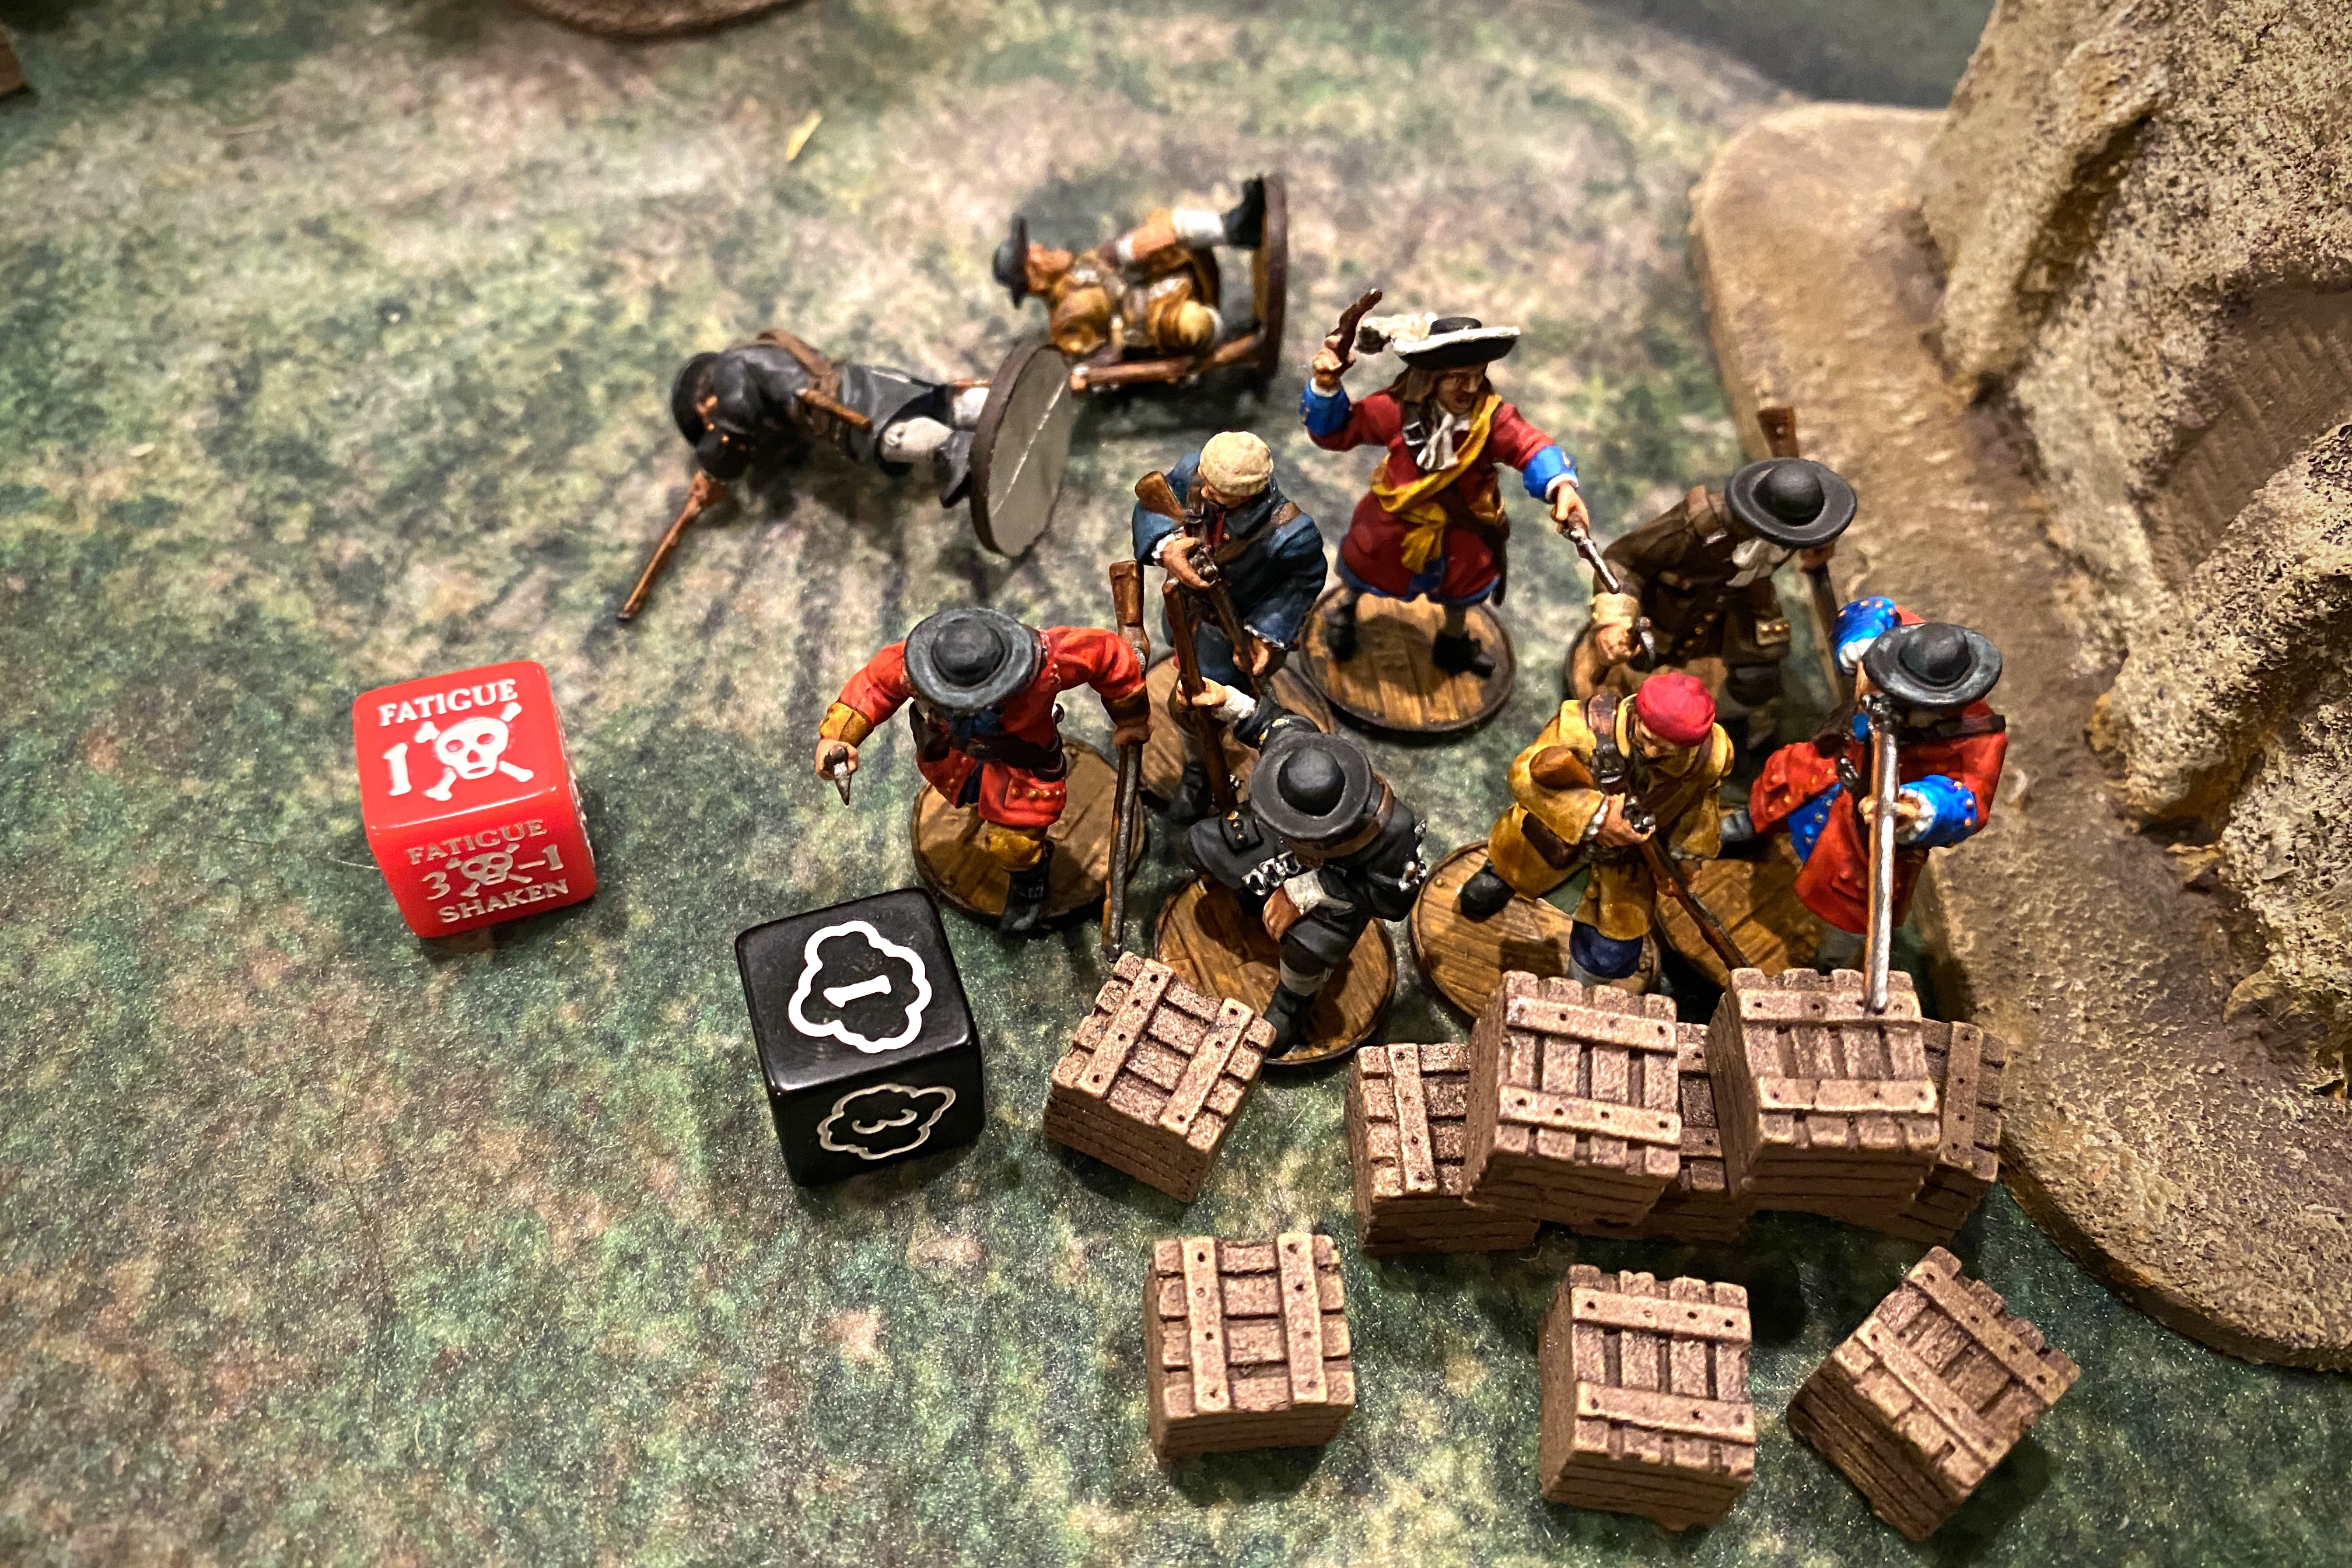
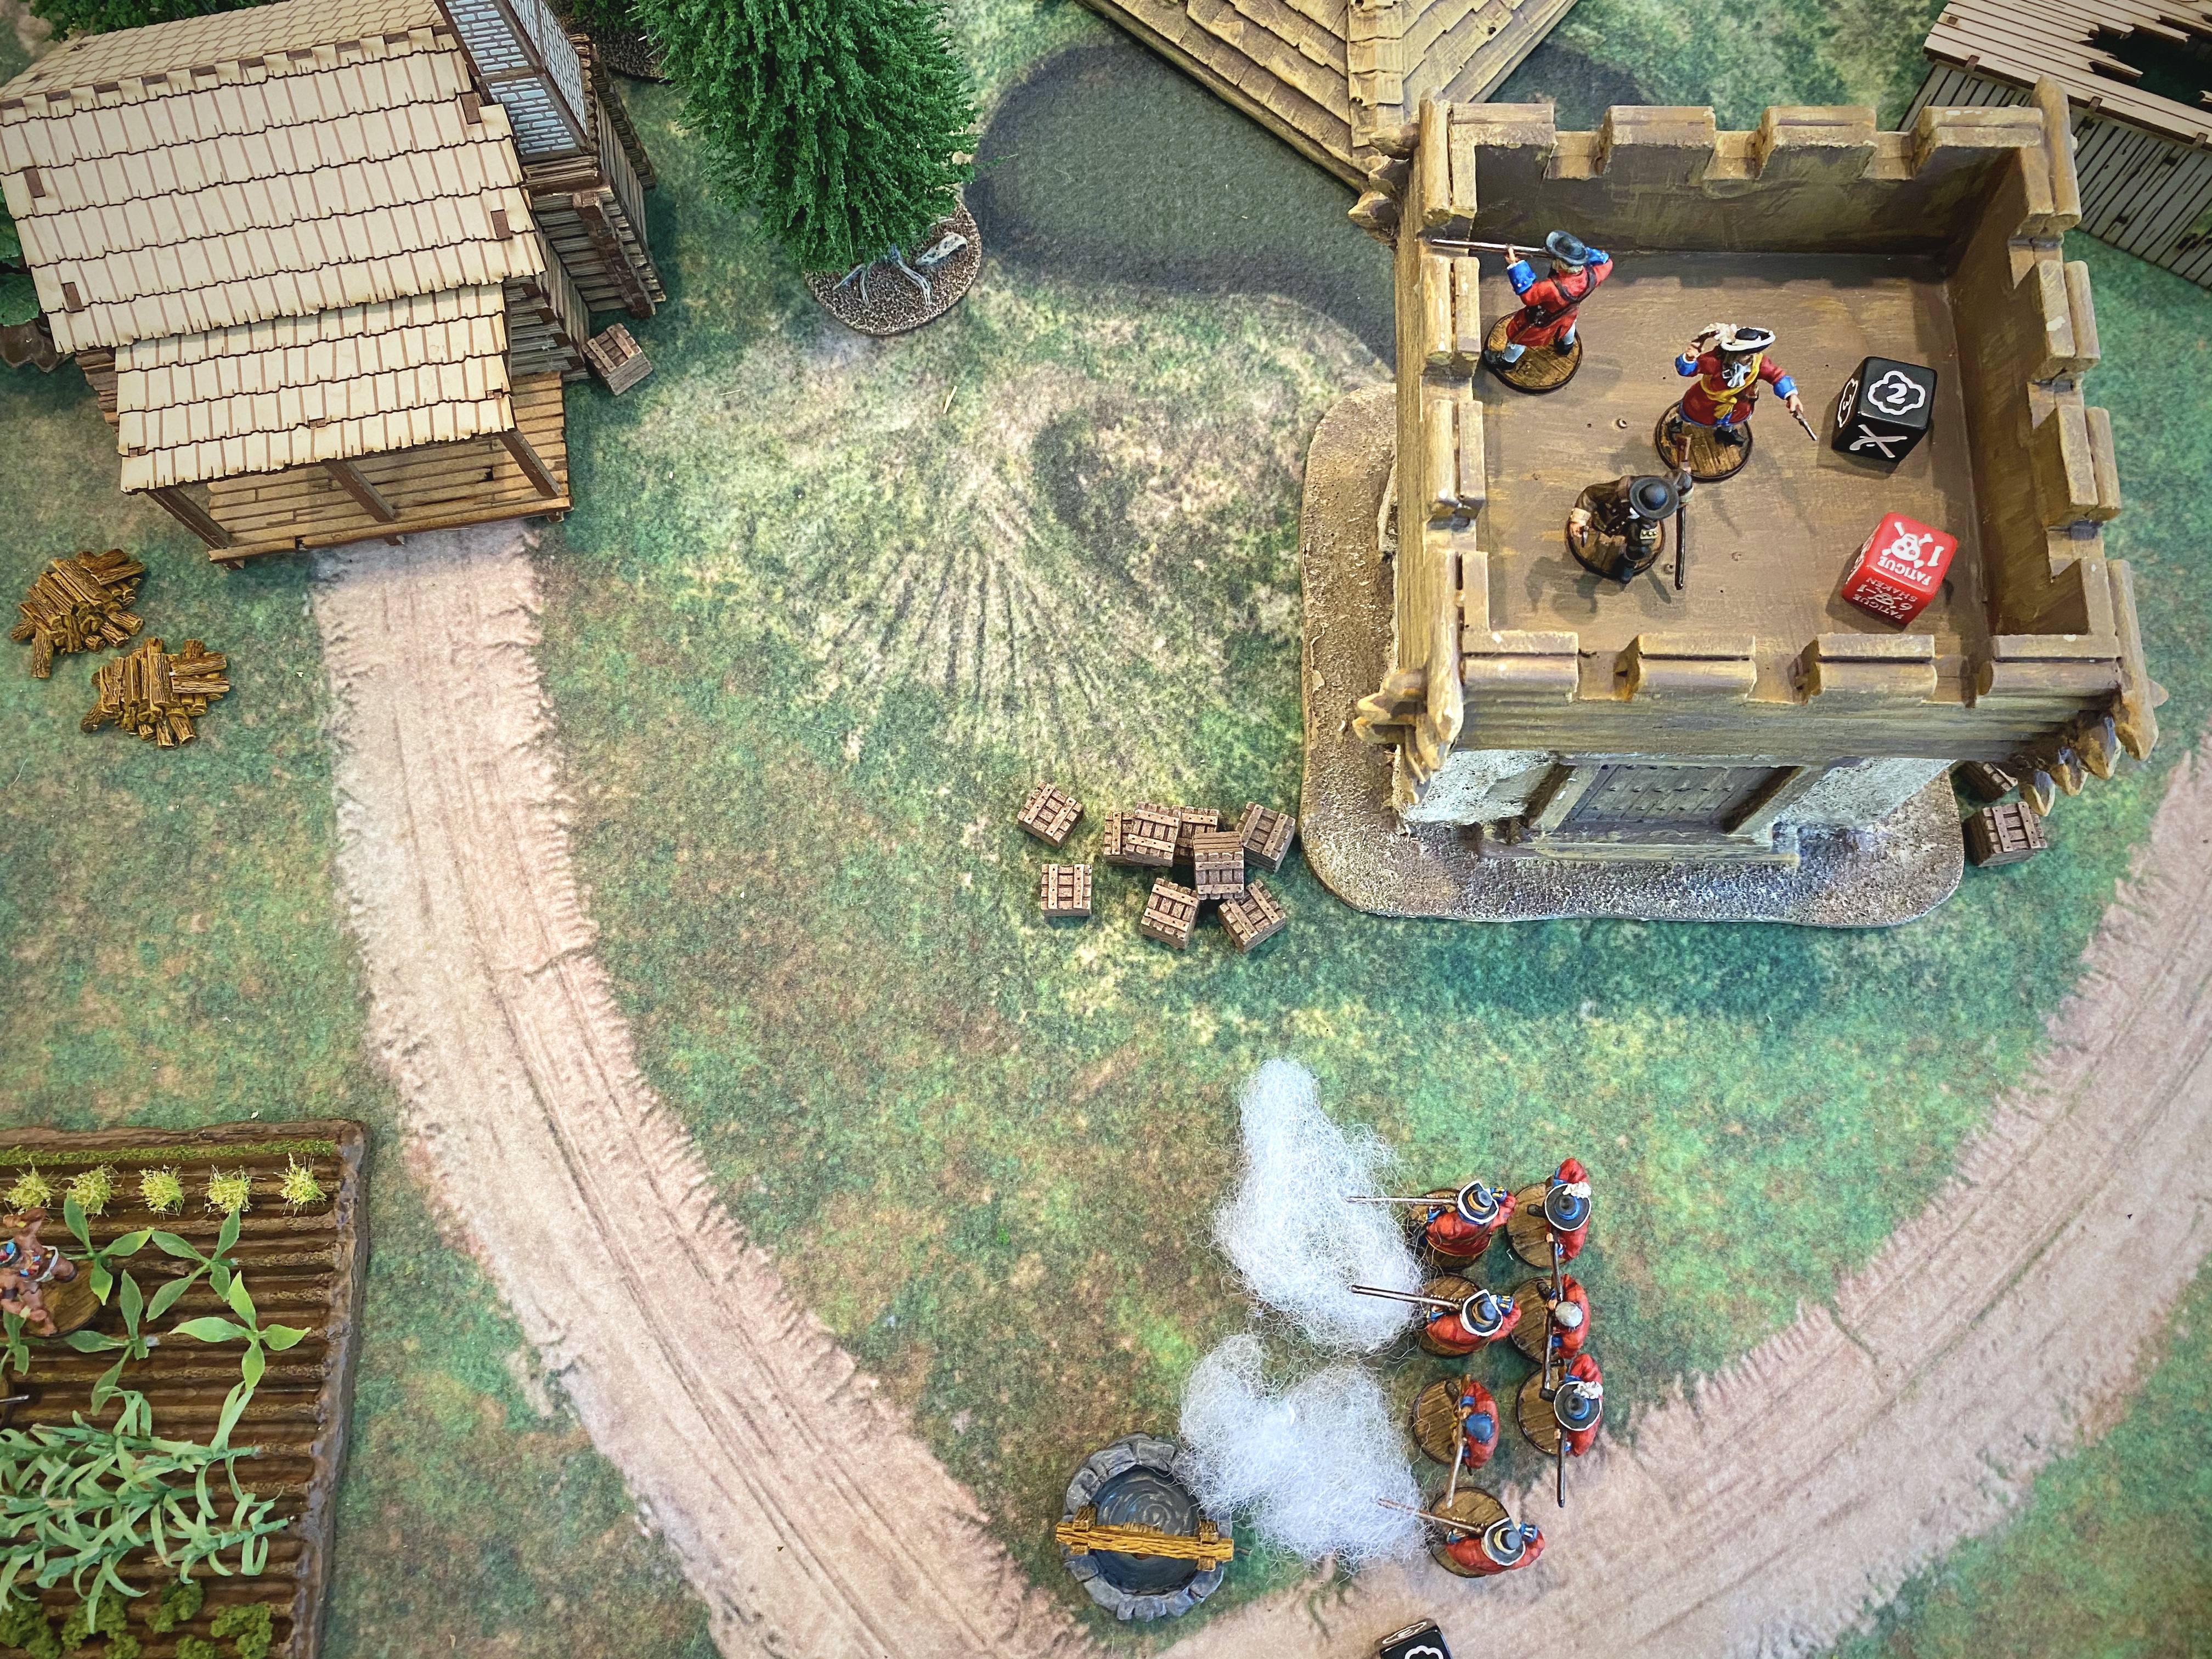
But that obviously left the Native commander out in the open for the rest of the turn! The English commander fired from his perch in the second structure and killed another Warrior.
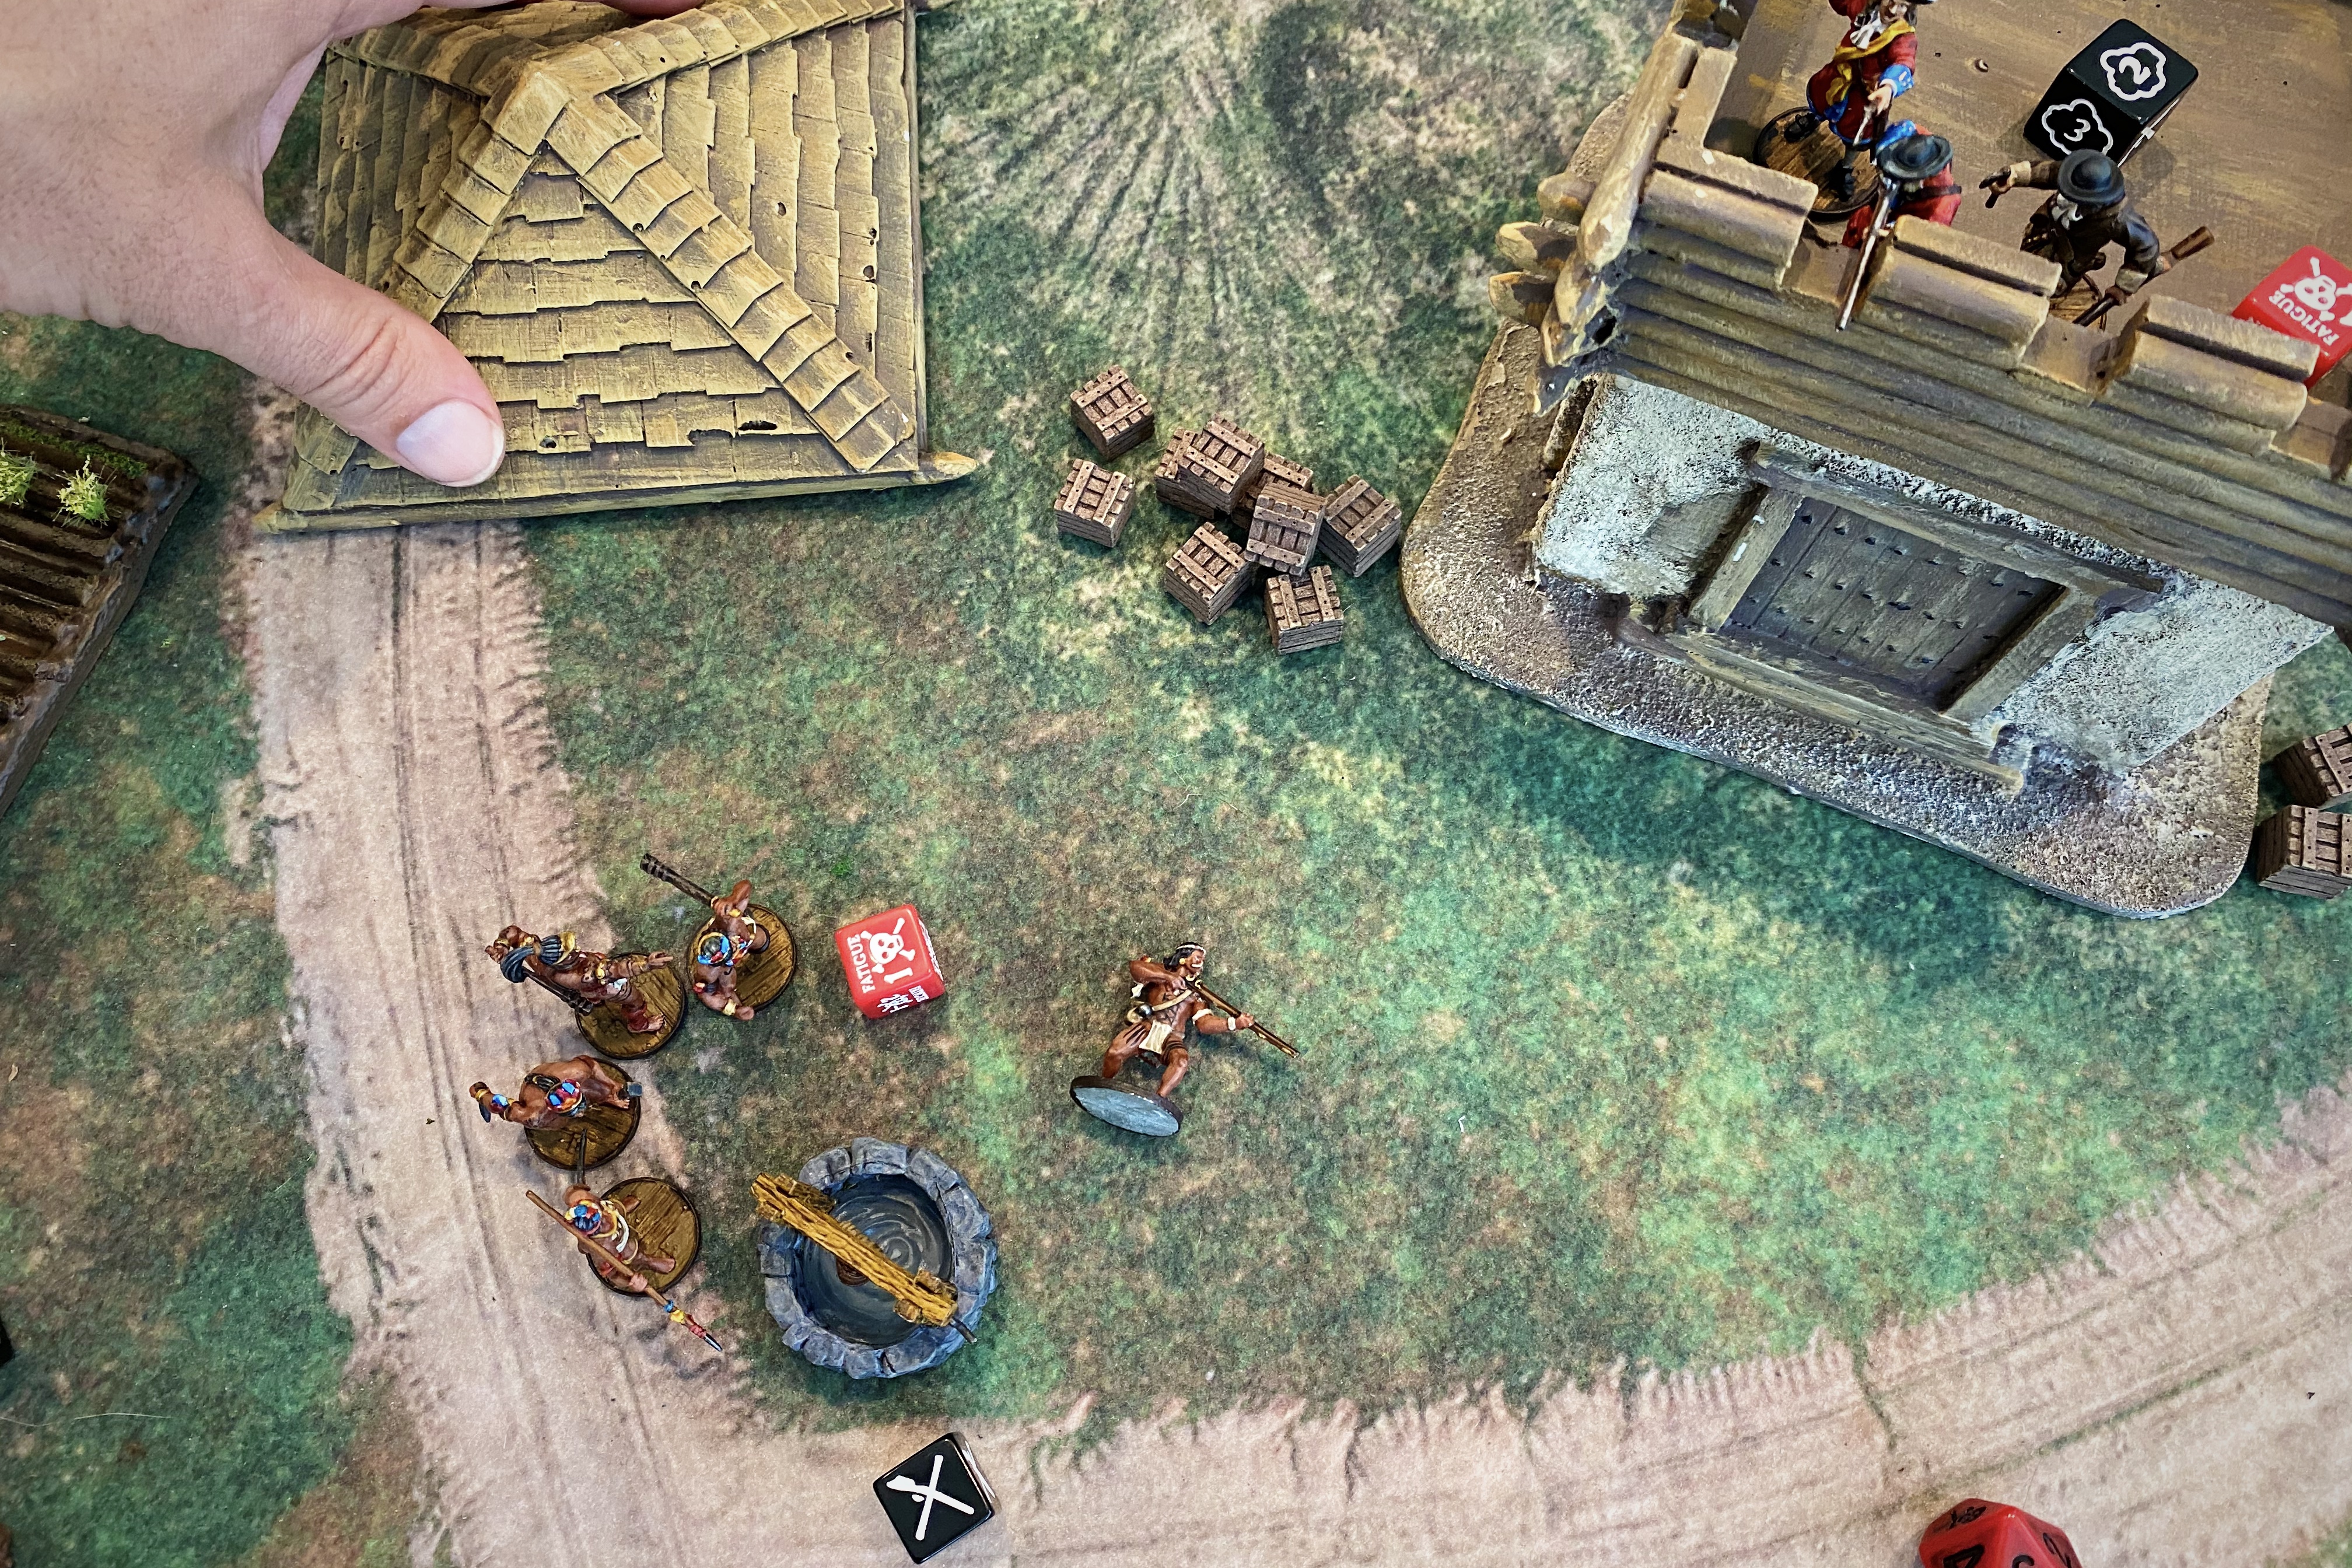
The archers fired from the cabin again with deadly accuracy and managed to kill one more Indian Fighter bring that unit down to a total of 2 models. Those archers take a toll!
Then the time of reckoning came for the Native commander… The remaining English cavalry charged the unit of Warriors in the open but somehow they didn’t break after taking a bit of a bloody nose.
If the English Cavalry had Skirmishers, it would have been helpful to withdraw here but all they get is Hard Chargers!
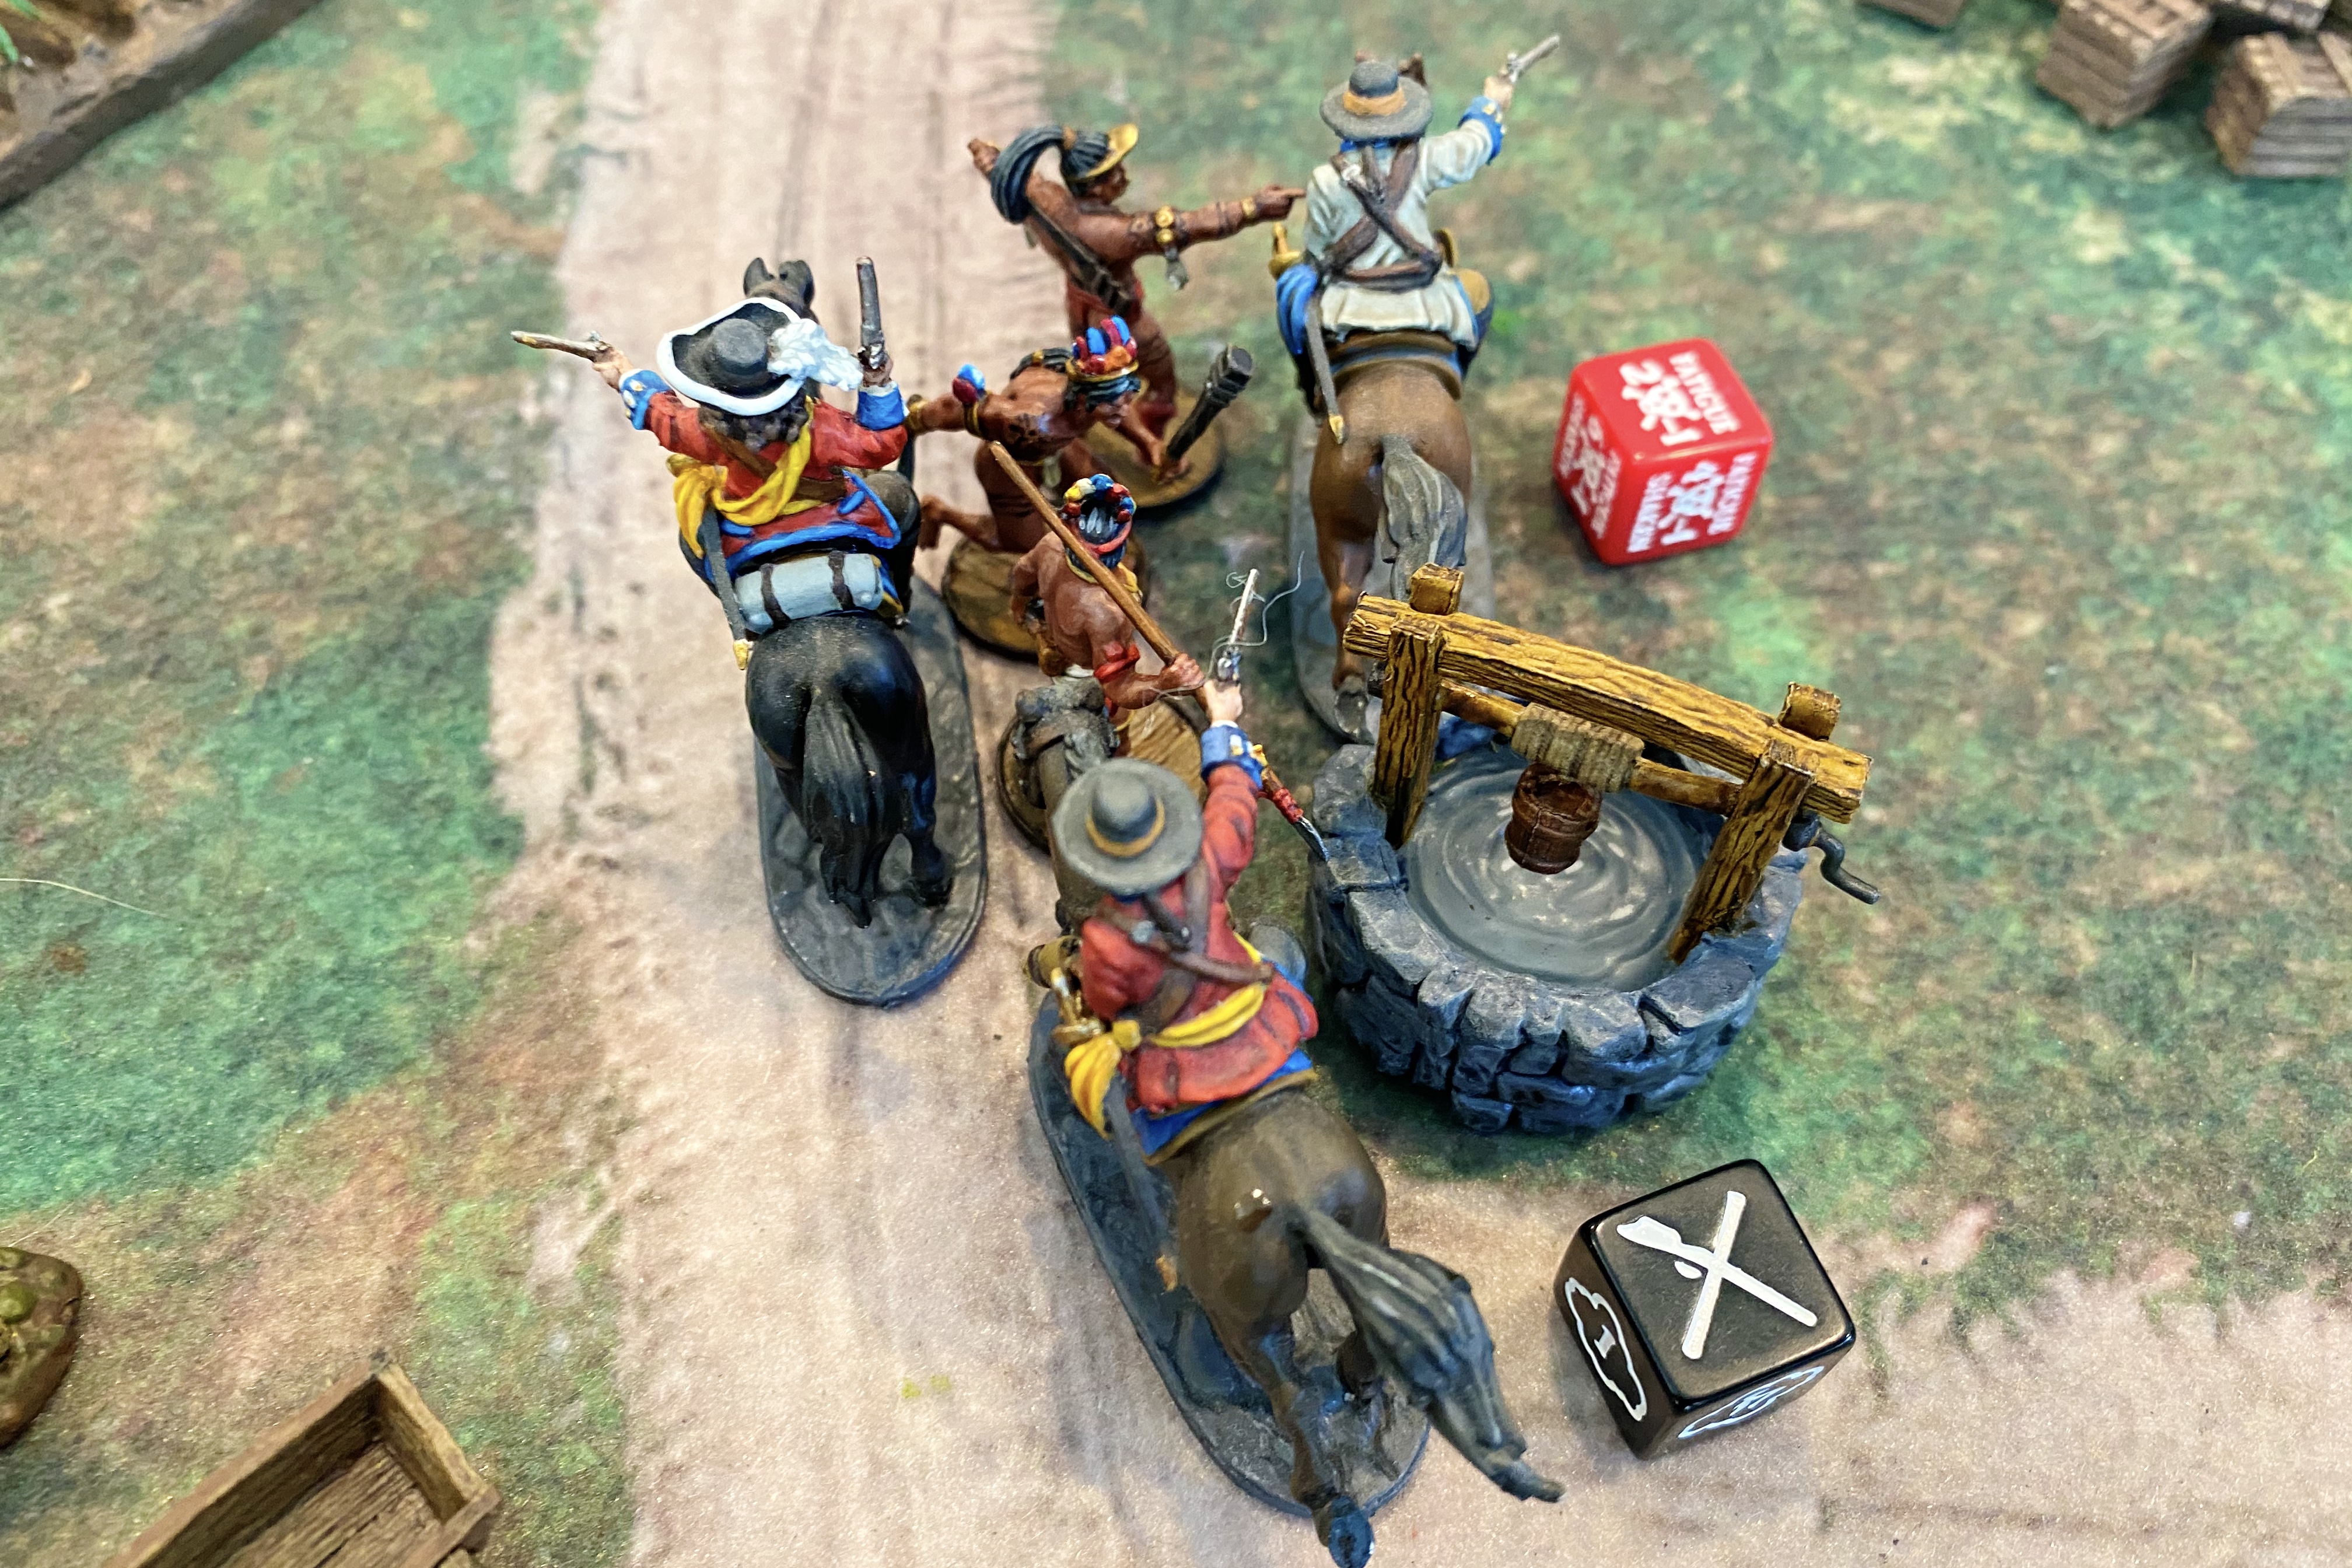
The Native Commander held long enough for the Warrior Musketeers to come out of their cover and charge the cavalry!

Even with a Fight of 6, the Musketeers saved the day and eliminated the last of the English Cavalry with the help of their faction War Cry ability.
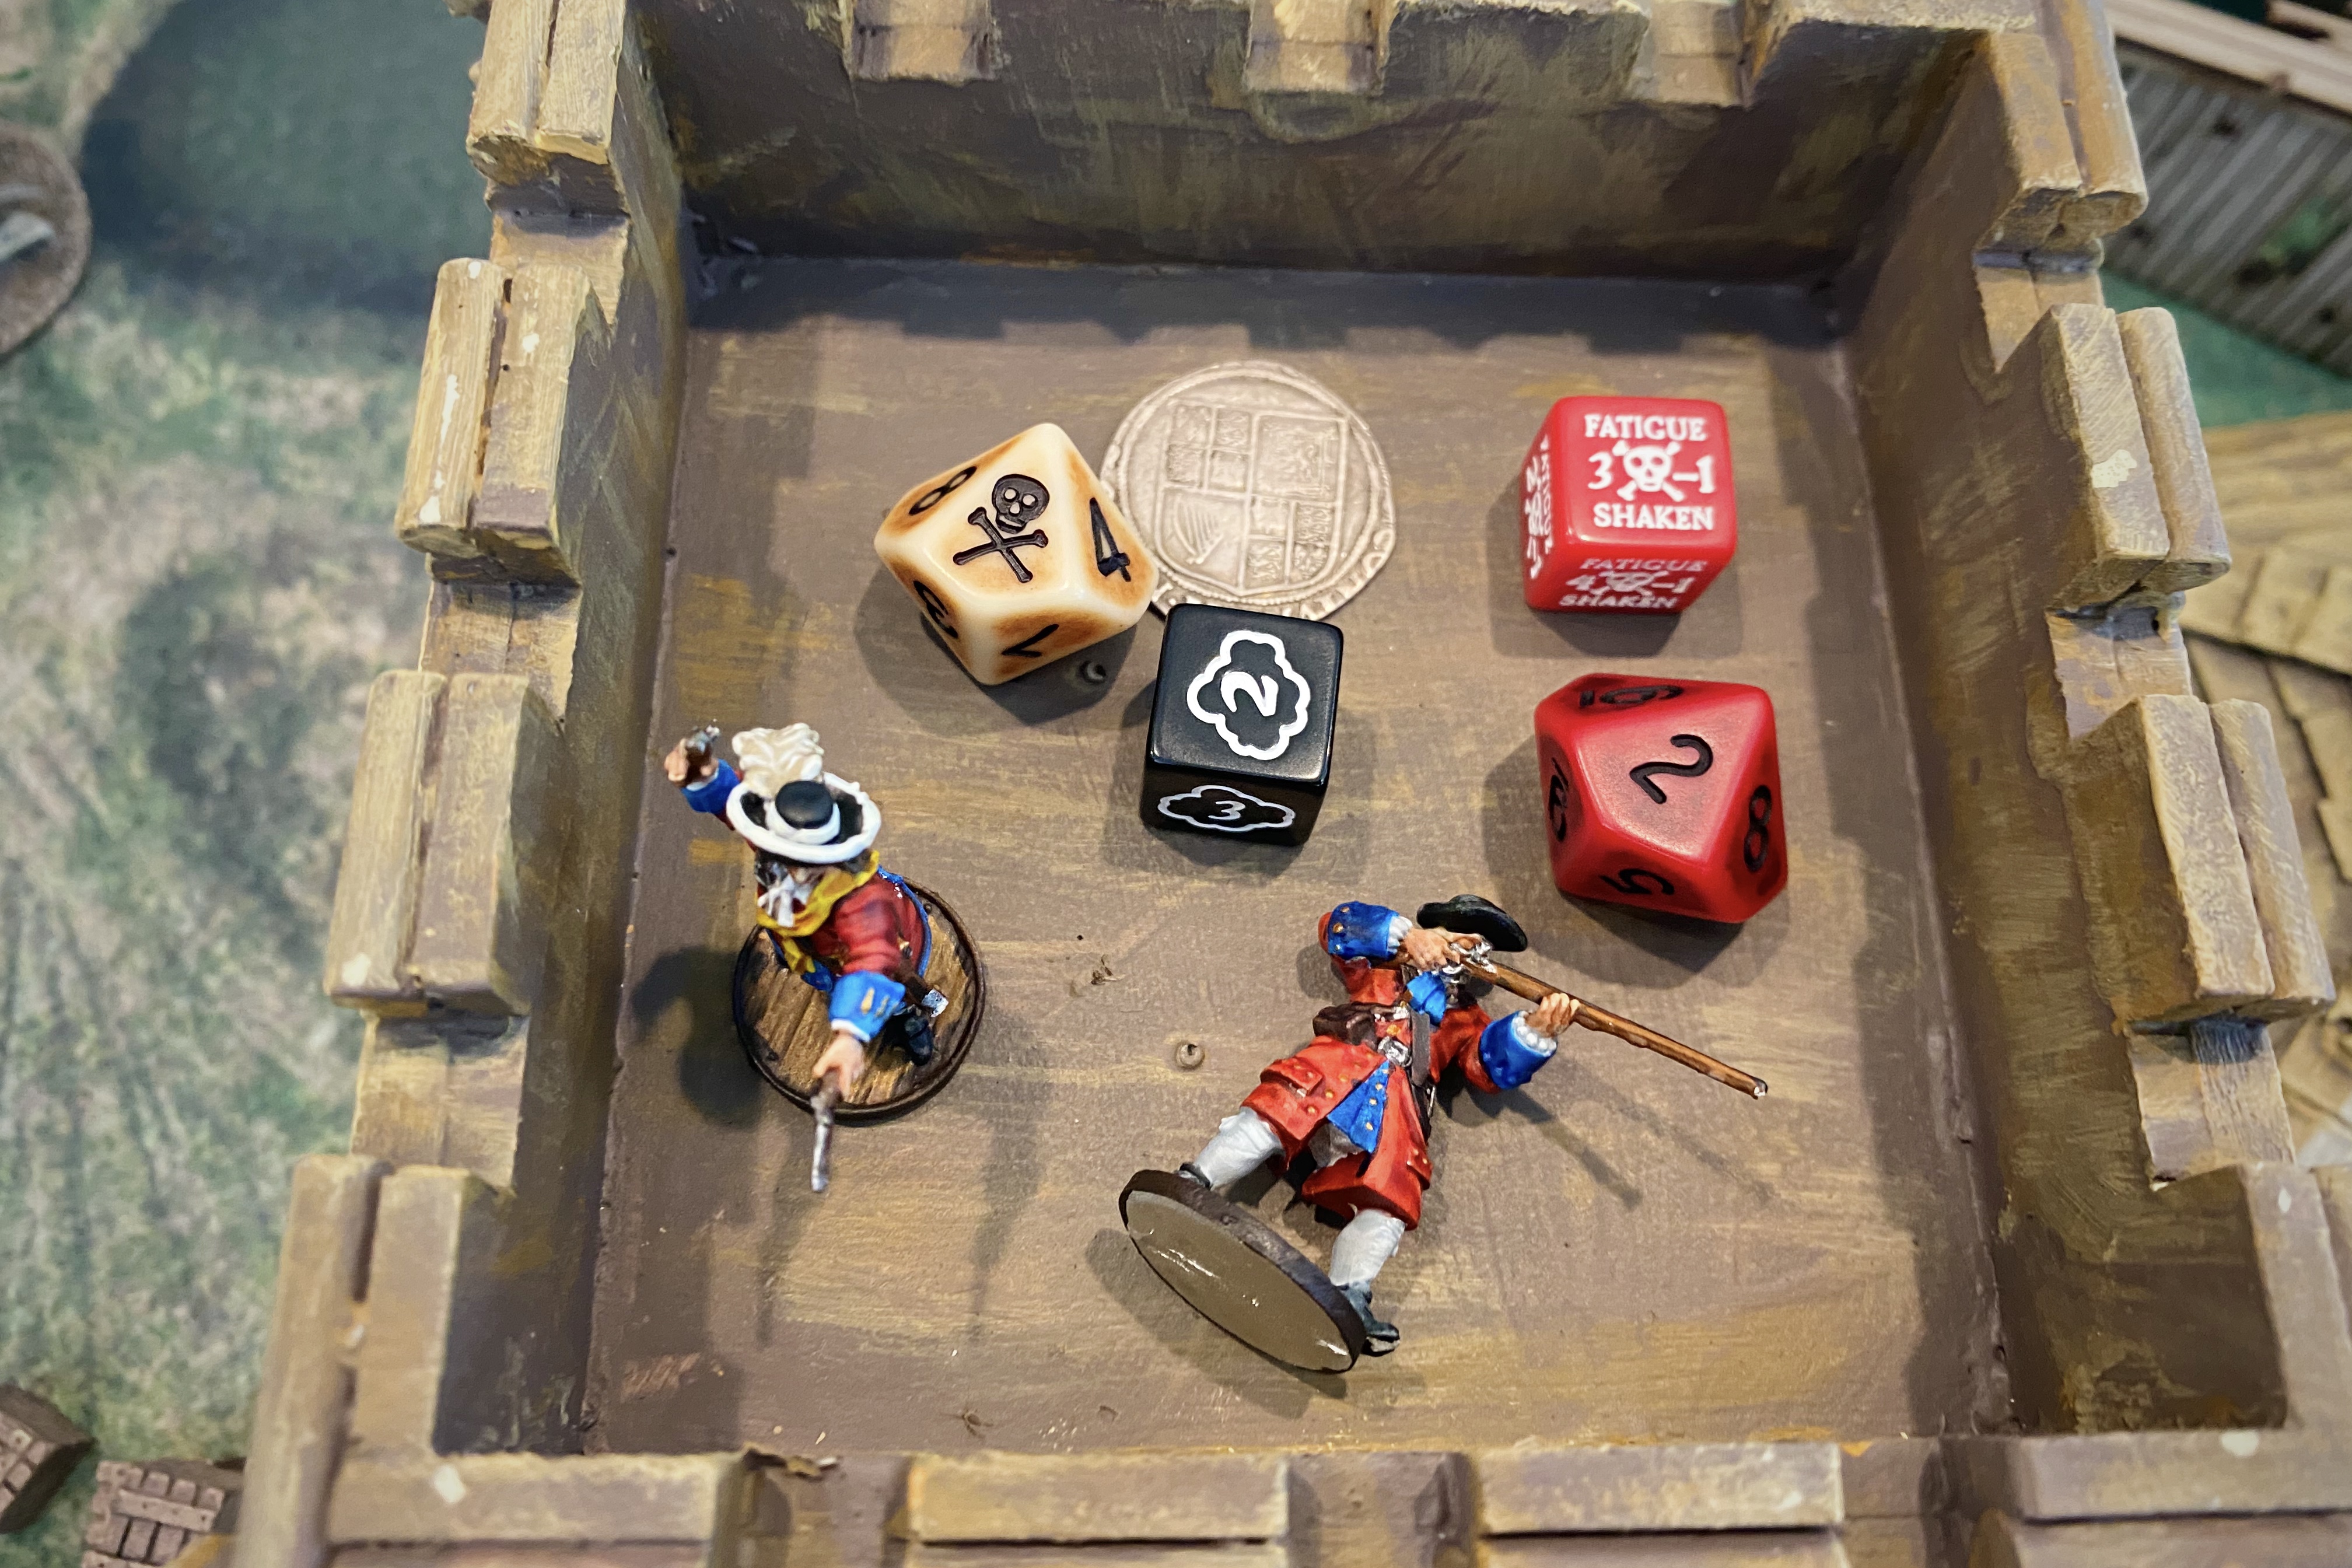
At the end of round 4 the English had 3 Strikes for Casualties, the Natives had 1 for 7 models lost and I thought neither side had any Strike Points for the scenario objectives (I was actually wrong. The Natives had one Strike for not having 2 units within the buildings). With only 2 models left the English commander had to take a Strike test and he failed. The English still had a Fortune Point so I let them spend it and they passed the Strike Test.
Turn 5
This was a short and brutal turn. I should have let the English give up on turn 4… The Archers shot into the English structure scoring 4 hits vs 2 models. While prone and in hard cover and with the bow save bonus, the Indian Fighters were saving on 2’s but all they needed was one Fatigue to flee and that’s what they got.
The English suffered 100% casualties and were pushed out of this outpost settlement while the natives suffered 7 dead. I’m sure a real person could have played the English a little better than my AI but I had fun using the natives and trying a new scenario.
Post Game Thoughts
- Well, I expected the scenario to be difficult for the Attacker but in this case they won handily. Having the AI was probably a big part of that but I think the other factors balance the scenario more than I anticipated. Forcing the Defender to deploy all their units first is a big advantage for the Attacker and having to place in the center of the board also makes the Defender’s job harder (even with the larger deployment zone). Letting the Defender place some of the objective buildings also helps even the playing field. I think the scenario felt reasonably balanced.
- The objectives felt OK but they kind of made my head hurt reading them as is. I wonder if they could be simplified a bit. Something like “The Defender gains a strike point for every building the Attacker occupies past the first one” along with “The Attacker gains a strike point if they no units inside an objective building by the end of turn 3.” I think the scenario works fine with these objectives but they are not simple to remember (or read). I misplayed the Strike Points on turn 4 (not that it changed the course of feel of the game).
- I wish the deployment instructions could be a little clearer as well. There’s two elements that seem like they could be confusing: the amount of buildings needed and when/how to place them. If the number (and minimum) of buildings was clearly stated along with instructions for placing them during setup was included in the Setup instructions, I feel it would be clearer and easy to grasp right away. As it is, you could get through setup and have your board, terrain and buildings all in place before you read on and find out there are restrictions for how to place the buildings in the Scenario Rules paragraph. I like simple instructions that you can read sequentially from top to bottom.
- I was really happy to see the North American English Militia first turn special ability do so much in this game! I’ve played this faction before and if the sides don’t clash on turn 1, it’s basically a useless ability. The English dodged 5 fatigue on turn 1 which really slowed down the Native fatigue train.
- I’ve played a lot of Natives but this was the first time I had played the Northeastern Woodland Tribes. They aren’t my favorite faction but with core access to all native units besides the Archers, they are flexible enough. The combination of War Cry and Spry pushes them towards a melee focus but they have fine ranged capabilities as well. Comparing this faction to the Later North American Tribes which features the new Braves unit, this faction is stronger in melee but substantially worse when it comes to gunpowder.

- Spry is one of those rules that sounds good but I rarely see do anything. My men always seem to have at least one Fatigue by the time they get attacked in melee. On the other hand Natives’ melee Saves are bad so getting a -1 bonus is always welcome! I’m going to have to concentrate on that rule next time it’s in my force to see if I can get value out of it.
- The cavalry was actually pretty good in this game. It seems like cavalry often gets shot off the table before they do much but they survived pretty well, got some good hits in and did a charge near the need in addition to providing a threat through the first half of the game. That 5 Resolve makes the English version a little more hardy than the French and Spanish as well.

- They didn’t do amazing in this game but I really like the Indian Fighter unit. They’re just good at pretty much everything on land. Kind of like the land version of what a Kaper is at sea. And Tough just puts them over the top! They seem like a great unit and I look forward to using them more. They’re models are really cool as well. If you haven’t bought some yet, you should! They will he taking a prominent place in a new English Raider faction which is part of the Queen Anne’s War material that should release soon.
- I sure like the Warrior Archer unit as well. A 5 Shoot with no reloads can just score so many hits! They are a Support unit in this faction but just having one unit of them on the table gives you a lot of control of the board by placing fatigue out on the table.
- I didn’t strictly use the official AI rules from Firelock for this game but after using them a few times, I feel I have a pretty good handle on how to run the AI. I used Fortune Points in this game which the official rules don’t allow but for testing a scenario like this, I wanted it to be as close to PvP as possible. I like my Fortune!
- I played this scenario again right after this using a 200 point Brethren of the Coast list attacking a 200 point Spanish Florida Garrison faction (in testing for the Queen Anne’s War expansion) and my Attackers barely won again but it boil down to killing each other rather than actually taking the buildings.
Thanks for reading! What do you think of this scenario? Any feedback is welcome! Does it look fun to you?
I’m looking forward to trying these new scenarios with some new Raider factions! I believe we should be getting a small Queen Anne’s War expansion with these new scenarios and several new units and factions soon! I’m guess the answer to the “how soon?” questions kind of depends on how much time the Firelock team has leftover after making sure they’re devoting enough attention to their Raise the Black Kickstarter.