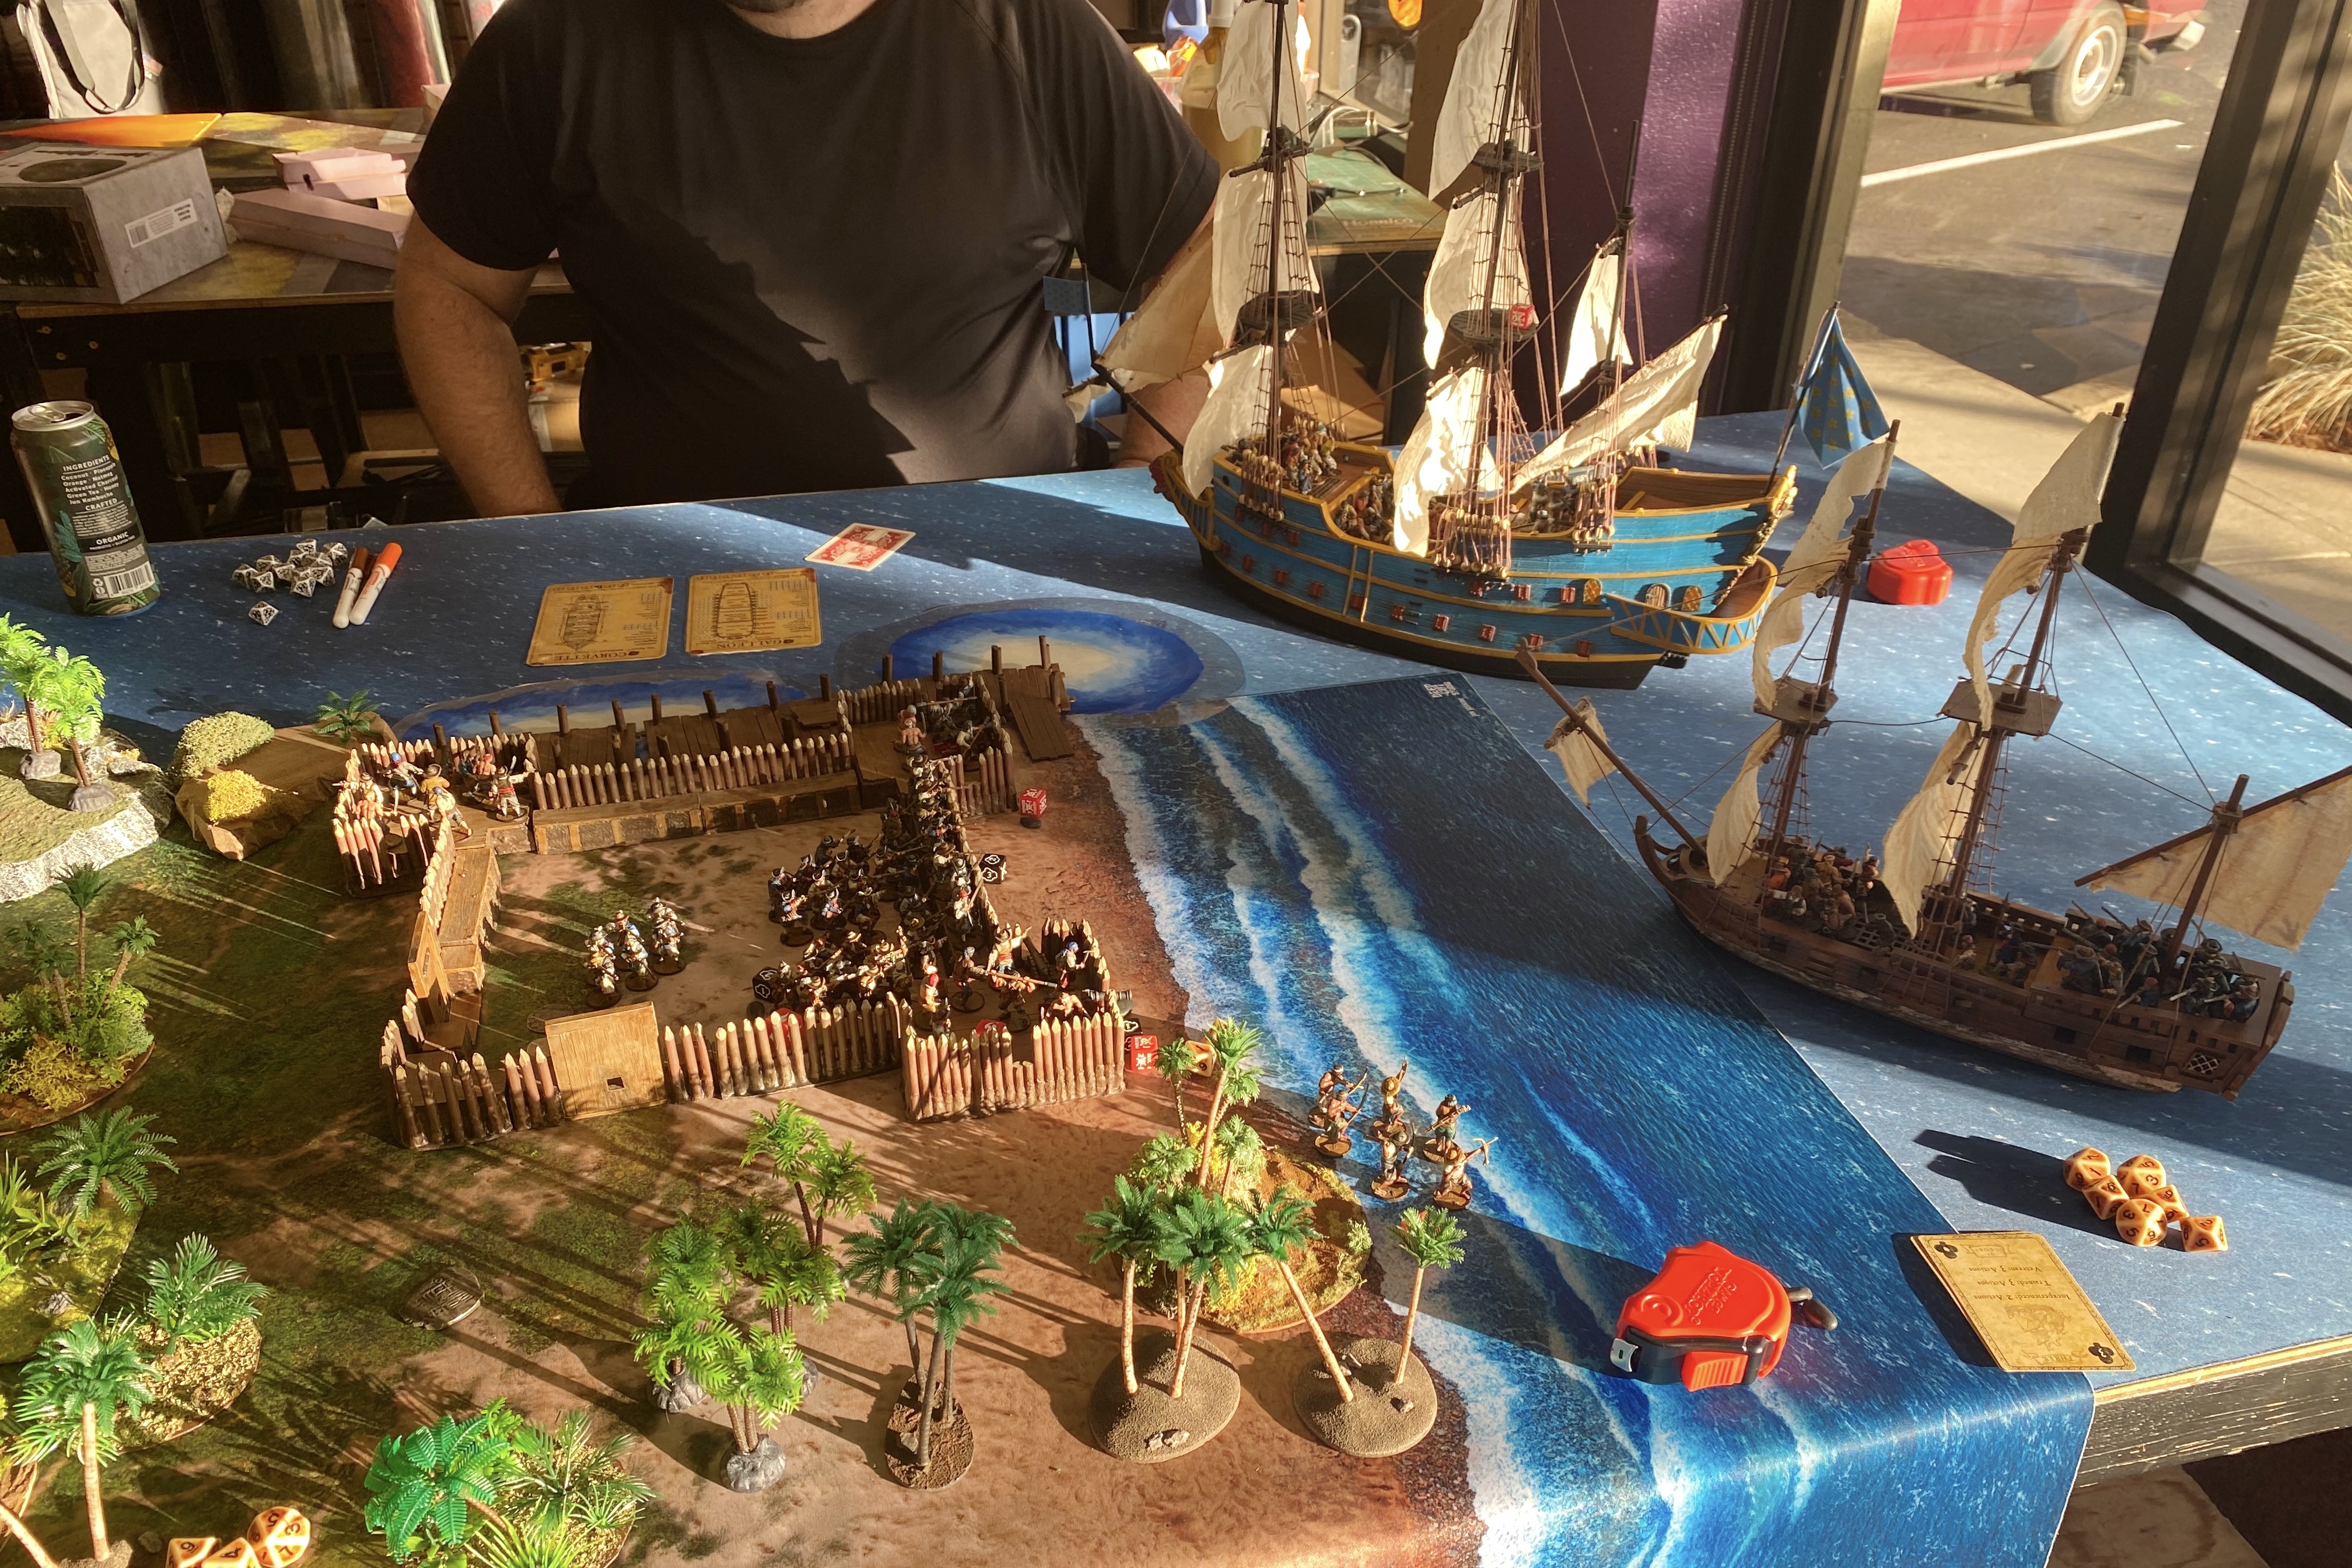
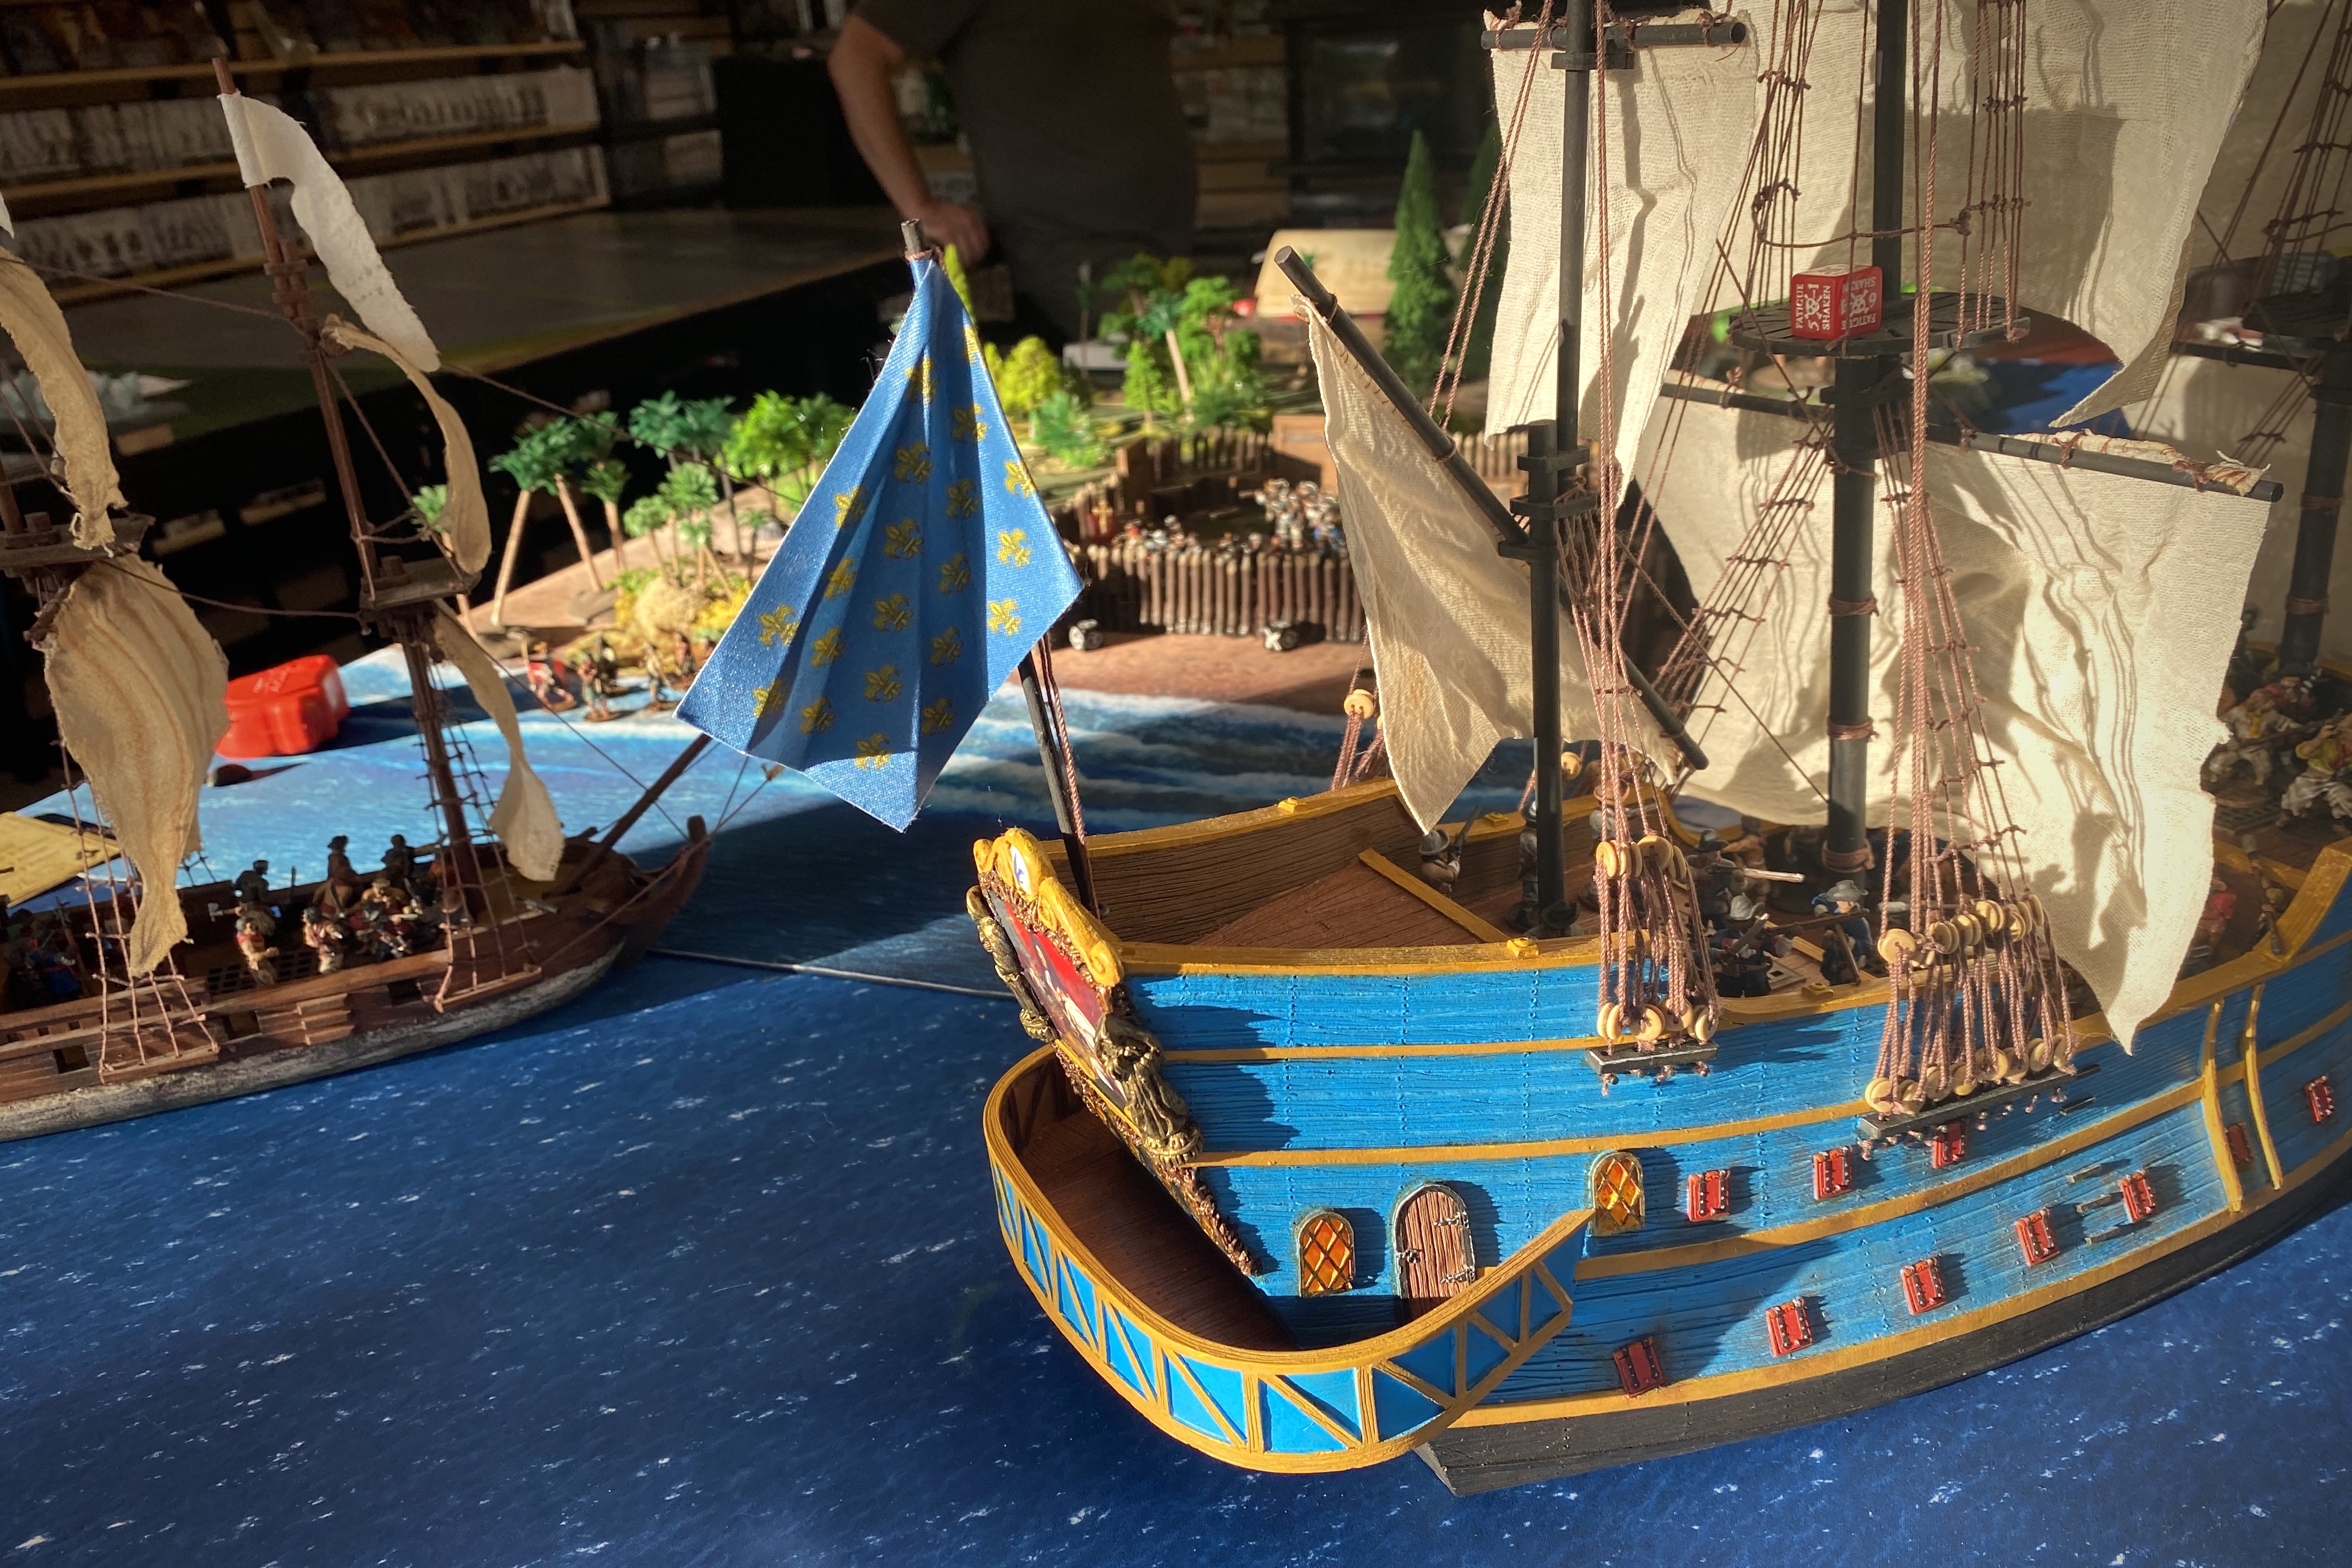
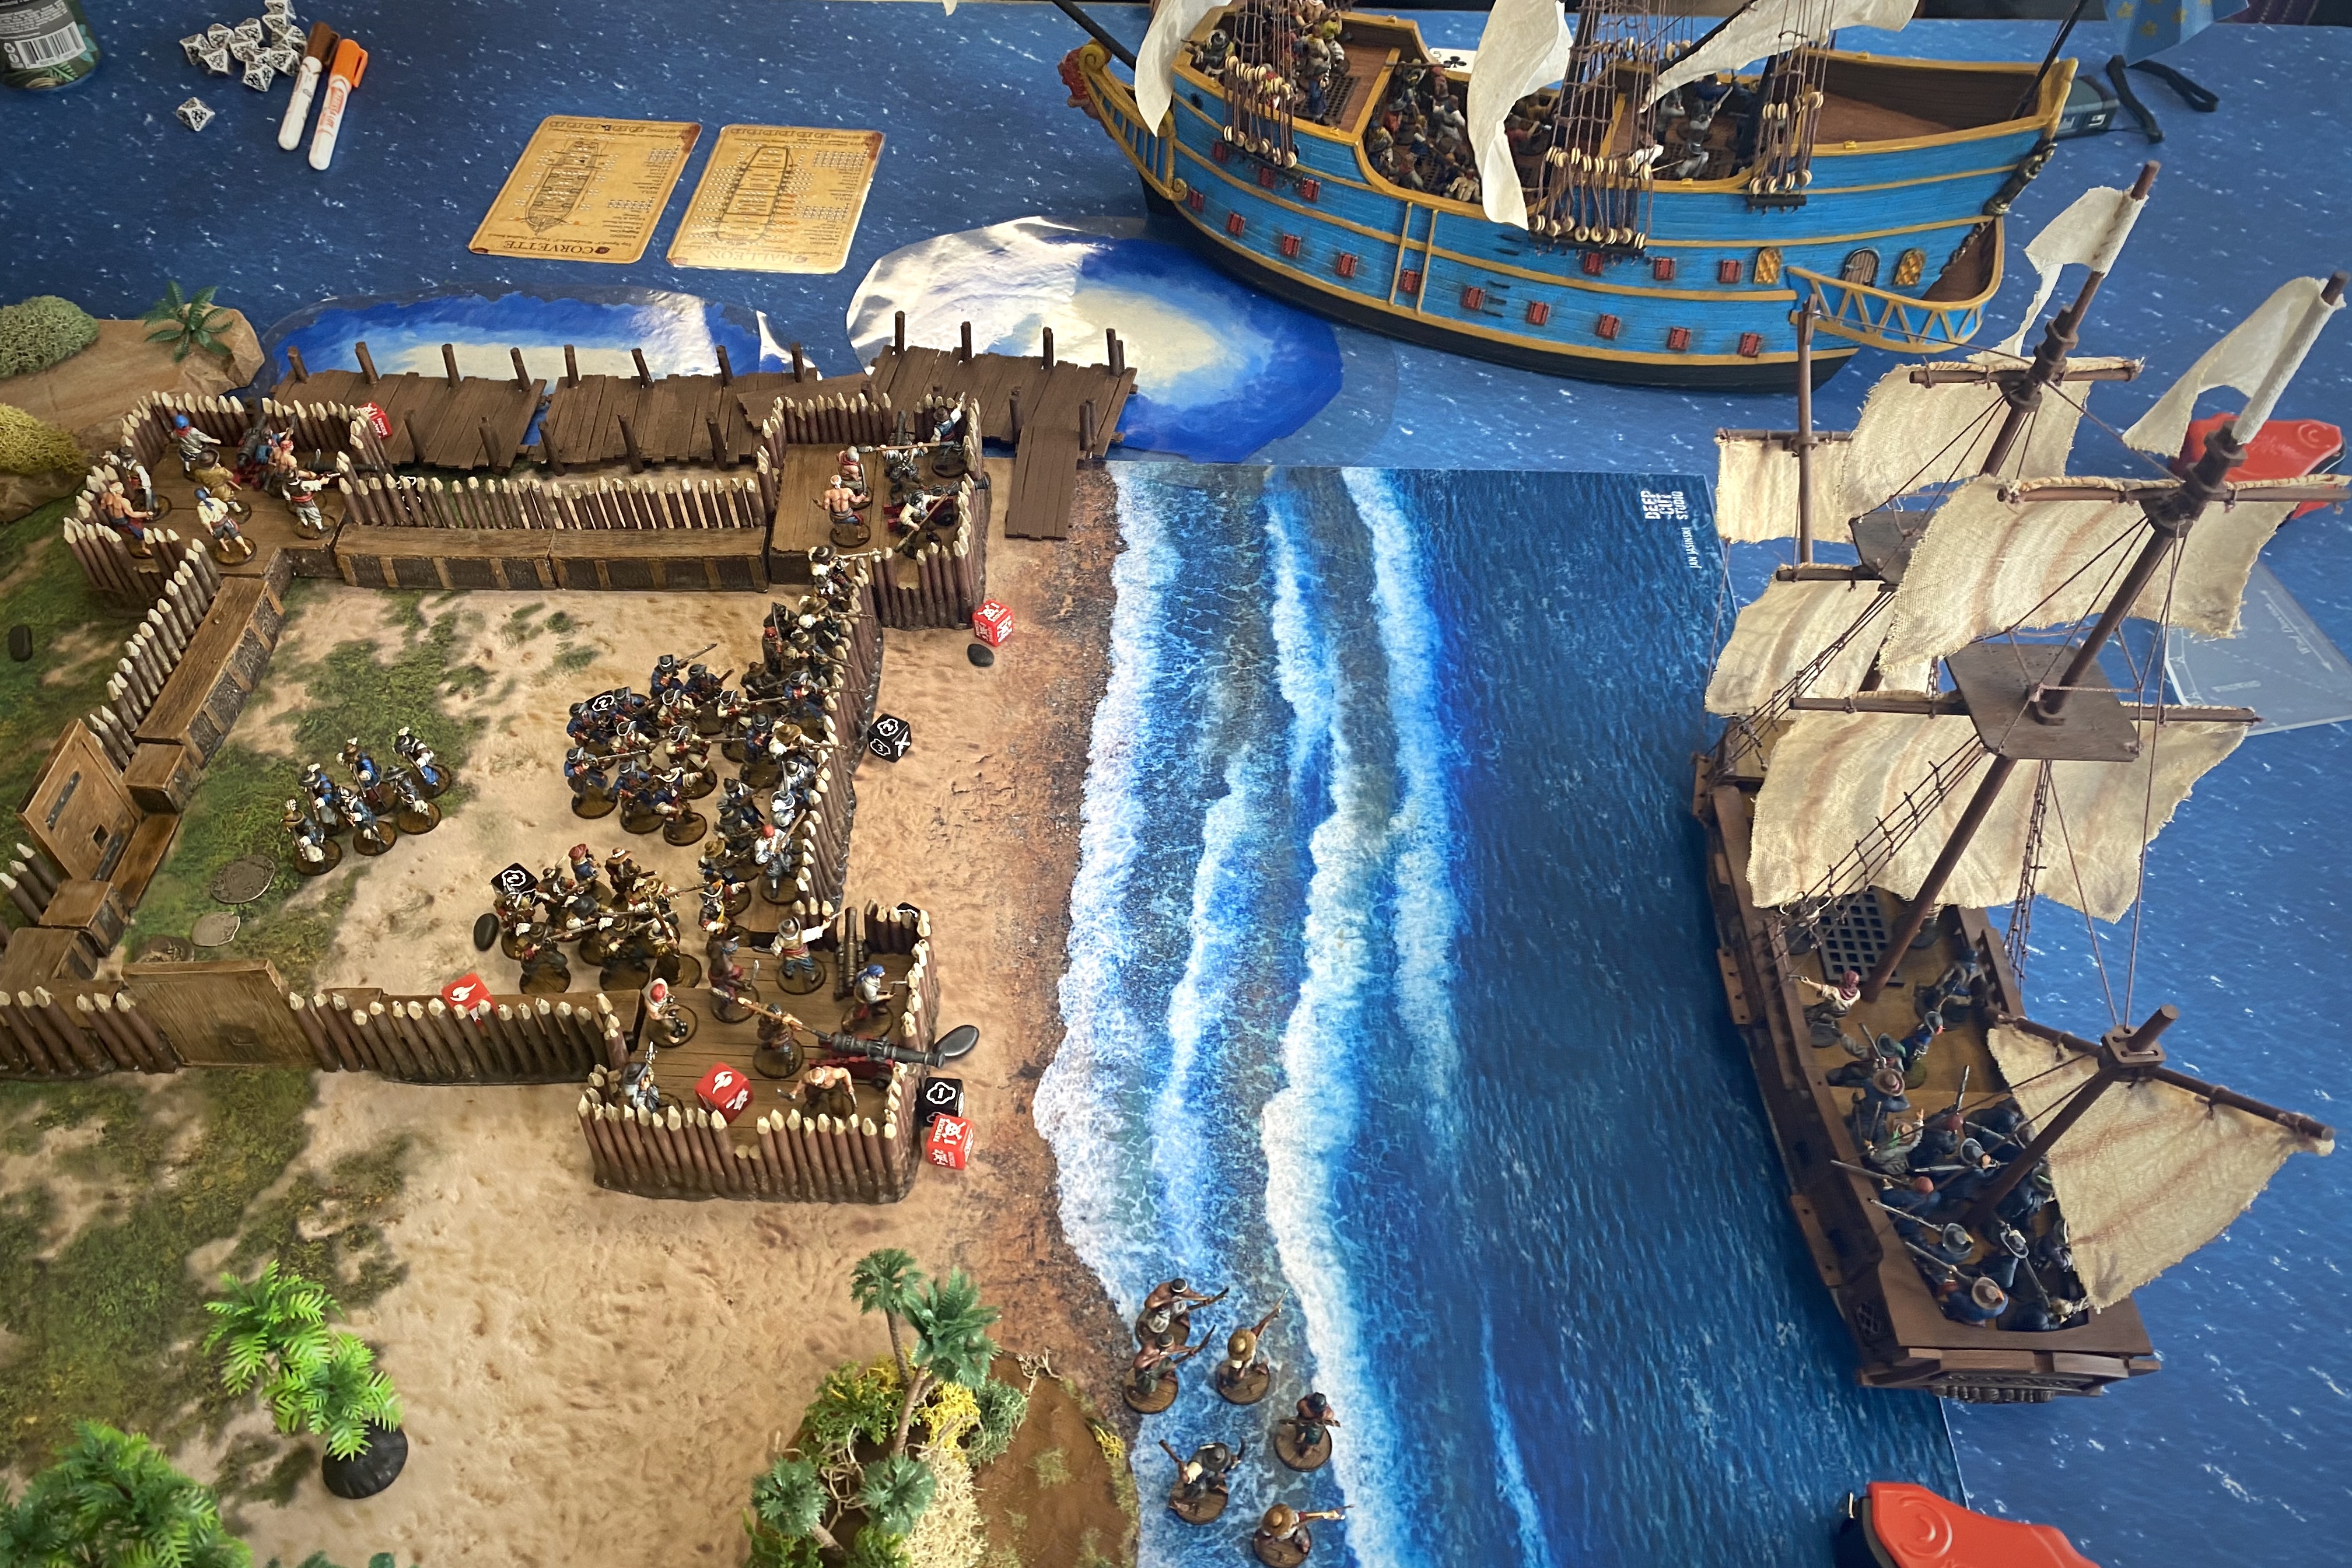
I have an epic battle report for you today! This was a 400 point amphibious game using a large wooden palisade fort manned with cannons and plenty of Spanish muskets vs the French Navy in a Corvette and the massive Galleon with my friend, Guy Reuark as admiral.
I’ve been working on play testing rules for the Palisade Fort and this was kind of the “big game” test game.

The Forces
As the defender, I chose the Spanish Tercios as my faction. I chose them partly for theme, partly because I have a lot of Spanish painted, and partly because they are actually pretty good in a fort. They are slightly superior to the Spanish Militia in this setting because you don’t need Lay in Wait and this faction can drop the Poorly Equipped rule on all Trained and Veteran units.
I also got to play test the new style of commander that is forthcoming in the Queen Anne’s War expansion and this played into my choice of factions.

Before I go over what was in my force I’ll outline the rules for the fort and the new rules for the commander that I used.

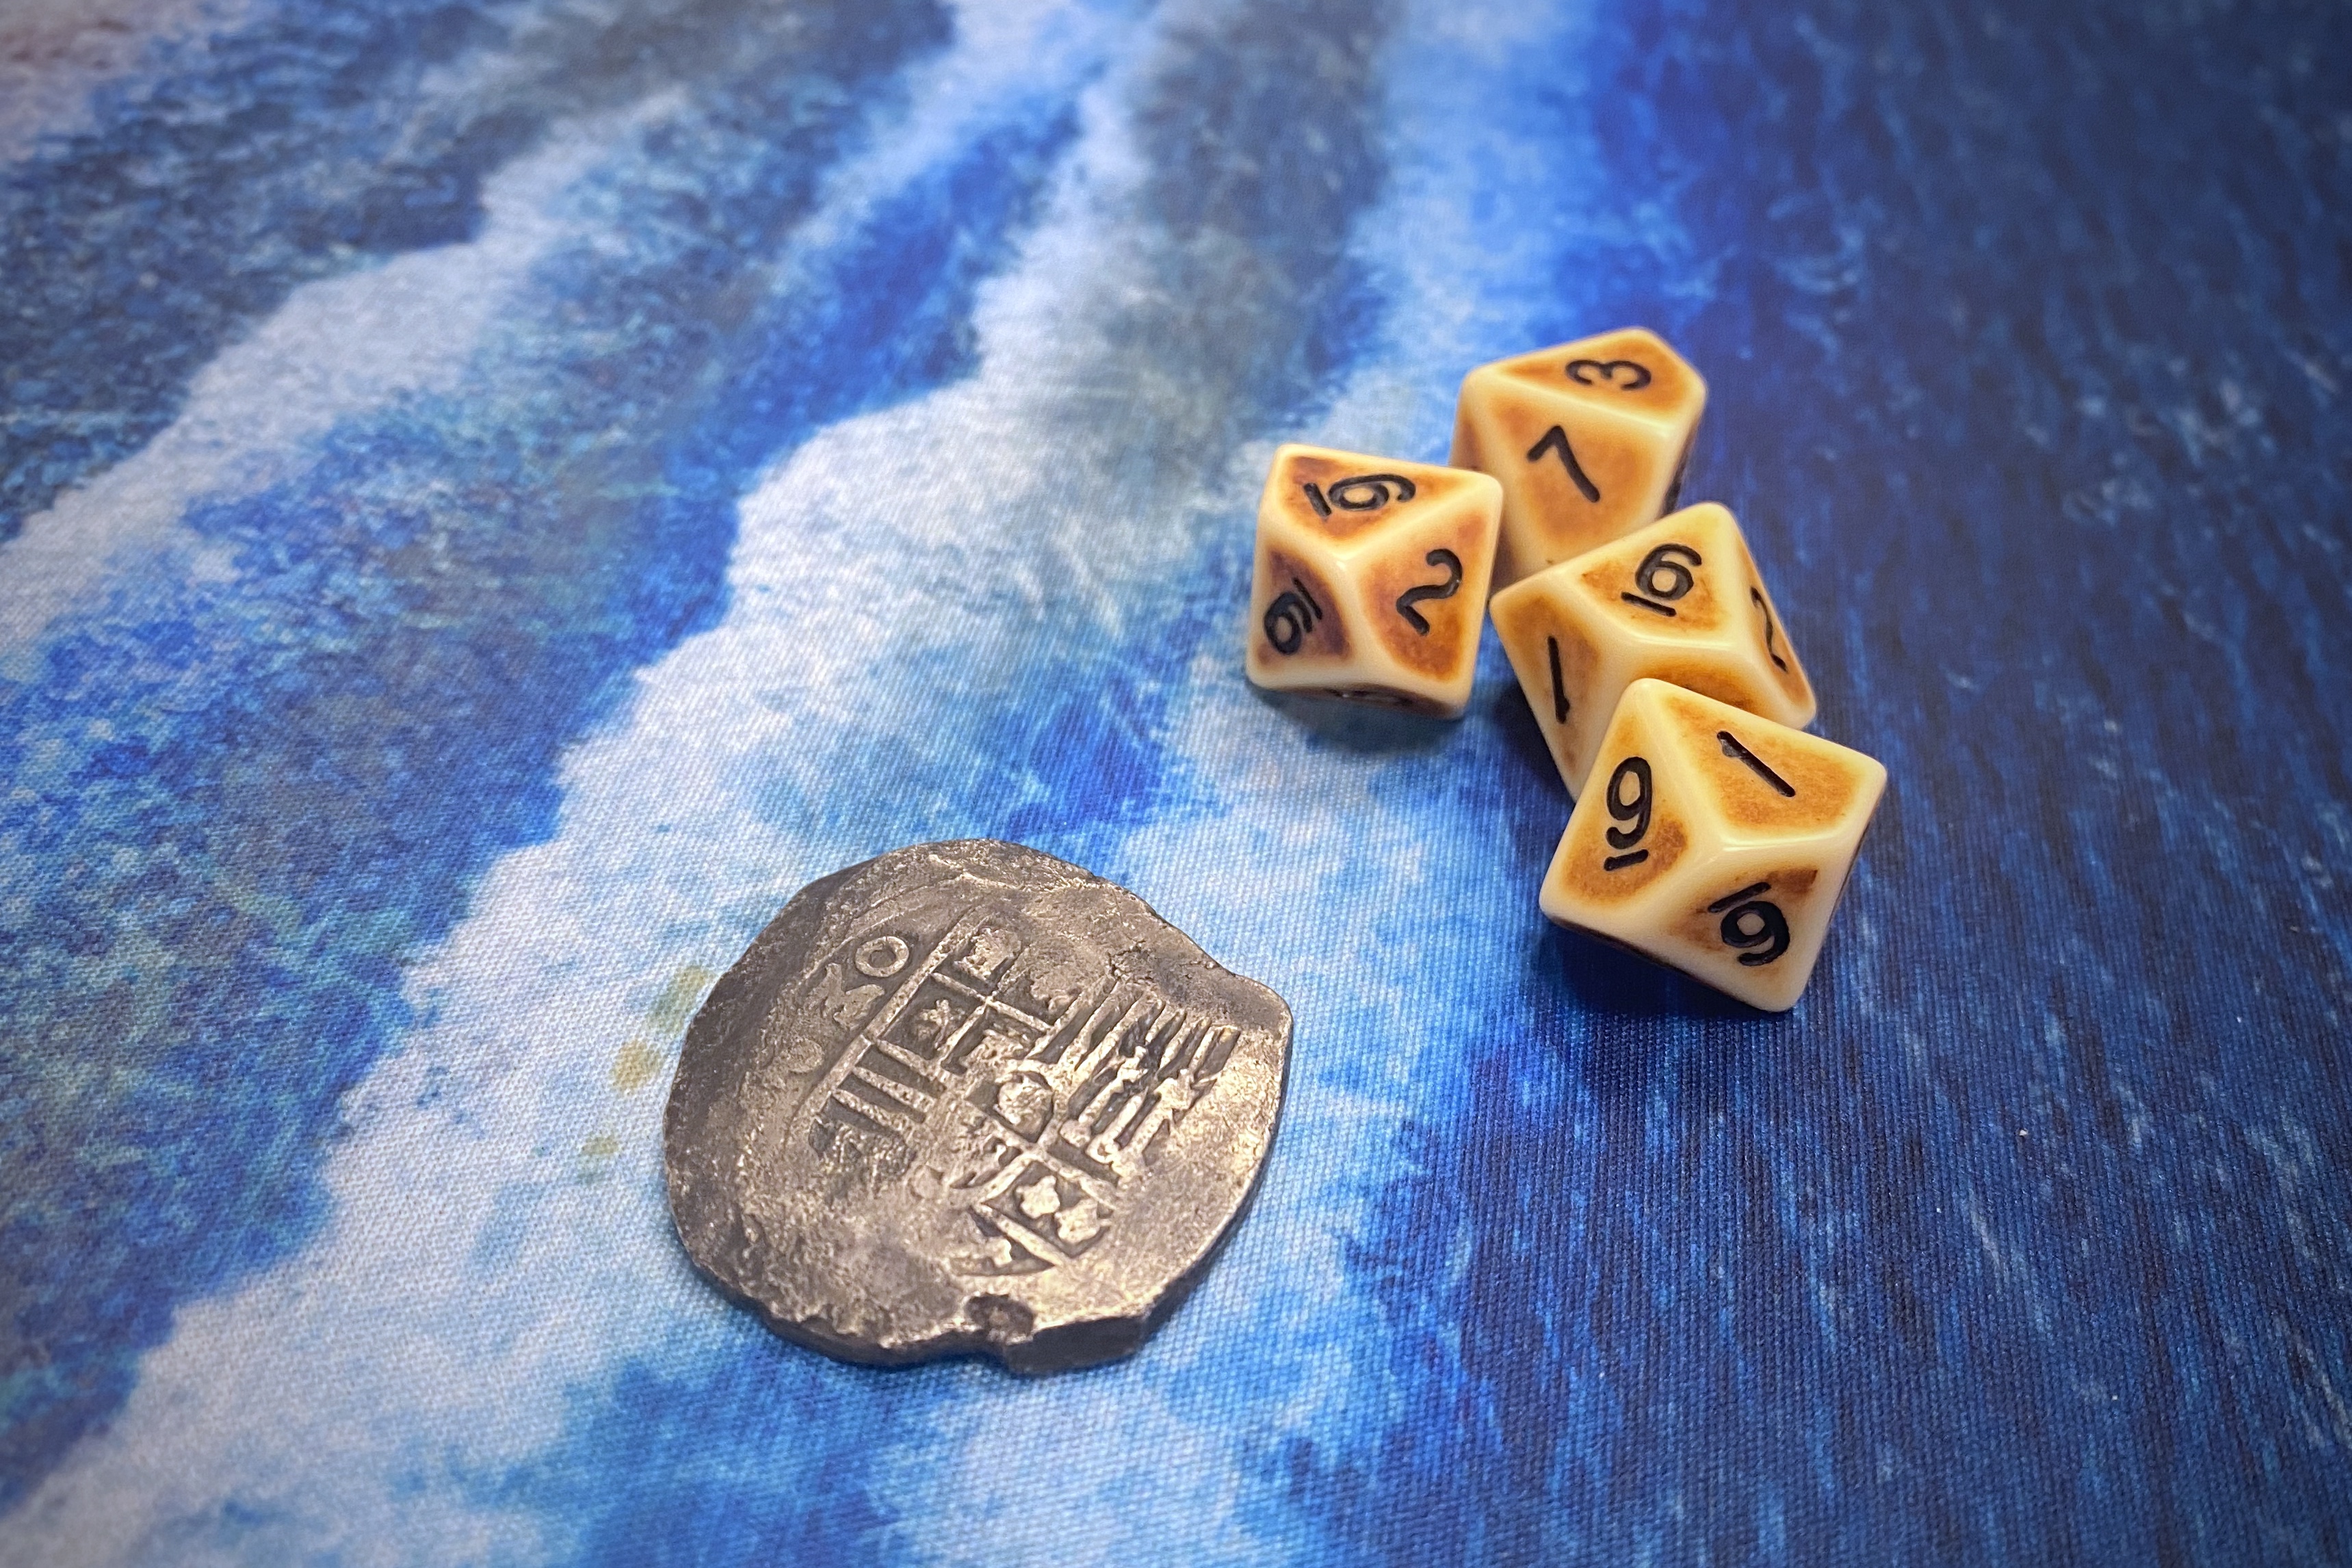
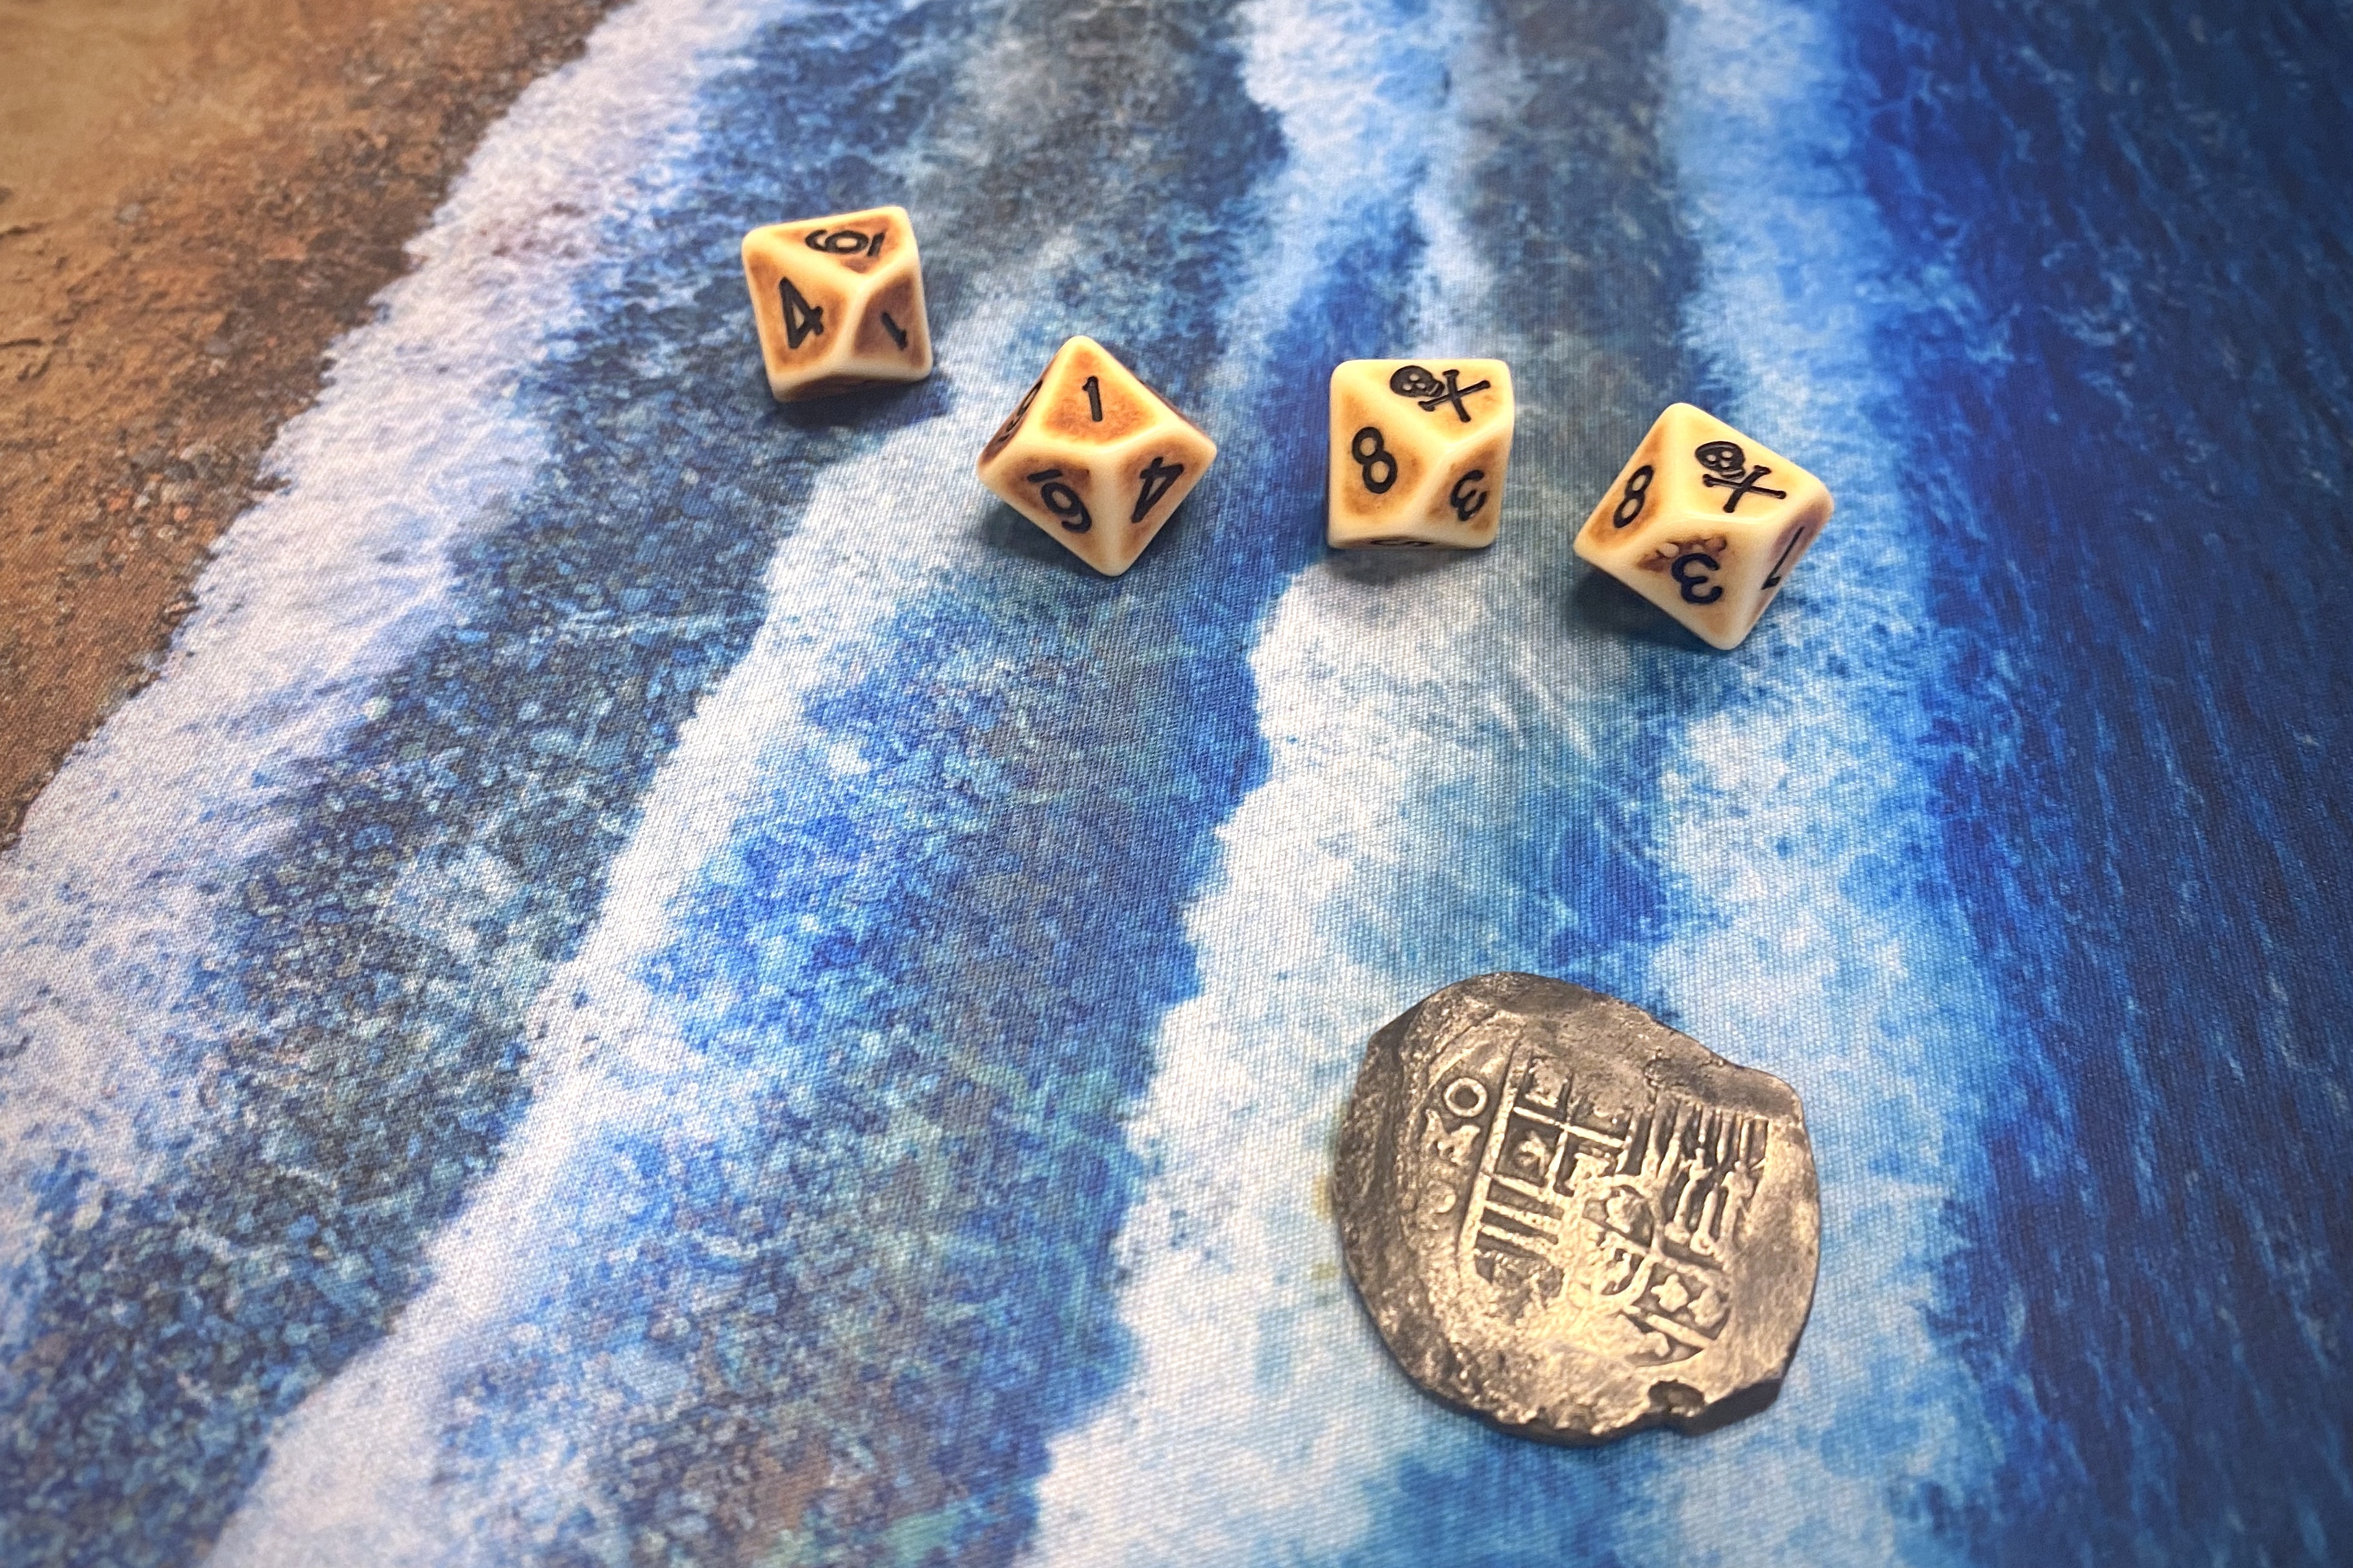
Real 17th century Spanish coins for my Fortune Points
The current rules in play testing for the Palisade Fort look something like this (although we tweaked the rules a little after learning some from this battle):
- Linear wall sections provide hard cover and act as a structure section with a Fortitude of 3 and Integrity of 4 with no mounts for cannons or swivels. Wall sections cost 2 points.
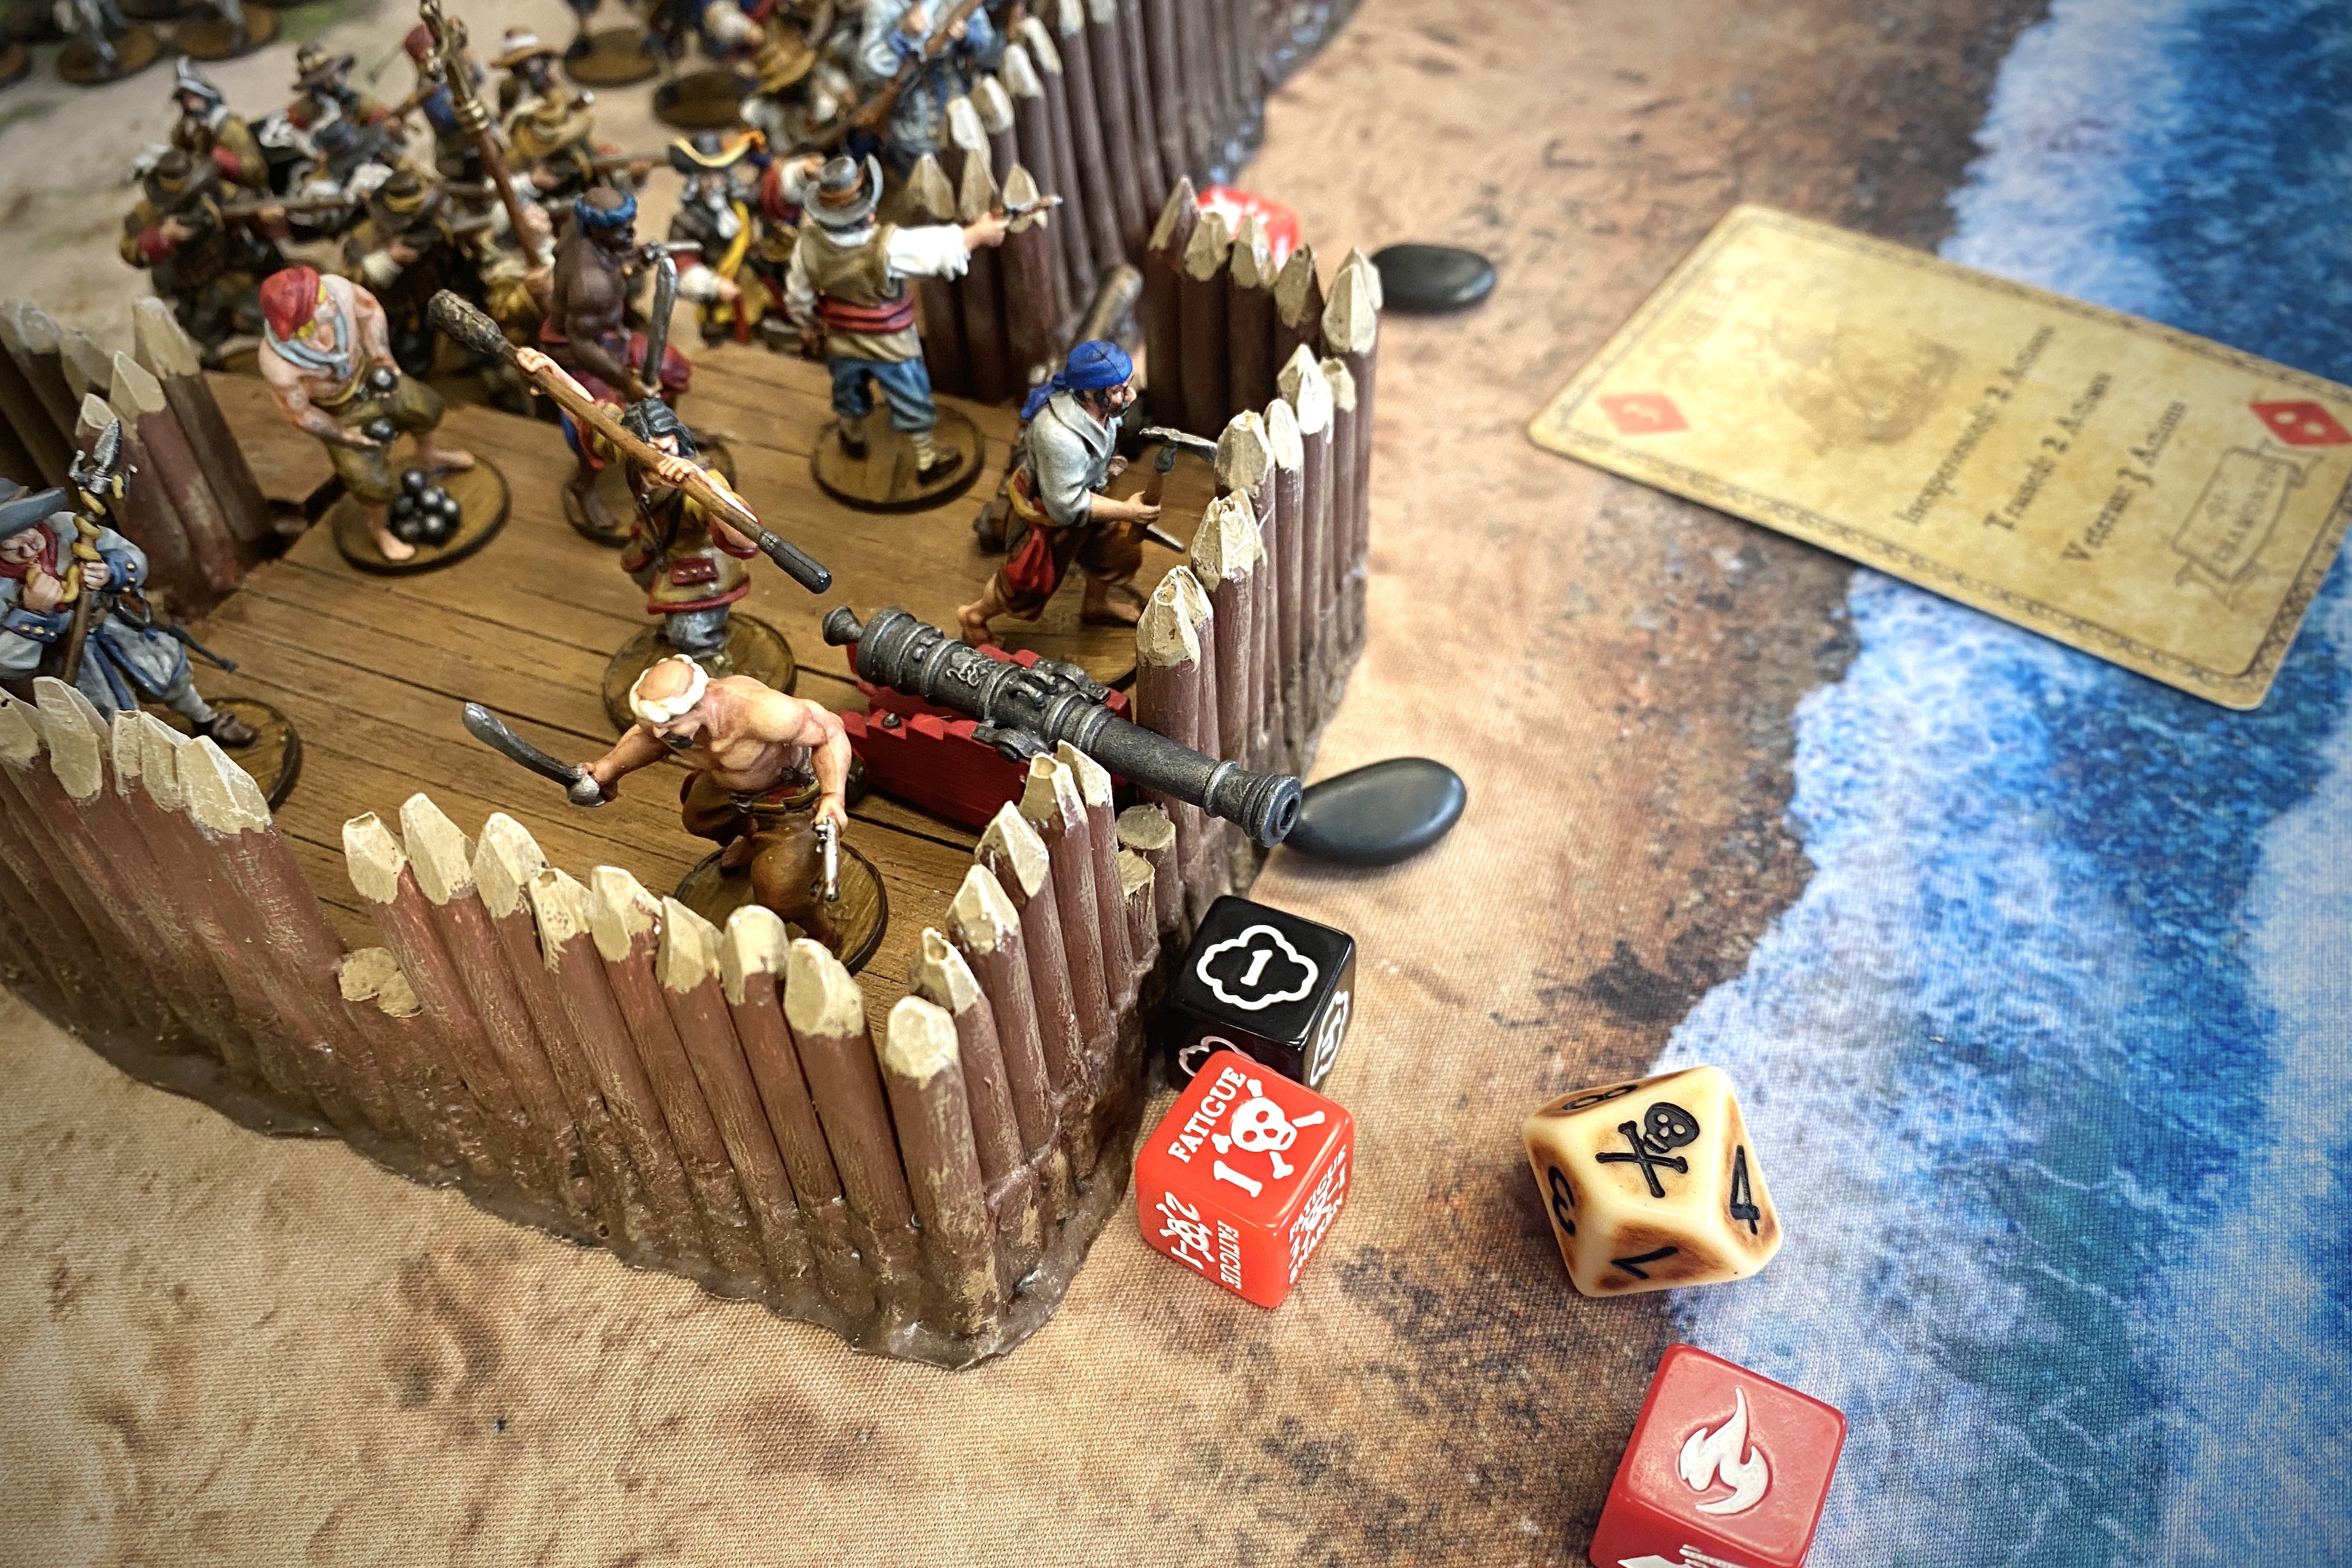
- Bastions also provide hard cover and function as a structure section with Fortitude of 4 and Integrity of 4. They can mount up to 2 cannons of any size and those cannons can be repositioned at different openings throughout the game with a Dedicated action to dismount and another Dedicated Action to mount the cannon at the new port. Bastions cost 5 points.
- For each bastion included in your list, you can include a unit with the Artillery Crew rule as a core unit instead of support.
- If you use a completely enclosed fort, your commander gains an additional Command Point that can only be used for Rally actions.
- When fired on from a moving ship, both the bastions and walls gain the Low Profile 4 trait.
There are more rules and details in the works to make this fort a lot of fun, but those are the basics.

I also used a new type of commander! In the upcoming Queen Anne’s War expansion, there will be new generic commanders which you can customize to best lead your army. At 0, 10 and 20 points, they are slightly cheaper than the current Untested, Experienced and Seasoned Commanders available for the various factions. Choosing your own special rules is a distinct advantage but the big catch is that the 10 point commander only has 1 command point instead of the 2 CP we’re used to on the 15 Experienced Commander that seems to see the most use. The other interesting thing is that these new customizable commanders use the same weapons and equipment as the unit they get attached to. The very cool thing about these commanders is that each nationality has a different list or menu of special rules to pick from. This way each nation keeps some distinct character and flavor, but you can make a cheaper commander that will have the abilities needed to lead the type of army you want to play. I’m really excited about this whole idea!

I’ll give you a sneak peek at the set of special rules available to the generic Spanish commander:
- Commodore
- Broadside
- Inspiring
- Resilient
- Swordsmen
- Castilian
- Guerrilla Commander
In addition, the Spanish commander always gets Spain’s signature Ruthless rule.
I used a 20 point commander so I got to pick 3 of these special rules. I chose Castilian, Swordsmen and initially I chose Inspiring but later realized that I had a Musician attached to the commander which gave him that ability anyway so I switched to Resilient. I mostly enjoyed getting to use the Castilian rule which is included in the rules in No Peace Beyond the Line but isn’t actually on any commanders and only available in the campaign (which is very fun btw).

My Spanish Tercio force included:
- 8 Hostigadores with the 20 point Commander and a Musician and Spiritual Leader attached
- 7 Hostigadores with a Grizzled Veteran attached
- 7 Hostigadores
- 6 Hostigadores
- 13 Veteran Soldados with Bayonets and an Officer attached
- 6 Milicianos Indios
- 8 Trained Milicianos Artilleros with a Master Gunner attached
- 8 Trained Milicianos Artilleros
- 8 Trained Milicianos Artilleros
- 33 points worth of Palisade Fort
- 3 Medium Cannons
- 3 Heavy Cannons (free on the Raze scenario)
- Grapeshot on all the Cannons
This is probably the largest land force I’ve ever used! At 72 models, I would only earn a Strike Point for every 18 casualties!
I also have to point out that the unit of Soldados was worth 103 points! 13 models x7 for Veterans plus 8 for the Officer and 4 for the Bayonets. I’m not sure if I’ve ever used a 100+ point unit before this game.

While I was running 9 units, Guy’s French Navy force only ran 5 large units in two ships.

The French Navy force included:
- 12 Marins without pistols with an Untested French Navy Commander attached, assigned to 3 pairs of Medium Cannons on the forward gun deck of the Galleon.
- 16 Marins without pistols with a Master Gunner attached assigned to 4 pairs of Medium Cannons on the main gun deck of the Galleon
- 9 Marins with Buccaneer Guns and a Son of Neptune attached on the main deck of the Galleon
- Galleon with 7 pairs of Medium Cannons
- 16 Marins with 5 Blunderbusses and 2 Firepots with a Grizzled Veteran attached assigned to the 2 Swivel Guns on the main deck of the Corvette
- 15 Trained Milices des Caraibes with an Officer attached on the back deck of the Corvette
- Corvette with the Mizzen Mast with 2 Swivel guns in on the main deck

72 Spanish and 6 cannons in a fort vs 68 French and 7 pairs of cannons in 2 ships. Blood will be spilt!
The Scenario
We chose amphibious Raze as our scenario.

In this scenario the Attacker has to either destroy one of three emplacements destroy a gun in the emplacement or having it burning by the end of turn 4 or later. They give the Defender a Strike Point if they fulfill that goal at any time and the Attacker will gain a Strike Point if they fail to either destroy the emplacement, a gun or fail to have an emplacement burning by the end of turn 4 or later.

We felt this worked really well thematically with the fort but we had to make a couple adjustments to the scenario. Usually the Defender gets free Gun Emplacements with Cannons according to the game size but in our game, we were using the fort instead of those emplacements. Gun emplacements usually cost 3 each so we gave my force a discount of 3 points per bastion and I got the Heavy Cannons for free. But the scenario specifies that the free cannons and any other cannons purchased by the Defender start the game with 4 Reload markers. Since cannons were a reasonably large part of my force, this balanced out the free stuff. The bastions also have a less Fortitude and hitpoints than the Gun Emplacements.

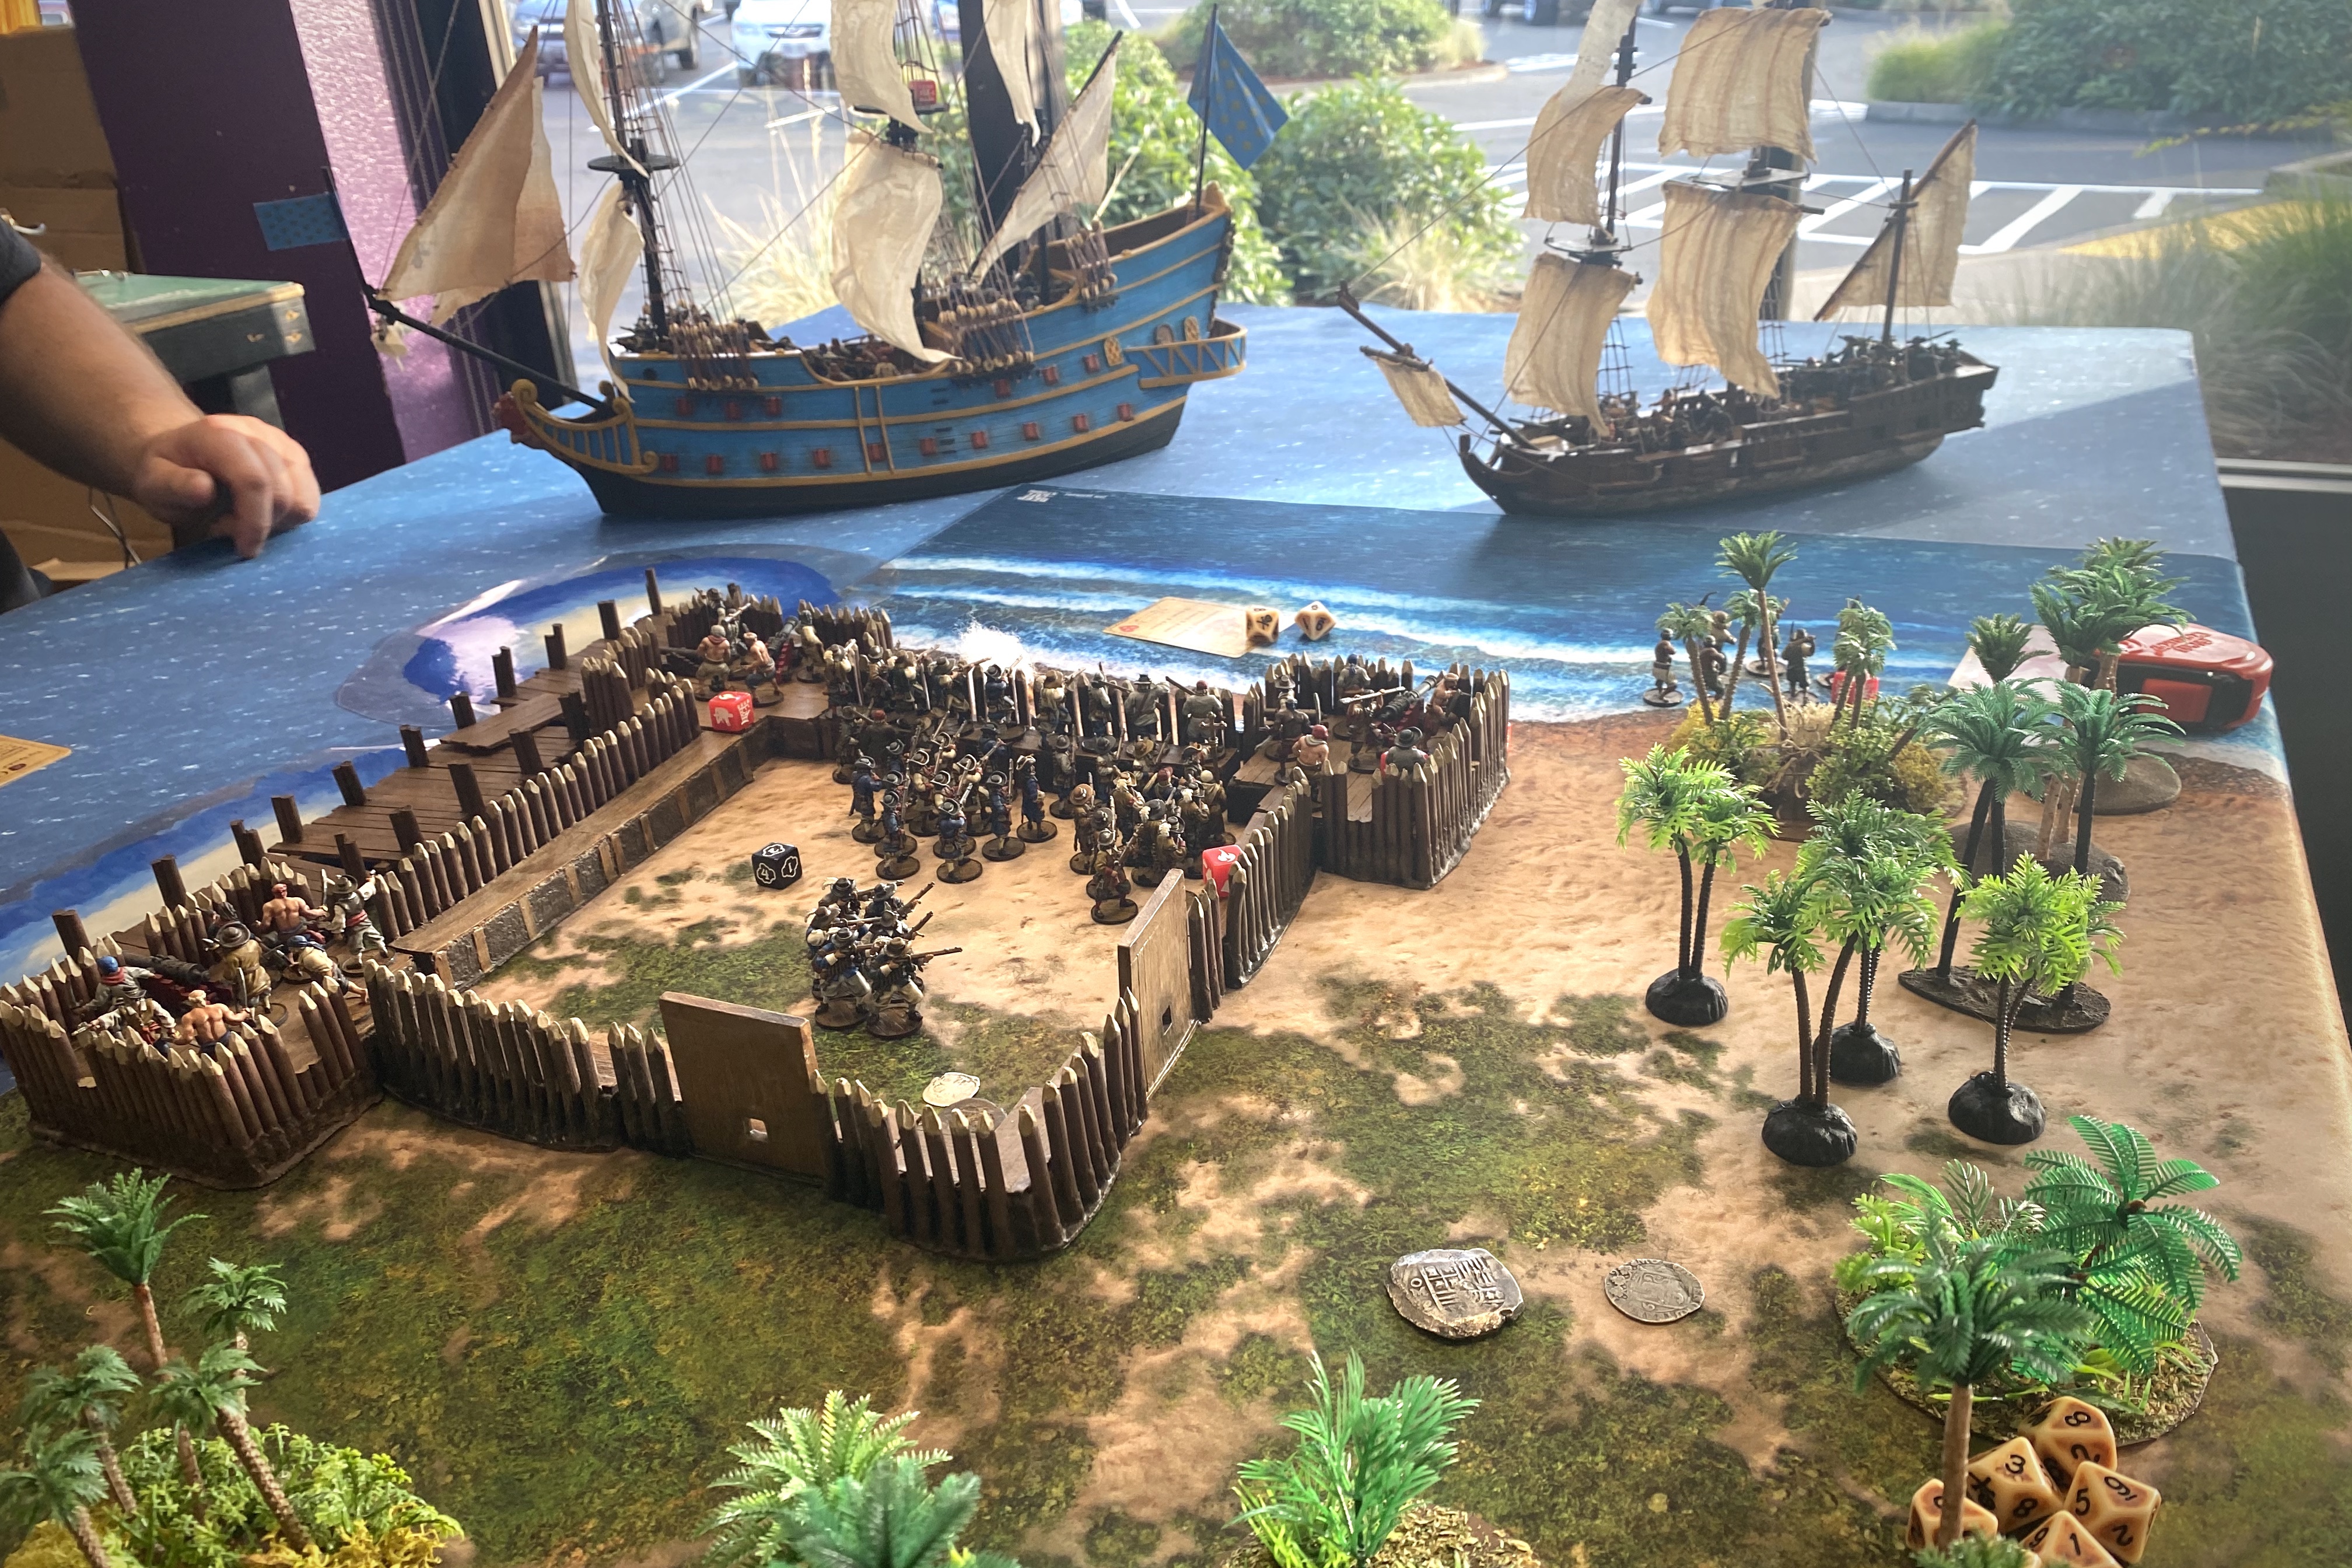
With 400 points per side, we expanded the board to a full 4’x6′ area as the rule book suggests.

The scenario rules allows the Attacker hold back any size 2+ ships during setup and have them enter the board during their first activation of any turn. Guy held both his ships back so I placed all my units first.
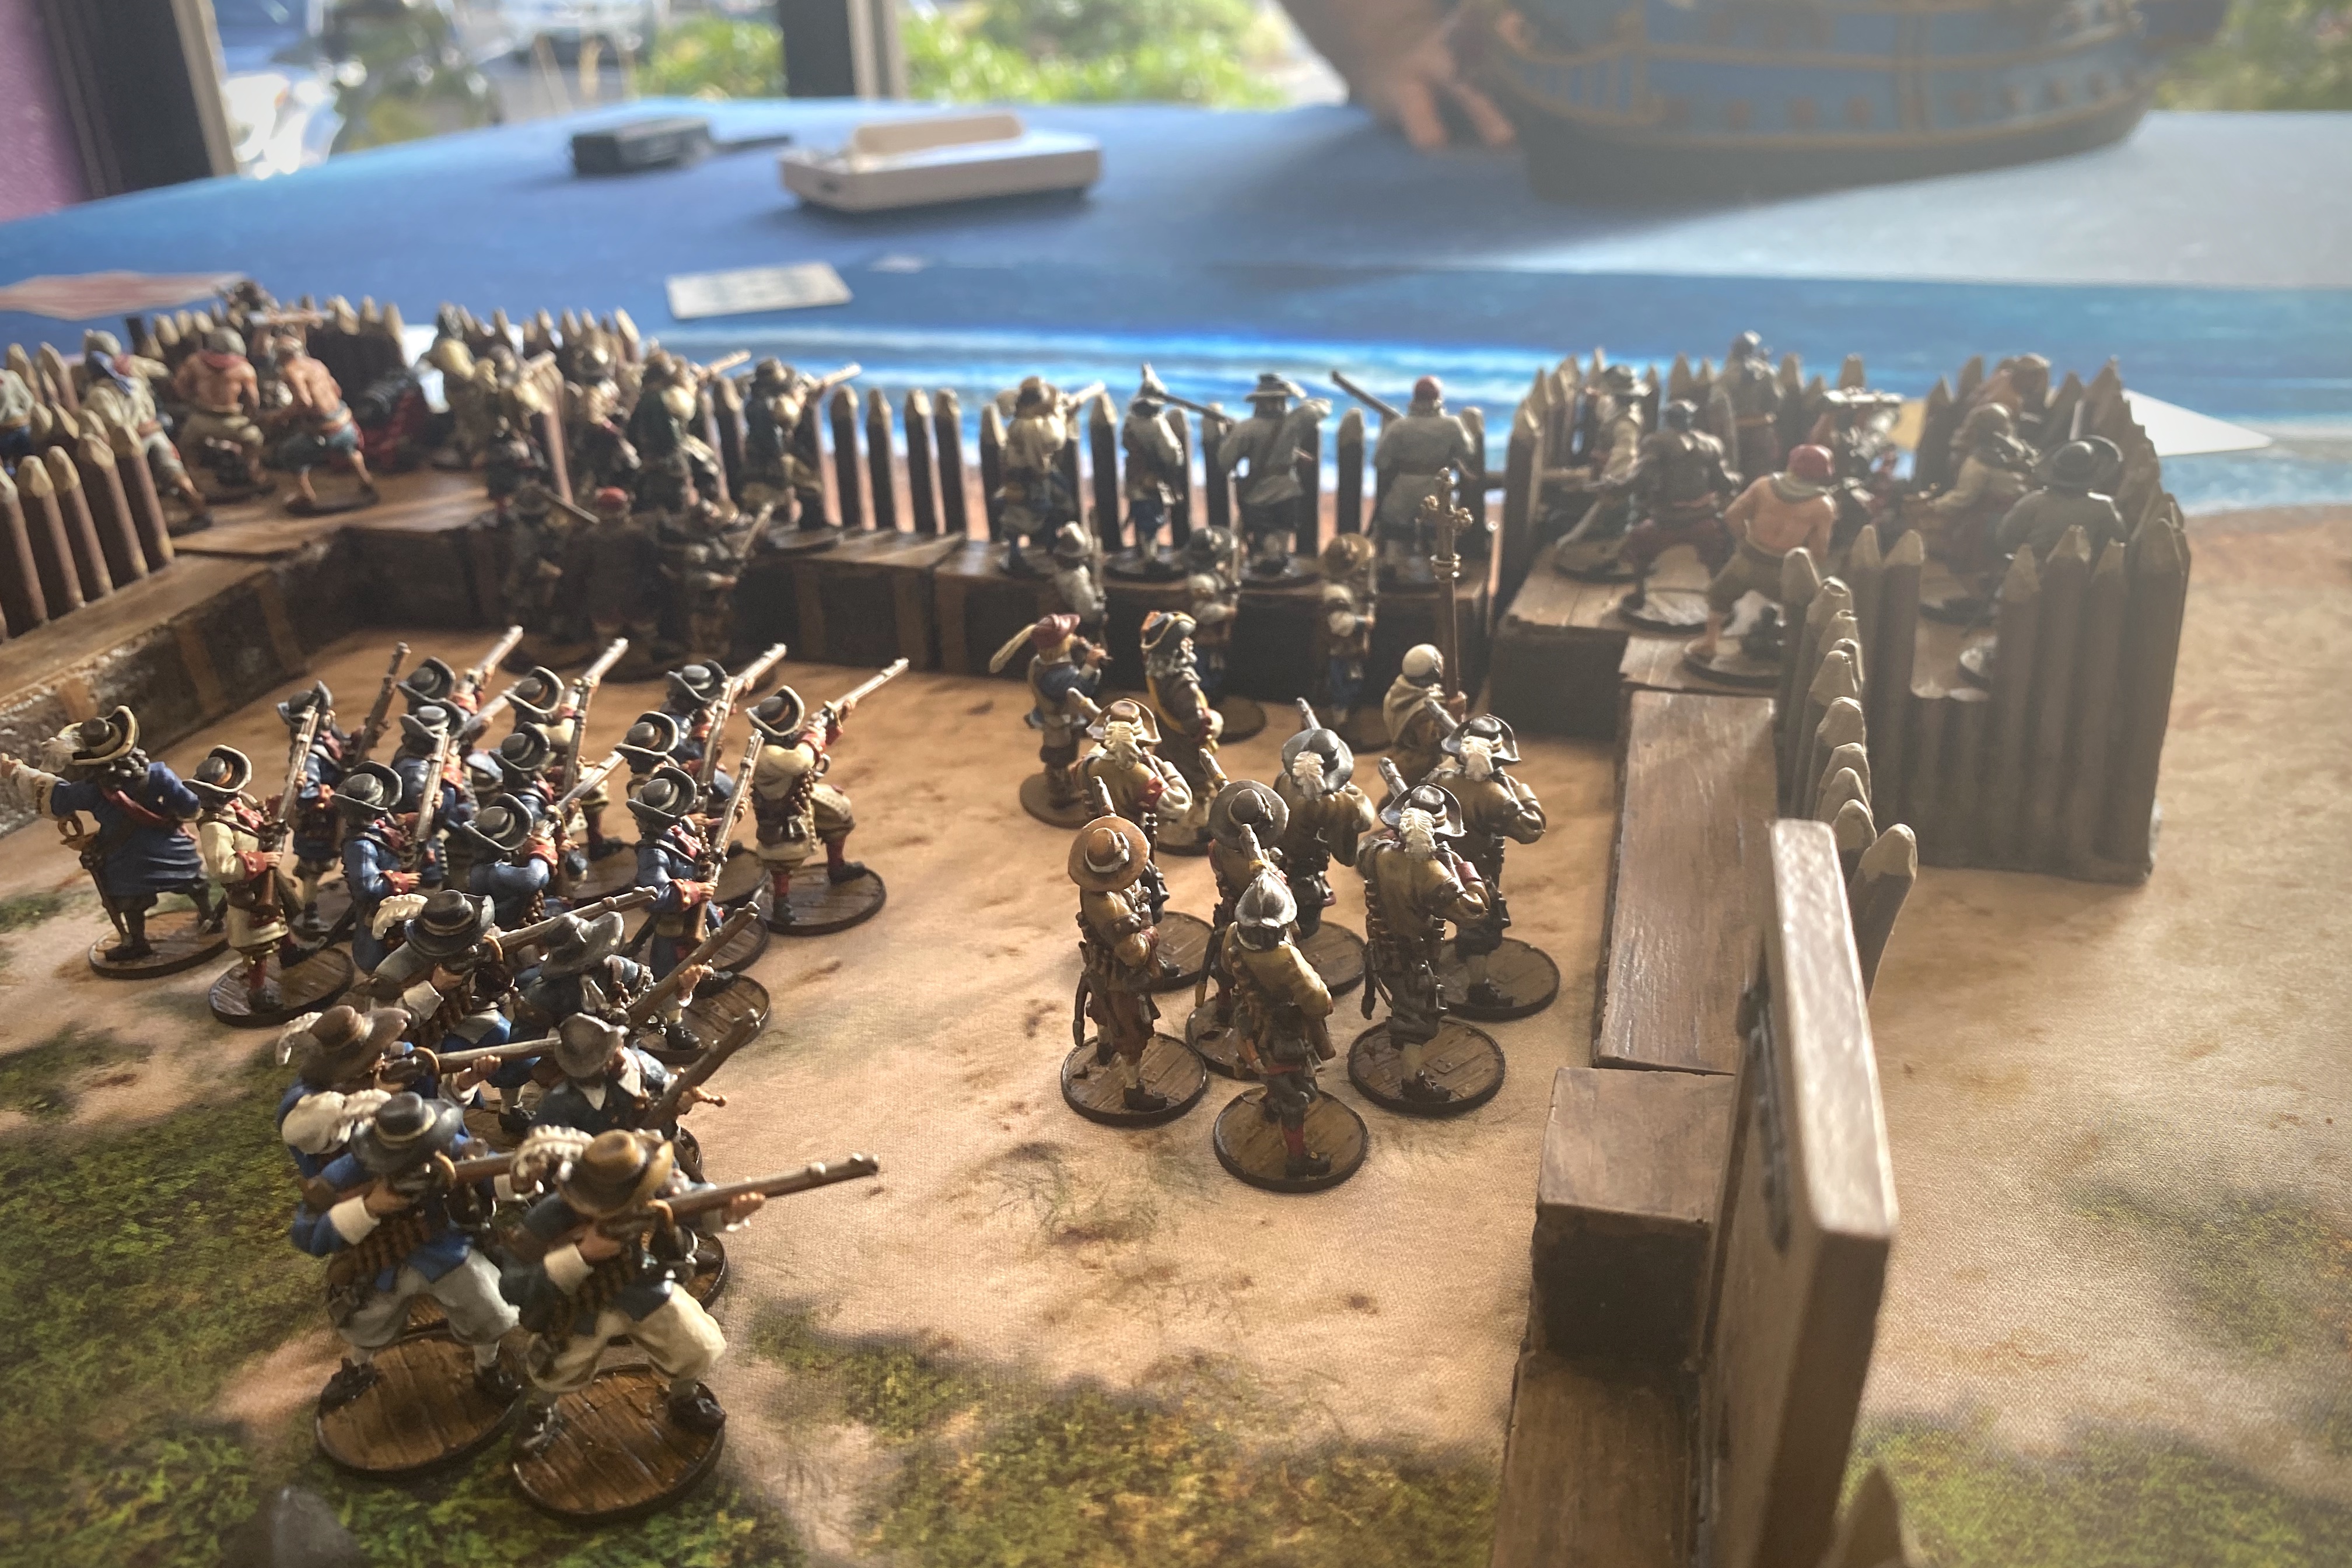
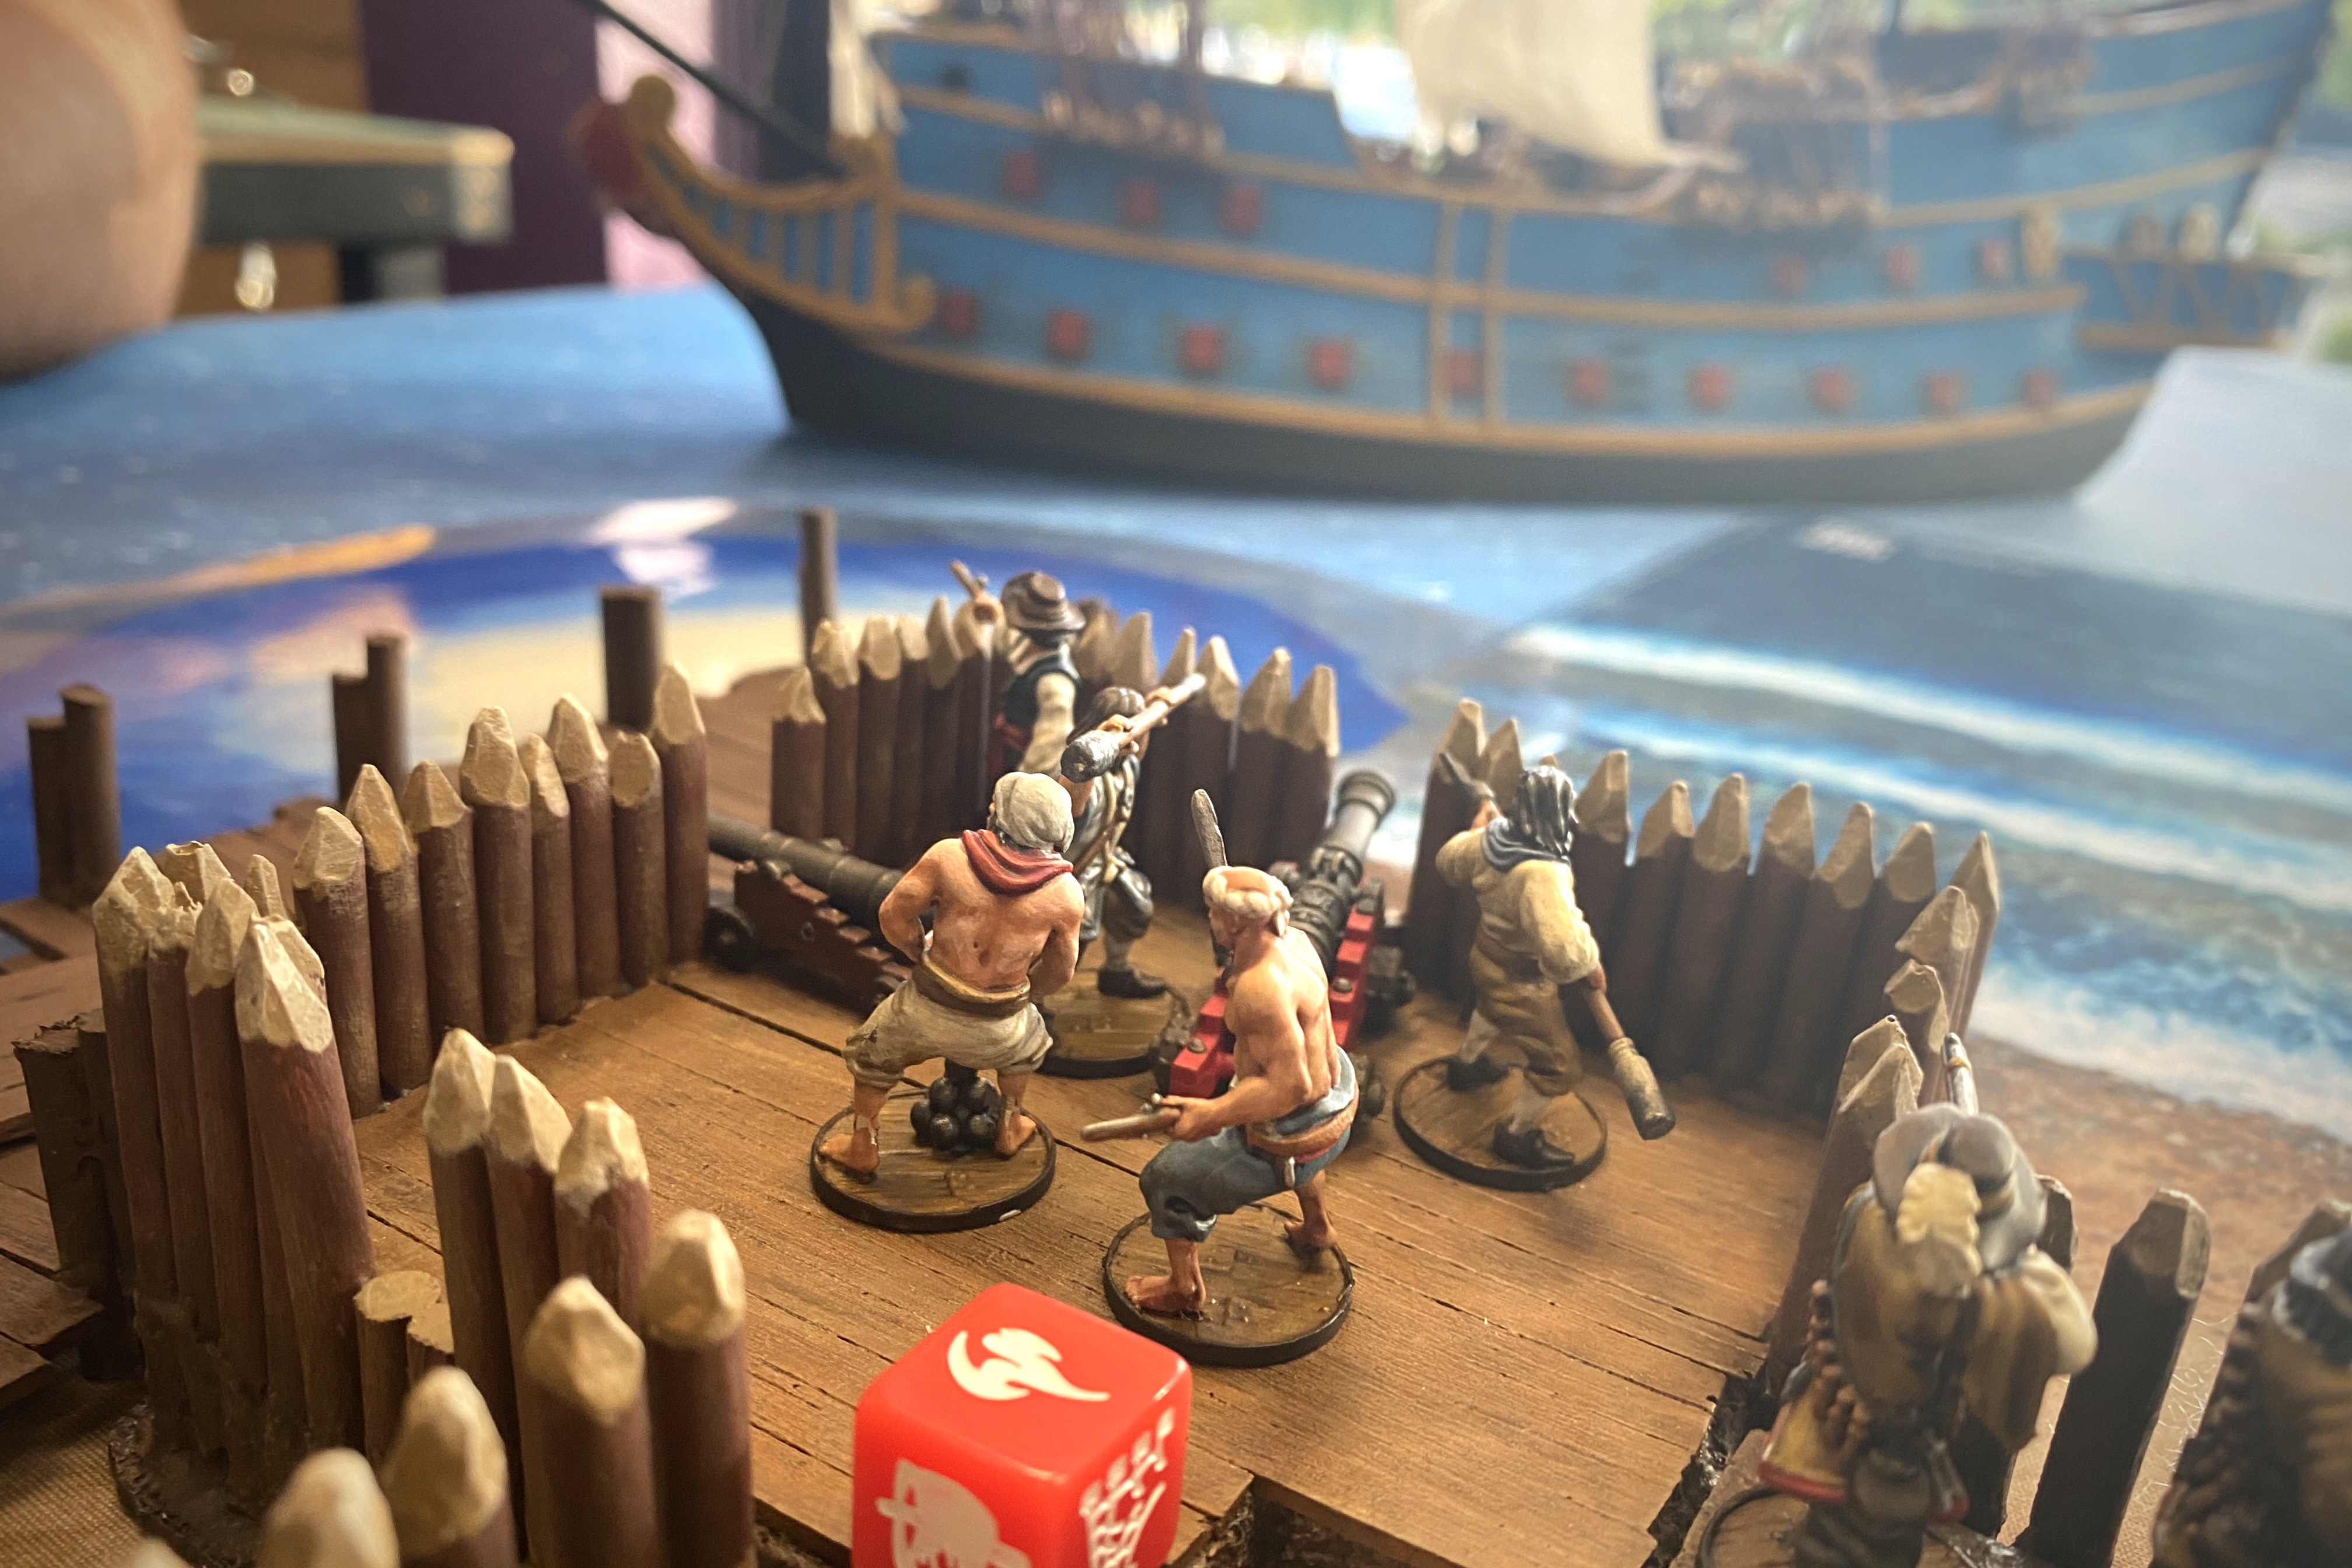
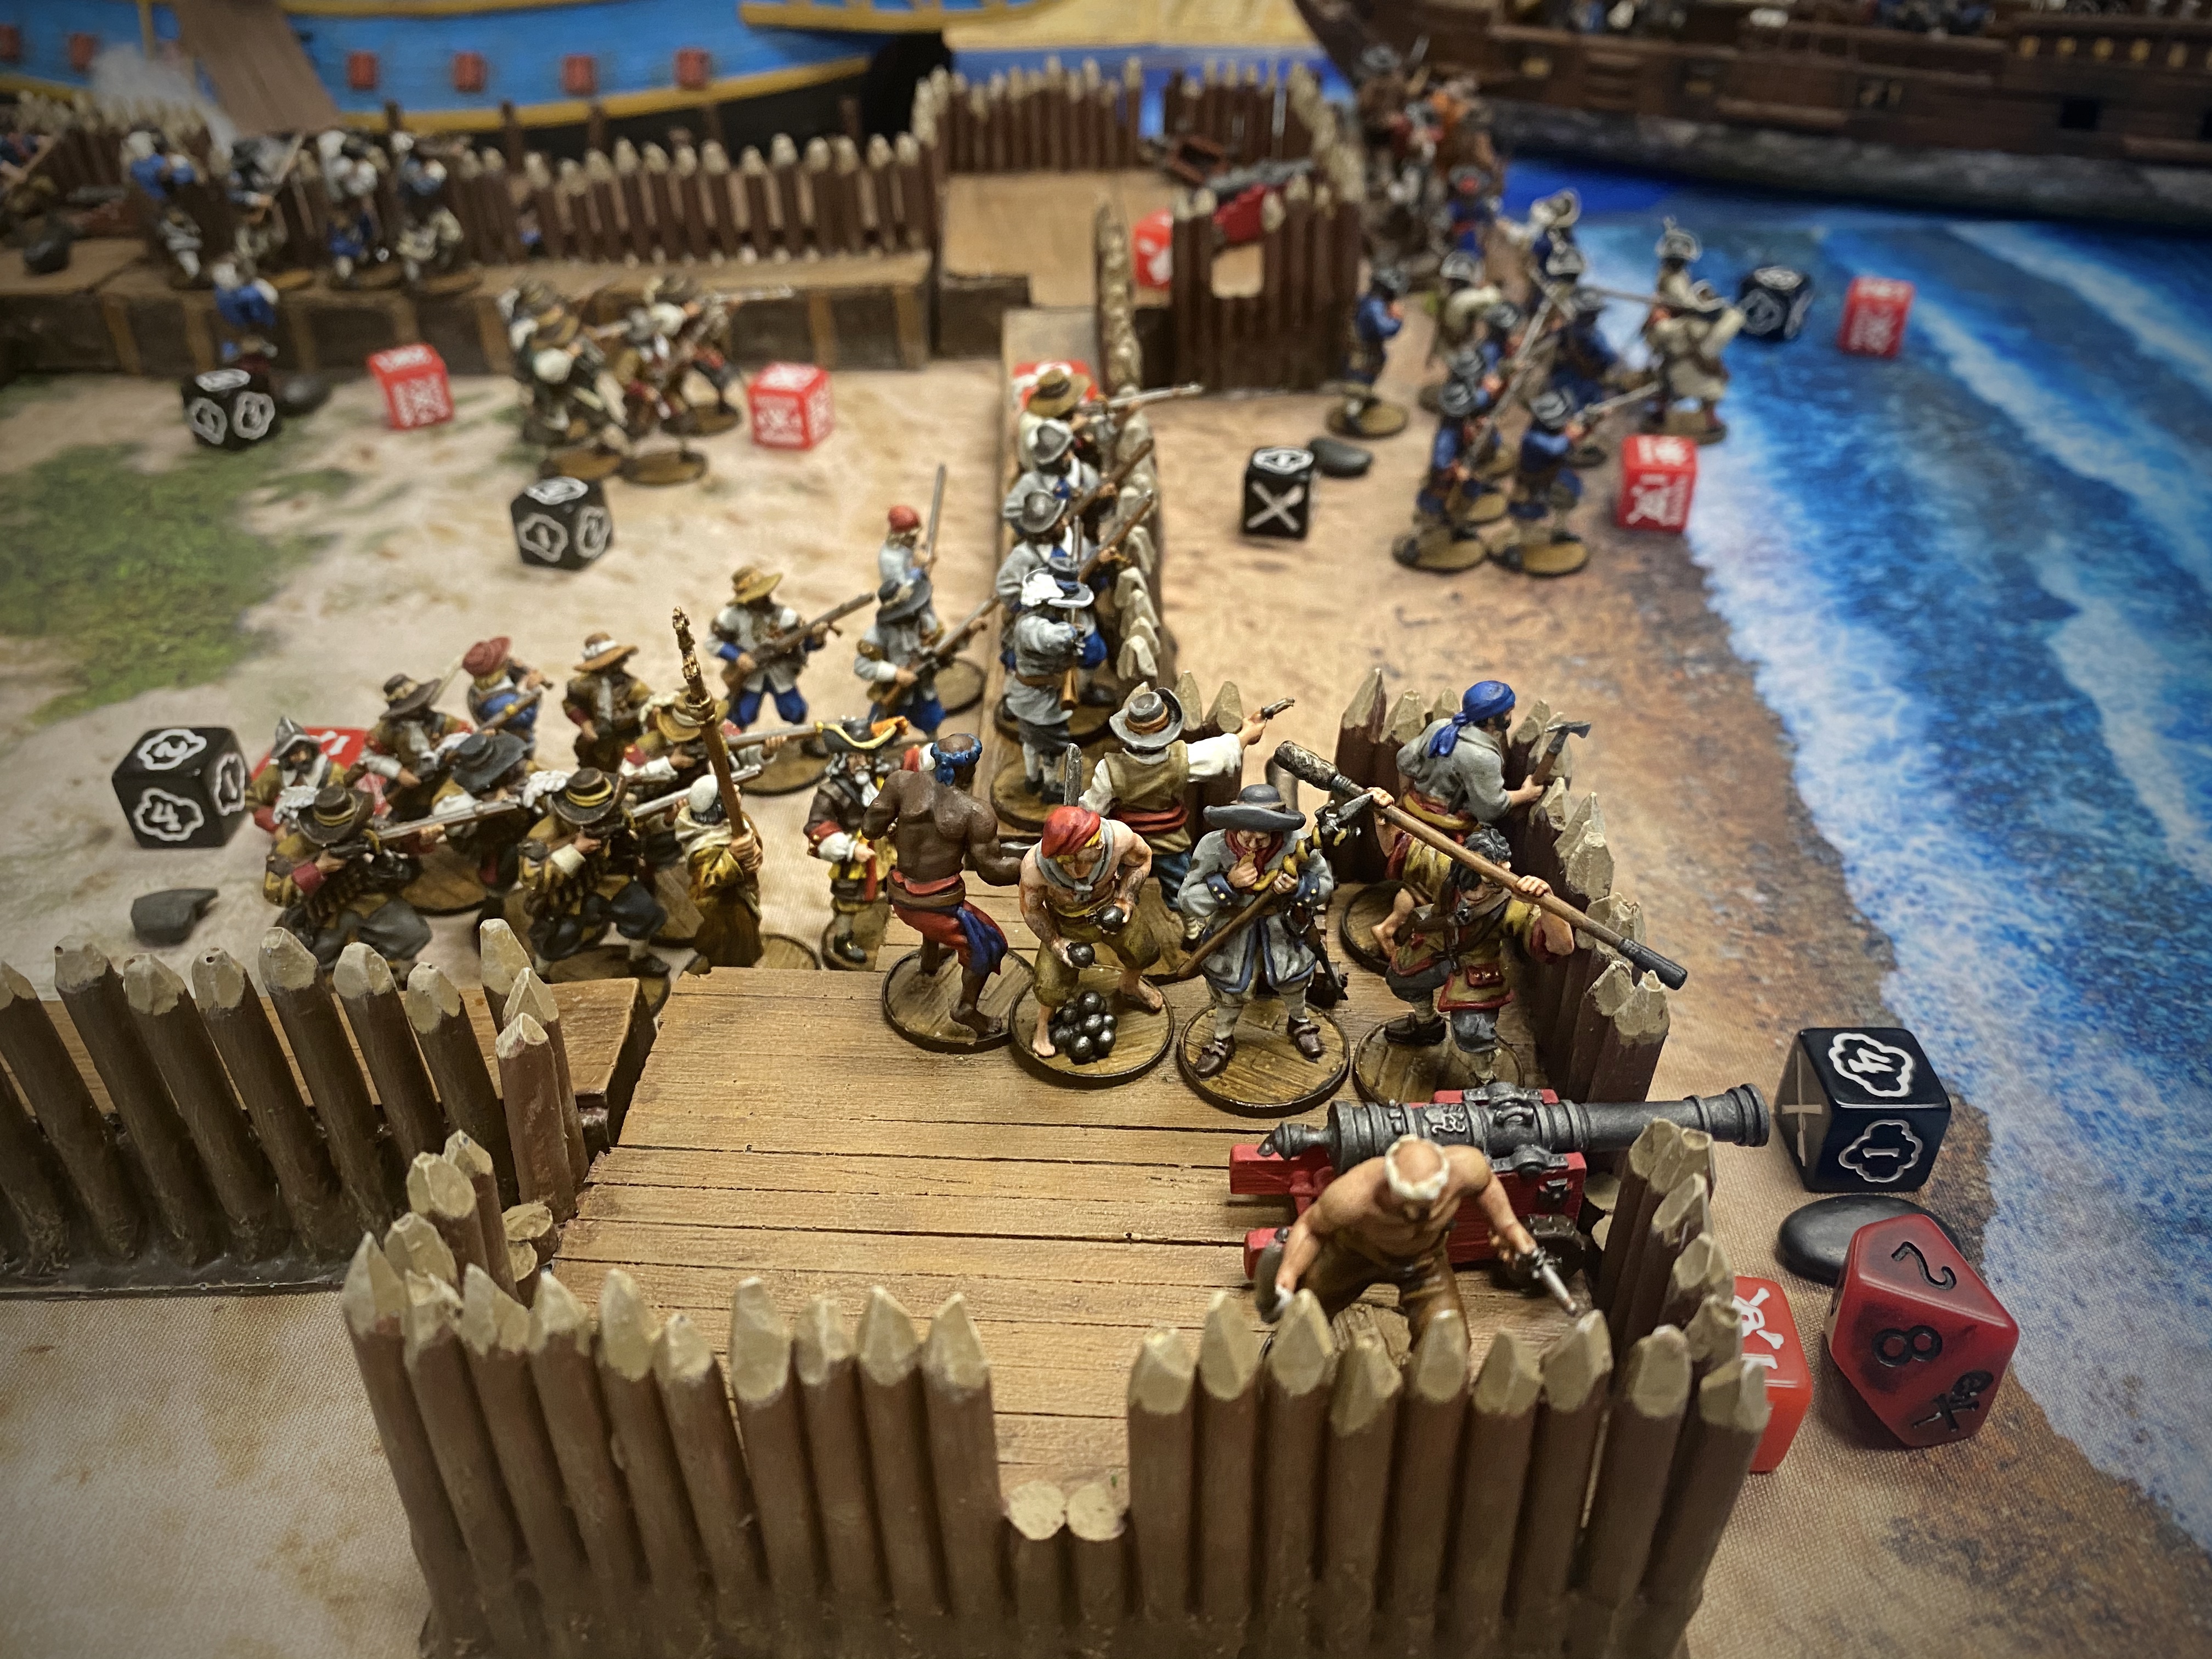
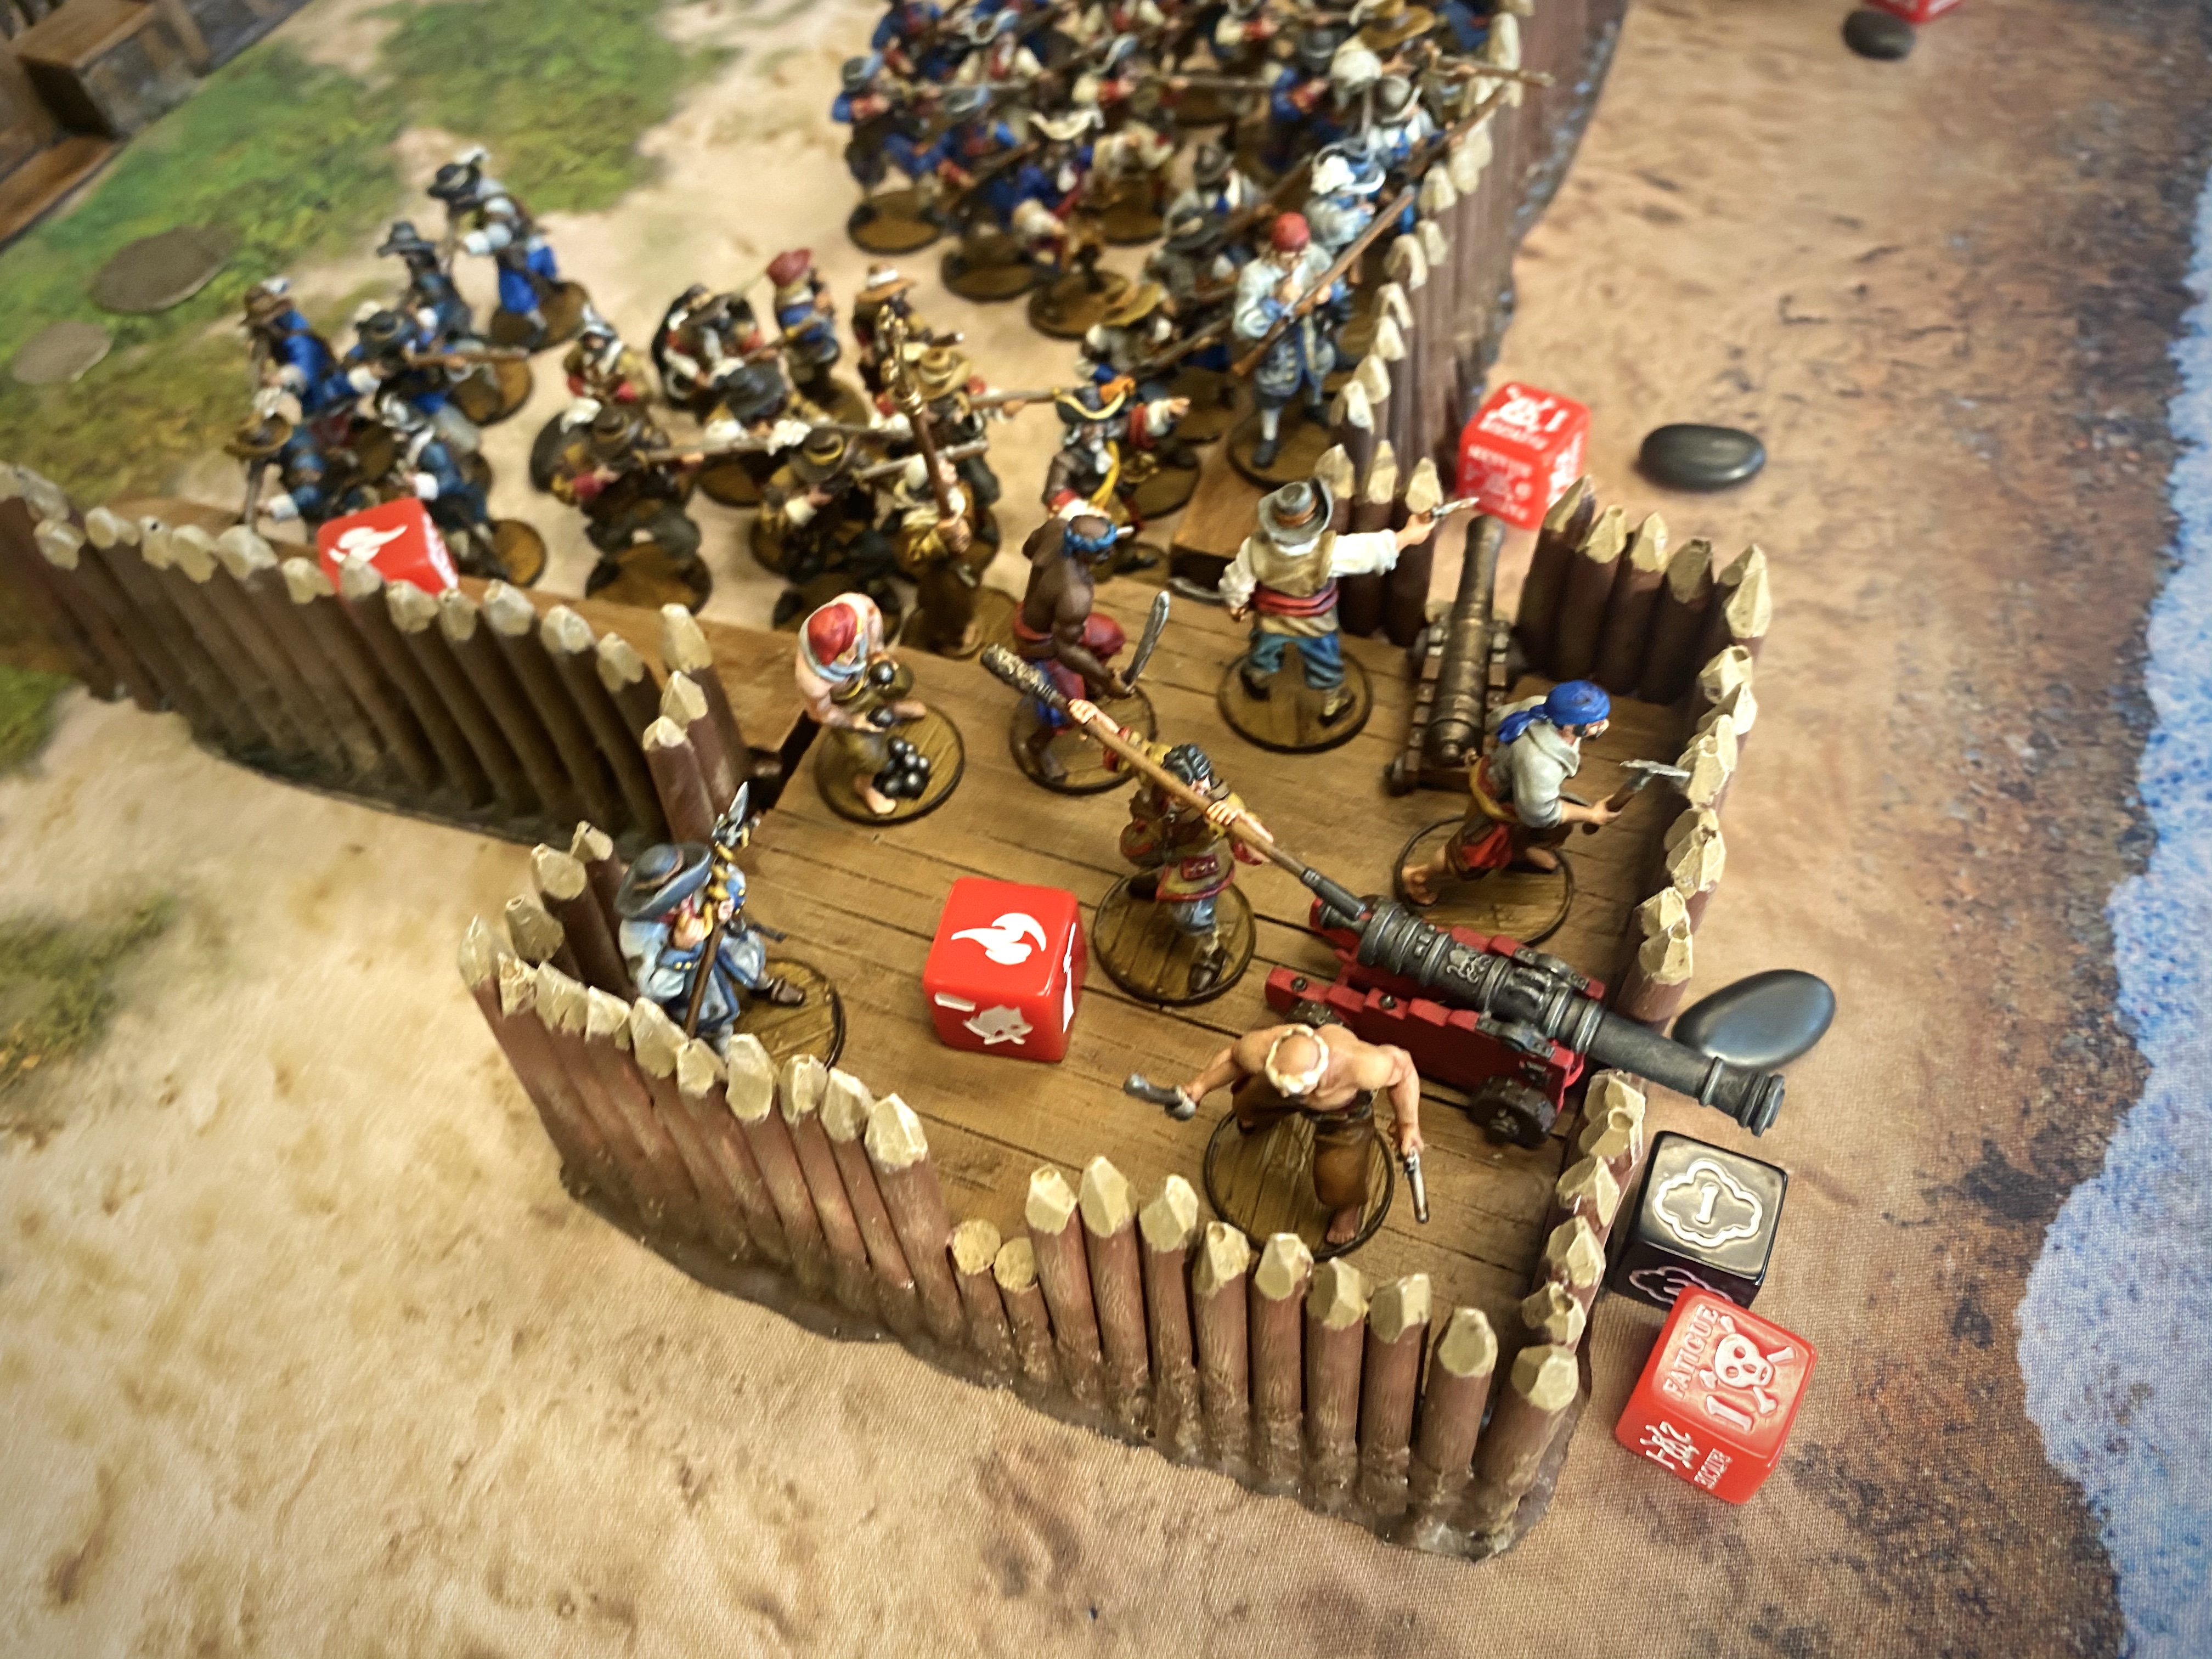
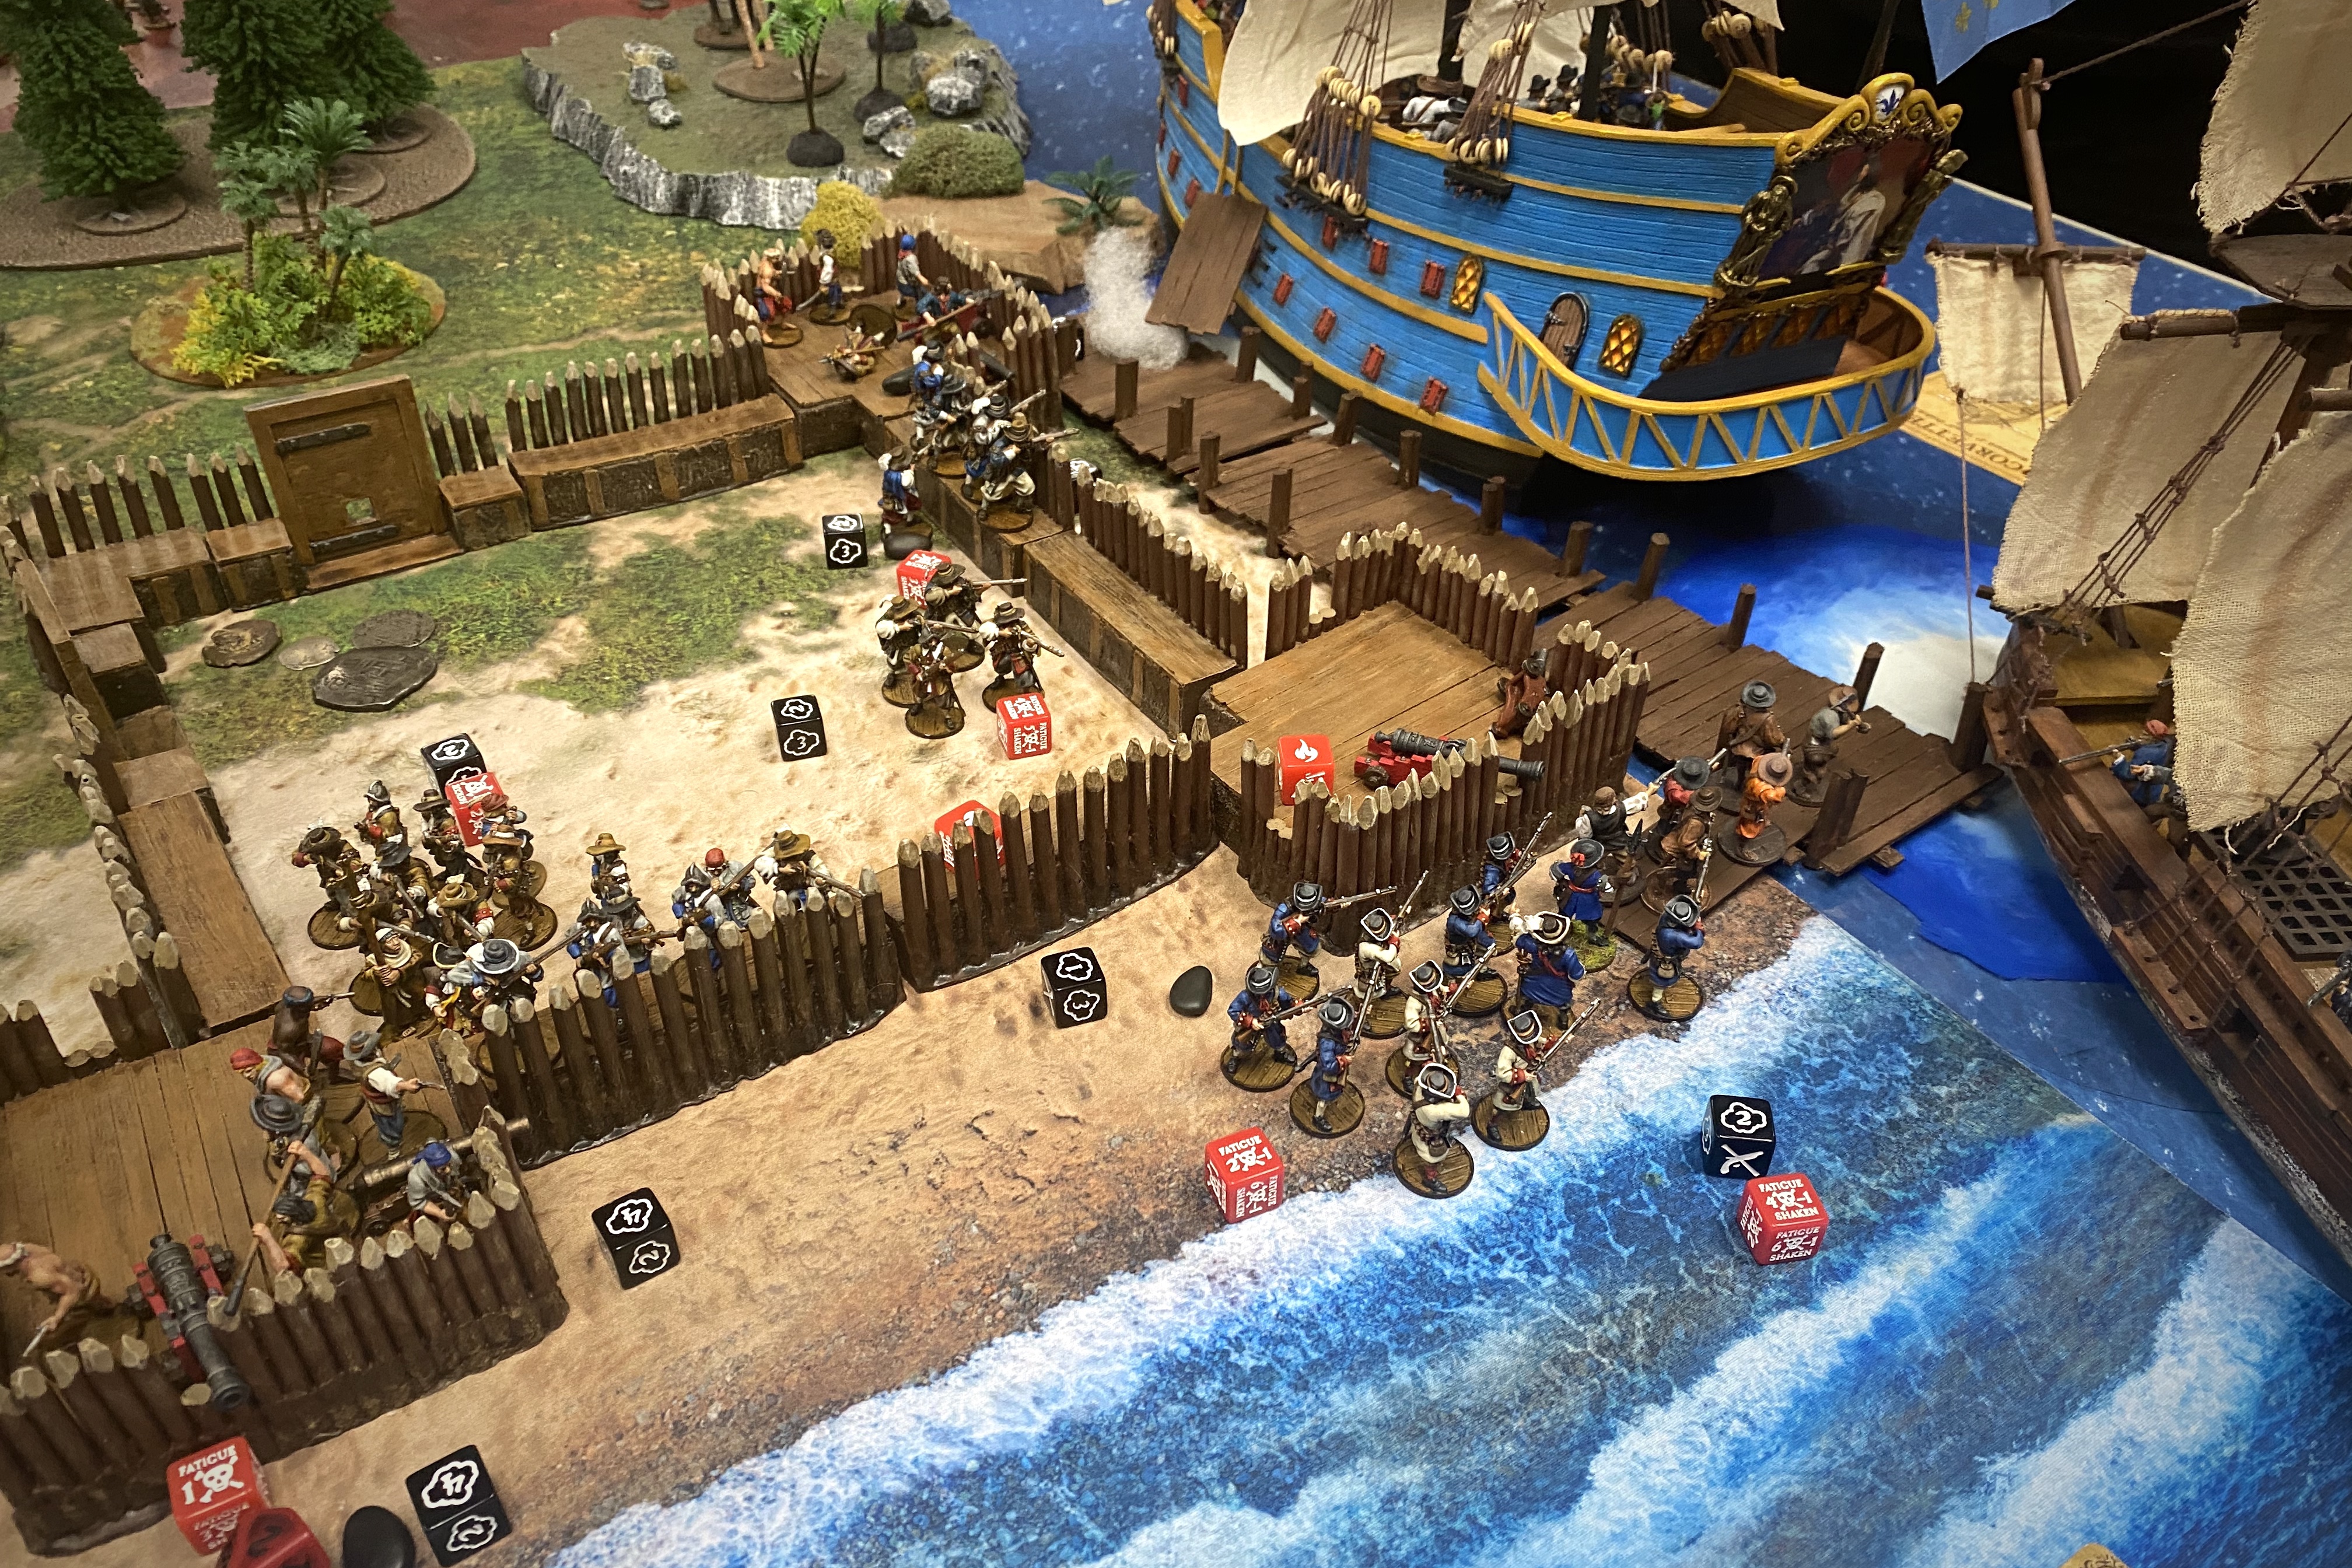
I placed all the Artillery Crews in the bastions, 2 units of Hostigadores on the walls, the unit of Milicianos Indios outside in the forest, and the command unit and the rest of the Soldados and Hostigadores inside the fort, but not manning walls. If those cannons hit me hard, no use in having my guys on the walls getting blown up if he was too far away to fire back!
We rolled for wind direction which was from the short sea edge (Right hand side in these pictures) and we were ready to start the game.
The Game

Drawing 9 cards a turn improves the odds of drawing events! I drew one on turn 1 and it came up as the Bravado event along with a wind change which rotated the wind direction one edge clockwise (now coming from my own perspective in most of these photos). Bravado involves blindly playing activation cards off the top of your deck rather than using what’s in your hand. It can be fun and entertaining, but here on the first turn of the game, we both ended up not using it at all.

Guy drew 3 cards which indicated he planned on bringing the Galleon into play this turn but not the Corvette.

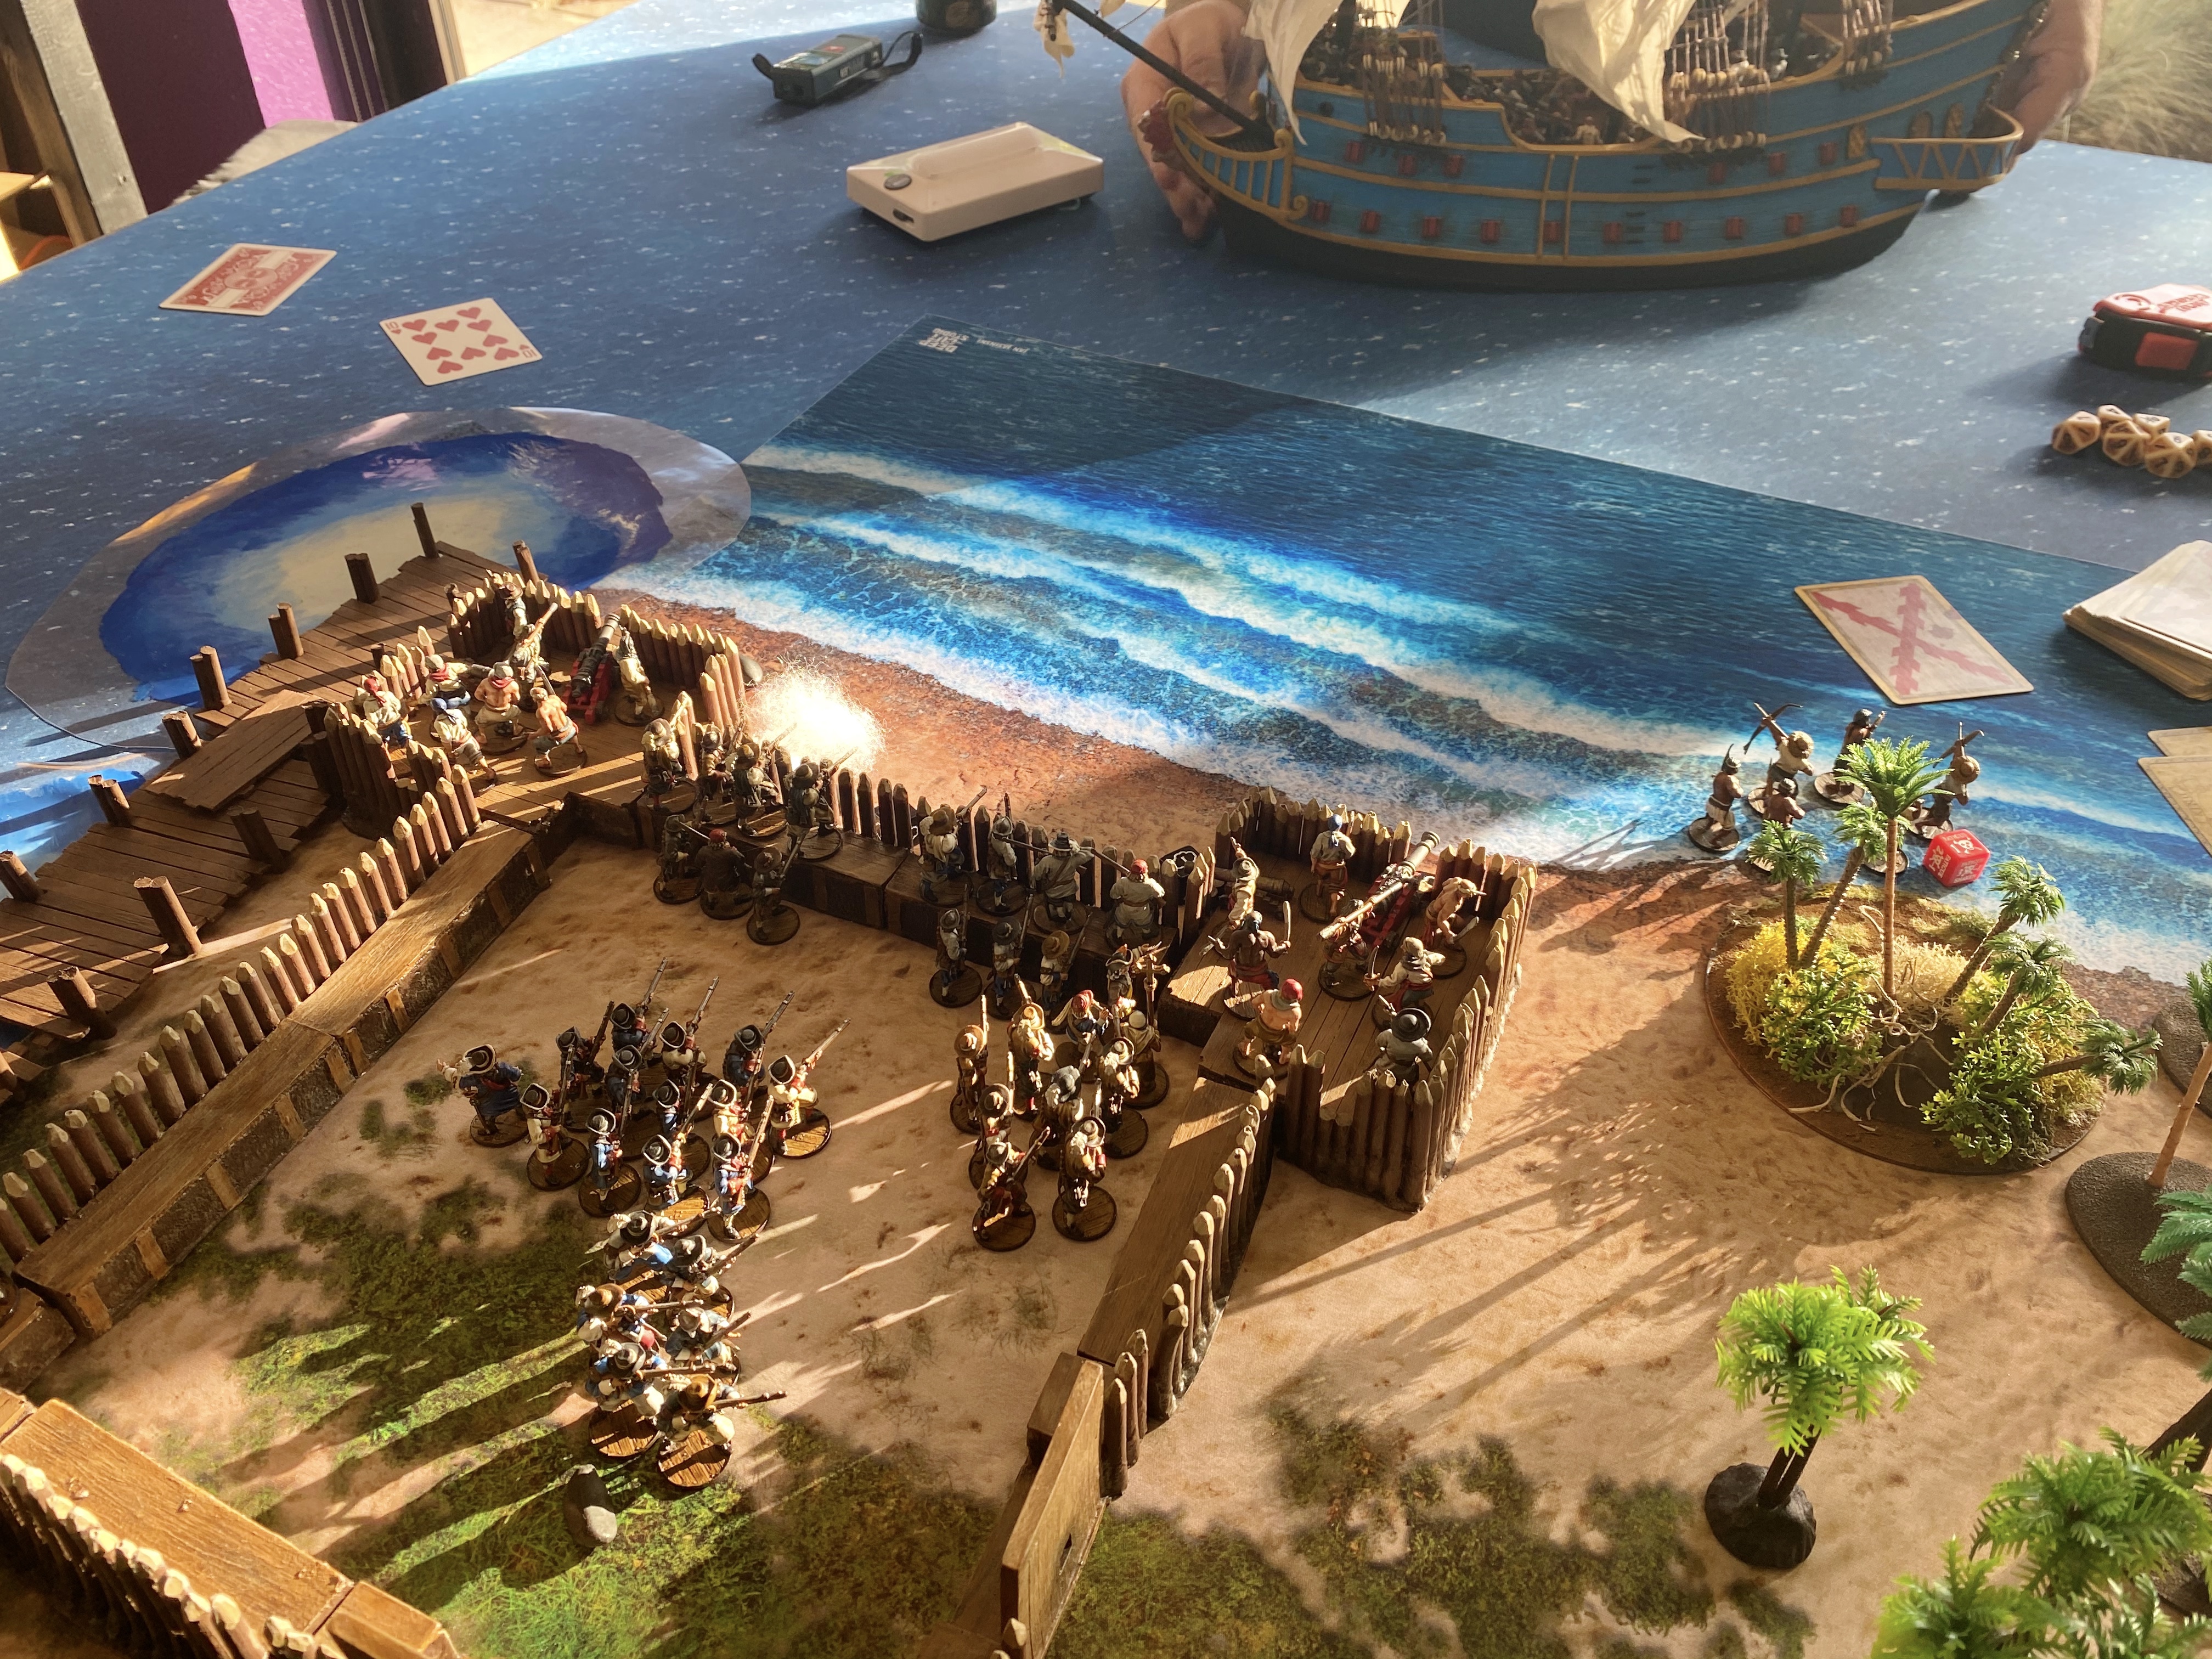
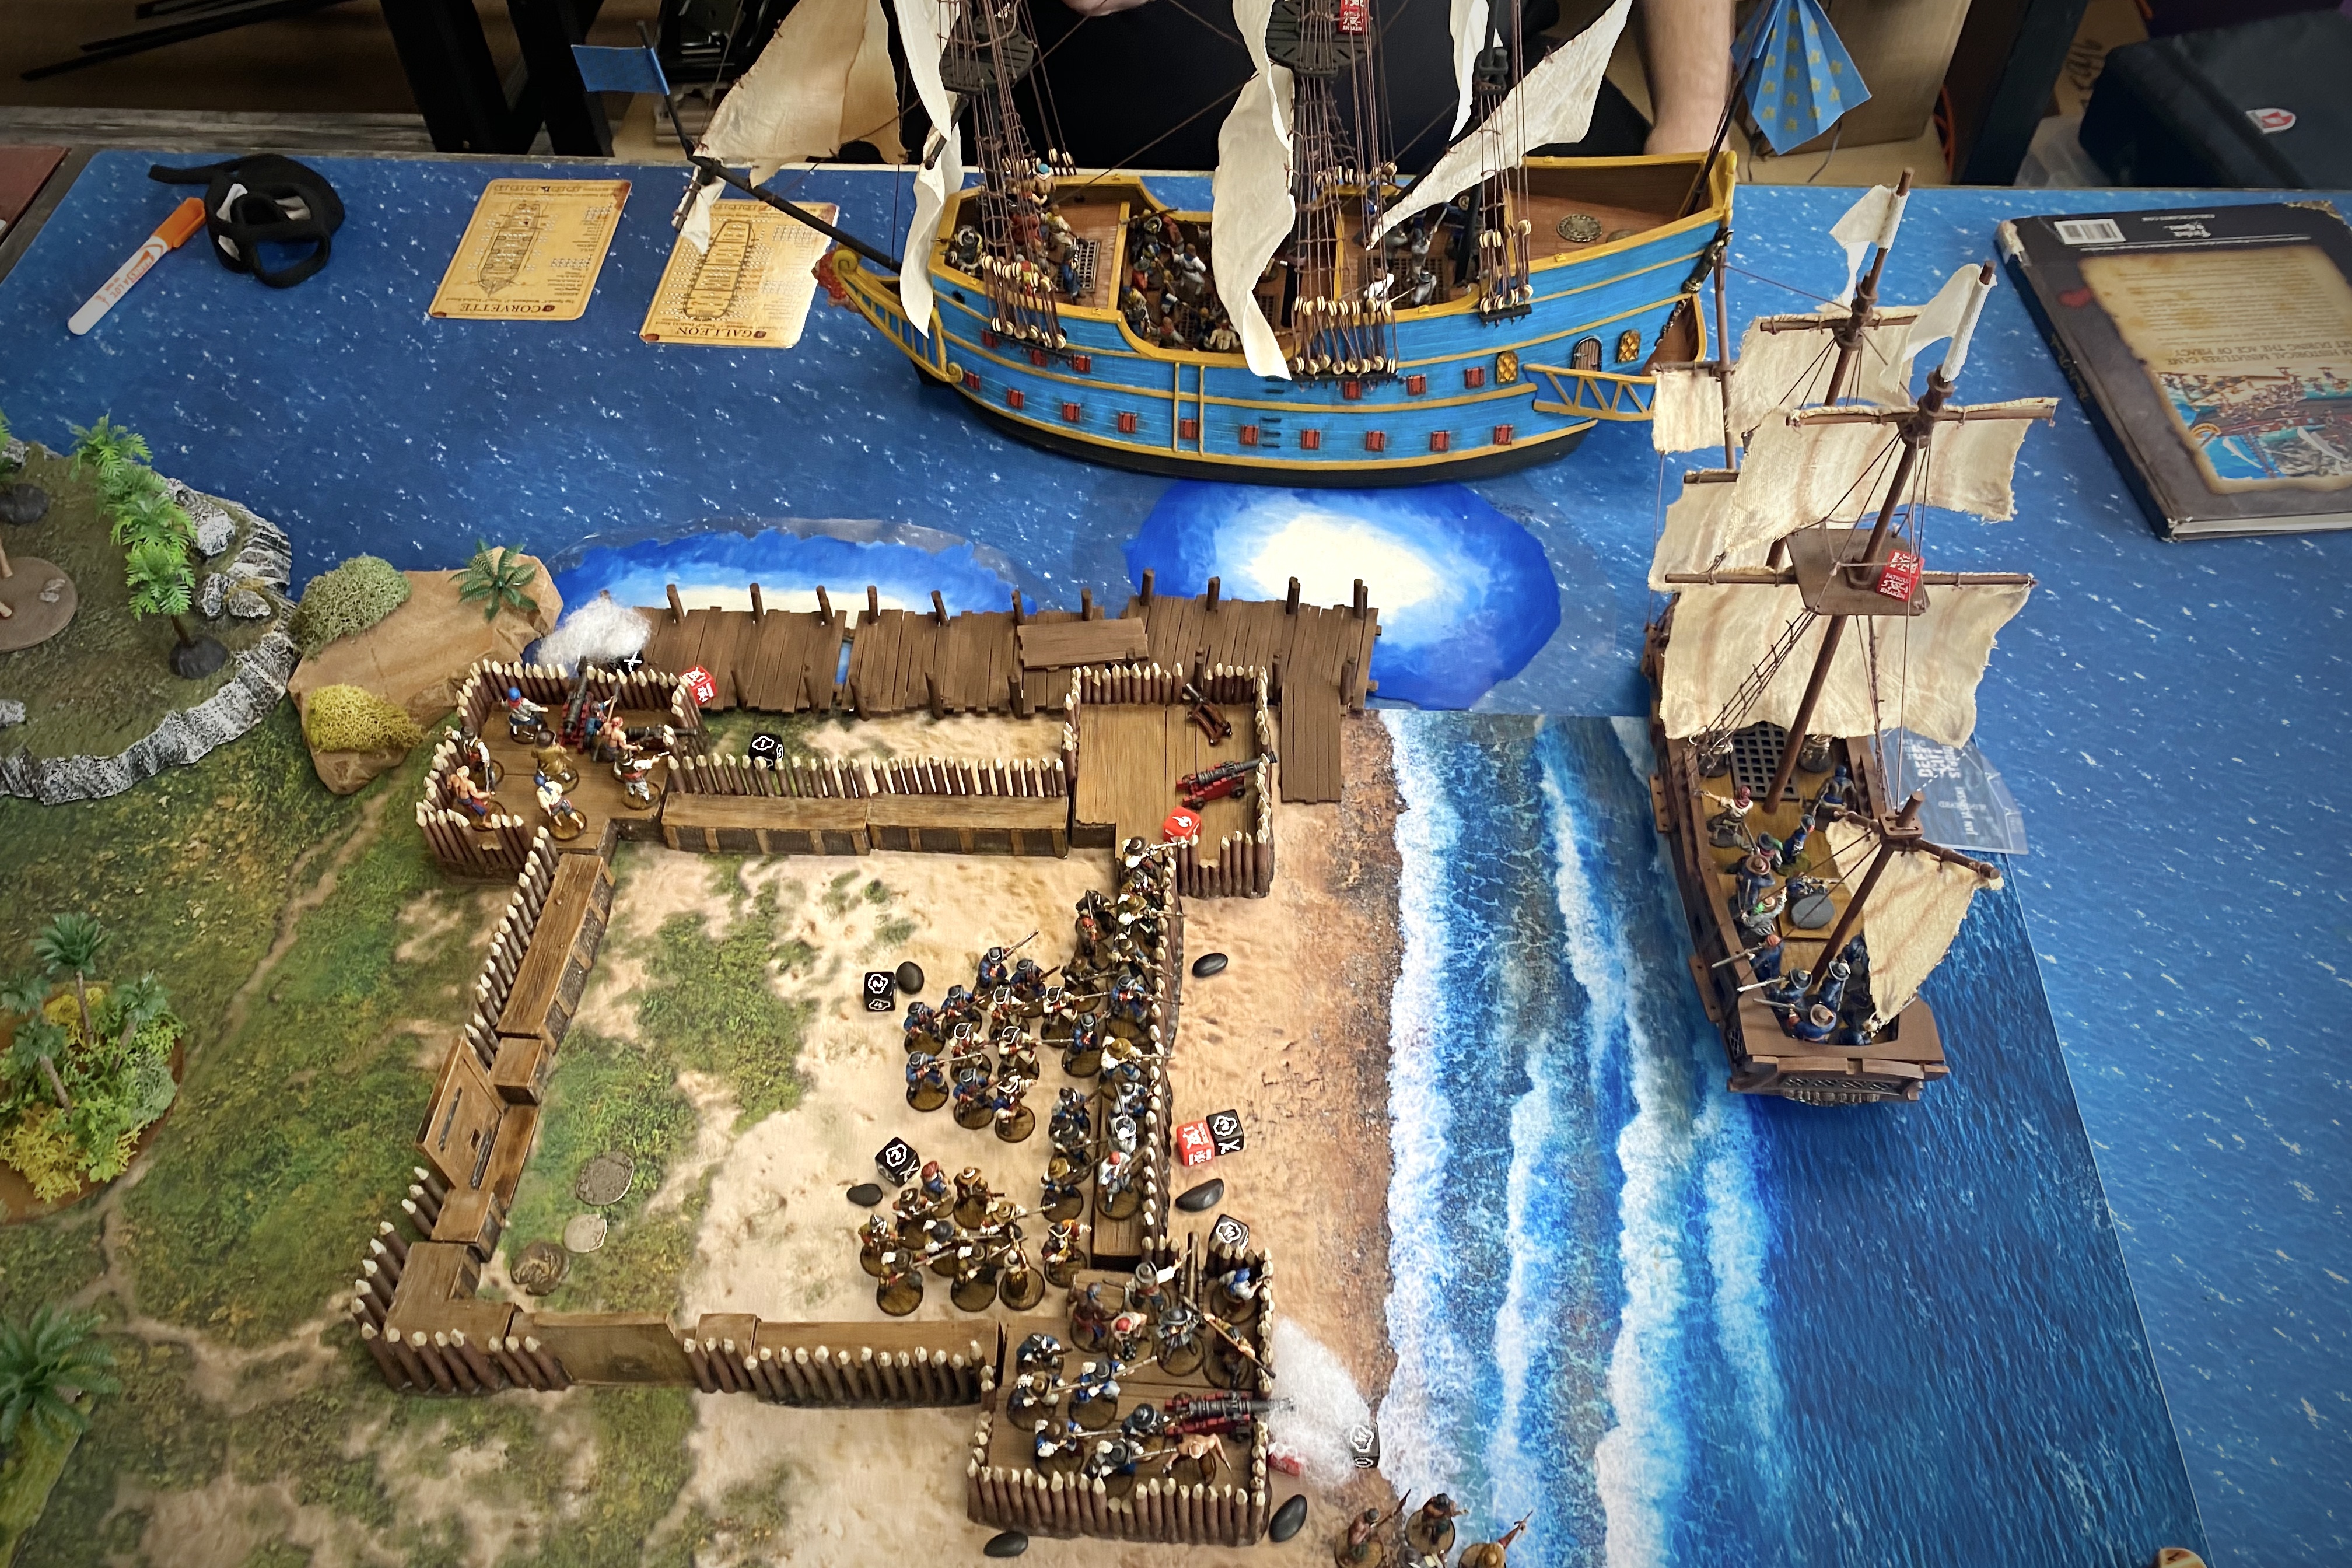
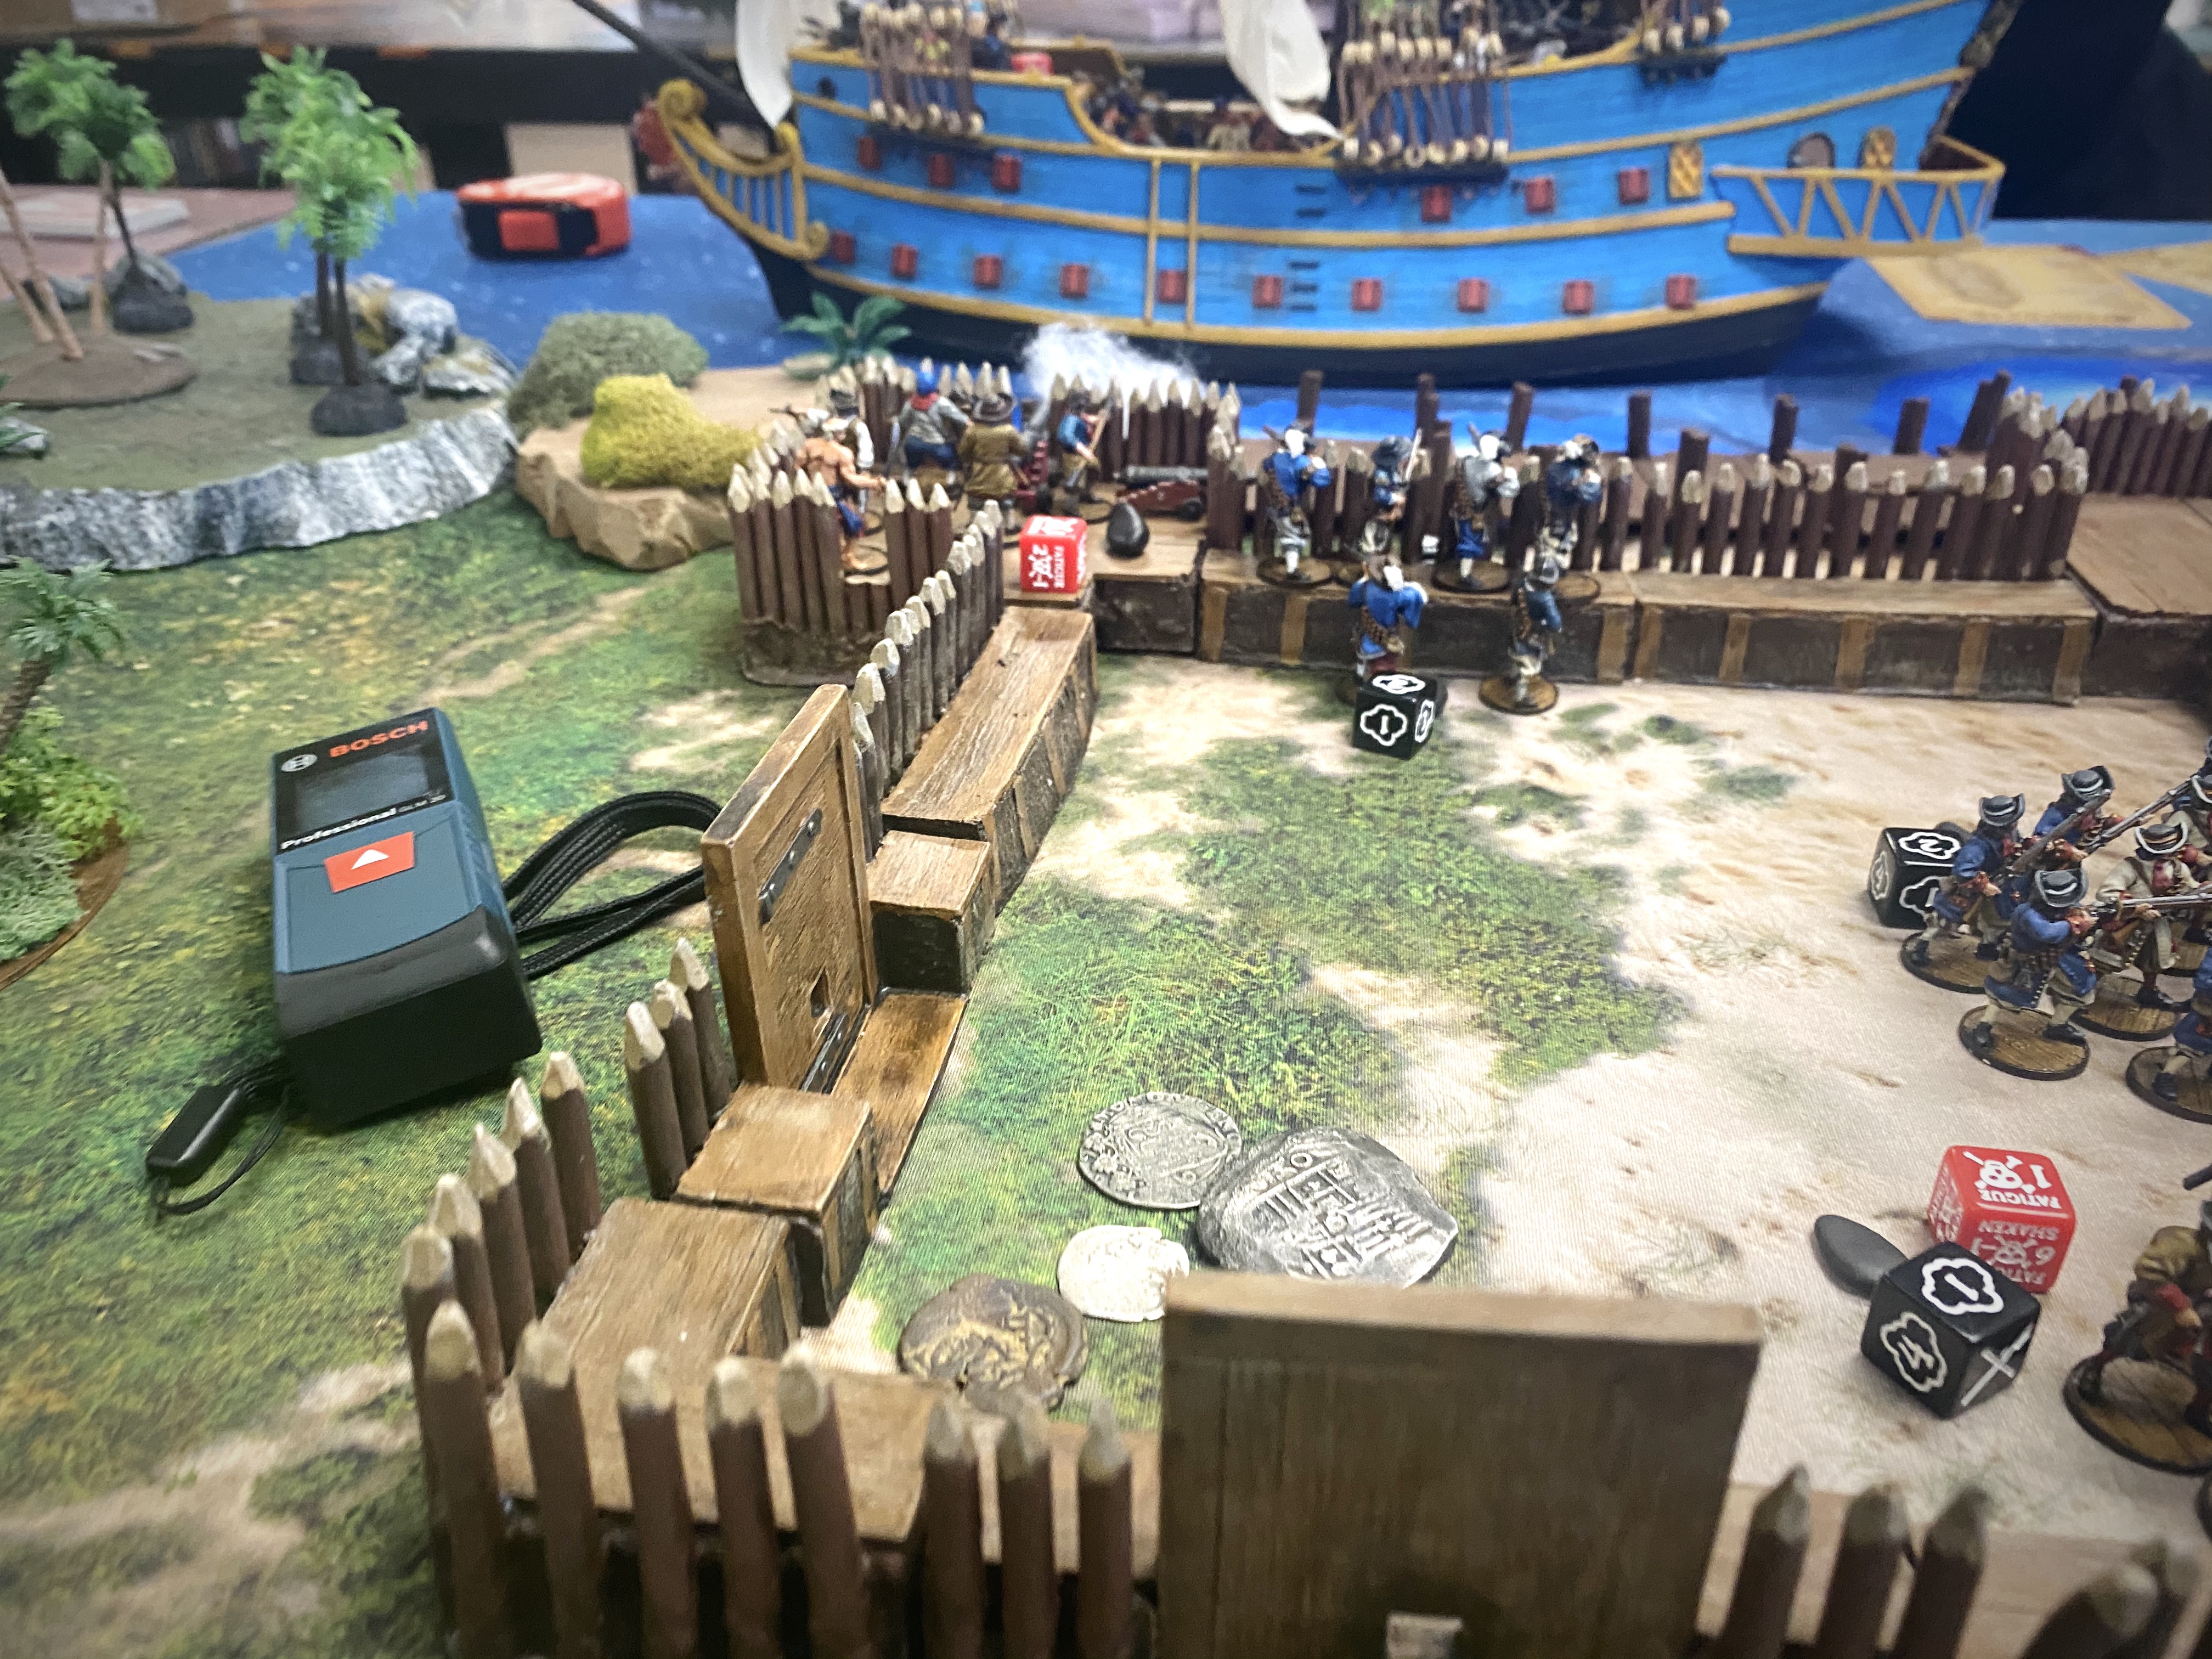
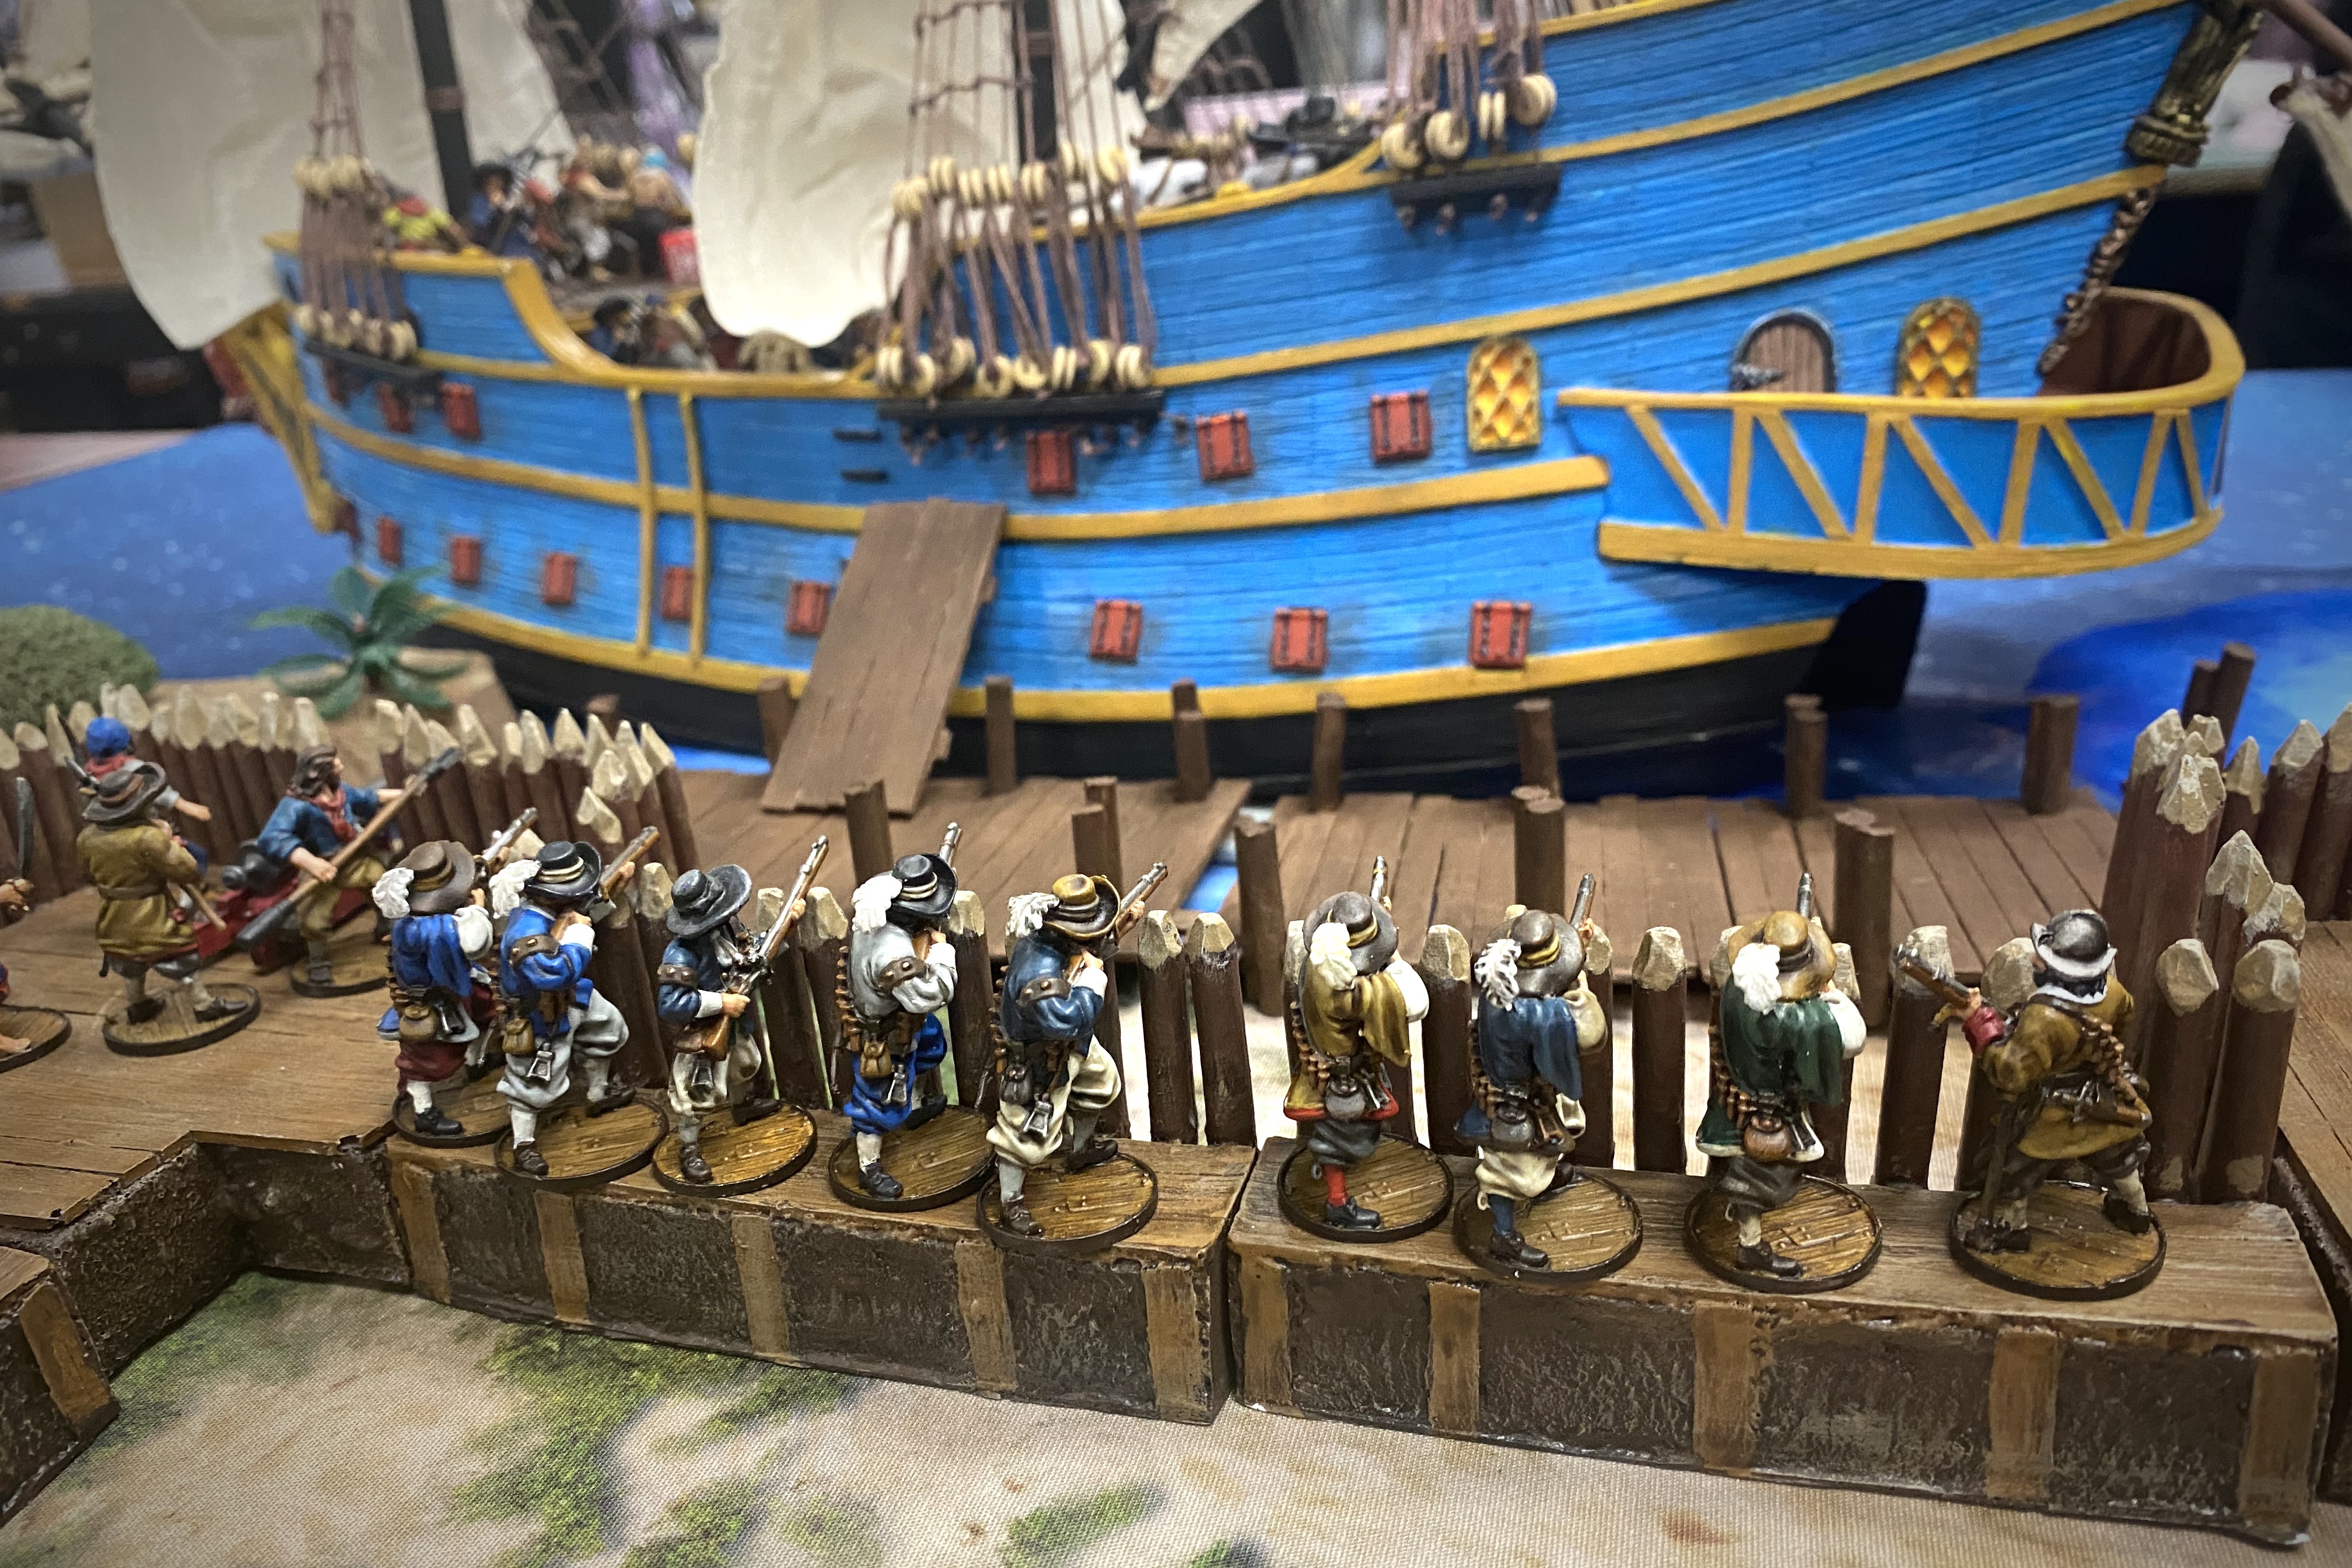
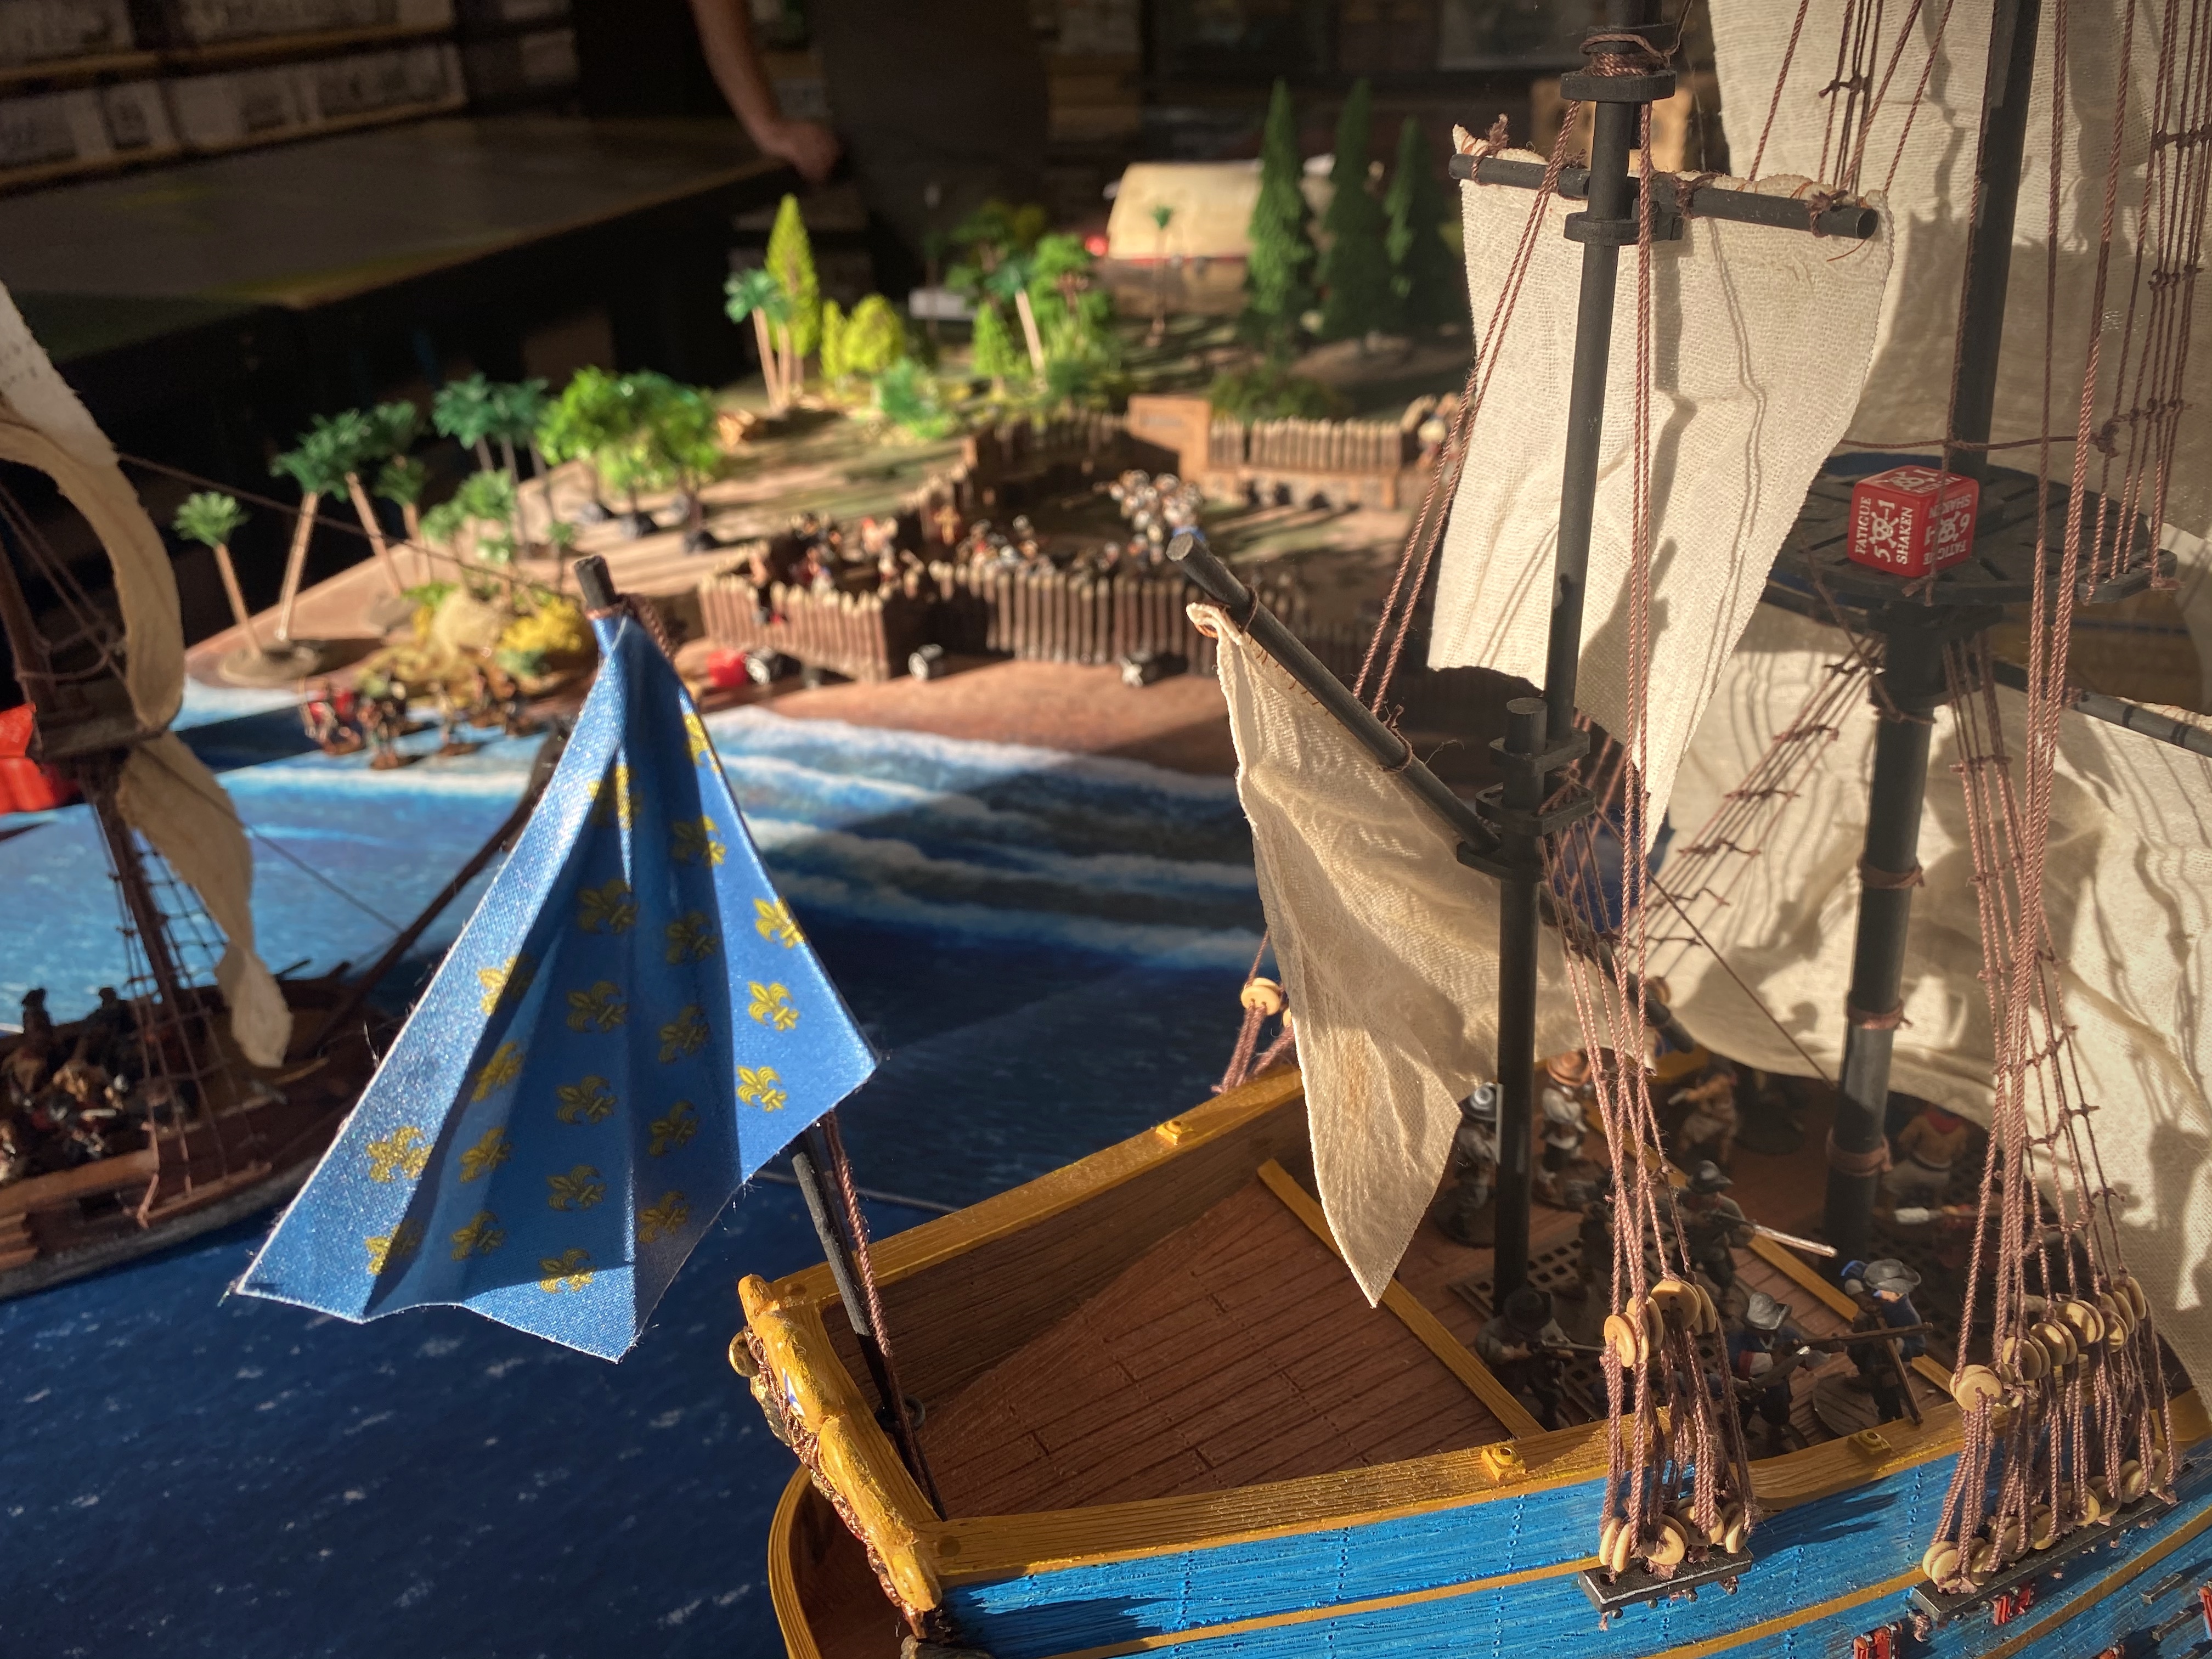
I used this first turn to start the reloading process on my cannons. I got two bastions of cannons down to 1 Reload and the bastion with the Master Gunner fully reloaded. Guy passed and passed until we had equal cards and then brought the massive Galleon into play along the short ocean edge of the board. It truly dwarfs the fort!
The Galleon is so huge that just entering the board moved it much closer to the fort than a small ship would have been. The Galleon is a full 26″ long which covers nearly 1/3 of the entire 6′ board!

I fired off some long range musketry but failed to find any 10’s
The mass of Marins with Buccaneer Guns fired at long range as the Galleon swiveled to bring is guns to bear on the fort.
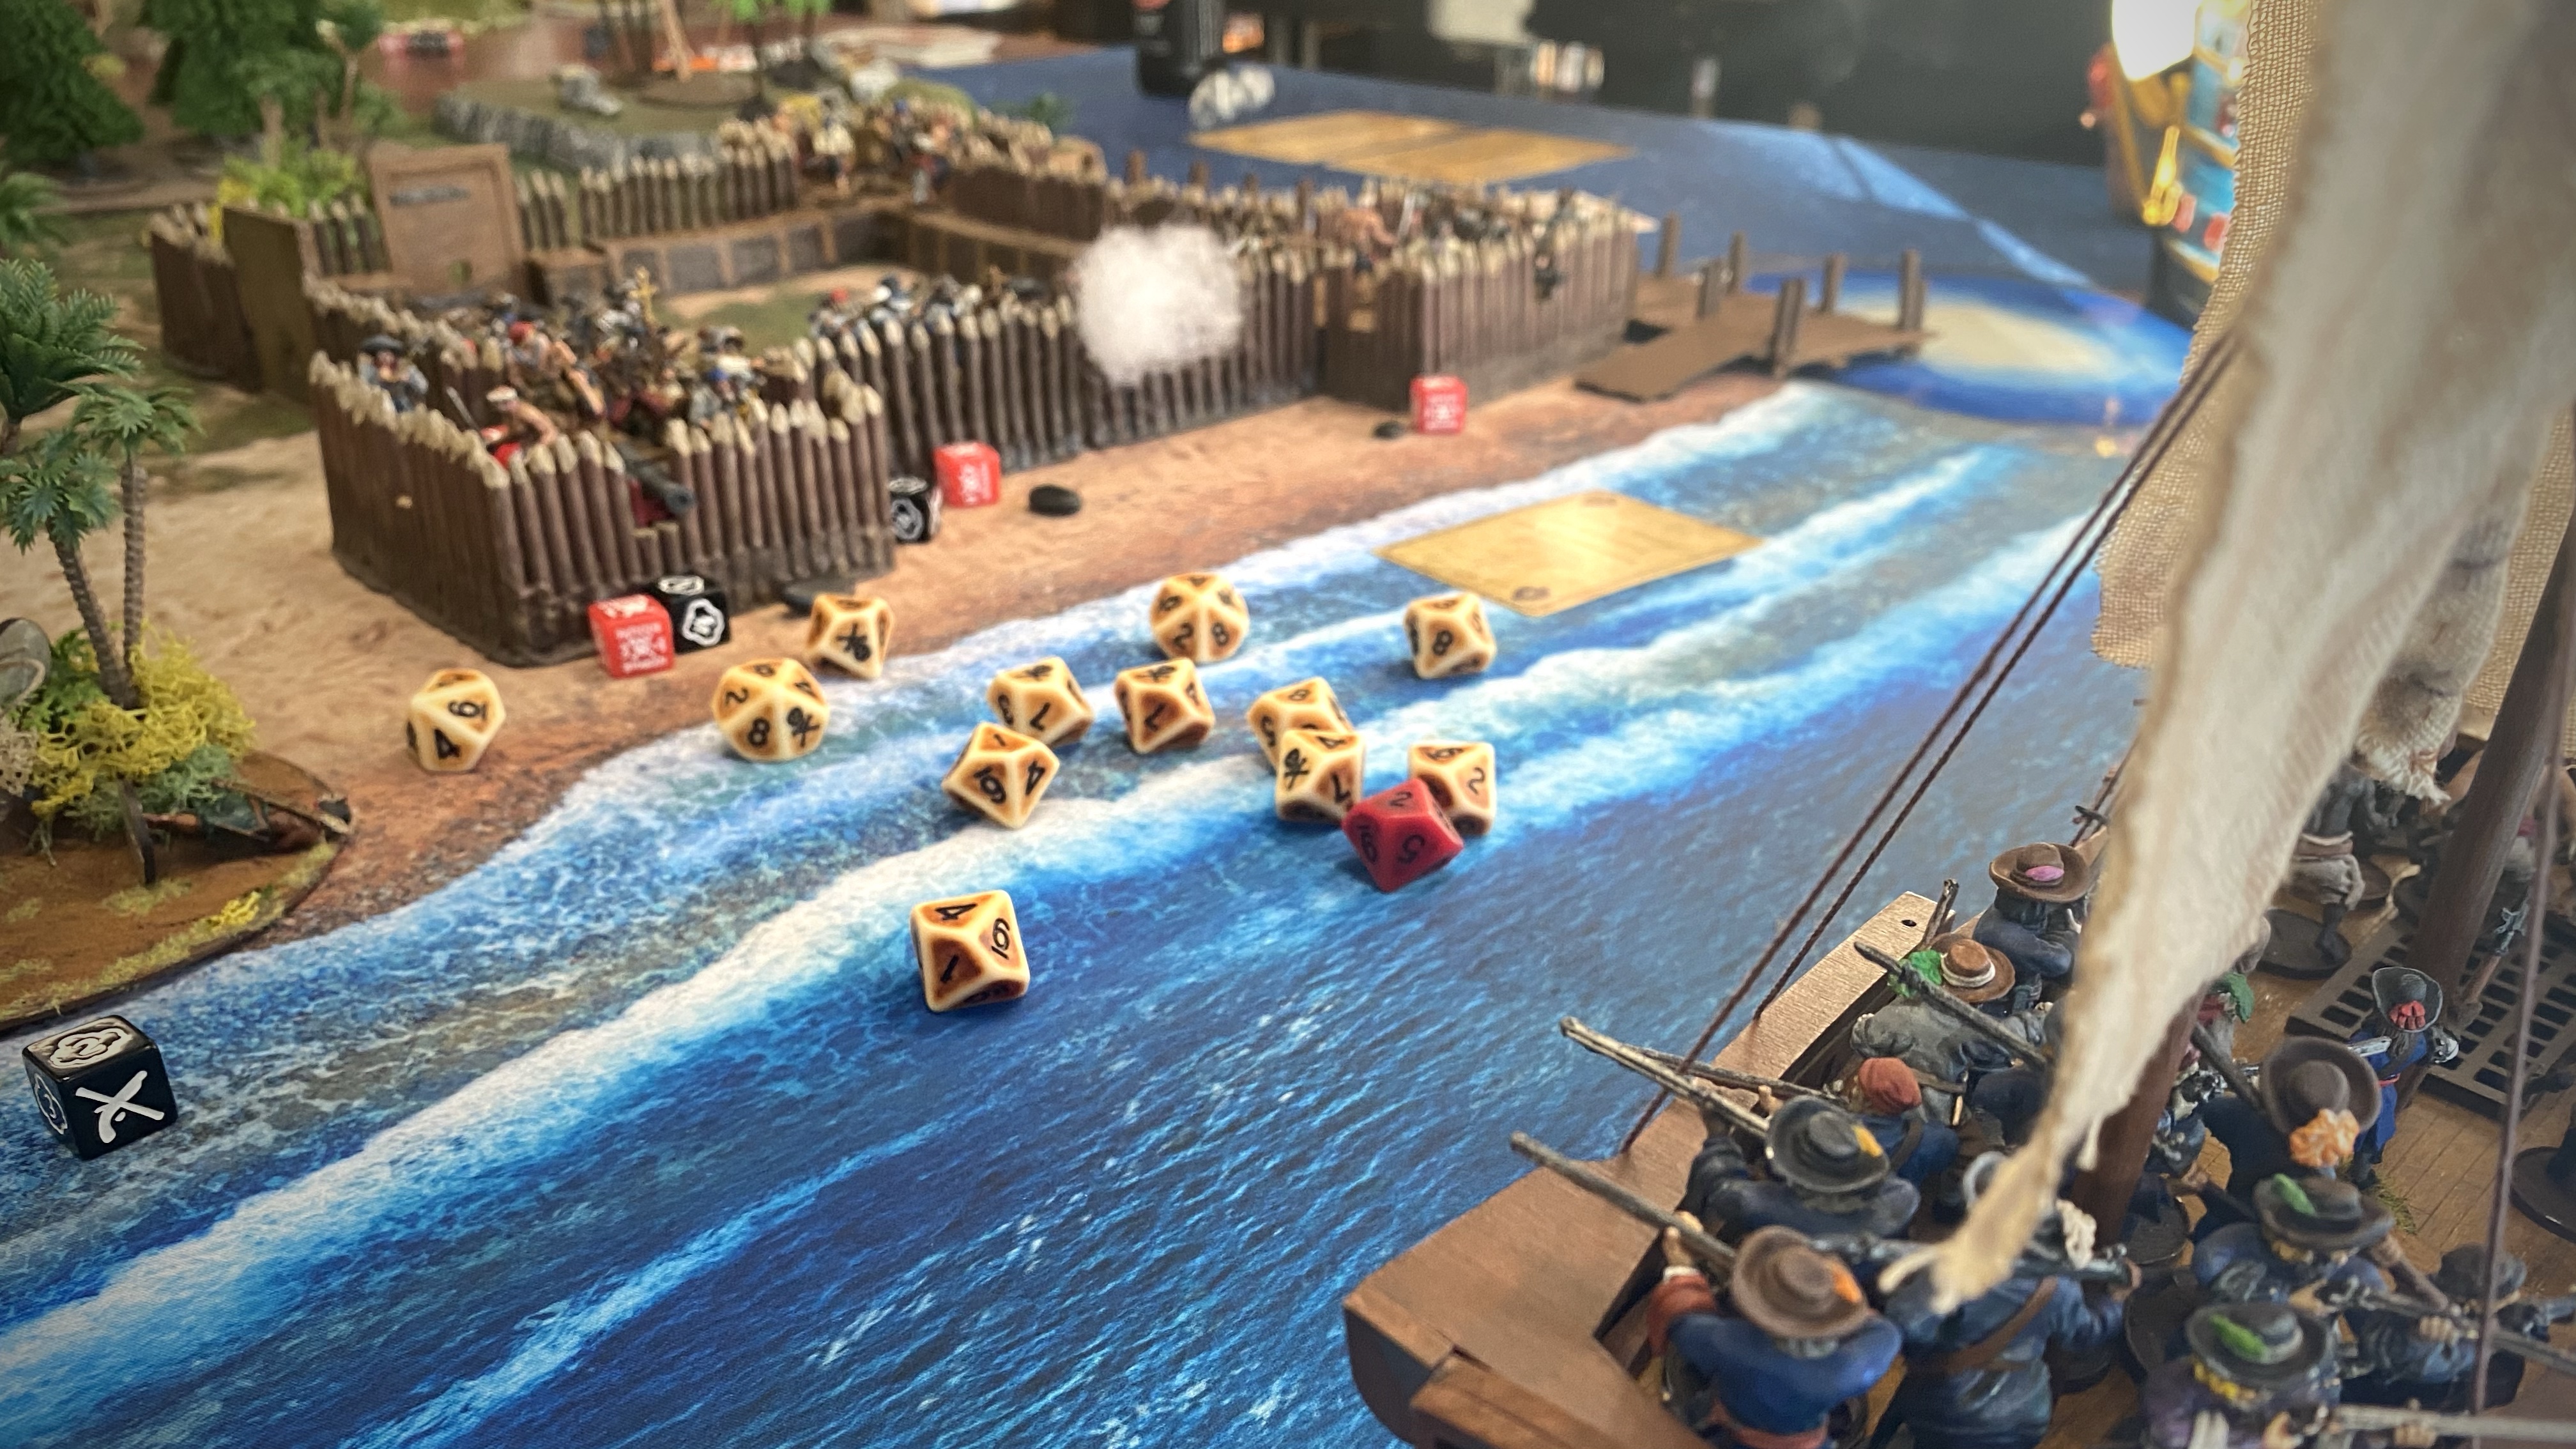
I planned to use my Milicianos Indios as harassers if there was a landing party but I wanted to make use of them in the meantime. I rushed them out into the surf and fired off two volleys of arrows but again, failed to find any 10’s. This was kind of pattern for my dice in the first two turns…

When the Galleon finally fired at one of my bastions it found the 10’s!

Two 10’s on the attack then a 10 for the Lucky hit which set my Bastion on fire!

Before the first turn was over, Guy’s Attackers had fulfilled the scenario objective (at least temporarily)!

Fire is pretty much the worst. You have to take a Fatigue check when you activate and you can’t fire any weapons and the fire can spread! I hadn’t even got to fire my cannons!
Seeking revenge and with my 103 point unit of Soldados ready to go, I moved them up to the parapet and used my Officer to fire an Expertly Drilled volley into the Galleon. I needed 10’s to get any hits but if I could get even one hit, that would trigger at least 2 Fatigue checks. But….I failed to find any 10’s.

At the end of the round we rolled for the fire and it spread to an adjacent wall section. Now I hadf two fires to deal with!

Guy drew 5 cards which meant he planned to bring in the Corvette during this turn.
I used my command unit first in an effort to put out the fires. First repair attempt: failed. Second command point: failed. I rallied another unit with my extra Rally CP. No progress on the fires yet!

Then the Galleon Fired again on the second bastion. At a closer range, the French cannons scored 7 hits! With the remaining Fortitude being 3, this triggered a Critical Hit.
We rolled on the Fortifications Critical Hit table and, you guessed it. It came up as a fire! Now I had 3 fires in my fort before I had even been able to fire 1 cannon or get one hit with muskets! I started to consider melting down all my dice…
The Corvette moved into range and I fired more arrows from my Indios but no effect. Couldn’t find those high numbers!

I used my artillery crew in the first bastion to try to put out the fire. A Club gave my Trained unit 3 actions so I only needed a 5 on my Dedicated Repair action. And I rolled a 1…. I spent a Fortune because I needed these guns firing! And I rolled a 3… AaArAAAAAAaaARRrg!

My other burning bastion with the Master Gunner managed to put out their fire by rolling a 10 on their Repair. Now I had “only” 2 fires burning in my fort.

I moved a unit of Hostigadores over to the burning wall to try to put it out next turn. These fires were really messing up my game!
So far the French bombardment on this fort was going pretty well…
I hadn’t lost that many models, but the French cannons had been really wrecking my bastions and the Lucky/Critical hits had “been on fire.” No pun intended…
As the Corvette moved in closer I fired my Soldados’ 13 dice again using a Spade to get the advantage of Expertly Drilled. At this point I only needed 9’s to get his. All 13 dice came up as misses! With frustration building, I spent another Fortune to reroll them and they came up as all misses again! That’s 39 dice from my 103 point unit and absolutely zero hits! AaArAAAAAAaaARRrg!
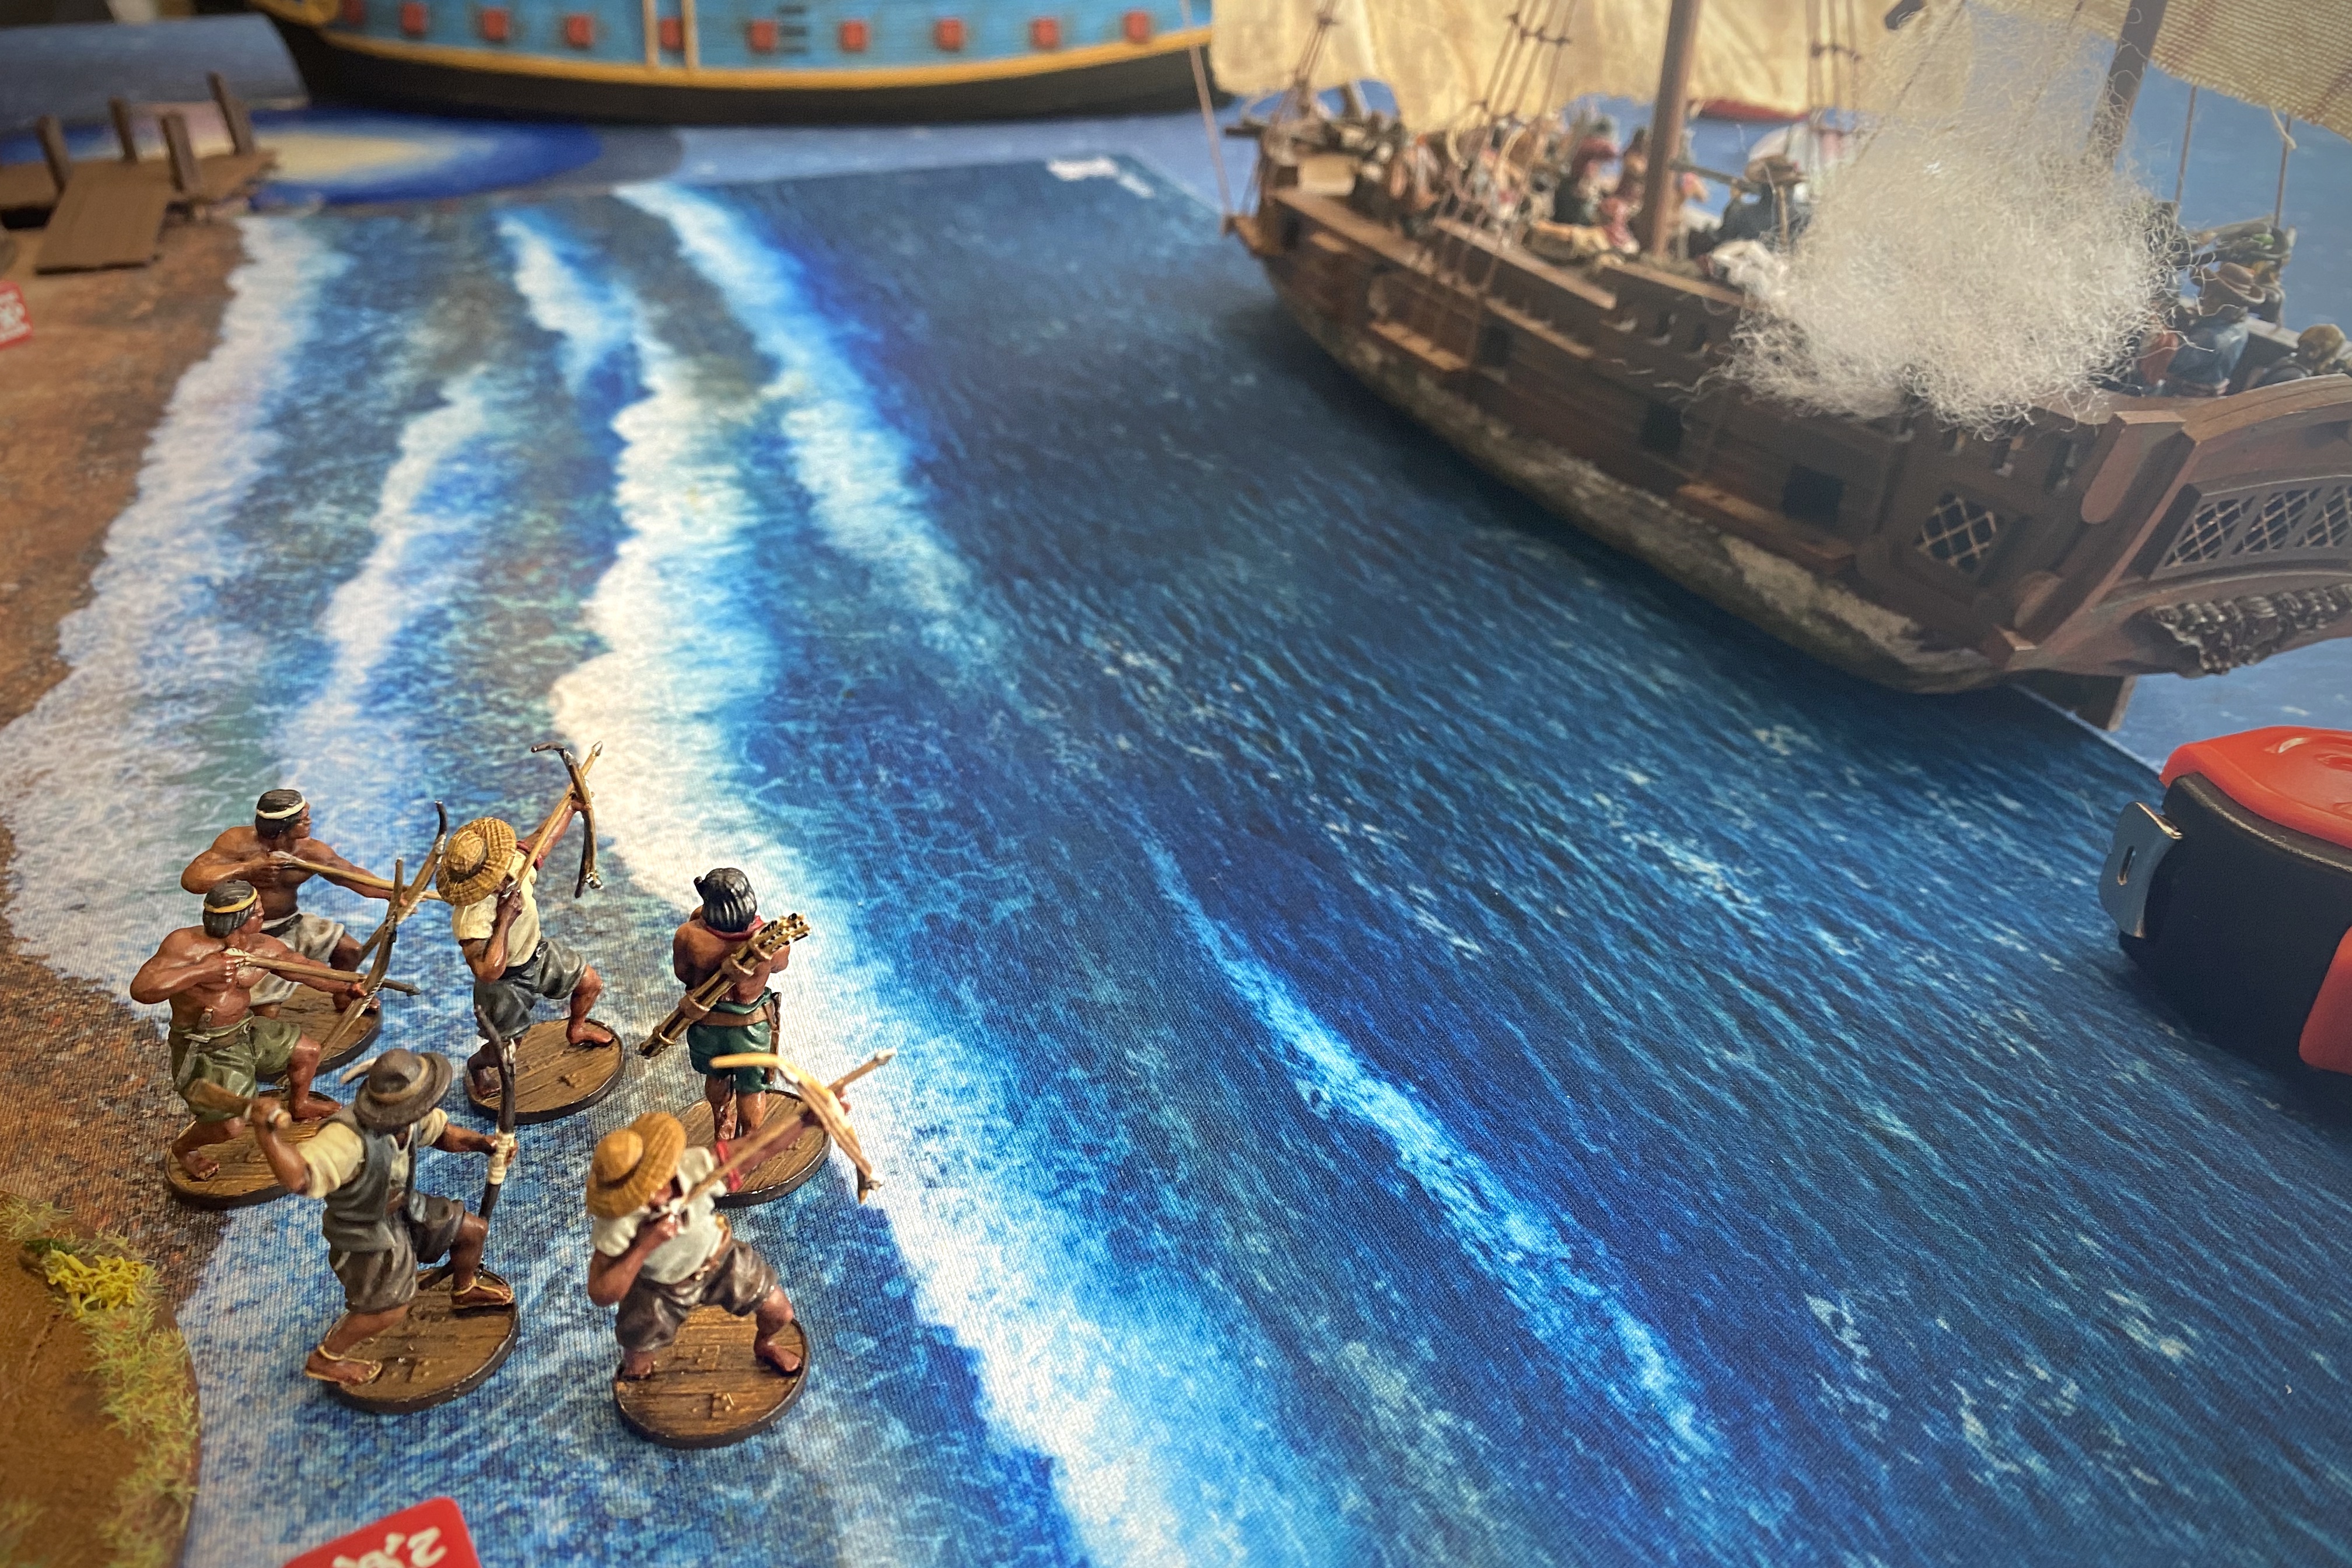
The massive unit of Milices de Caraibes shot a volley into the Indios in the surf. His first roll scored 4 hits which was below probability but not bad vs a unit of 6 men. Guy chose to reroll with a Fortune which surprised me! He scored 7 hits which I assumed was the end of the Indios. We decided the surf gave them cover (Guy insisted) but I didn’t apply Elusive to their Save roll. I rolled 6 successful Saves! And here I was judging Guy for rerolling that attack… One model died anyway since the French scored 7 hits and the unit broke and retreated to the cover on shore.
My artillery crew in the first burning bastion had to spend their action trying to put their fire out. I pushed them to gain an extra action on a Diamond to get my Dedicated Repair down to 5. Stop the burning! I rolled a 10 and finally put the original fire out. By the end of turn 2 none of my cannons had fired but the Galleon has let off two full broadsides!
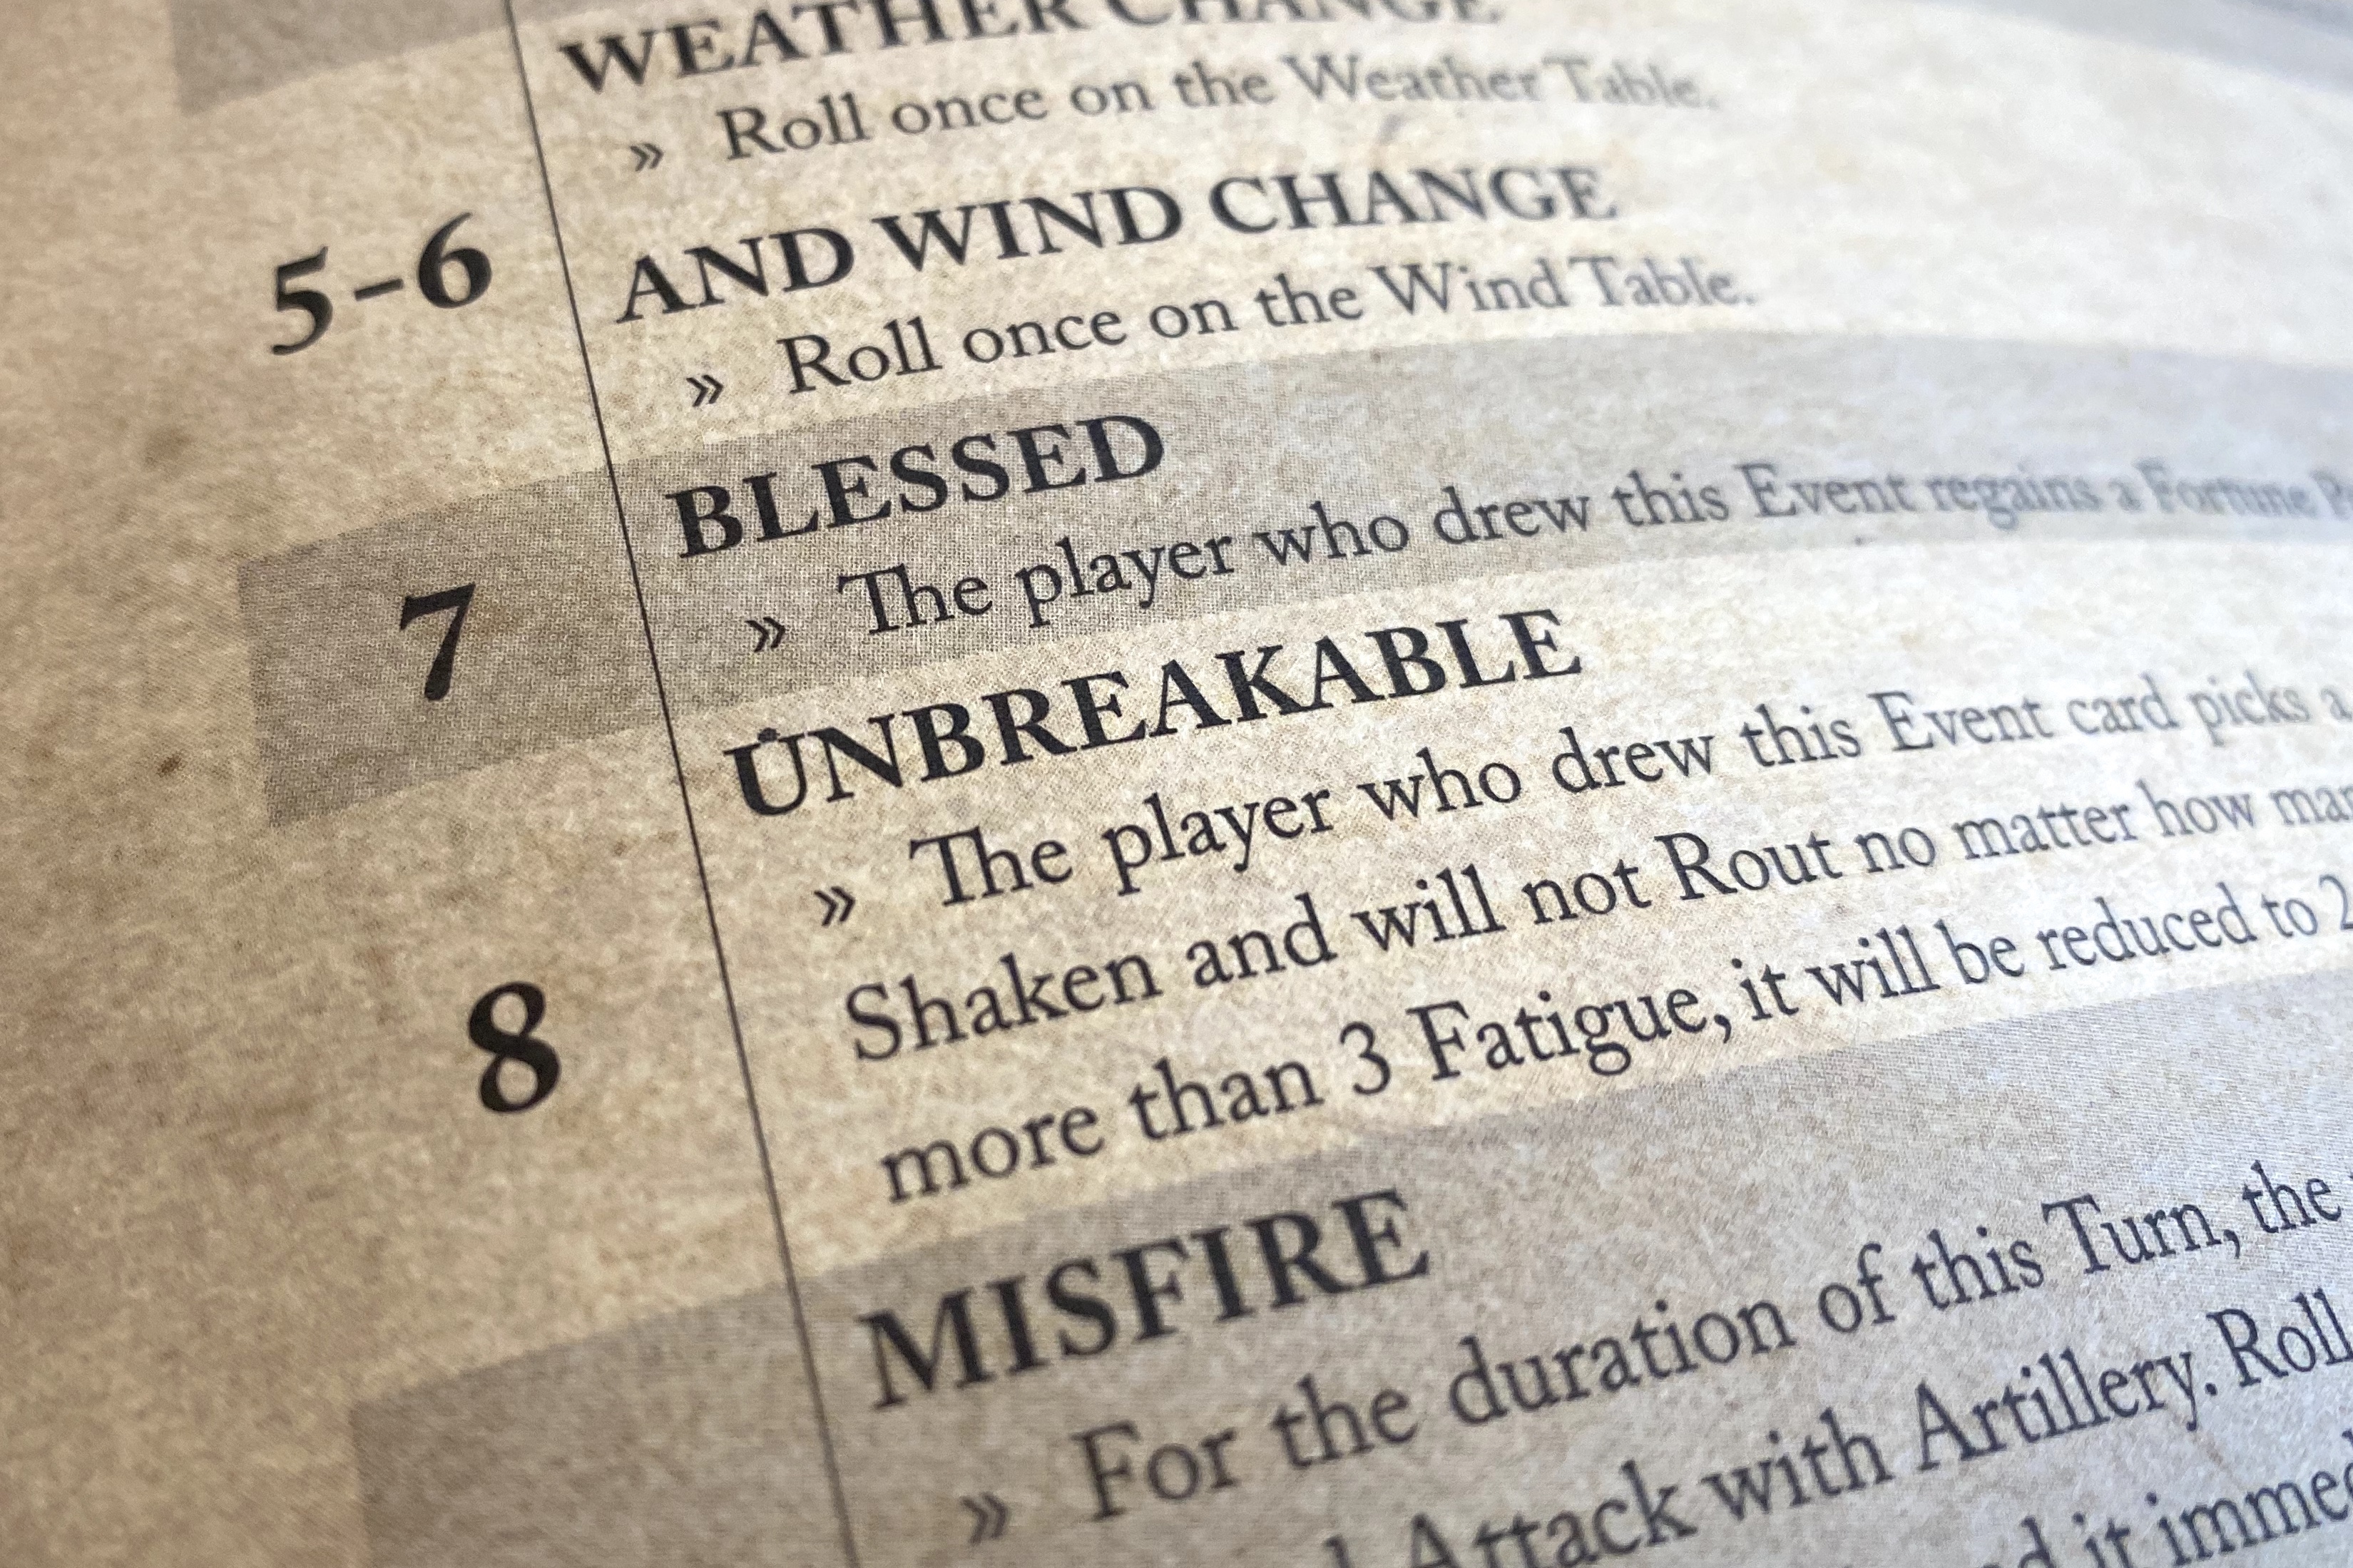
I drew my second event on turn 3 which gave me the chance to make one of my units “unbreakable.” I chose my artillery crew with the Master Gunner in bastion 2. Spoiler alert. Unbreakable isn’t the same as unkillable…

I took initiative on turn 3 and fired my veteran Soldados for a 3rd time. I finally got some hits! Maybe my luck was changing!

I finally killed a couple models on the Corvette. These were the first French casualties in spite of my throwing more than 70 musket dice at them!

I incorrectly assumed the Galleon wouldn’t fire again this turn since it had fired two turns in a row already. But Guy was managing his crew well and my ineffective fire hadn’t slowed the gun crews at all yet. I should have known! I should have fired my cannons at point blank range into the Galleon when I had the chance!

Another volley of four Medium Cannons into the already weakened bastion was more than it could take. With 9 hits scored, the bastion was reduced to nothing, the Unbreakable crew was massacred and the bastion took a Breach, Debris, Gun Destroyed and, (you guessed it again) a Fire critical market. That destroyed gun meant Guy had fulfilled the scenario objective and I couldn’t reverse it like I could if it was merely on fire.
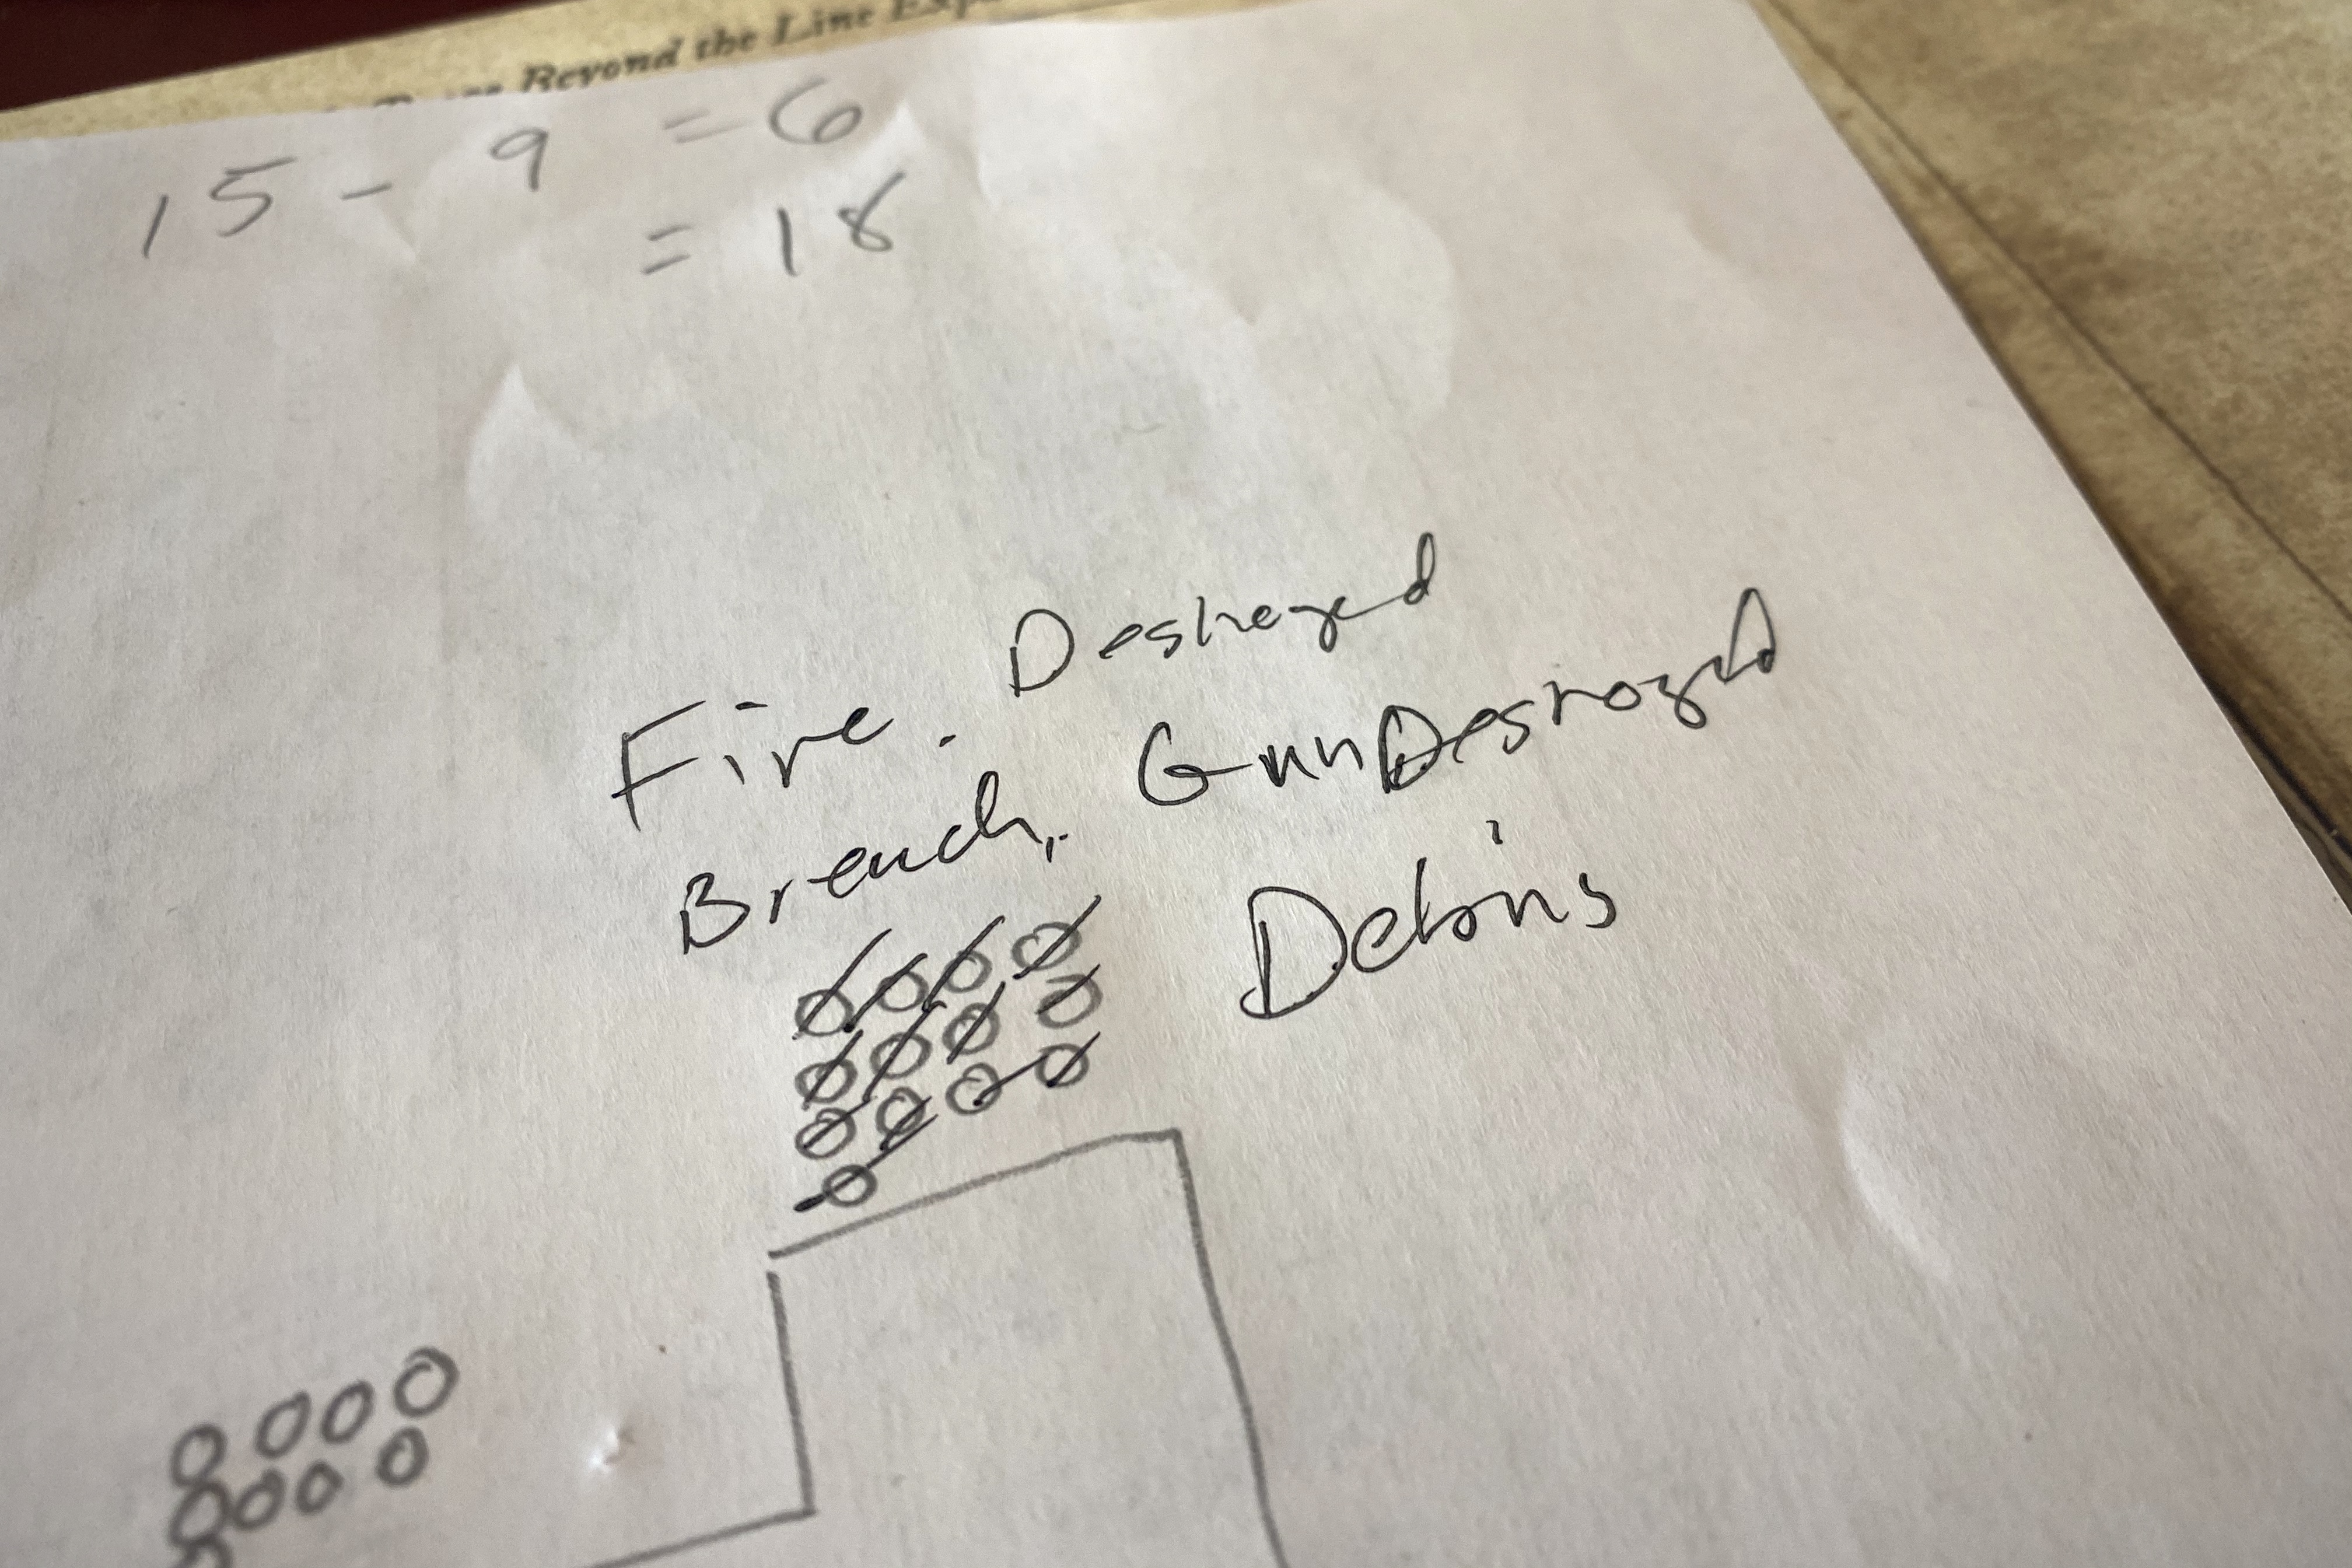
That poor bastion never got to fire!

But bastion #1 could finally shoot!
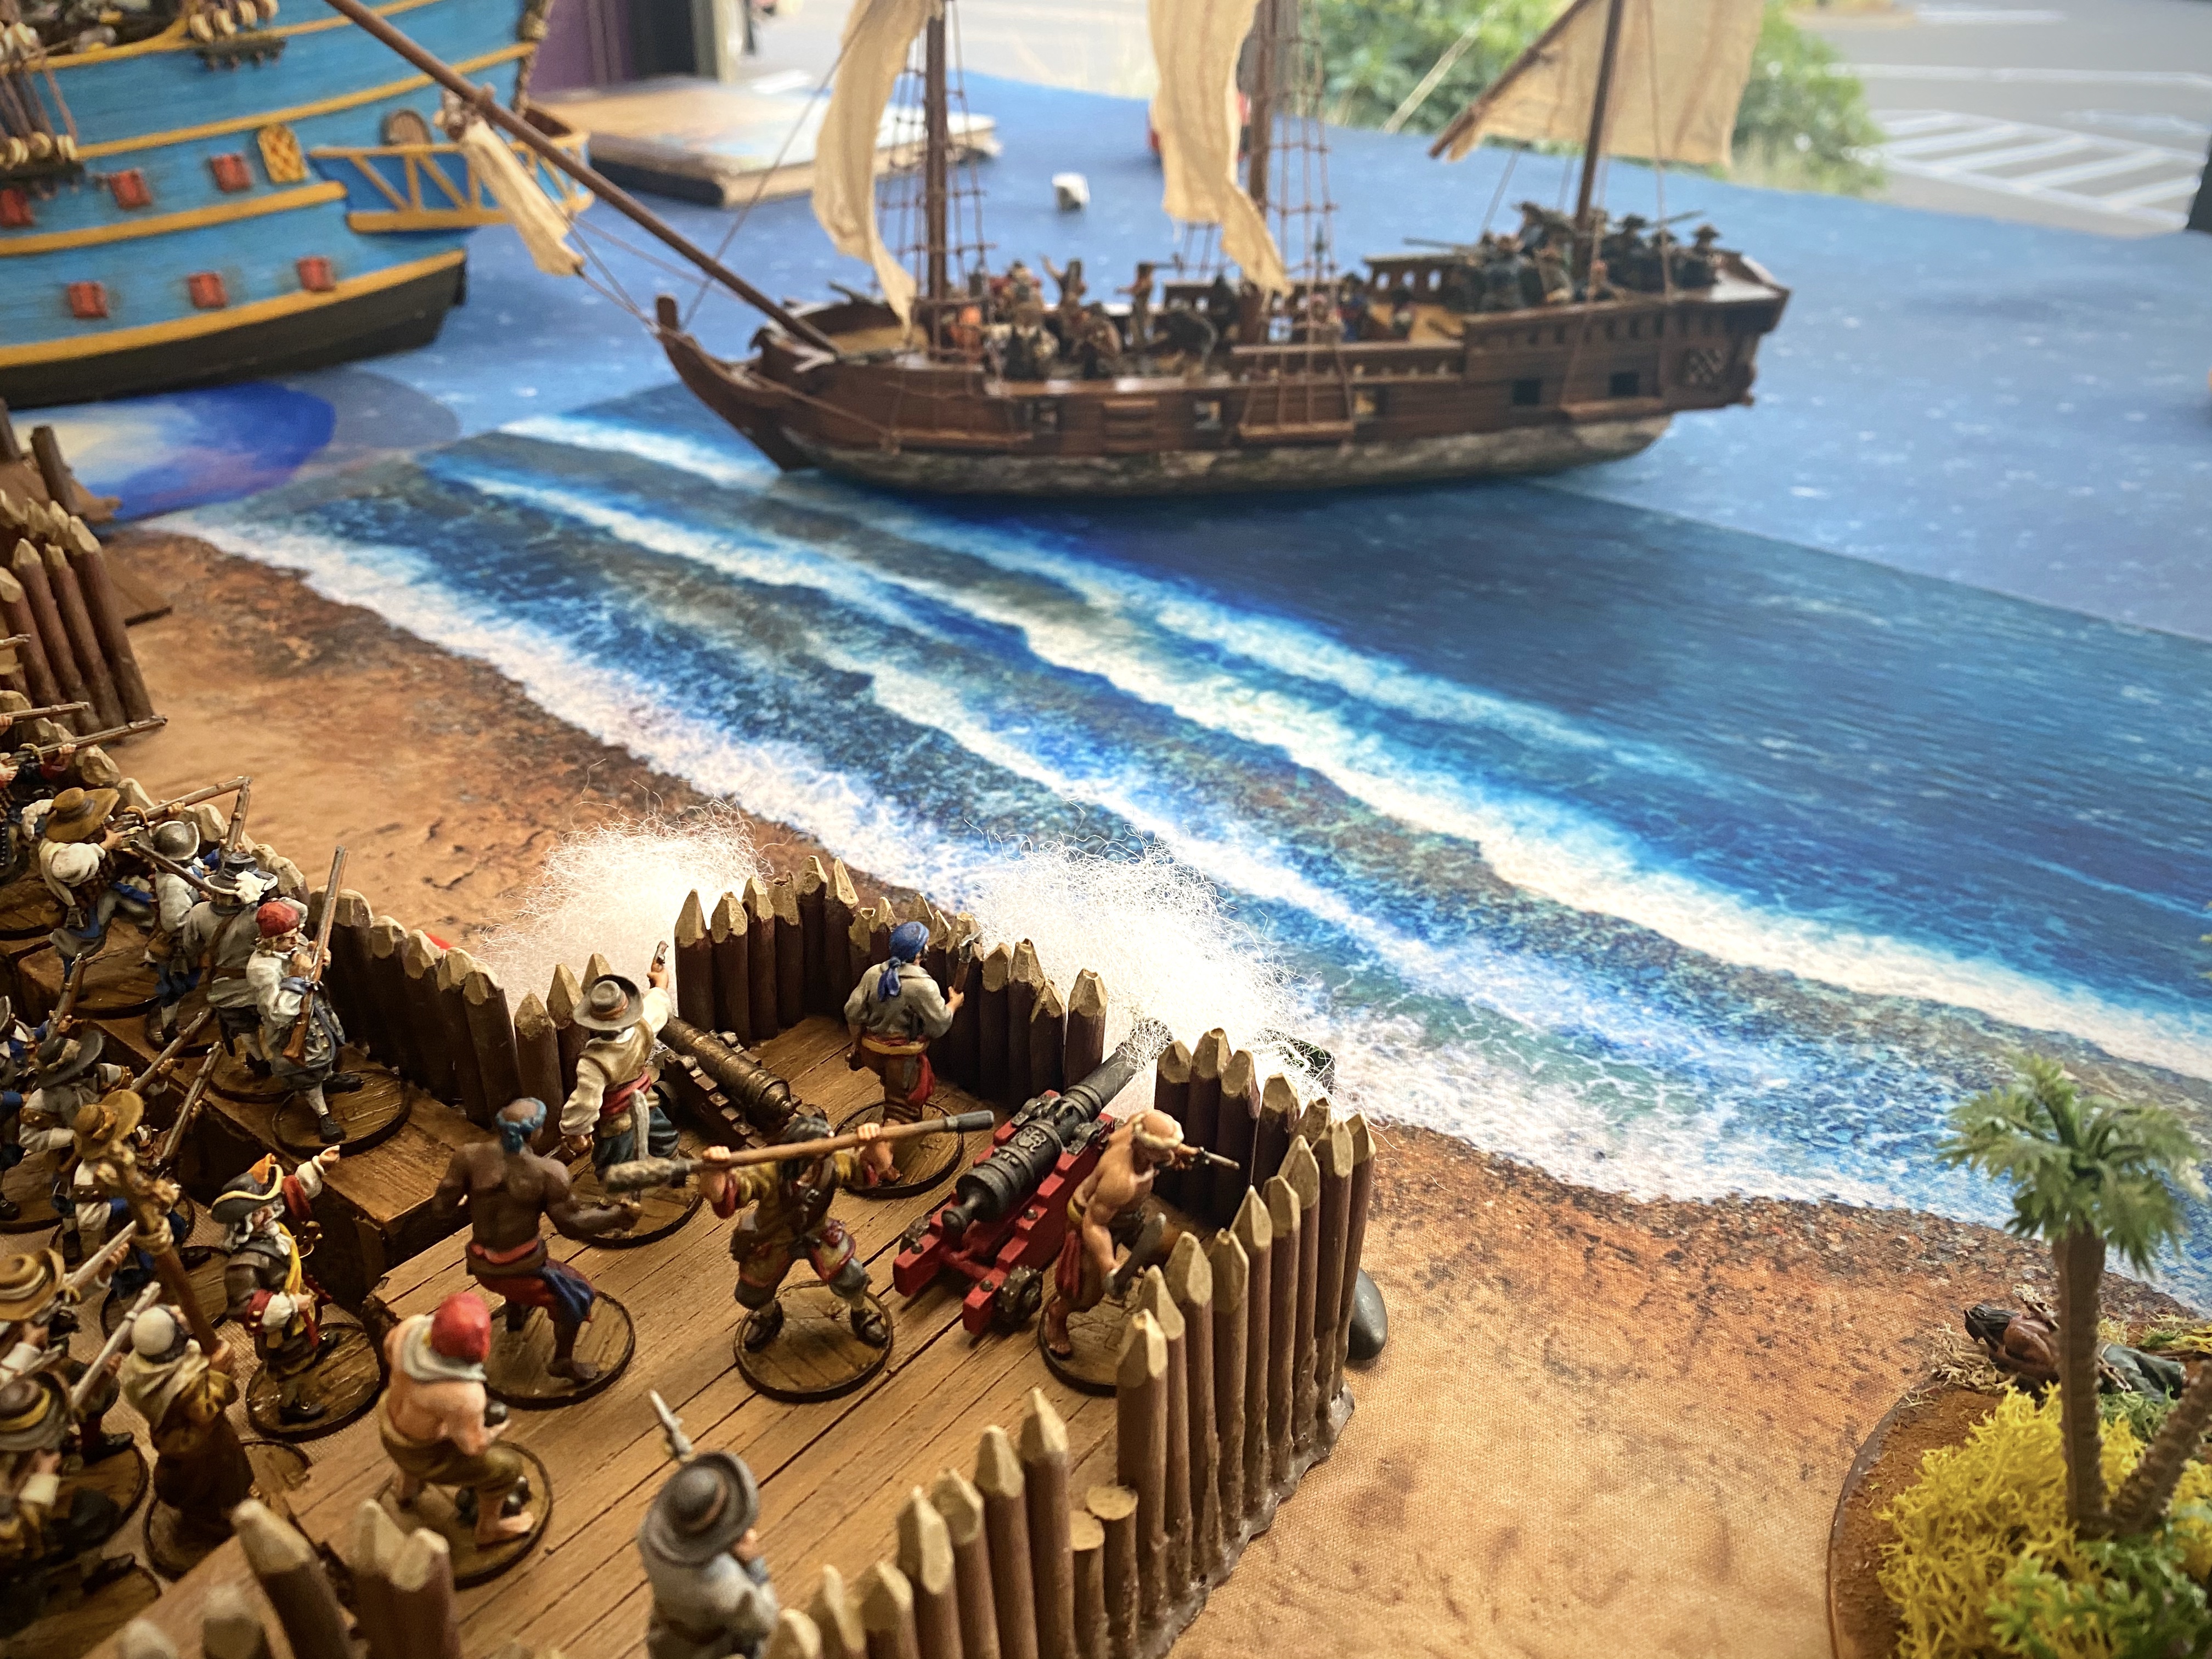
Finally free of fire for the first time in the game, bastion #1 got to fire on the Corvette and it scored some hits.
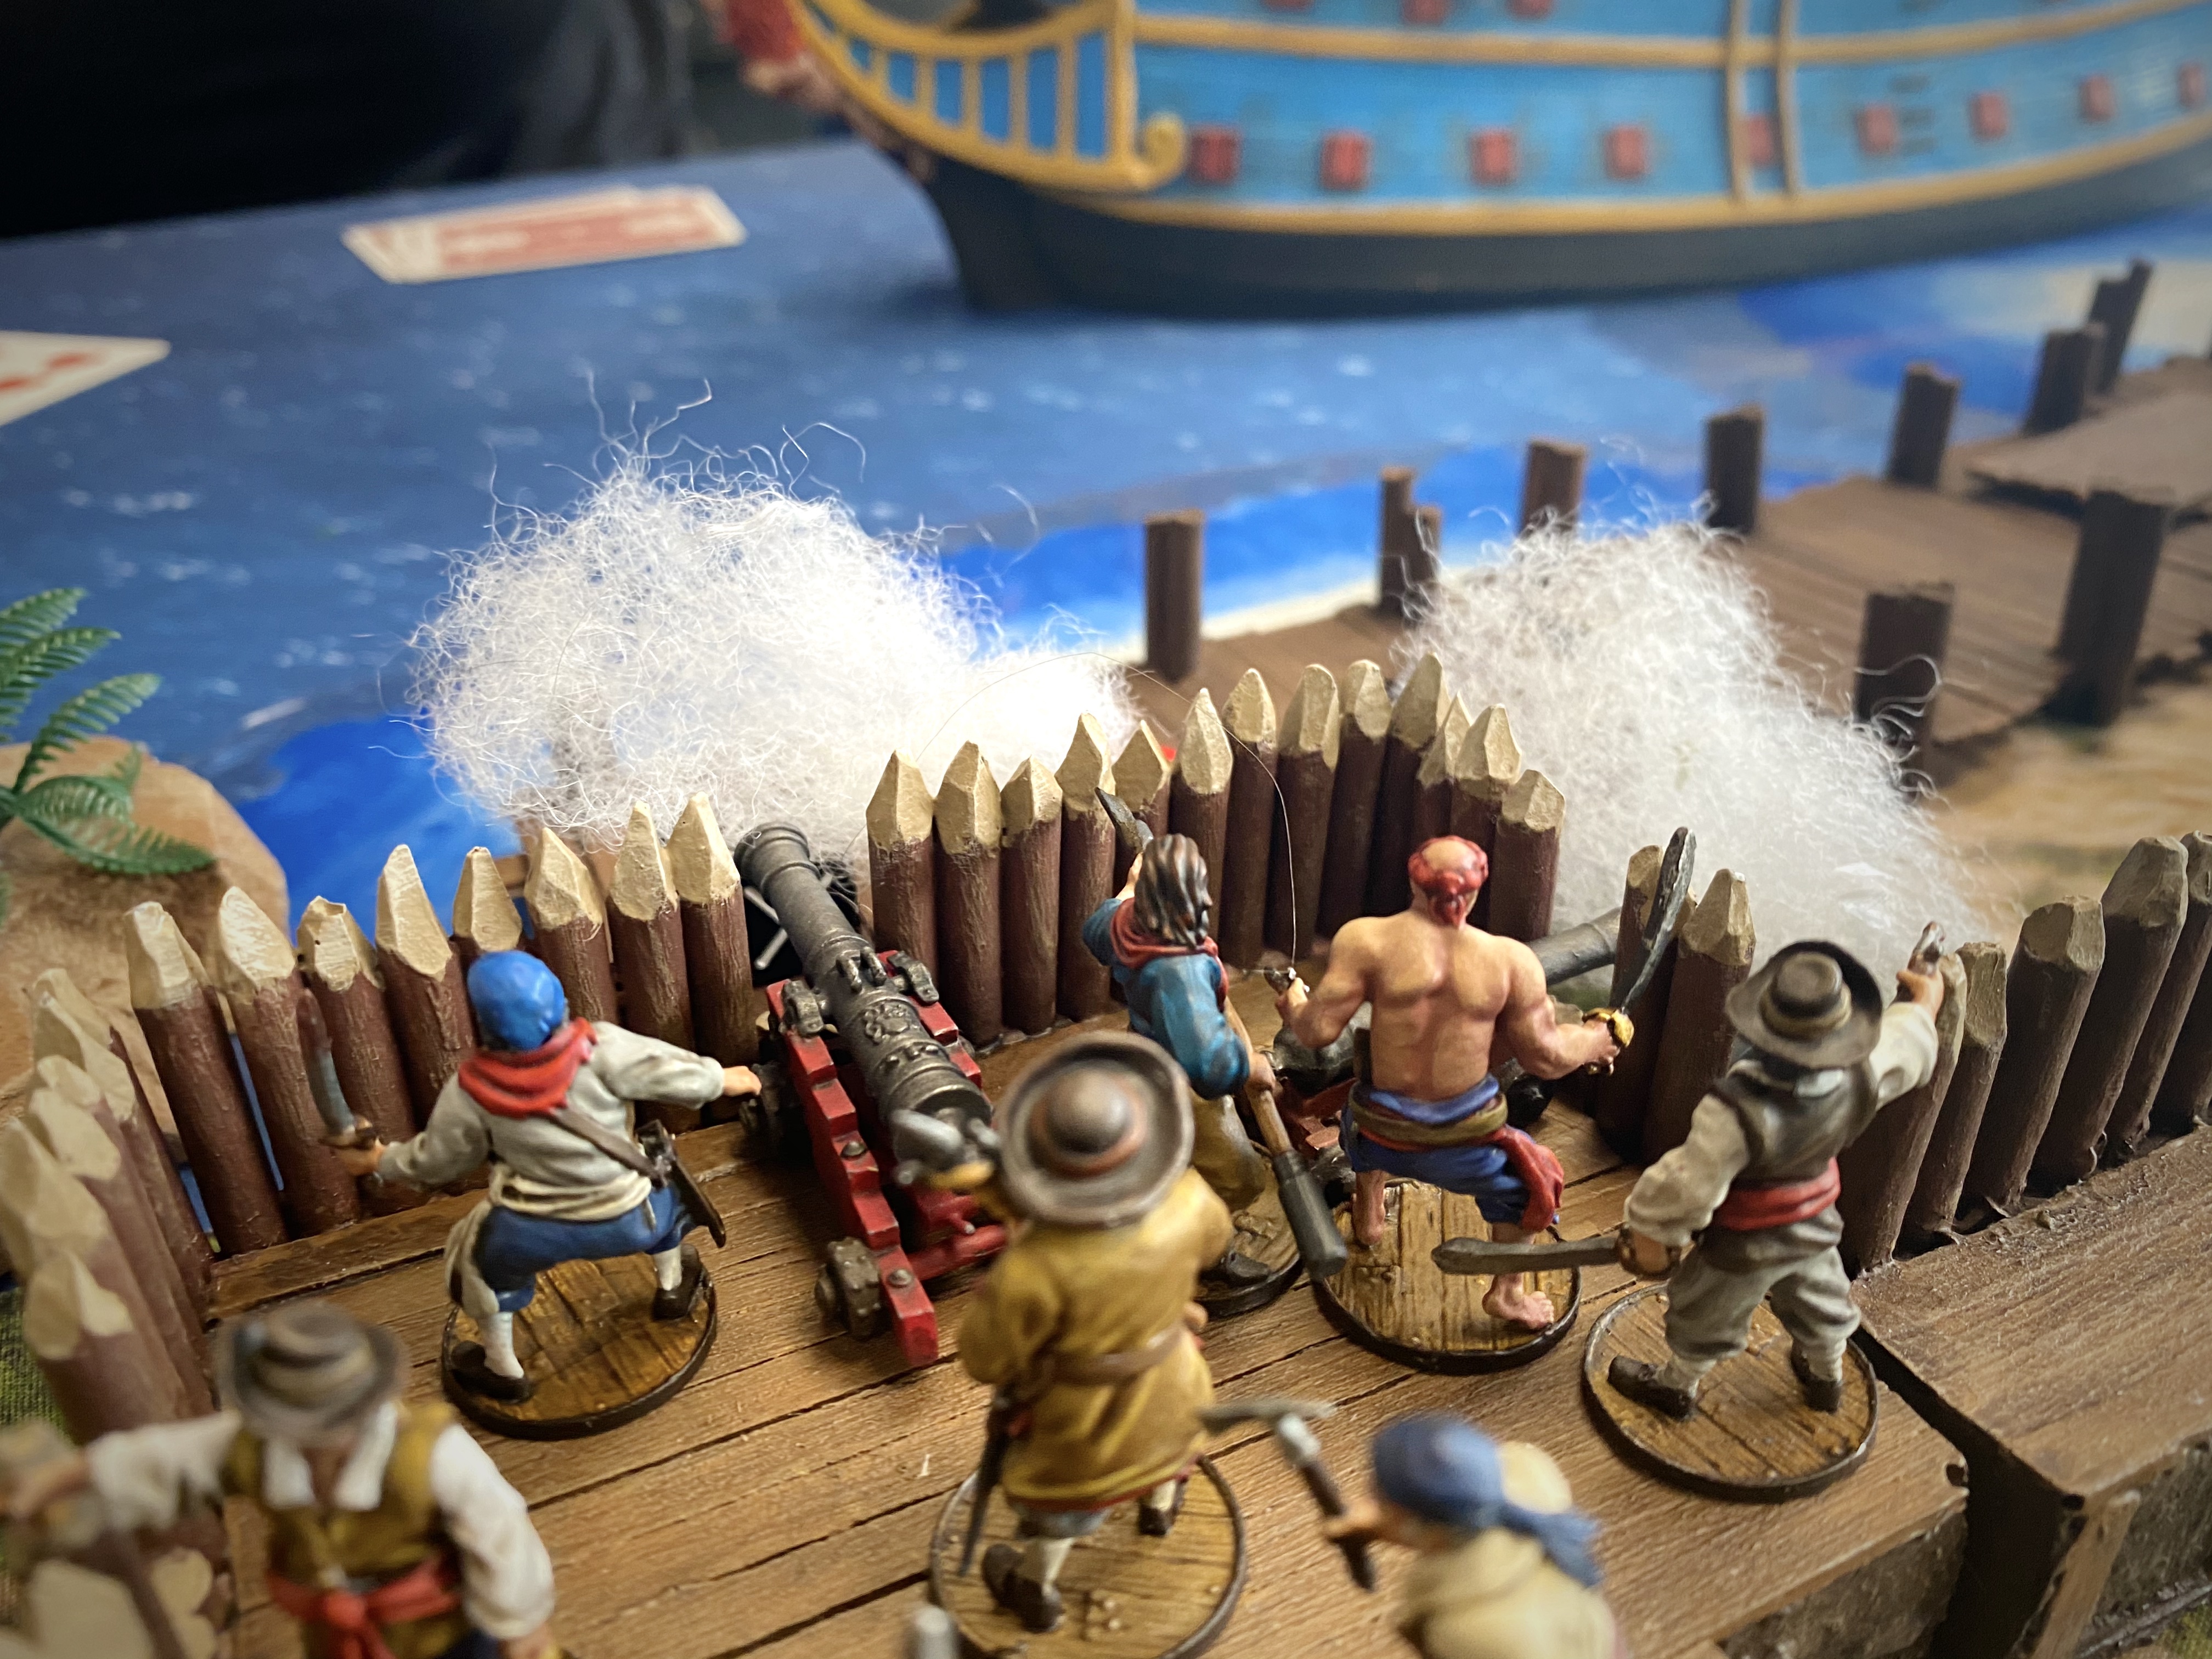
My third bastion got to fire on the Galleon as it moved towards the other face of my fort and it got some decent hits. The game is more fun when you actually get to shoot your beautiful Heavy Cannons!
The Marins on the upper deck of the Galleon reduced sail down to 3″ near the end of turn 3.

Neither of the two fires spread at the end of turn 3. Halfway through the game and I had only got two pairs of cannons to shoot and one effective musket volley! Meanwhile my fort was feeling the pain.

With the bastion breached, this opened up the palisade wall to be flanked by cannon fire. Firing for a fourth turn in a row, the main deck of the Galleon scored 4 hits in the wall section and a Critical Hit which SET IT ON FIRE! I’m not bitter. I’m very bitter. 5 fire tokens in 3 turns. My fort seemed to be made of matchwood and the French must have been using heated shot!
My Saves were good though and I only lost one Soldado out of the 4 hits. The Hostigadores’ 6 Shoot Save was very beneficial behind these walls!
The Galleon continued to pull in sail and move more slowly. On move it actually only drifted because it was at 2″ and sailing slightly against the wind. This fouled up the corvette which had to turn hard to starboard to avoid a collision. This was a bit of break for me as it effectively took it out of the game for the next turn as it had to come around and cross the eye of the wind.

I was able to put out one of the fires before the end of the round and the other fire mercifully didn’t spread. But each of those Repair actions costs me either a command point or an entire Hostigadore activation that should have been spent firing on the French gun crews.

I was able to fire my cannons at the Galleon again early in turn 5 and I got a couple hits including a Lucky Hit that turned into a Leak. The Gun Deck subsection rules give a huge Shoot Save bonus vs small arms but not so against cannon fire so I was finally able to kill a couple of the Marins manning the guns. Not enough to knock out a gun but it was something!

My outclassed Indios raced along the beachtrying to put fatigue on the cannon crew but their arrows apparently couldn’t find the gun ports. They did pretty much nothing useful the entire game!

I kept my Veteran Soldados in a constant loop of reloading twice on a Heart or Spade then using the Officer Character to give them a Dedicated Shoot action to use the Expertly Drilled ability in an attempt to lay down extra Fatigue.

I got a decent shot at the main gun deck on the Galleon and actually killed a couple and got that unit up to 3 Fatigue. I finally disrupted the incoming cannon fire! Turn 5 is a little late but it helped.

The Corvette had to swing around and eventually Tack to cross the wind so they didn’t throw anything at me on turn 5.

So far there had been a lot gunpowder spent and lots of fire in the fort but not that many casualties considering the amount of men on the table.
At the end of turn 5 I had a Strike Point for a bastion still being on fire and the gun destroyed but my 16 casualties still didn’t reach the level of a Strike Point.
Guy’s French had only taken 10 casualties over the first 5 turns! Those Gun Decks were really paying off. Very difficult to get shots through that bonus of -3 cover (hard cover plus -2 of Gun Decks).

I should have drawn 8 cards here on turn 6. I later drew another.
Going into the last round there was only 1 unit destroyed on the entire board.

With both the Galleon and my bastion #3 ready to fire, I was glad to take initiate by the slightest of margins! 8 vs a 7 of Spades.

With only 5 artillery crew remaining on the bastion, I couldn’t reload both the Medium and Heavy Cannon so I finished reloading the Heavy with the free Artillery Crew action and fired.

At 8″+ I made contact with the Galleon but rolled no 7+ needed to damage with my Heavy Cannon. This was not to be borne!
I spent my fourth and final Fortune Point in a desperate attempt to at least put a dent in The Beast!
Spending a fortune with one cannon vs a Galleon with Heavily Built was a statistically poor choice but it was the last turn and I wanted to hurt that Galleon! I got two 10’s on my reroll. Only one damage but it was a symbolic success! The Lucky Hit destroyed one of the hated French guns. I think this attack did enough damage to the Marins to stop them from firing again on the last turn which was worth the Fortune.
After firing I pushed the unit to go prone to minimize casualties on the last turn of the game. The Marins on the upper decks grappled the Galleon to the pier but they didn’t seem to eager to get out of the ship at this point in the game.

I was able to fire both cannons out of bastion #1 at the Corvette again on the last turn but both missed their ranging shots and I had just spent my last Fortune!

Meanwhile the Corvette had completed it time in the wind’s eye and was again a threat. The Milices de Caraibes absolutely destroyed the Indios and there were no lucky Saves this time. The Officer with the Milices used his CP to order the Marins on the Corvette’s main deck to grapple the dock but they failed.
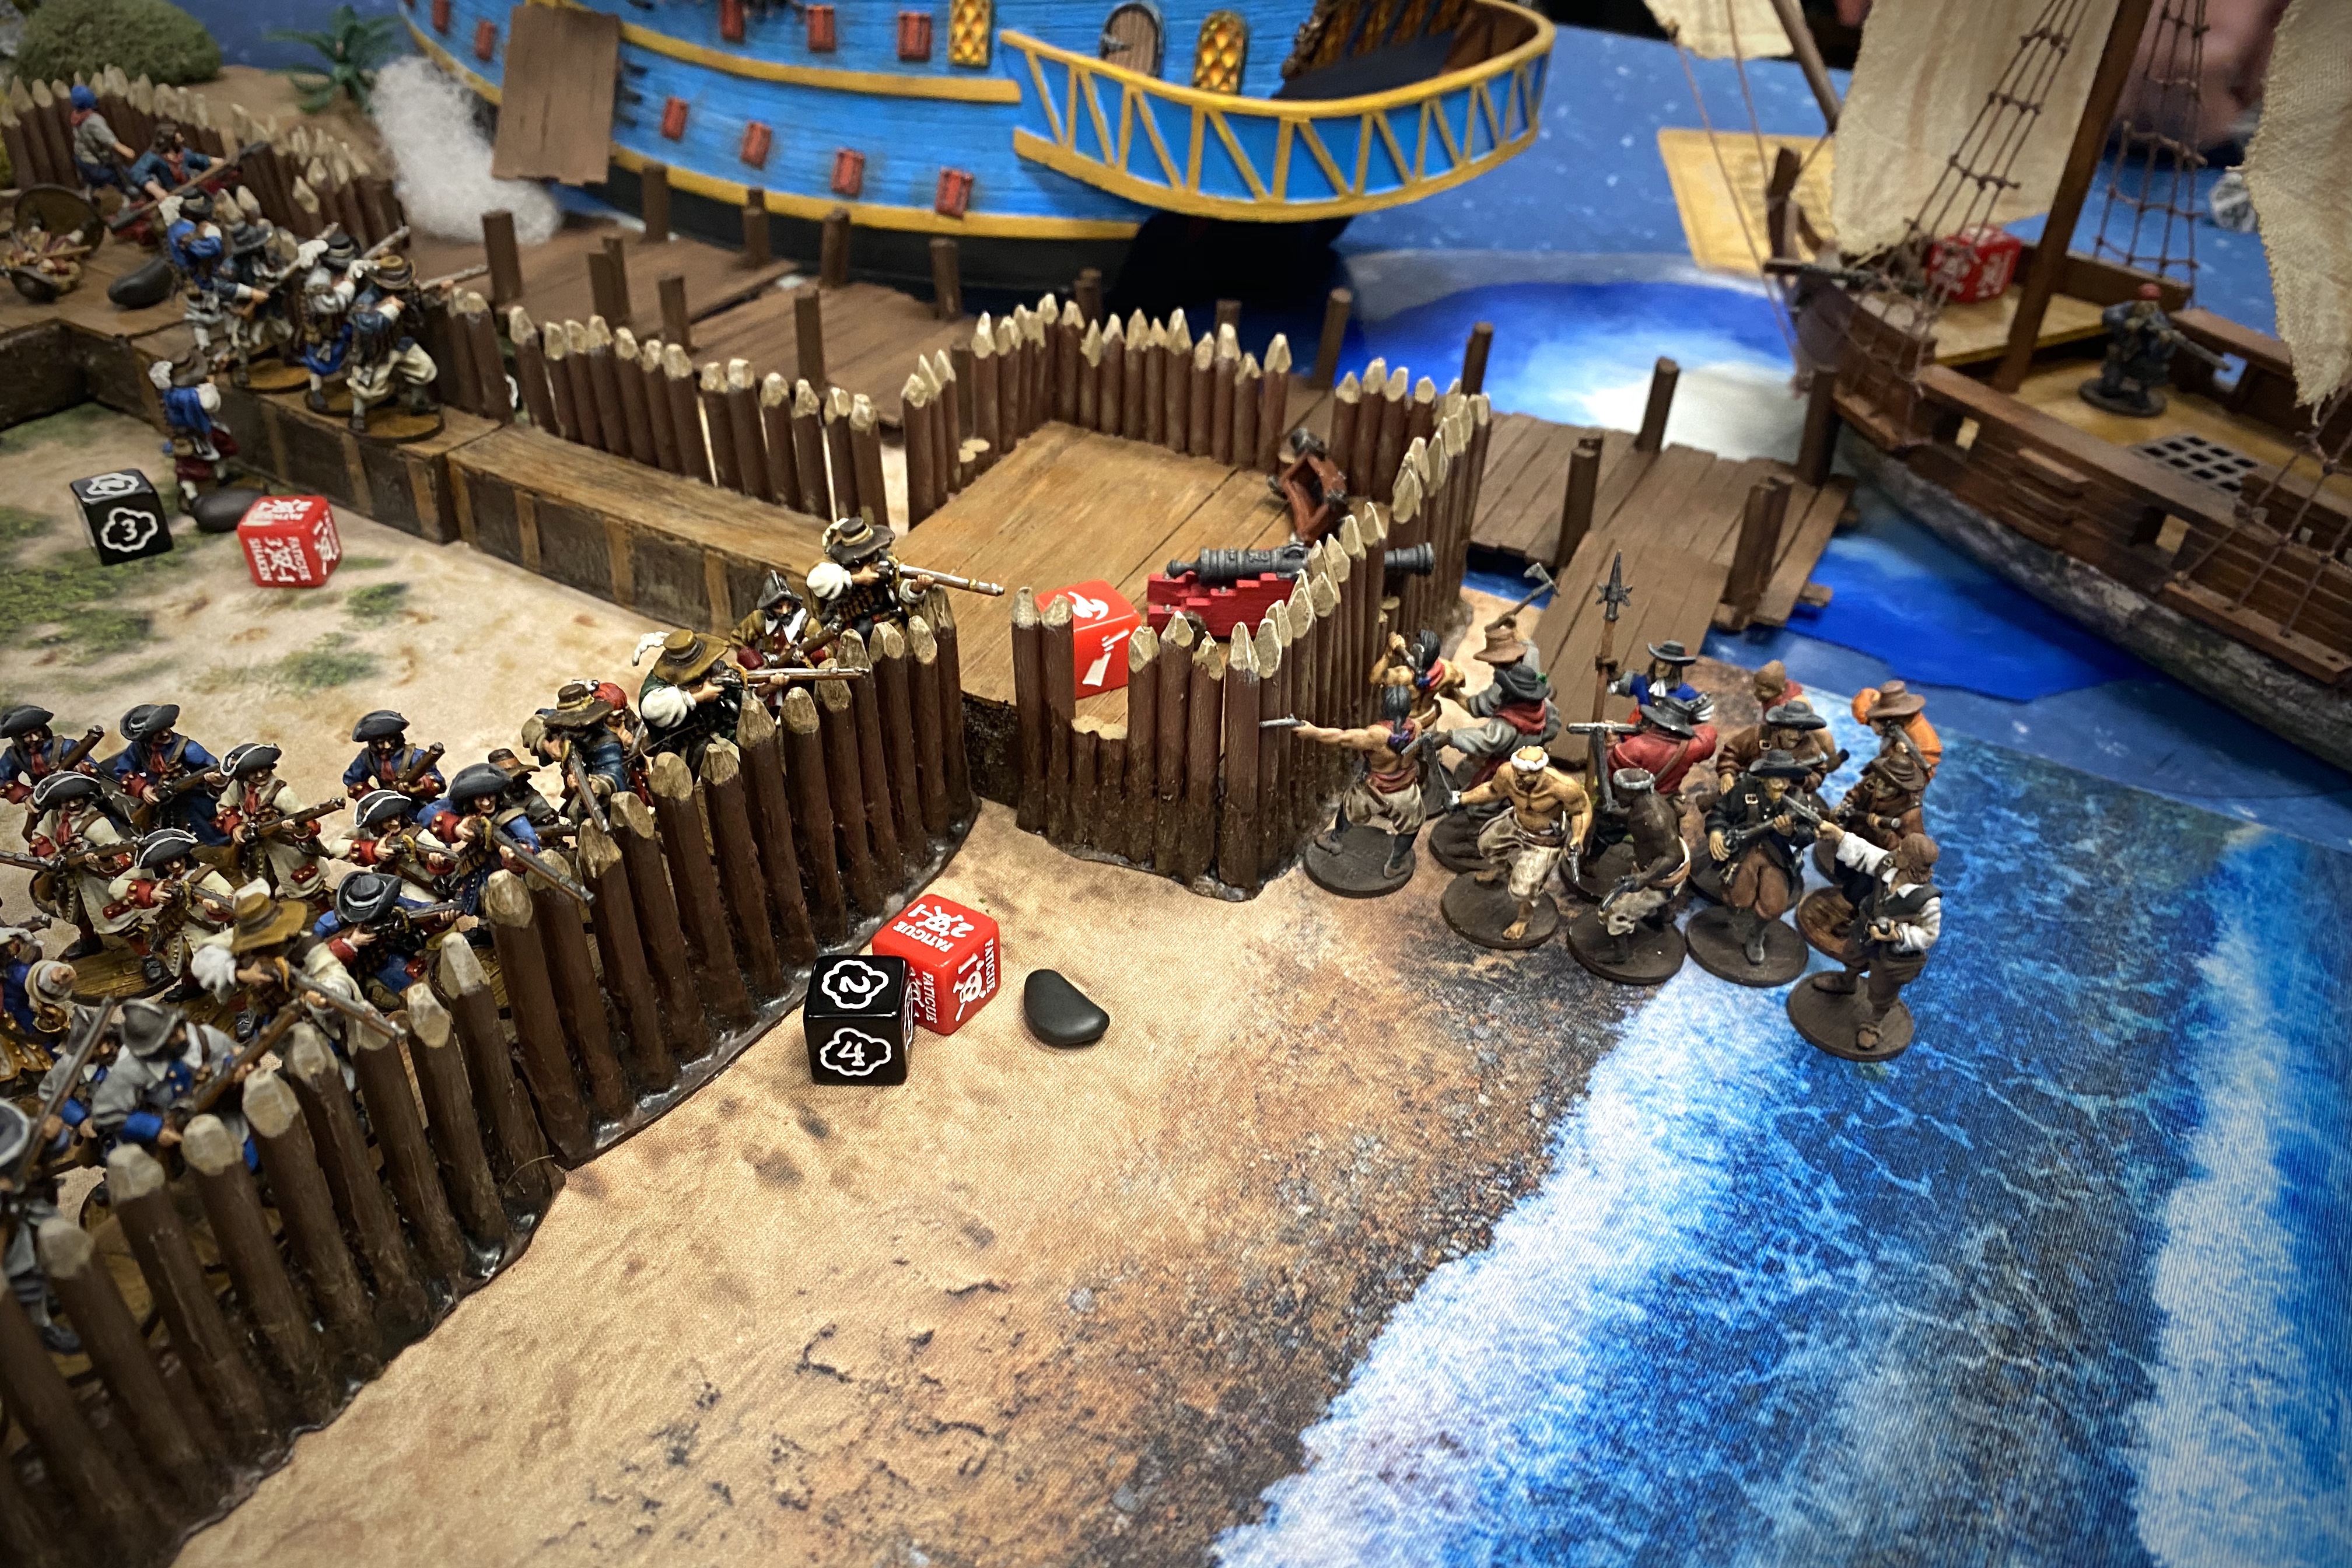
On the next activation the Marins successfully grappled and jumped on to shore. These Marins were armed to the teeth and were eager to use their Firepots!
5 blunderbusses, 2 firepots and 9 pistols all fired at the same time meant 23 dice coming at me at less than 4″, all hitting on 8’s. The Marins passed the explosive check for throwing on a single action. But then the fickle dice gods suddenly betrayed the French and there was only 3 hits out of all those dice! The Hostigadores took a 3rd Fatigue and moved back but the Soldados held.
The firepots missed all their 6 dice but even so, they had a chance to set the wall on fire. And low and behold they did. OF COURSE WE NEED ANOTHER FIRE!

I had only my Soldados left to activate. I was at a Strike Point for casualties now along with my Strike for the burning bastion and Guy’s French still didn’t have a single Strike! This 103 point unit needed to save my game!
I had a couple options but before I used them I had to to a single Fatigue check for starting an activation in a burning section of fort. They failed which gave them a second Fatigue so they were reduced to 2 actions no matter what I did with cards or the Officer. At 2 to 0 Strikes this was dire but I had a couple options.
I could attempt to put out the fire in the bastion. I thought this would take away one of my Strikes and give one to my opponent making things even. (Looking at the scenario objectives again after the game proved this wrong. Having the gun destroyed gave the Strike Point and there’s no coming back from that.) I could attack the Marins and likely get enough kills to push Guy over the casualty threshold for a Strike. But I had to charge over my Palisade wall which is a dedicated action and nerfs my Fight. But those bayonets hadn’t tasted blood yet!
I could have tried to both put out the fire and charge the Marins. I had forgotten about the destroyed gun fulfilling the objective so I was considering trying to put out the fire or do both but I ultimately went for the glory of the bayonet charge.
I used the Officer’s CP to jump over the wall, used a free action to fix bayonets and then charged the Marins. Blood soaked the sand and the Marins withdrew. I had done enough to give the French a casualty Strike!

The melee action concluded turn 6 and finished the game! What a game! We remembered to check for fire spreading but it mercifully didn’t and the game was over.

Time to tally final Strike Points. My Spanish took a total of 24/72 casualties which amounted to 1 Strike.

The scenario objectives gave me a second Strike for having a bastion on fire and a gun destroyed.

Guy’s French had 1 Strike for 18/68 models.

And then my desire to not lose dug up an easily forgotten rule in the recesses of my brain to give the French a second Strike Point. Having a Hostage/Advisor still attached to one of your units at the end of turn 6 gives the opposing force a Strike Point.

Father Pedro, my Spiritual Leader had not only blessed my last Heavy Cannon shot against the Galleon, but had accomplished just as much as the other 71 Spanish men had over the previous 6 turns!
At 2 to 2 Strike Points, the tie breaker is points worth of models killed so I lost anyway! It looked like the French had about 66 points worth of casualties while I had exactly 100 points of casualties.
The French has succeeded in substantially weakening the Spanish coastal fort while sustaining very light casualties.
Post Game Thoughts
- This was an epic game. I felt a lot of frustration during the game with the fires popping up and my dice not helping me much in the first couple turns but looking back on the game, it was actually really fun. Even with some real difficulties, it wasn’t a blow out loss for either of us and that makes for a good game.
- Casualties were very light for a game this size but that’s because all of our units were in hard cover nearly the entire time. Except the Indios and we know how that ended…
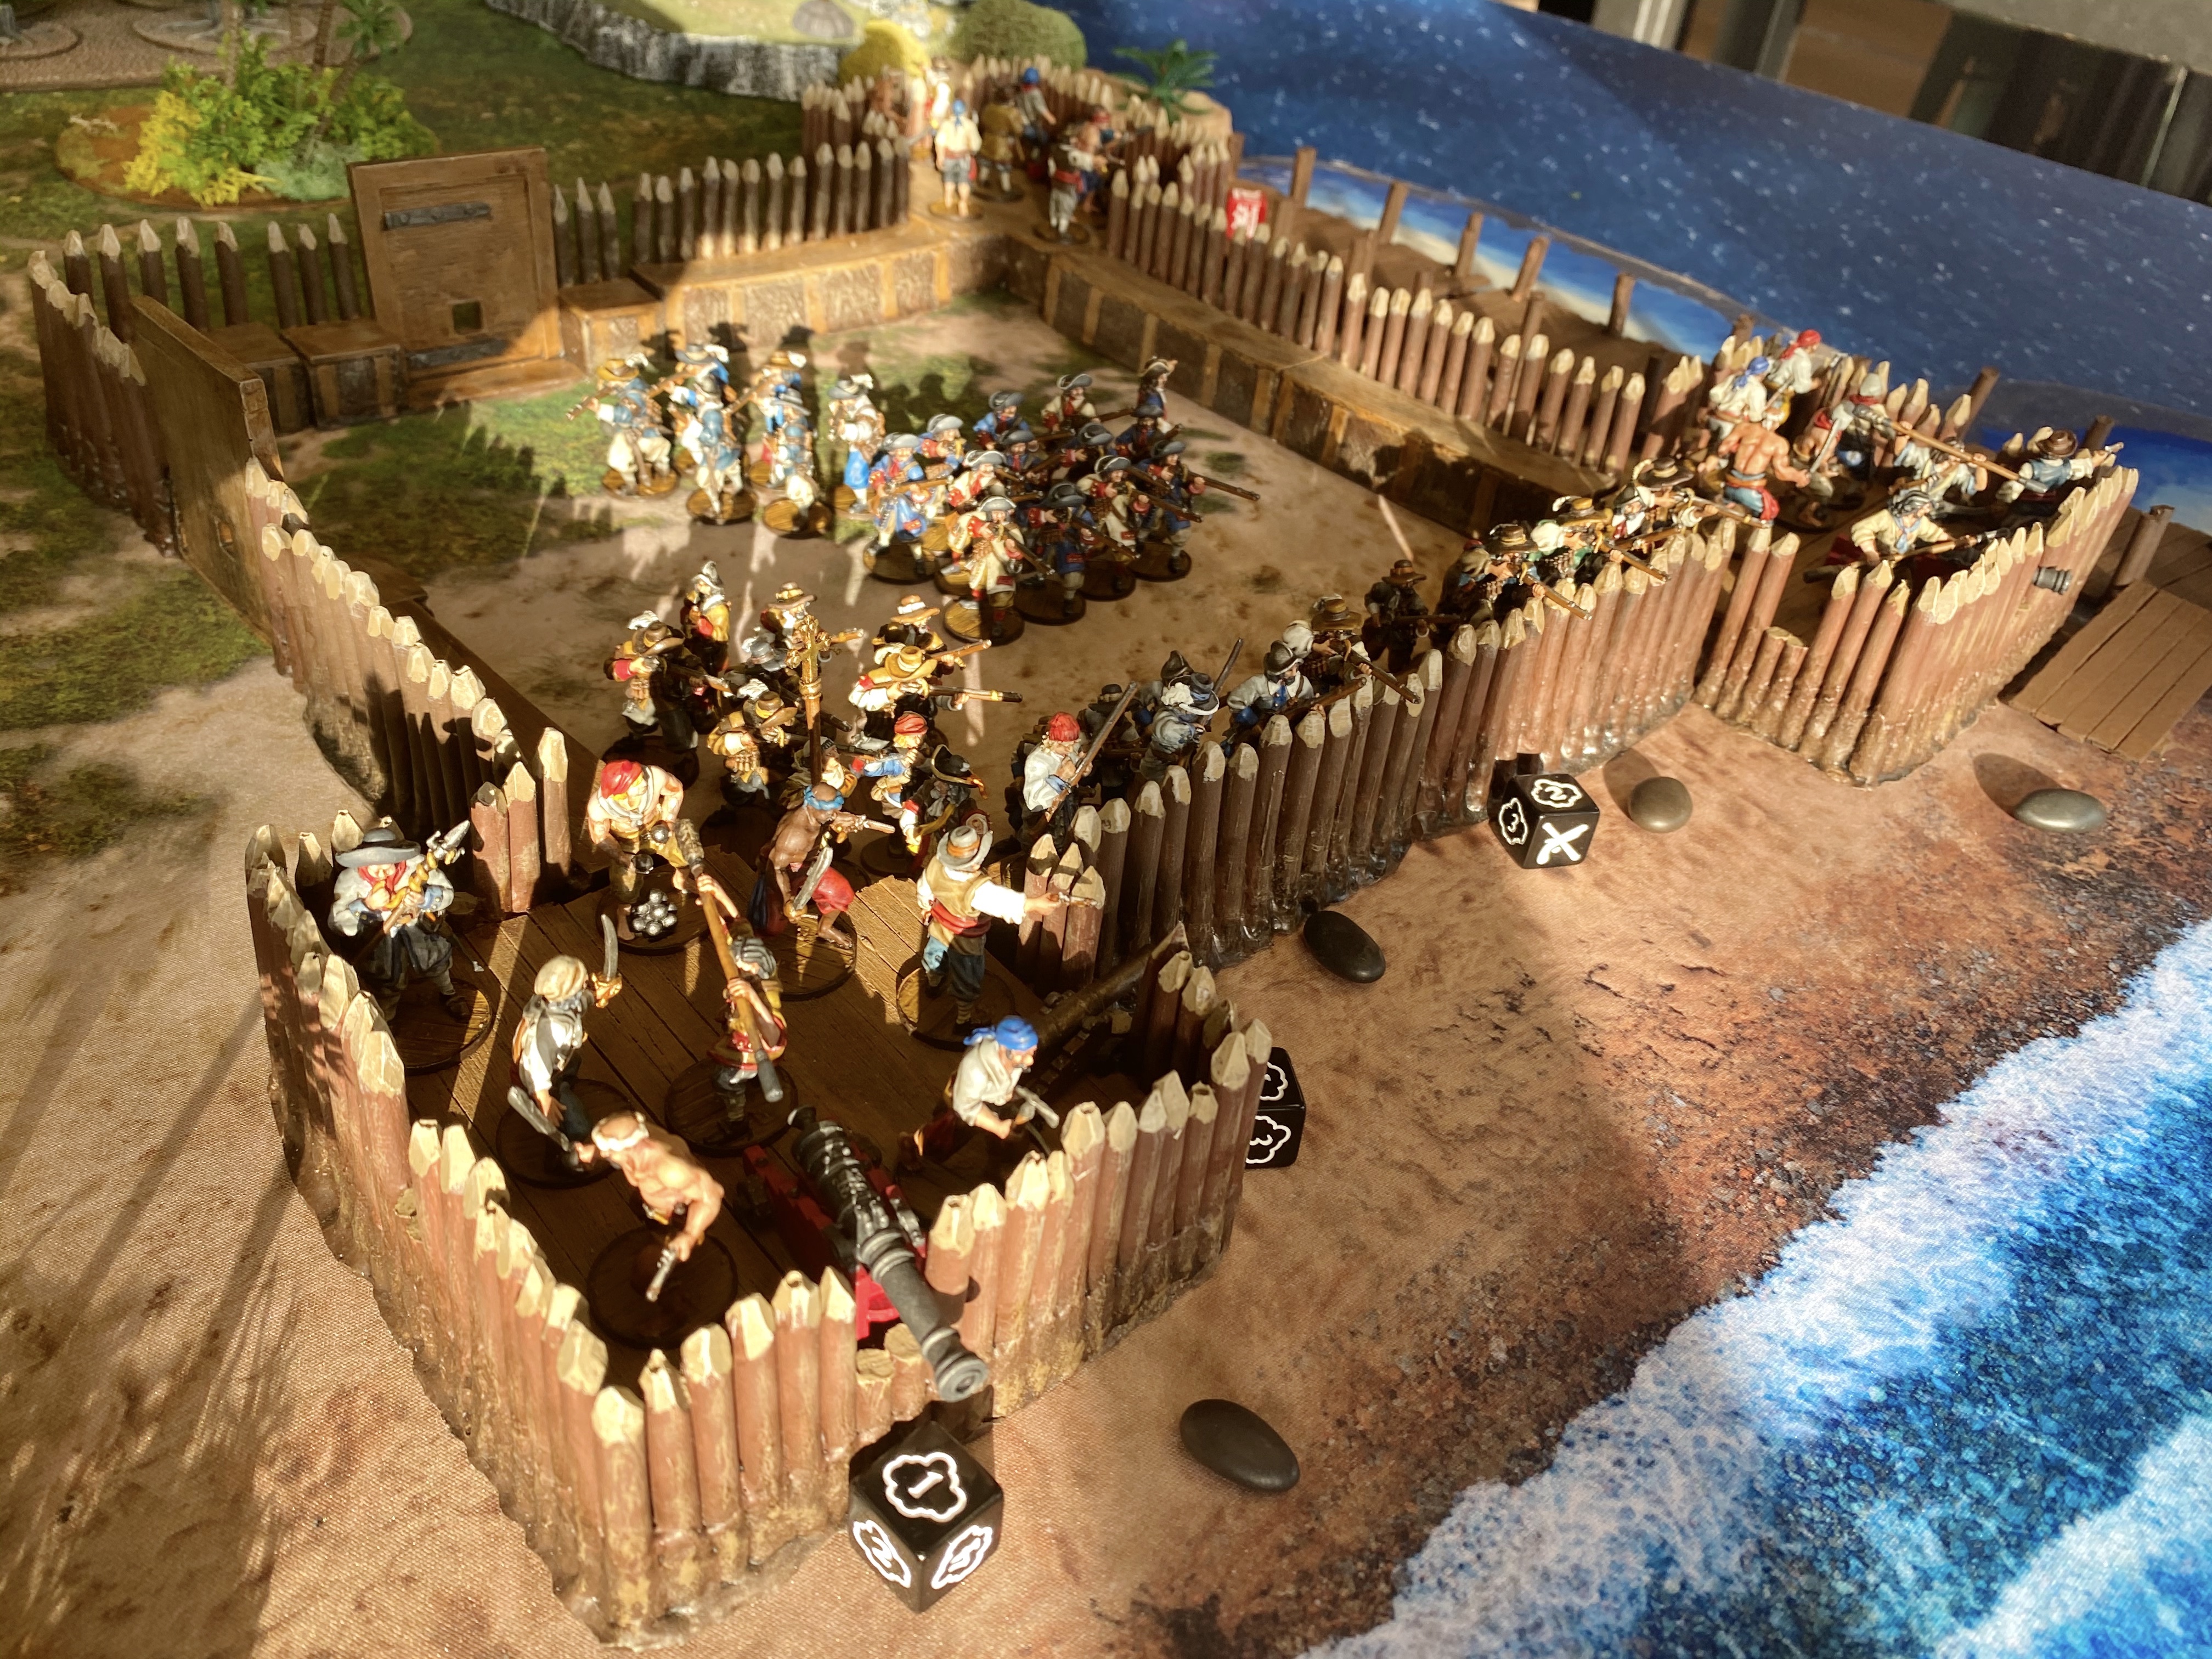
- The fort seemed to work really well. The Fortitude/Integrity feels a little weak when put up against a ship with lots of cannons, but there are so many sections of the fort that it kind of makes up for that fragility.
- One thing that caught me off guard with the fort was the size of the interior. I kind of assumed I could easily shuffle my units around with interior lines but this fort was 11″ square on the inside. That means to move off a parapet on one side, traverse the middle of the fort and move onto the opposite parapet you’re looking at around 4 move actions. It’s not a tiny space! But this was a large fort. This size of fort takes 2 fort sets so there’s two wall sections between each corner. The $55 fort kit is smaller and easier to move within.

- I wasn’t sure how the Low Profile 4 would feel on the fort when targeted by cannons from a moving ship but I don’t think its too powerful it all. The fort is actually really short and small compared to the tall ships and the combination of the ship moving and the pilot trying to not beach the ship near land seems like it has good reason to be part of the fort rules. It helps balance the higher concentration of cannons which ships can take.

- After this game we tweaked the wall section rules so they can only hold a single unit rather than 2 like a normal structure section. Only 4 or 5 models can actually fit on the parapet so it felt a little silly to pretend a unit of 13 Soldados could share that one wall section with another unit of 8 Hostigadores. One unit per section might seem limiting but with so many sections, you can still defend the fort pretty well. It does mean you can wear down the single unit defending and charge a tiny bit easier than before.
- The Raze scenario worked out pretty well with this set up. It made it slightly easier for the Attacker in that the bastions are a little weaker than the Gun Emplacements, but with the fort around them, they are easier to defend against a land assault. It also really hurt that all my cannons started unloaded. Wow that made a difference. Guy’s naval guns started blasting on turn 1 and didn’t really let up. But on the other side of the equation, I got 3 Heavy Cannons and 9 points of fortifications for free! But I didn’t get to shoot a cannon until turn 3! One bastion never fired, one fired twice and entirely missed one of those times and the best bastion fired 1.5 times. Being able to fire first and keep that momentum up was a real advantage.
- The Galleon was amazing in this game. The Gun Decks just shut down my small arms fire. That -3 bonus to small arms ranged saves combined with my artillery being suppressed/depressed/massacred meant that they just didn’t take any damage for the longest time! The Heavily Built trait did massive work here as well. With my bastions firing two or one gun at a time and with that Fortitude of 5, I was doing good to get two hits in an attack. Heavily Built cancels half those hits. Pretty goooood! This Galleon was only at around 200 points but it was still very effective. Just twice the points of my unit of Soldados that missed so many Expertly Drilled volleys!

- They Galleon had to work hard to slow down in the second half of the game. I wonder what would have happened if I had heavily targeted the Marins on the upper decks who were reducing sail. If I could have suppressed them and stopped them from changing the sail, the French would have either lost good control of the ship, be forced to let it sail past the fort and off the table, or have it crash into the land mass. I was so focused on trying to put out fires and stop the incoming cannon fire I didn’t think about it but it might have been a viable tactic. It might have forced one of the Gun Deck Marin units to leave the guns and come up to change sails.
- Even with landing plenty of hits on the fort and taking out an entire bastion, it wasn’t easy landing and taking the fort in an amphibious game. It takes time to dock a ship and unload it and then prepare to storm over the walls. So in spite of being weaker than a ship in stats, the fort does offer a lot of protection and safety.

- The Spiritual Leader showed his quality! That rule that gives the opposition an extra Strike Point at the end of the 6th turn makes those expensive characters valuable, especially in a more static game like this that was unlikely to end with high percentage of casualties. I kept my command unit pretty safe most of the game so that Spiritual Leader didn’t have a high risk of being knocked out before the end. I’ve been taking the Spiritual Leader a lot more since I got a model for him and even more now that I have cool historic coins for Fortune Points.
- I’m not sure how I feel about my 103 point unit of Soldados… So many ineffective volleys! It just wasn’t a good game for them. They did get a moment of glory at the very end with their bayonets and their veteran status did let them fire every turn but they just didn’t do enough damage. I guess part of the problem was that the fight was really at long range for small arms. Most of the incoming damage was from cannons at 8″ or more. Most of my small arms volleys needed 9+ or even only 10’s. Hard to hit hard when you’re looking for 10’s! And those dice didn’t help. 39 dice out of those Soldados before they got a hit! I counted and I rolled 75 dice before I rolled a single 10. Those first turns were rough.

- Guy managed his cannons really well. The combination of a commander and Master Gunner with those two large decks of guns and the awesome save rolls from the Gun Decks meant they were able to function at maximum efficiency through most of the game. Both decks of guns fired every turn from turns 1 to 4! That’s 28 guns firing in 4 turns vs my pathetic 4 guns firing over the same time period. Starting loaded and having better saves produced much better results! One deck fired 4 times and the other fired 5 times. That’s a total of 32 guns fired compared to my dismal 7 guns fired. Four of mine were Heavy Cannons but that doesn’t come near to making up the difference.
- We have to talk about these fires. They were out of control! I’ve never seen so many fires in one game. I had 6 Fires applied to the fort over the course of the game! I put 4 of them out which took an enormous amount of my units’ actions. I was thankful I had so many units to apply to the task while still making some semblance of defensive fire from my small arms. Those Lucky and Critical Hits just kept coming up as 9’s and 10’s. It was crazy!

- The cannons were OK in the fort but the limit of two per bastions and the limited places to mount them means that the fort will never boast the same kind of firepower as a ship. And I think that’s good. I was able to position two cannons in bastions so they had cones of fire that could often target a ship at the same time. It’s nice to have a place to use these Heavy Cannons too! You could make a really heavily defended wall of a fort by using the gate wall sections which have a space to position a field gun to shoot through a gun port in the gate. If you put two of those gates in one side of the fort in addition to the two bastions on a side, you could potentially fire 4 cannons at once with a super commander with the Broadside! rule. But that’s really expensive to buy field guns and man each of them with an individual unit, plus pay for a huge expensive naval commander for your fort! That’s not what the fort is for.
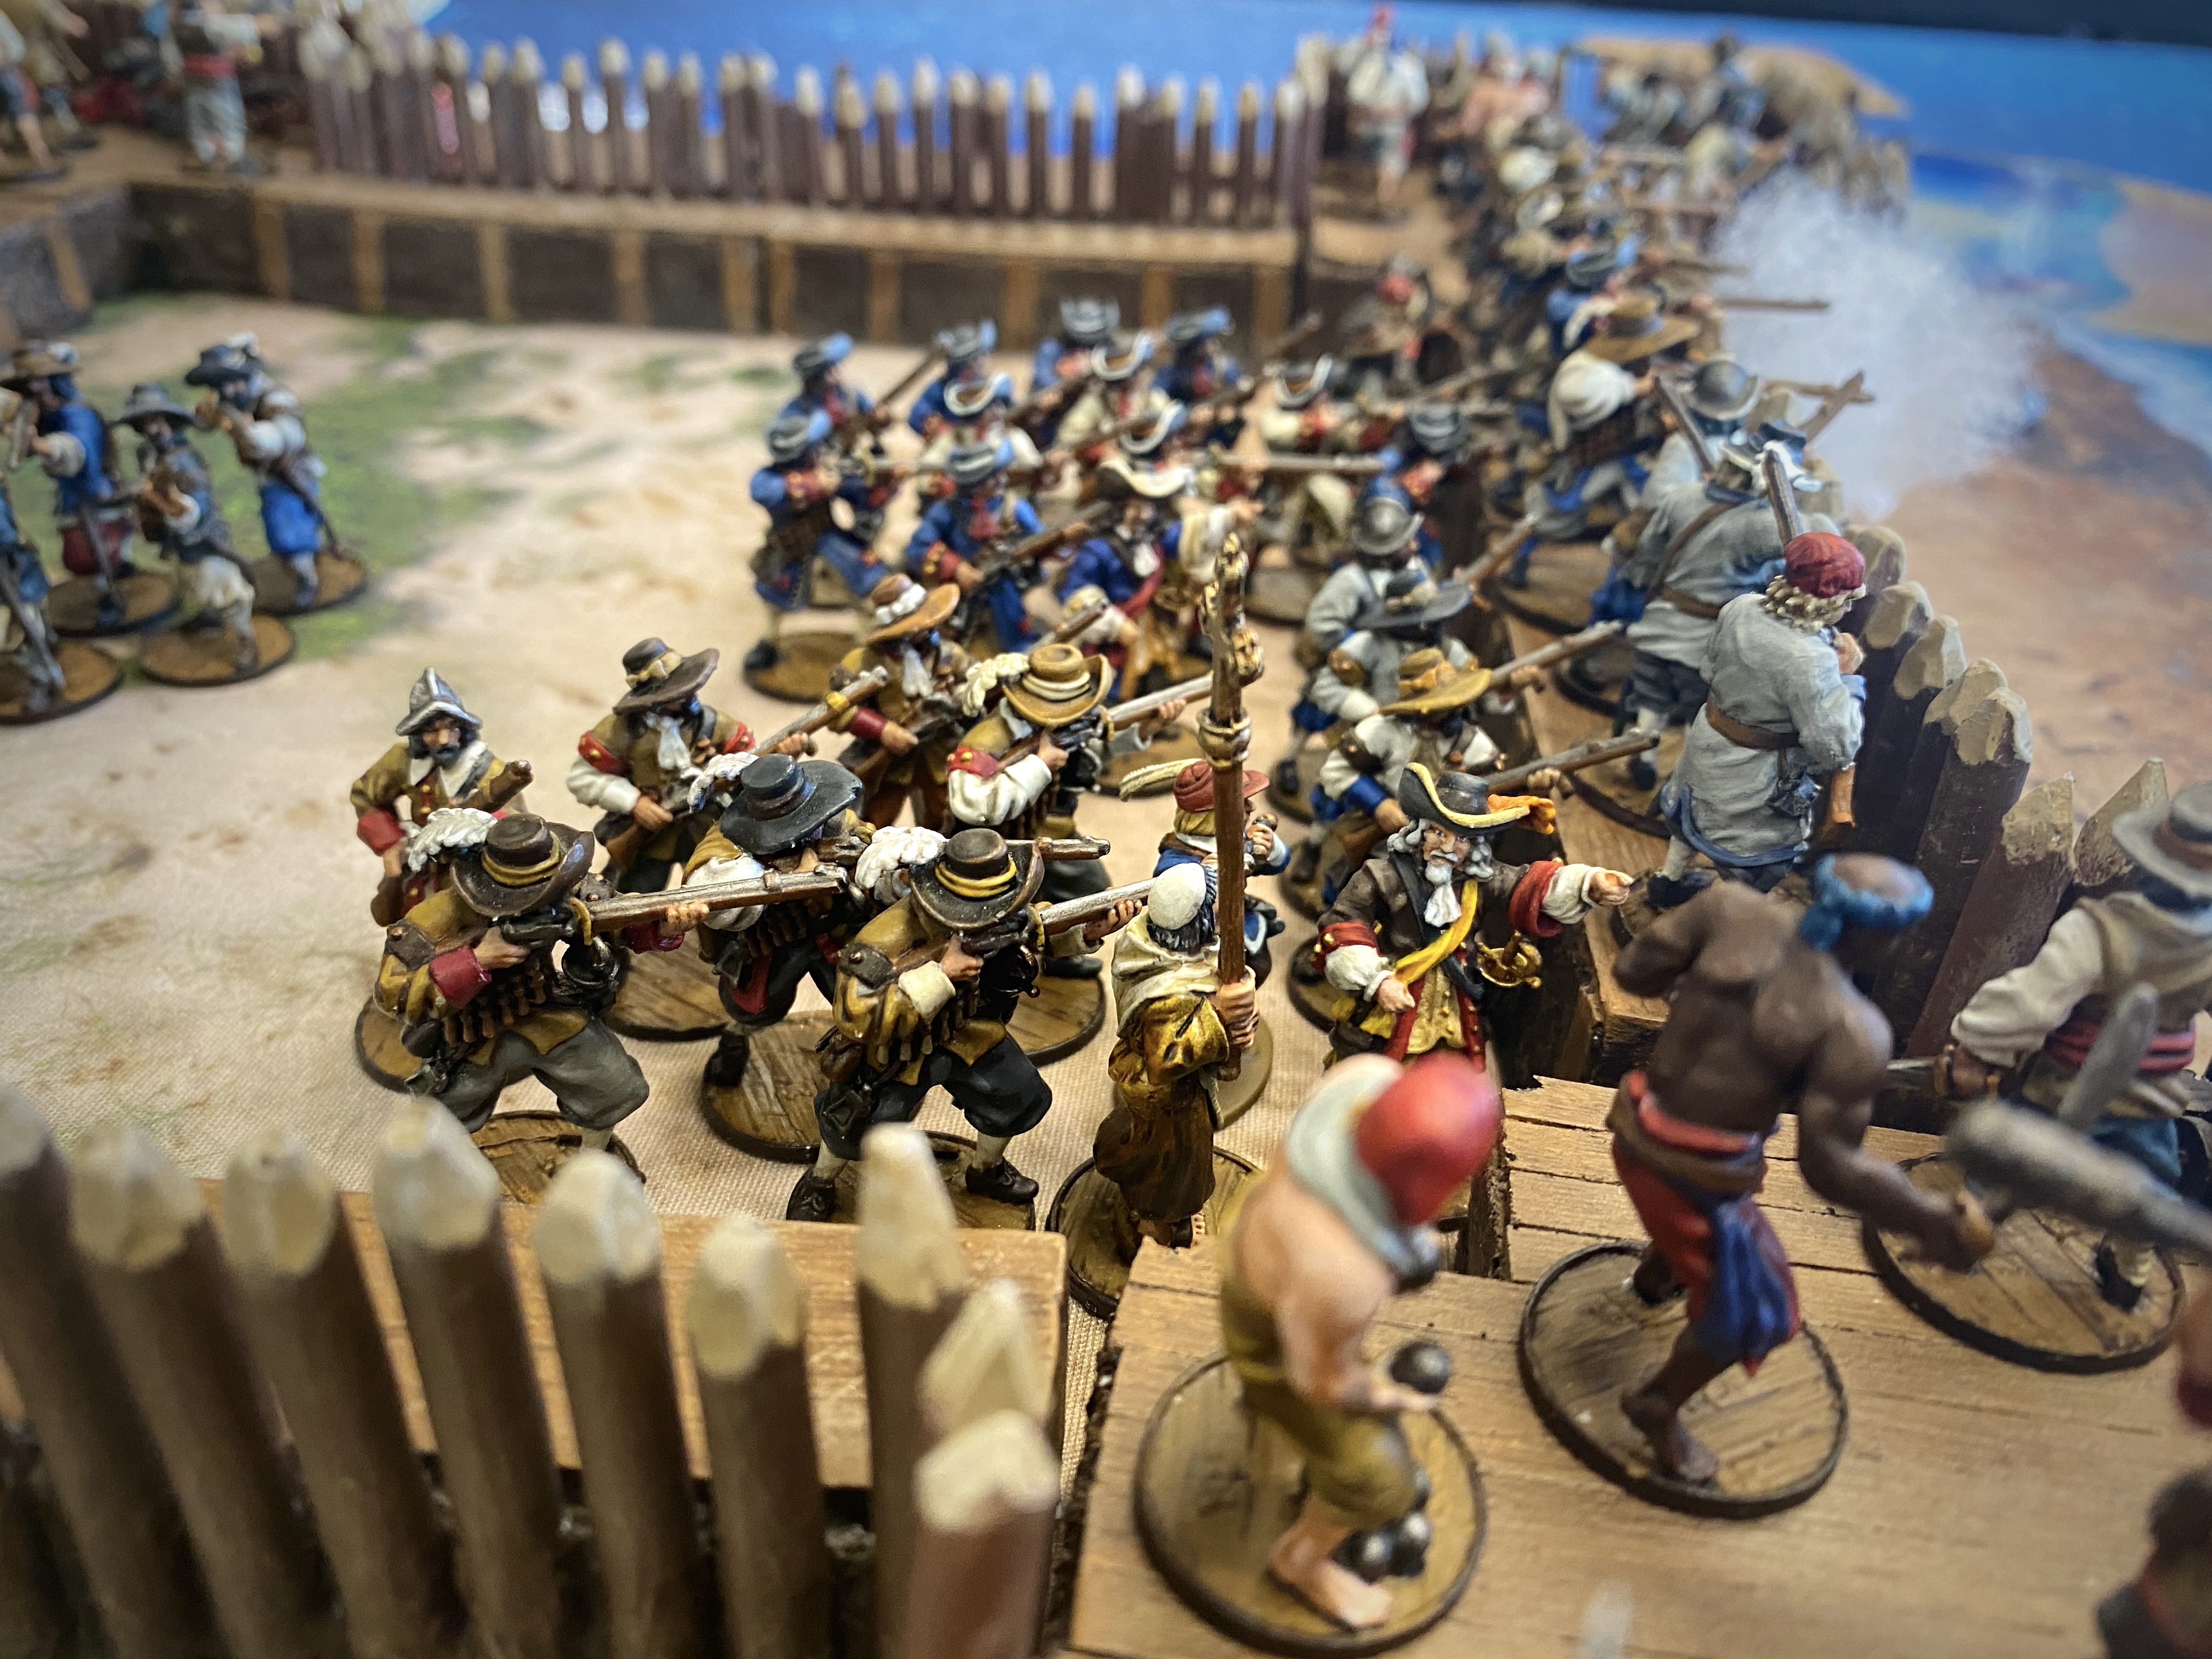
- The Hostigadores were champs in the fort. That hard cover brought their Save down to 5 and they absorbed a lot of hits without losing too many men. The unfortunately had to spend most of their time putting out fires but at least they were good at dodging cannon balls while they did it! I think Hostigadores are a great unit and I will take them above Milicianos almost every time.
Thanks to Guy for a good game! It was a lot of fun. Thanks to Firelock Games for letting me play test for this Palisade Fort and for sending me early copies of the bastions! Thanks to you for reading and congratulations if you got through that long winded battle report. It was a pretty long and complex battle and I wanted to process it fully in my own mind to make sure I had fully evaluated how the fort had performed.
The rules for the Palisade Fort should be released “shortly” but with Covid and other behind the scenes complications, I don’t know an exact date. The Palisade Bastions should be released for retail soon as well, but apparently Firelock has had a hard time getting their mold creator to deliver during this pandemic era. Everything is more difficult in 2020! That’s OK. Getting pieces for a game produced really isn’t that important in the big picture. I hope everyone is staying safe and still able to enjoy this hobby.
Great write up, very interesting analysis. You’d have to see the soldado 100 get up to say 8” and firing its first game volley to see its true value as opposed to long range 10 sniping. I love the combat in Blood and Plunder it’s very evocative.
What’s the thinking on giving a command point bonus to a full Fort? Maybe there should be some kind of specific Fort skills for commanders. Like a braced fire that gave a longer base range to muskets, or some kind of at the double for moving in the Fort.
Thanks again for great content.
Thanks!
Here’s some of the thoughts from Liam, one of the guys working on the fort rules:
The additional Command point is to reflect that within a prepared defensive position morale would be potentially higher, and command and control easier – at least while the commander is alive.
The point on movement within the fort for the garrison is something we have already amended – we are thinking to allow the extra CP to be used for a move actions or a rally action. (I forgot to mention this at the end.)
Special defensive abilities is a great idea for the future – we are thinking about possibly having some special scenarios for using the fort, and this could fit right in…
Pingback: Faction Overview – French Expeditionary Forces | Blood & Pigment
Pingback: Force Building IV: Building for Amphibious Games | Blood & Pigment
Pingback: Blood & Plunder Ship Overview - The Galleon - Blood & Pigment