This will be the first in a series of painting guides on this blog. I’m no master painter, but I’ve picked up some methods and techniques over the past couple years (thanks to the Great Sorastro!) and I hope this can be of use to some people.
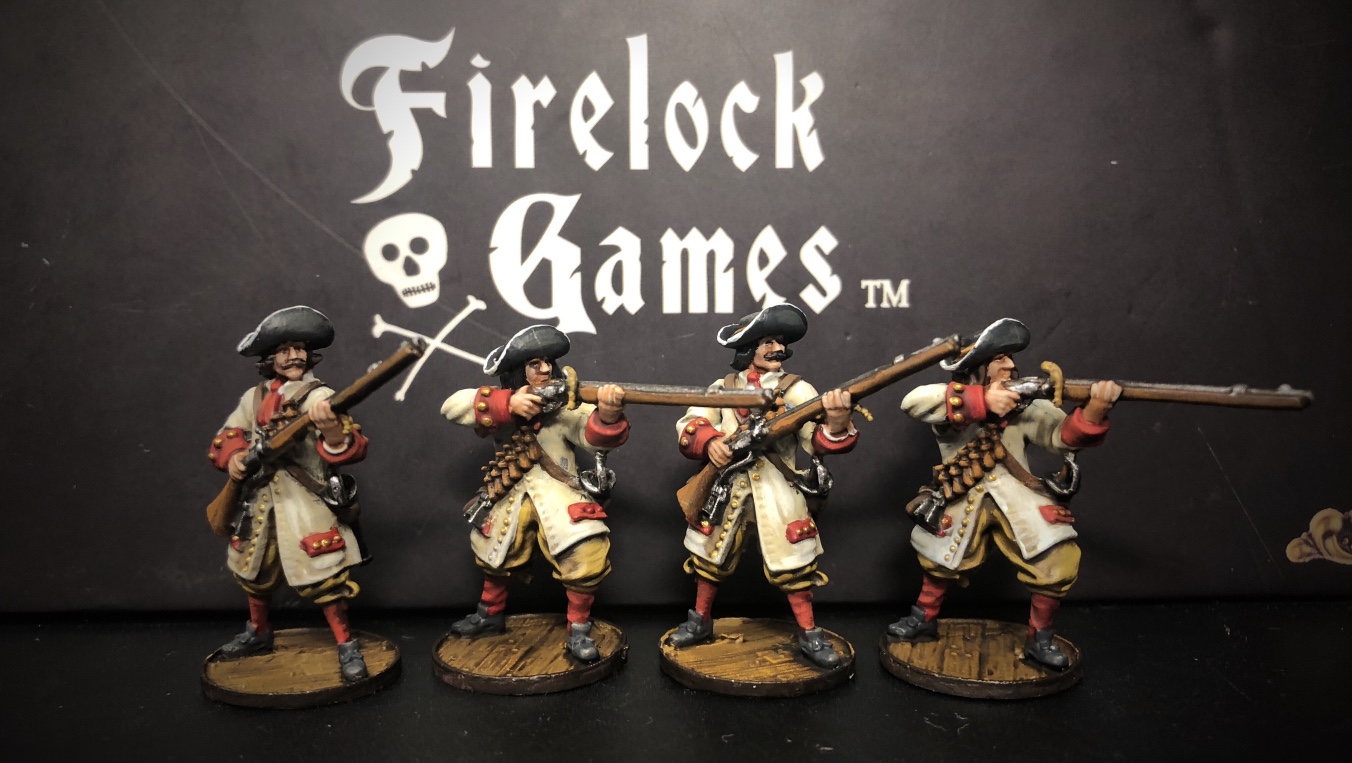
I generally paint my first set of a new group of minis pretty close to the way Firelock has painted them and that’s what I’ll do here. I’m going to try to approximately match the color scheme used for the Spanish Soldados from the rule book. These minis can be used for Spanish, English, French, Dutch and most of the minor powers as well! I’m copying the Spanish look but this is probably just fine for any nationality as uniforms were far from standard in these days.
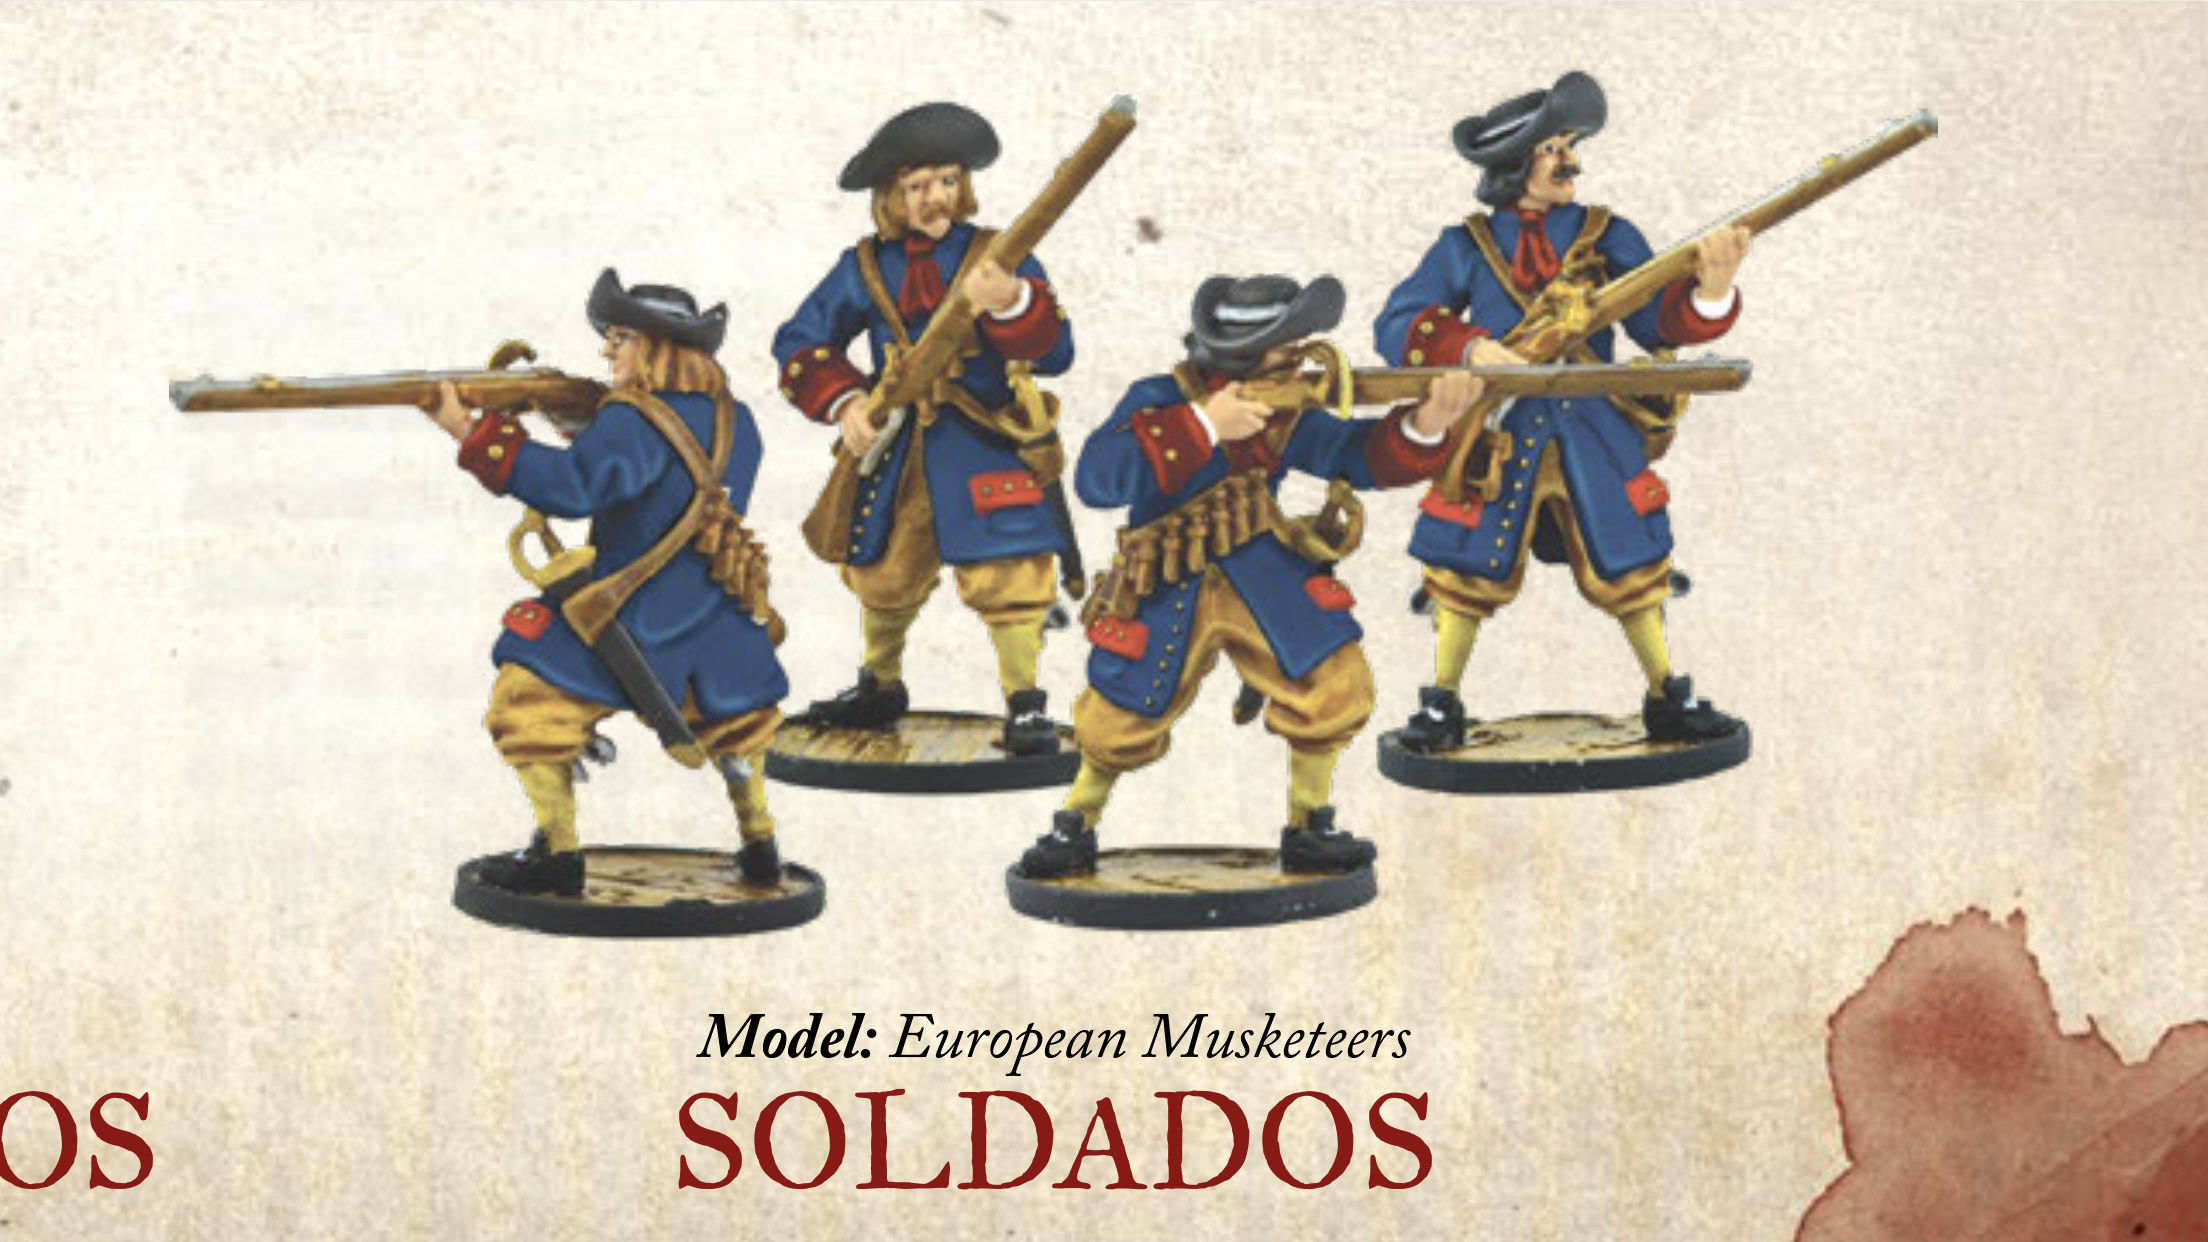
I’m going to try to have a little more contrast in my finished minis than the examples in the rulebook, but these will be my basic guide.
I will be using primarily Citadel paints but there are some other paints I will bring it that I prefer over the Citadel line, most notably the metallics. I will try to provide suggestions for Citadel substitutes when possible.
My process is almost always:
- Prep and prime
- Base coats
- Washes
- Highlights
- Protective coat and any extra details
Step 1 – Prep and Prime
This process will be identical for basically any model so I wrote up a separate post you can refer to if you need tips for removing flash, cleaning and priming your minis.
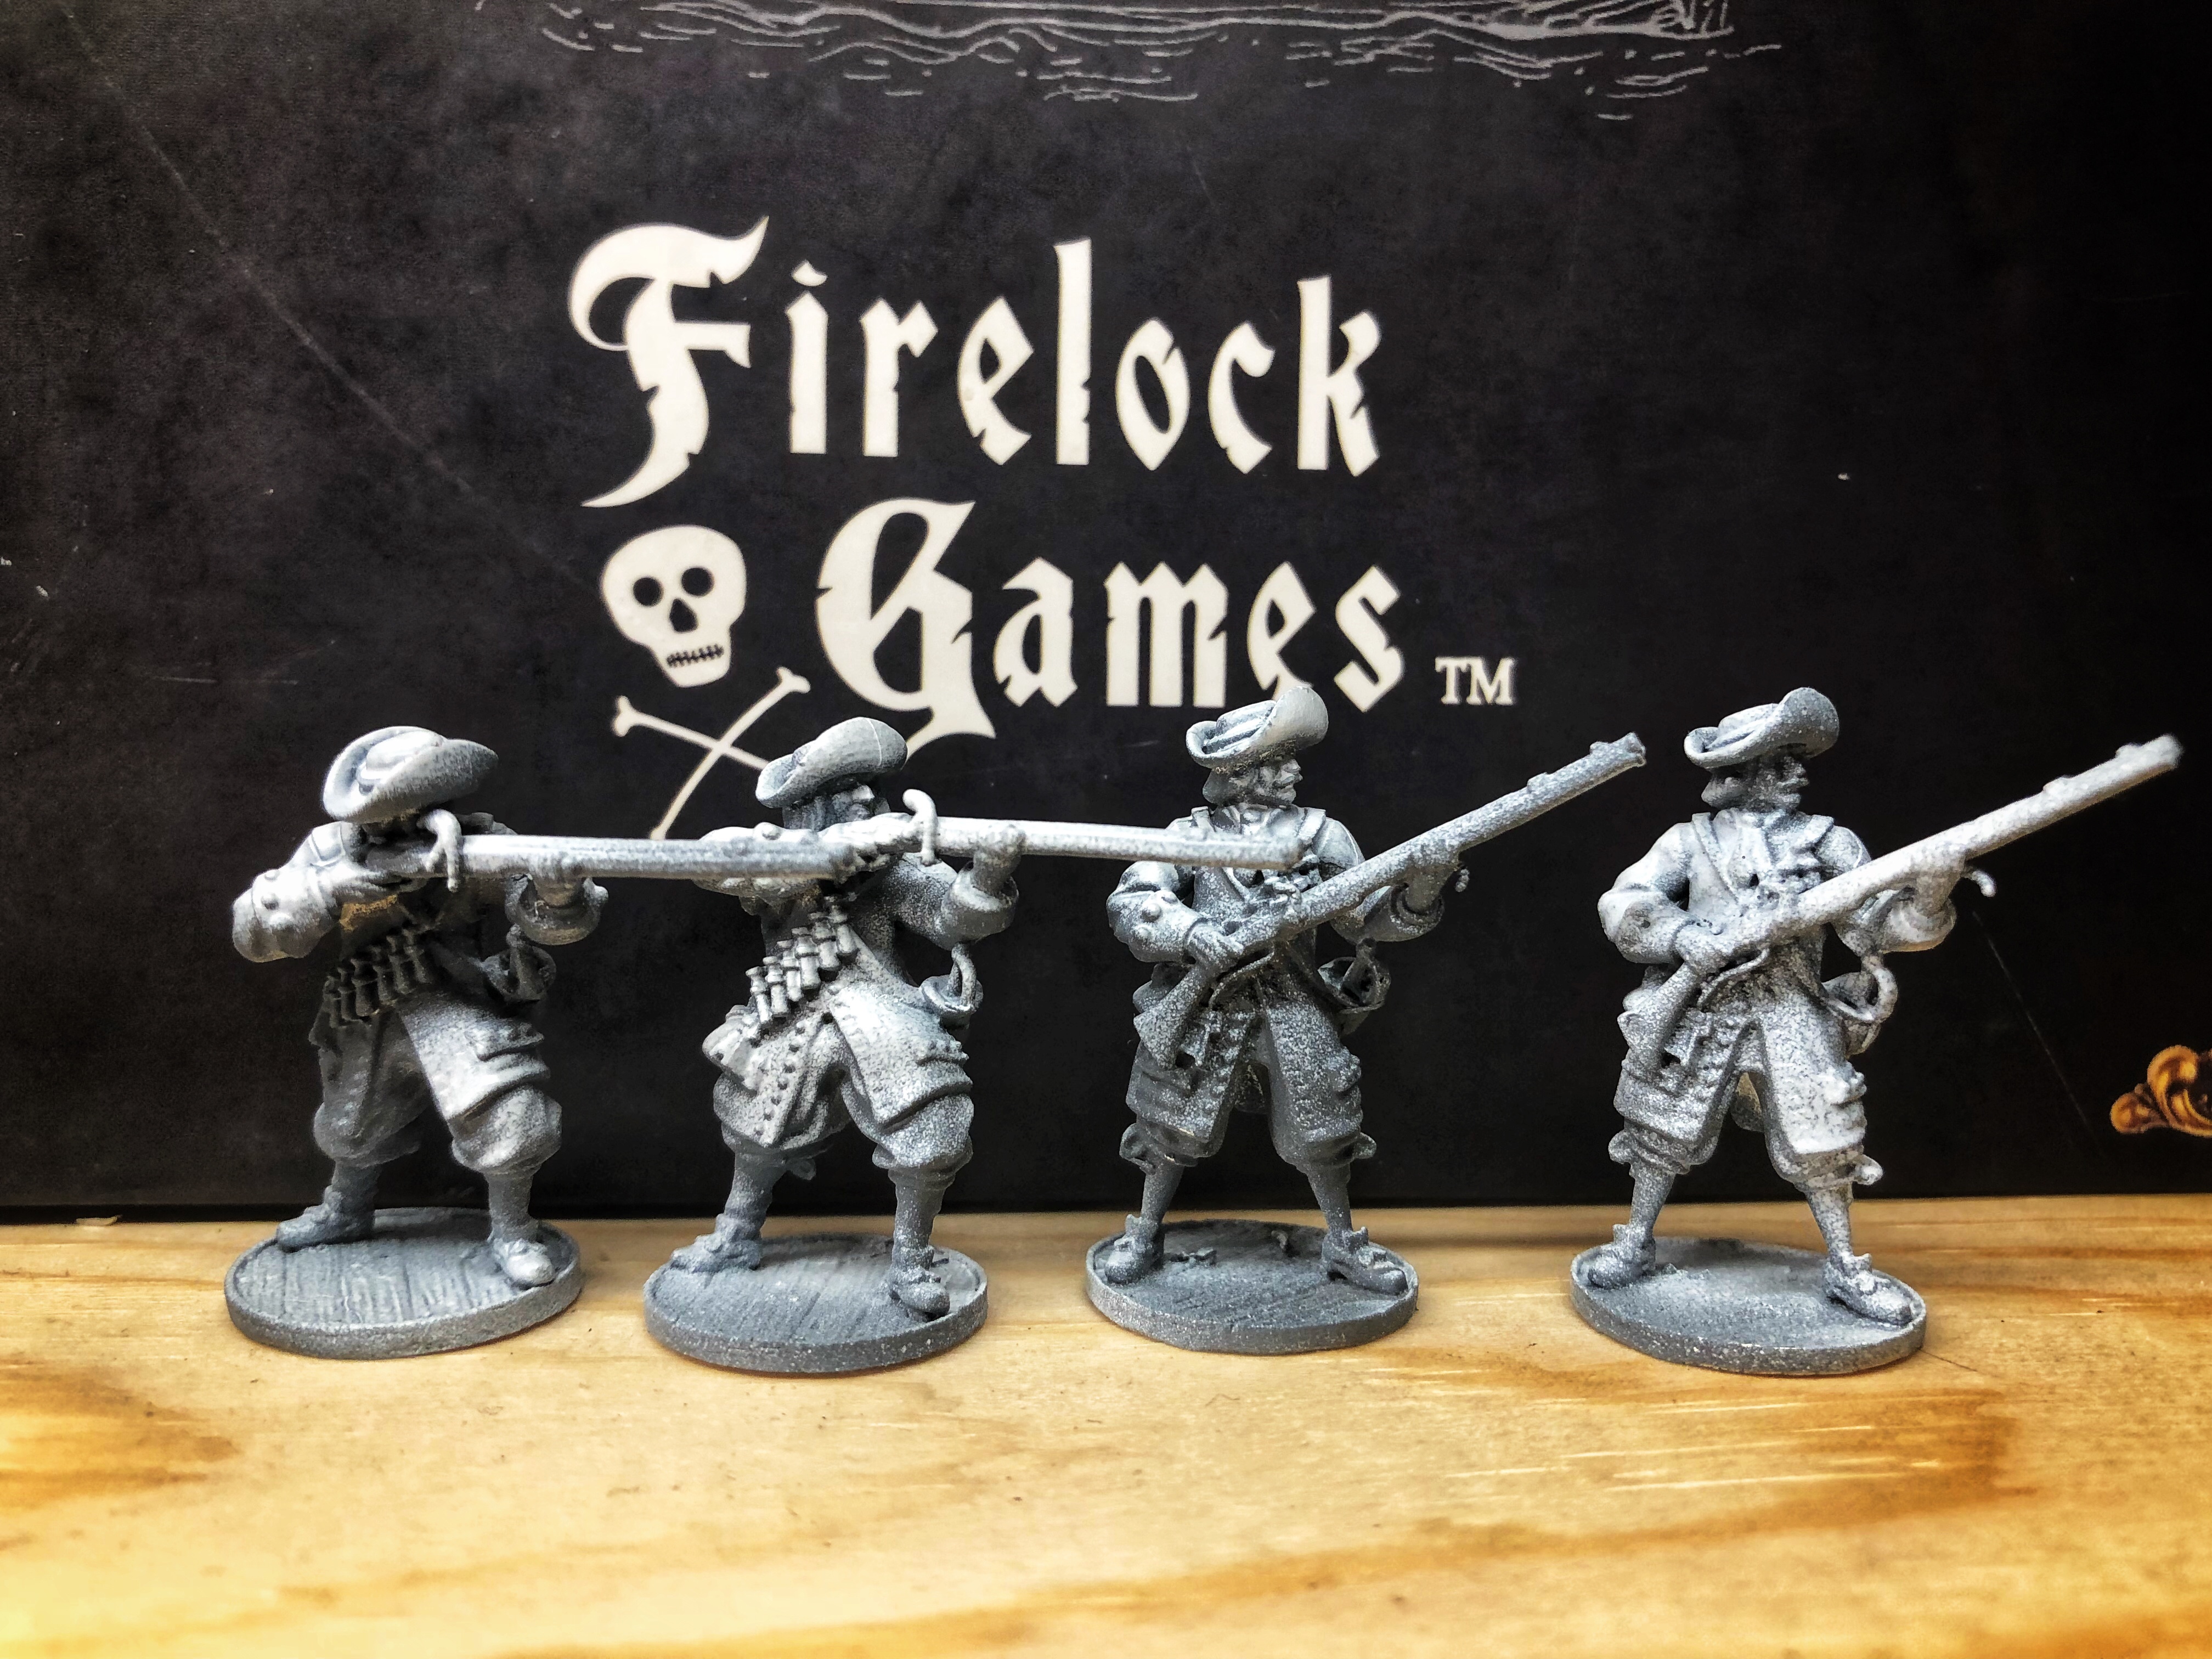
These models have been prepped, cleaned and primed as described in my “Preparing Models” post.
Step 2 – Base Coats
During this step we will cover the minis with the foundation colors. I will be primarily using “Base” paints from Citadel’s selection since they have a high level of pigmentation and usually provide even and full coverage.
When applying the base coats you want to be careful to get a nice even coat but avoid applying the paint too thickly. This usually means you’ll need to thin the paint a little bit so you can spread it evenly, but this also means you’ll often need to apply two coats to get complete coverage. It’s possible to dip your brush straight into the Citadel paint pots, but make sure your brush has a little moisture in it so it thins the paint as you work. It’s better to move some paint into a pallet (or wet pallet) so you can add a little water or medium to thin it down.
I usually start with the skin. It’s smart to work “from the inside towards the outside” of the model. Two of these minis are aiming their muskets which makes the right side of the face very difficult to reach. Getting the base flesh tone down first will save you time touching things up later as you would be sure to hit other areas with the skin tone paint.
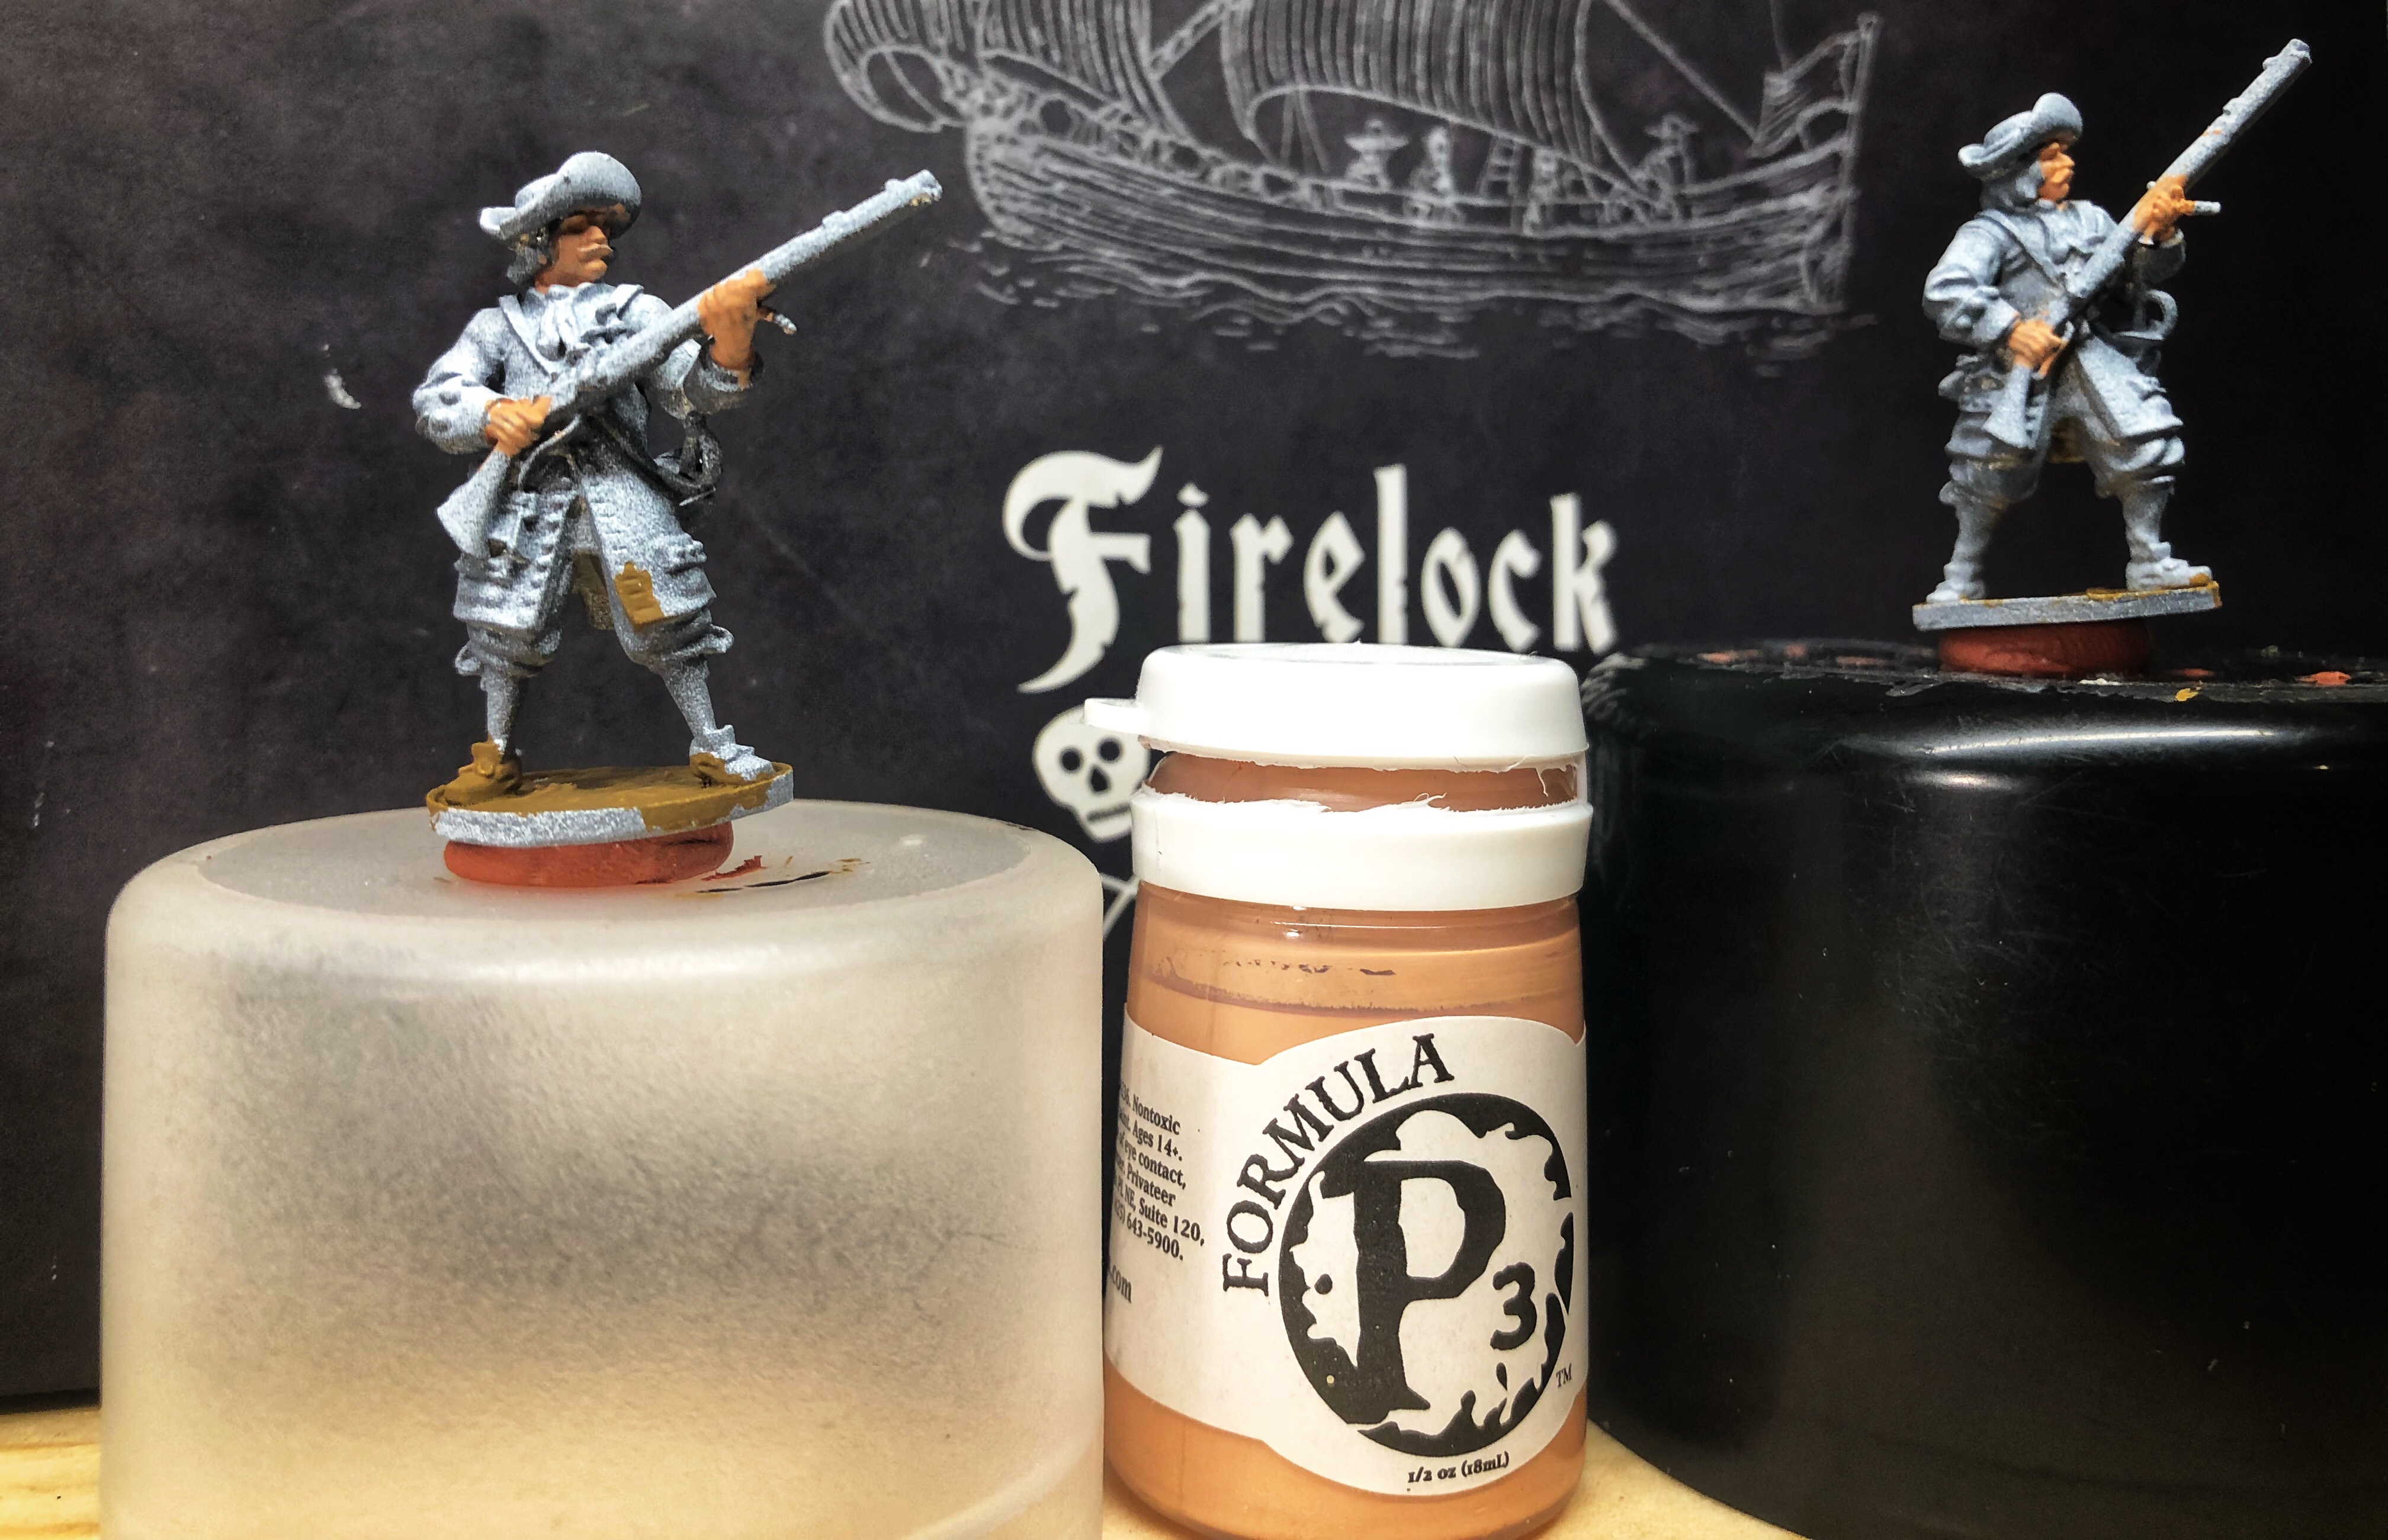
I used Midlund Flesh from the P3 series for the skin. Cadian Fleshtone is a good basic fleshtone from the Citadel line.
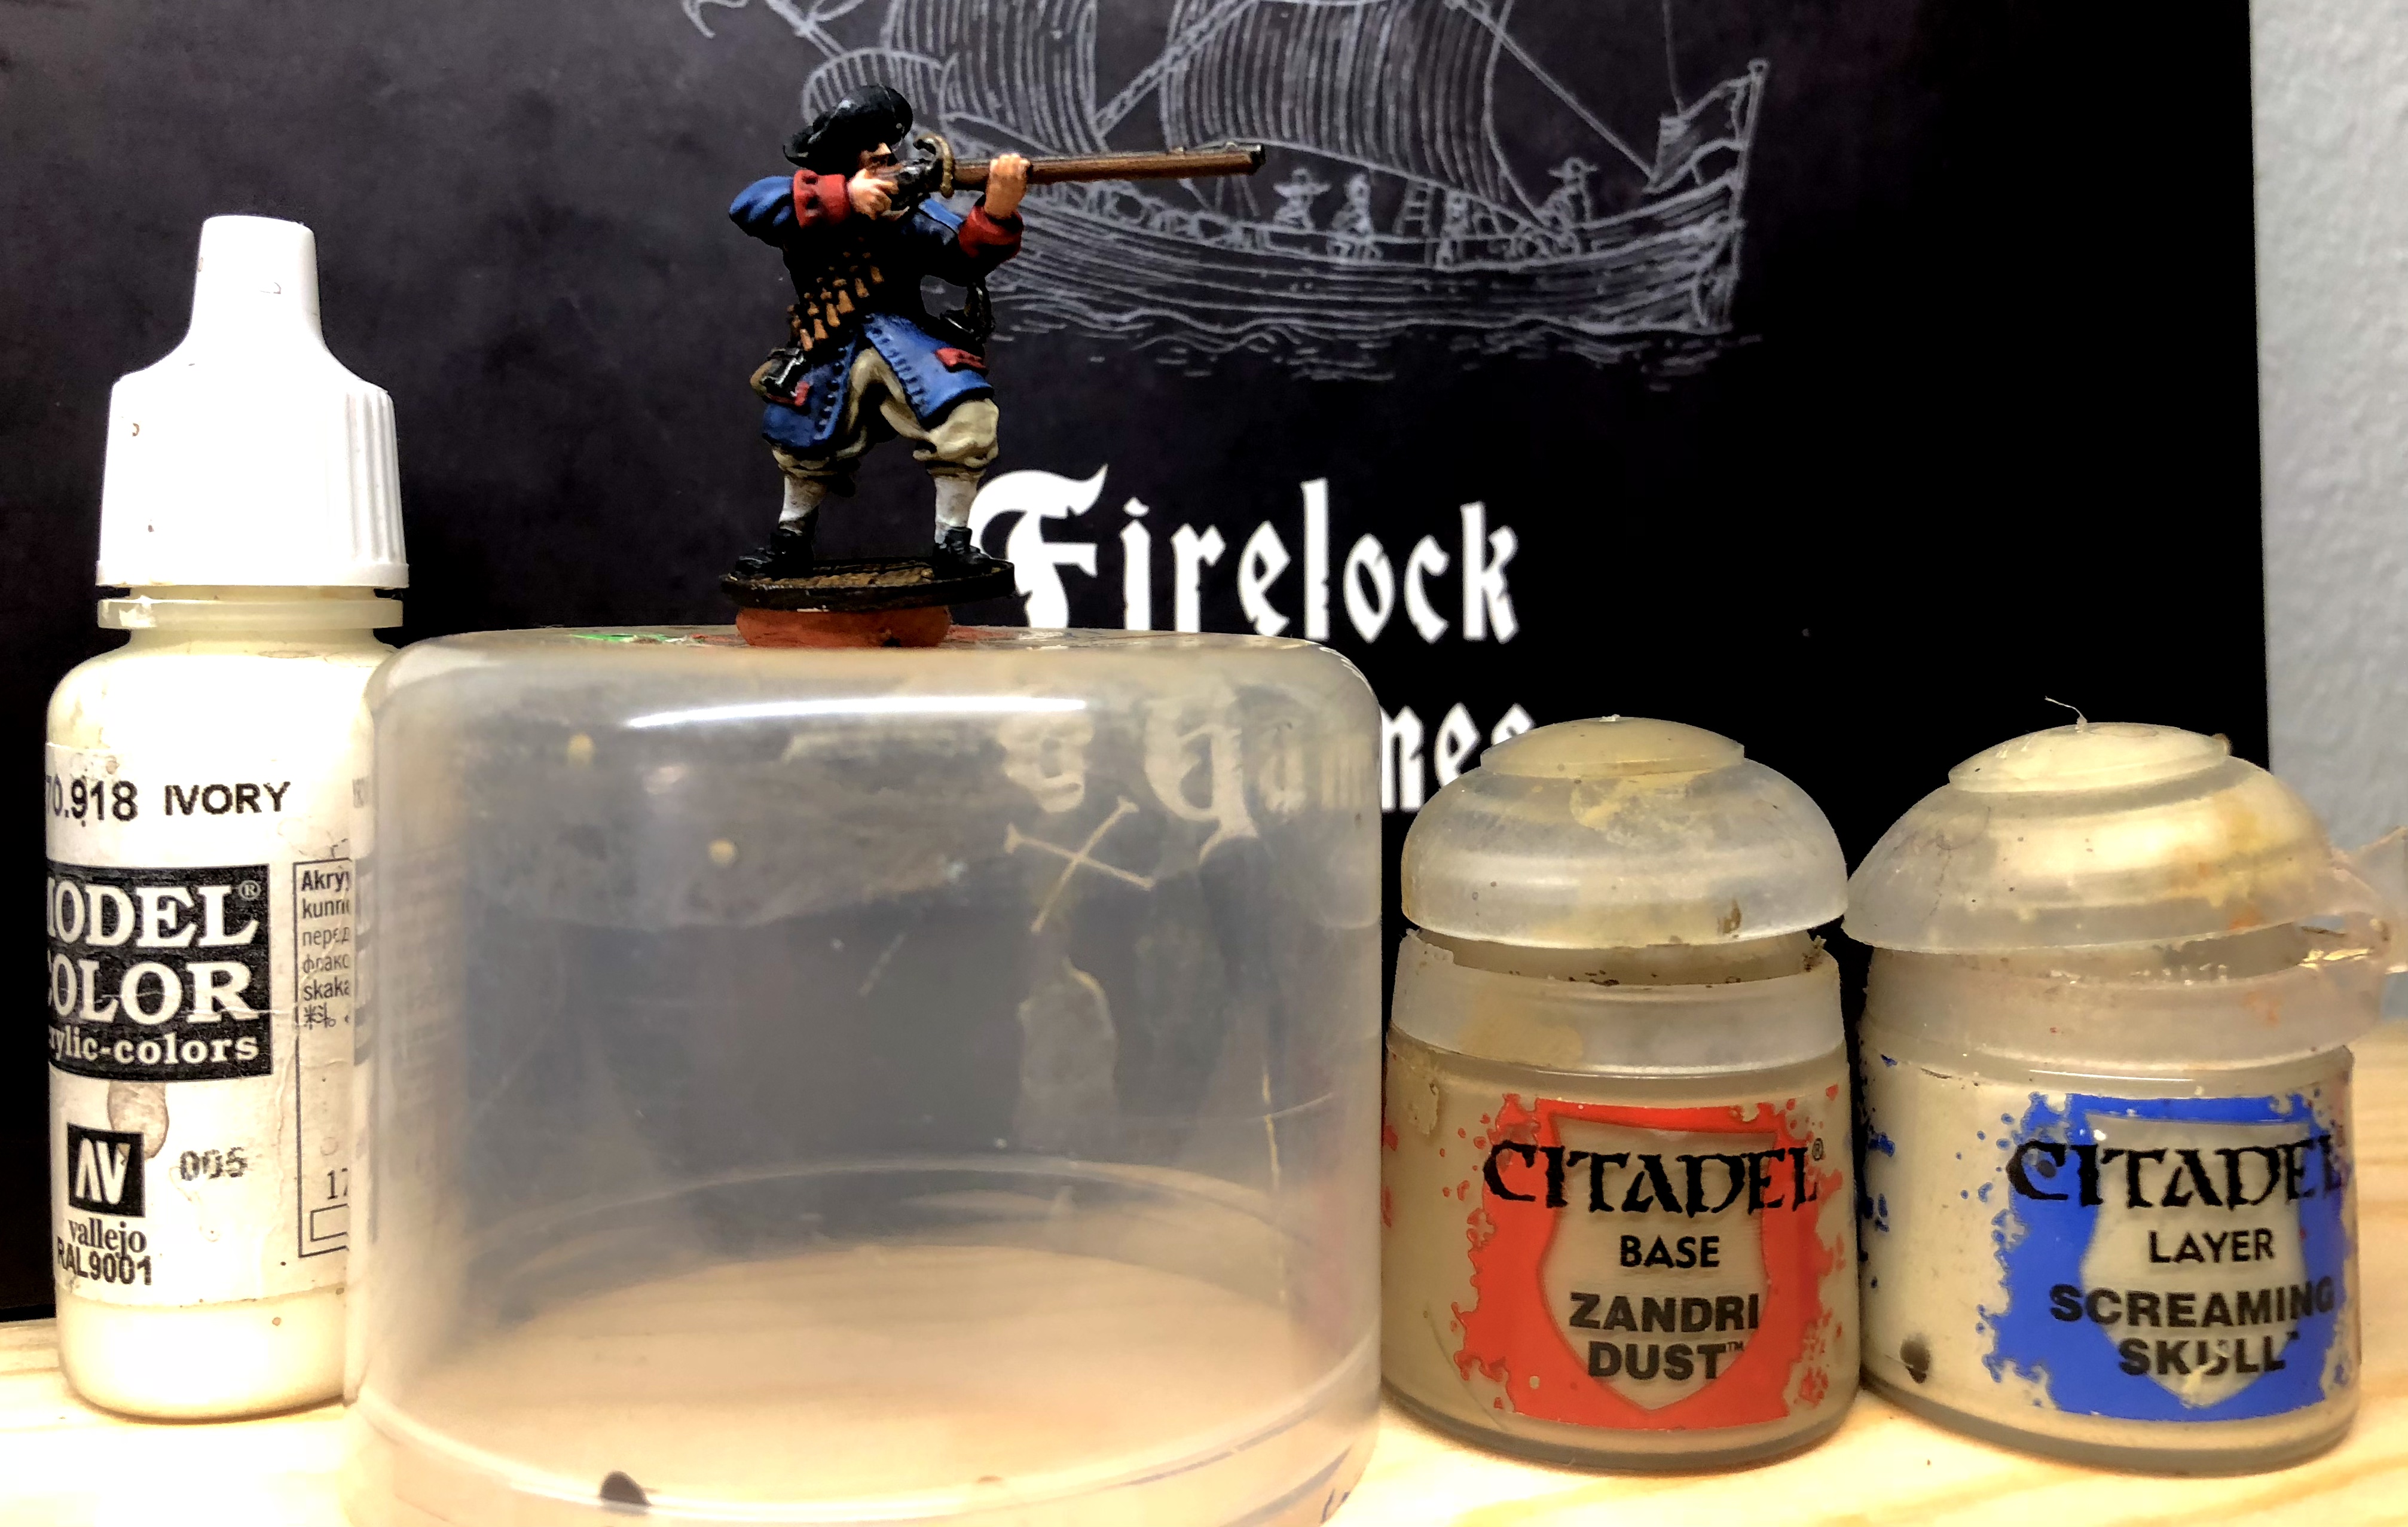
I put down a layer of Citadel XV-88 on the bases. Next comes the coats and trousers.
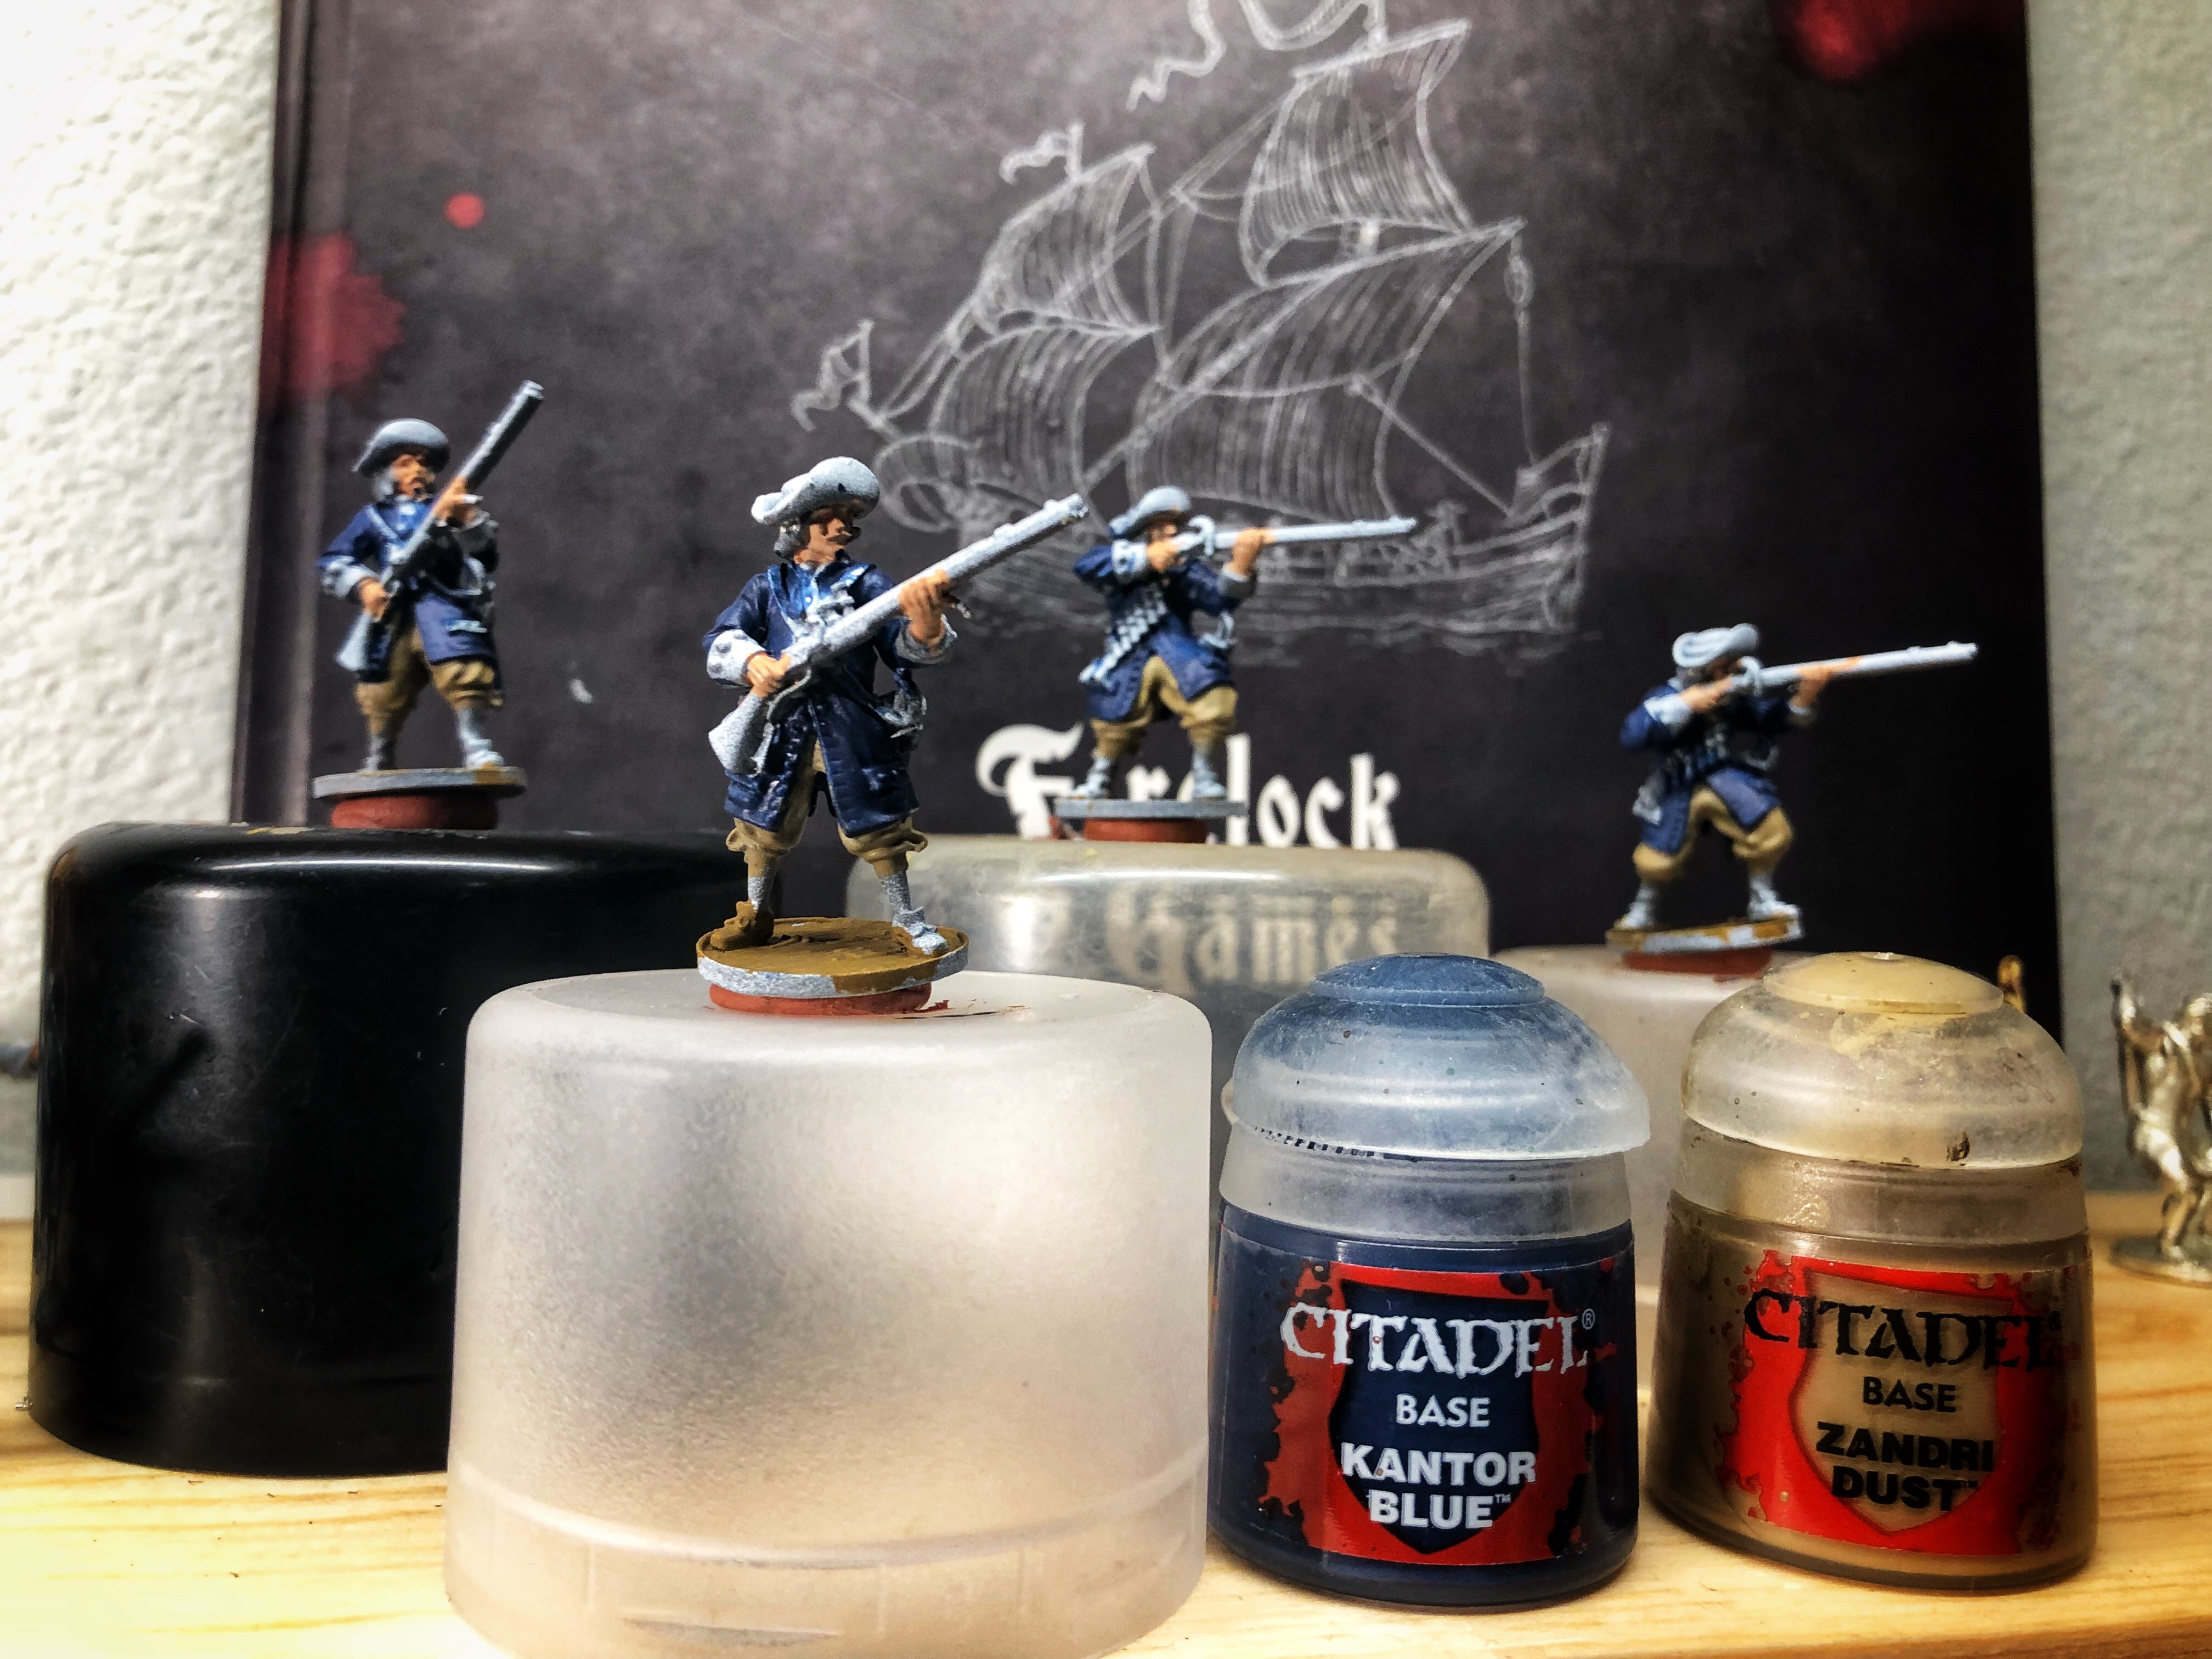
Zandri Dust for the pants and Kantor Blue for the coats.
I suggest painting the coat before the trousers since the inside of the back of the coat is very difficult to reach. If you paint the trousers first you’re sure to get blue all over them while trying to cover those hard-to-reach spots.
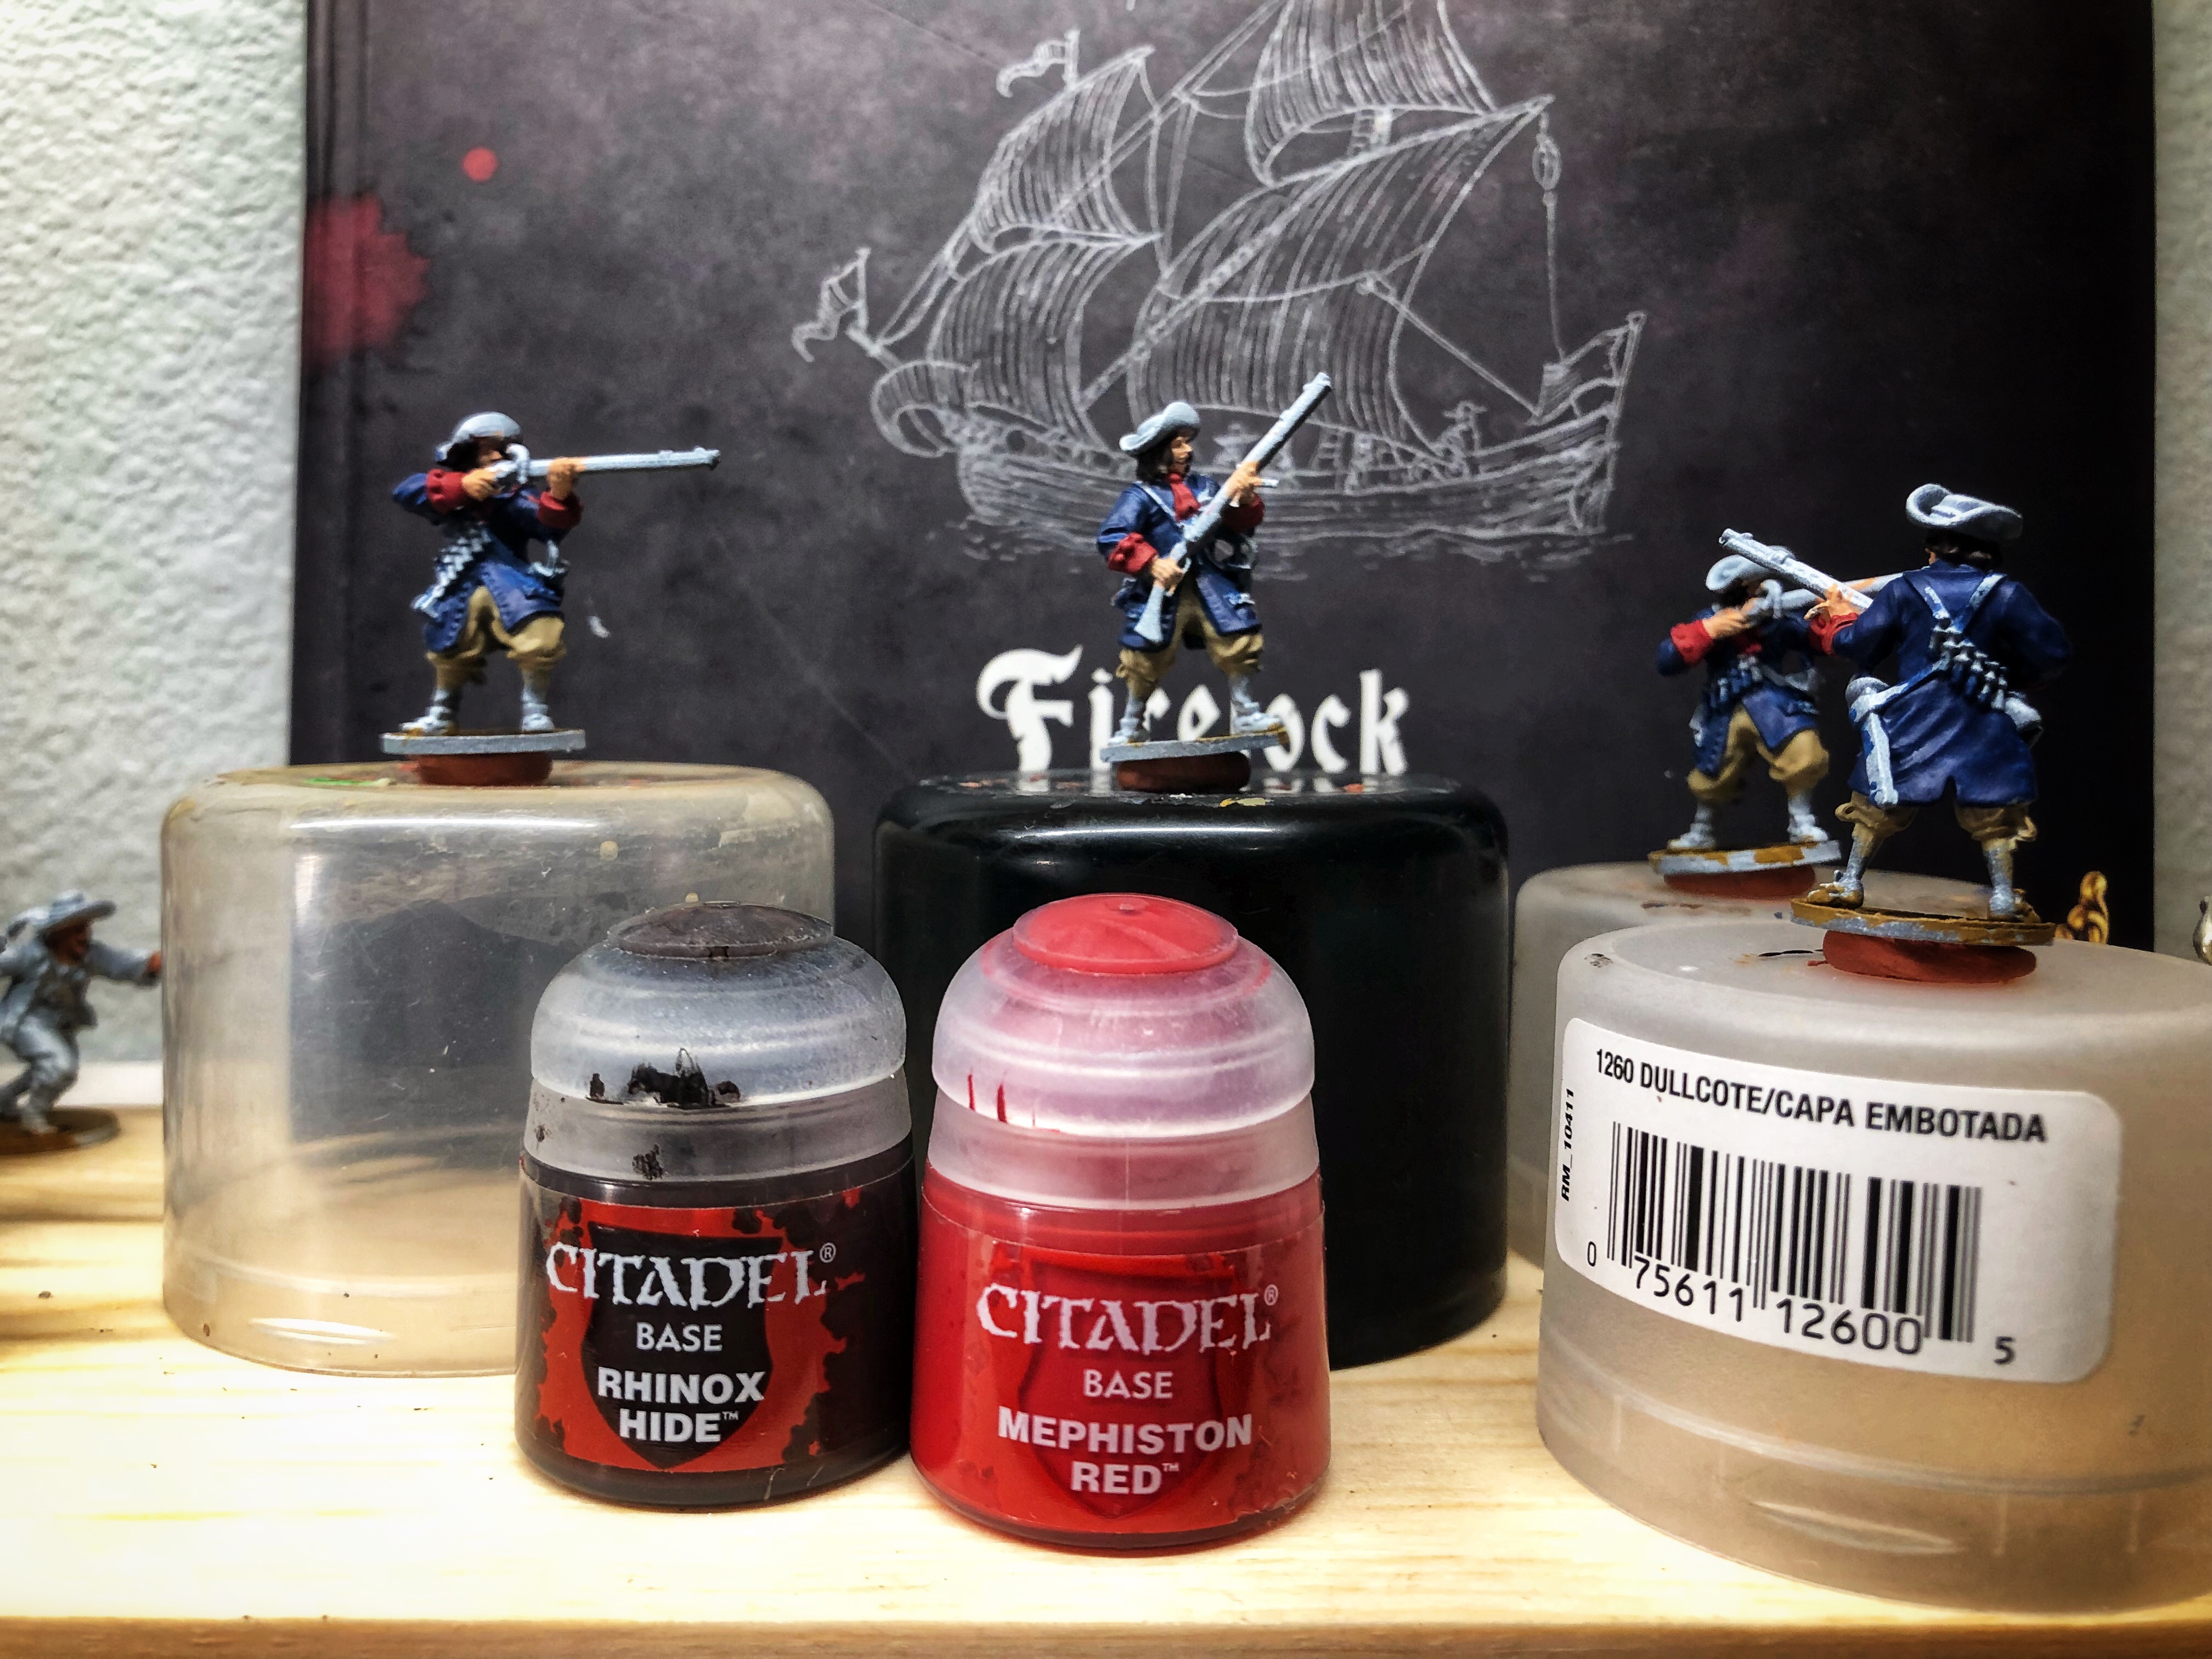
I used Rhinox Hide for the hair (and eventually the swordbelt and rim of the base) and Mephiston Red for the cravat, cuffs and pocket trim.
I forgot the pocket trim!
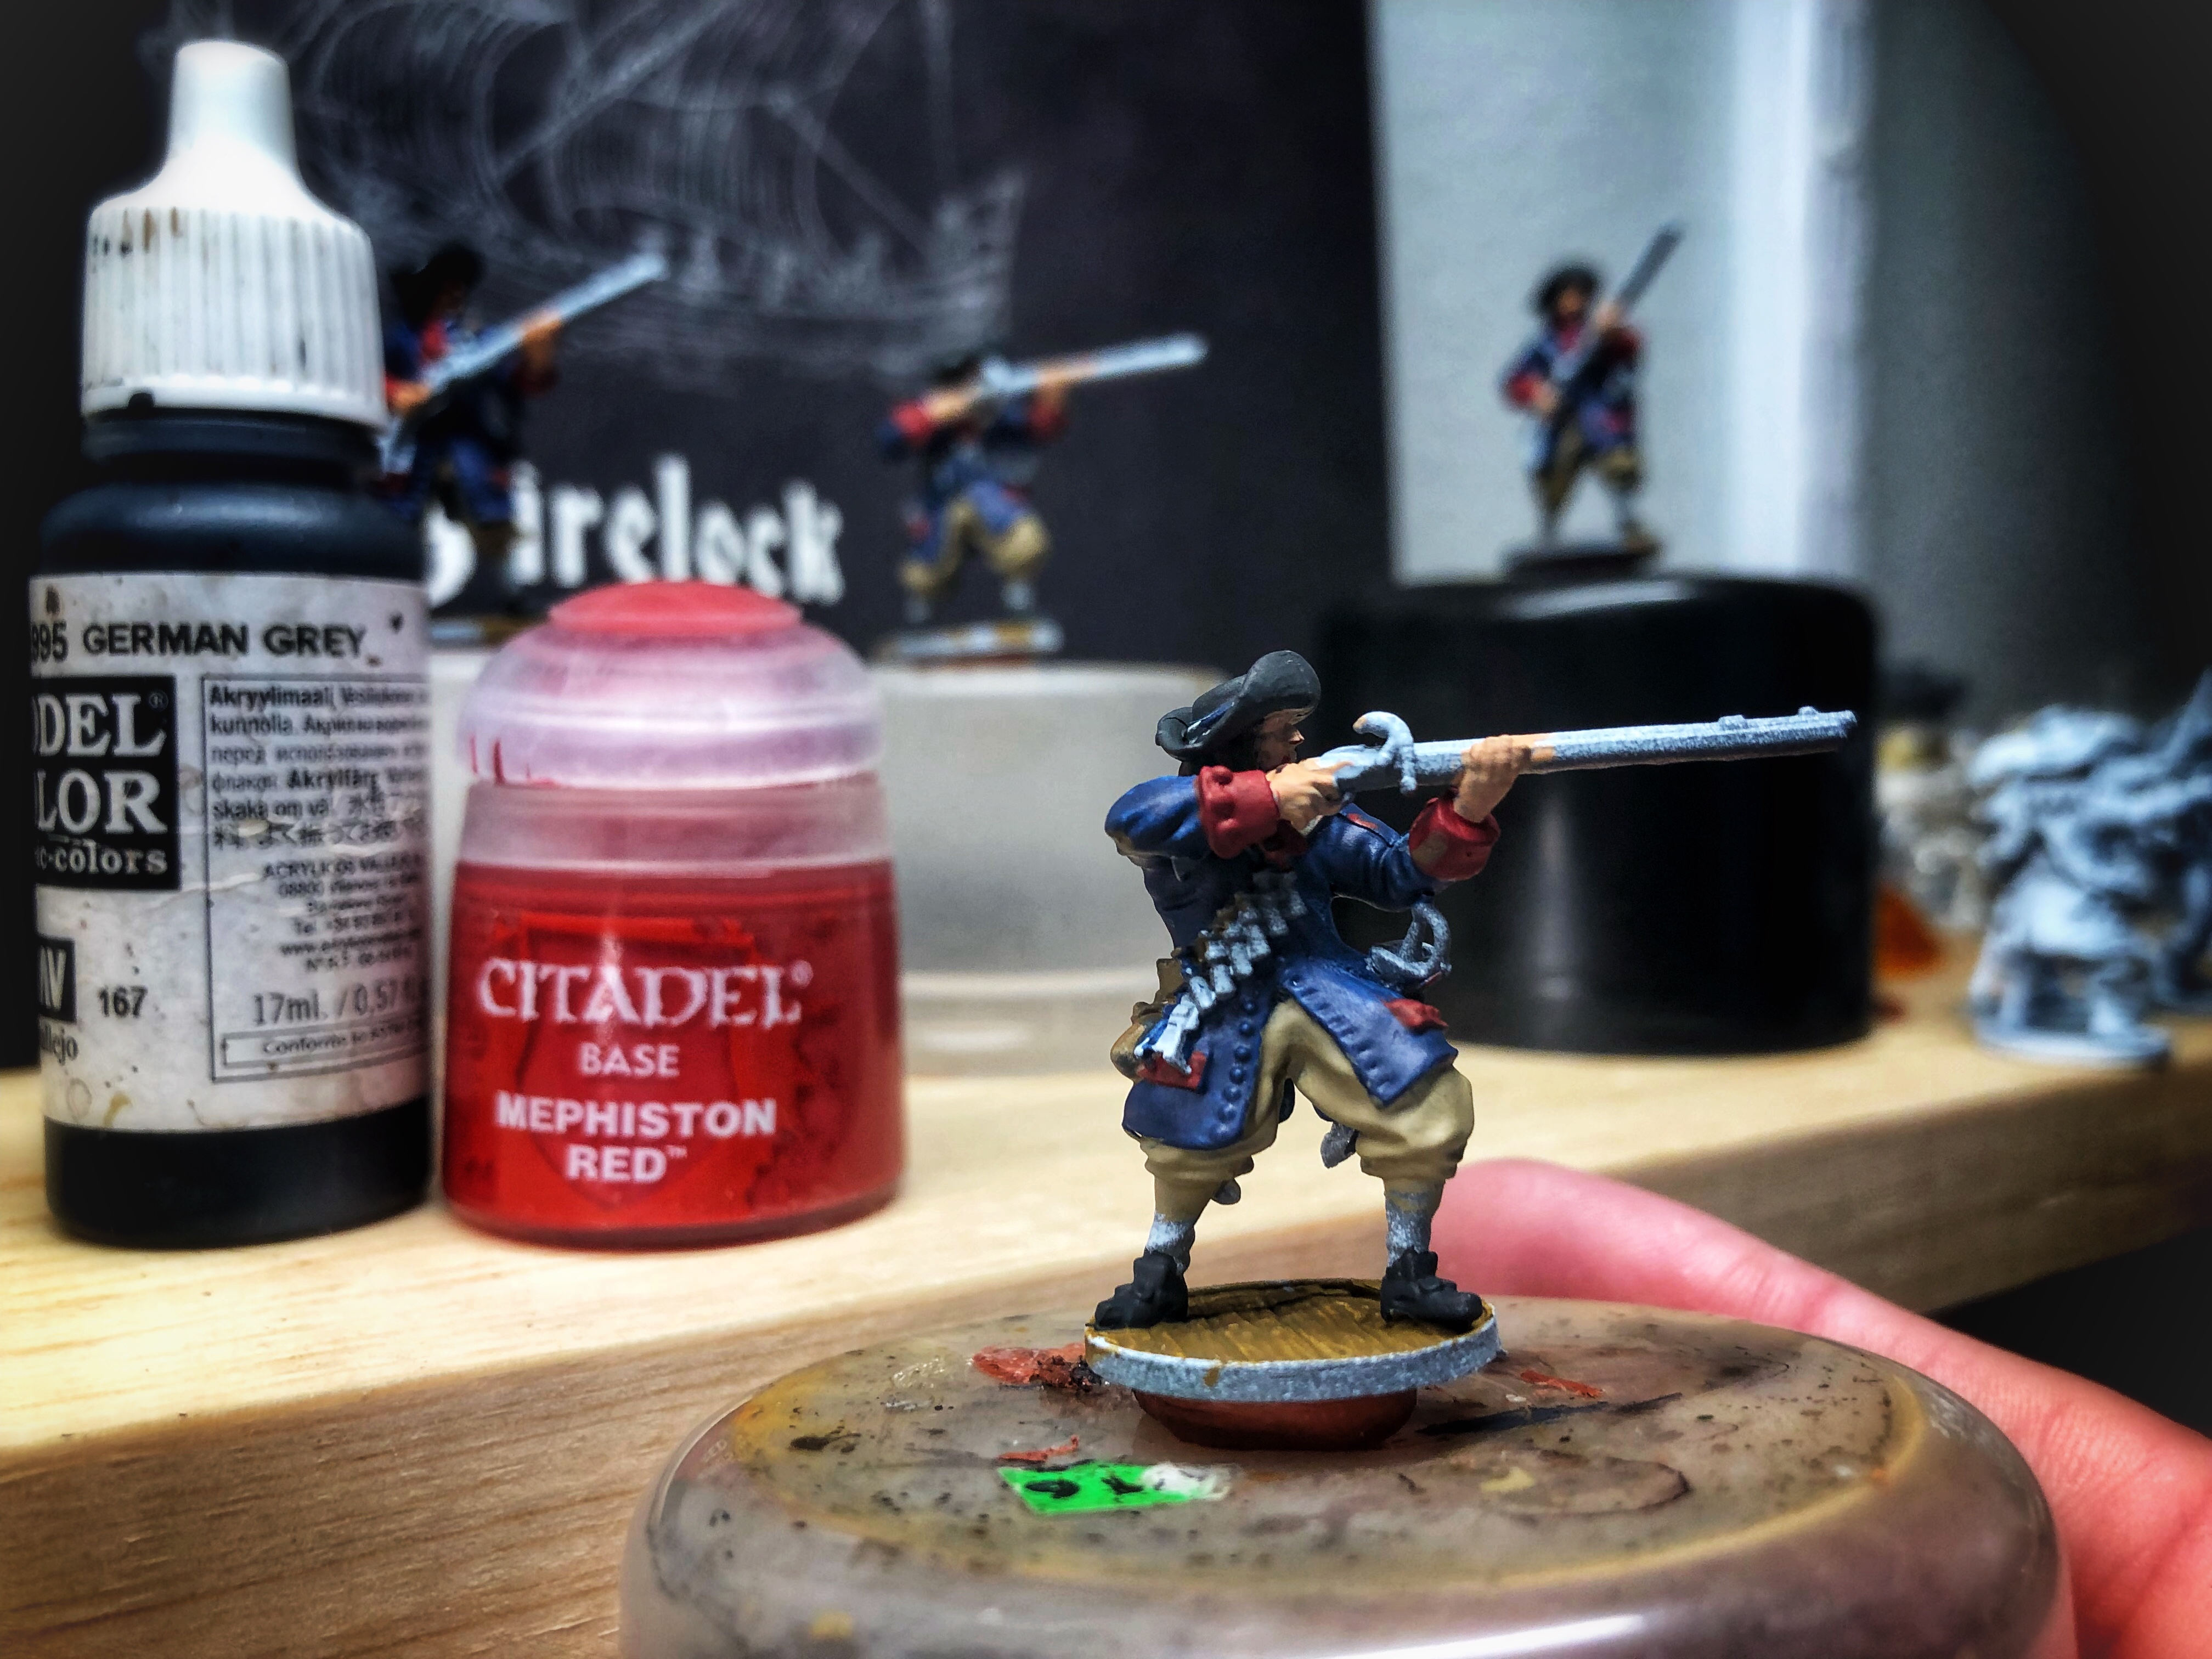
Next I paint the hat, shoes and scabbard with Vallejo German Grey and get the pocket trim with Mephiston Red. I also painted the cartridge strap and pouch on the right hip with Zandri Dust.
I use Mournfang Brown for the cartridges and the wood on the muskets. I open Rhinox Hide again to paint the outside edge of the bases.
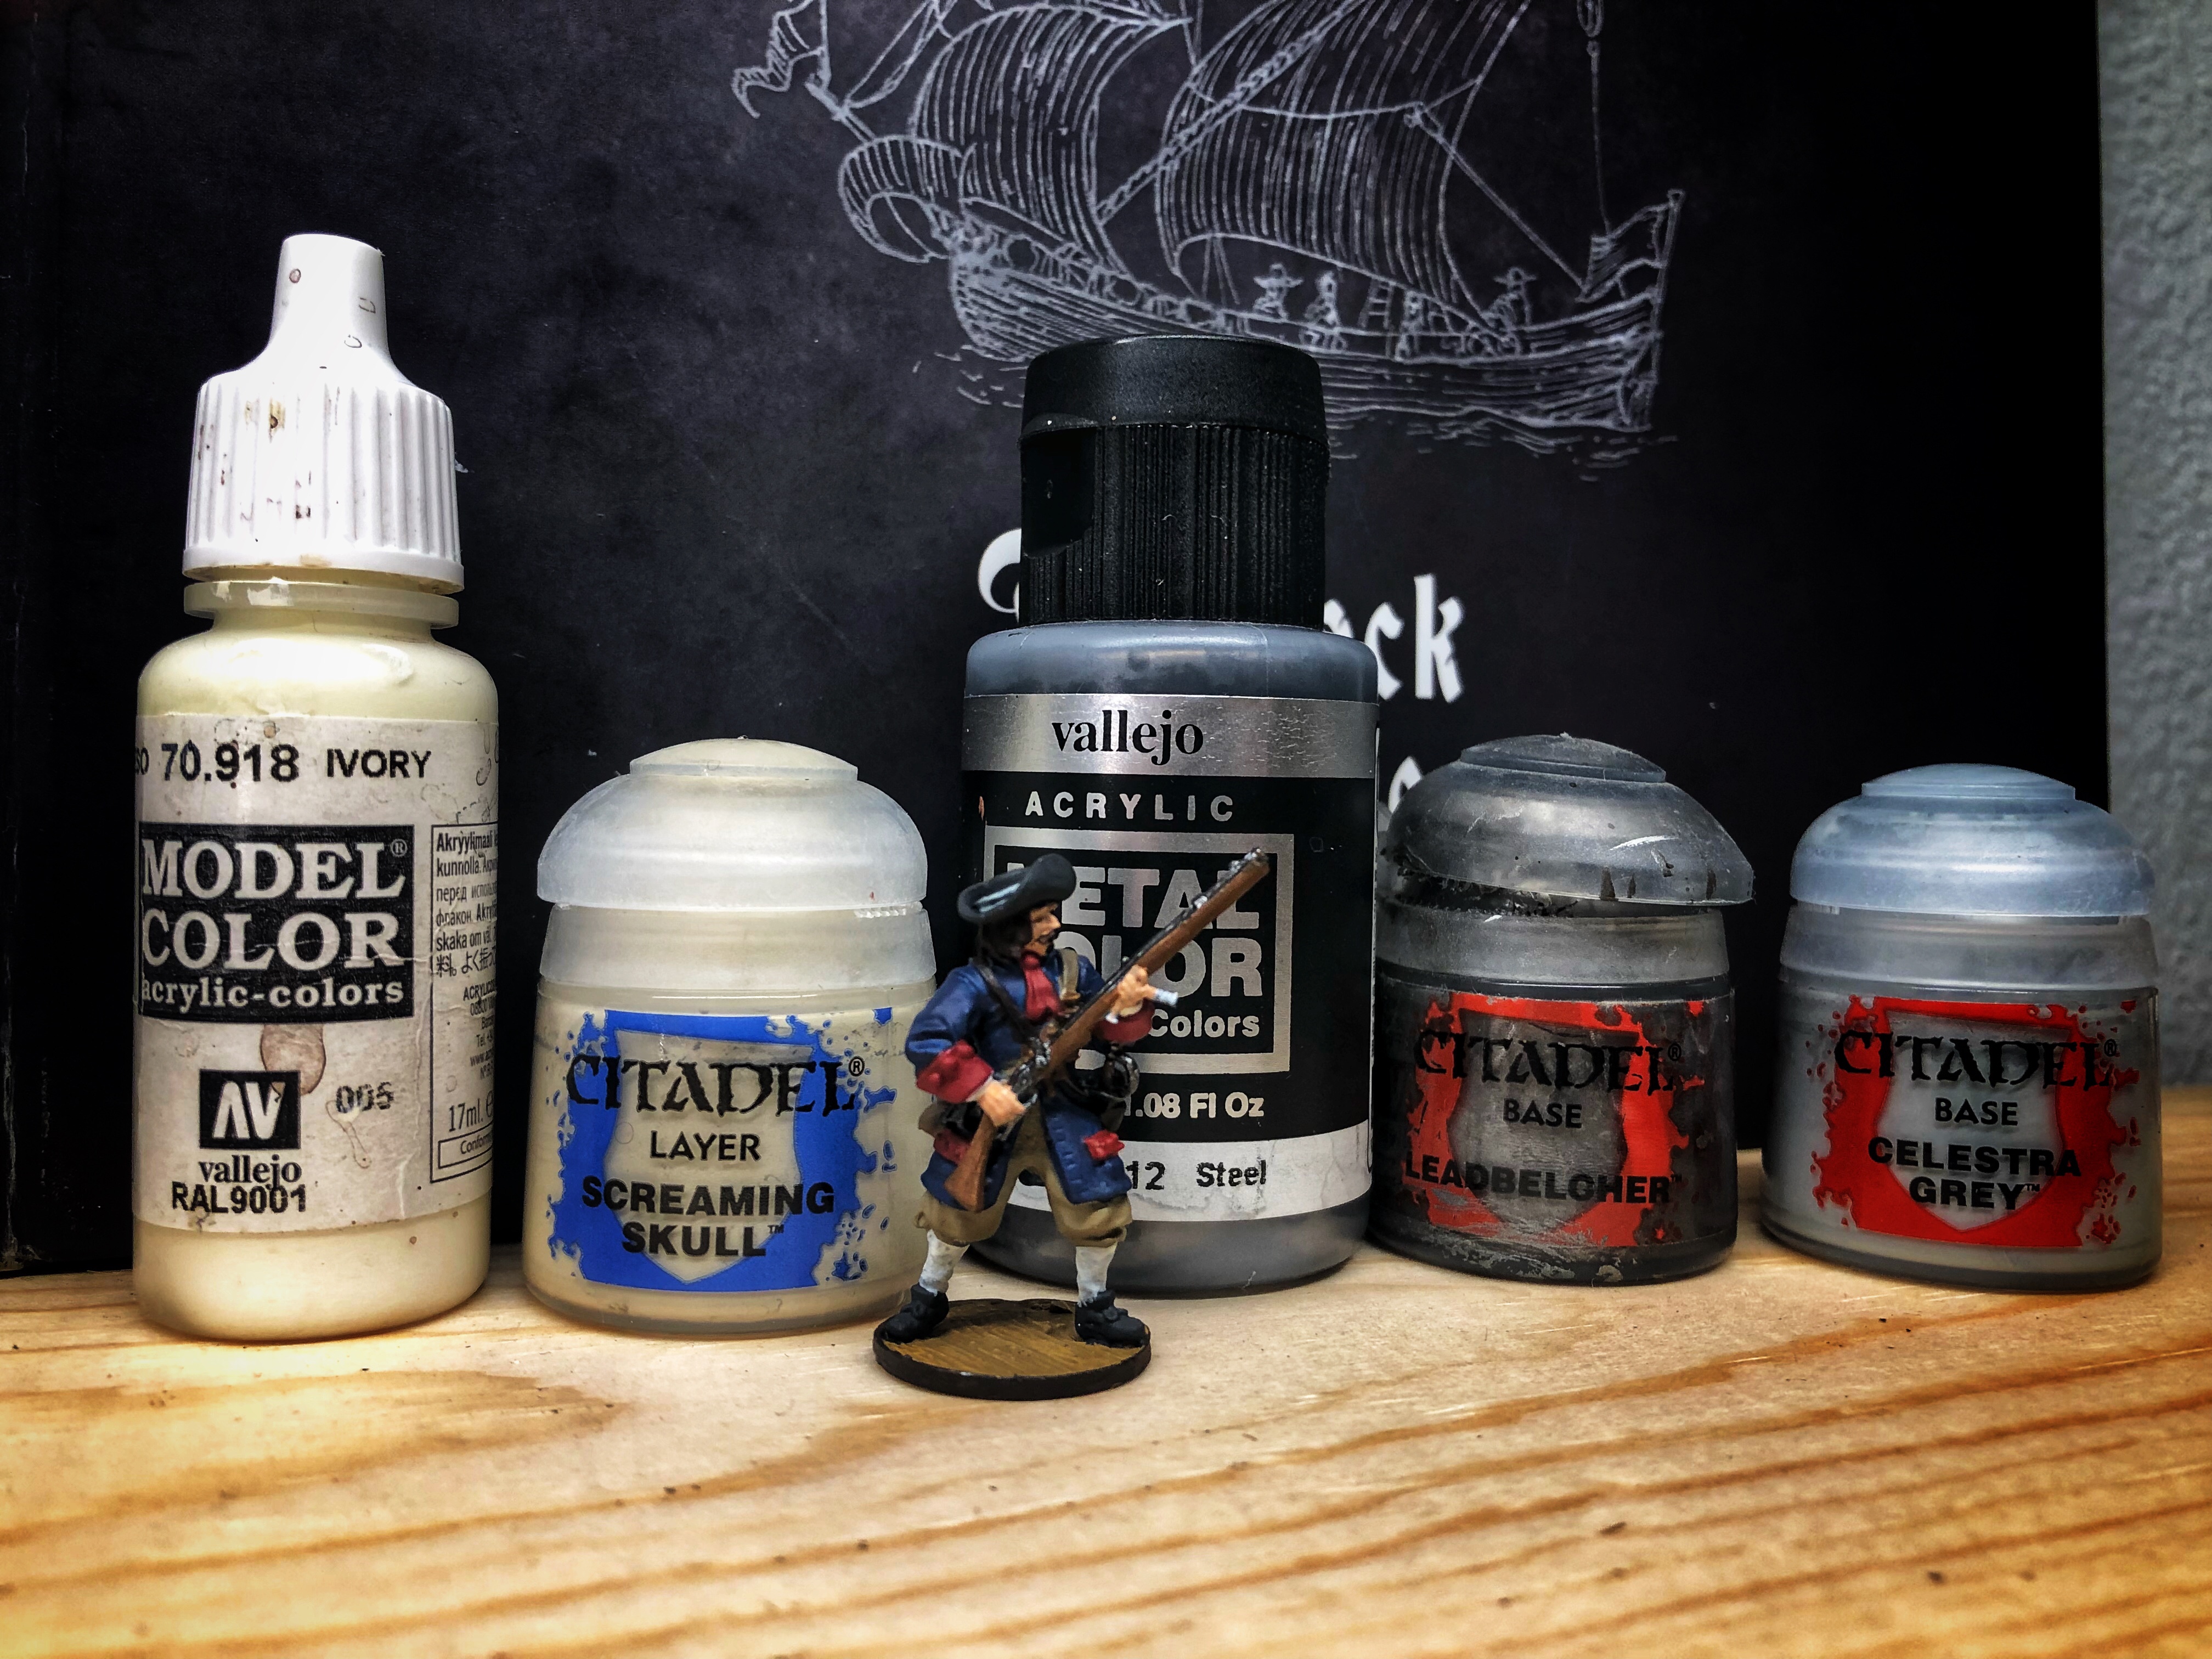
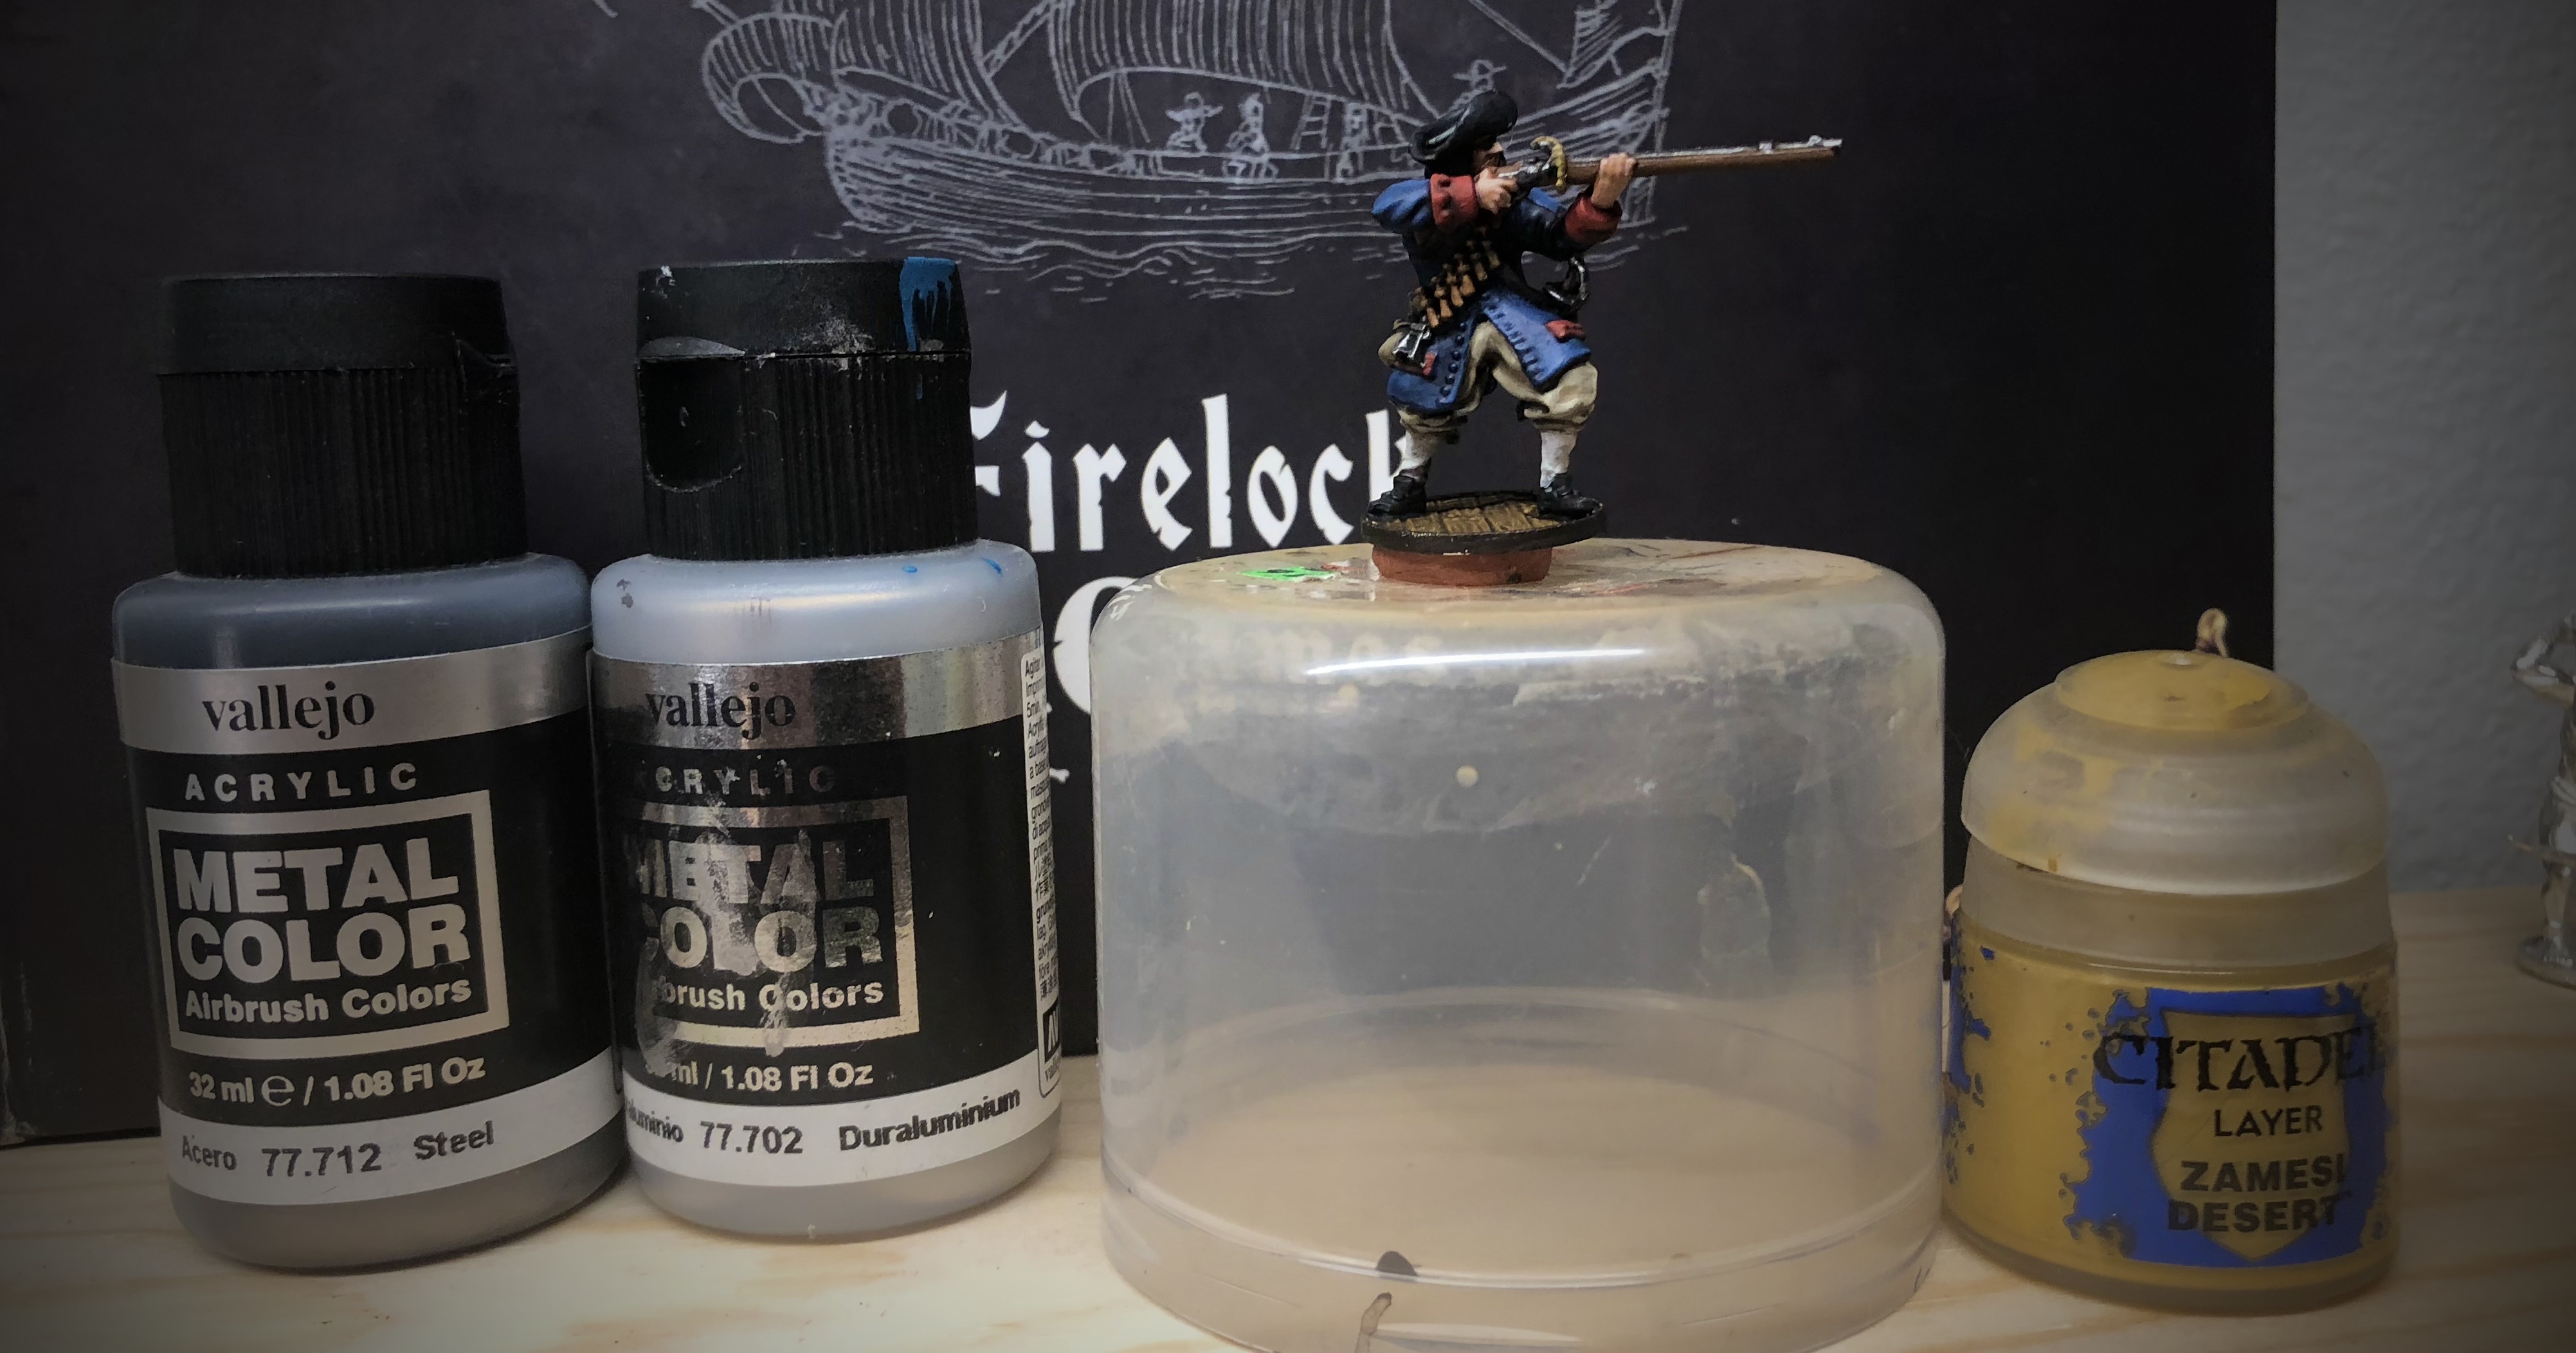
I use Vallejo’s Ivory (Citadel Screaming Skull is a slightly darker but good substitute) for the stockings and shirt cuffs and Vallejo Metal Color Steel for the metal parts of the musket, the hilt of the sword and the entire powder flask (Citadel Leadbelcher is a good substitute). I used a bit of Celestra Grey for the hatband and then had to touch up the hat again with German Grey.
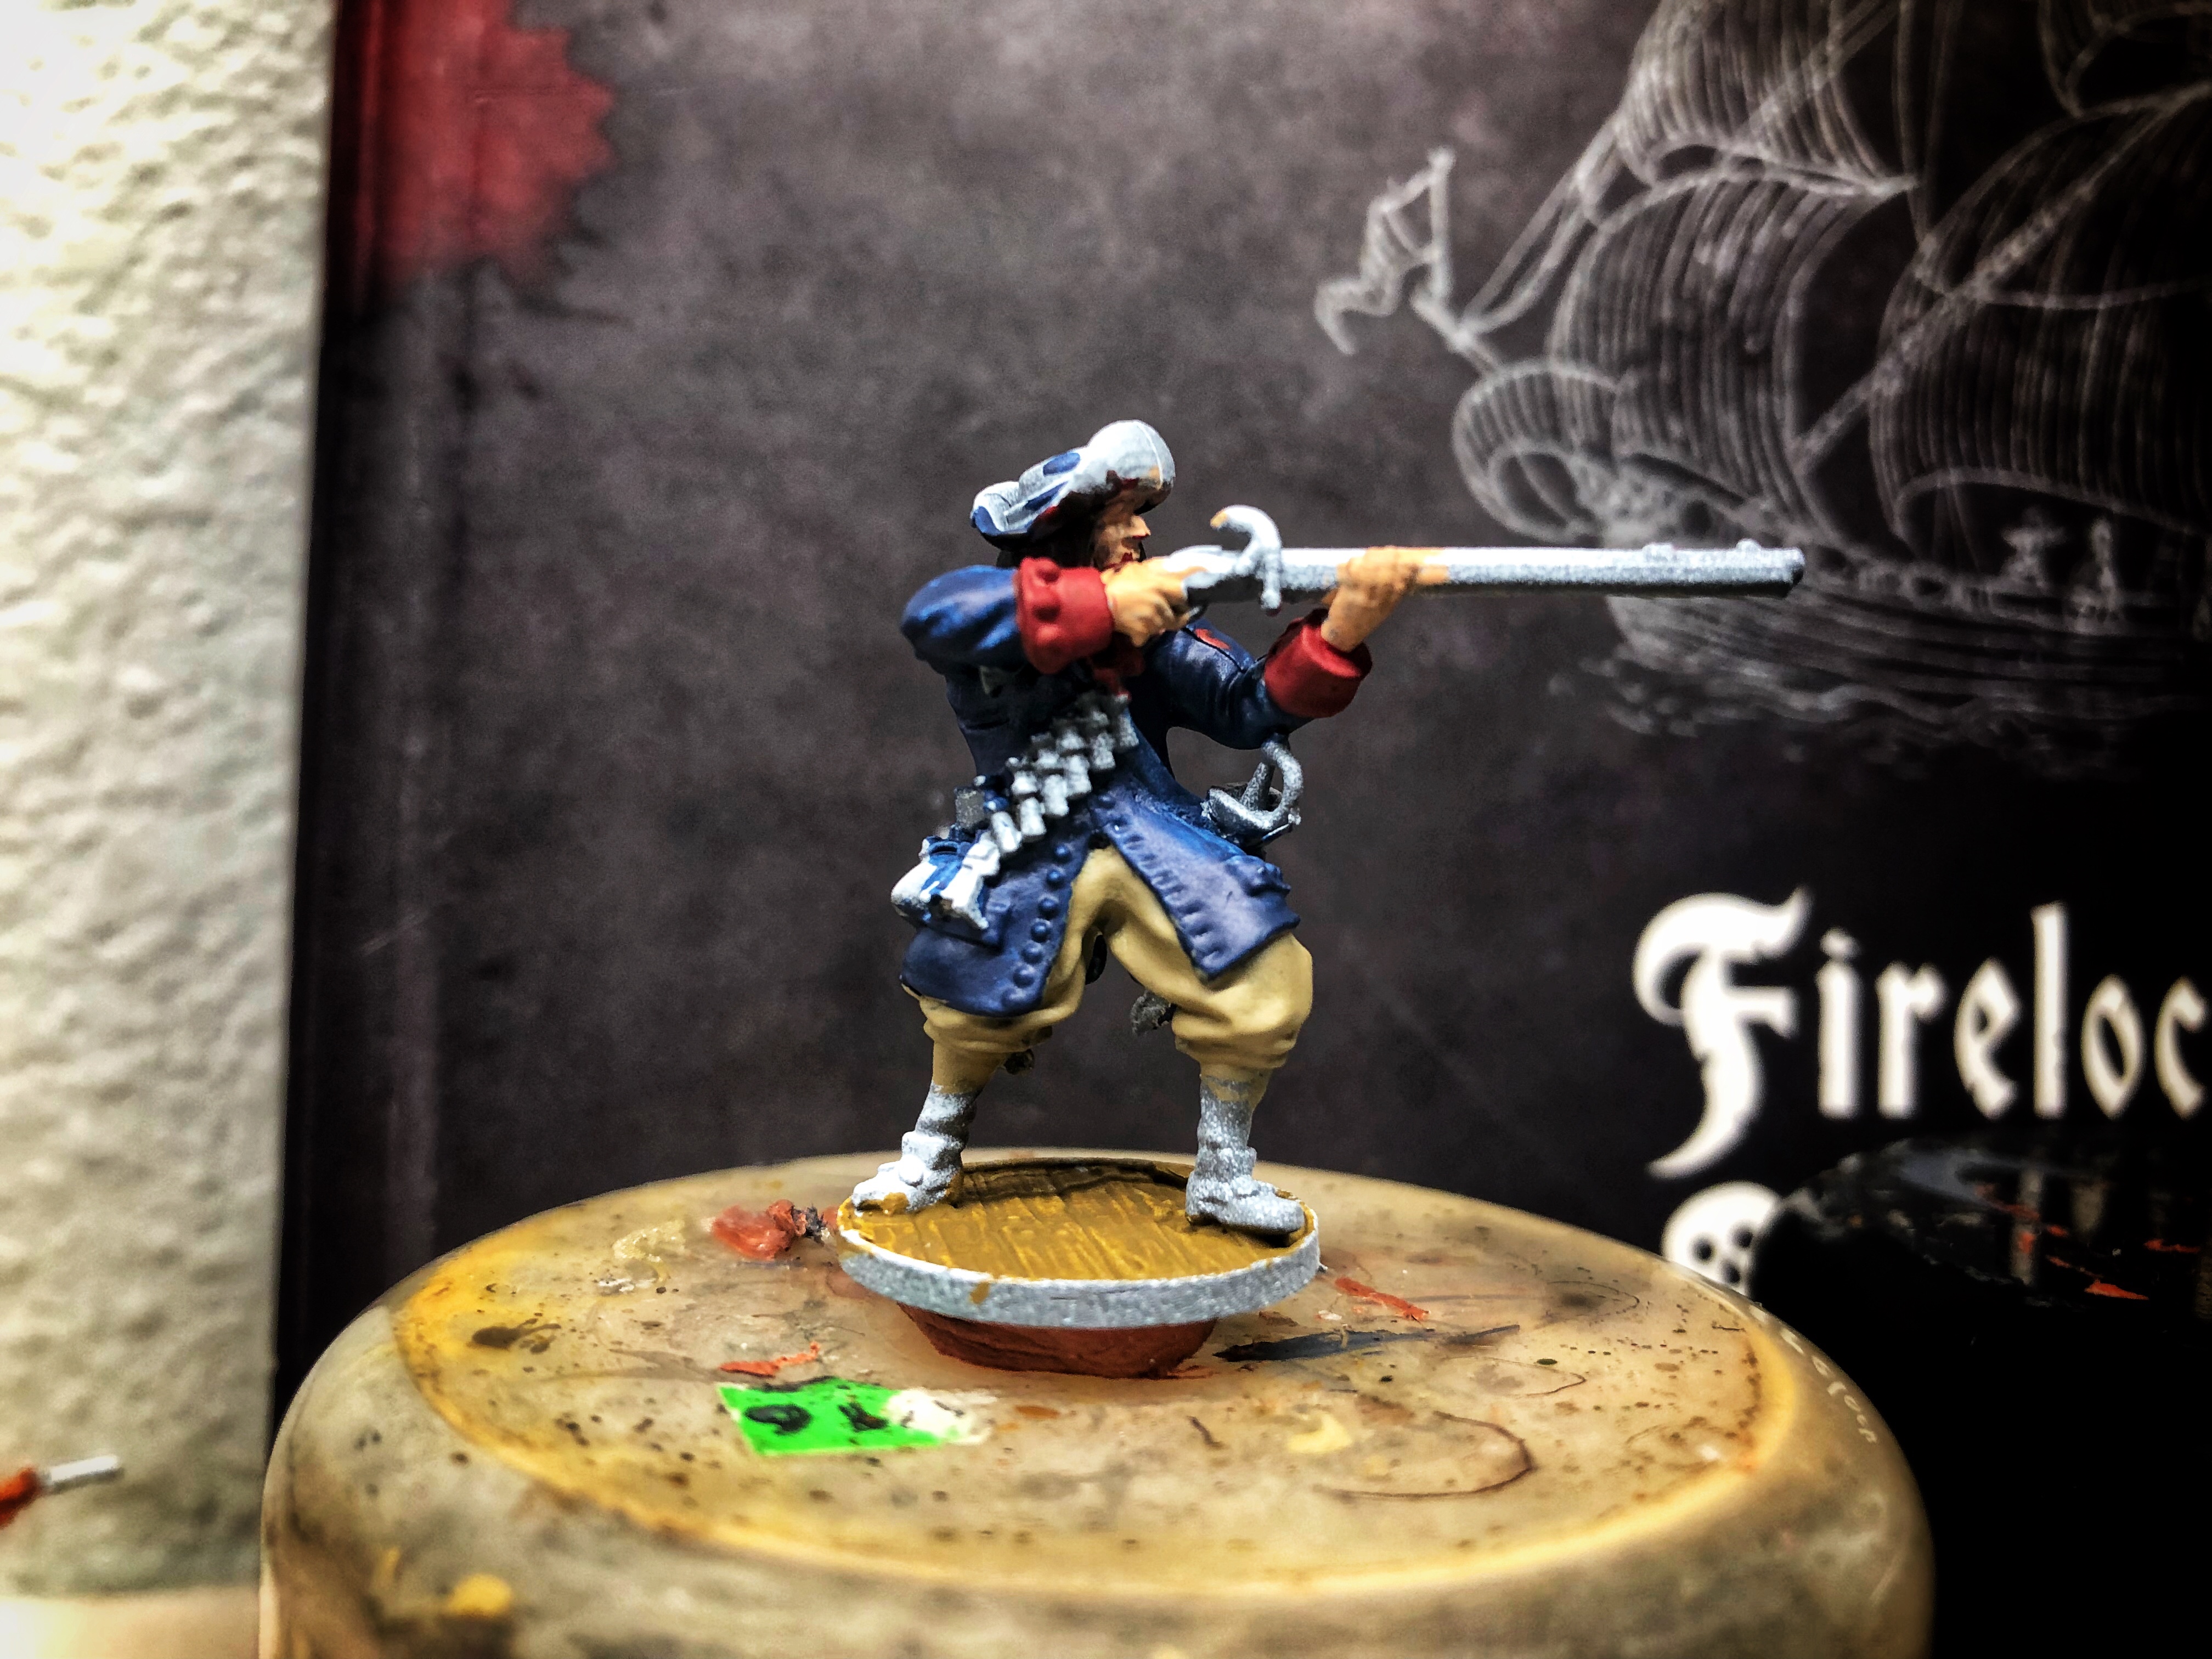
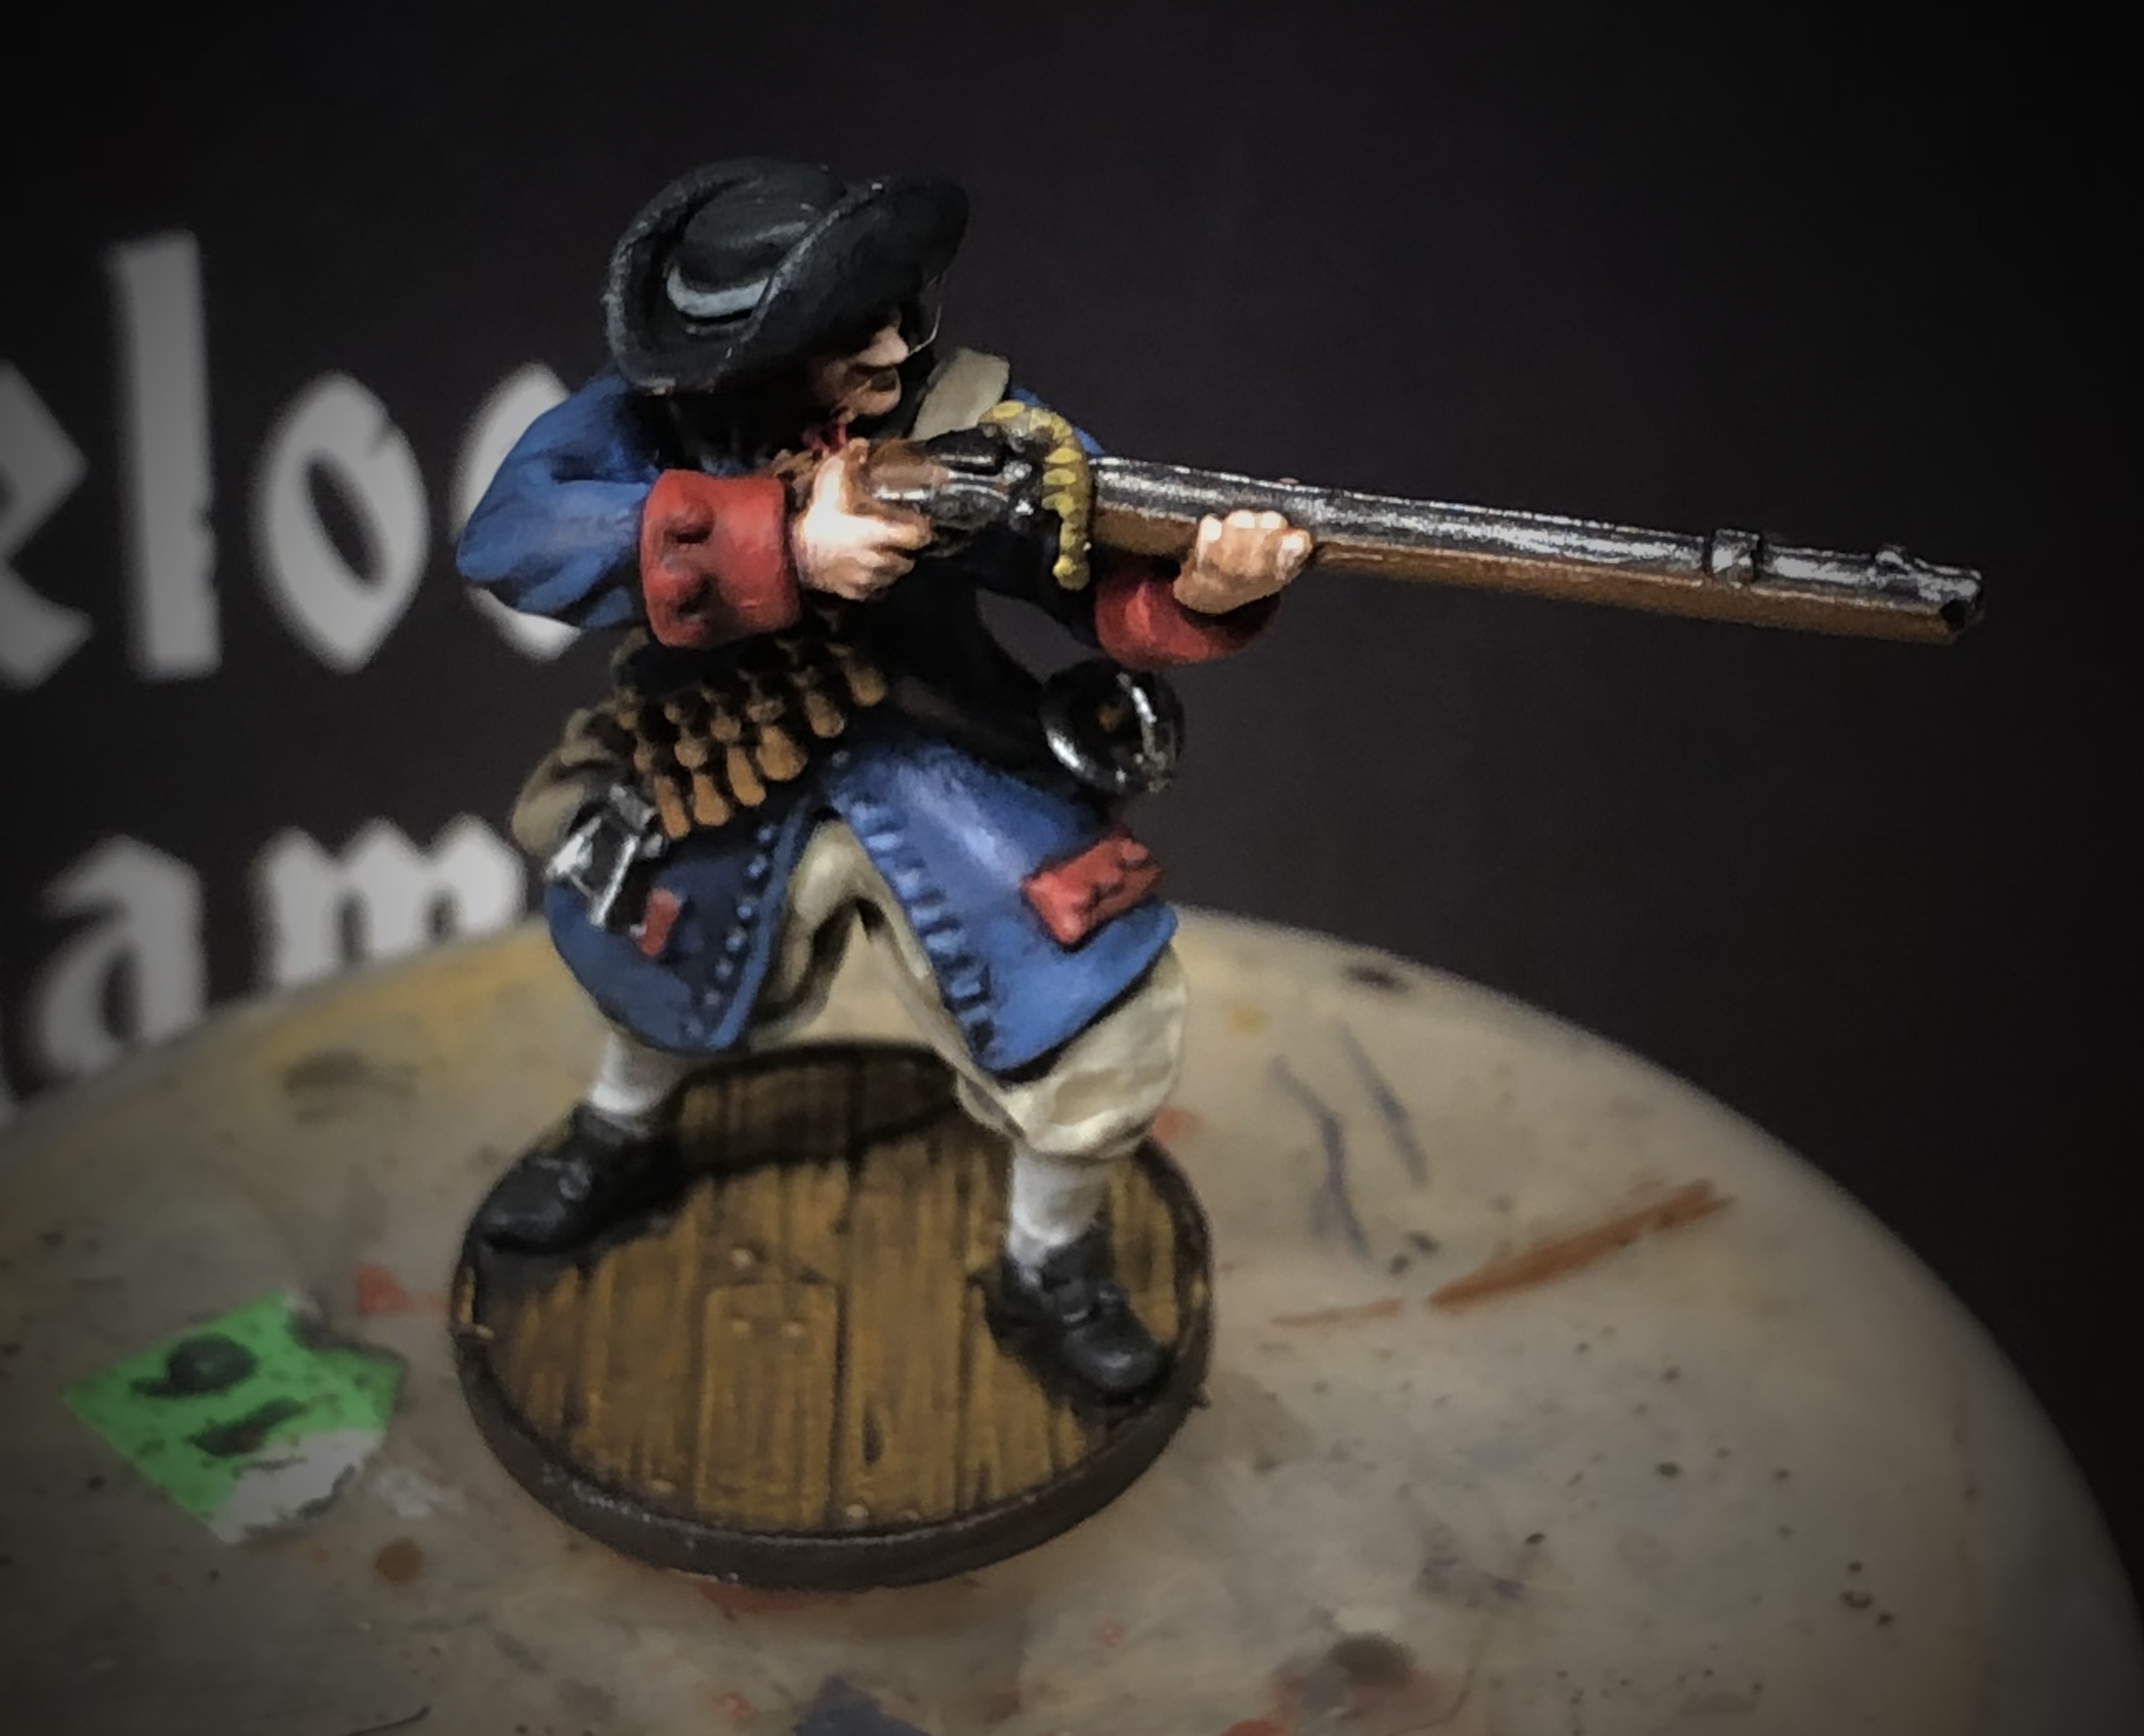
At this point the model is covered and it looks decent. You could be finished right here if you want a reasonable “tabletop” look. I’m going to go to apply washes and highlights to boost the contrast and realism, but you certainly wouldn’t have to.
I’ve intentionally left the buttons unpainted at this point. I’ll go back and paint them at the end.
If you’re happy with how these guys look, you could just jump to step 5 and spray them with a protective coat and get them into battle!

I realized I forgot to paint the match cord. I later painted it with XV-88, the same color as the base.
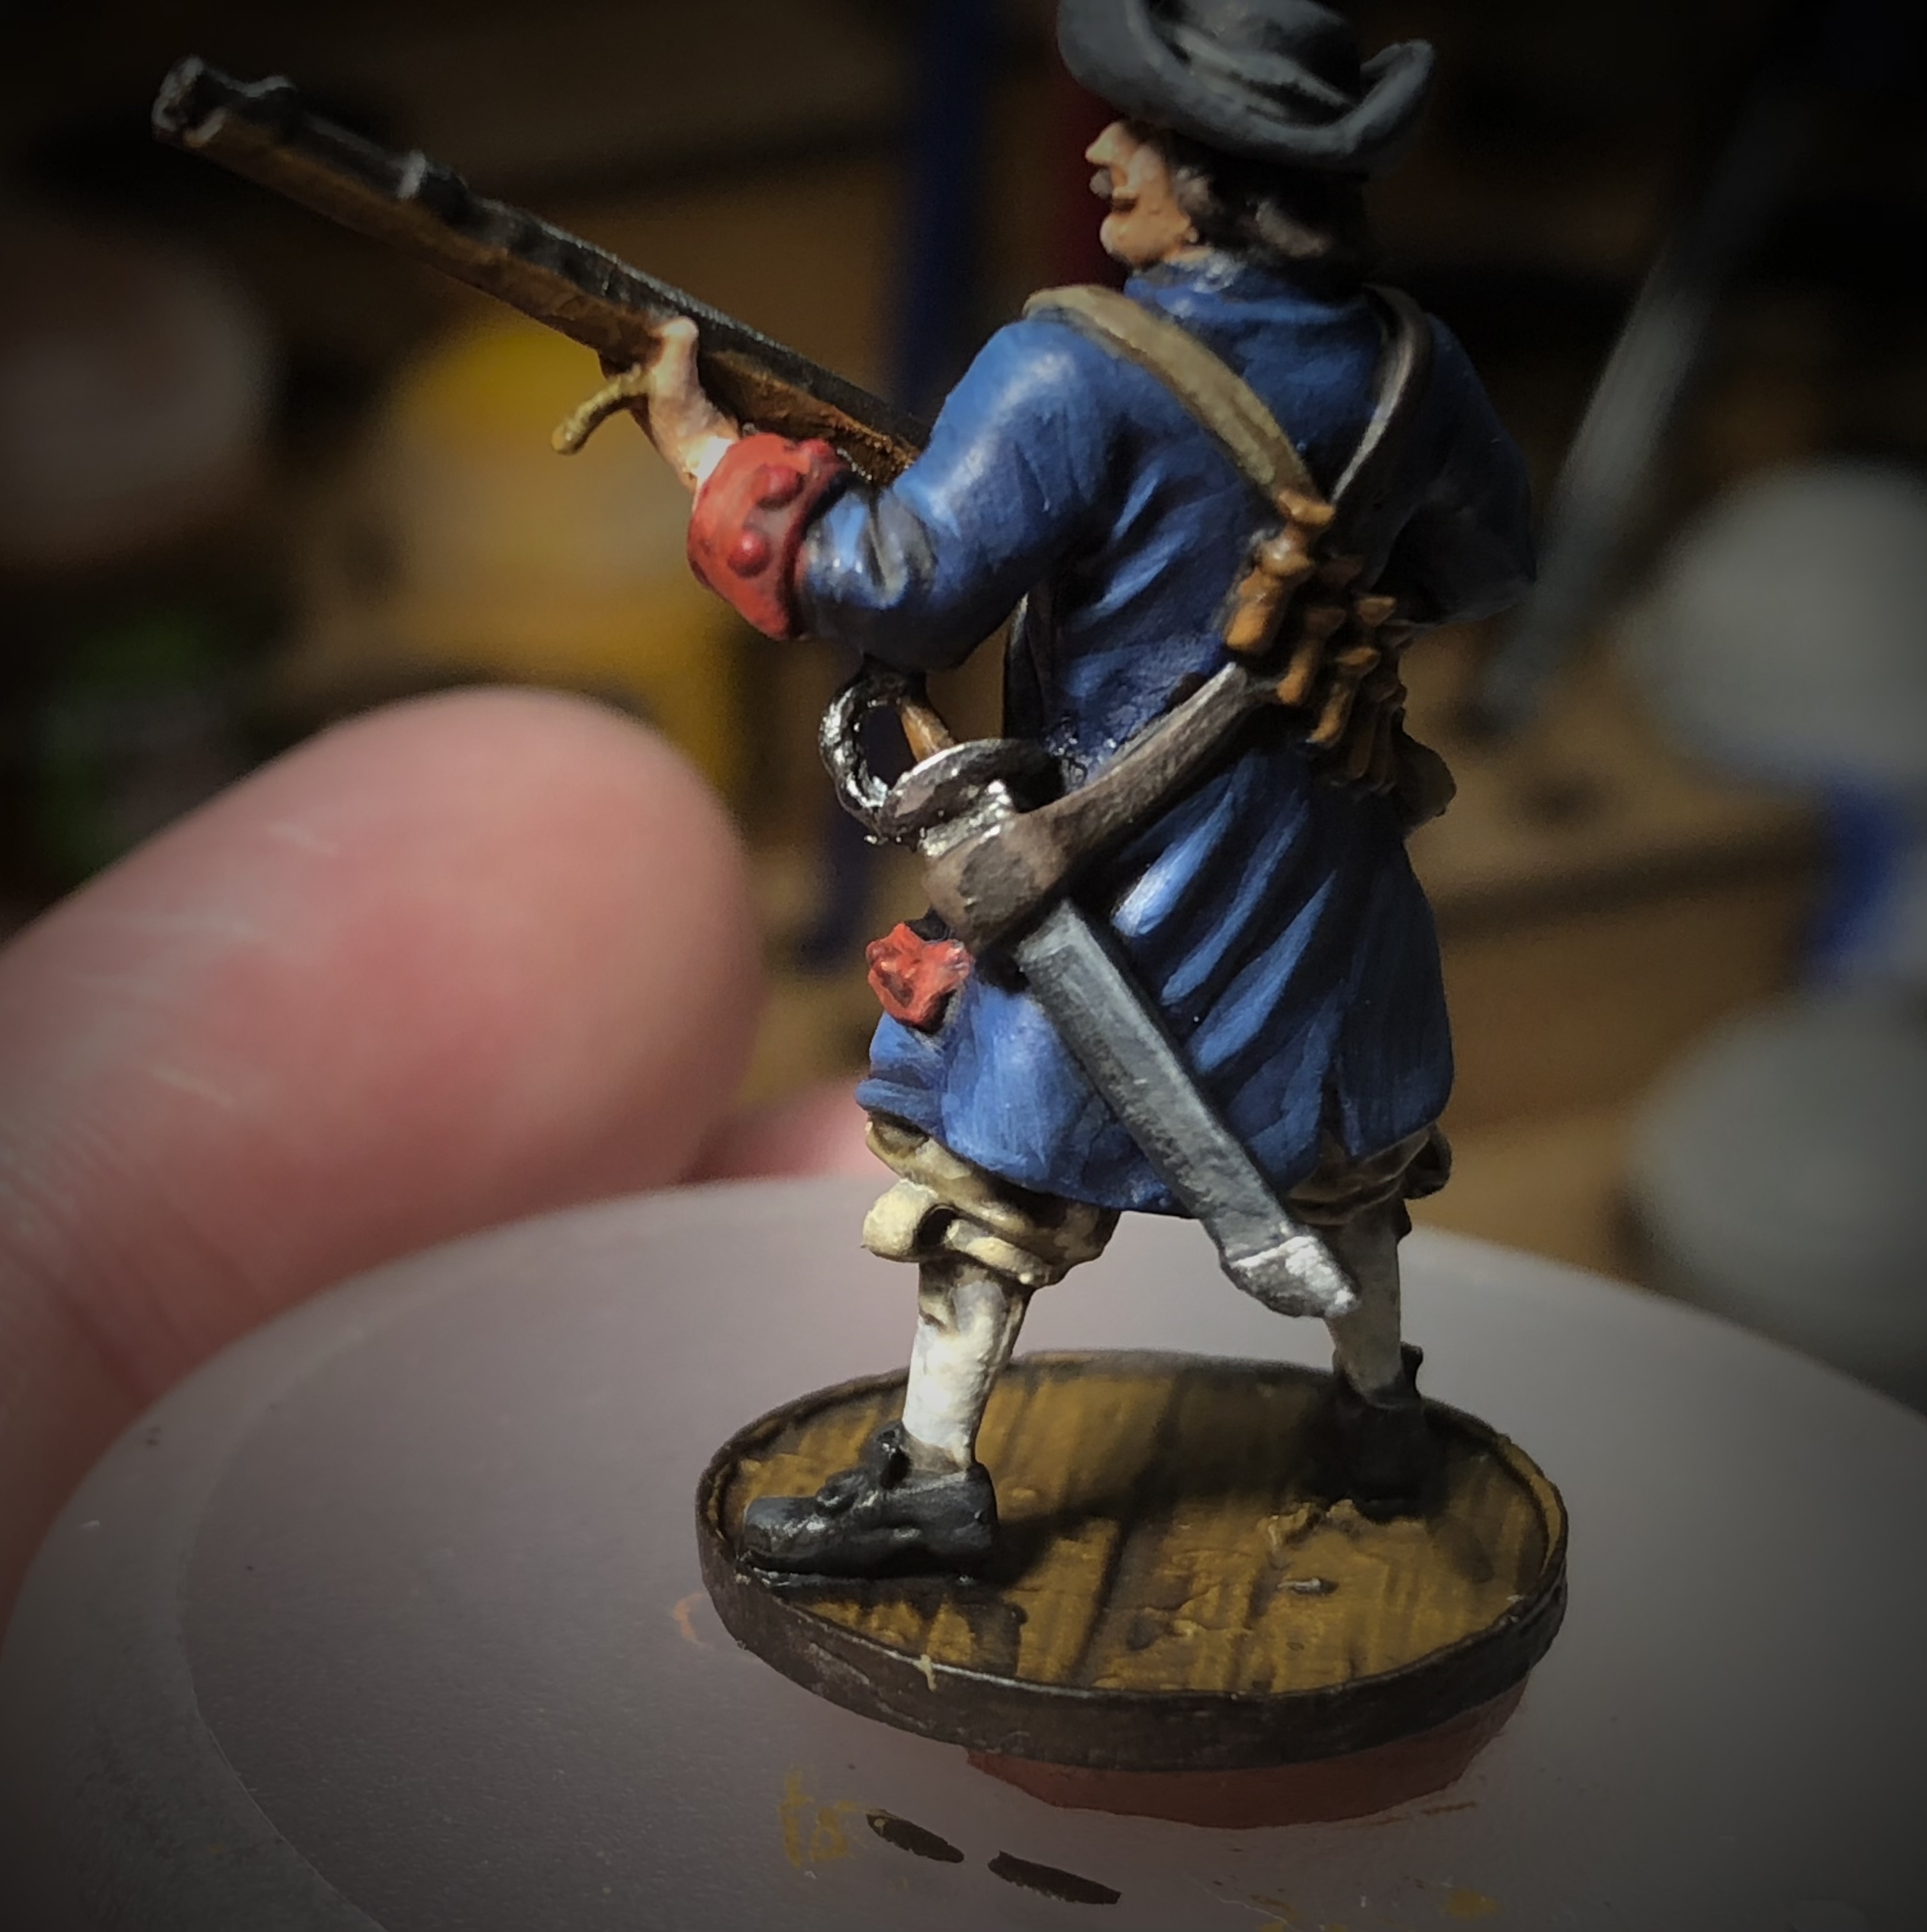
Step 3 – Washes
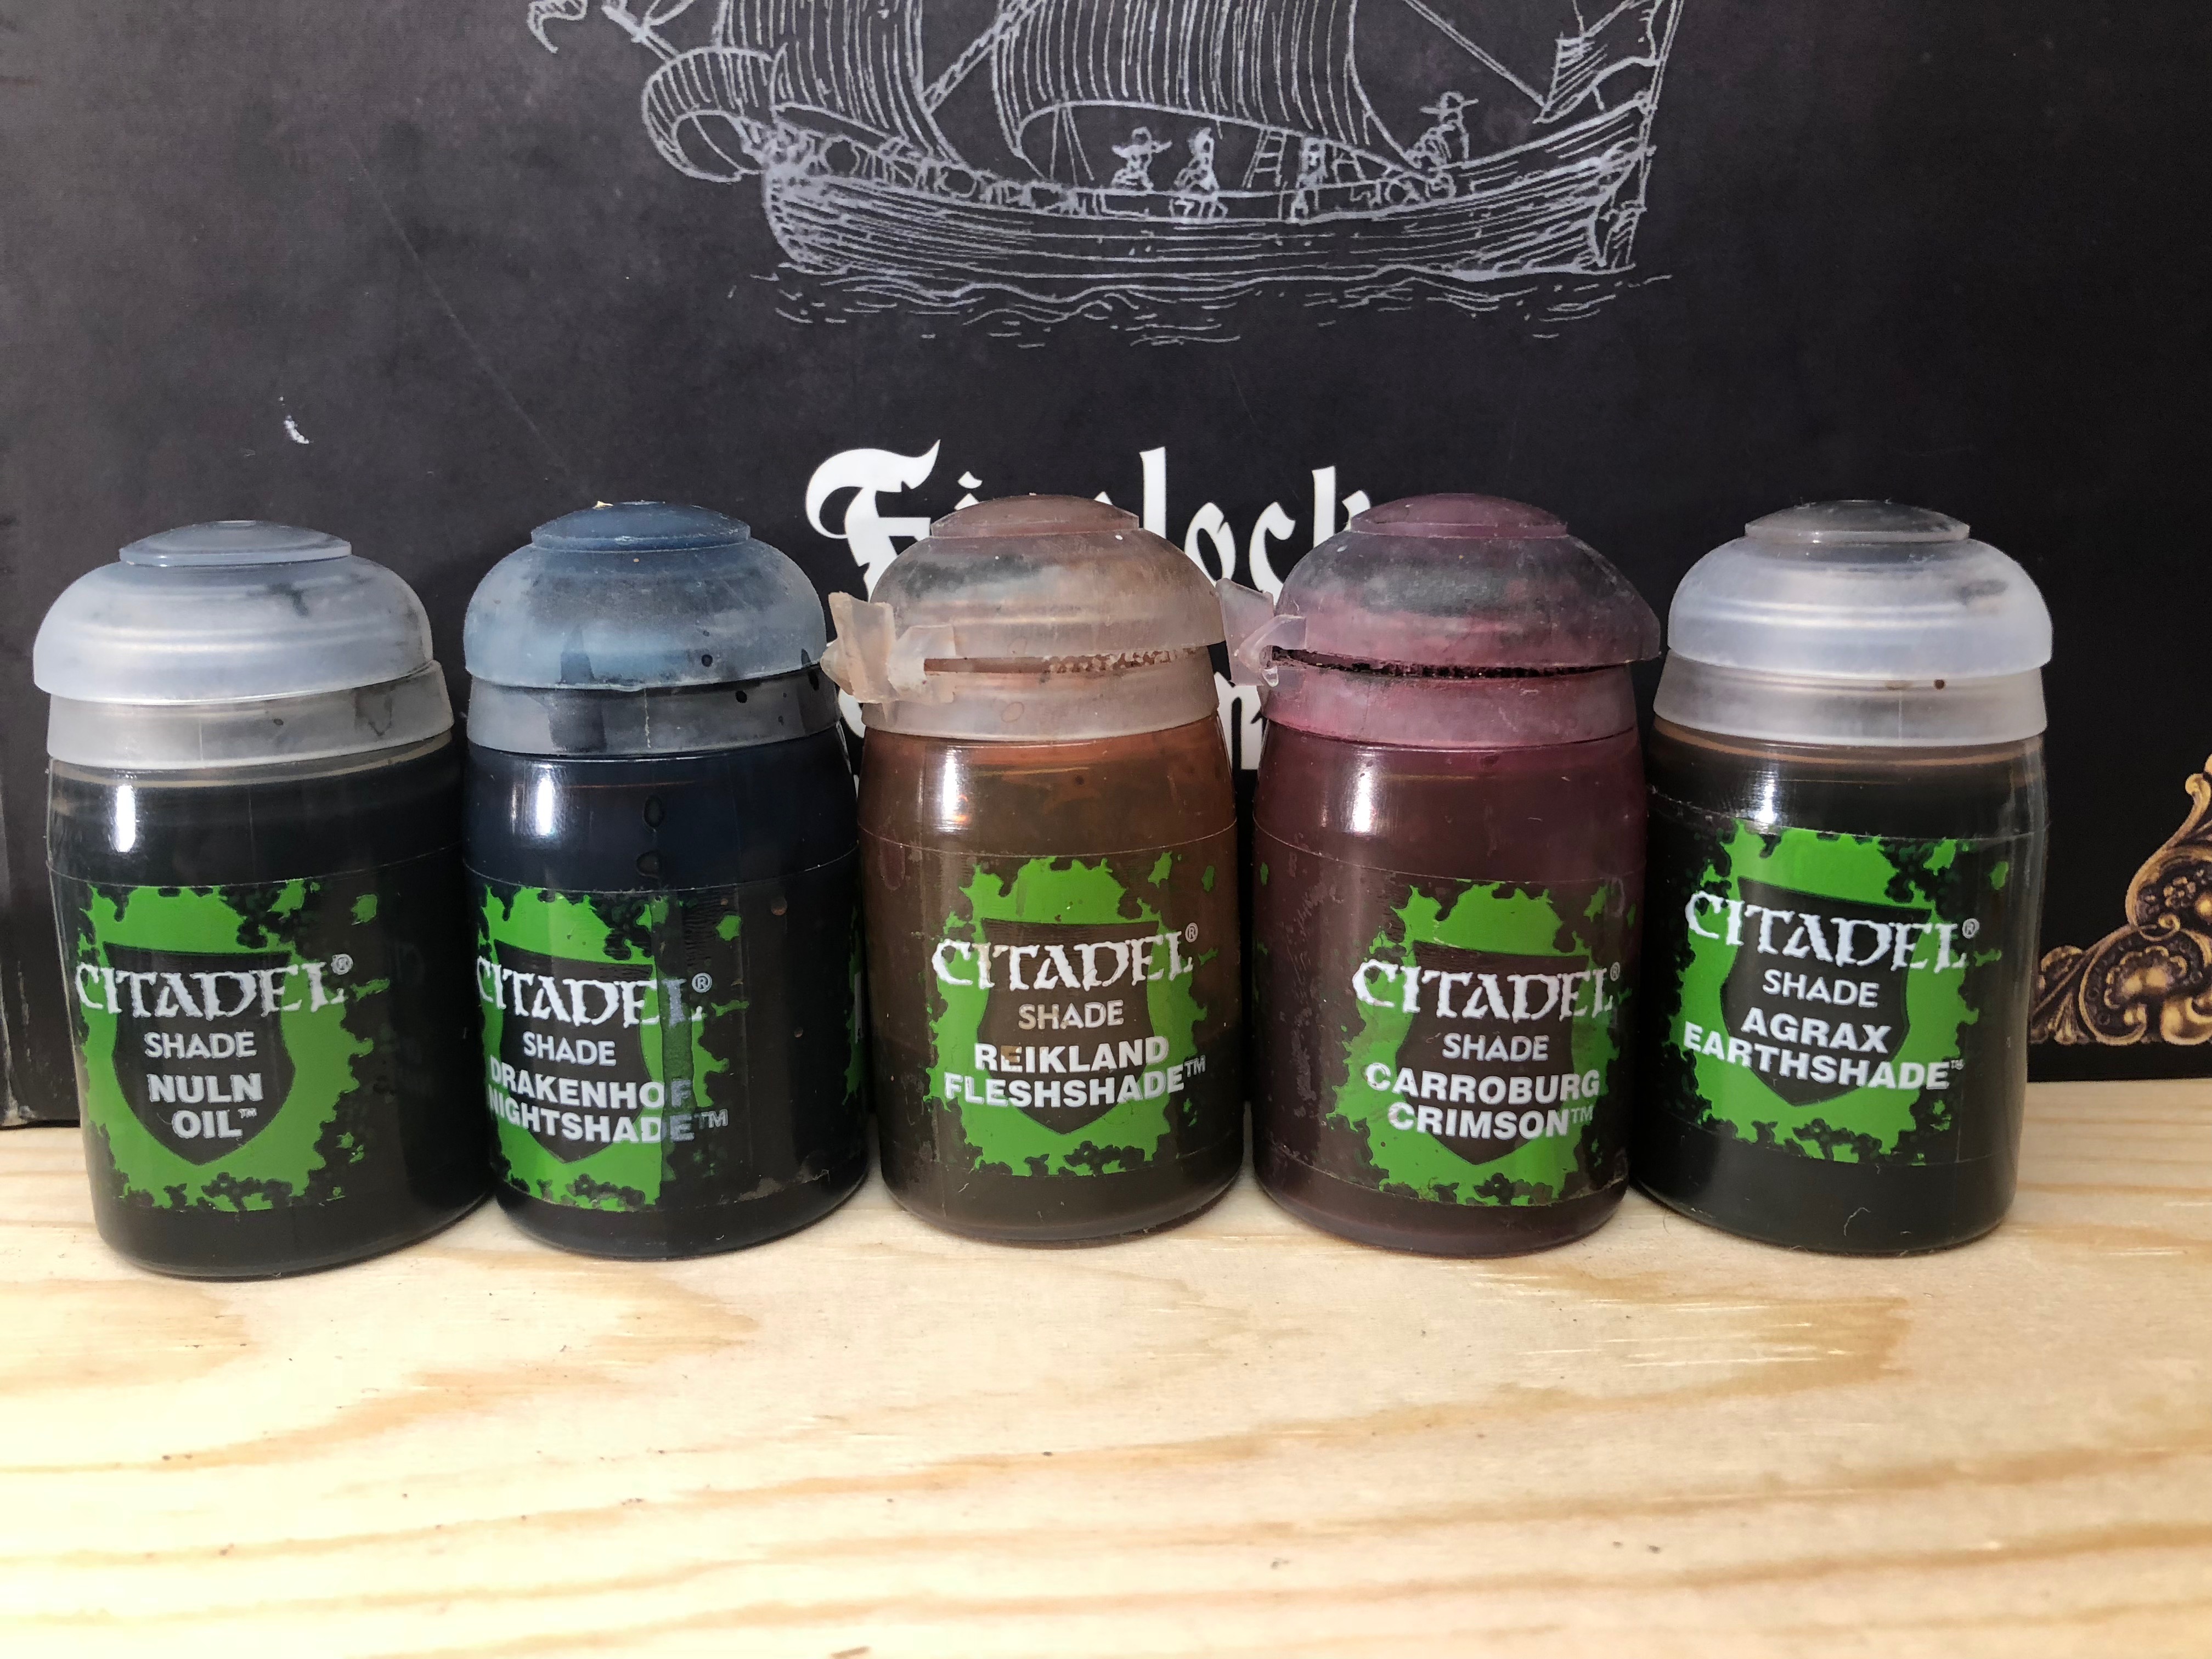
Next I will cover each area of the mini with a “wash” or “shade.” This extremely thin paint is designed to settle in the recesses of the miniature and dark the areas that would be shadowed. This gives the mini or more dynamic and 3-dimensional look.
I highly recommend the Citadel washes. I haven’t found anything comparable to them and I find them very useful.
This process is fairly quick and easy. Just apply a moderate amount of the appropriate color of wash to each area, making sure a little pools in the recesses without overloading it so it runs all over the place.
- Drakenhof Nightshade will cover the blue coat
- Reikland Fleshshade will go over the face and hands.
- Carroburg Crimson will shade all the red trim and the cravat.
- Agrax Earthshade will cover the base, hair, musket stock and the brown straps and bag.
- Nuln Oil will cover the hat, shoes, scabbard and metallic bits
- The white stockings, shirt cuffs and trousers need a little care. I mixed a 1:1:2 brew of Nuln Oil, Agrax Earthshade and water (or medium) to cover these lighter areas.

There is much more subtlety and variation in the colors now. The shades are most obvious in the pants and red cuffs in this picture.
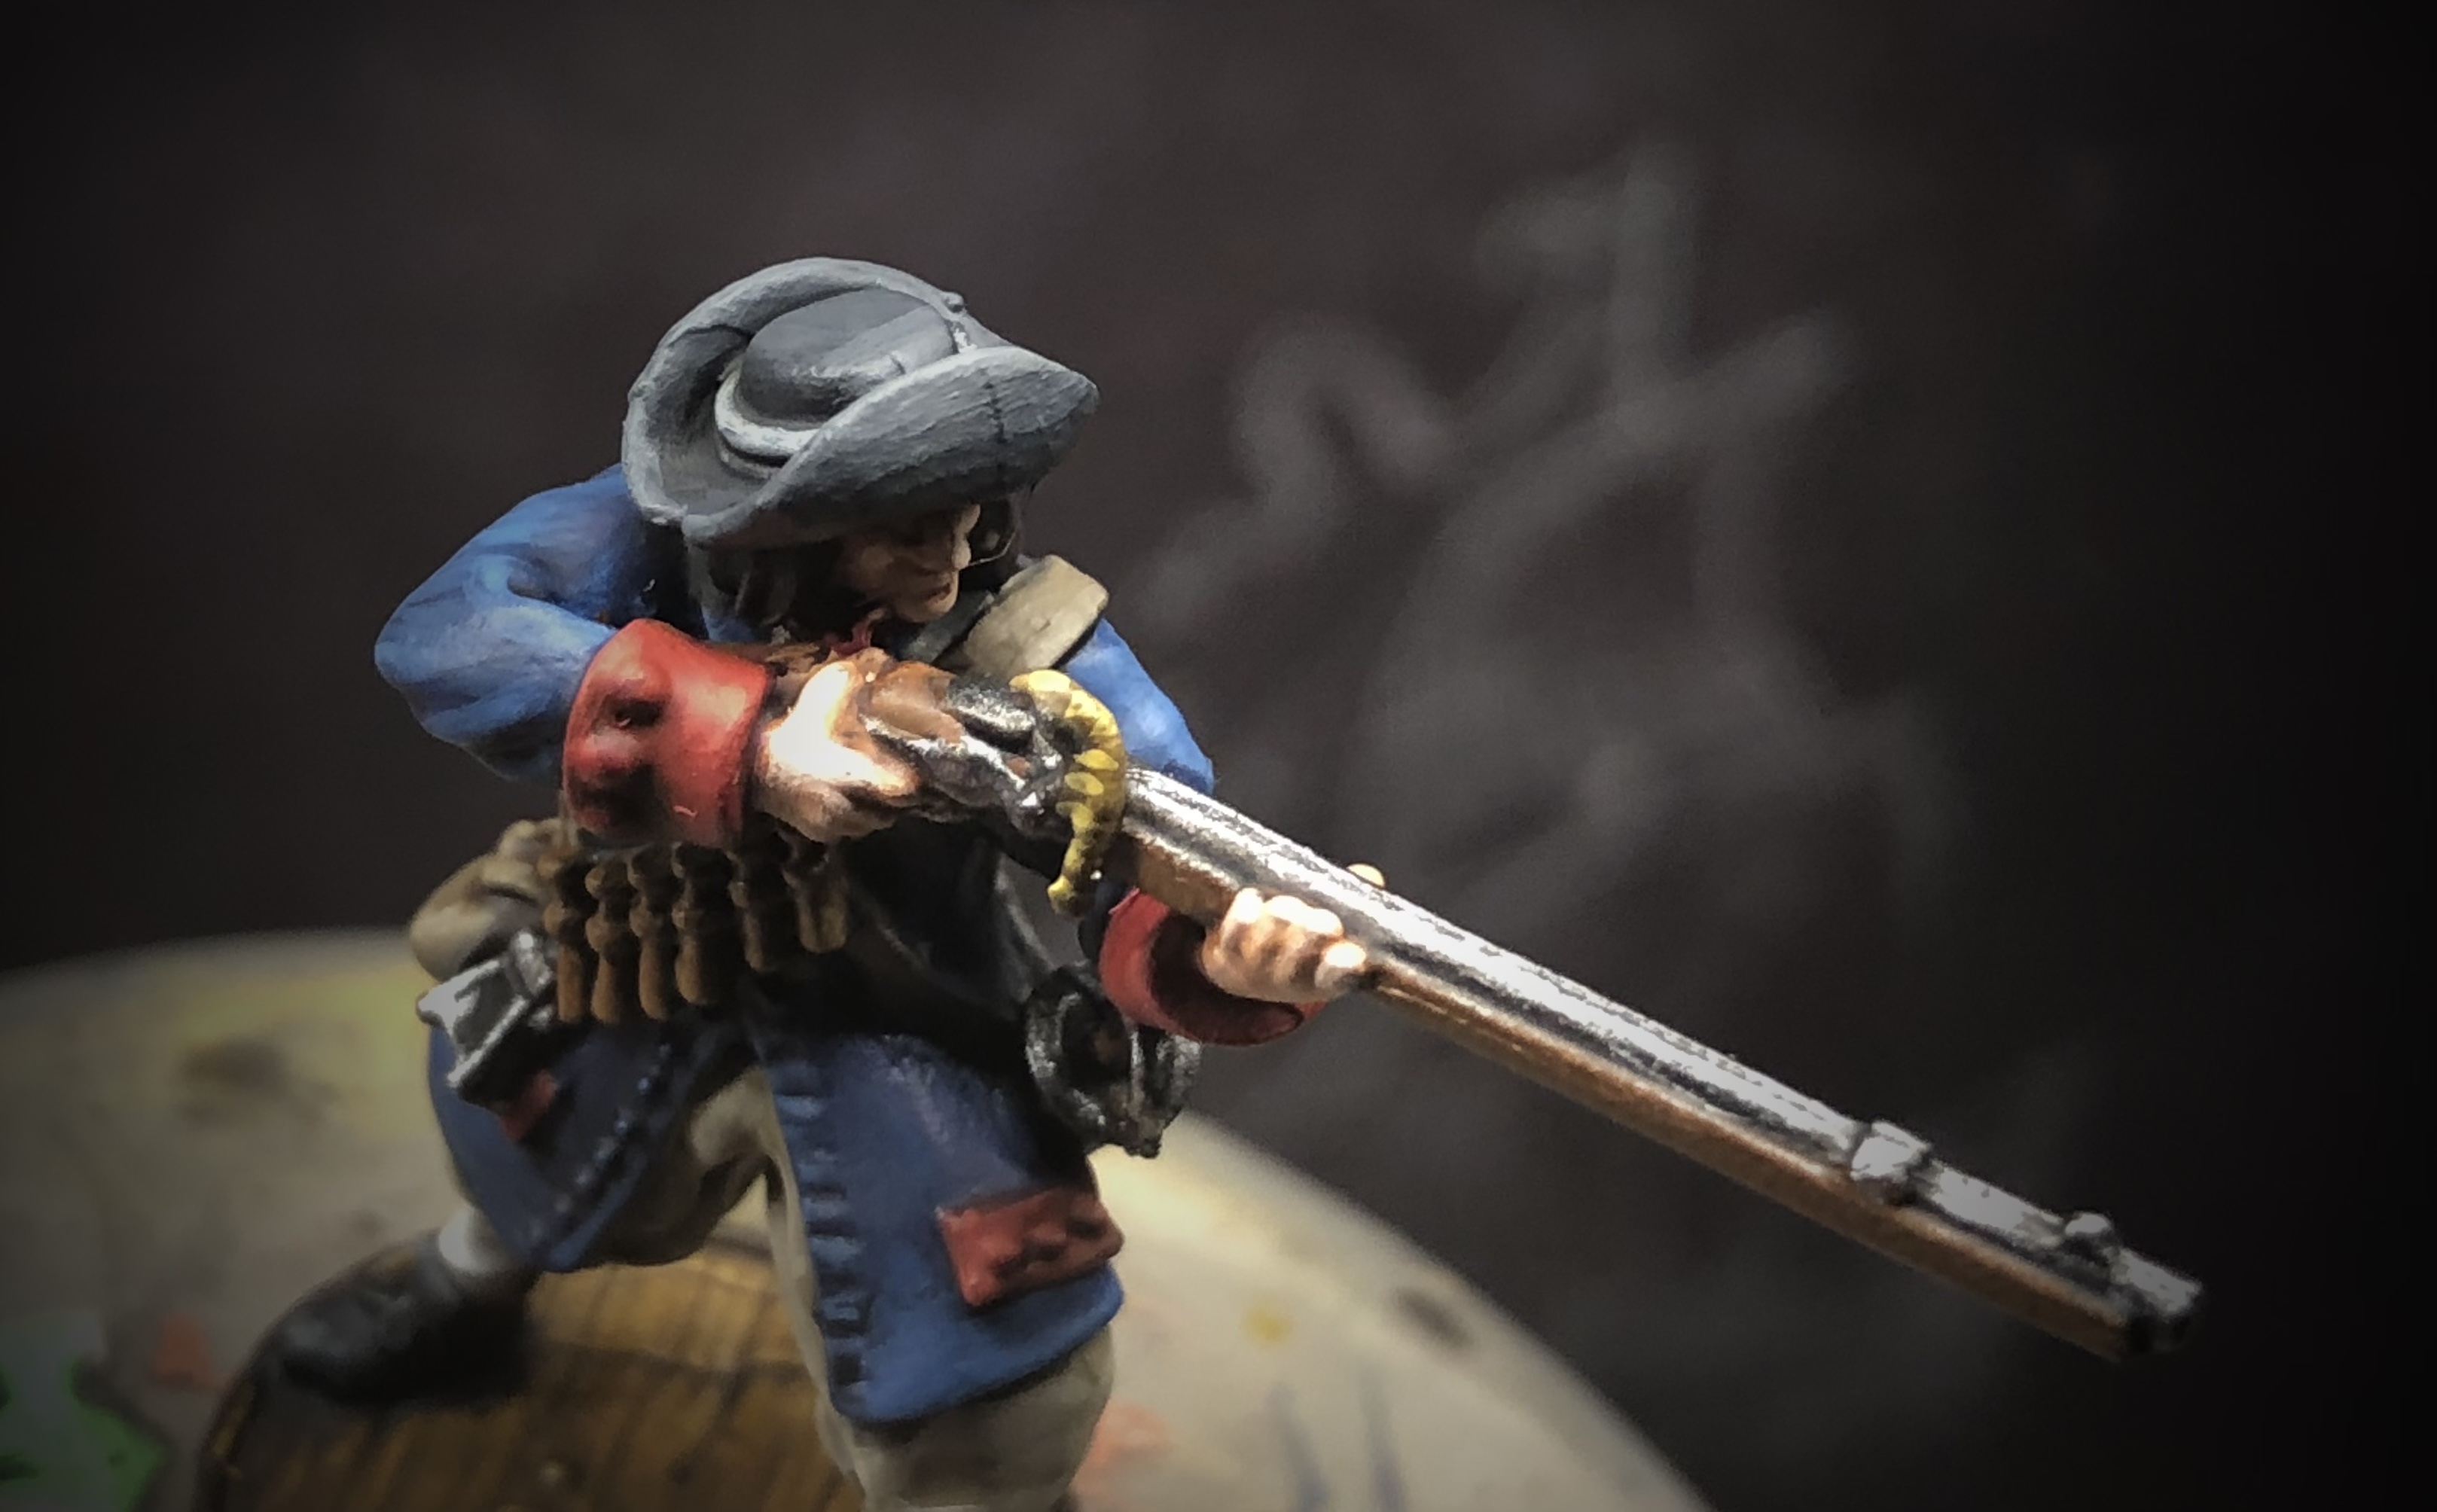
Again, you could be finished at this stage and spray them with a protective coat and be done. I’m going to on to do some highlighting to boost the contrast and this is where I think miniatures can really come to life.
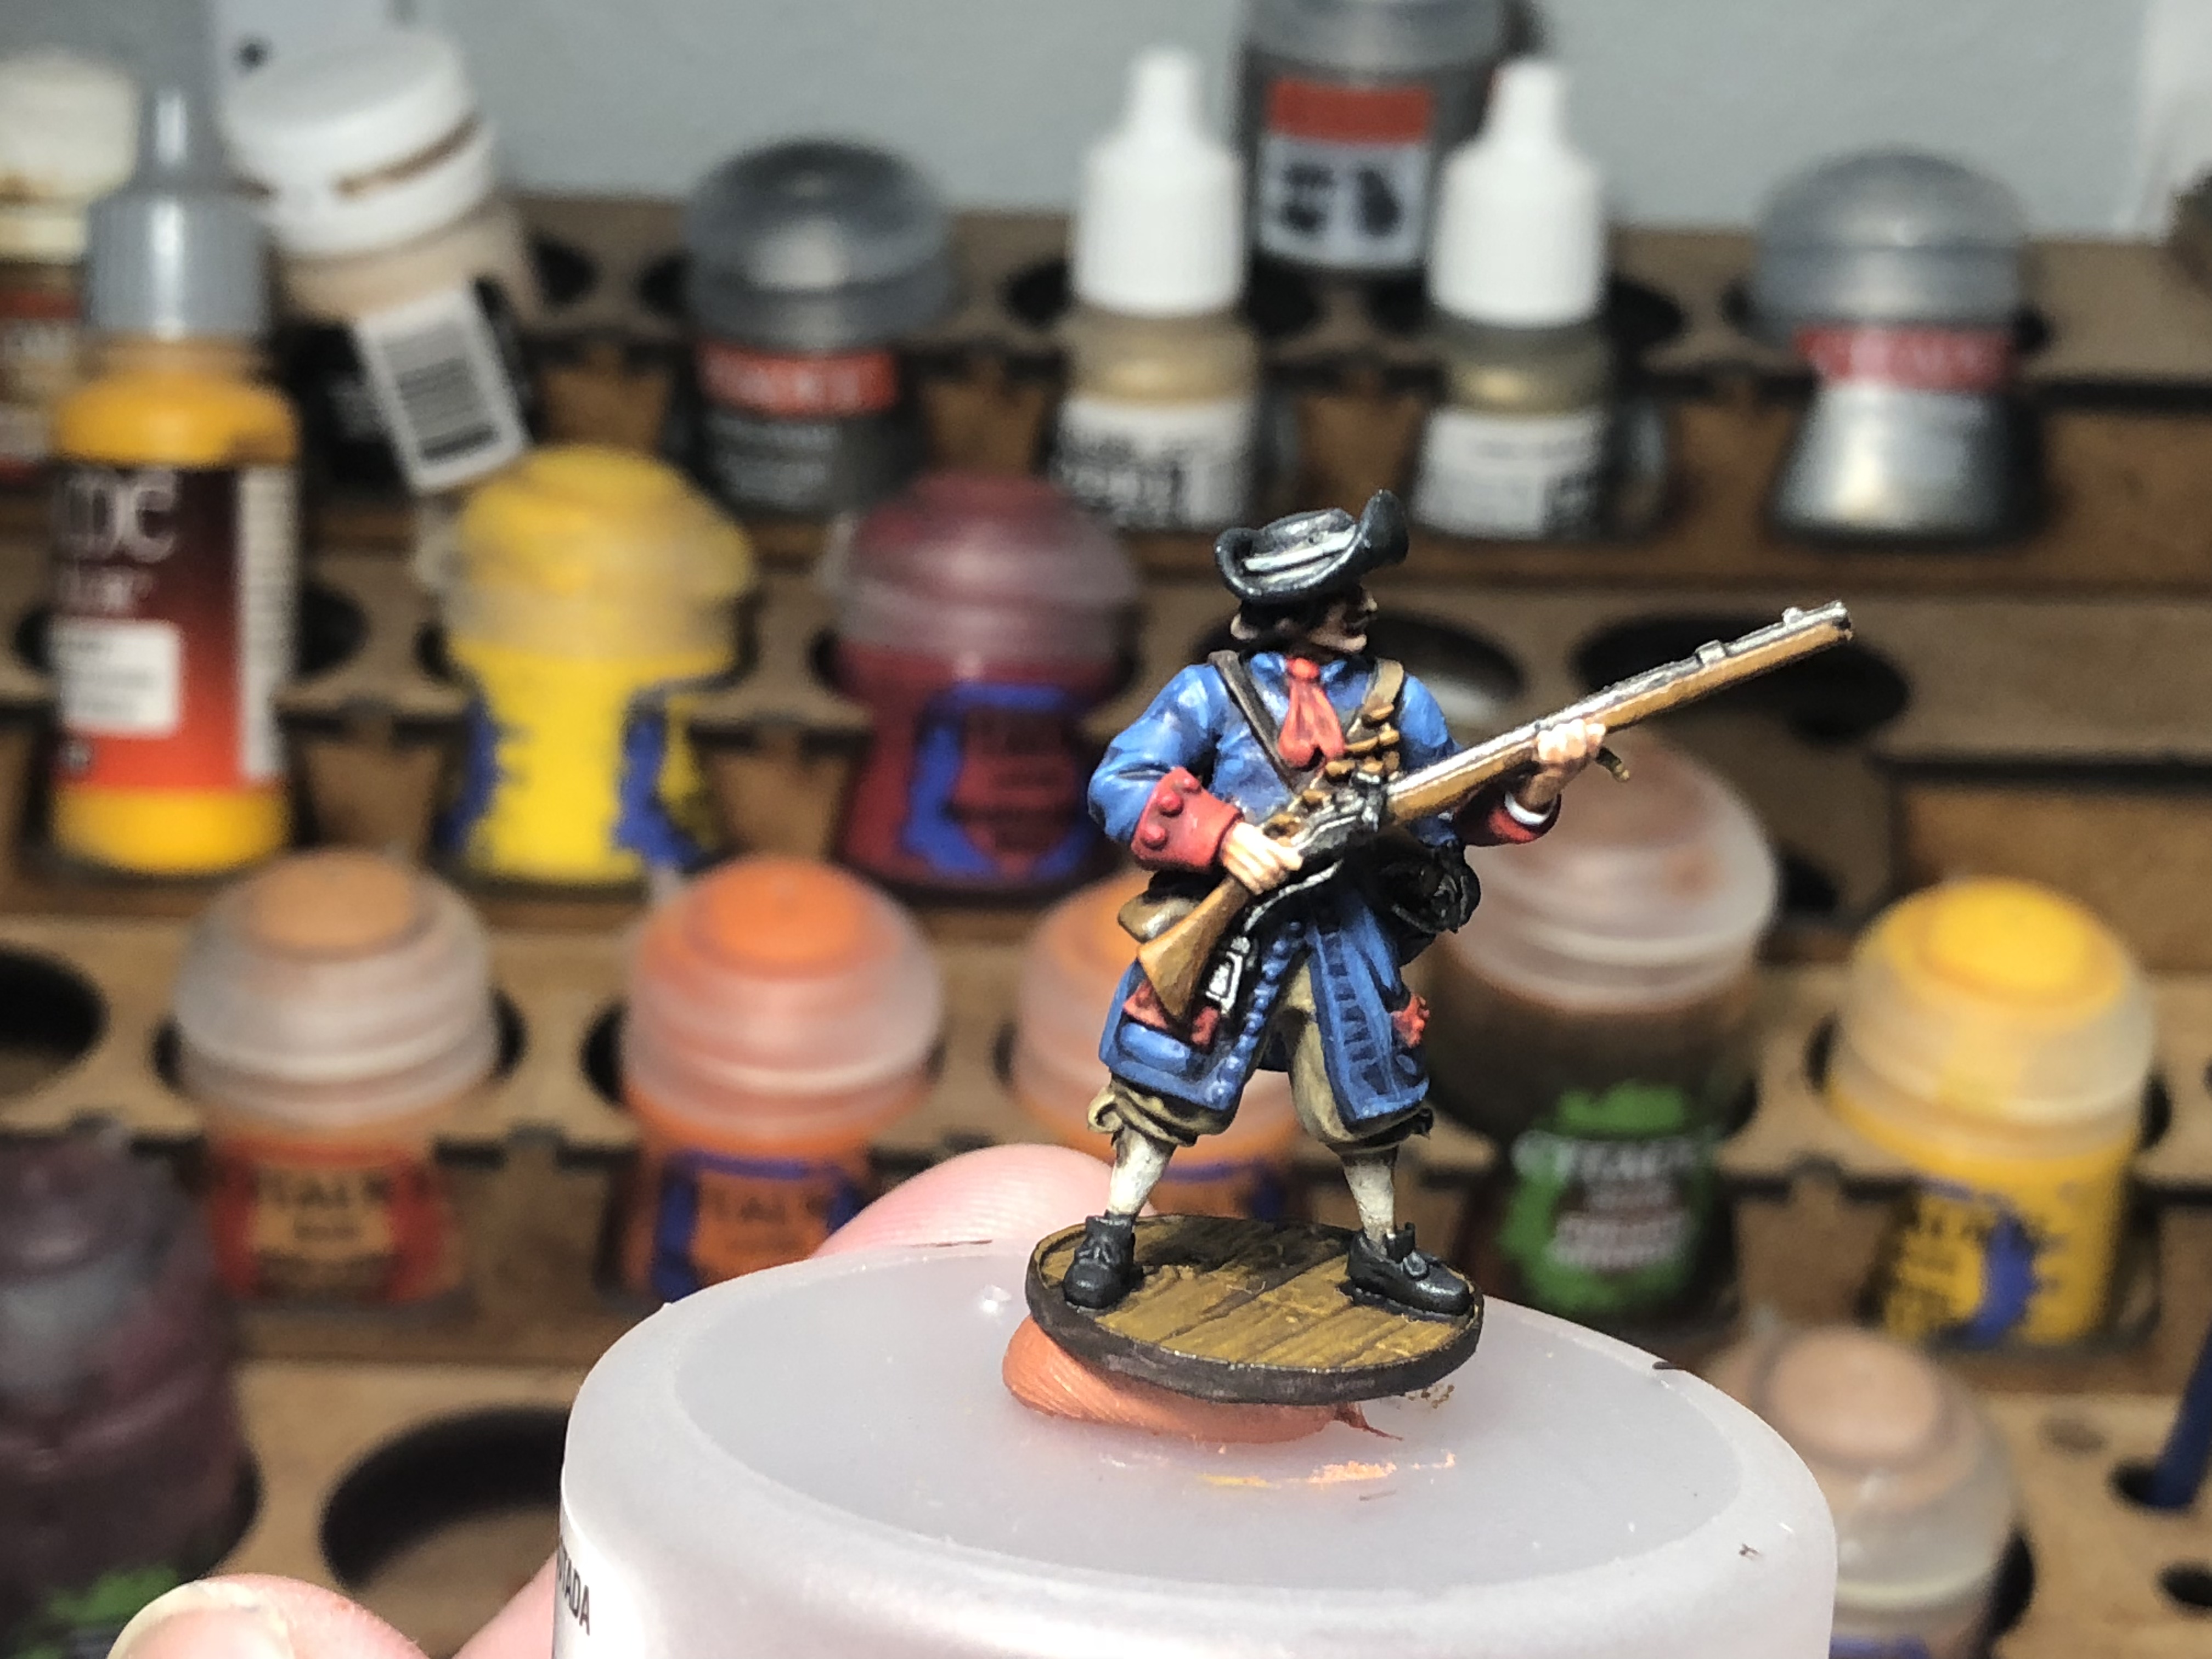
Step 4 – Highlights
This is the hardest but also most enjoyable part of painting for me. It does take some extra time, patience and paint, but if you take the time, the final product will be eye-catching and lifelike.
In this step we will be using lighter versions of our base tones to highlight the raised portions of the mini to mimic how light and shadow hit objects. You can either mix these variations in tone yourself, or use many different paint colors (as I will do).
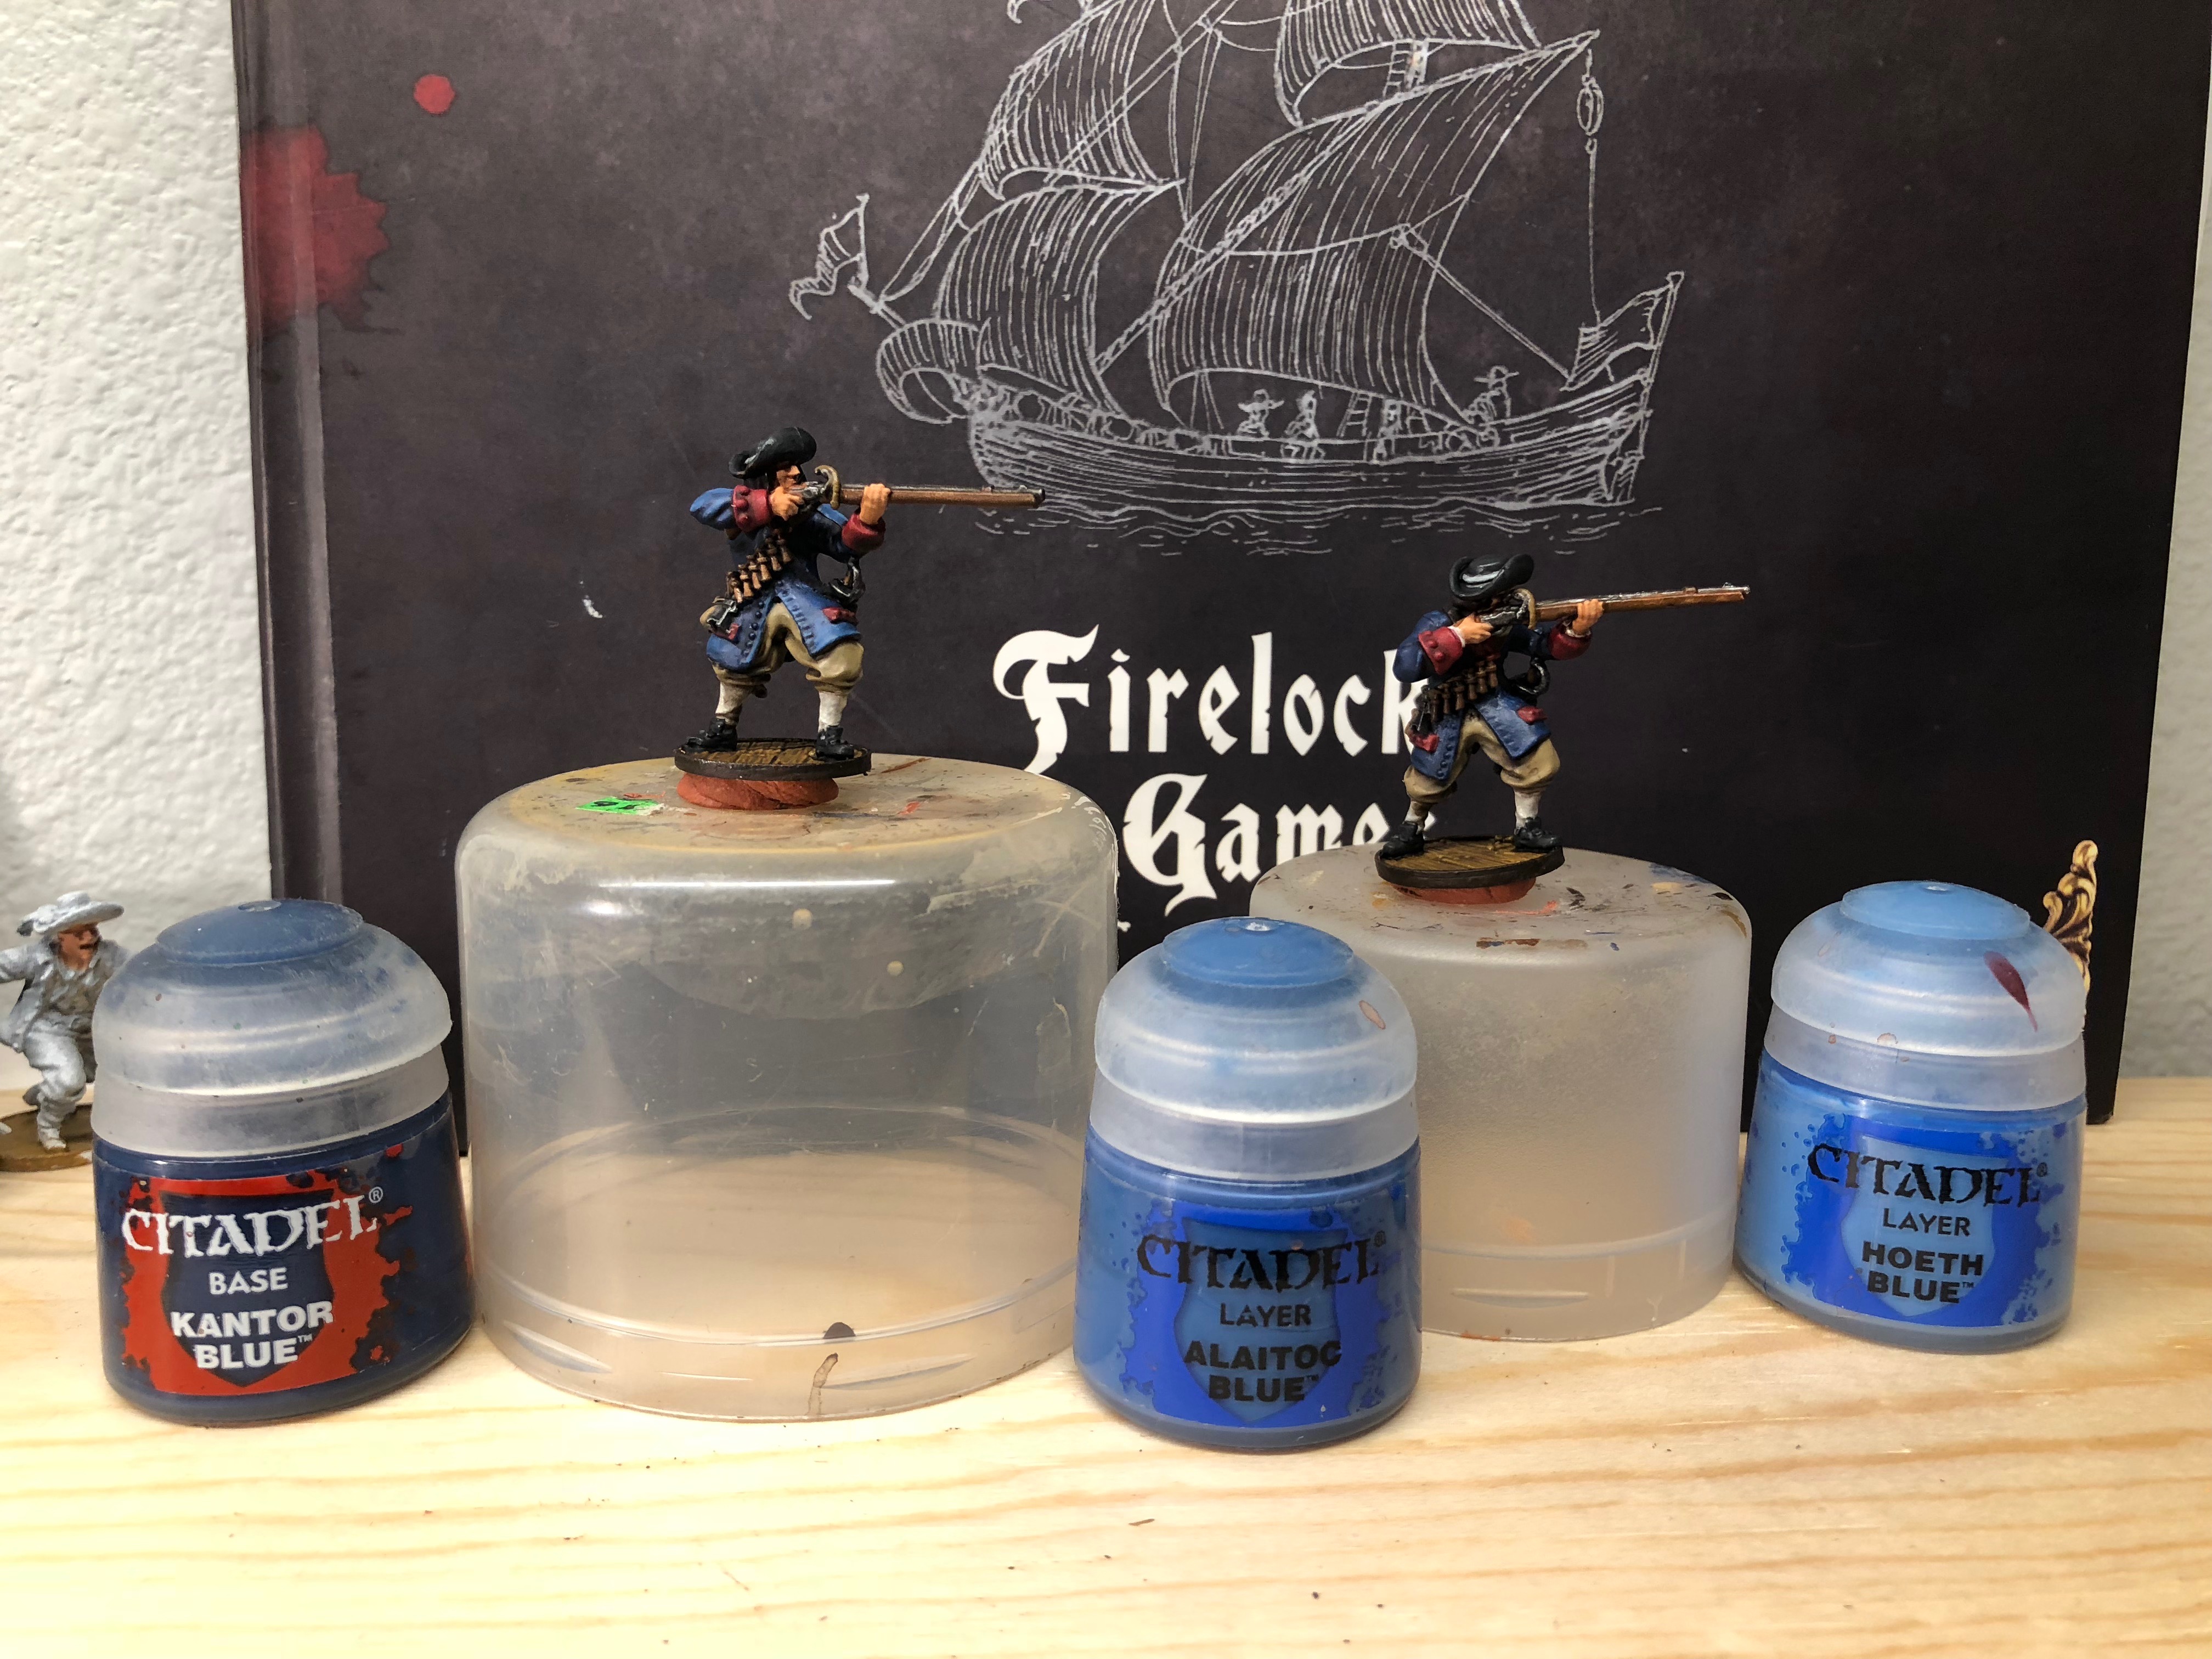
I’ll start with the blue coat. I’m going to use 3 different shades of blue. To keep the transitions between the different shades smooth, I’m going to move a large brush full of each blue to my wet pallet, and blend where the paints meets so I have a smooth spectrum of blue going from the base Kantor Blue to medium tone of Alaitoc Blue to the lightest Hoeth Blue.
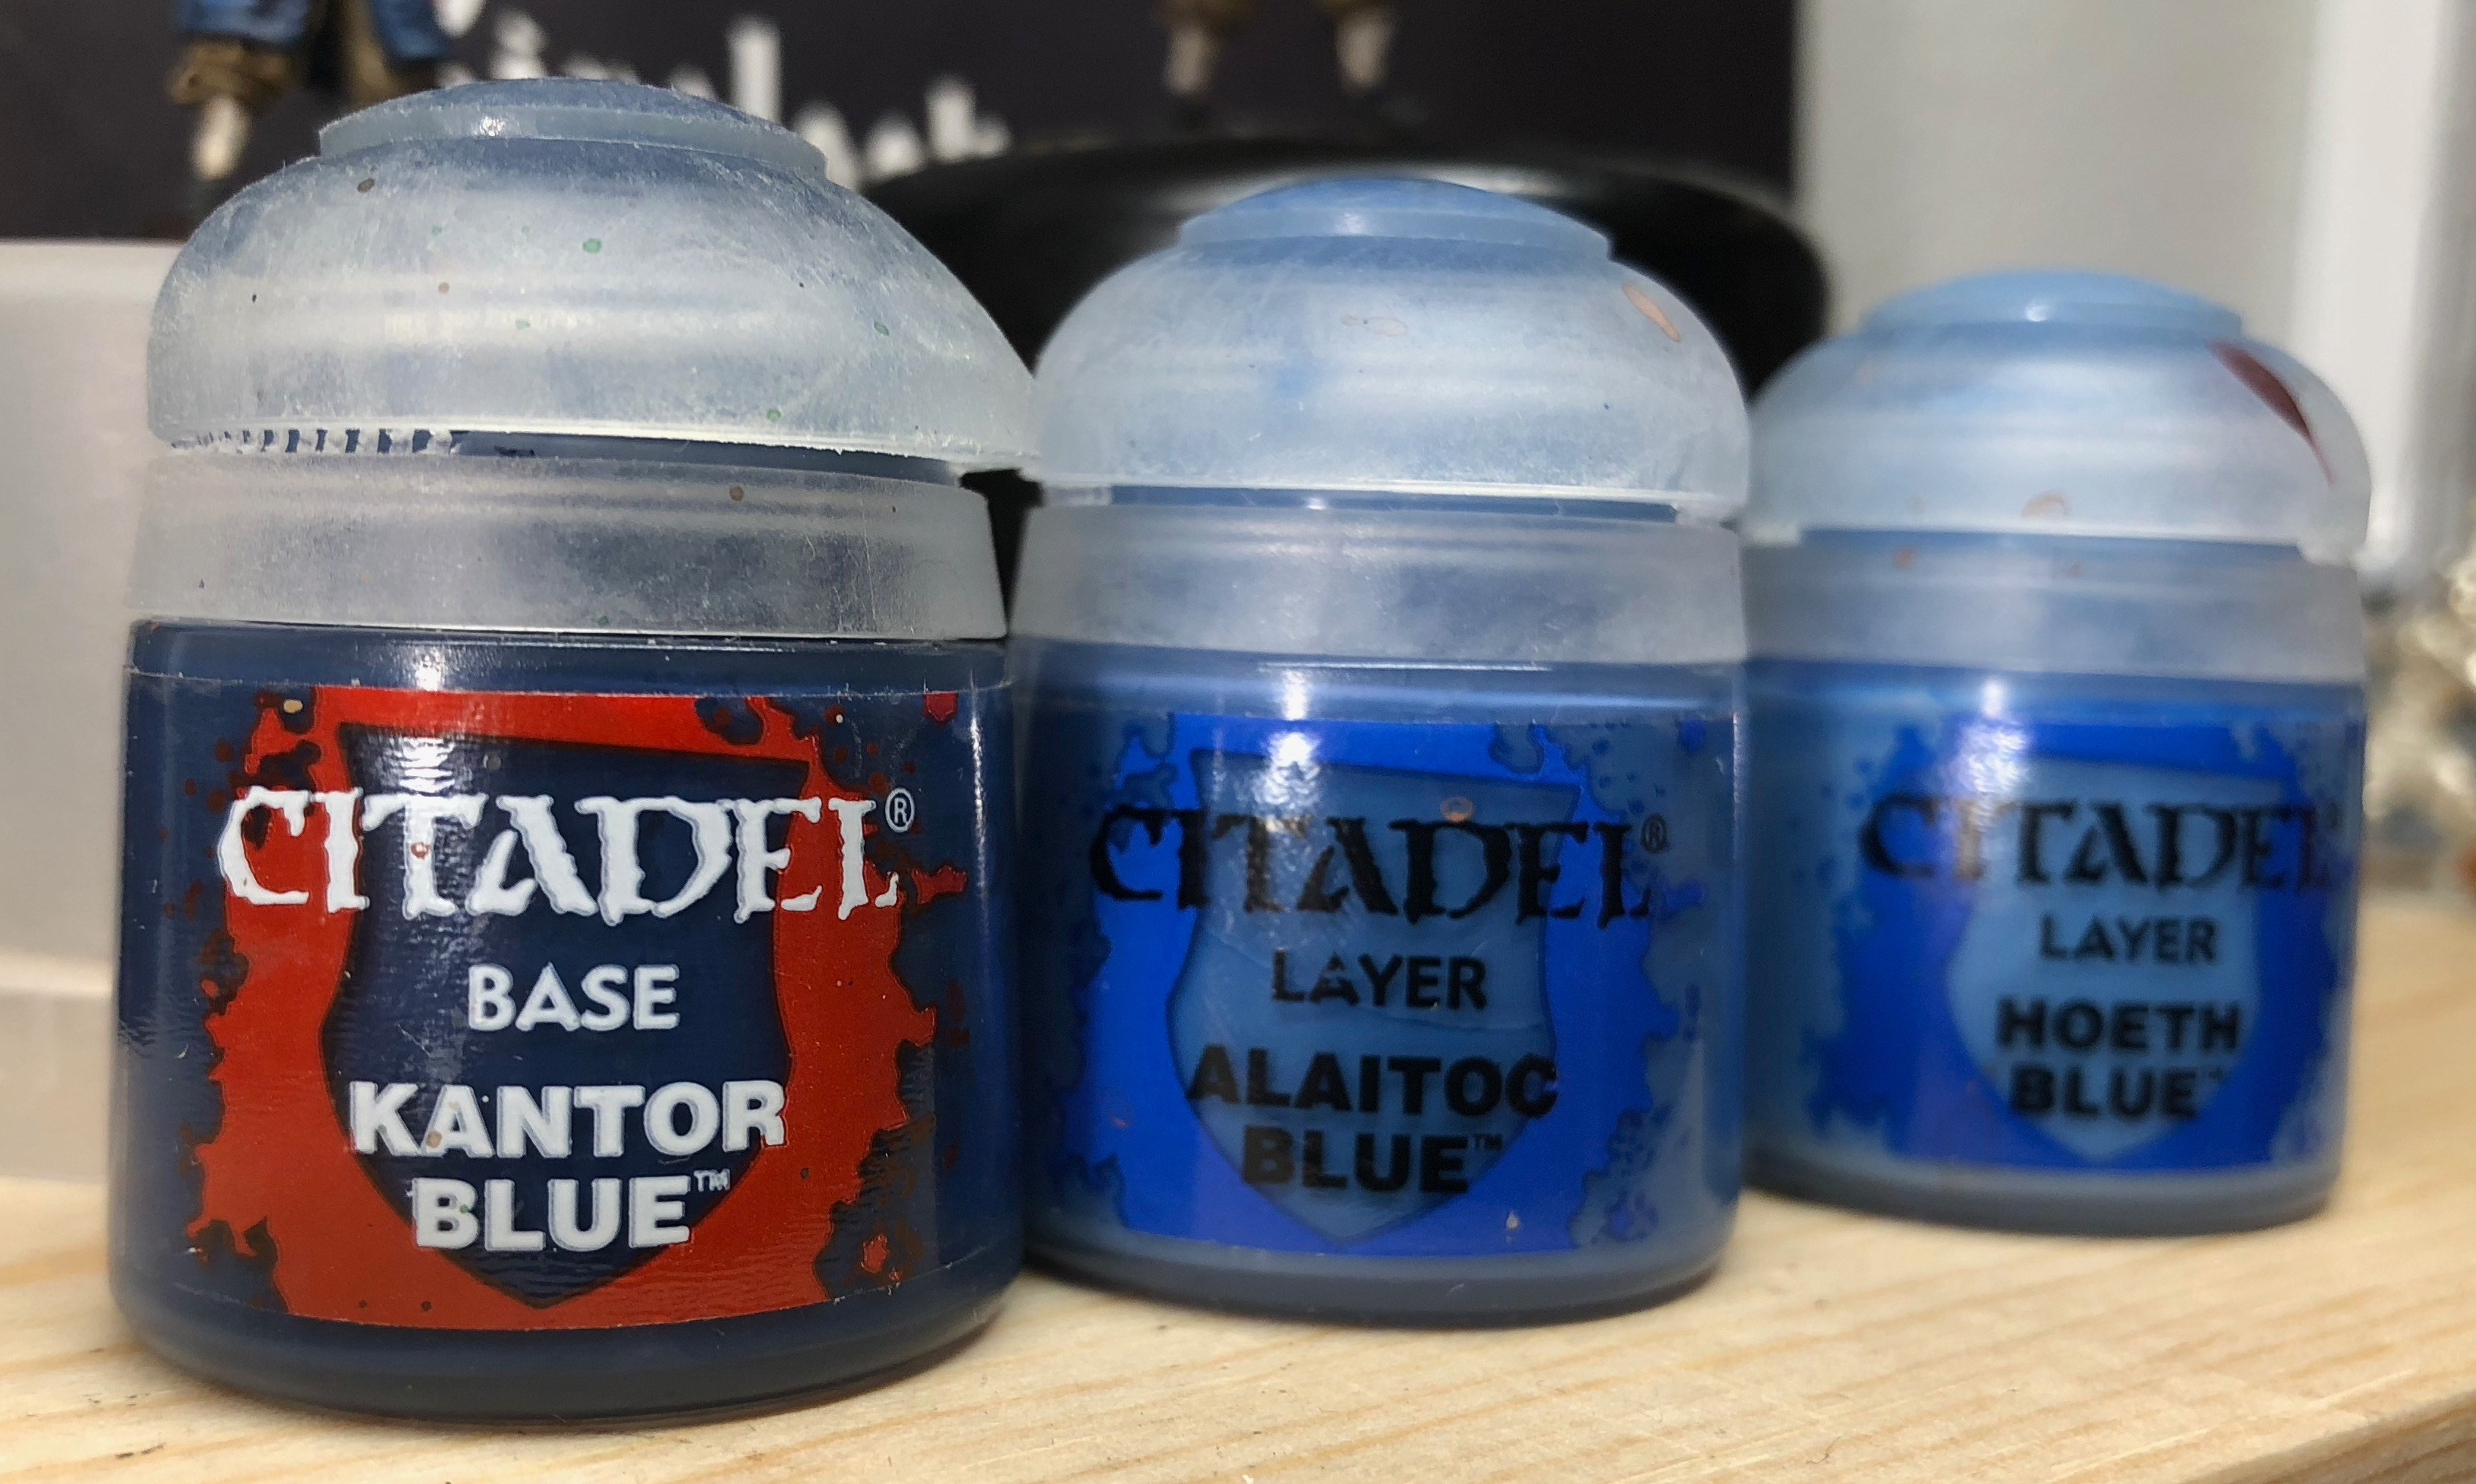 Our three shades of blue for the coat.
A wet pallet isn’t necessary for this process but it really helps. You can just move from one paint pot to the next, but this way you can blend the tones and get nice smooth transitions without jarring lines.
I’m going to first reapply my base of Kantor Blue to most of the blue areas, leaving the the parts that would naturally collect shadow shaded with the wash. Then I’ll move to the medium Alaitoc Blue and cover all the raise areas that would catch most of the light hitting the coat. Last I’ll use the lightest Hoeth Blue to highlight the most prominent parts like the wrinkles in the sleeves, the edges of the front and the very top of the shoulders.
Next I’ll go through the same process for the red areas, using 3 different colors of red: Mephiston, Evil Sunz Scarlet and Wild Rider Red. The pocket trim isn’t super important but you can really bring out some depth in the cravat and cuffs with some careful highlighting.

The true colors aren’t coming through really well in this picture, but the red should be getting lighter and more orange, but not pink.
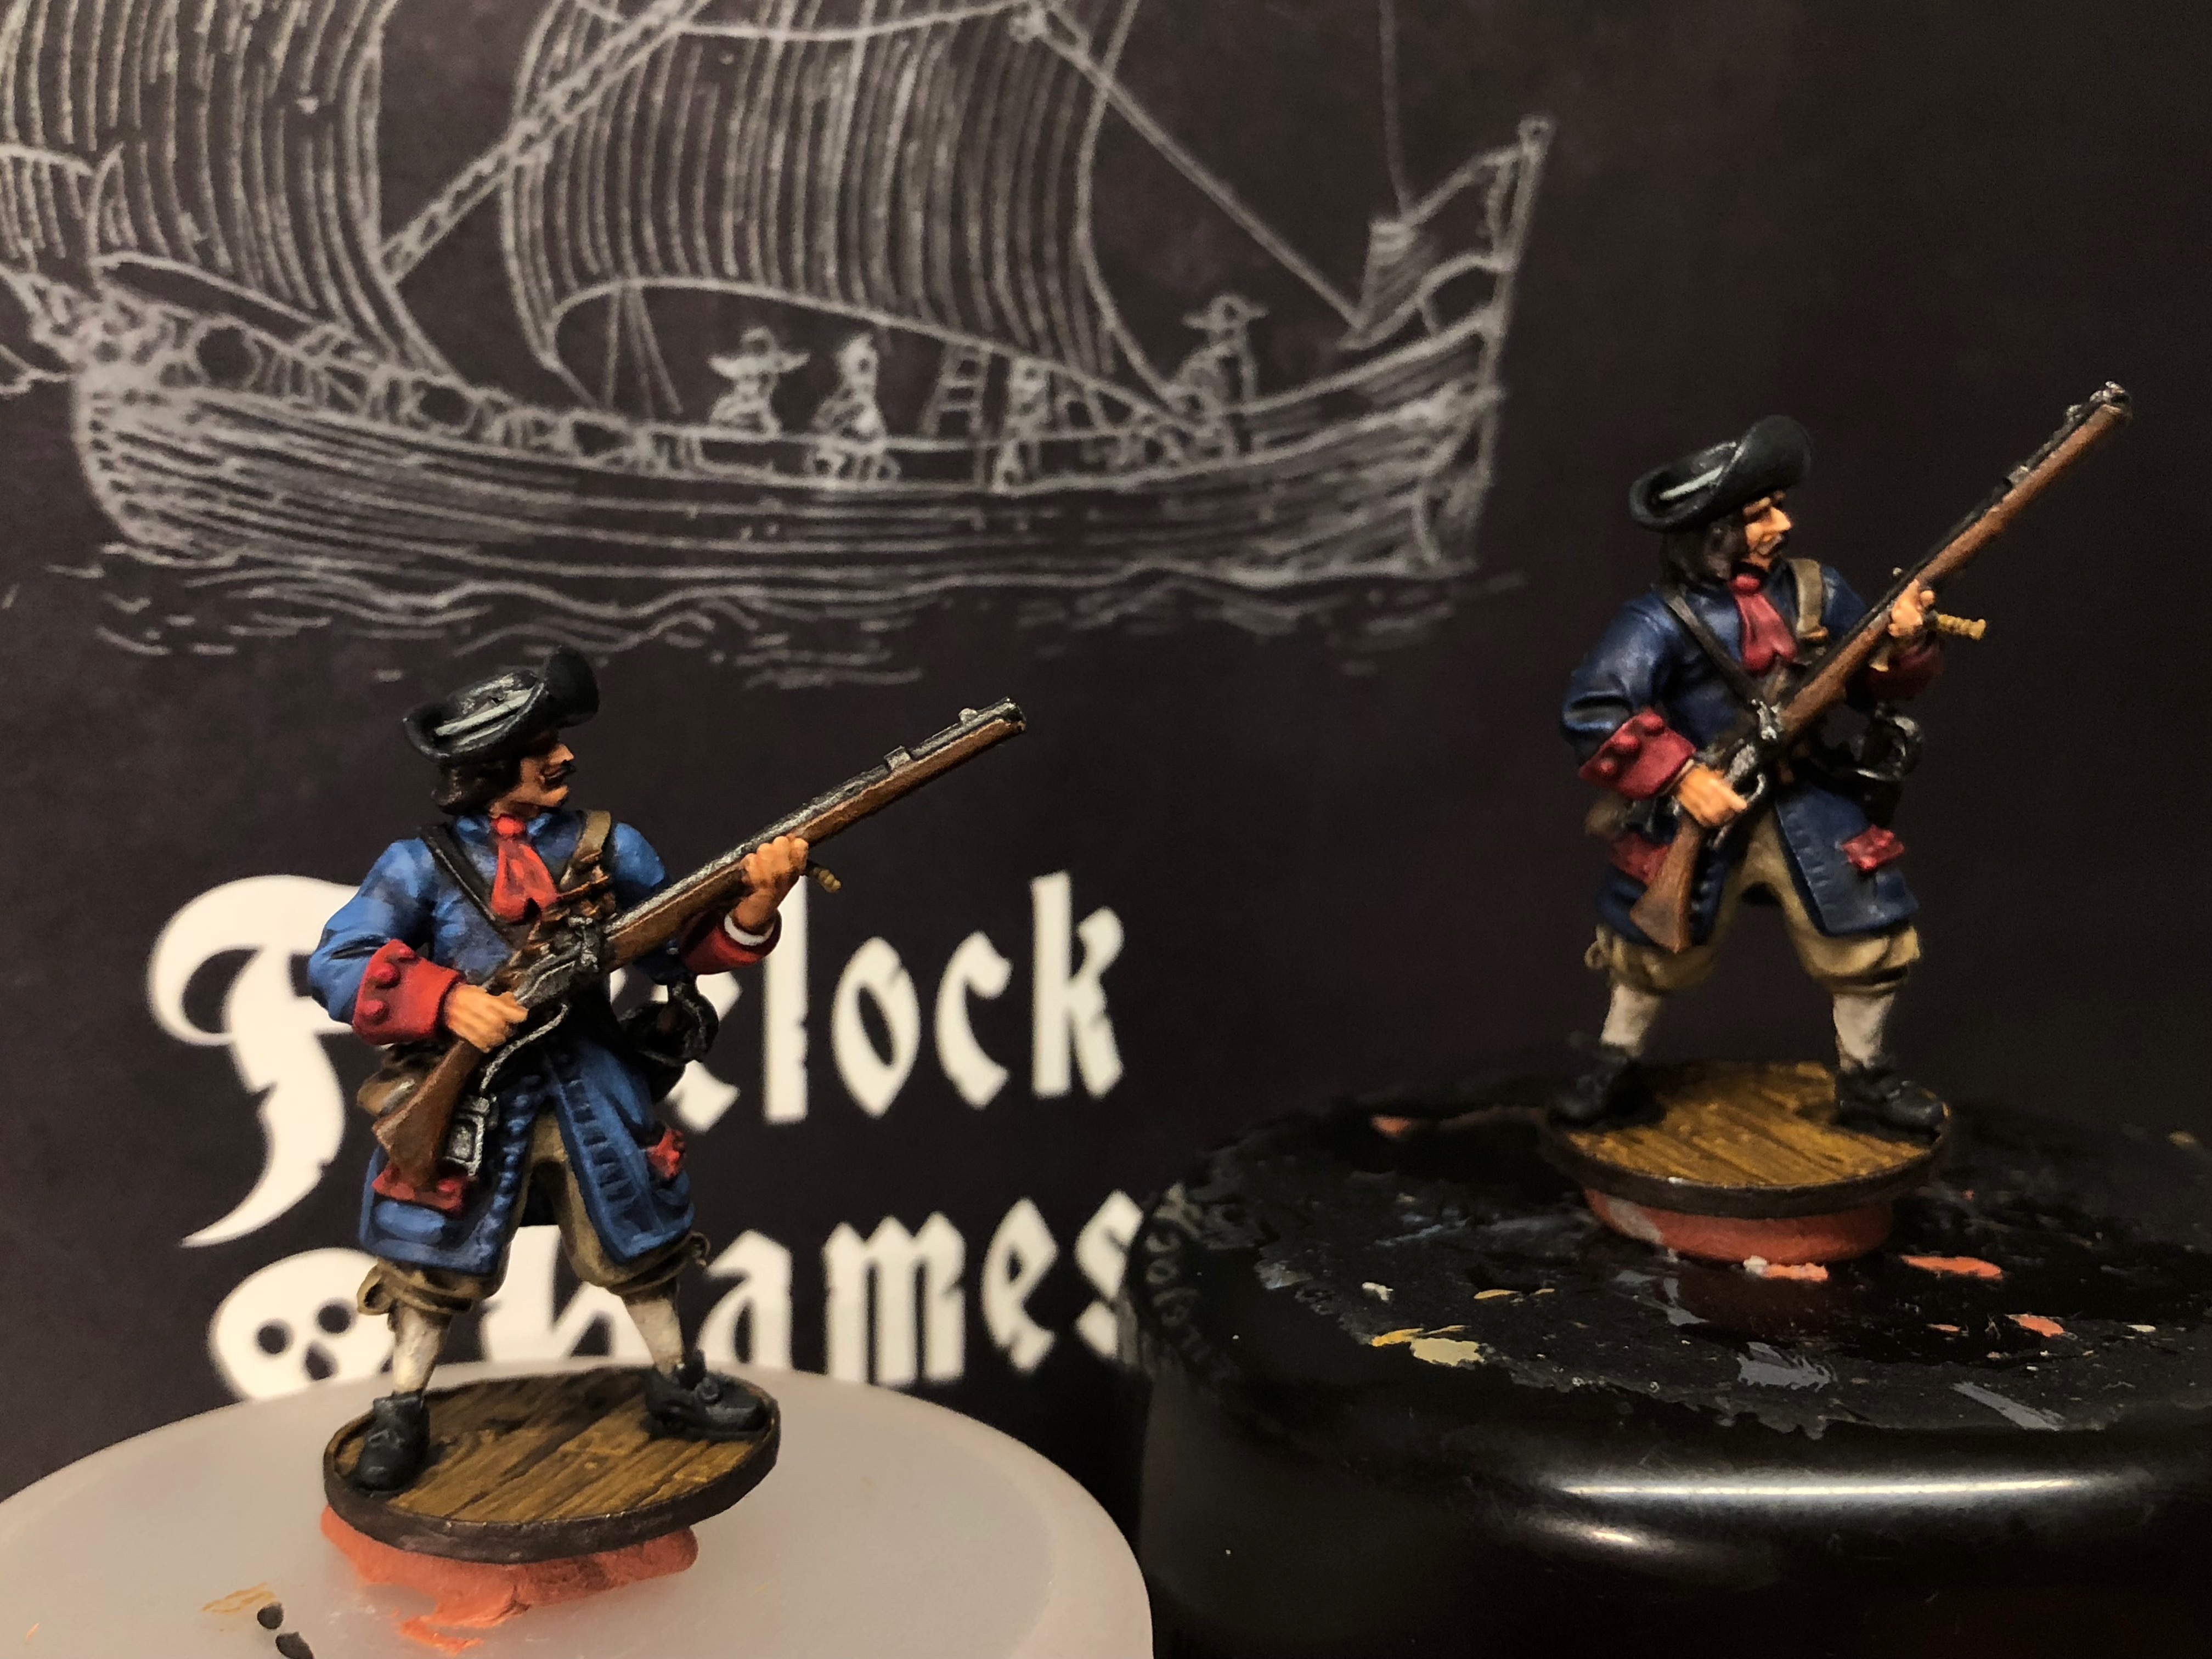
Reds and blues highlighted on the L and just washed on the R.
Next I’ll paint the eyes and highlight the skin. Carefully apply a horizontal sliver of Vallejo Ivory to the eye socket and then a dot or vertical sliver of German Grey for the pupil. This is the time to use your smallest brush! I use a Windsor & Newton Series 7 size 0 for this job.

Eyes aren’t necessary and it’s easy to make “googly eyes” if you apply too much white but they really bring a model to life if done well. If you were messy with the white or made the eyes googly, you can touch up around the eye while you highlight the skin.
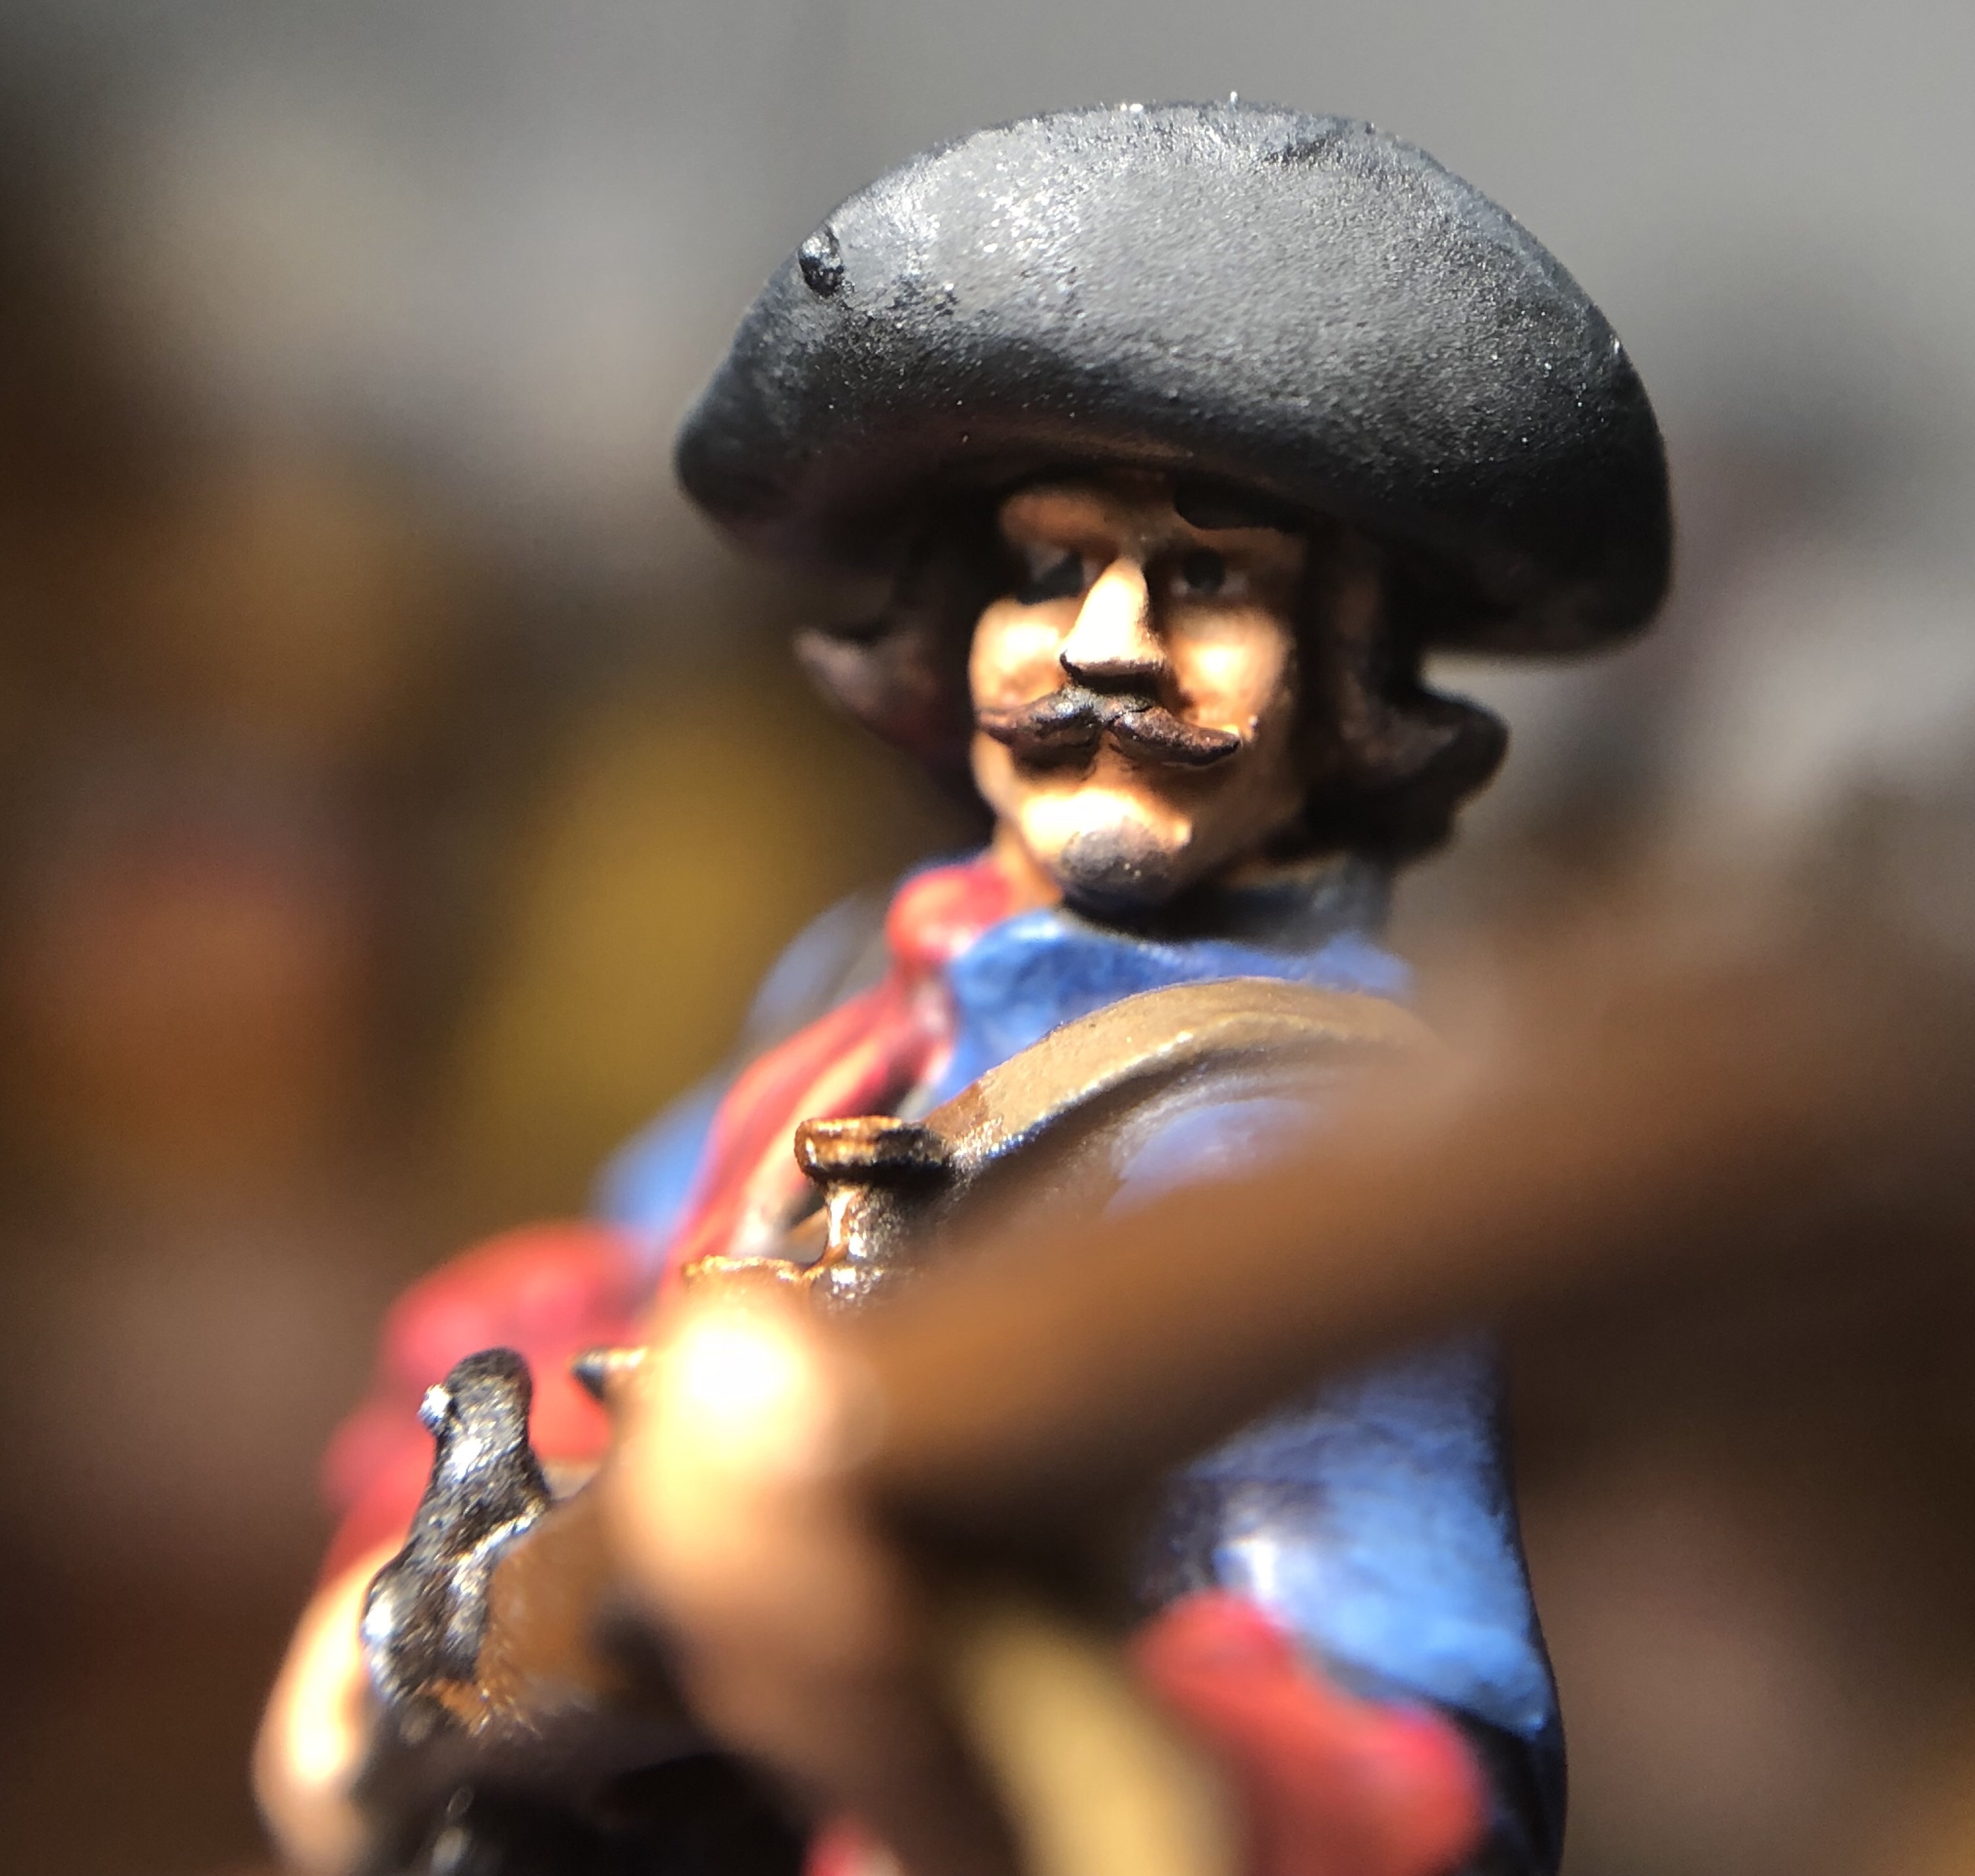
The R pupil could be smaller but it won’t be noticed on the table, so I’m leaving it as it is.
Next I’ll touch up any eye issues with the base fleshtone and highlight the hands and face with Midlund Flesh followed by a final layer of Ryn Flesh. I find the P3 paints easy to layer so I didn’t bother using my wet pallet or blending the tones for smooth transitions. I just hit the prominent areas with Midlund, then traced the fingers, put dots on the finger tips of the L hand hold the musket and hit the nose, chin and cheekbones of the face with Ryn Flesh.
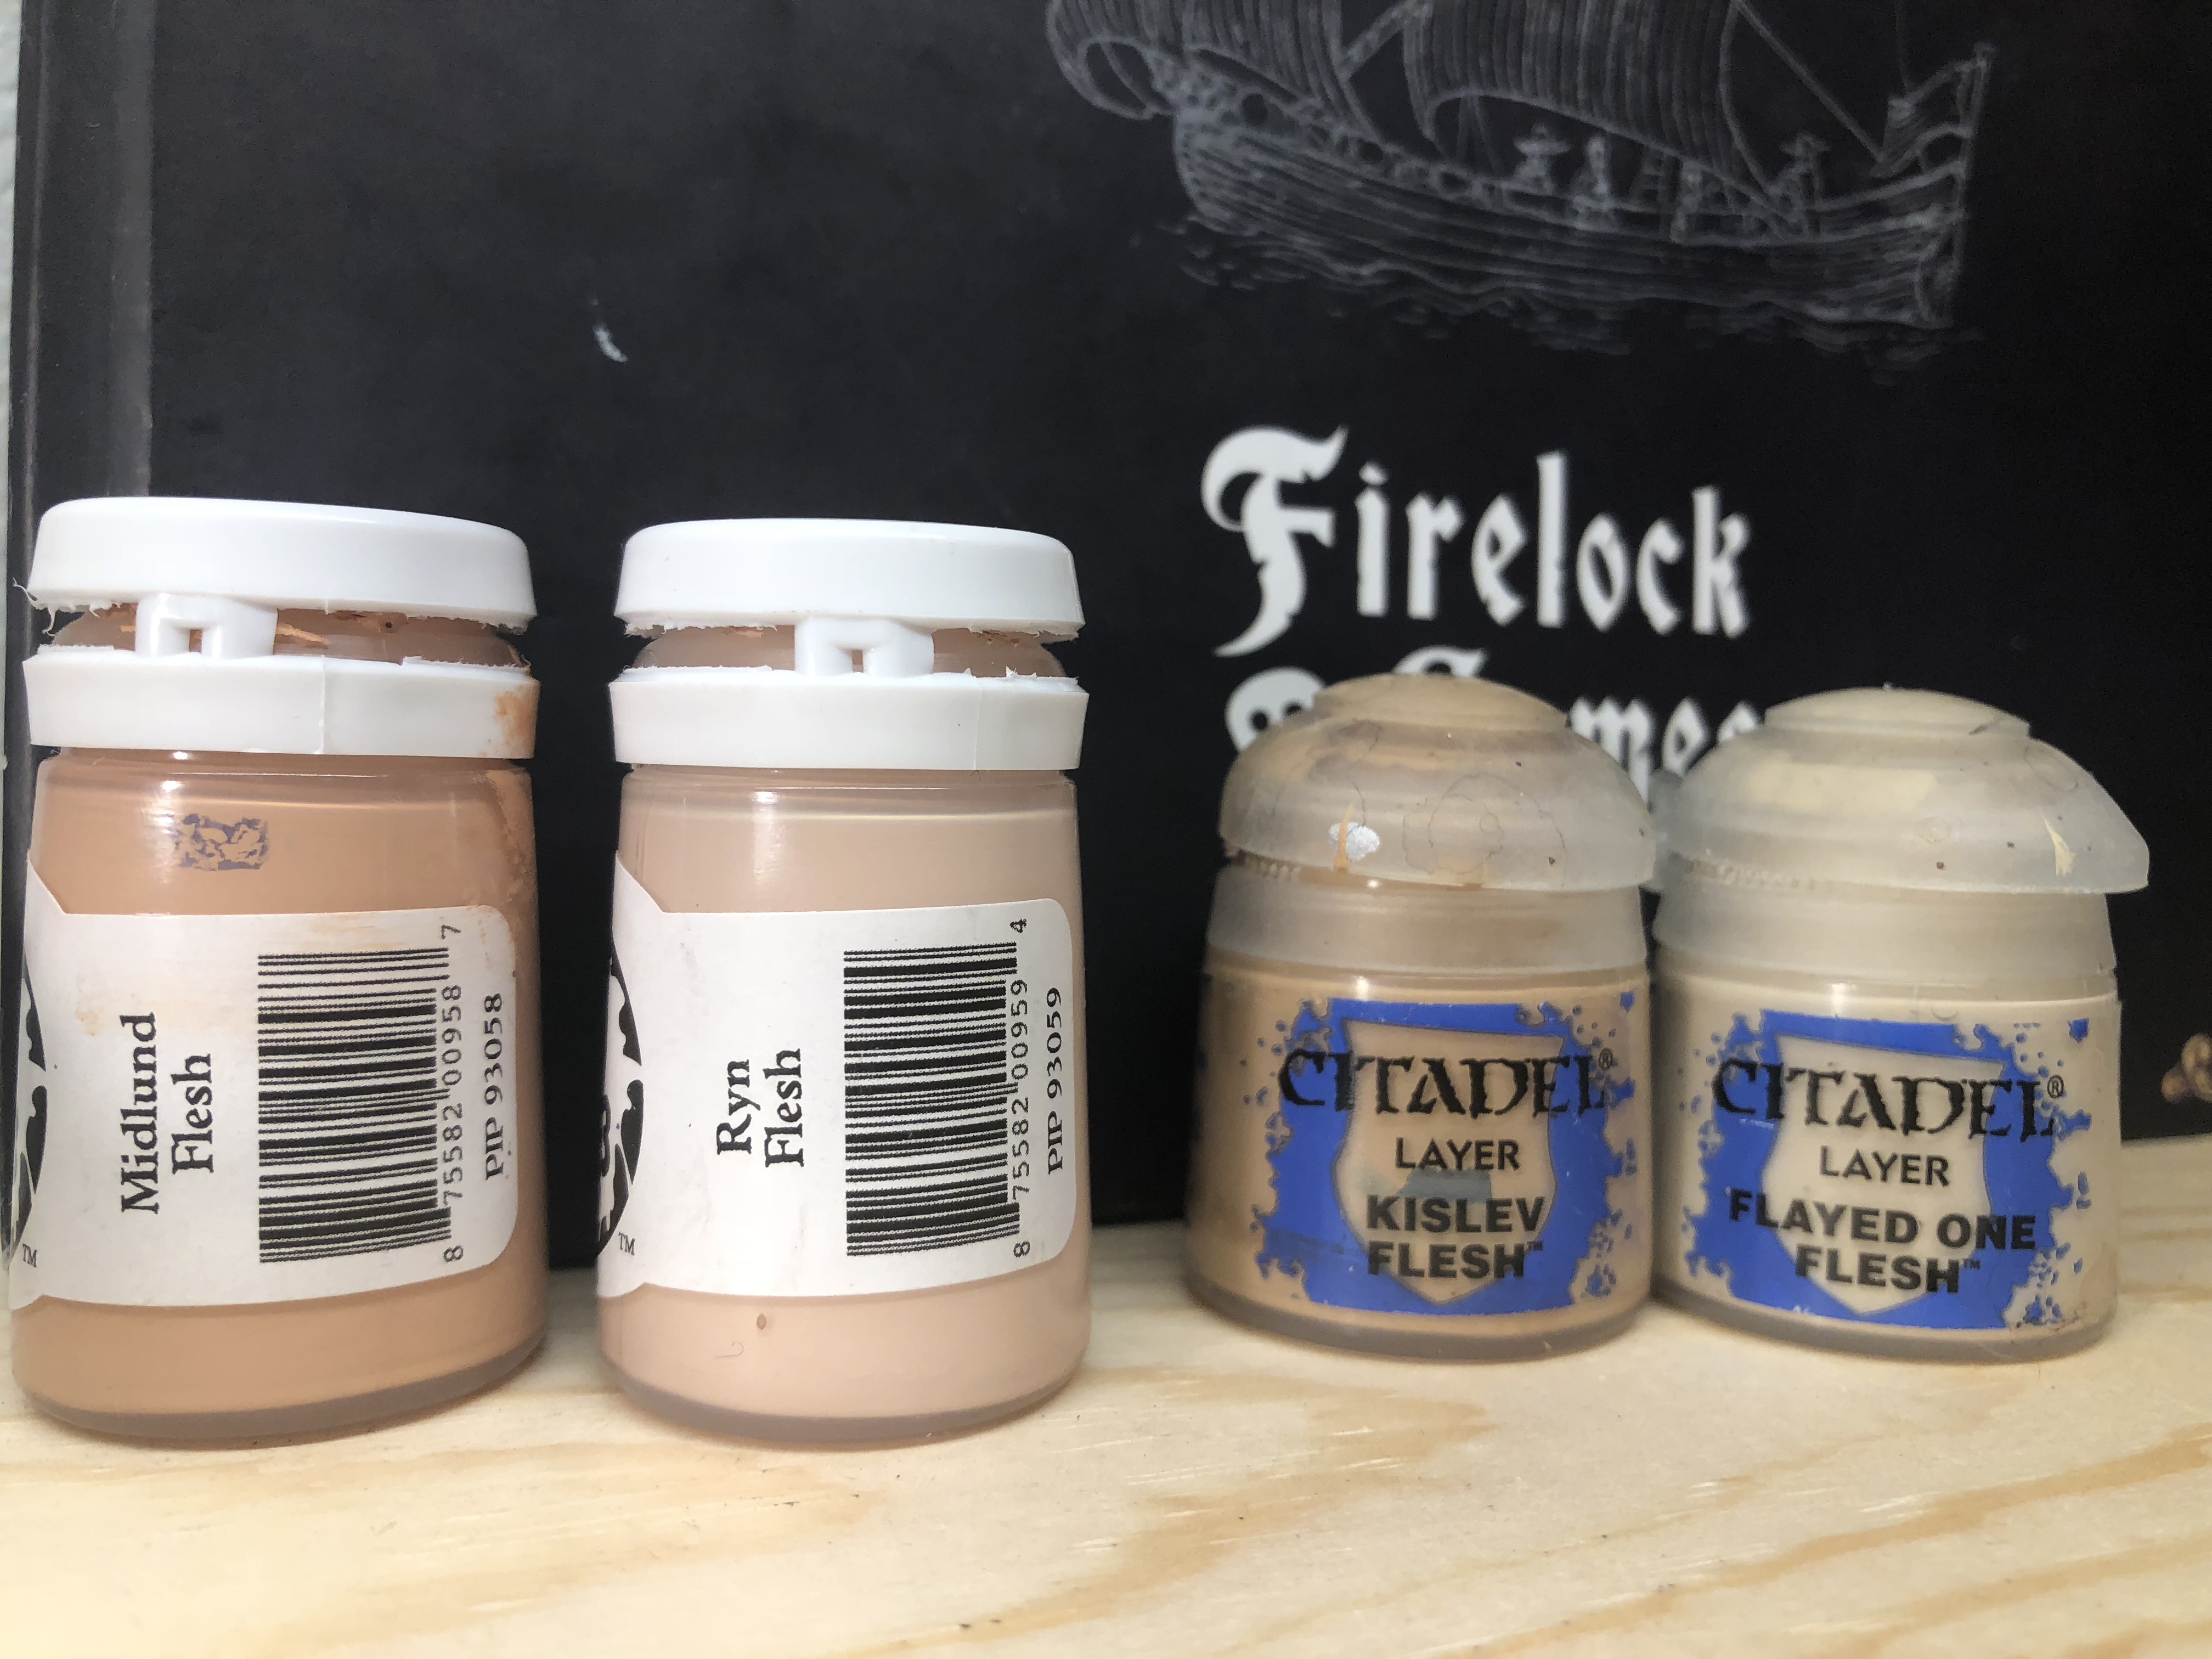
Kislev Flesh and Flayed One Flesh are roughly comparable Citadel colors.
The faces are small enough on these models that you don’t need to slave over them. It should just take a minute or two.
Just a couple highlights make that face much more interesting.
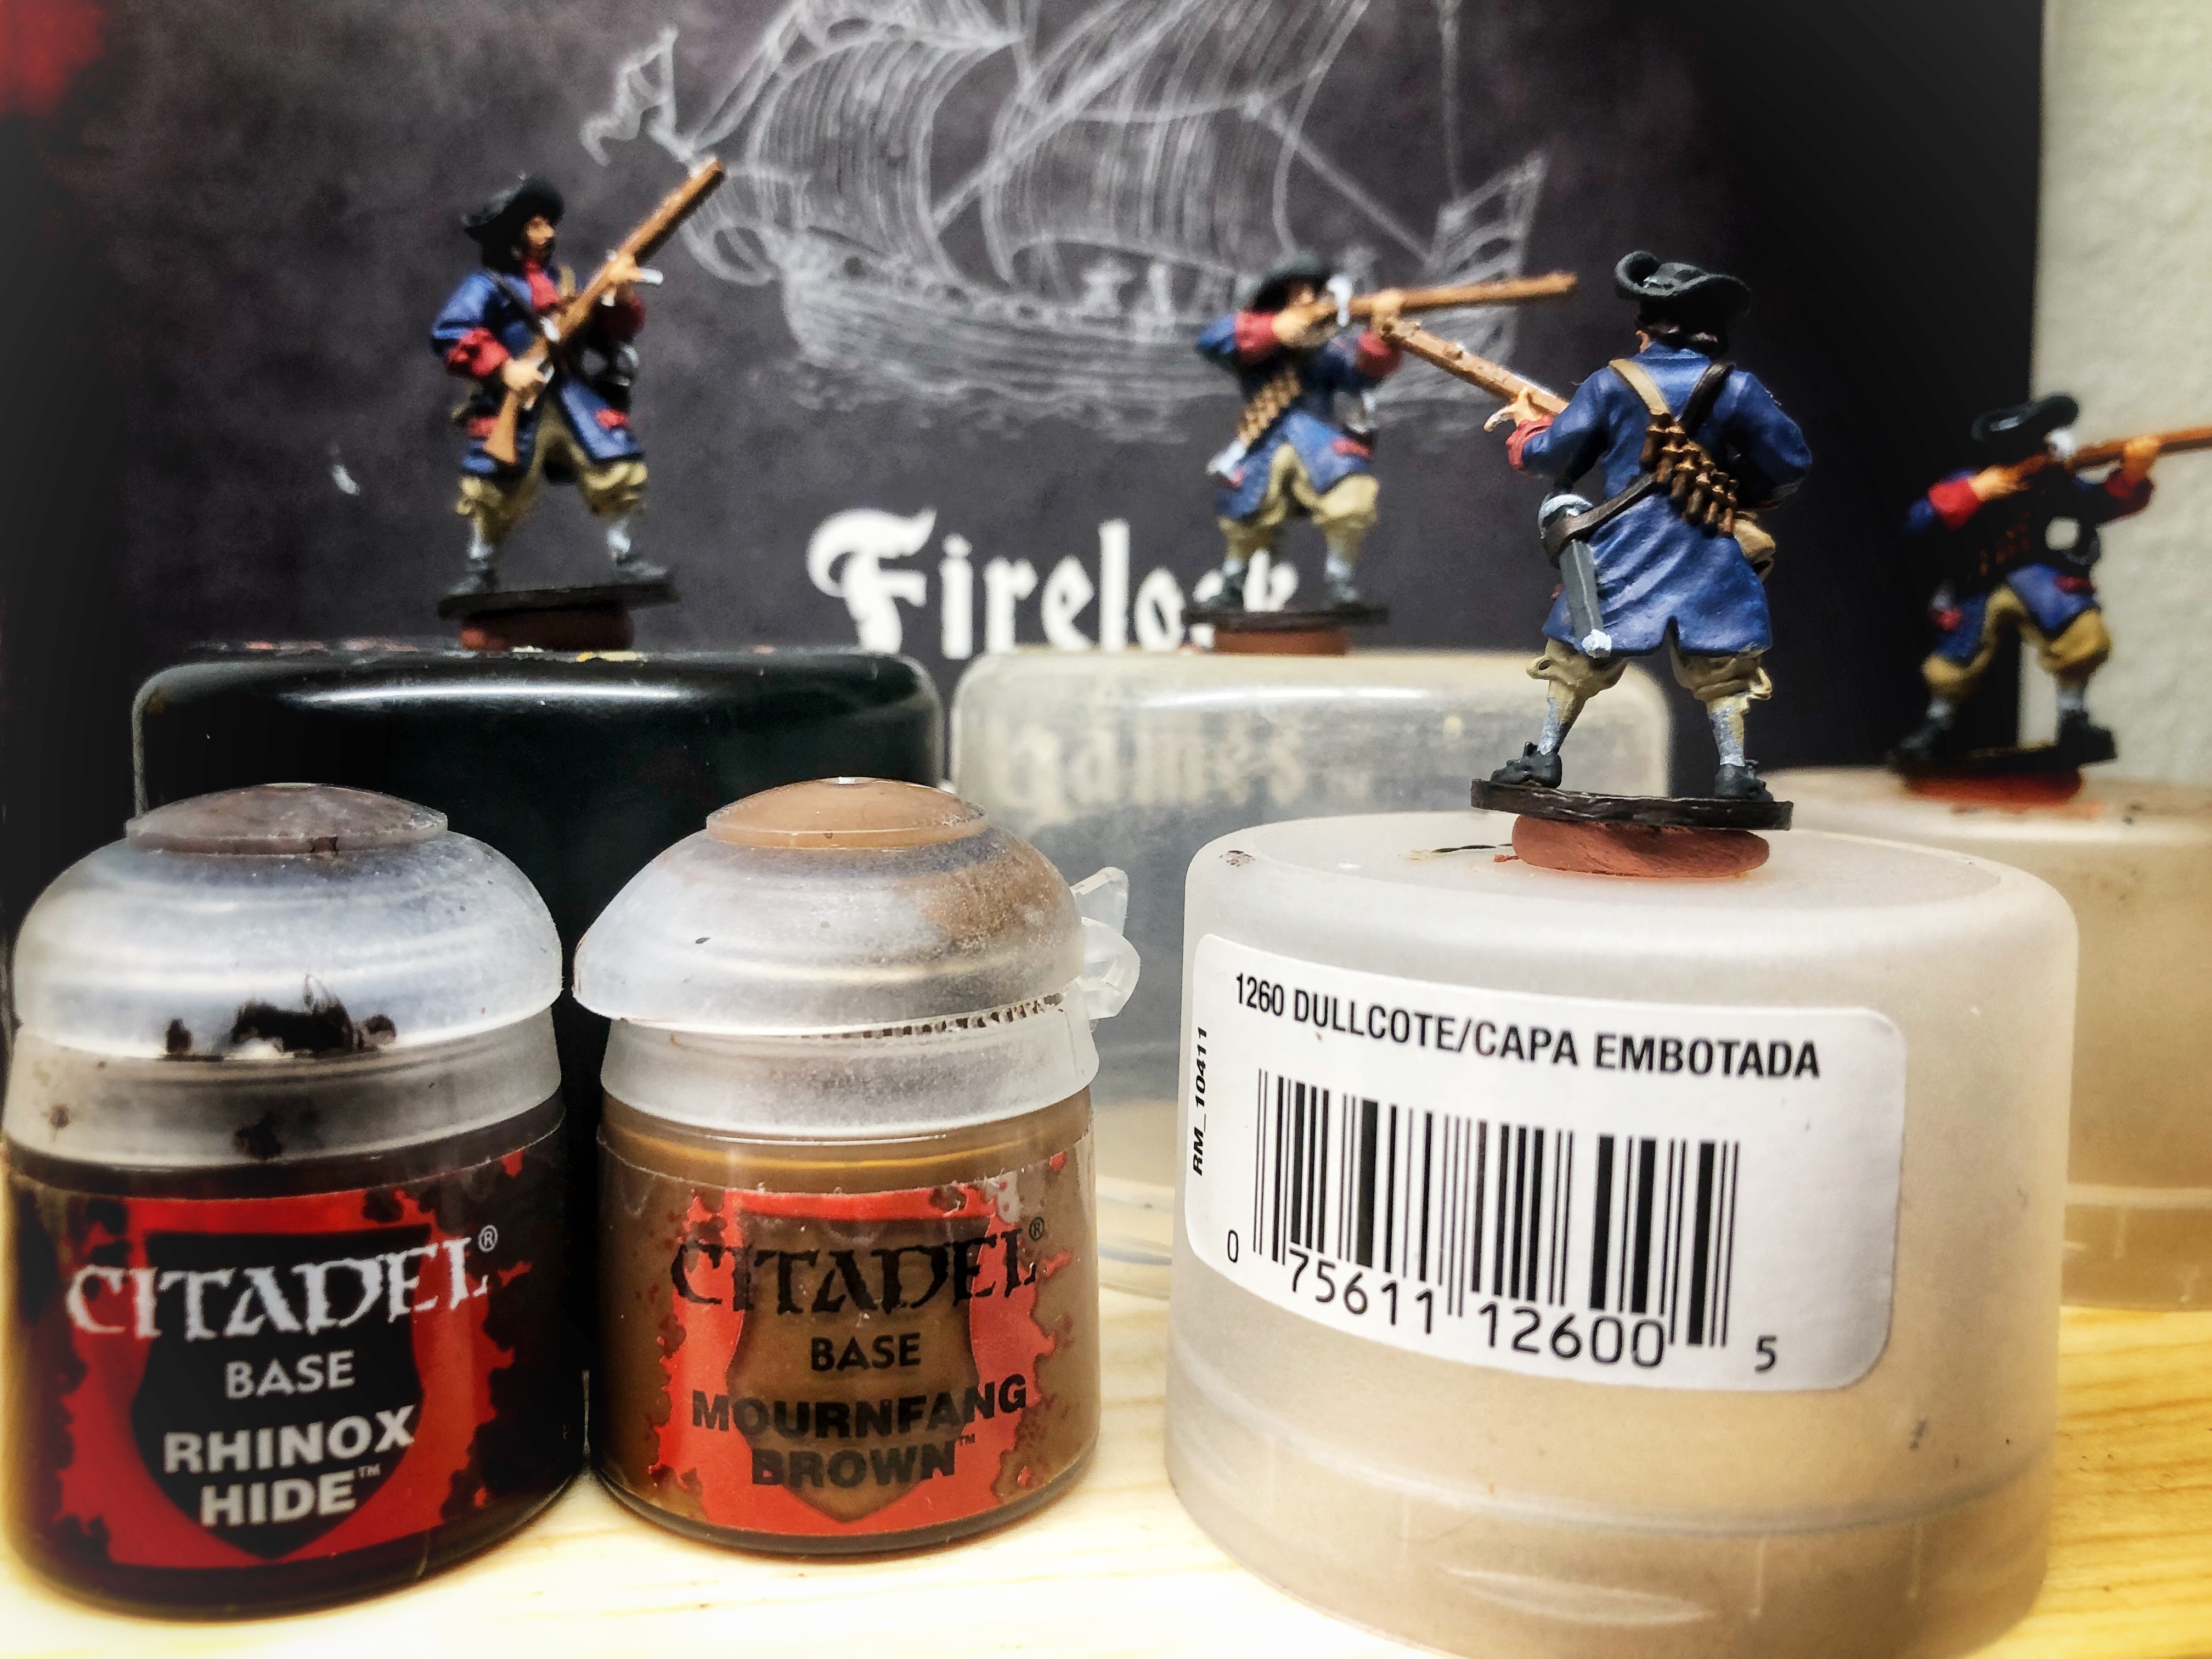
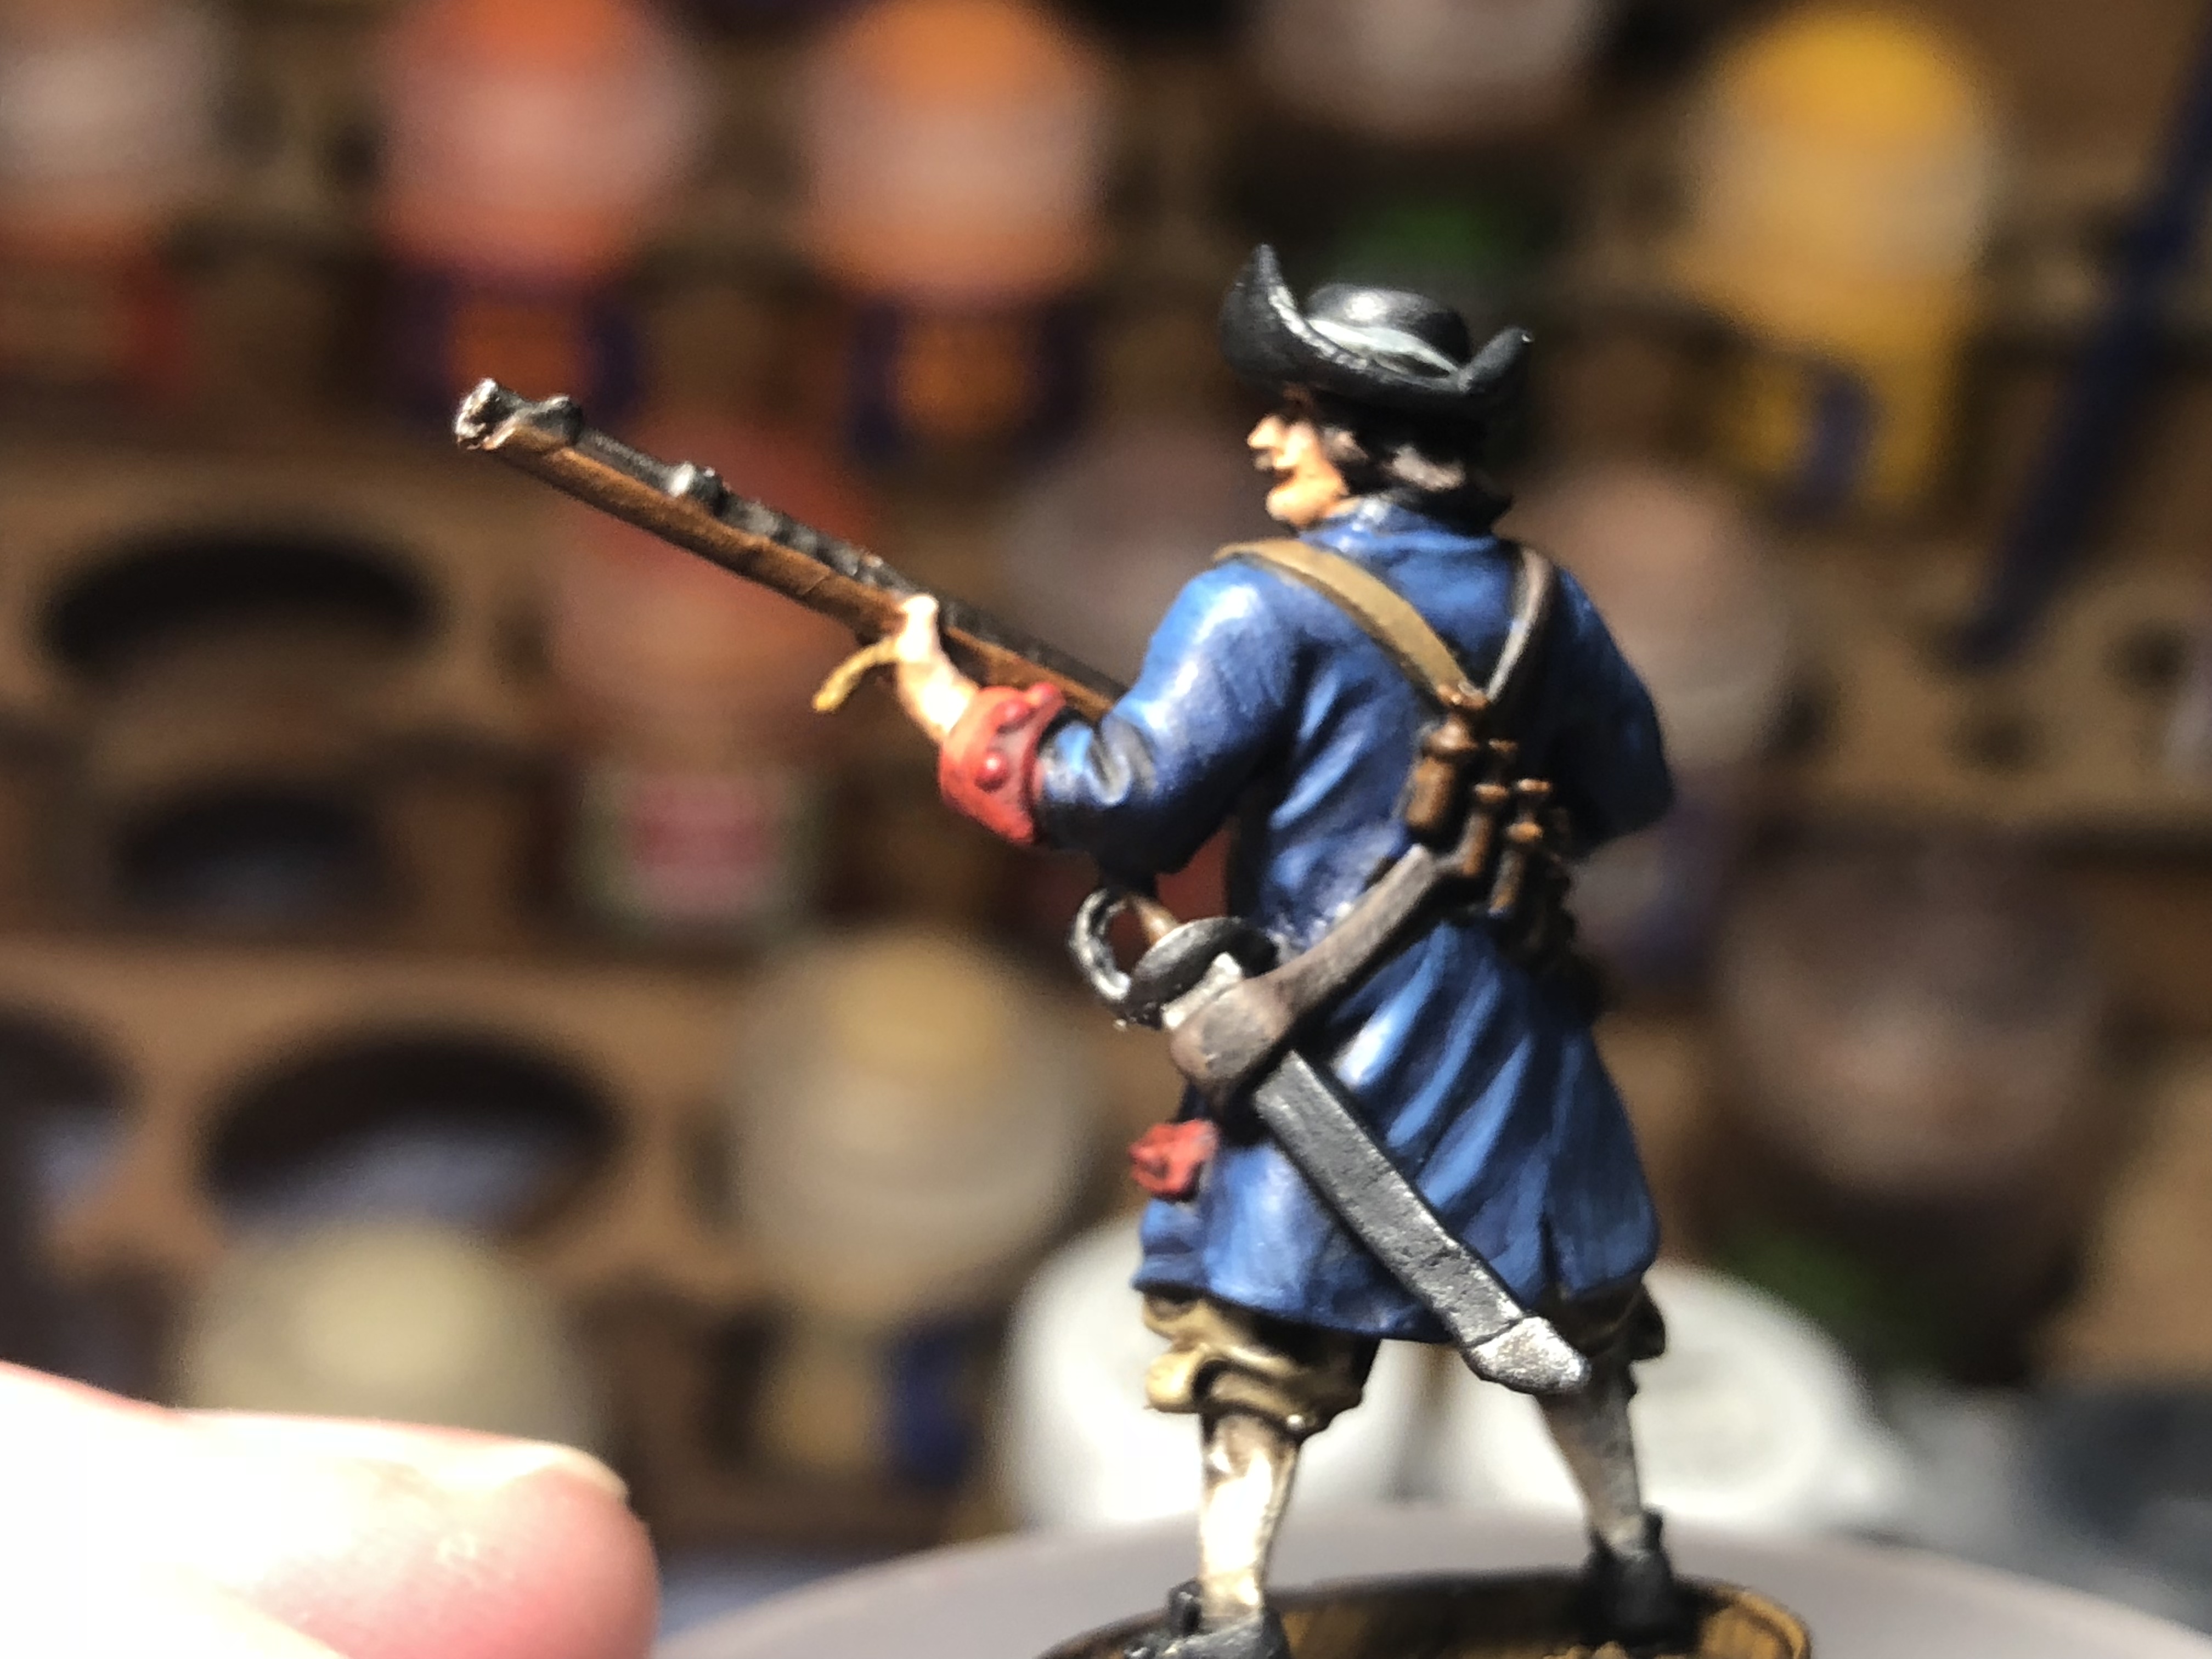
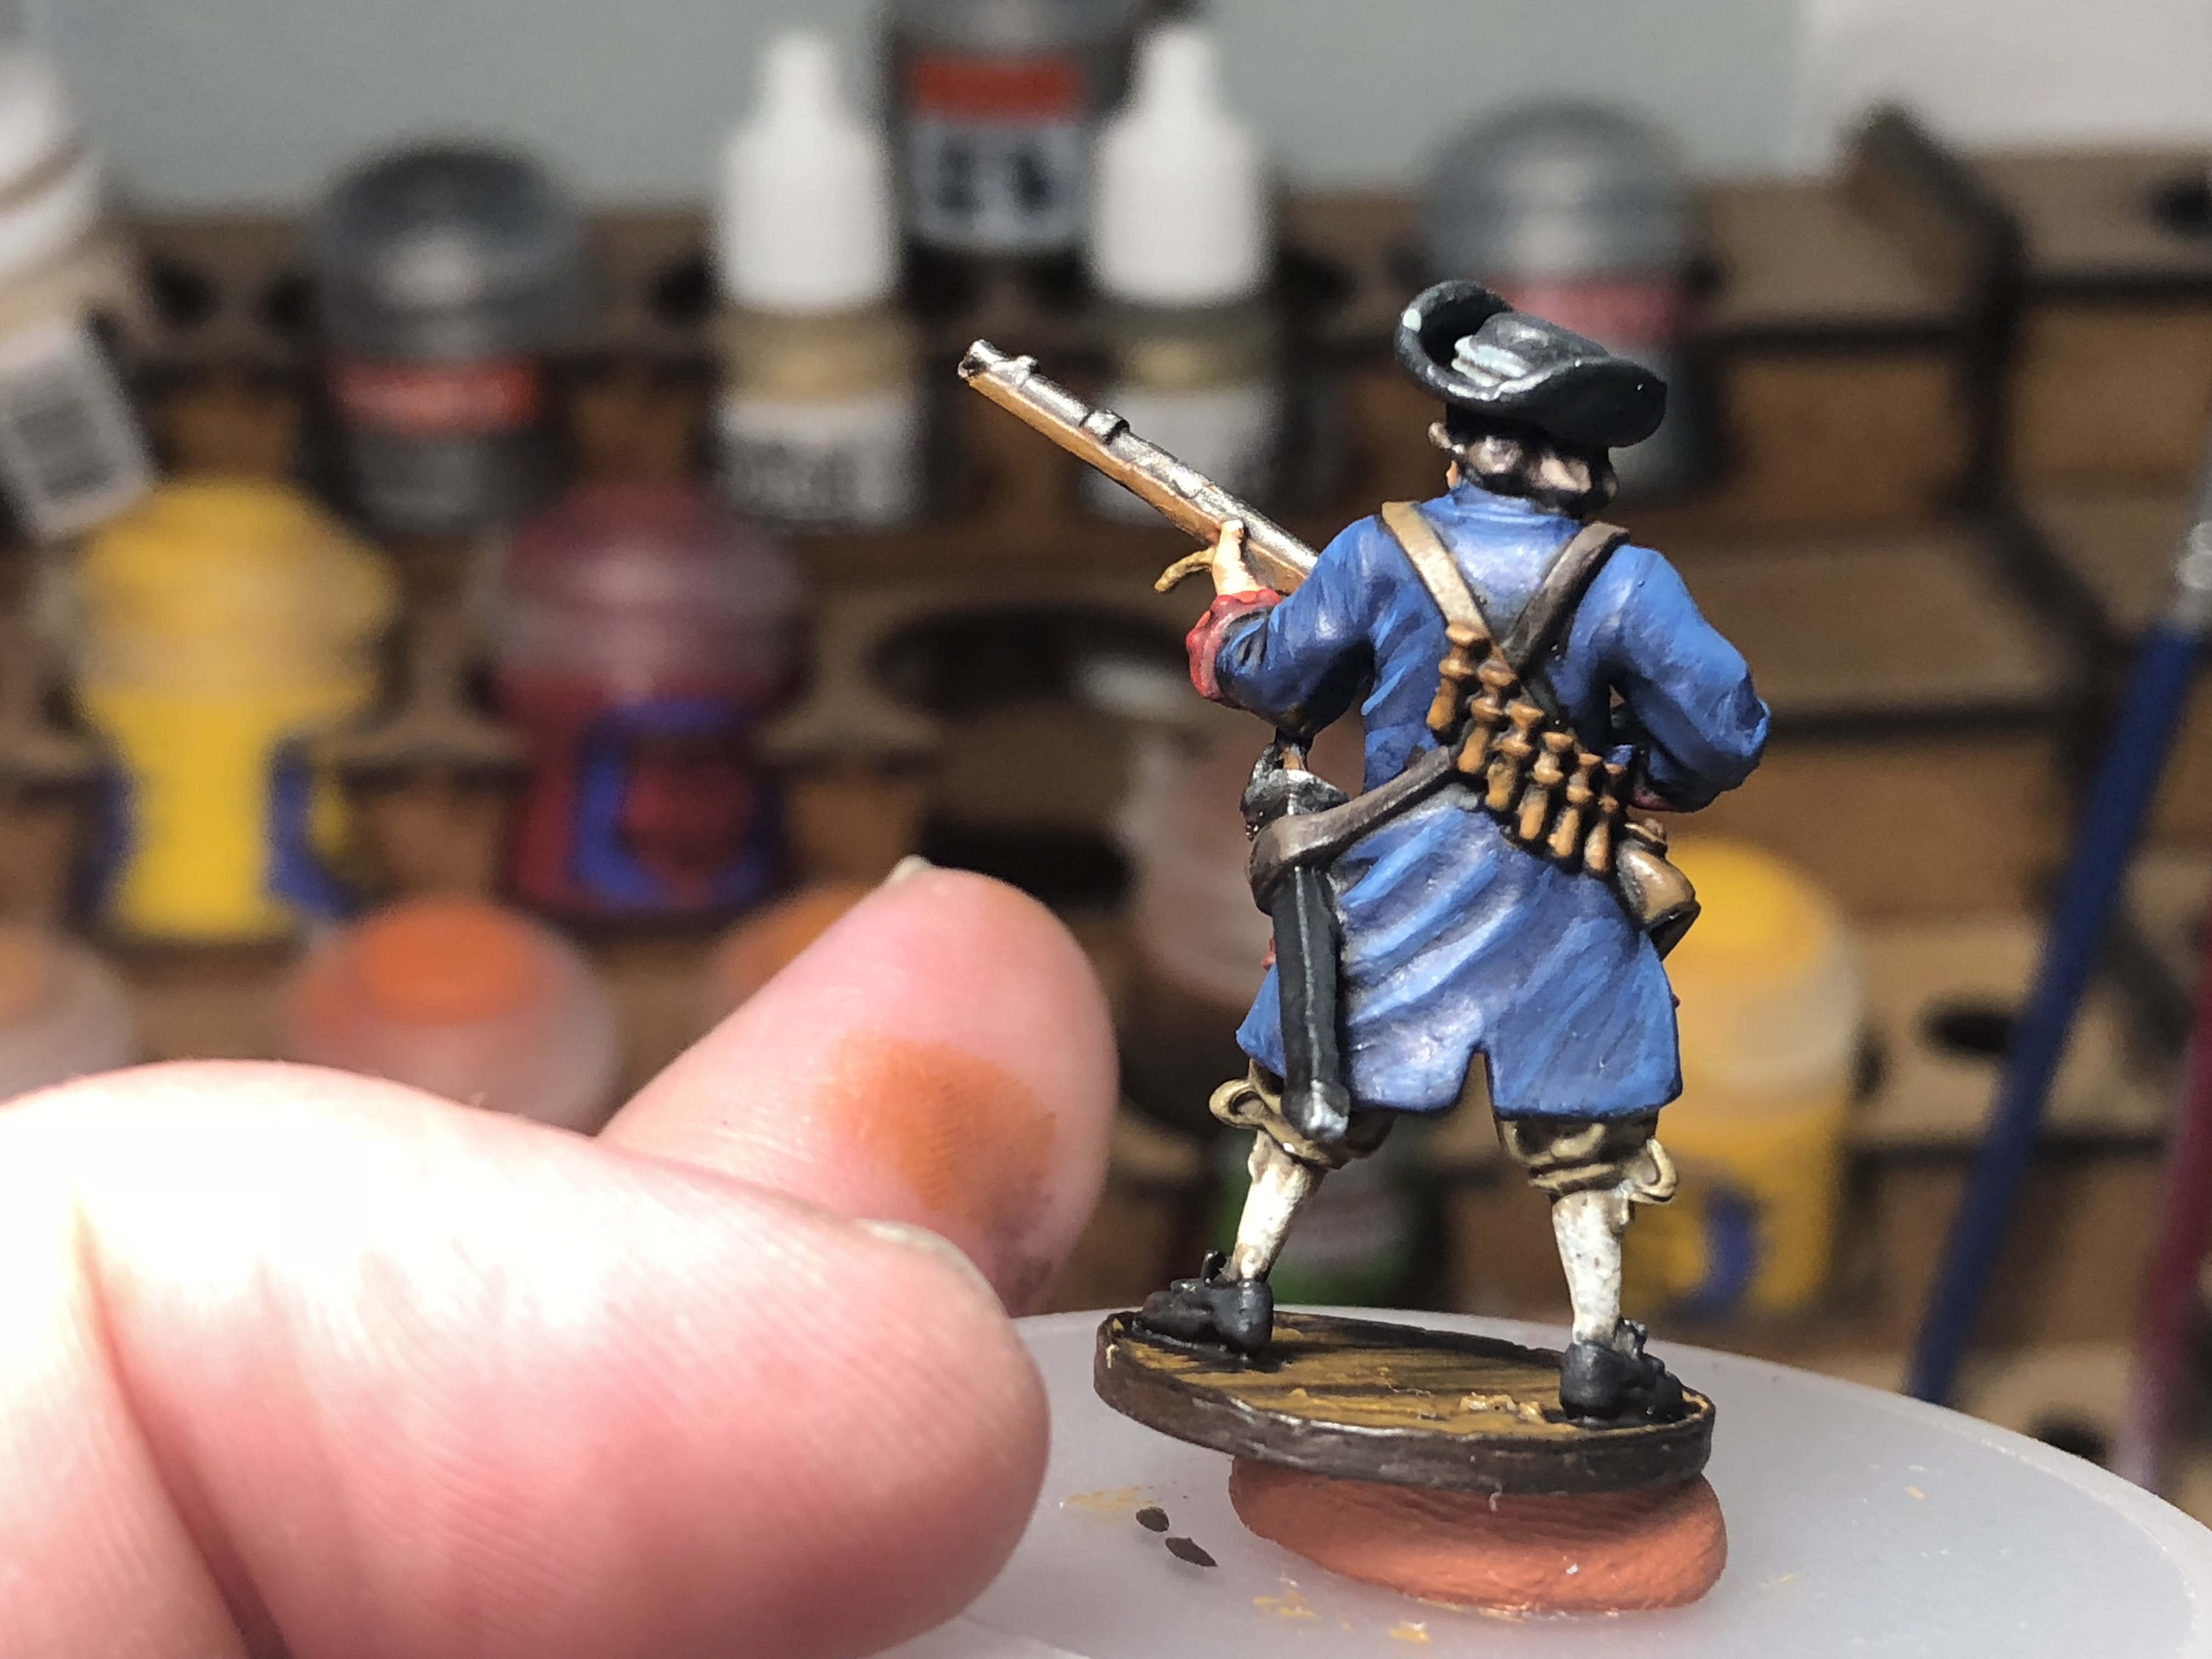
Next I’ll highlight the brown areas including the swordbelt, hair, musket and “apostles.”
For the hair and swordbelt I blended the base Rhinox Hide with Gorthor Brown and layered it up to pure Gorthor Brown.
For the cartridges and musket stock I mixed up a range of Mournfang Brown, Skragg Brown and Deathclaw Brown.
Highlight the upturned edge of the stock and along the edge below the barrel.
You can bring the edges and bottoms of the cartridges all the way up to pure Deathclaw to make them really stand out.
Next I quickly hit the white sleeves and stockings with Ivory then highlight the trousers, bag on the Right hip and strap with Zandri dust with an increasing amount of Screaming Skull.

Highlighting the metallic is fun! I reapplied Vallejo Metal Color Steel and then mixed increasing amounts of Duraluminium into the steel for the musket, power flask, sword hilt and scabbard tip.
You can cover all the raised metallic areas with the steel, the hit the top of the barrel, the sight, and band of the musket at the edge of the cup of the sword with the brighter color. Be sure to hit the upper edges of the metal tip of the scabbard as well.
I used some Zamesi Desert to put some horizontal lines on the matchcord to give it some texture.
Highlighting Black/Dark Grey is tricky so I’m mixing up a spectrum of three shades ranging from German Grey (which I used as the base coat), Eshin Grey and Dawnstone.
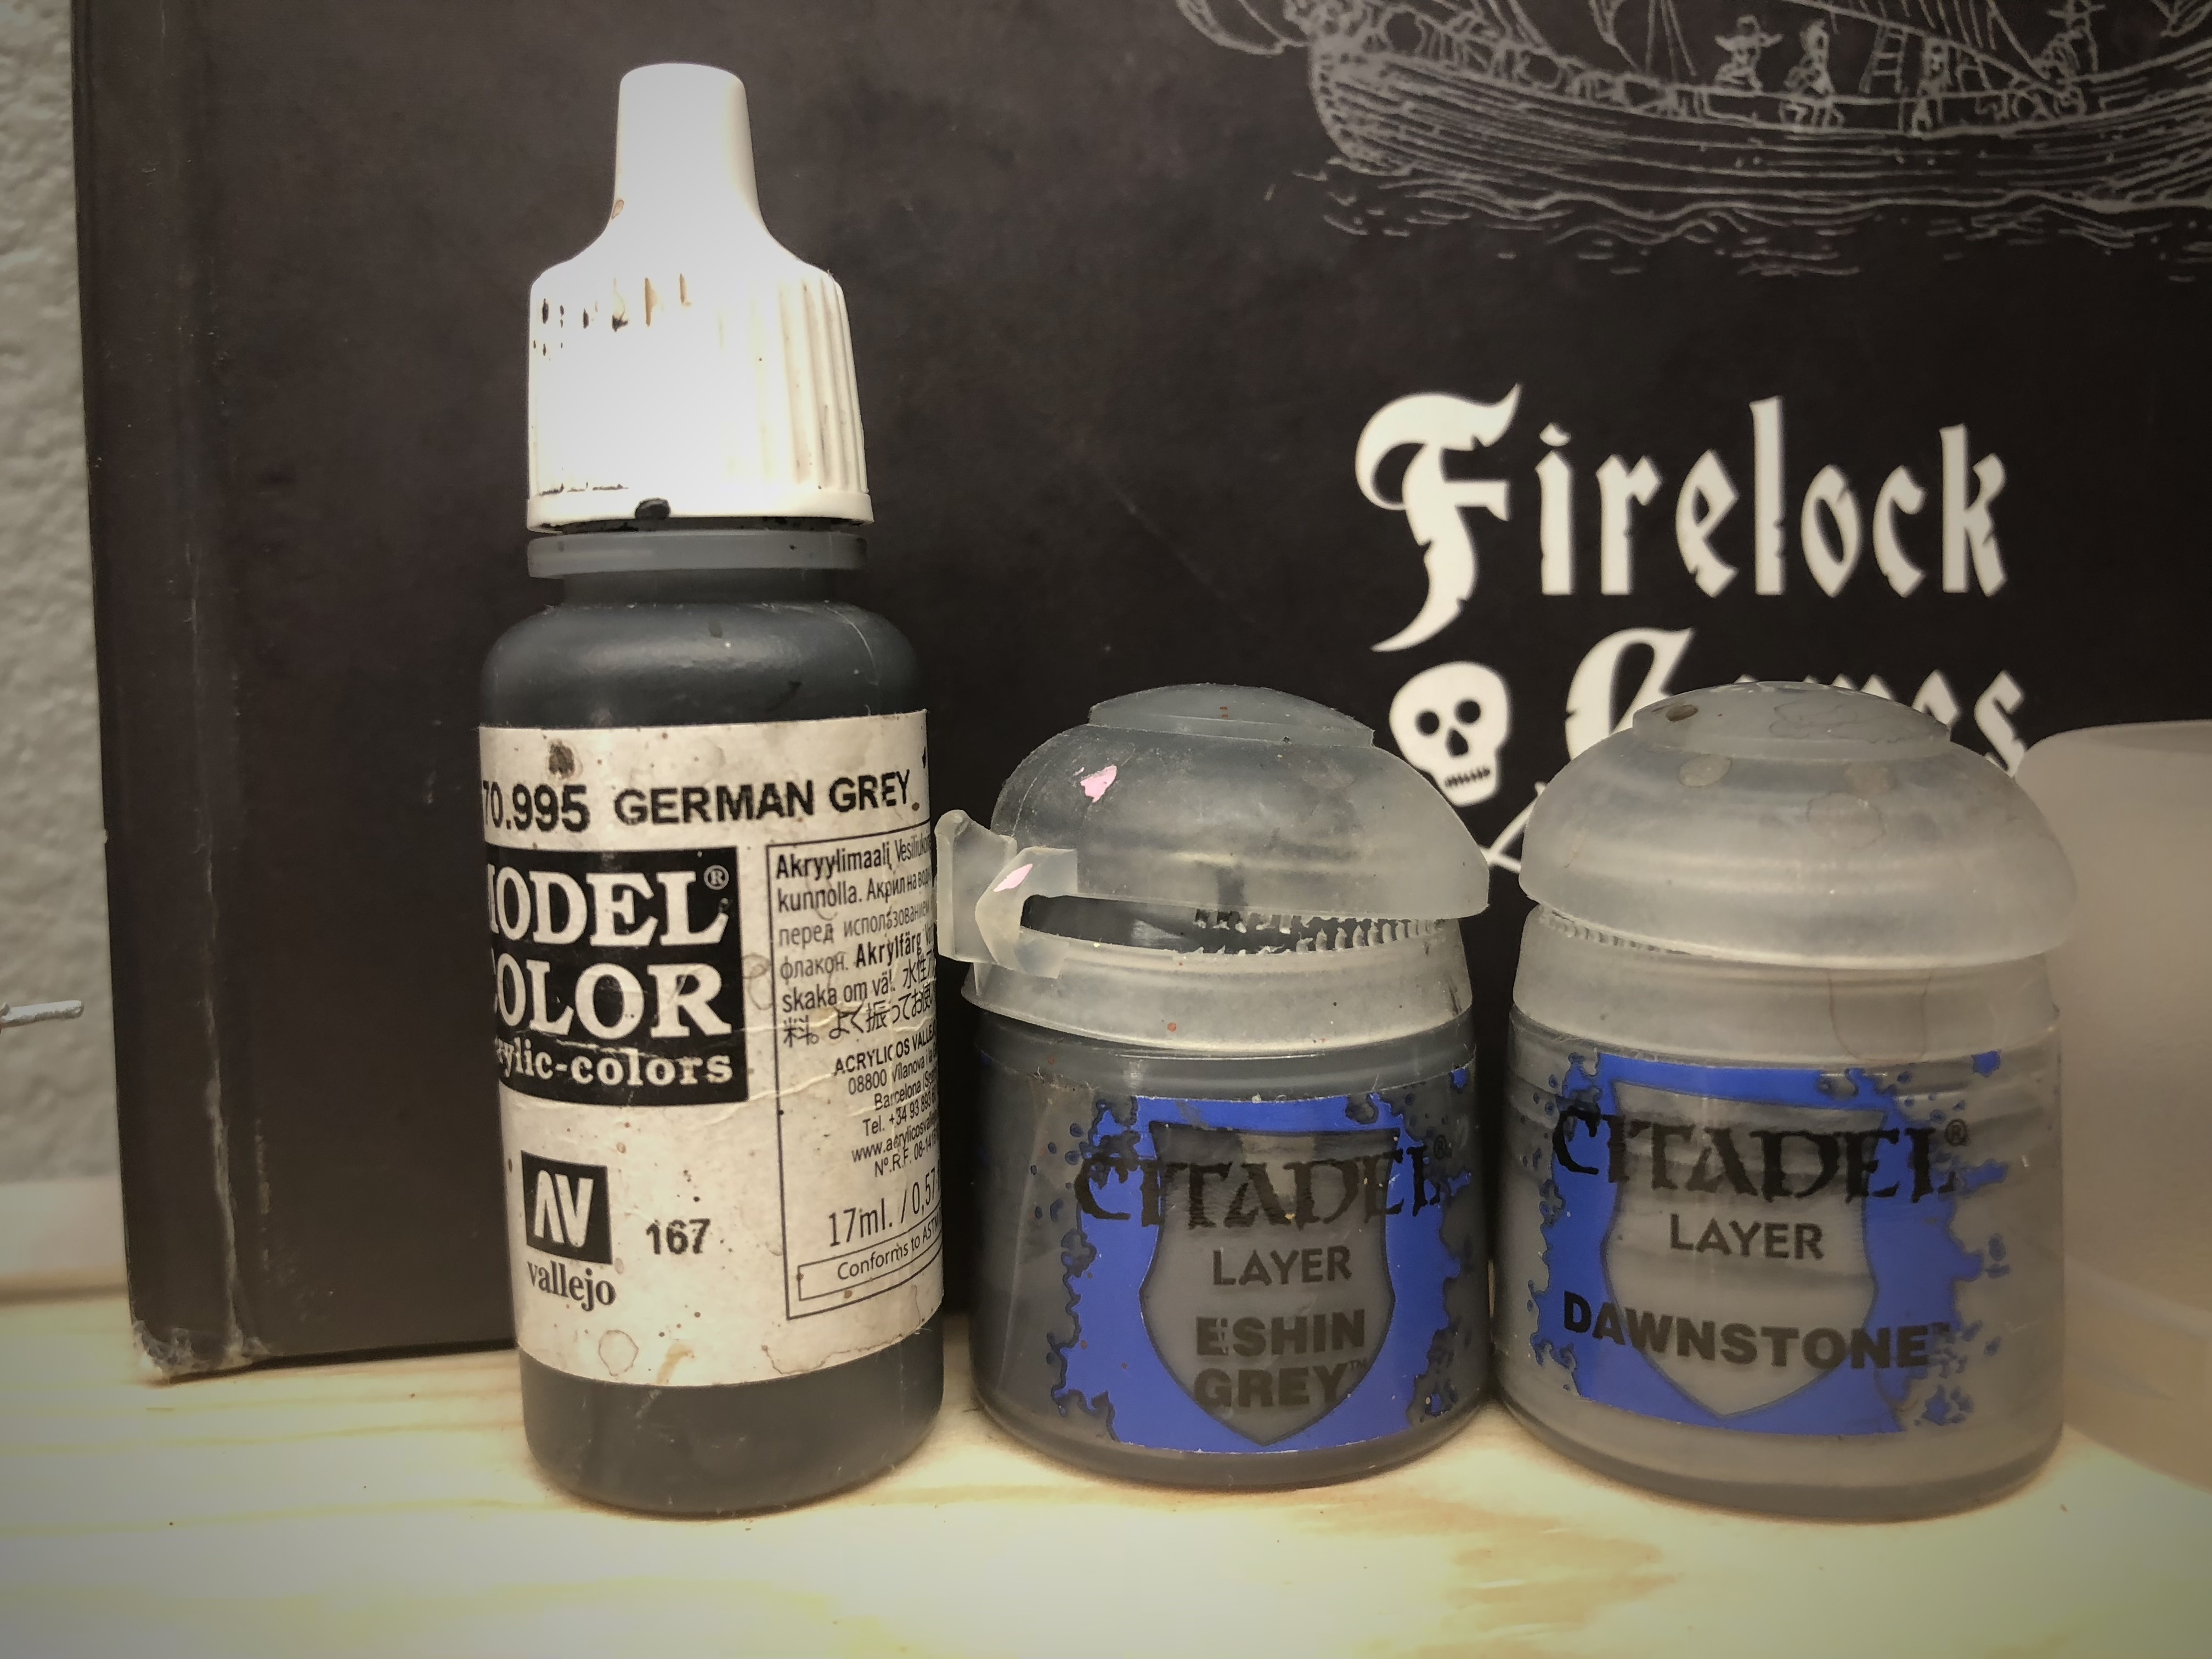
Start with the German Grey again and move through the shades ending with pure Dawnstone on the very edge.
I don’t layer at all for the scabbard but just do an edge highlight along the top.
I didn’t take a picture but it doesn’t hurt to highlight the hat band with a touch of the original Celestra Grey.
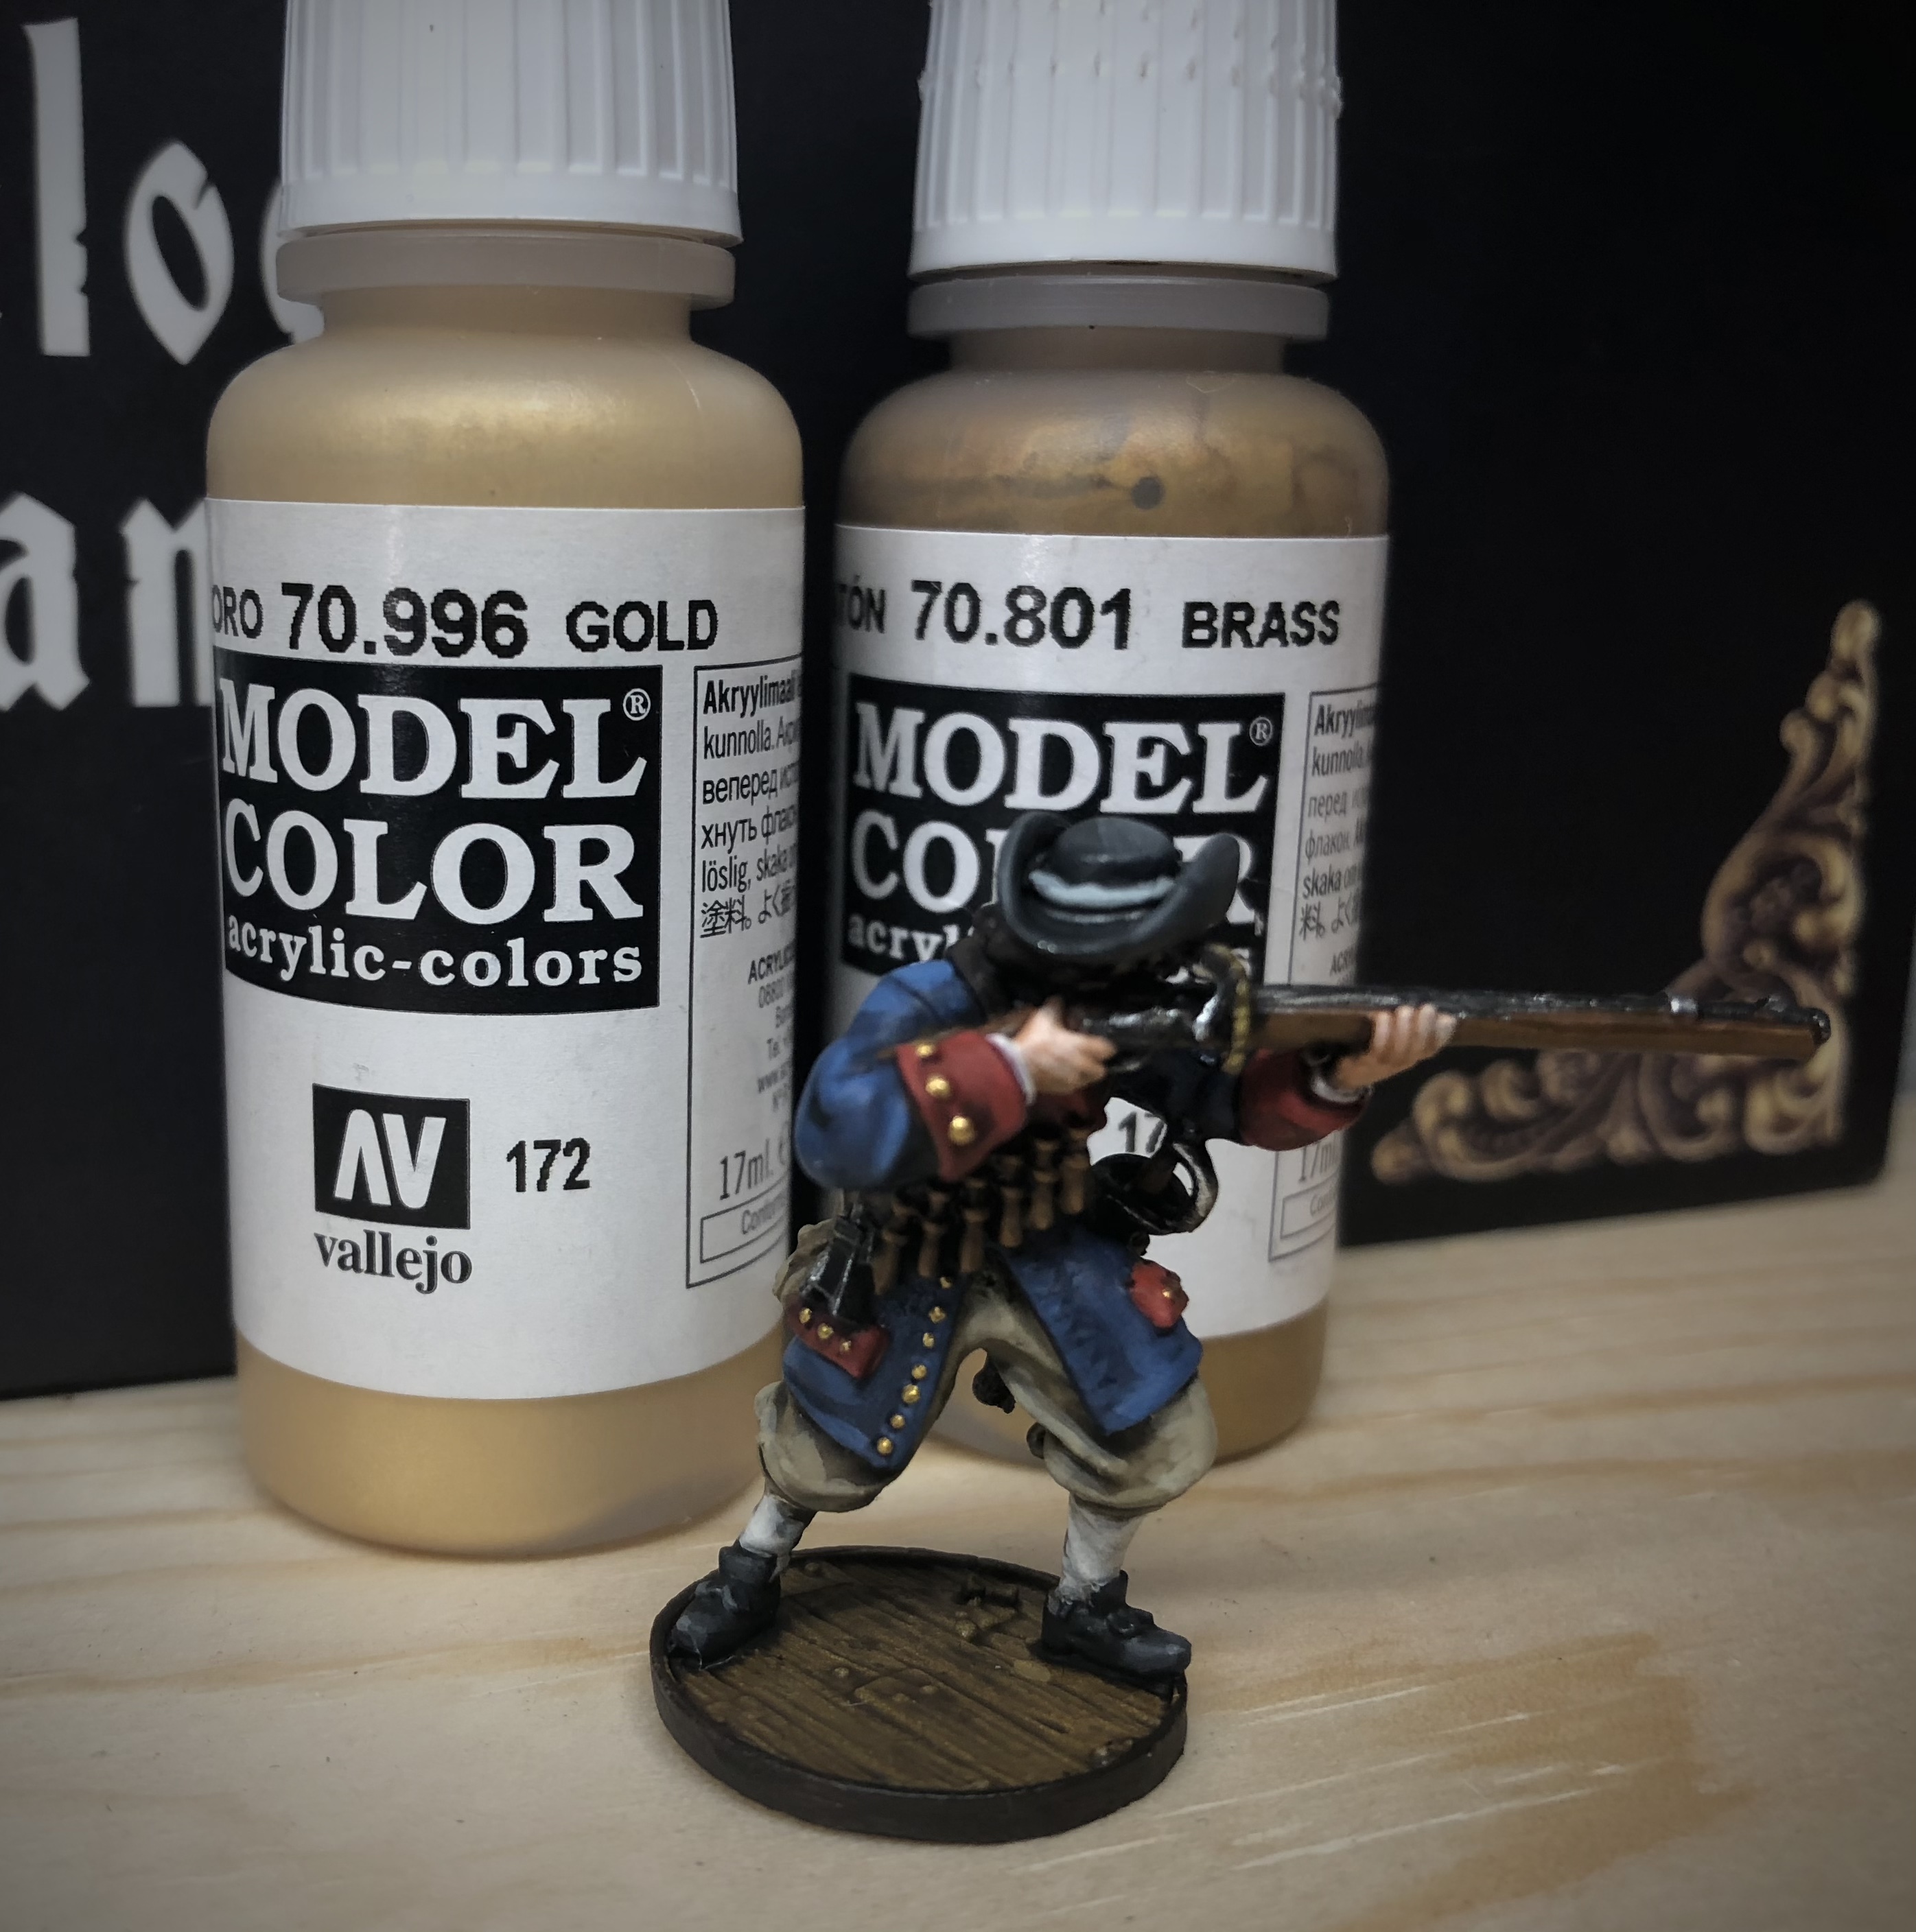
The last step is the buttons! I base them all with Vallejo’s Model Color Brass then do a tiny highlight of Gold on some of the buttons to make the more reflective. I strongly advise against using the brass and gold colors from the Citadel line. I’ve always had a terrible time with them.

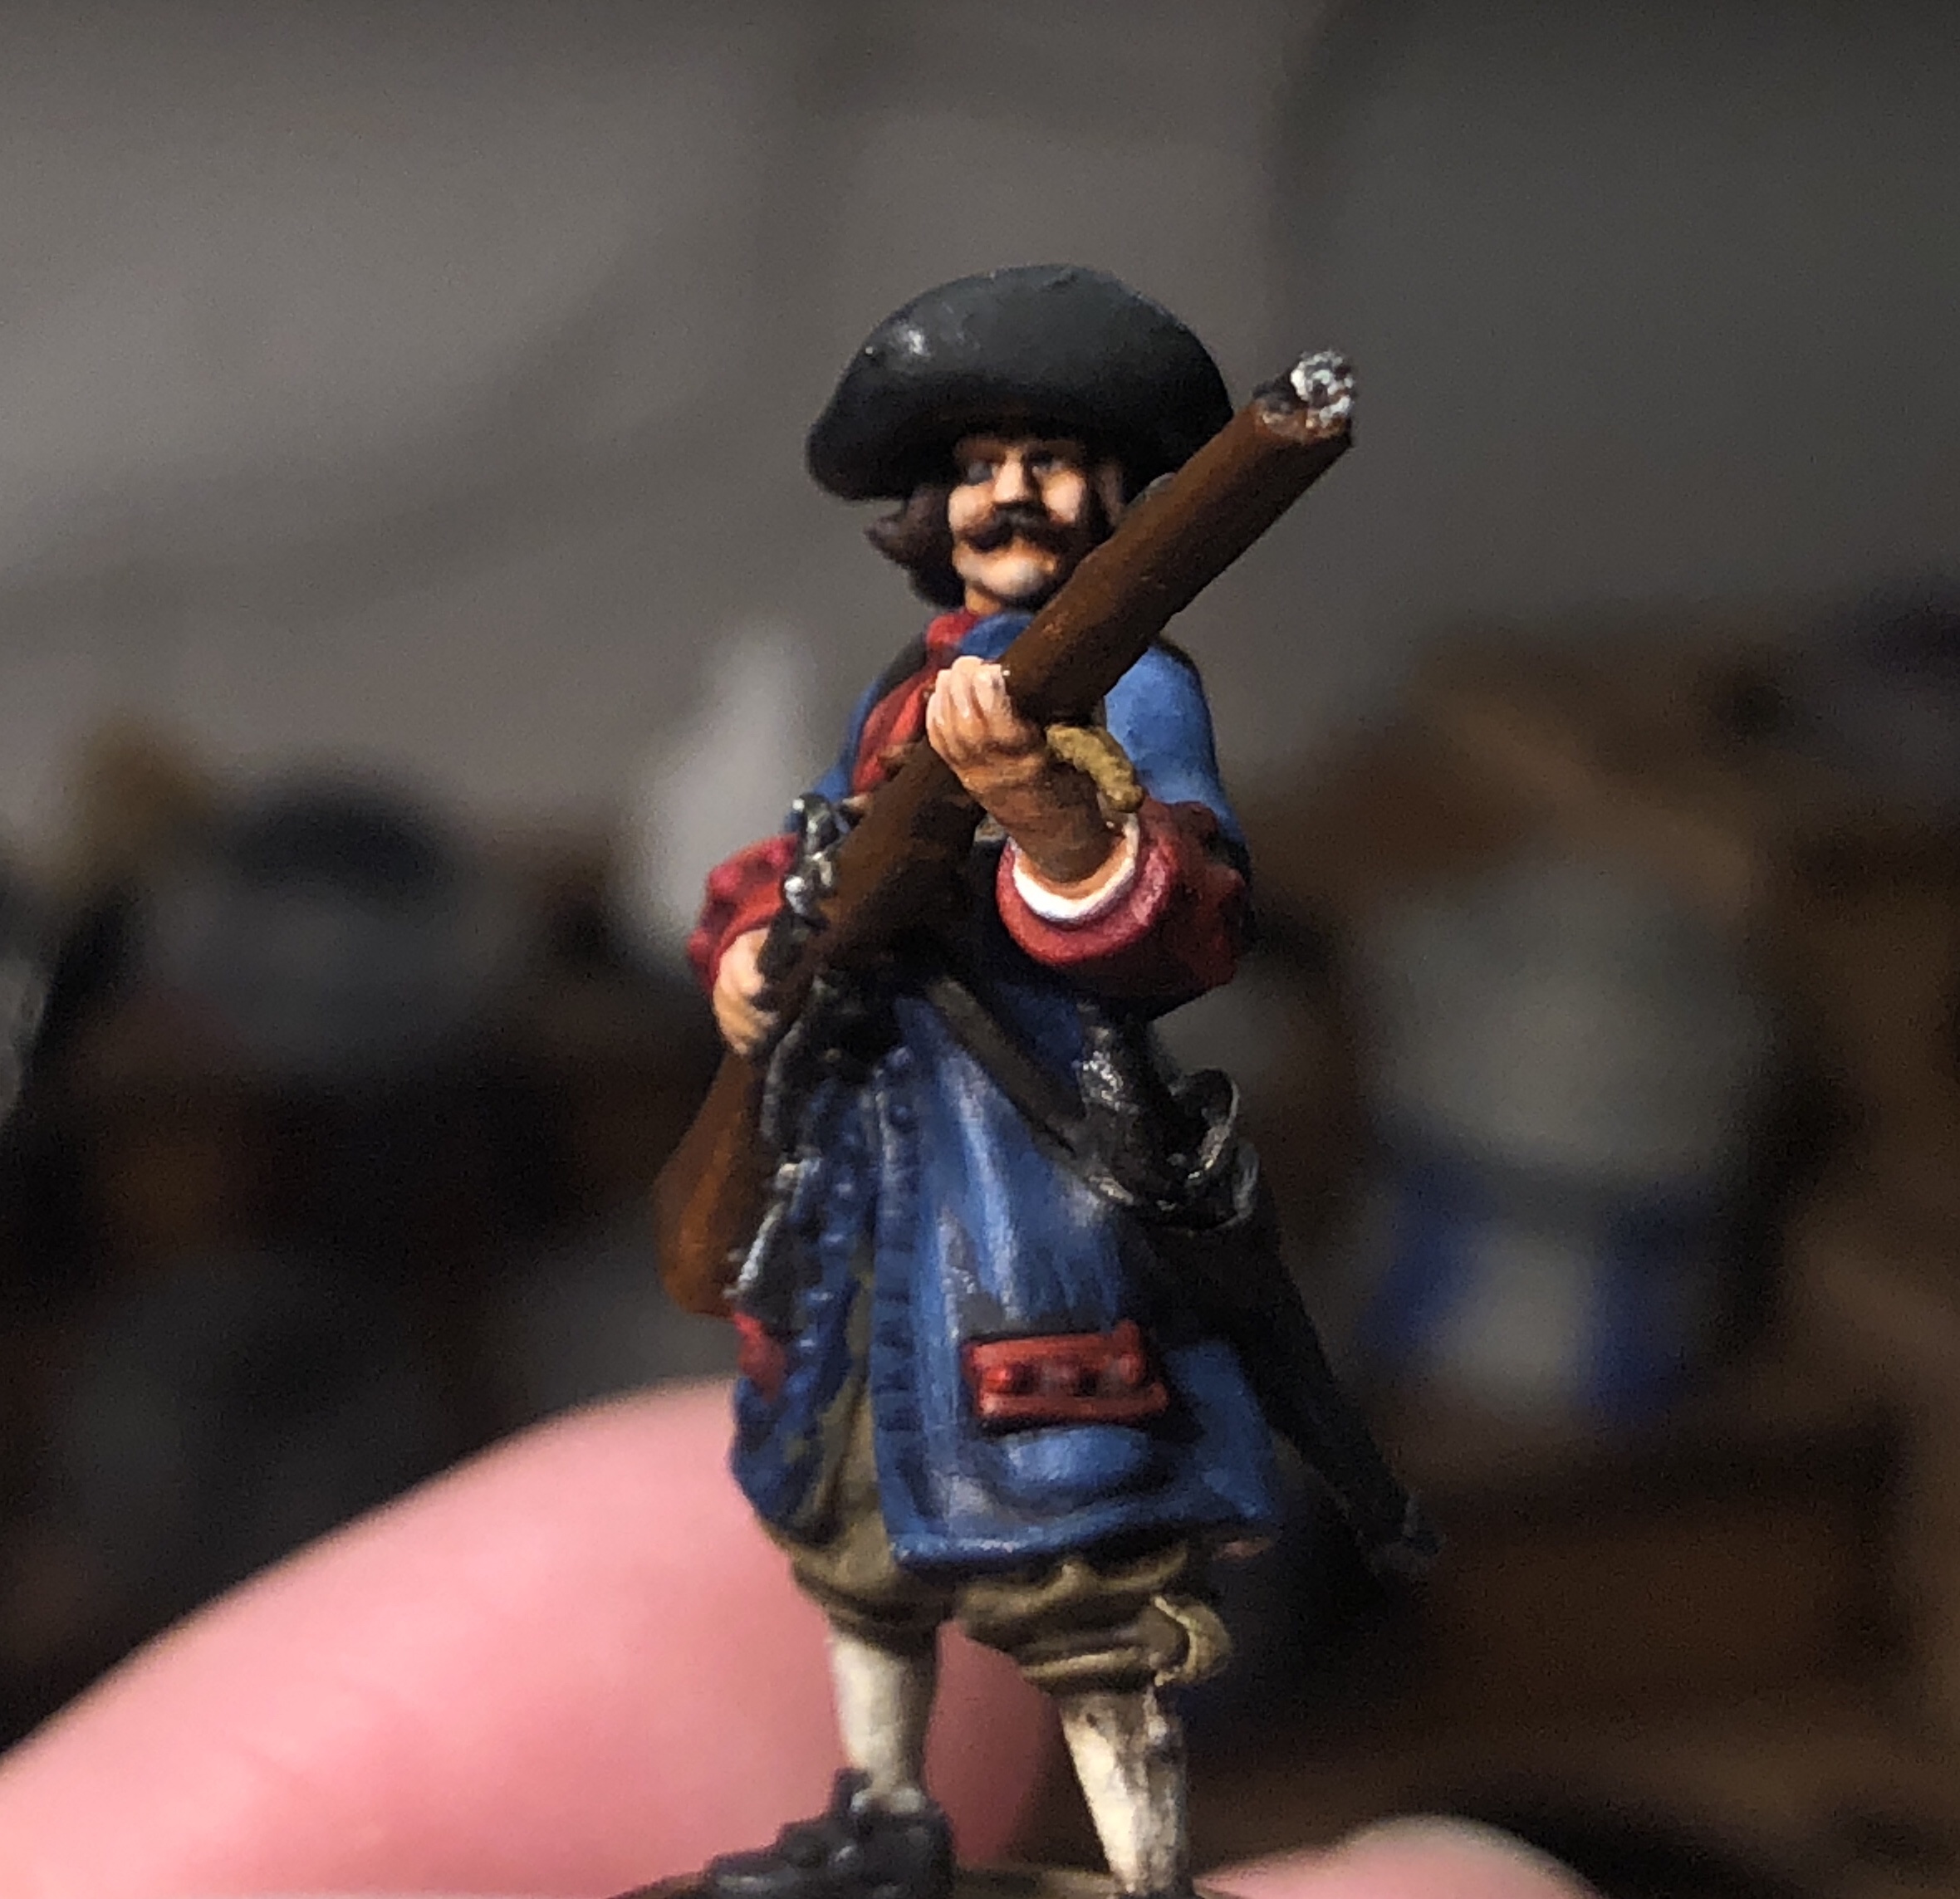
A shaded mini on the L and a completely highlighted mini on the R. The highlights are work, but they make a big difference!
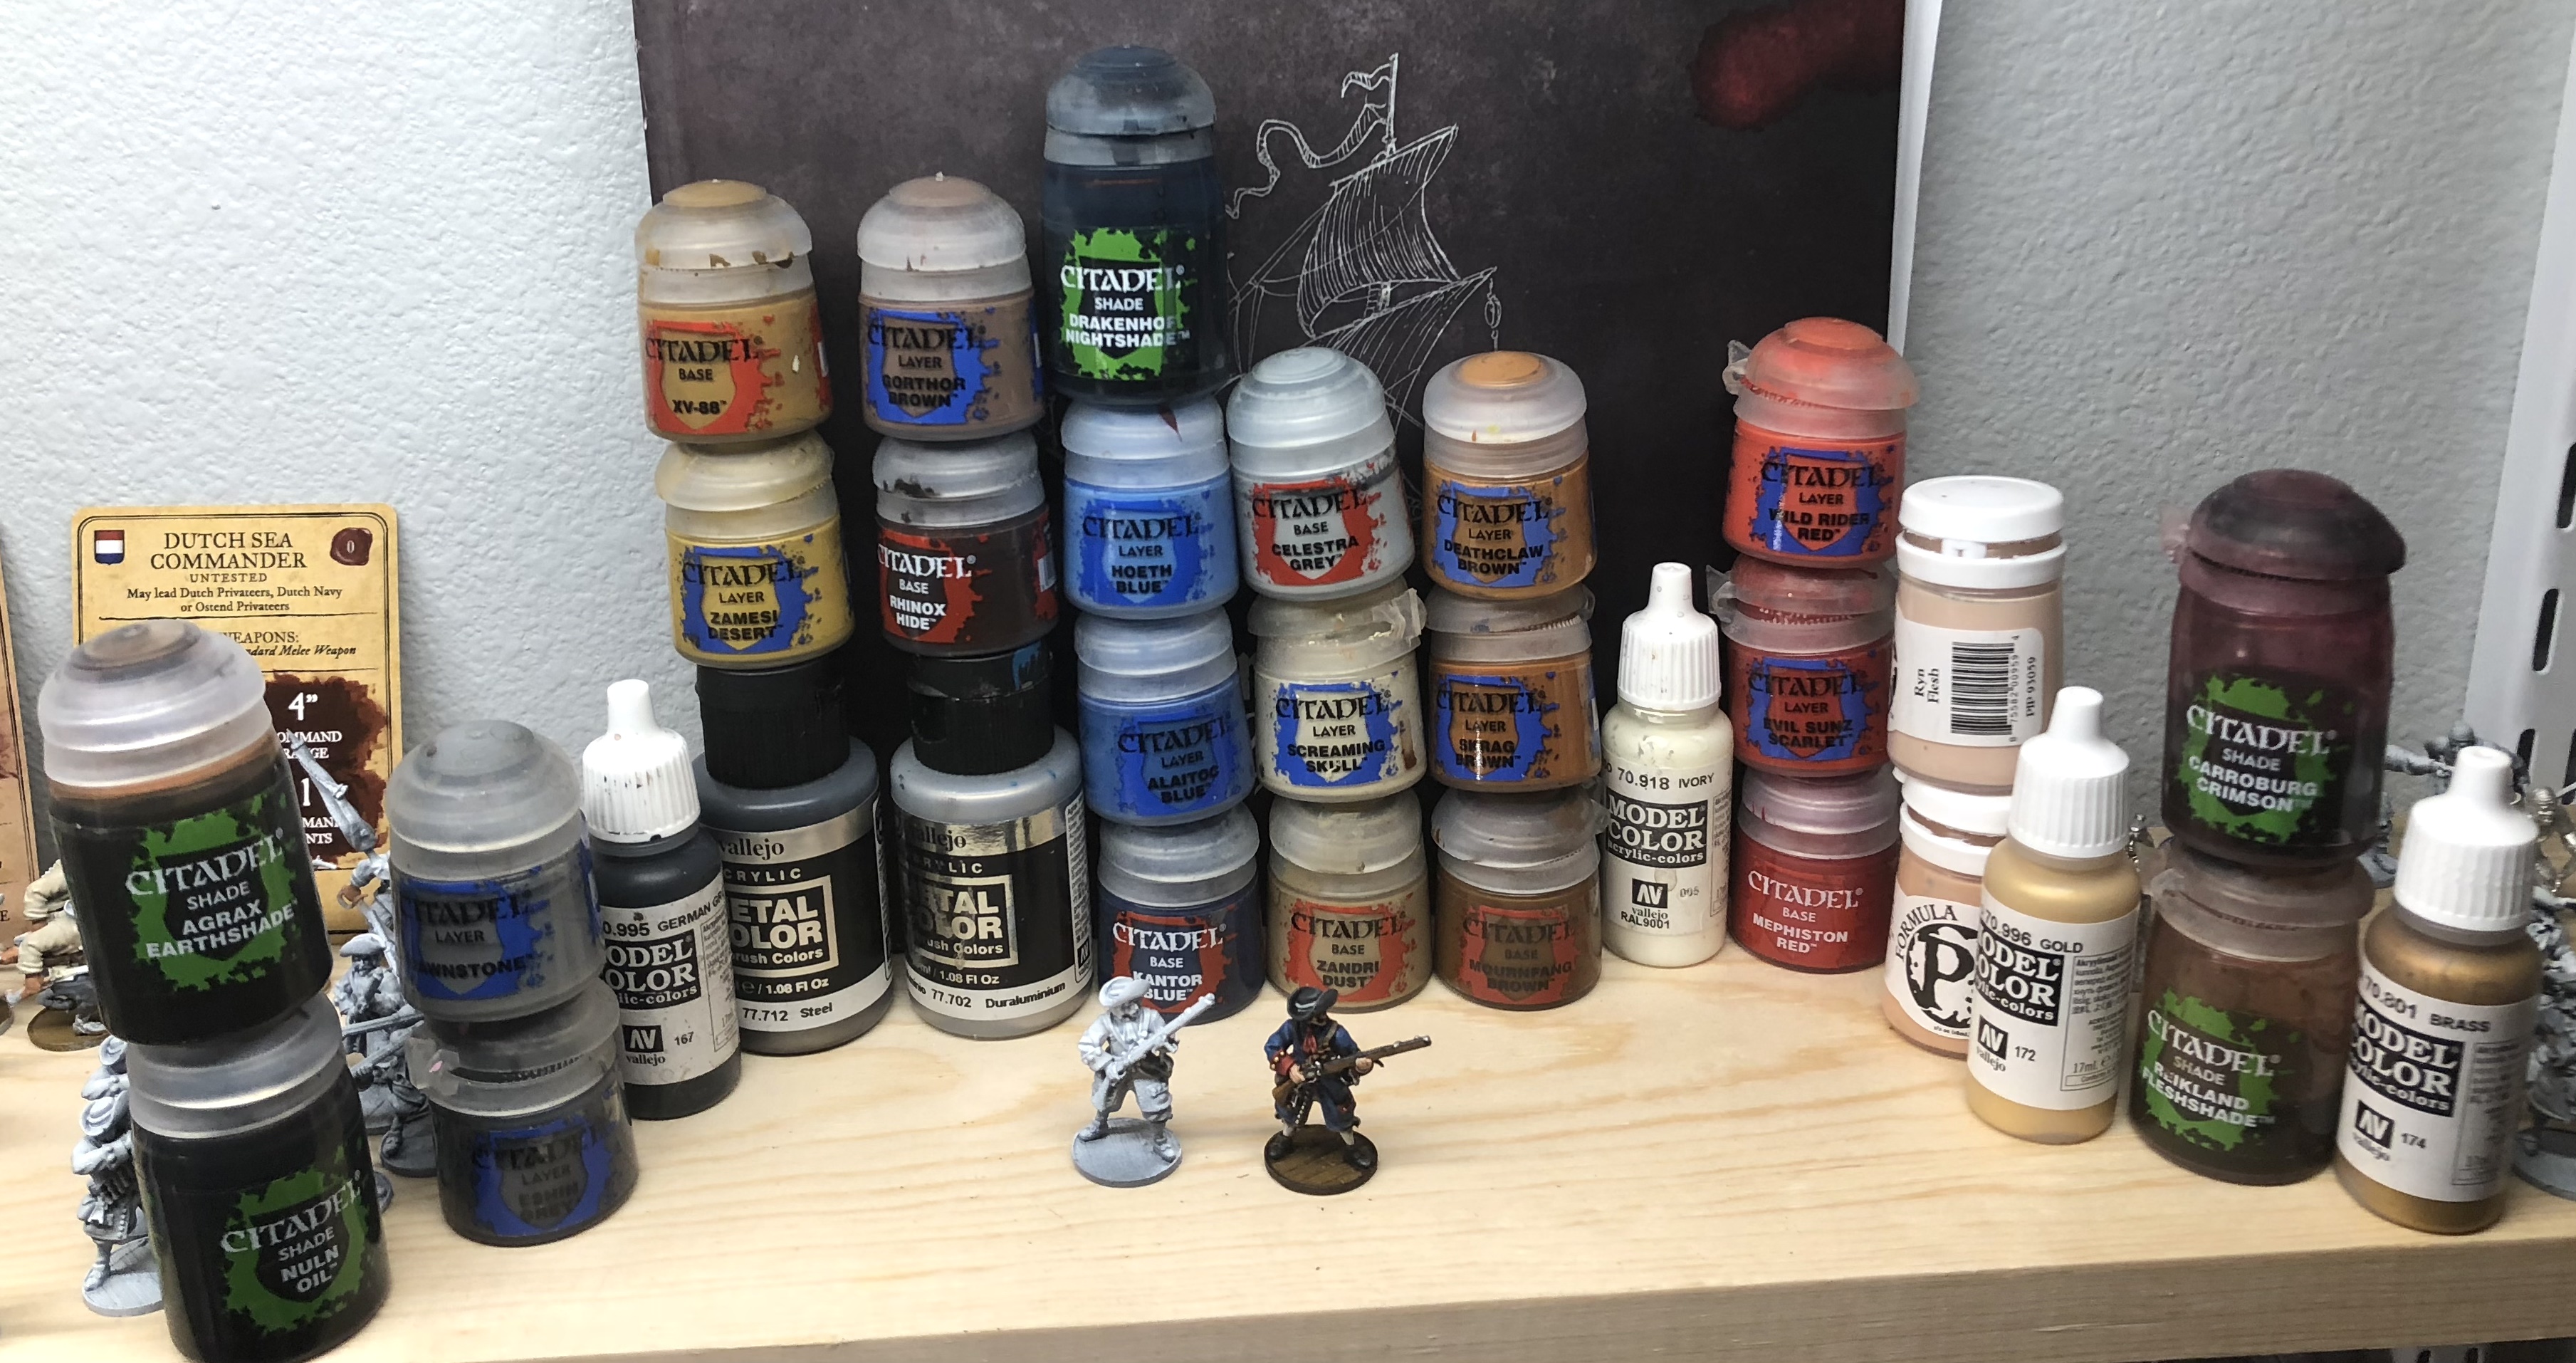
This Is the complete set of paints I used but you could certainly simplify by mixing lighter colors from the base tones to accomplish the highlights.
Step 5 – Protective Spray
You don’t want your minis chipping after investing so much work in them. I use Testors Dullcote spray varnish to protect them. I’ve used Army Painter’s spray varnish as well but it tends to be a bit glossy and stay tacky indefinitely.
I stick the minis back on the same board I use for priming and give them at least two good coats of varnish (apply outdoors or in a well ventilated area) . This will give them a nice uniform flat finish and give them a hard surface that will keep the paint from chipping. Since the minis are metal, you can still chip them if you’re rough with them, but this helps a lot.

They’re finished!

Let me know if there is anything I glossed over too quickly. I’m planning to do more of these so please tell me which figures you want to see covered here.
Thanks for reading! I plan to paint a set of Marineros next.
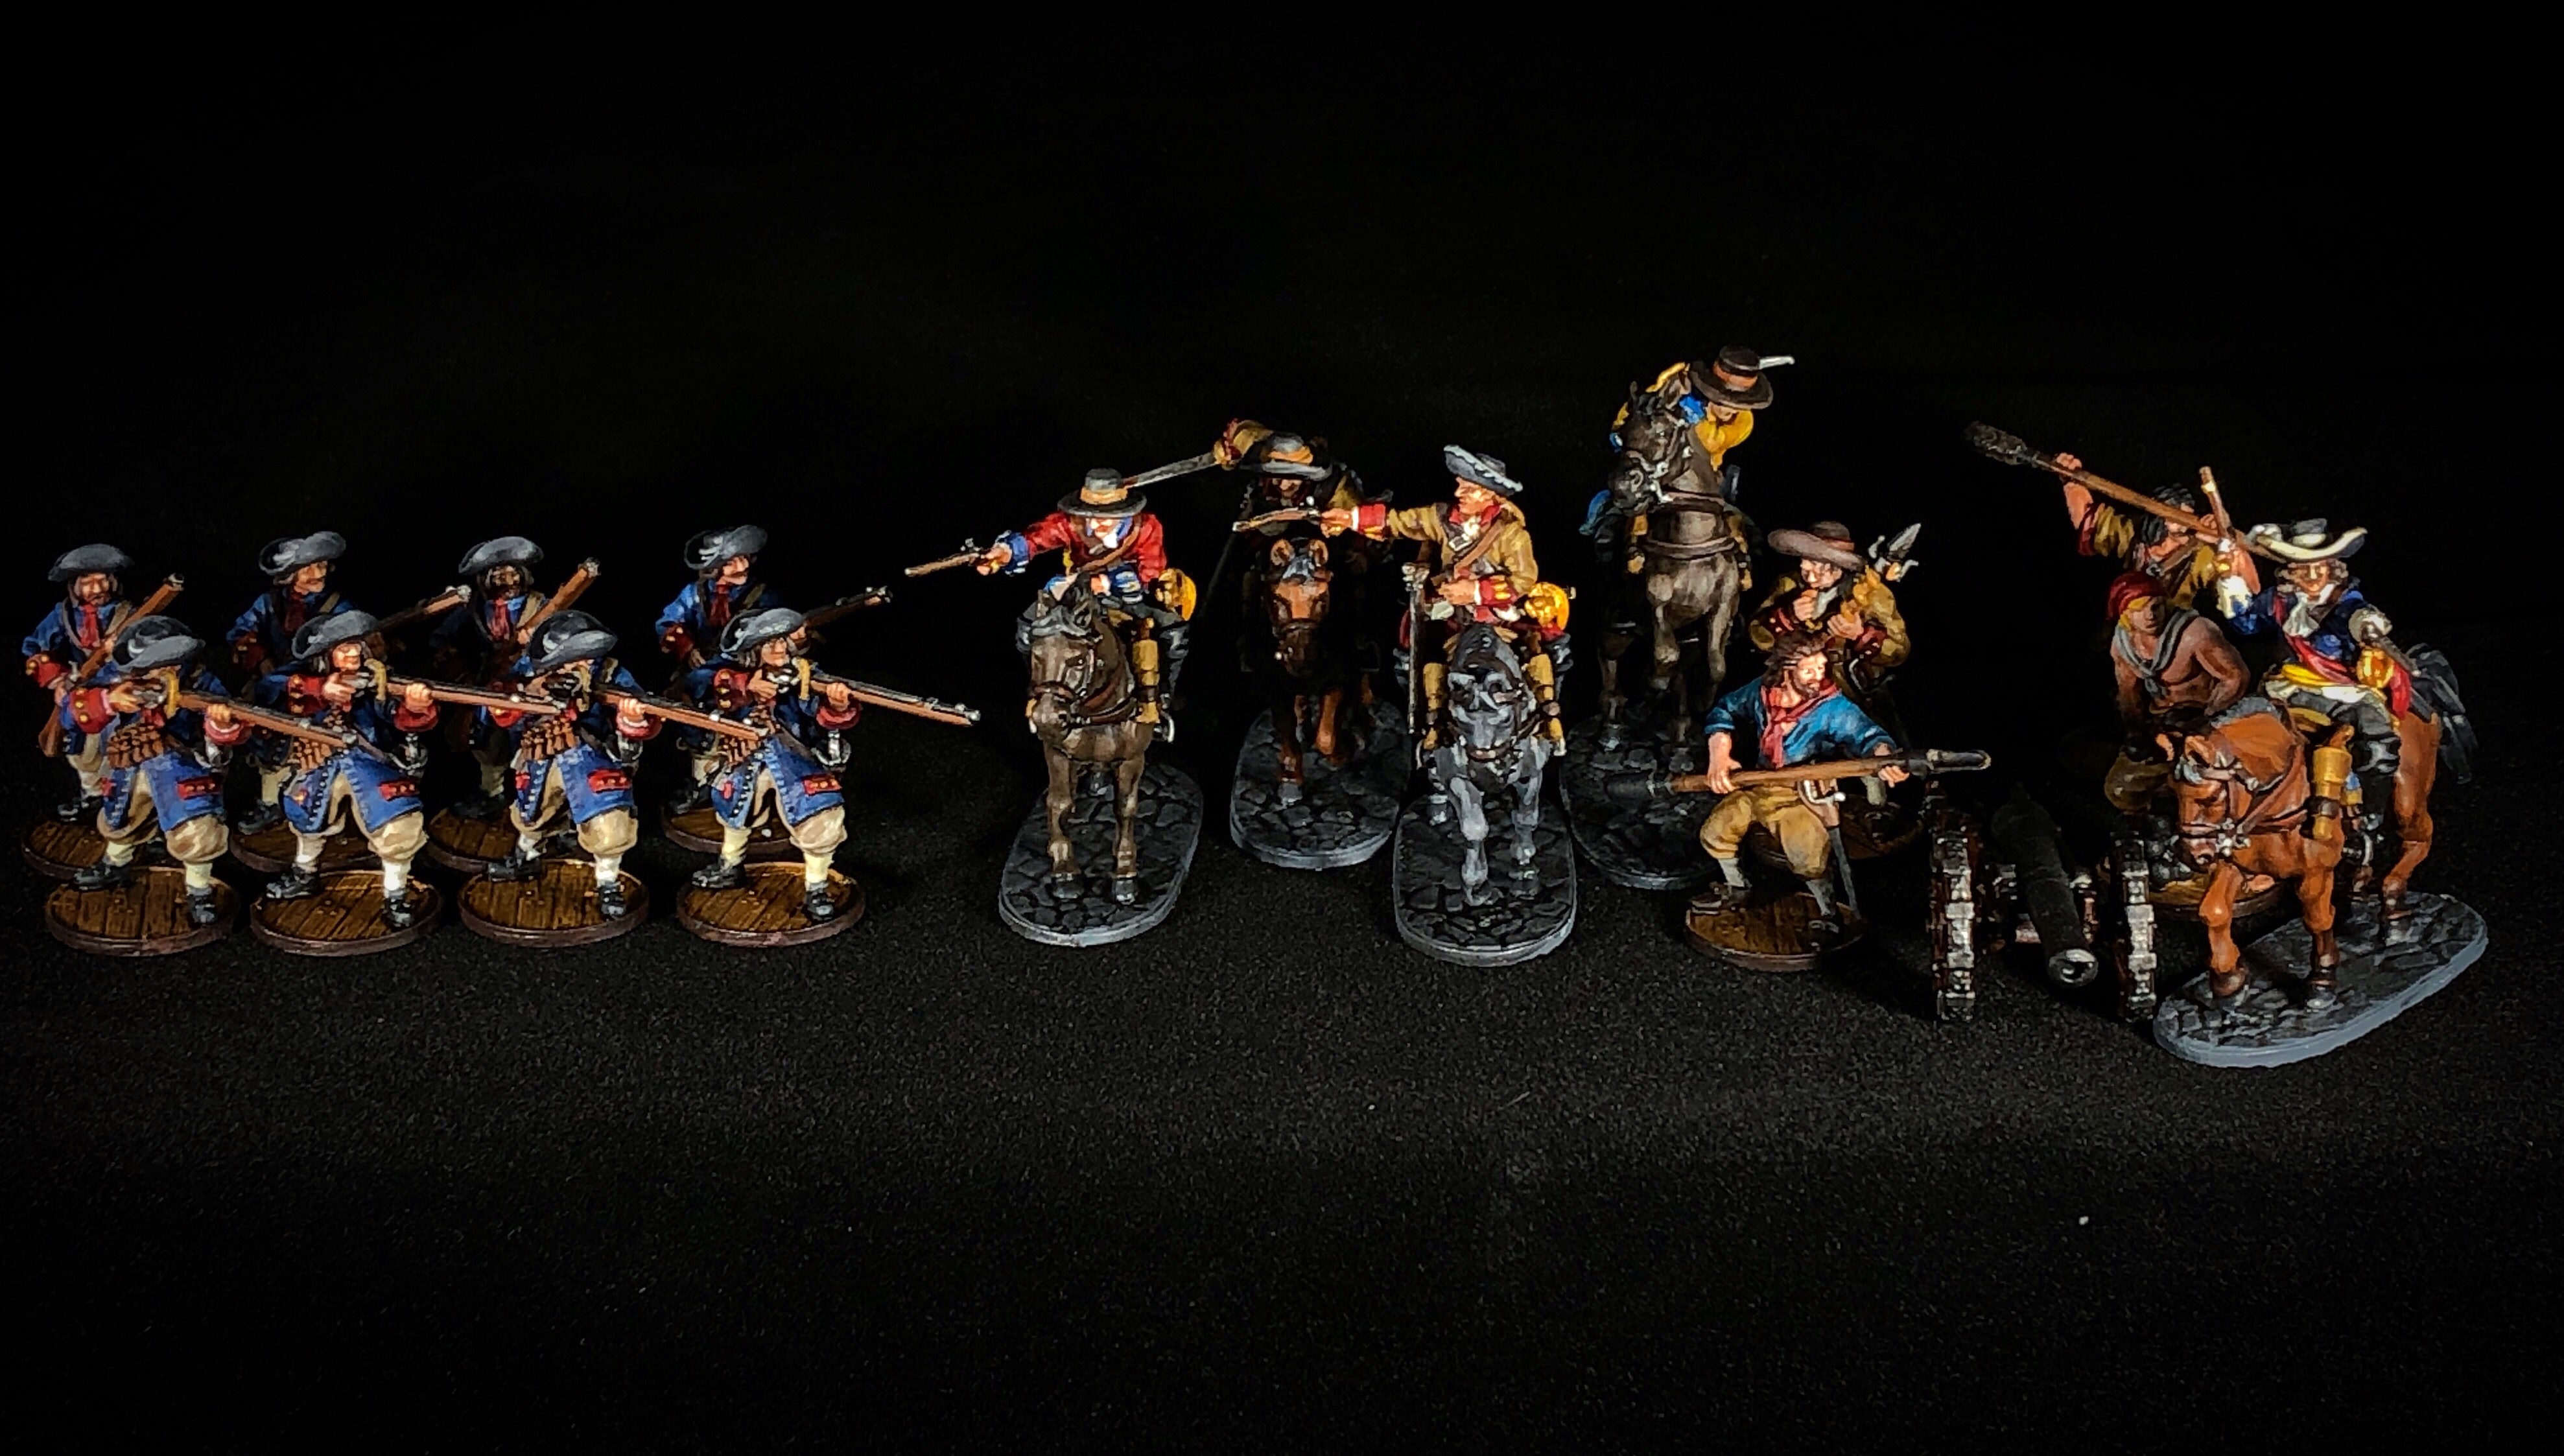
Complete European Militia Starter Box
Complete Paint List
Citadel Paints
- Kantor Blue
- Rhinox Hide
- Mournfang Brown
- Mephiston Red
- XV-88
- Zandri Dust
- Celestra Grey
- Alaitoc Blue
- Hoeth Blue
- Evil Sunz Scarlet
- Wild Rider Red
- Gorthor Brown
- Skragg Brown
- Deathclaw Brown
- Screaming Skull
- Zamesi Desert
- Eshin Grey
- Dawnstone
- Agrax Earthshade
- Nuln Oil
- Carroburg Crimson
- Drakenhof Nightshade
- Reikland Fleshshade
Vallejo Paints
- German Grey
- Gold
- Brass
- Ivory
- Steel
- Duraluminium
Formula P3 Paints
- Midlund Flesh
- Ryn Flesh
An alternate paint scheme
Pingback: Completed European Soldiers | Blood & Pigment
Pingback: Blood & Plunder Painting Guides - Blood & Pigment