Preparing models for the painting process isn’t the most complicated or glorious task, but it is important. If done poorly, the rest of the painting will be difficult and you may struggle with continuous chipping and flaking once you start using your miniature. If done well, it can make the rest of the paint job easier, and produce a more pleasing and durable finished product.
Many of the gamers and painters that have joined the Blood & Plunder community over the past two years are very experienced and if you’re part of that group, you might not find much helpful here, but if you are like I was when I picked up Blood & Plunder, with no miniature gaming background at all, this might help you avoid some of the mistakes I made.
Step 1 – Straighten Parts and Remove Flash and Mold Lines
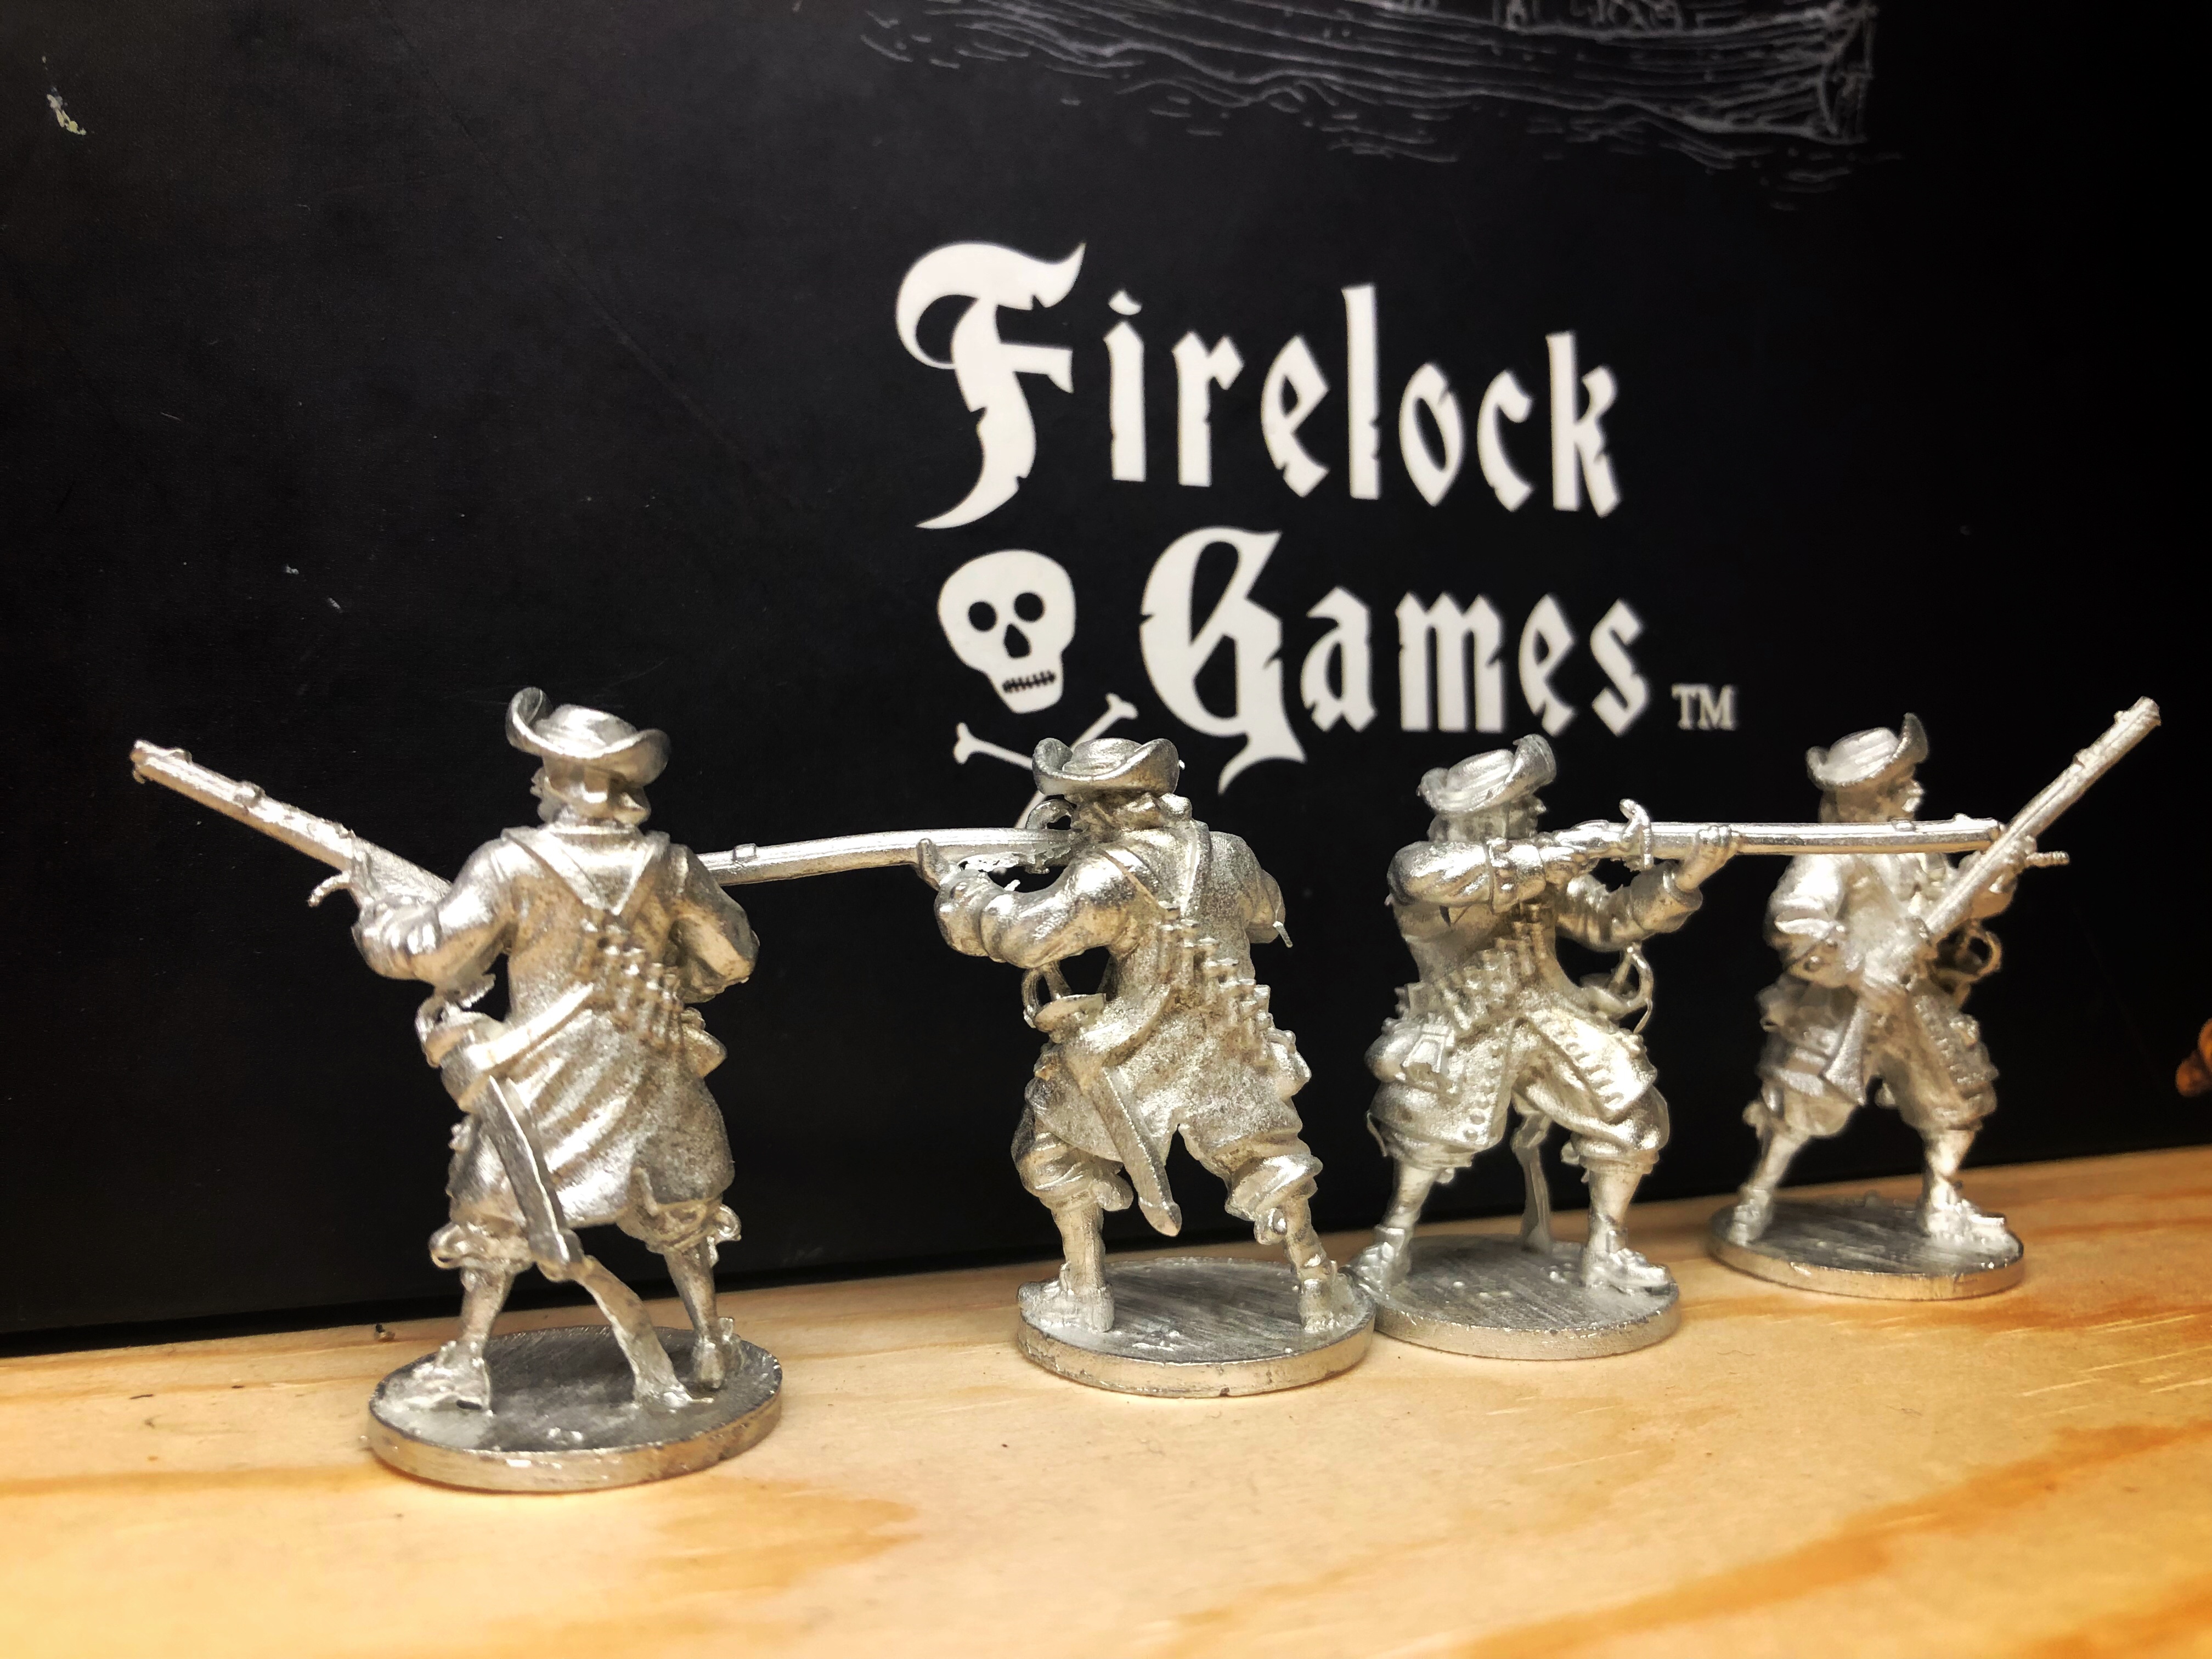
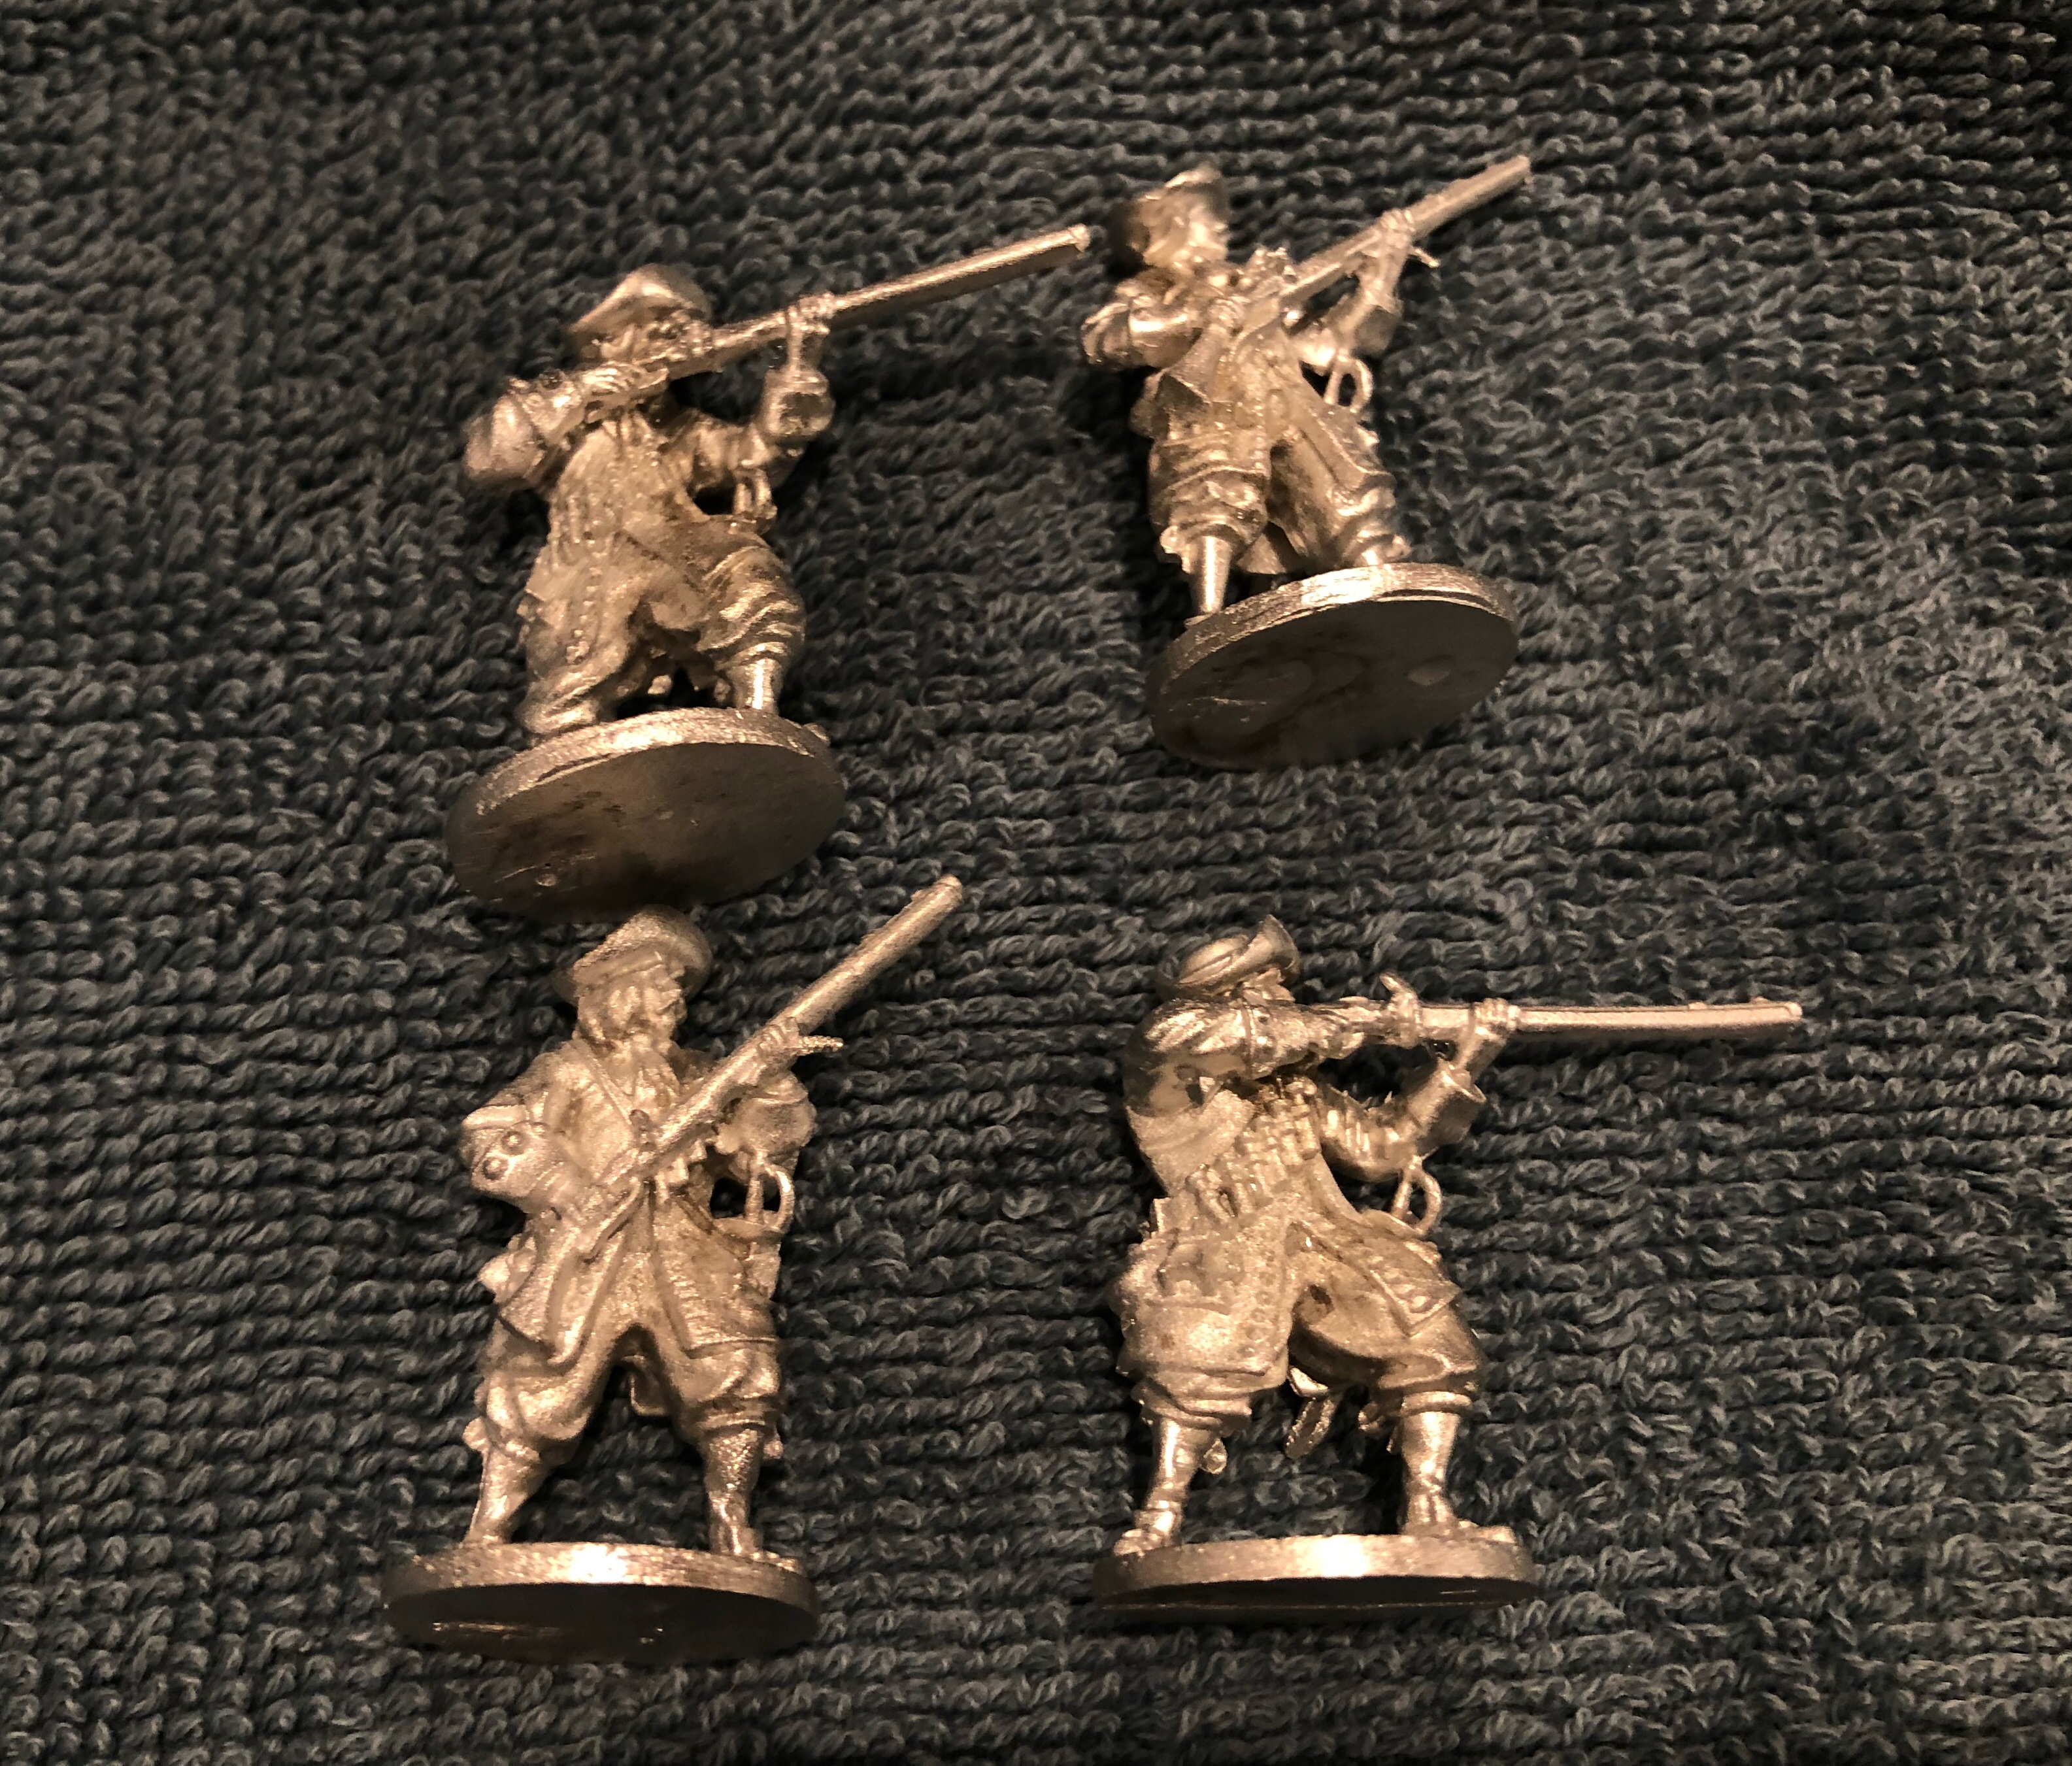
I’ll be using the European Soldiers as examples. This is basically how they come to you from Firelock Games. I’ve already straightened the muskets here (compulsively after purchasing them), but you can see the extra bits of metal that need to be cleaned up and one of those muskets is still crooked!
Try to get your straightening correct the first time as the metal can weaken if you bend it several times.
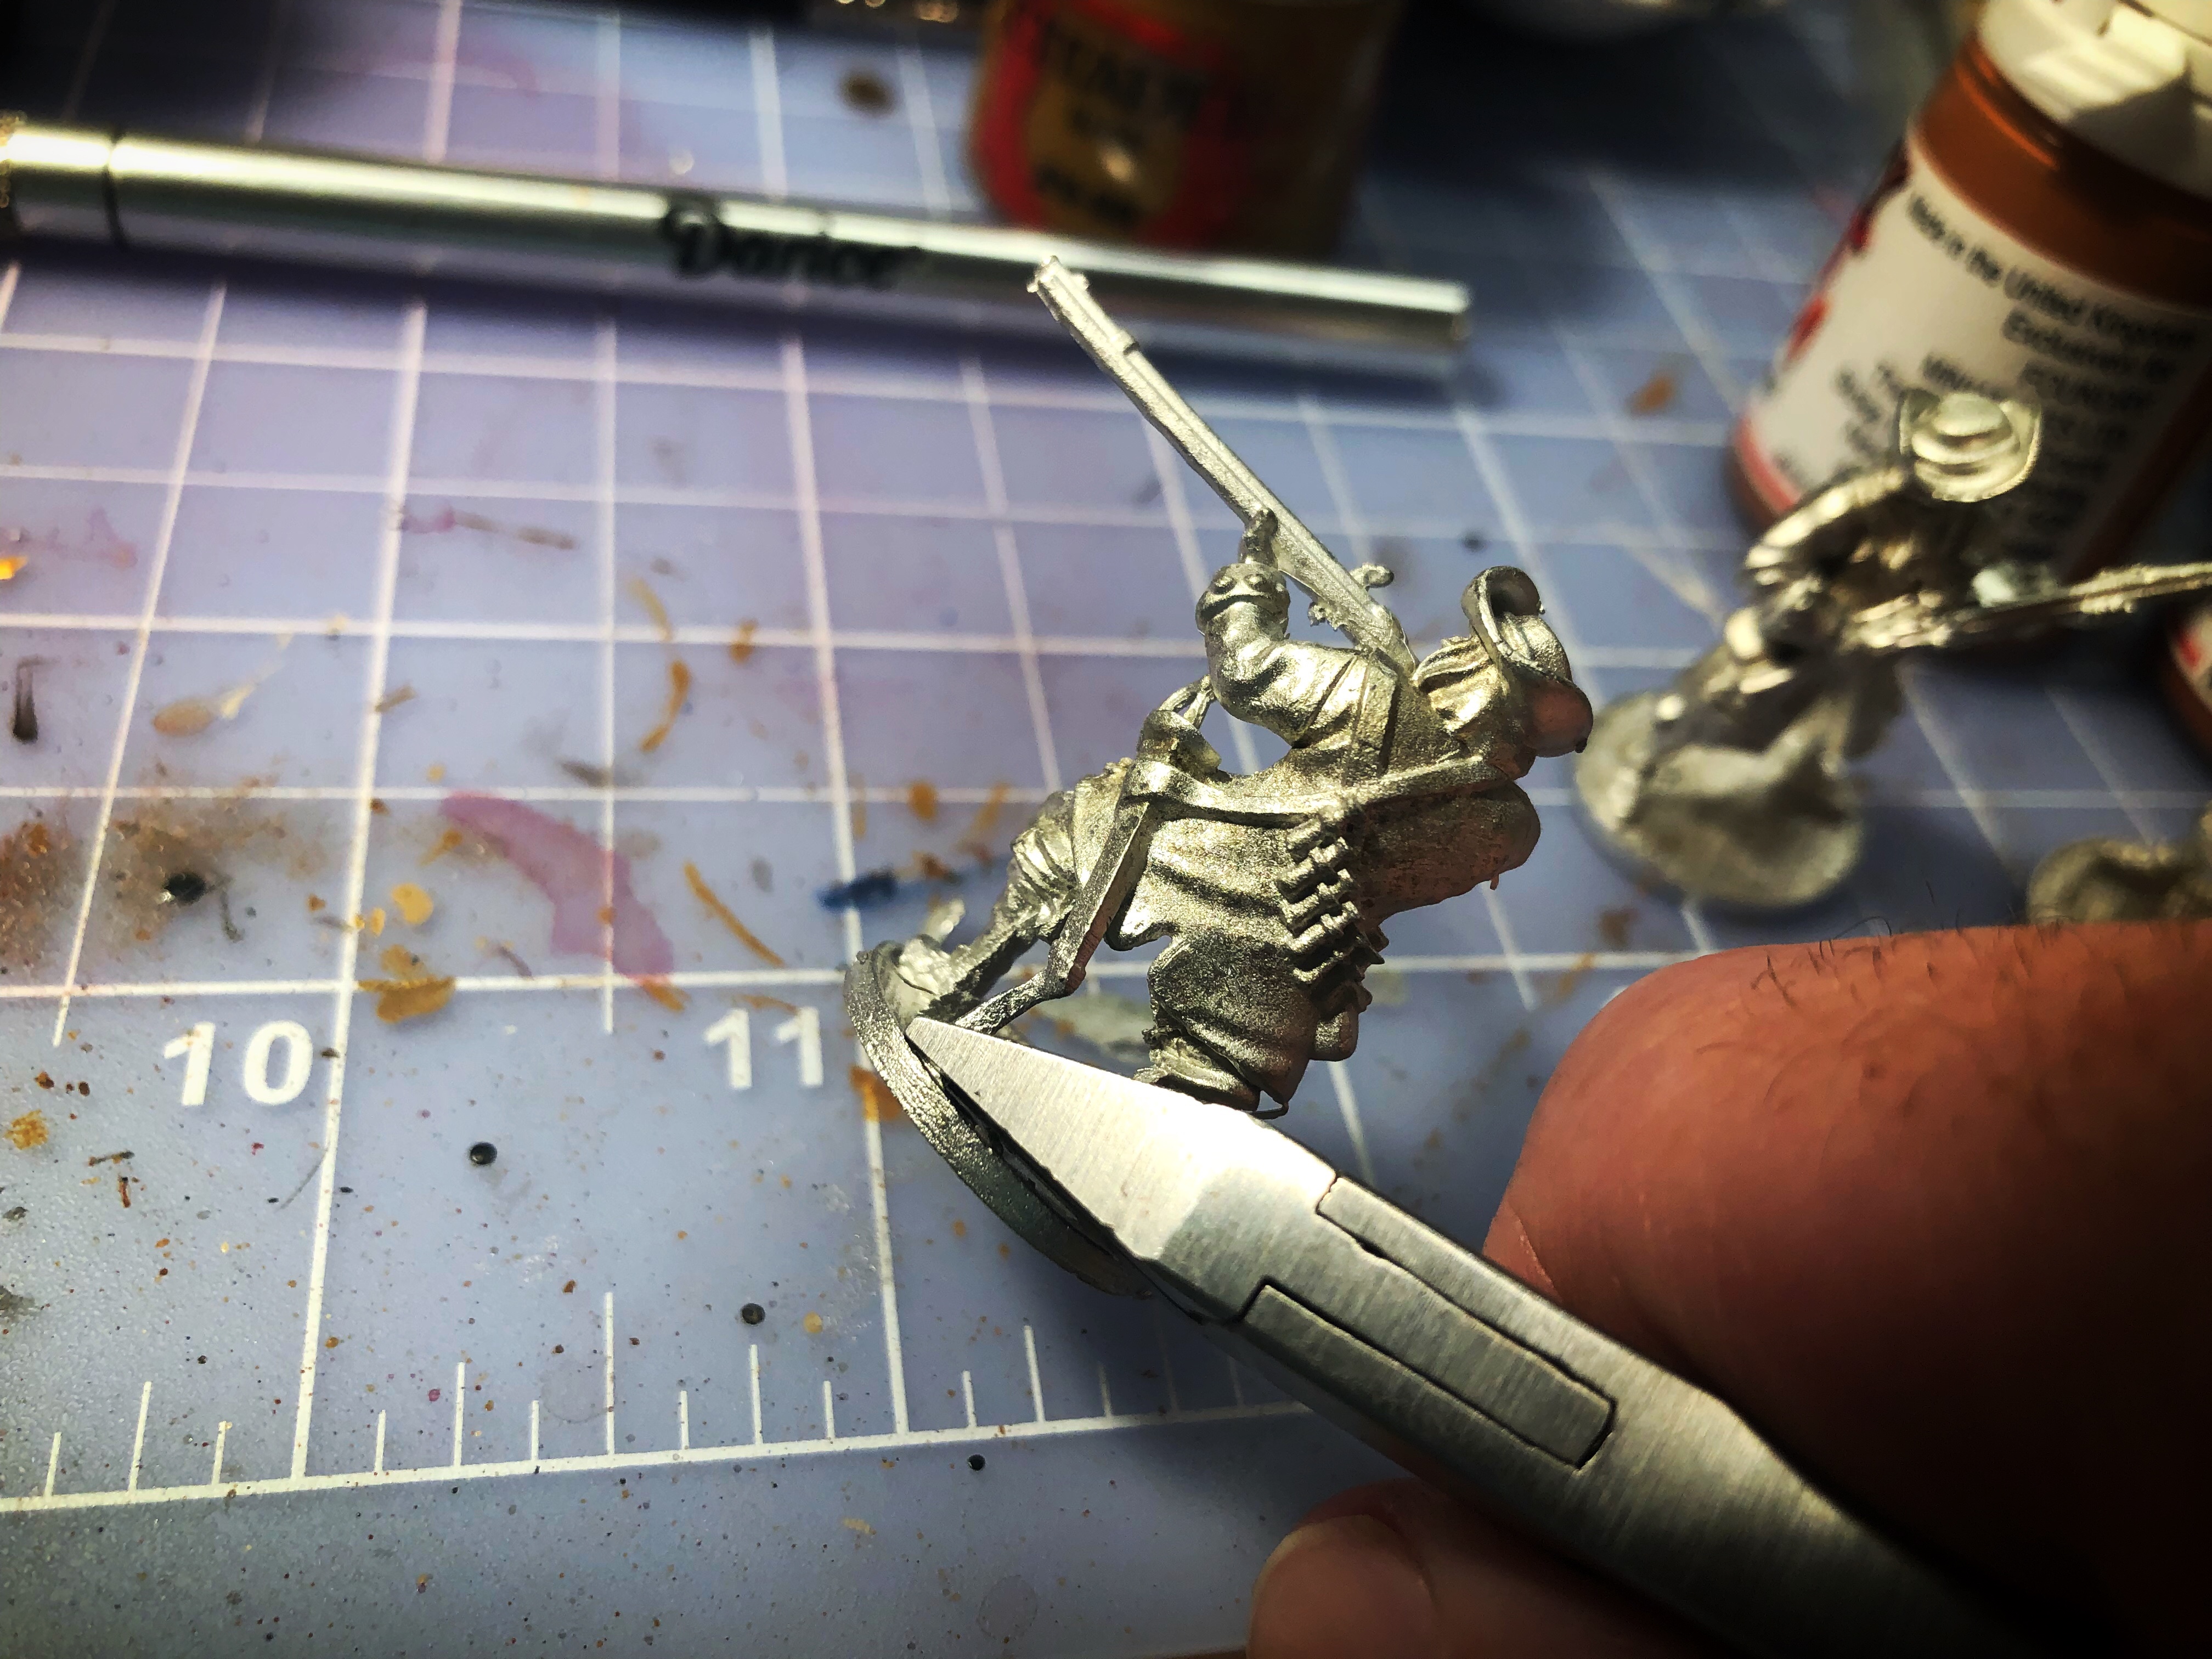
I use a combination of flush cutters (Army Painter), a craft knife and a fine file (Games Workshop). Deciding which tool is best for any given task will take some experience. In this case I found the flush cutters did a good job removing the extra piece of flash from the base, but I couldn’t get a clean cut off the scabbard. I got the best results on the scabbard by simply twisting the flash back and forth a few times and the piece fell off without leaving material or damage on the scabbard.
The area between the left arm and the musket is a spot that usually needs attention. The model below had that entire opening closed up with a large piece of metal. I had to punch through the metal a few times with the knife to create smaller pieces I could then remove one at a time. I find the inside lower portion of the musket stock can be particularly troublesome.
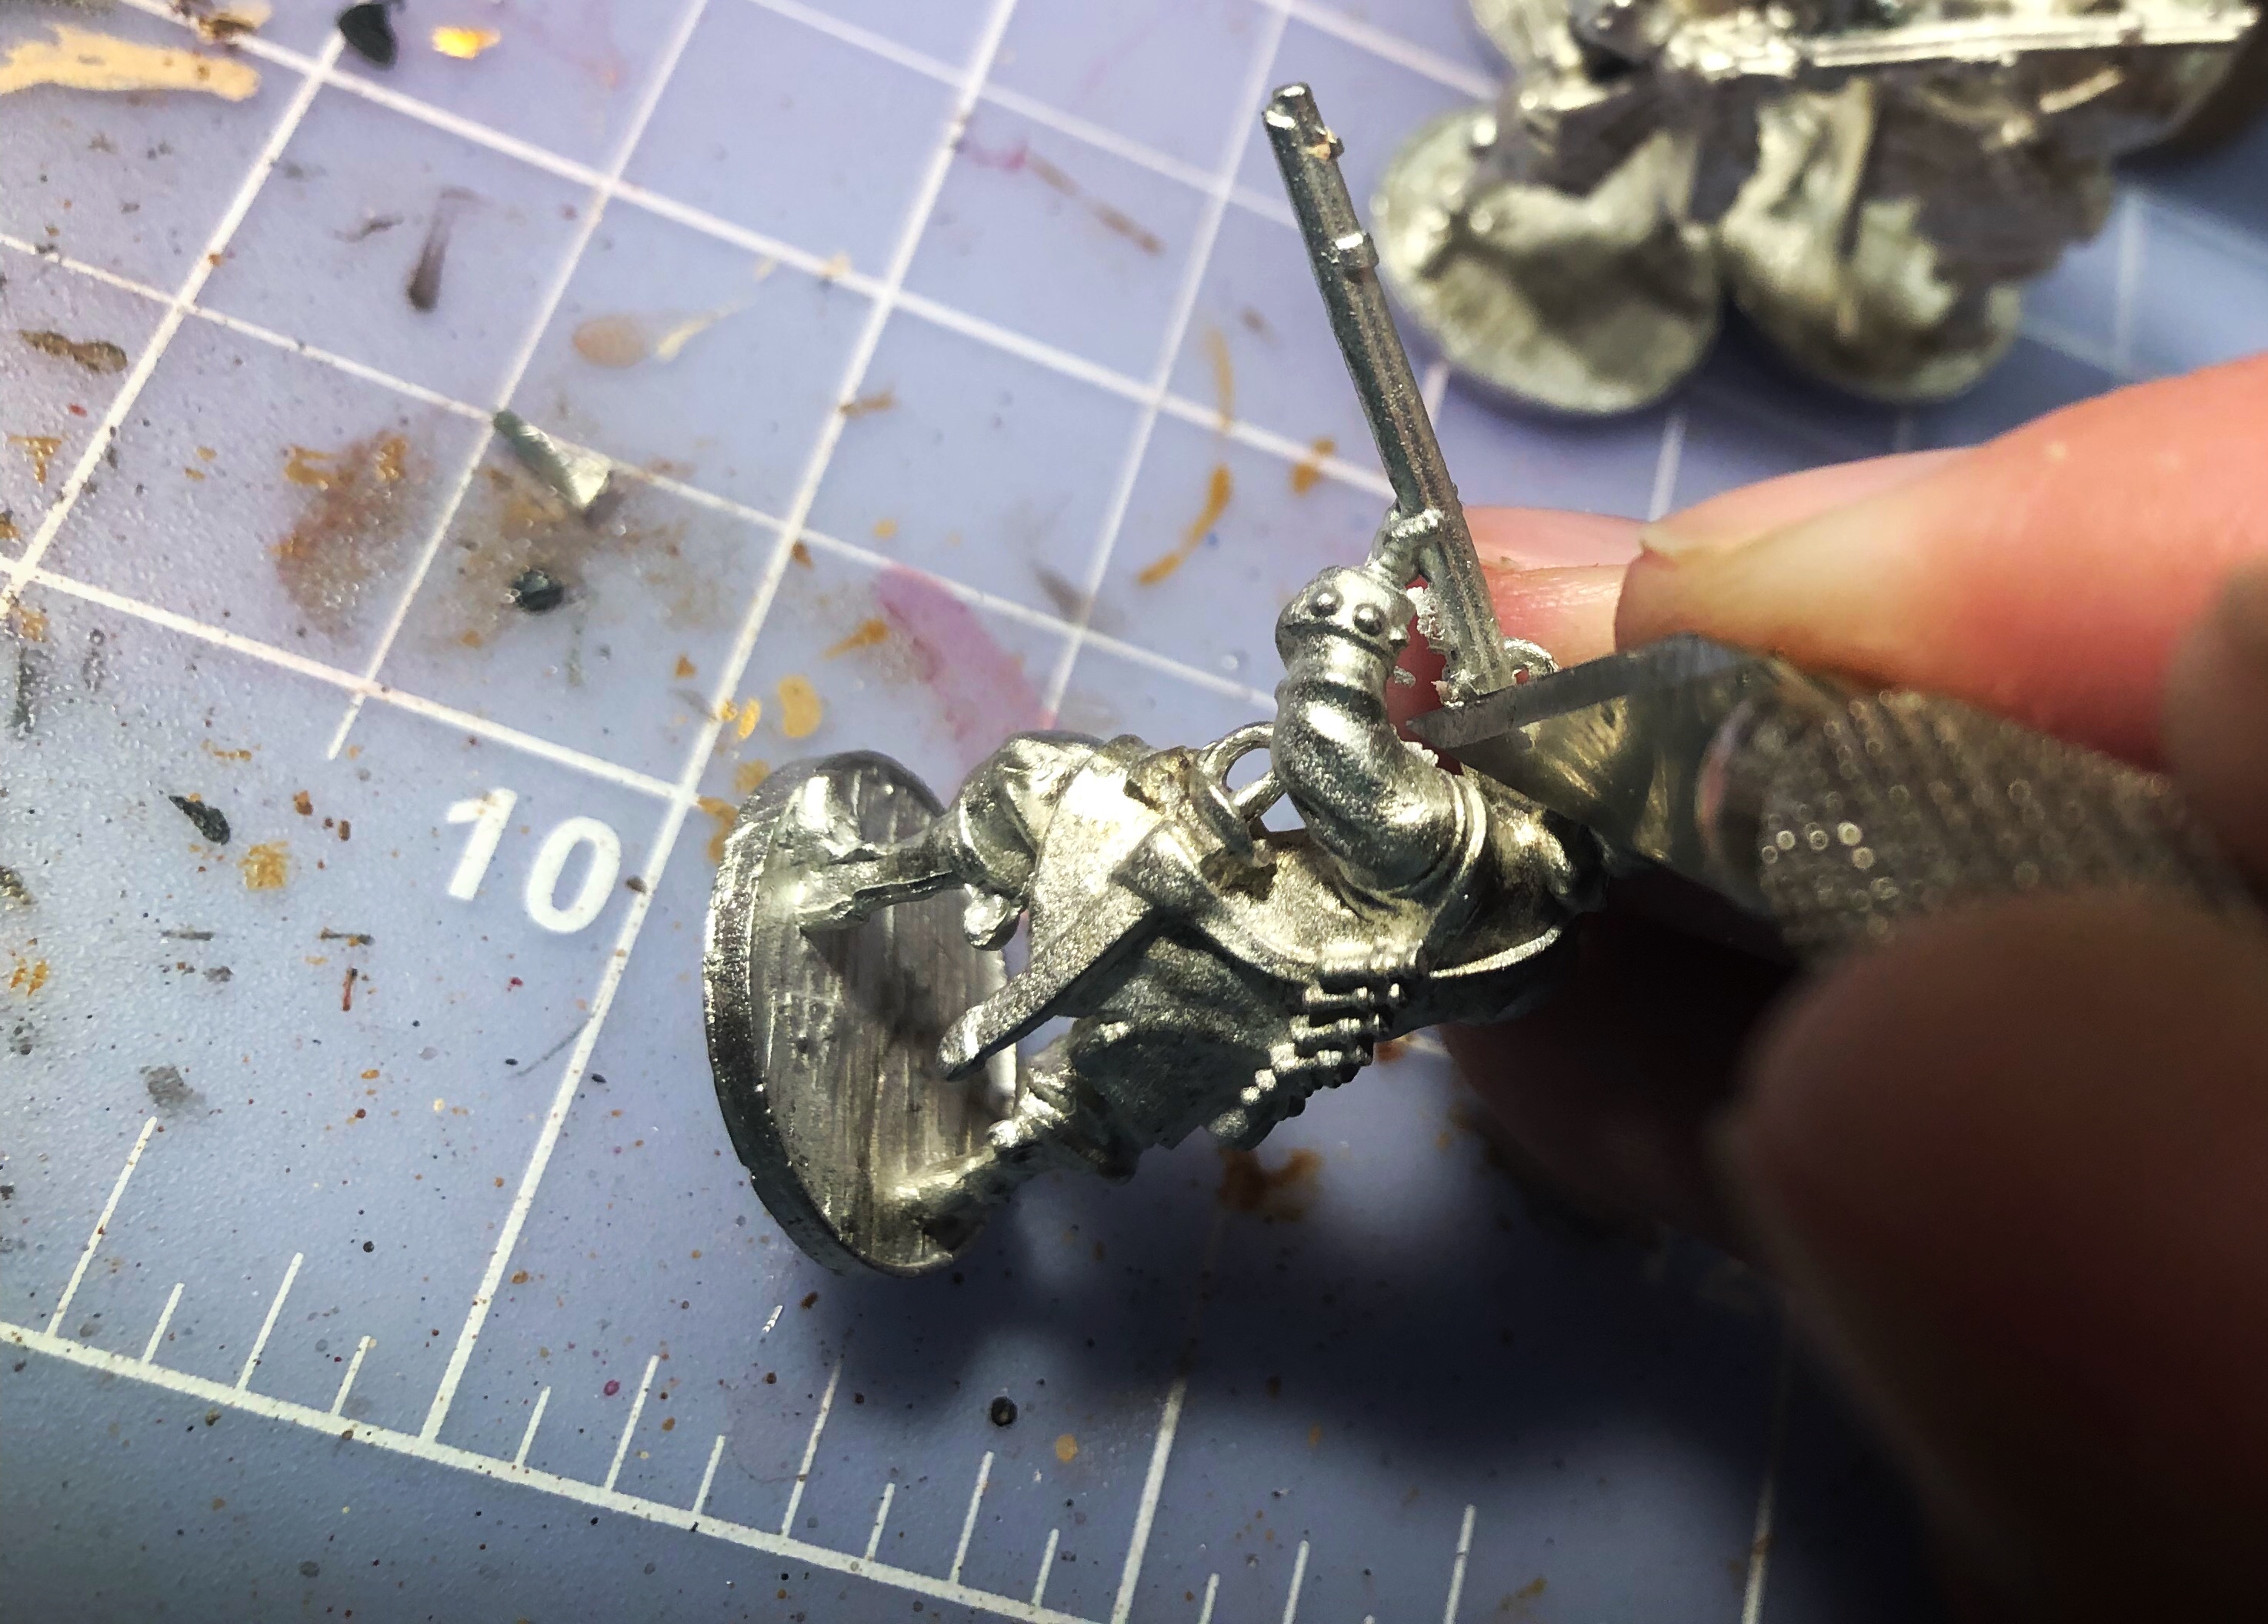
Be careful to look over the miniature at least two times. There are these little tiny tags of metal that fold over that can easily be missed but will annoy you later as they are harder to remove once the primer is applied.
The mold lines are common on the hat, shoulders and legs. Careful use of a file can eliminate these lines, but I’ve been having more luck with scraping the blade of the knife over those lines.
Check the bottom and side of the base for extra material. In some cases the base of the model might need to be straightened as well.
You can obsess over this step and it’s easy to spend much more time than is needed. After a couple minutes on one model you’ll be getting diminishing returns. The mini might not be perfect but if you’ve taken off all the obvious extra metal and removed the prominent lines, that’s probably good enough.
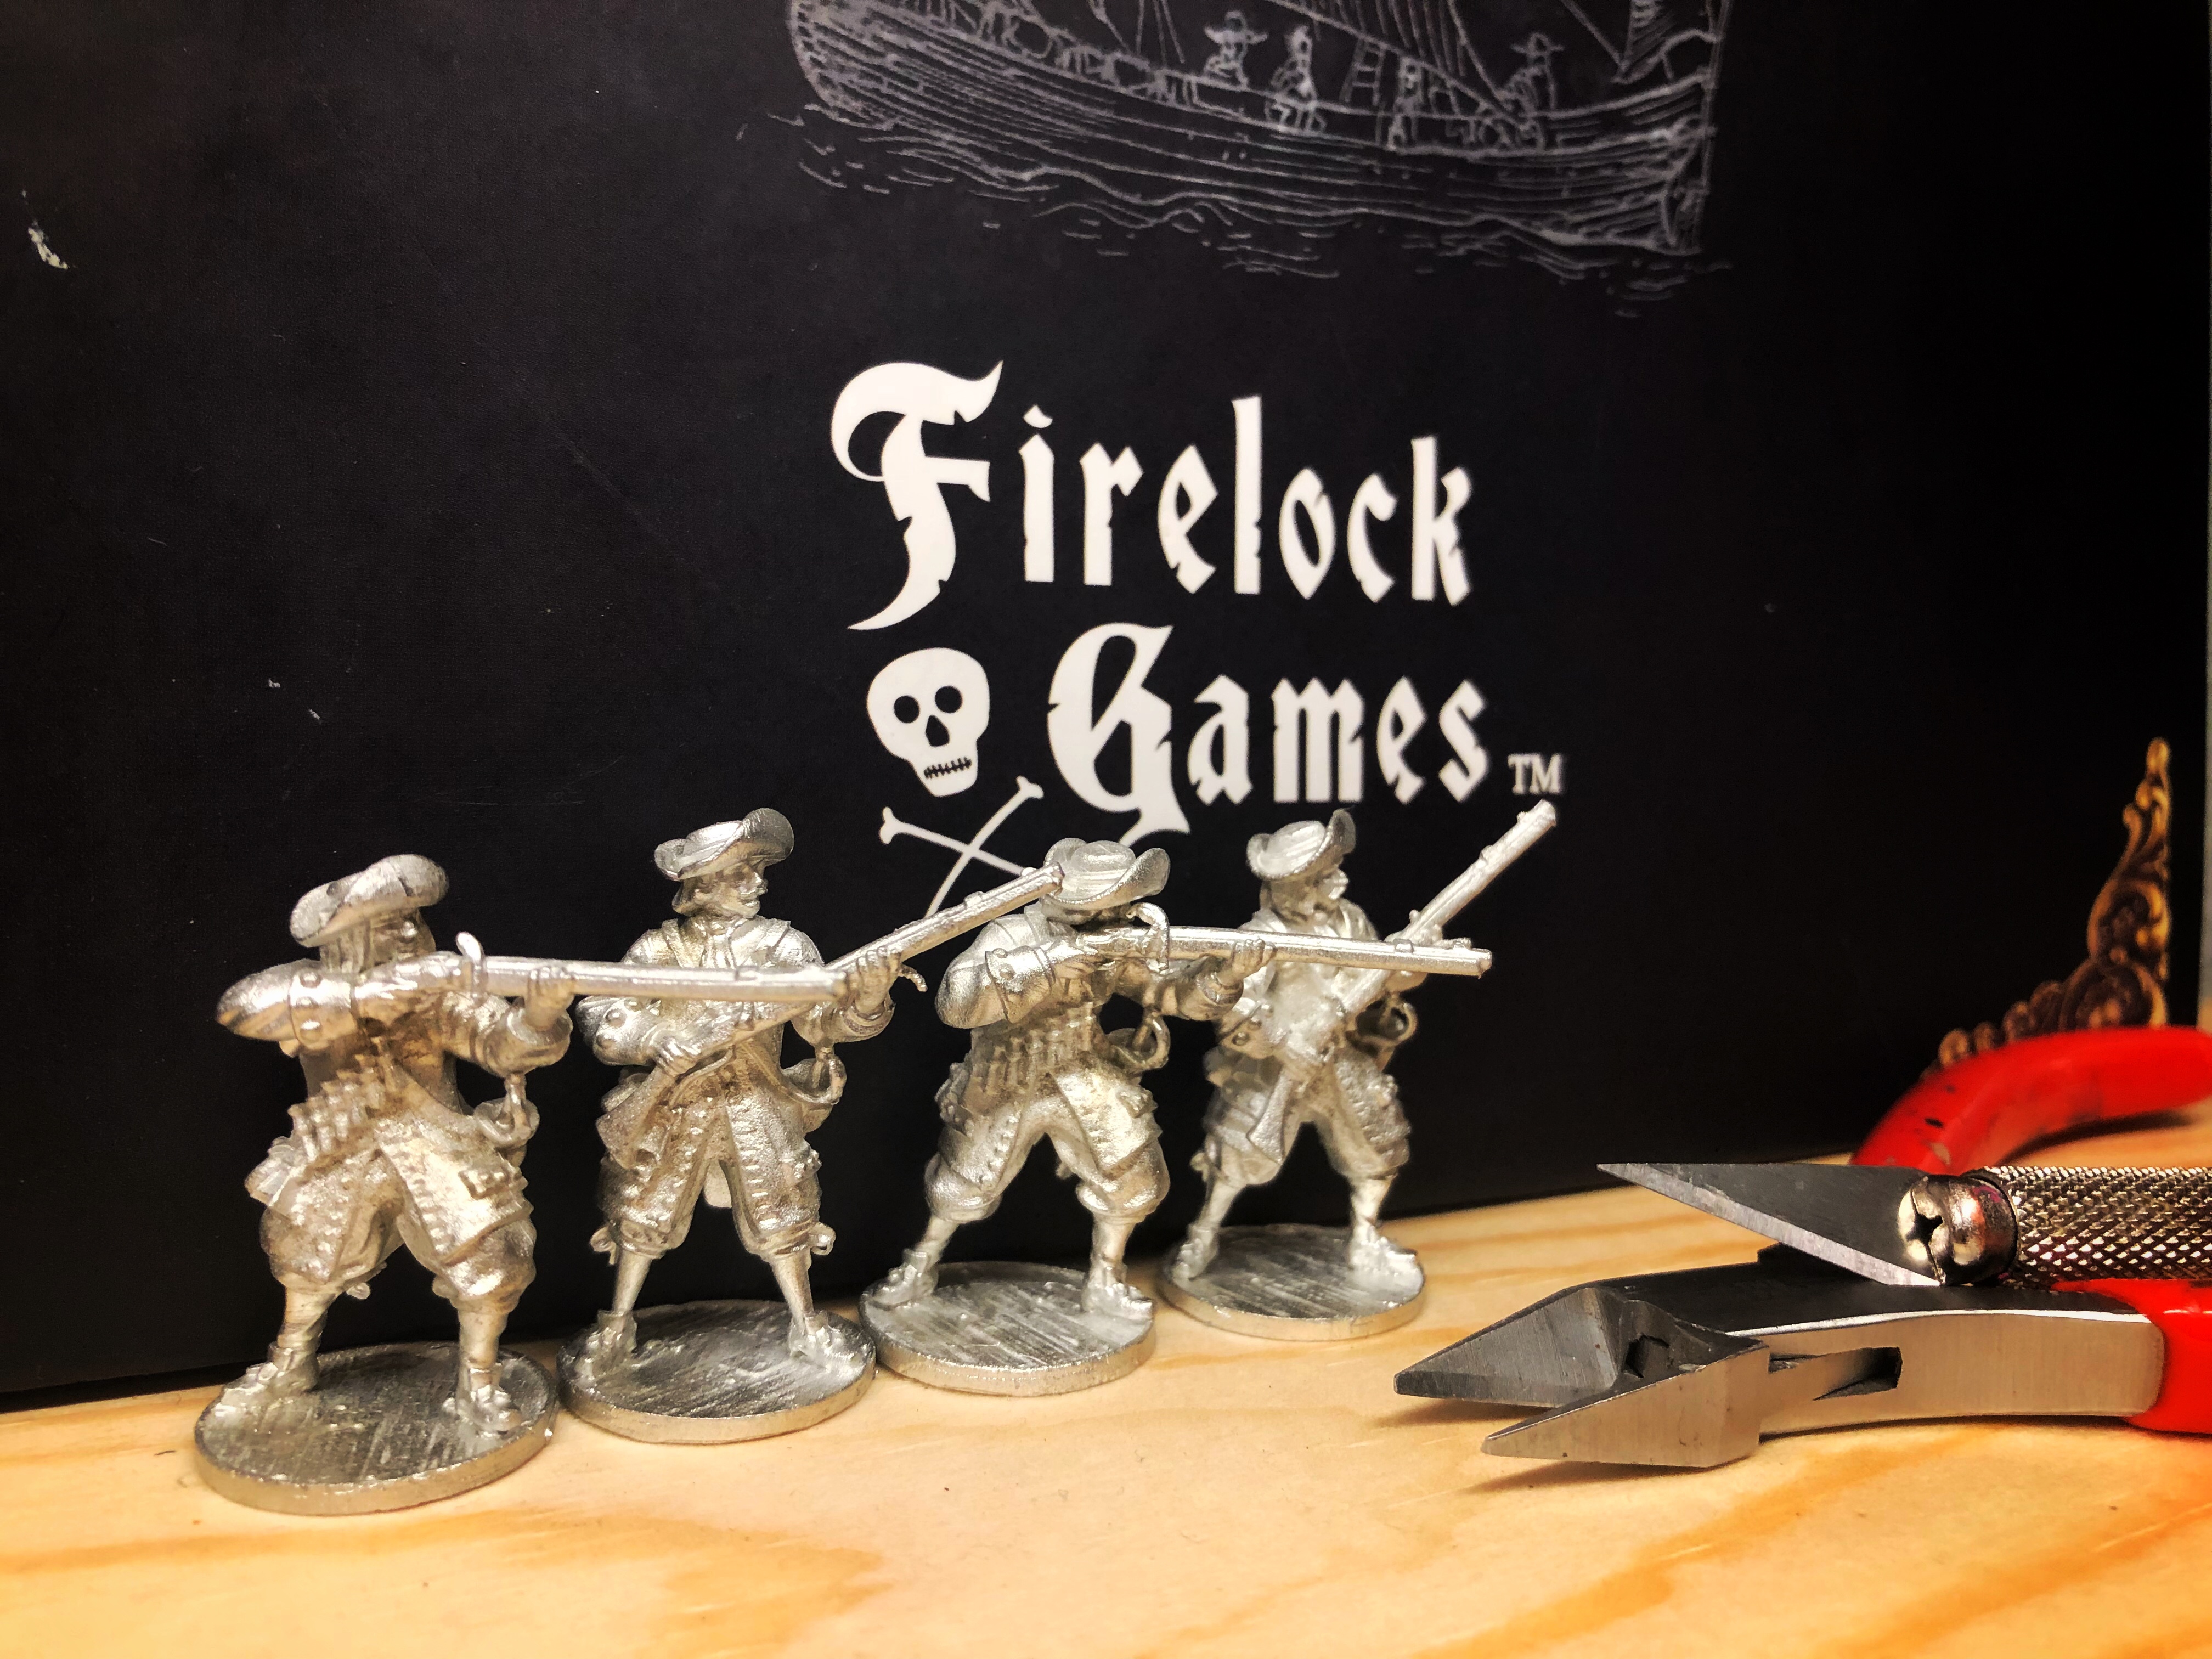
All cleaned up! You can see where I scraped a mold line on the hat of the solider on the far left.
Step 2 – Rinse and Dry
Don’t overthink this. Firelock Games doesn’t use any release agent or any soap or chemical on these miniatures so you don’t need to do much. A good rinse in hot water is plenty. This will rinse any dust or powder off that might have collected from bouncing around in a case with other metal minis and it will rinse off any oils that may have come from your skin while cleaning up the model earlier.
You can use a soap or cleaner like Simple Green or dish soap, but it doesn’t need it and if you don’t thoroughly get every bit of that off, you’ll have trouble with the primer sticking to the metal. I did that… It’s so sad to see a well painted miniature chip over and over again.
I used to scrub each mini with an old toothbrush but I stopped doing that a few months ago and I haven’t had any troubles.
Just rinse them with hot water. That’s all they need and anything more just introduces the potential for problems.

I just lay them out to dry on a towel and if I’m in any hurry for them to dry, I might give each a hard puff of air to blow off any large bits of water that might have collected in the cracks and would take a long time to dry.
Makes sure they are completely dry before moving on to priming.
Step 3 – Priming
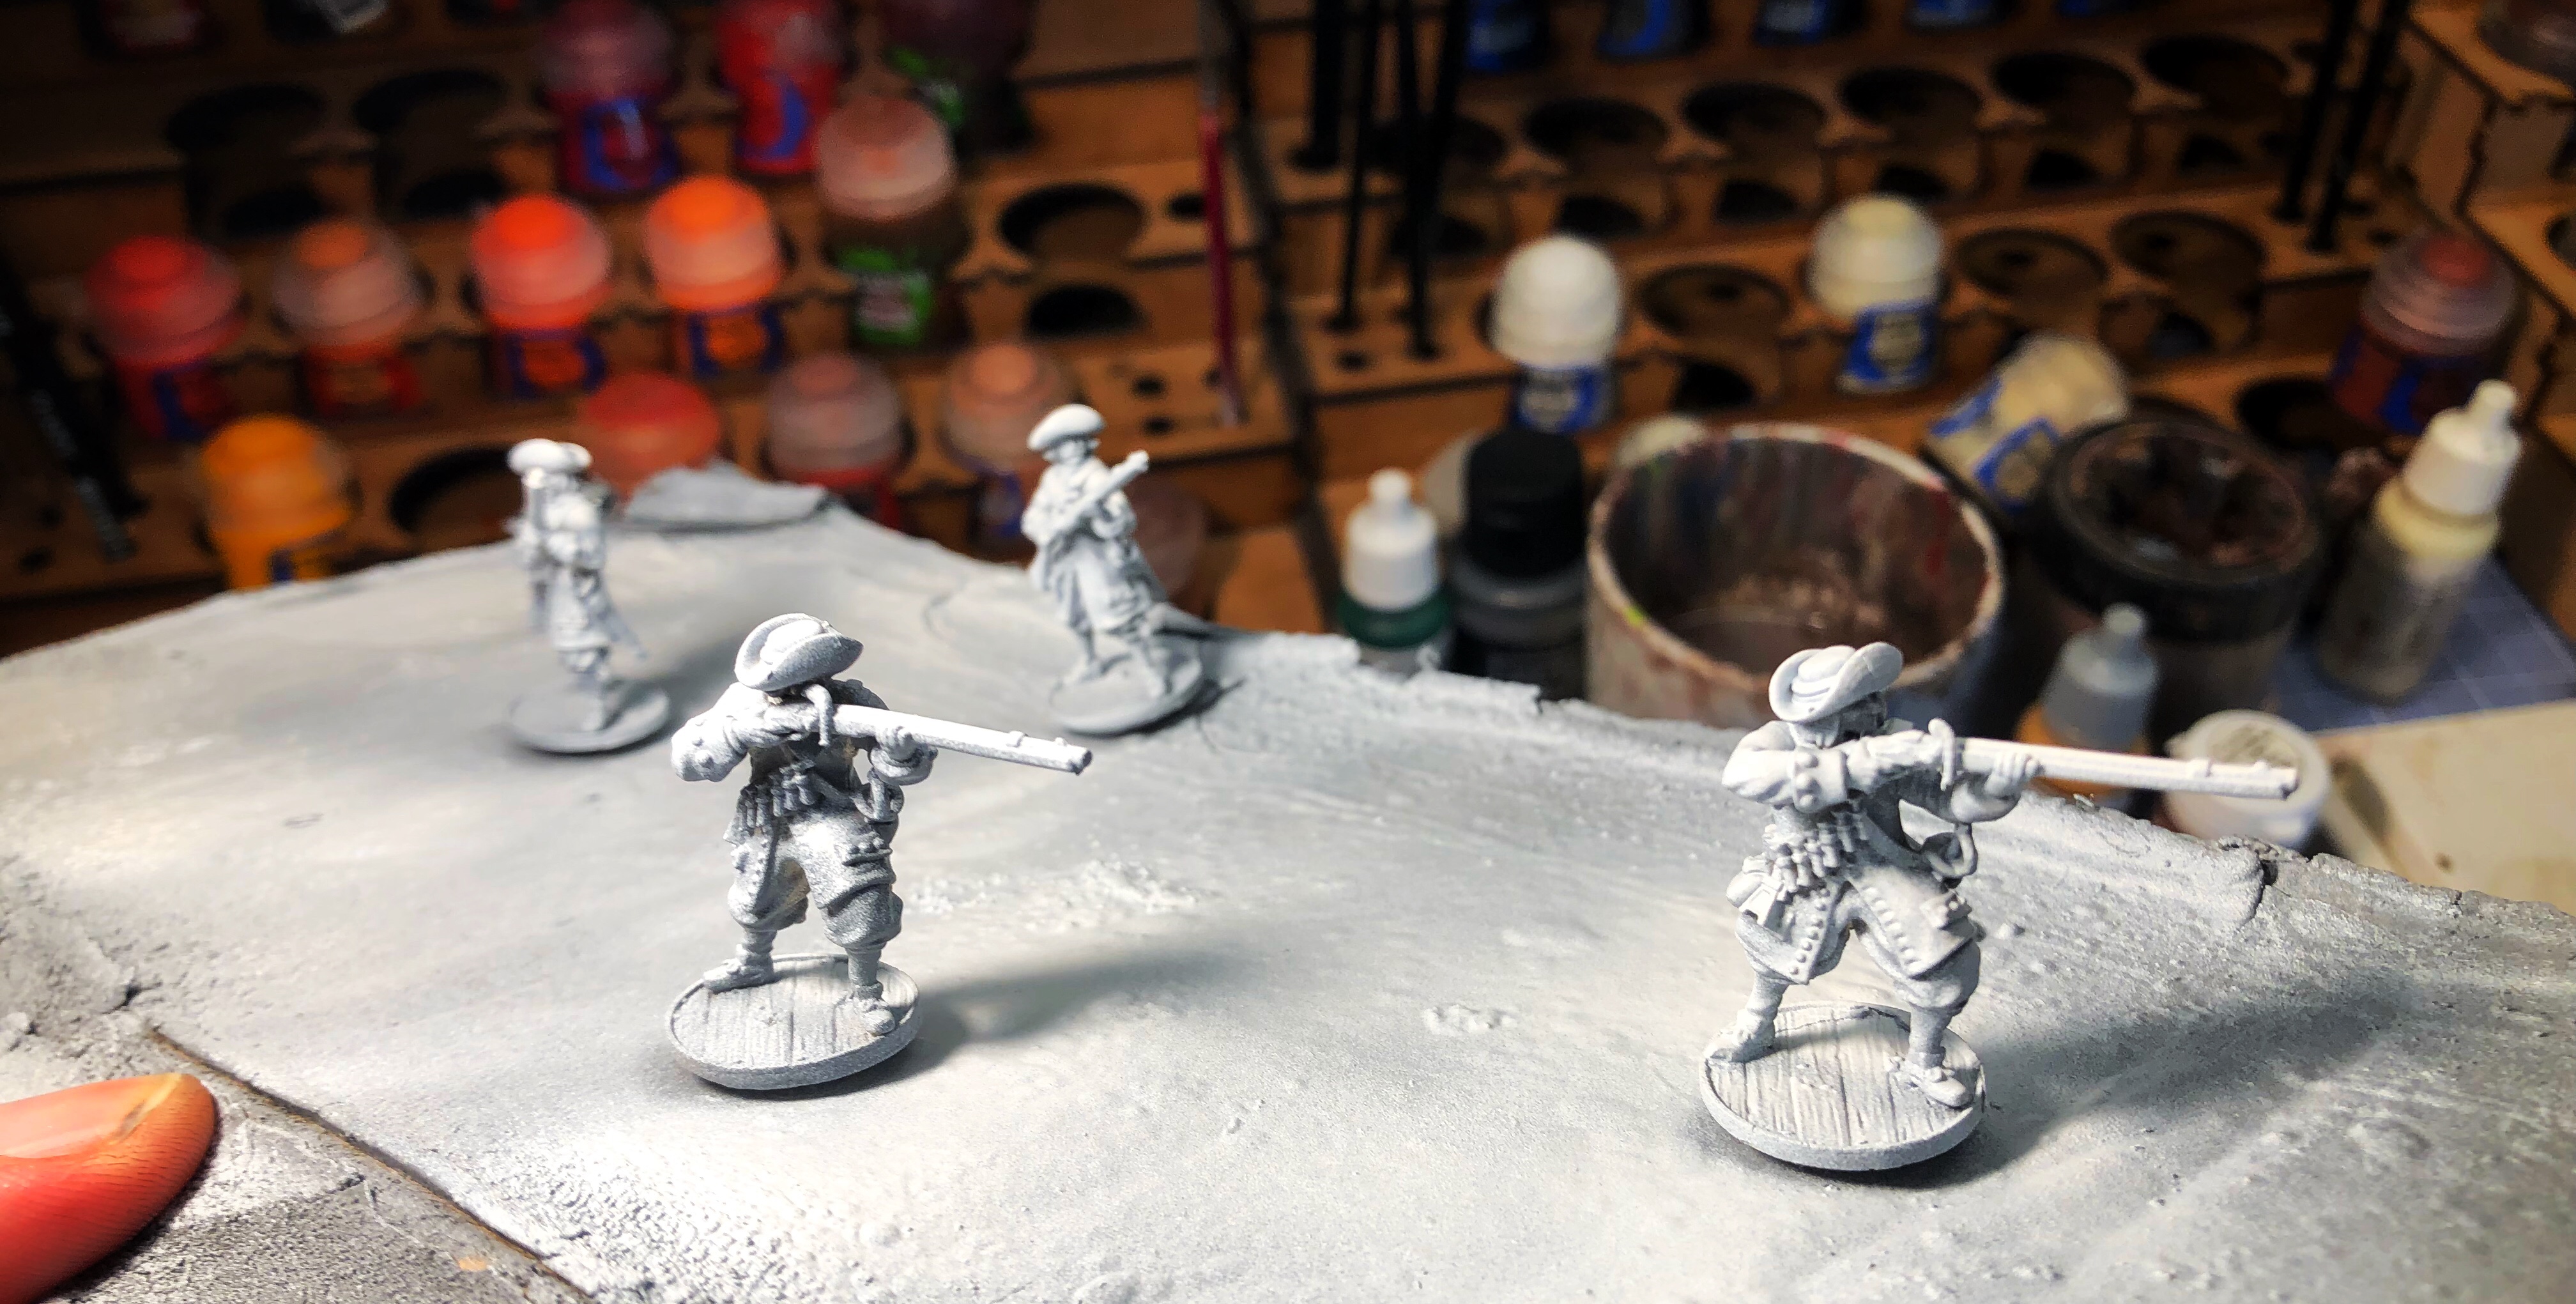
I use a two step priming process of a base of grey, then a white “zenithal” highlight from the top and 45* around the sides.
First I attach the models to my trusty-crusty piece of ancient cardboard with poster putty, then I prime with Army Painter Uniform Grey (from a rattle can). Hold the can about 5-7″ away from the mini. I use short and controlled “bursts” from the can rather than a steady stream of paint. It’s really easy to get too much paint if you just keep spraying. I spray all the minis on my board from one side, then rotate the board and hit them all again until I’ve hit all four sides. The downward facing parts of the minis are hardest to hit so check the lower parts of the arms and under the legs.
I’ve used Citadel primer and generic Rust-oleum and I found Citadel to chip easier and generic spray paint to come out so heavy that it was difficult to control and too easy to cover the mini with too much paint and destroy detail. I recommend Army Painter primers.
Priming with an airbrush might be superior to the rattle can, but I haven’t invested in an airbrush and I think the spray can does the job just fine.
After letting that first coat dry for a few minutes, I apply a quick spray of white from the top and at an angle to provide a highlighting effect. In general, colored paint looks best over a white primer (in my opinion) but that base layer of darker grey will make sure all the cracks and lower portions of the mini are dark, even if you miss a spot or two. The bright white on the upturned parts of the mini give you a head start on highlighting as well. Paint a red of blue over that model and the areas with the white primer will be brighter than the grey and you already have a head start on the highlights.
I find this zenithal method really brings out the detail in the miniature as well so it’s easier to see those little pieces that you might miss if its all stark white.
At this point they’re ready for color! I use the same poster putty to attach the models to the discarded tops of old spray cans. That way I can hold the mini to paint it without touching it. Citadel and several other companies make fancy miniature handles or holders, but I find this works very well and it uses a byproduct of my hobby anyway!
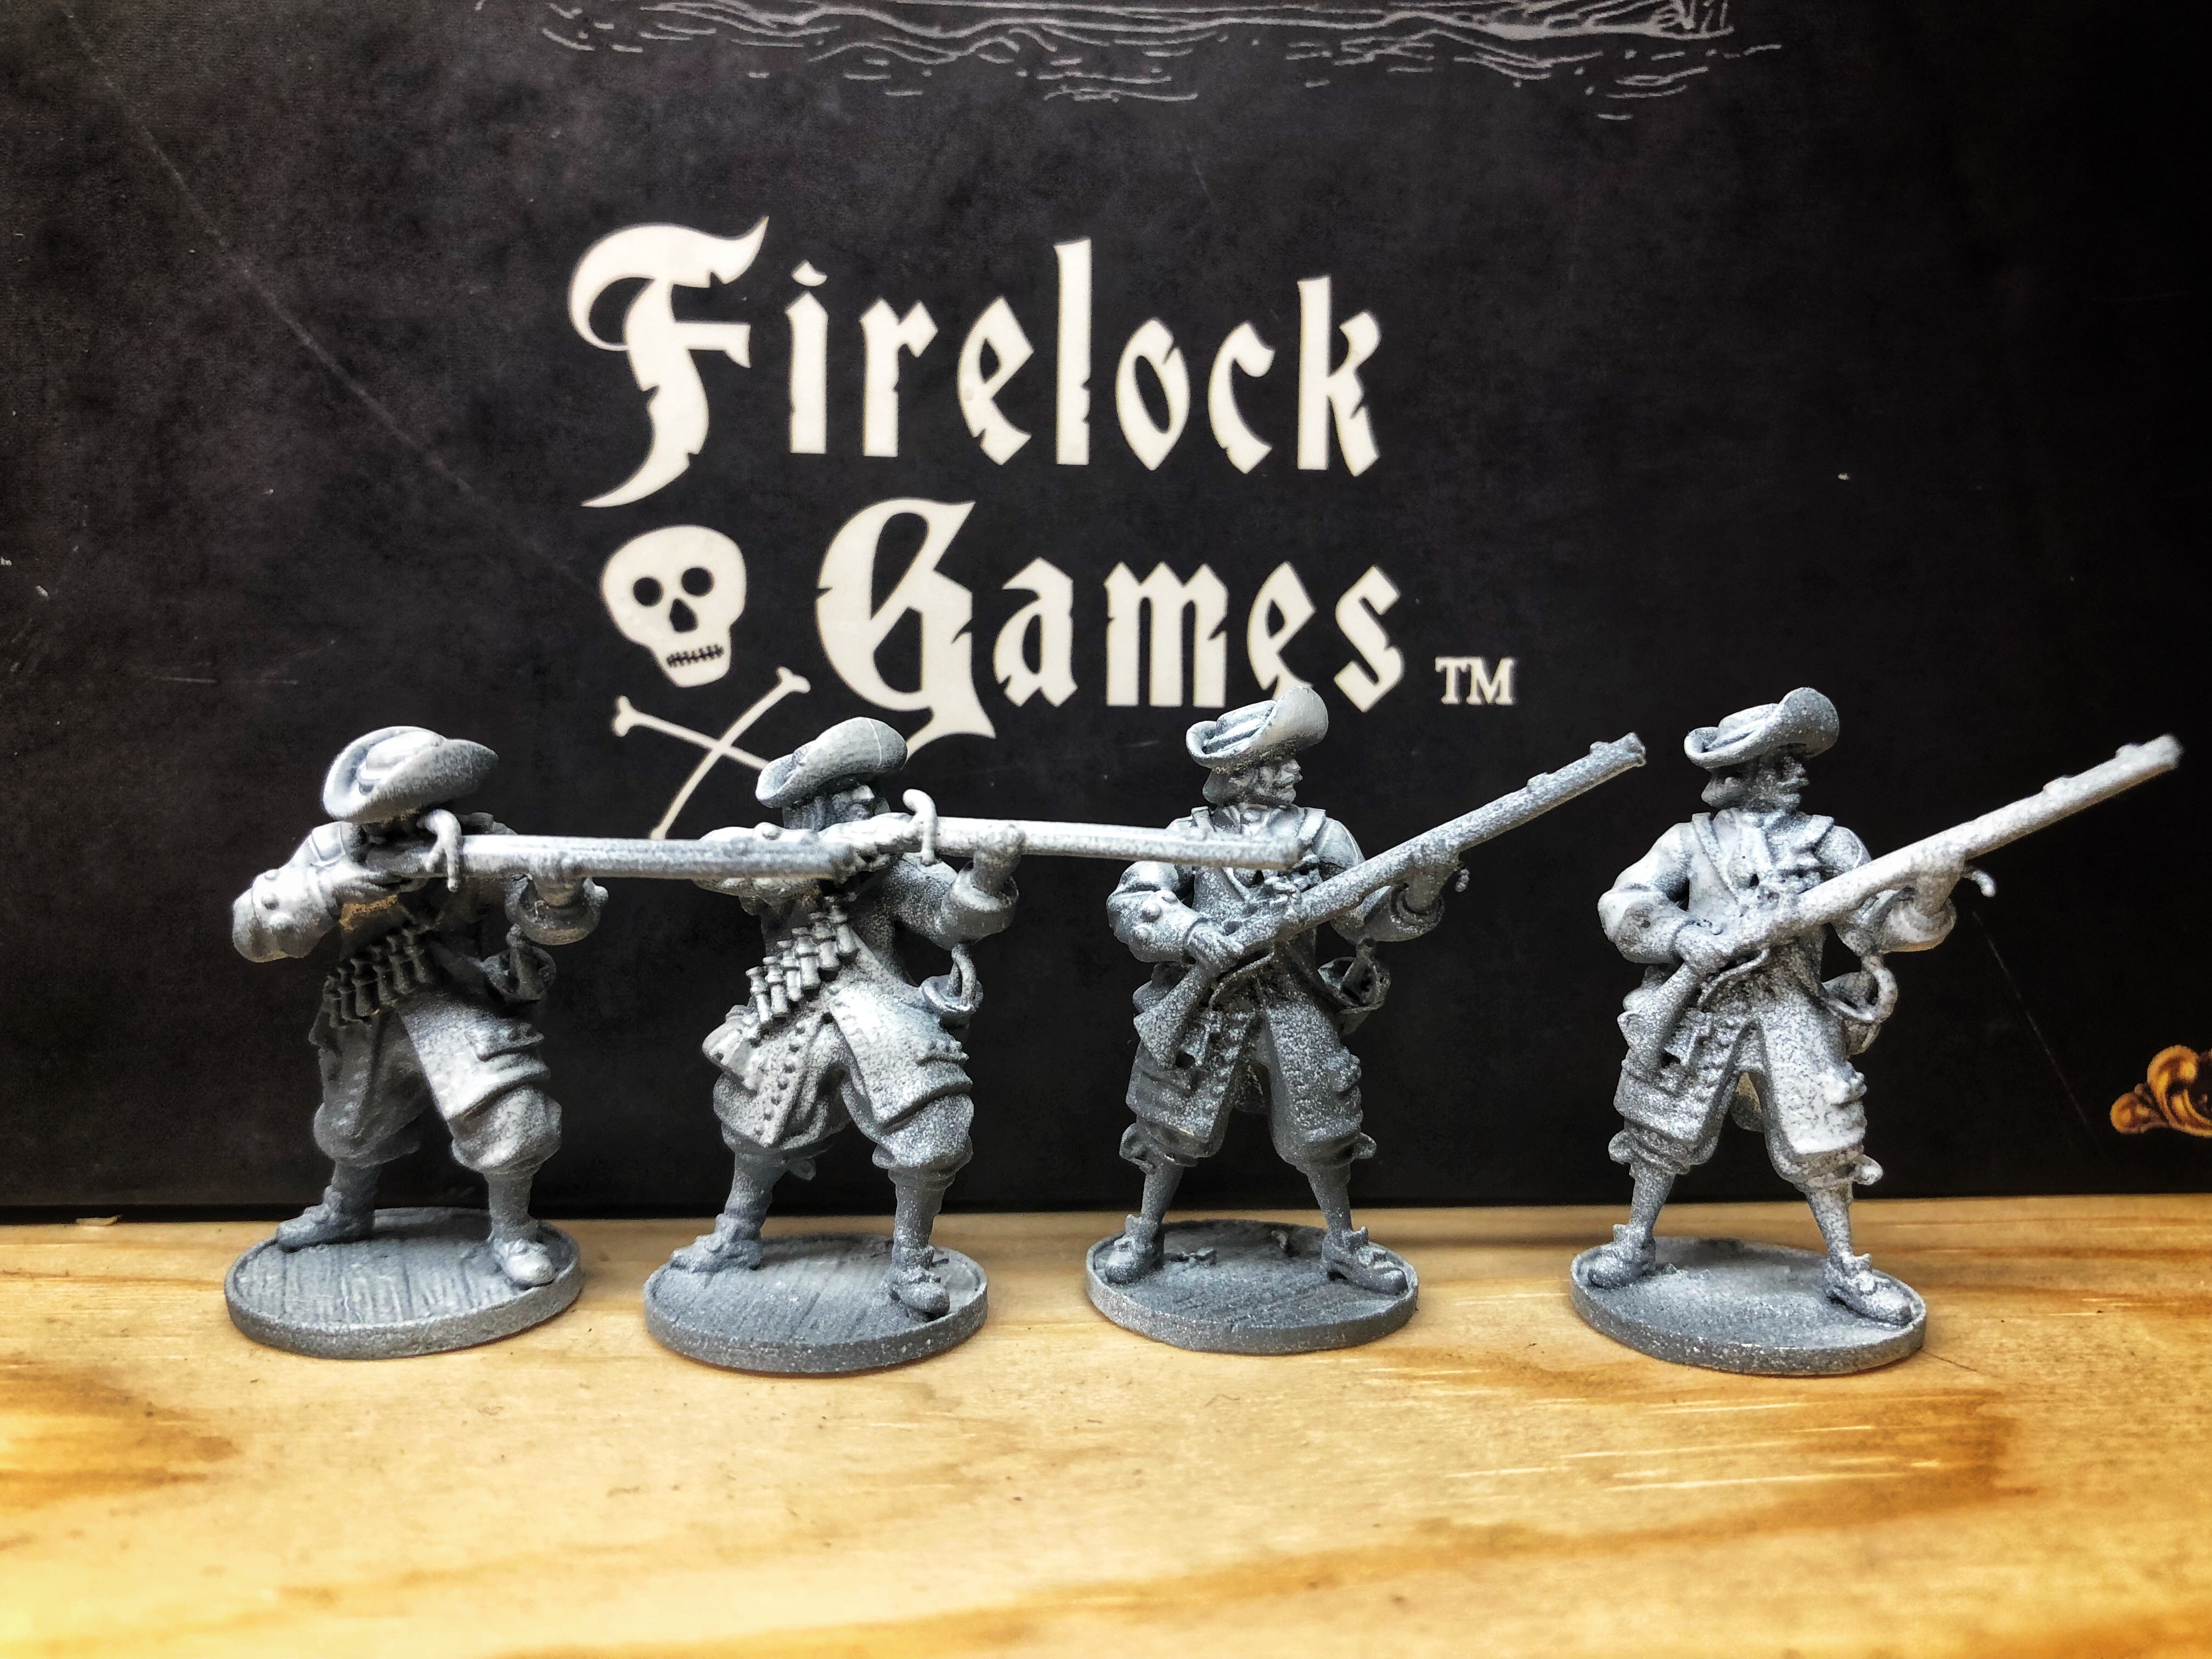
These gentlemen are ready for some colors!
This isn’t the only method for preparing these metal minis, but it works for me. I’ve painted about 150 of Firelock’s minis now and my early issues with chipping and flaking disappeared as I adjusted my preparation and painting methods.
Thanks for reading! Let me know if you have any other tips for preparing models quickly and efficiently.
Pingback: Soldados – A Painting Guide | Blood & Pigment
Pingback: Marineros – A Painting Guide | Blood & Pigment
Pingback: Sea Dogs – A Painting Guide | Blood & Pigment
Pingback: Enter Ploeg – A Painting Guide | Blood & Pigment
Pingback: African Warriors – A Painting Guide | Blood & Pigment
Pingback: Boucaniers – A Painting Guide | Blood & Pigment