During the 17th century, livestock was a crucial component of the economy and society. Cattle, horses, pigs, and other animals provided food, clothing, and transportation. They were often used as a form of currency and were often traded with Native American tribes. Livestock also played a vital role in agriculture, as they provided the necessary labor for plowing fields and transportation for crops. The ownership of livestock was a symbol of wealth and status, and disputes involving the rustling of cattle were common. In this non-standard game of Blood & Plunder, a cattle stampede will play a central role in the scenario objective, but first, some history!
Historical Background for the Scenario
The British campaign against Spanish Florida was one of the first major events in Queen Anne’s War. Governor James Moore of South Carolina mustered a significant force of colonial militia and Indian allies and marched and sailed down the American coast, eventually landing at St Augustine, Florida. Marked by early English successes and feeble Spanish resistance, the campaign dramatically stalled once Moore’s troops came up against the stout walls of Castillo San Marcos in St. Augustine.
I’ve been slowly working on putting together a Blood & Plunder campaign of linked scenarios to recreate this part of Queen Anne’s War and here is a report on a playtest game for the 3rd scenario.
With an entire town of civilians to protect and a far inferior number of troops at hand, the Spanish retreated into the large stonework fort when the English arrived. The Spanish considered the fort strong enough to withstand a siege for a good while but a solid supply of food is essential for this style of warfare! With the population of the fort ballooning to over 1,000 souls, they would need food, and plenty of it to last until help could arrive from Cuba, San Luis, or French Louisiana.
As the English were still landing and disembarking, the Spanish sent out a troop of horsemen to bring in a herd of 137 cattle. The Spanish broke through the disorganized English lines and stampeded the cattle back to the fort where they kept the herd in the dry moat for the duration of the 80 day siege. This source of fresh meat was undoubtedly crucial in the Spanish surviving within the overcrowded fort and holding on until relief arrived from Havana. These cows and this little skirmish could very well have changed the course of American history!
Recommended Miniatures for Creating a Cattle Stampede
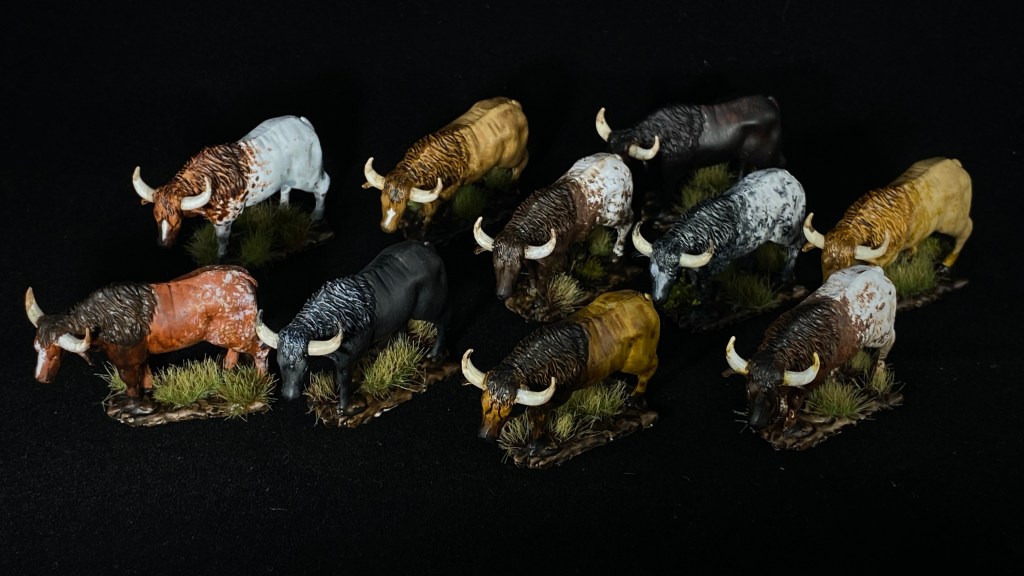
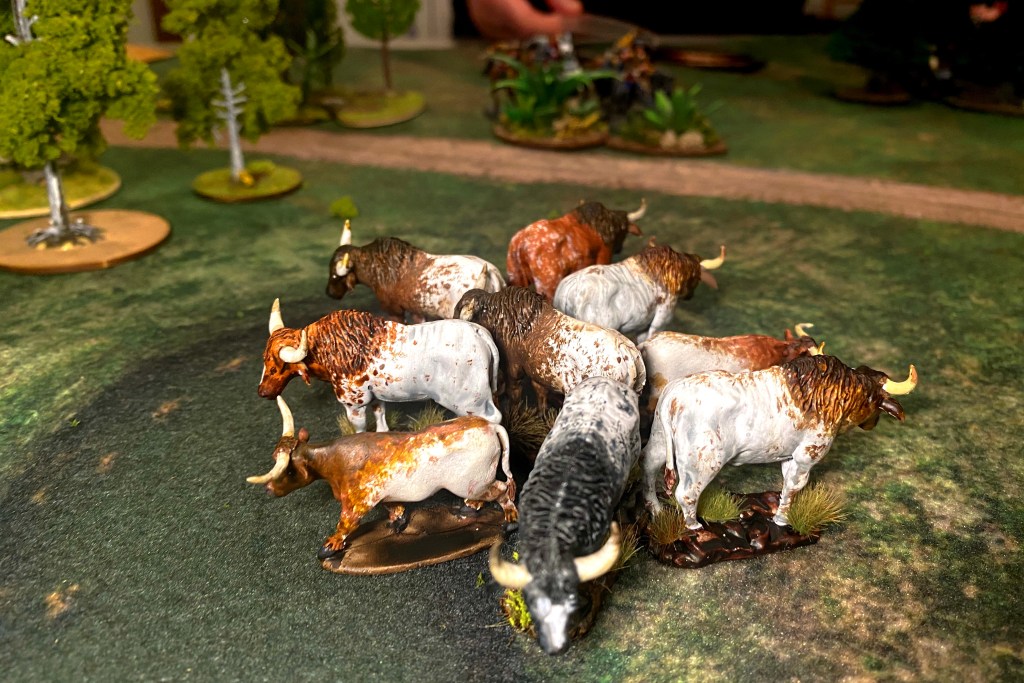
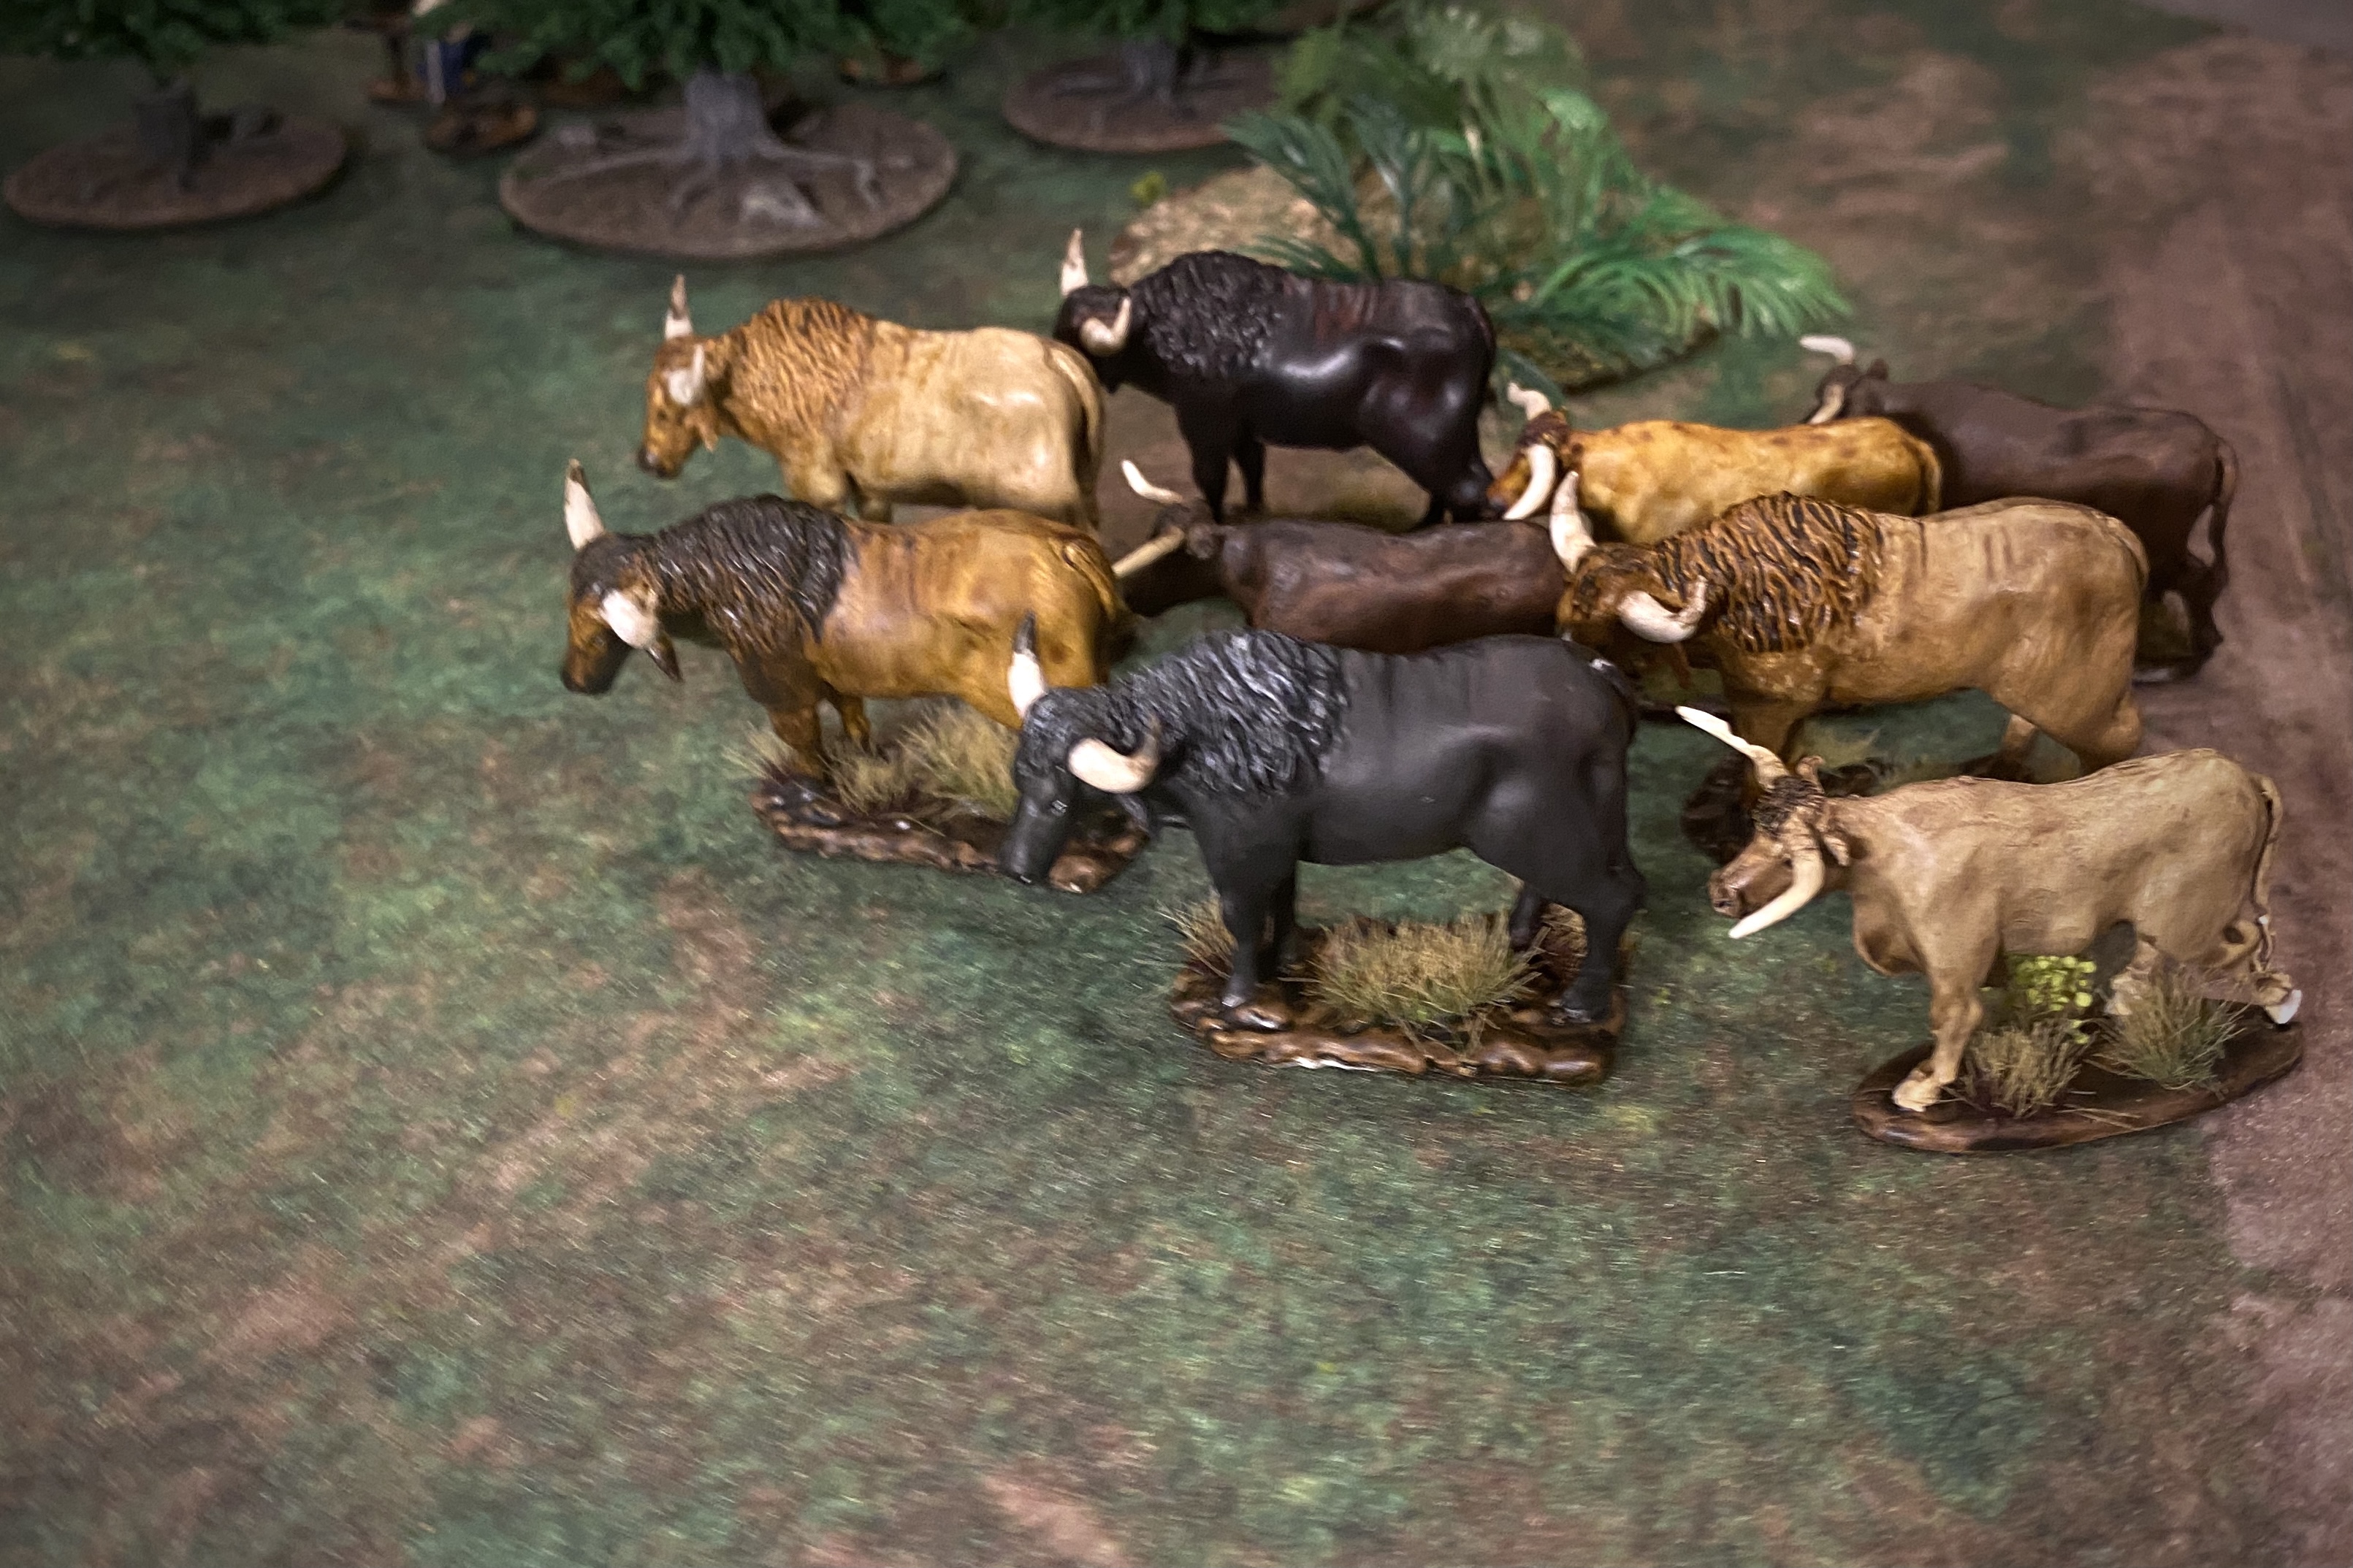
I used cattle models from two sources: WizKids Deepcuts Oxen and Knuckleduster Longhorn Steers. The WizKids Oxen are cheaper and easier to find, but the Knuckleduster Steers are probably a better scale. Those oxen are huge! I did a little research on Spanish cattle in Florida and found a breed called Pineywood that seems to be close to what they would have had in the 18th century and I used them as my painting examples for half of my herd. I never thought my miniature gaming hobby would ever lead me to be reading scholarly papers on historical cattle breeding!
Setting up the Cattle Stampede Scenario
Much like the core rule book’s Breakthrough scenario, it requires the Attacker (Spanish) to drive across the board toward the Defender’s (English) deployment zone. As the game begins, the Spanish have rounded up the cattle and are now driving them back to the fort through enemy lines.
Here are the basics rules for the scenario. The two forces deploy within 12″ of the short ends of a 3×4′ board. The cattle are represented by two large objective tokens (or real herds of cattle minis in this case!). They are placed along the centerline of the table similar to the setup show below:

Scenario Objectives
The English (Defender) take Strike Points for each of the objectives and each of the Spanish (Attacker) units to pass through their lines and escape off the edge of the board. The English can give the Spanish Strikes by either keeping the Cattle on the board until the end of turn 6.

Scenario Rules
The interesting part is how the units can interact with the cattle to move them. You can taken action while in close proximity to a cattle objective to Herd it which gives you control of where they go. Or, if you are firing gunpowder weapons close to the cattle, they will spook and move, but your opponent will control their movement!
And the most exciting rule is the stampede damage! If a Cattle Objective overlaps a unit, that unit takes a melee attack of 3 dice with a Fight of 7. So players can damage their opponents by driving the cattle through their units!
I played the English Defenders and my good friend Guy played the Spanish.
Suggested Forces for the Scenario
Historically, the forces were fairly small and that is reflected here. With much more at stake and much more to accomplish, the Spanish get a full 100 points, mostly in two units of cavalry with a supplementary unit of men on foot.
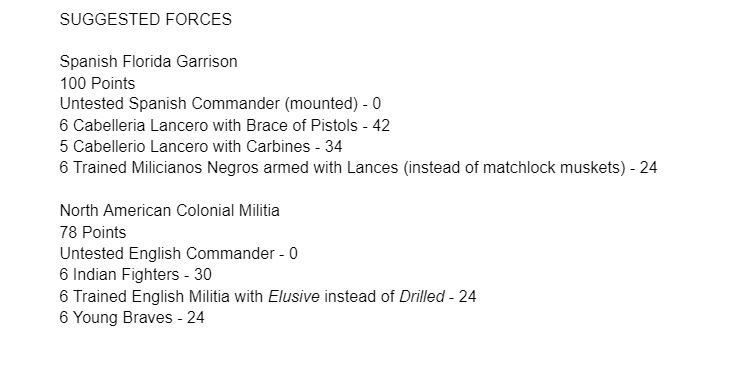
The English, with the less difficult goal of stopping the Spanish, were giving fewer points at 78. They were made up of units of 6 Indian Fighters, 6 Trained Militia and 6 Young Braves (armed with bows).
These forces are made using forces from the upcoming Raise the Black/Queen Anne’s War factions (which are not set in stone yet).
So the Spanish slightly outnumber the English, but the burden of actually doing something is on the Spanish while the English have only to stop them or shoot them down. The English are hardy and have more ranged firepower, but the Spanish are much more mobile and will have an easier time manipulating the herds of cattle with their cavalry than the slower moving English units.
Post-Game St. Augustine Cattle Stampede Battle Report
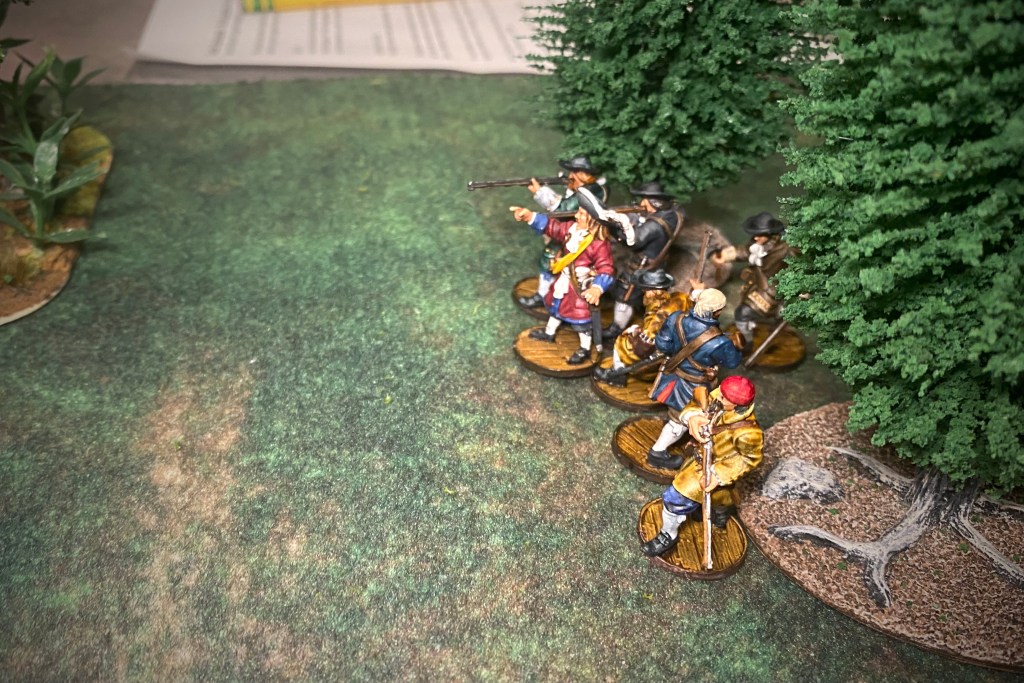
I deployed my three units in a line in areas of cover while Guy deployed the cavalry behind blocking terrain so I couldn’t attempt any lucky long-range shots.

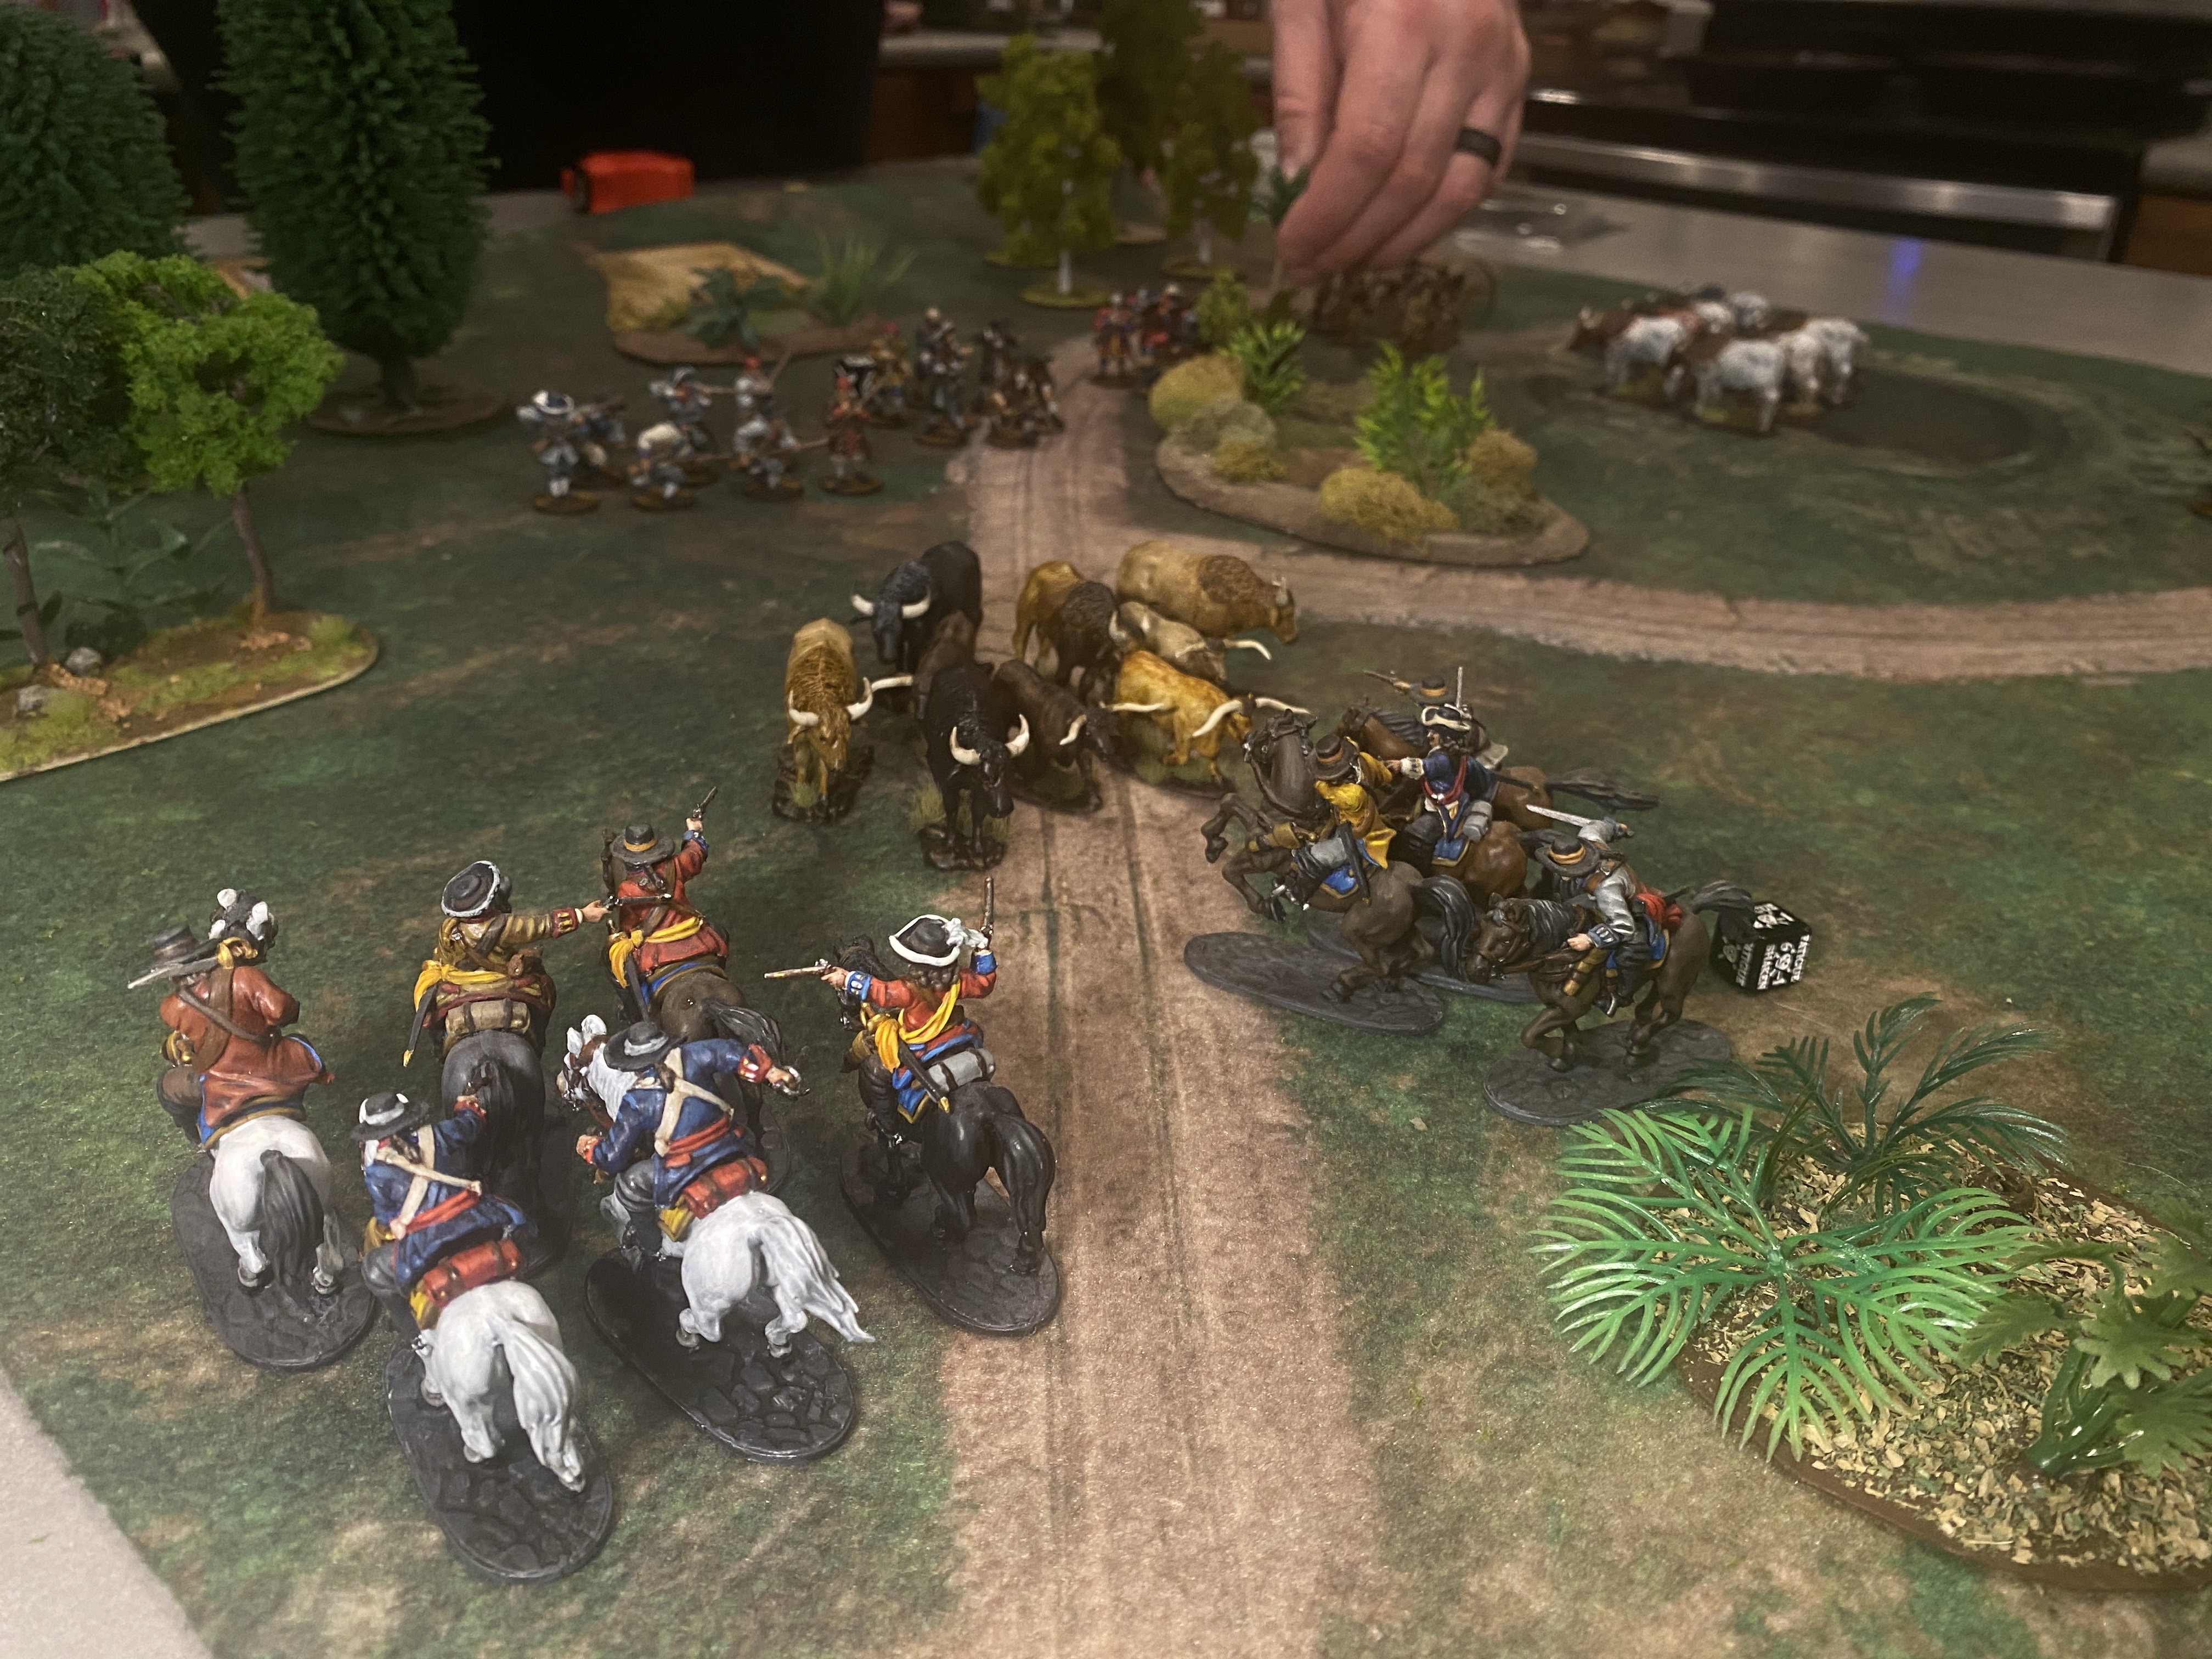
The Spanish cavalry went first, moving up quickly and pushing the herd toward my right flank.

Nestled in some cover, I figured my militia could be stationary and shoot and load, hopefully knocking out some horsemen and reducing the effectiveness of the quick cavalry.
But I sent my command unit of Indian Fighters out to hunt the enemy!

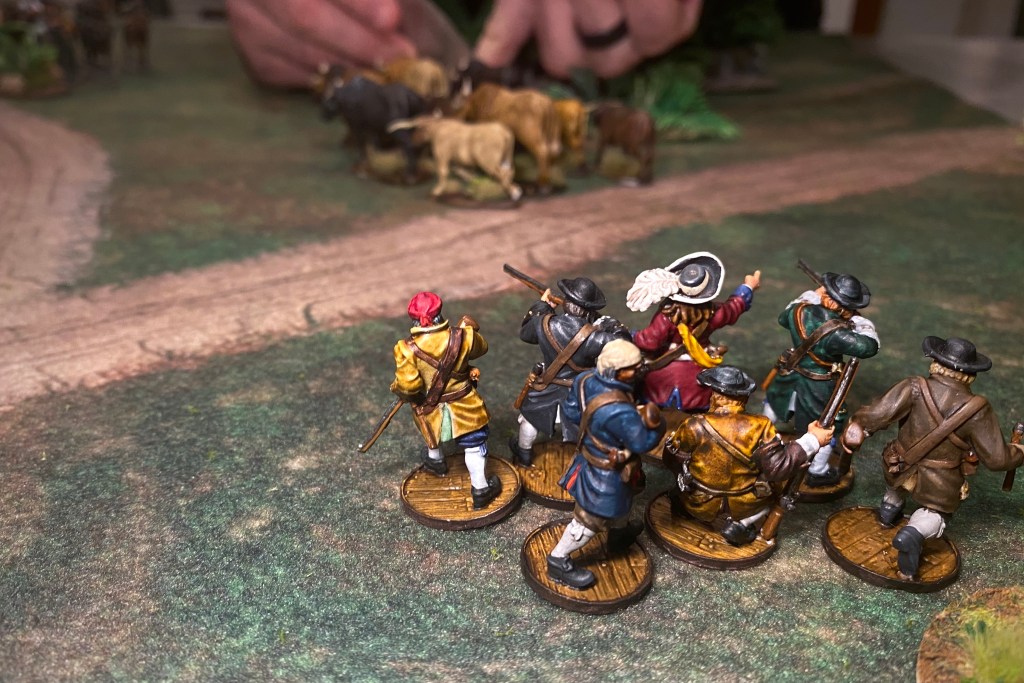
The Spanish were able to reach the center of the board very quickly. They promptly turned the herd into a cattle stampede that ran right through my Command unit!

One of my Indian Fighters got trampled but the rest held on and didn’t take too much Fatigue. I tried to use the Young Braves to shoot down some of the horsemen, but they were moving too fast for the arrows to find a mark. I should have herded these cows back toward the Spanish!

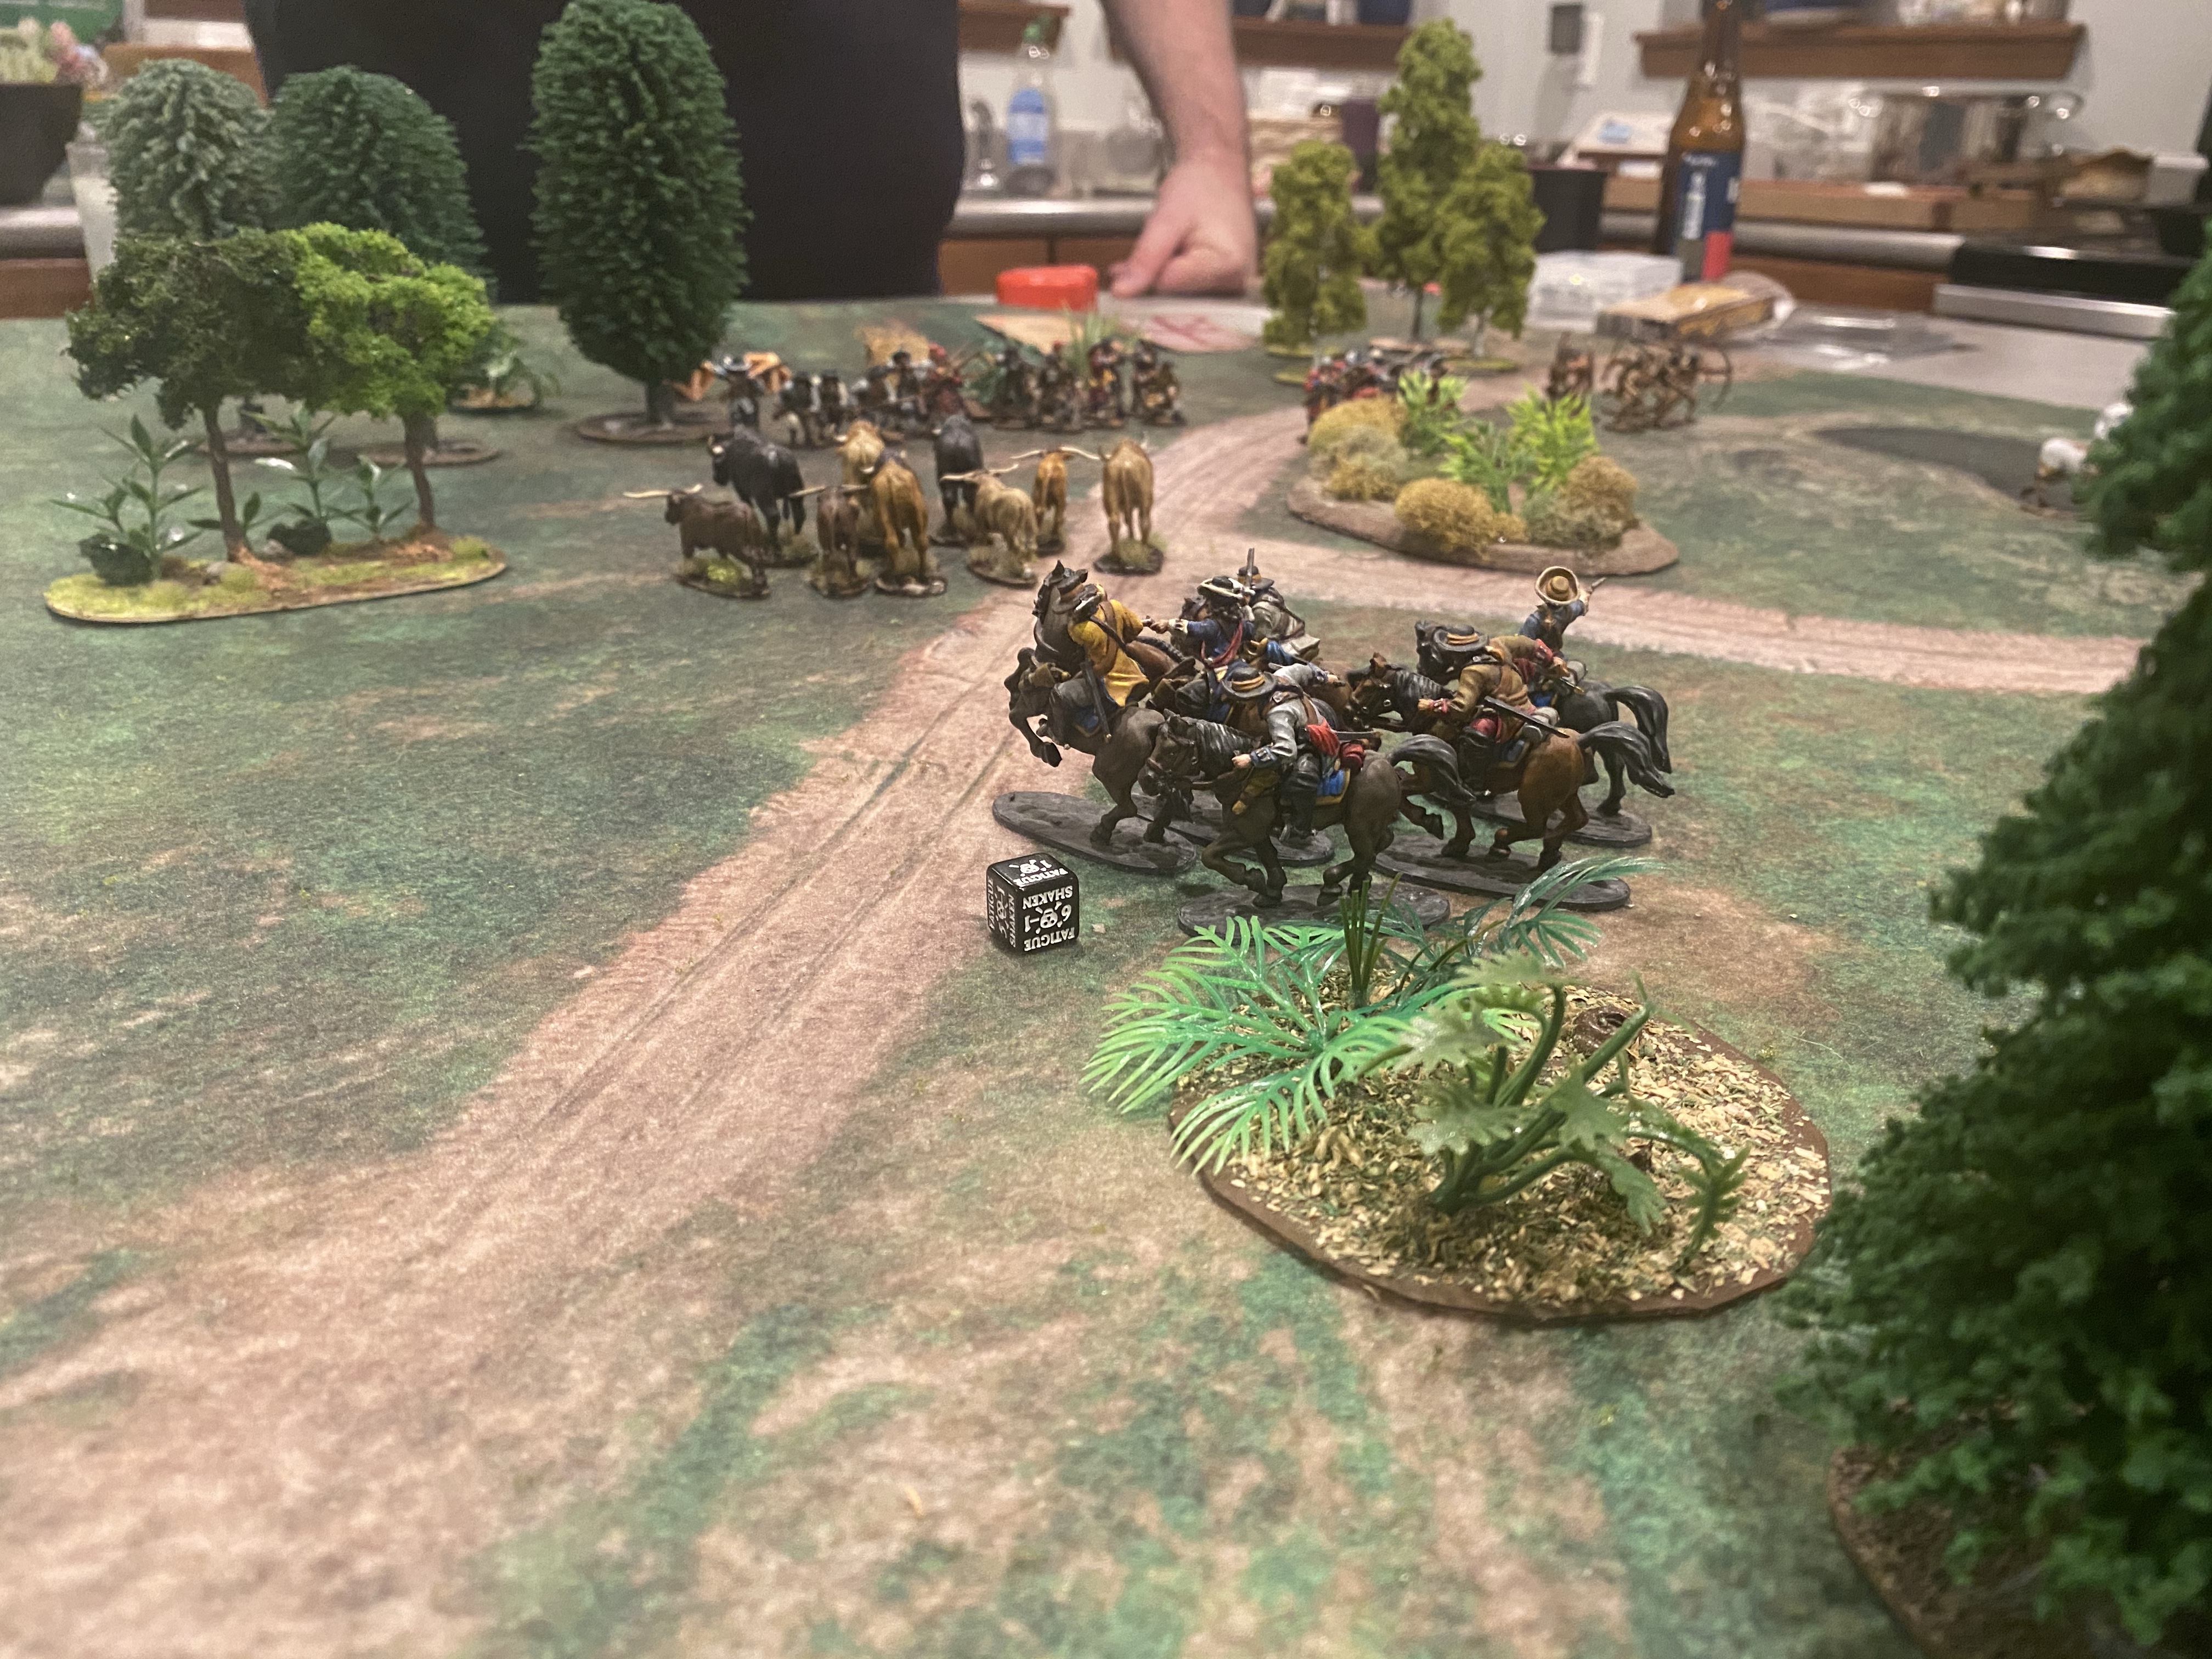
By the second turn, my poor command unit had been hit again by the cattle stampede and was in pretty bad shape. Once free of the trampling cattle, the cavalry shot the survivors down and by turn 3, my commander was dead!
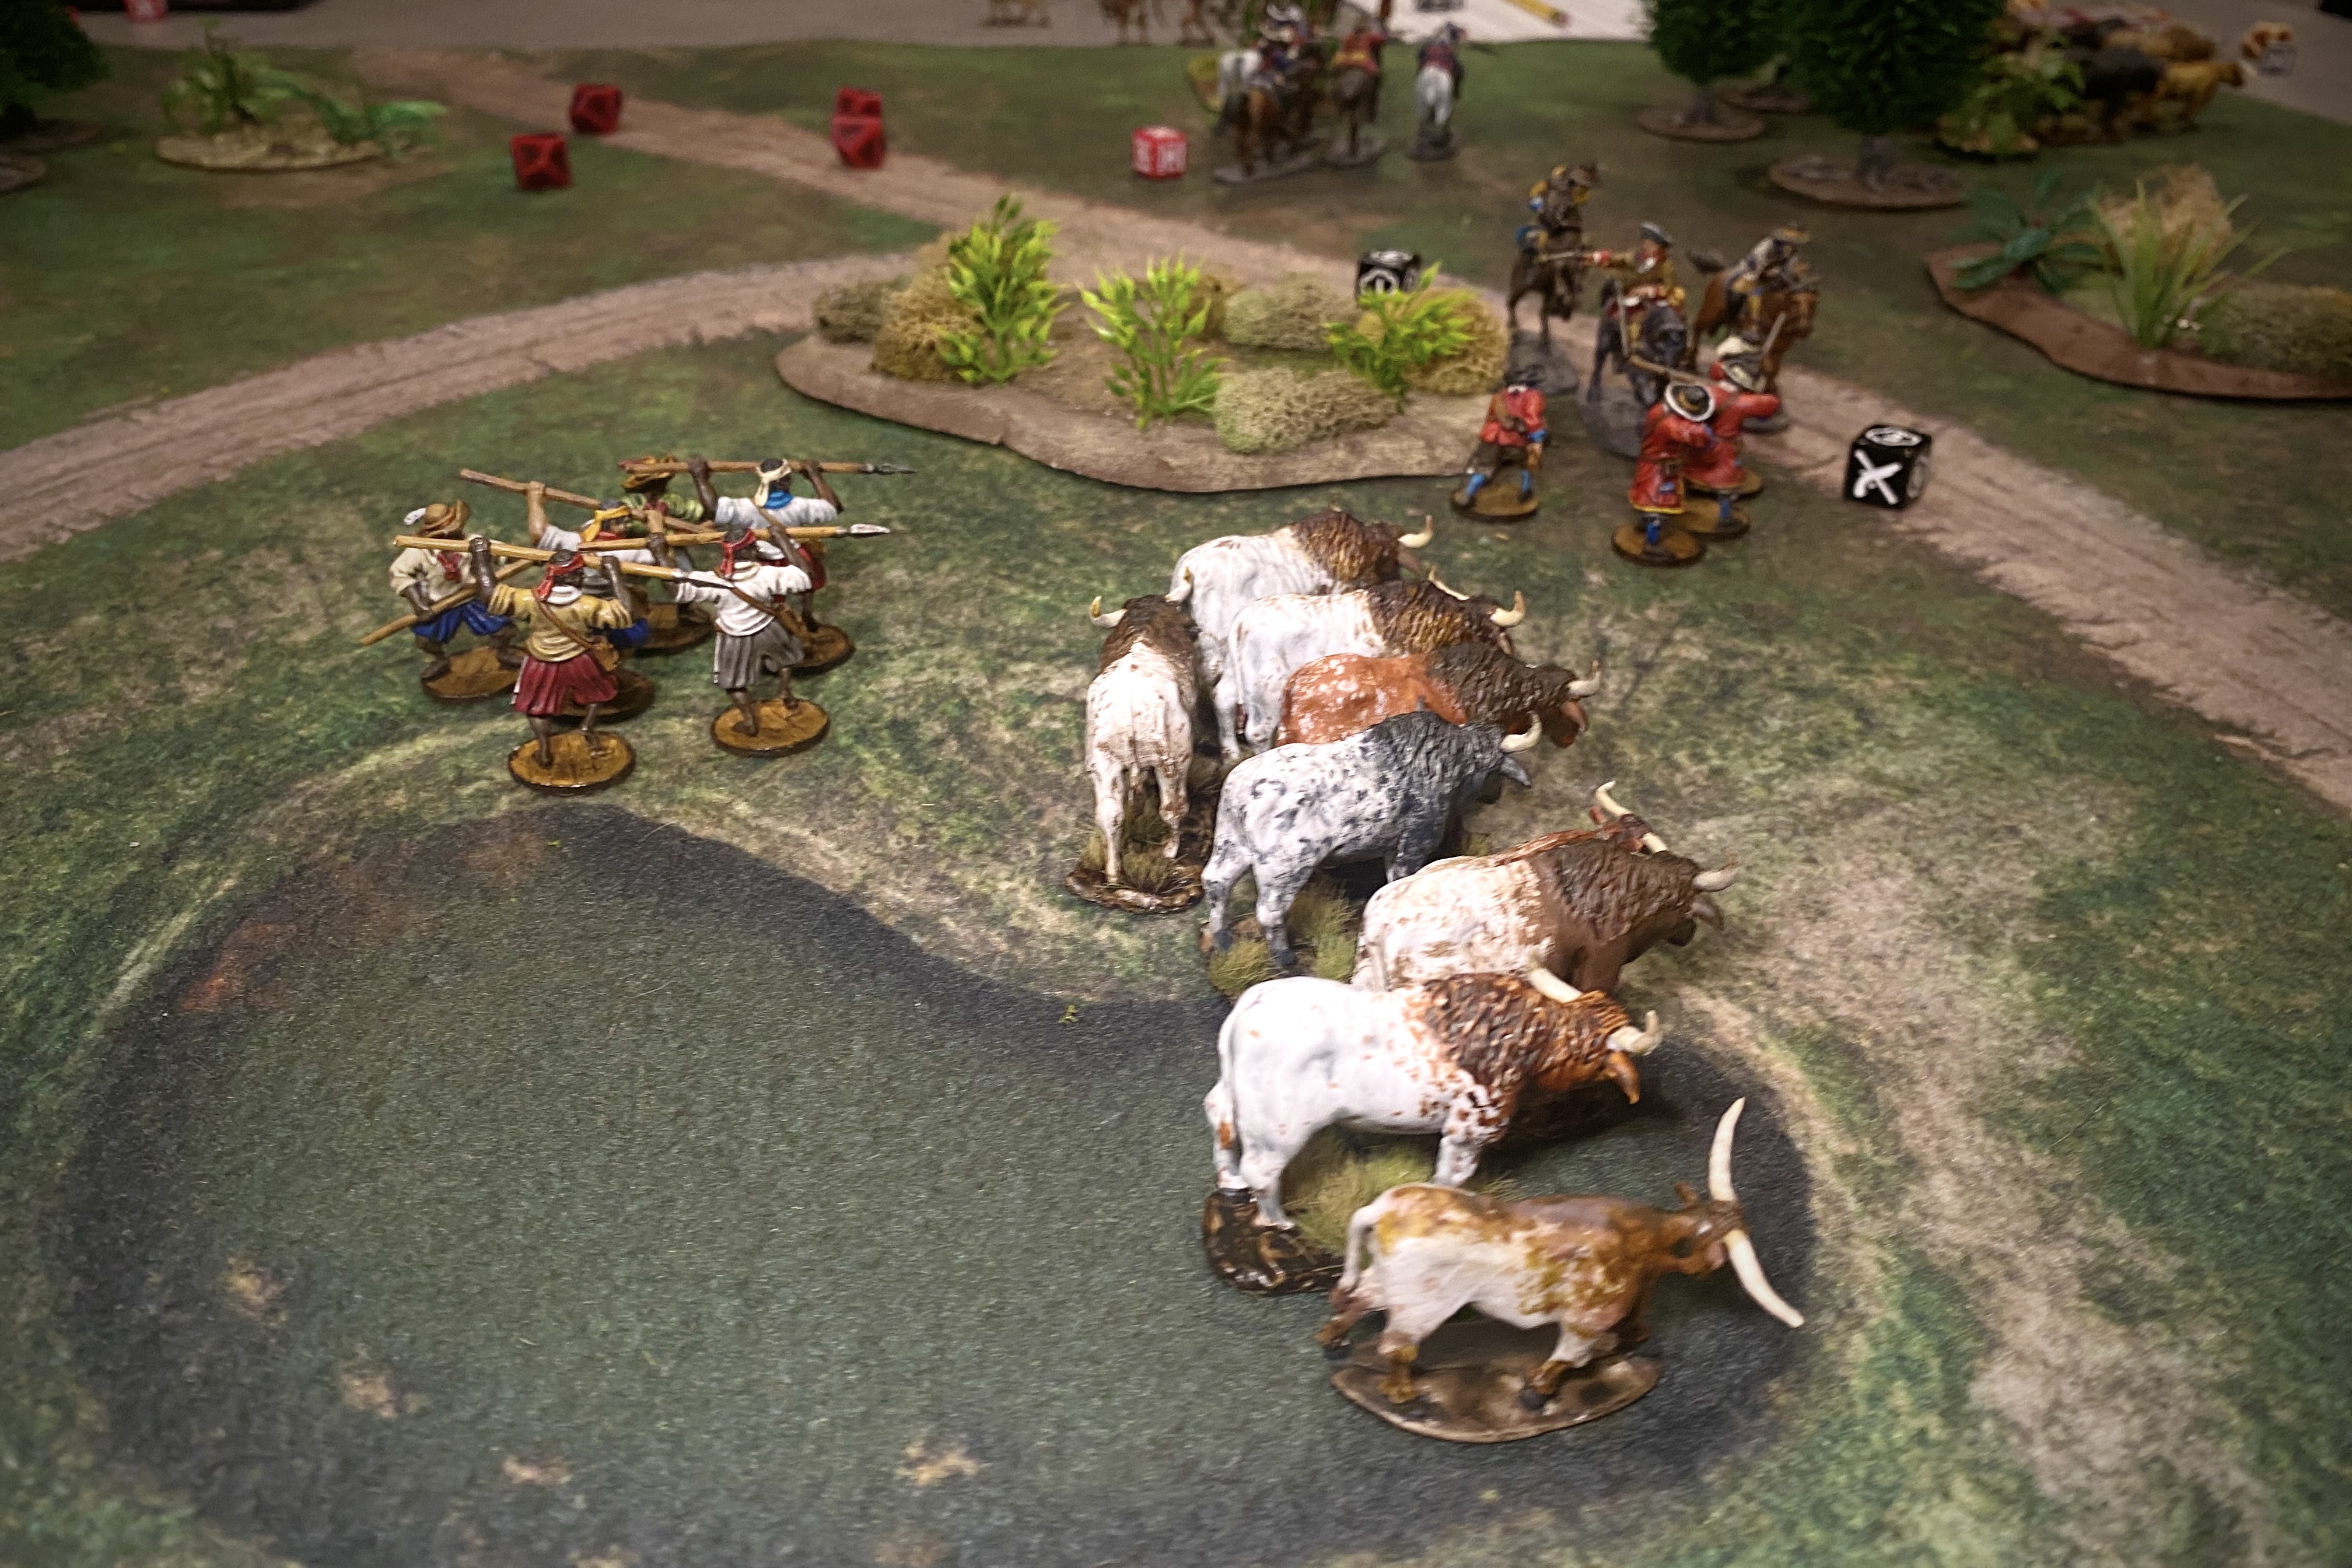
On my left flank the Militia and Young Braves turned to drive off the dangerous horsemen but neglected to deal with the lancers sneaking up behind the cattle.

One unit was driven off into the trees but the other unit of cavalry charged my Young Warriors. They shattered, leaving only the Militia to stop the Spanish from taking their beef straight back to San Marcos!

Late Game Rounds
By turn 5 the second herd trampled my Militia unit, leaving m with only 4 models left on the board!
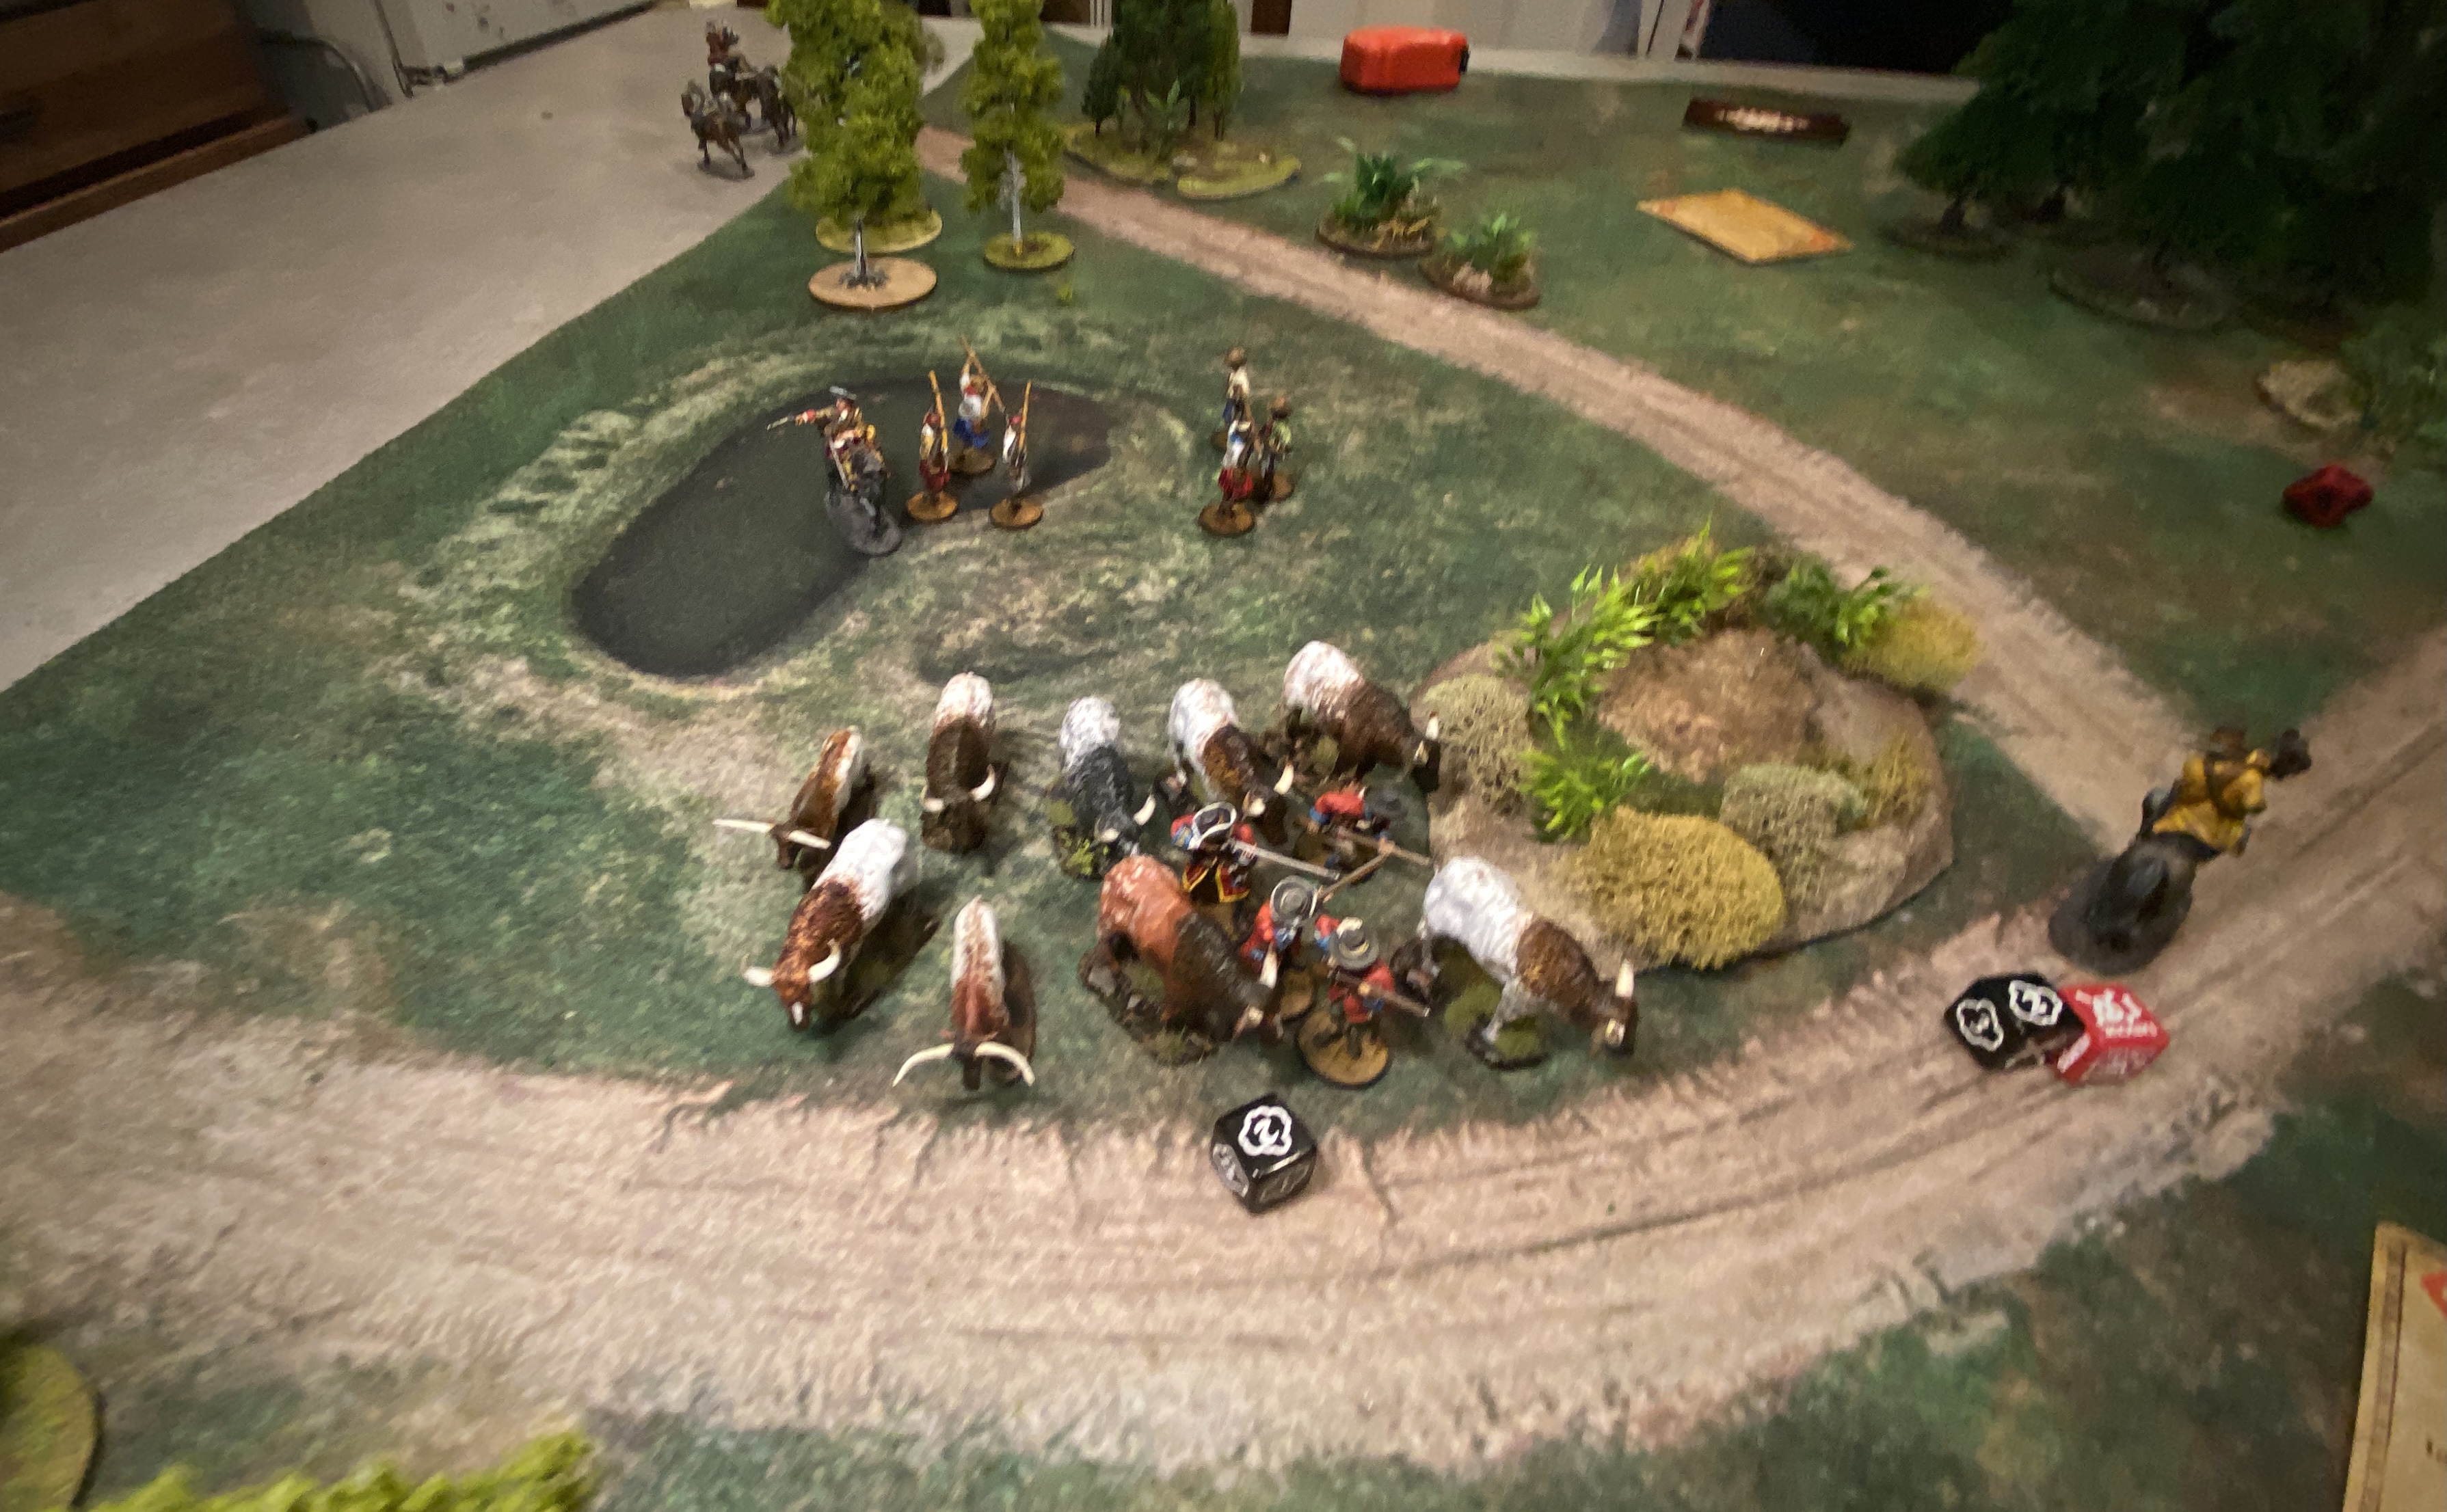
With only a few men left on the board, there was no reason to not use my final Fortune Point to attempt to Save my men when the cattle stampede trampled them again.
My single Militia unit stood no chance against cattle in their face, cavalry behind them and lancers behind them. At the start of turn 6, the Spanish Commander’s cavalry unit charged and dispatched the final blow.

But with the odds at 3 to 1, my poor English militia didn’t last long before they were dispatched by the Spanish cavalry.
My entire force had been eliminated while only causing a handful of casualties to the Spanish! The Spanish could herd their cattle back to San Marcos at their leisure with no English vanguard left to harass them.
Post Game Thoughts
- The cavalry were actually very good in this game! Nice to see them shine in a game instead of just getting shot up. Their extra mobility let them move close to the cattle and still have an action to move them. And they were able to use the cattle stampede as provide mobile cover for them to hide behind.
- My English lost badly! I made a couple of mistakes but I still felt as if I didn’t have a decent chance with the lower point total. We decided to give the English another unit of militia for the second play-test game and while the Spanish cavalry still ended up winning, it felt more even and desperate.

Thoughts on the Stemepeding Cattle
- The moving cattle stampede objectives were very fun! I’ve been slowly painting them up for a couple of months now and I’m happy I did. It was oddly satisfying moving large herds off cows around on a table! After this 1st game we modified the movement of the cattle. Initially, a basic herd action was “move the objective 6″ away from your unit,” but adjusted to “move the objective directly away from your unit until it is 6″ away.” That makes the placement and proximity of your unit performing the action a little more important. It also slows the stampede across the board a little.
- The “spook” movement was very fun too! When any gunpowder weapons are used in proximity to the cattle, the player who didn’t use the weapons gets to move the cattle and that makes you play more carefully around the herds!
- Stampeding units was very entertaining as well! My English took the brunt of the stampede in this game but I got in on the fun when we switched sides and played it again. We ended up modifying the stamped rule so it wouldn’t hurt mounted units. The cavalry have the mobility to get out of the way and not get trampled. I think I’ll change it to something like this: “If a cattle objective would overlap a mounted unit, that unit is pushed by the objective instead.”
- Stampeding cattle also played a notable role in Henry Morgan’s Panama adventure. So if there’s ever a scenario for that crazy battle, I’ll be ready with my cows!

Spanish Unit Analysis
- The Spanish militia with lances were much less effective than the Cavalry. But they provided some excitement in the second half of the game when they finally started herding the second objective. Lacking any ranged weapons seems to help balance the forces since the cavalry is so effective here.
- The Spanish Cavalry was highly effective and definitely the central antagonist of the scenario. Cavalry minis don’t see a lot of play time so it’s fun to see them on the board.

- I’ve complained about the English Militia special rule before and there’s rumor of change! Currently the English Militia factions can reroll failed Resolve and Rally dice on the first turn. There is an errata being considered that would let the faction reroll one Resolve test every turn which would be more comparable to the French Militia free move which is available every turn. We tried this new variation in this (and the following) game and it was really fun. It really made the English stout! They still died but they just didn’t run! It really gave them a stronger identity which I felt was lacking a little since that first turn of so many games isn’t really that interesting.

General Thoughts on the Scenario
In the campaign, the stakes are very high for the Spanish in this game. If they fail to get any of the cattle off the board, there’s a good chance some of their Indian allies will actually rebel. That meant that during the last scenario, they would revolt and instead ally with the English. According to the narrative, there was actually an English sympathizing Native that infiltrated the fort during the siege. His express goal was to start a rebellion from within. If the people in the fort weren’t well-fed, the likelihood of that happening would have been much greater.
- If they get both herds off, there is no consequence to the final game.
- If they get one off, each unit makes a Resolve test or takes one Fatigue. This was to represent minimal food distributed to the 1000 people over the 80 days of the siege.
- If the Spanish fail to get both herds off the table, all their units start with 1 Fatigue and each Native unit makes a Resolve test before the battle. Any unit that fails, switches sides and is controlled by the English player.
St Augustine Campaign Summary
We’ve played through half of the St. Augustine campaign at this point and I’m enjoying it! Castillo San Marcos may appear someday in a proper Fortifications book. However, if that doesn’t end up happening, I’ll publish it here on the blog.
The campaign is a set of 7 scenarios between English and Spanish forces. The finale features two different options. The first is a battle where the English attempt to take the fort if they have done well. Or if the Spanish are winning, the Spanish can sally forth and attempt to destroy a disheartened English force. Each scenario has consequences further down the road and builds on each other. So by the time you reach the final scenario, that game could look very different than it first appeared!
I’ve had fun studying the history around this campaign and creating fan-made scenarios for it. If you have any input on the scenario or thoughts on making a St Augustine campaign, please leave a comment! Thanks for reading!
By Joseph Forster

Recommended Products
Additional Reading Suggestions
- Checkout some of our other great Battle Reports and Scenarios
- An article about my visit to the real-life Castillo San Marcos Tour
Very Clever. Great report, thank you. I look forward to reading and playing the scenarios.
Pingback: Blood & Gators - New Blood & Plunder Expansion - Blood & Pigment