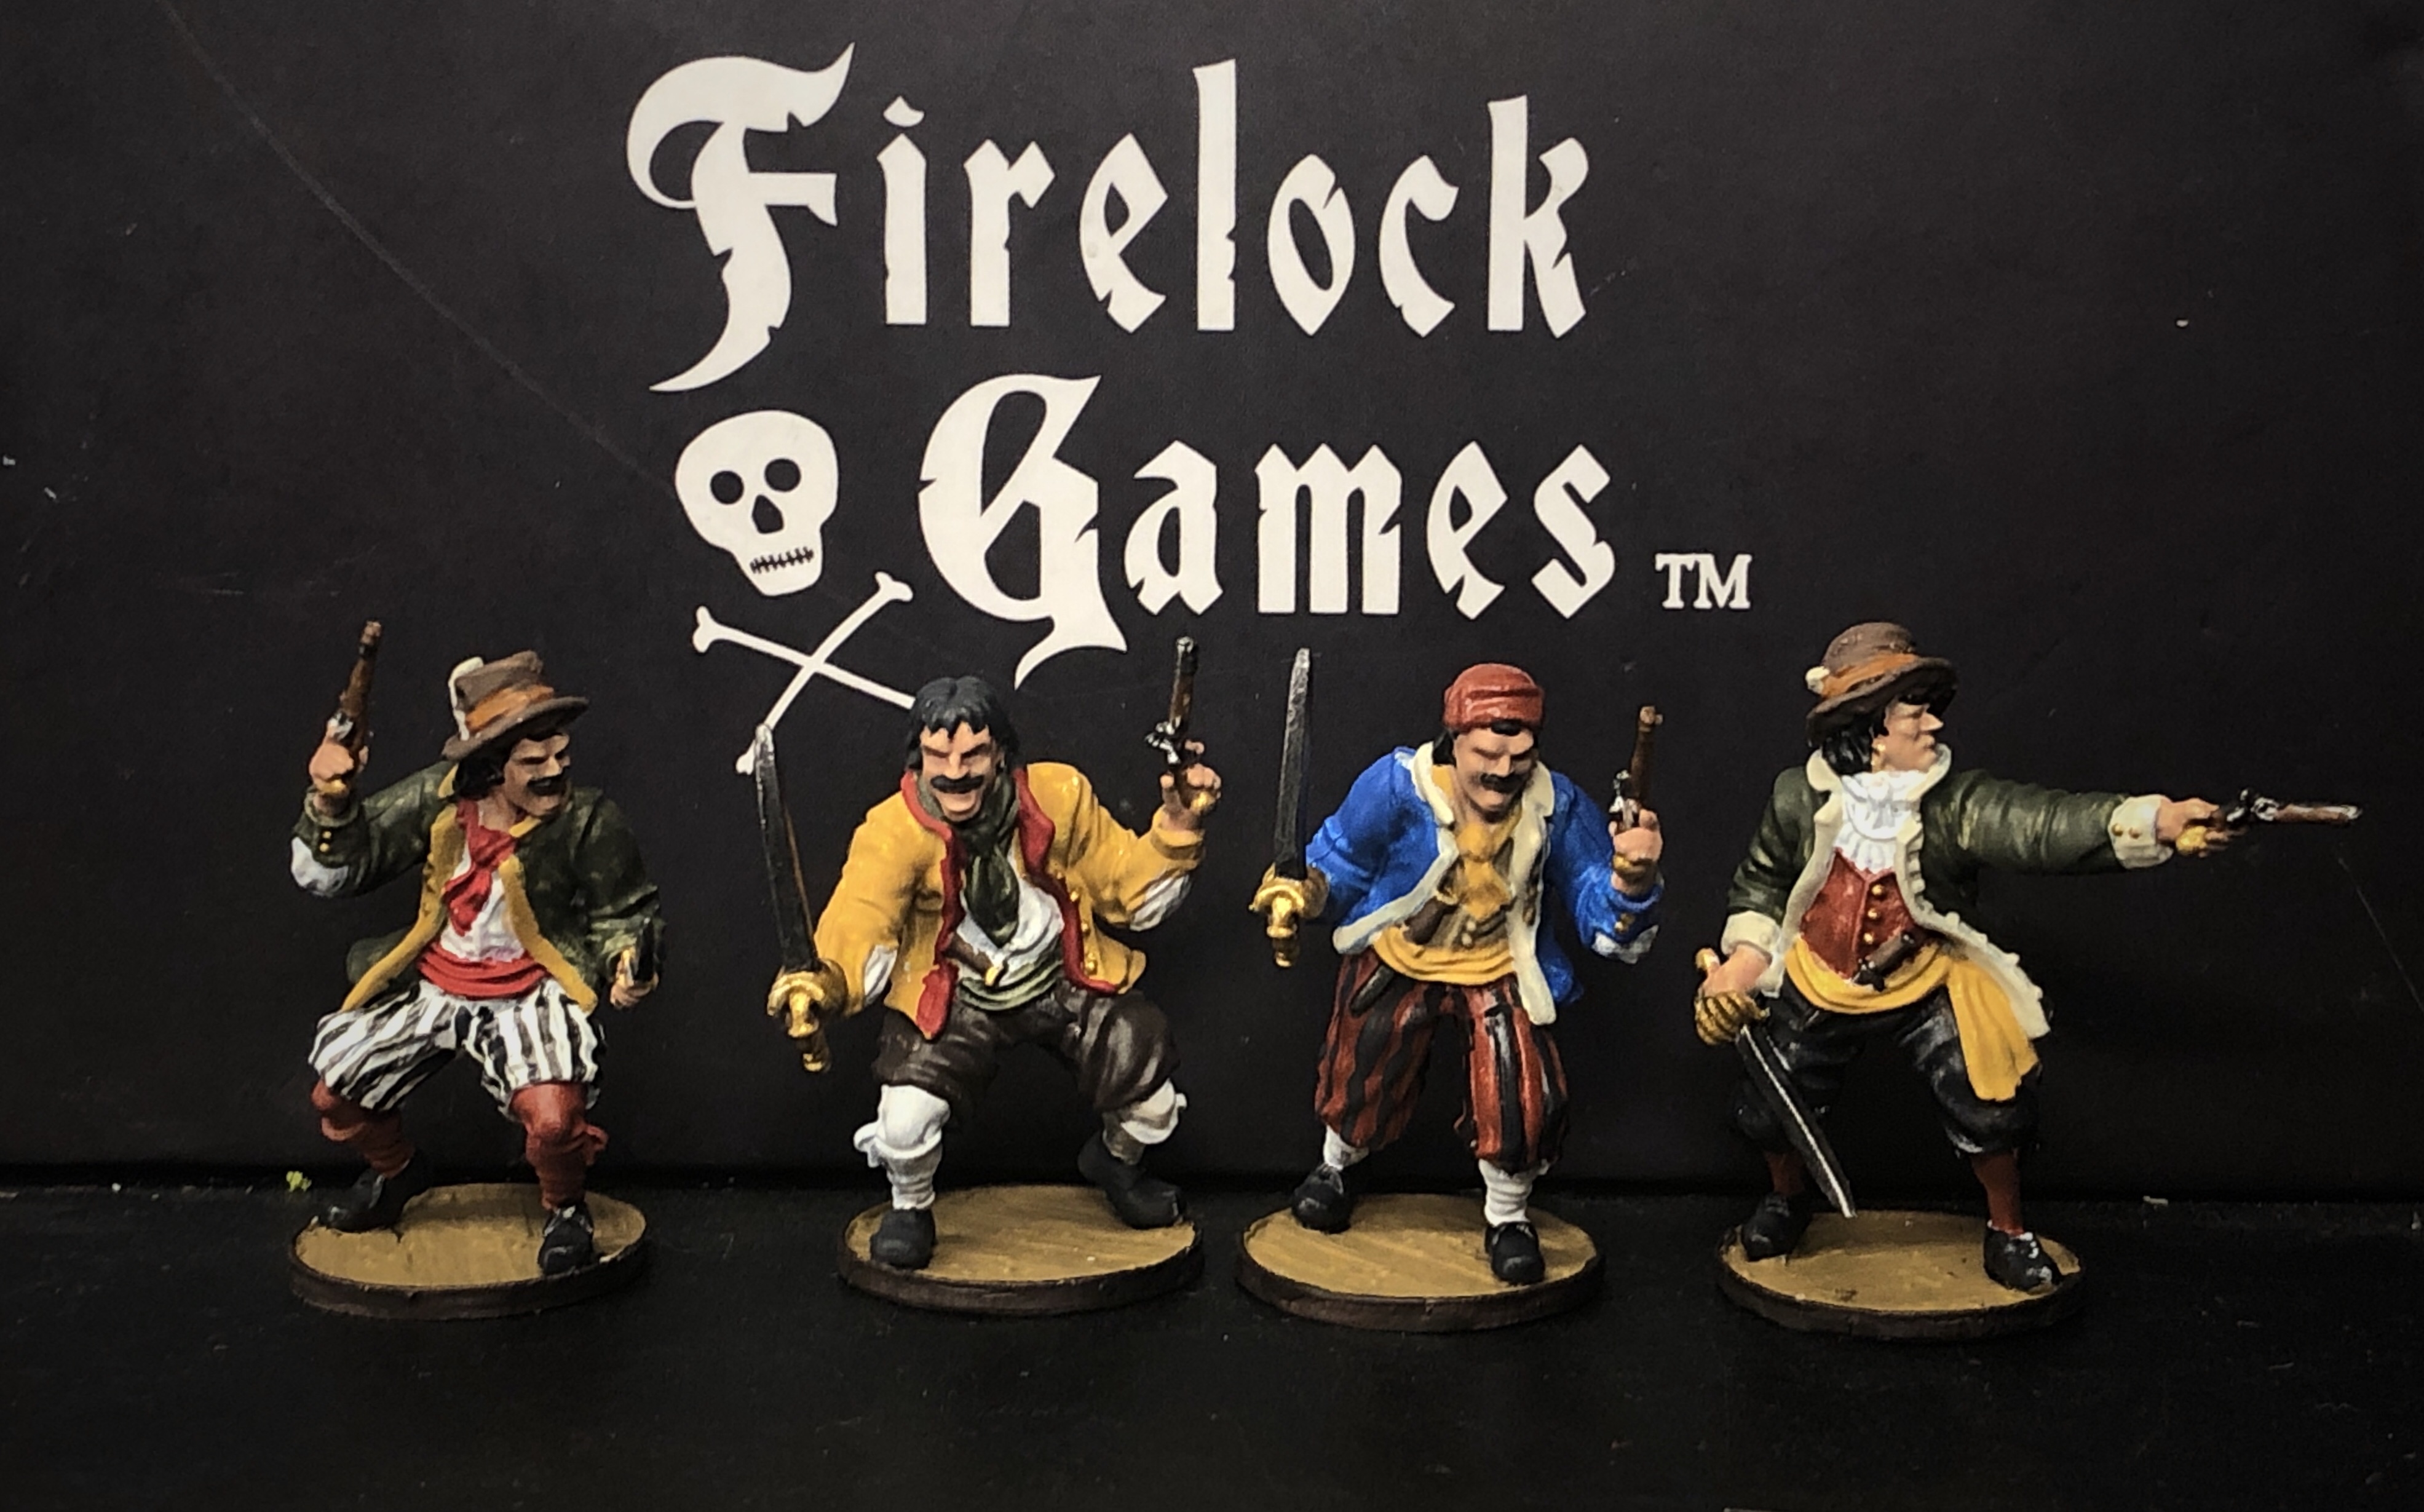
I’m slowly getting to my Dutch models! The Zeelieden are some of the best sailors/artillery crew in the game and I’m eager to get some painted up so I can use them in my unaligned forces and play some Dutch Privateers and Dutch Navy factions as well. With Expert Artillery Crew, Expert Sailors, the hardiness of the English in a melee and the Hard Chargers ability from the Marins, they look super solid!

This painting guide will be using my standard Prime, Base, Shade and Highlight method using a variety of paints and attempting to approximate the color schemes used on these minis in the rule book, Force Builder etc.
Step 1 – Prep and Prime
This is the boring part. Trim off the flashing, scrape away mold lines and straighten the guns. There’s one arm that I noticed being consistently rough on this set of minis, but overall, they aren’t bad.
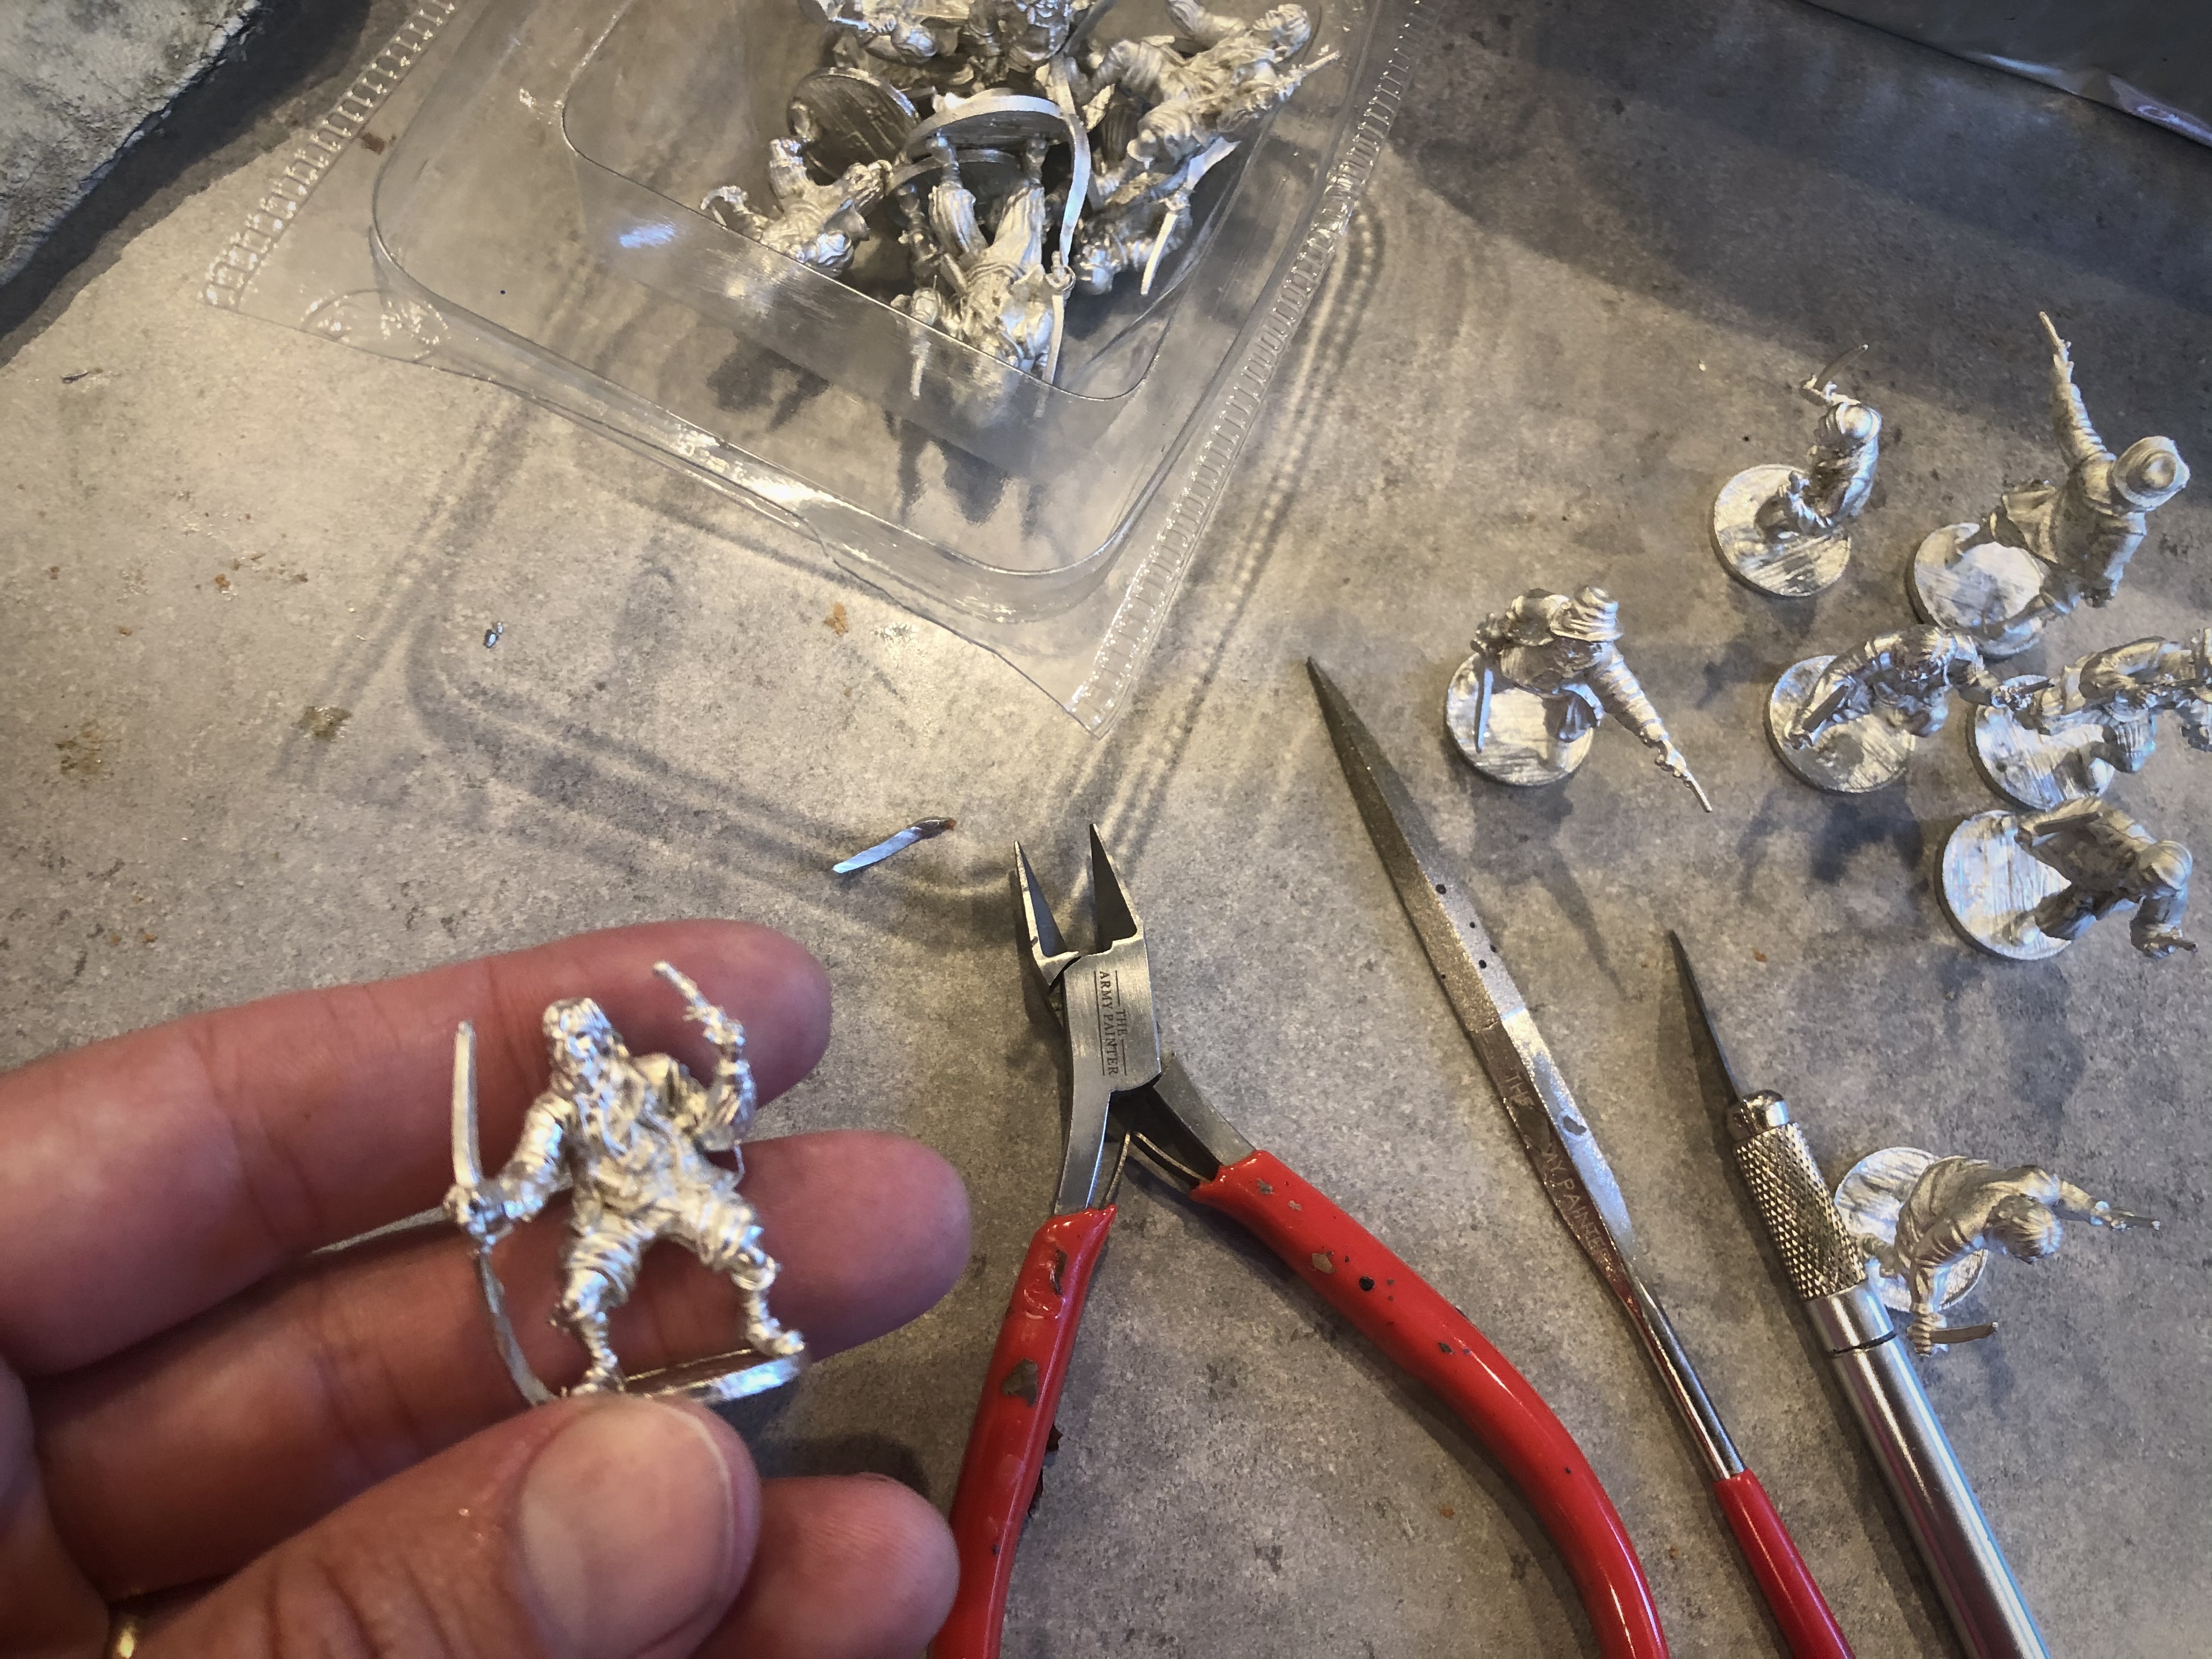
I prepped 4 sets of these minis at once. We’ll see how many months it takes me to paint all 16 minis…
I prime using Army Painters Uniform Grey with a white spray from above to create a zenithal highlight which helps me see details while painting and reinforces the highlights in the end product. Spray the grey from the sides, then white from above.

Primed and ready for color!
Step 2 – Base Colors
This step is where the hard decisions are made. I tried to keep the colors close to the examples given in the rule book while keeping the paint list to a minimum.
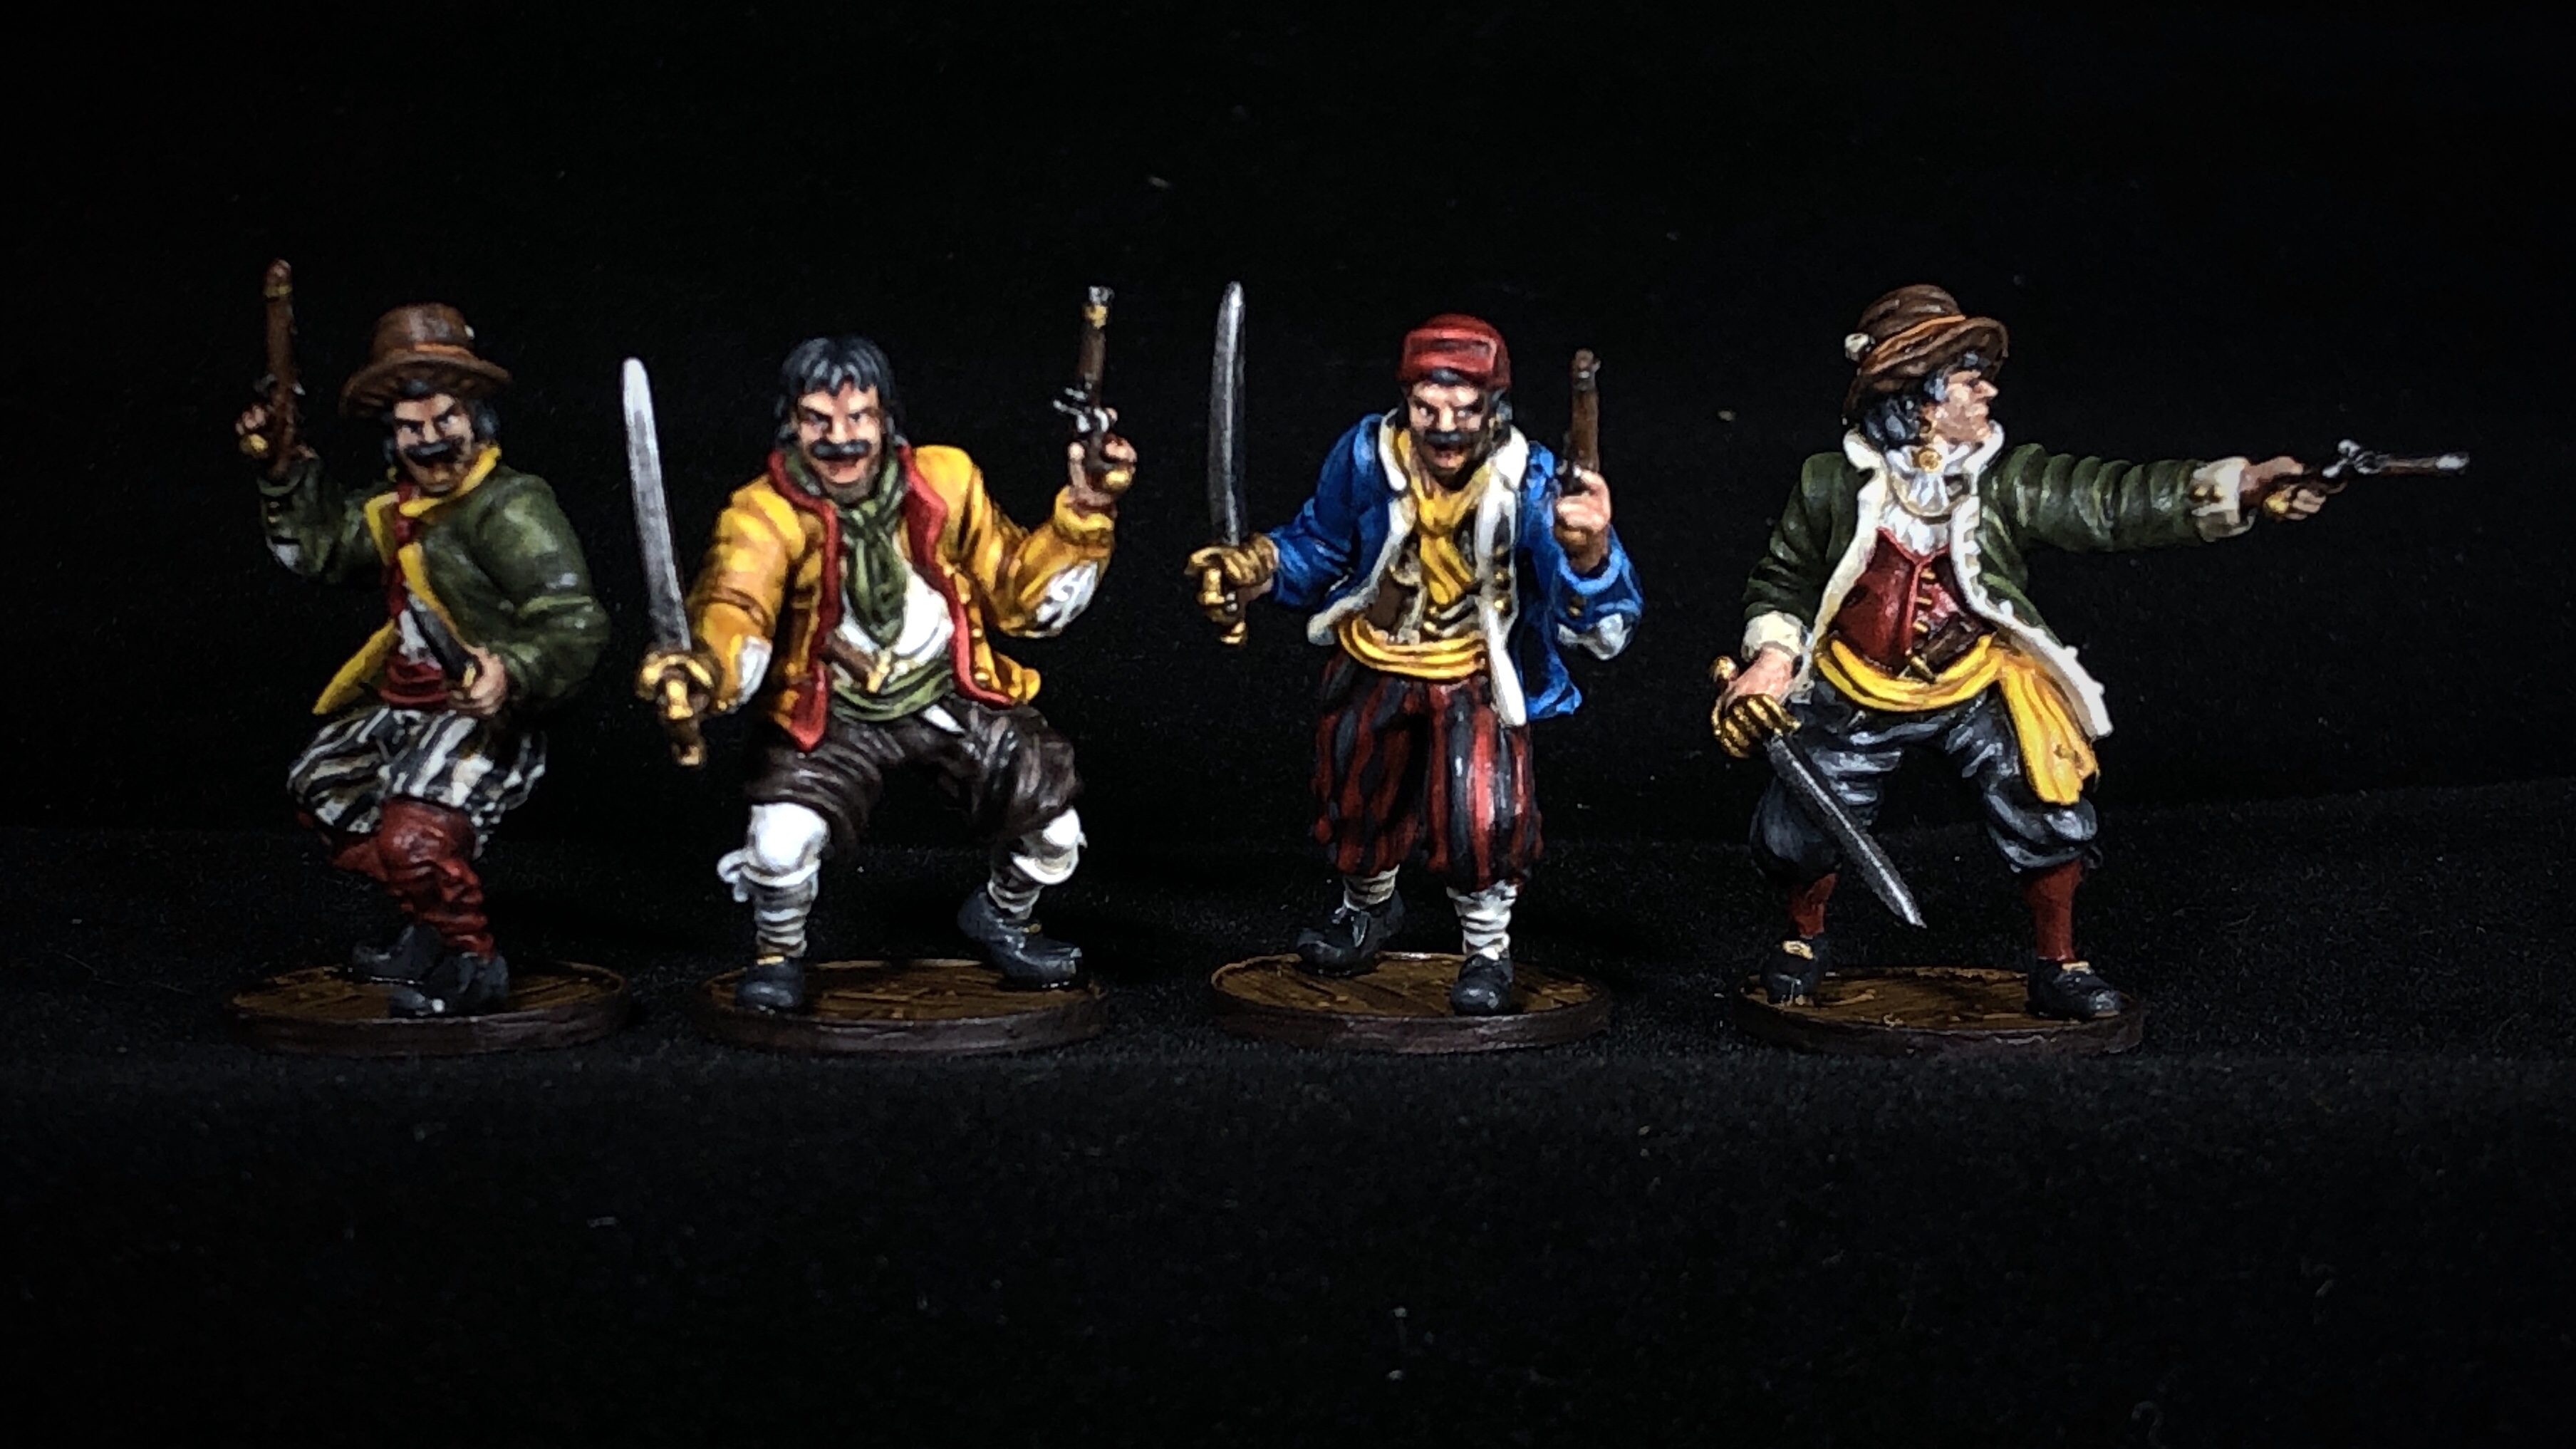
Here are the minis halfway through base coats.
Each mini has it’s own color scheme, but the colors overlap a lot.

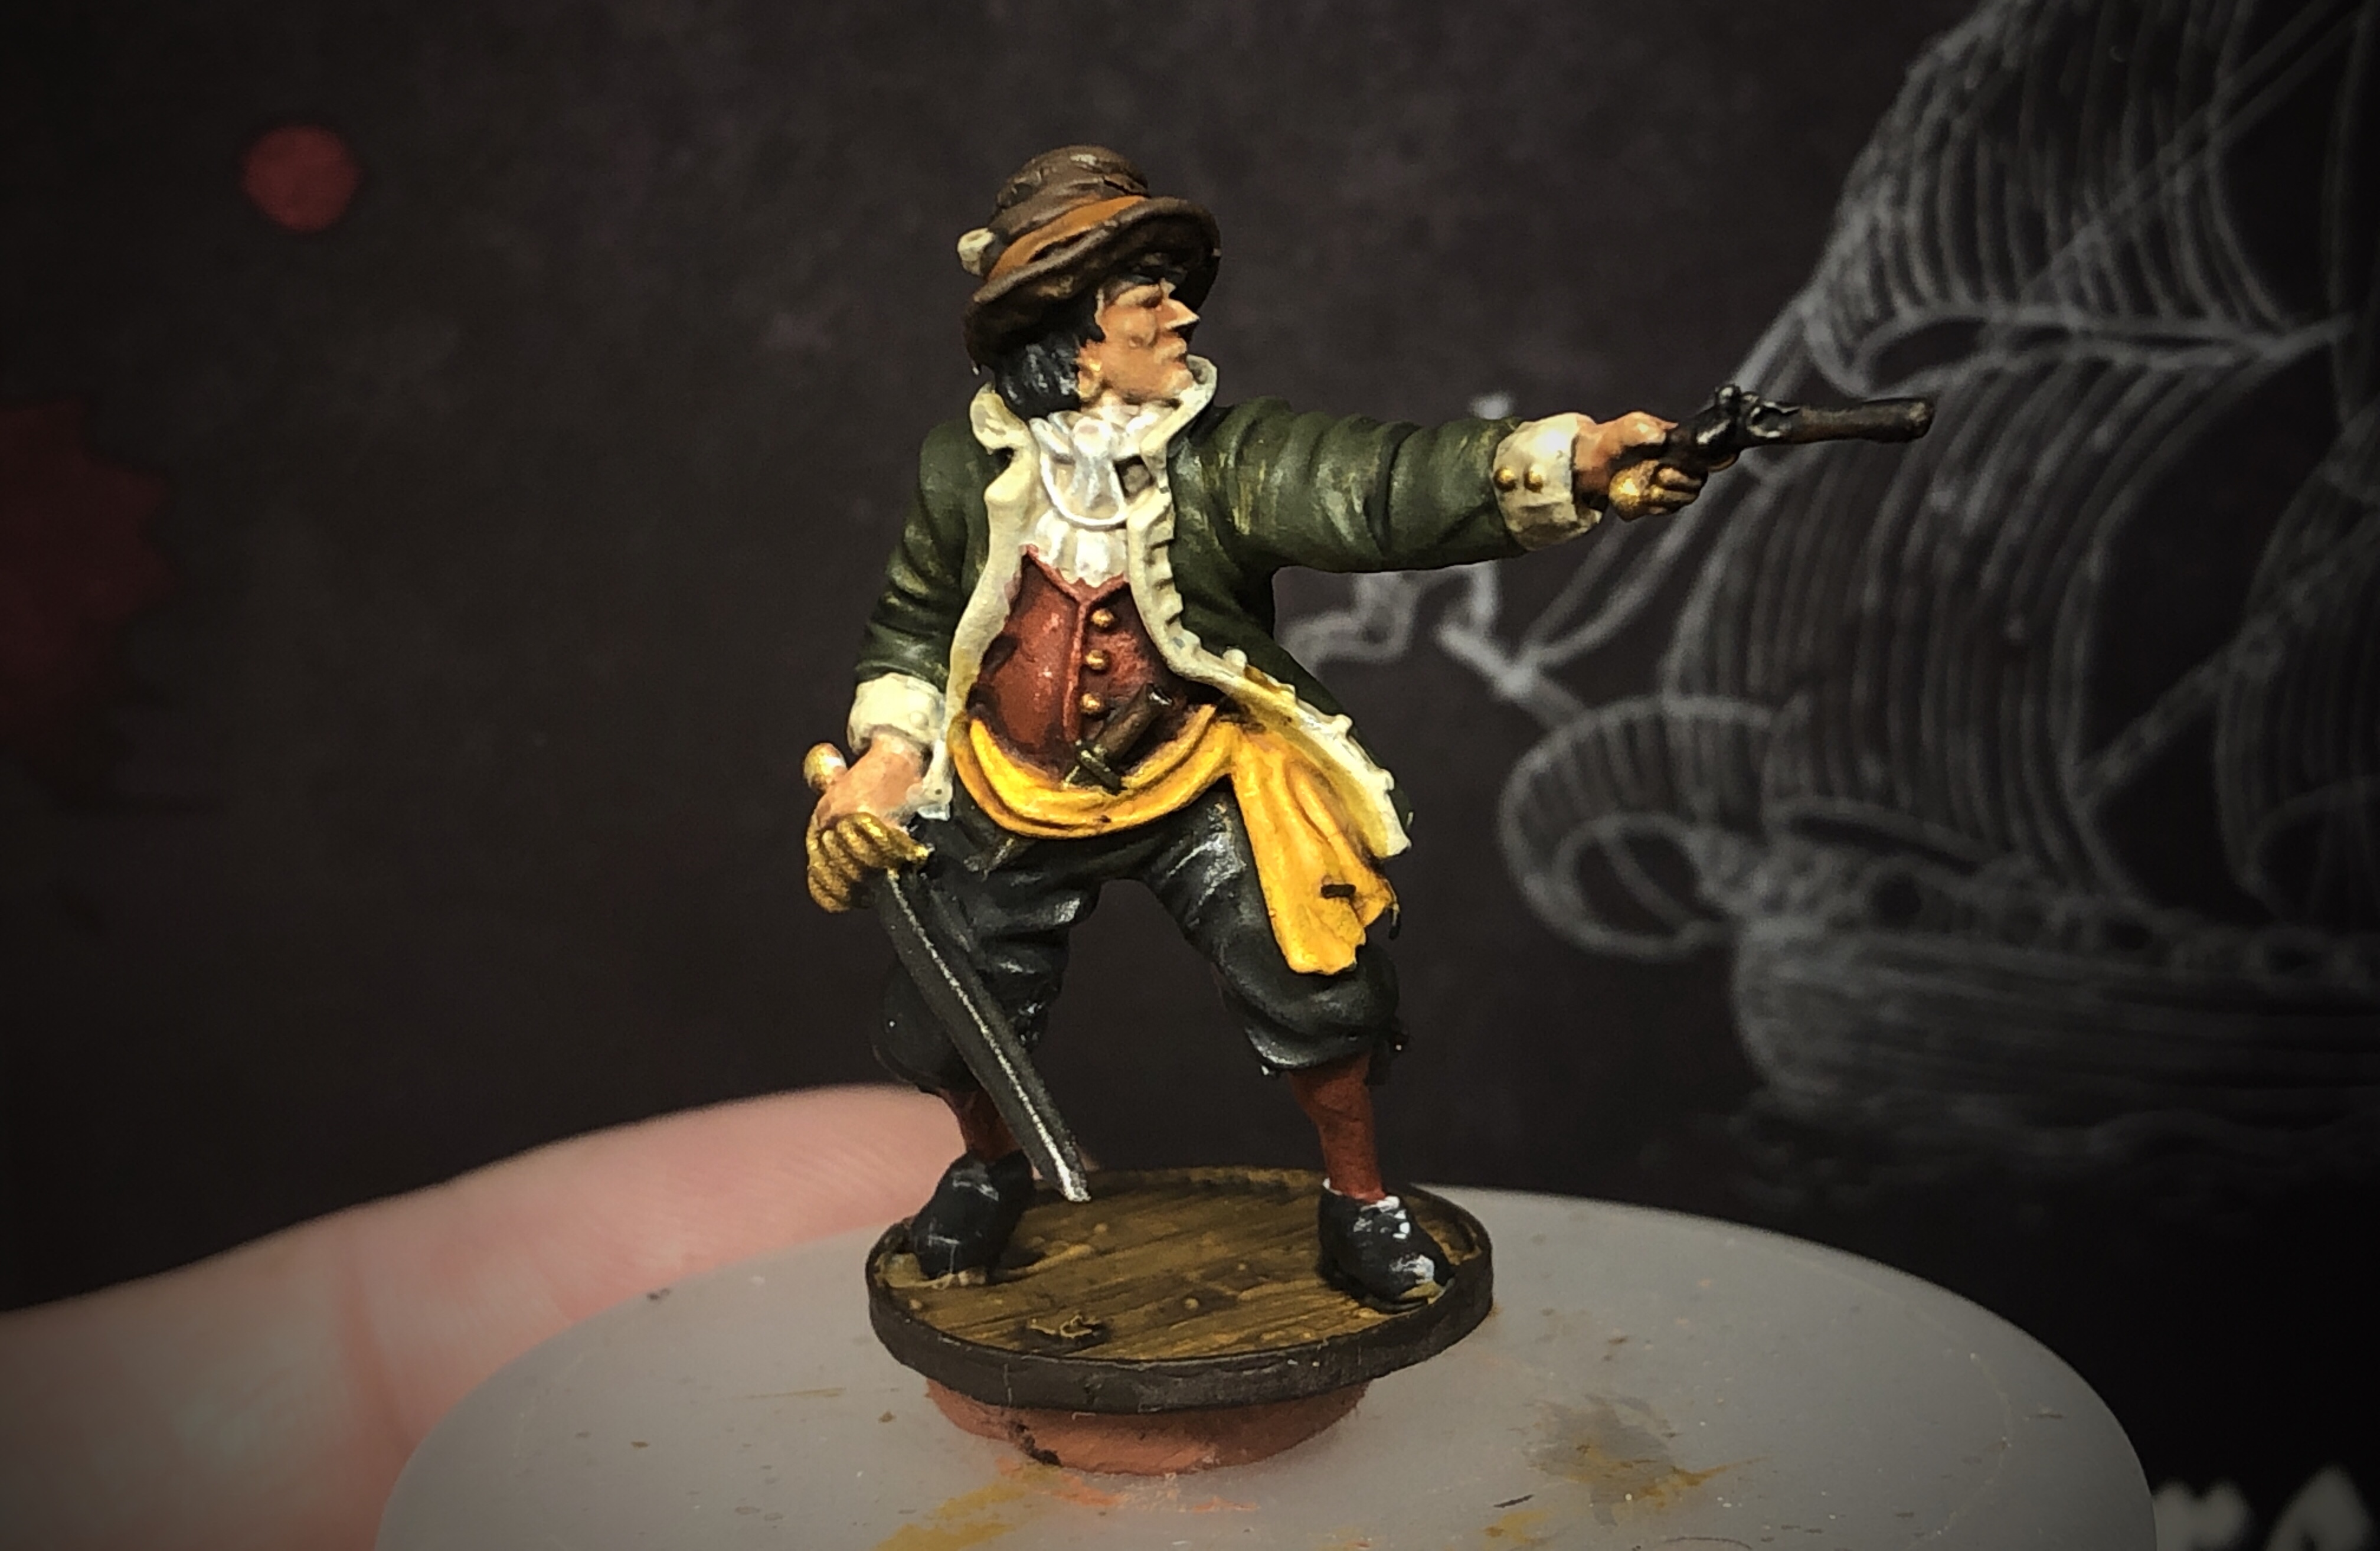
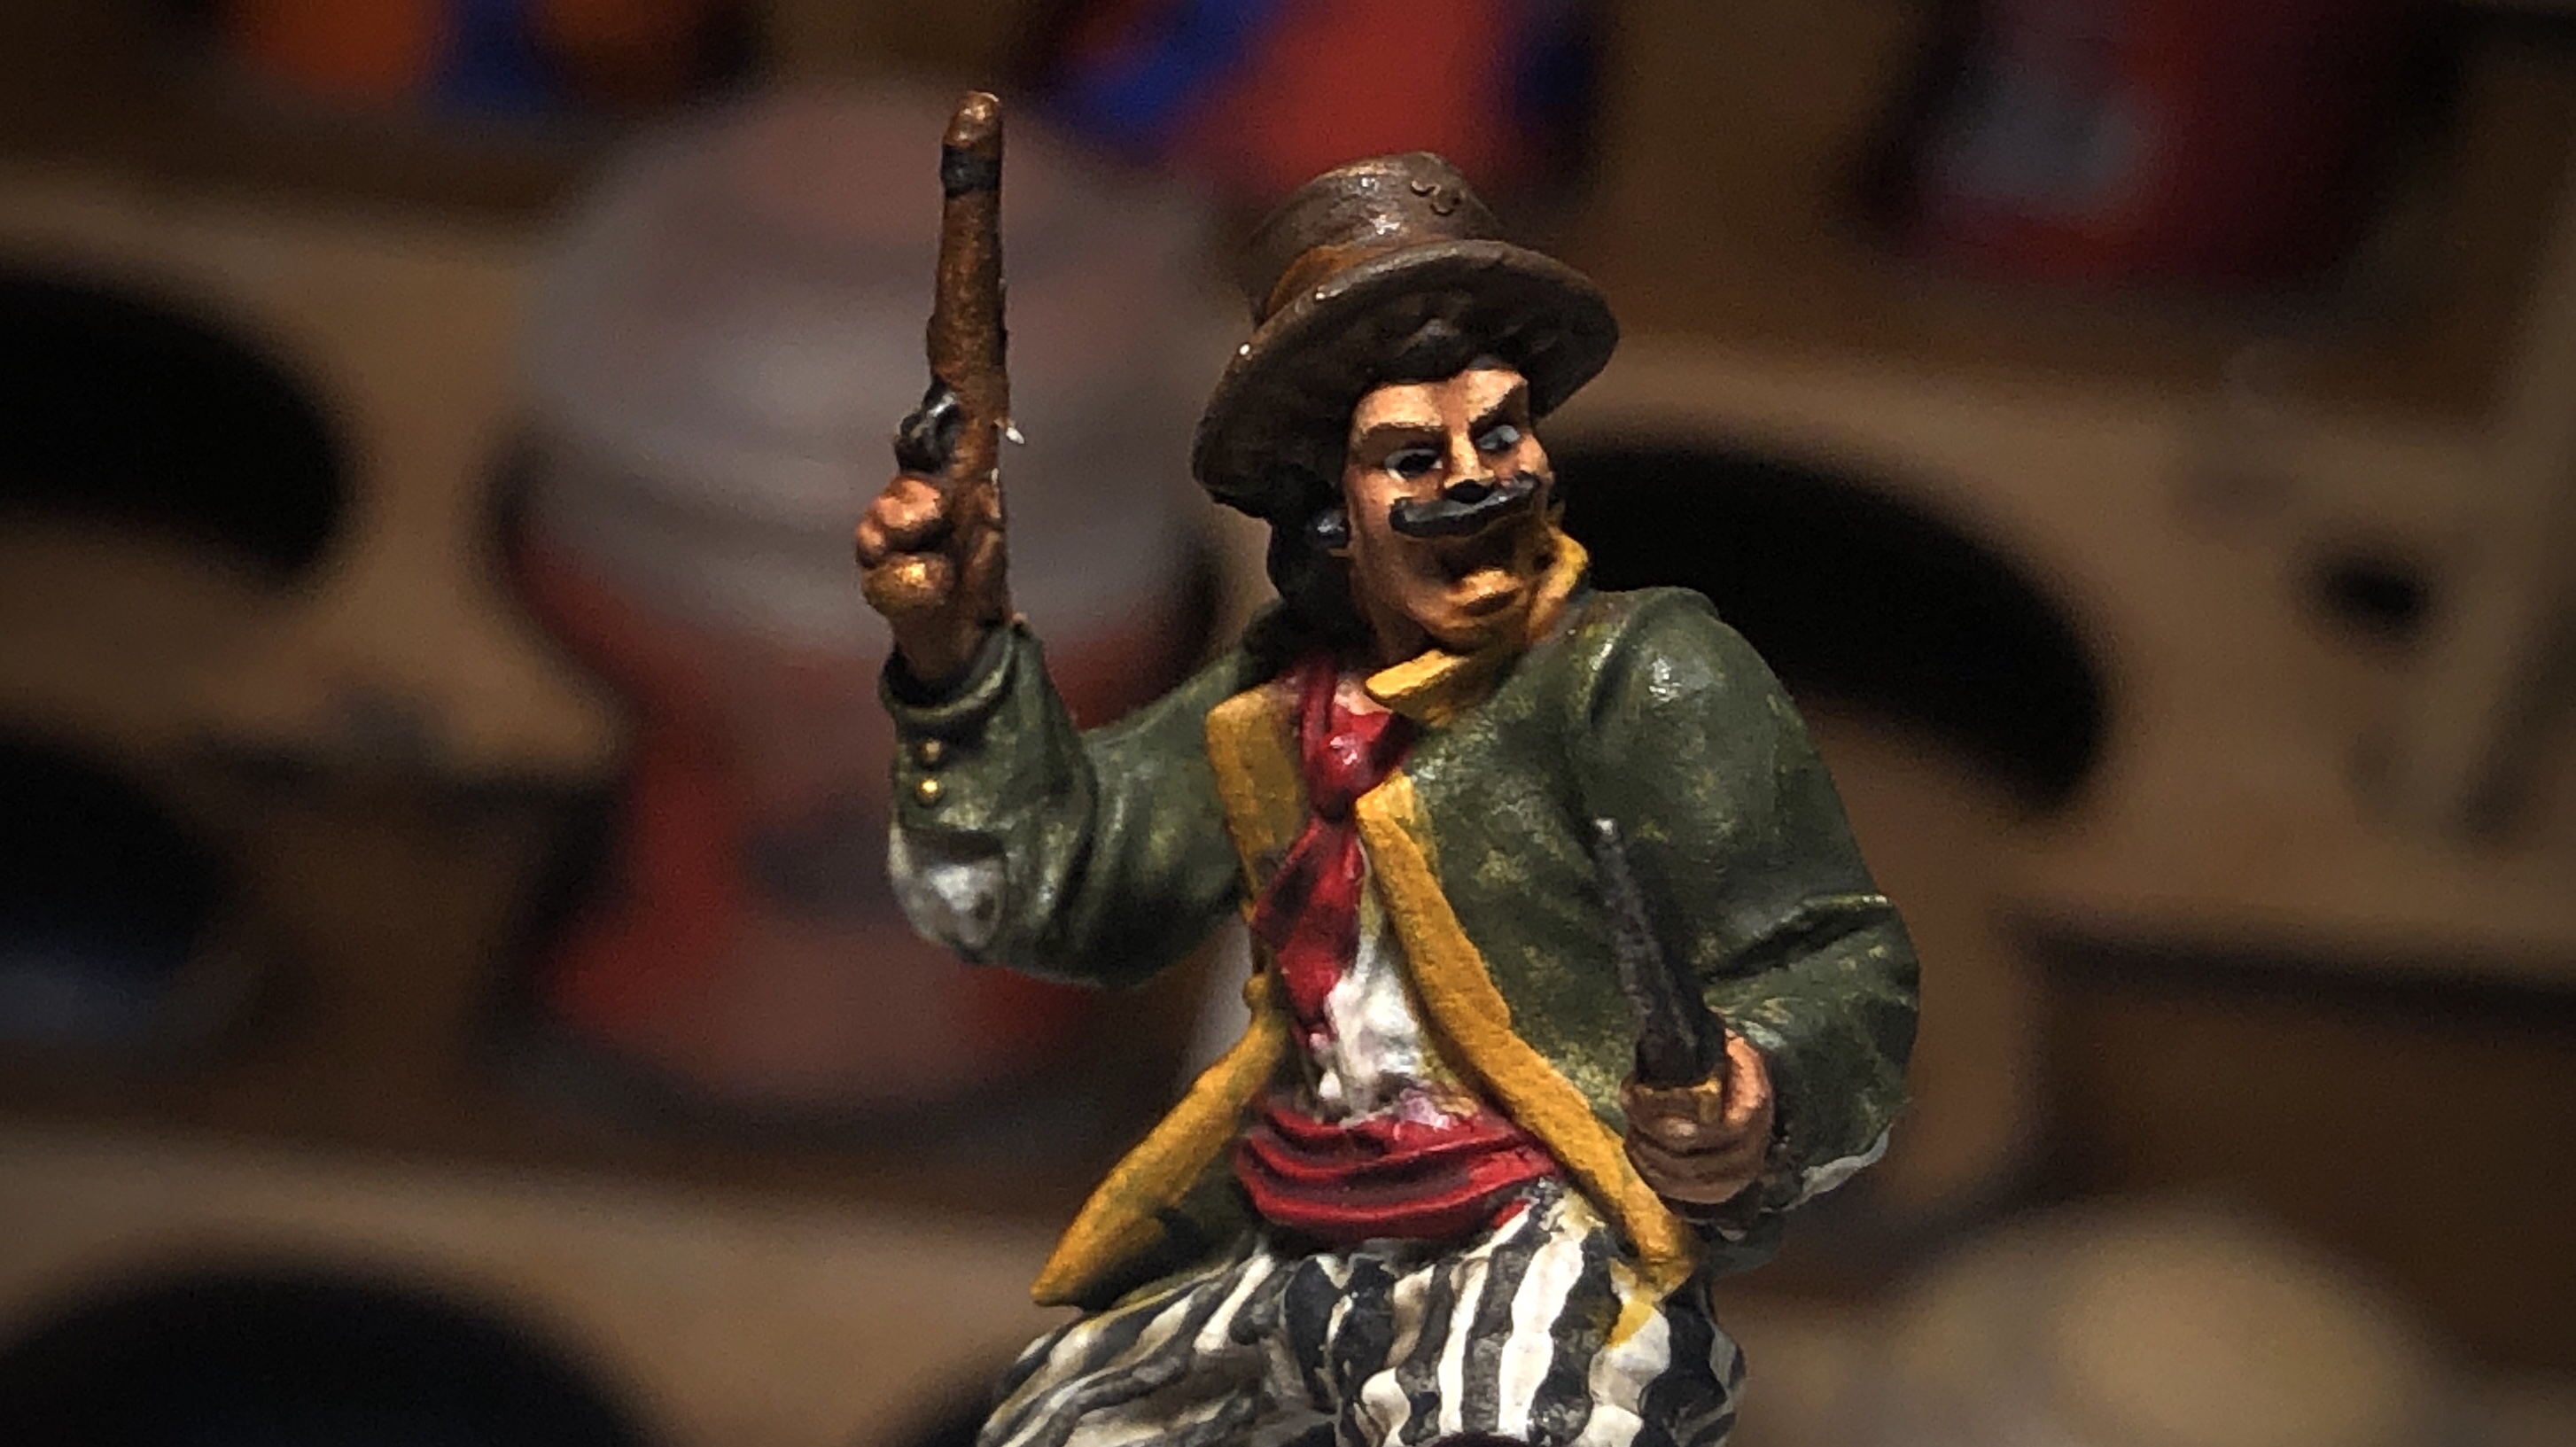
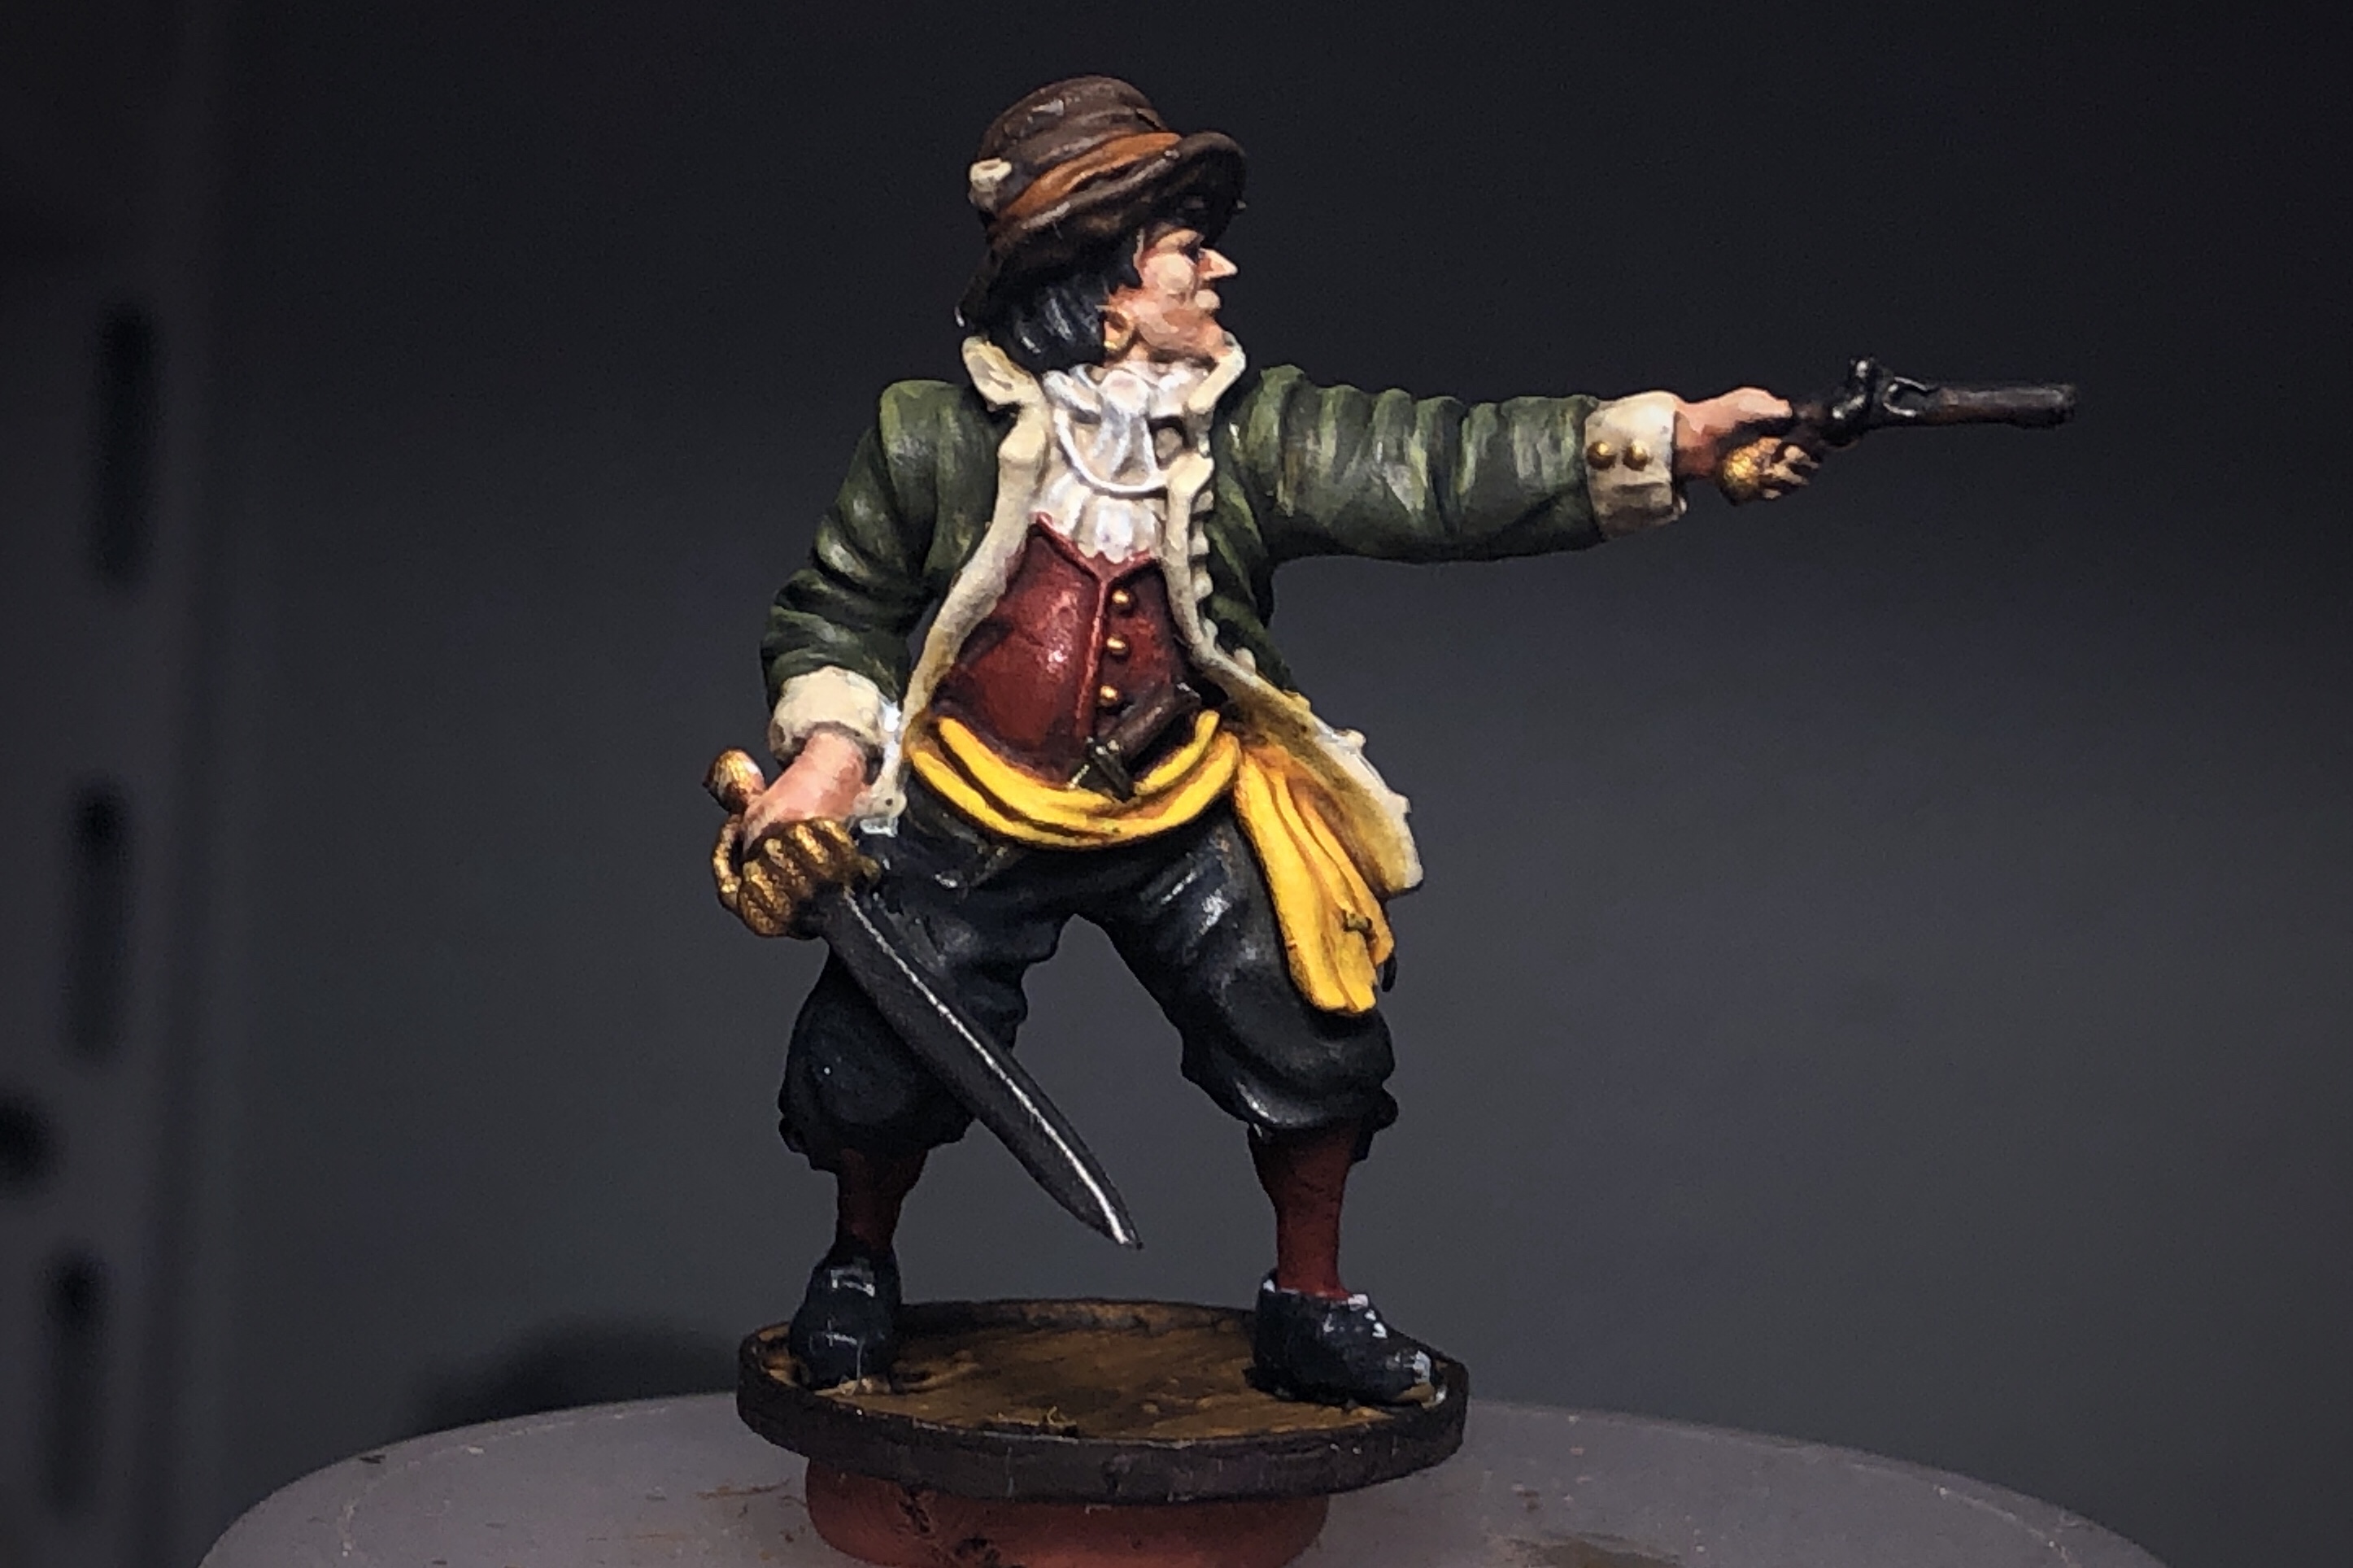
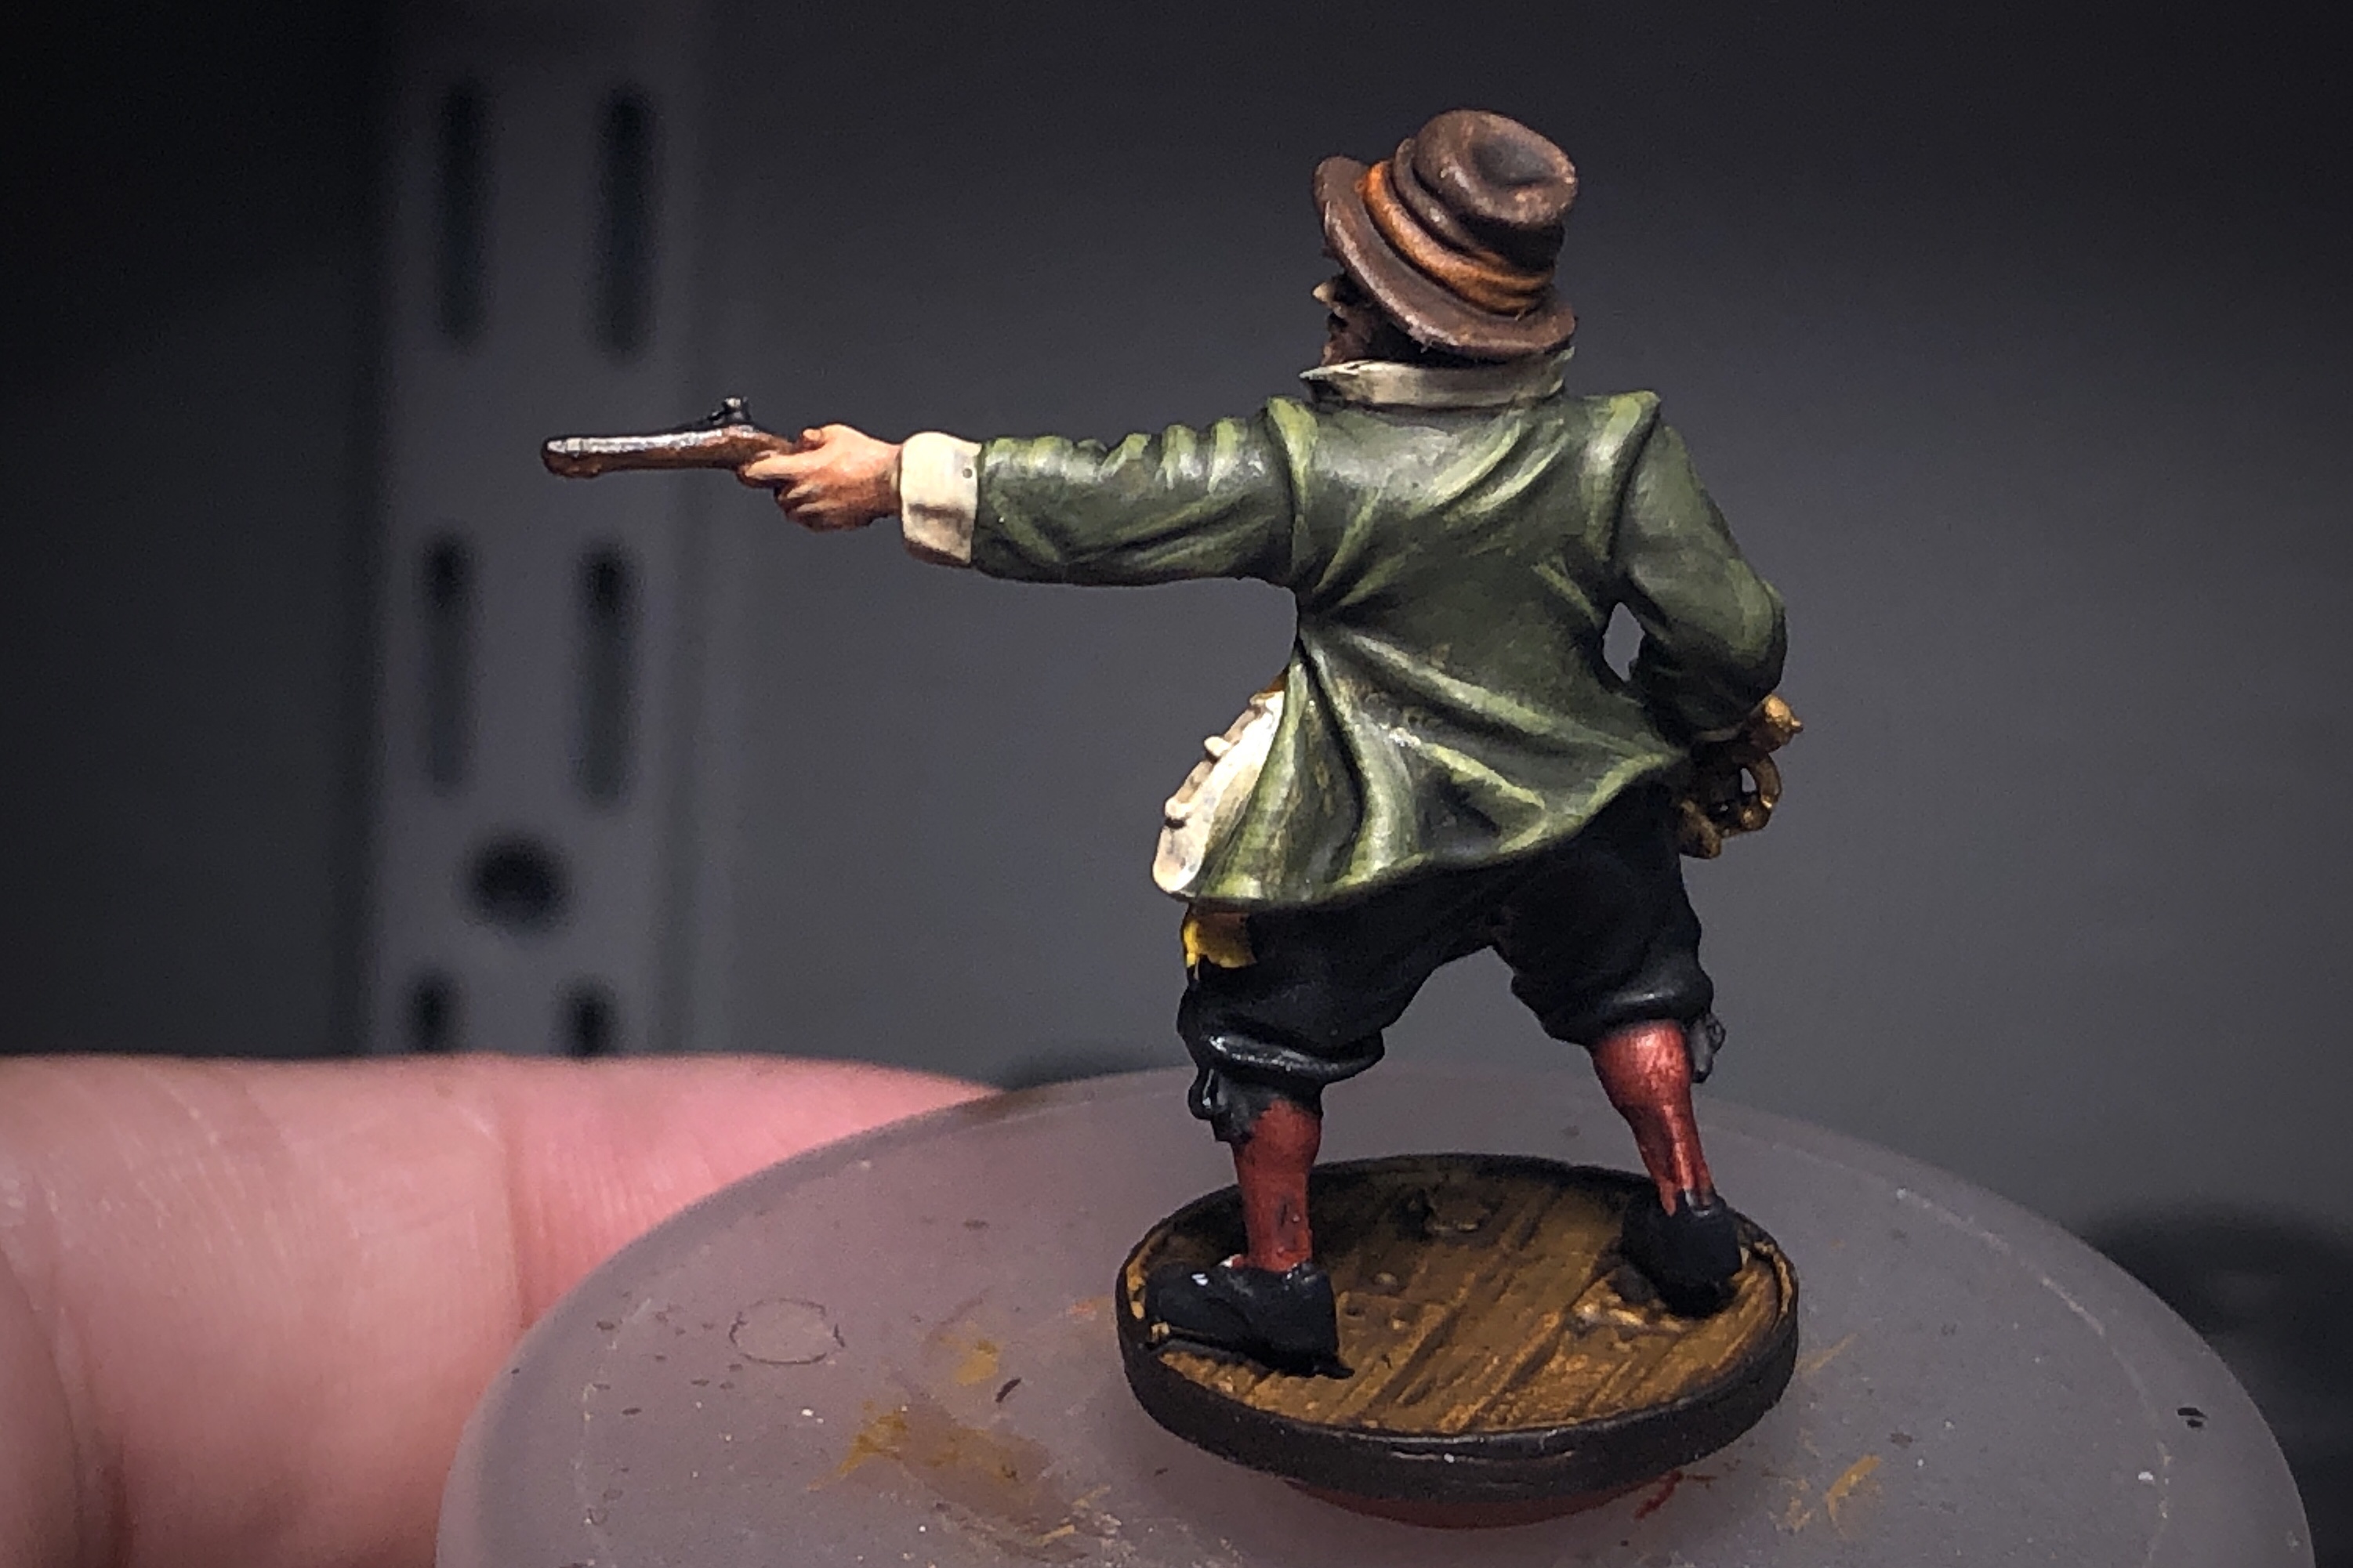
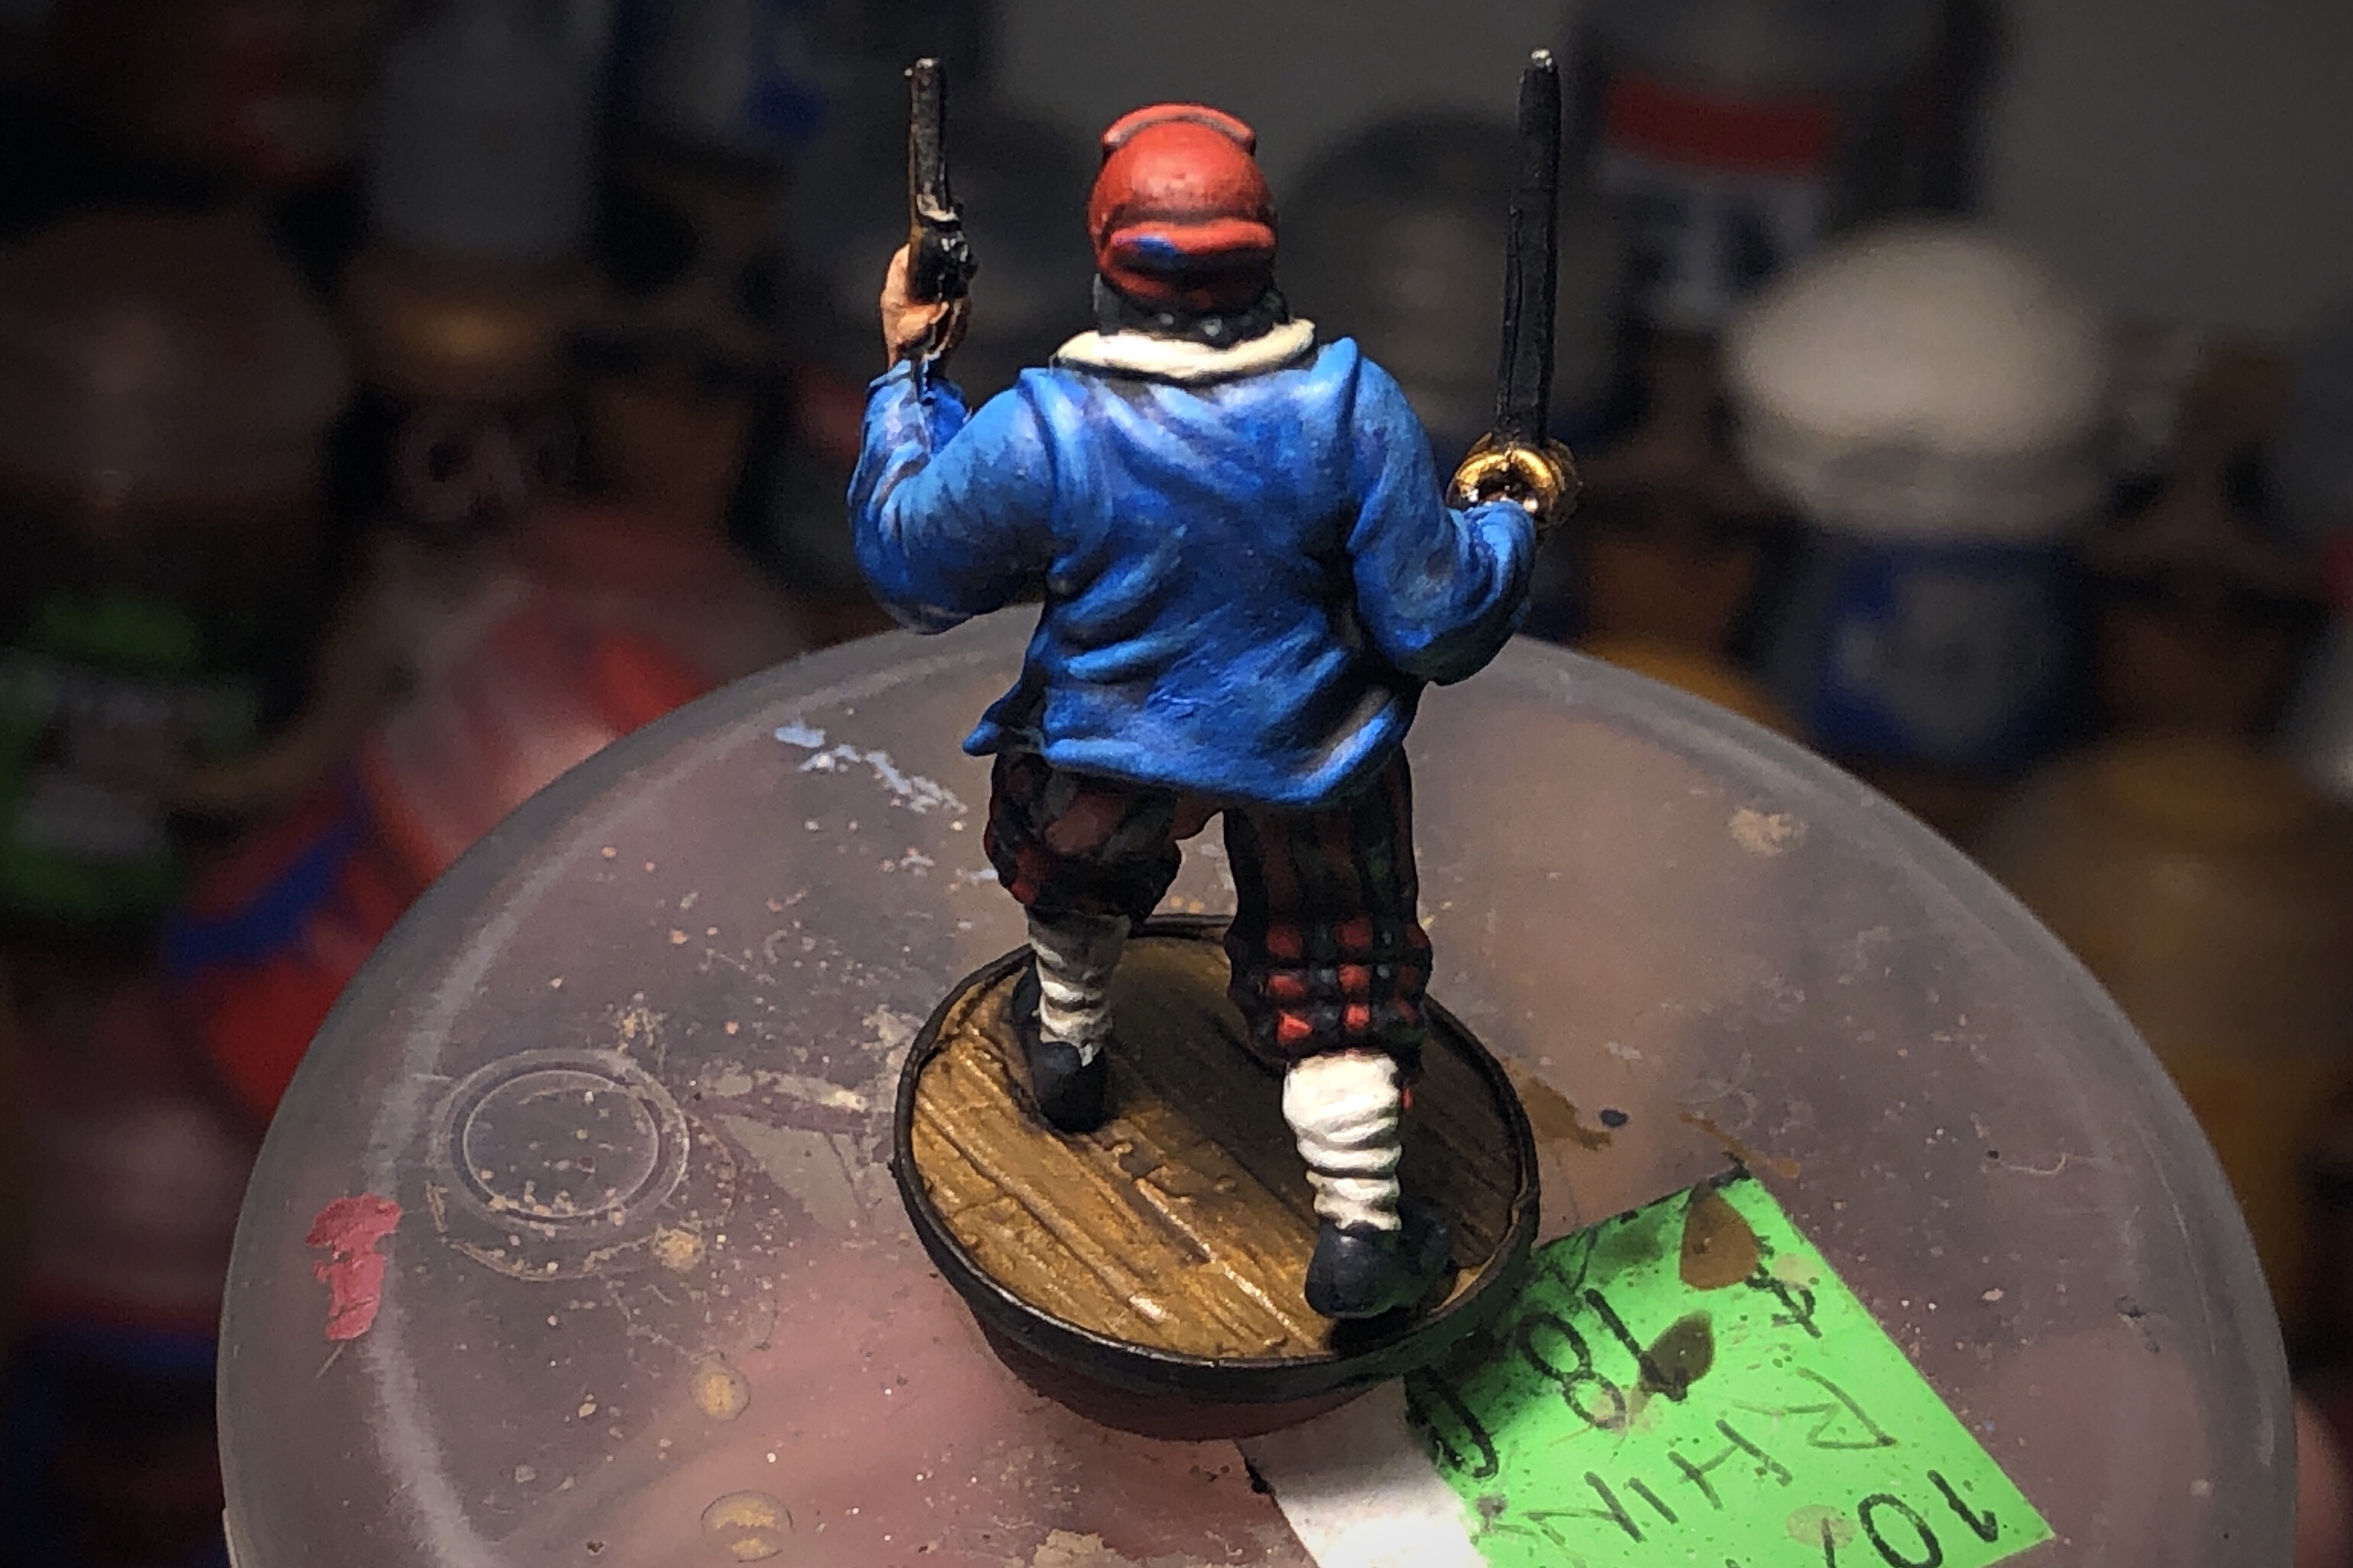
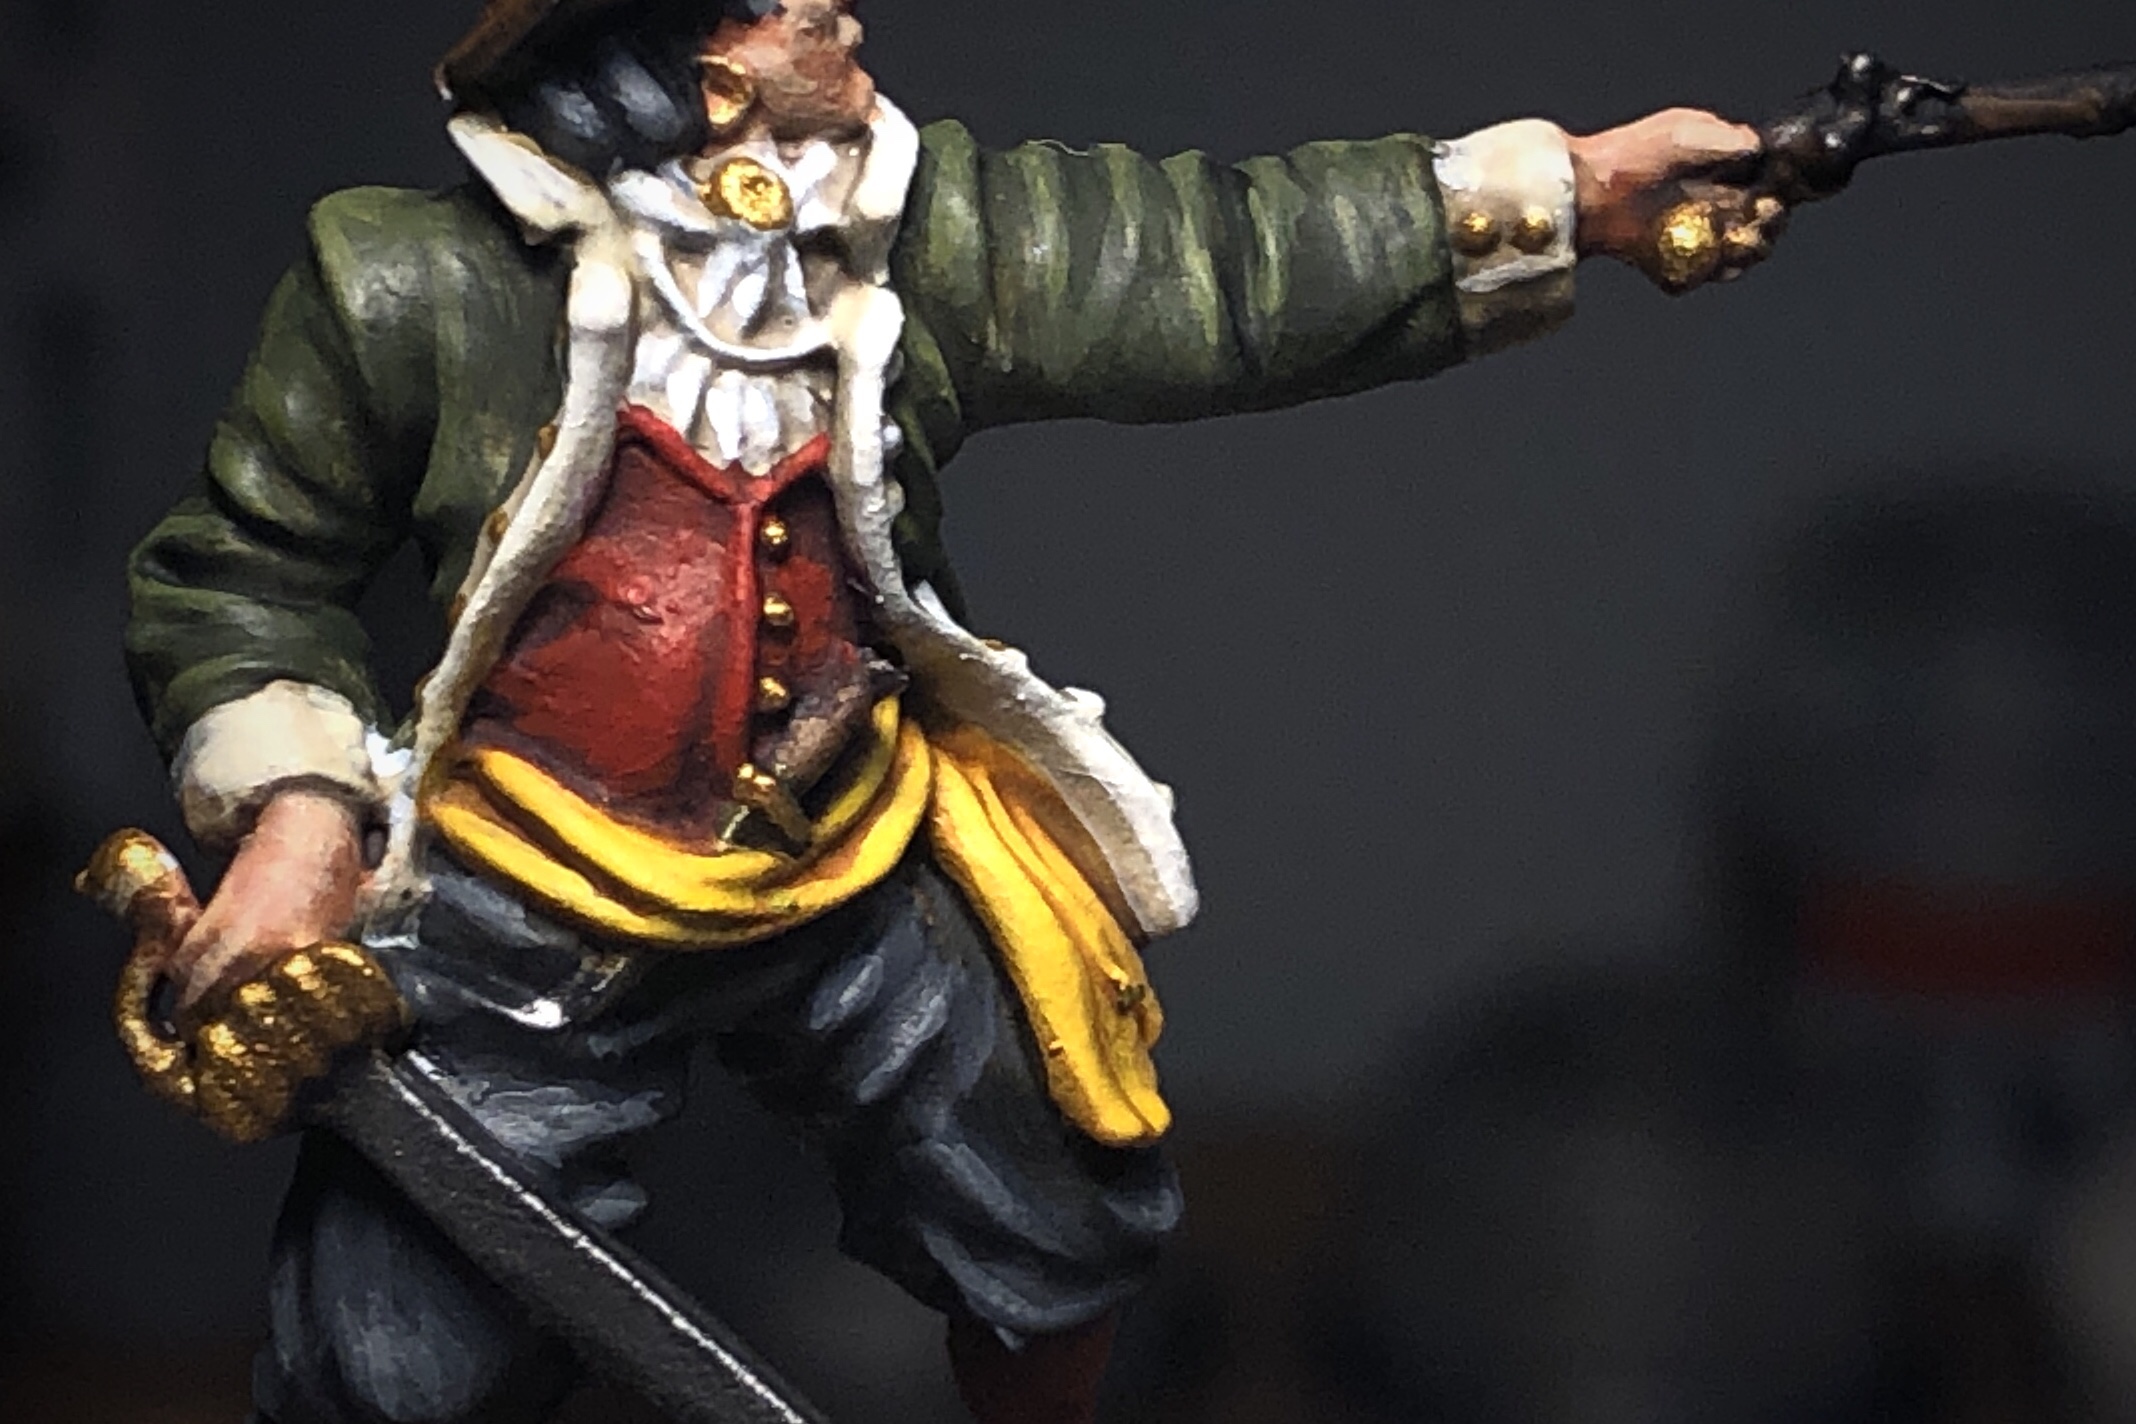
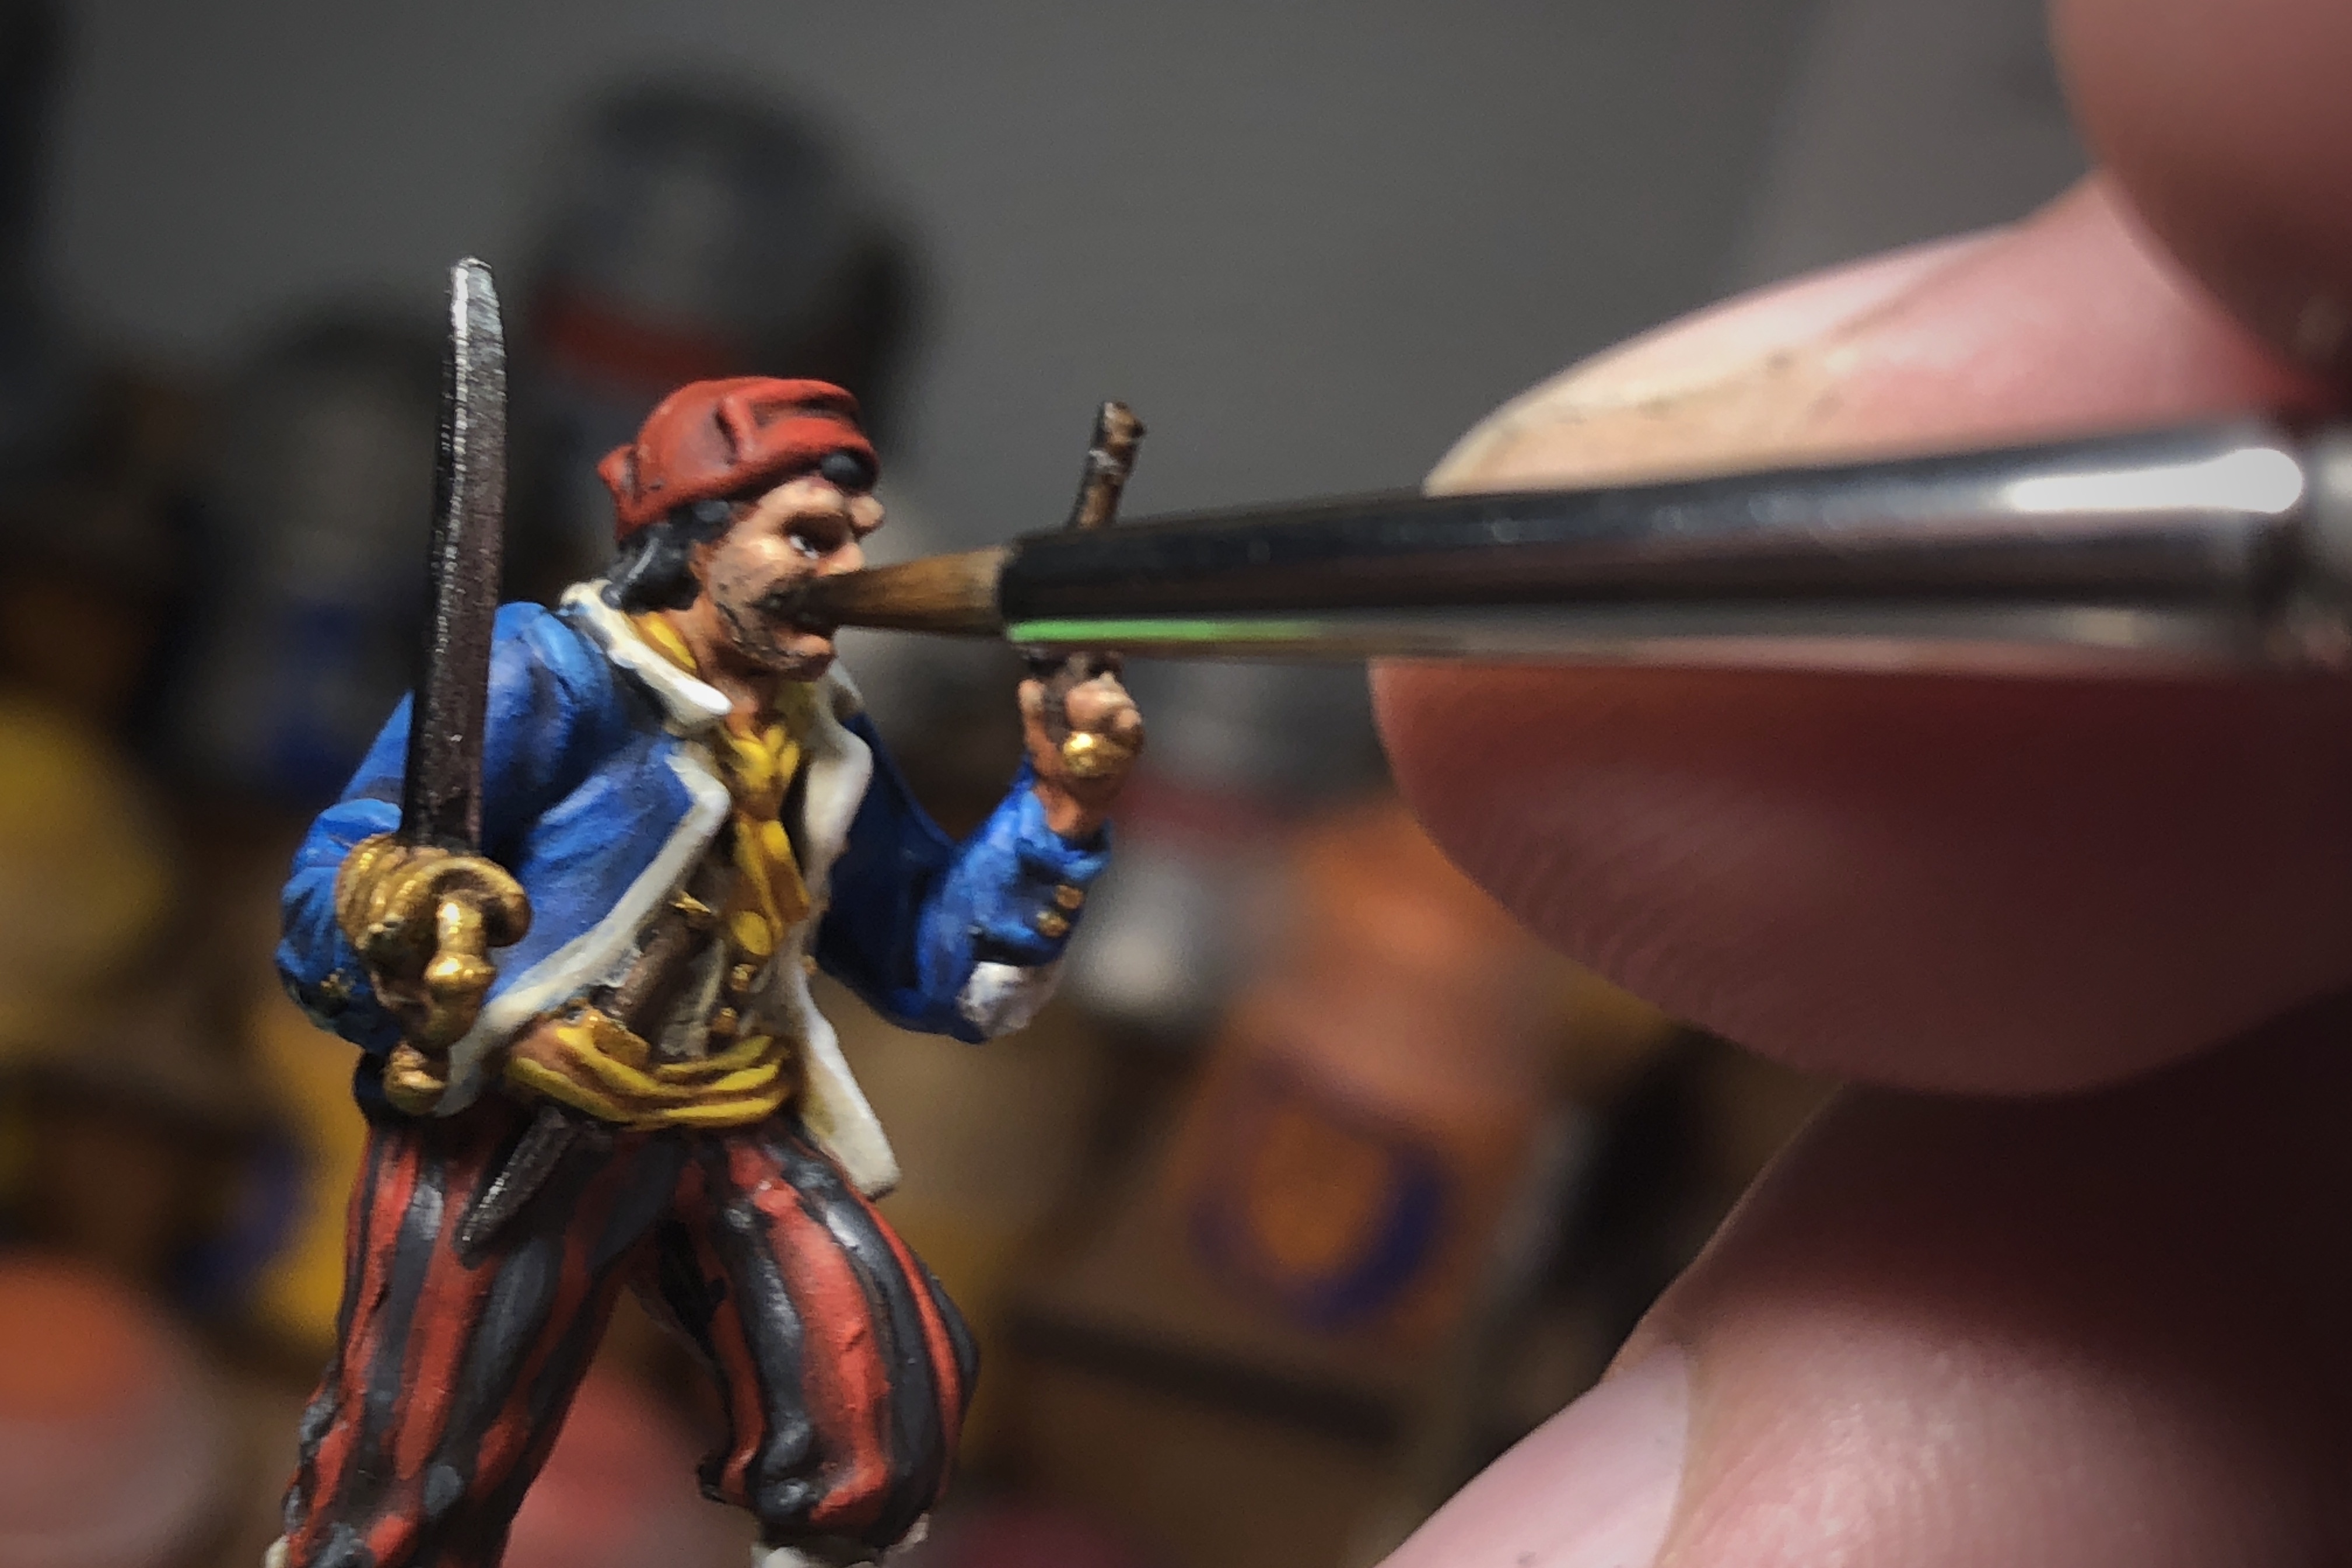
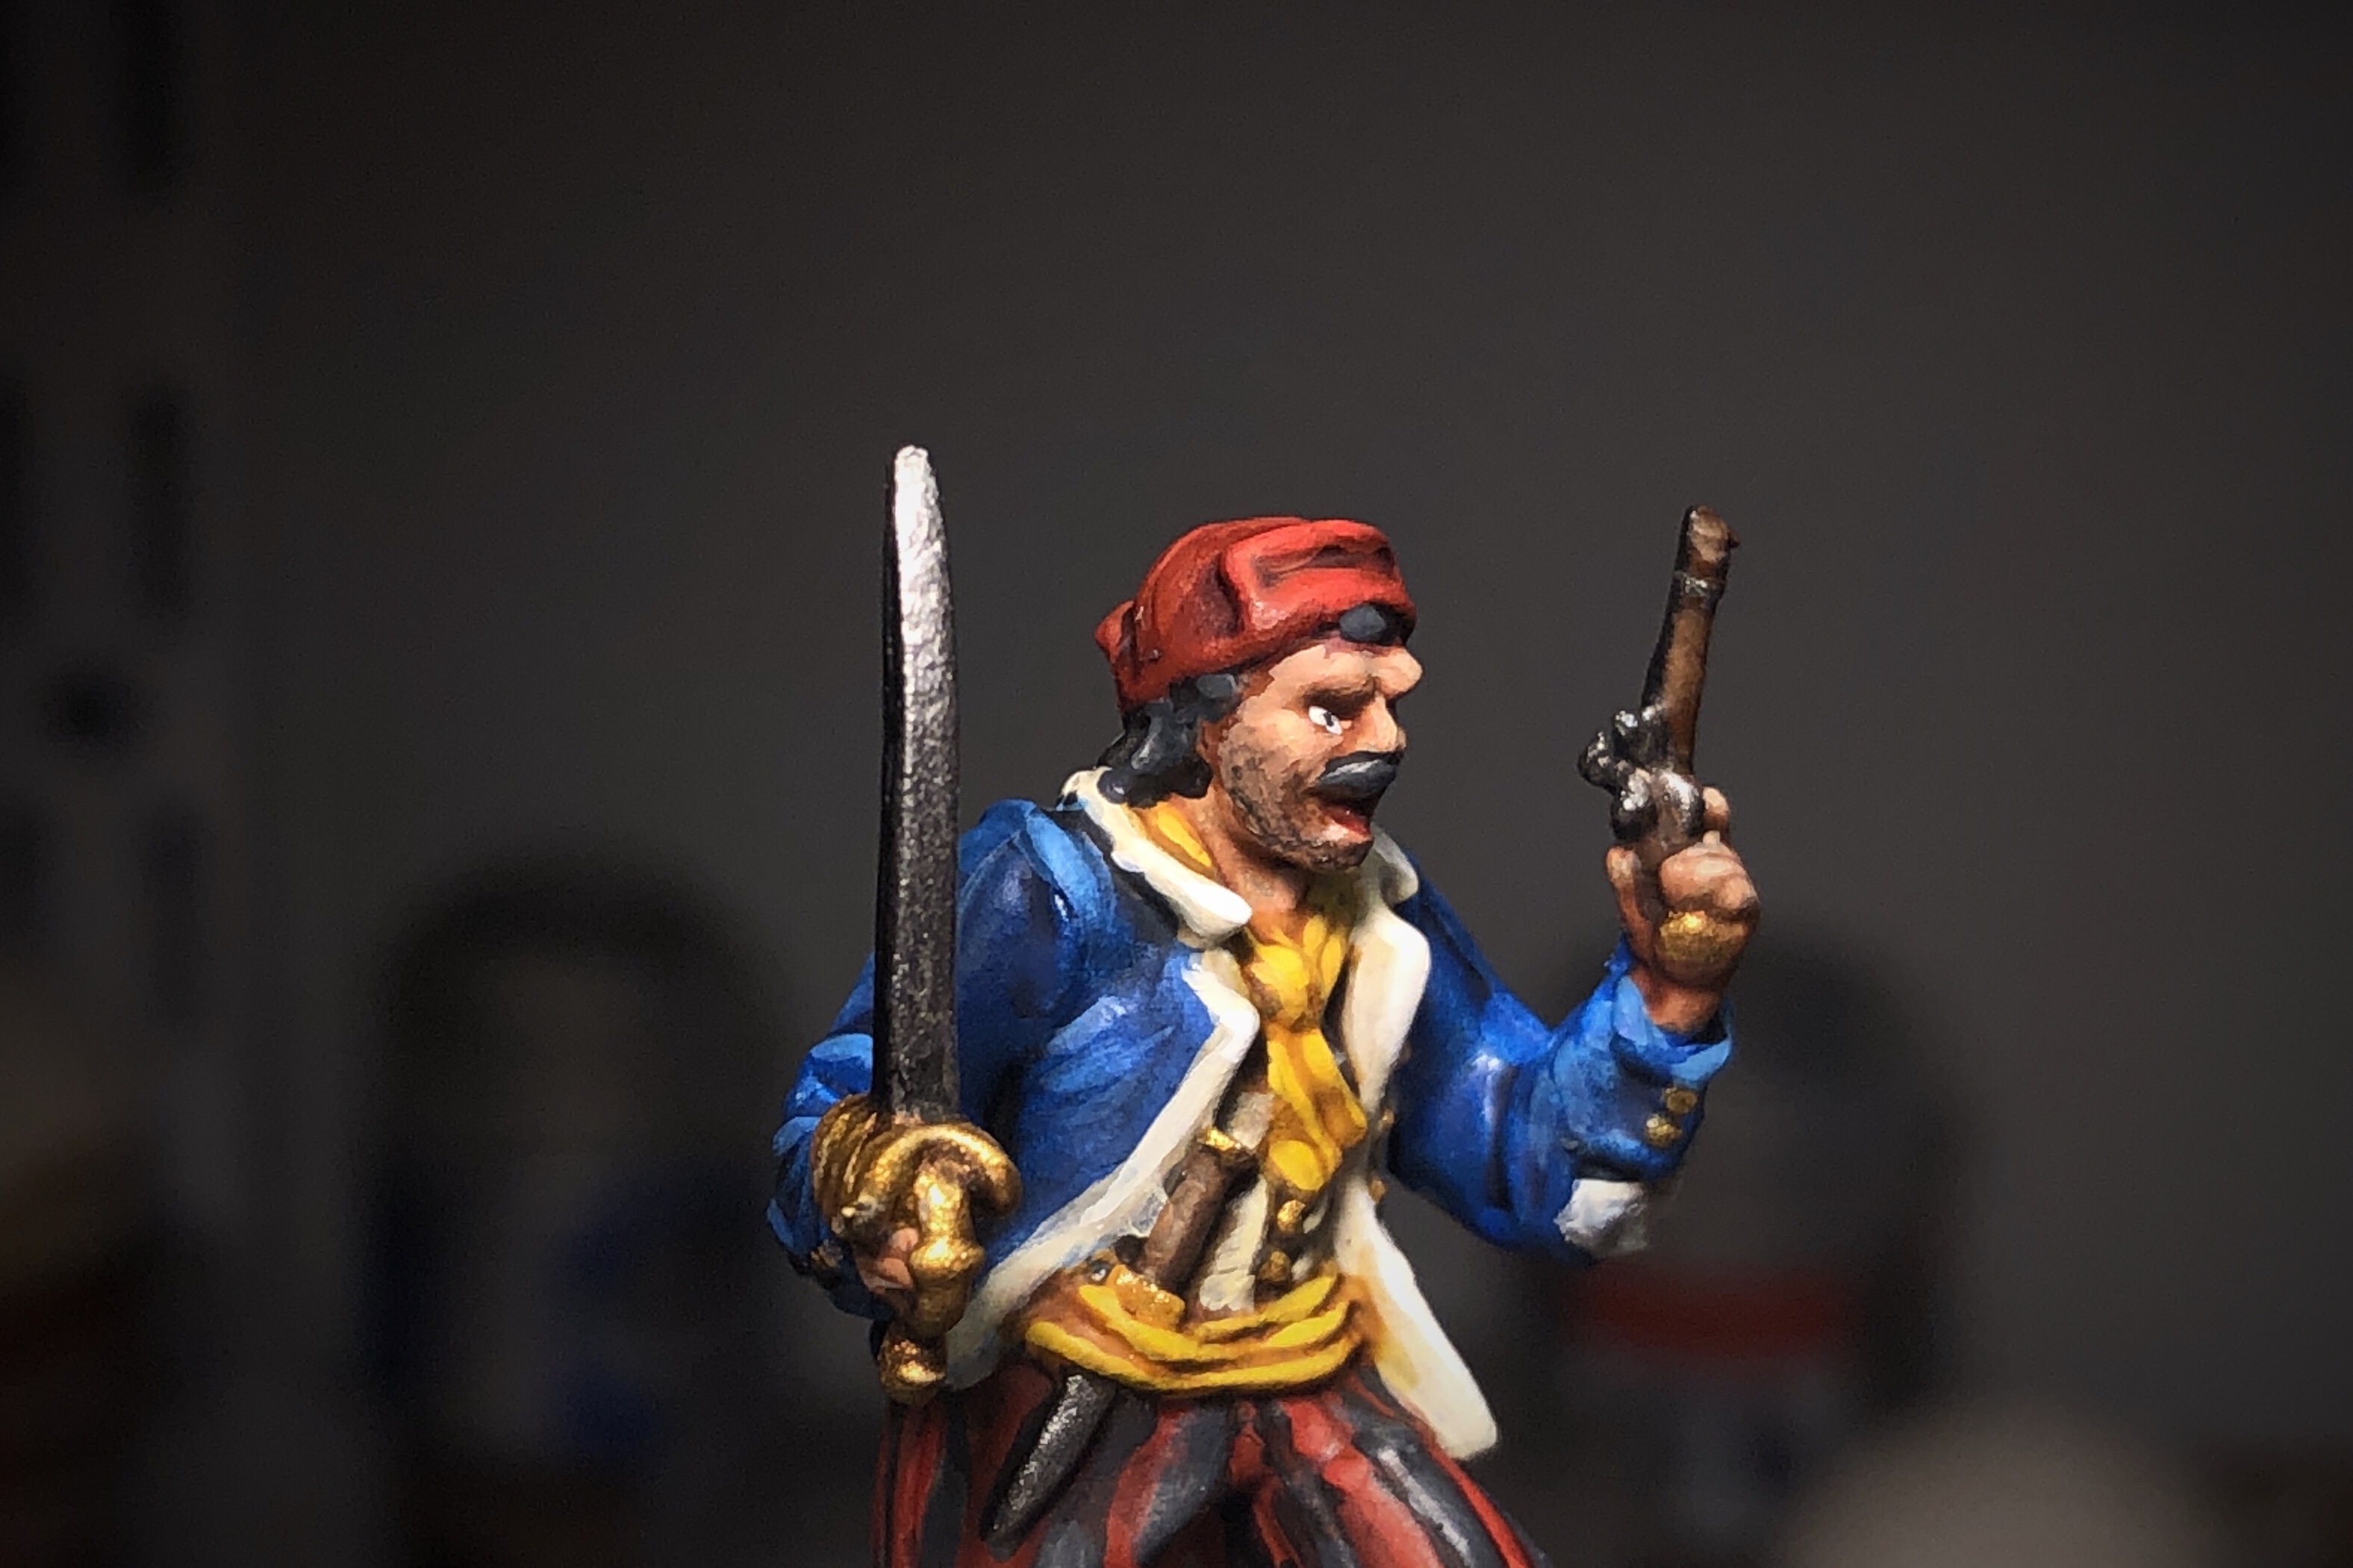
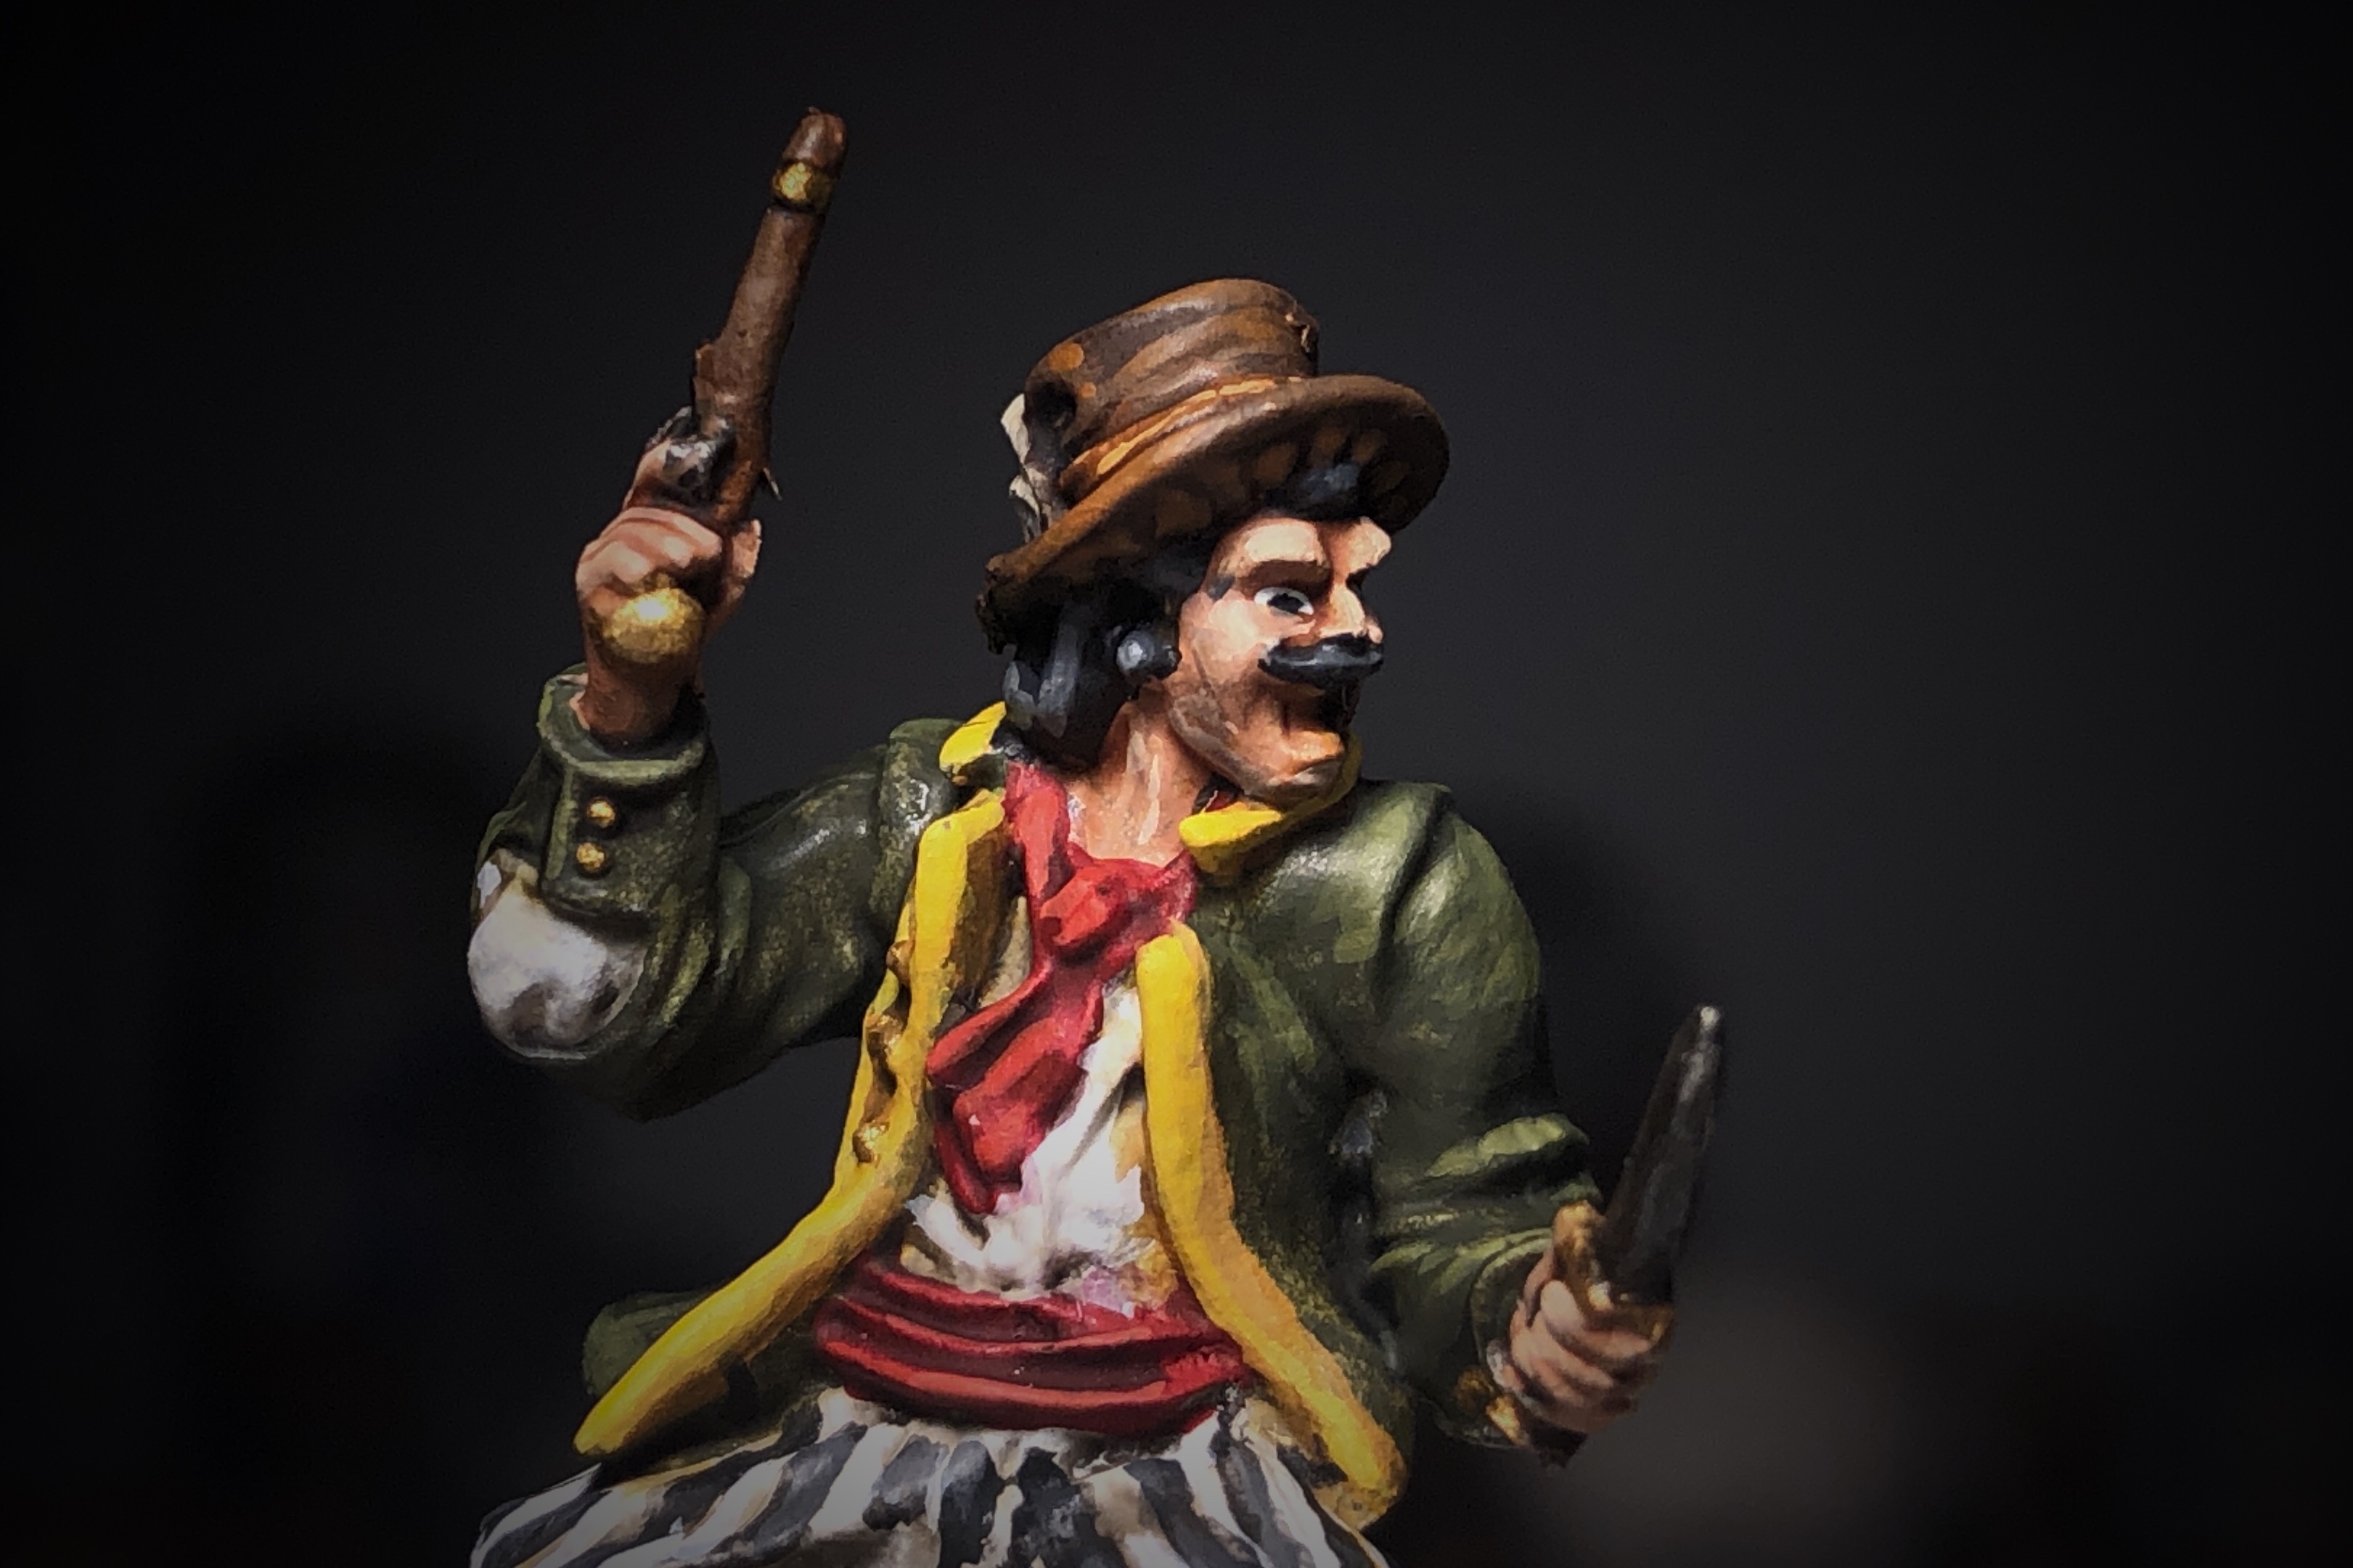
For this mini pointing his pistol I used:
- Cadian Fleshtone for the skin
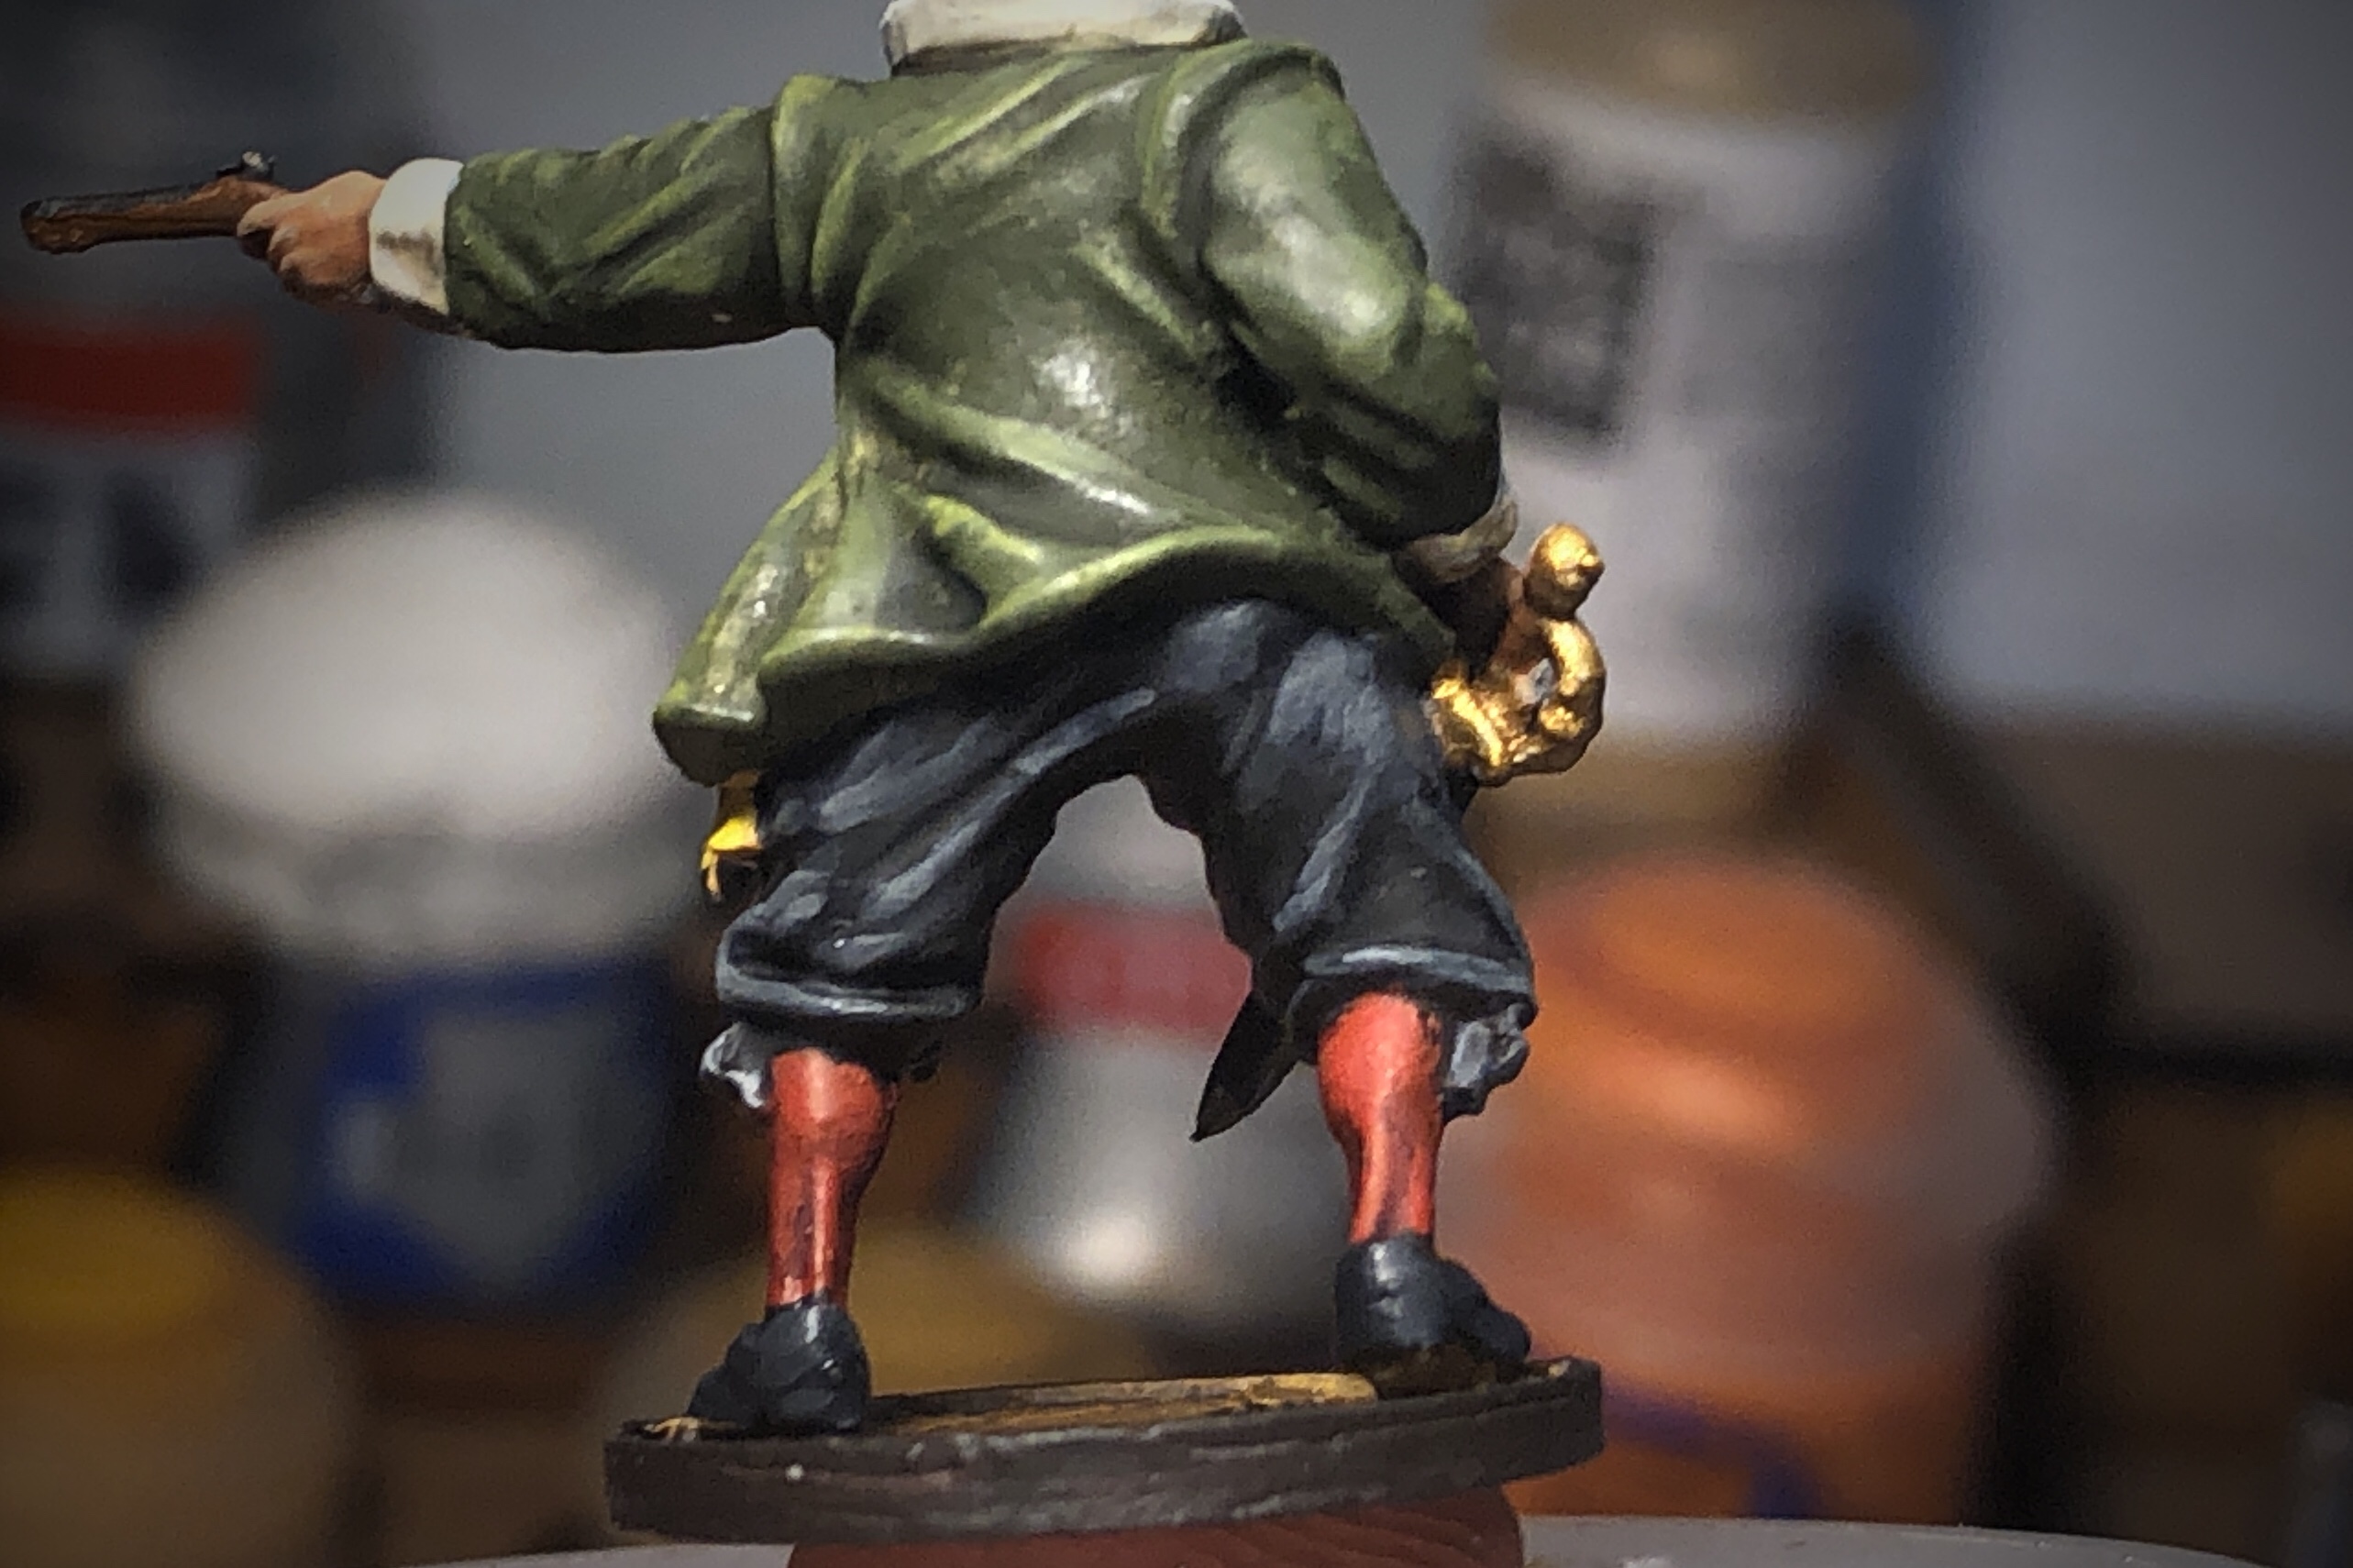
- Castellen Green for the jacket
- Screaming Skull for the jacket trim and tiny feather
- Averland Sunset for the sash
- XV-88 and Rhinox Hide for the base
- German Grey for the hair, paints and shoes
- Mournfang Brown for the pistol wood
- Skragg Brown for the hat band
- Panzer Aces Leather Brown for the hat and dagger handle
- Model Color Ivory for the undershirt
- Model Color Cavalry Brown for the waistcoat and stockings
- Model Color Brass for the buttons, pistol butt and sword hilt
- Metal Color Dark Aluminium for the sword blade, dagger hilt and pistol metal
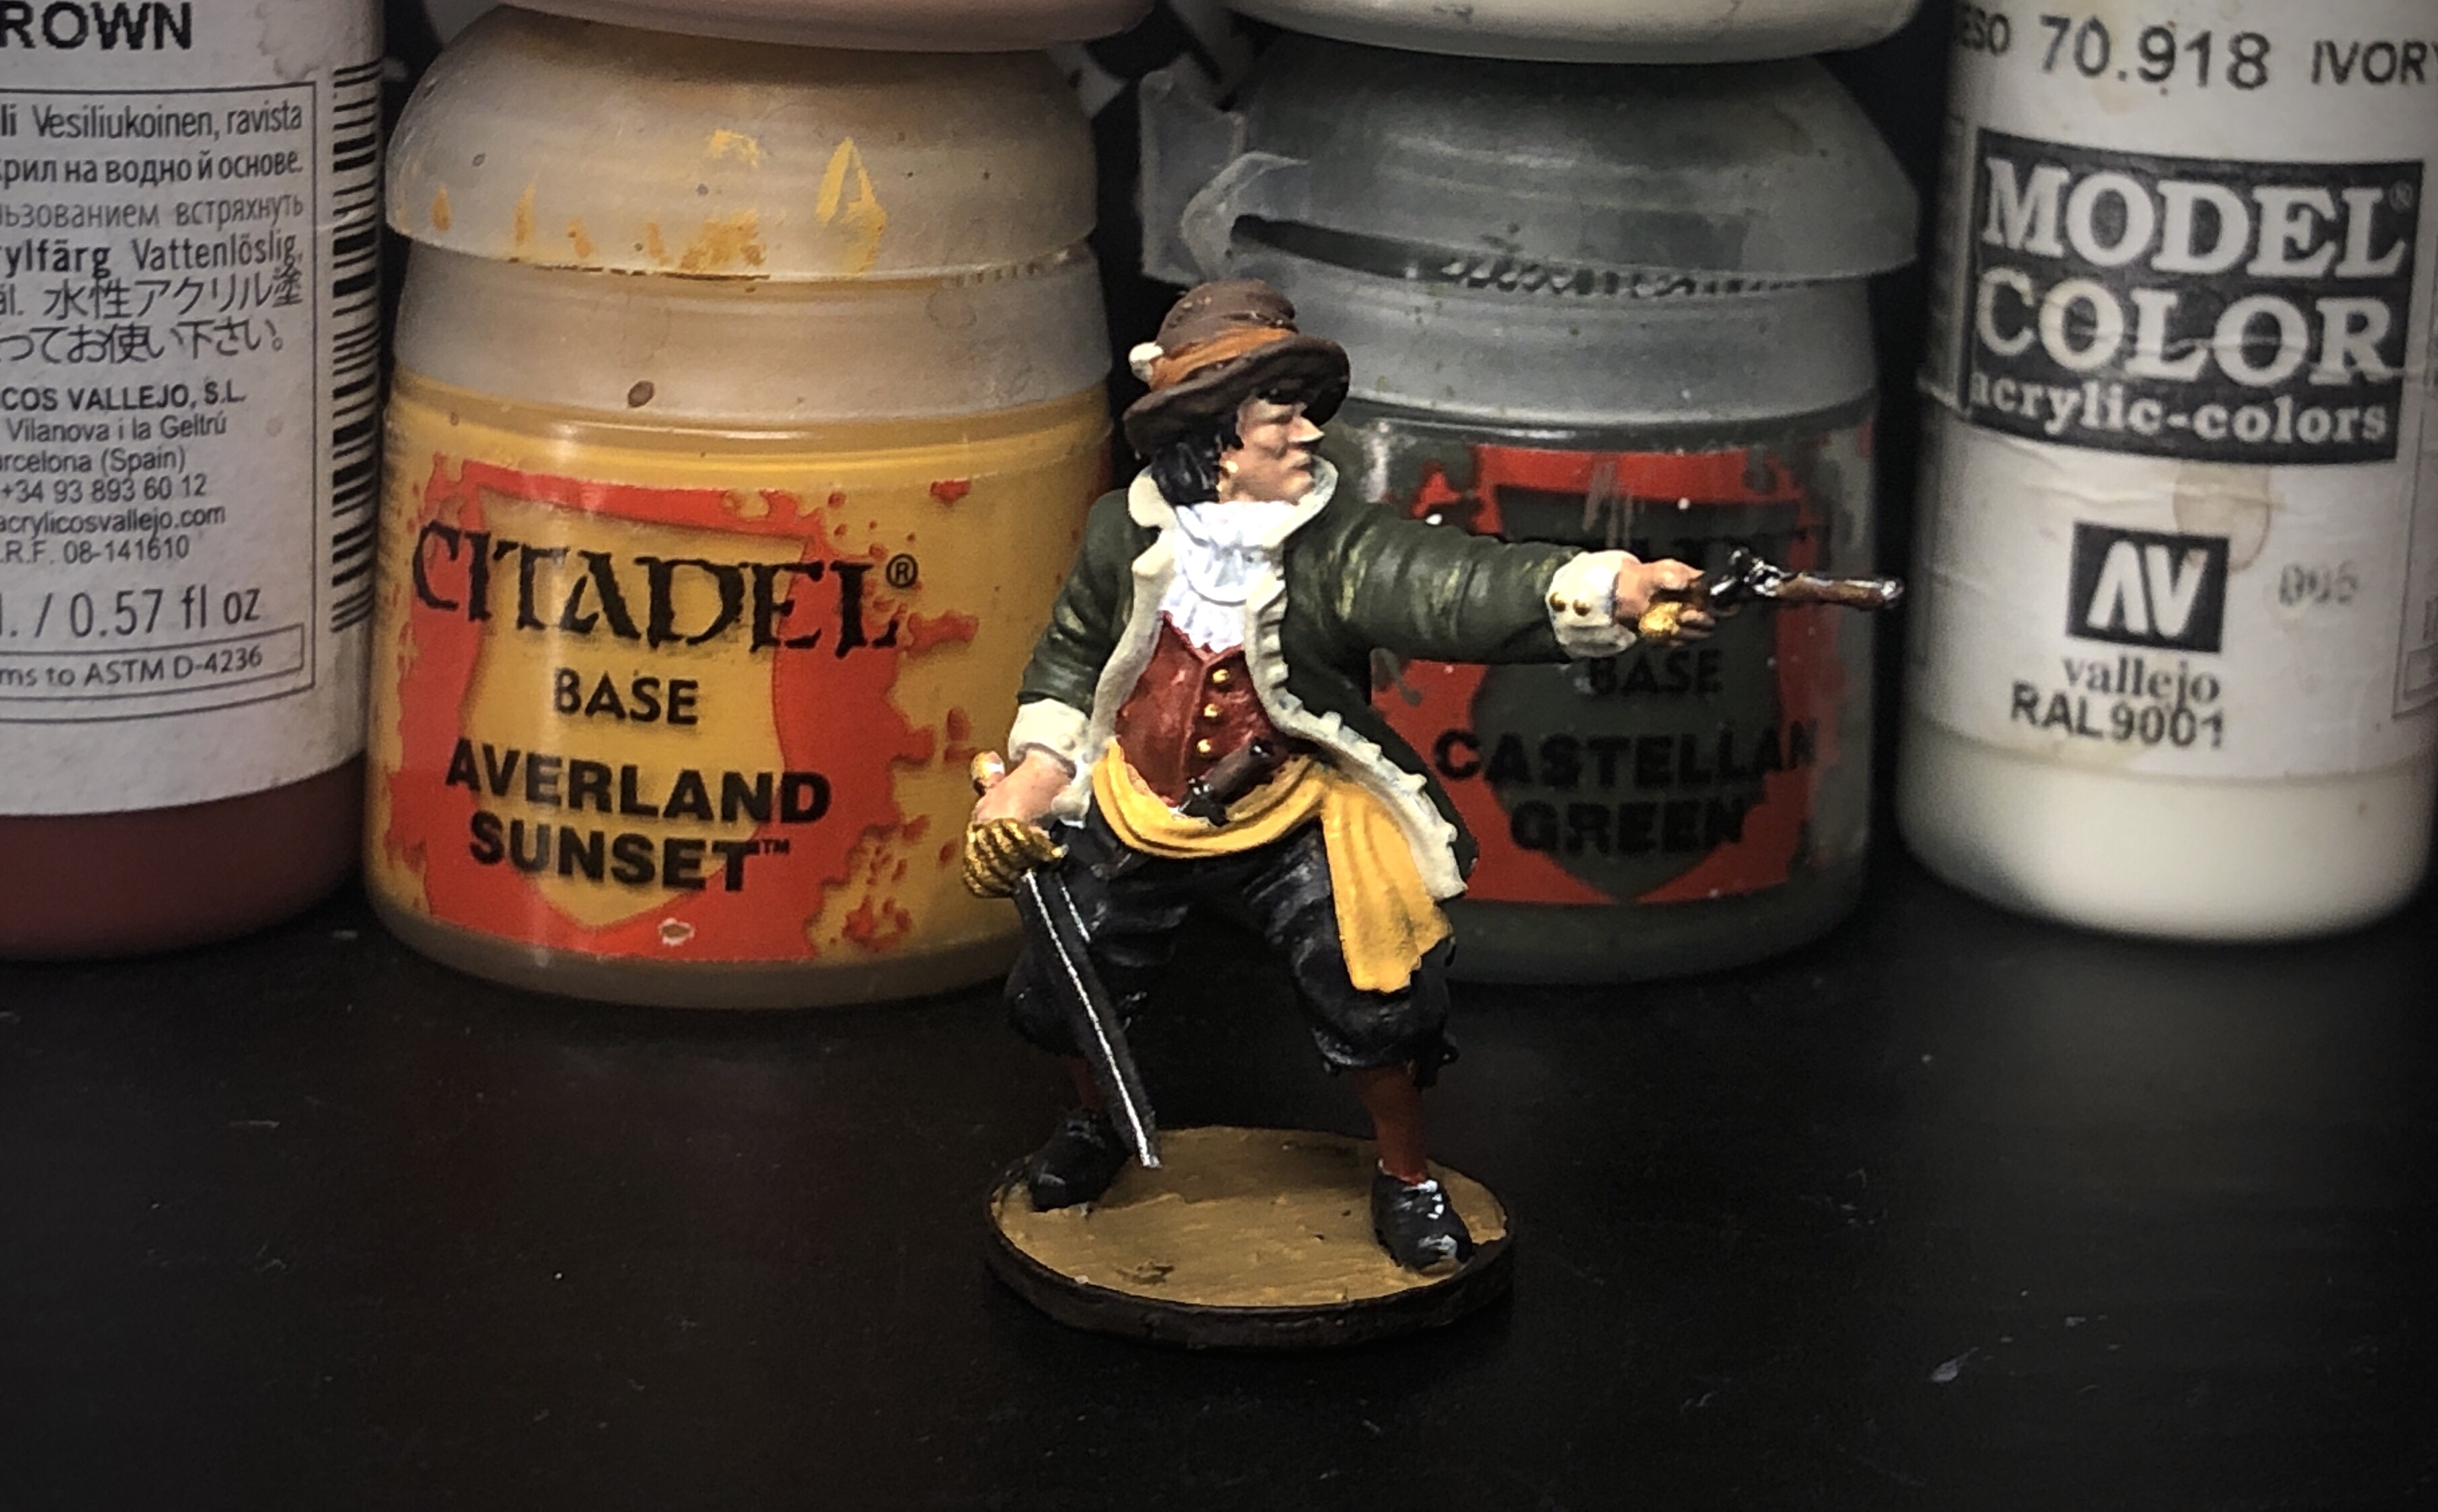
13 base colors!

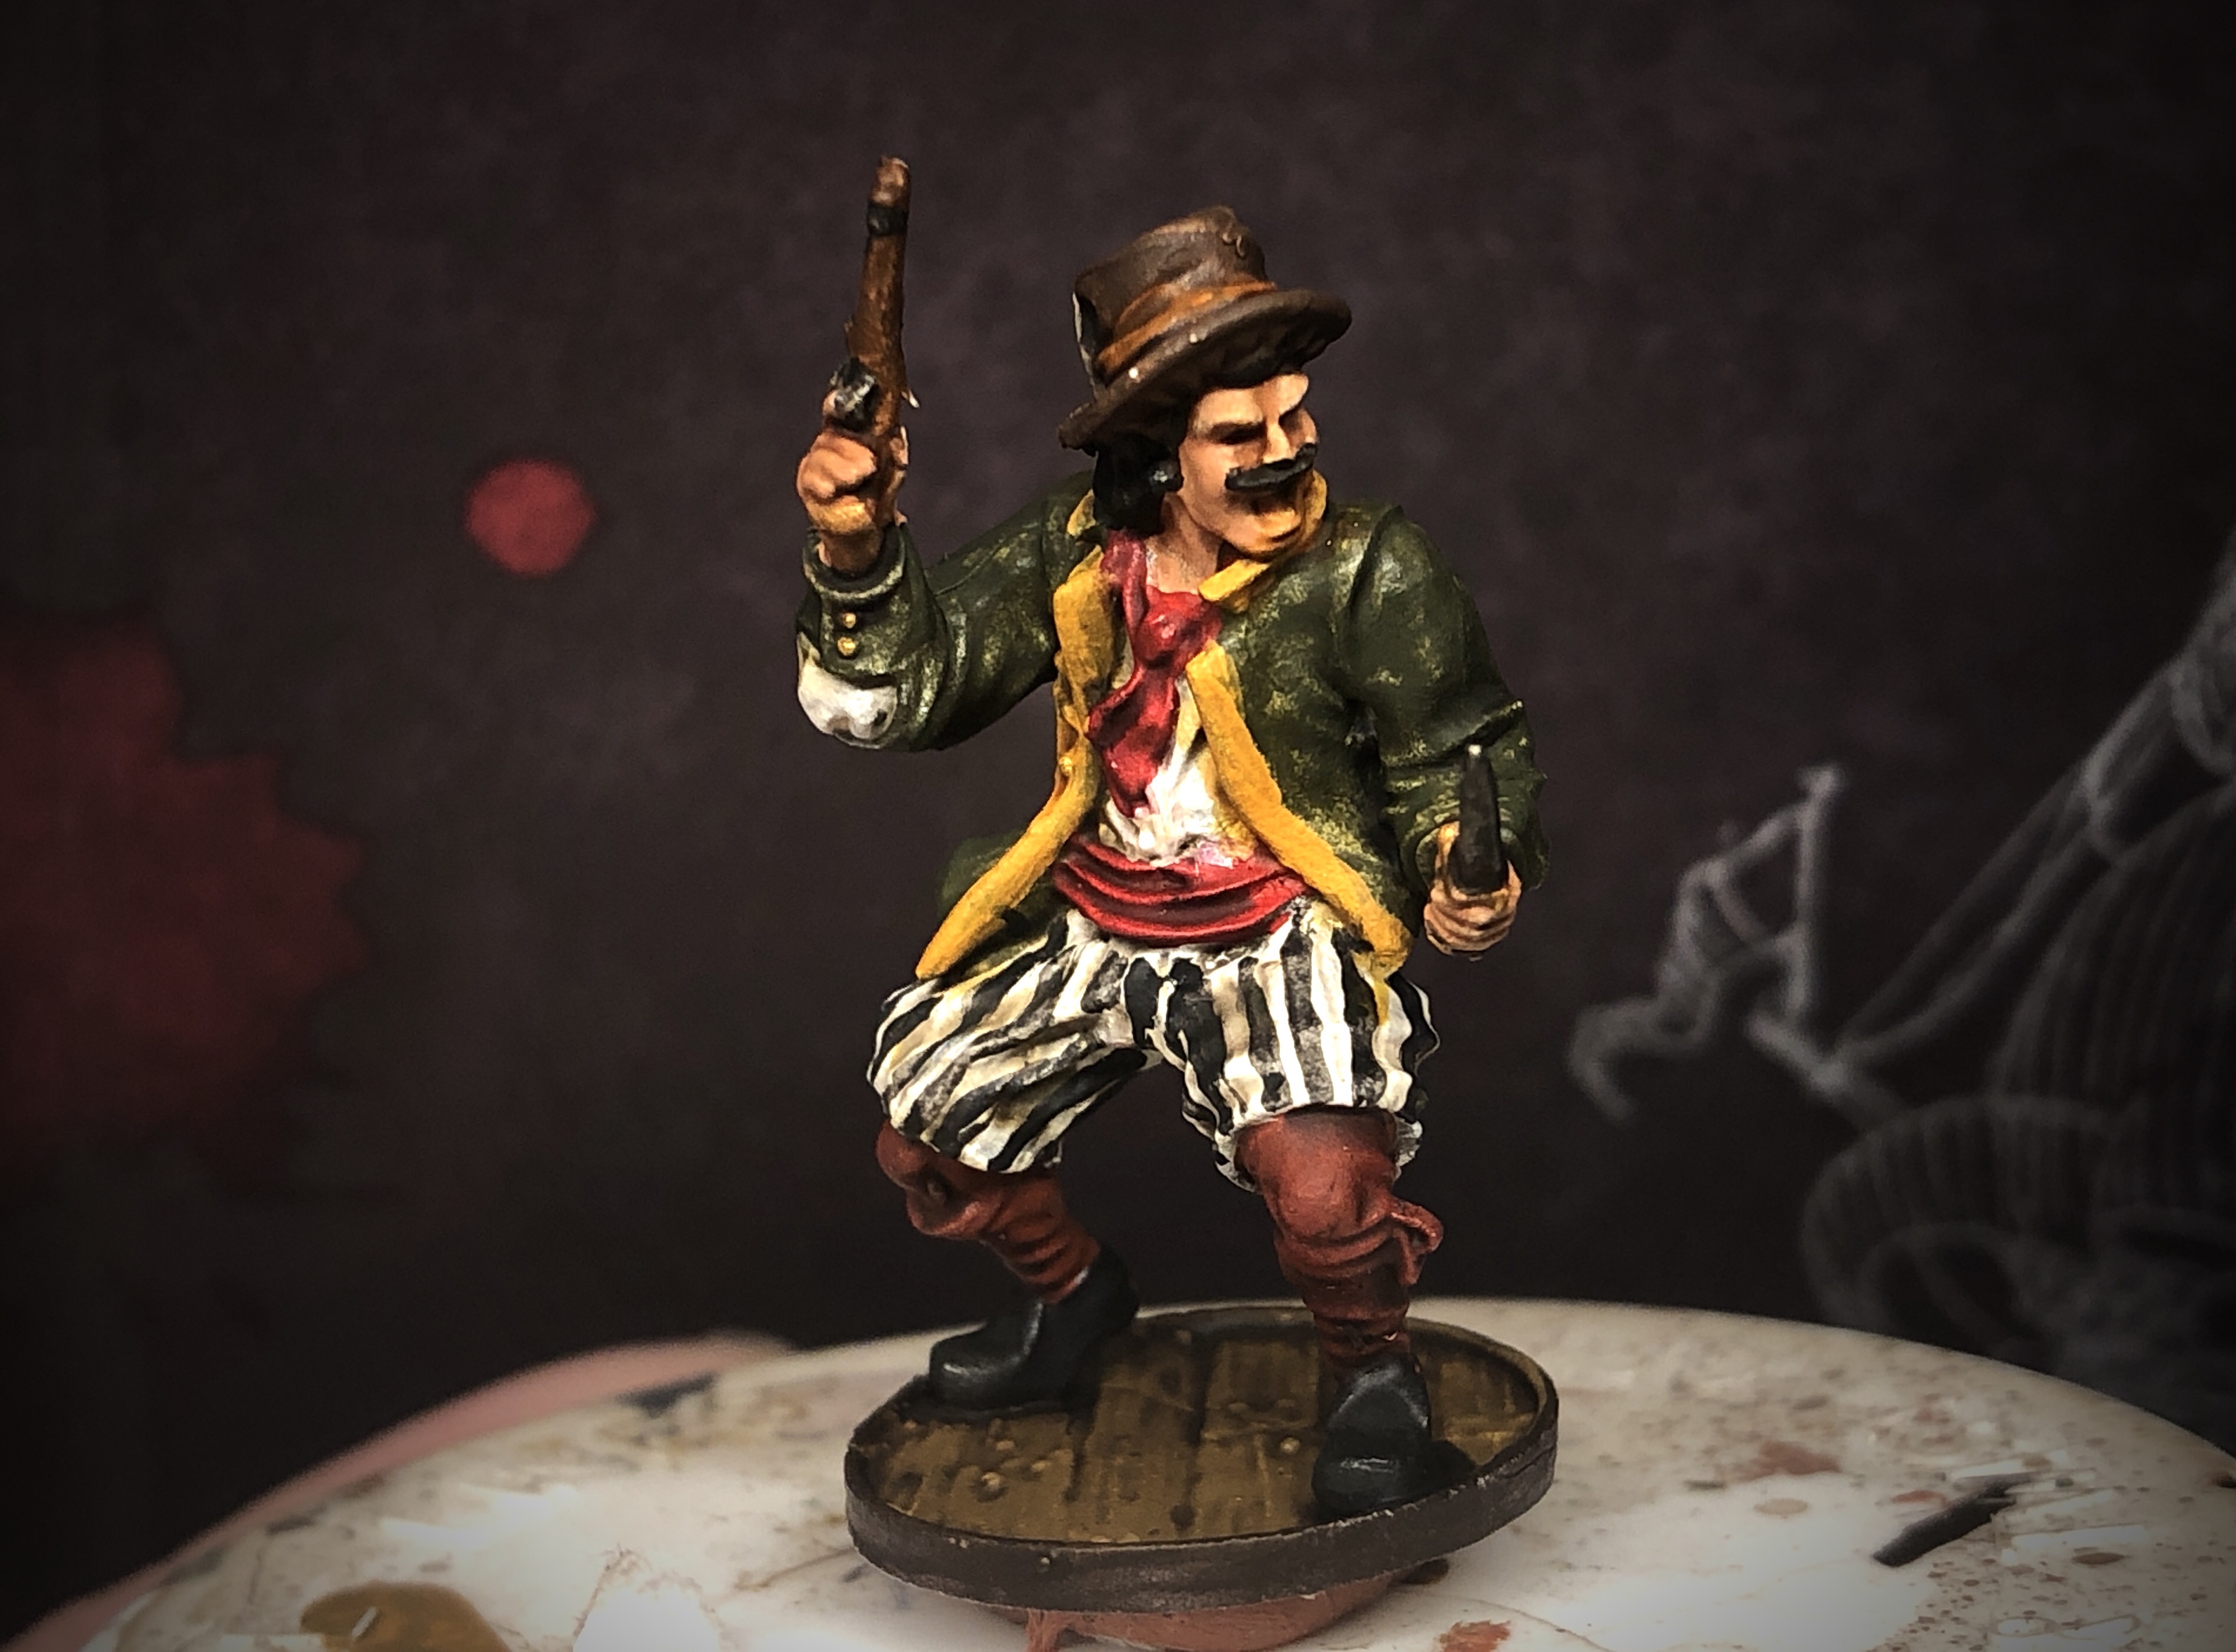
For the next model I used:
- Cadian Fleshtone for the skin
- Caledor Sky for the jacket
- Zandri Dust for the waistcoat
- Screaming Skull for the jacket trim
- Averland Sunset for the sash
- XV-88 and Rhinox Hide for the base
- German Grey for the hair, and stripes on the pants
- Mournfang Brown for the pistol wood
- Model Color Cavalry Brown for the hat and pants
- Panzer Aces Leather Brown for dagger handle
- Model Color Ivory for the stockings
- Model Color Brass for the buttons, pistol butt and sword hilt
- Metal Color Dark Aluminium for the sword blade, dagger hilt and pistol metal
I had to go back and paint the buttons on the waistcoat after this picture.

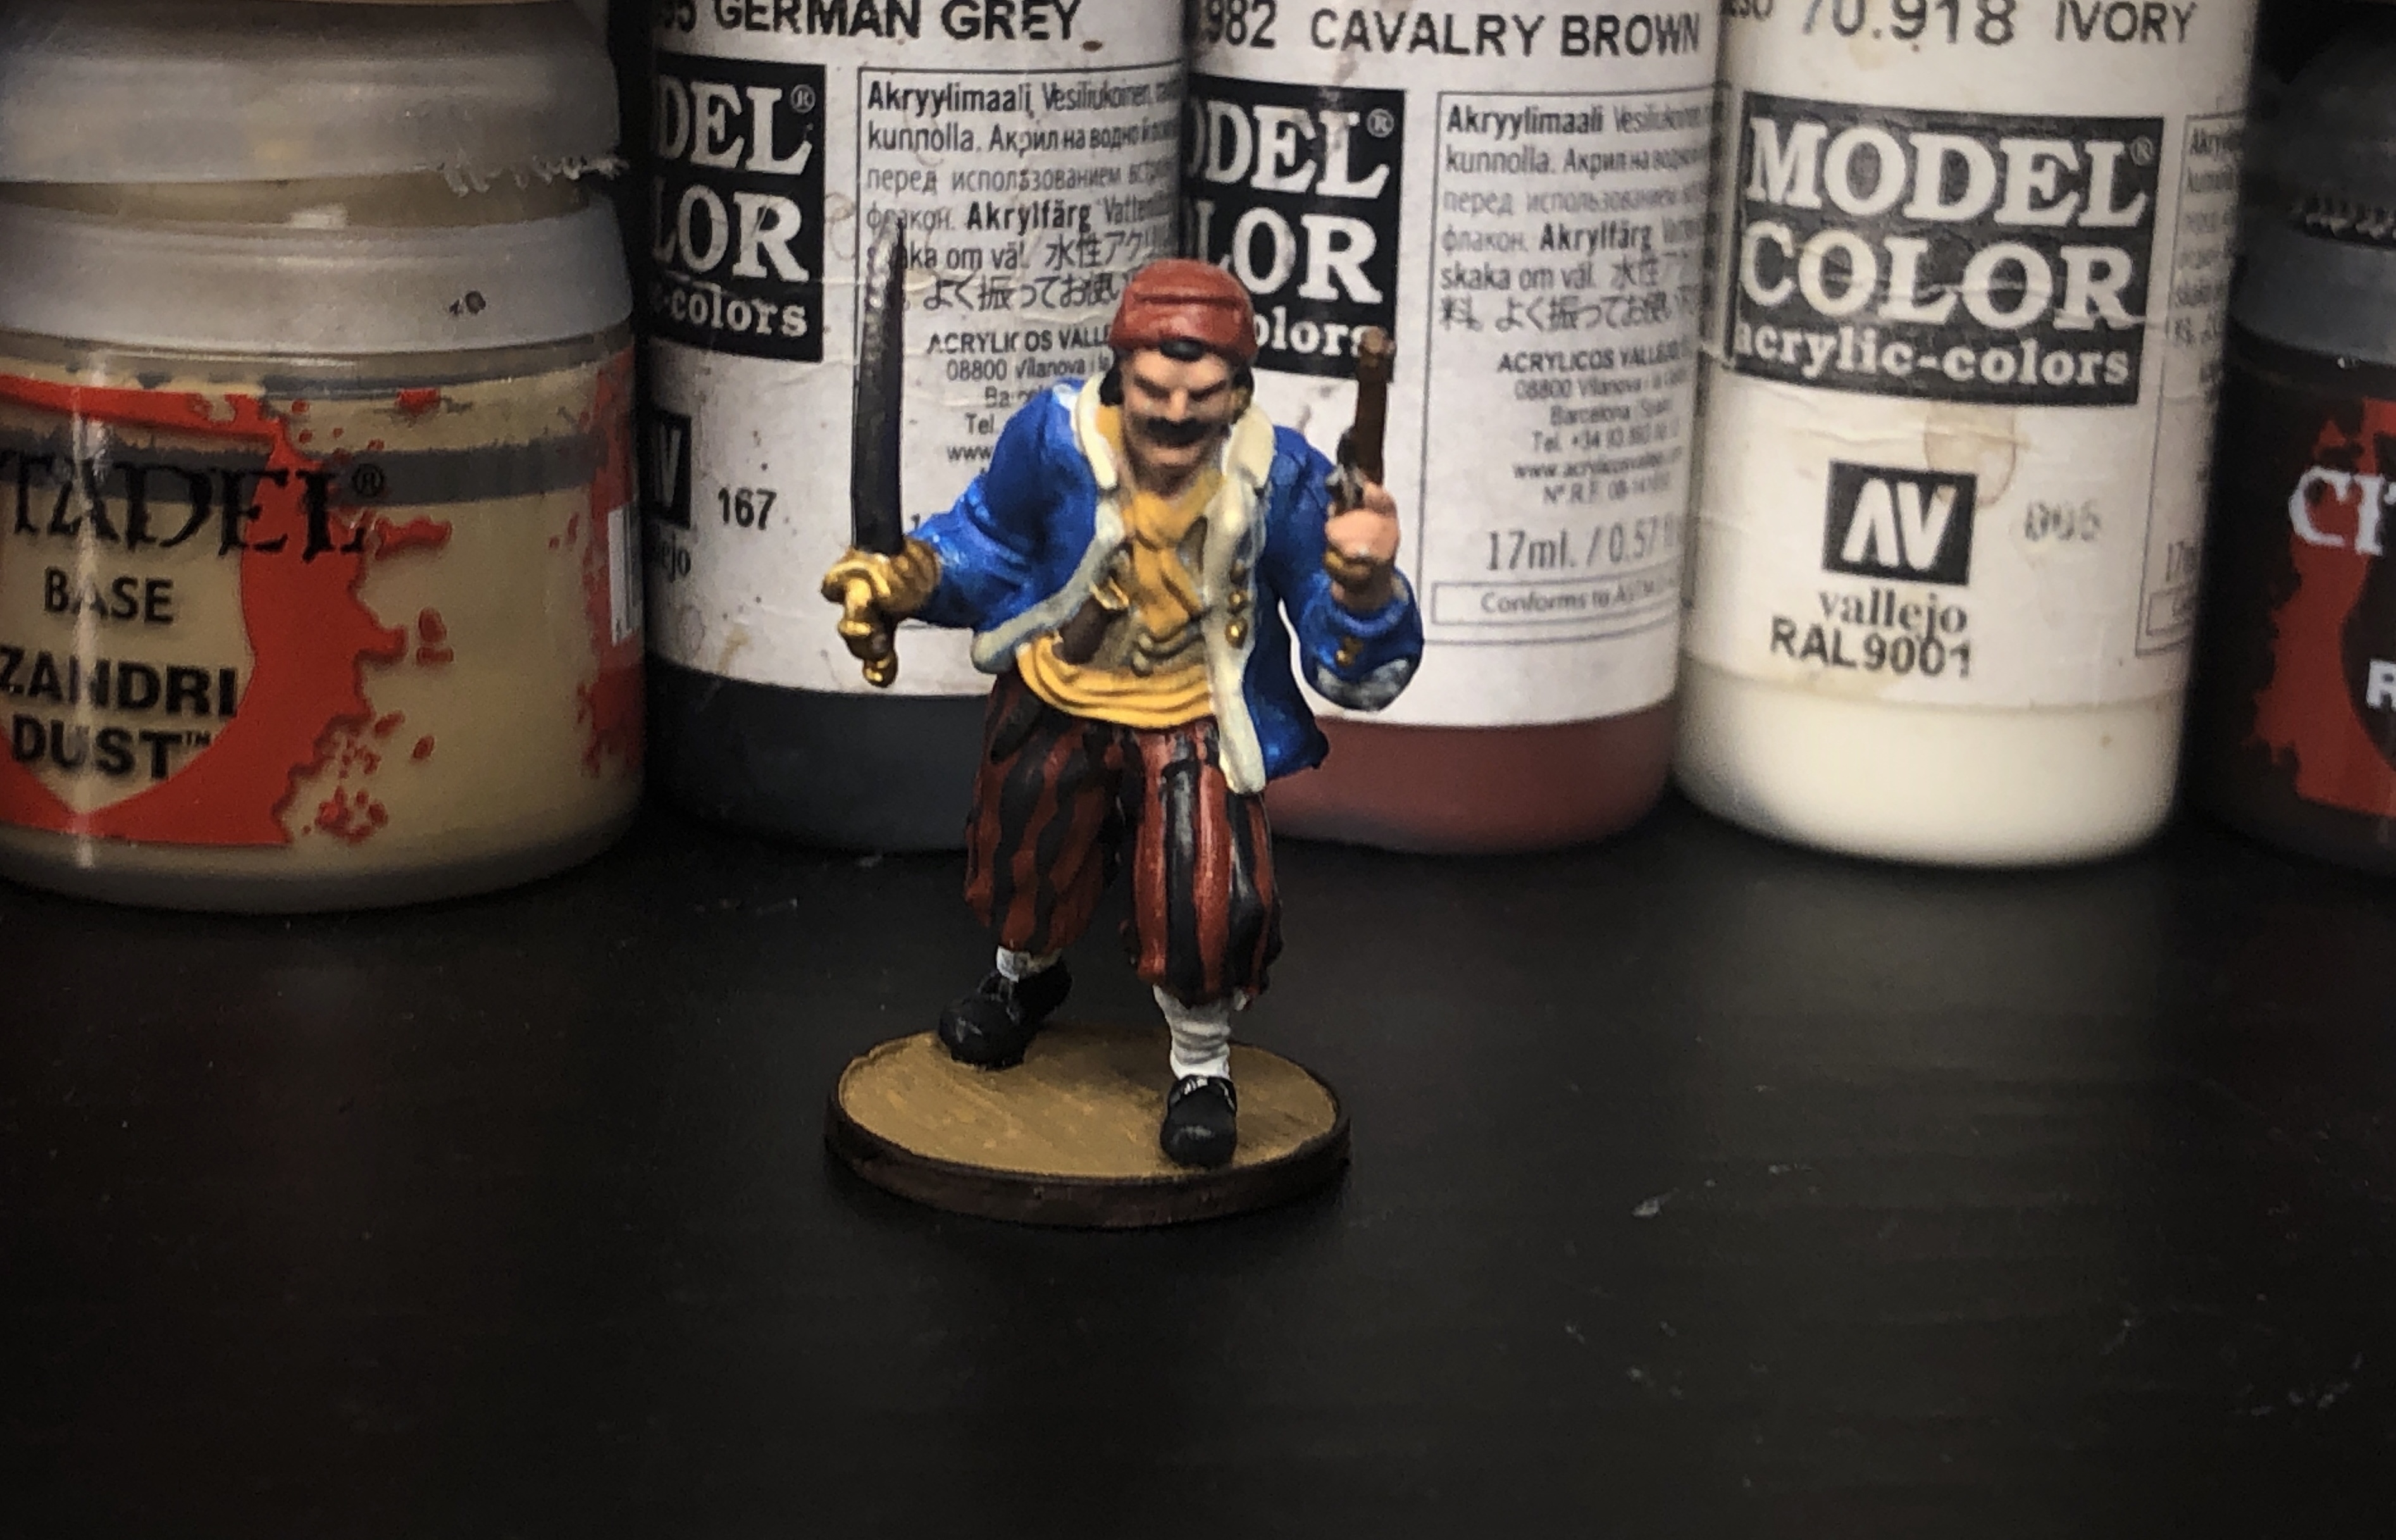
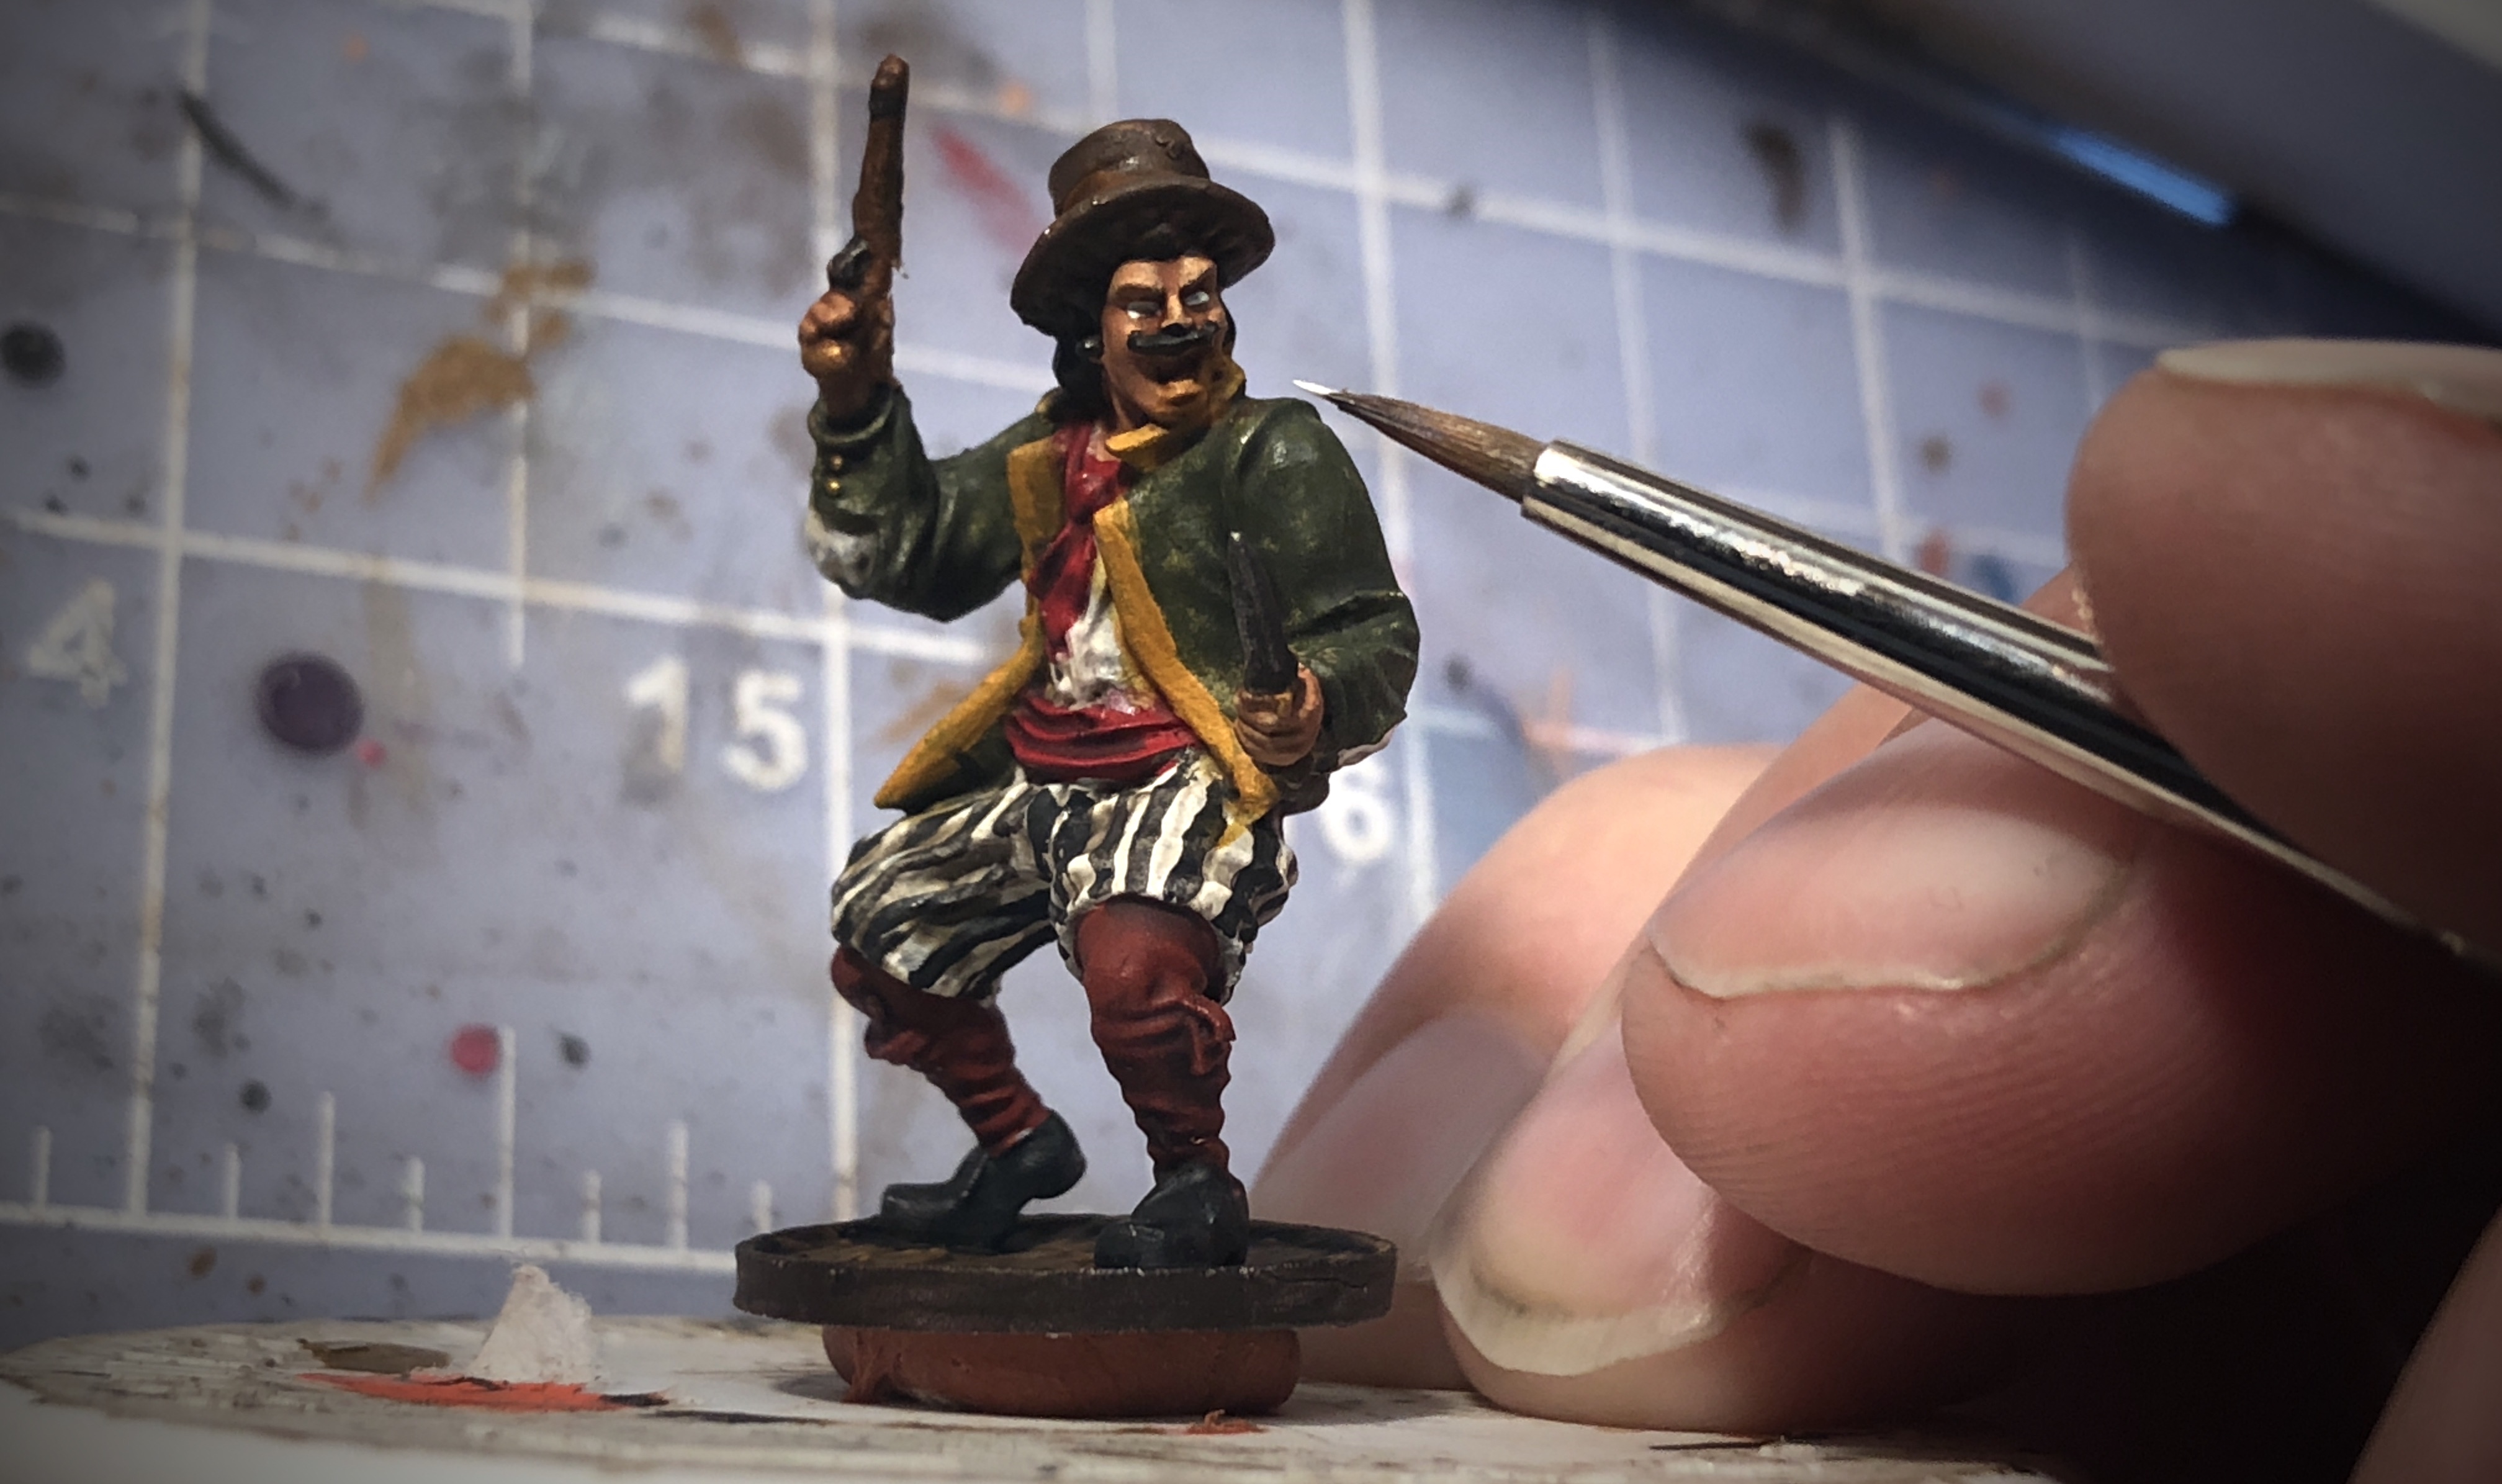
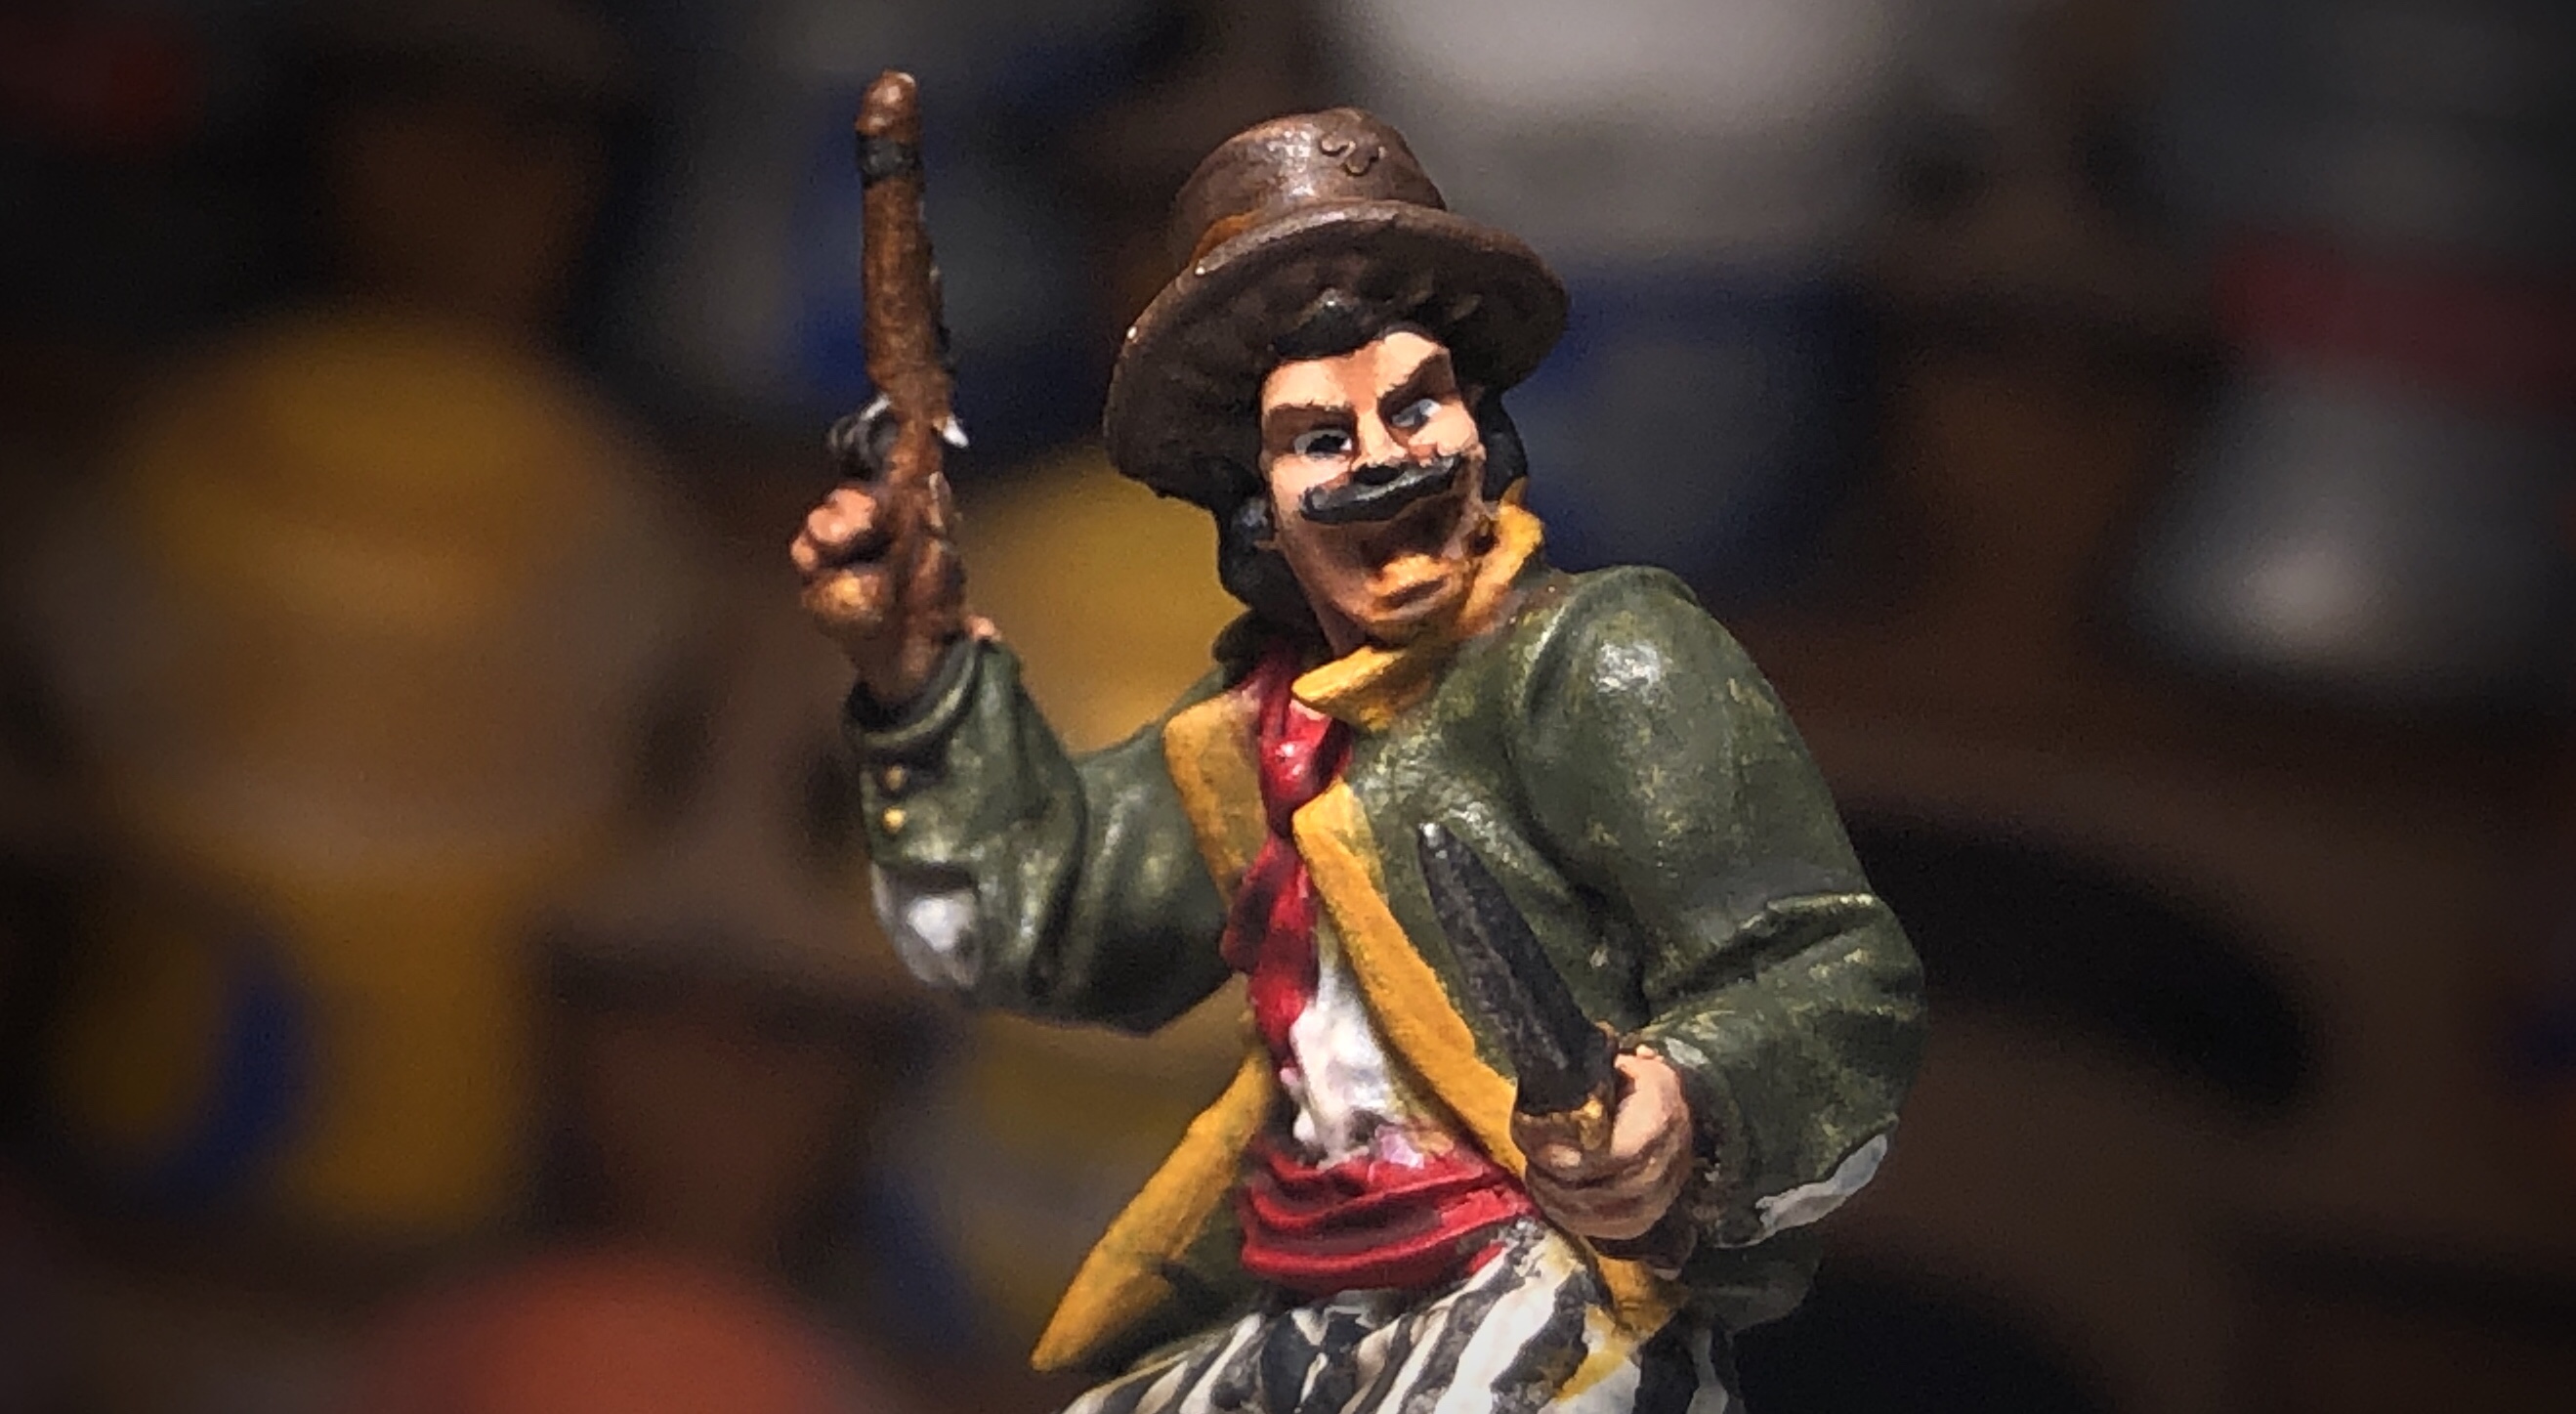
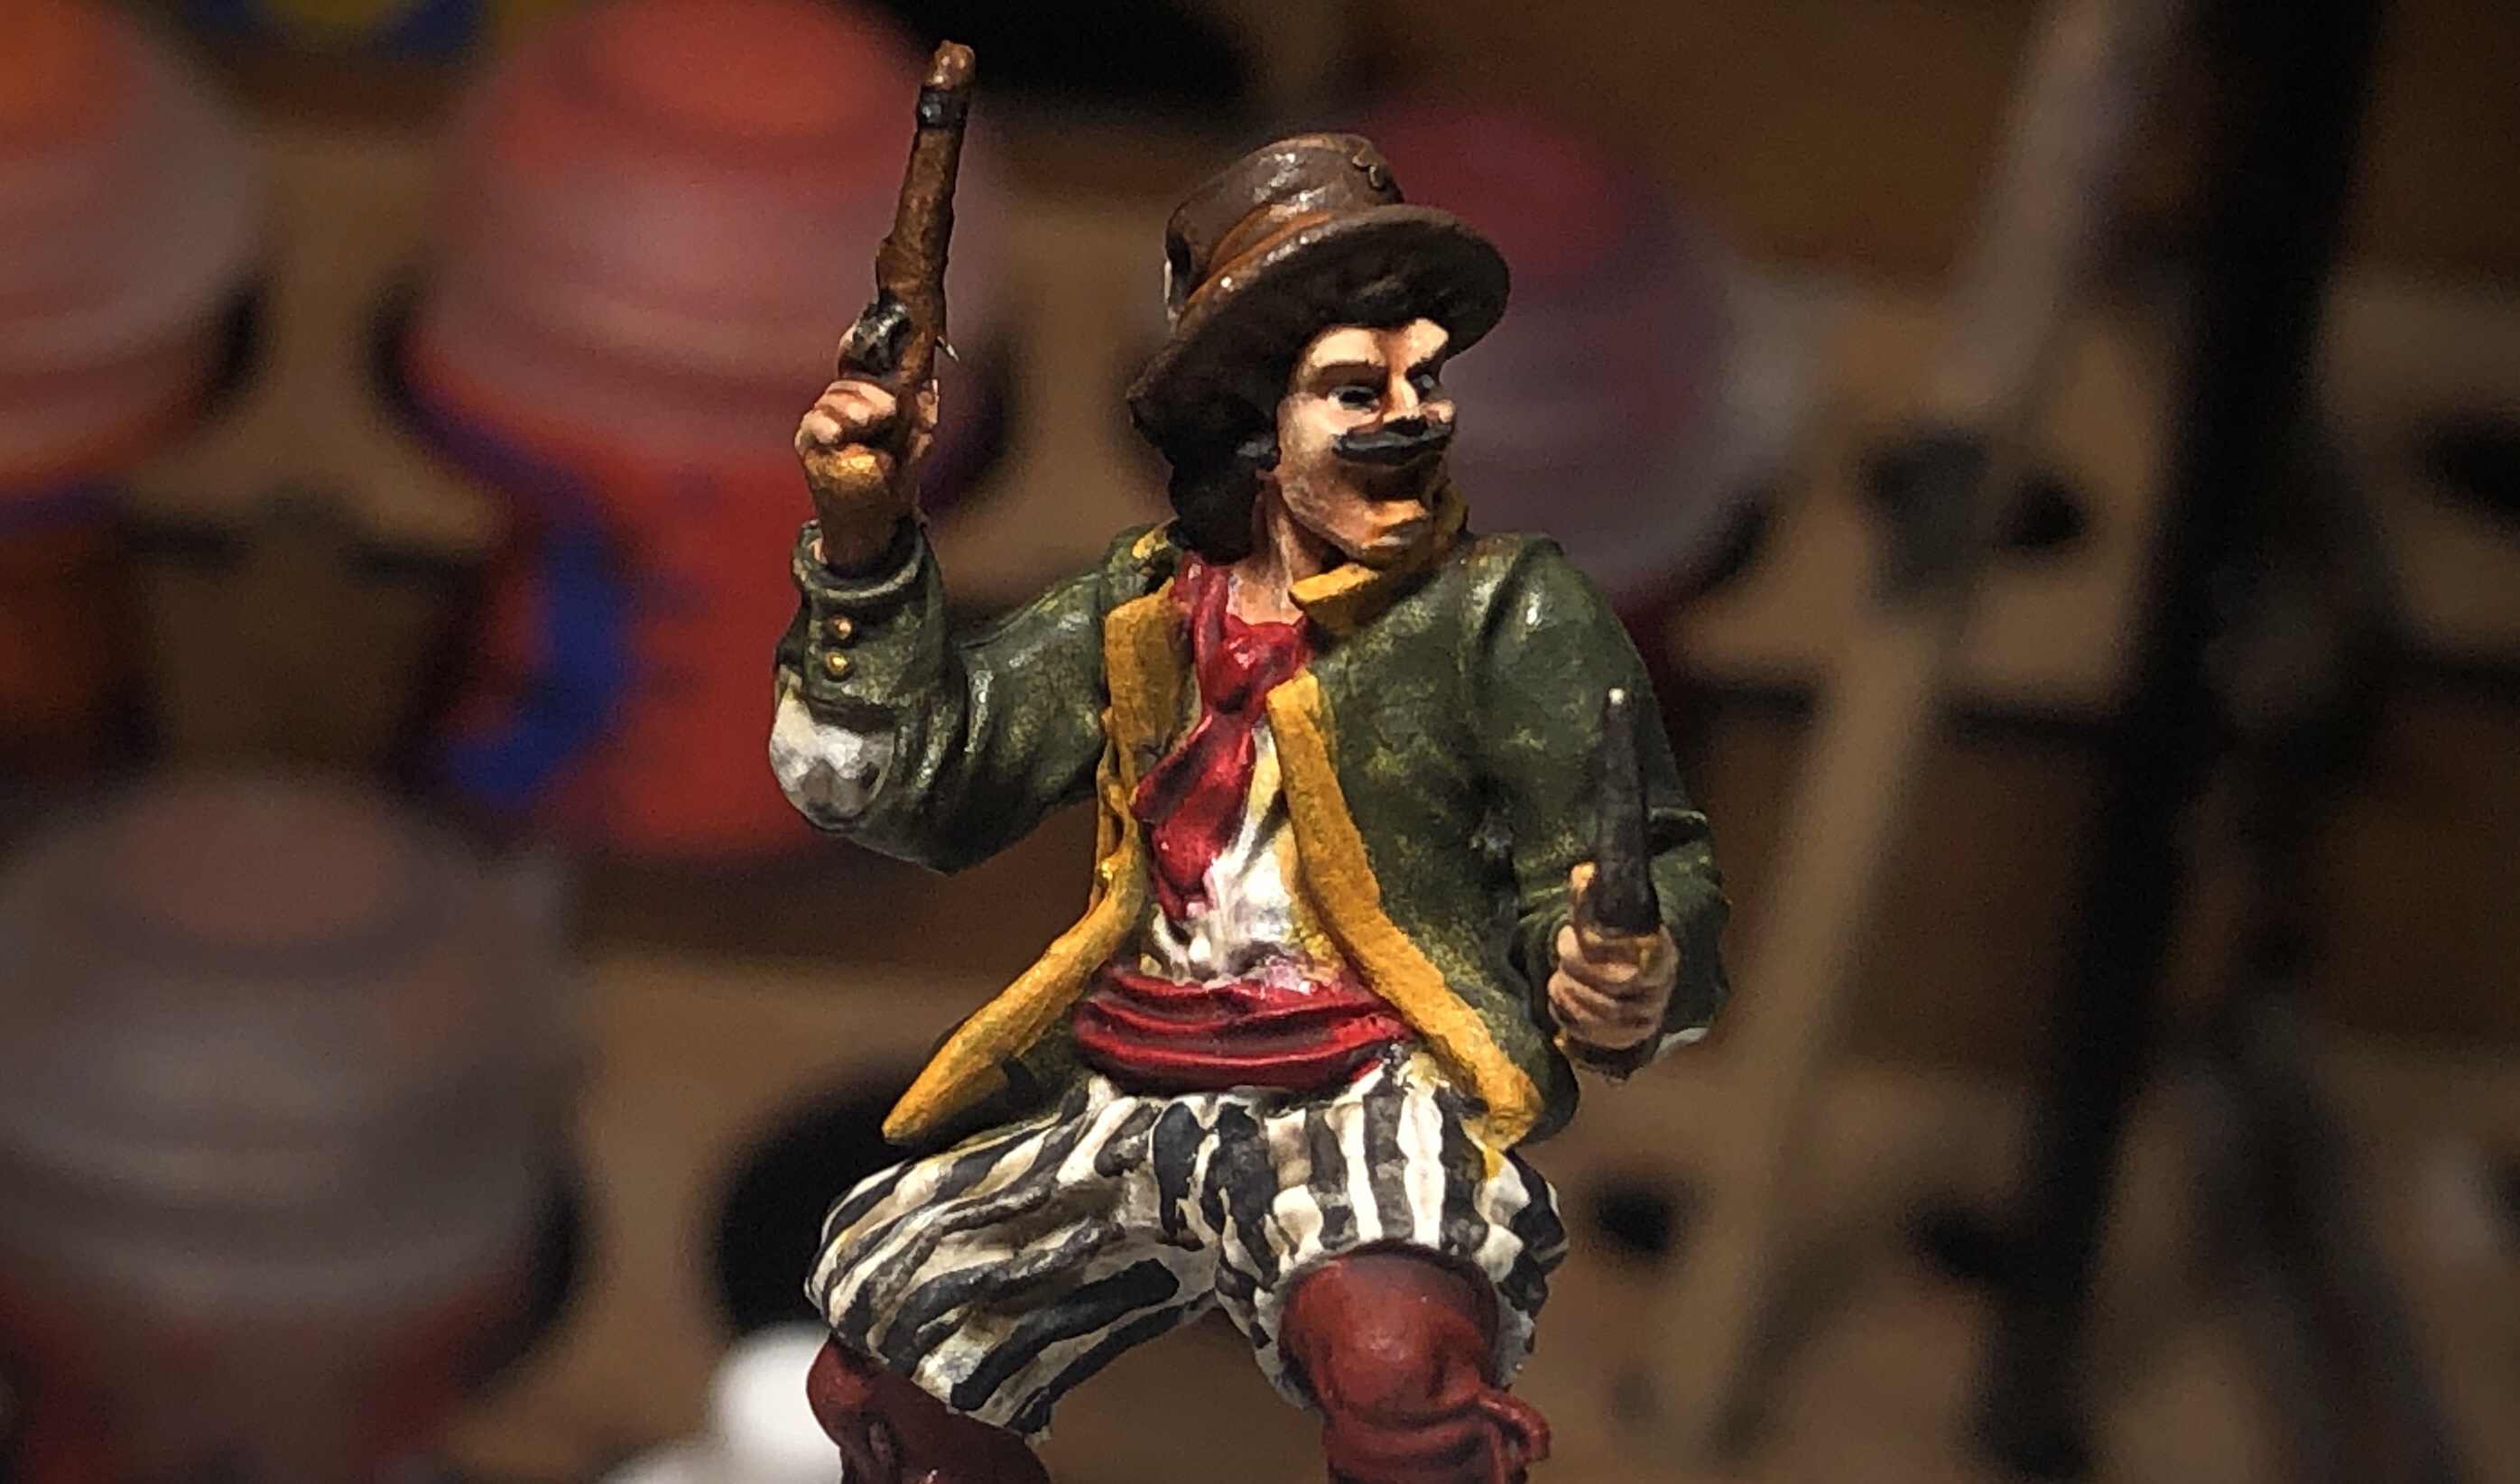
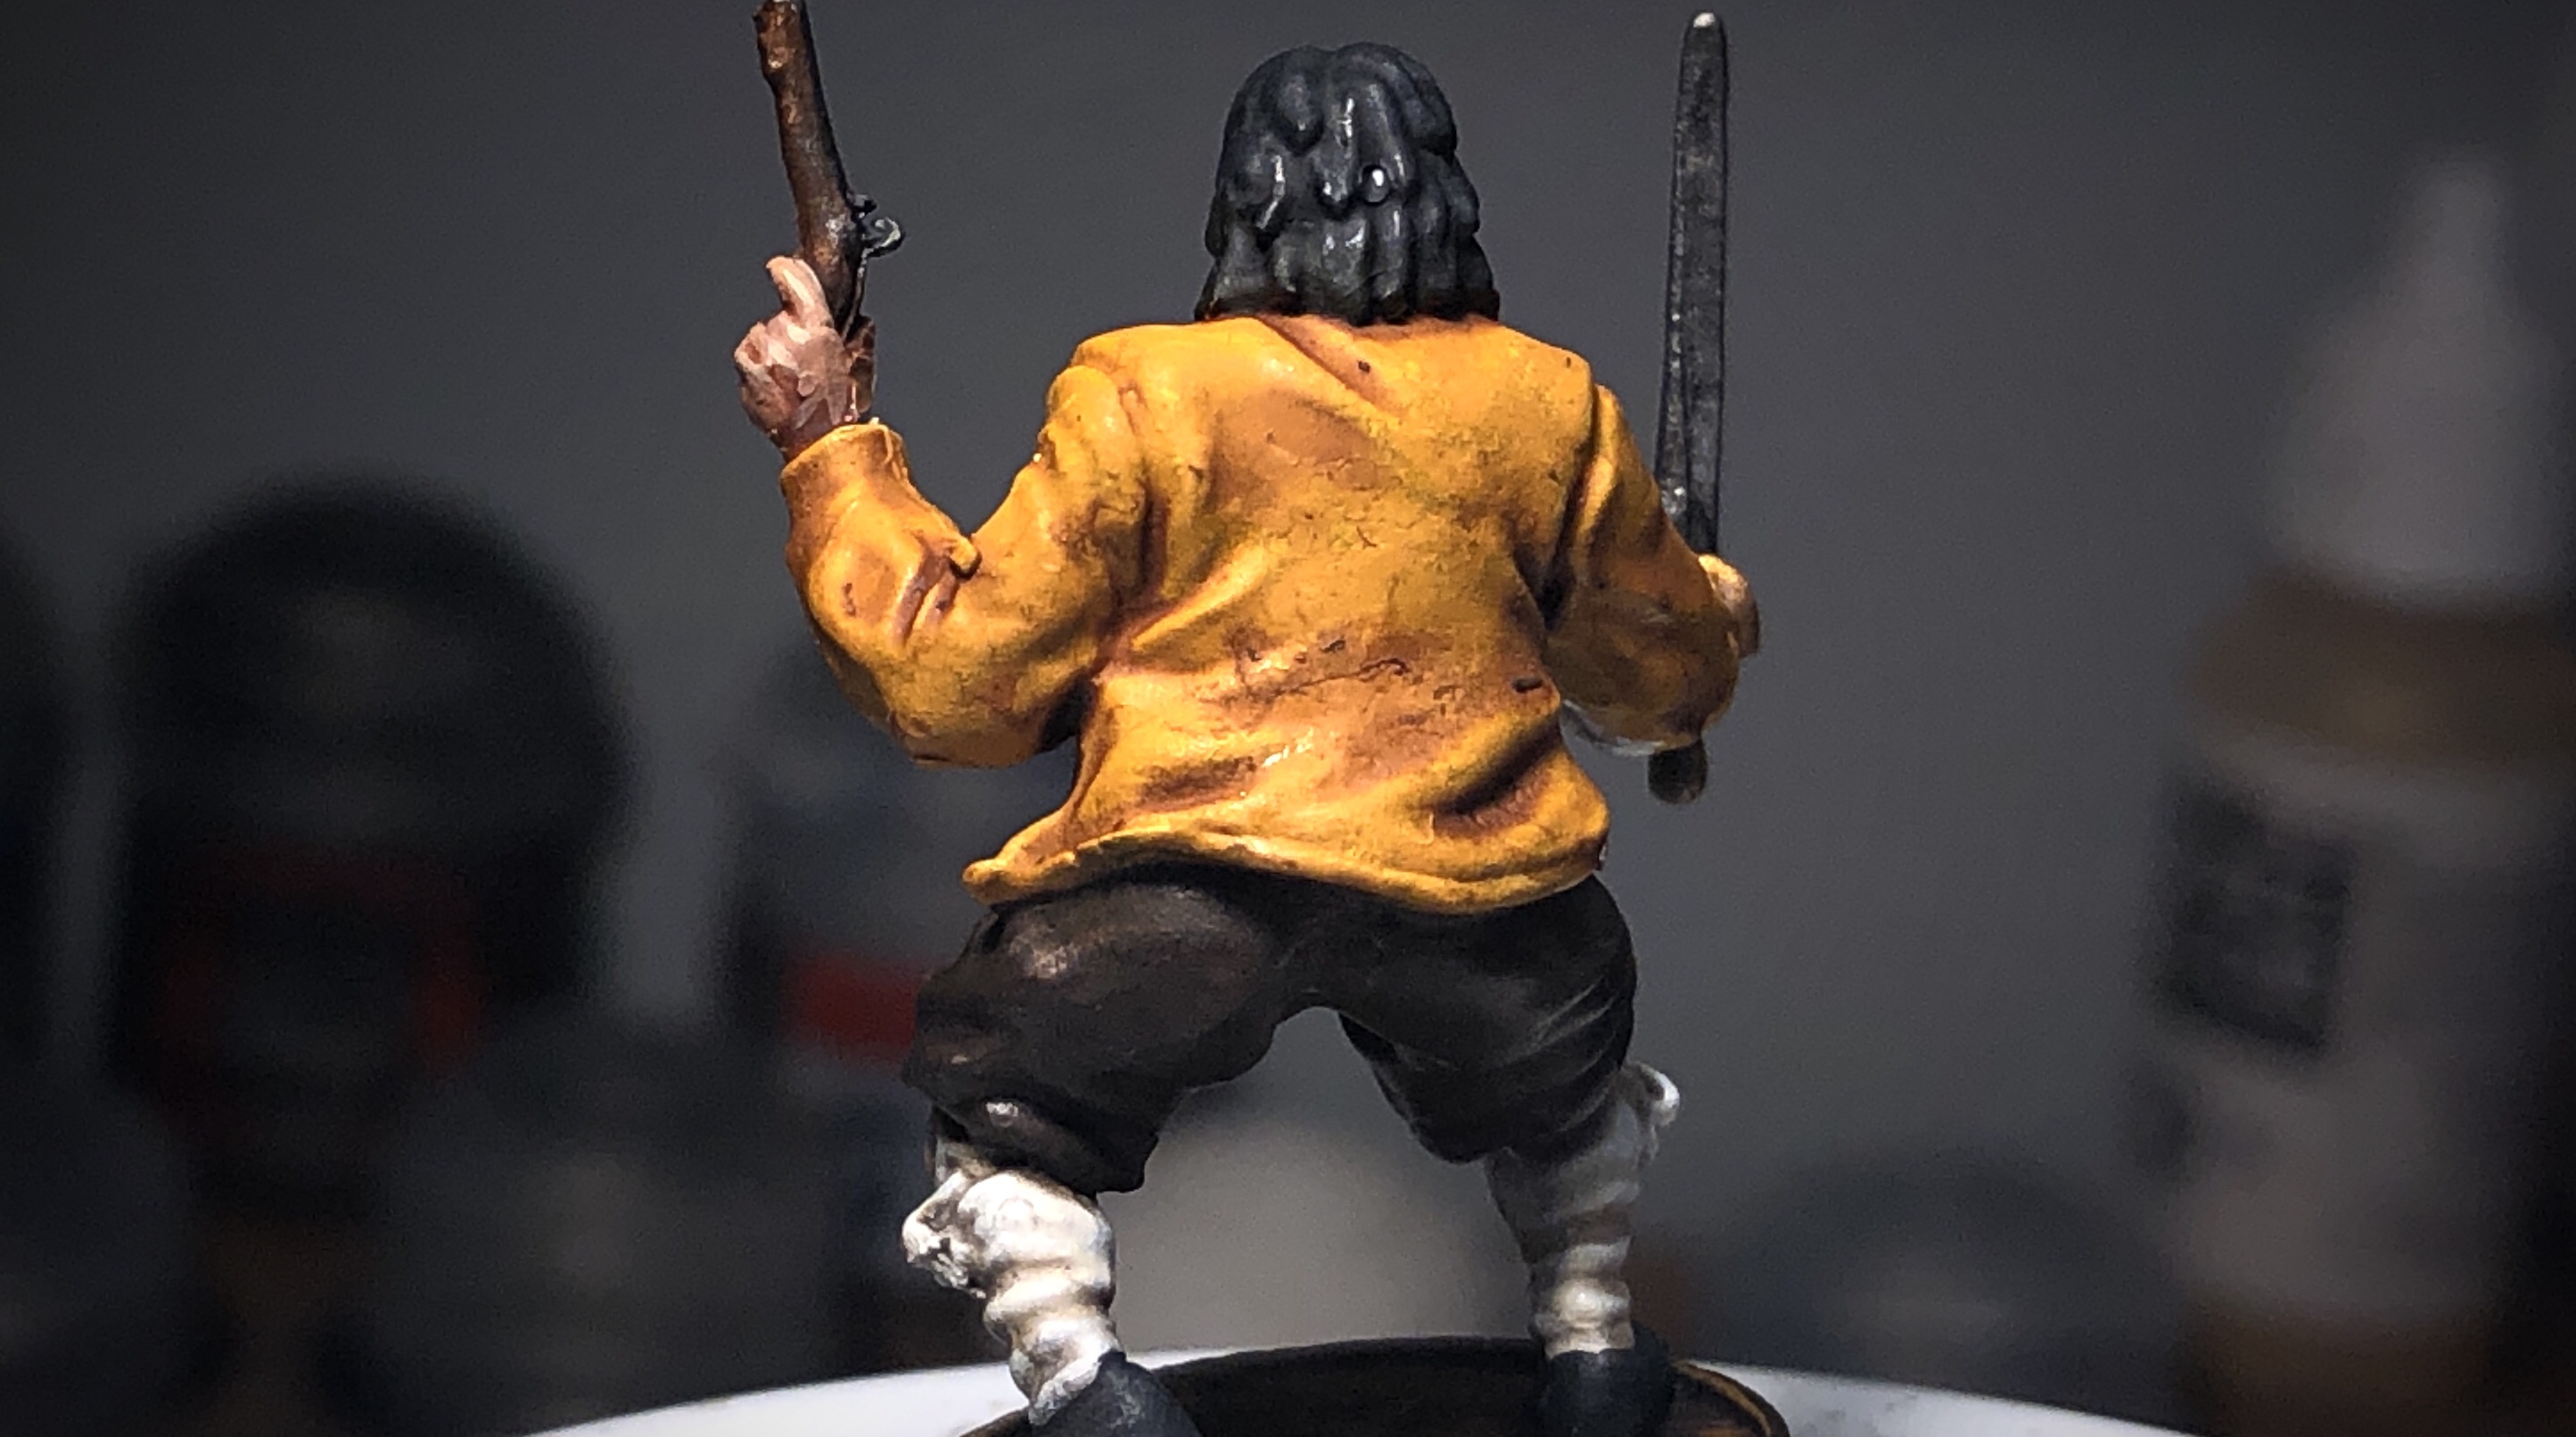
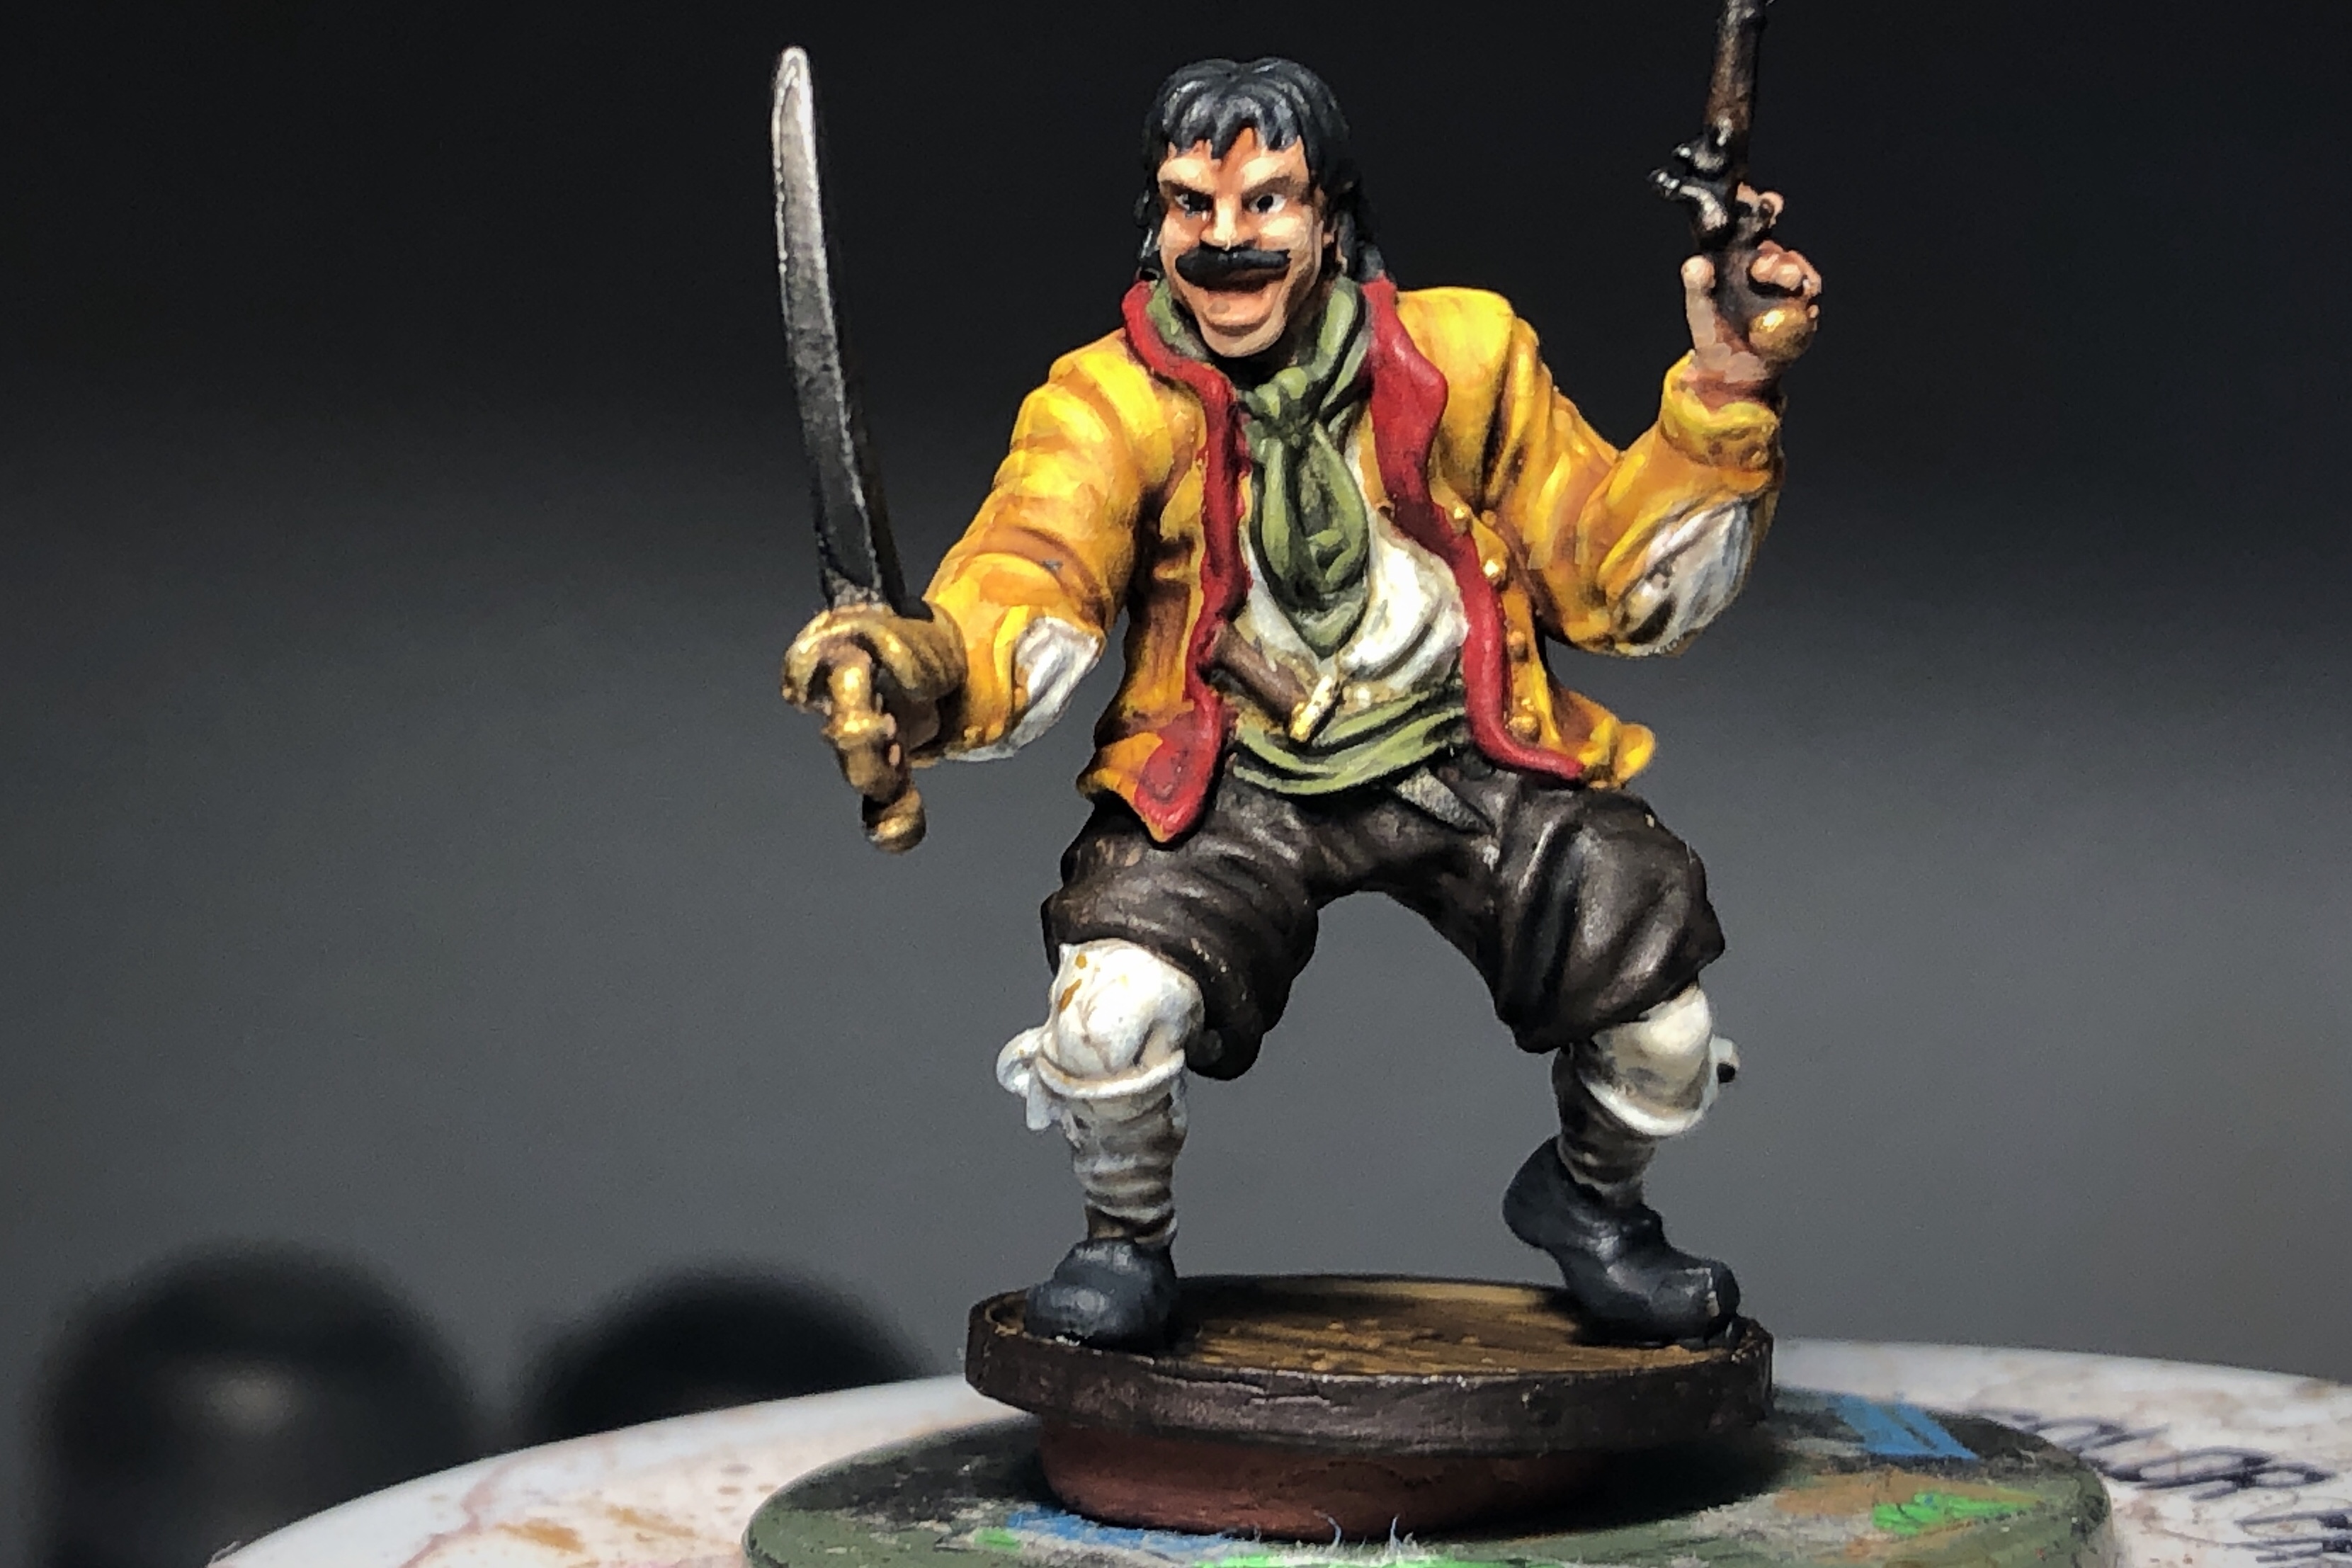
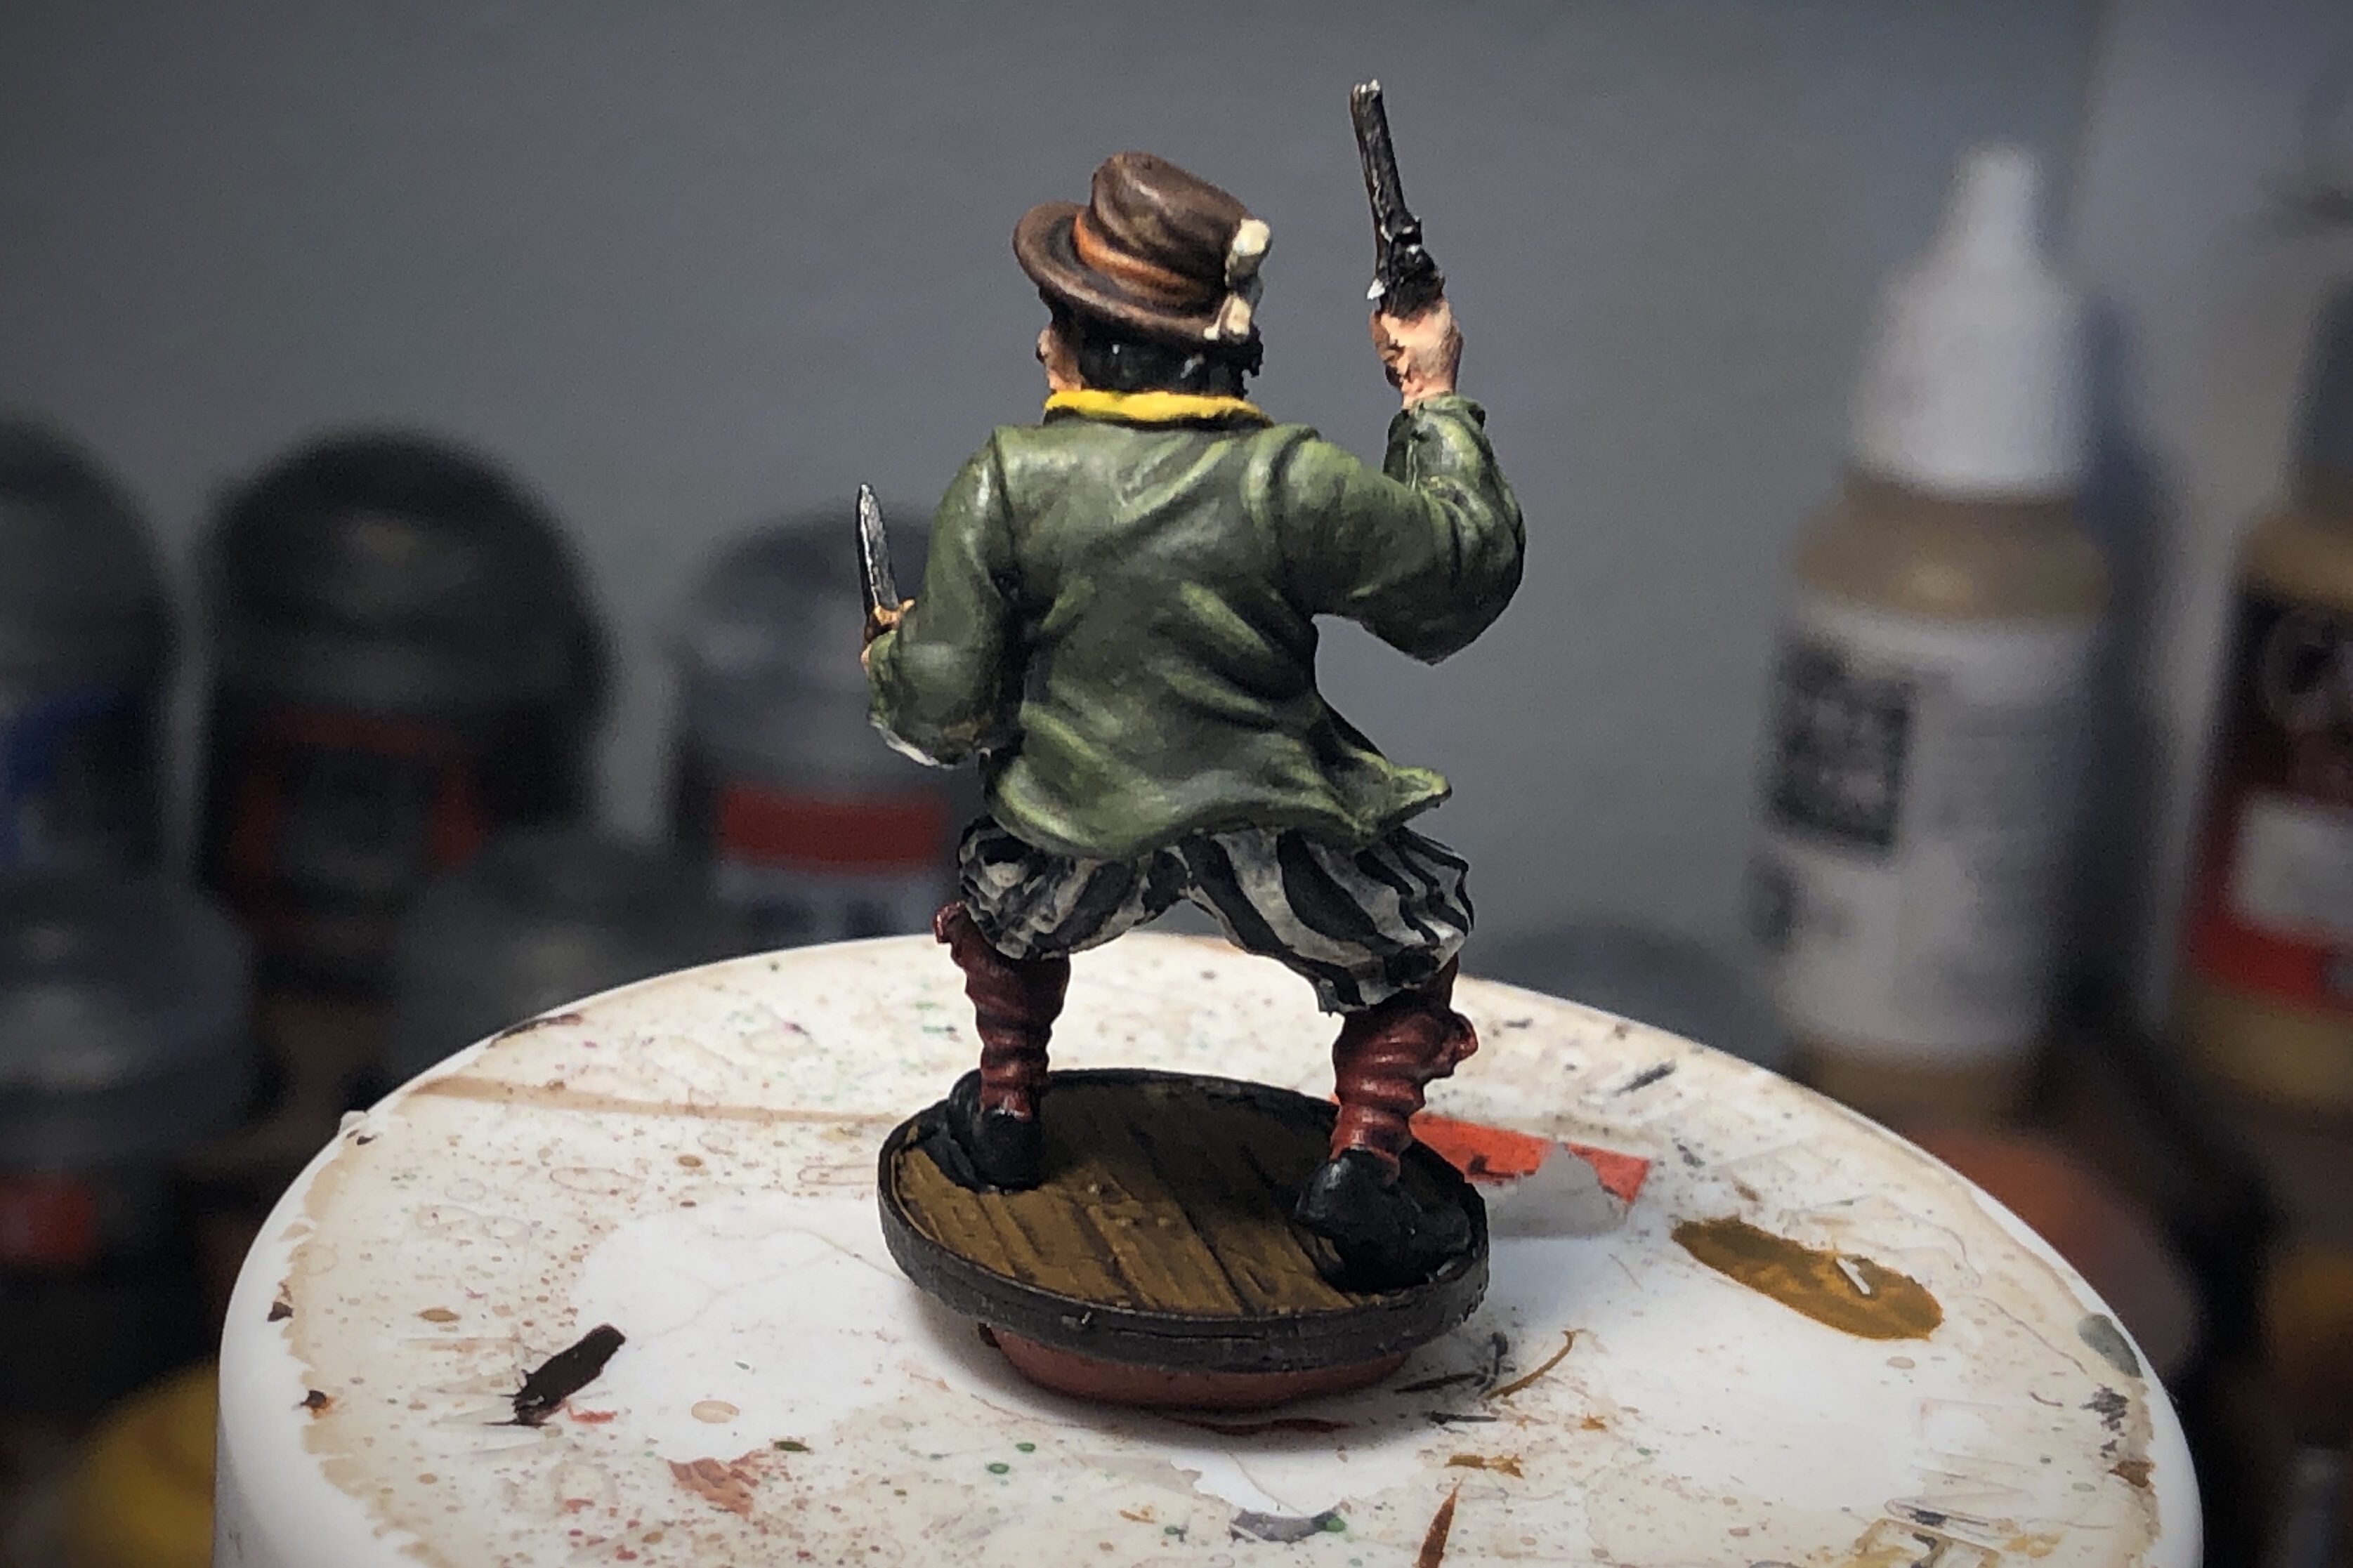
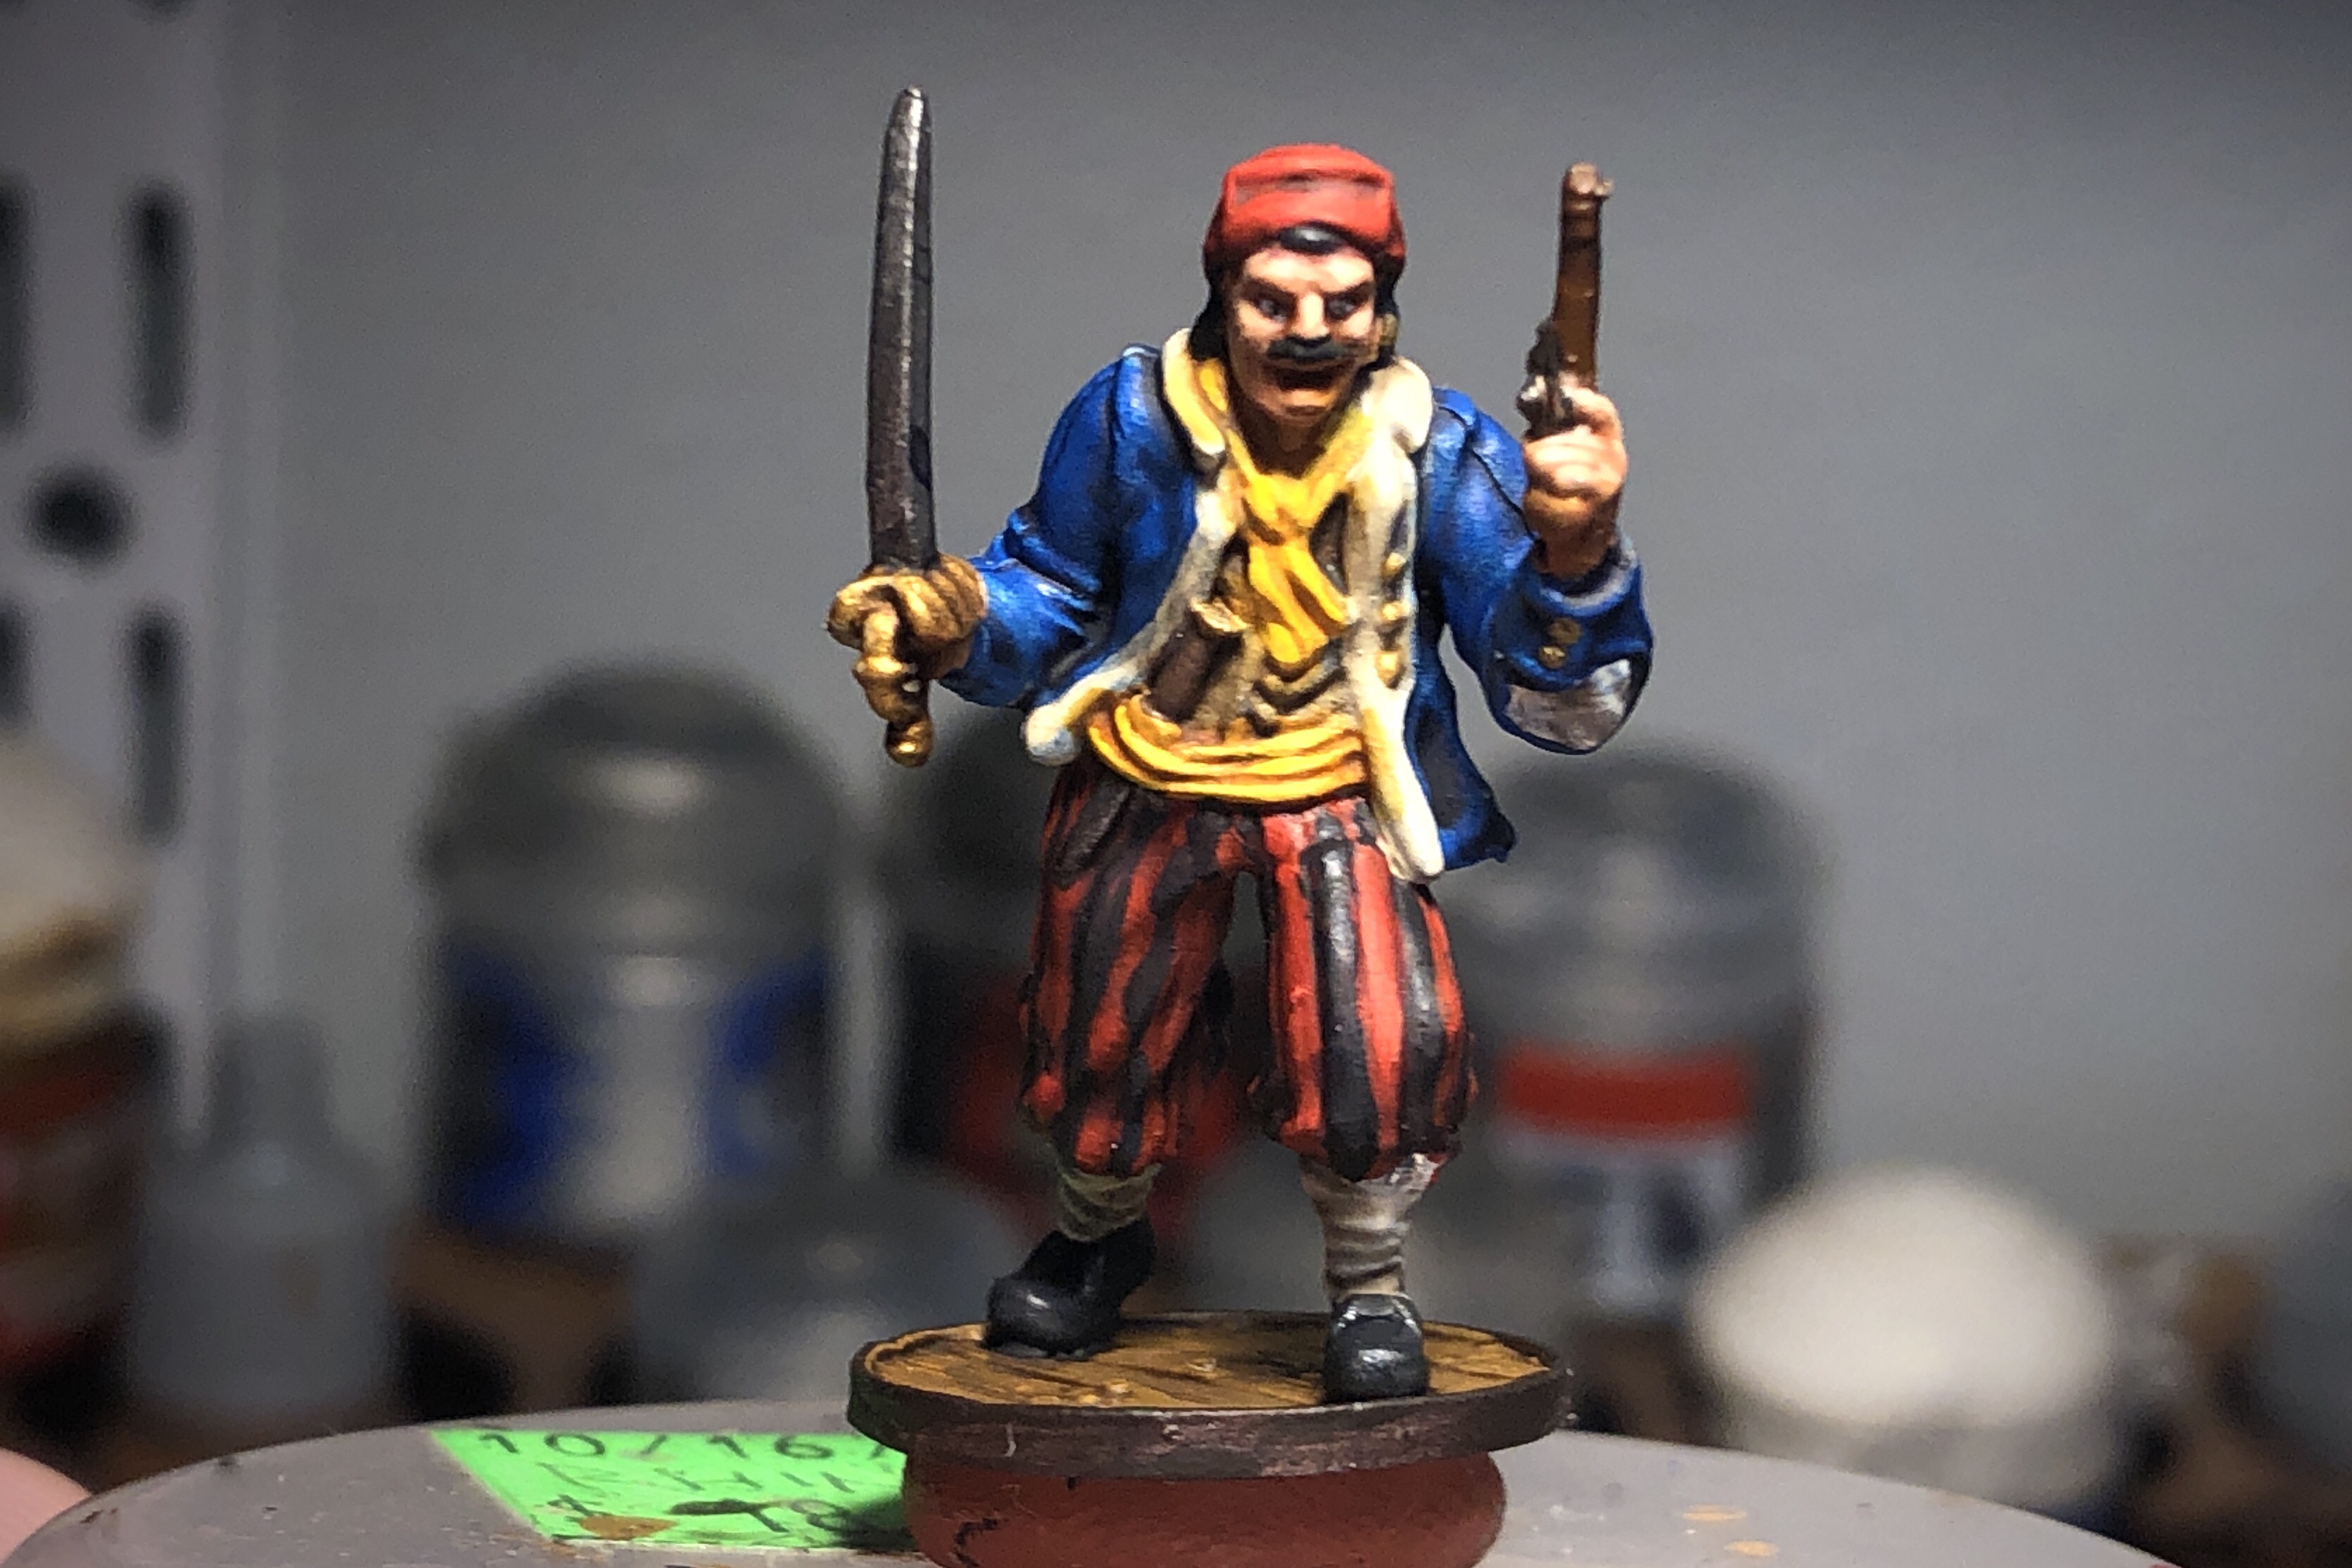
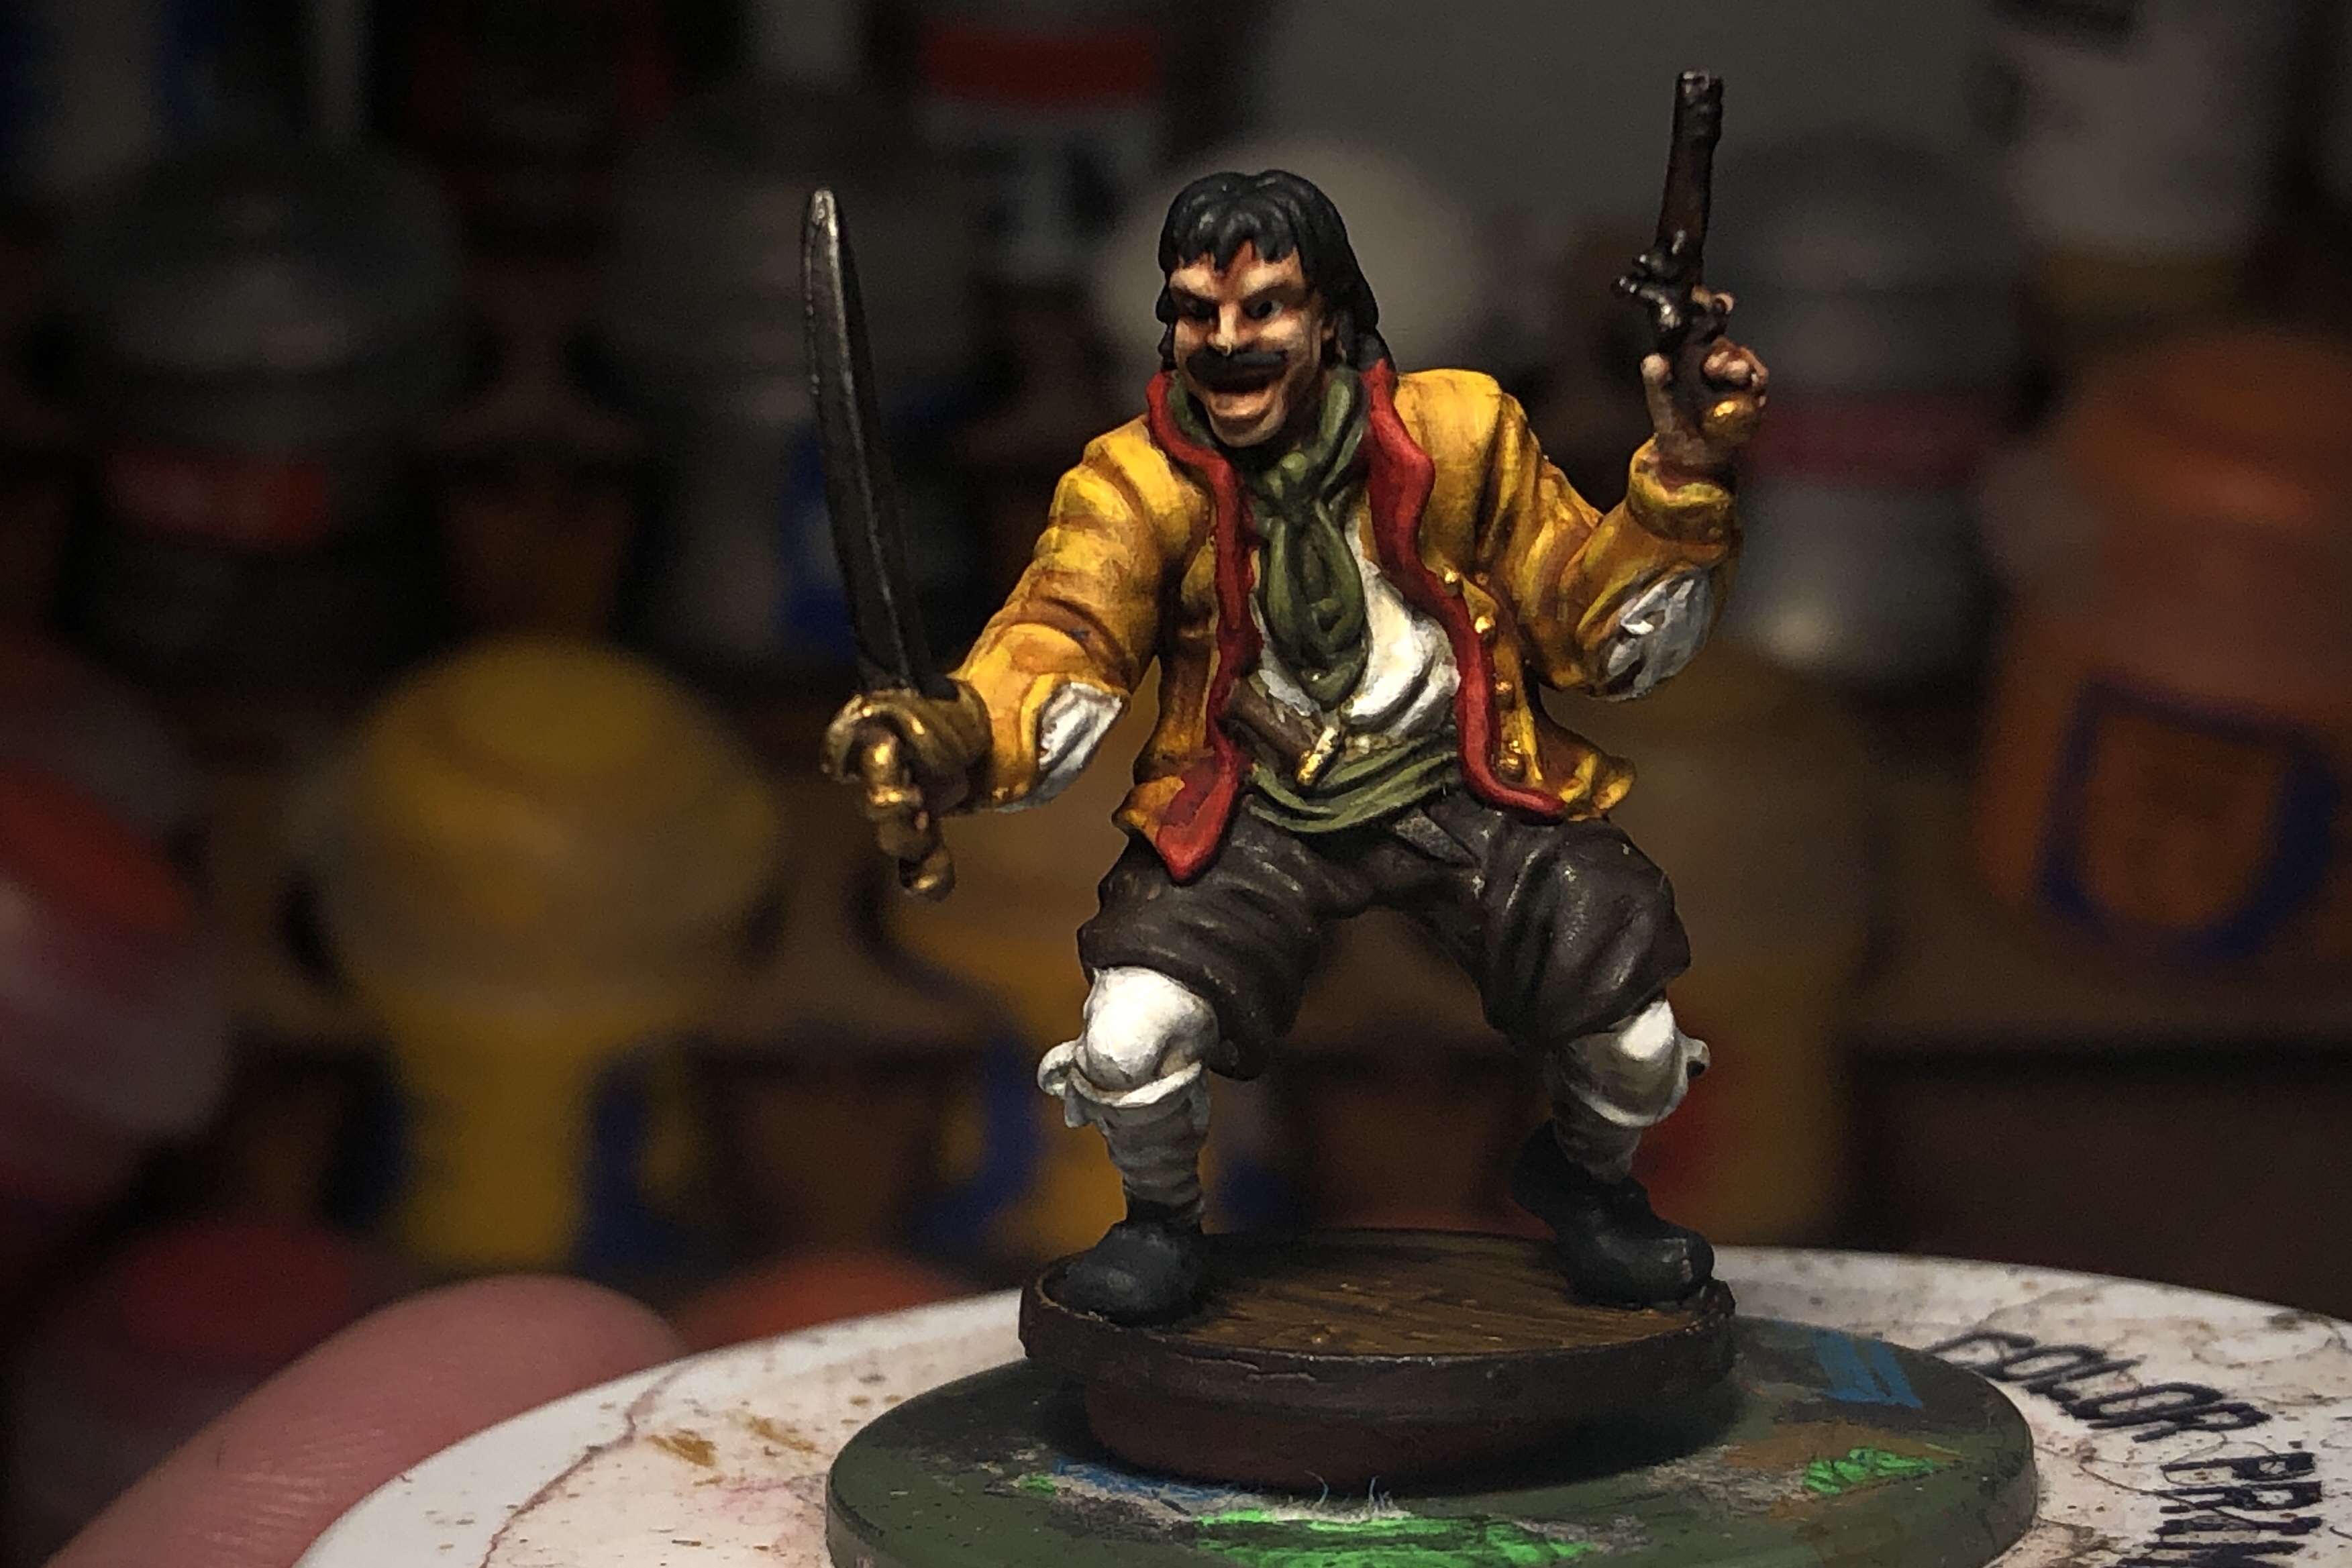
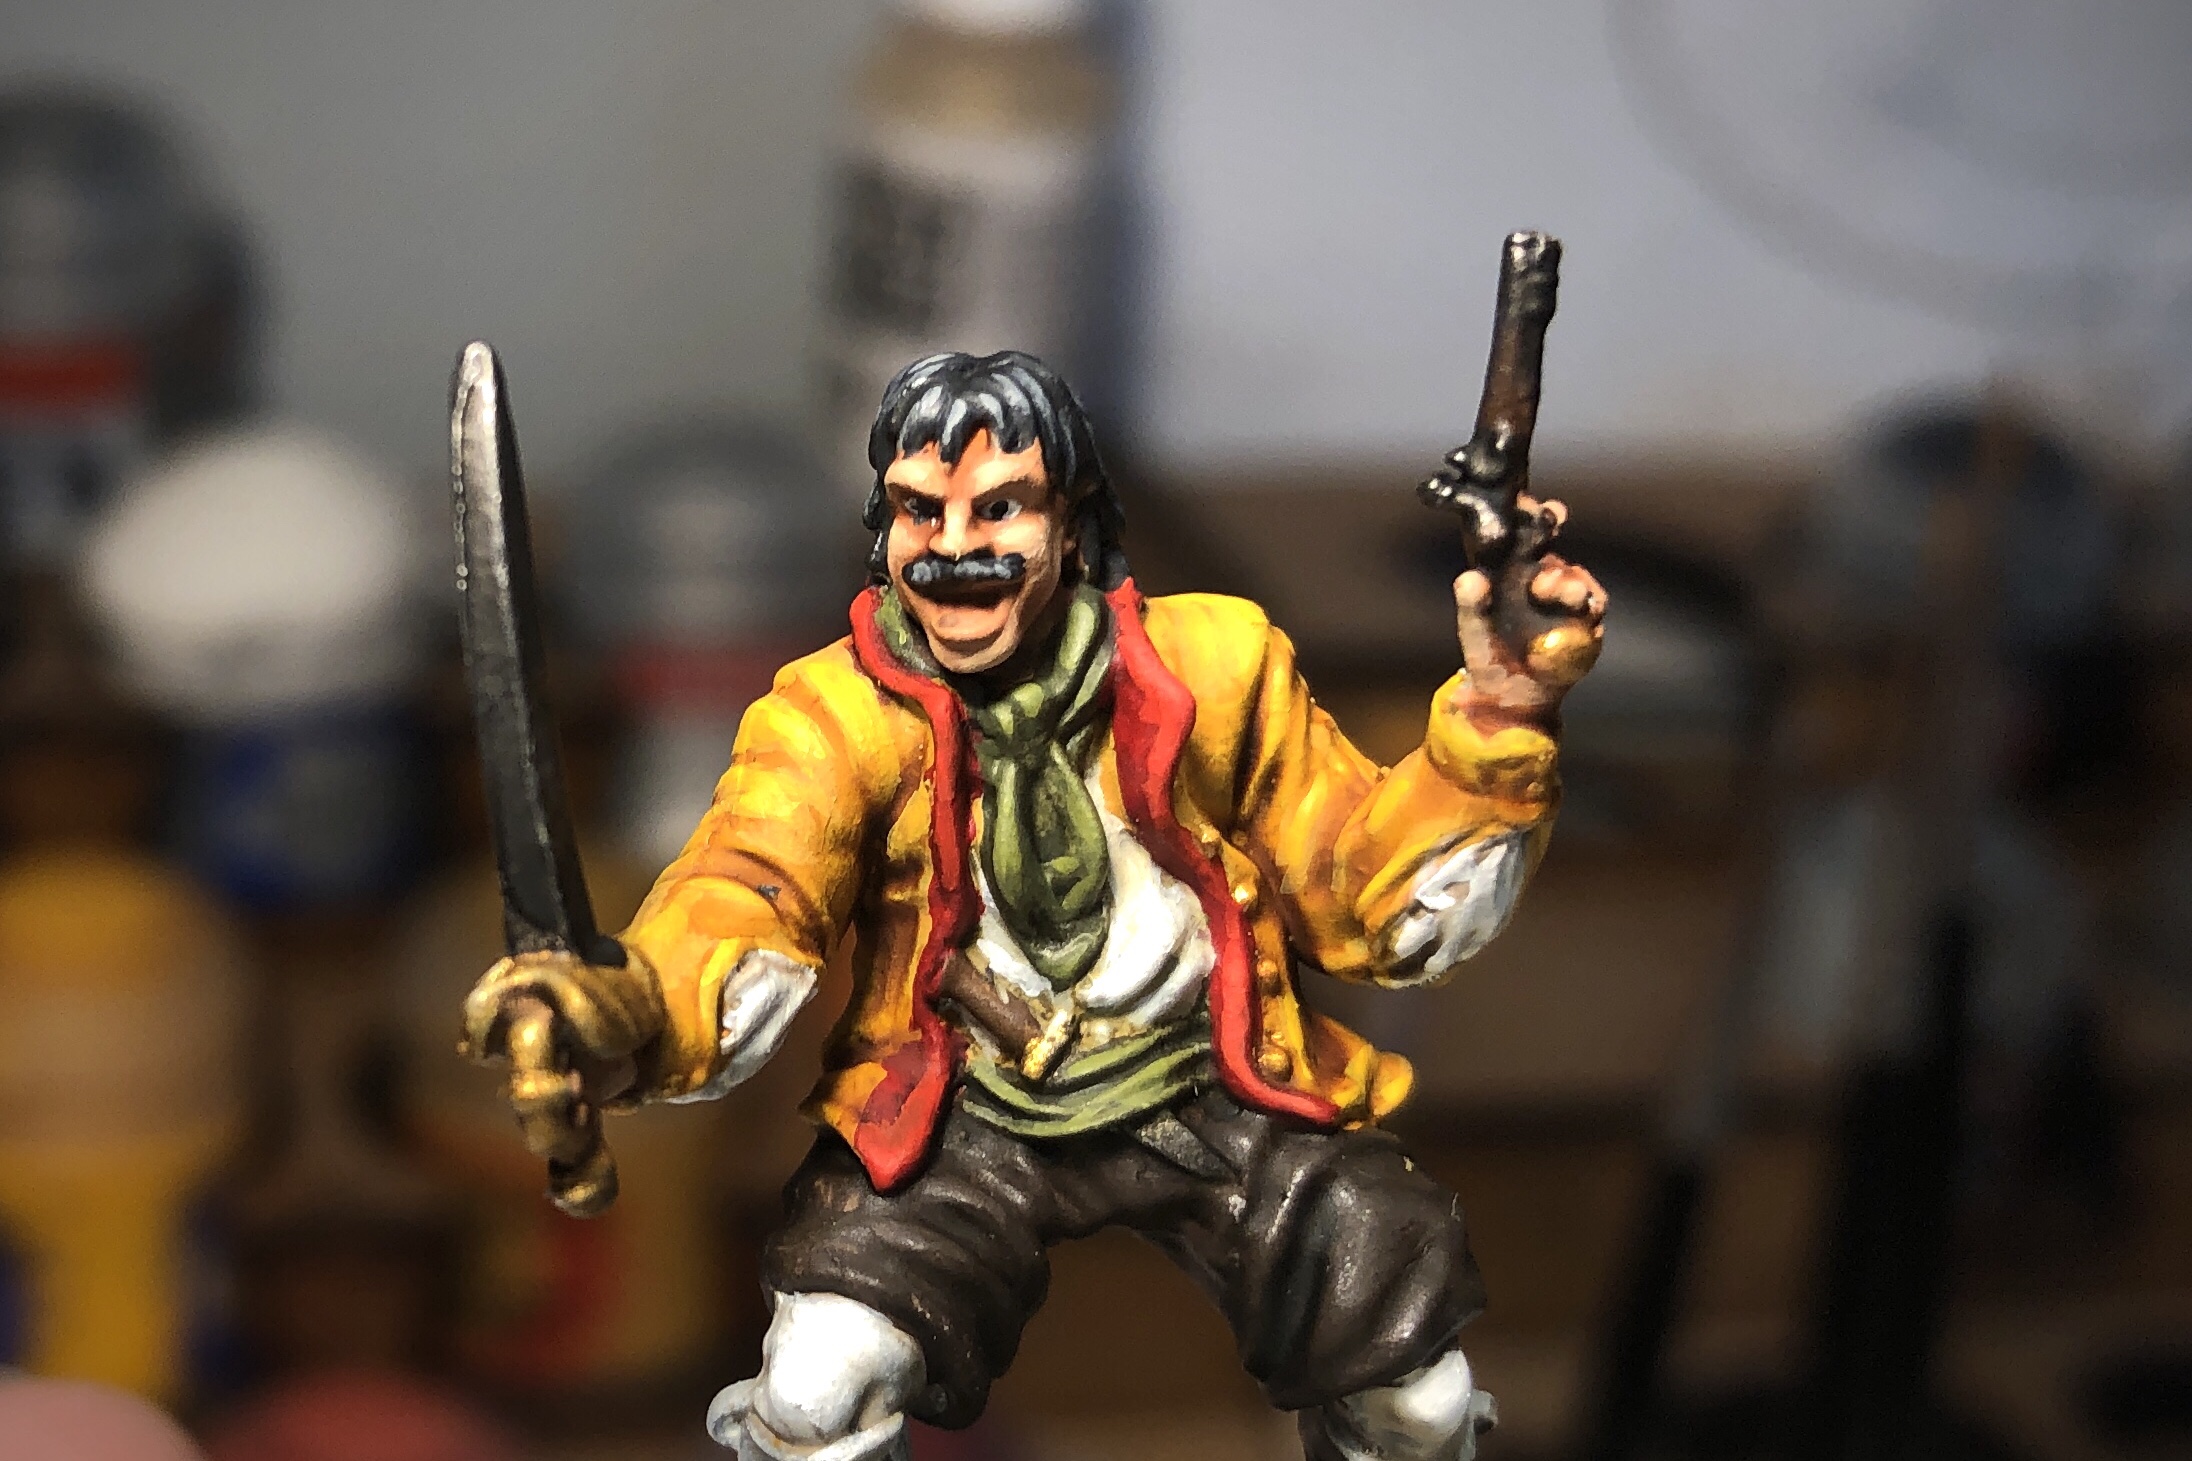
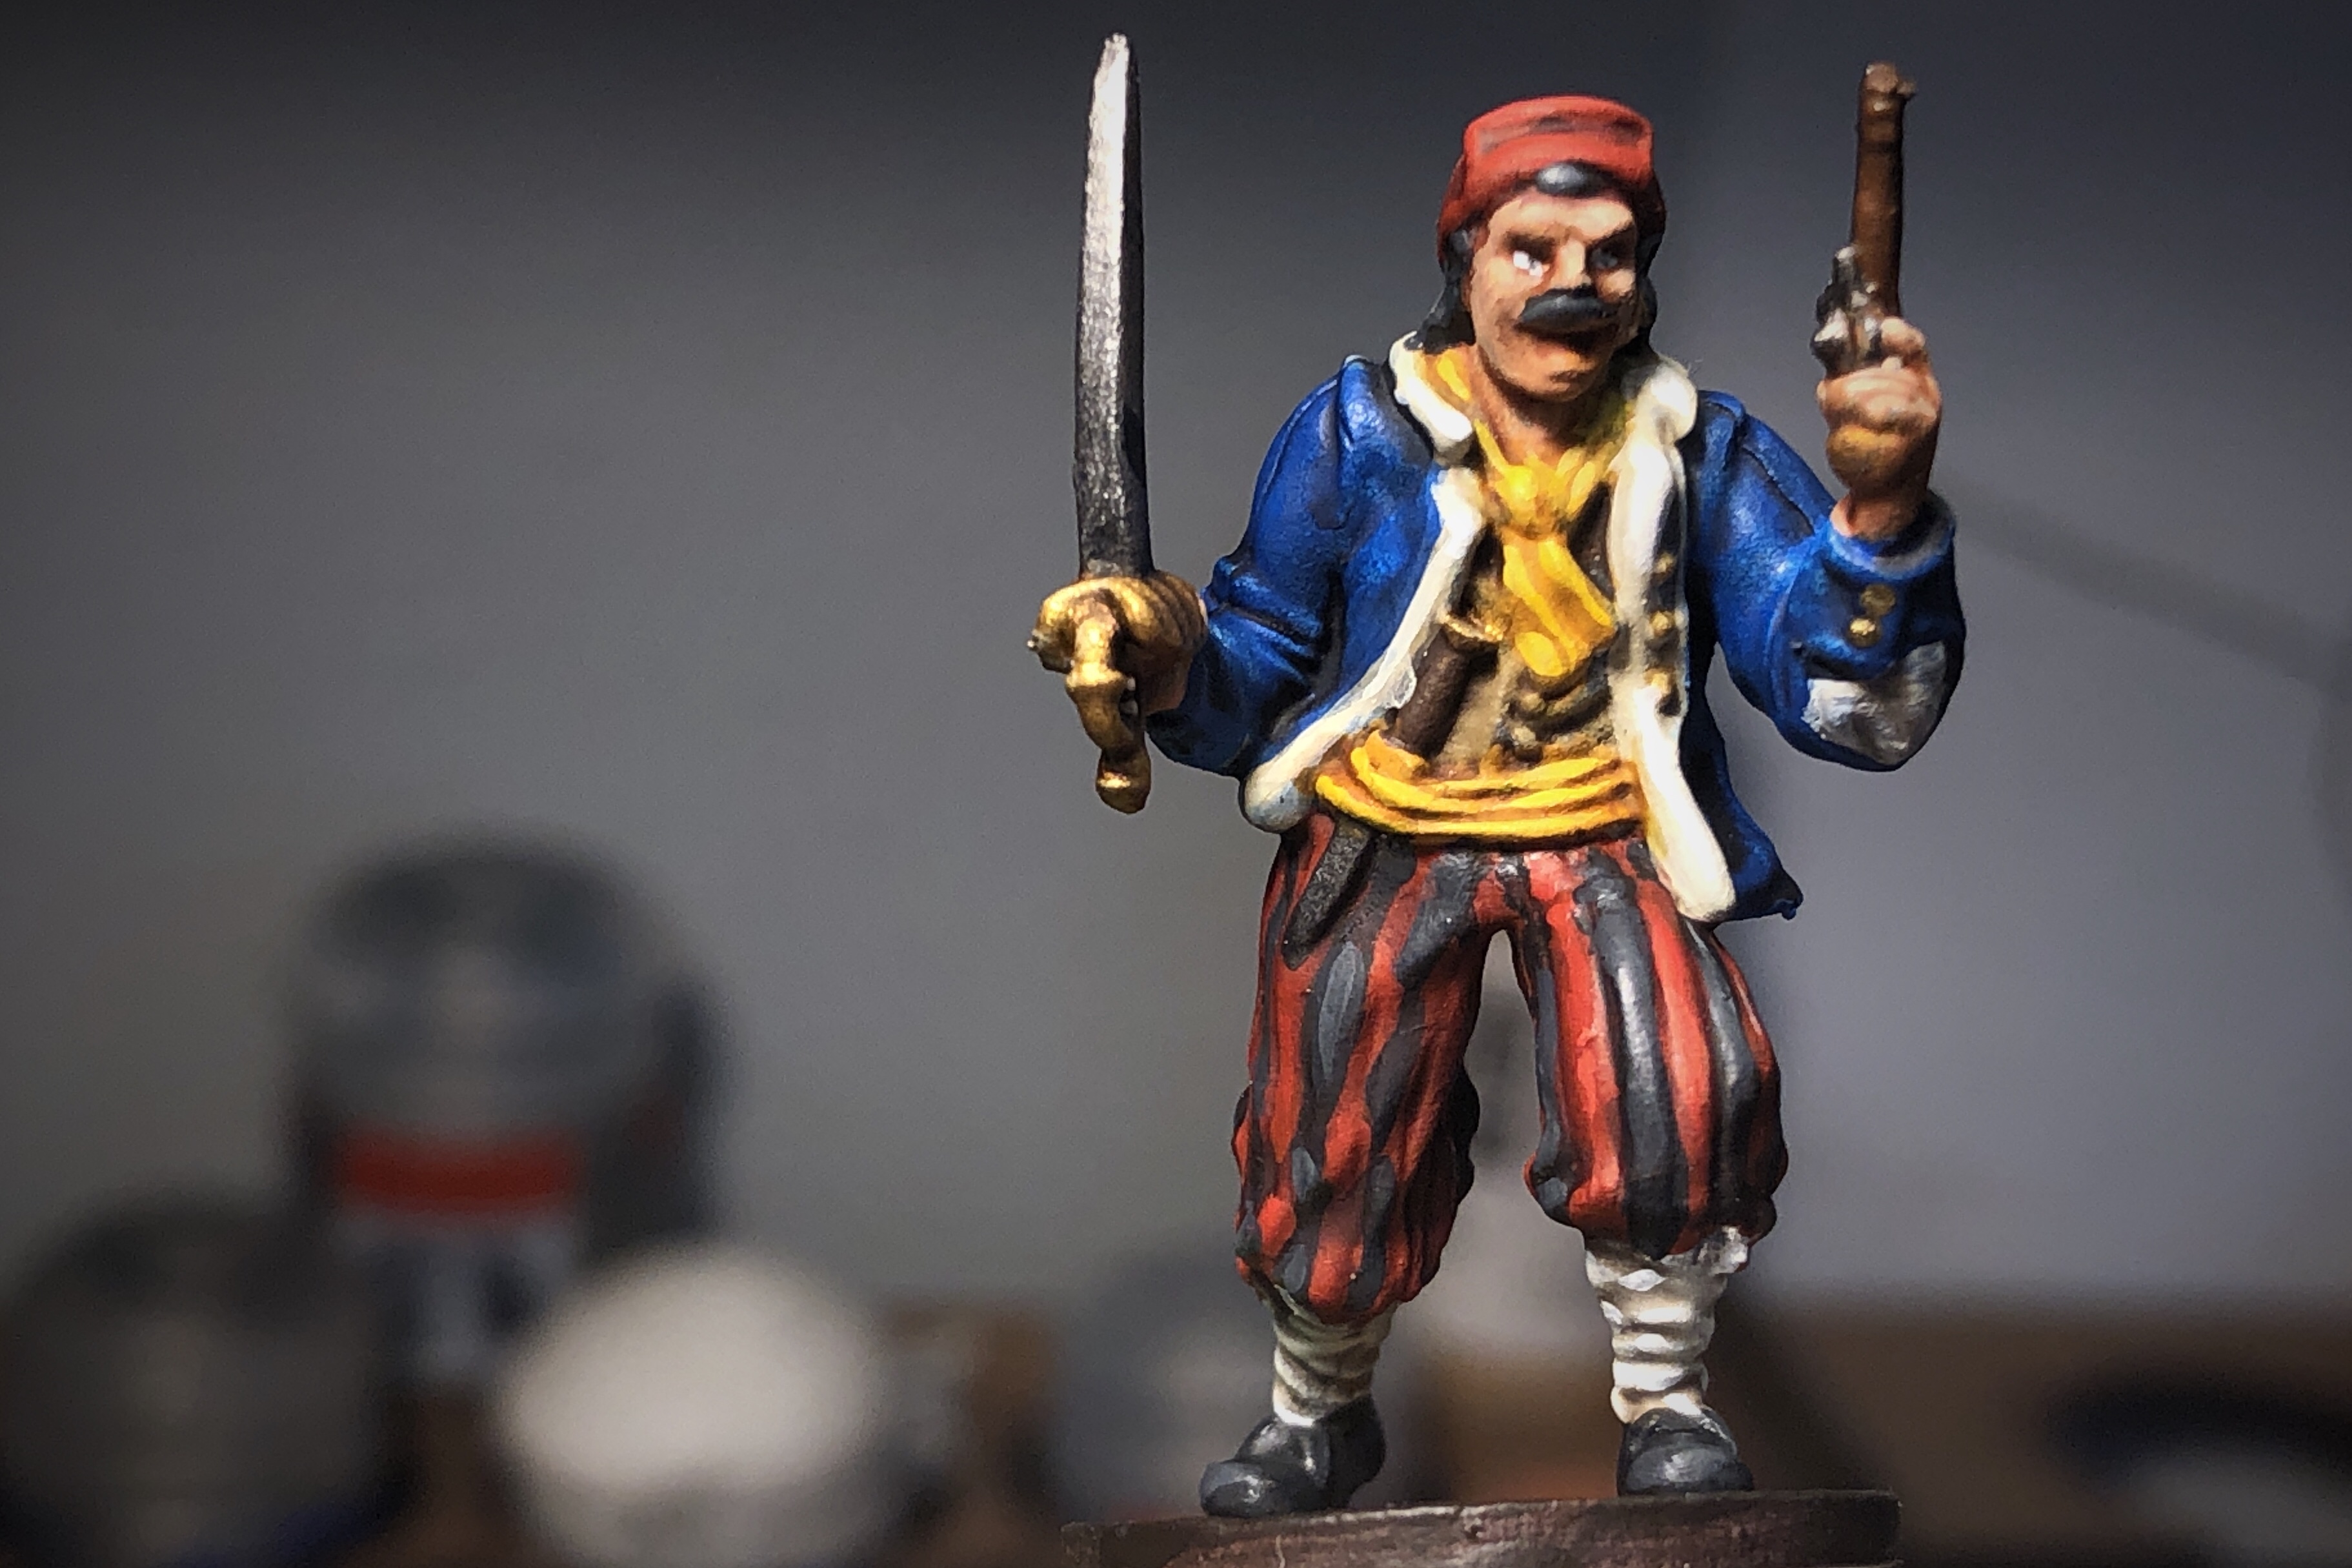
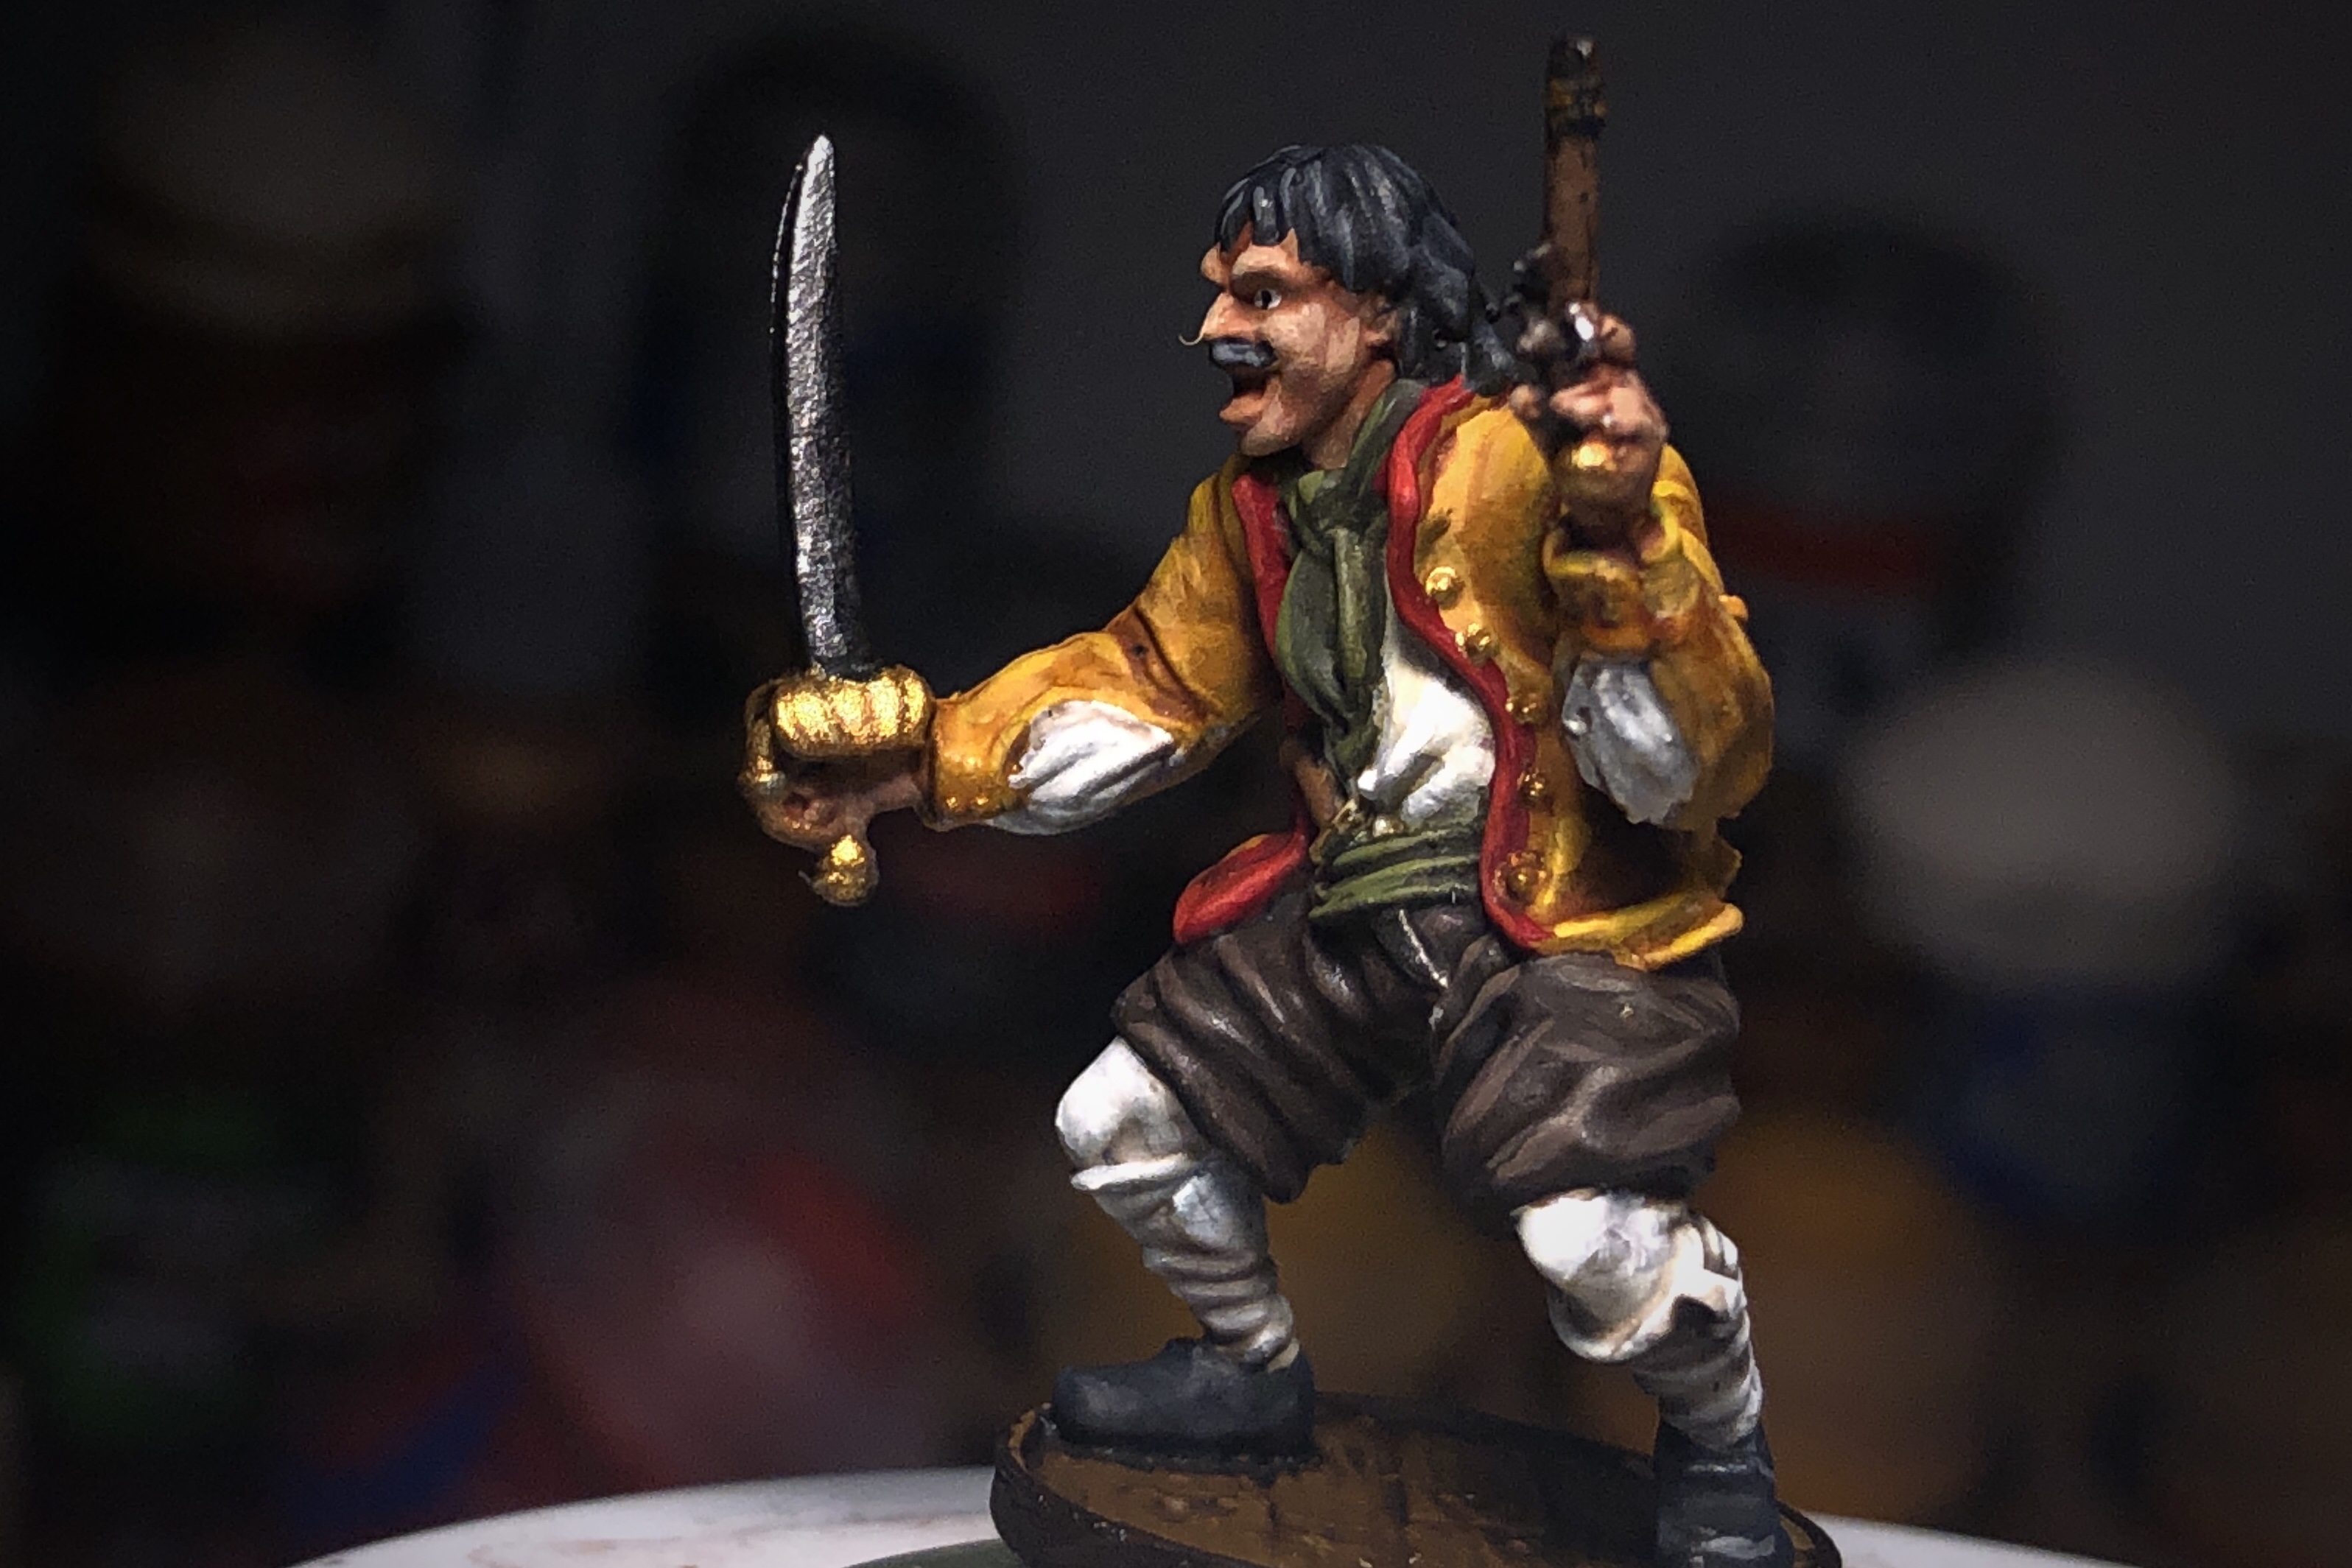
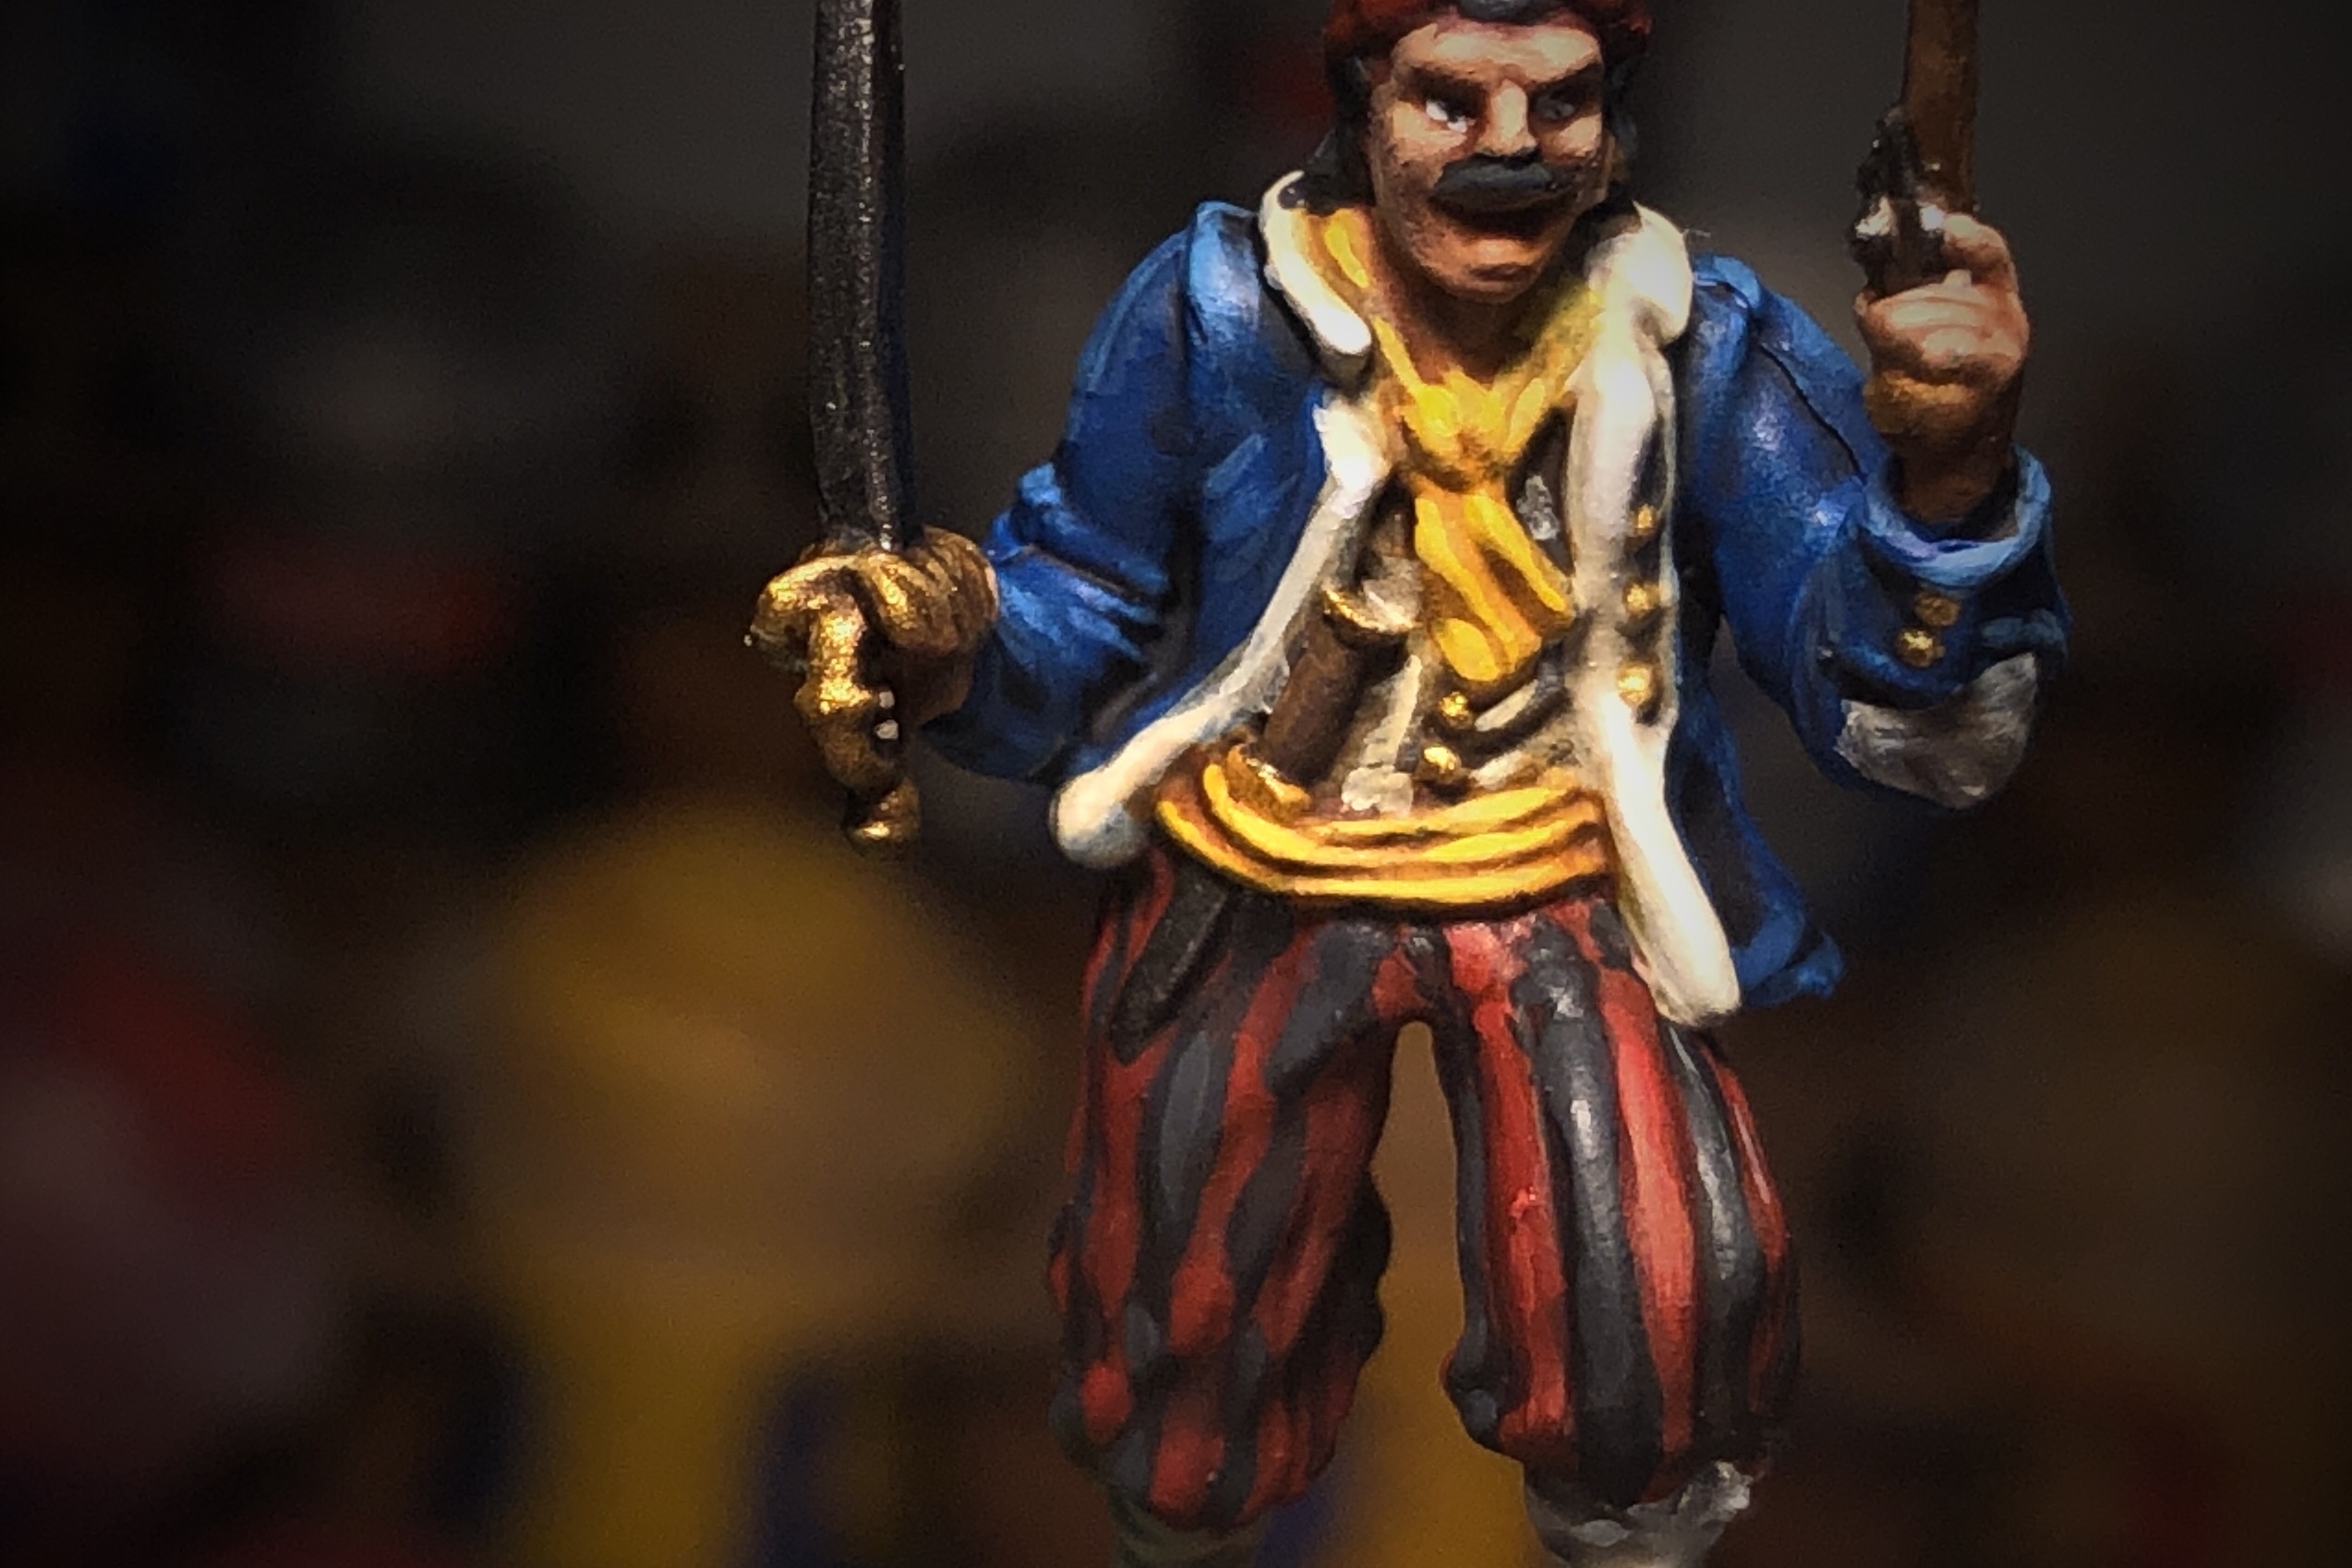
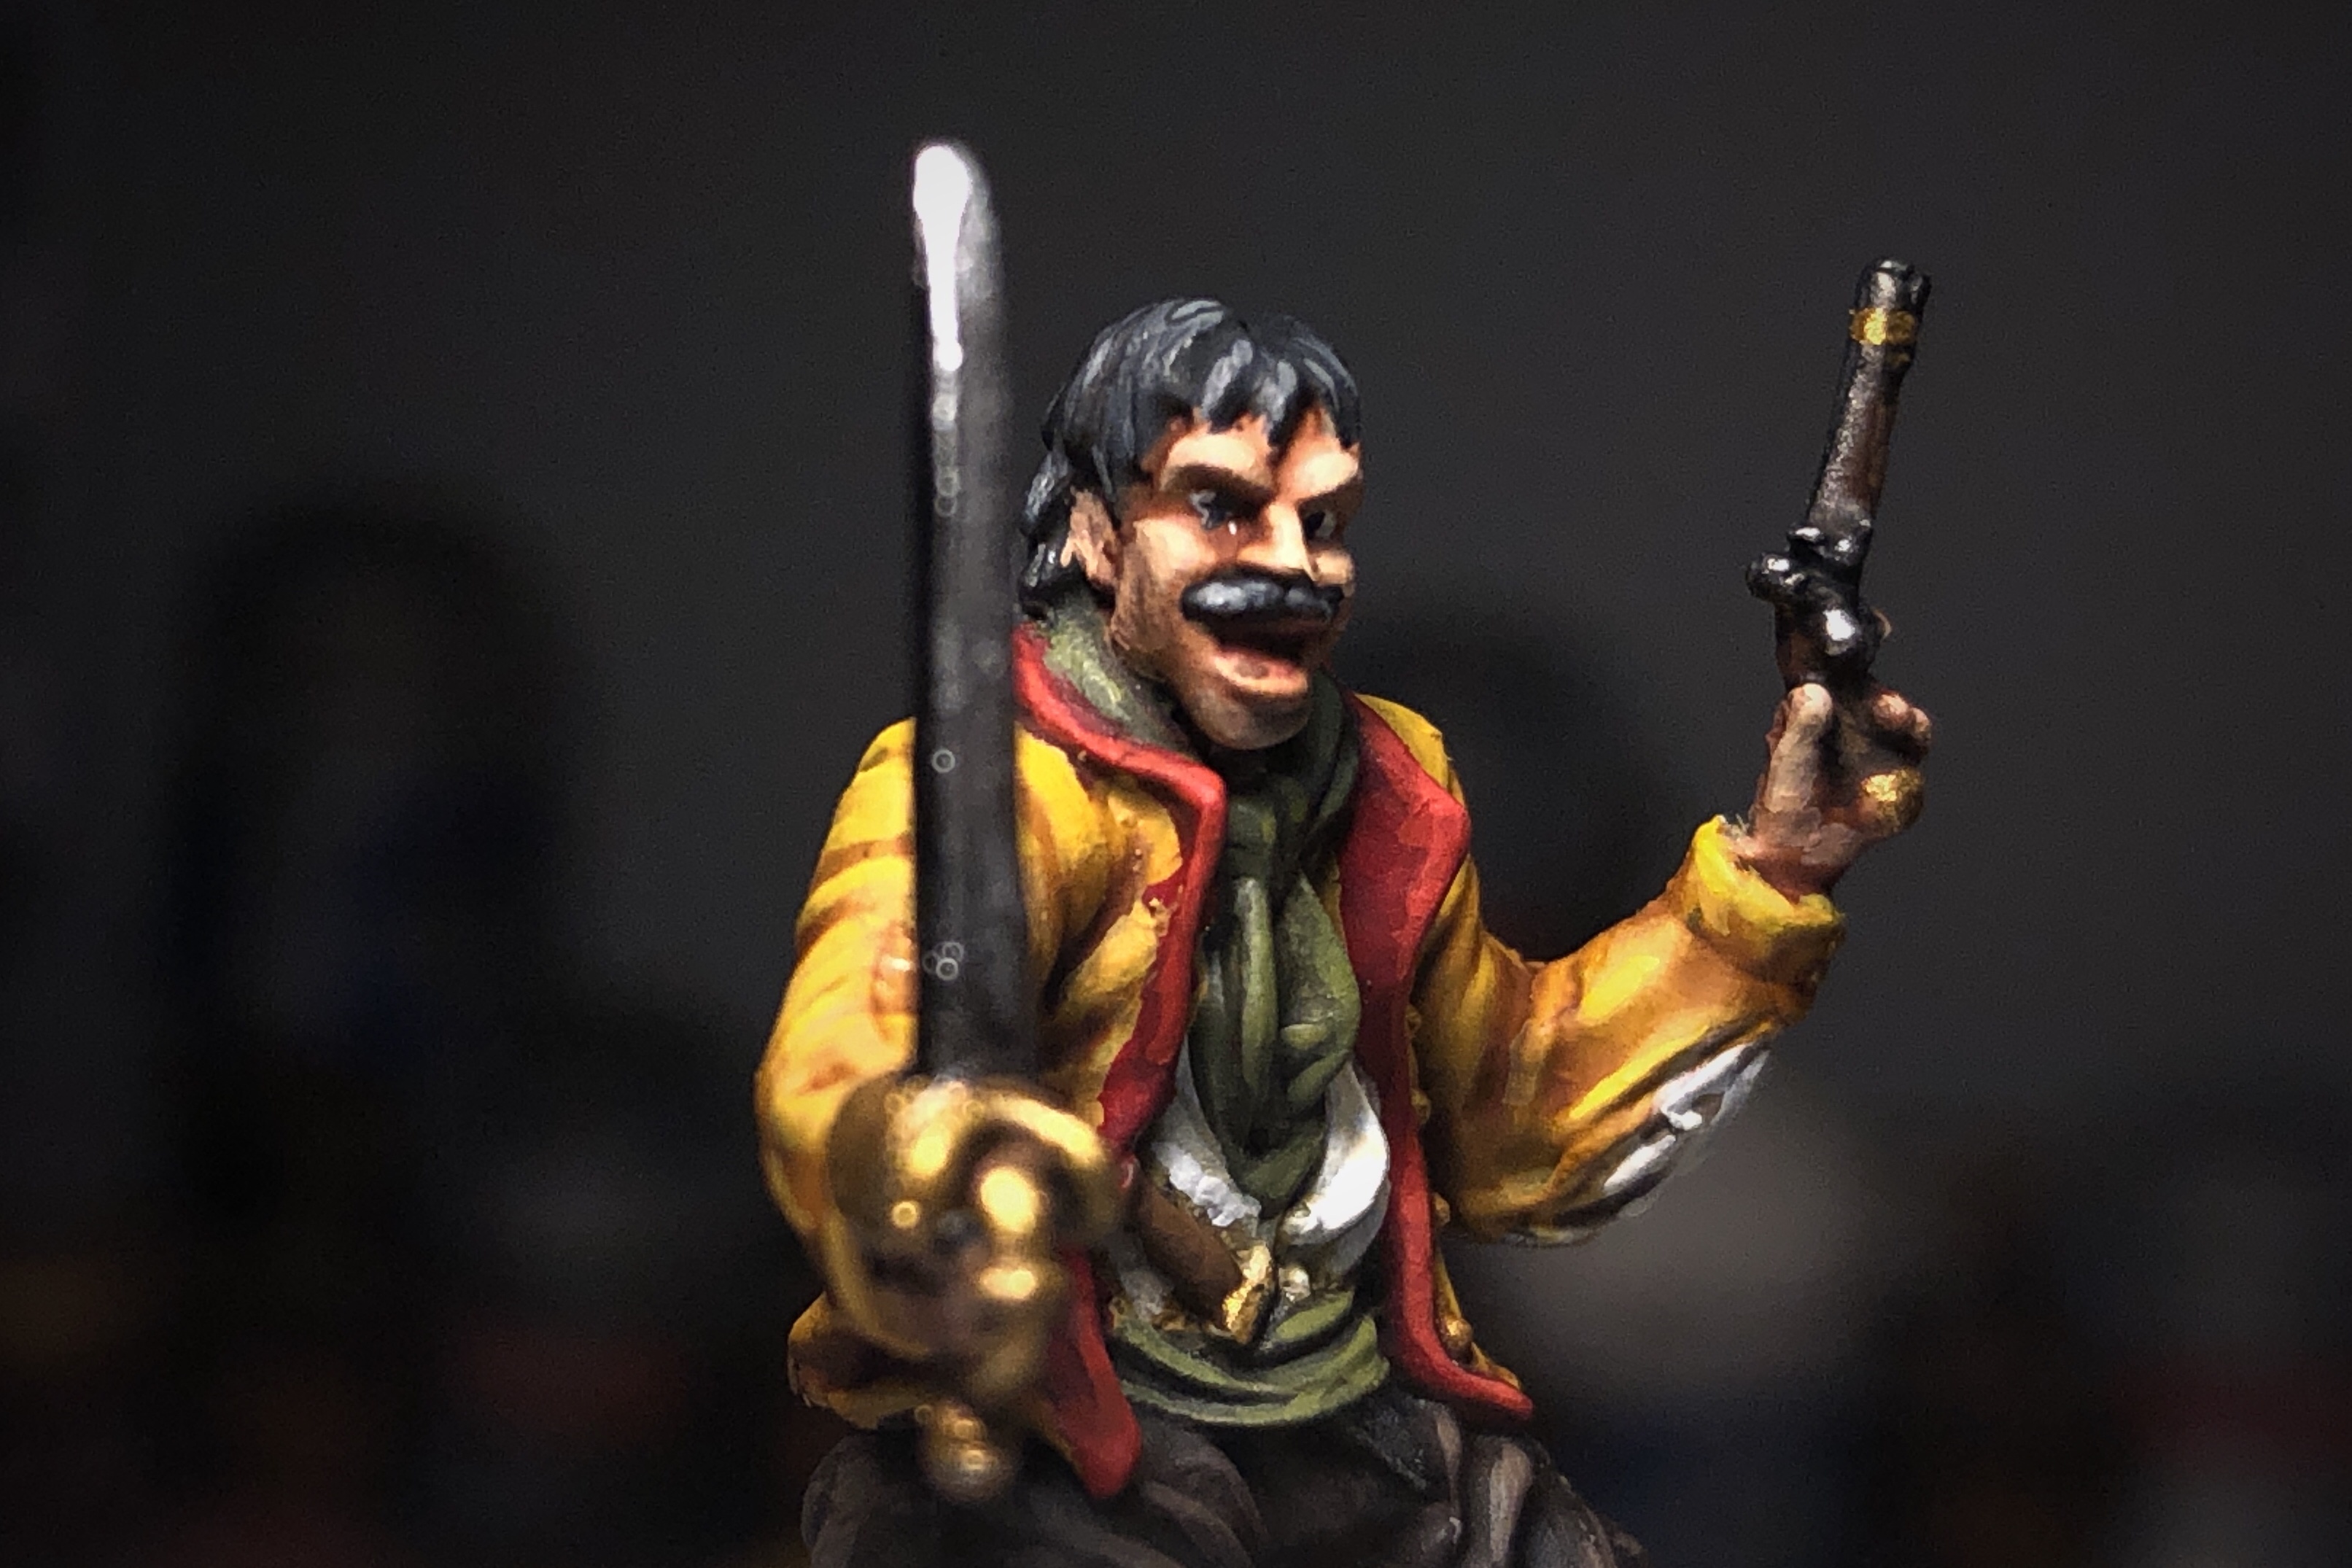
For the model with the pistol and the dagger I used:
- Cadian Fleshtone for the skin
- Castellen Green for the jacket
- Mephiston Red for the sash and necktie
- Averland Sunset for the jacket trim
- Skragg Brown for the hatband
- Screaming Skull for the feathers in the hat
- XV-88 and Rhinox Hide for the base
- German Grey for the hair, and stripes on the pants
- Mournfang Brown for the pistol wood
- Model Color Cavalry Brown the stockings
- Panzer Aces Leather Brown for dagger handle and hat
- Model Color Ivory for the pants
- Model Color Brass for the buttons, pistol butt and sword hilt
- Metal Color Dark Aluminium for the sword blade, dagger hilt and pistol metal
I’ll be touching up these stripes on the pants here but I’m not going to obsess about it.

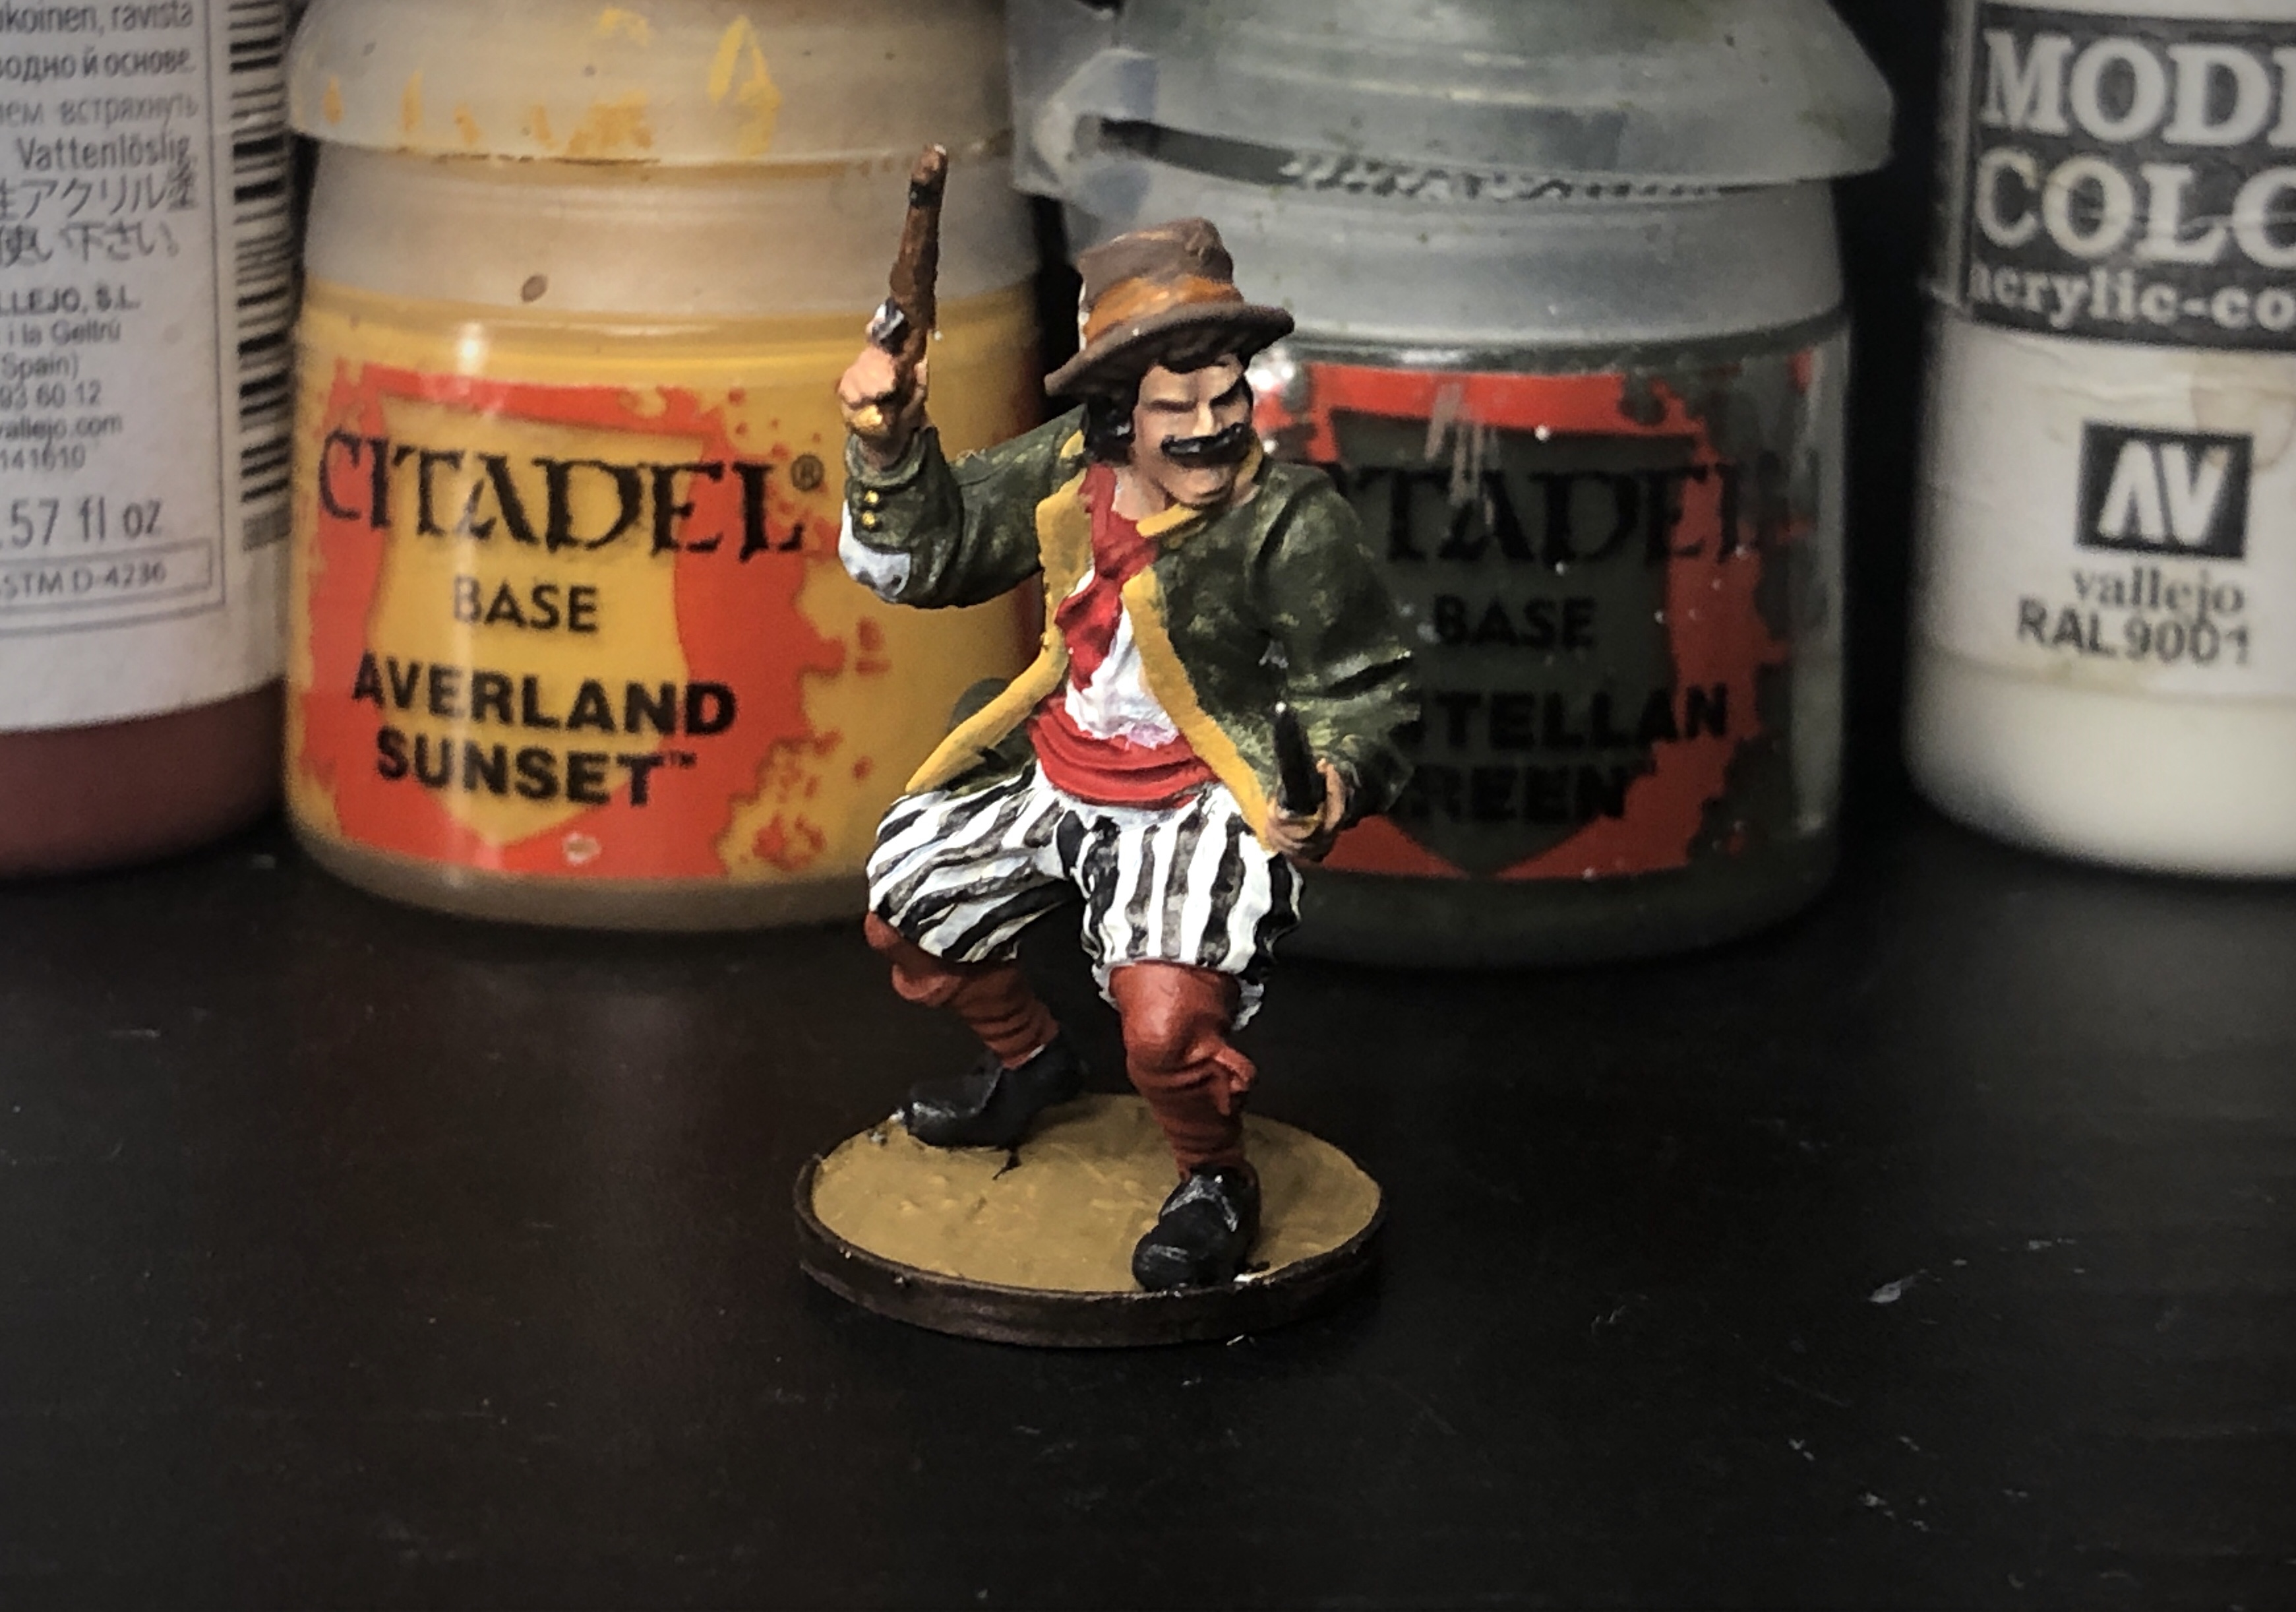
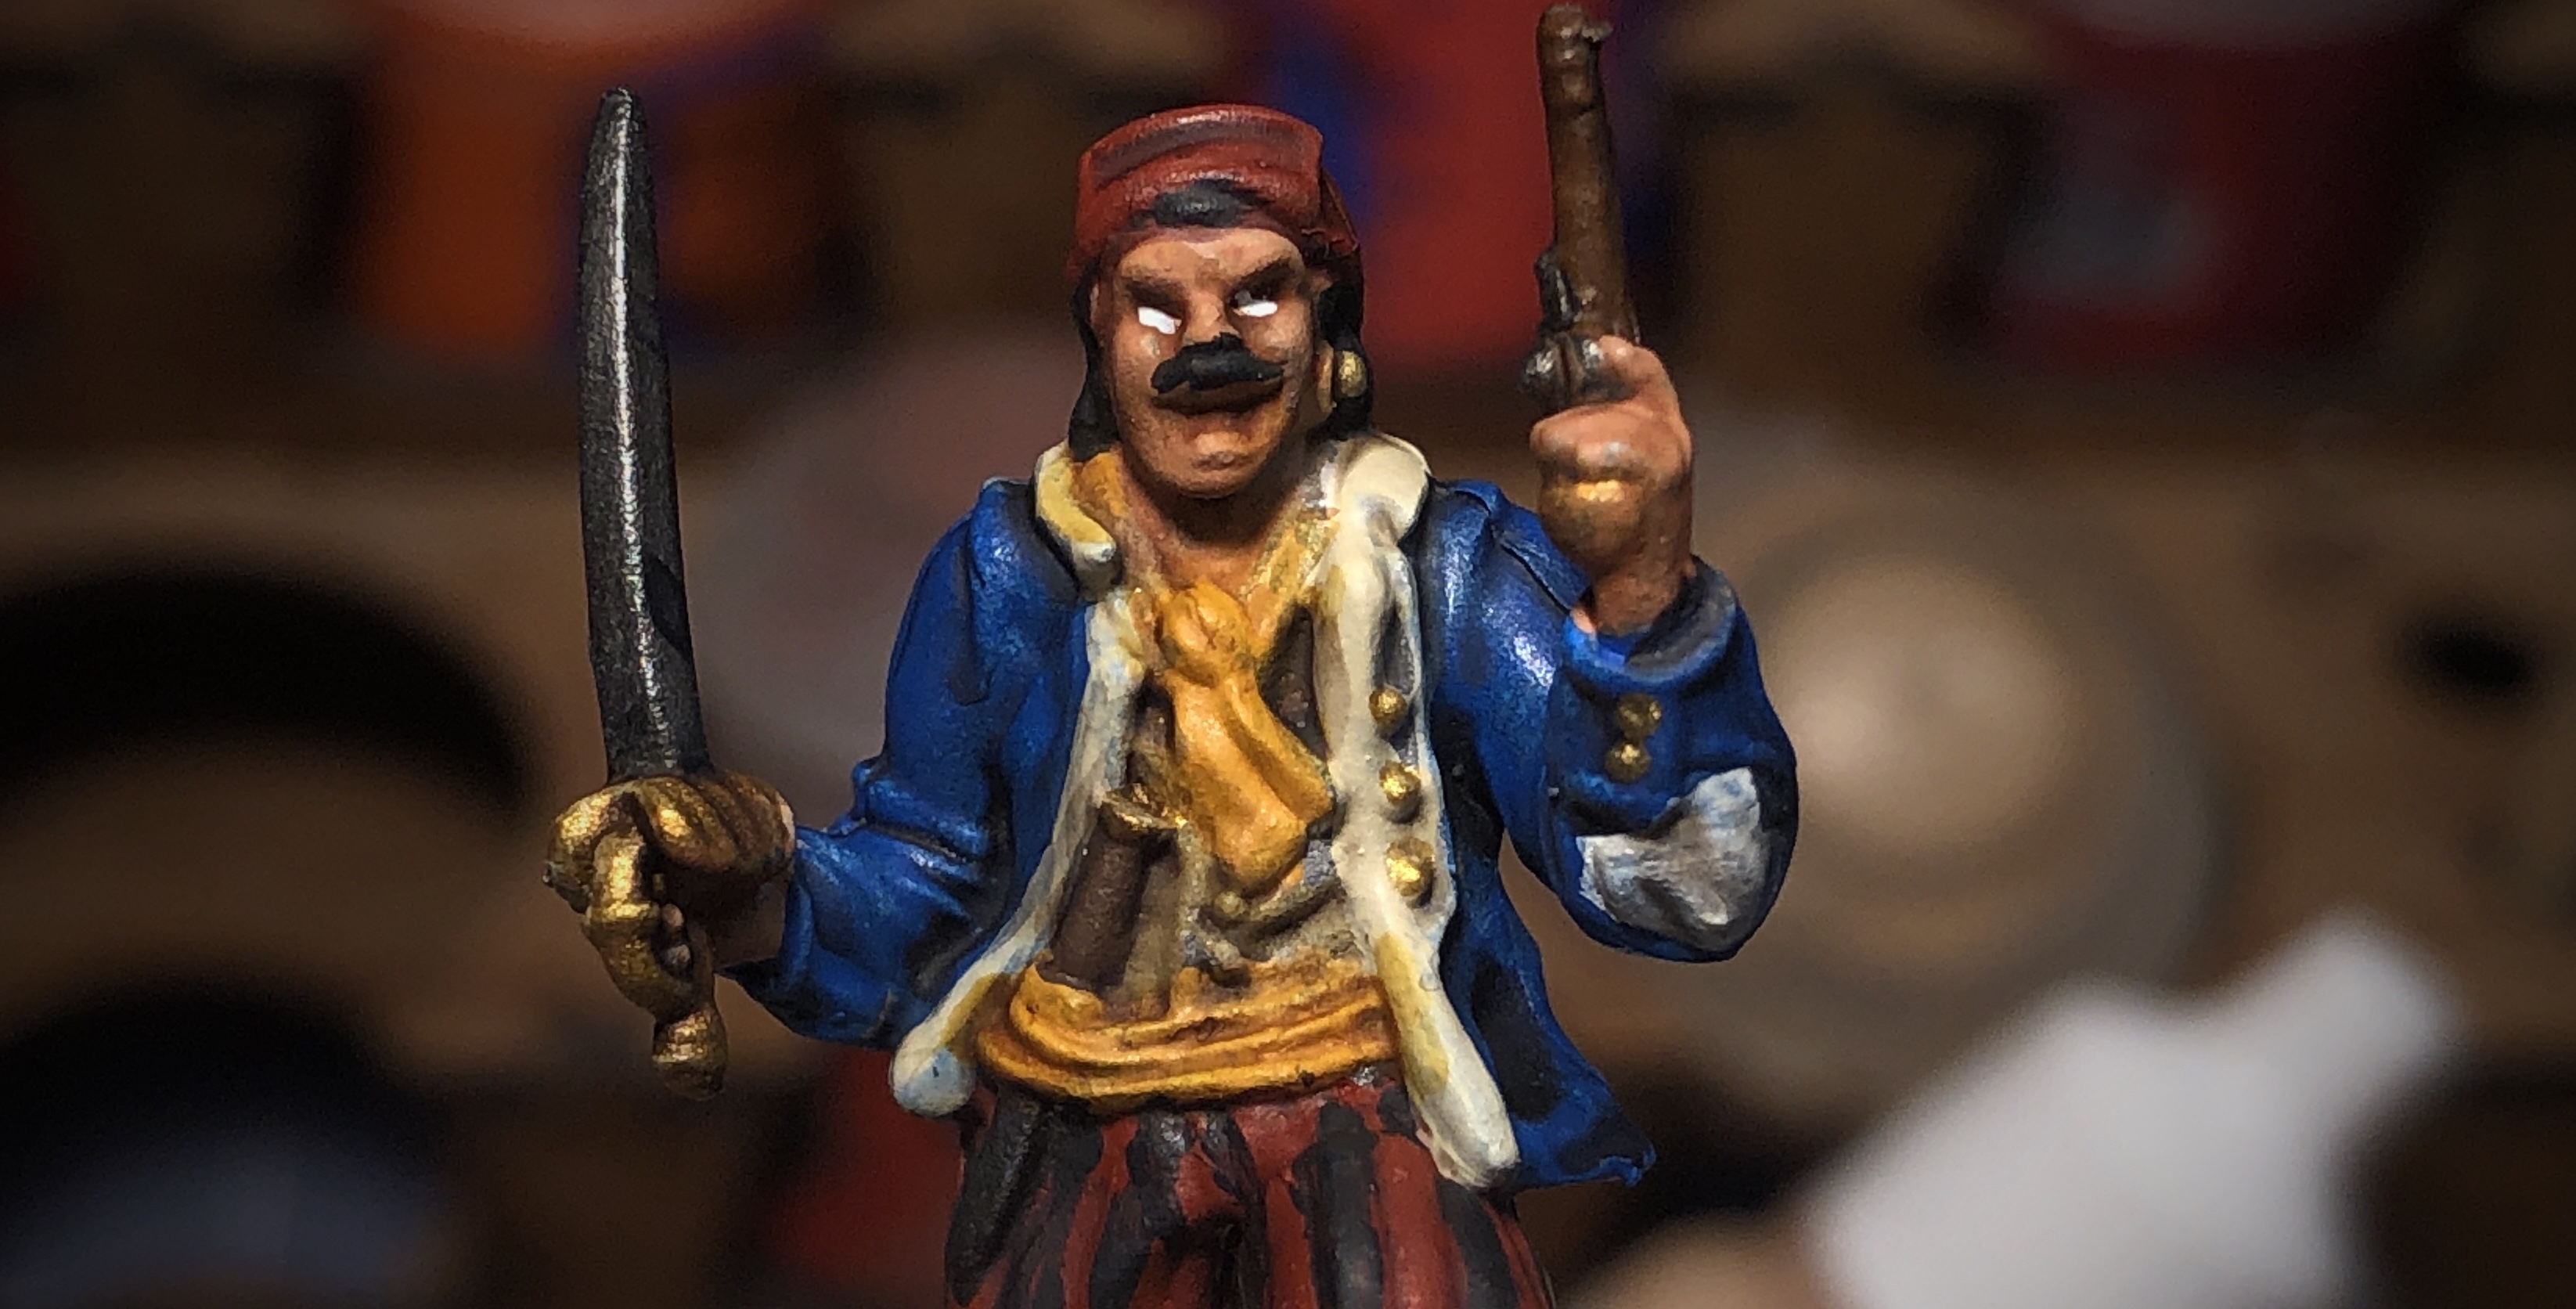
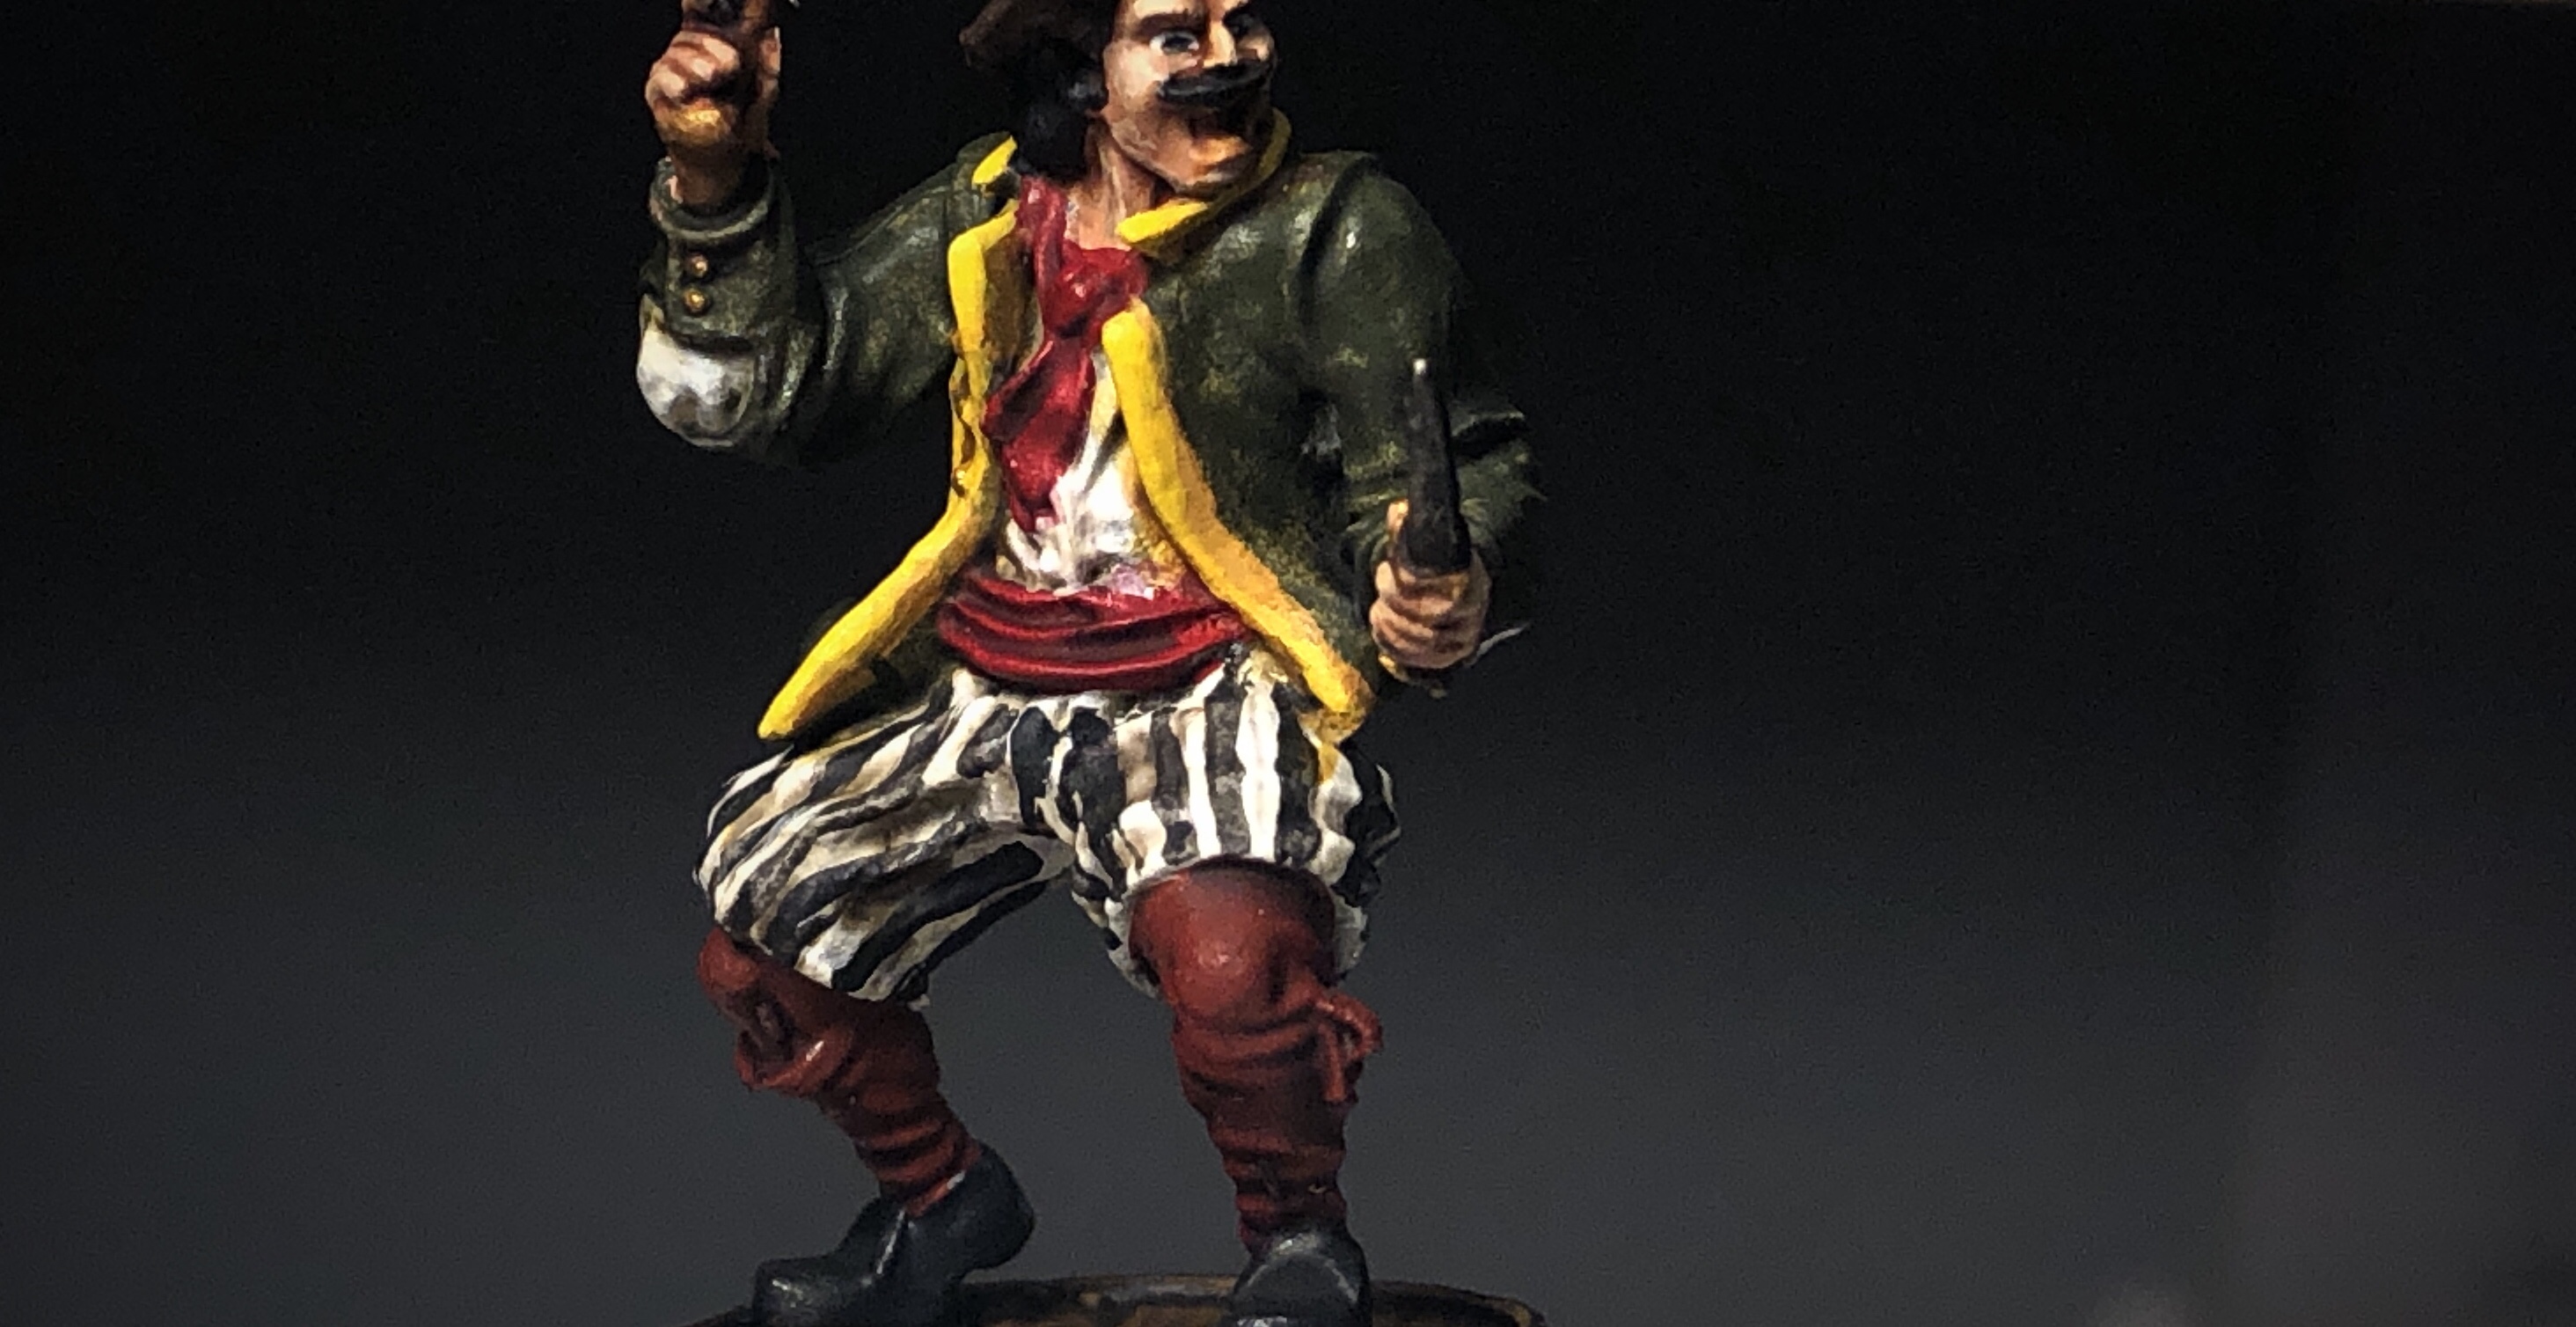
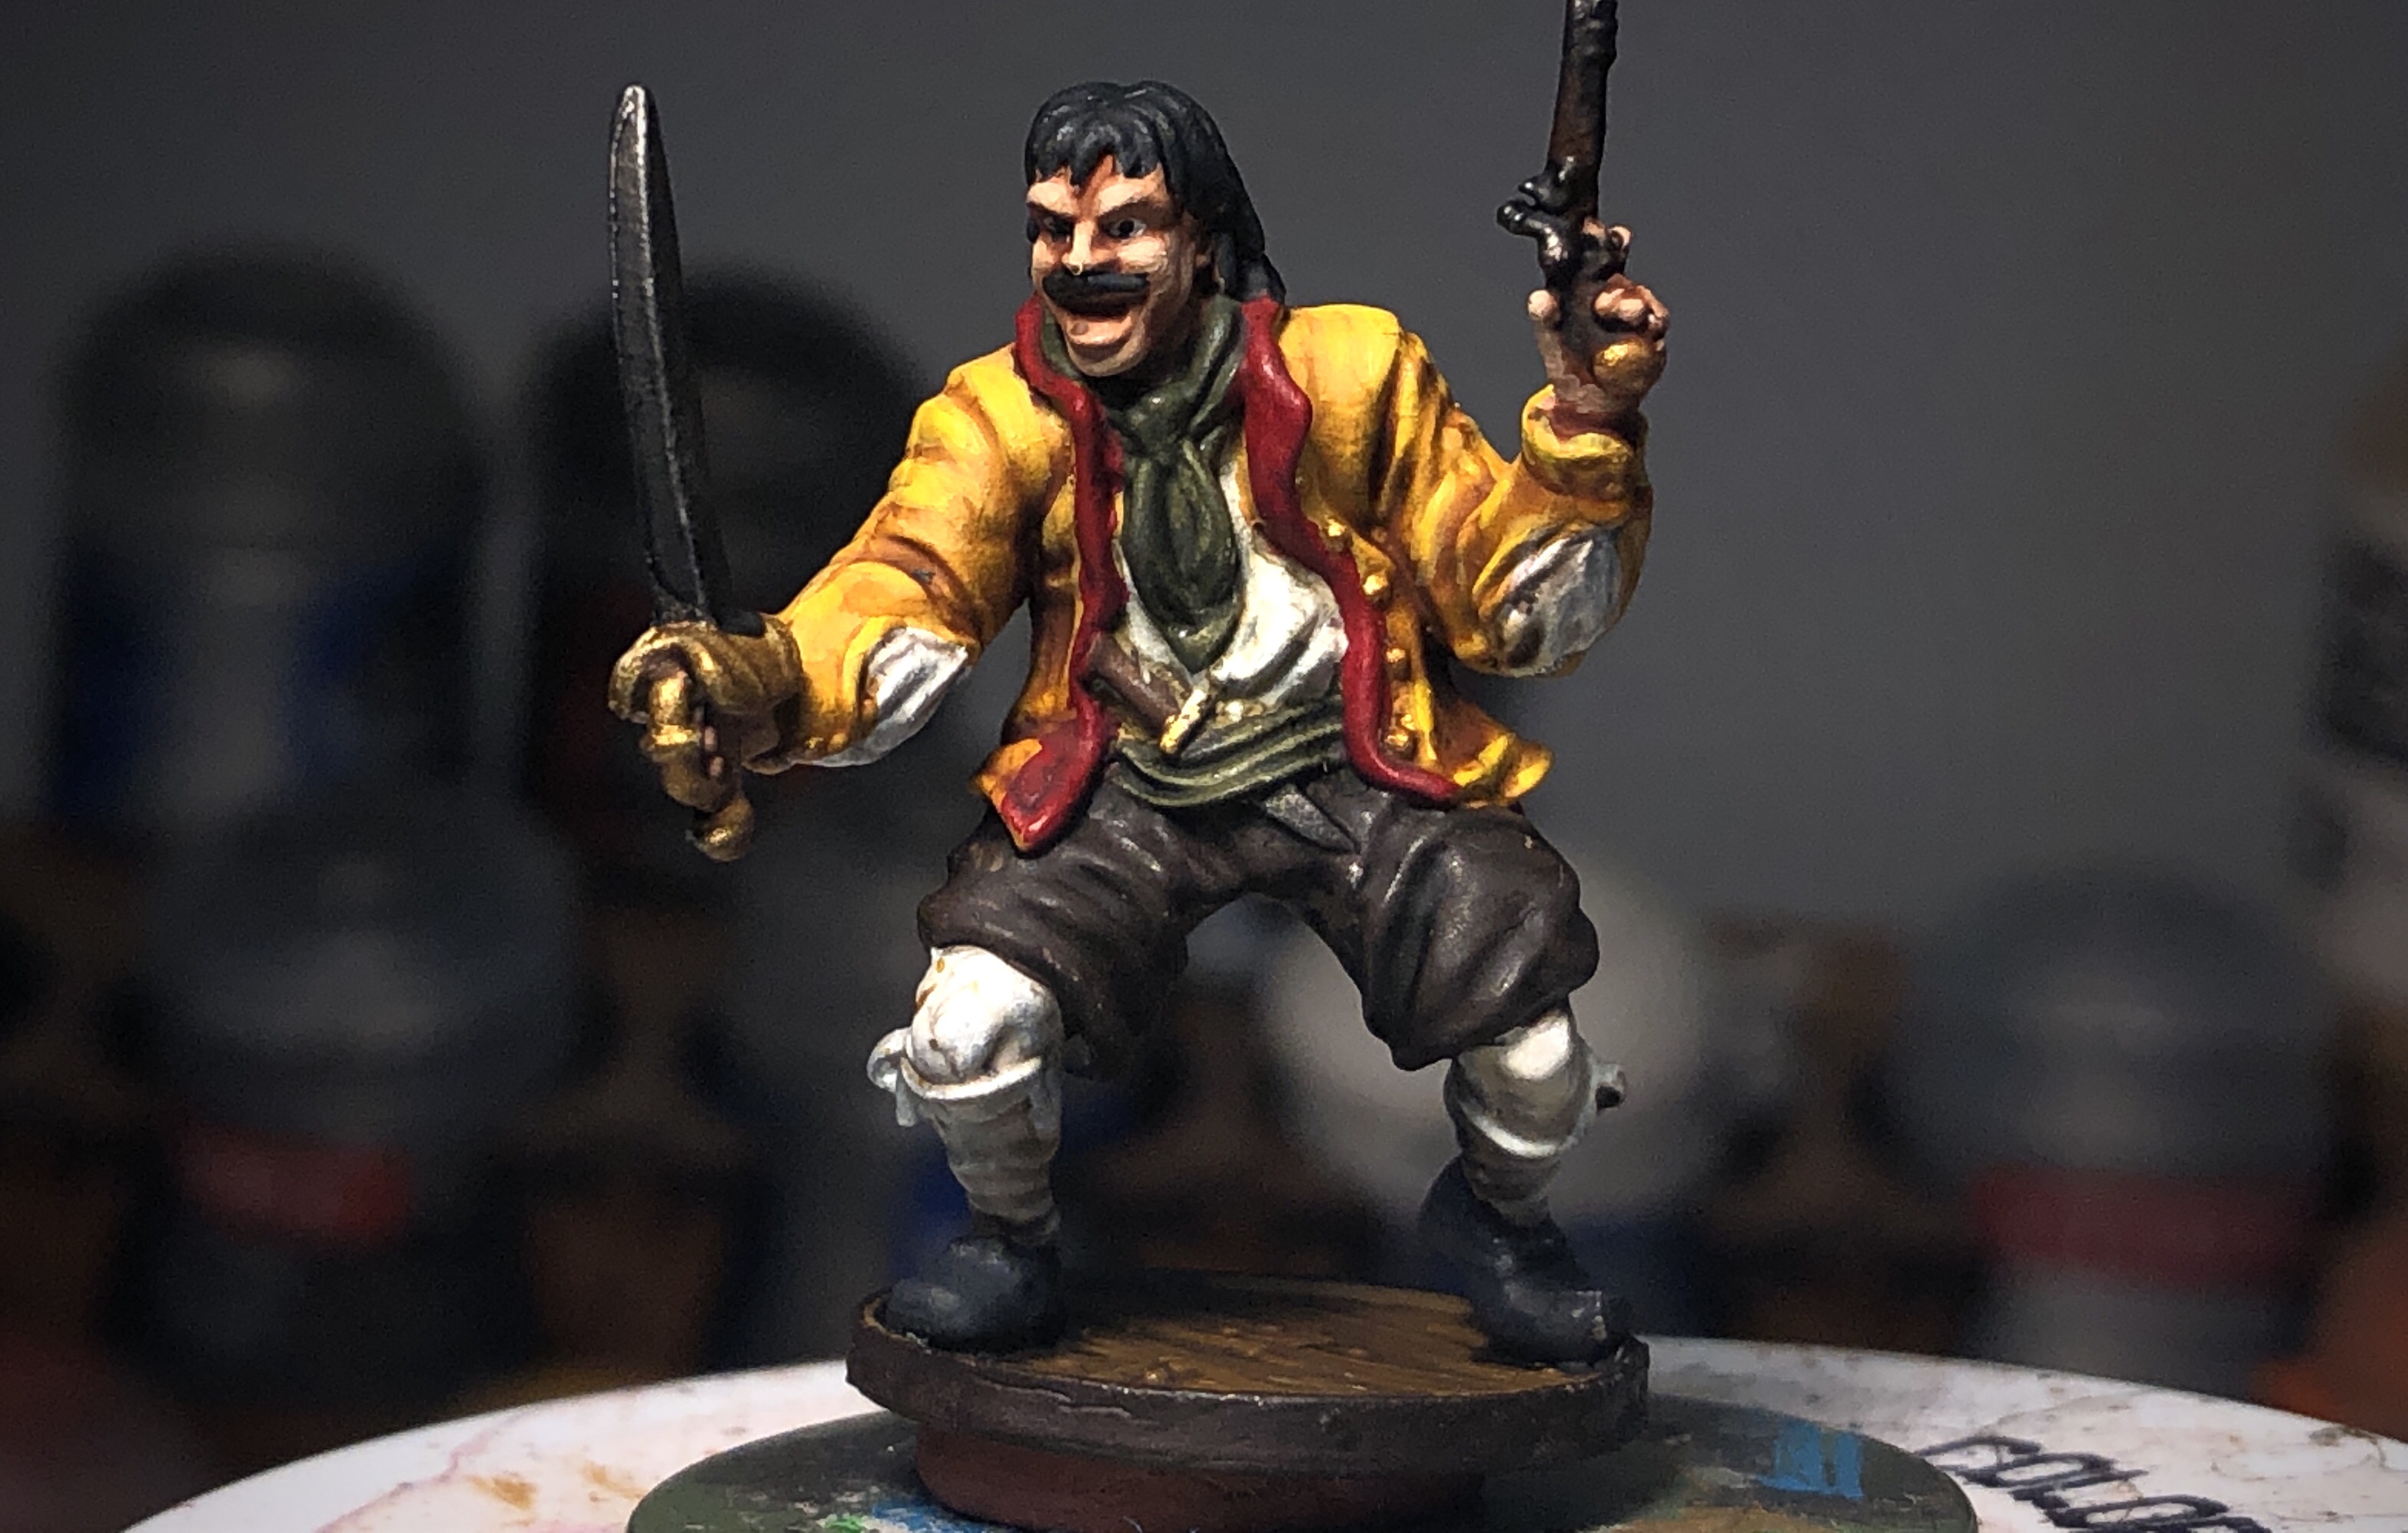
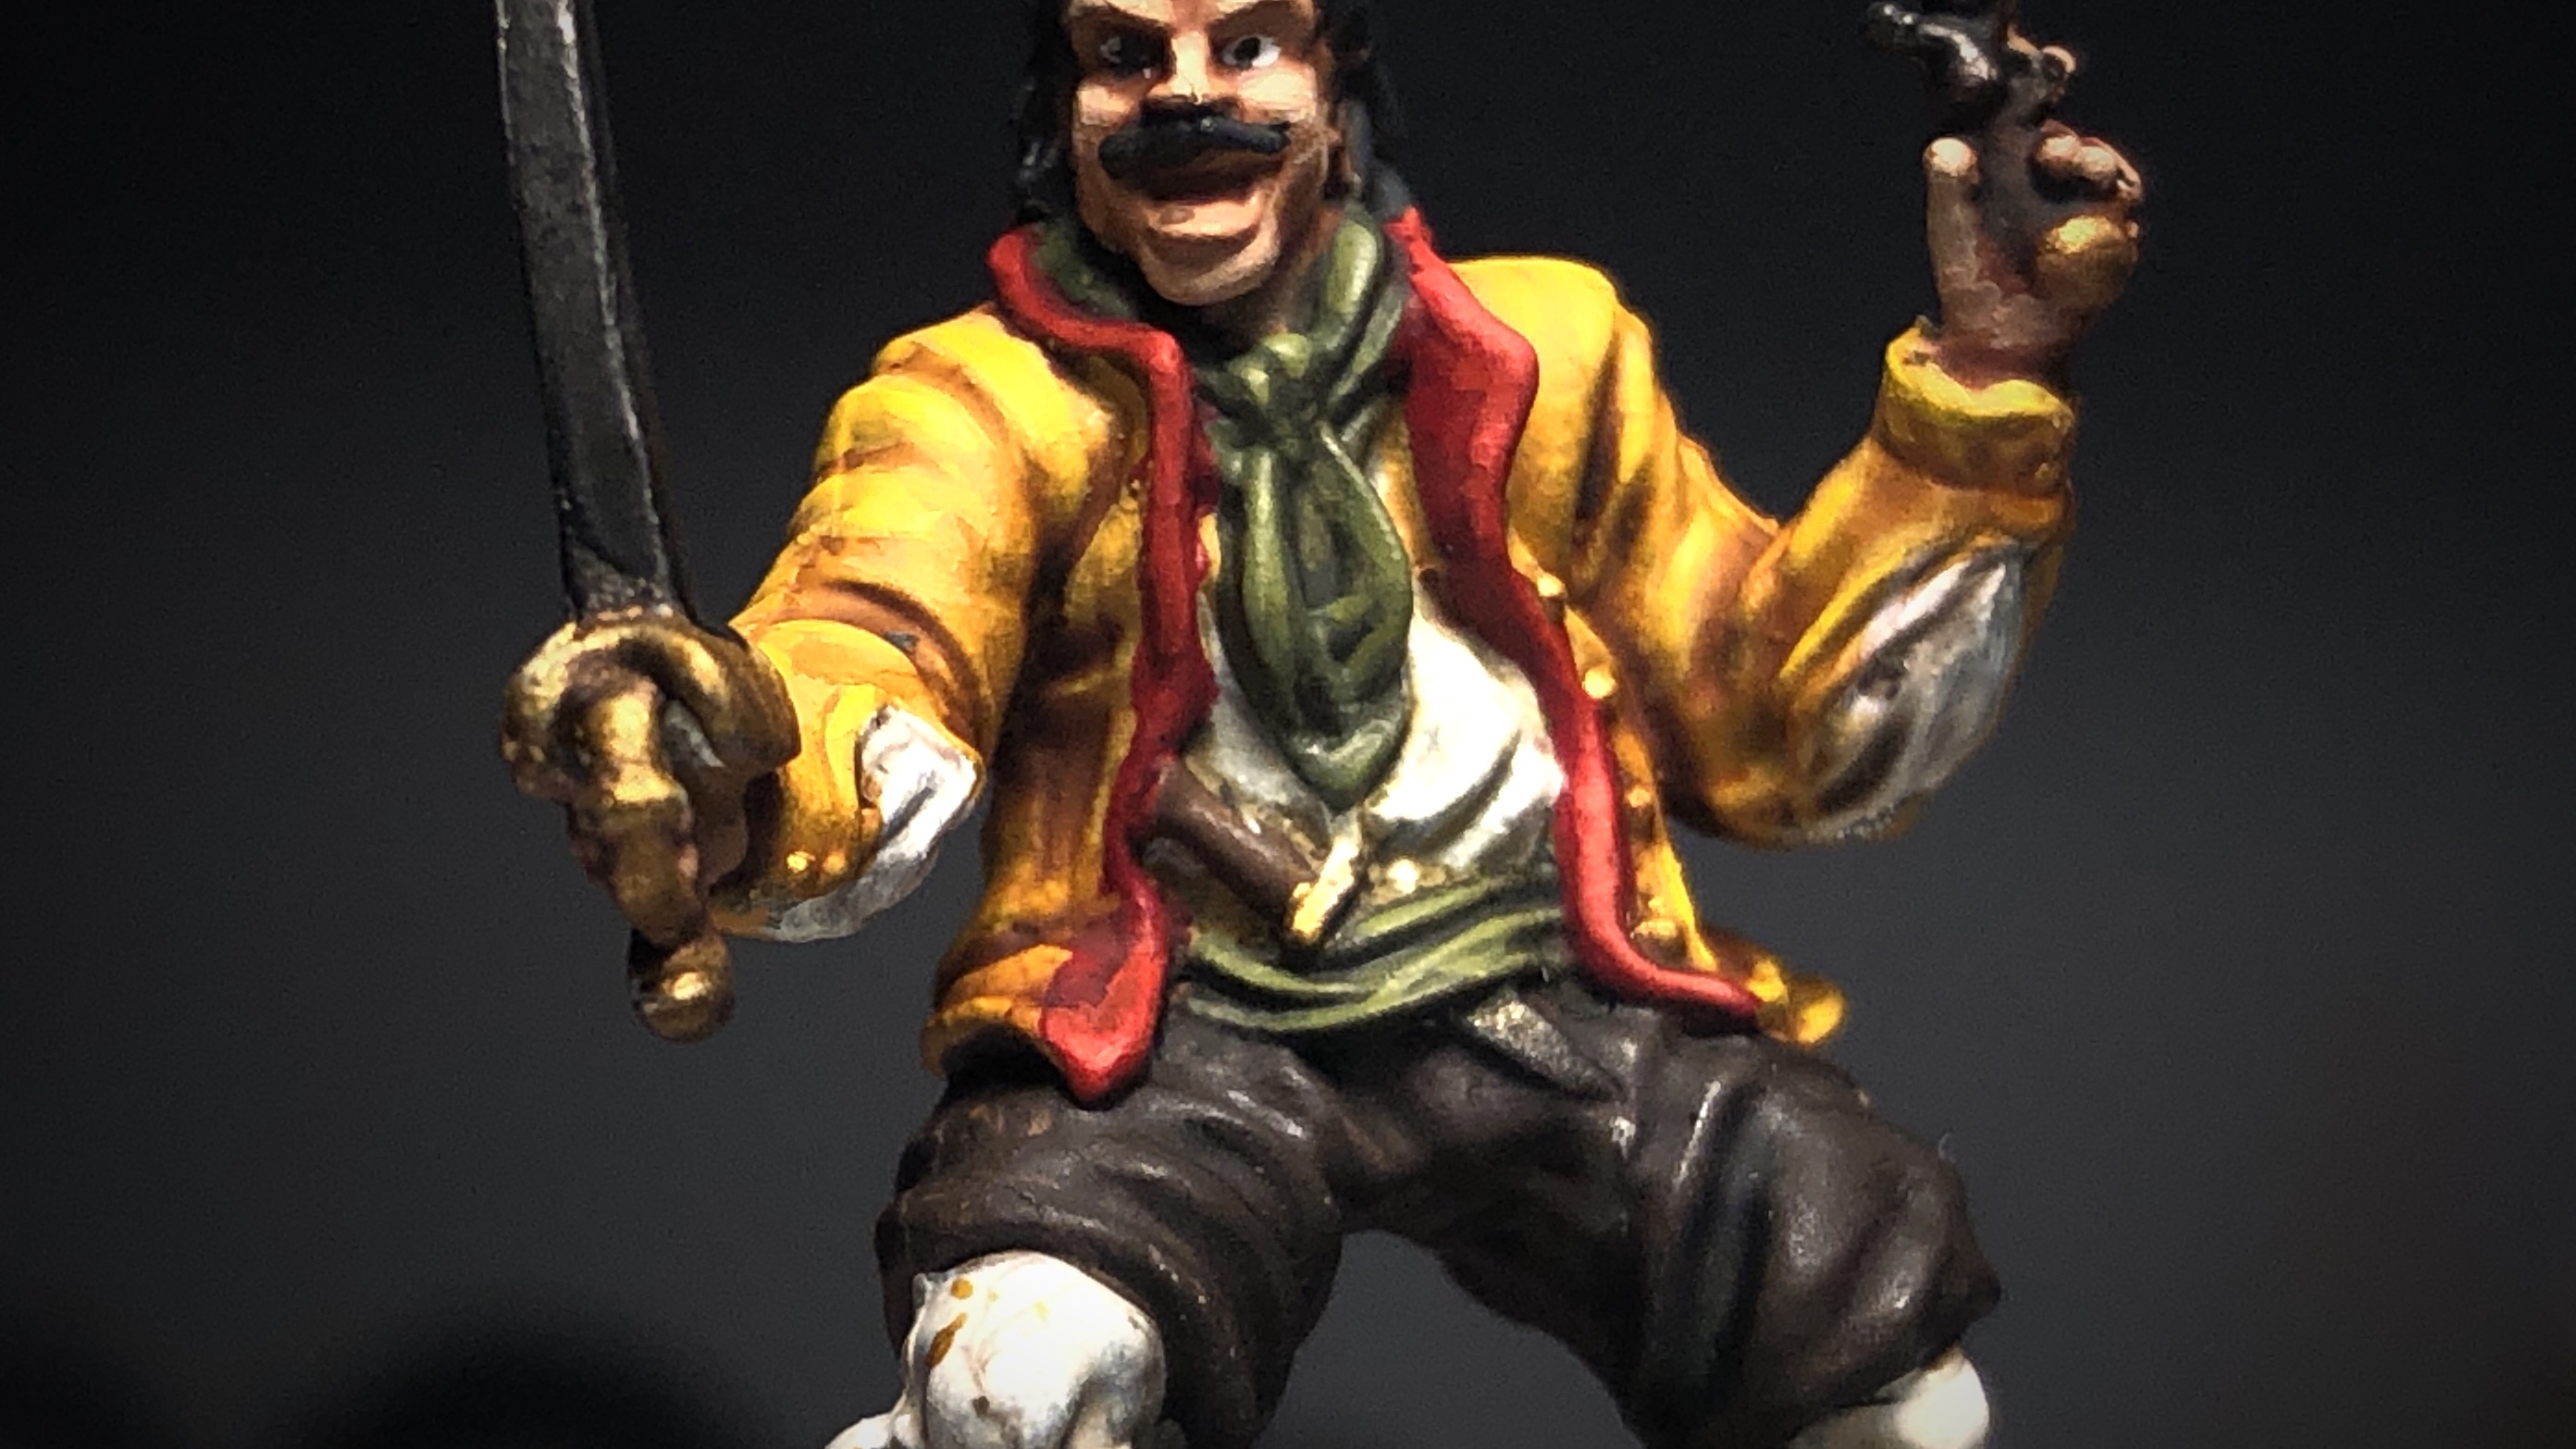
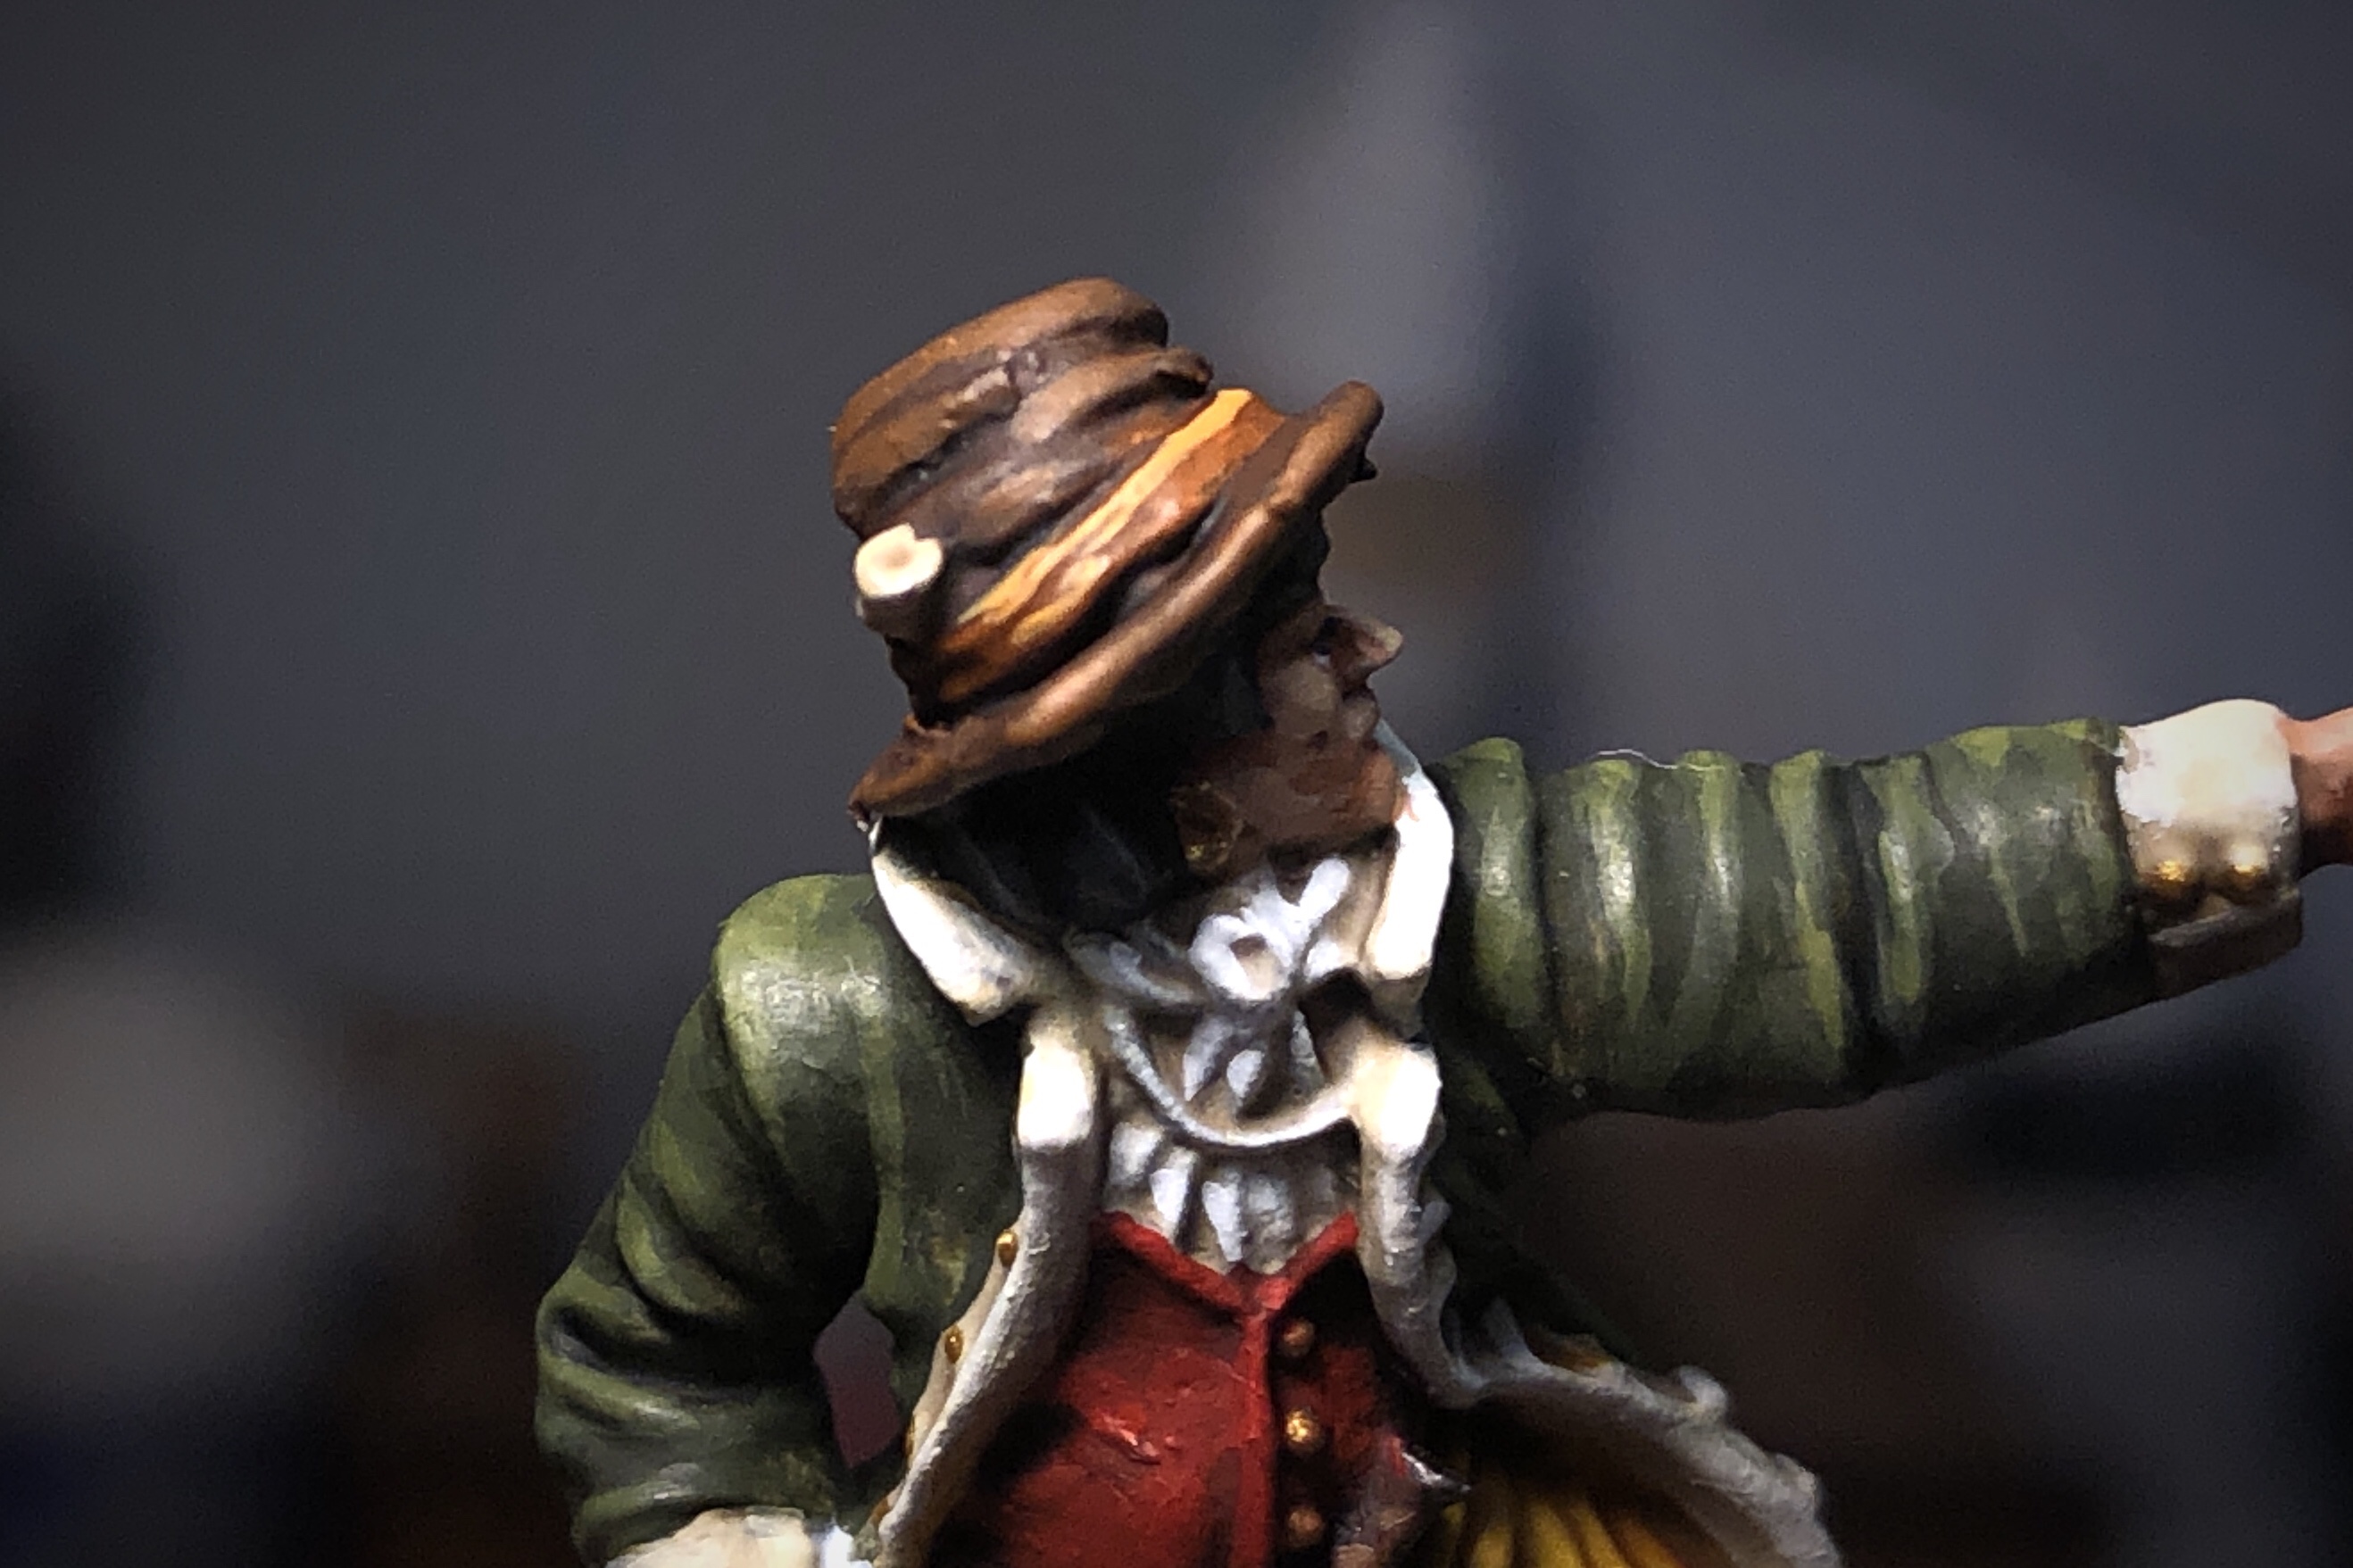
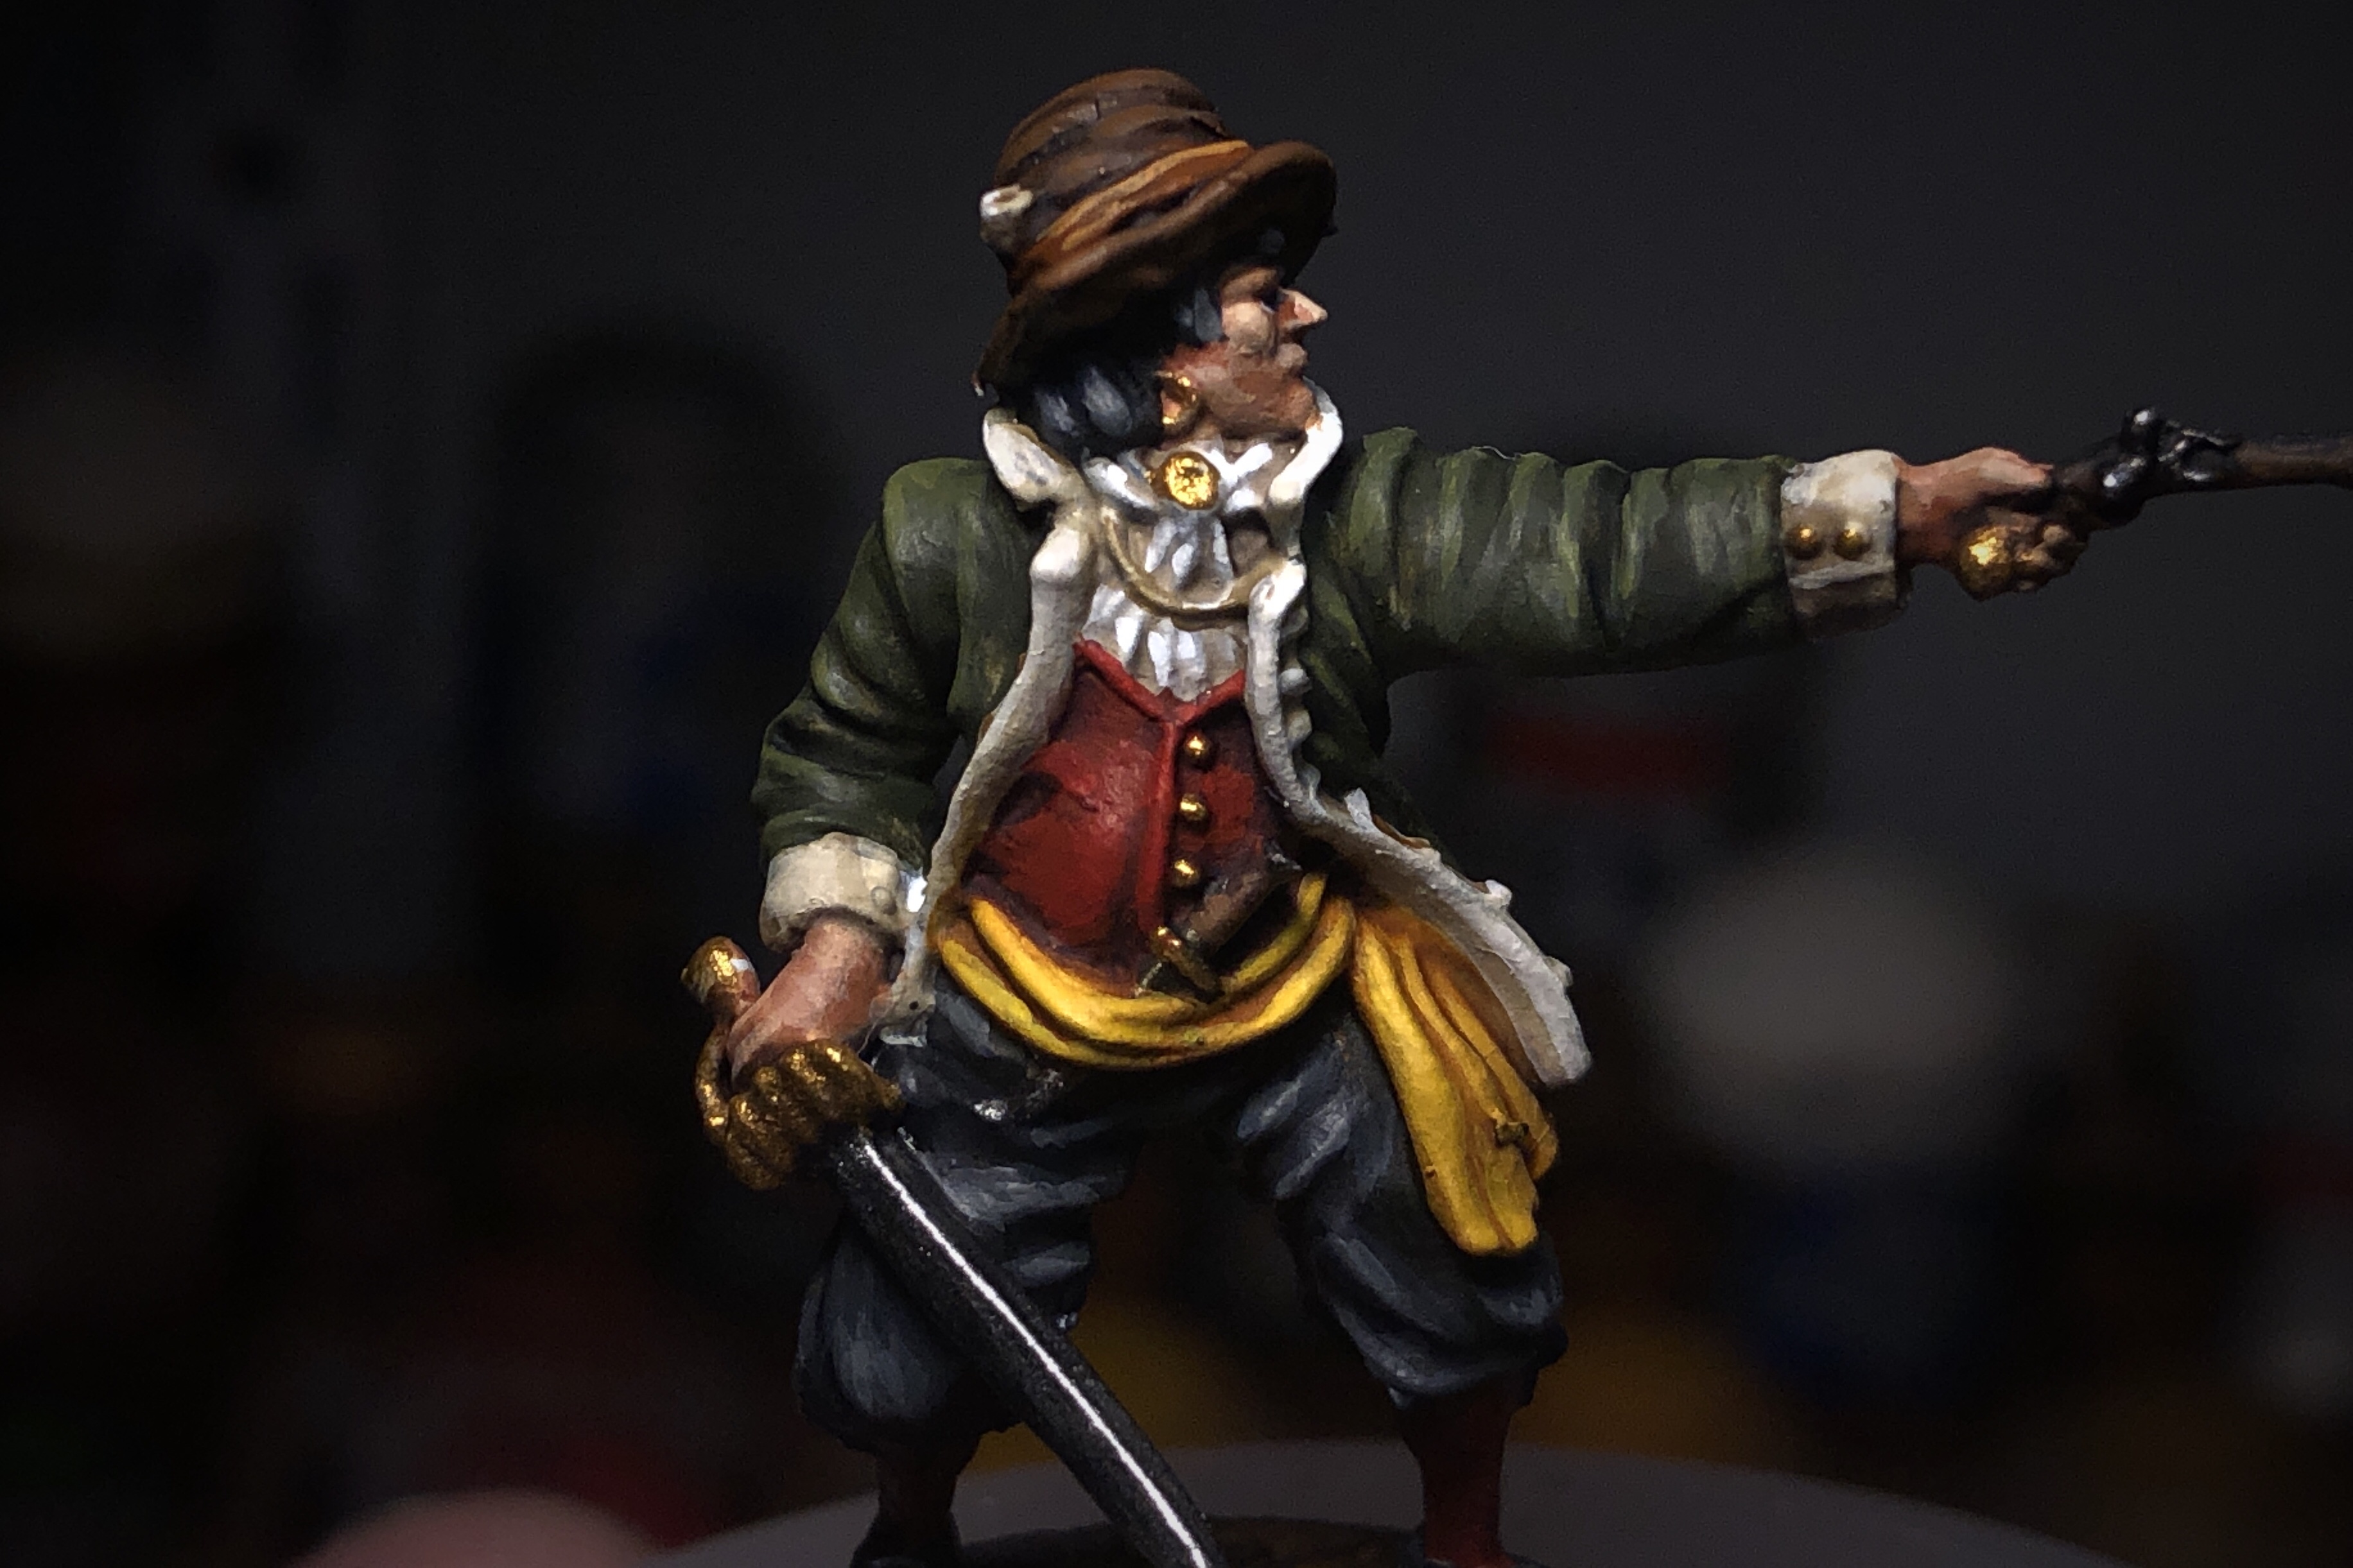
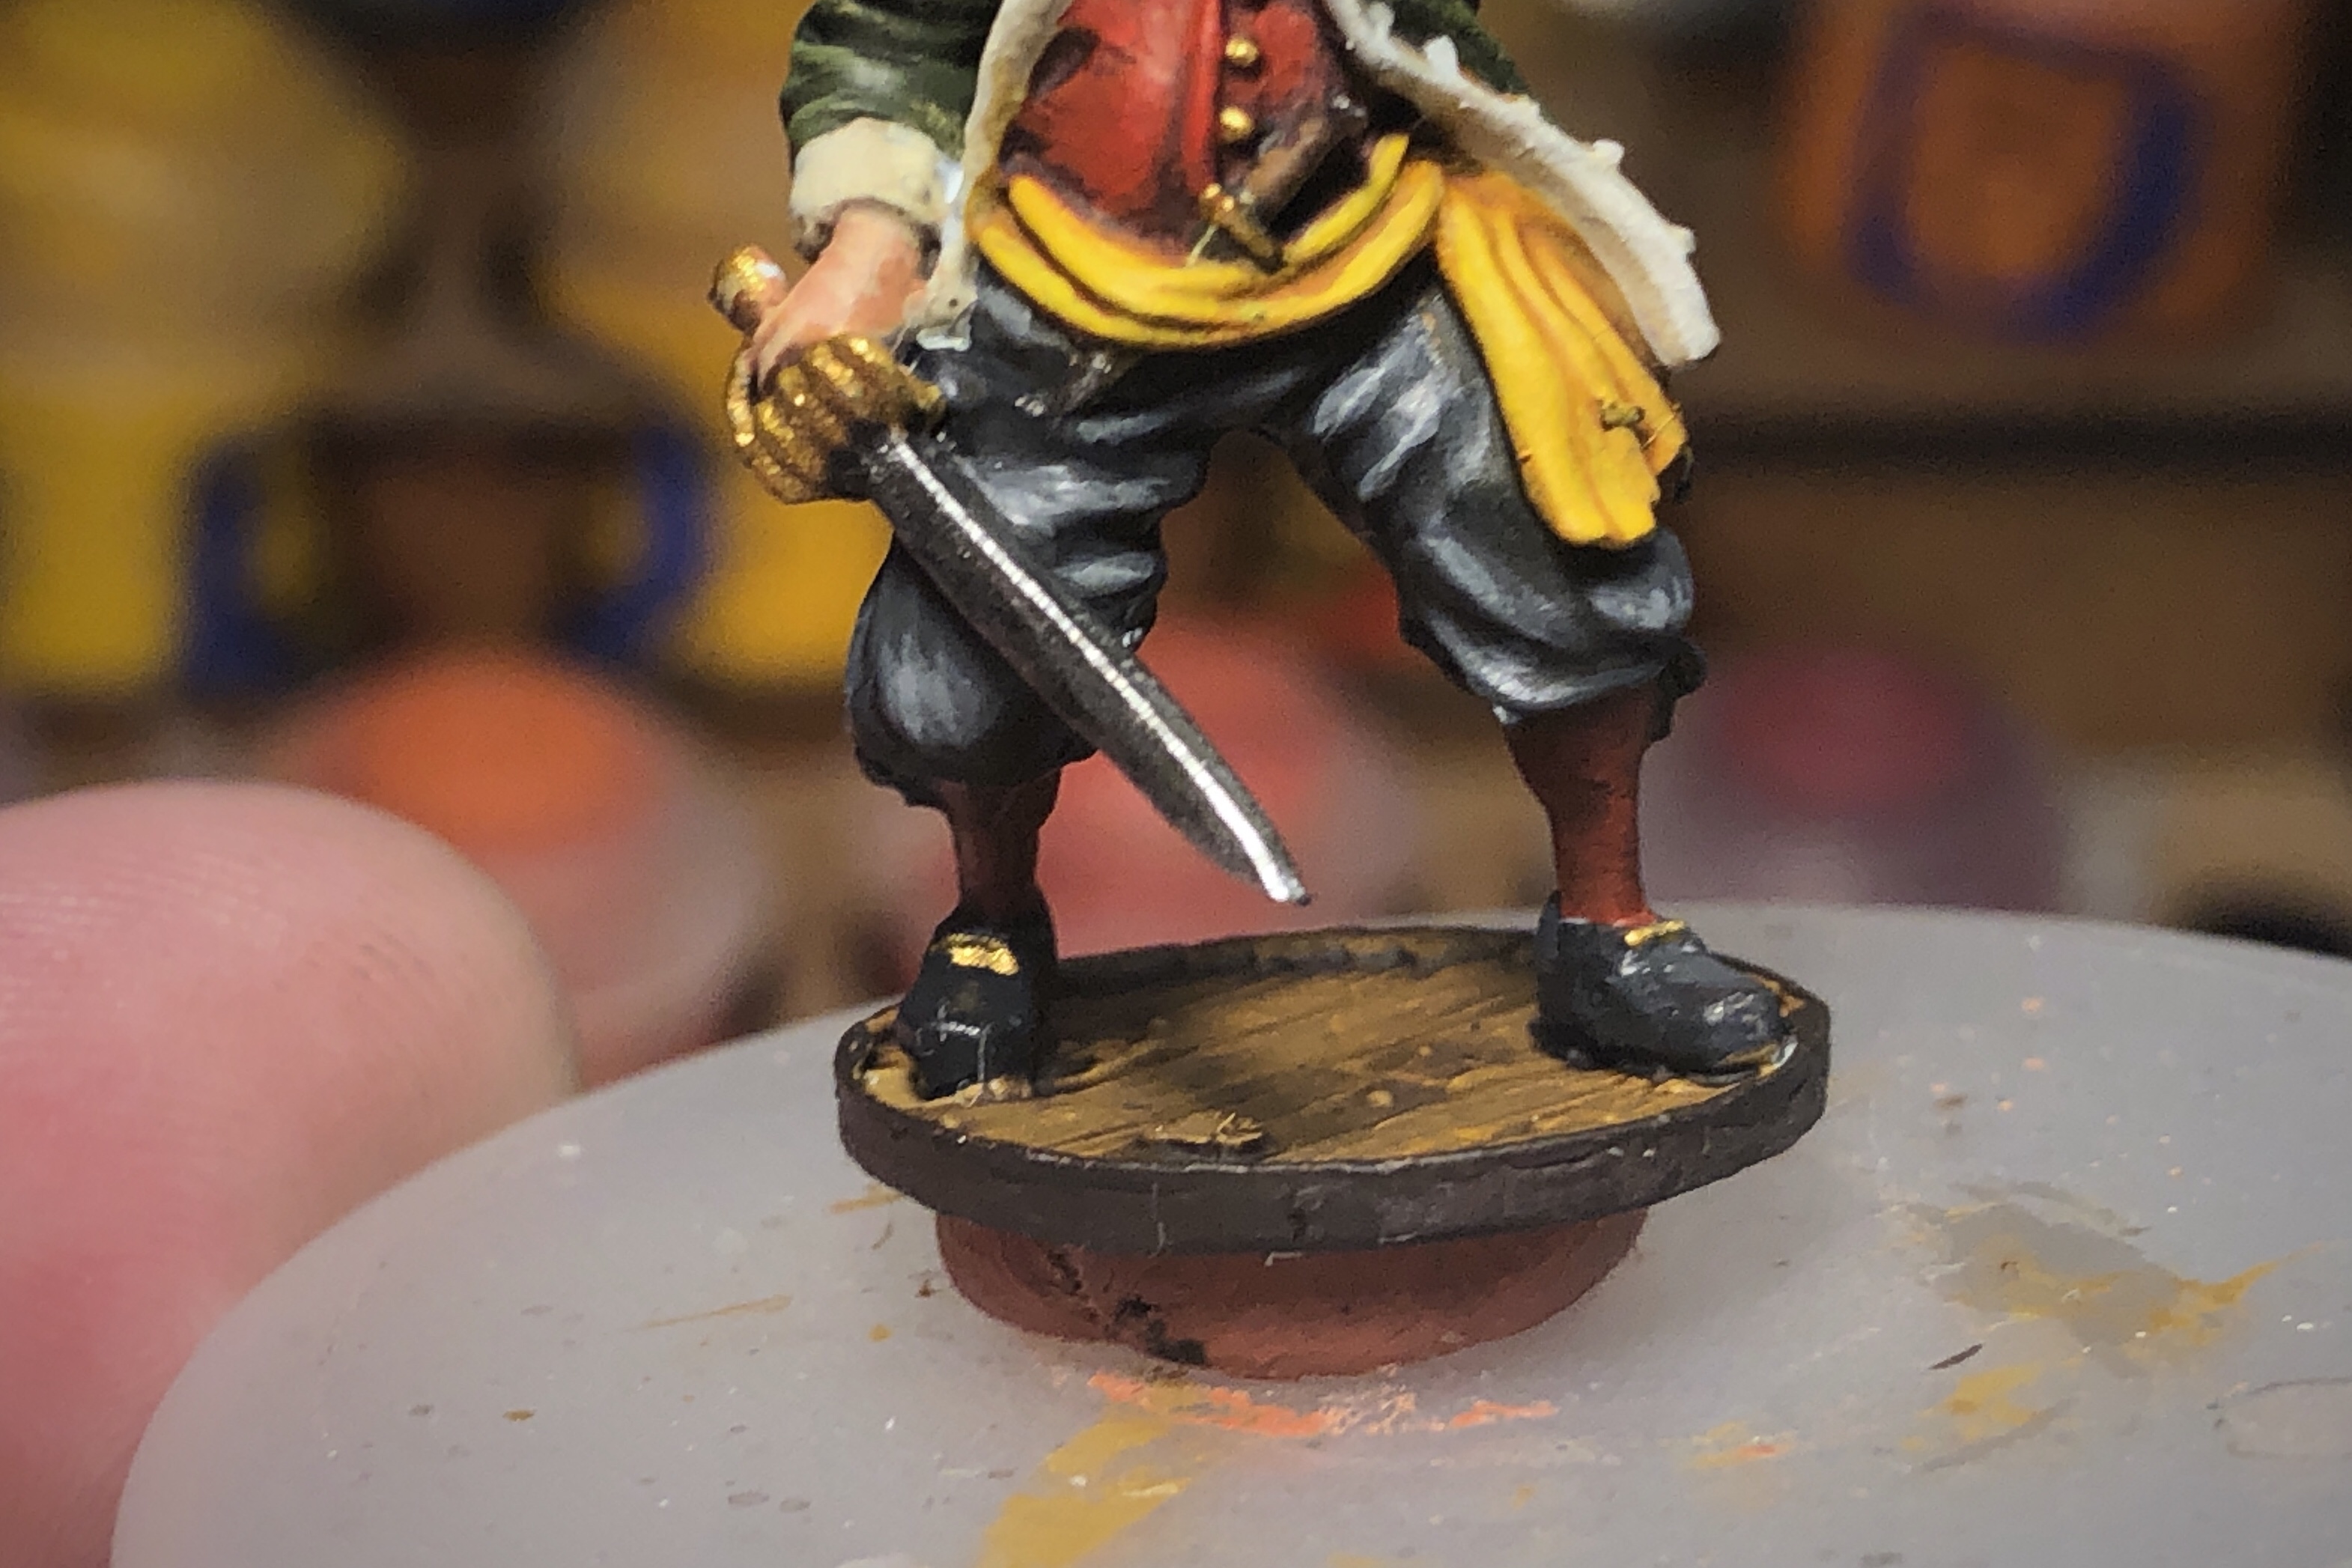
I think this is my favorite model of the set.
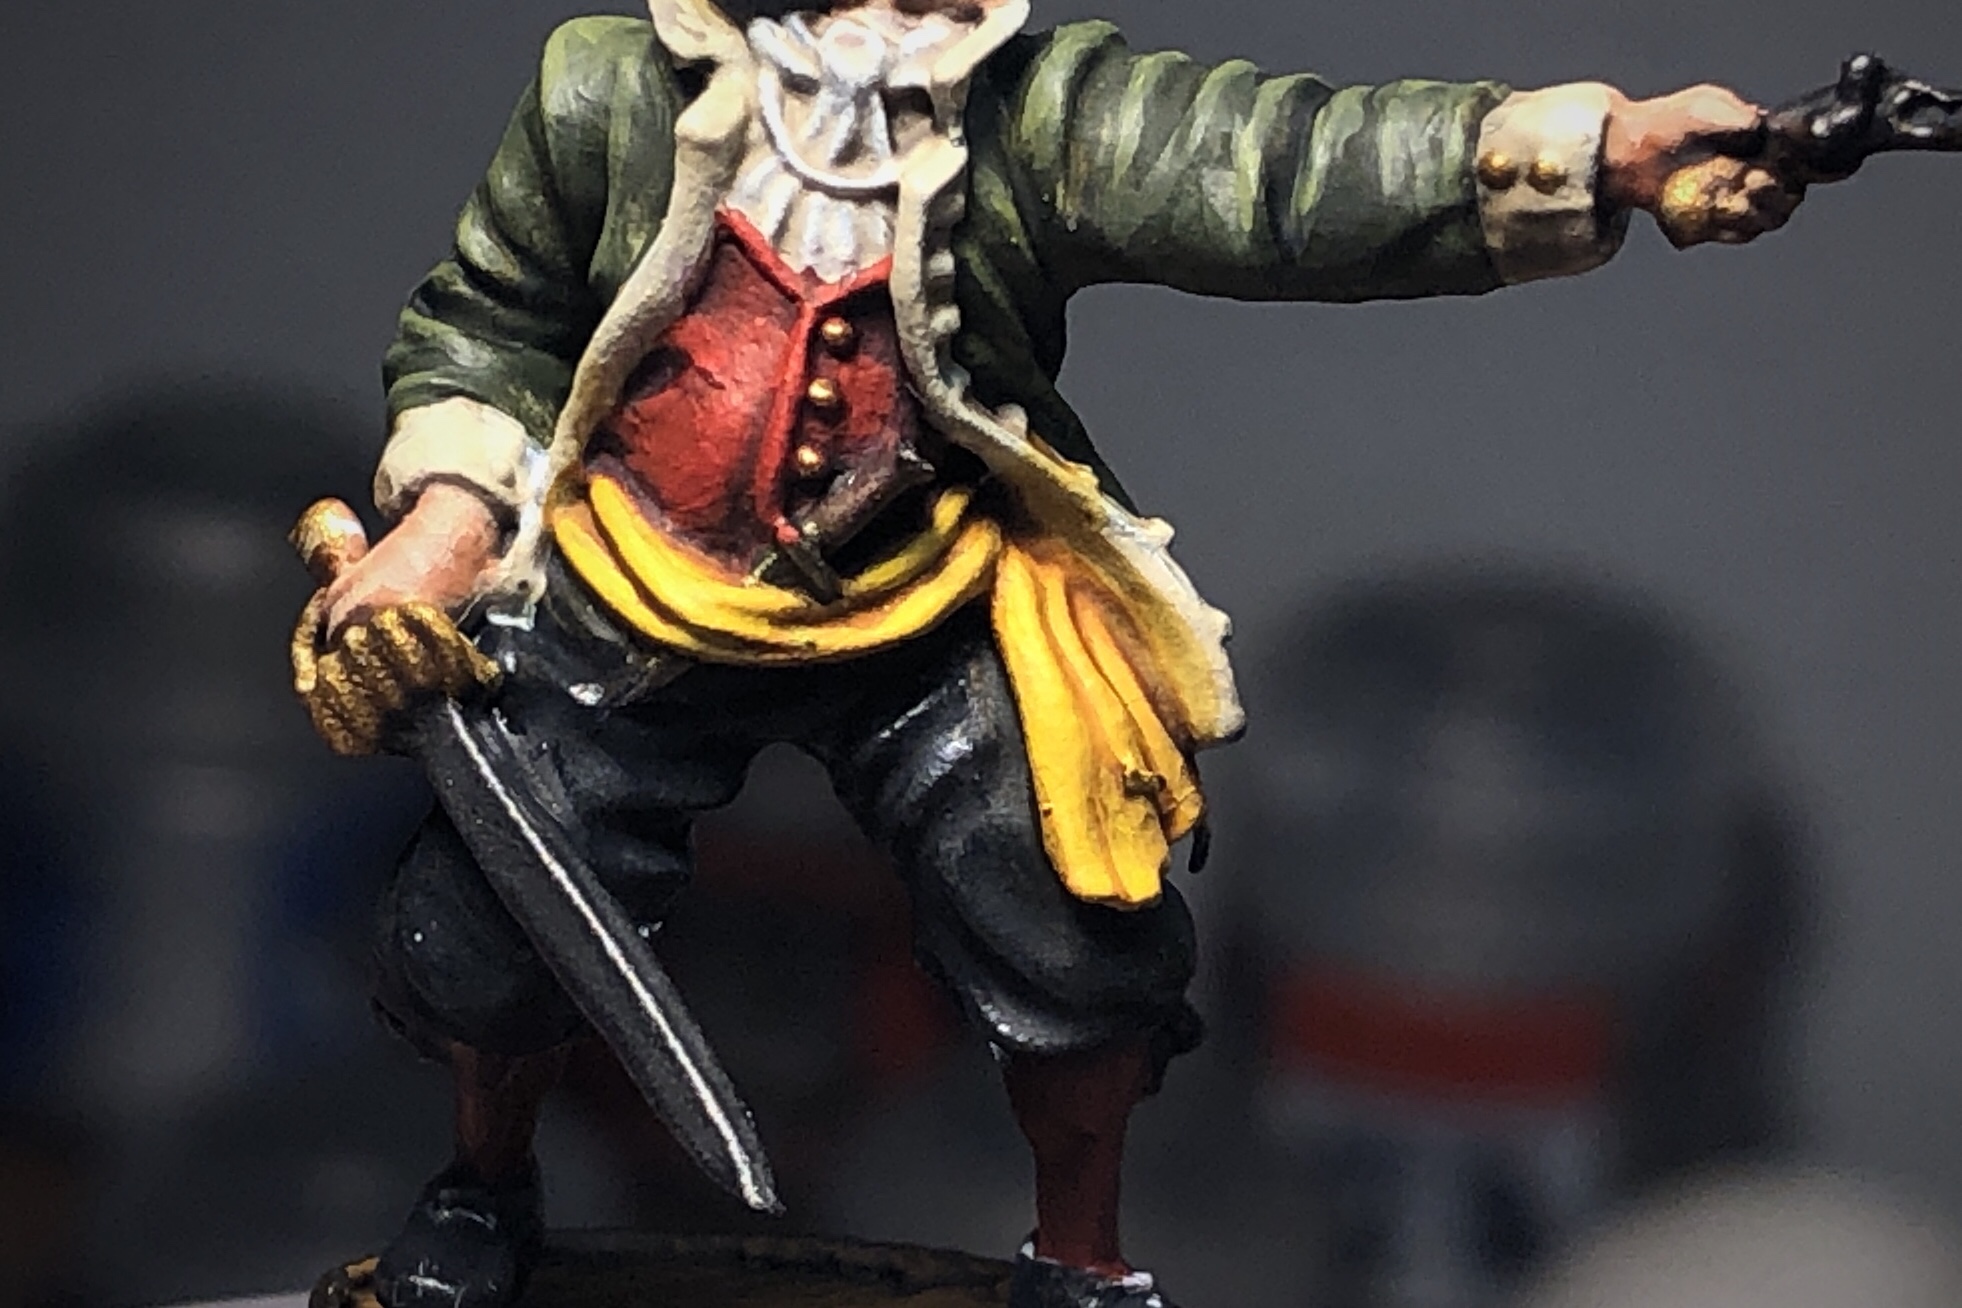
- Cadian Fleshtone for the skin
- Averland Sunset for the jacket
- Mephiston Red for the jacket trim
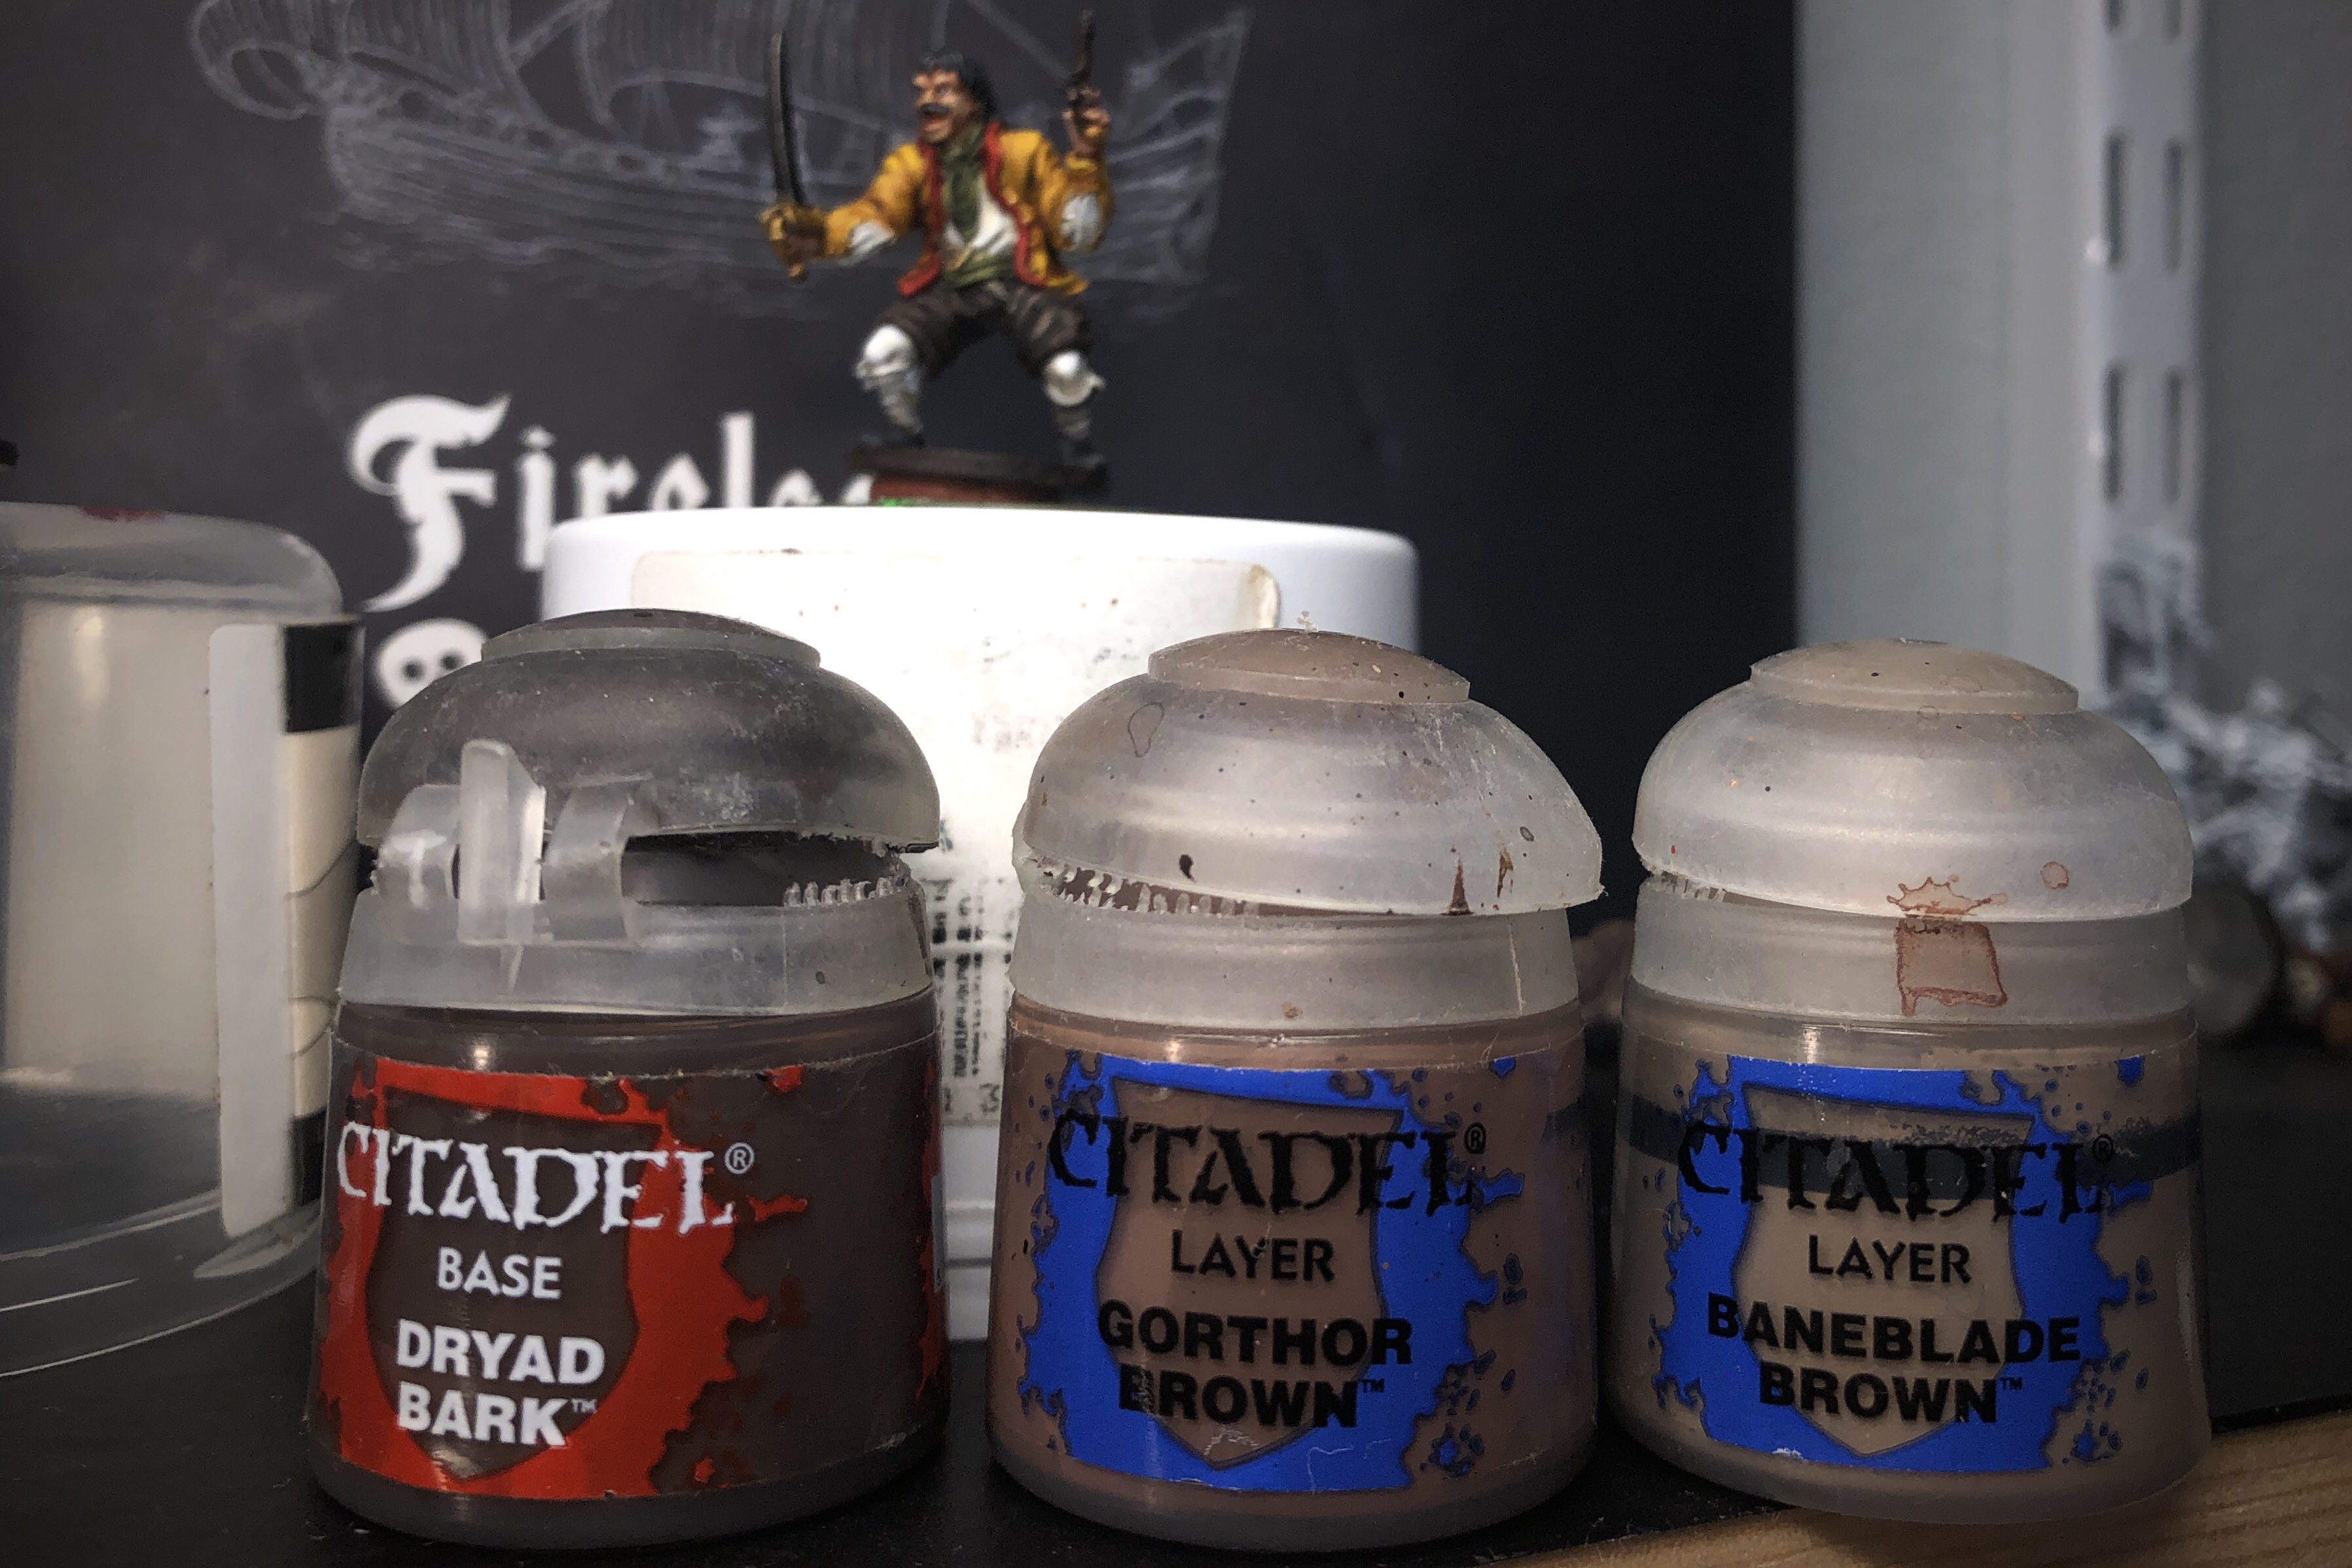
- Dryad Bark for the trousers
- Castellen Green for the sash and necktie
- XV-88 and Rhinox Hide for the base
- German Grey for the har and shoes
- Mournfang Brown for the pistol wood
- Panzer Aces Leather Brown for dagger handle
- Model Color Ivory for the stockings and shirt
- Model Color Brass for the buttons, pistol butt and sword and dagger hilt
- Metal Color Dark Aluminium for the sword blade, dagger hilt and pistol metal

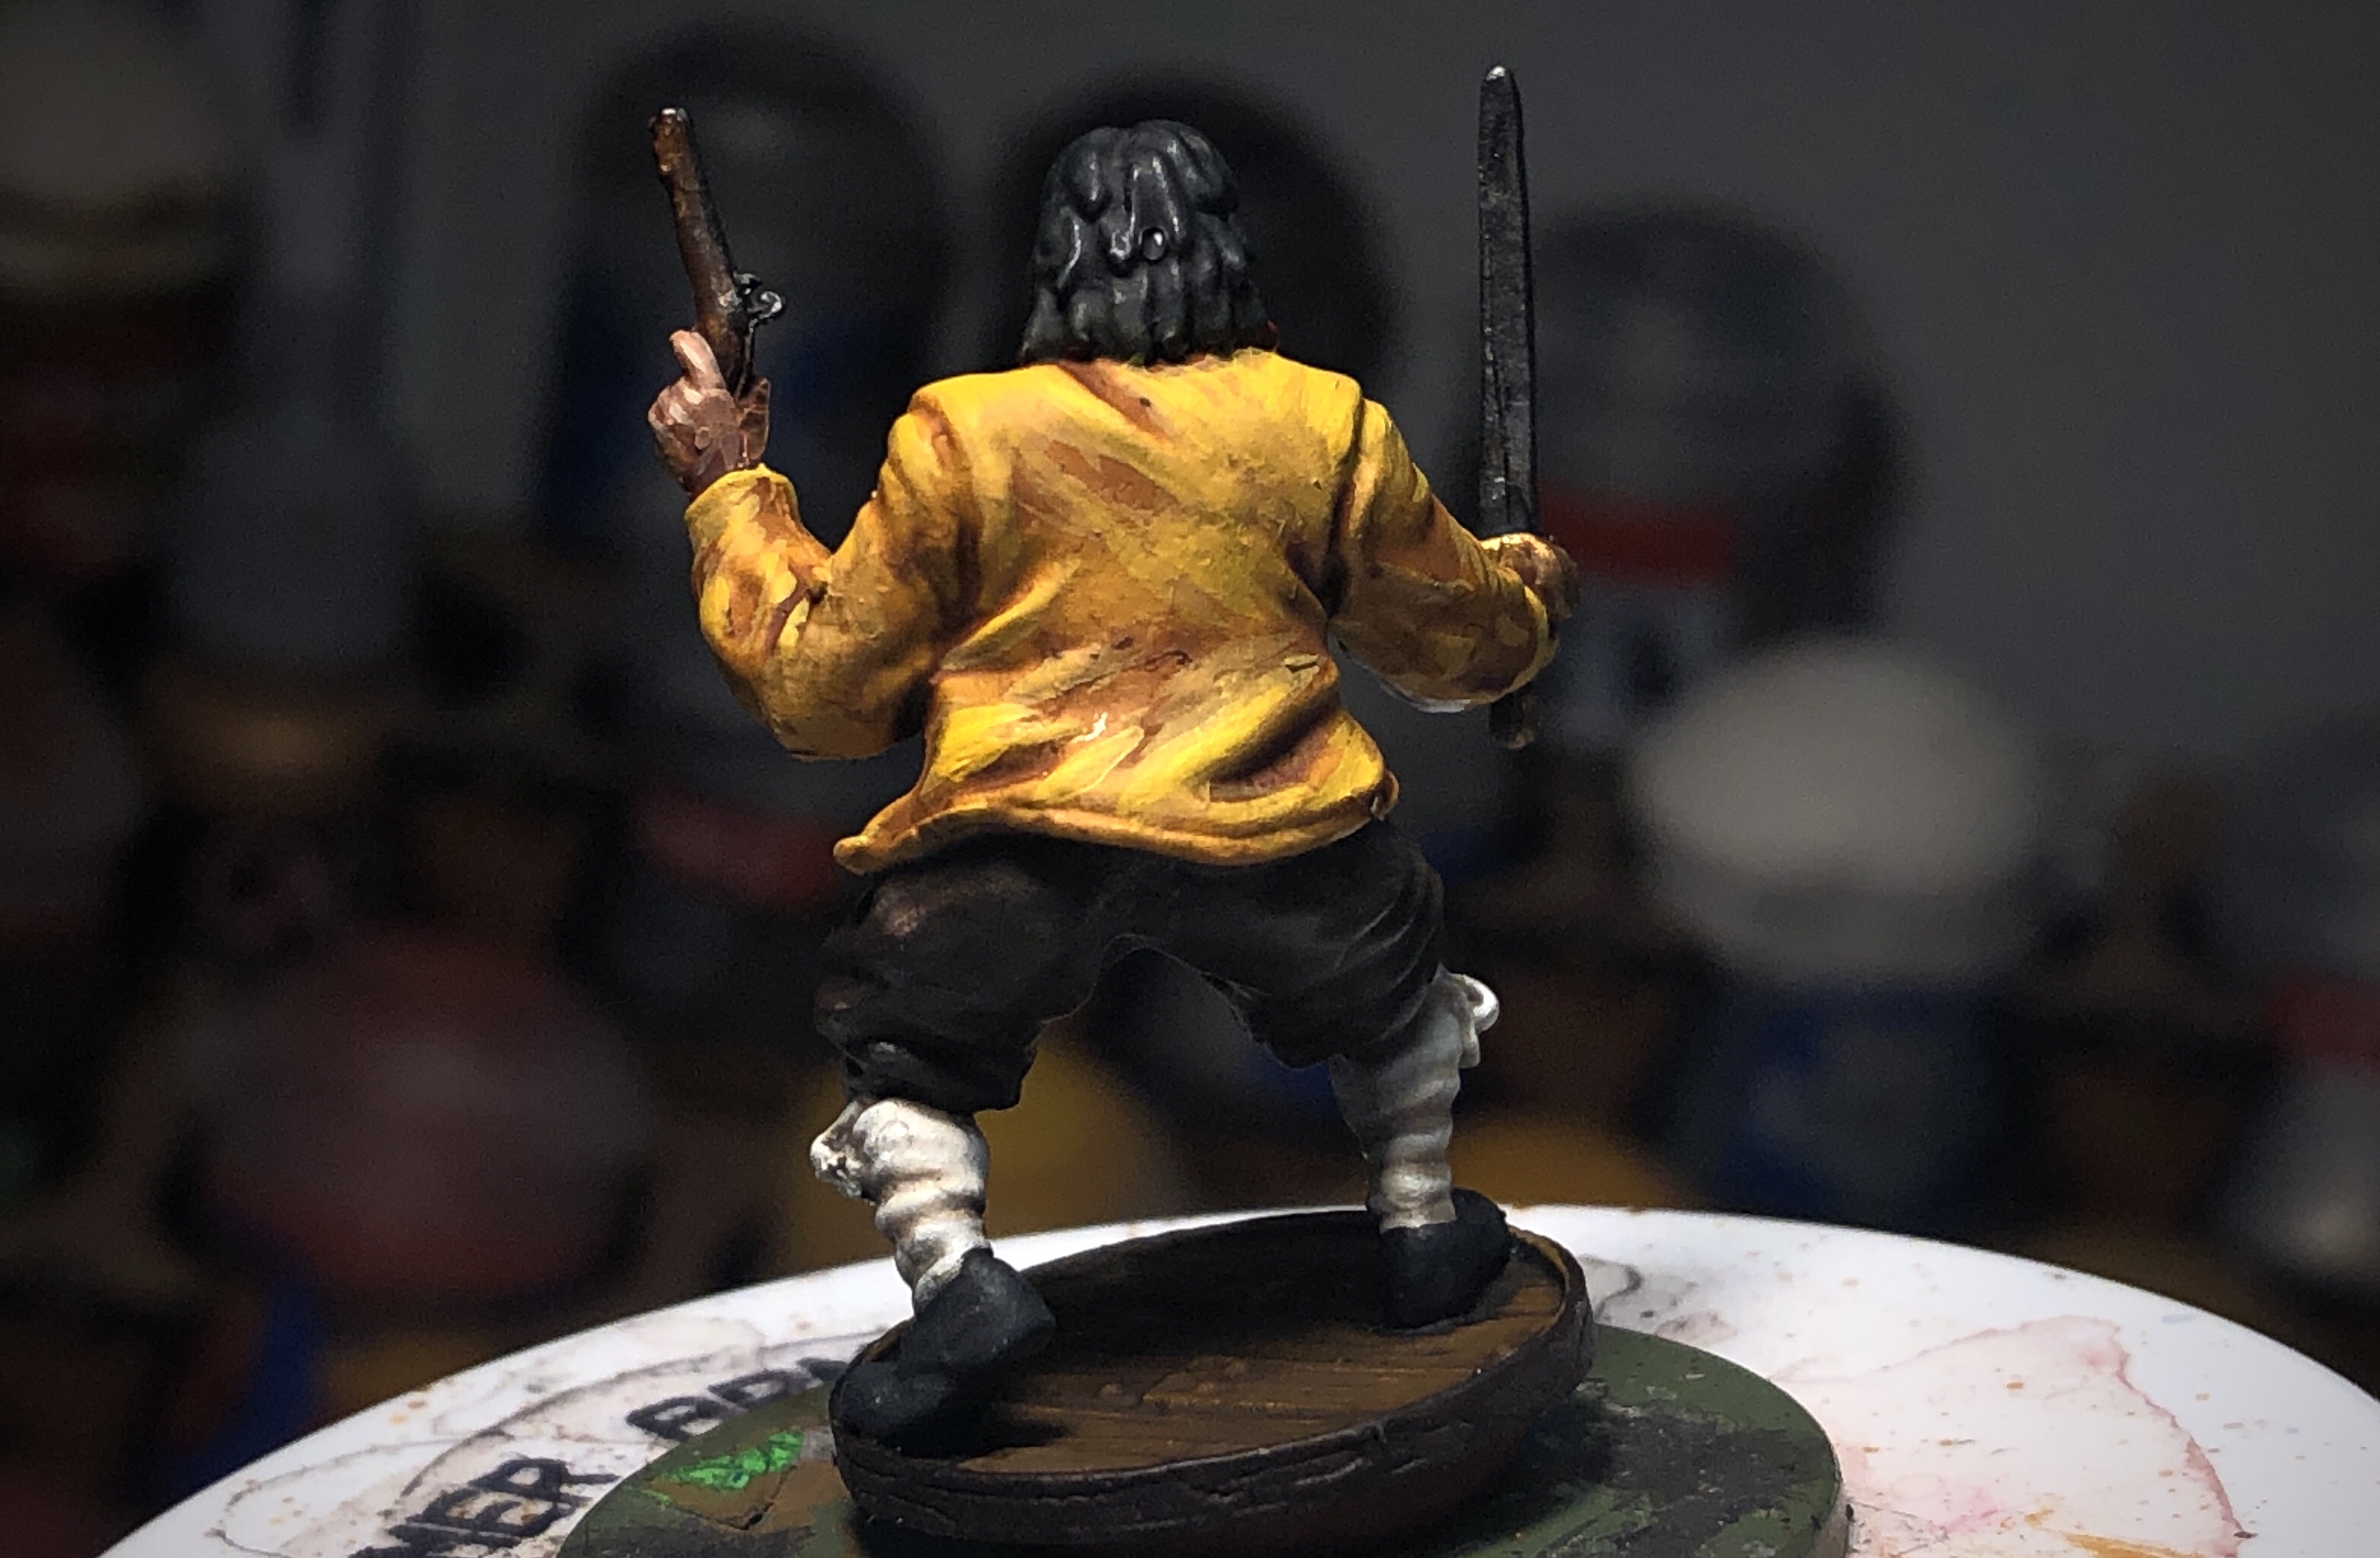
With all the base colors complete, we can move on to Shades.
Step 3 – Shades
This step going very quickly and there’s not a lot to it, provided you have these shade paints.
I used these 7 different shades along with Lahmian Medium to thin a couple of them.
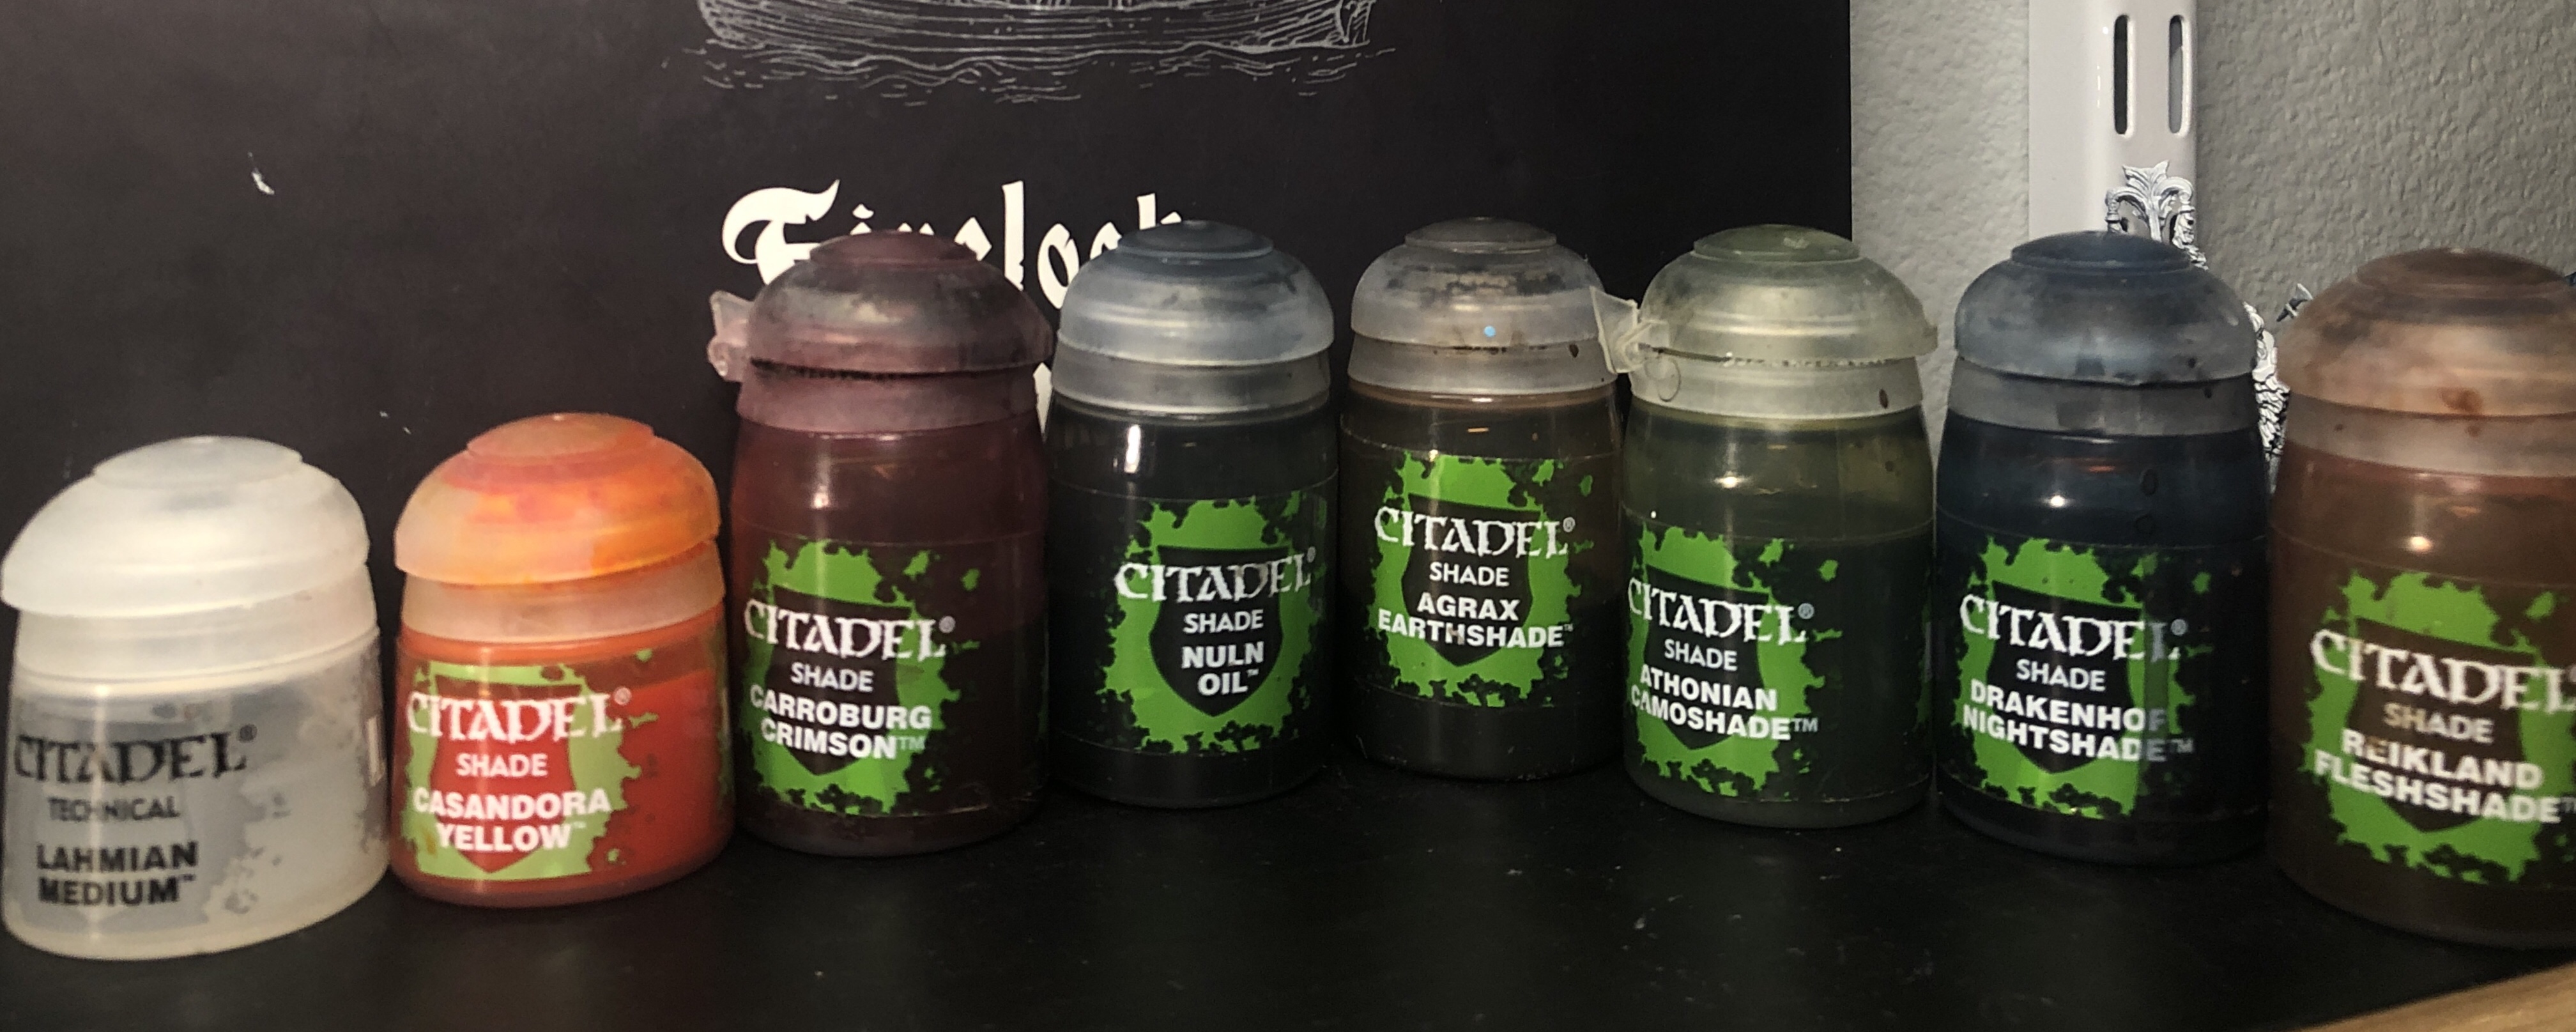
For all the skin I used Reikland Fleshshade. Be careful not to overdo the faces.

For all the yellow areas, I used Cassandora Yellow. For the jacket, I mixed in a tiny bit of the Agrax Earthshade to make it look a little more dirty.
For the steel on the pistols, swords, daggers and all the hair and the black set of pants, I used Nuln Oil.

For all the brown areas including the bases, the wood on the pistols, the dagger handles, the brown hats and the sword hilts, I used straight Agrax Earthshade.
The different shades of white and off-white, I mixed Agrax Earthshade and Nuln Oil together, then thinned it with Lahmian Medium, or water to tone it down a little.
For the green jackets, sashes and neckties, I used Athonian Camoshade.
For the red areas, I used straight Carroburg Crimson for the areas I based with Mephiston Red and a mix of Carroburg Crimson and Agrax Earthshade for the areas I based with Cavalry Brown. I covered the entire area of the red/black striped pants with the Agrax/Carroburg mixture as well.
Step 4 – Highlights
I always start the highlight step by doing the eyes (which are not highlights). These are a pain to paint and optional but I like how eyes bring a miniature to life so I try to give all my minis a bit of color for eyes.
First I apply a thin sliver of Ivory. Use your smallest brush here but also don’t worry if the whites are a little large because you can touch them up with the flesh highlights in a minute.
These white are crooked but I’ll even them out.

A little messy but just shrinking the eyes a tiny bit with the fleshtone will make these eyes perfectly acceptable.
Then I apply a dot of German Grey in the middle of the Ivory. It’s more important you control your brush here as a large blob of black will force you to re apply the Ivory. Doesn’t have to be perfect but you don’t want googly eyes either.
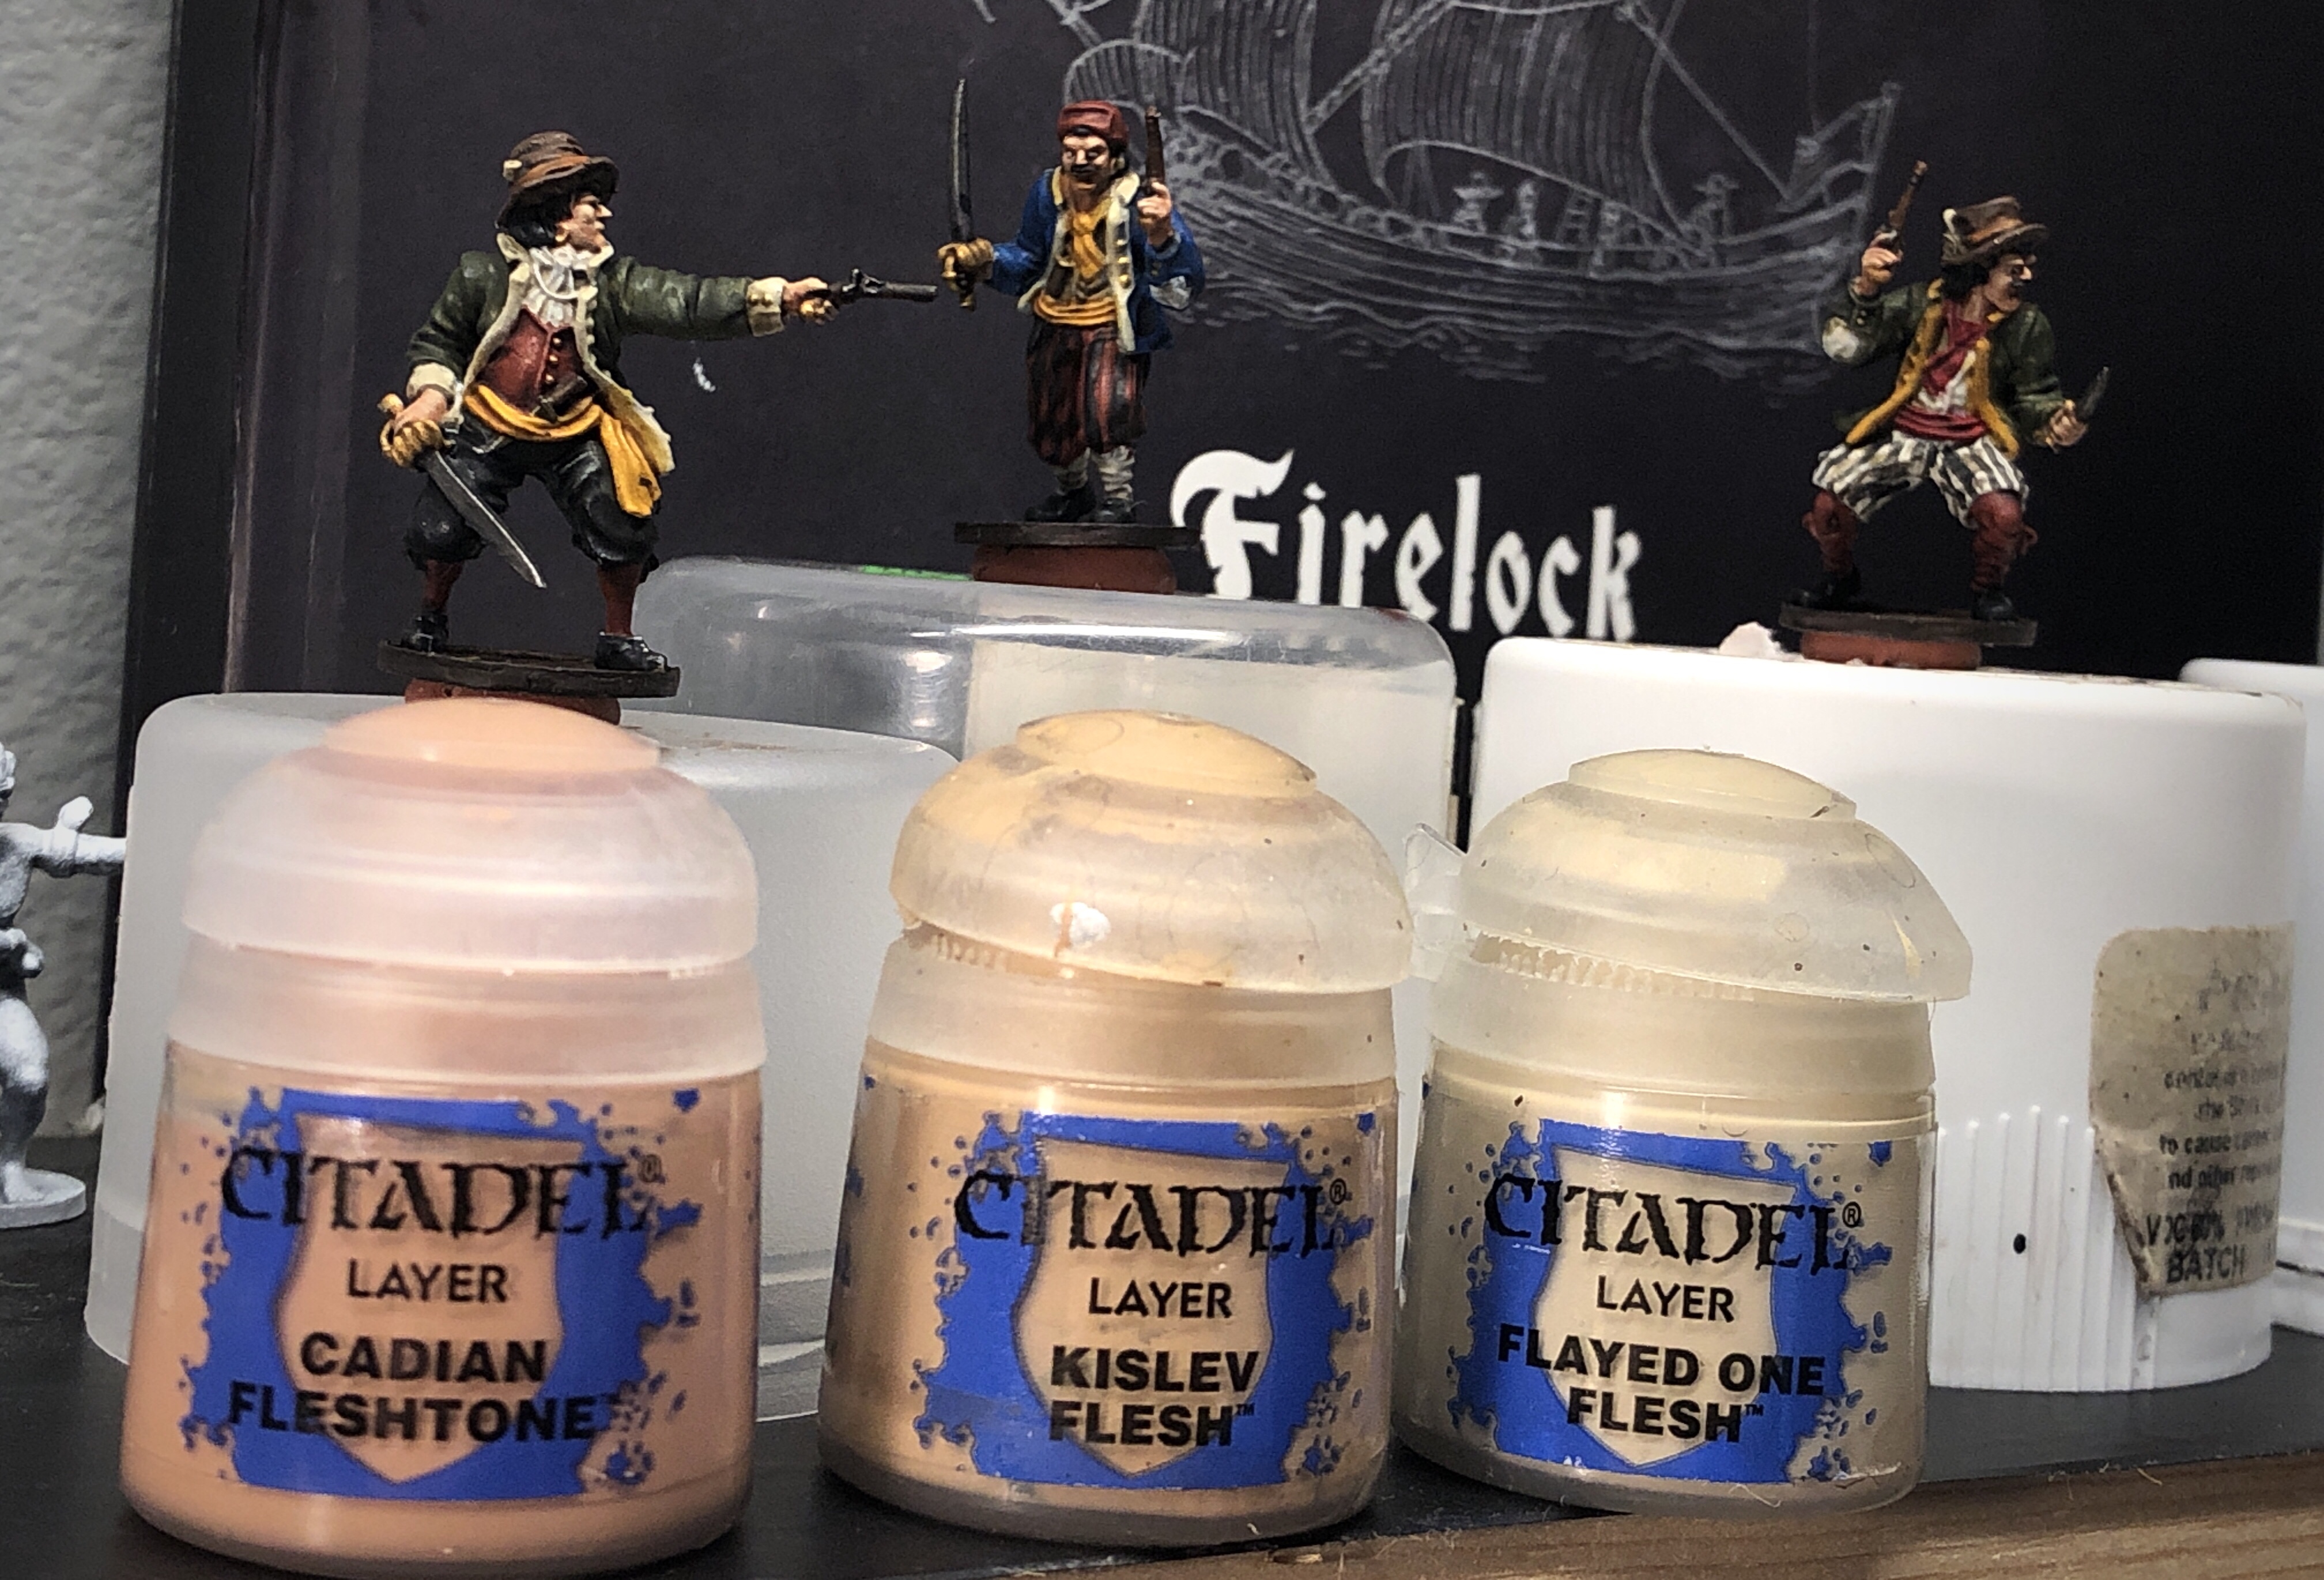
Next I highlight the skin. There’s no particular reason you have to do the skin first, but it kind of brings the mini to life and its more pleasant to look at while you continue to work on it.
First I re-apply the original Cadian Fleshtone very thinly to all the raised areas of the face.

Then I mixed in Kislev Flesh and reduced the area of highlight. Cheeks, eyebrows, nose, chin and fingers all need to be covered.
I moved to pure Kislev, then Kislev Flesh with a little Flayed One Flesh and finally a couple highlights on pure Flayed One Flesh. I’ll be coming back later to apply a glaze to the cheeks/chin where you might see a five-o-clock shadow.
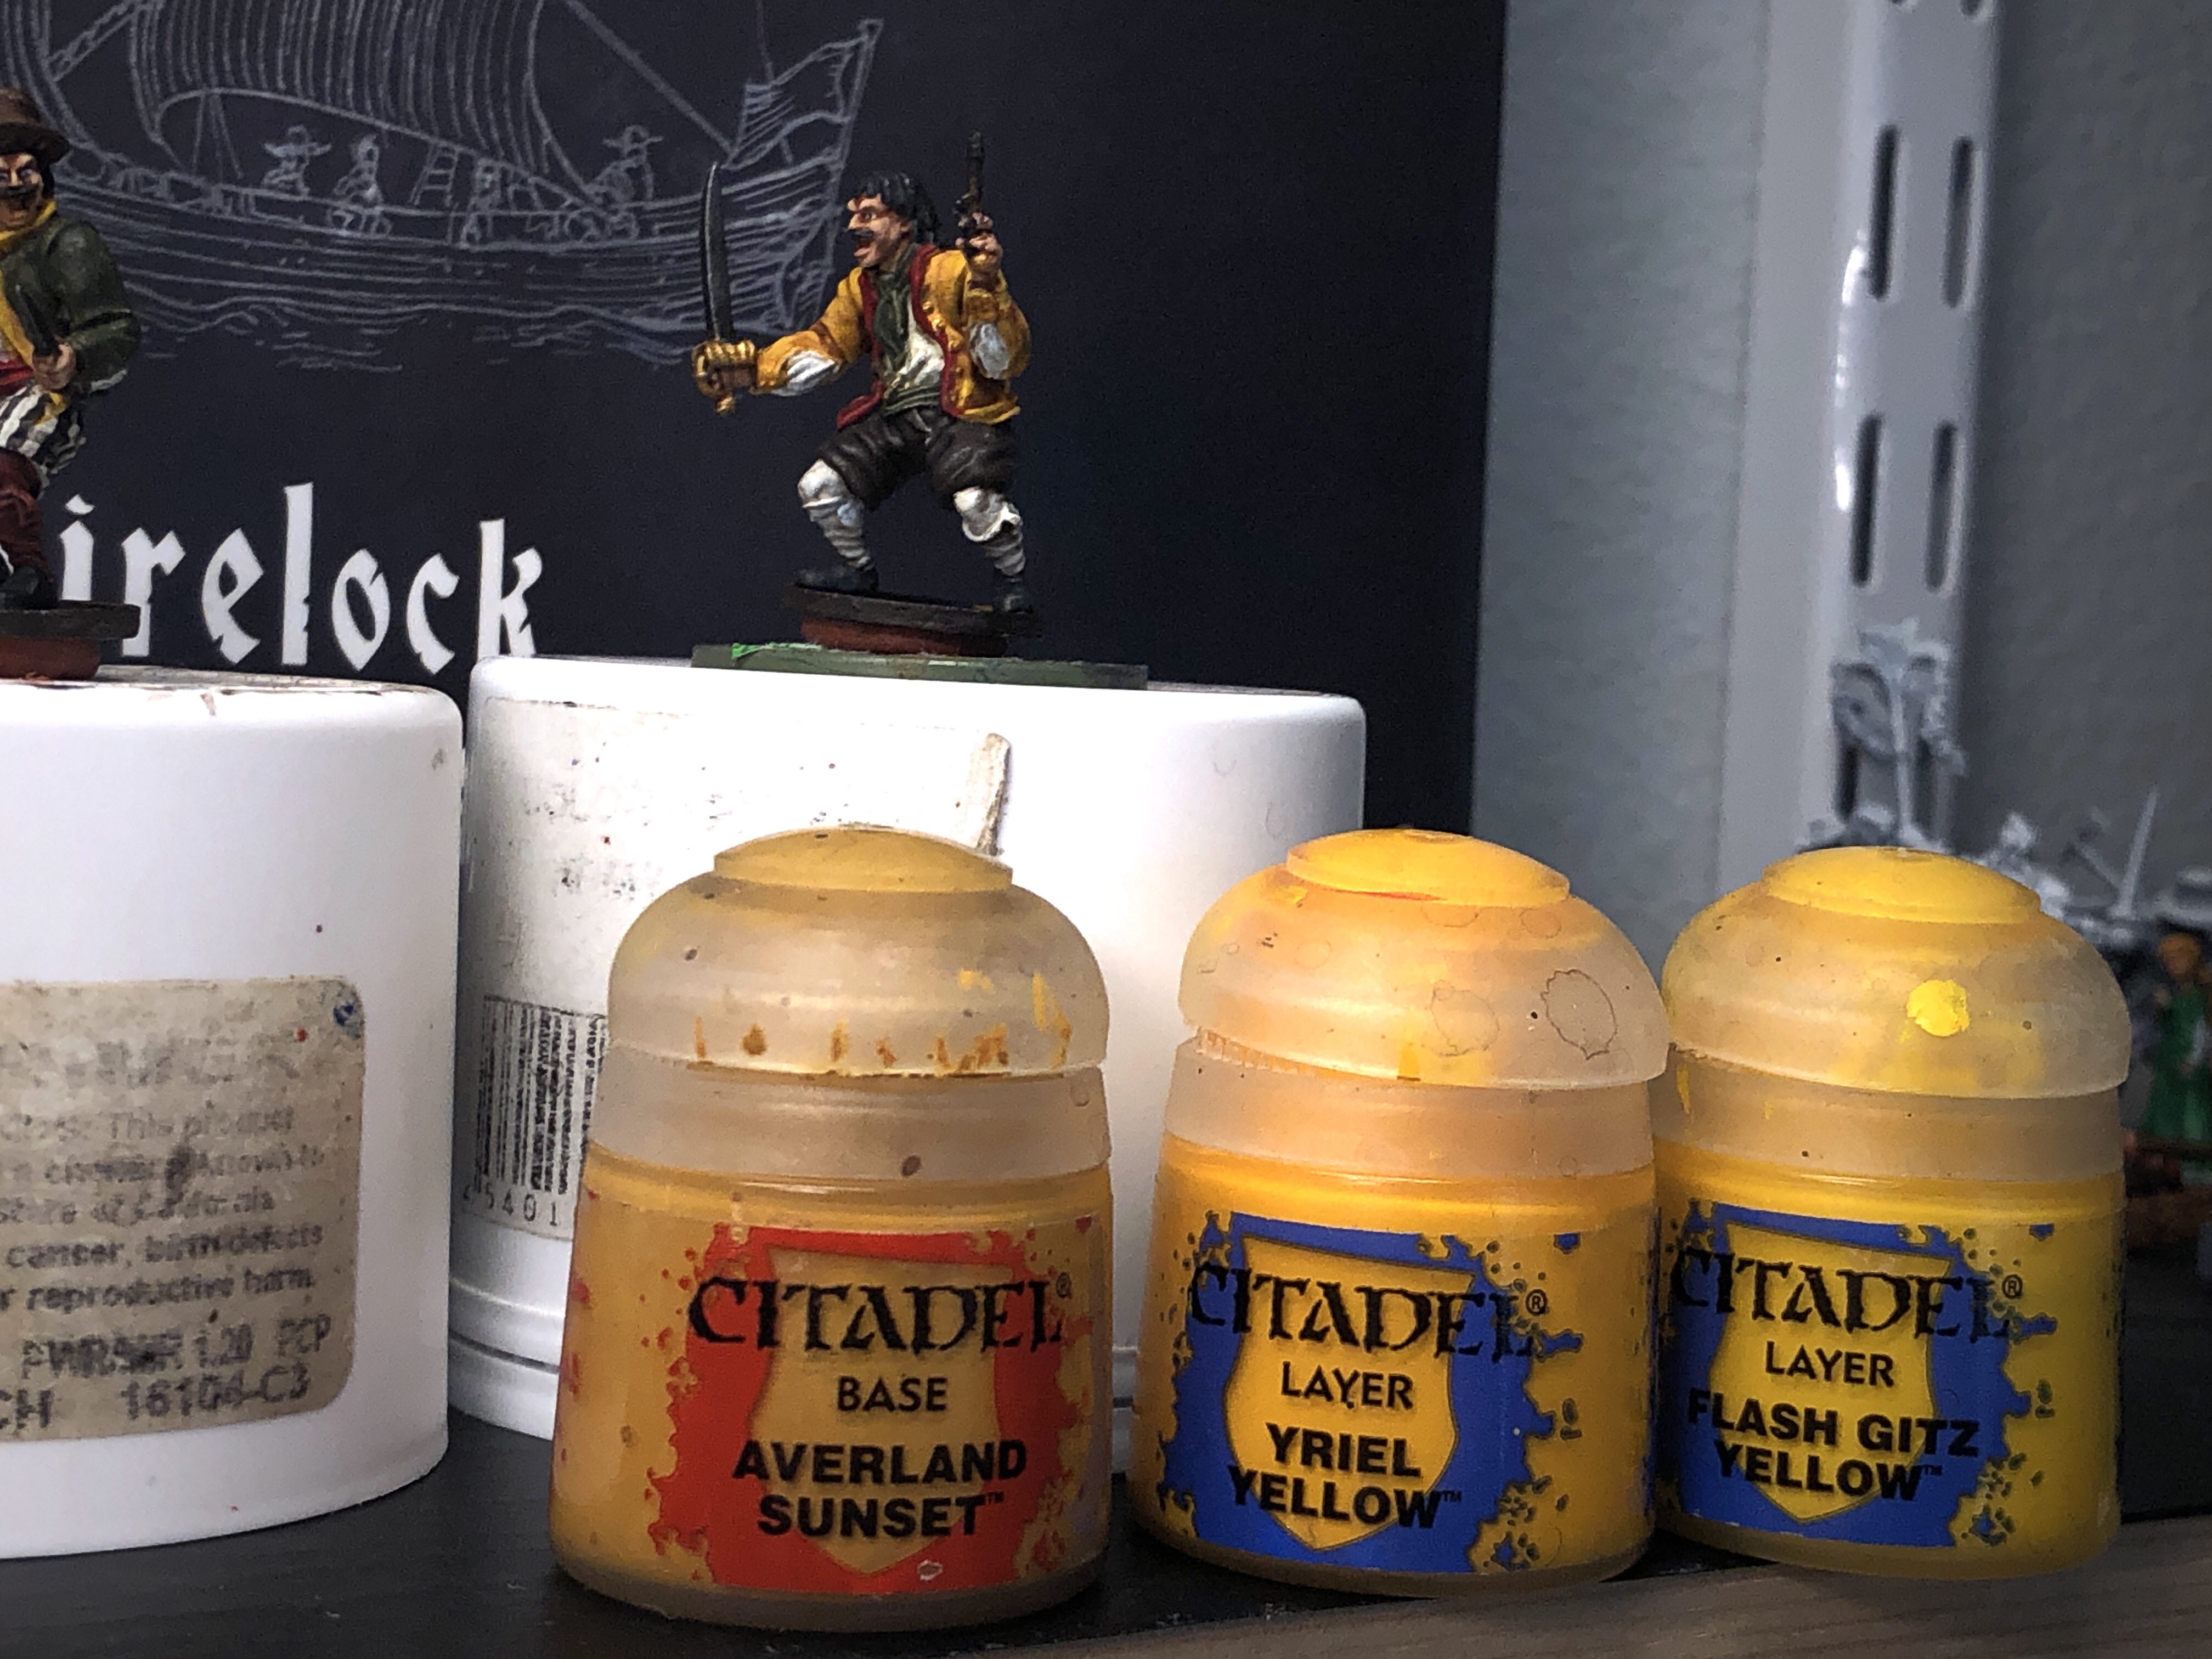
Next I highlighted the yellows, starting with a a little Averland Sunset, but I found it just looked really saturated by itself so I basically moved straight to Yriel Yellow for most of the highlights. Yellow is so translucent, it’s pretty forgiving if you move to a brighter shade quickly.
HIghlight the trim on this fellow.

Before
And after
This model certainly had the most yellow.
Before
And after highlights
Plenty of delightful folds and creases in this jacket to highlight.
The green jackets also take highlights very nicely.
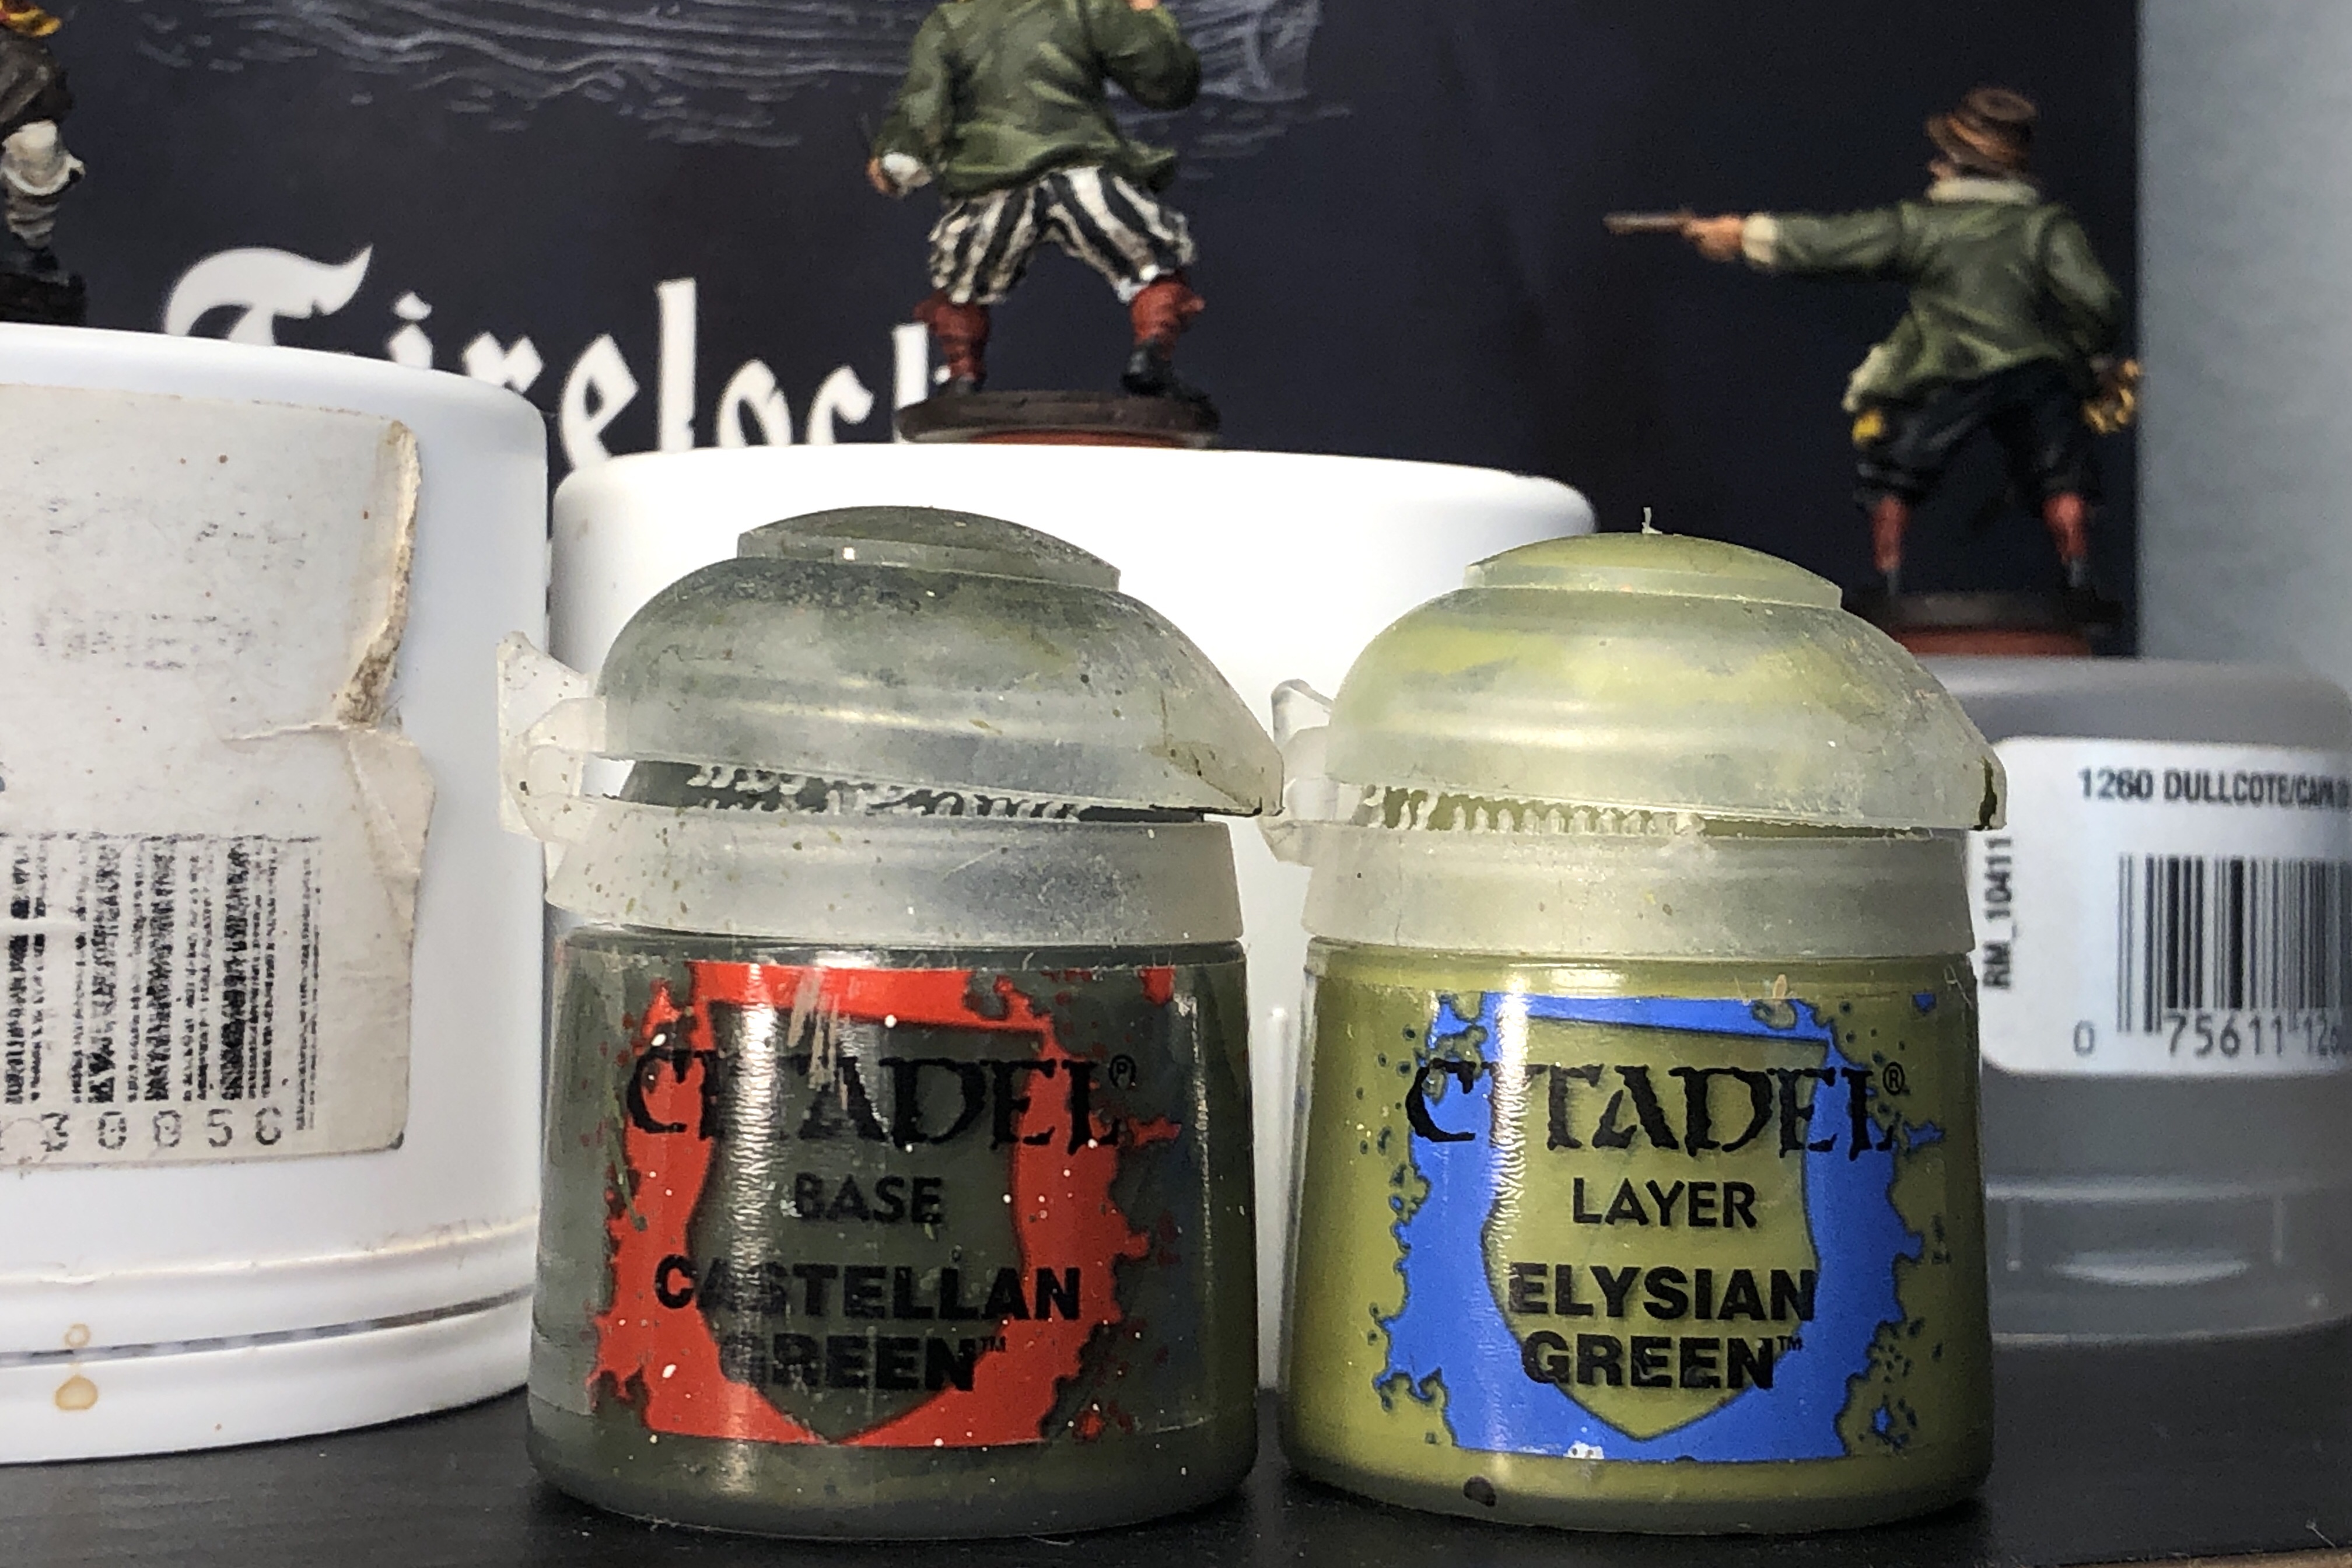
I didn’t go crazy with the green and simply used the base tone with increasing amounts of Elysian Green for the highlights. Last highlights are pure Elysian.
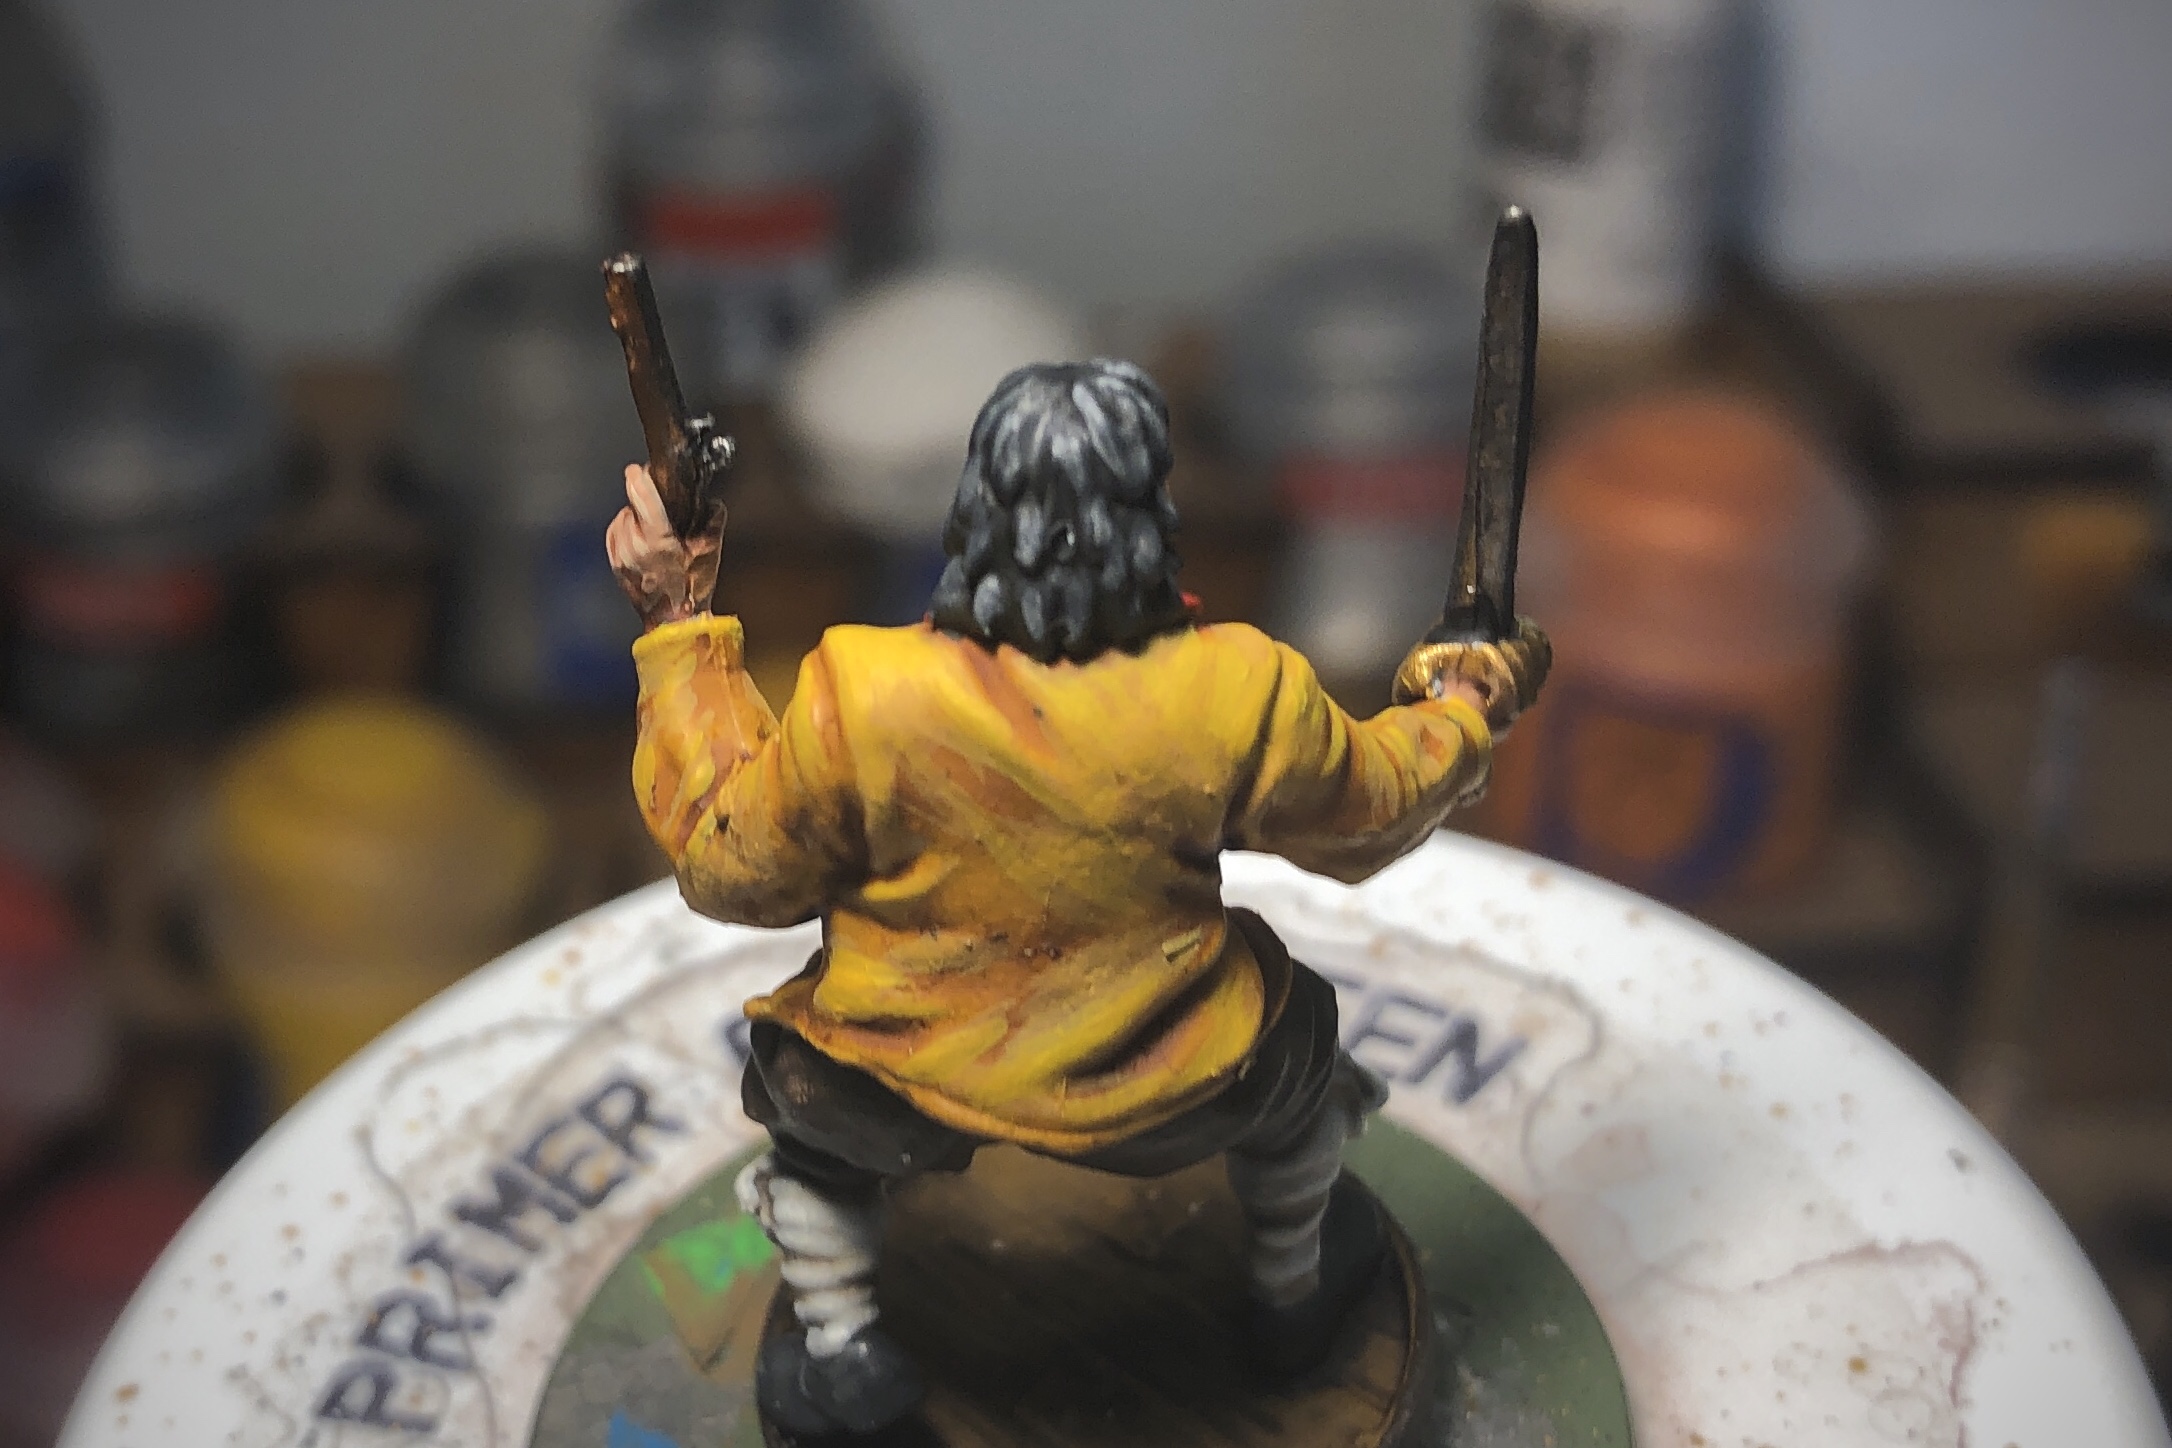
Highlighted front
And back
Sash and necktie highlighted here
And the second jacket
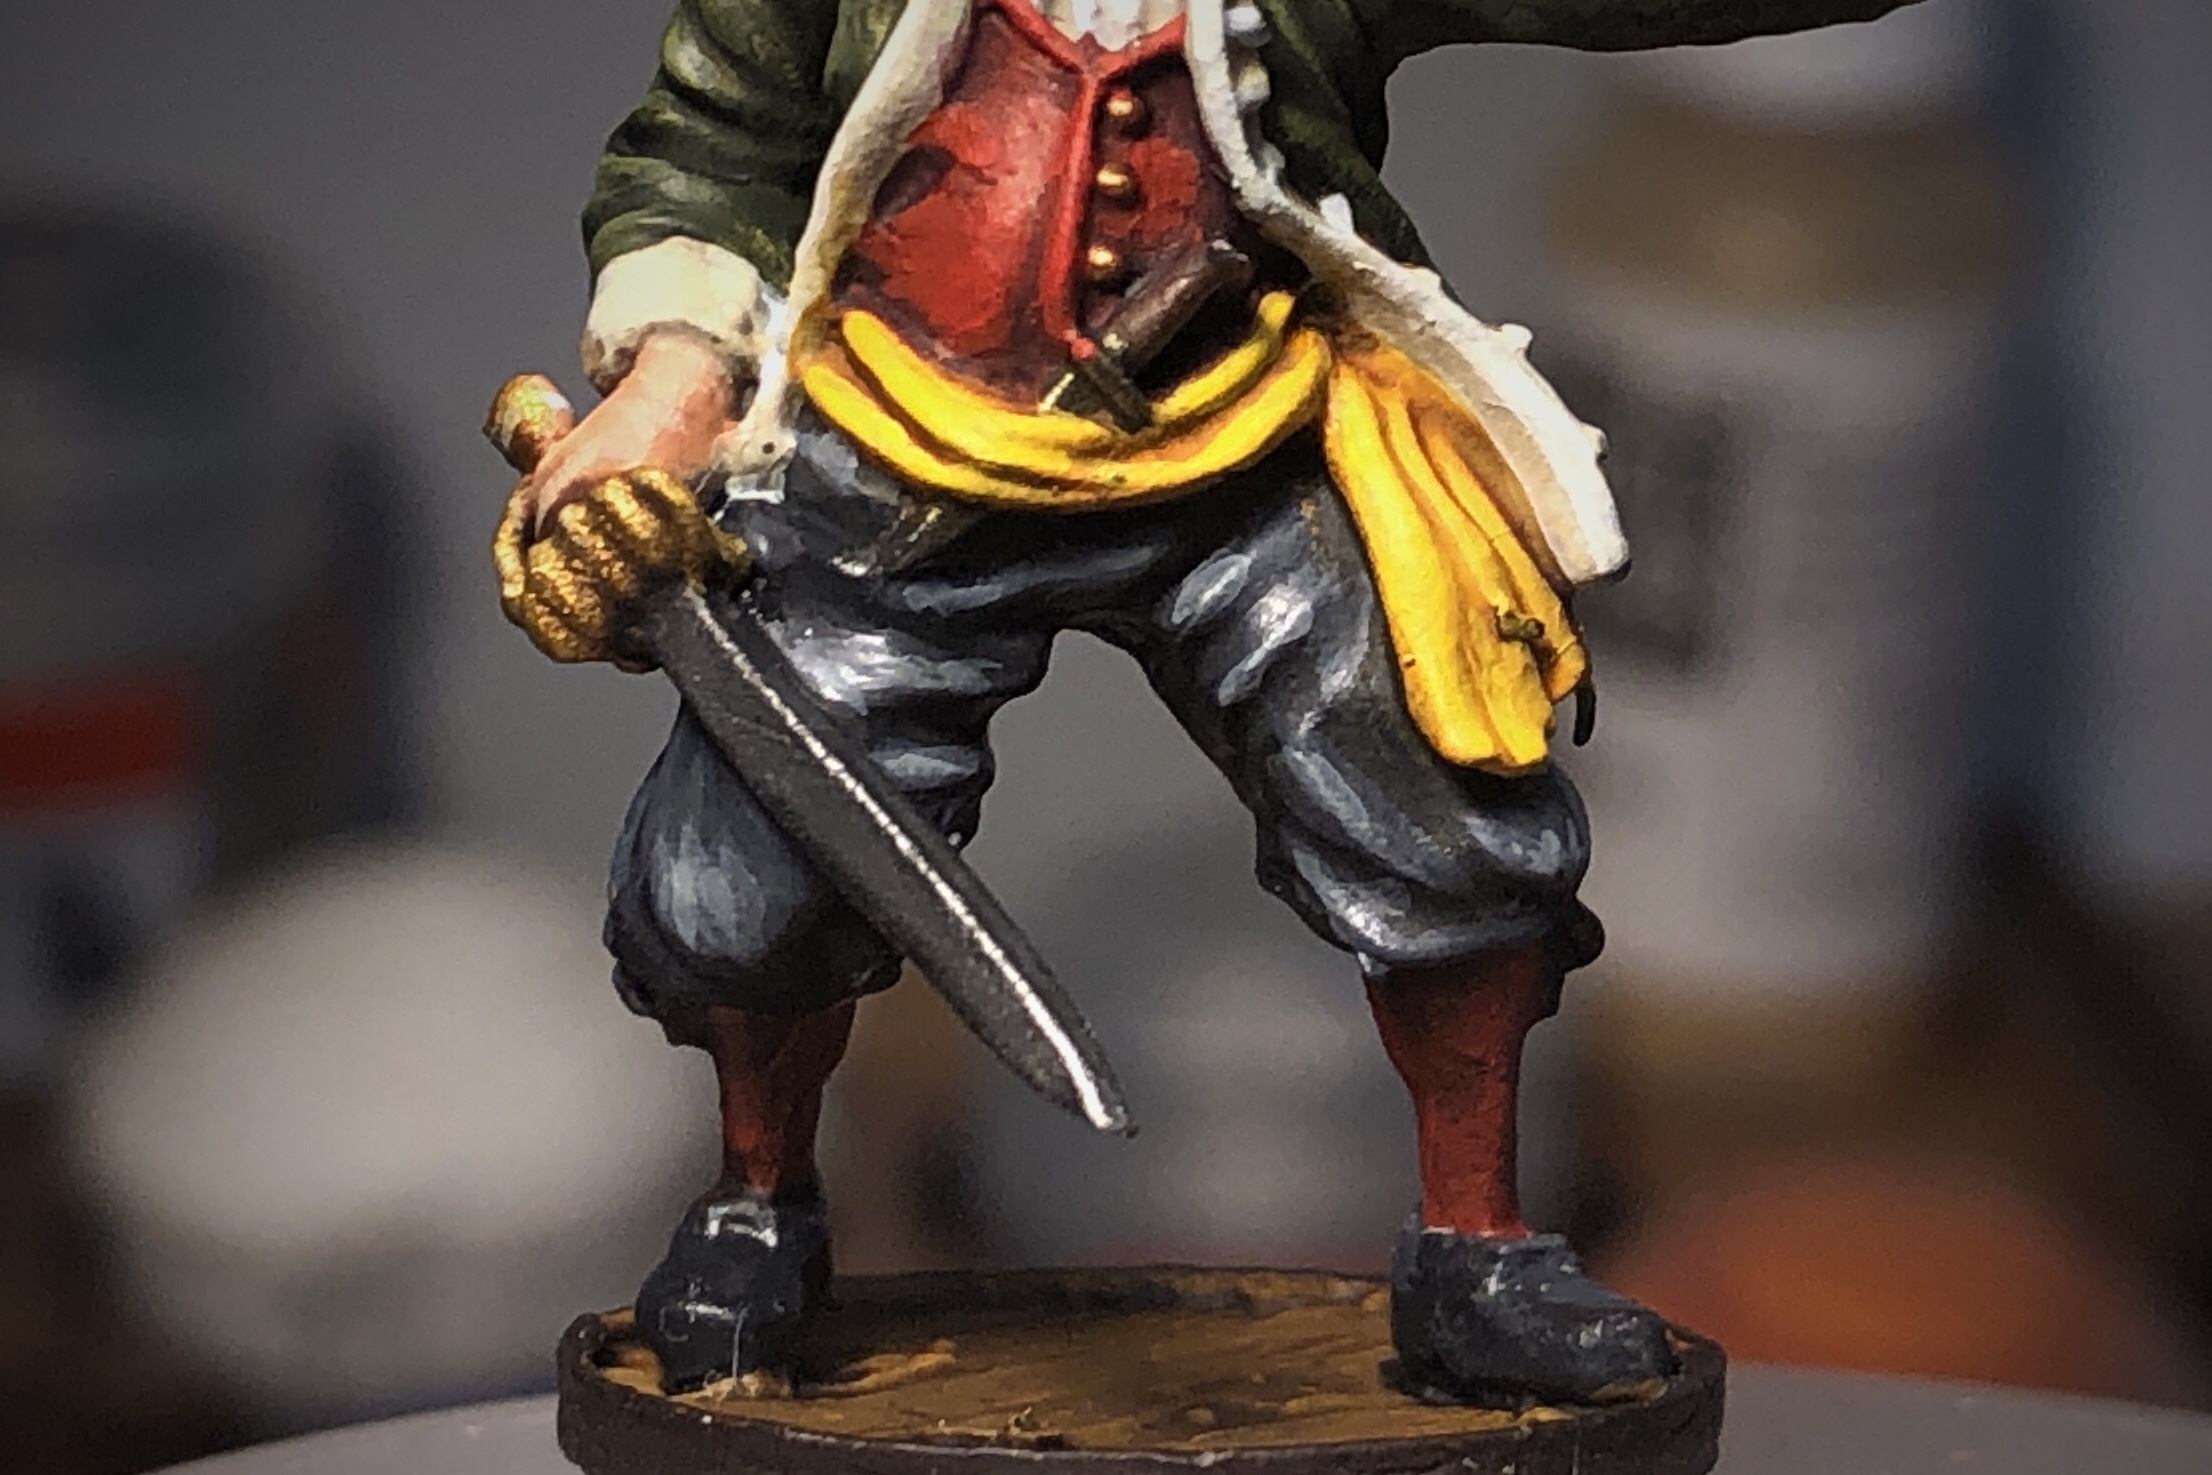
I used two tones of red but tried to keep the highlight colors simple.
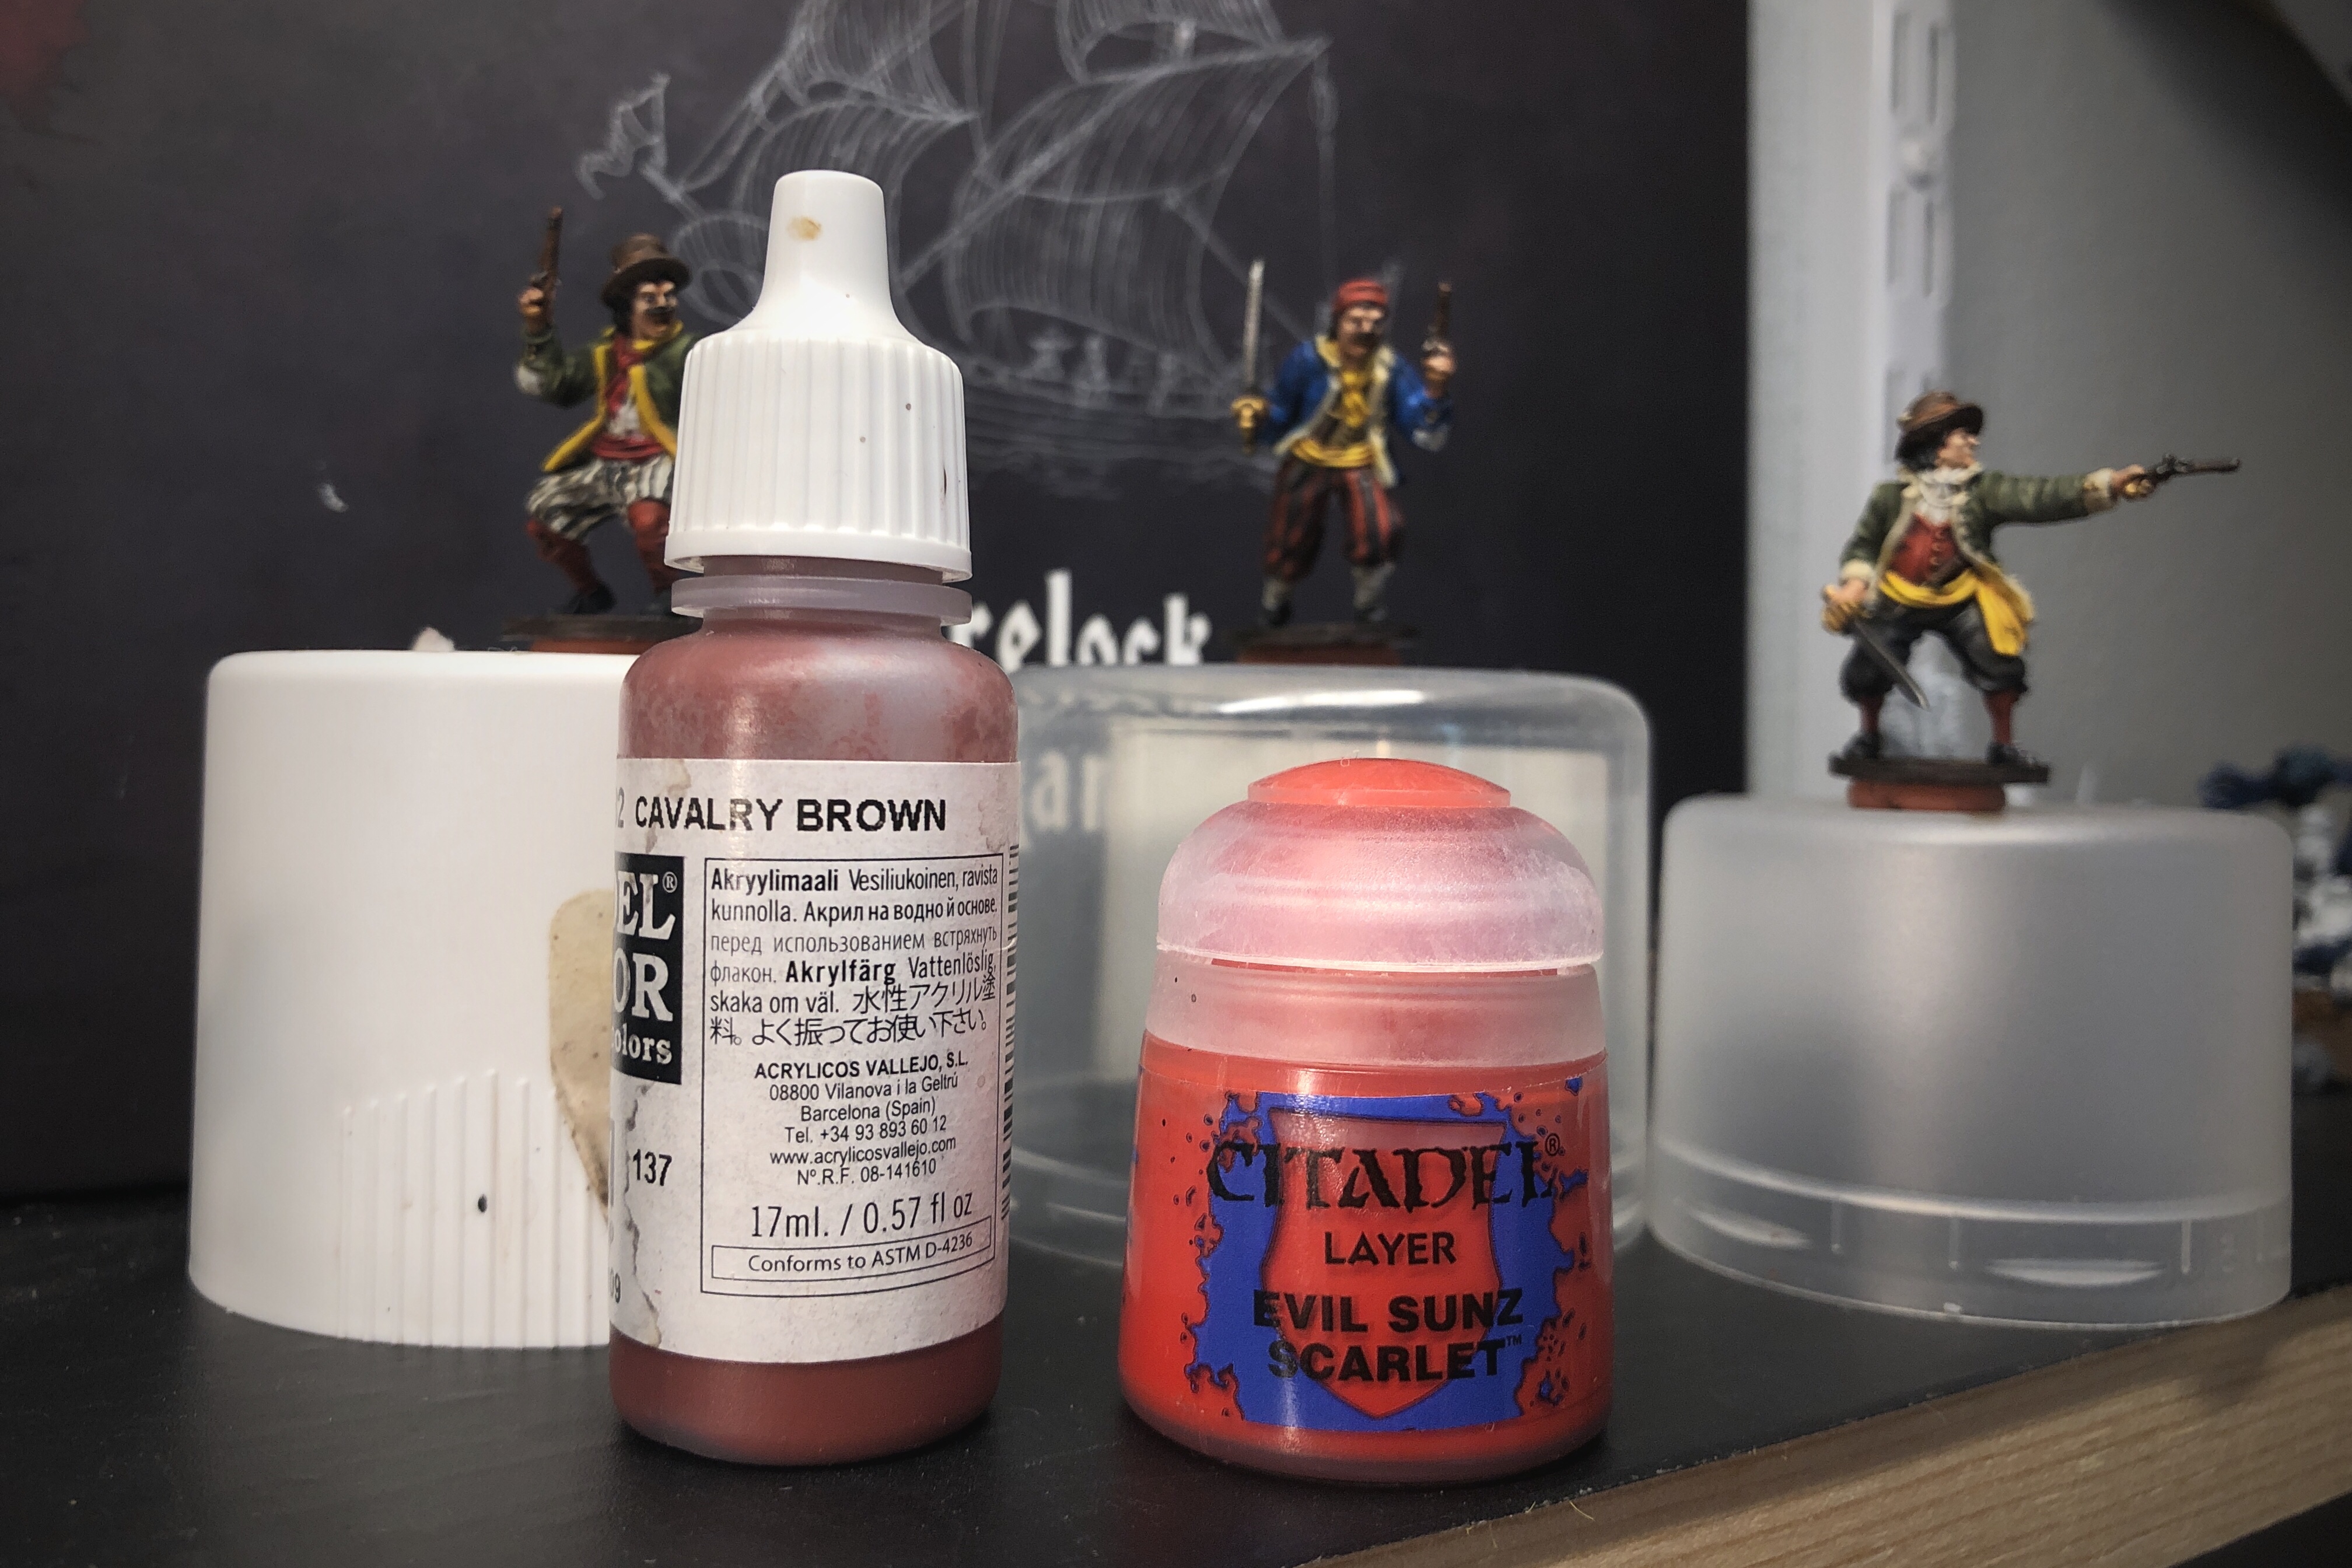
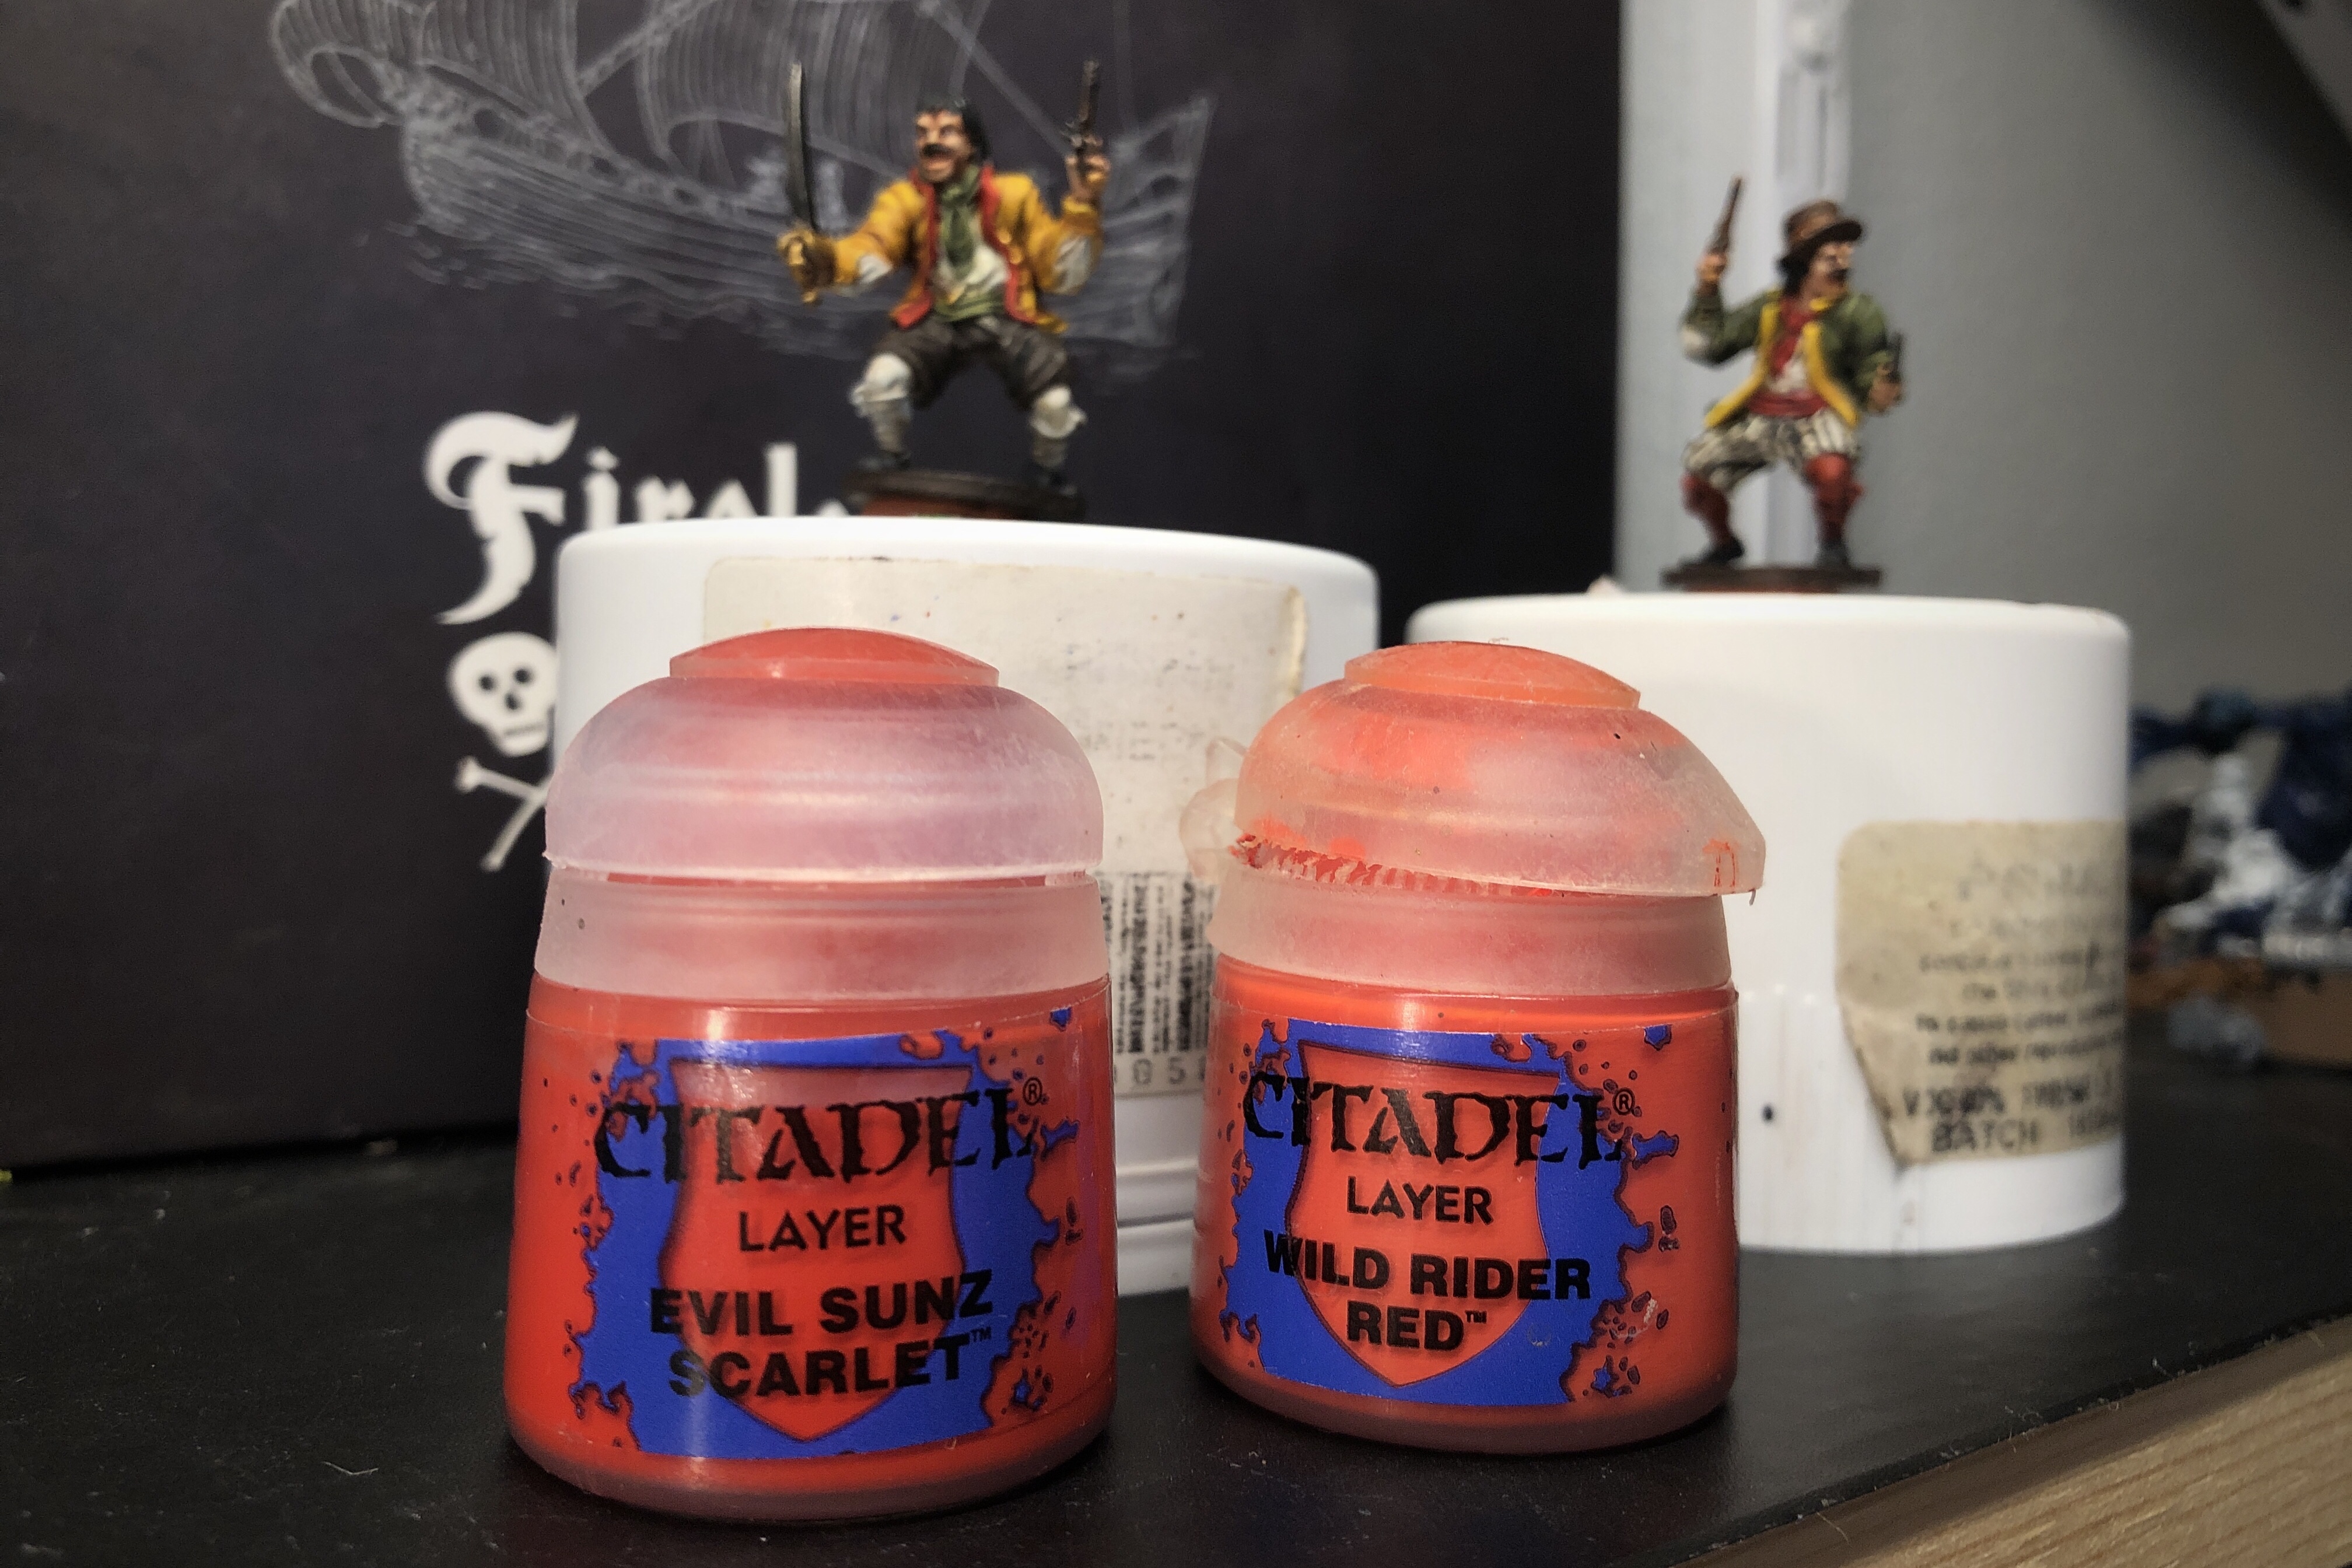
For the Cavalry Brown areas, including the hat, pants stripes, waistcoat and all the red stockings, I mixed increasing amounts of Evil Sunz Scarlet into the original Cavalry Brown.
Highlighting the striped pants is kind of weird but a little highlights on the most raised portions does something.
I got some red on the dagger hilt but I’ll clean that up with the metallic highlights.
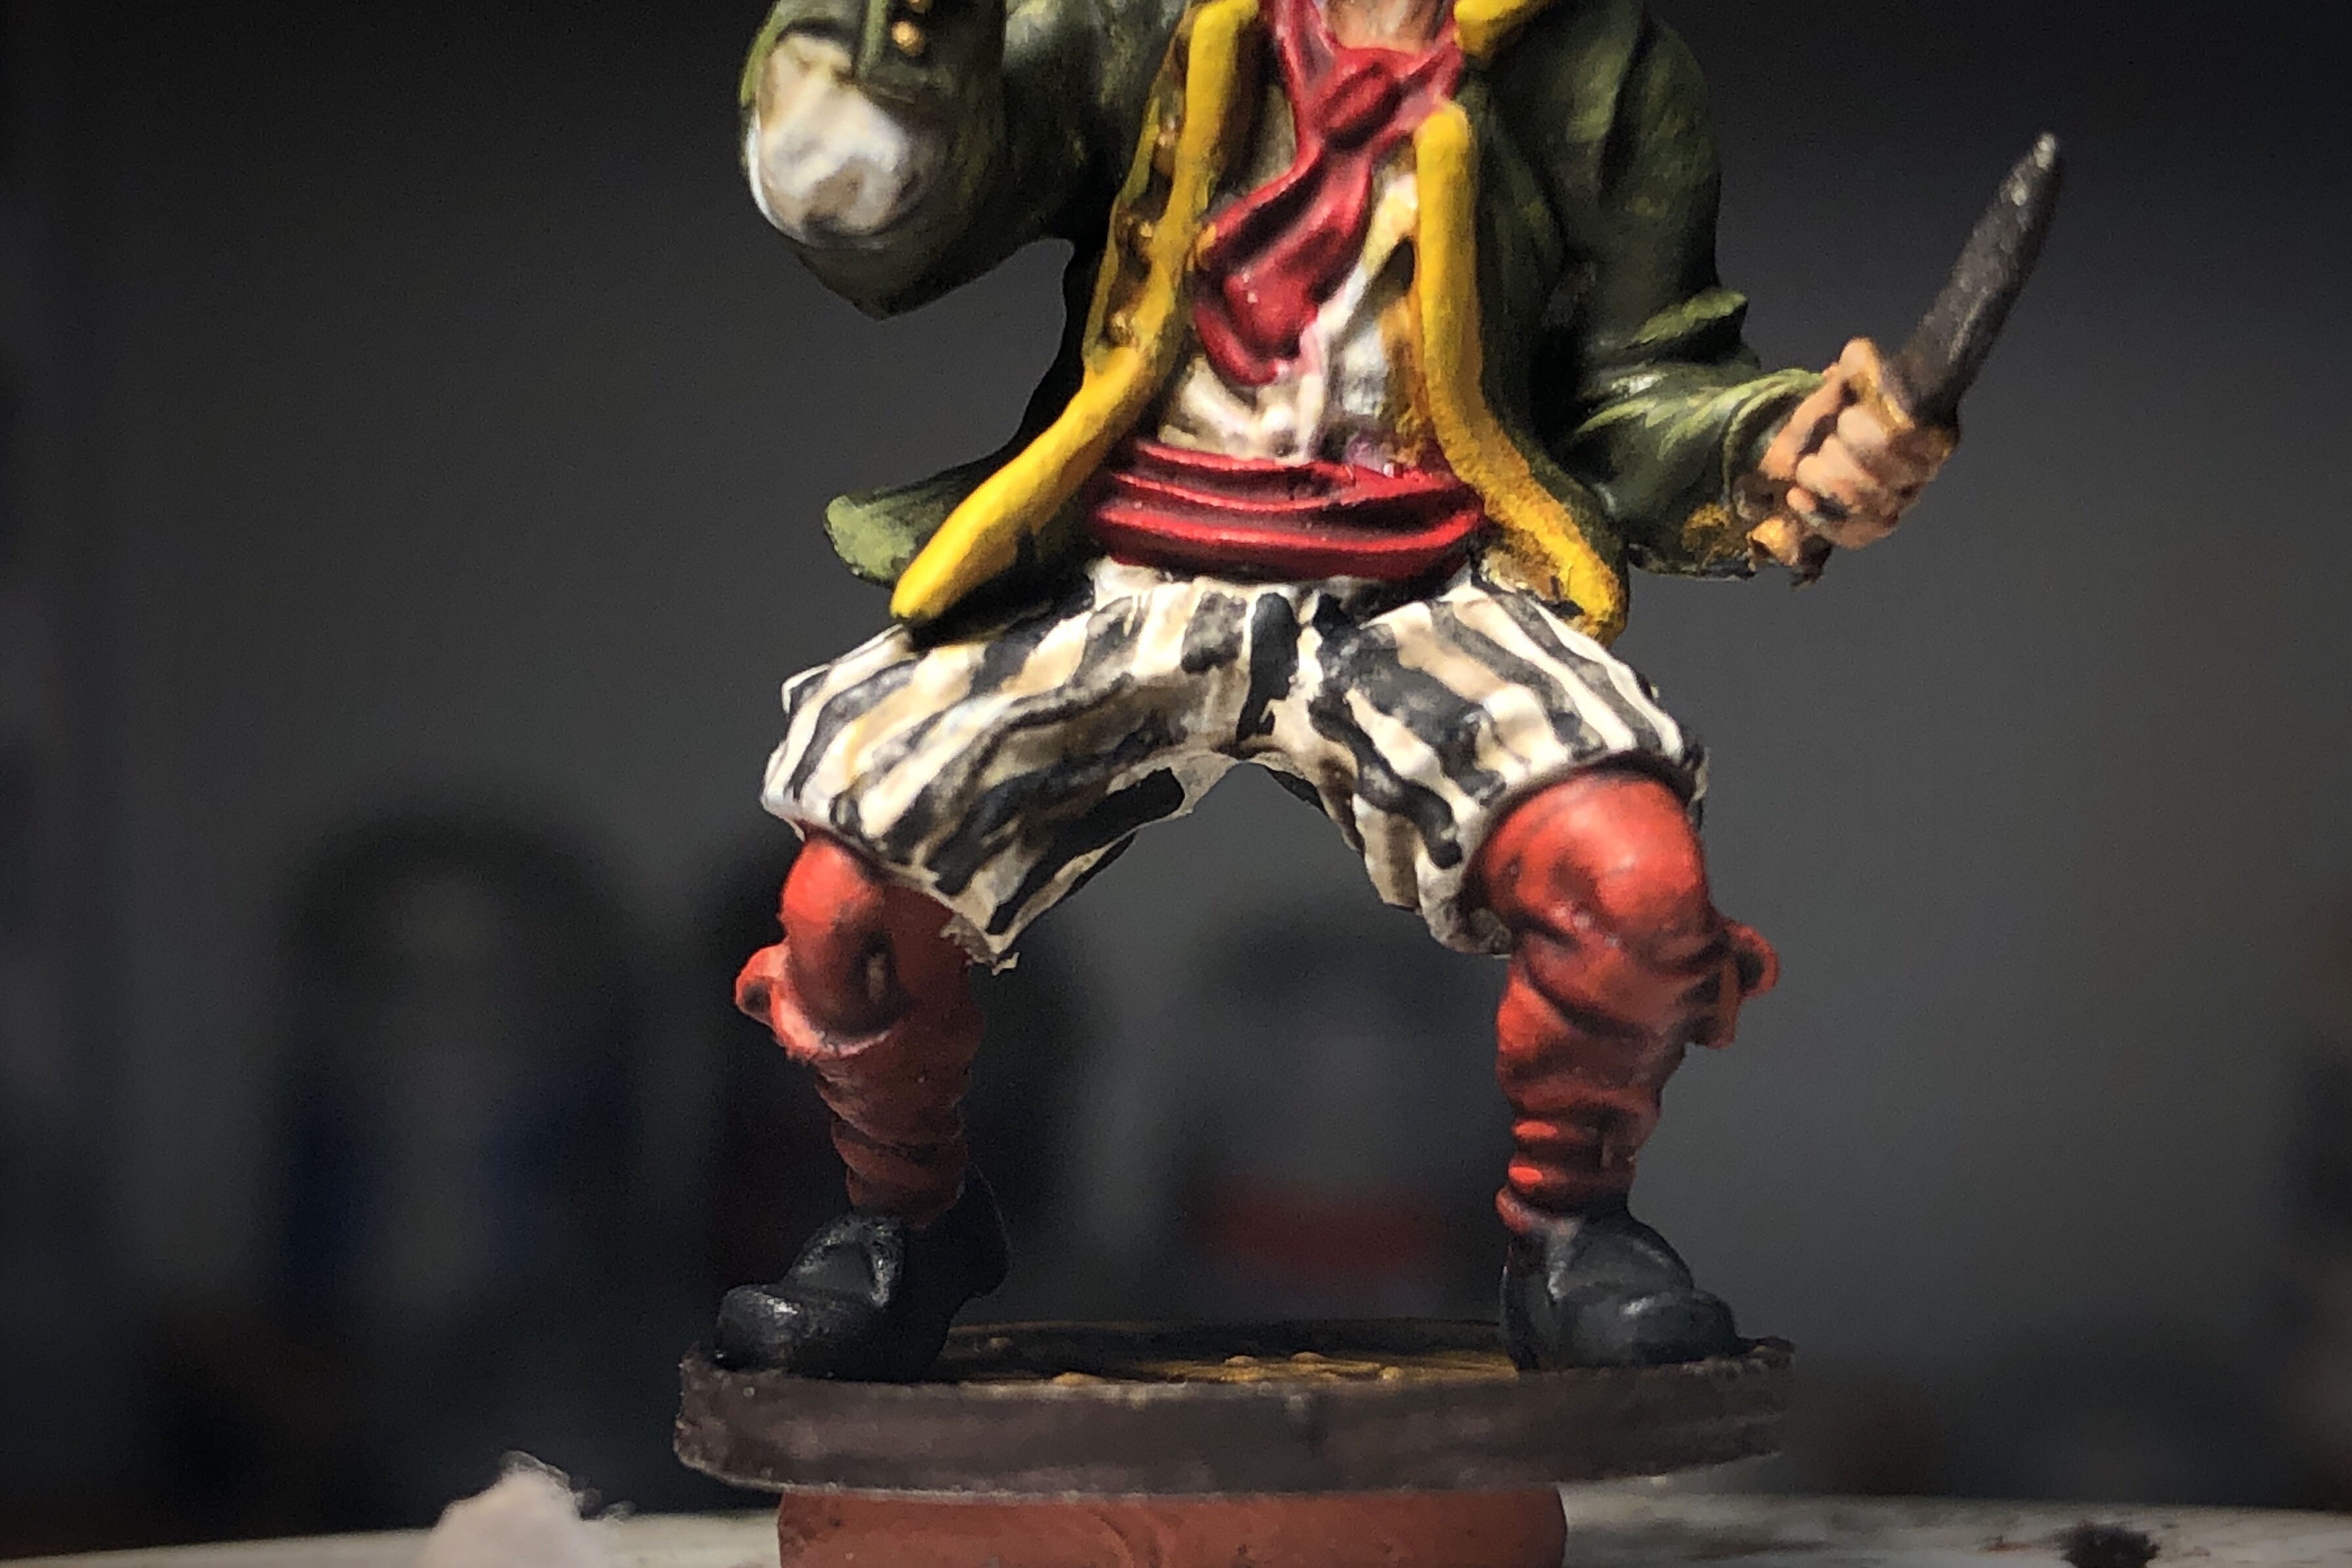
Highlights on the stockings.
For the red jacket trim, neckties and sashes, I started with Evil Sunz and worked up to Wild Rider Red.
These highlights are only applied to two of the minis.

You can see the resulting difference in tones of red between the stockings and the tie and sash.
This guy is a dandy!
For the areas based in Screaming Skull, I highlighted with the same tone, eventually working up to pure Ivory.

You can even mix in a little pure white for a couple bright highlights.

Don’t forget the feathers!

For the white shirts, pants and stockings I used the original Ivory brightened with pure White. I don’t like the Citadel whites so I tend to use Vallejo but Citadel is fine if you can make it work for you.

Highlight the stockings.
Again, highlighting the stripes on the pants is weird but not hard.
Getting between the jacket and necktie is almost impossible… Don’t forget the shirt sleeves peeking through the slashed sleeves.
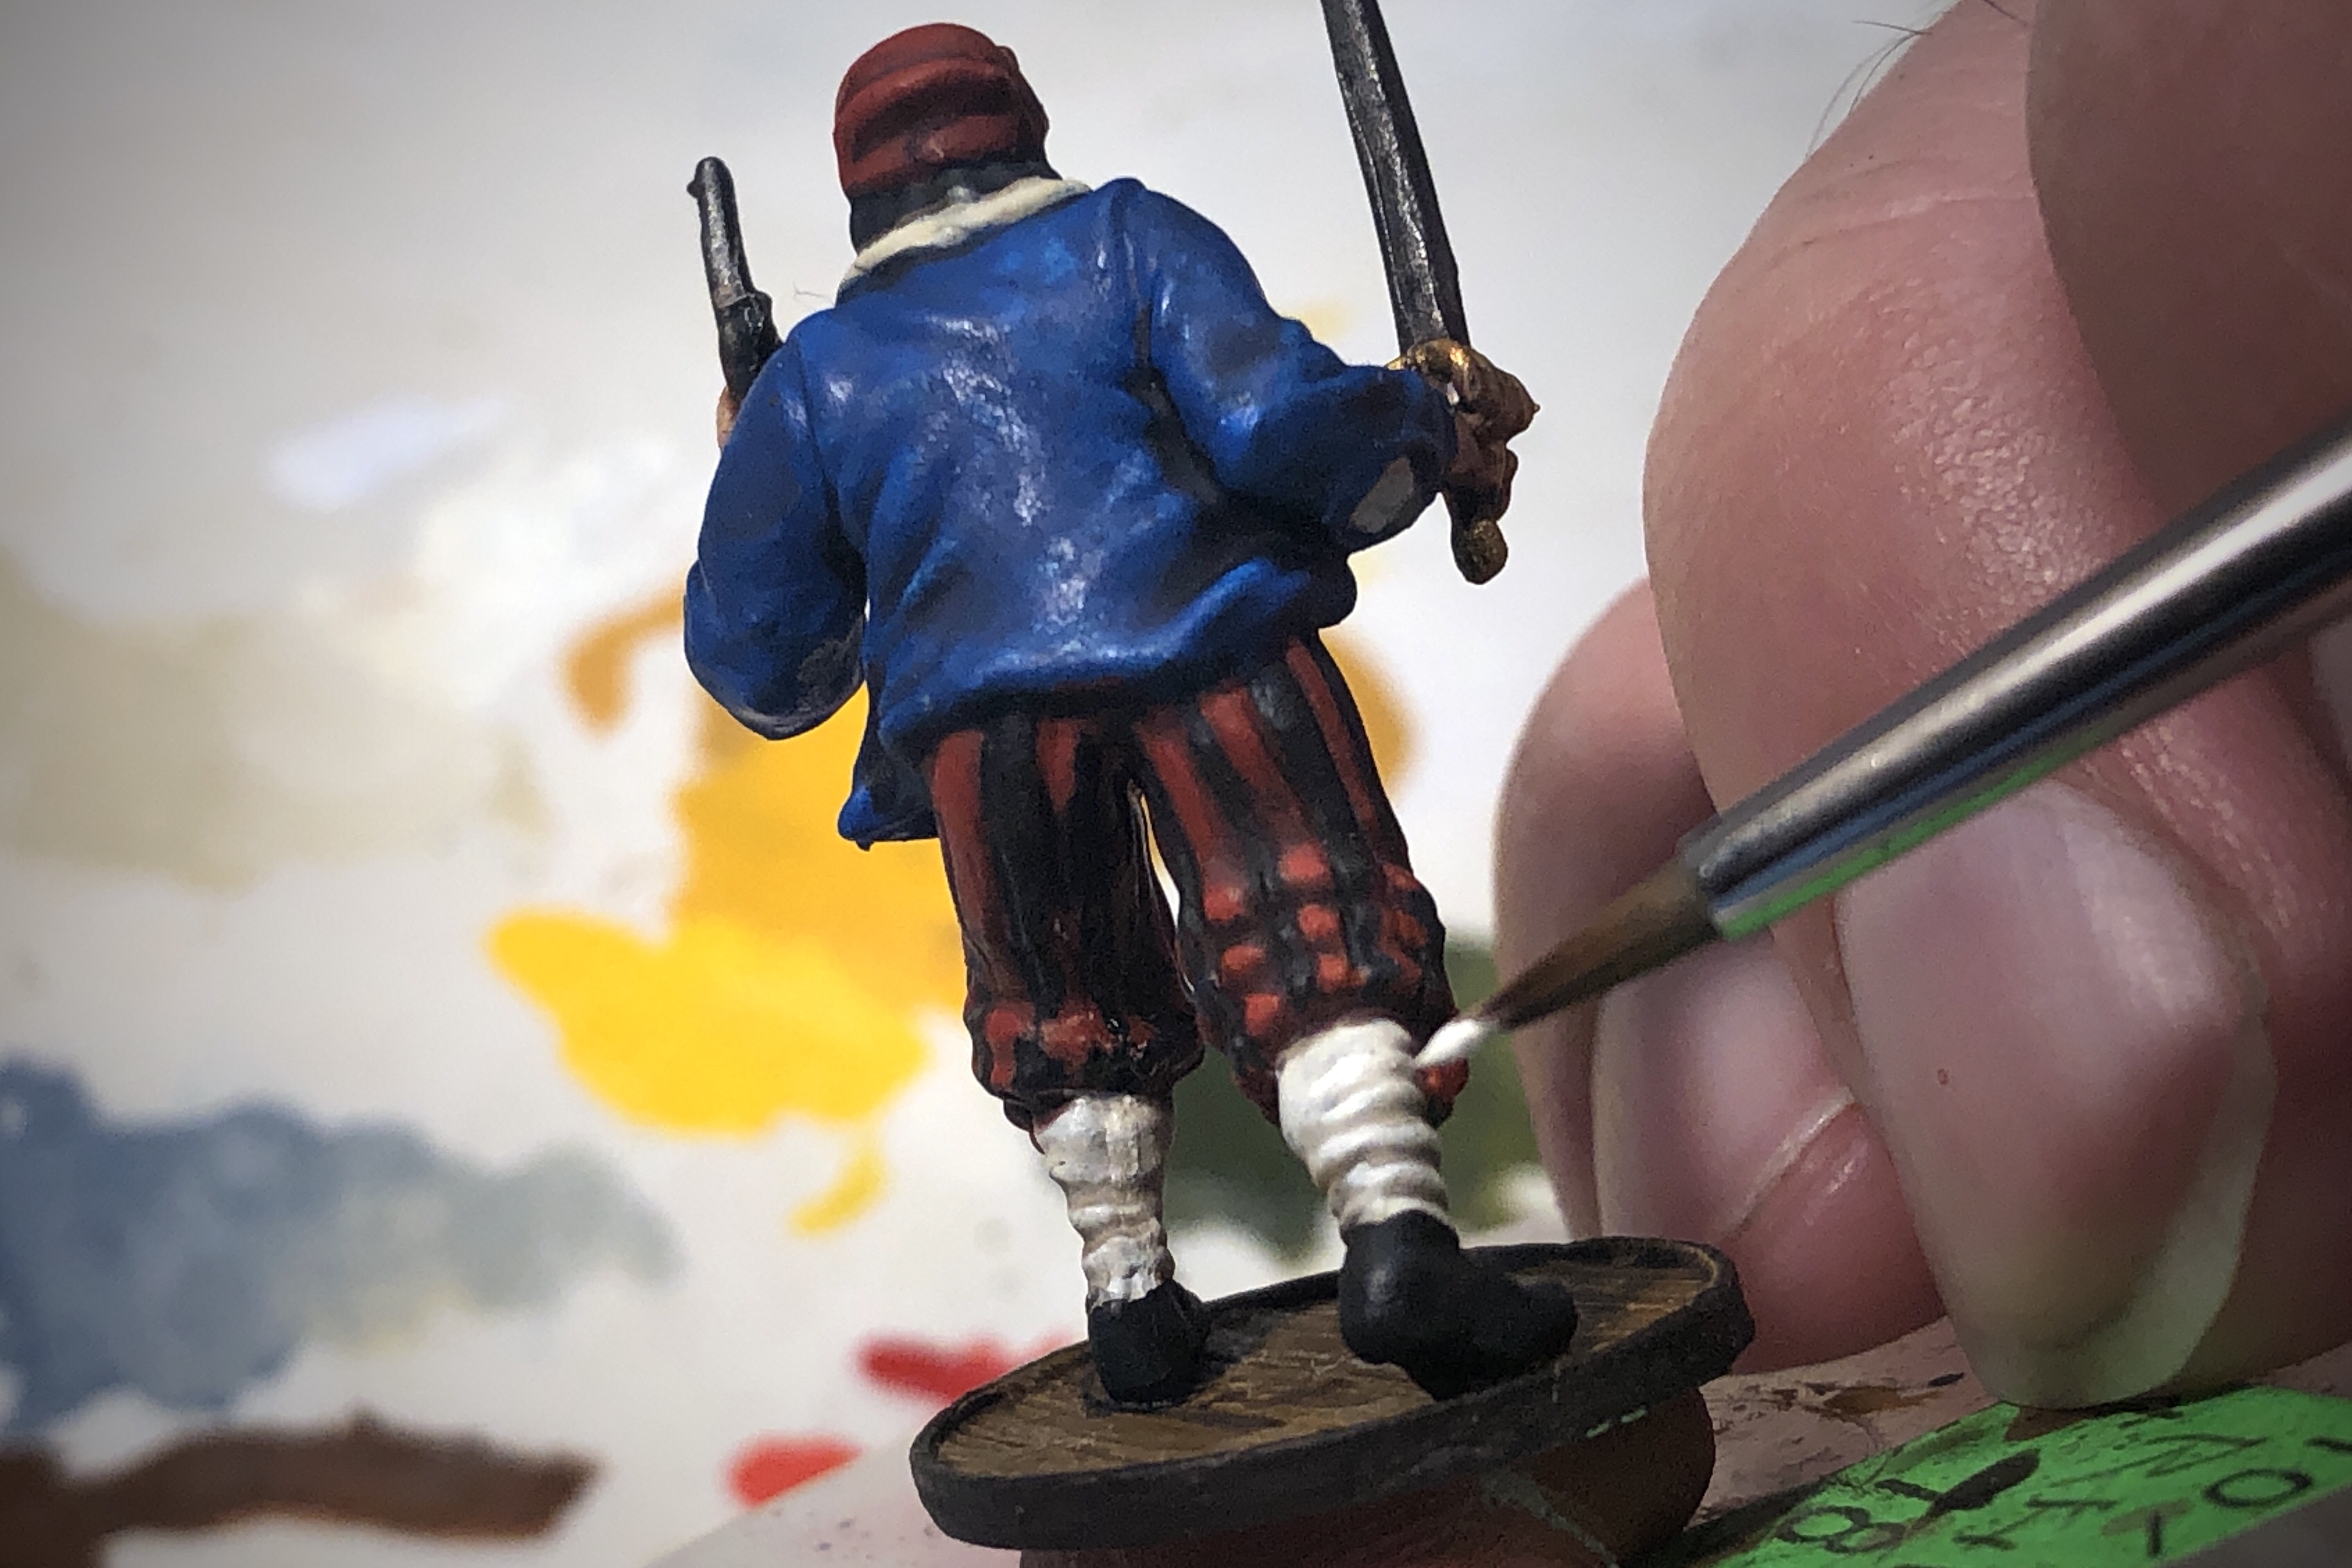
I highlighted the black hair, shoes, and pants with a sequence of the original German Grey, Eshin Grey and Dawnstone.

You don’t have to push the highlights this far but I like it.
Highlight the ‘stache!
And the dark pants.
Front
And back.
Highlighted hair, shoes and pants.
For the brown trousers you an use the original Dryad Bark and highlight through Gorthor Brown with a few final touches of Baneblade Brown.
This is a nice set of colors for hair as well if you would like some variety.

I used the original Leather Belt and Skrag Brown to highlight the two brown hats.

I used Skrag Brown as the base tone for the hatband so I used the much brighter Tau Light Ochre to brighten it up.
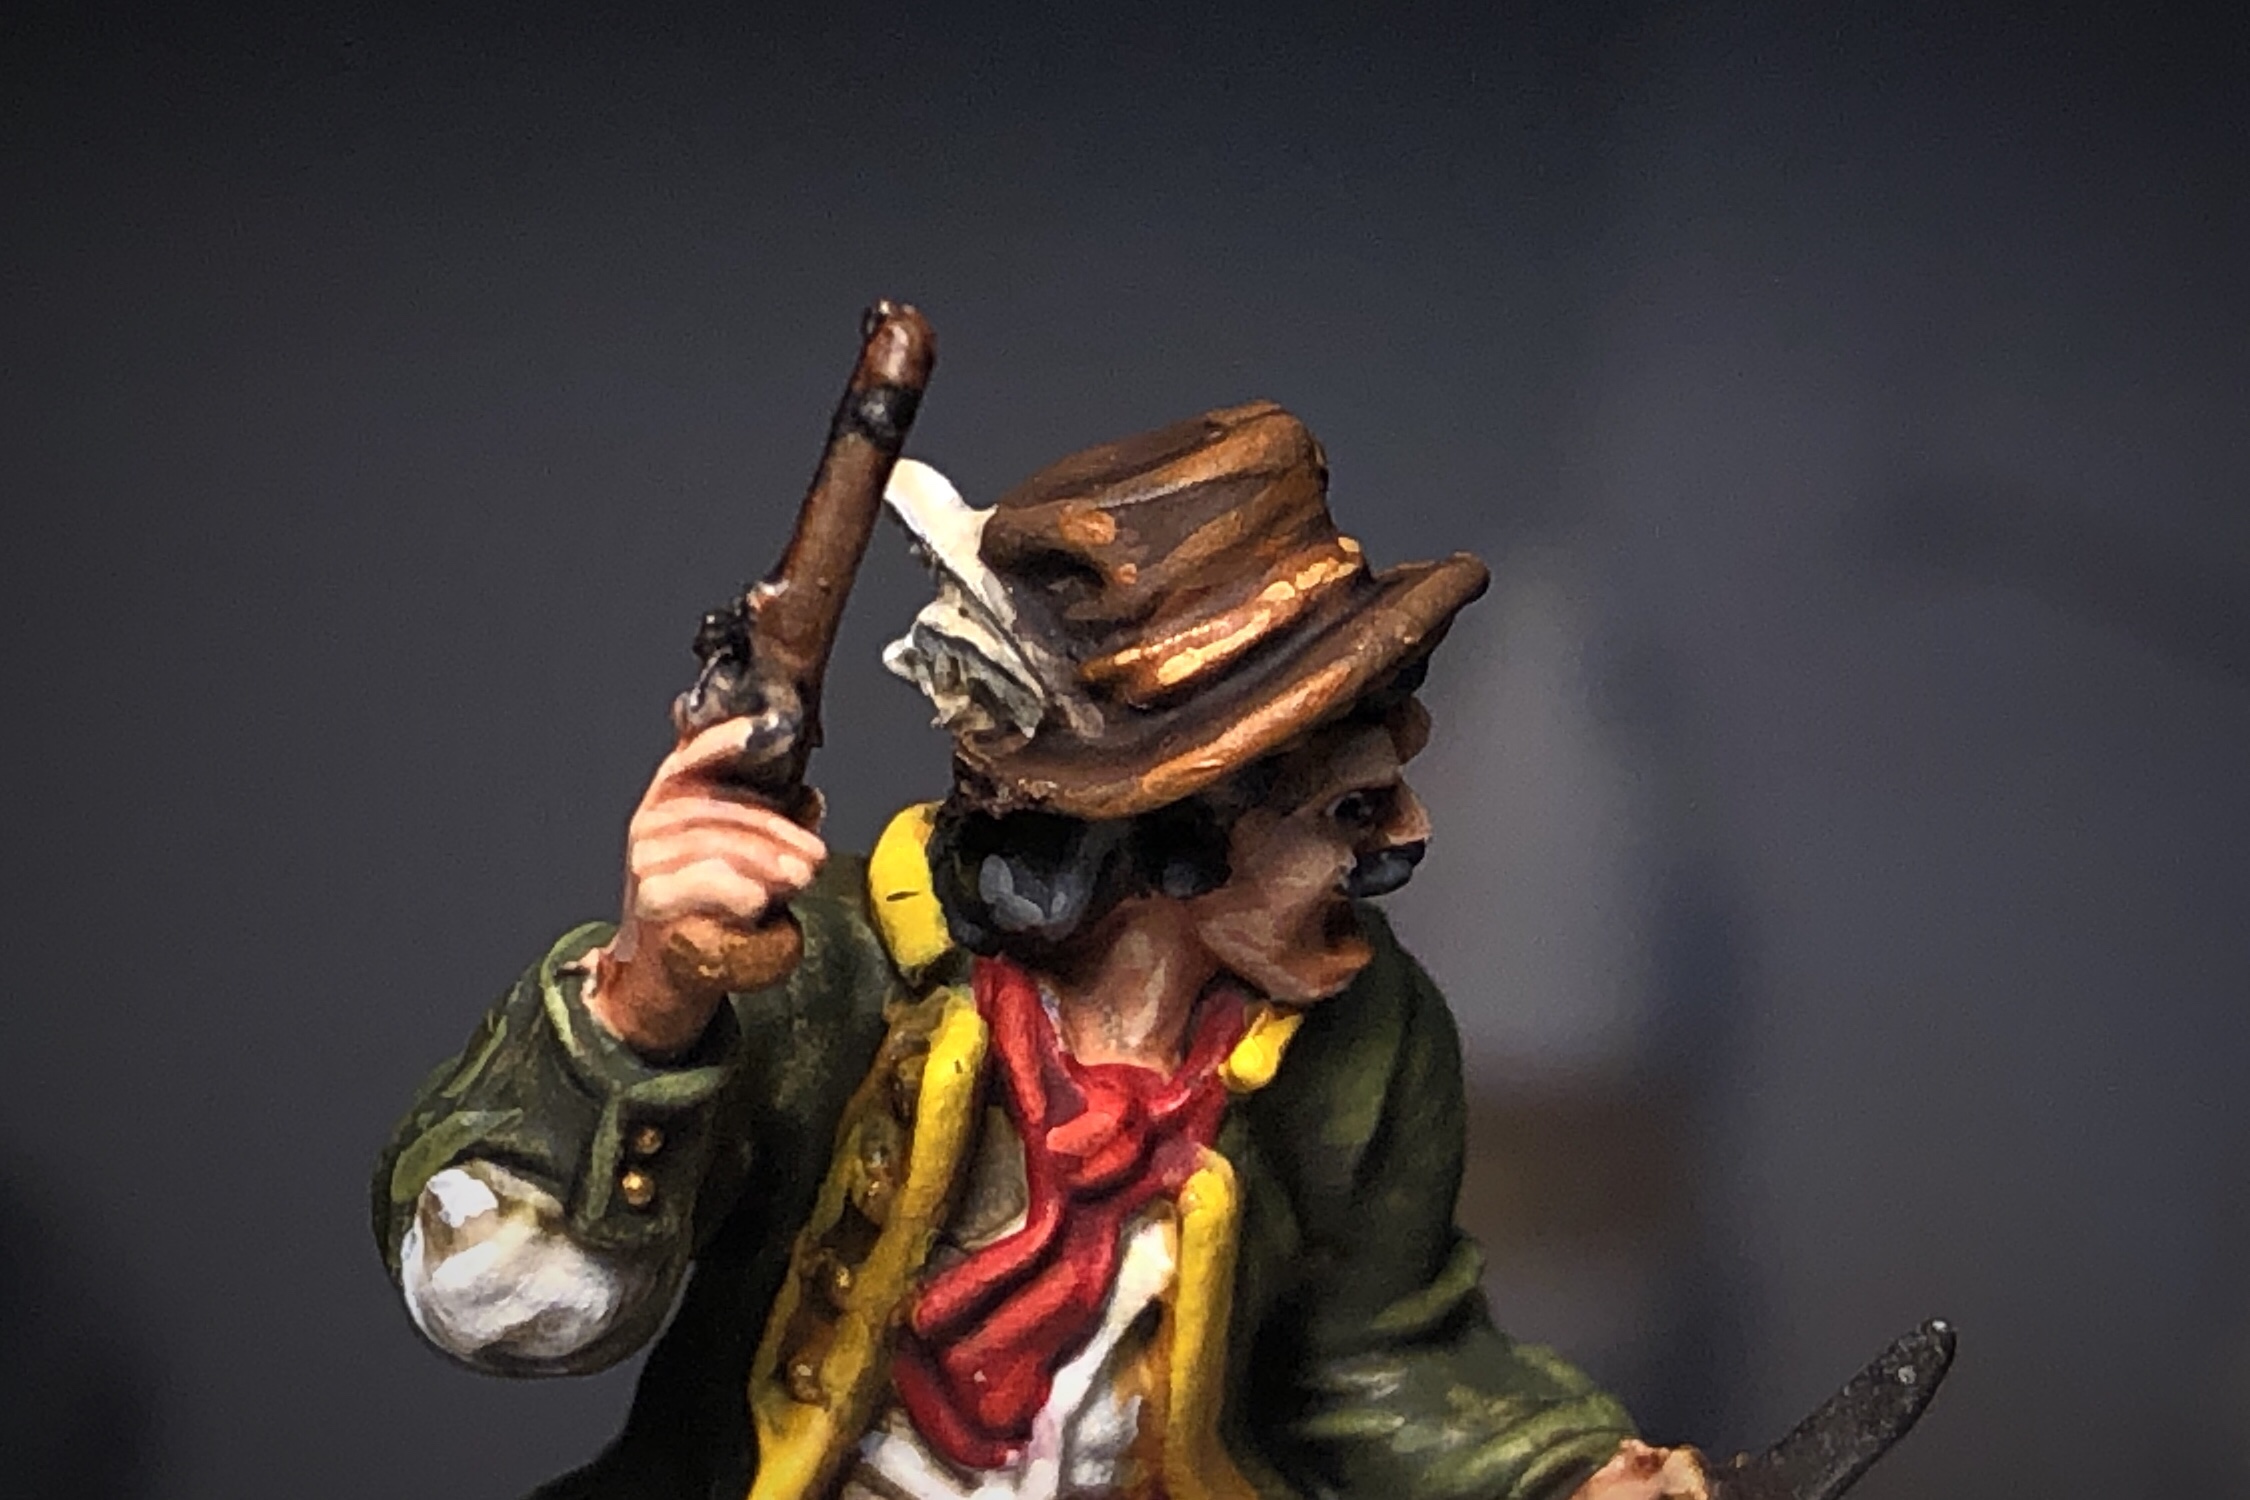
I think you could easily make these hats black/dark grey as well.
I’ve neglected the blue jacket!

Nothing fancy here. I mixed a tiny bit of the original Caledor Sky into the brighter Teclis blue for the first layer, then moved all the way up to a few bits of Lothern Blue.
Lots of color on these guys!

We made it to the metallics and that means were almost done!
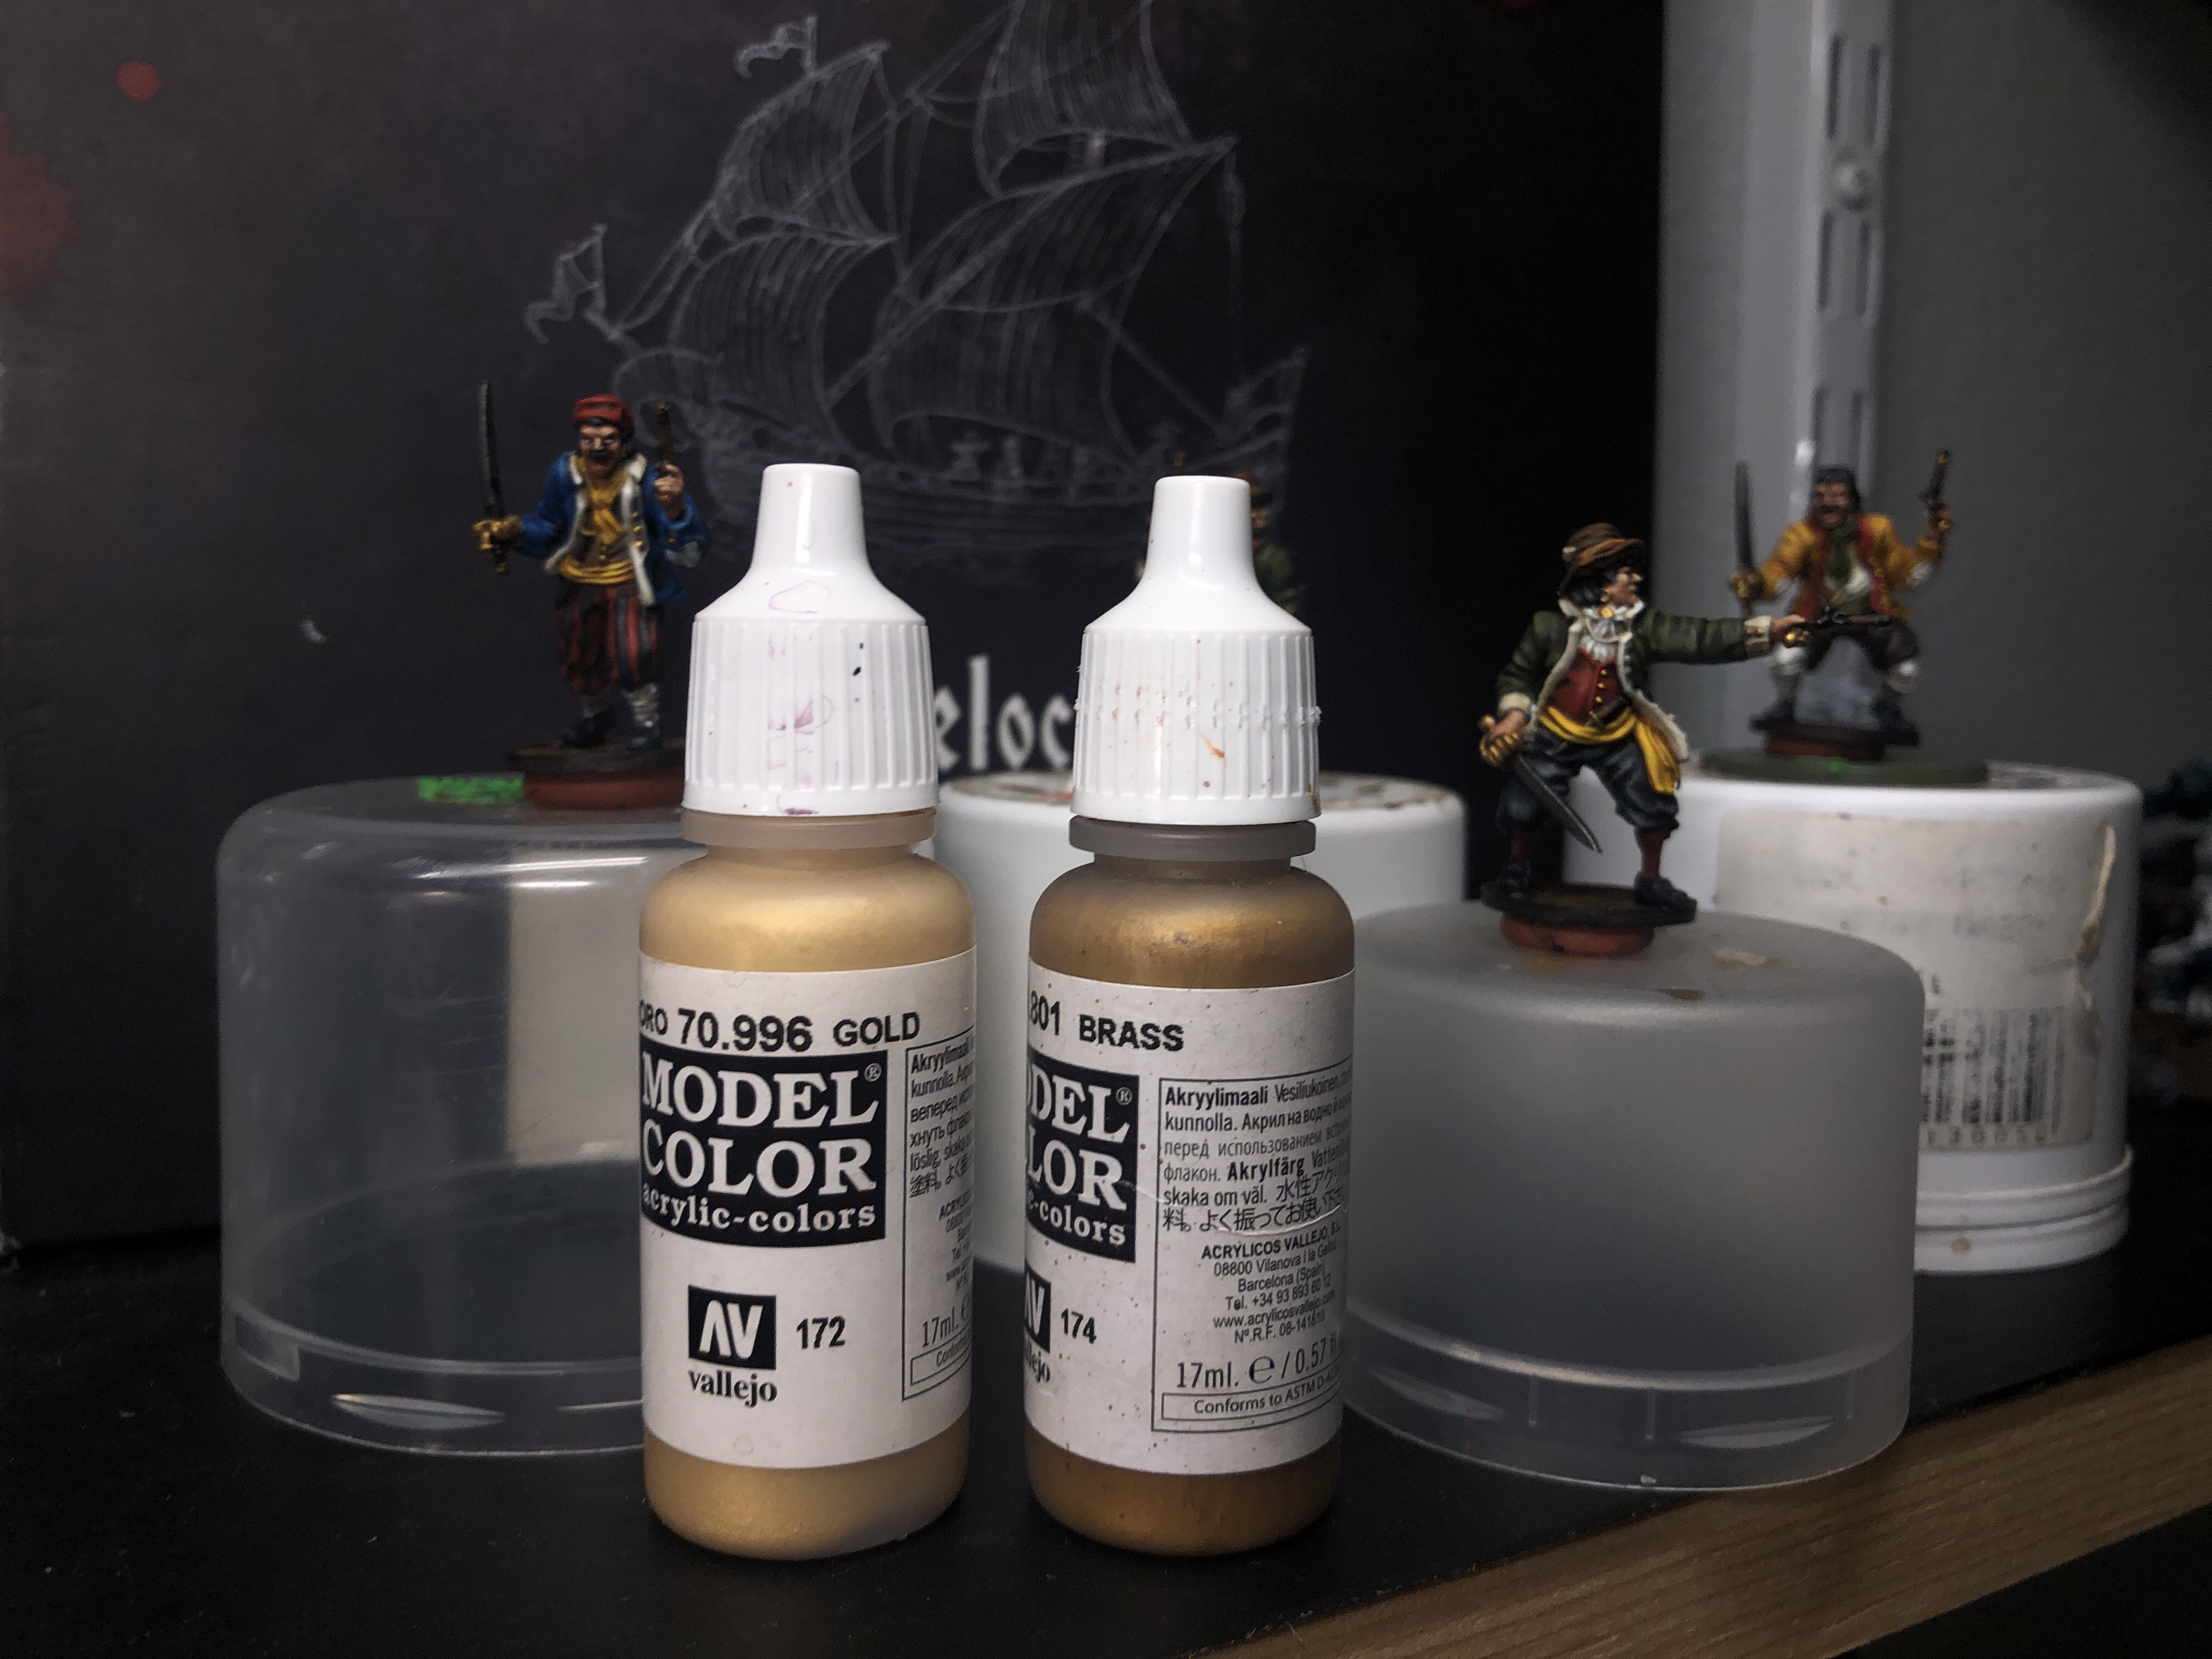
For all the brass bits I re-applied the Brass, the did a few highlights of Model Color Gold. I don’t really like the Citadel Metallics either but these Vallejo paints are great.
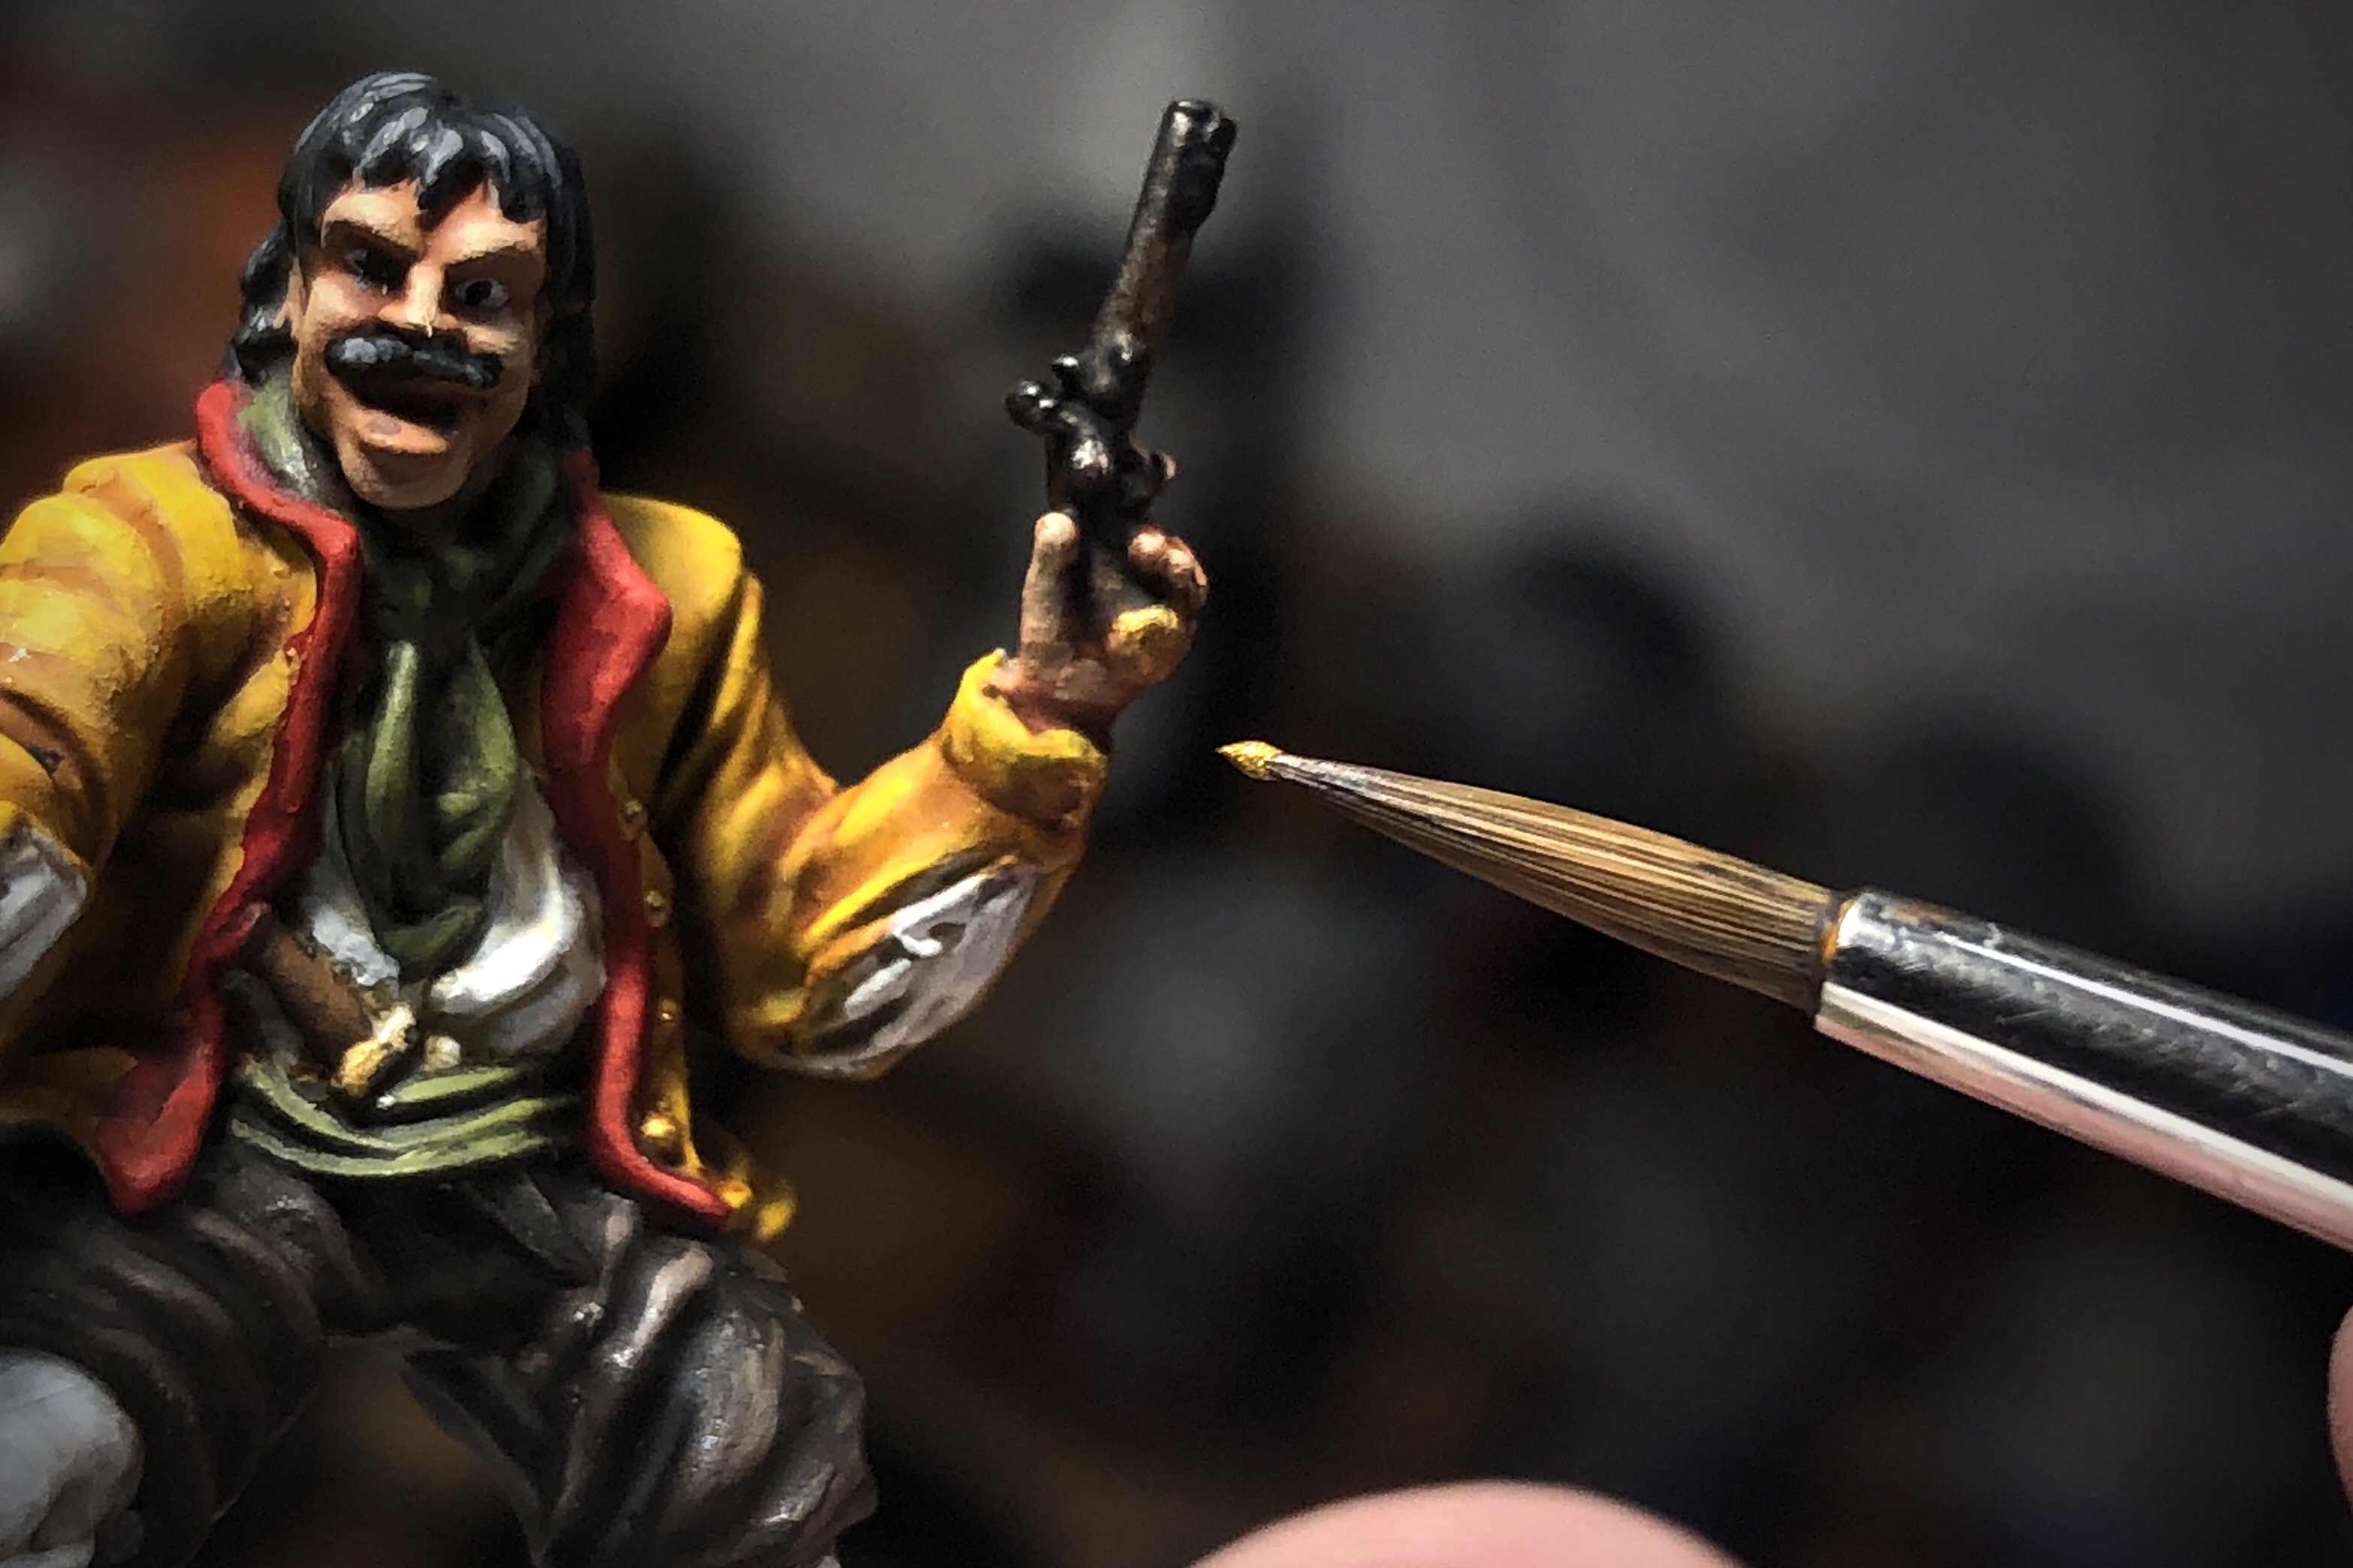
Buttons, hilts, and pistol butts. I also decided to paint the little ring on the necktie on the model below at this point. Not exactly sure what’s going on with his front but this seems to work.
I had missed the vest buttons on this model until this point in the process.
For the blades and pistol hardware, I used the original Dark Aluminium along with a midtone Duraluminium and a very bright Chrome for a final highlight on the pistols.

I use a wet palette all the time and I highly recommend you do as well but avoid using it for metallic paint. The flakes from the metallic paints tend to start floating around that wet palette and they pollute your other paints and they’re difficult to get rid of.

Highlighting the lock on these pistols really brings them to life. I also added a brass band to the end of a couple of the pistols.
I try to highlight the tip and front edge of the swords but it can be done several different ways.

I still wasn’t happy with how the necktie area of this model looked so I painted the little ropey thing across the chest with Zandri Dust. I don’t know what it is and I couldn’t find any helpful images on Google so I just did something that looked decent to me.
Two of the models have buckles on their shoes and I decided to drop a little Brass paint on the buckles. You could paint the laces on the other two models as well but I just highlighted them grey while doing the pants and shoes earlier.
All these little details! I based this model’s vest with Zandri Dust earlier so I used Ushabti Bone for a few highlights.

I should have reapplied some Zandri Dust before using the highlight for a smoother look. Some of the yellow shade had hit the vest so I had to cover a good bit just to get rid of the yellow.
Those are all the highlights! This next step is optional and I wasn’t entirely happy with the results when I was done. To finish the faces of these models, I mixed a little Drakenof Nightshade into some Nuln Oil, the heavily diluted it with Lahmian Medium to make a light gray/blue glaze and applied to the beard areas.

Up close it looks a little messy because I didn’t perfectly mix the glaze, but from a small distance, it gives them a more masculine look.

Before the beard glaze
I tried to apply a couple very thin coats
But it came out more splotchy that it should have…
Not terrible
All these guys are yelling! I put a drop of Carroburg Crimson into their mouths to make them vary a little from the skin tone. You could do some Ivory for teeth as well (the Firelock paint jobs have teeth) but I find it distracting so I left that out.
Very manly.
That’s it! The last step is protecting the paint job with a varnish. I always use Testors Flat Clear Coat. I apply two coats and it keeps them from chipping.

Make sure to spray this outside. I’ve never had any trouble with this spray fogging models up like some varnishes.
That’s it! We’re finished. That took probably a good 6-8 hours of painting. You could certainly abbreviate the process by just basing and shading or keeping highlighting to a minimum but this is the way I like to paint. It takes time, but I find it fun and I have a hard time cutting corners.

I have 12 more of these models primed and ready to paint. Sailor models are usually among the faster and easier models to paint but these guys are much more intricate and complicated than the Spanish and English and even the spiffy French. I’ll probably simplify my paint schemes for the next couple batches just I can get through them a little faster.
I hope this guide has been helpful! Feel free to share any ideas you may have on how to make a guide like this as user-friendly as possible.
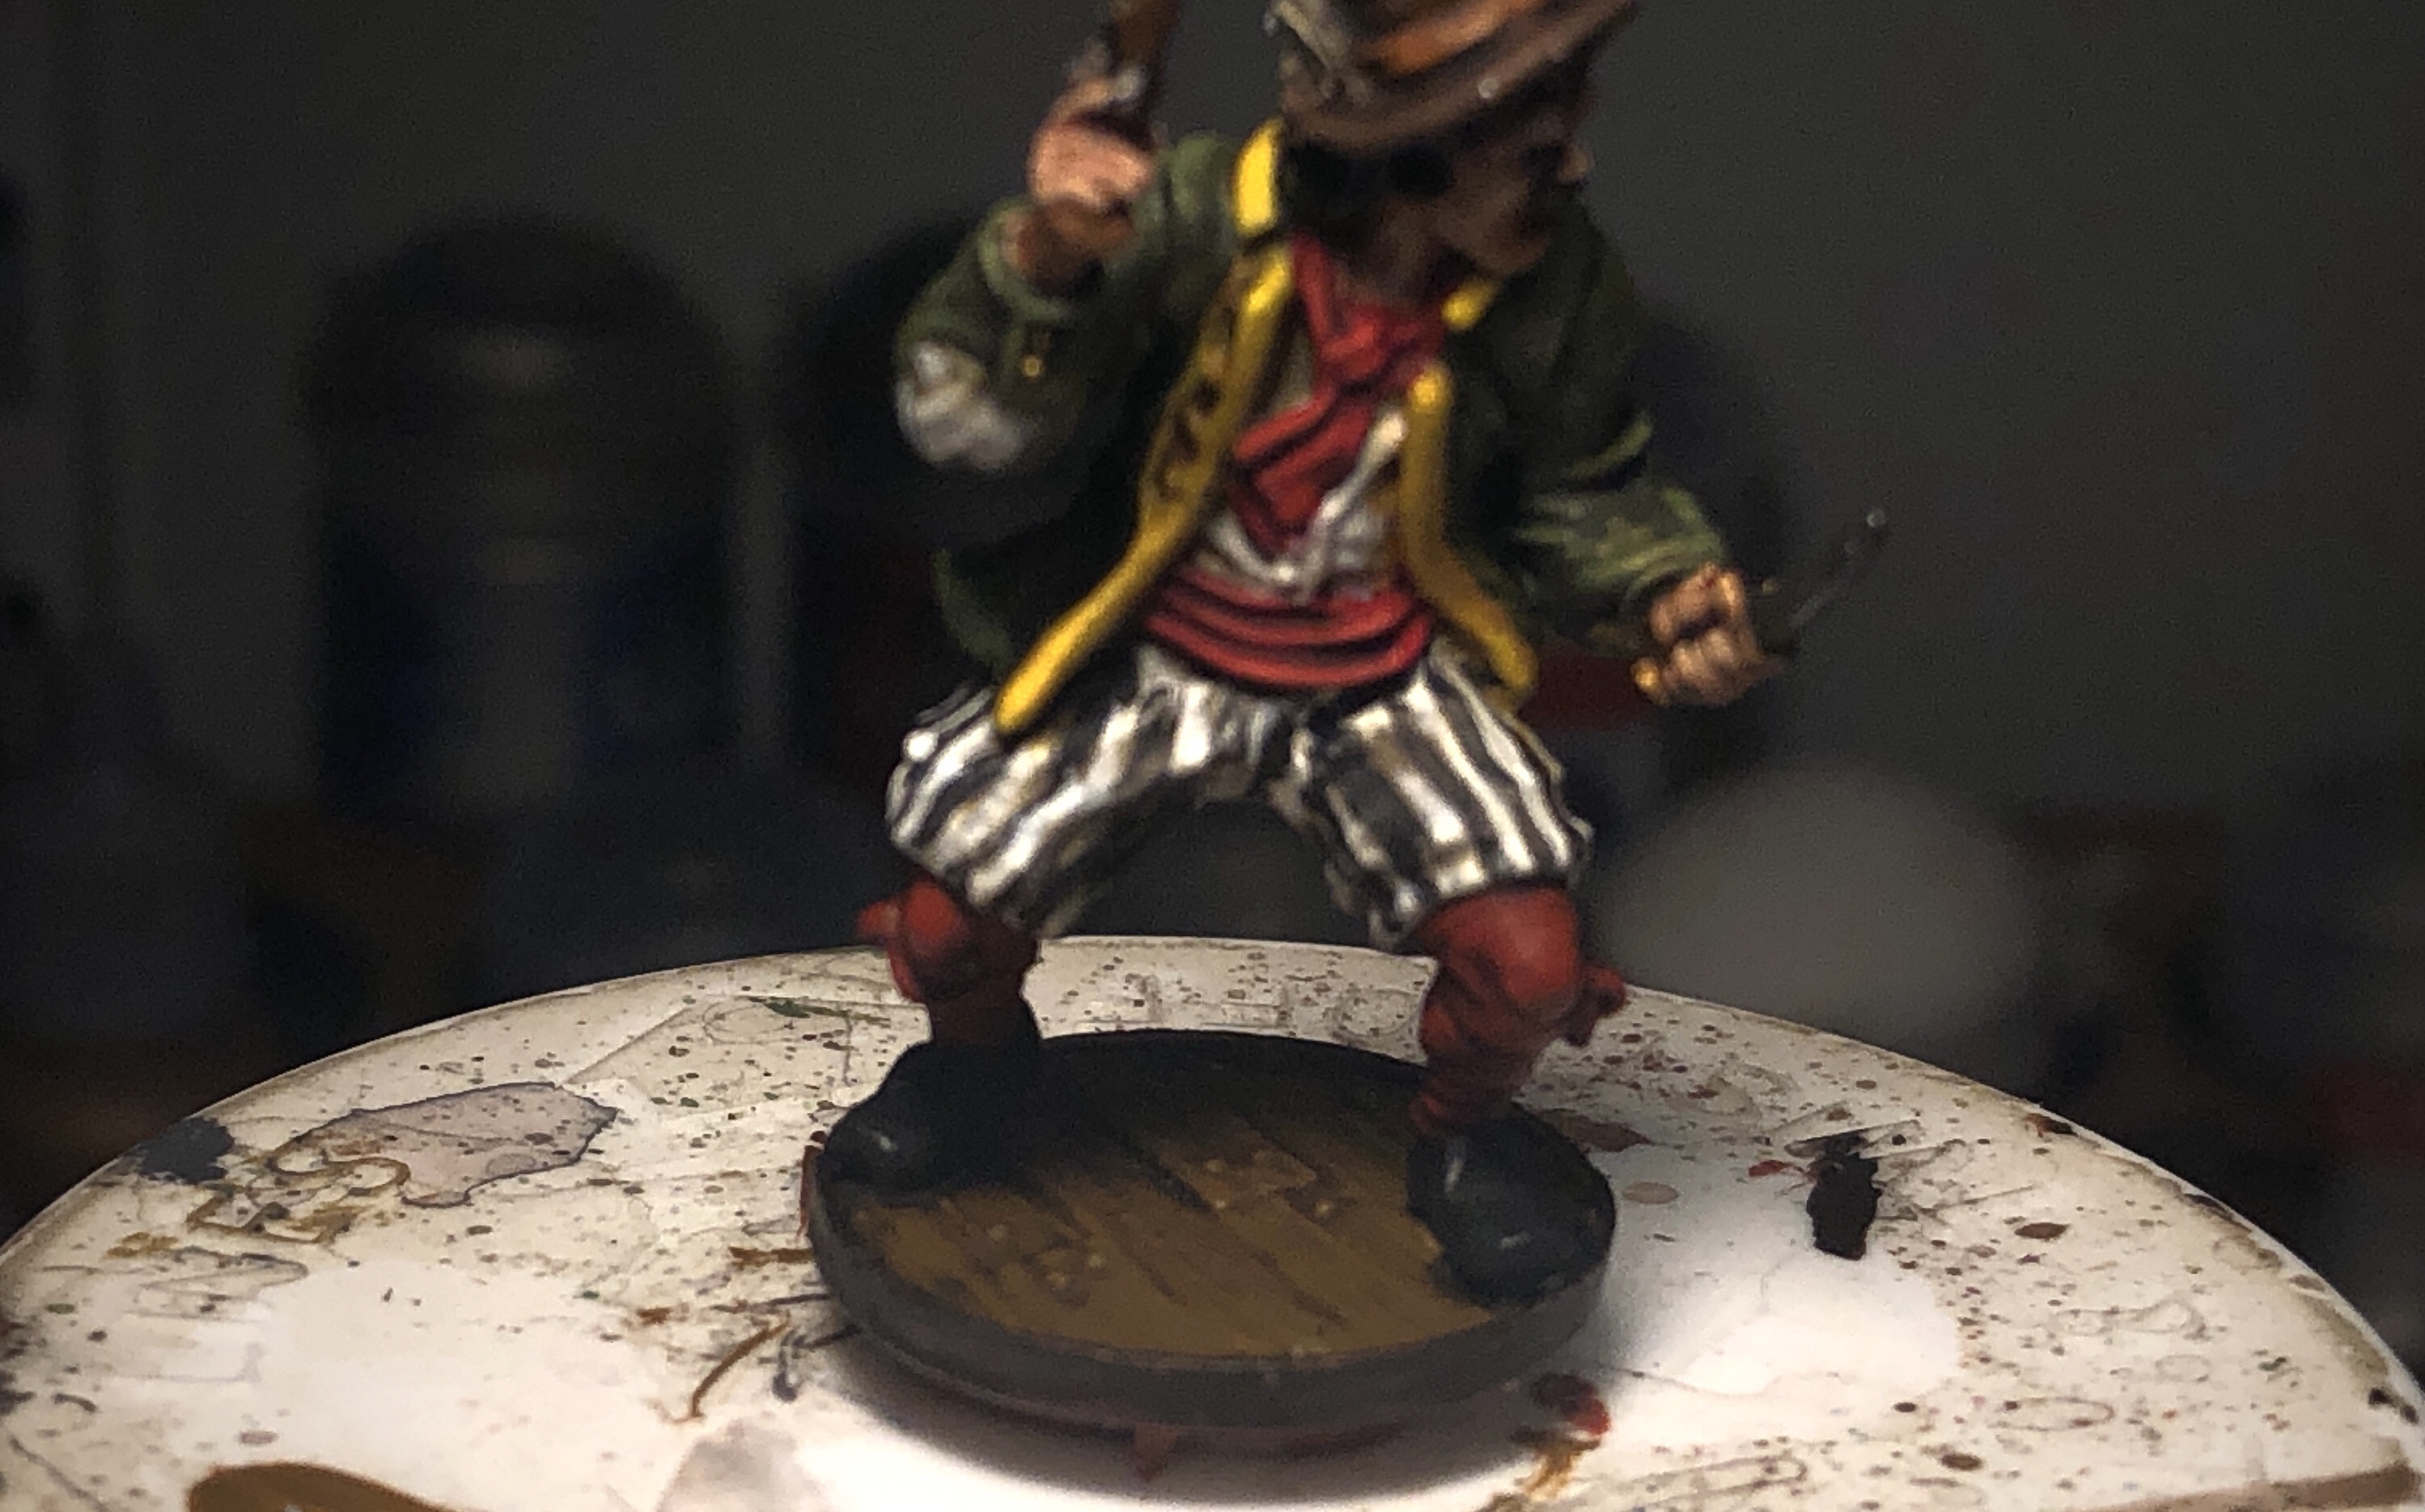
After I was almost finished with these models I looked at the Firelock paint jobs again and realized the model with the white/black striped paints actually has white and blue stripes. These are already colorful enough but if you want to more closely copy those models, white and blue would be the accurate choice for the model holding the pistol and dagger.