Ever since the post-NPBtL errata came out, I’ve been eager to play William Kidd again! With a new version of Strict available, he’s much more attractive as a commander for larger naval game. The following report covers a 350 point naval game vs my friend, Guy. I mentioned to him that I wanted to play Kidd again and he did some research and read up on his largest and most controversial prize, the Quedagh Merchant, and he built a list that represented the crew of that ship. The Quedagh Merchant was technically a Armenian merchant ship but it was commanded by an English captain and had a mixed crew of (East) Indians, Dutch, French, and Armenians. It was sailing under French protection so Kidd assumed it was fair game for a Privateer takeover, but the powers over him judged differently and he was ultimately hanged for taking this ship.
This encounter was much bloodier and eventful than the actual events surrounding the capture of the actual Quedagh Merchant.
The Forces

There is no force in Blood & Plunder that would precisely recreate the crew of the Quedagh Merchant, but Guy was creative and made something that represents the ship fairly well, although the crew is clearly and necessarily more warlike than the actual crew.

He used English Buccaneers as his faction and his 350 point list included:
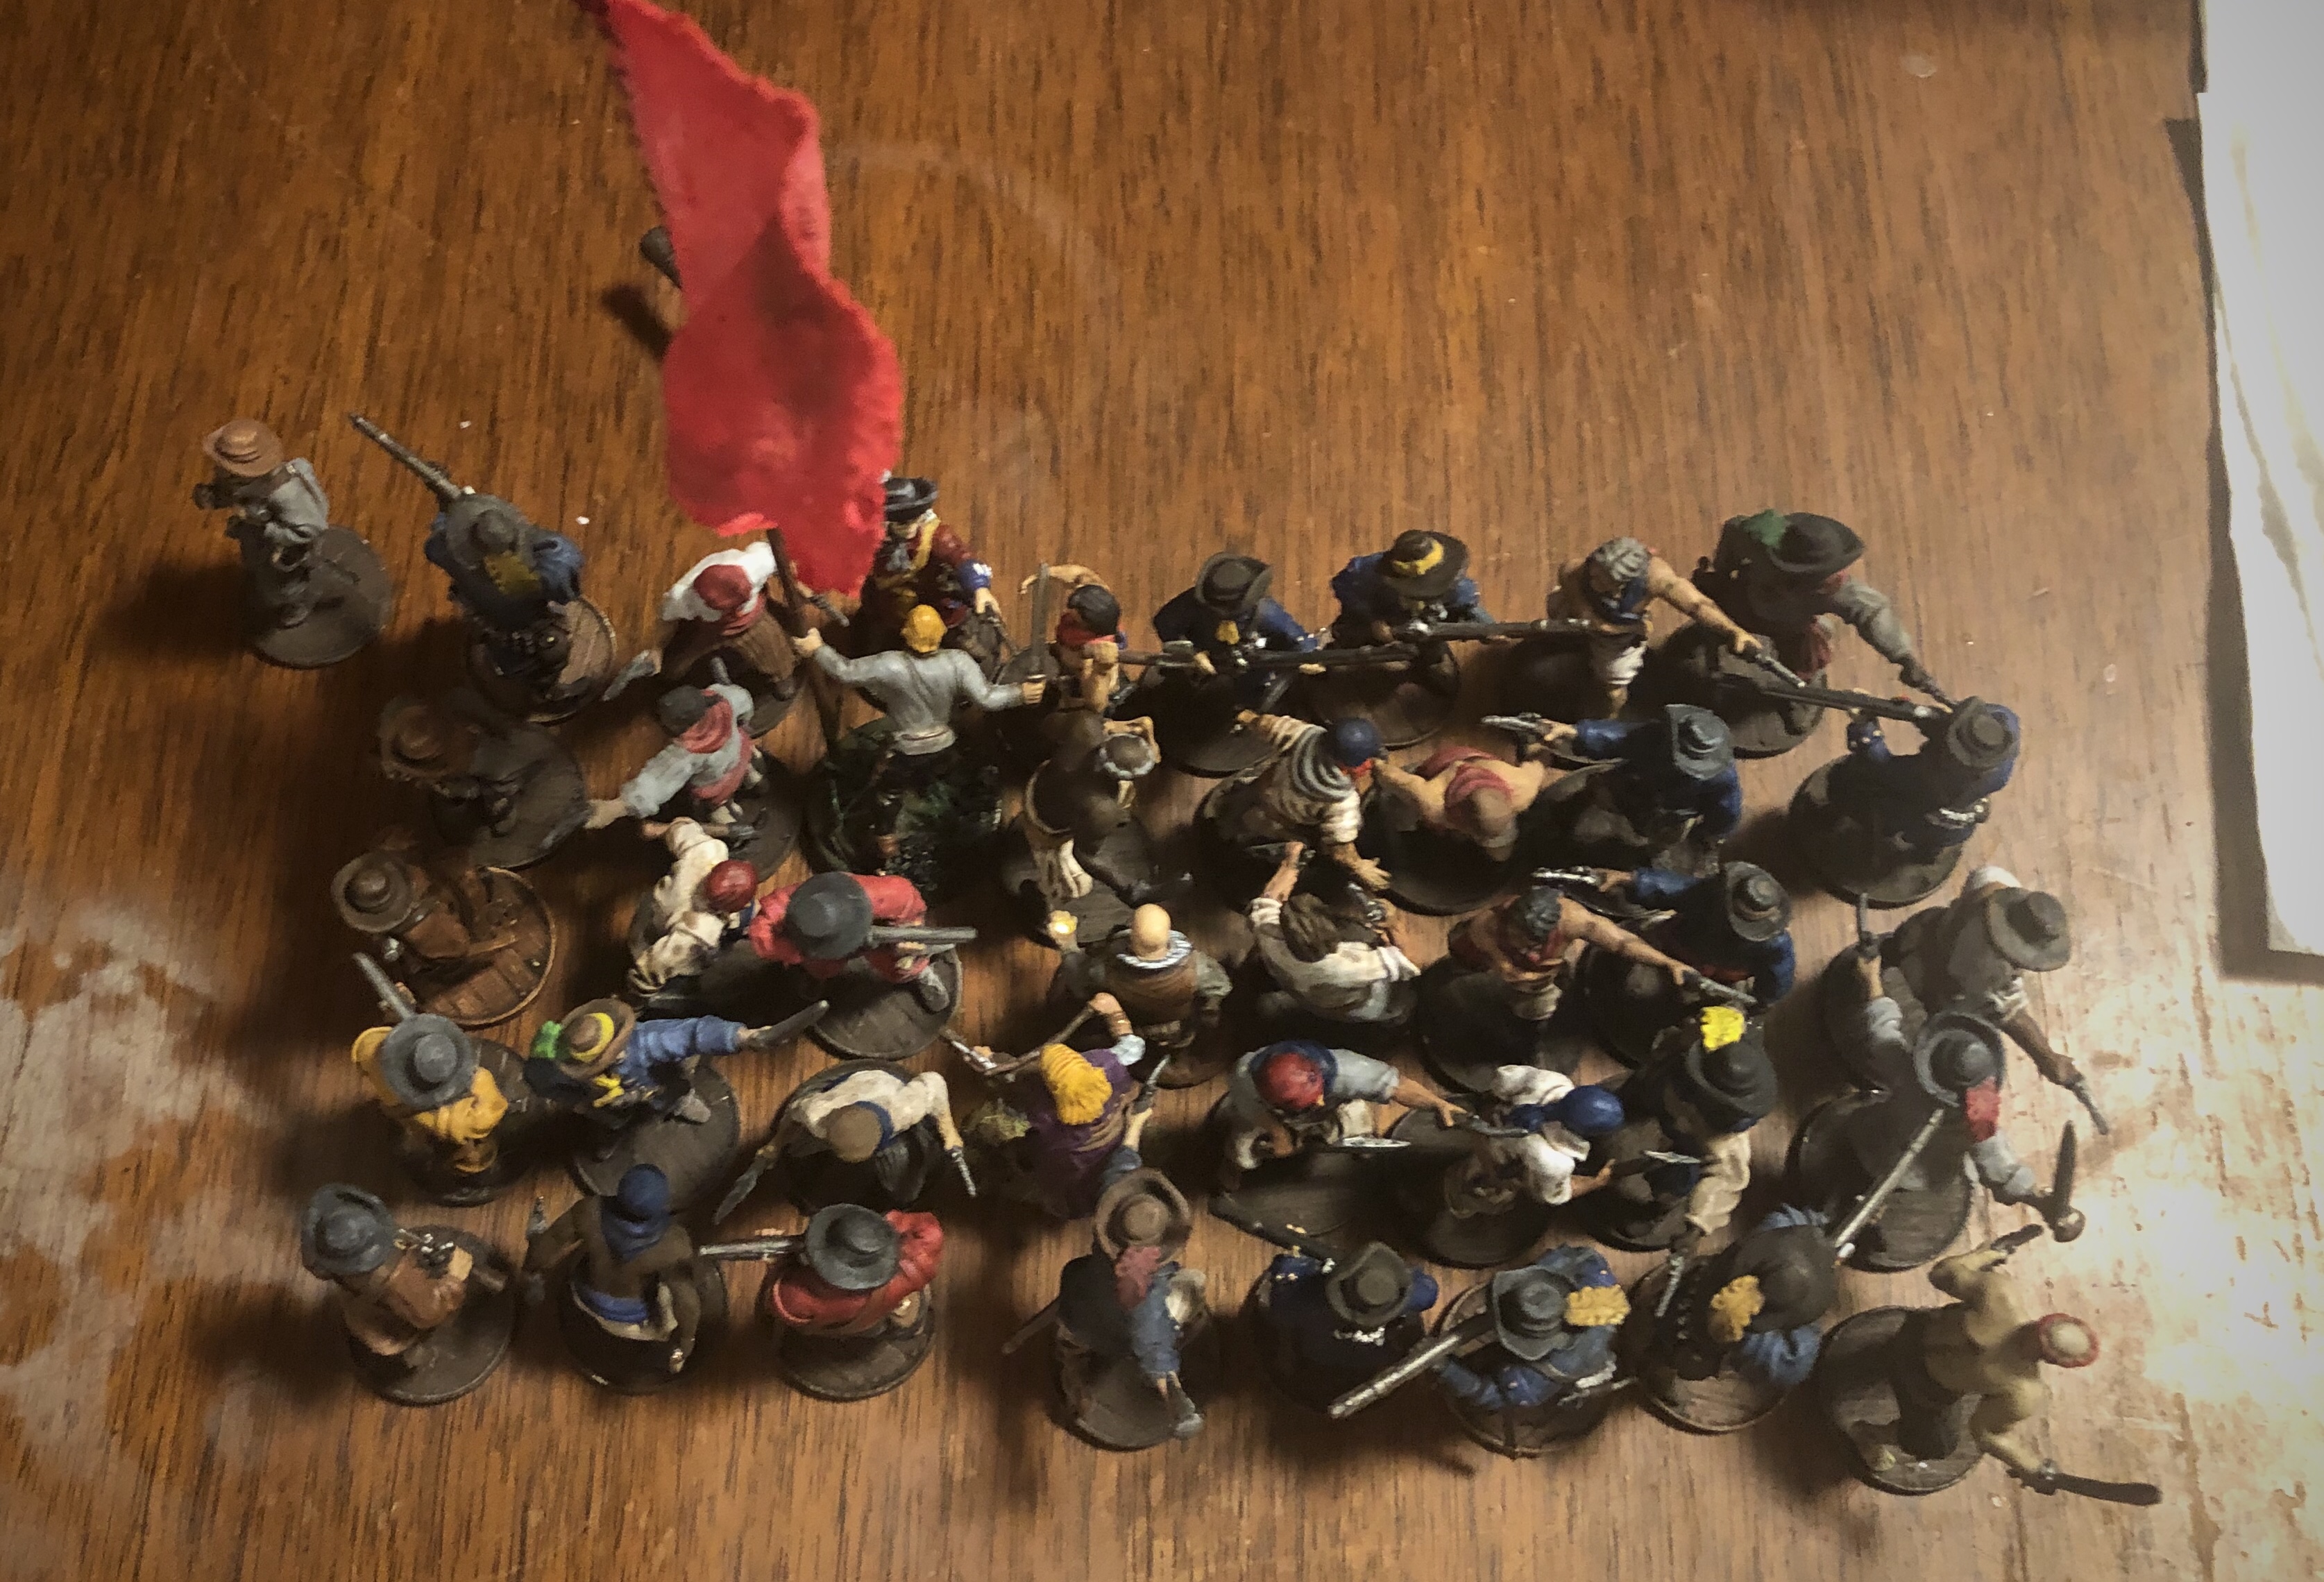
- Seasoned English Commander (Captain John Wright) attached to a unit of 16 Sea Dogs with a Captured Merchant, a Standard Bearer and a Musician attached.
- A unit of 12 Kapers with 4 Blunderbusses swapped out for their muskets and a Sharpshooter attached.
- A unit of 16 Zeelieden with an Officer and 2 Firepots.
- A unit of 10 Sea Dogs with a Master Gunner and no pistols.
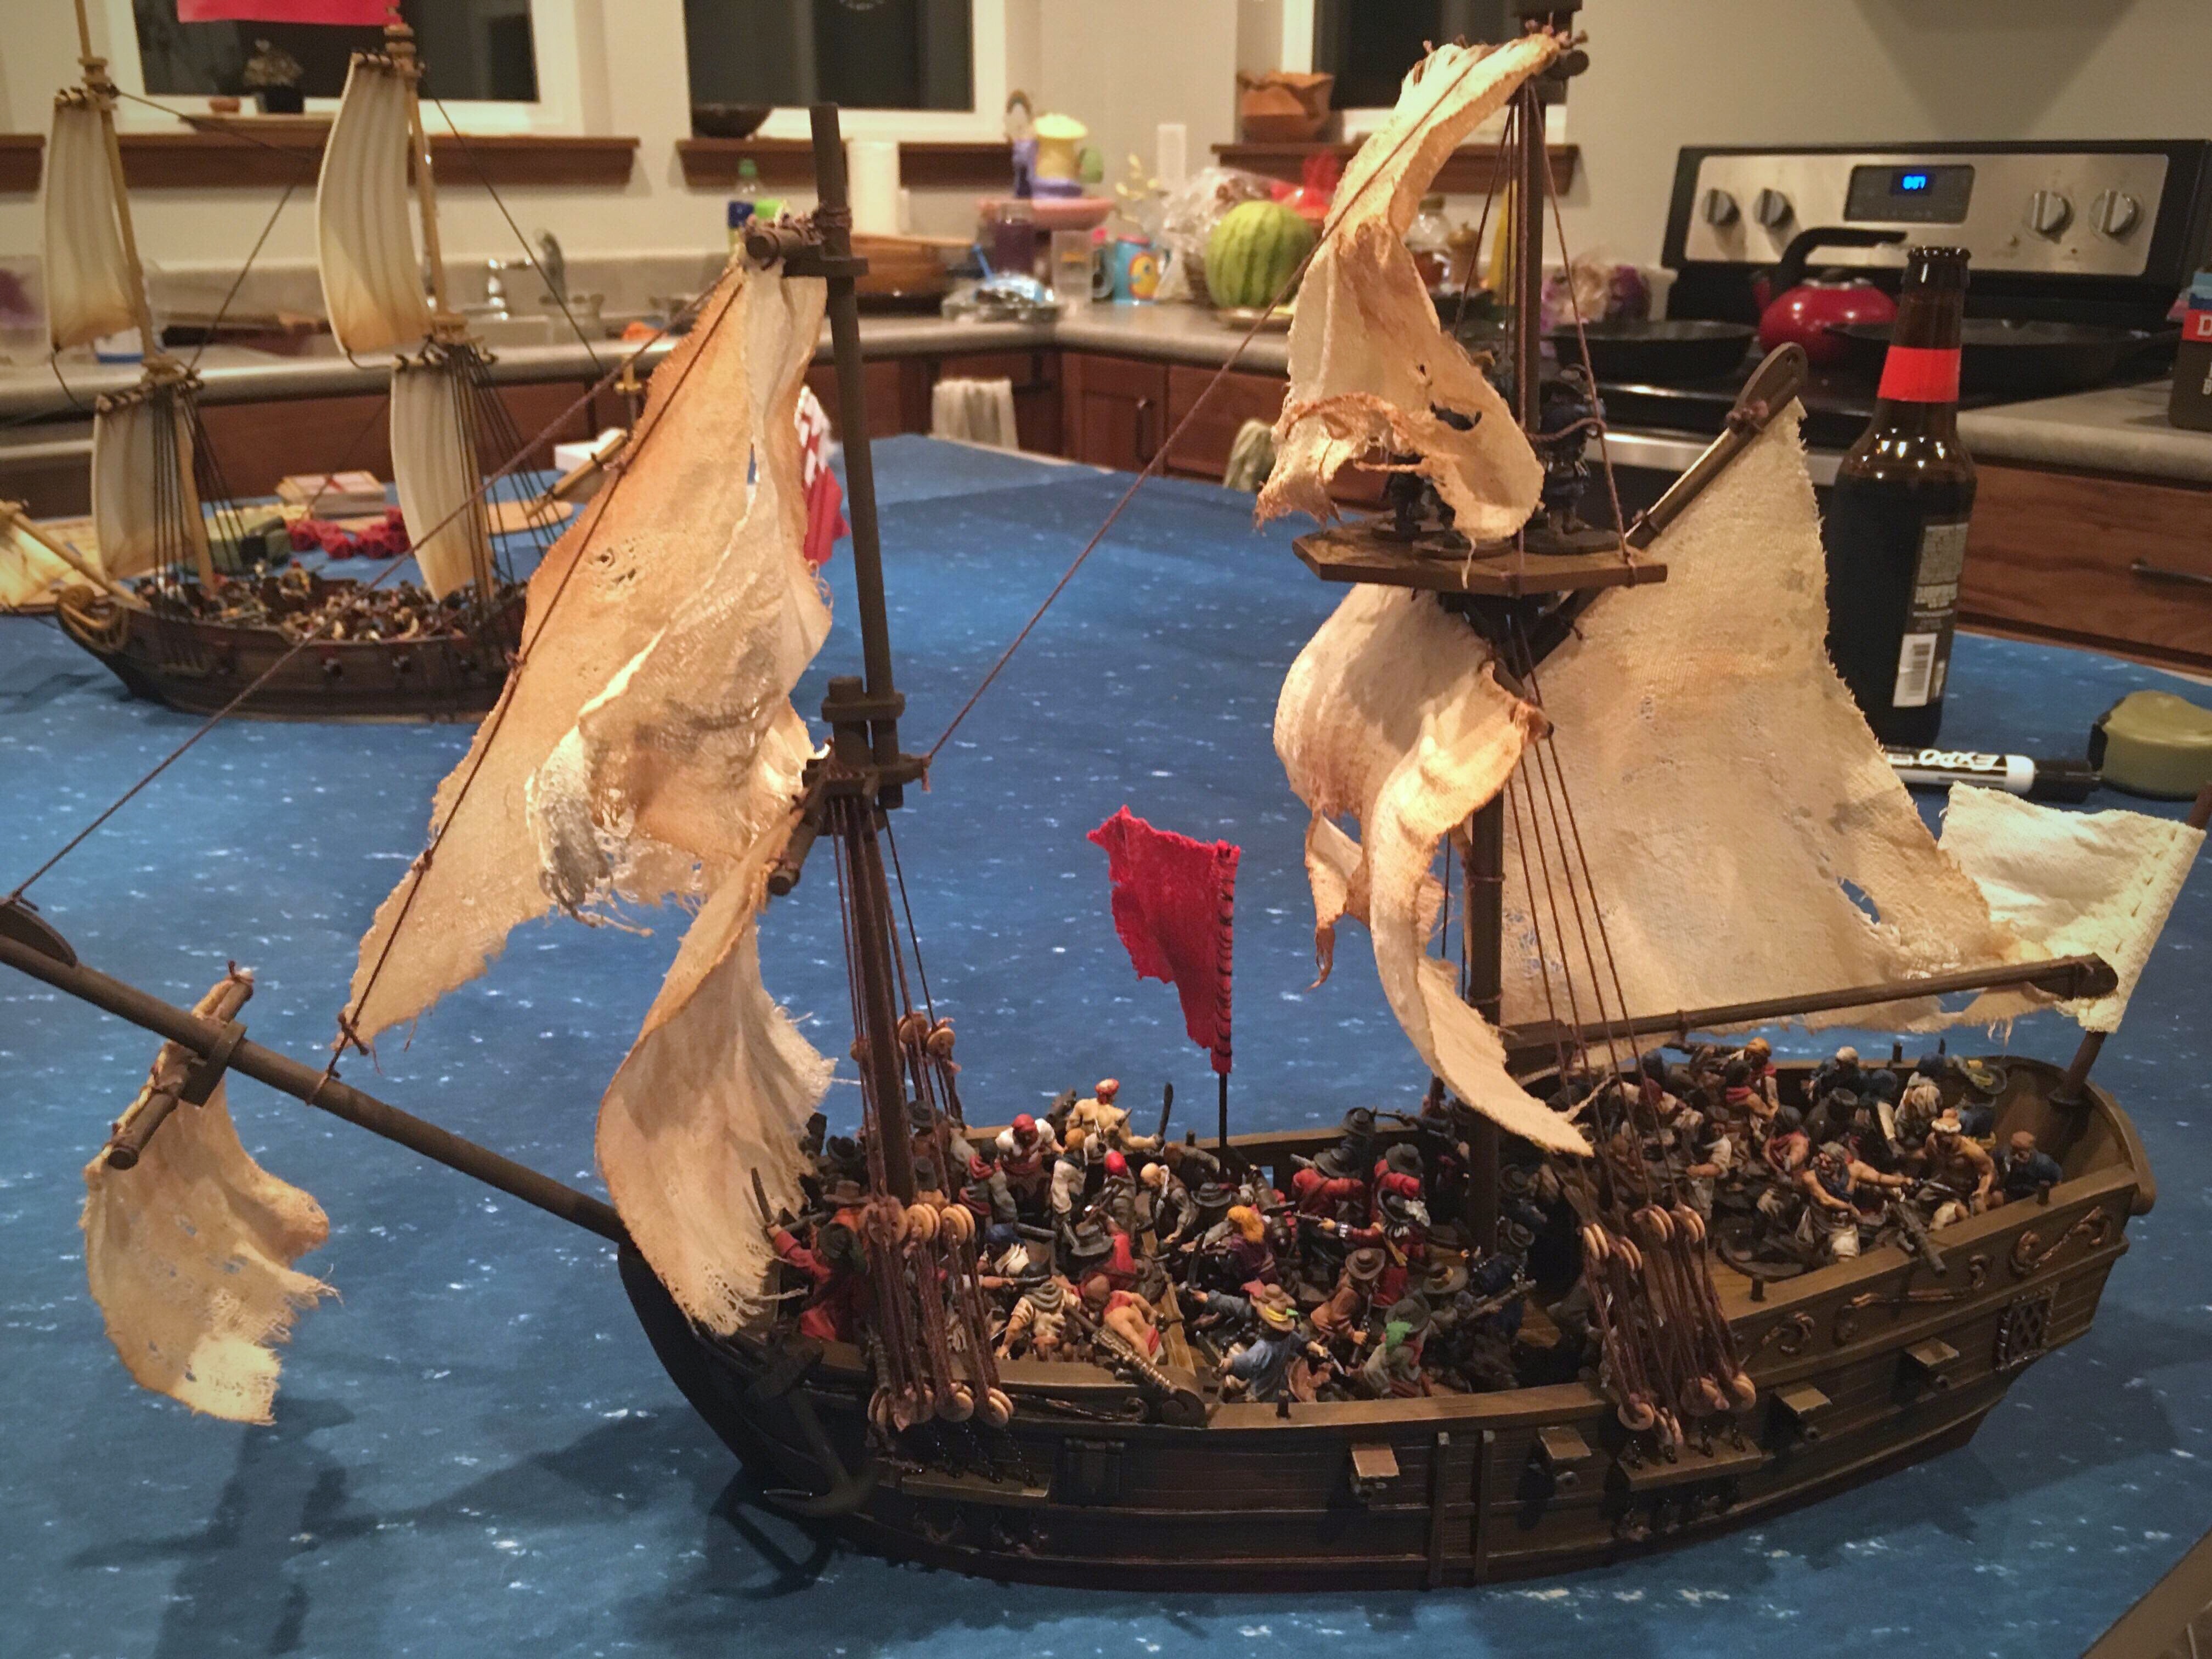
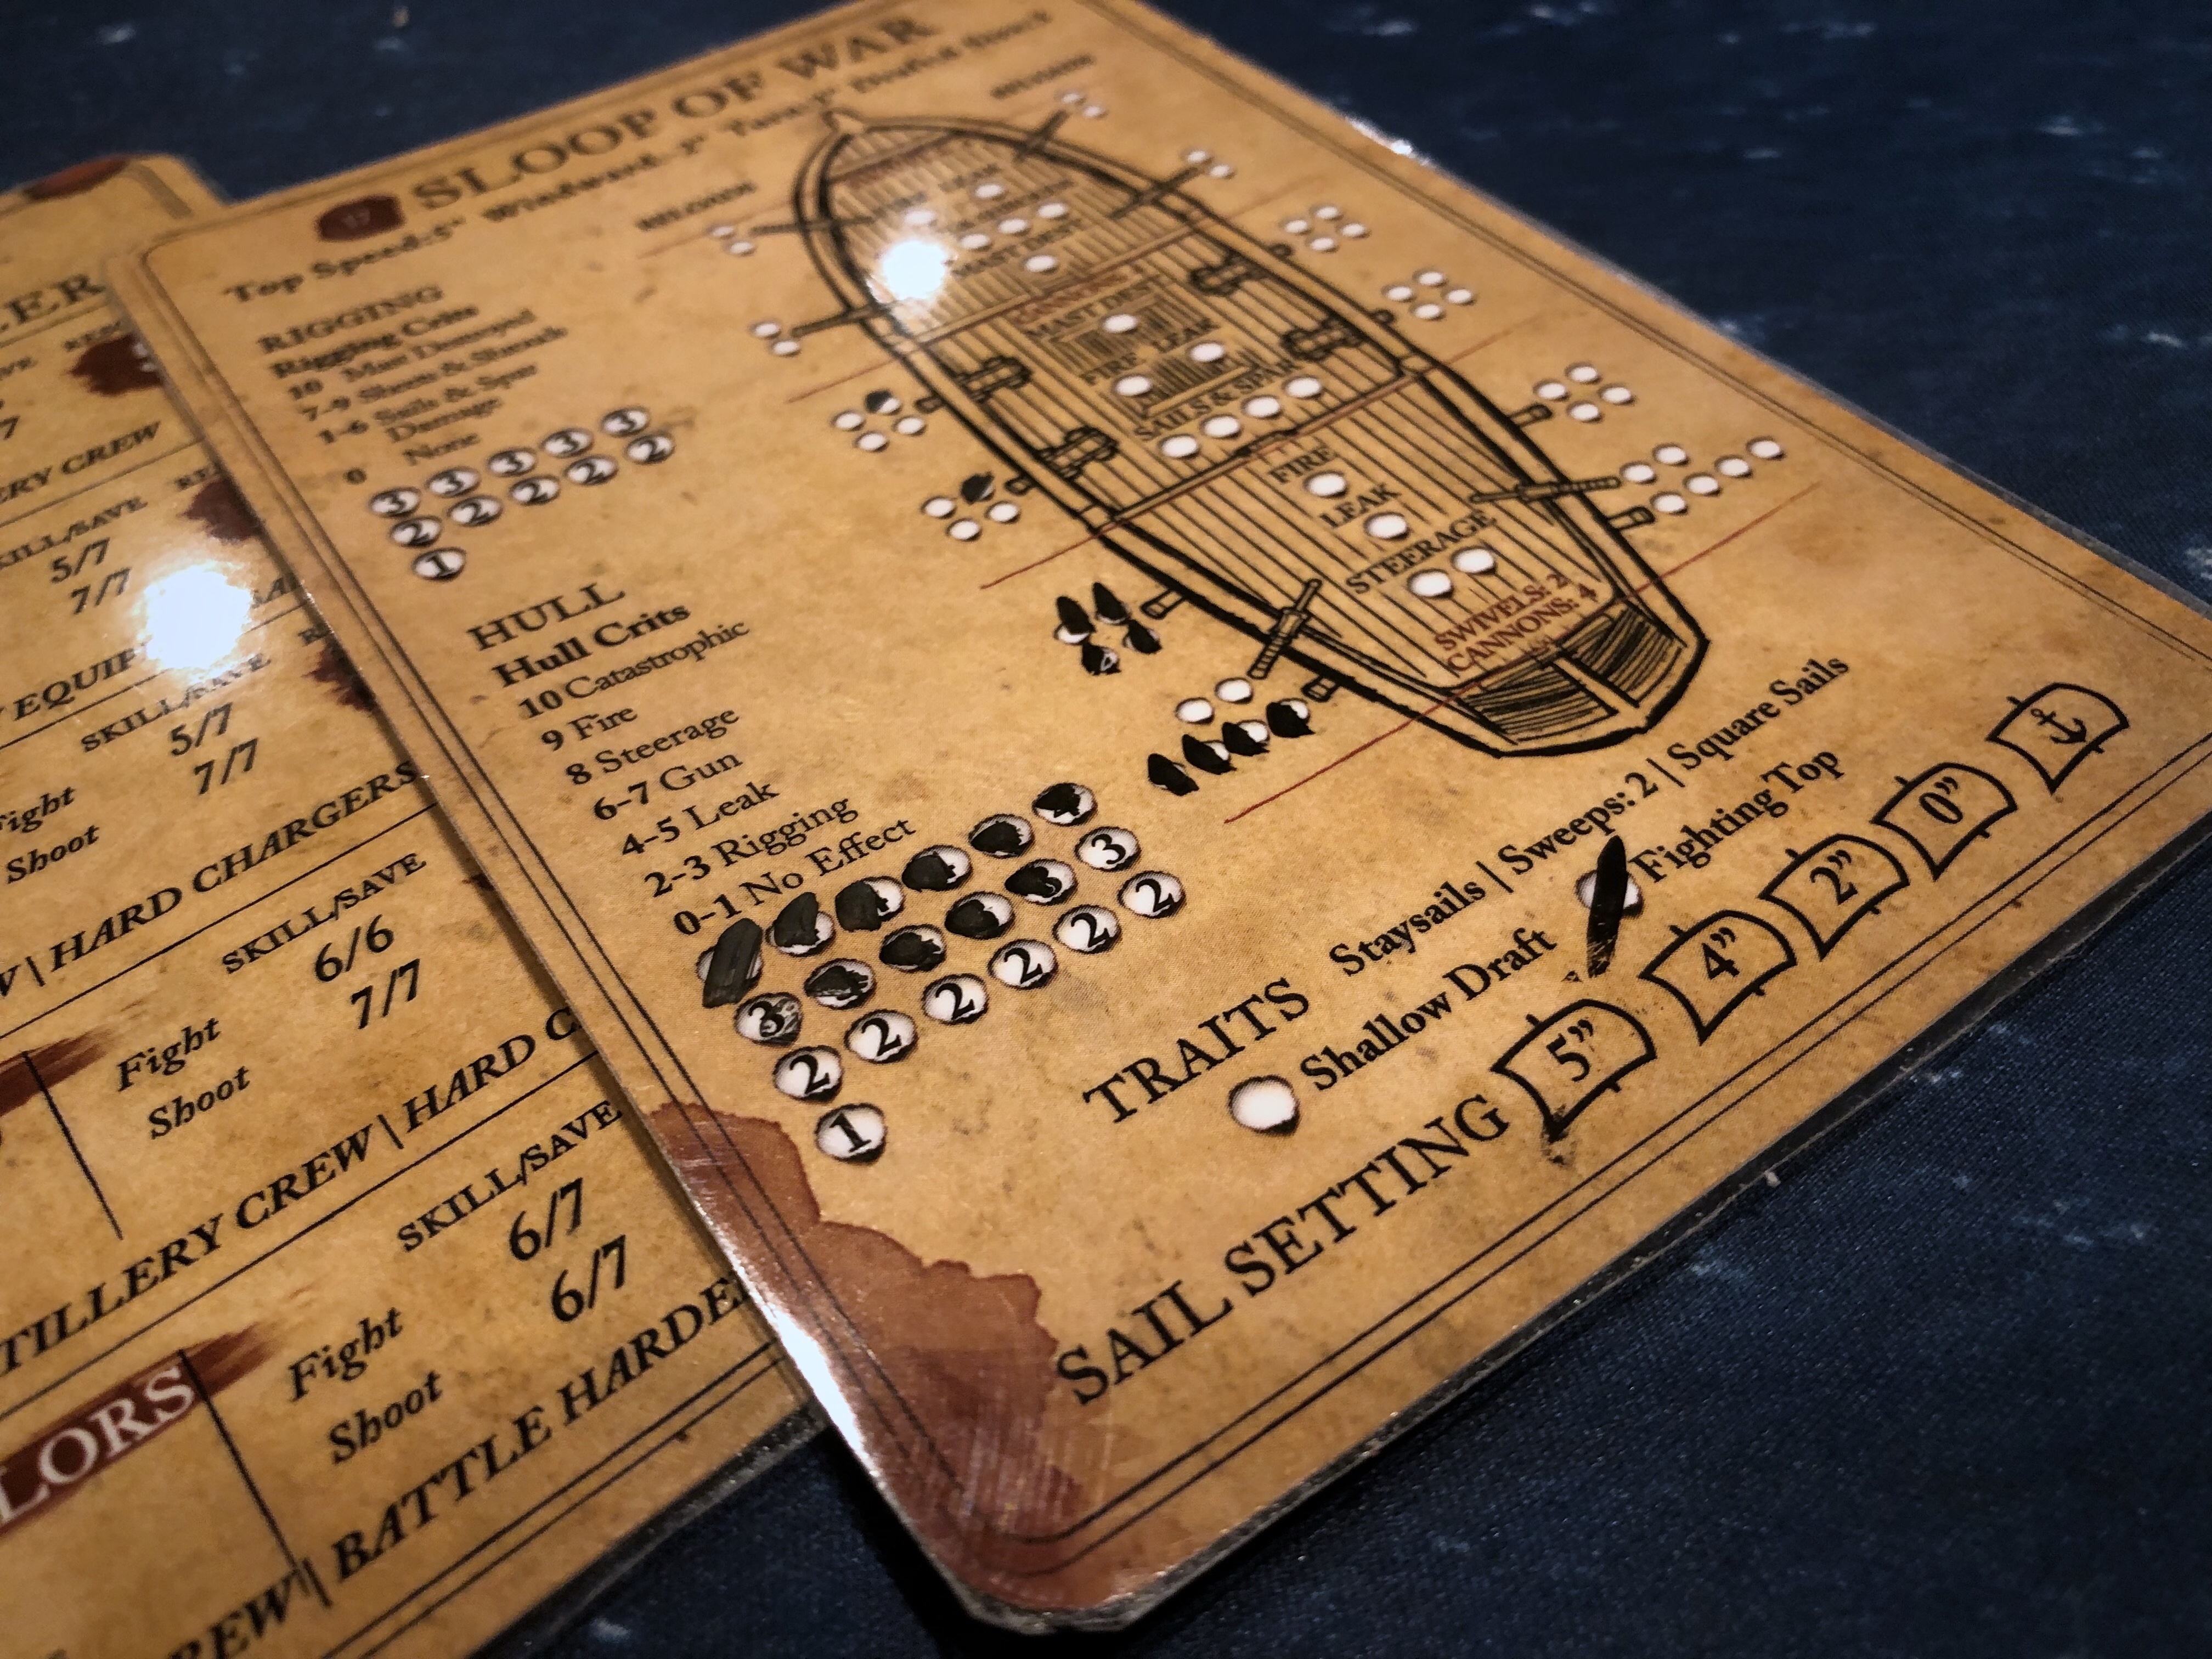
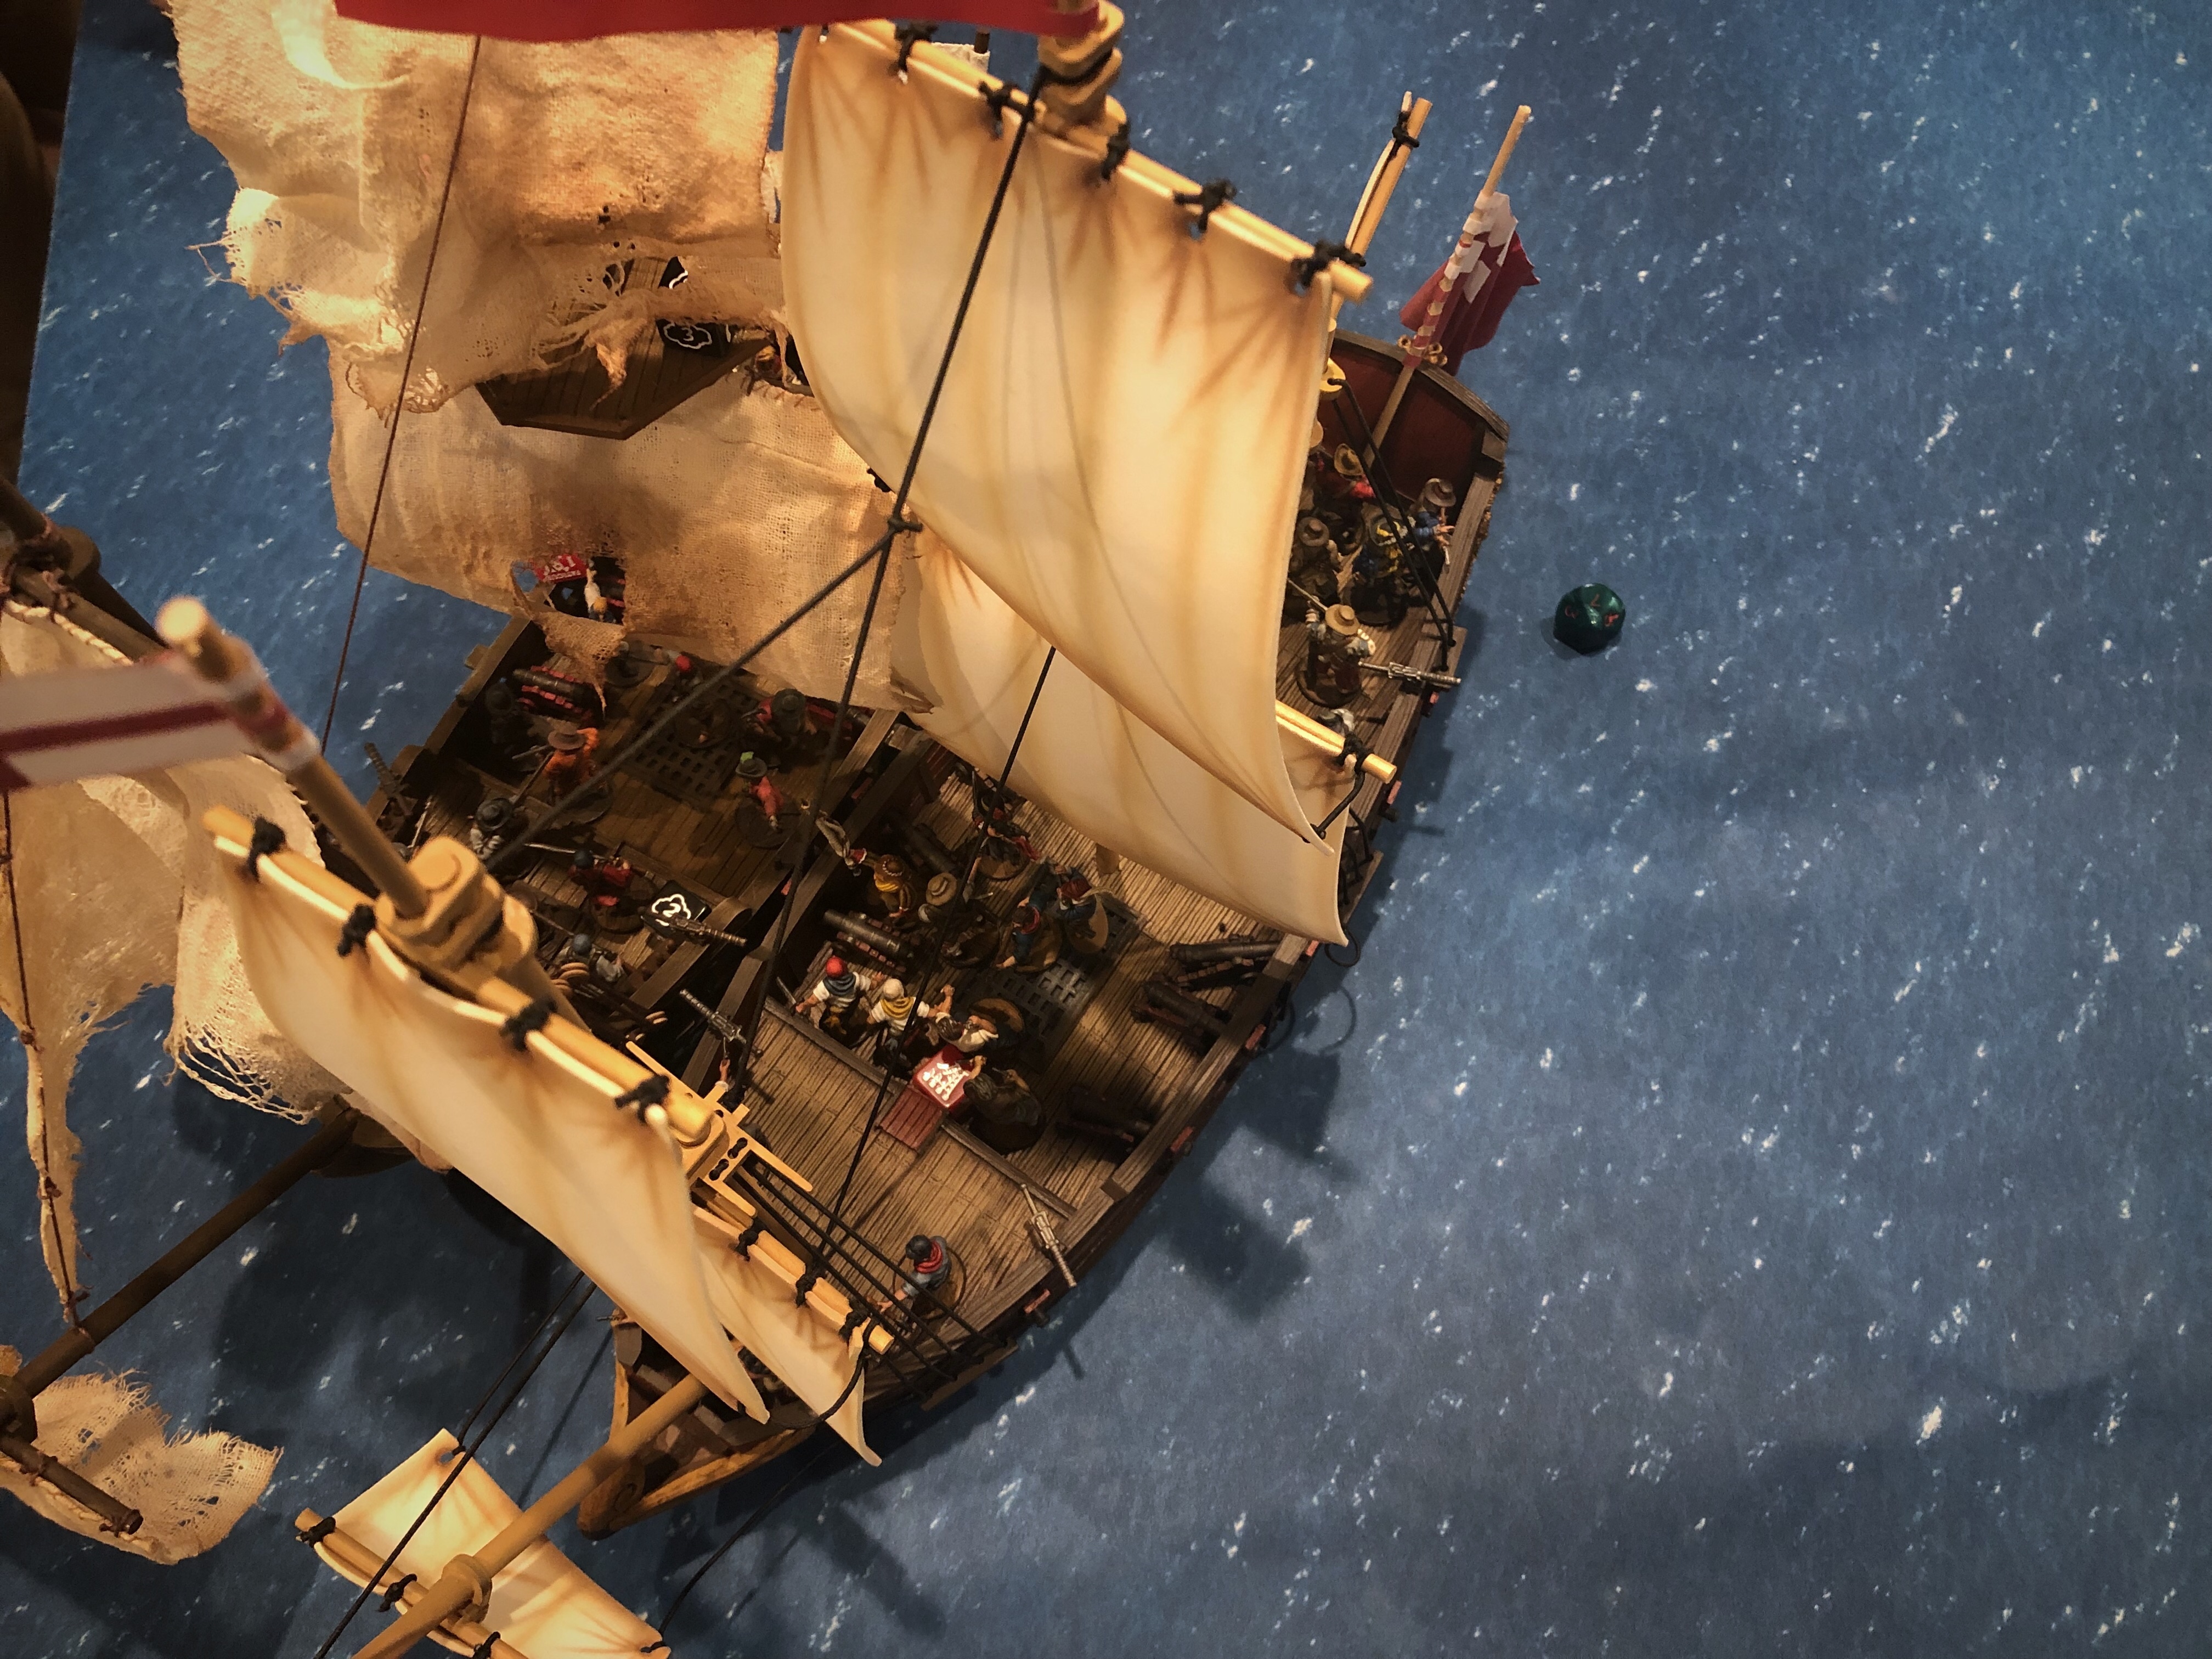
- Sloop of War with 1 Fighting Top, 6 Swivel Guns, 4 Medium Guns and Grapeshot.
The Quedagh Merchant
Captain William Kidd
I used Kidd’s own faction and my list included:
- William Kidd attached to a unit of 14 Sea Dogs without pistols with a Standard Bearer, Musician and Master Gunner attached.
- A unit of 8 Sea Dogs without Pistols.
- Two units of 8 Freebooters.
- A unit of 10 Marins with 3 Blunderbusses.
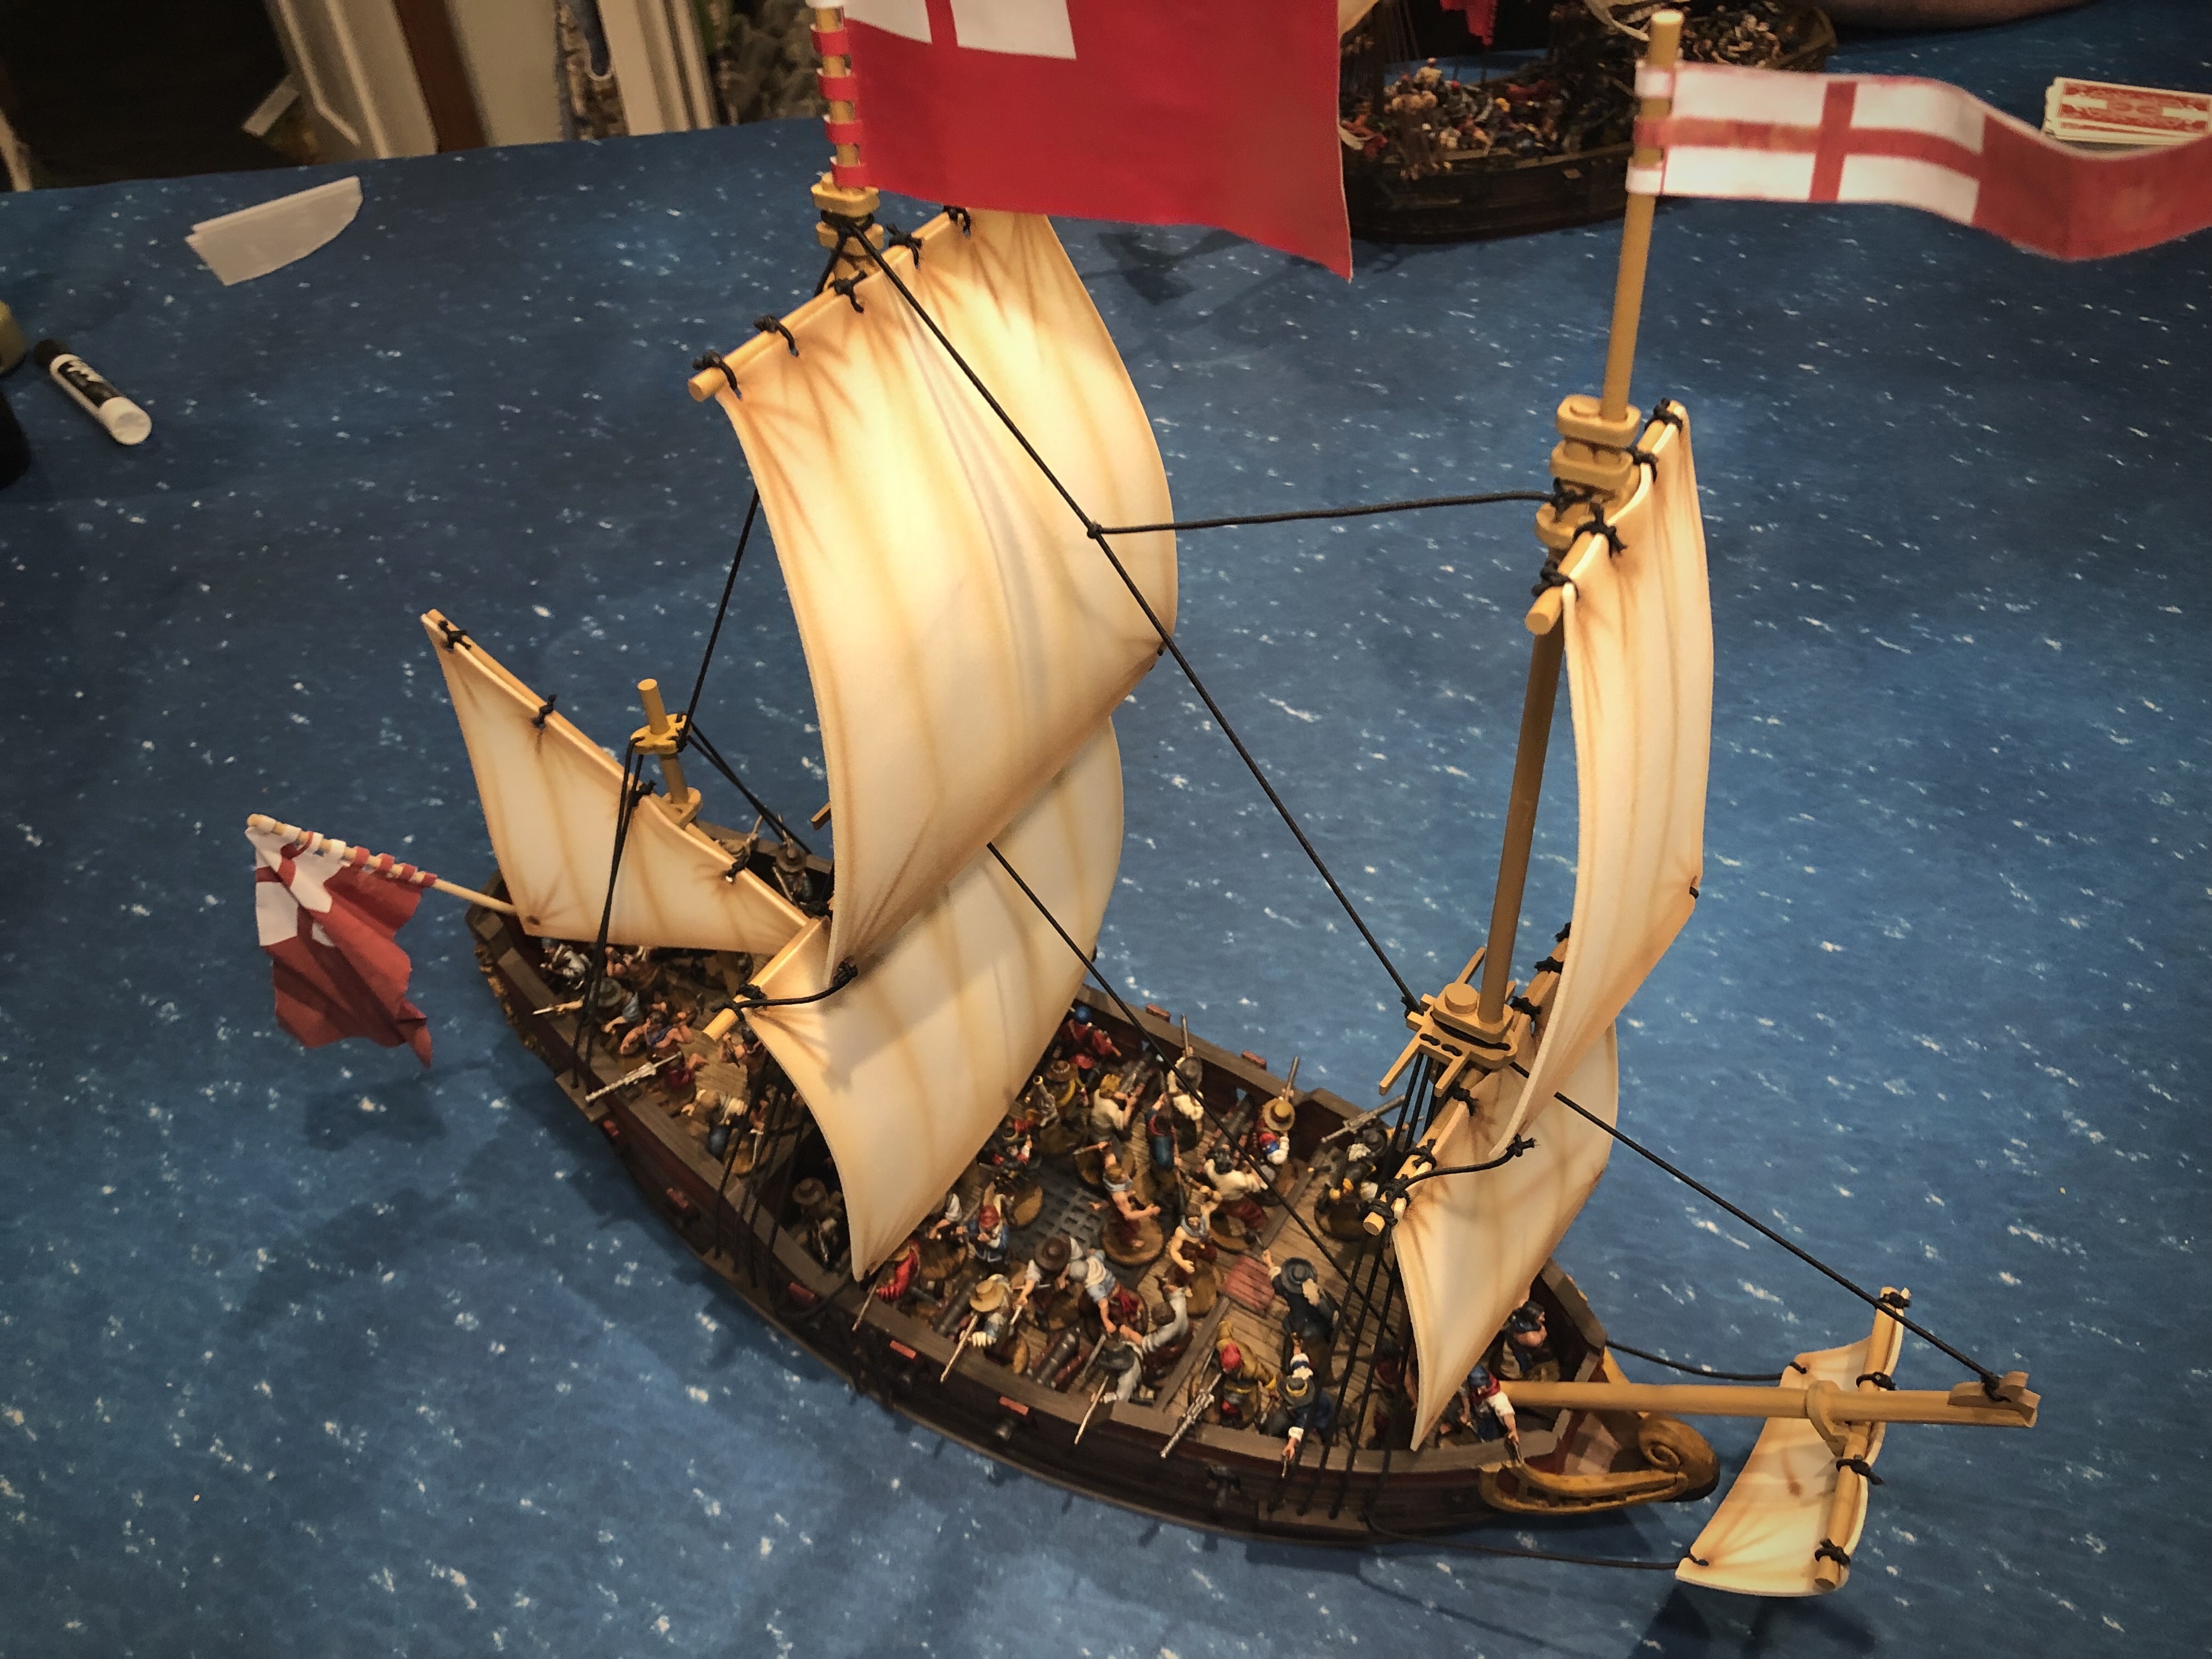
- A Light Frigate (Heavily Built using Kidd’s faction) with 1 Fighting Top, 4 Swivel Guns, and 6 pairs of Medium Guns with Grapeshot.
The Scenario
We couldn’t decide which scenario would be most appropriate so we rolled a dice to select between Raid and Raze (since Kidd ultimately burned his prize). It came up as Raid and I was obviously the Attacker.
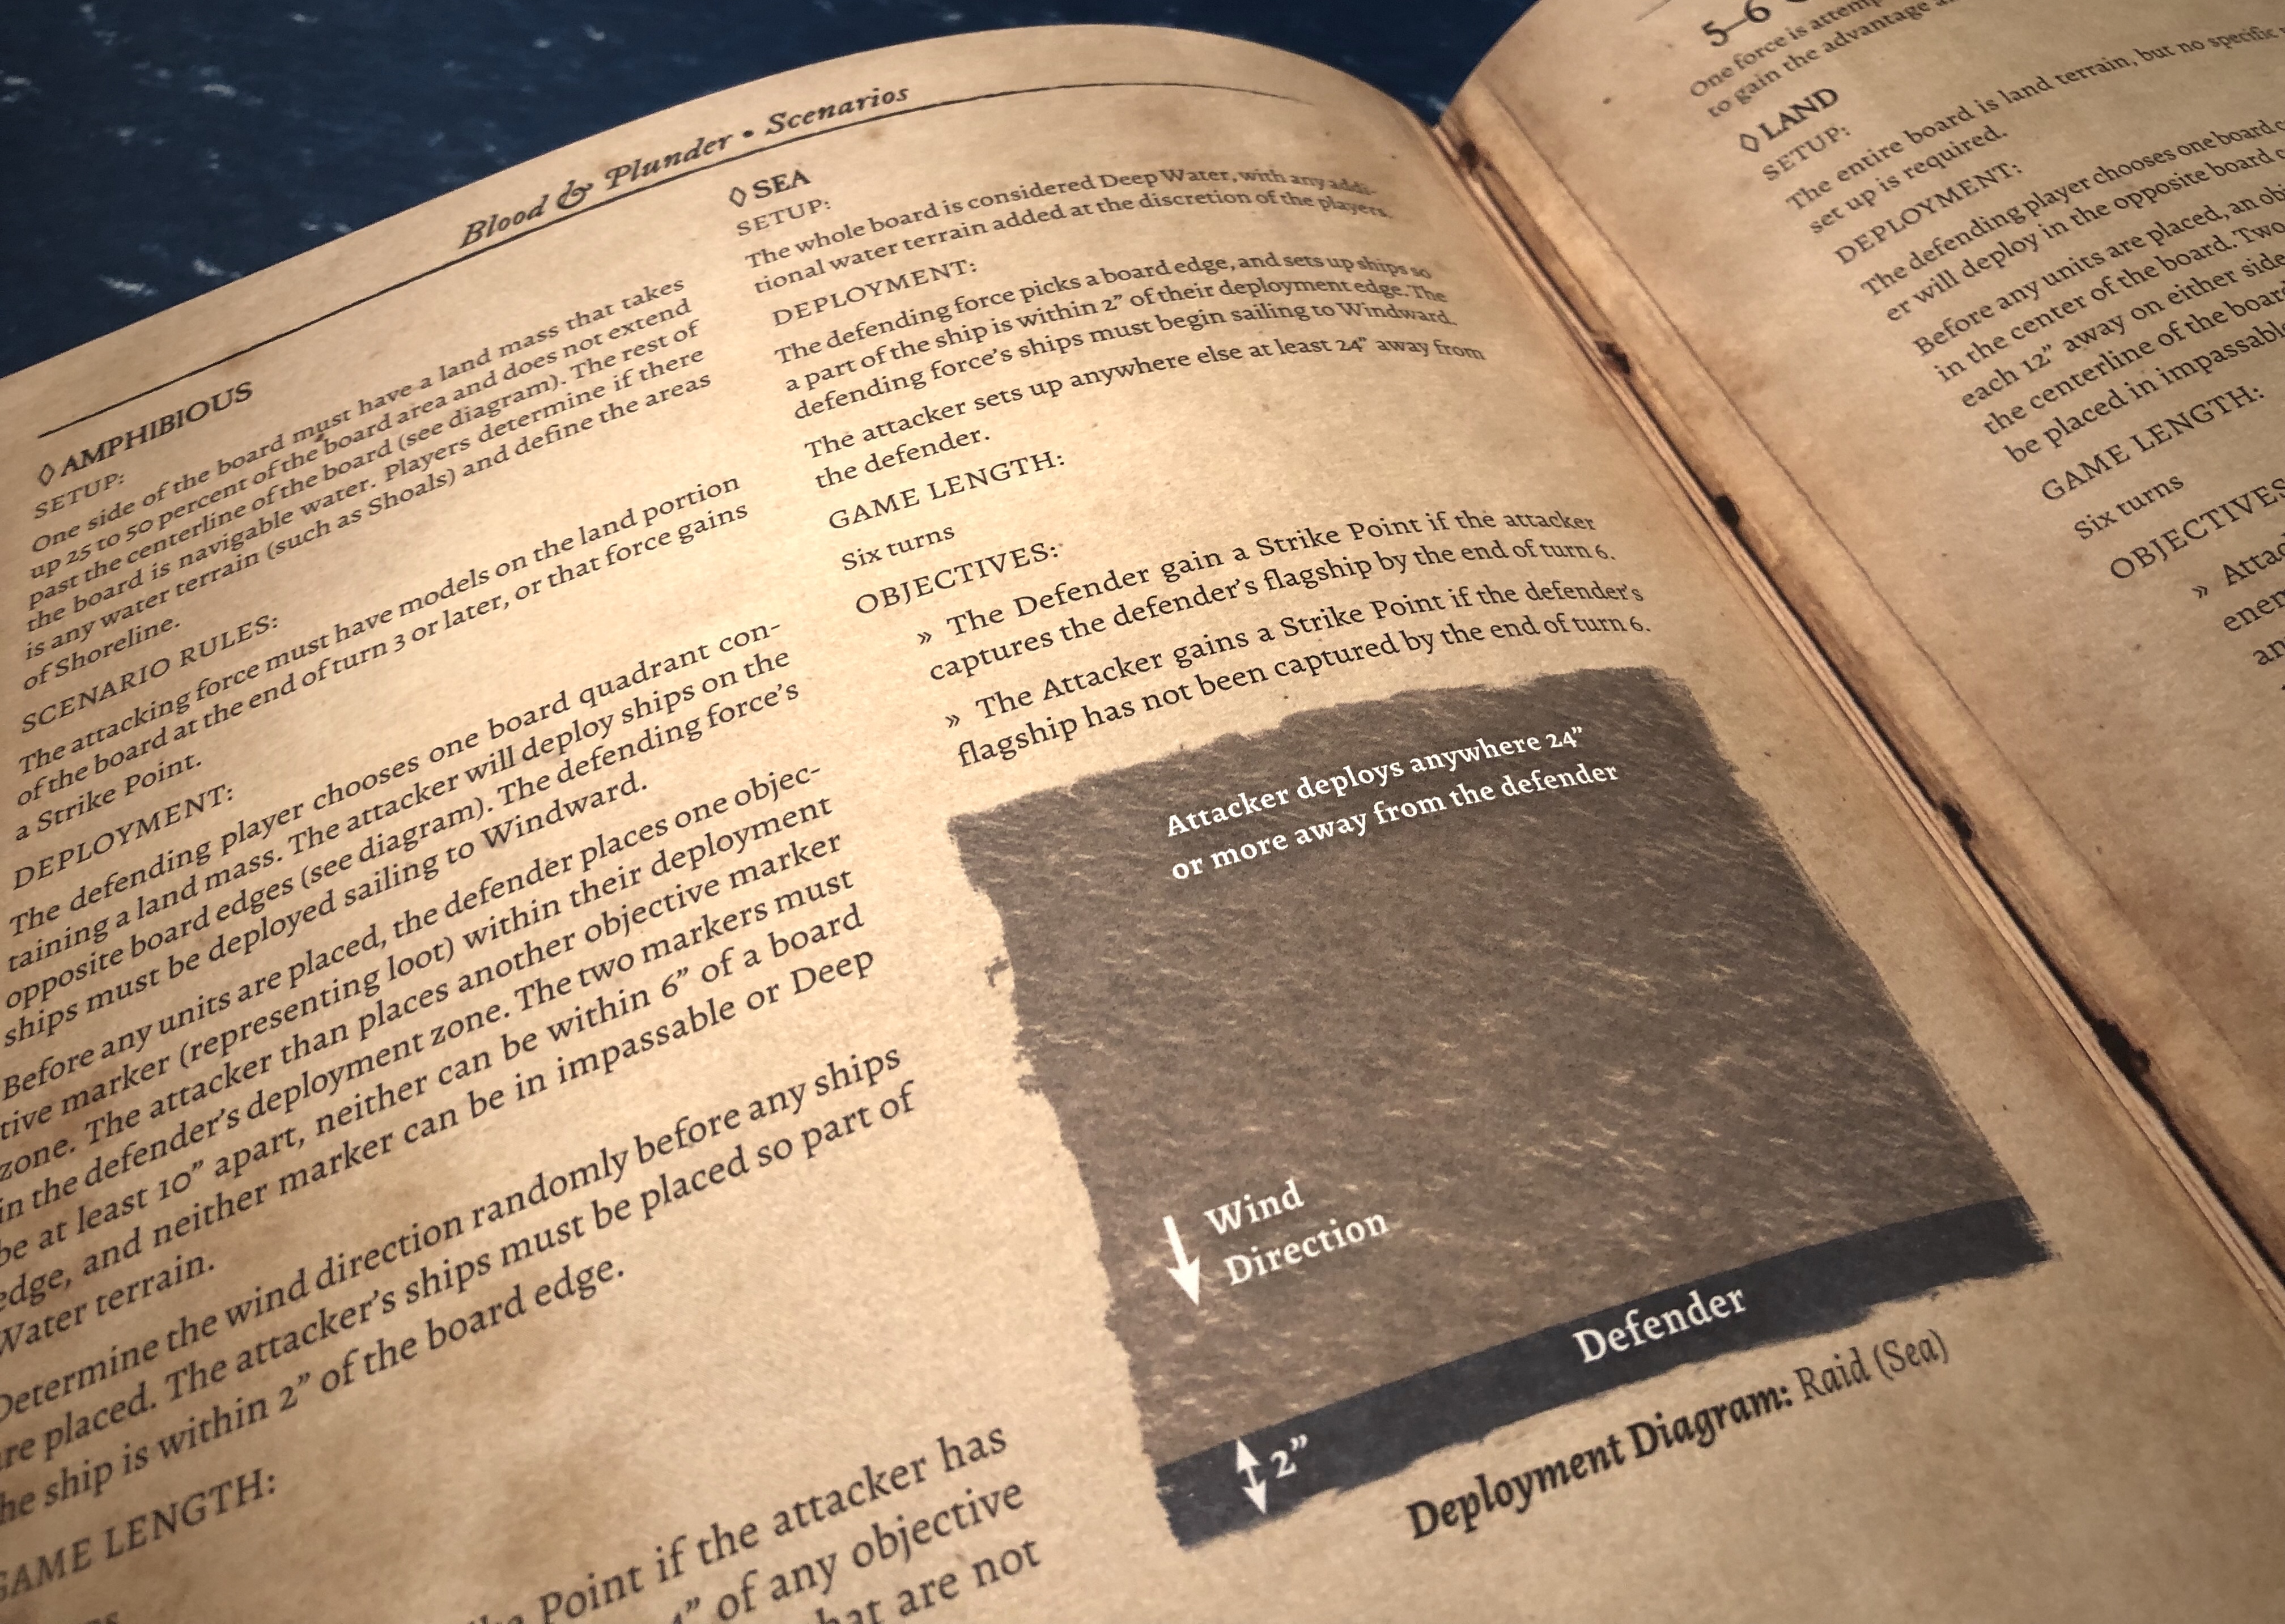
Raid is fairly straightforward. Players get an additional Strike Point if their Flagship is captured. With only one ship on the board, this won’t effect the game much since if your ship is captured, you have already lost!
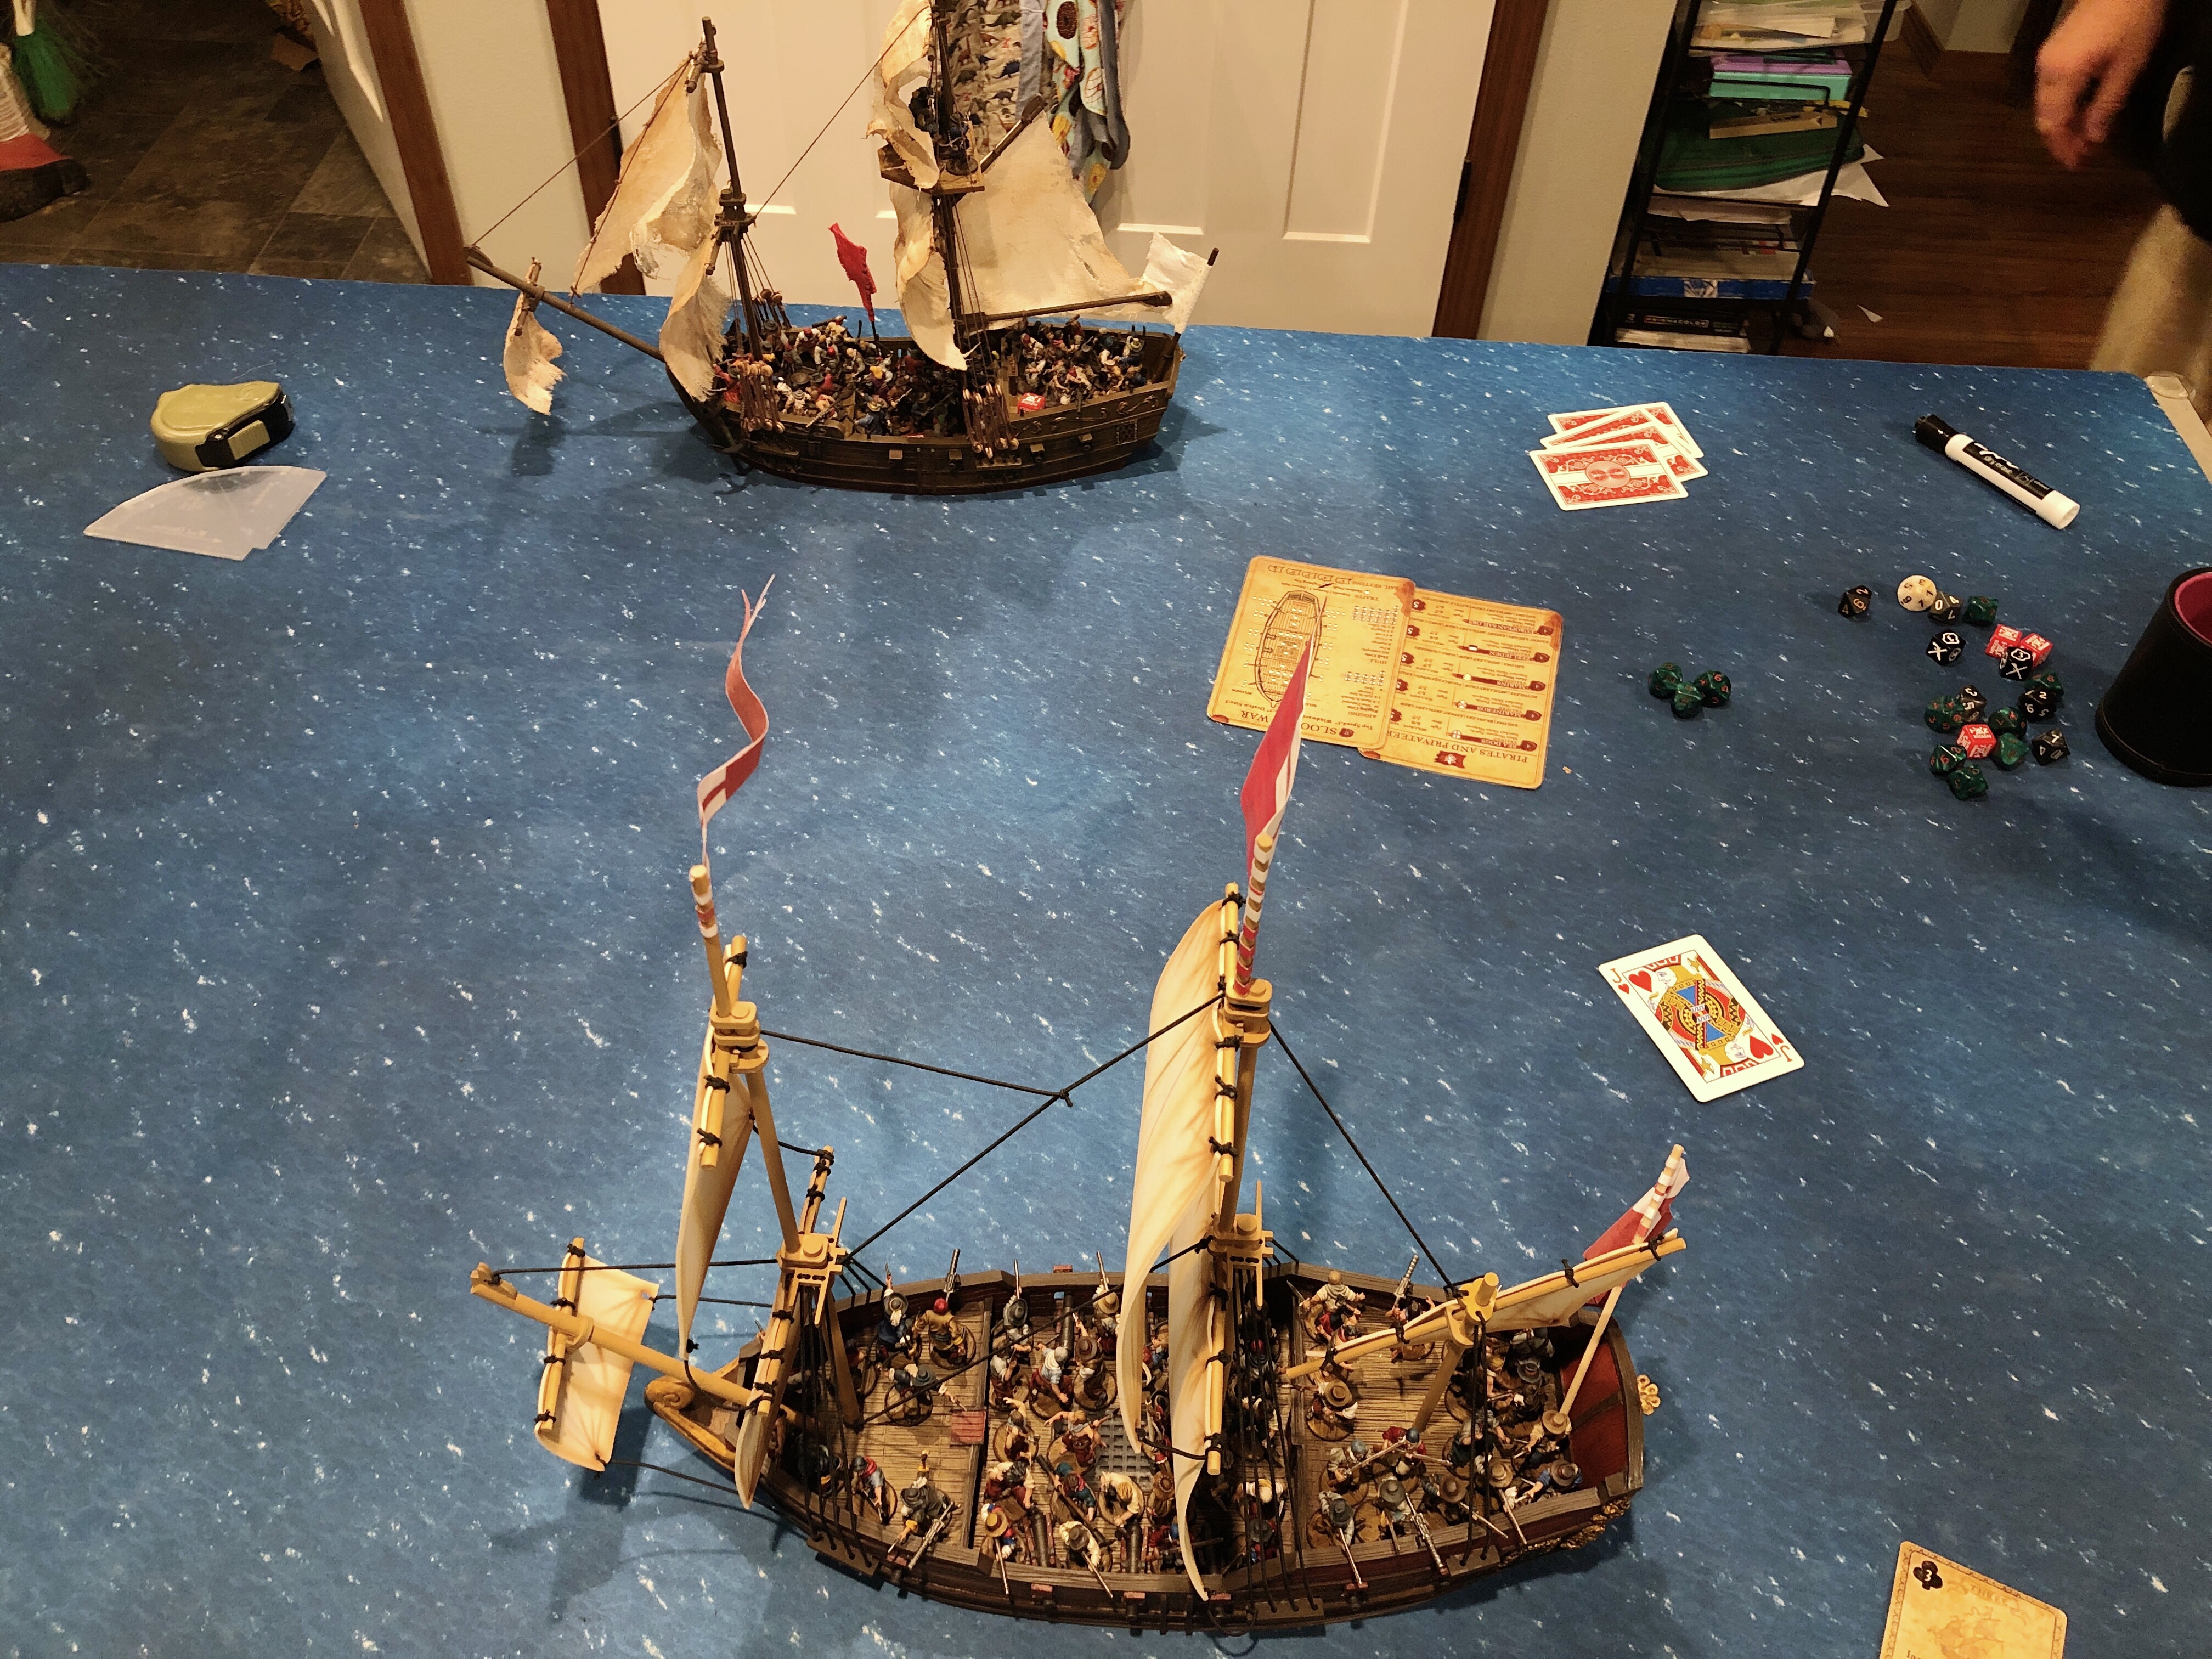
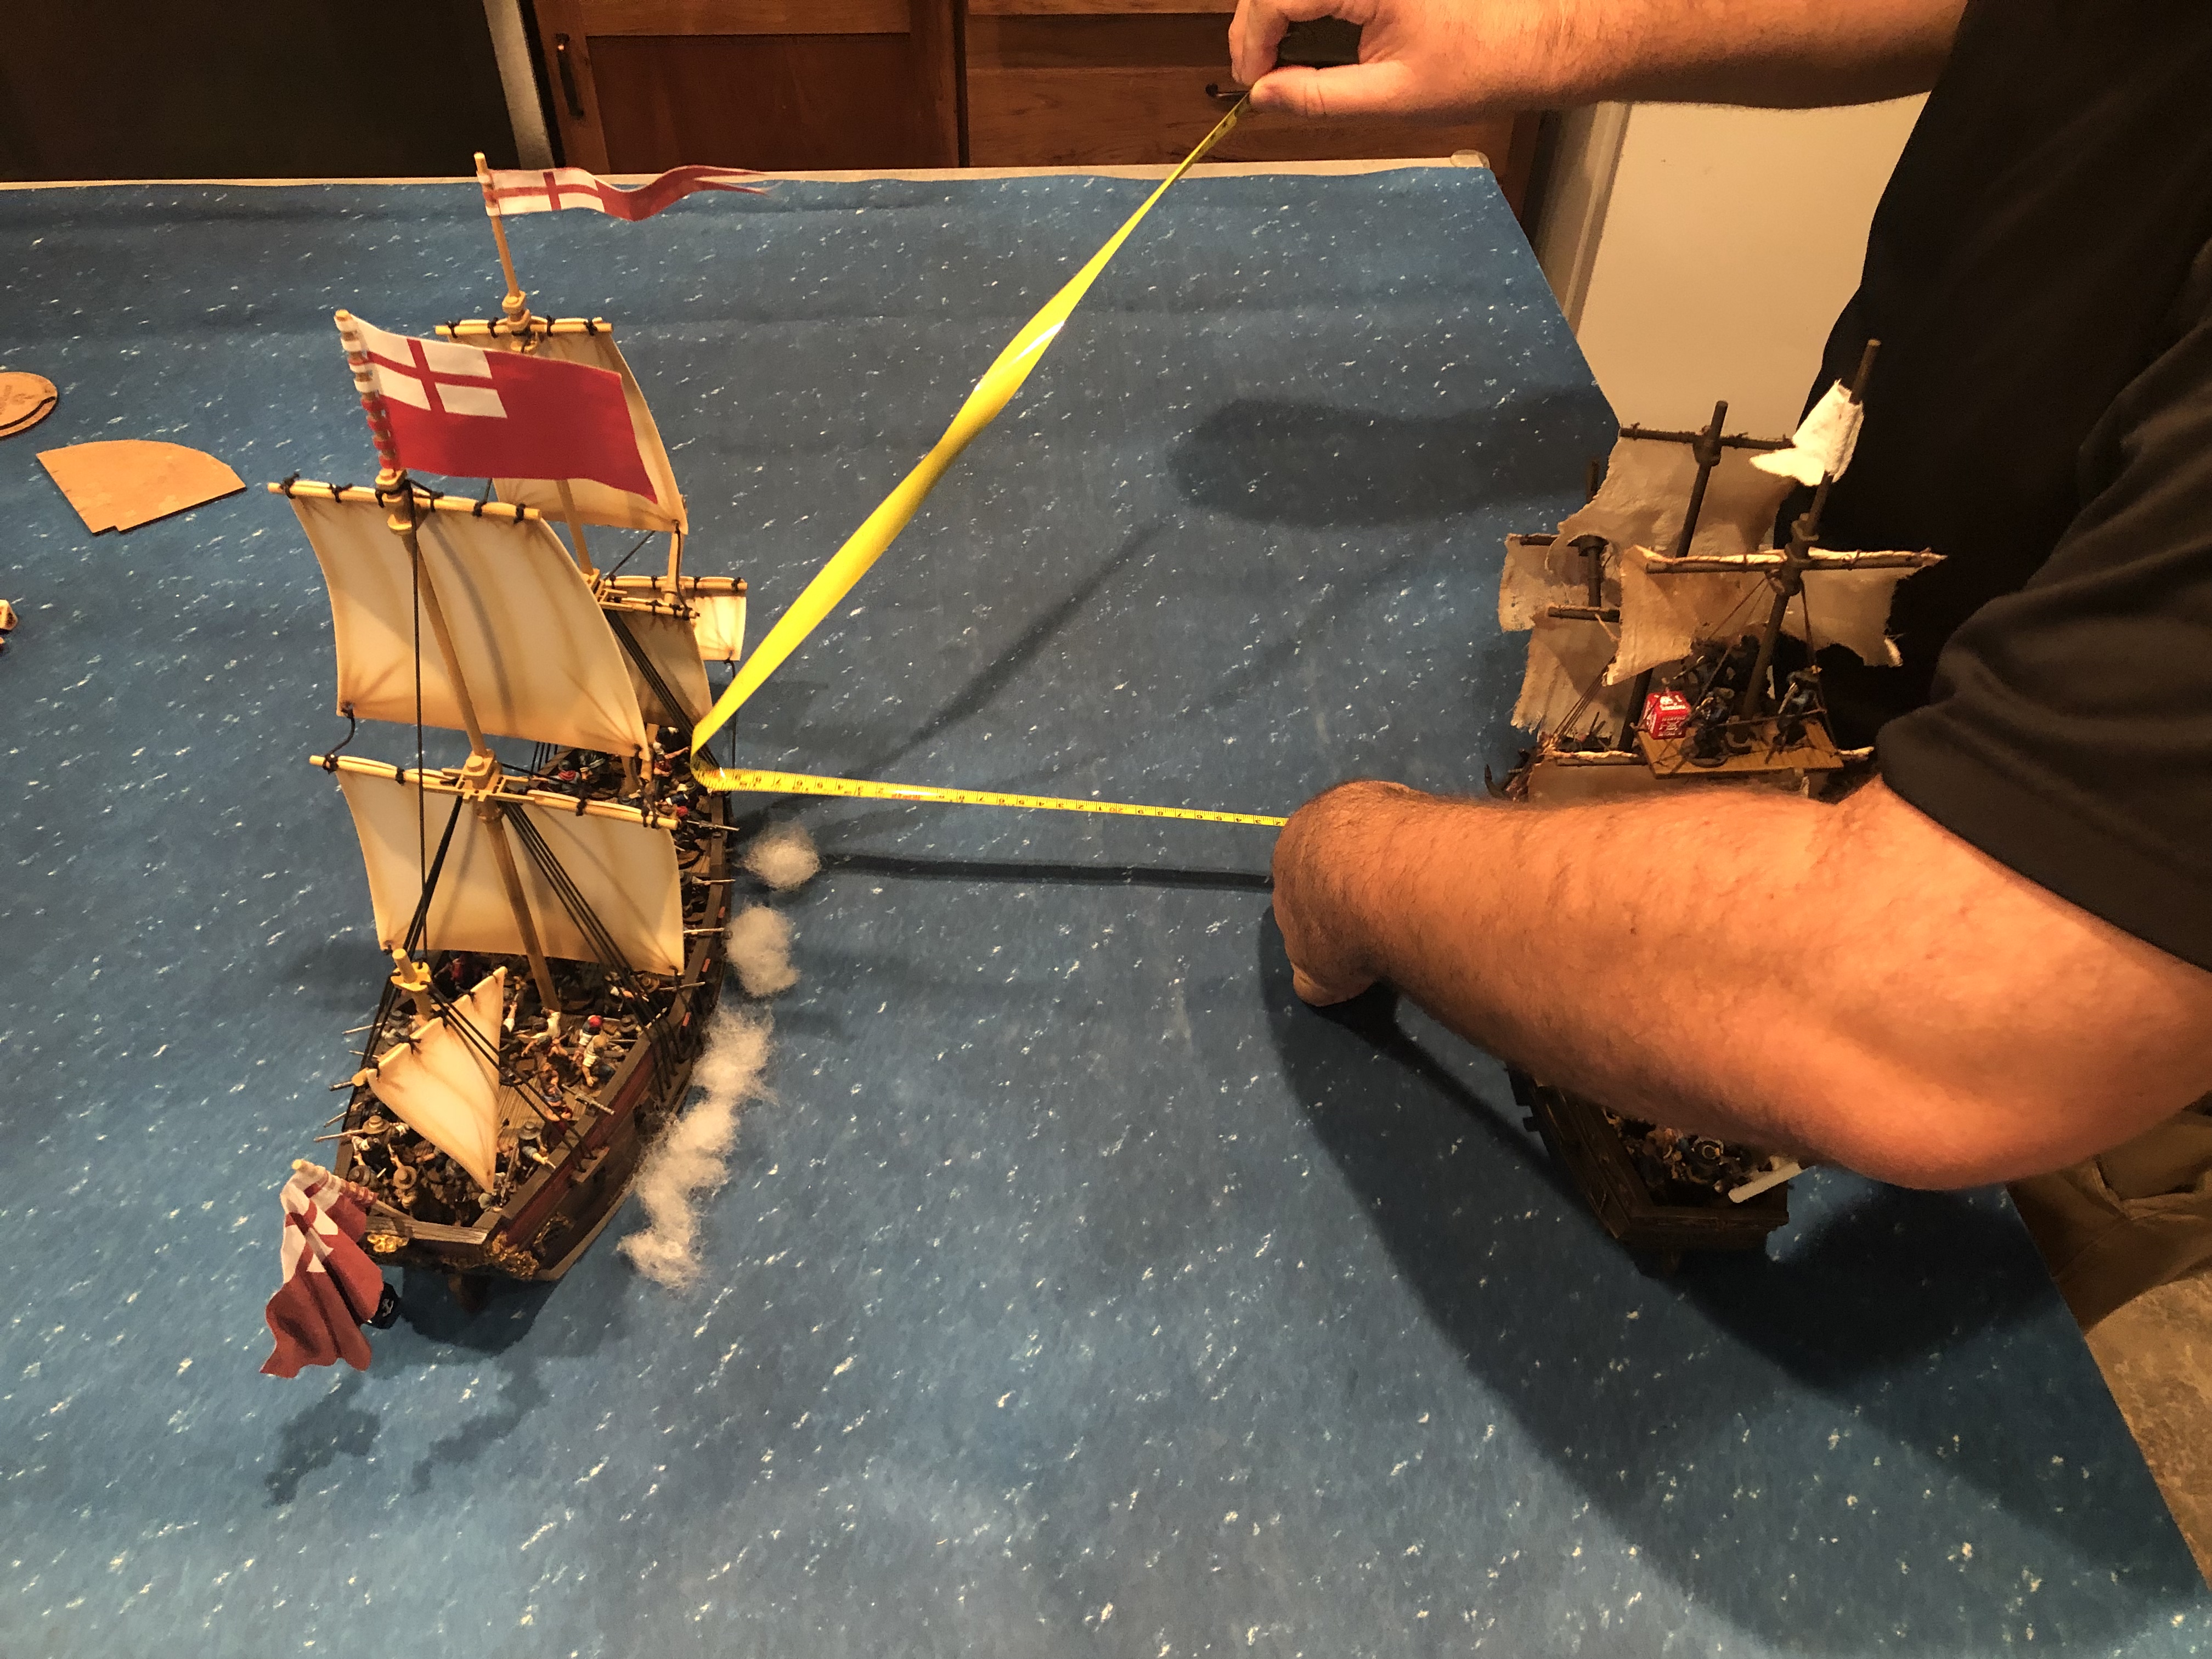
The Defender had to set up within 3″ of the board edge with the wind moving towards the Defender’s edge. I set up my ship outside of 24″ from the Defender’s ship and we were ready to start the game!

I like to set up unit cards to represent my ship so I can put all applicable Fatigue, Reload and Activation markers on the card rather than in the ship where it’s sometimes difficult to add and remove dice.
The Game
Before the game we both had to roll a Fatigue check on all our units for the Musician’s Terror effect. Guy rolled well and only took Fatigue on one unit of his 4. I took Fatigue on 3 of my 5 units. [Edit: since we both had Musicians, neither of us should have rolled for Terror, per character rules.]

The Terror!
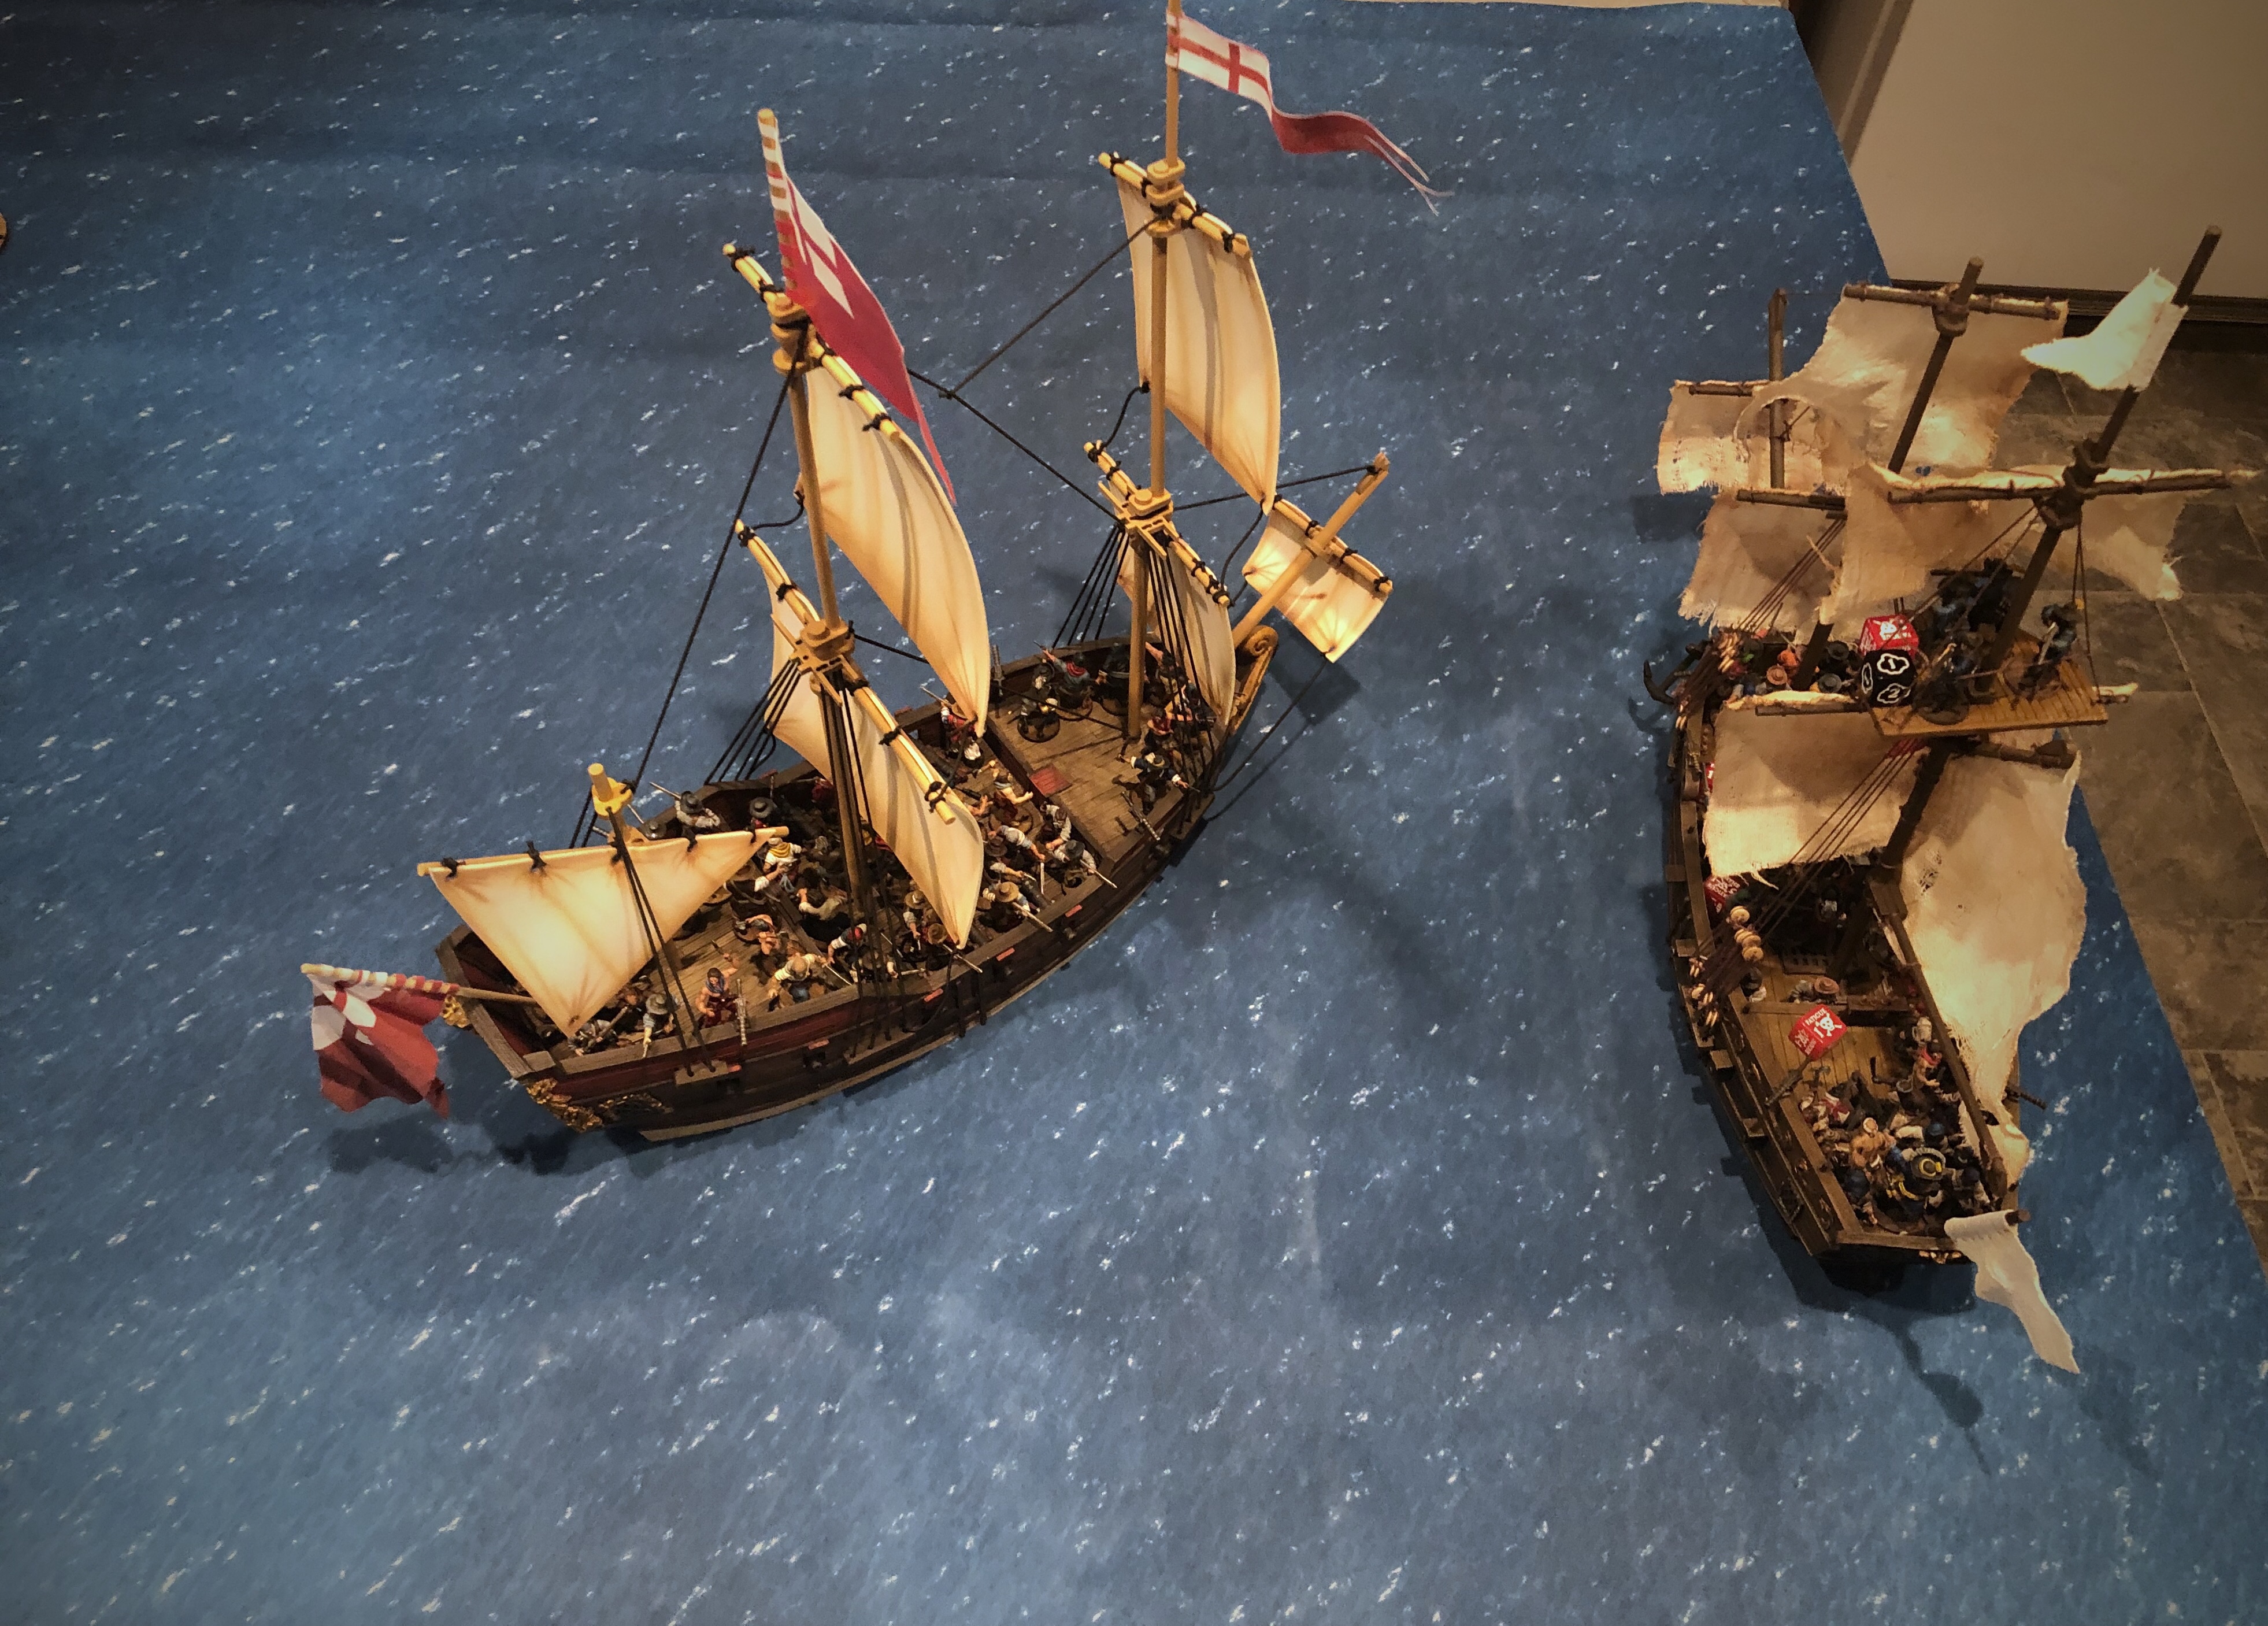
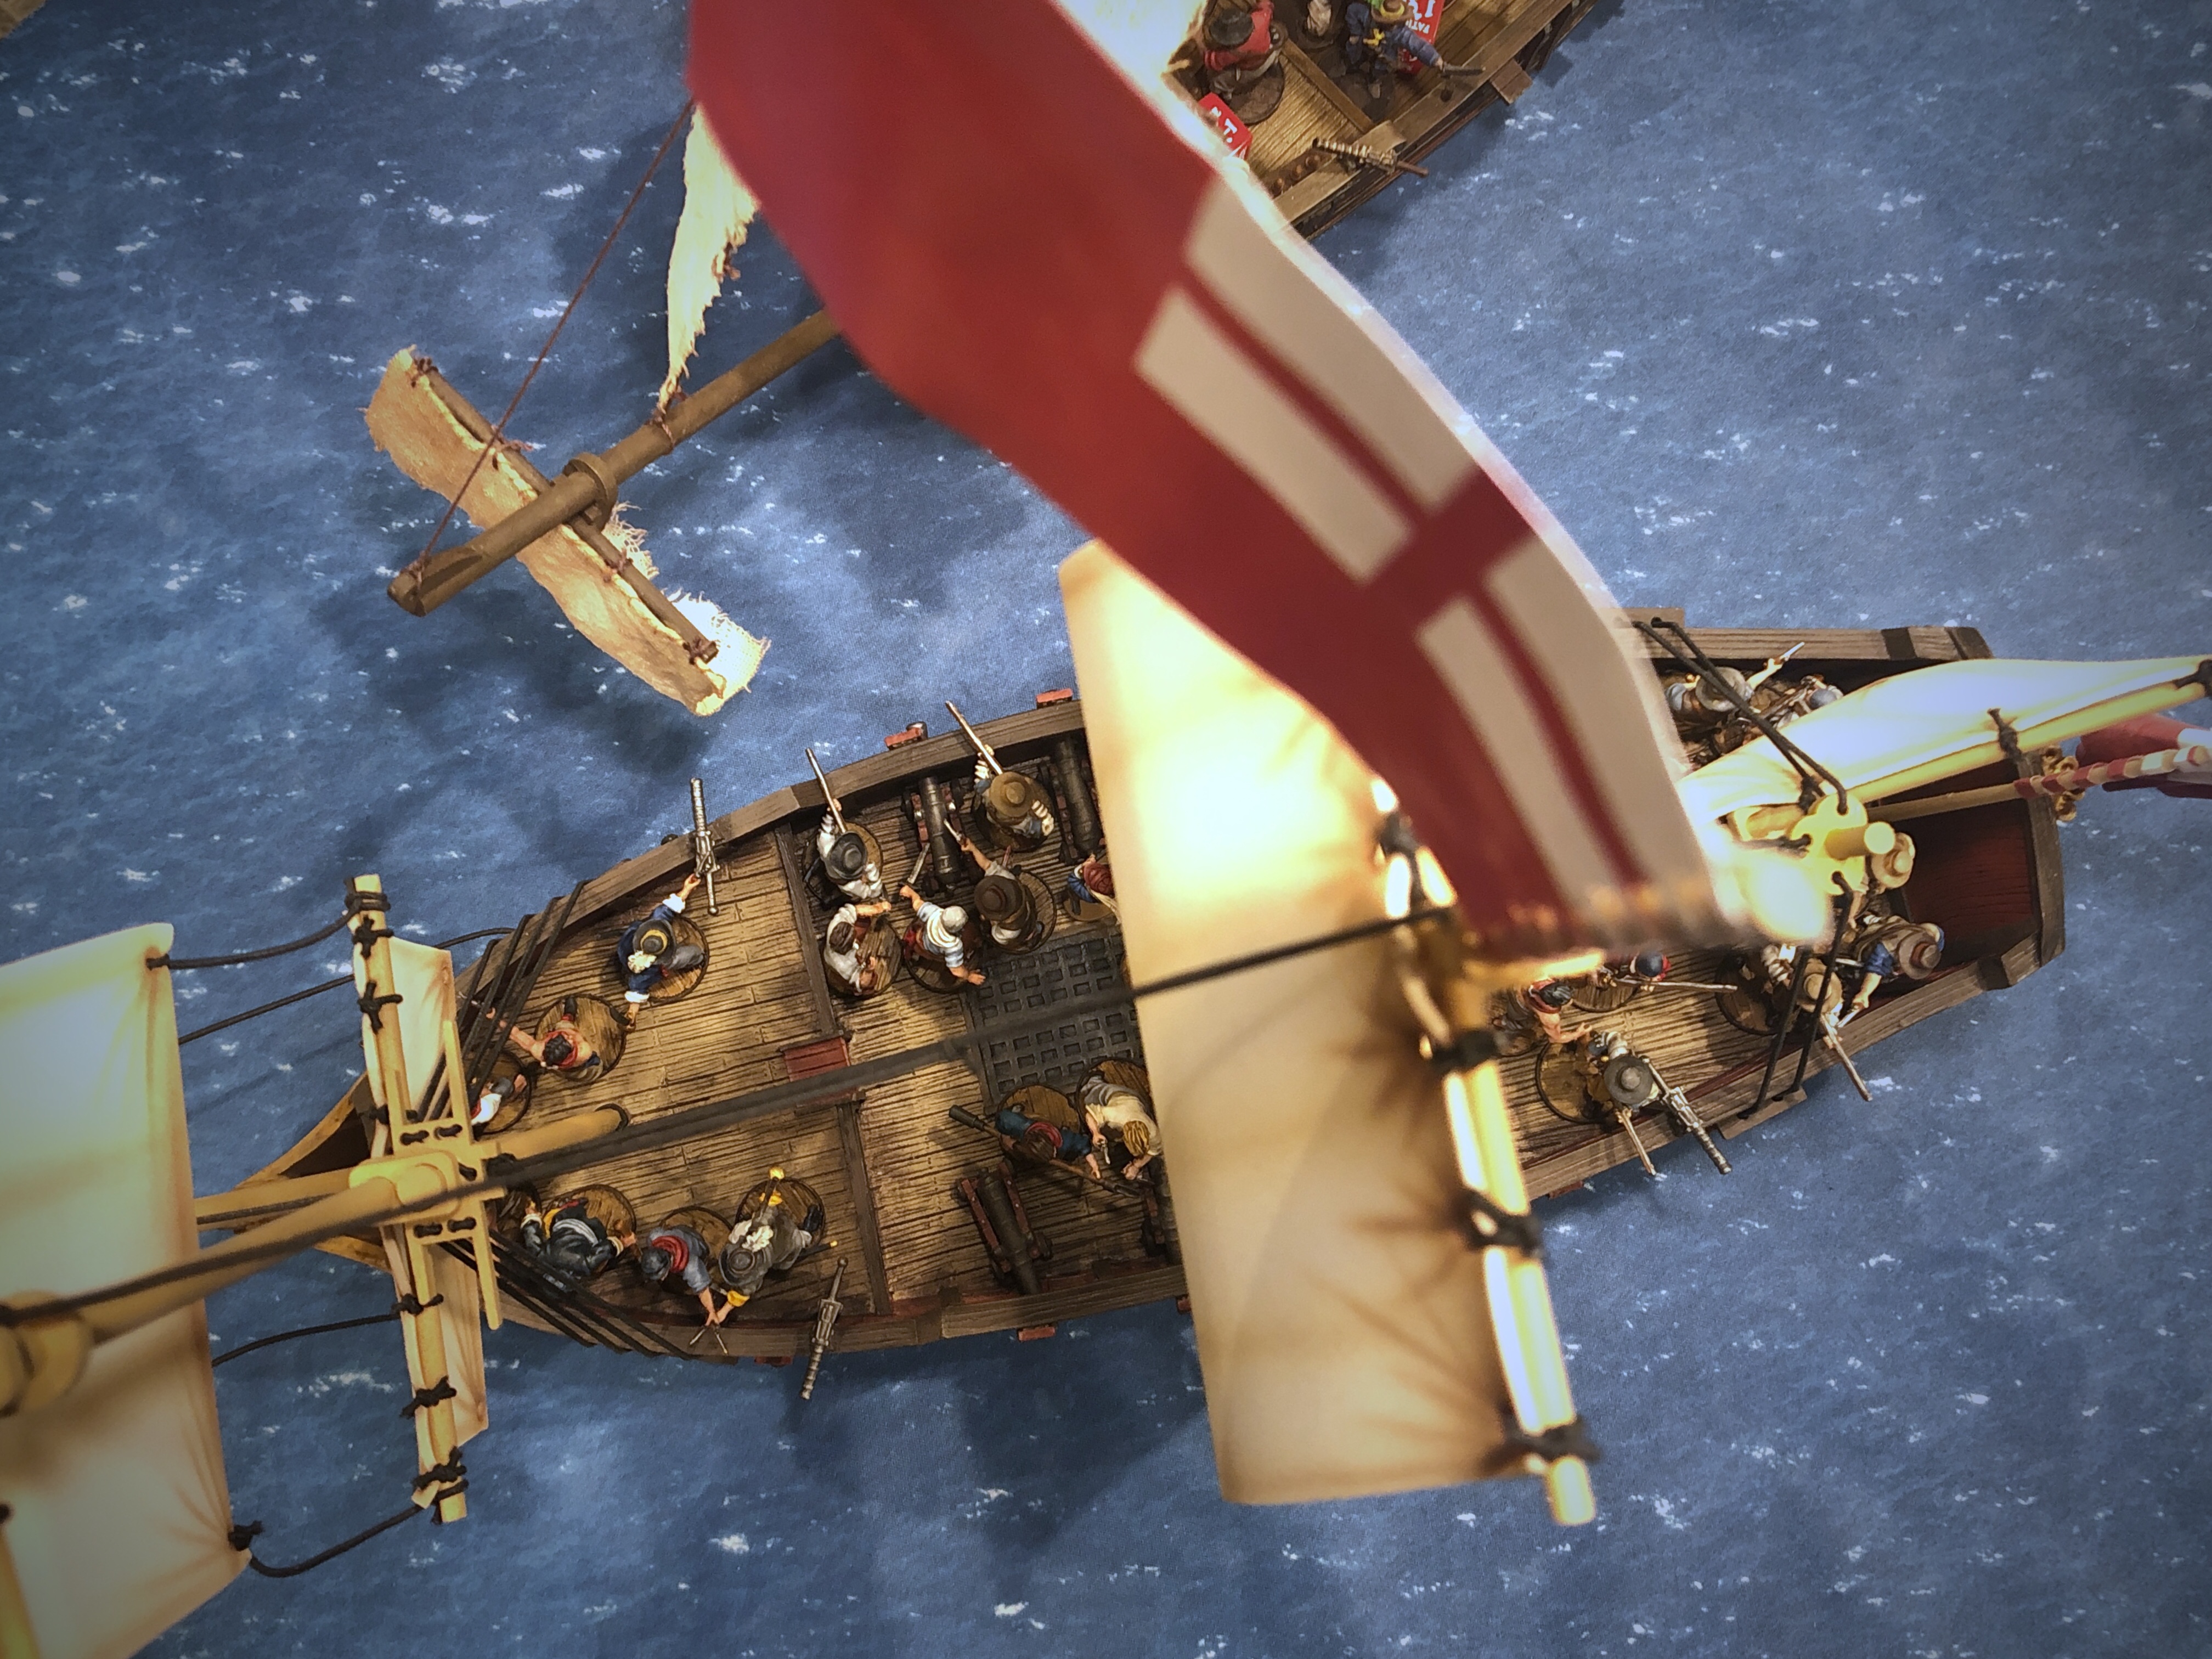
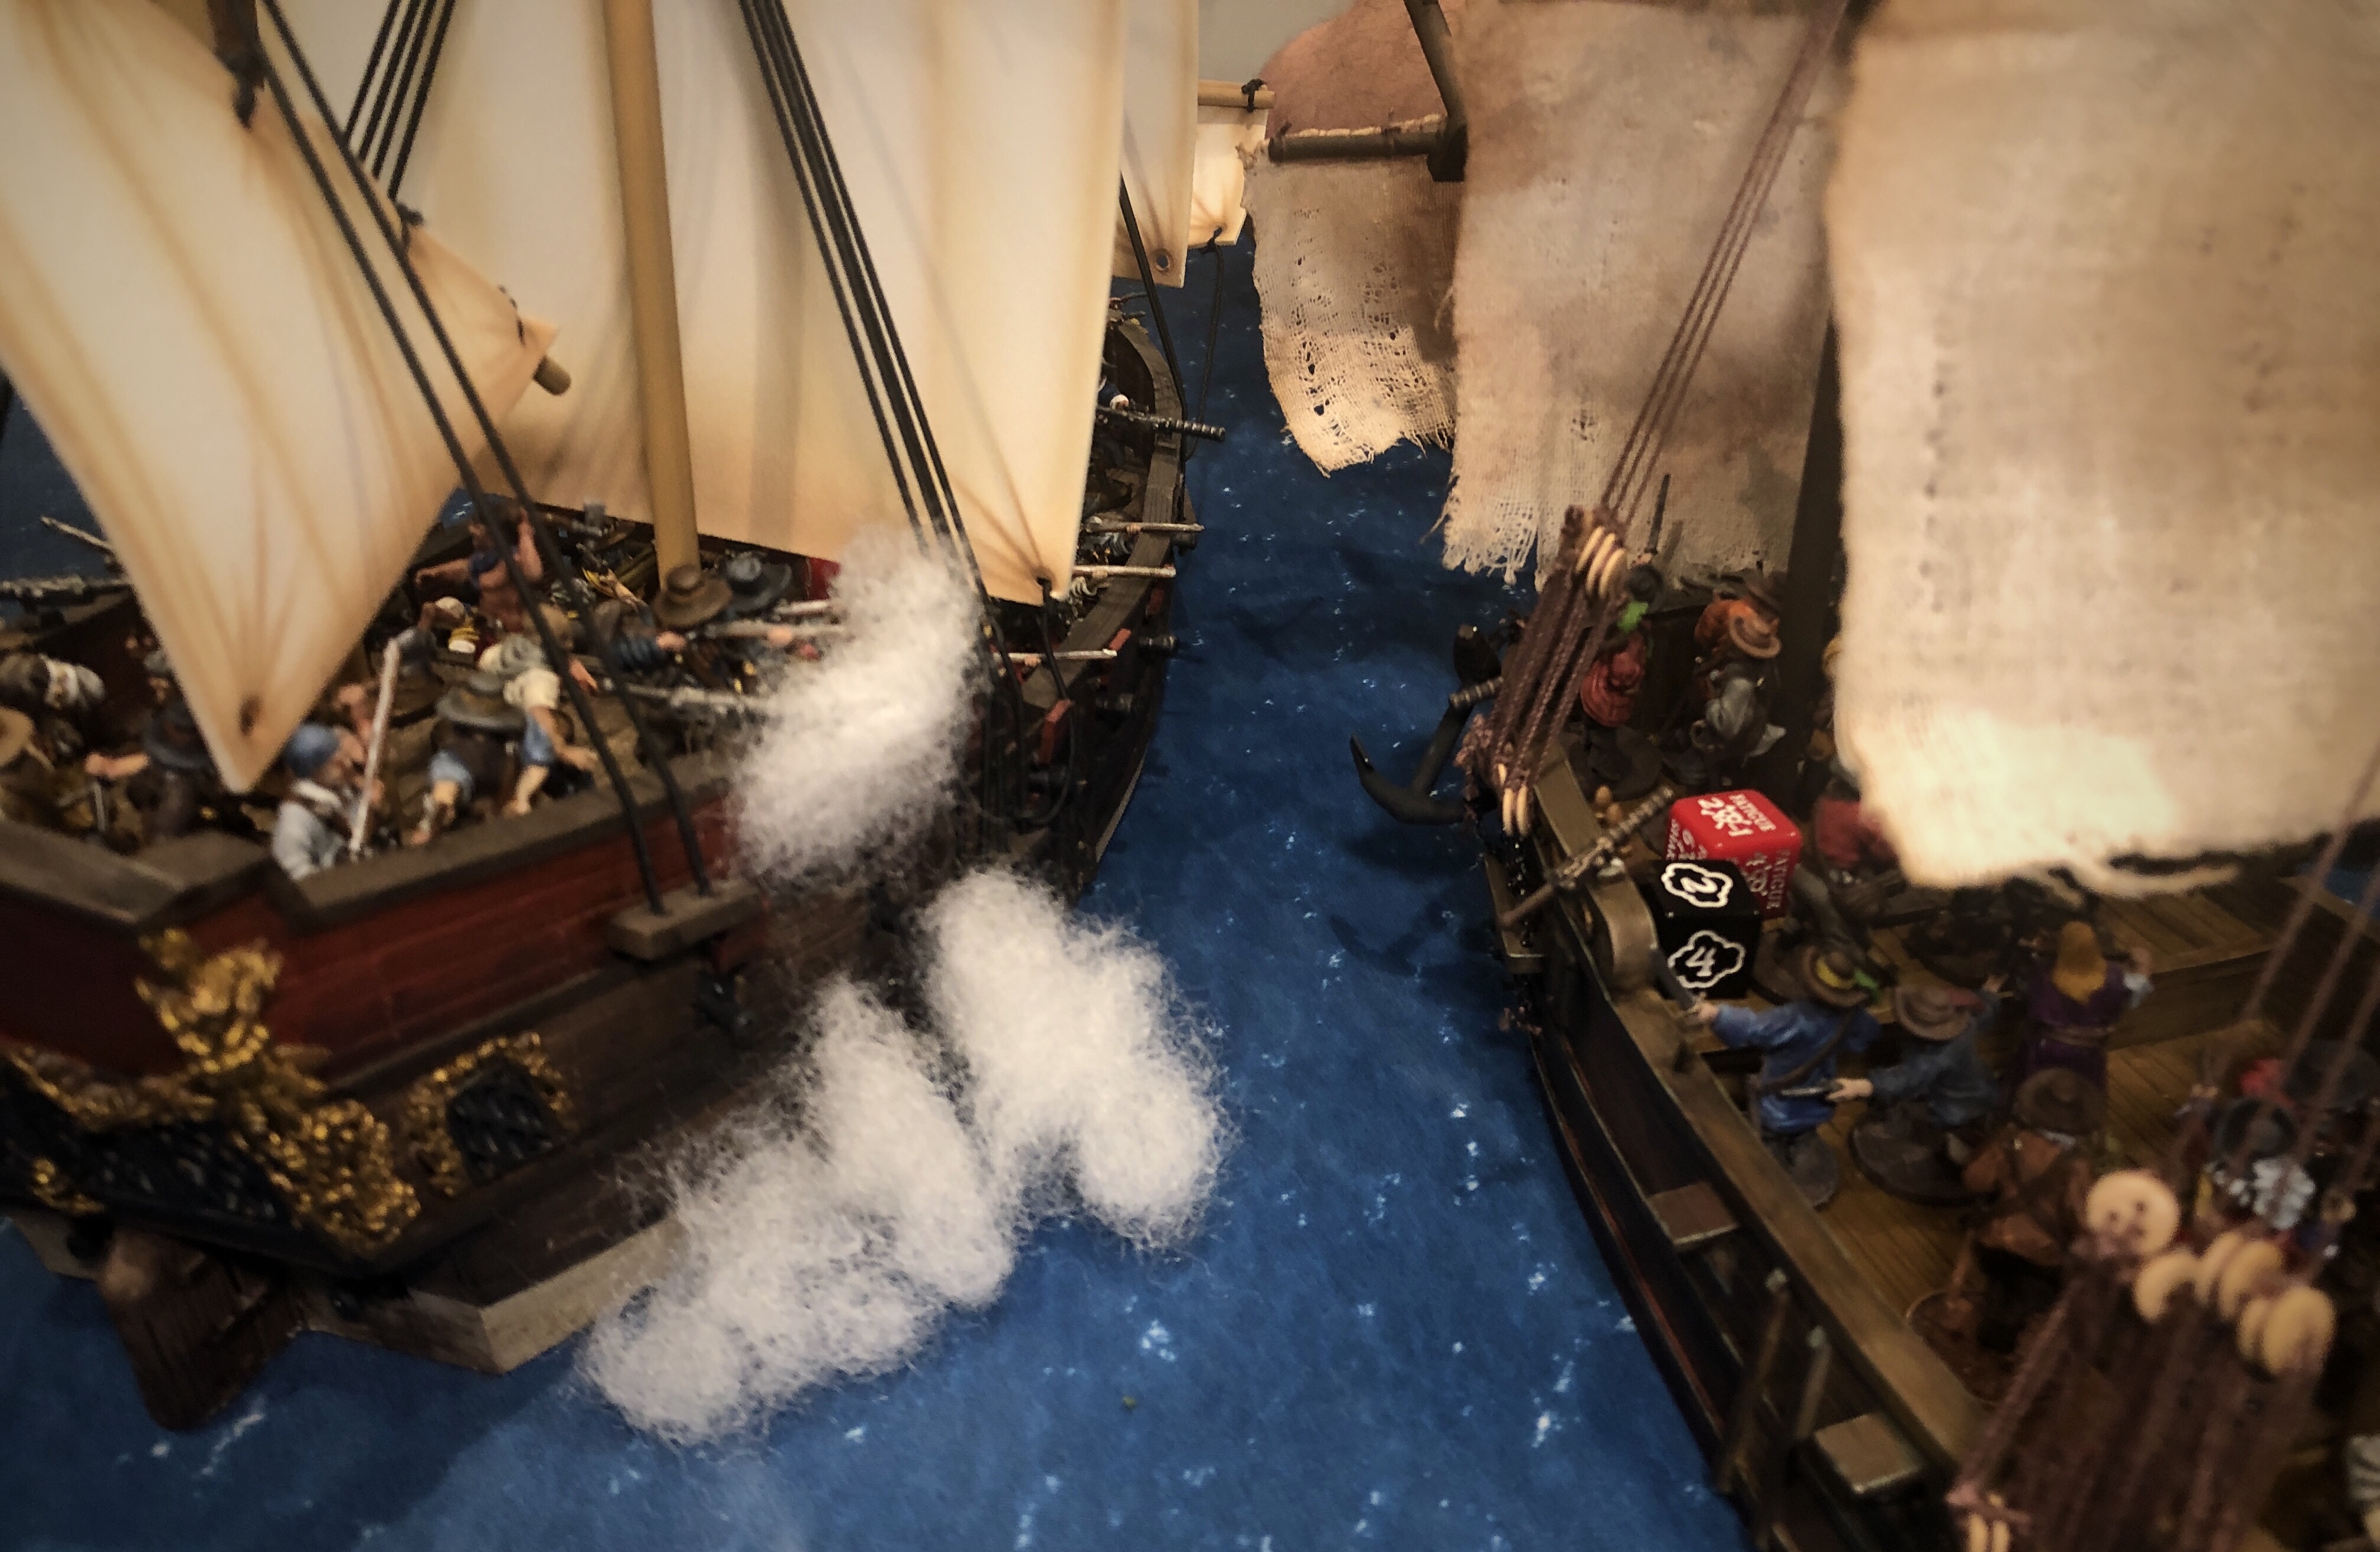
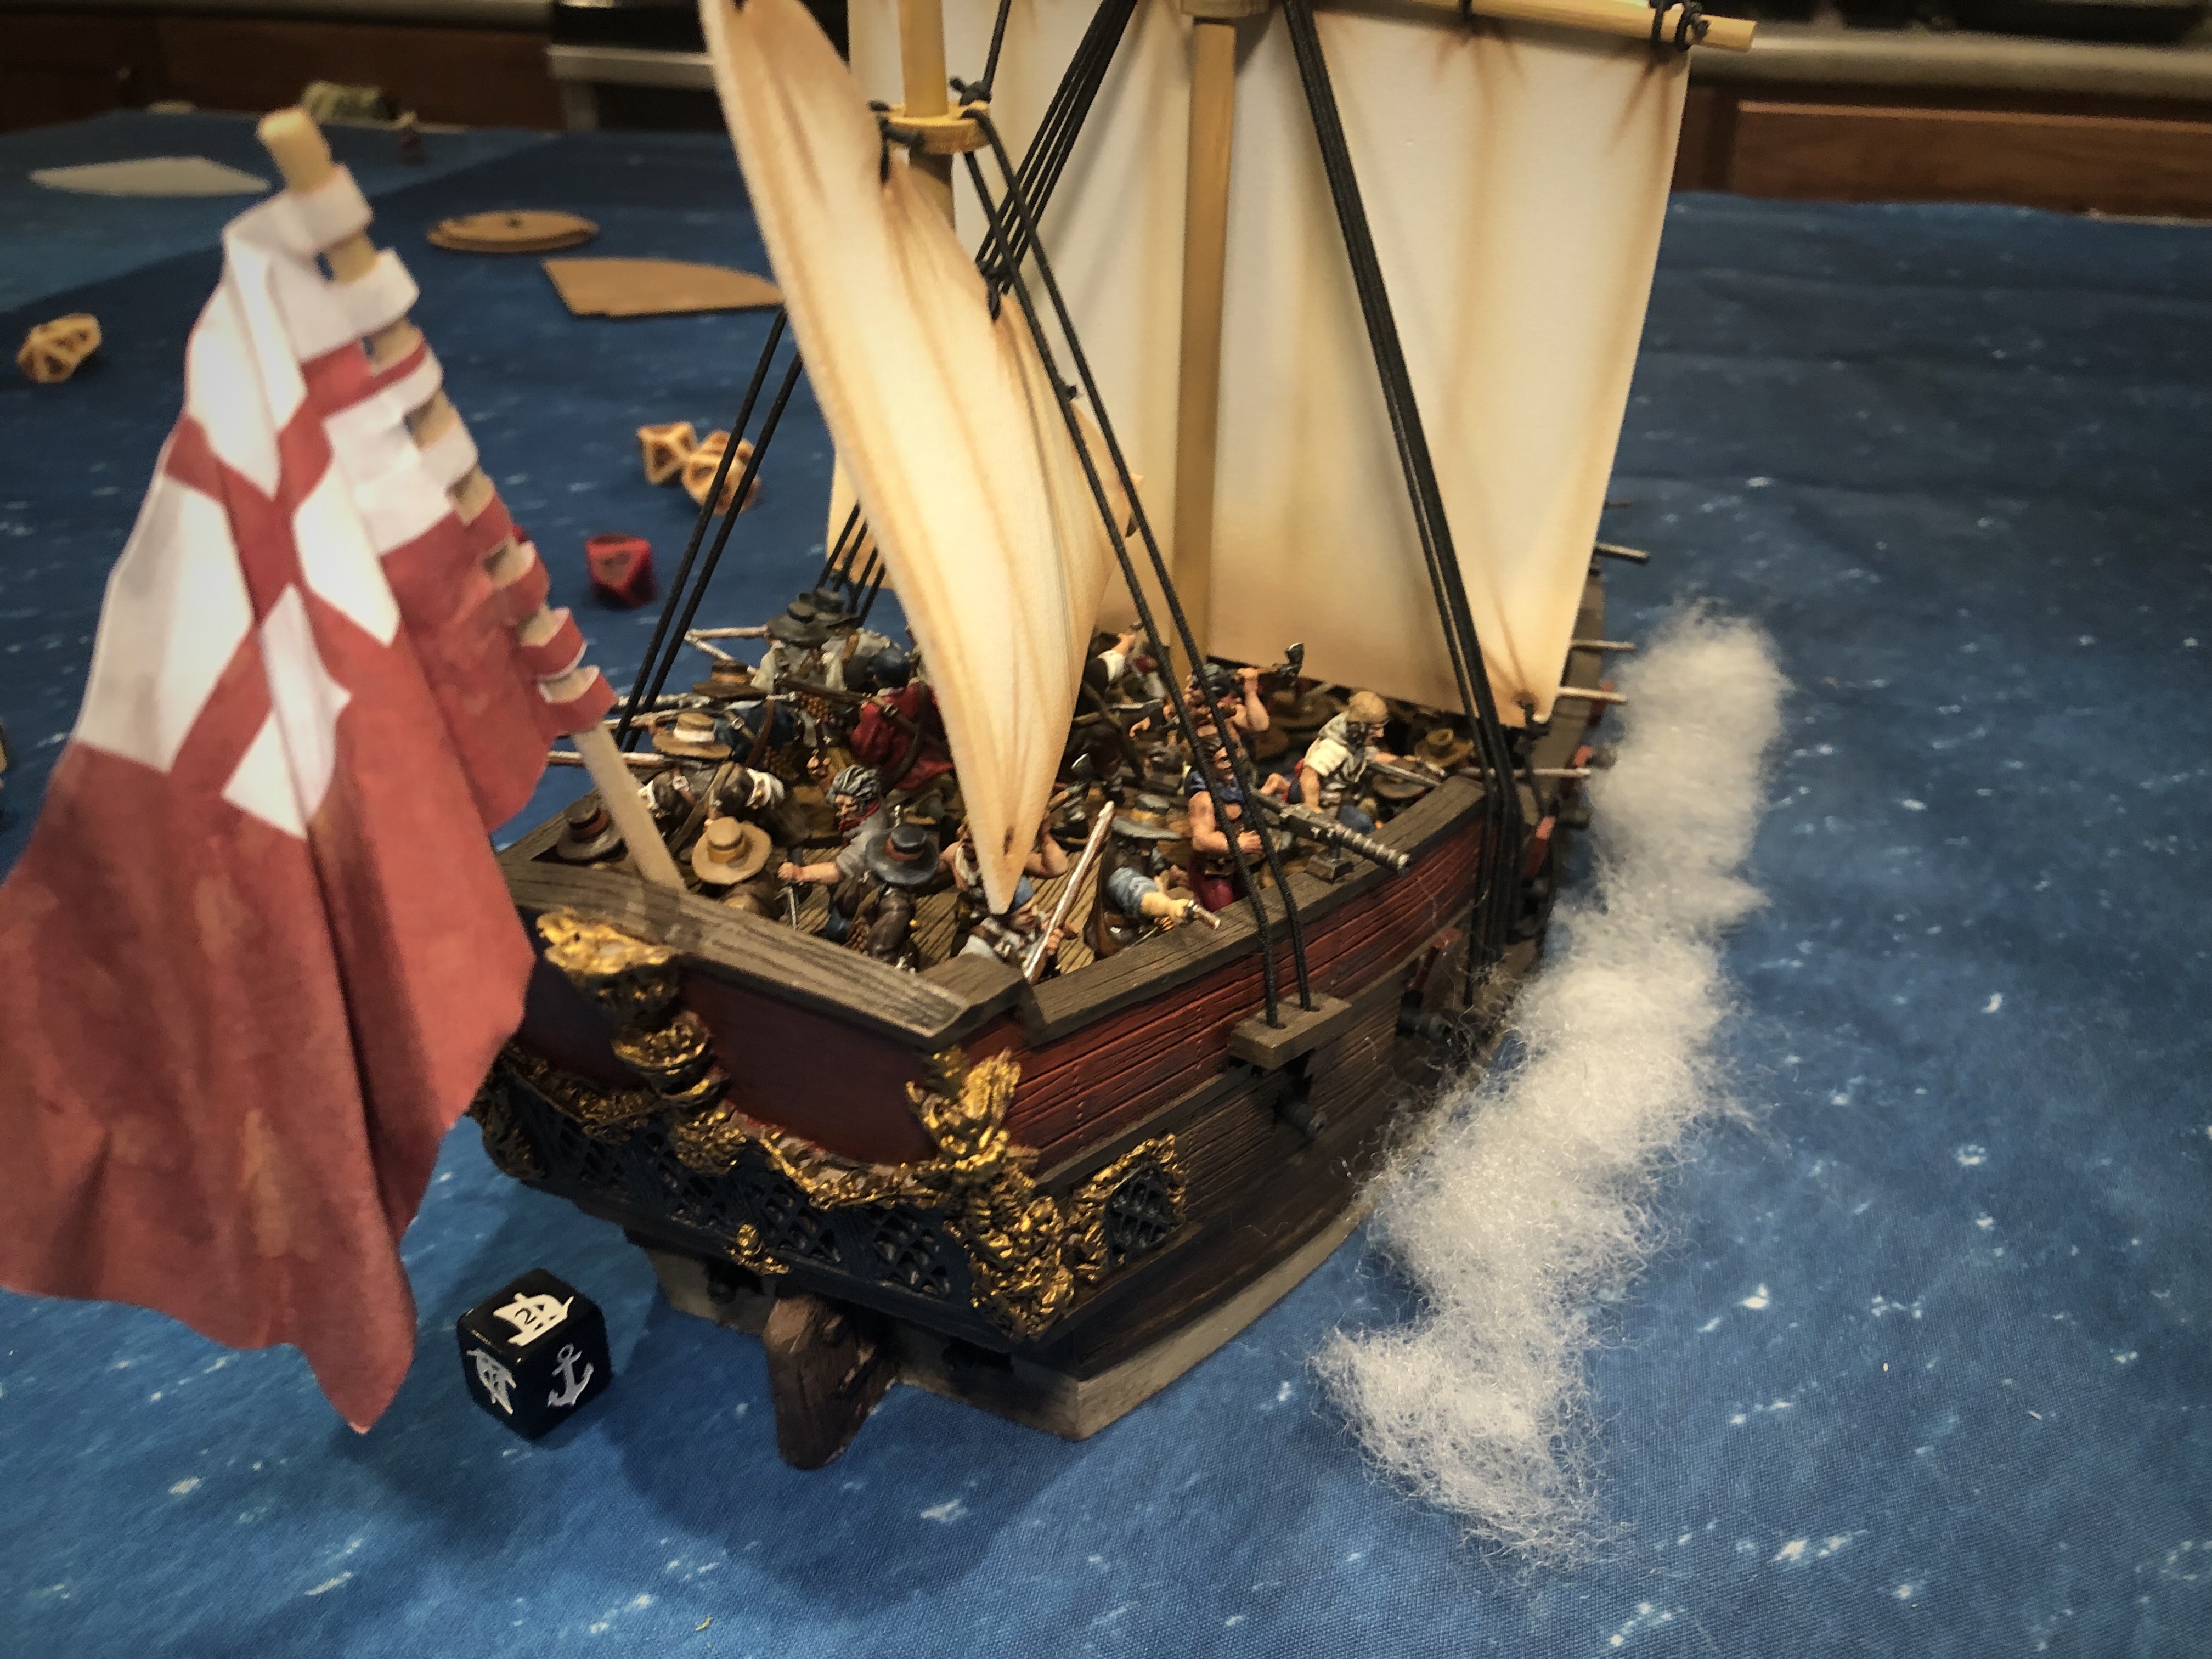
We started the game sailing the same direction with the wind abeam. Guy activated first and let off an early broadside but his dice came up cold and he only scored one hit which bounced off the Heavily Built Frigate but killed a Sea Dog.
I turned my ship to close the distance between us on my first move and fired with some Buccaneers, and I think I killed one sailor.

At 16″+, I used a Marksmen shot to get my target number down to 9’s.

I moved again on my second activation and lined myself up for a broadside at less than 16″. Using the new Strict rule (During this Commander’s activation, any friendly
unit rolling a Test may gain one point of Fatigue to apply a -1 bonus to that Test. This may not be done if the unit is Shaken or would become Shaken.), I fired off all 6 cannons using Kidd’s command points. Using Strict, I was hitting on 7’s.

All 6 cannons hit (using the “optional” cannon rules), and my damage dice were hot and I scored 11 hits on the Sloop of War!
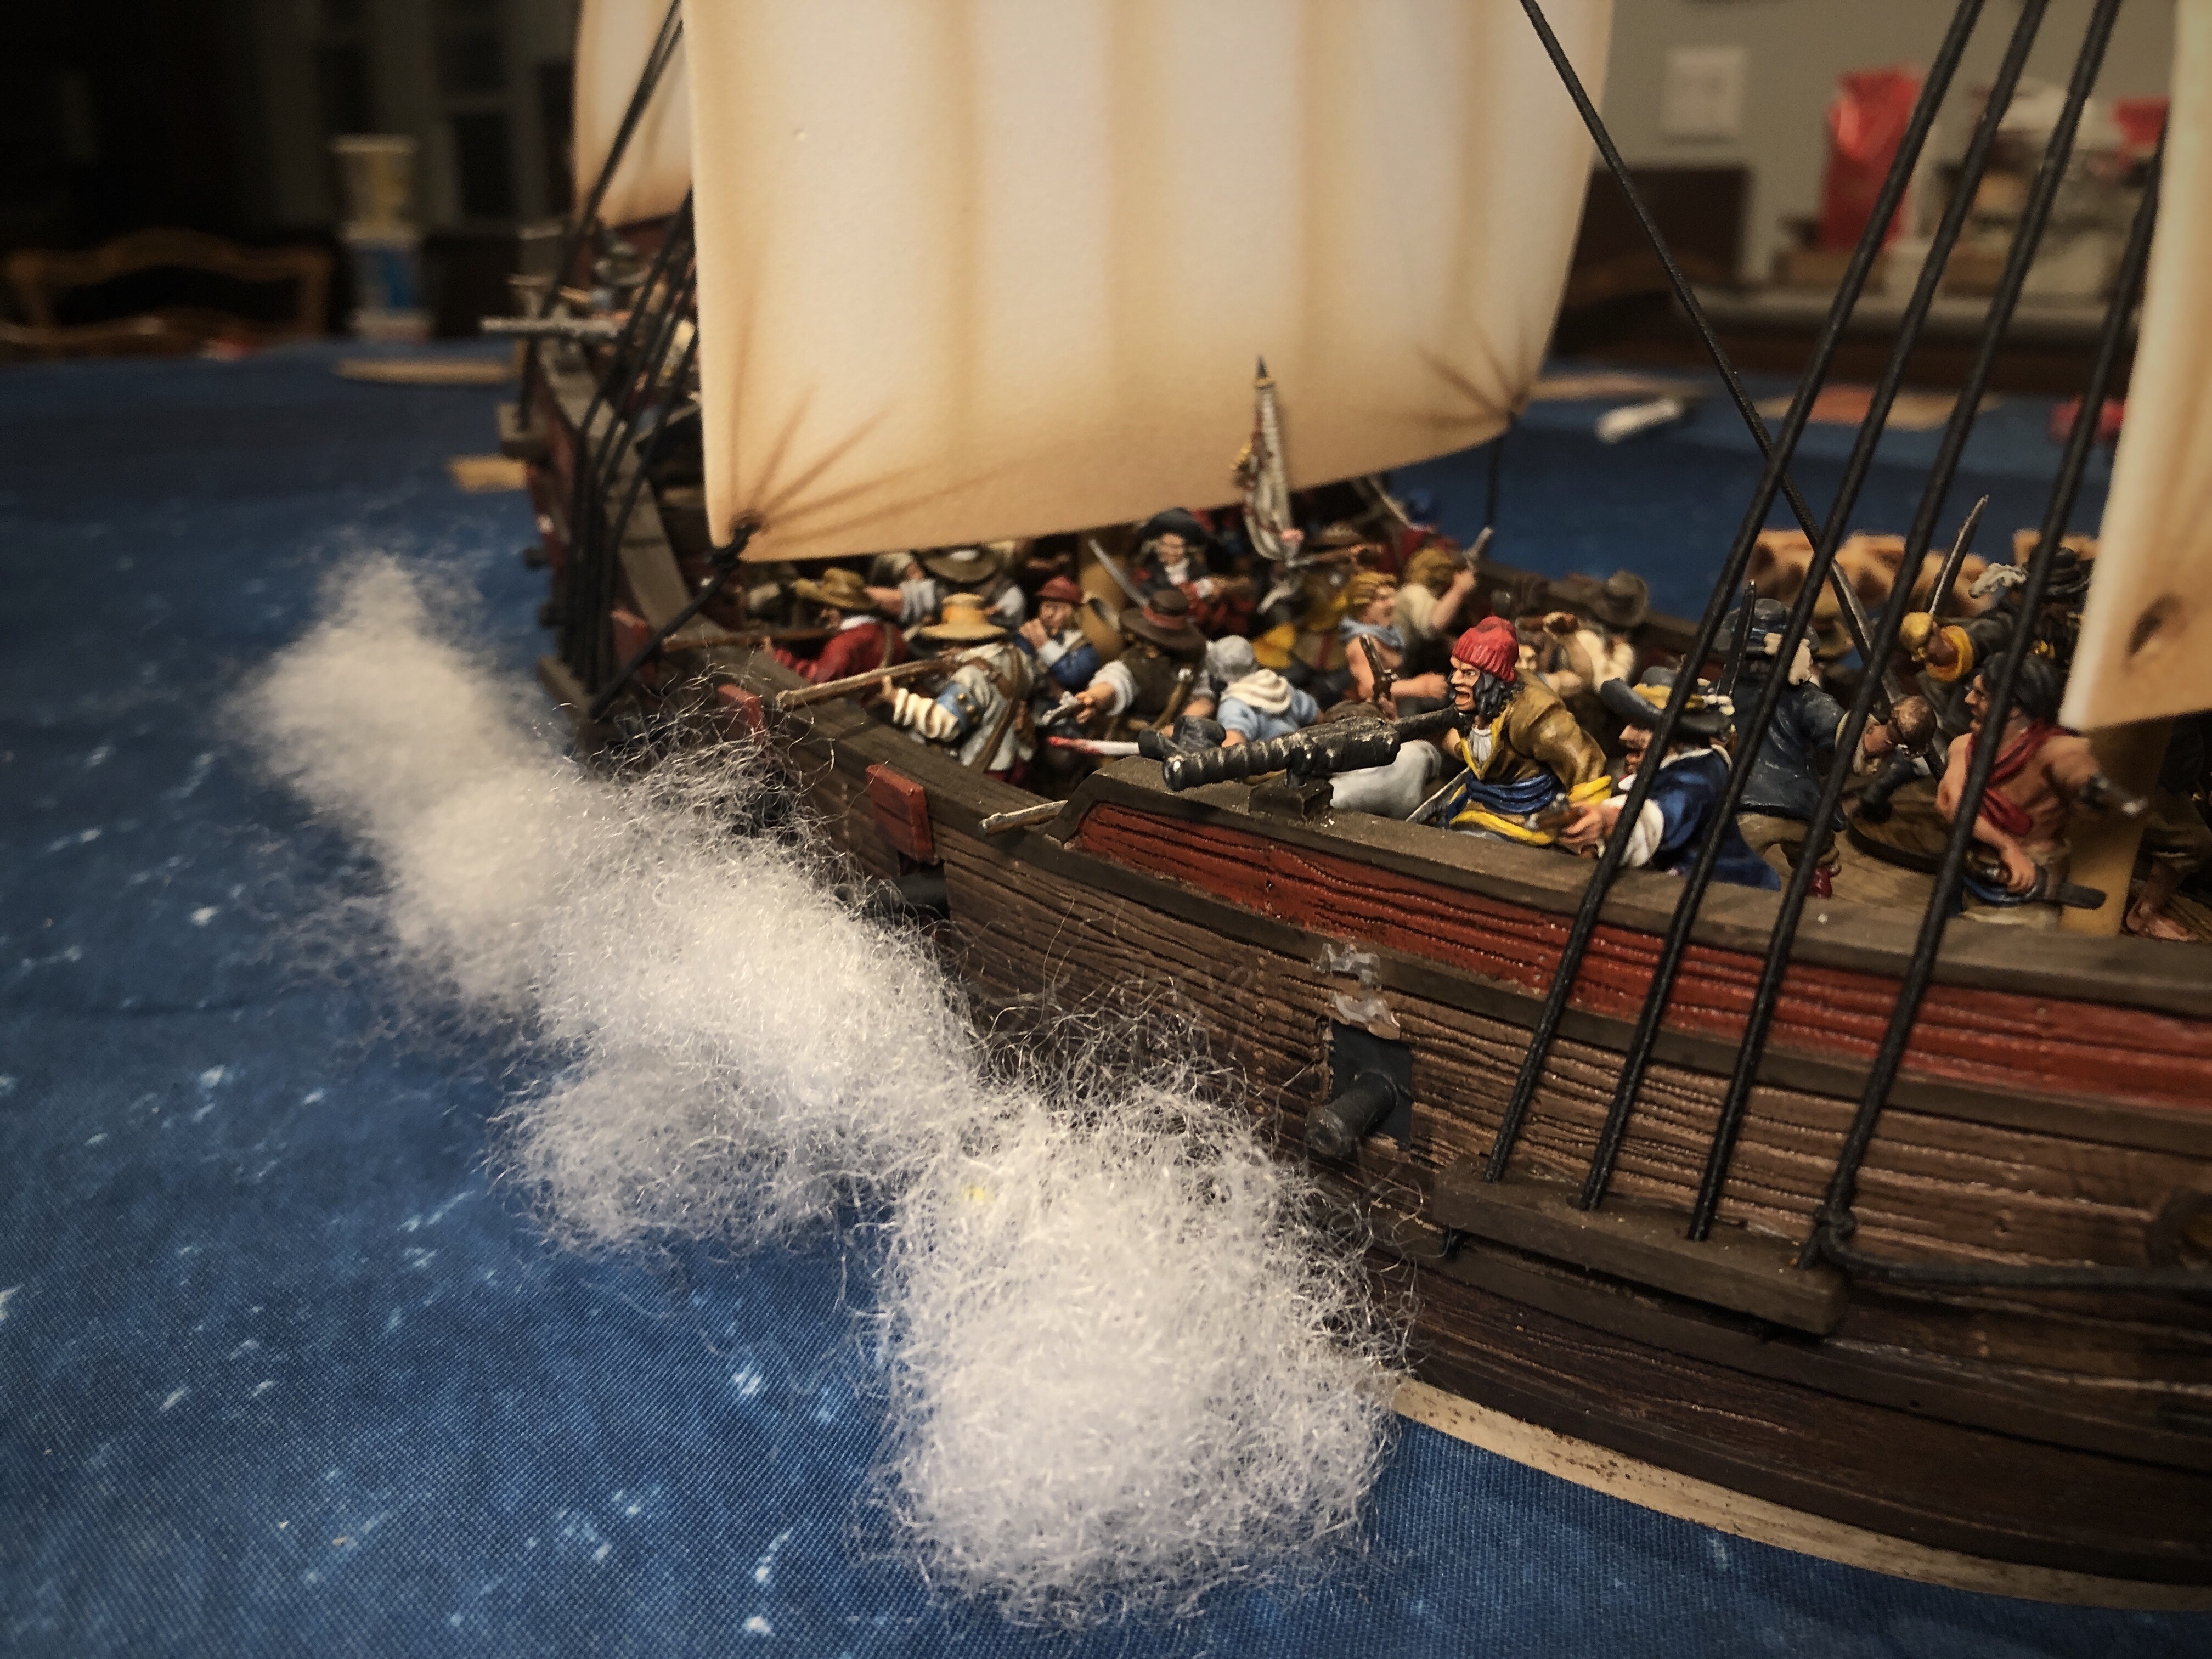
Guy’s troops Saved pretty well but they still lost 5 men and took some early Fatigue. The Sloop of War also suffered a Steerage Lucky Hit and a Destroyed Gun Critical Hit. It was an instant Strike Point for Guy as well since it was more than half the health of the ship.
We exchanged some more small arms and swivel gun fire through the rest of turn 1.
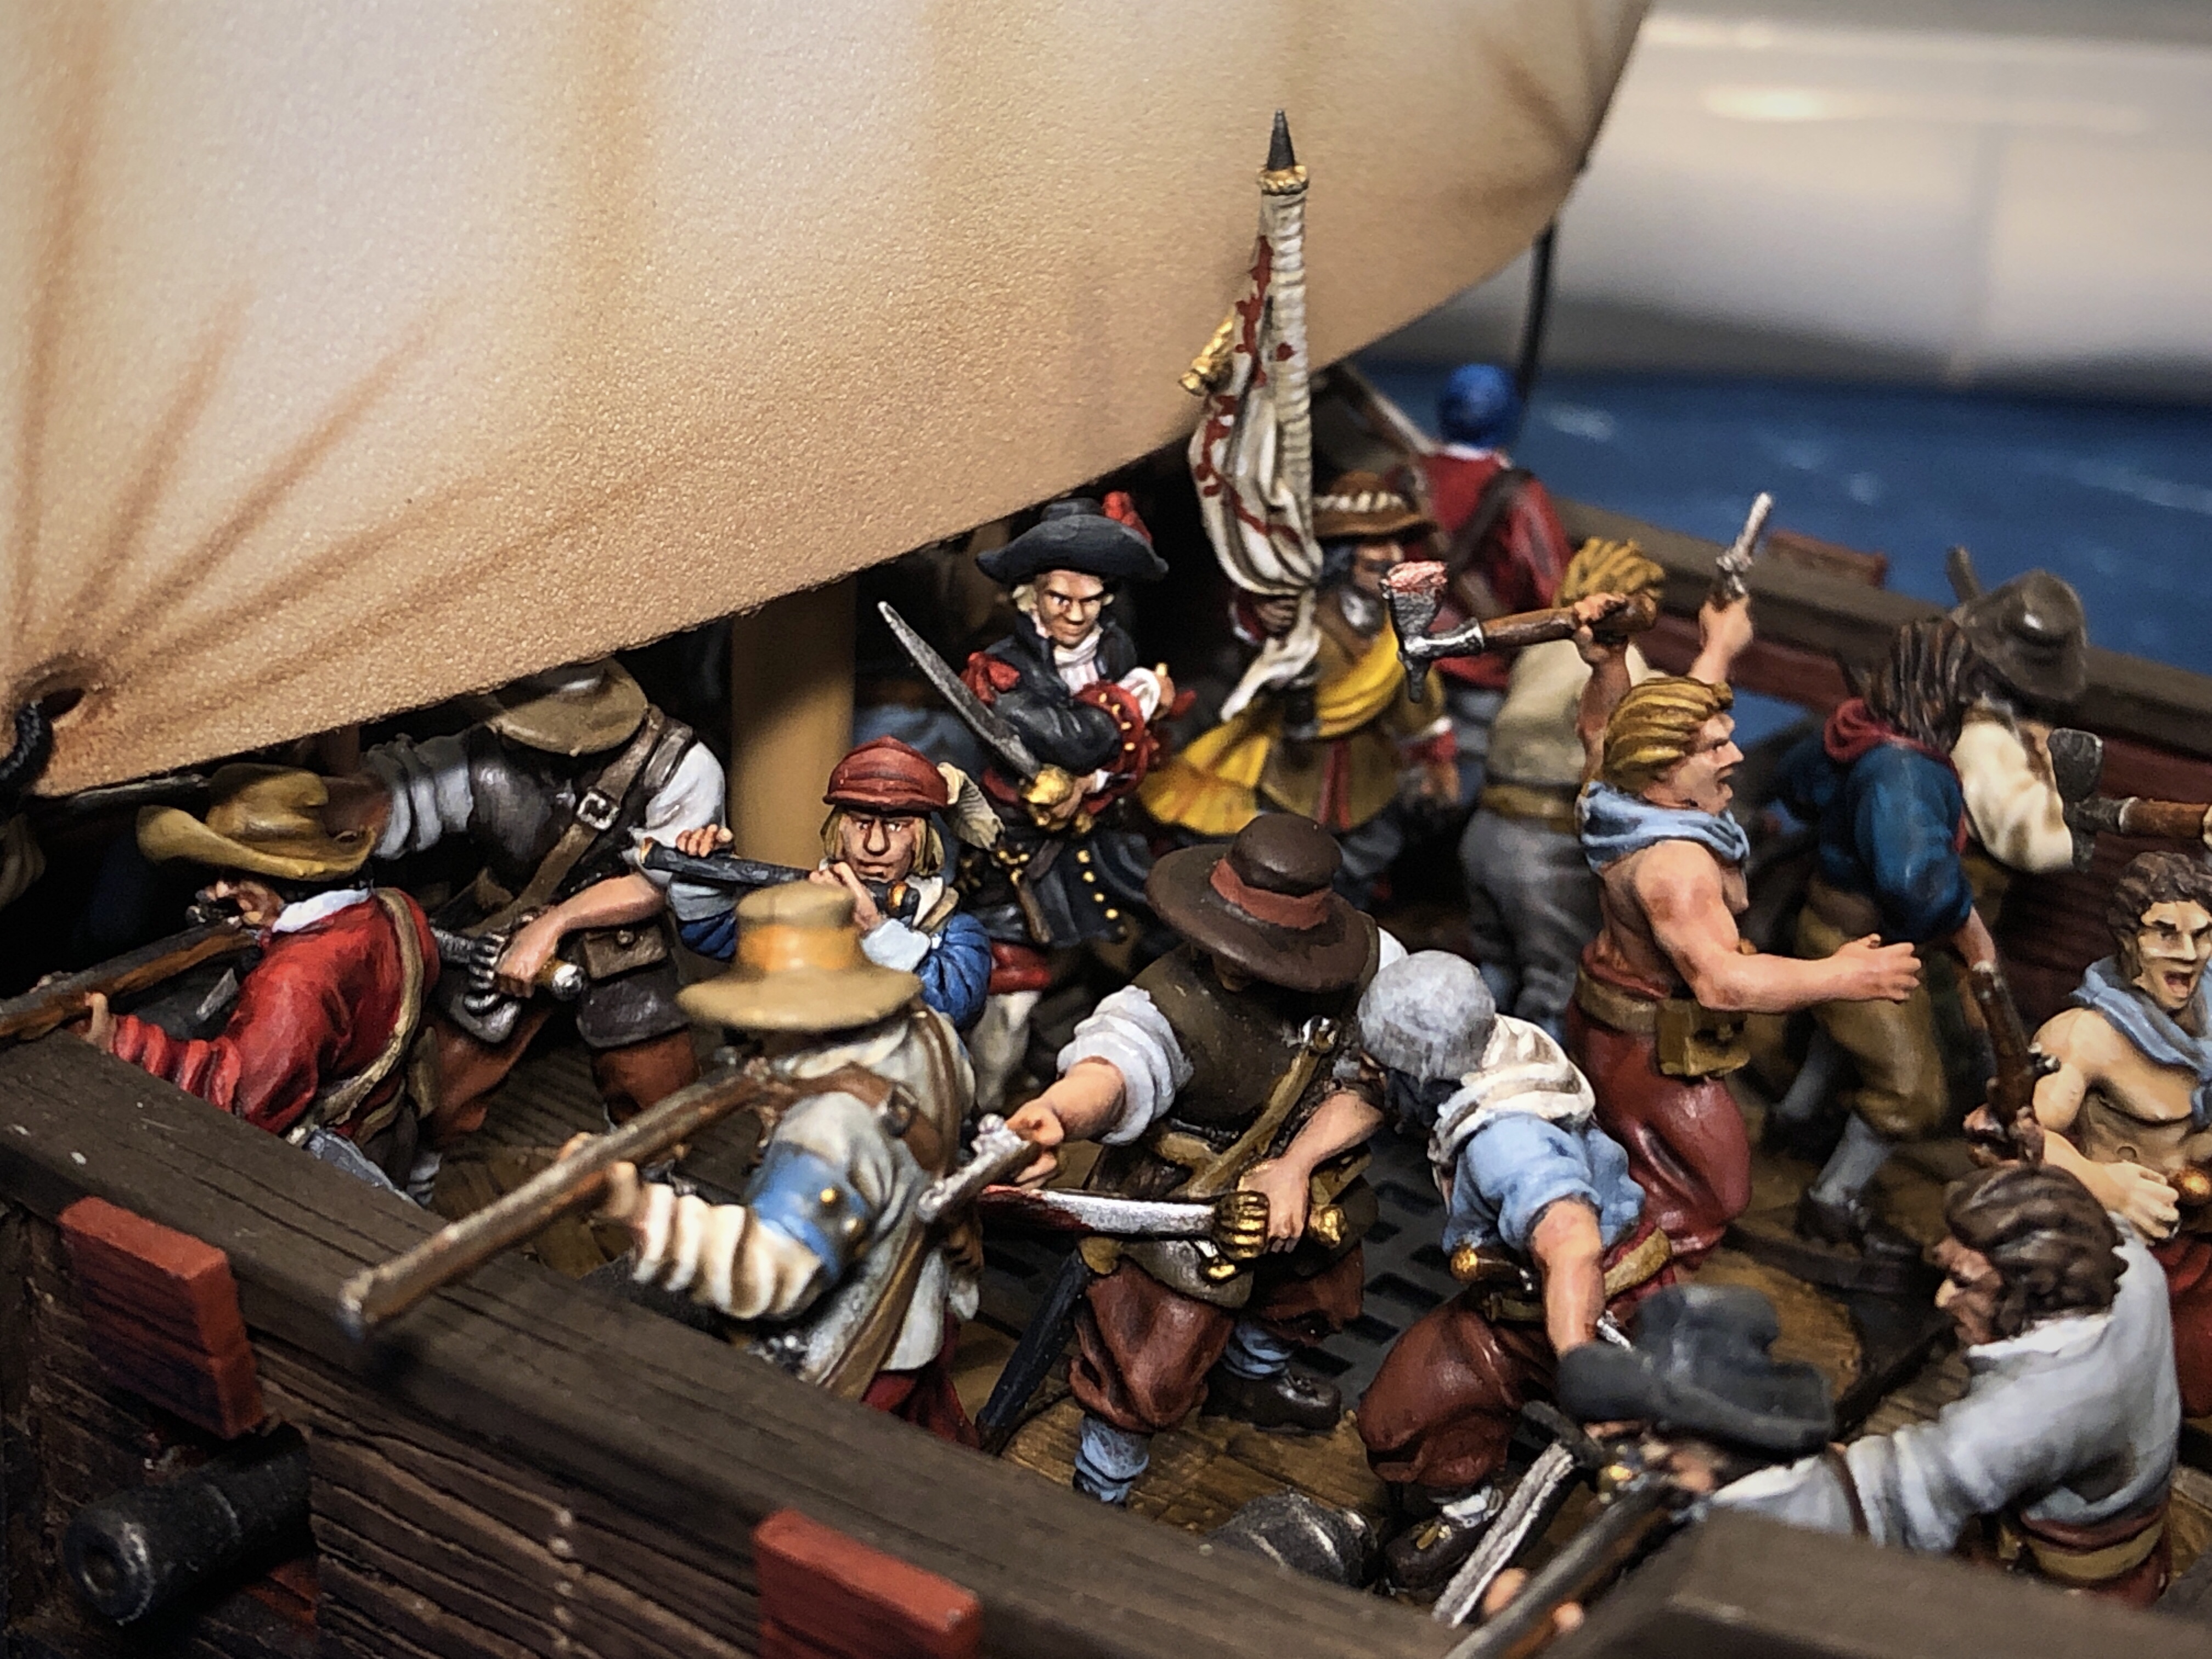
Guy’s Kapers fired a half shot from the fighting top and scored some good hits on my center deck.

Milicianos and European Soldiers functioning as Kapers.
The Sharpshooter stubbornly refused to score a hit the entire game, which seems typical…

My Strict Broadside was extremely effective, but that extra Fatigue, combined with the Terror Fatigue left my crew a little shaken up at the end of the first turn.
I moved in closer for my final move of the first turn while the Quedagh Merchant sailed straight on.
Initiative would be key going into the second turn and I took the first activation with a high Spade. I was able to move in close and line up a shot with my central deck of cannons. With 2 Fatigue on my Sea Dogs, I couldn’t use a Strict shot so I rallied to give them a chance to use Strict, but, like a noob, I didn’t plan out the entire activation and by the time I rallied and got my free reload from the Spade, I didn’t have an action to fire and I couldn’t push because I had rallied in the same activation! I totally wasted that crucial moment! If I had done it correctly, I could have fired off 12 dice of grapeshot hitting on 5’s! That successful opening broadside made me over confident and I wasn’t careful enough and it ended up hurting!
With lots of Fatigue on my ship and 1 reload on both units of Freebooters and reloads on my cannons, I used all of Kidd’s 4 (1 from the Standard Bearer) to rally away most of that Fatigue. I had taken the valuable first activation of a round and used all my commander’s command points and not done any harm to my opponent! This was a major mistake on my part and it gave the merchant ship time to recover from that broadside and hit me with a lot of small arms fire which badly rattled my crew.
Guy’s crew rallied and hit back hard while I was only able to respond with some swivels and some more Freebooter musketry.

At the end of turn 1 I only had 1 casualty vs at least 7 for the English Buccaneers but by the end of the second turn, the casualty count had evened out and I wasn’t feeling nearly as confident.
I took a mulligan with a Fortune Point going into turn 3 and took initiative again.

I moved in close again, and, lacking the courage to grapple and board, I fired off my center deck of grapeshot and rallied off some more Fatigue with Kidd’s Command Points. The grapeshot landed plenty of hits but Guy got some strong Save rolls the merchant crew didn’t break as I hoped.
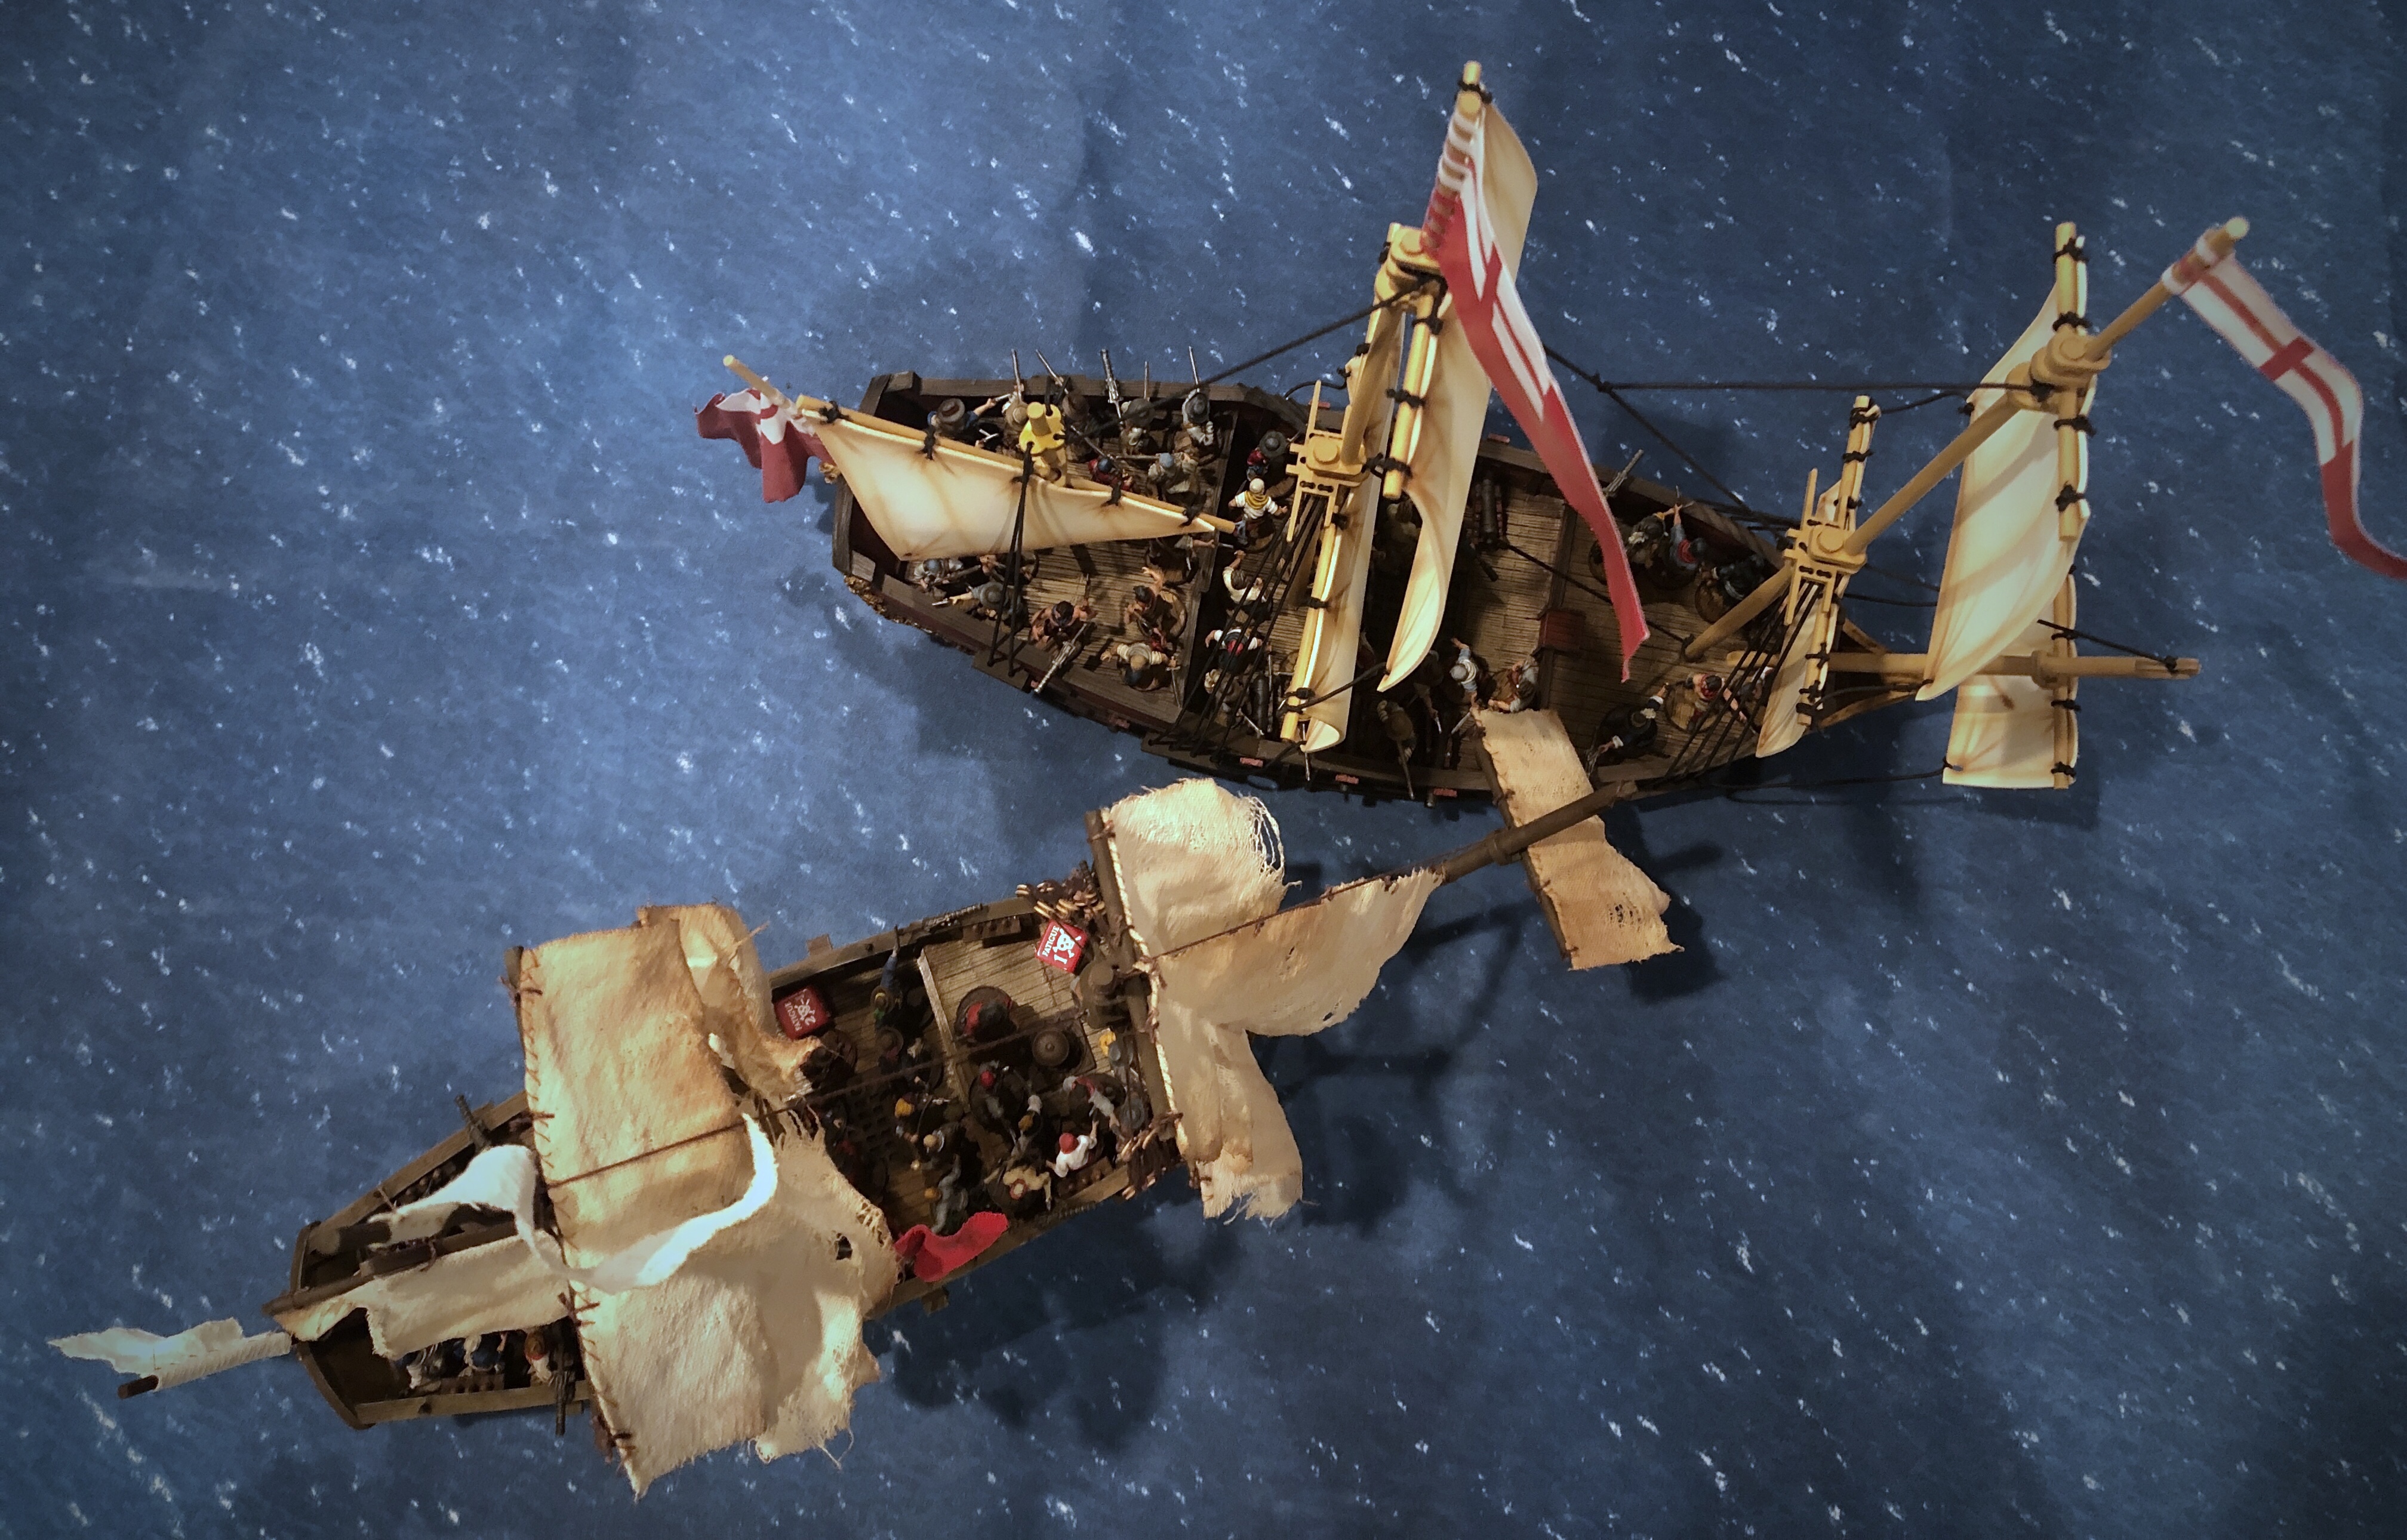
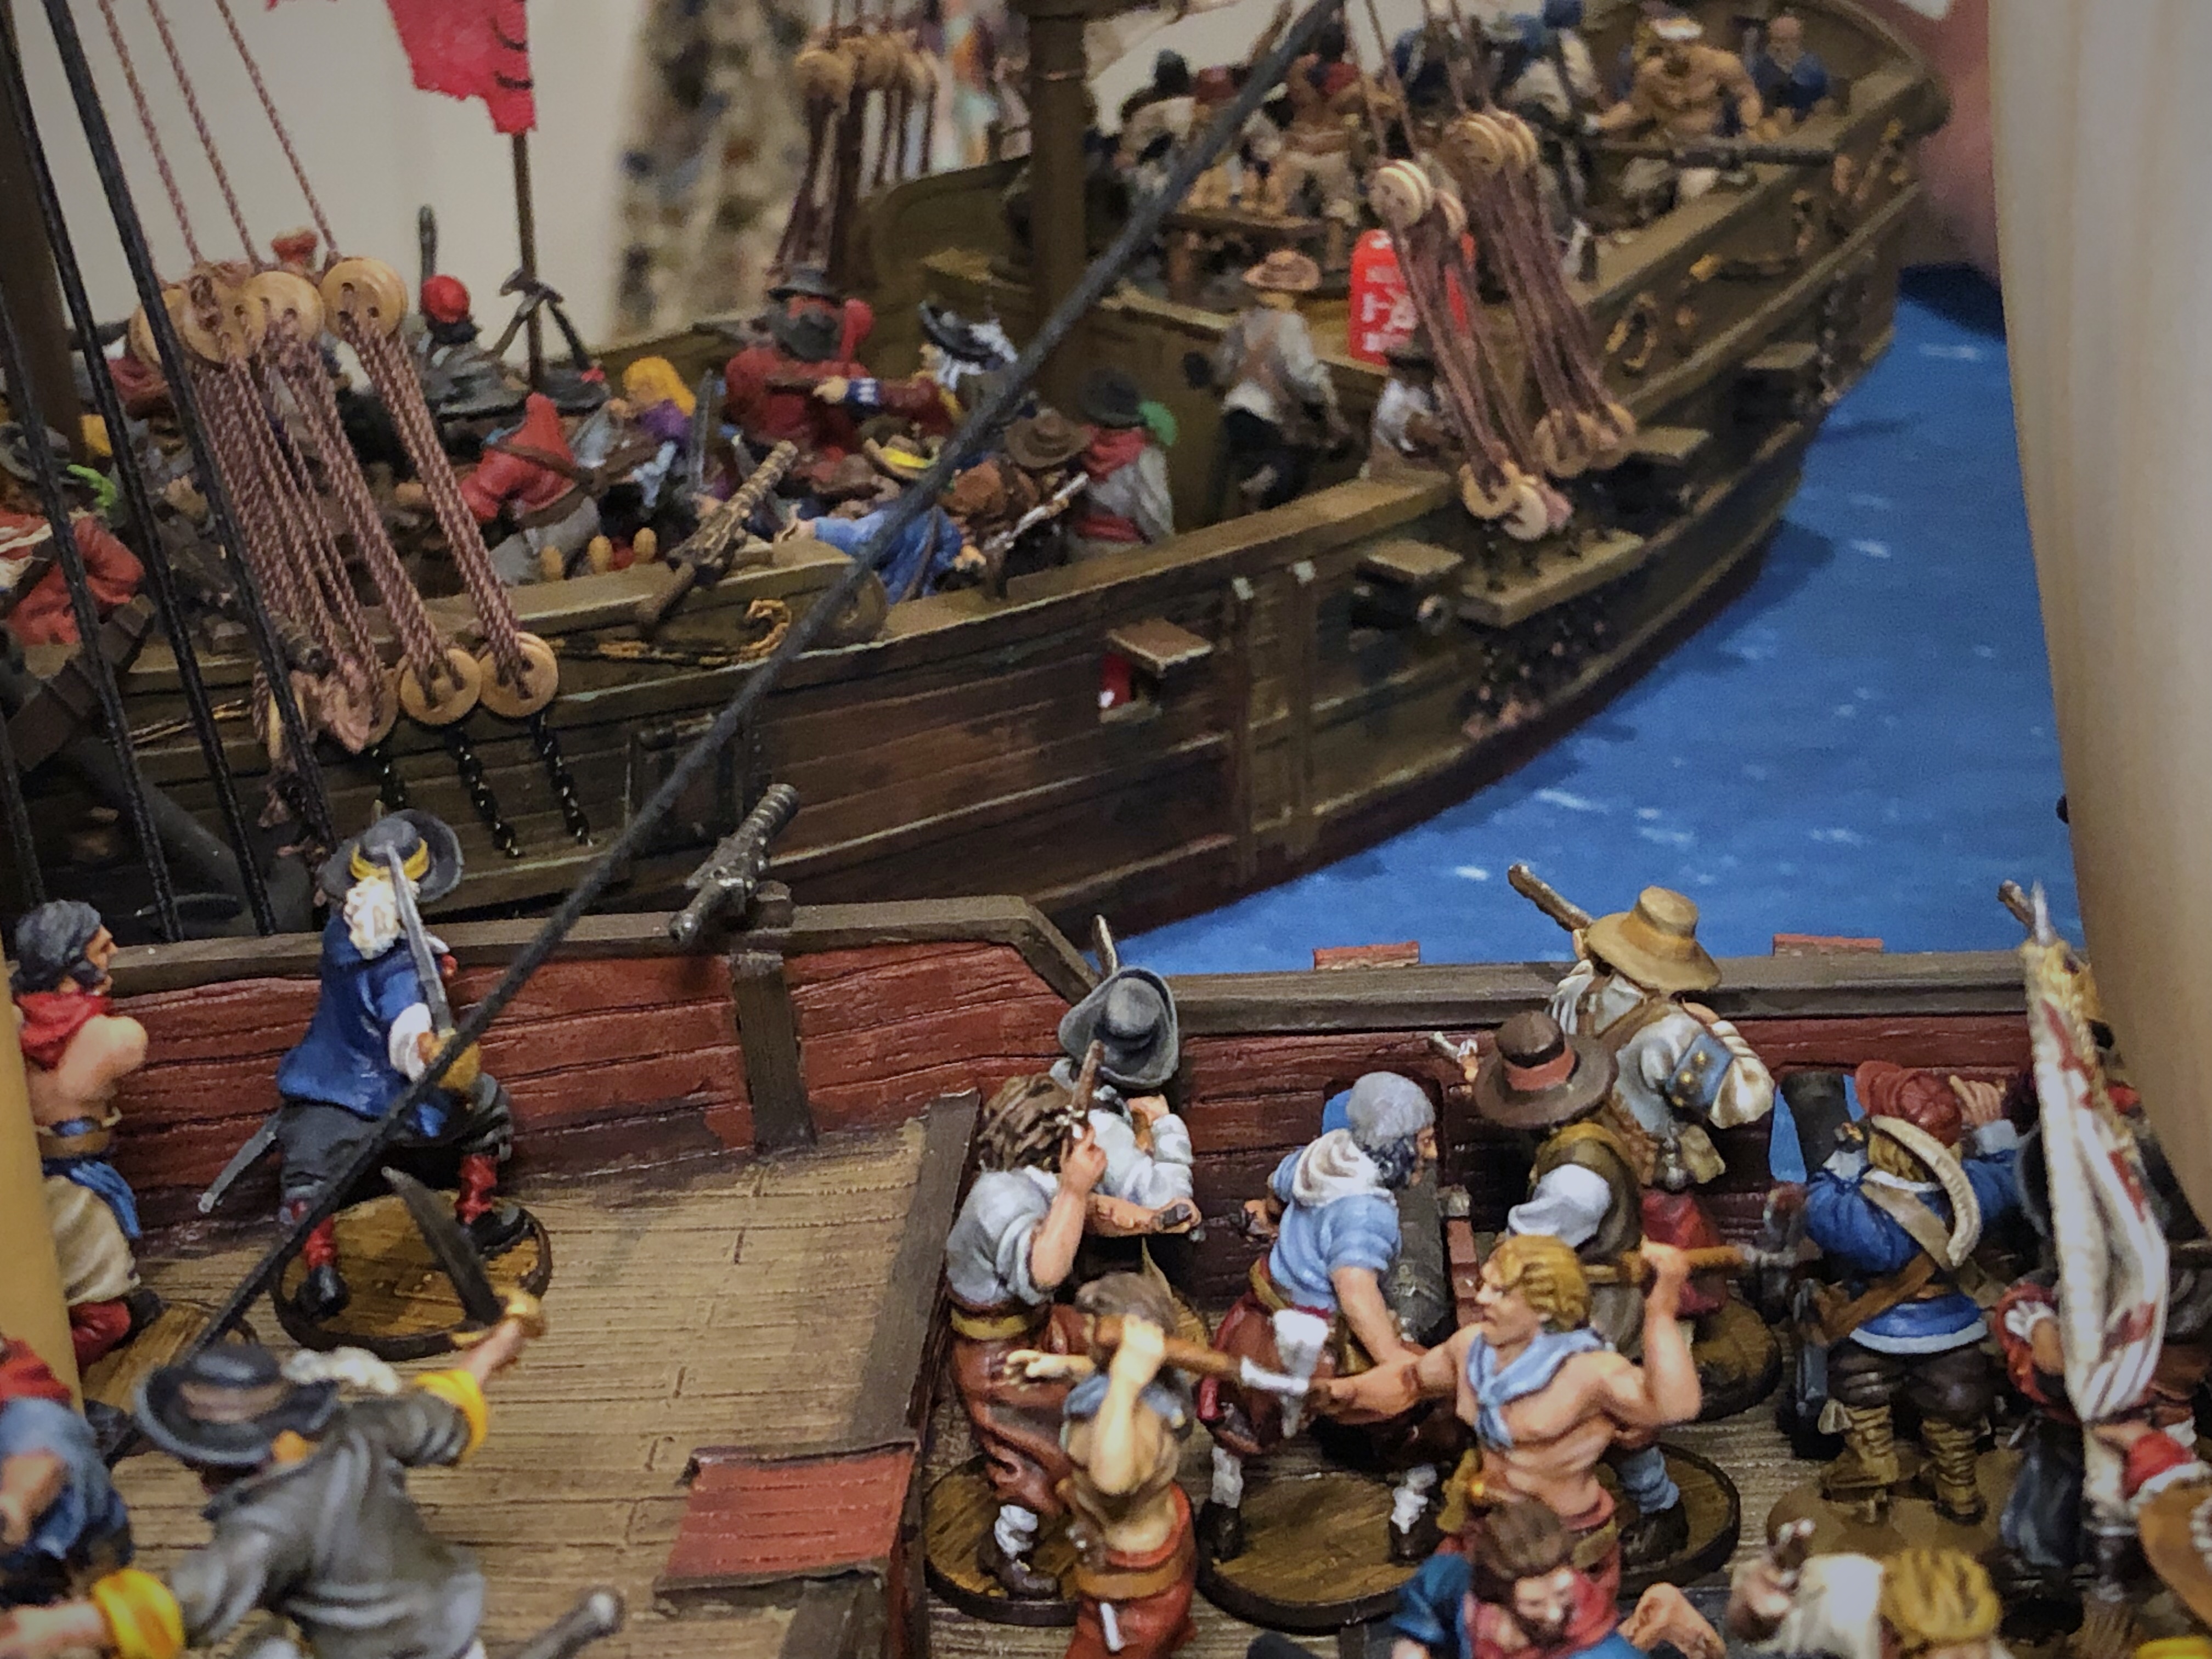
The Sloop of War turned into my Frigate and we collided by nothing was entangled and my ship was merely pushed away 3″ and we both took a point of damage.
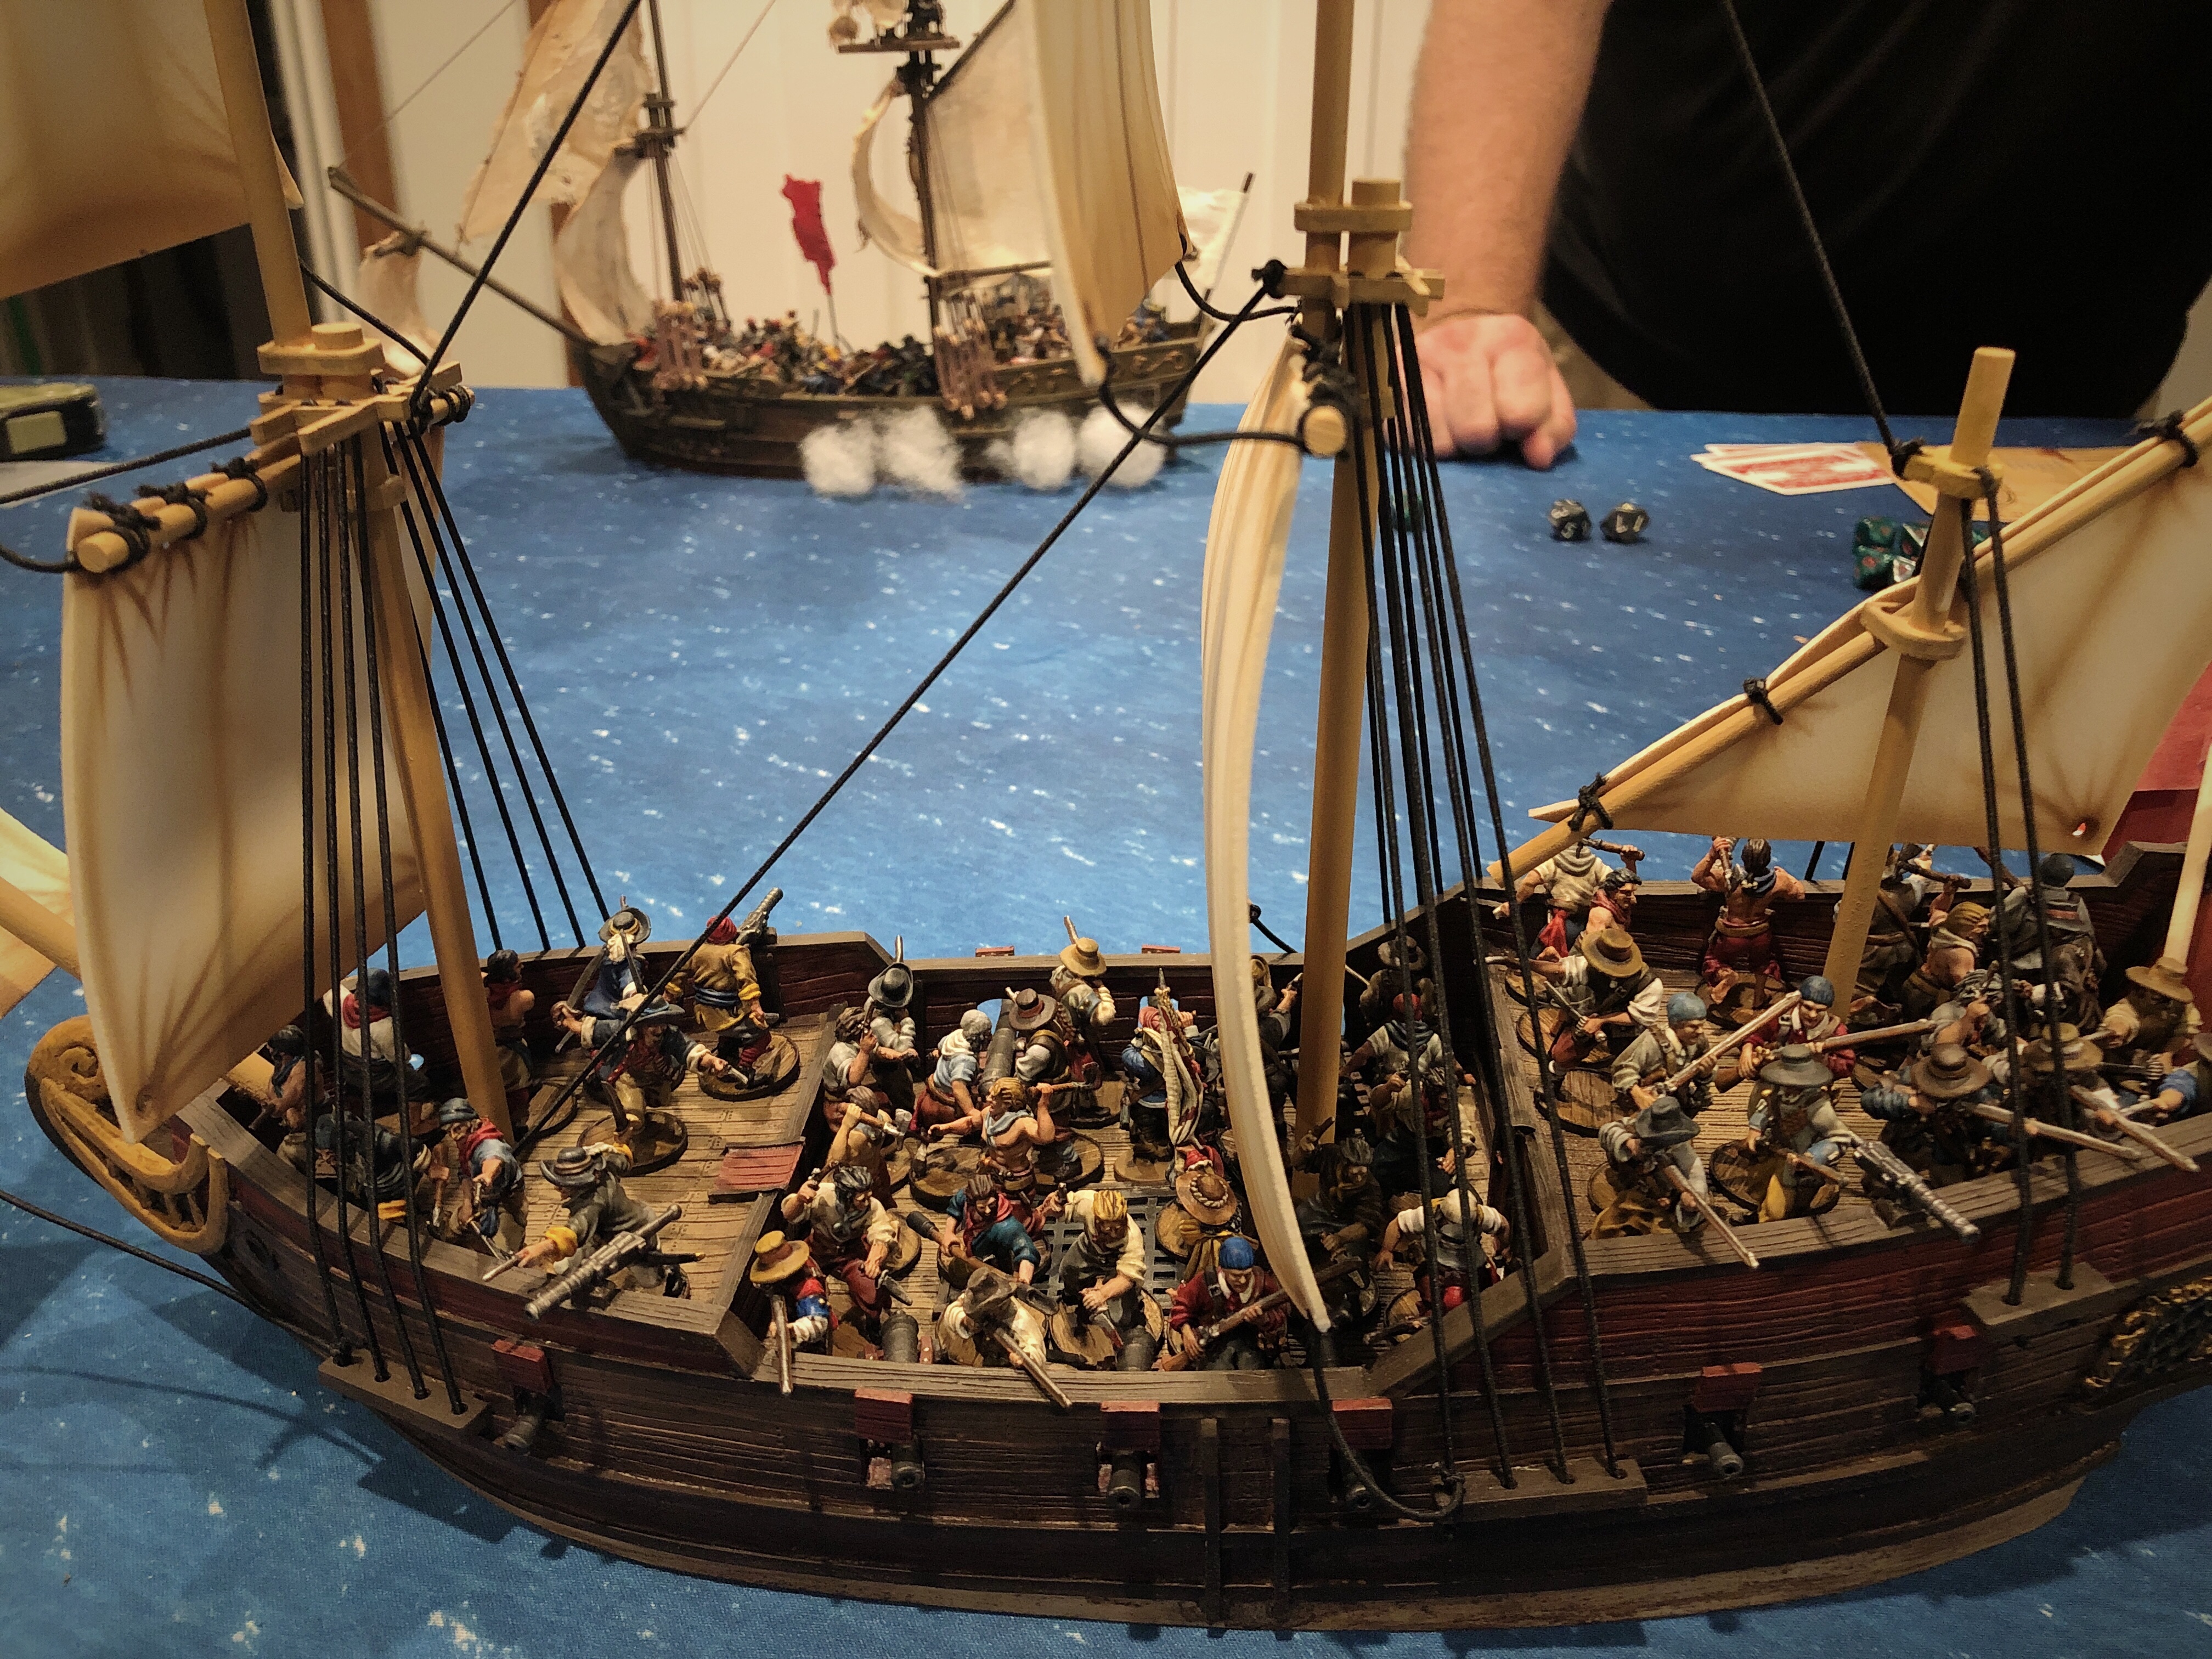
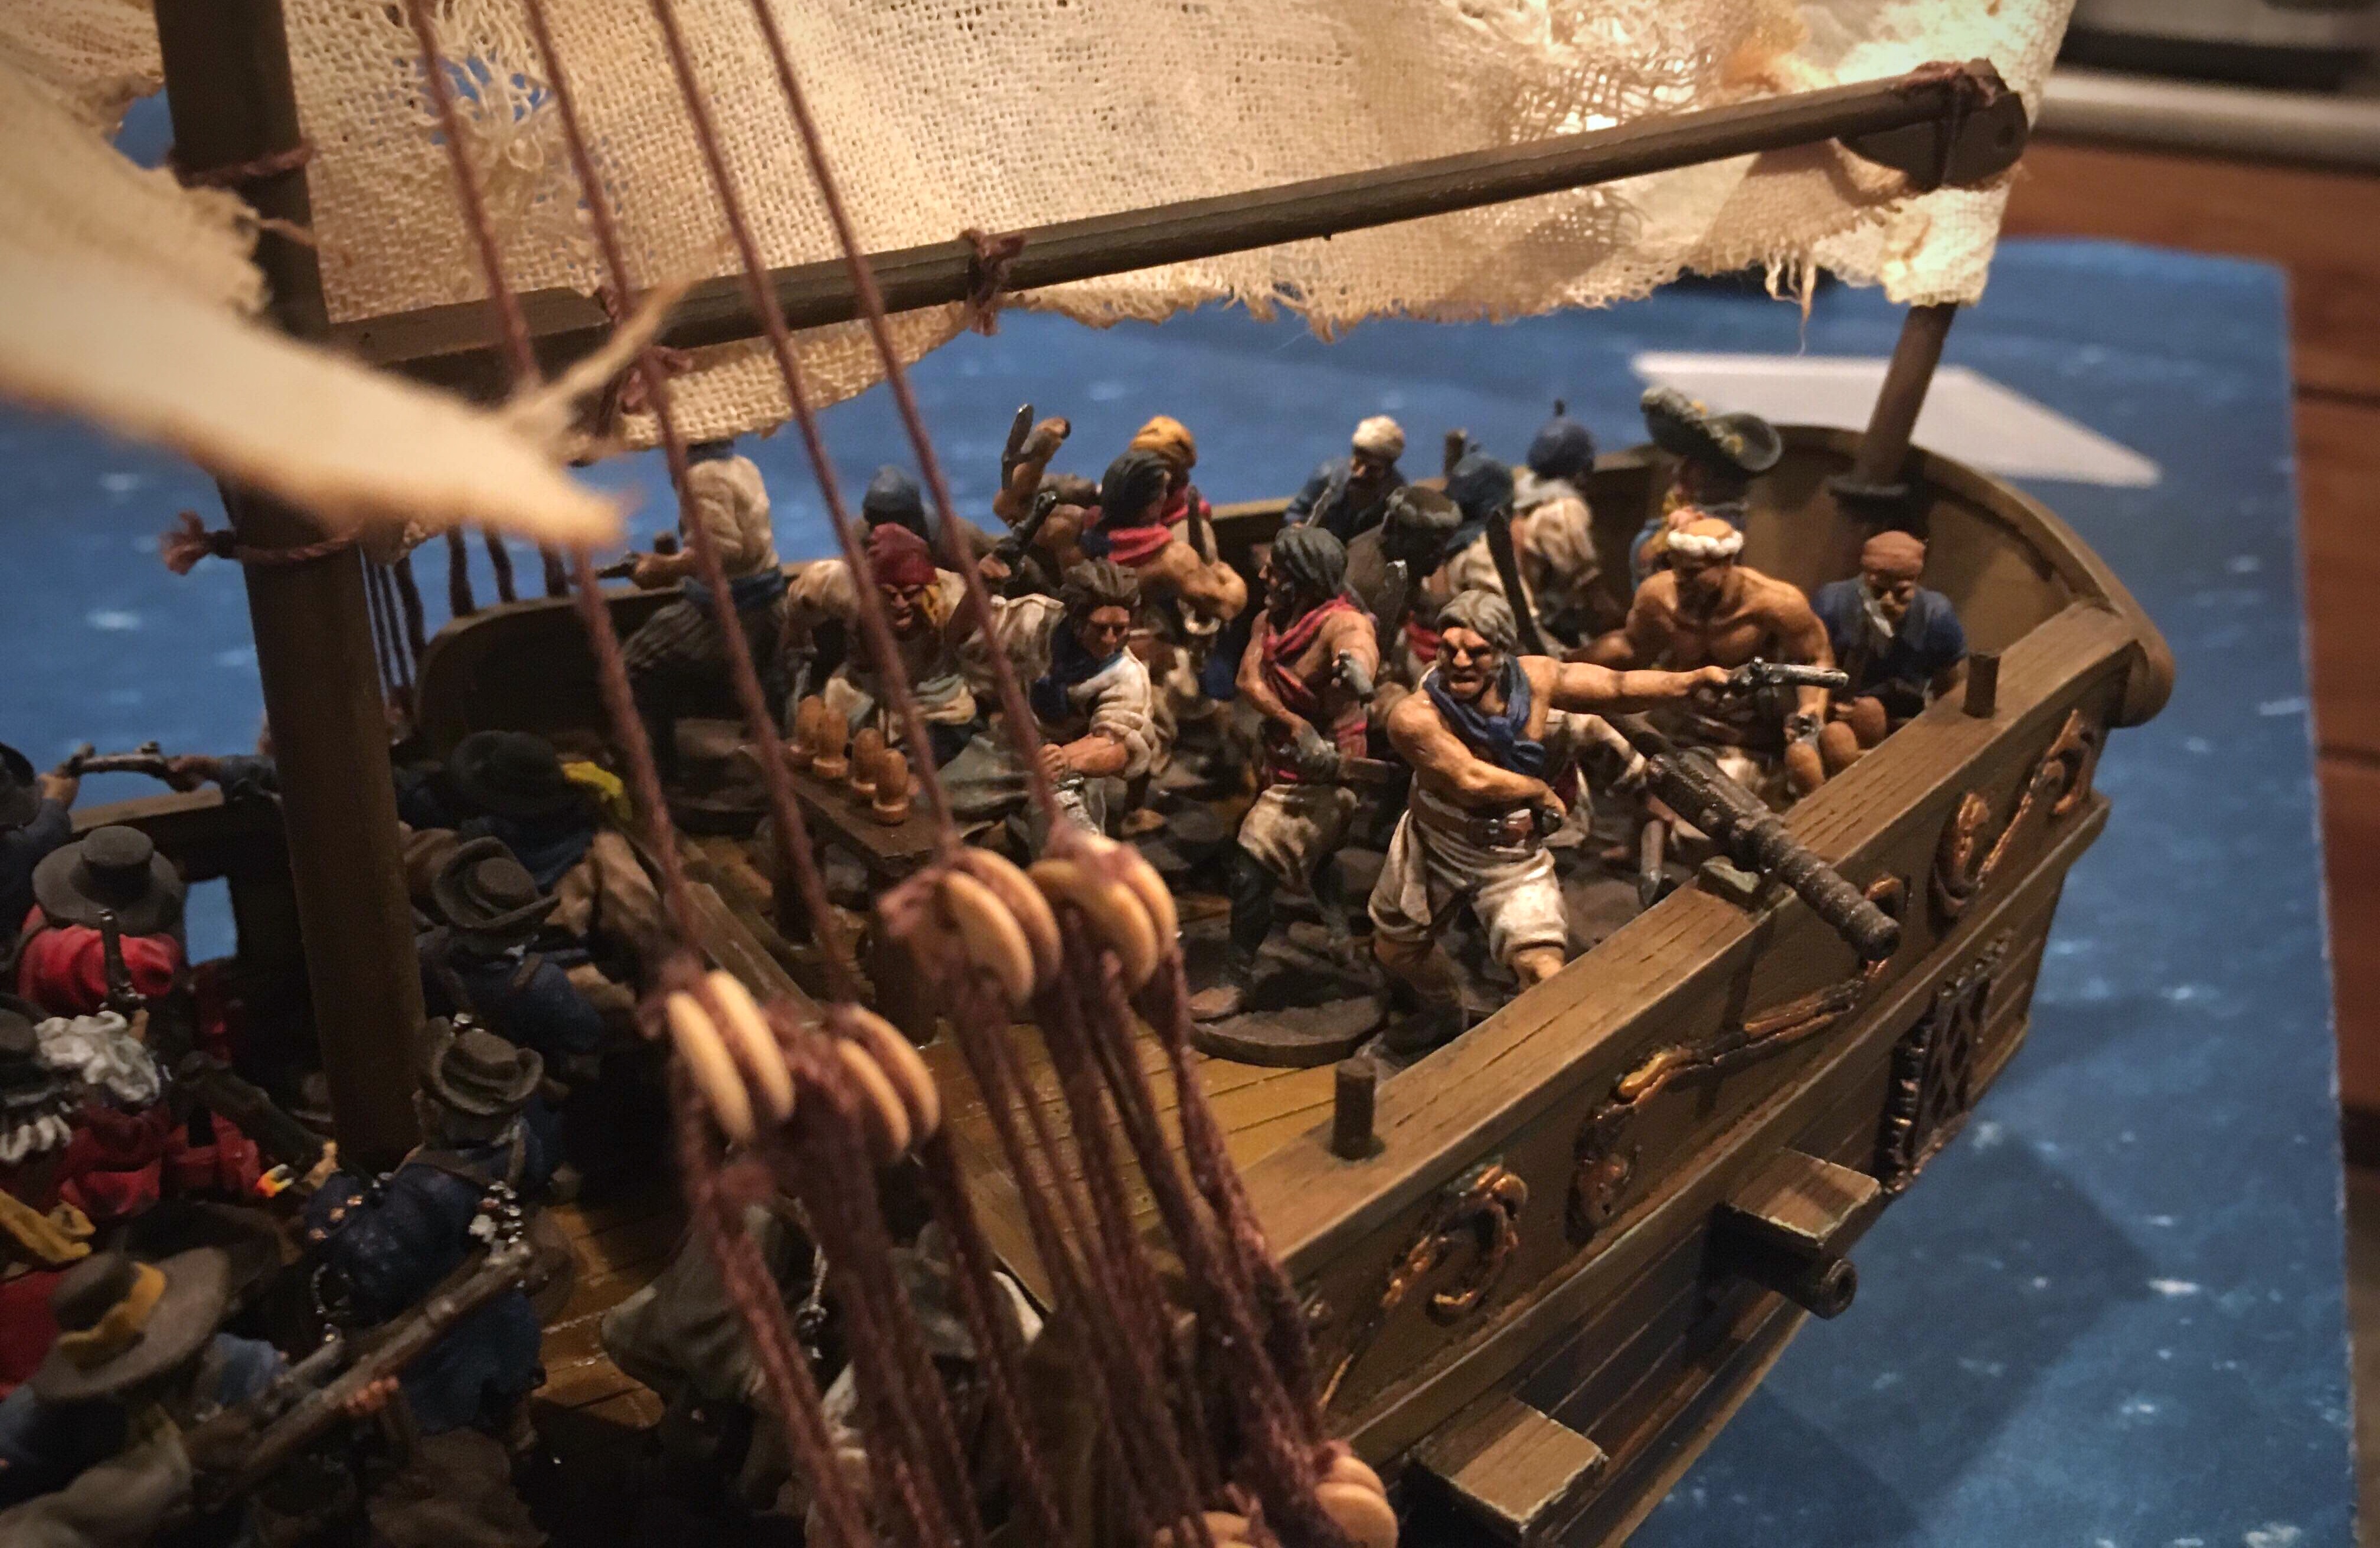
Starting out with massive 12 and 16 models units meant that even after taking substantial casualties, Guy’s units were able to continue firing off substantial volleys well into the game. Especially those forward Sea Dogs with 5 Blunderbusses! Even after taking around 4 casualties, that unit could throw a huge handful of dice with exploding 10’s on 5 Blunderbusses! With 10 exploding Blunderbuss dice, 6 “no cover” Firepot dice and a couple pistol dice, that volley really hurt. My Marins took a nasty punch from them but they didn’t break.
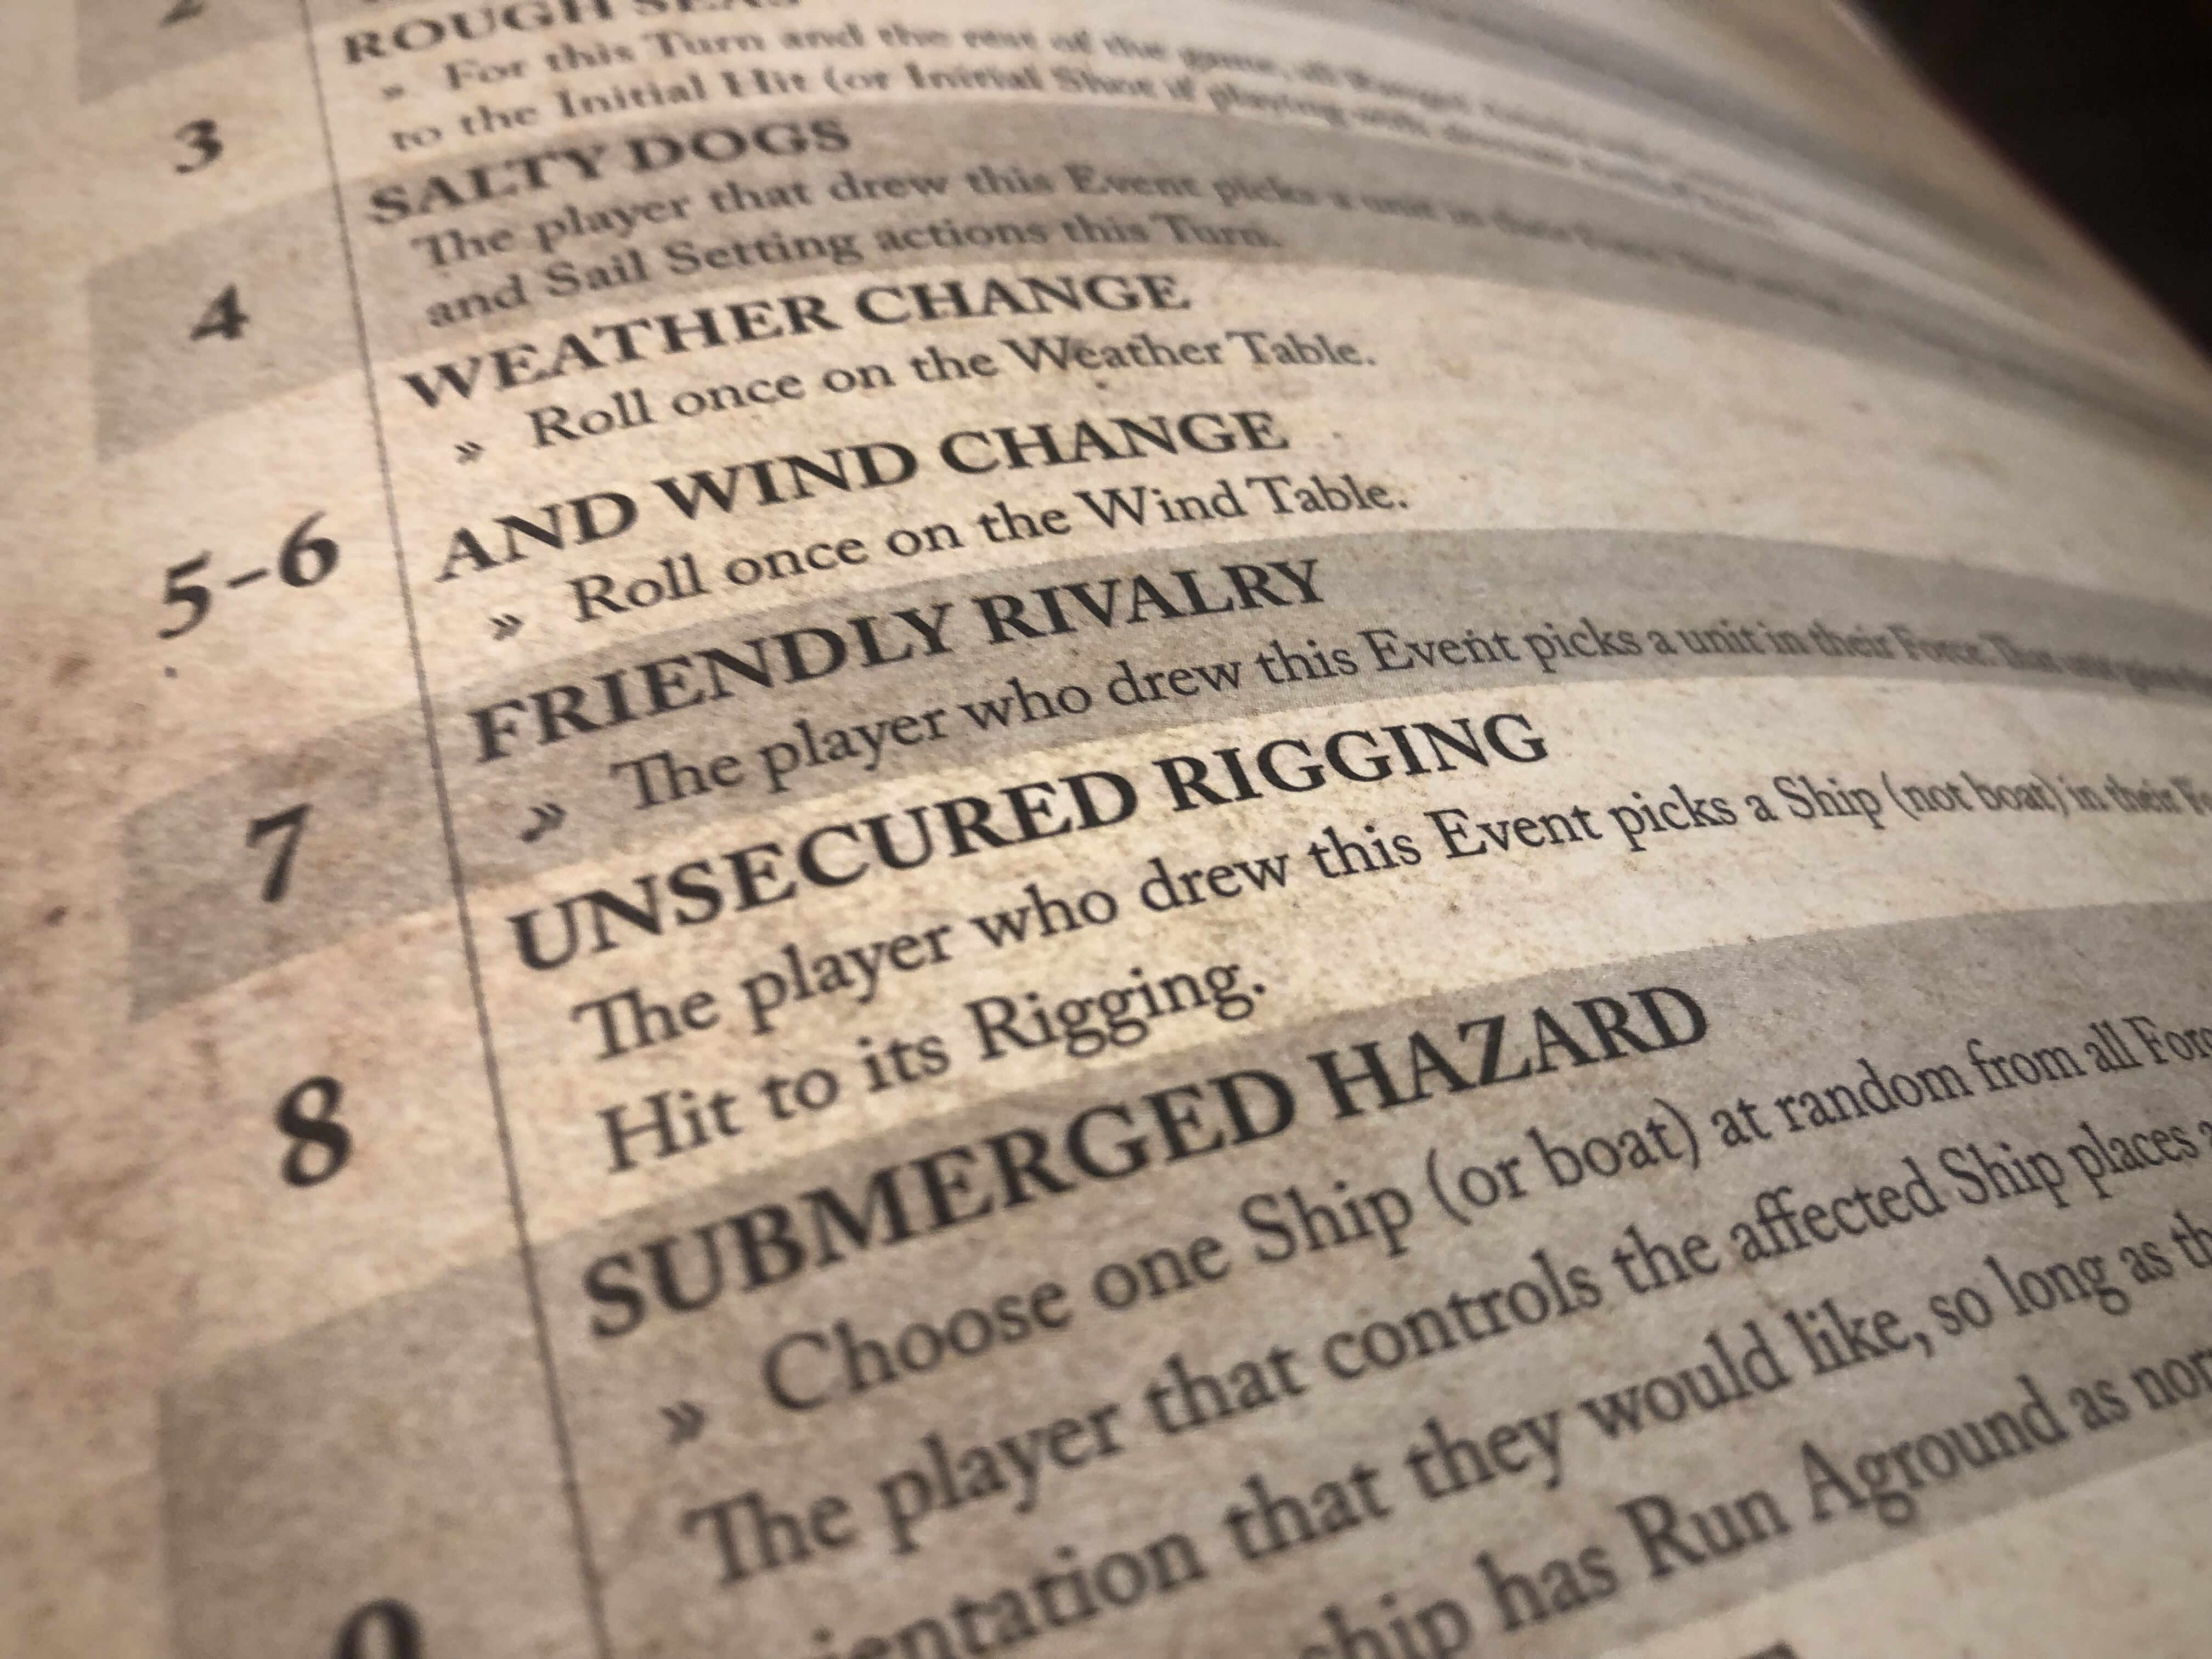
I drew an event going into turn 4 which came out as the Unsecured Rigging even which damaged my rigging. I took a Sails and Spares Lucky Hit but fighting at such close range with no advanced maneuvers or fancy sailing, it didn’t hurt me that much.
At the end of turn 3 I think I had one Strike Point for casualties and Guy’s Buccaneers had 2 for casualties and 1 for 50% damage on his ship’s hull. He rolled for a Strike Test and passed so the game continued.
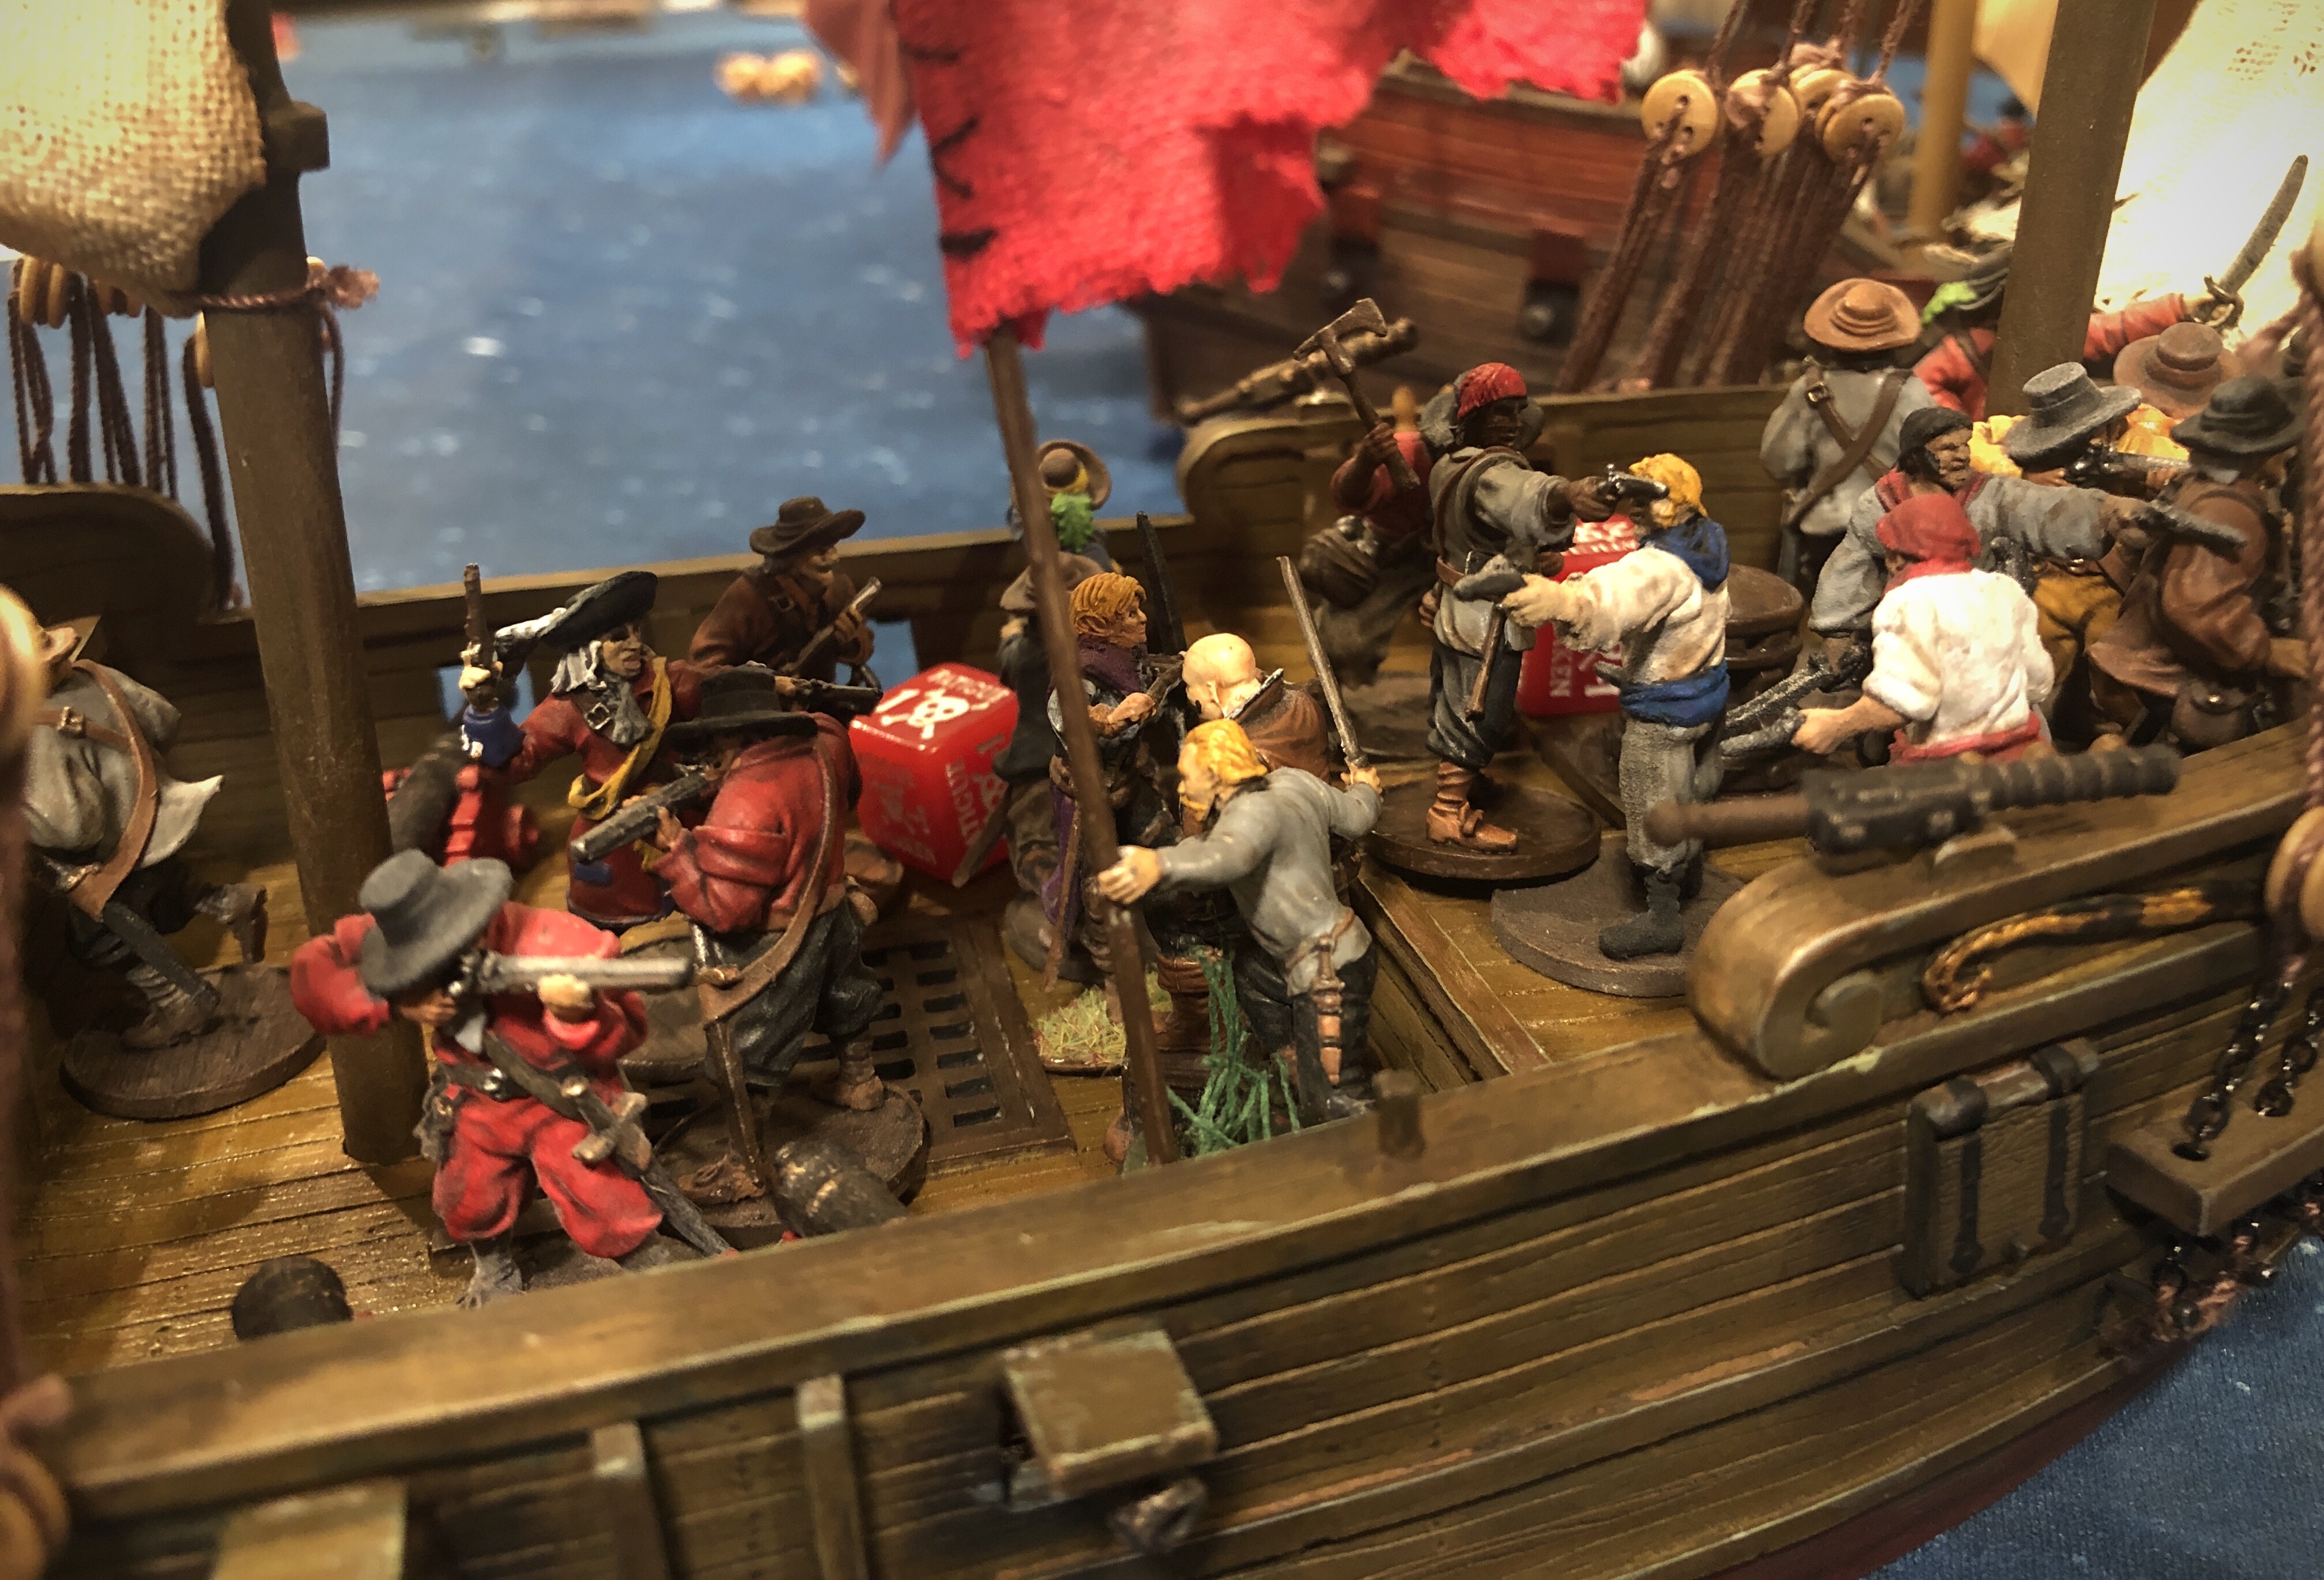
I really wanted initiative going into turn 4 so I could attempt to cripple his command unit before it activate by Guy finally drew a high Spade and took the first activation. He hit me hard with more small arms fire and Kidd’s unit took a 3rd Fatigue and moved to the front deck. I still had the advantage but things weren’t looking so rosey for me.
My rear deck fired a decisive volley of grapeshot and swivel guns. I scored a massive amount of hits and nearly every model in that middle deck had to roll a Save test.
The Sea Dogs rolled poorly and they were eliminated along with Captain John Wright. The Kapers rolled insanely well and only lose 1 model out of 6 hits!
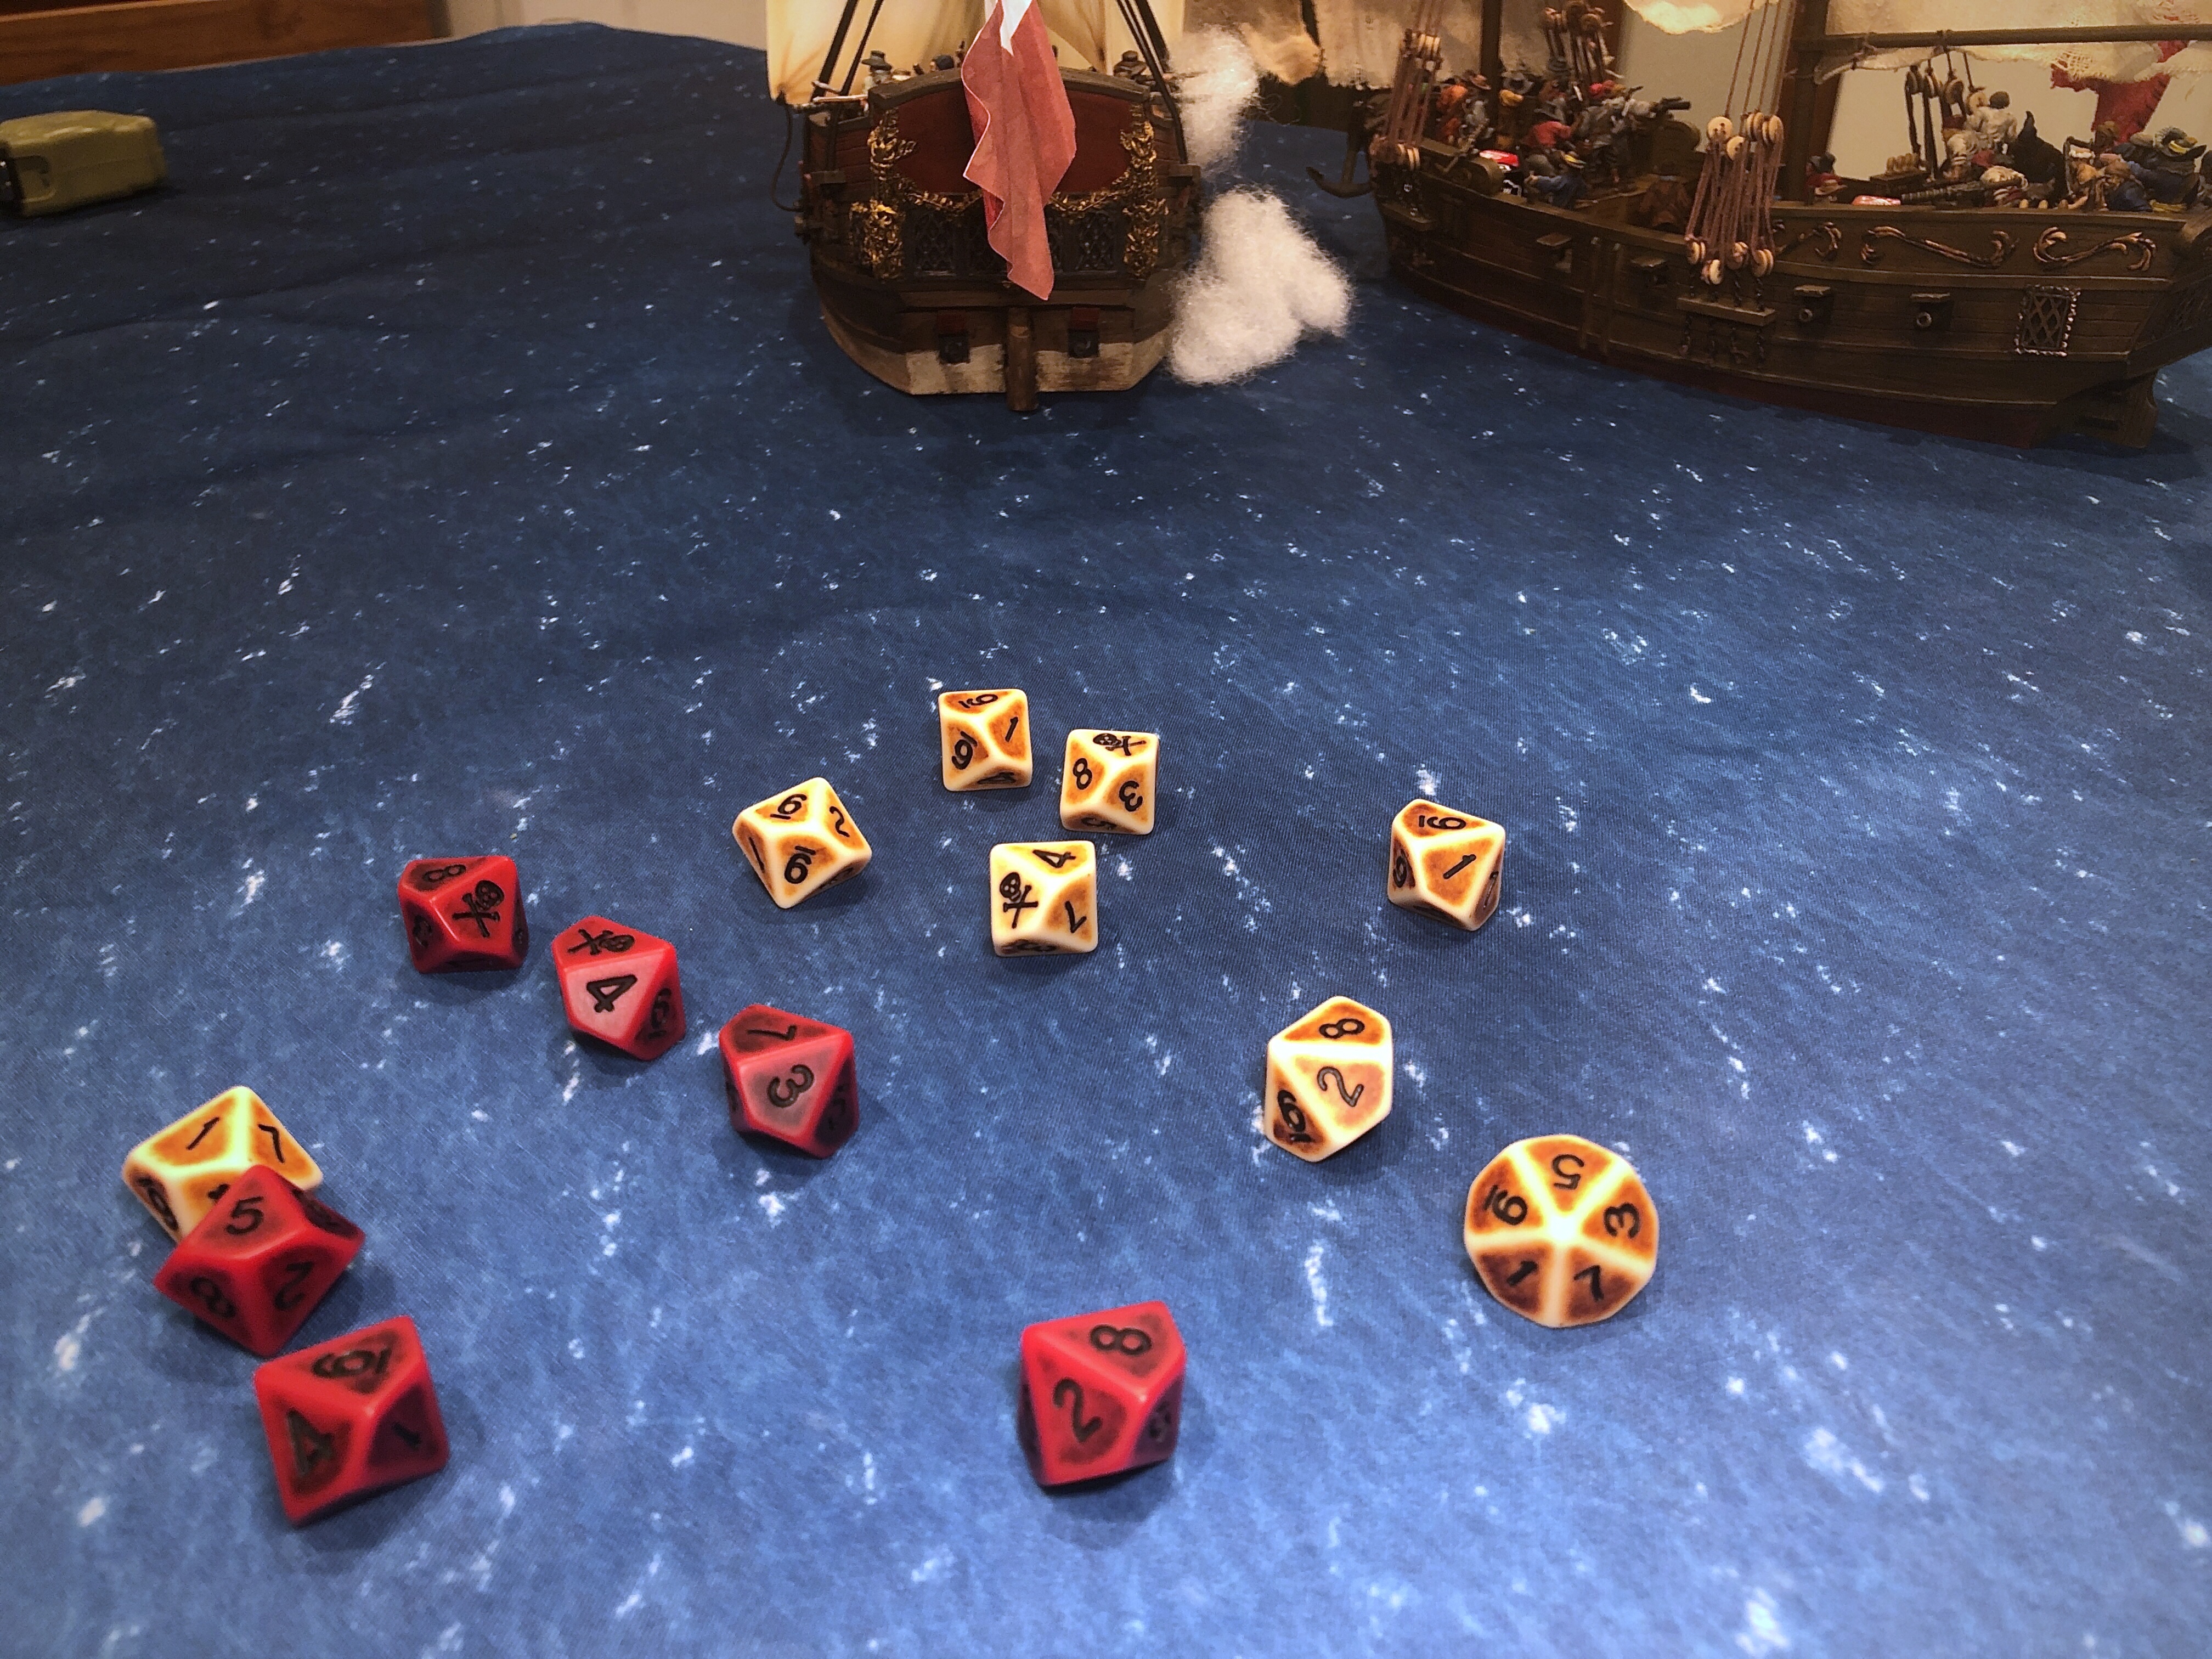
8 Grapeshot dice were all hits and 5 of the 6 Swivel dice were hits!
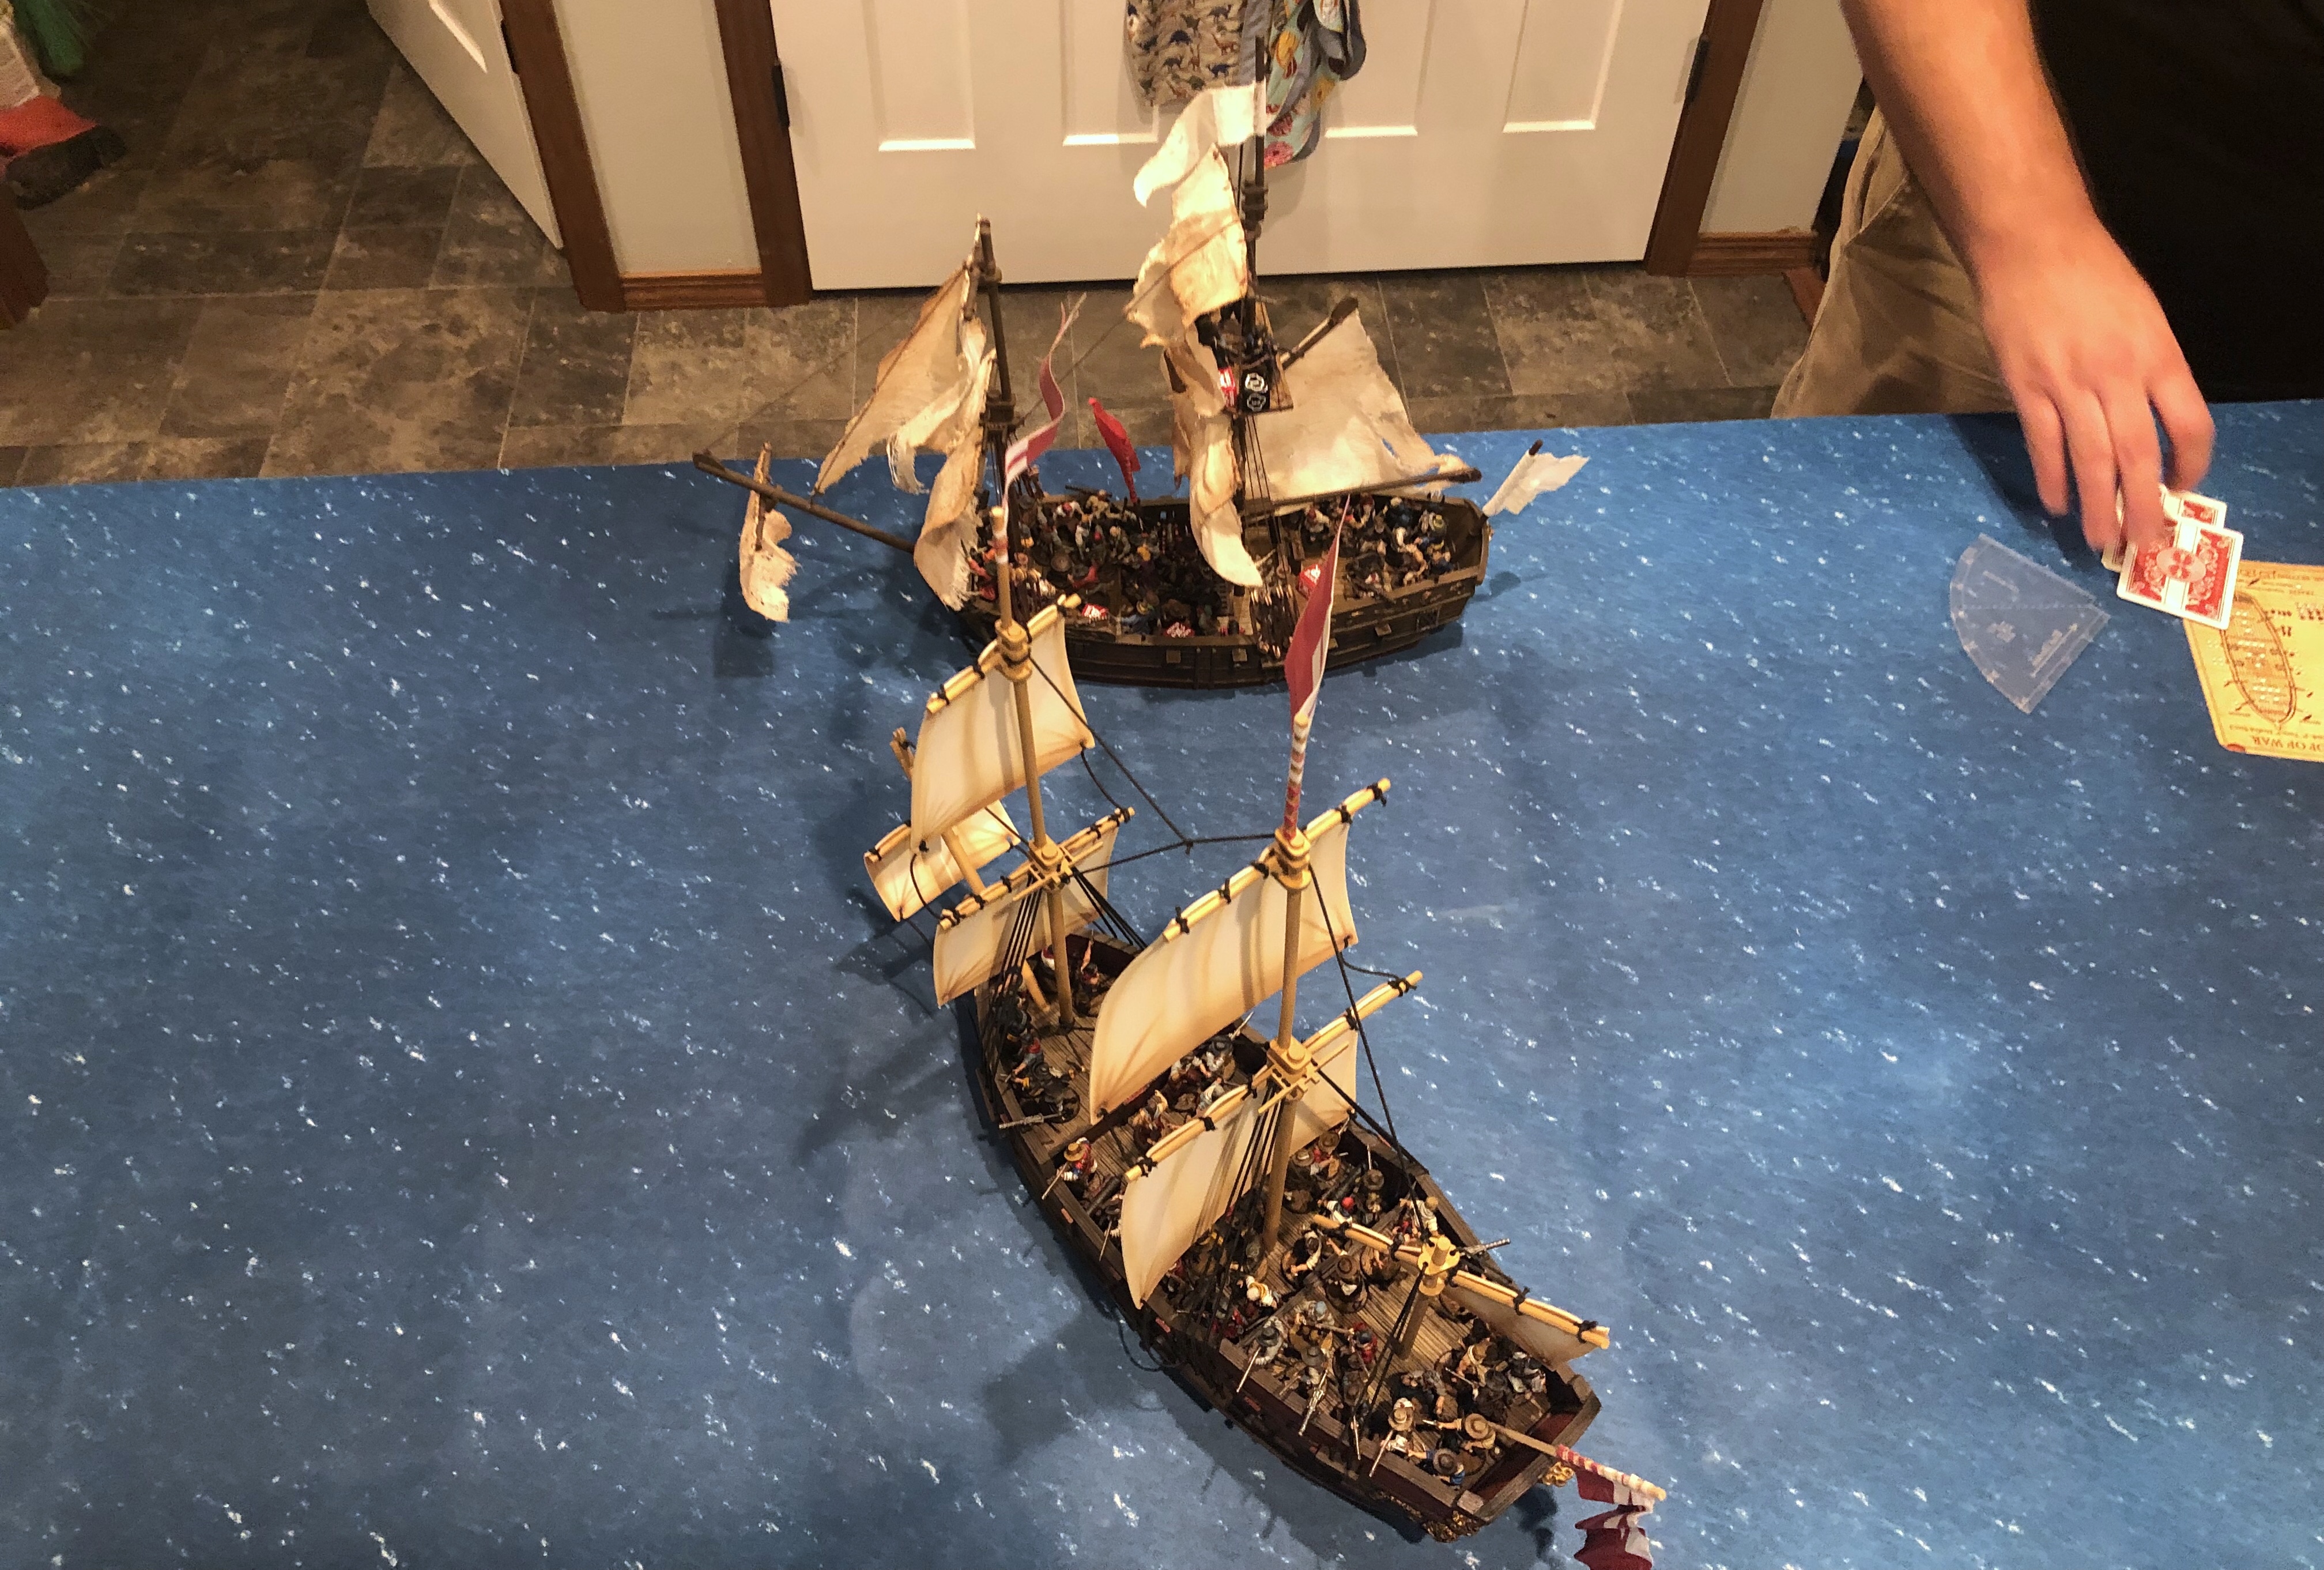
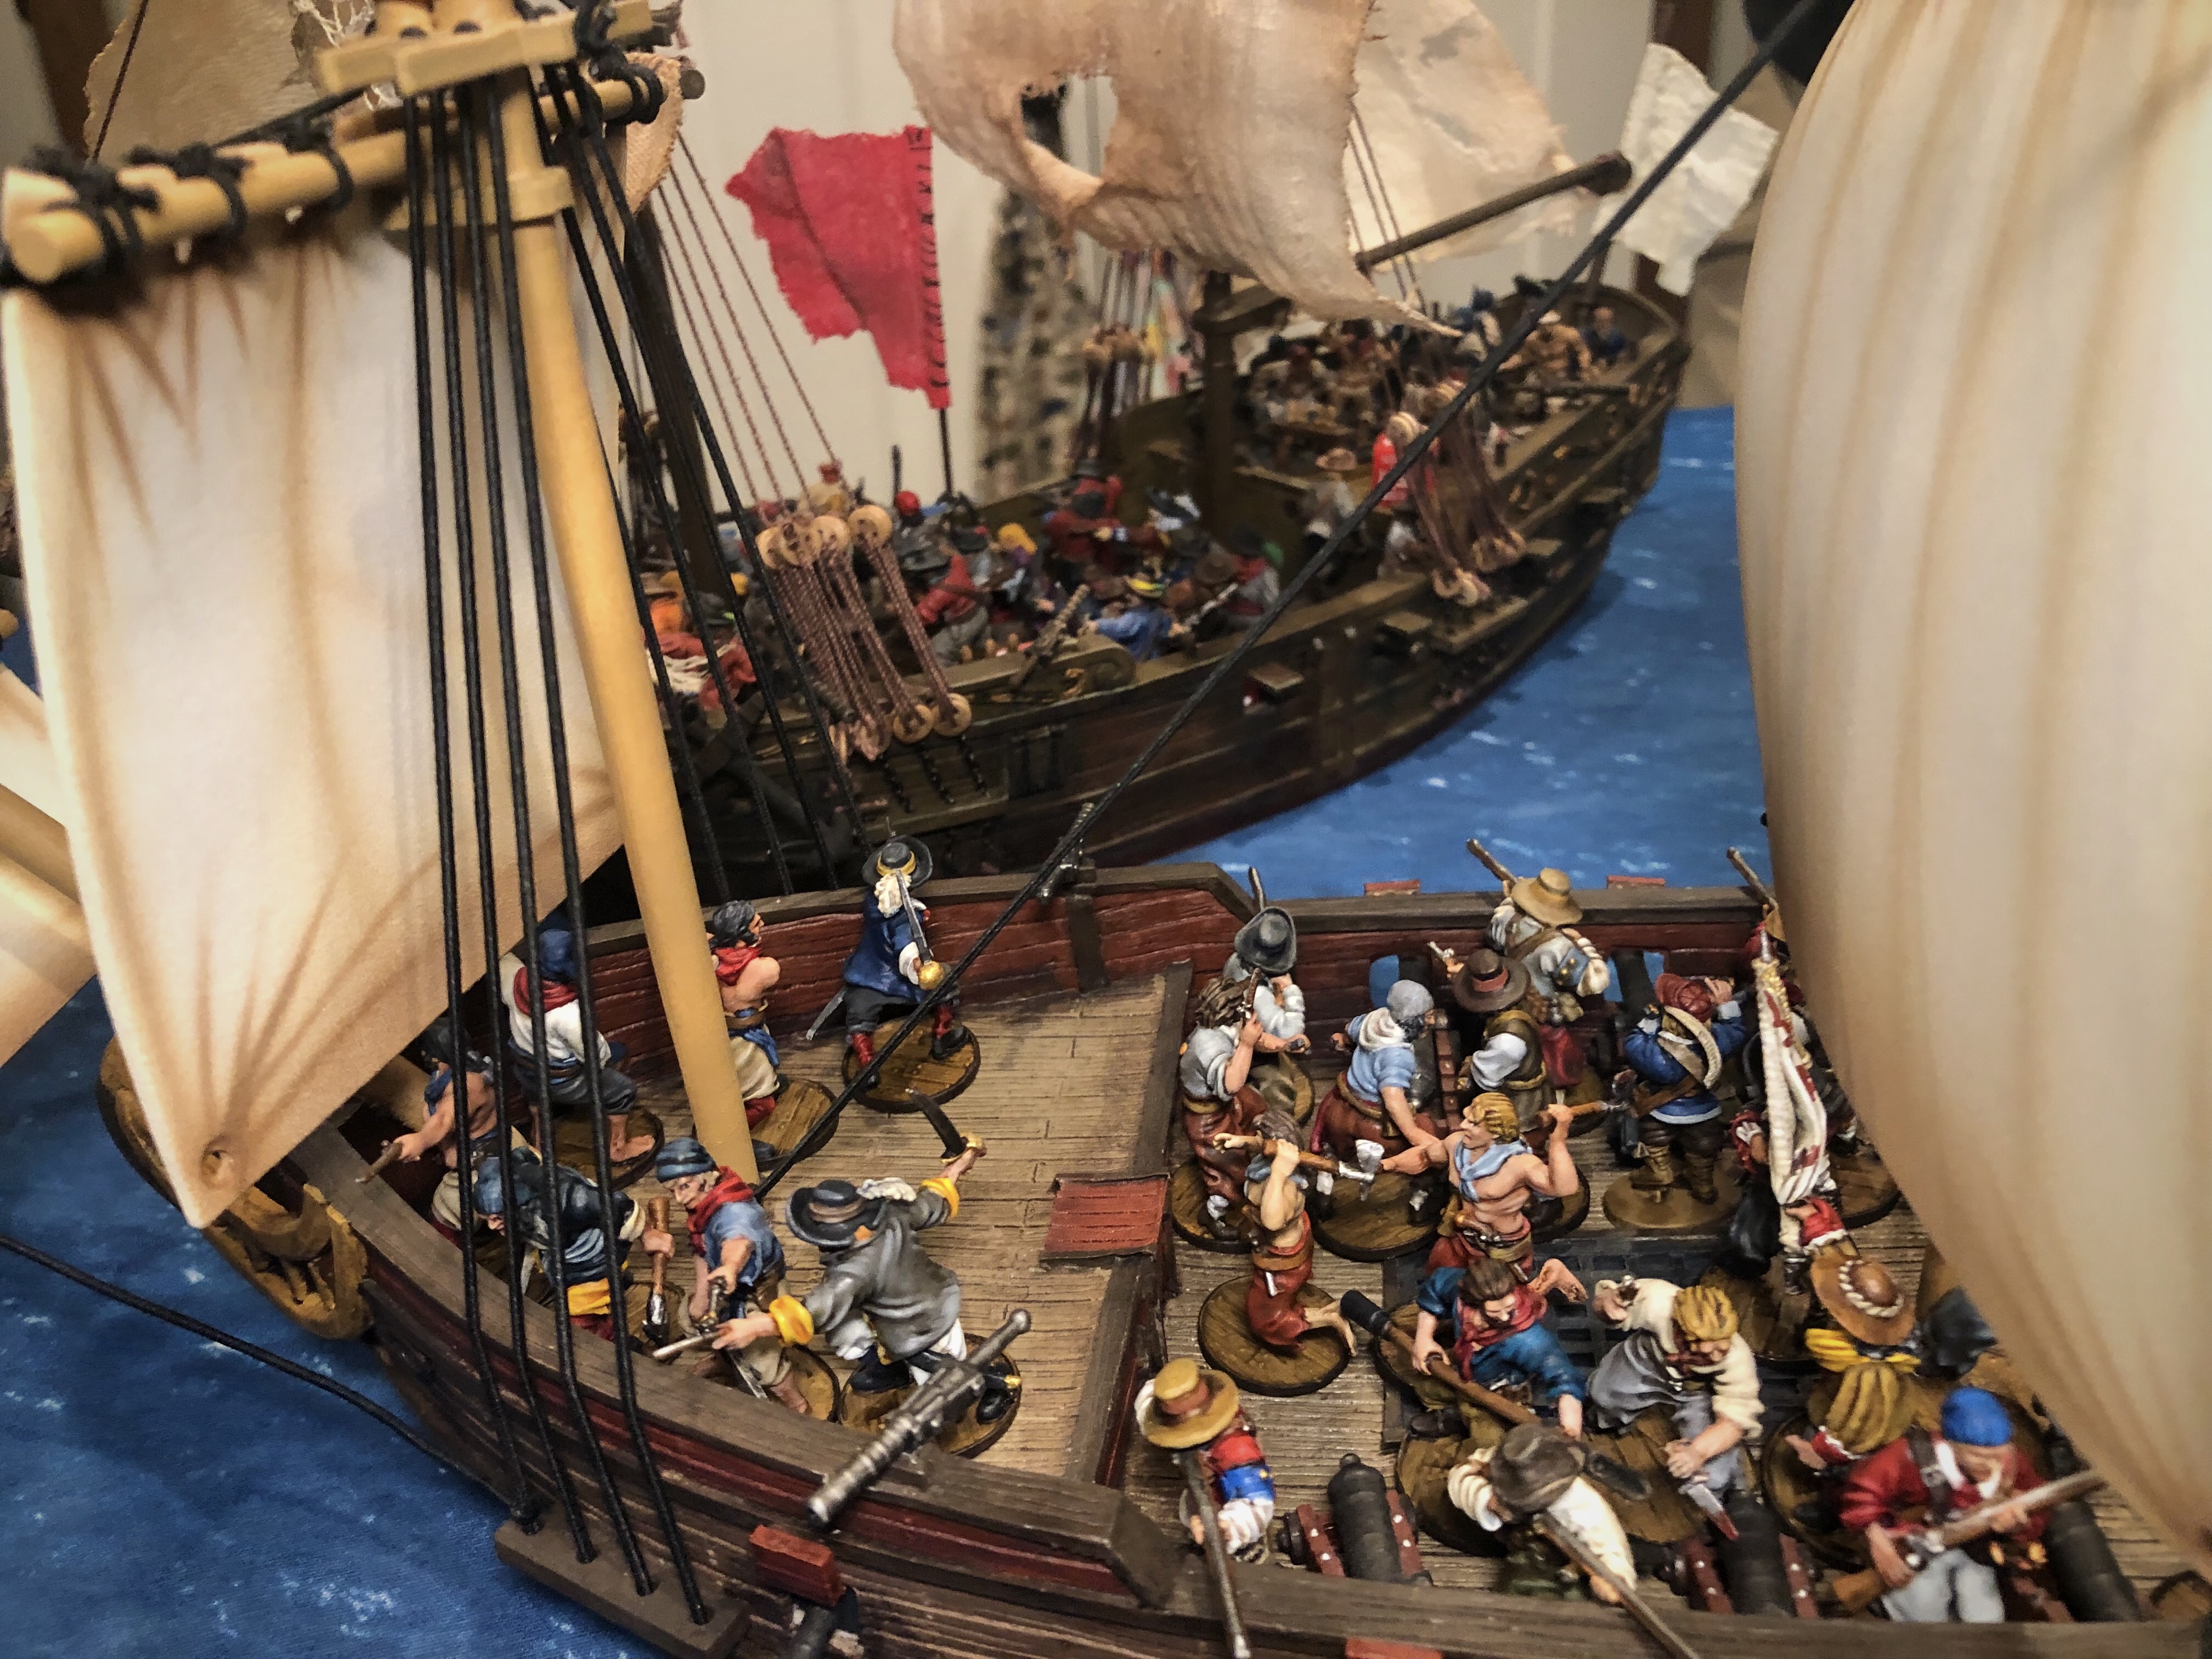
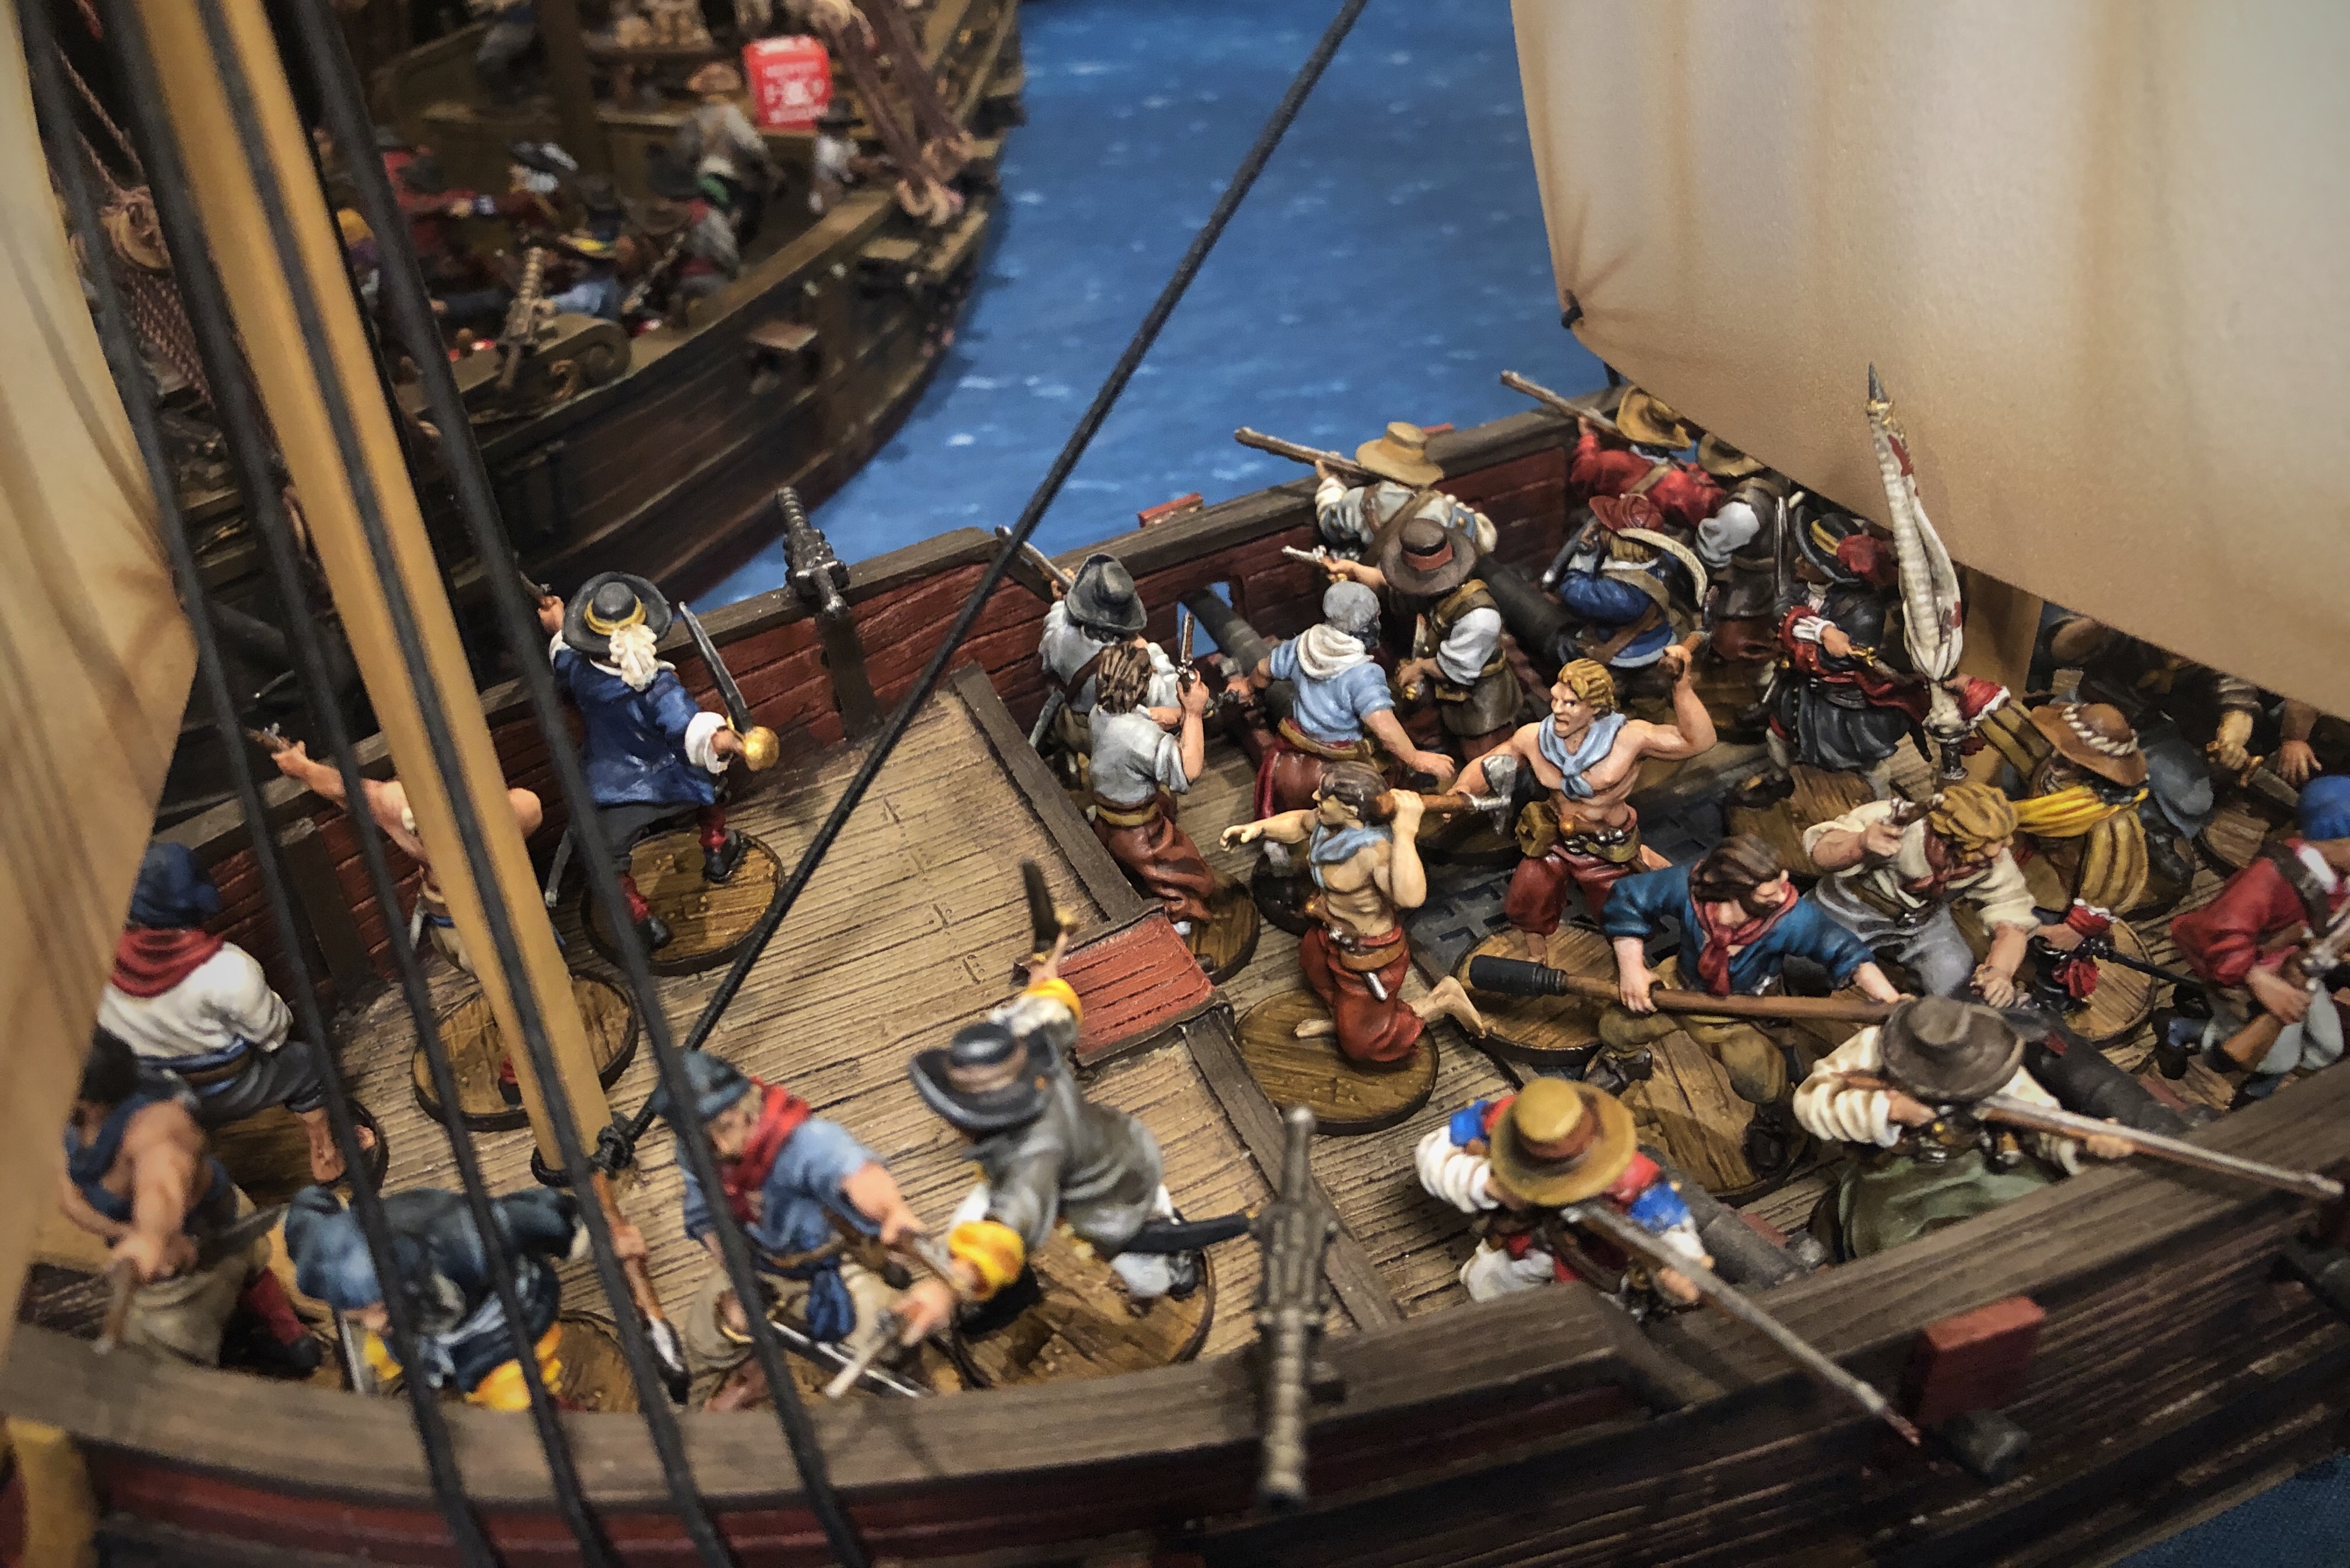
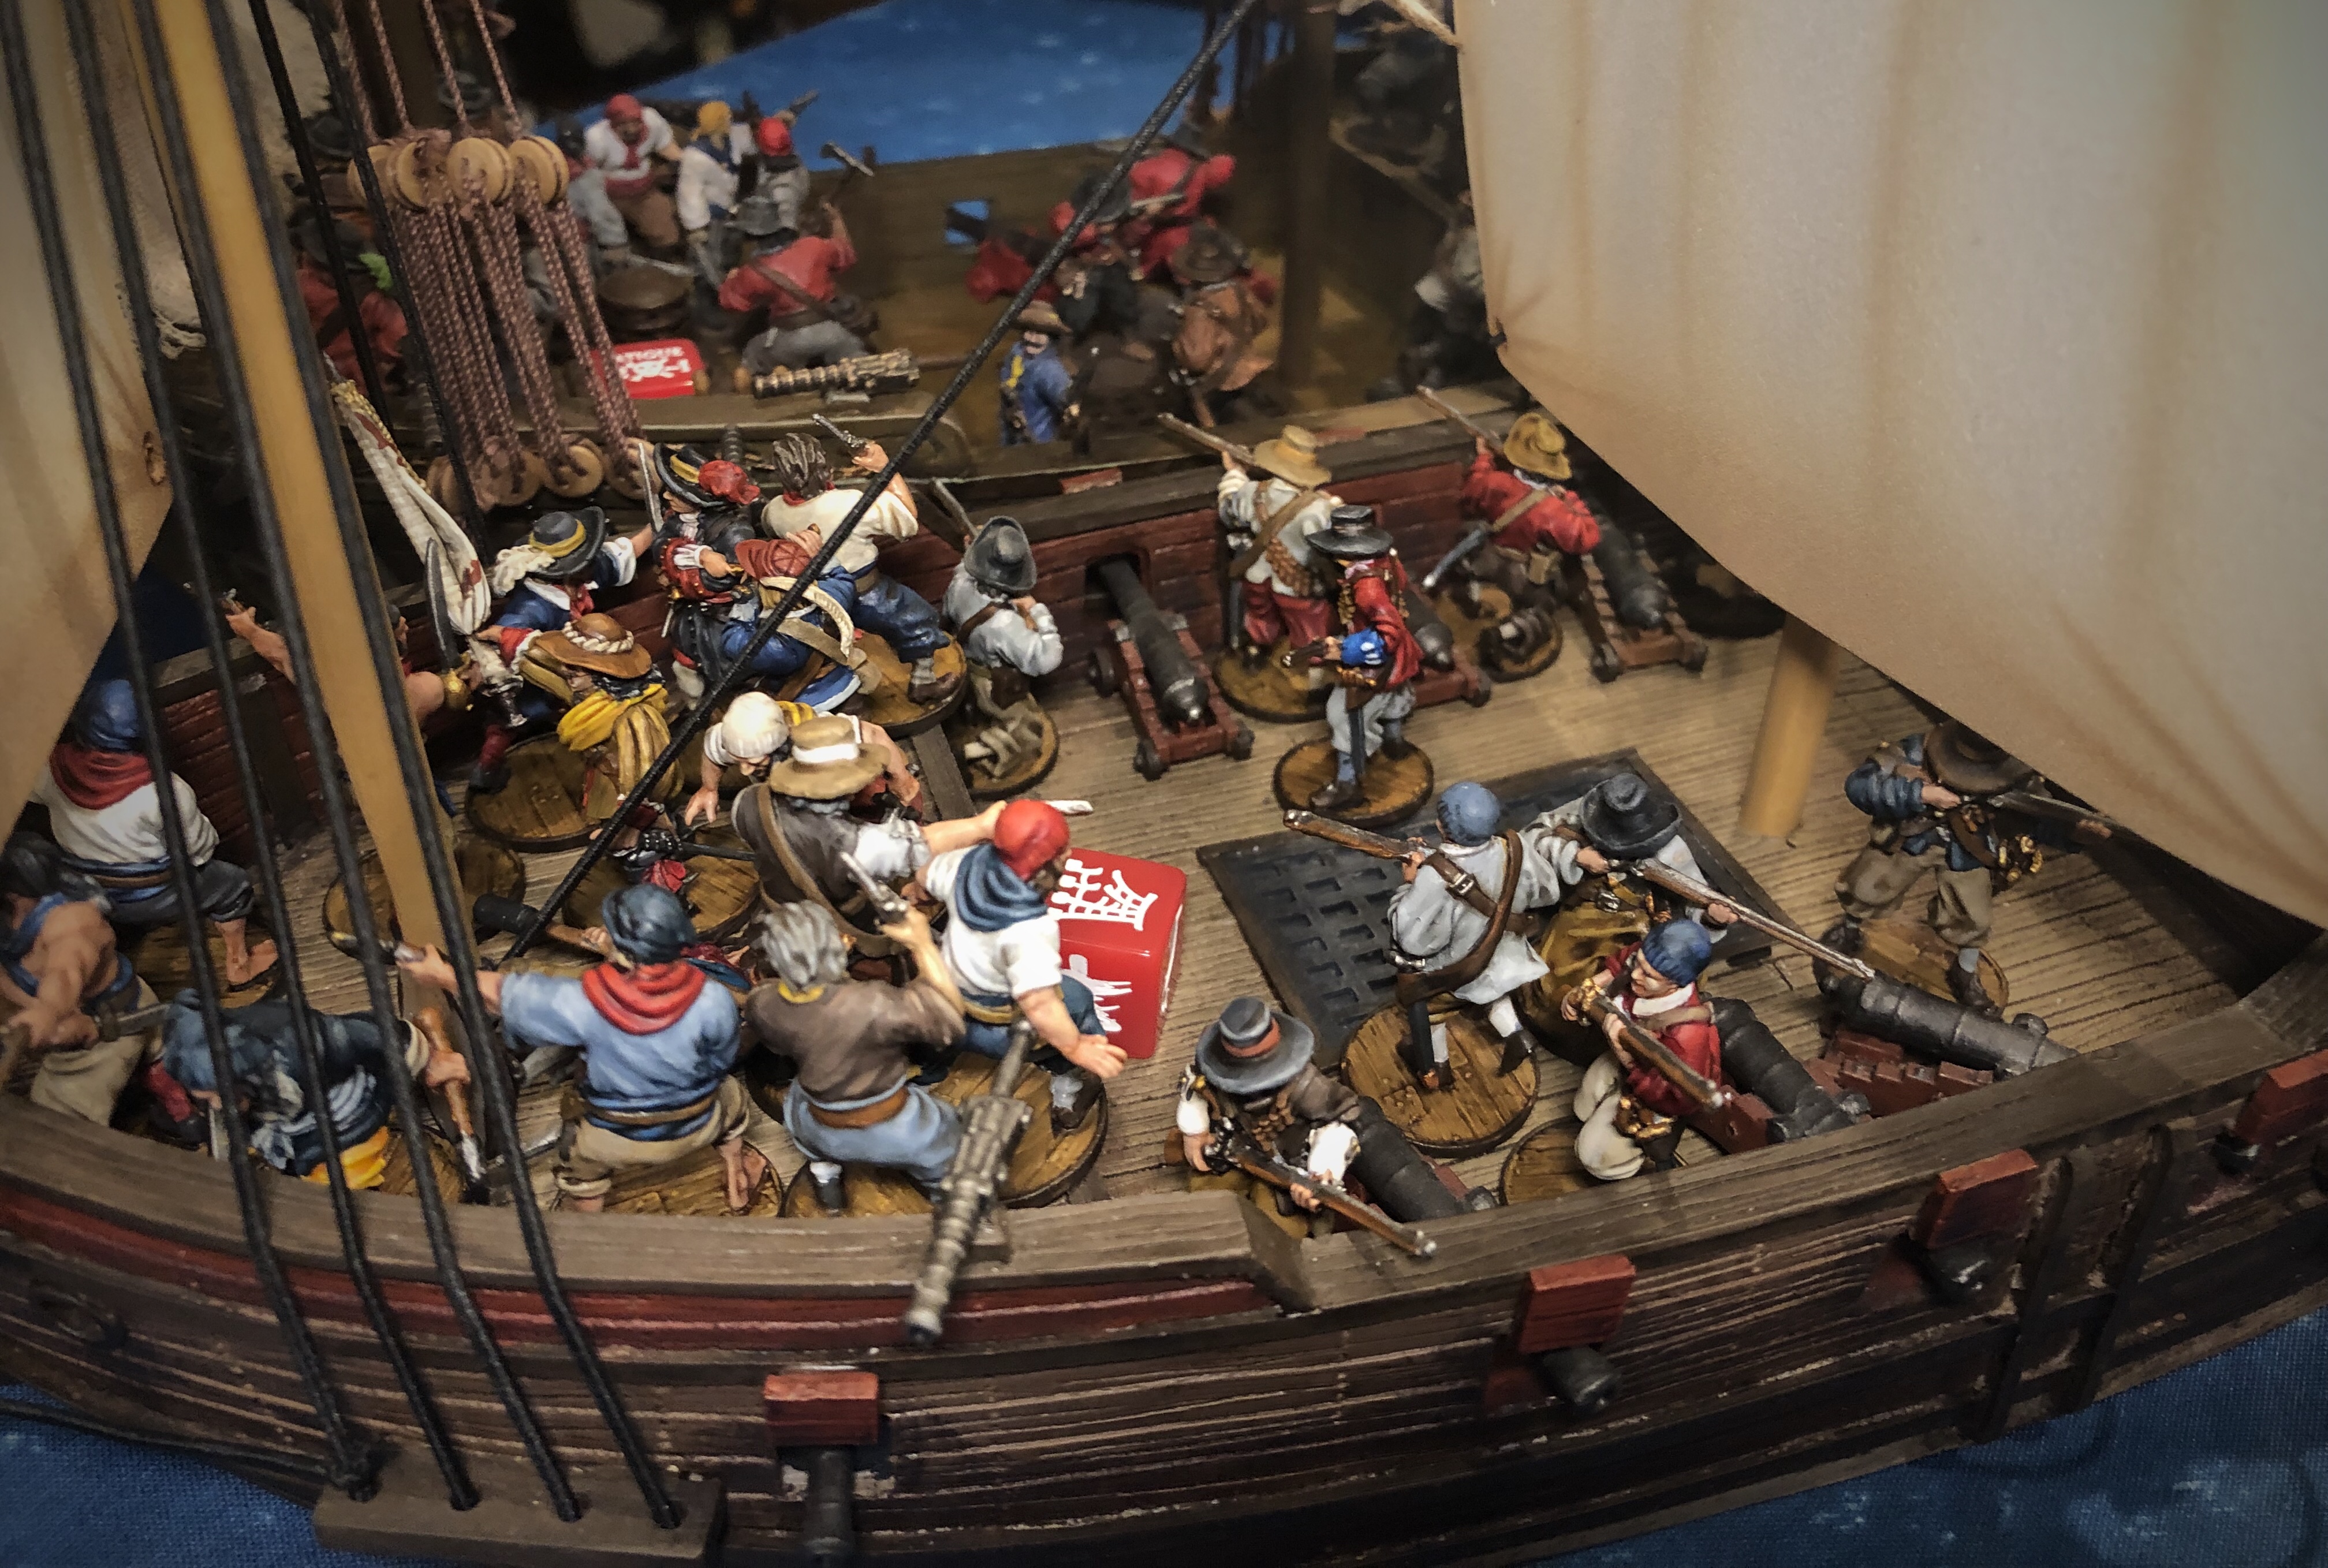
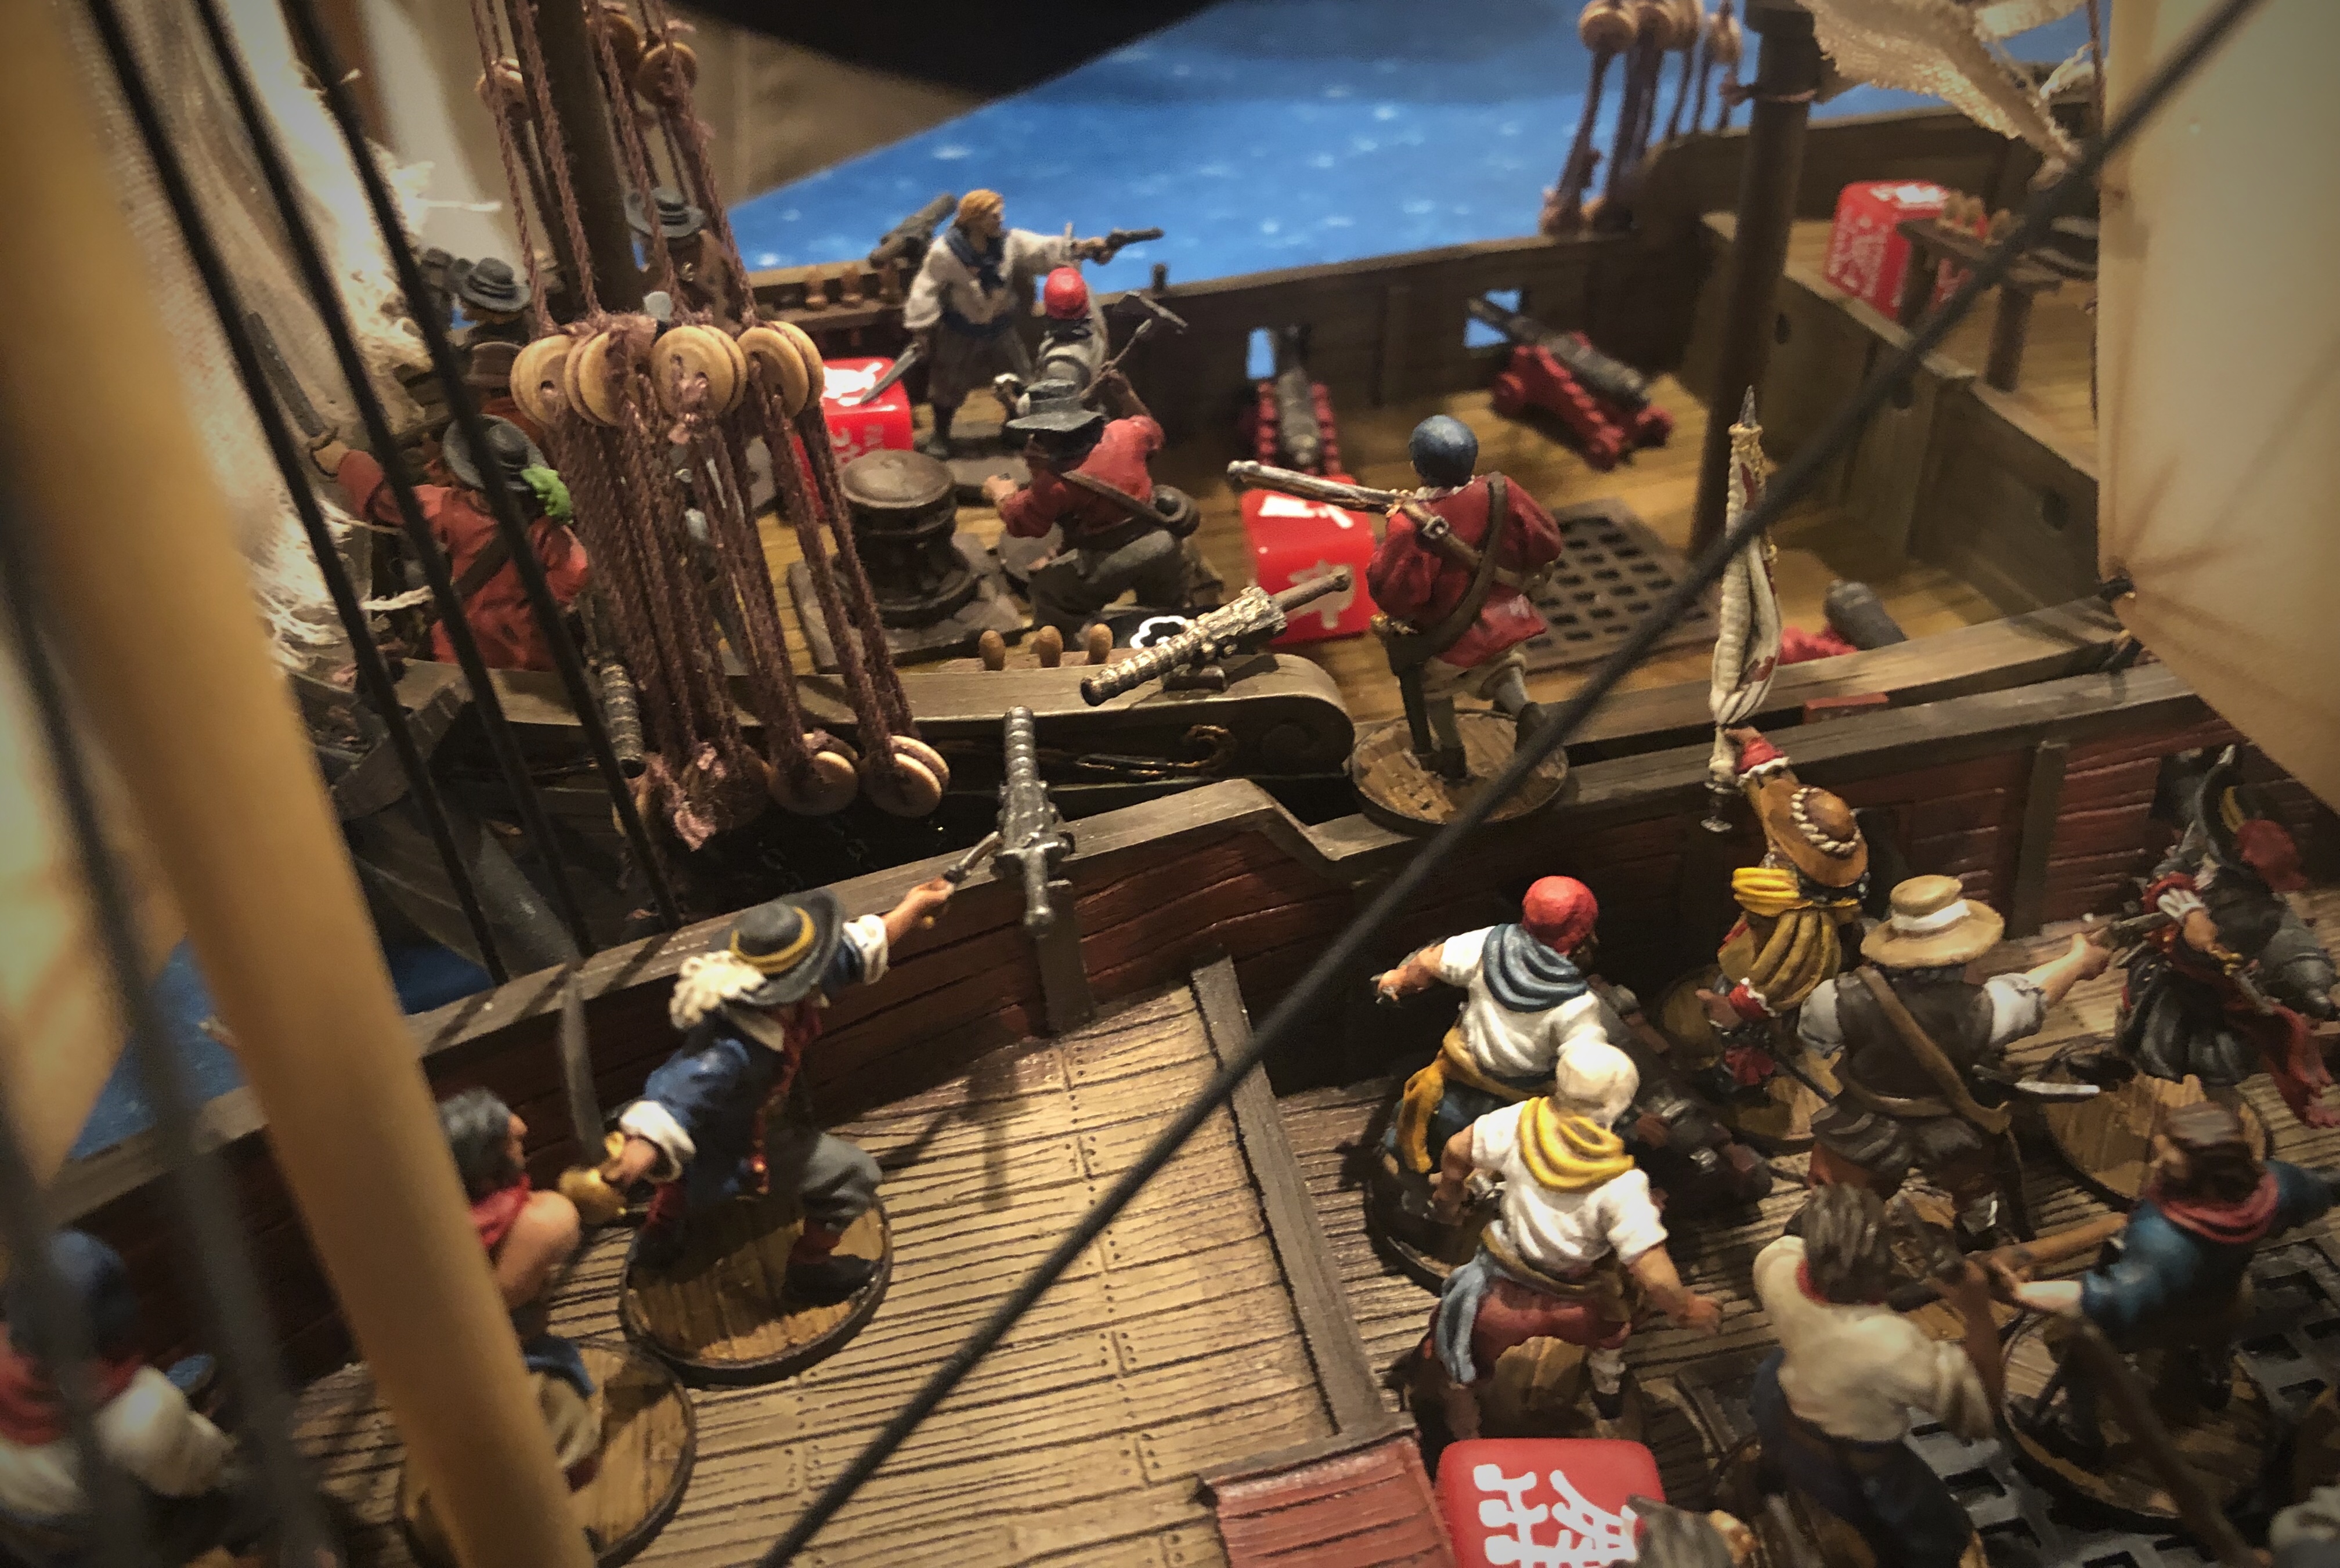
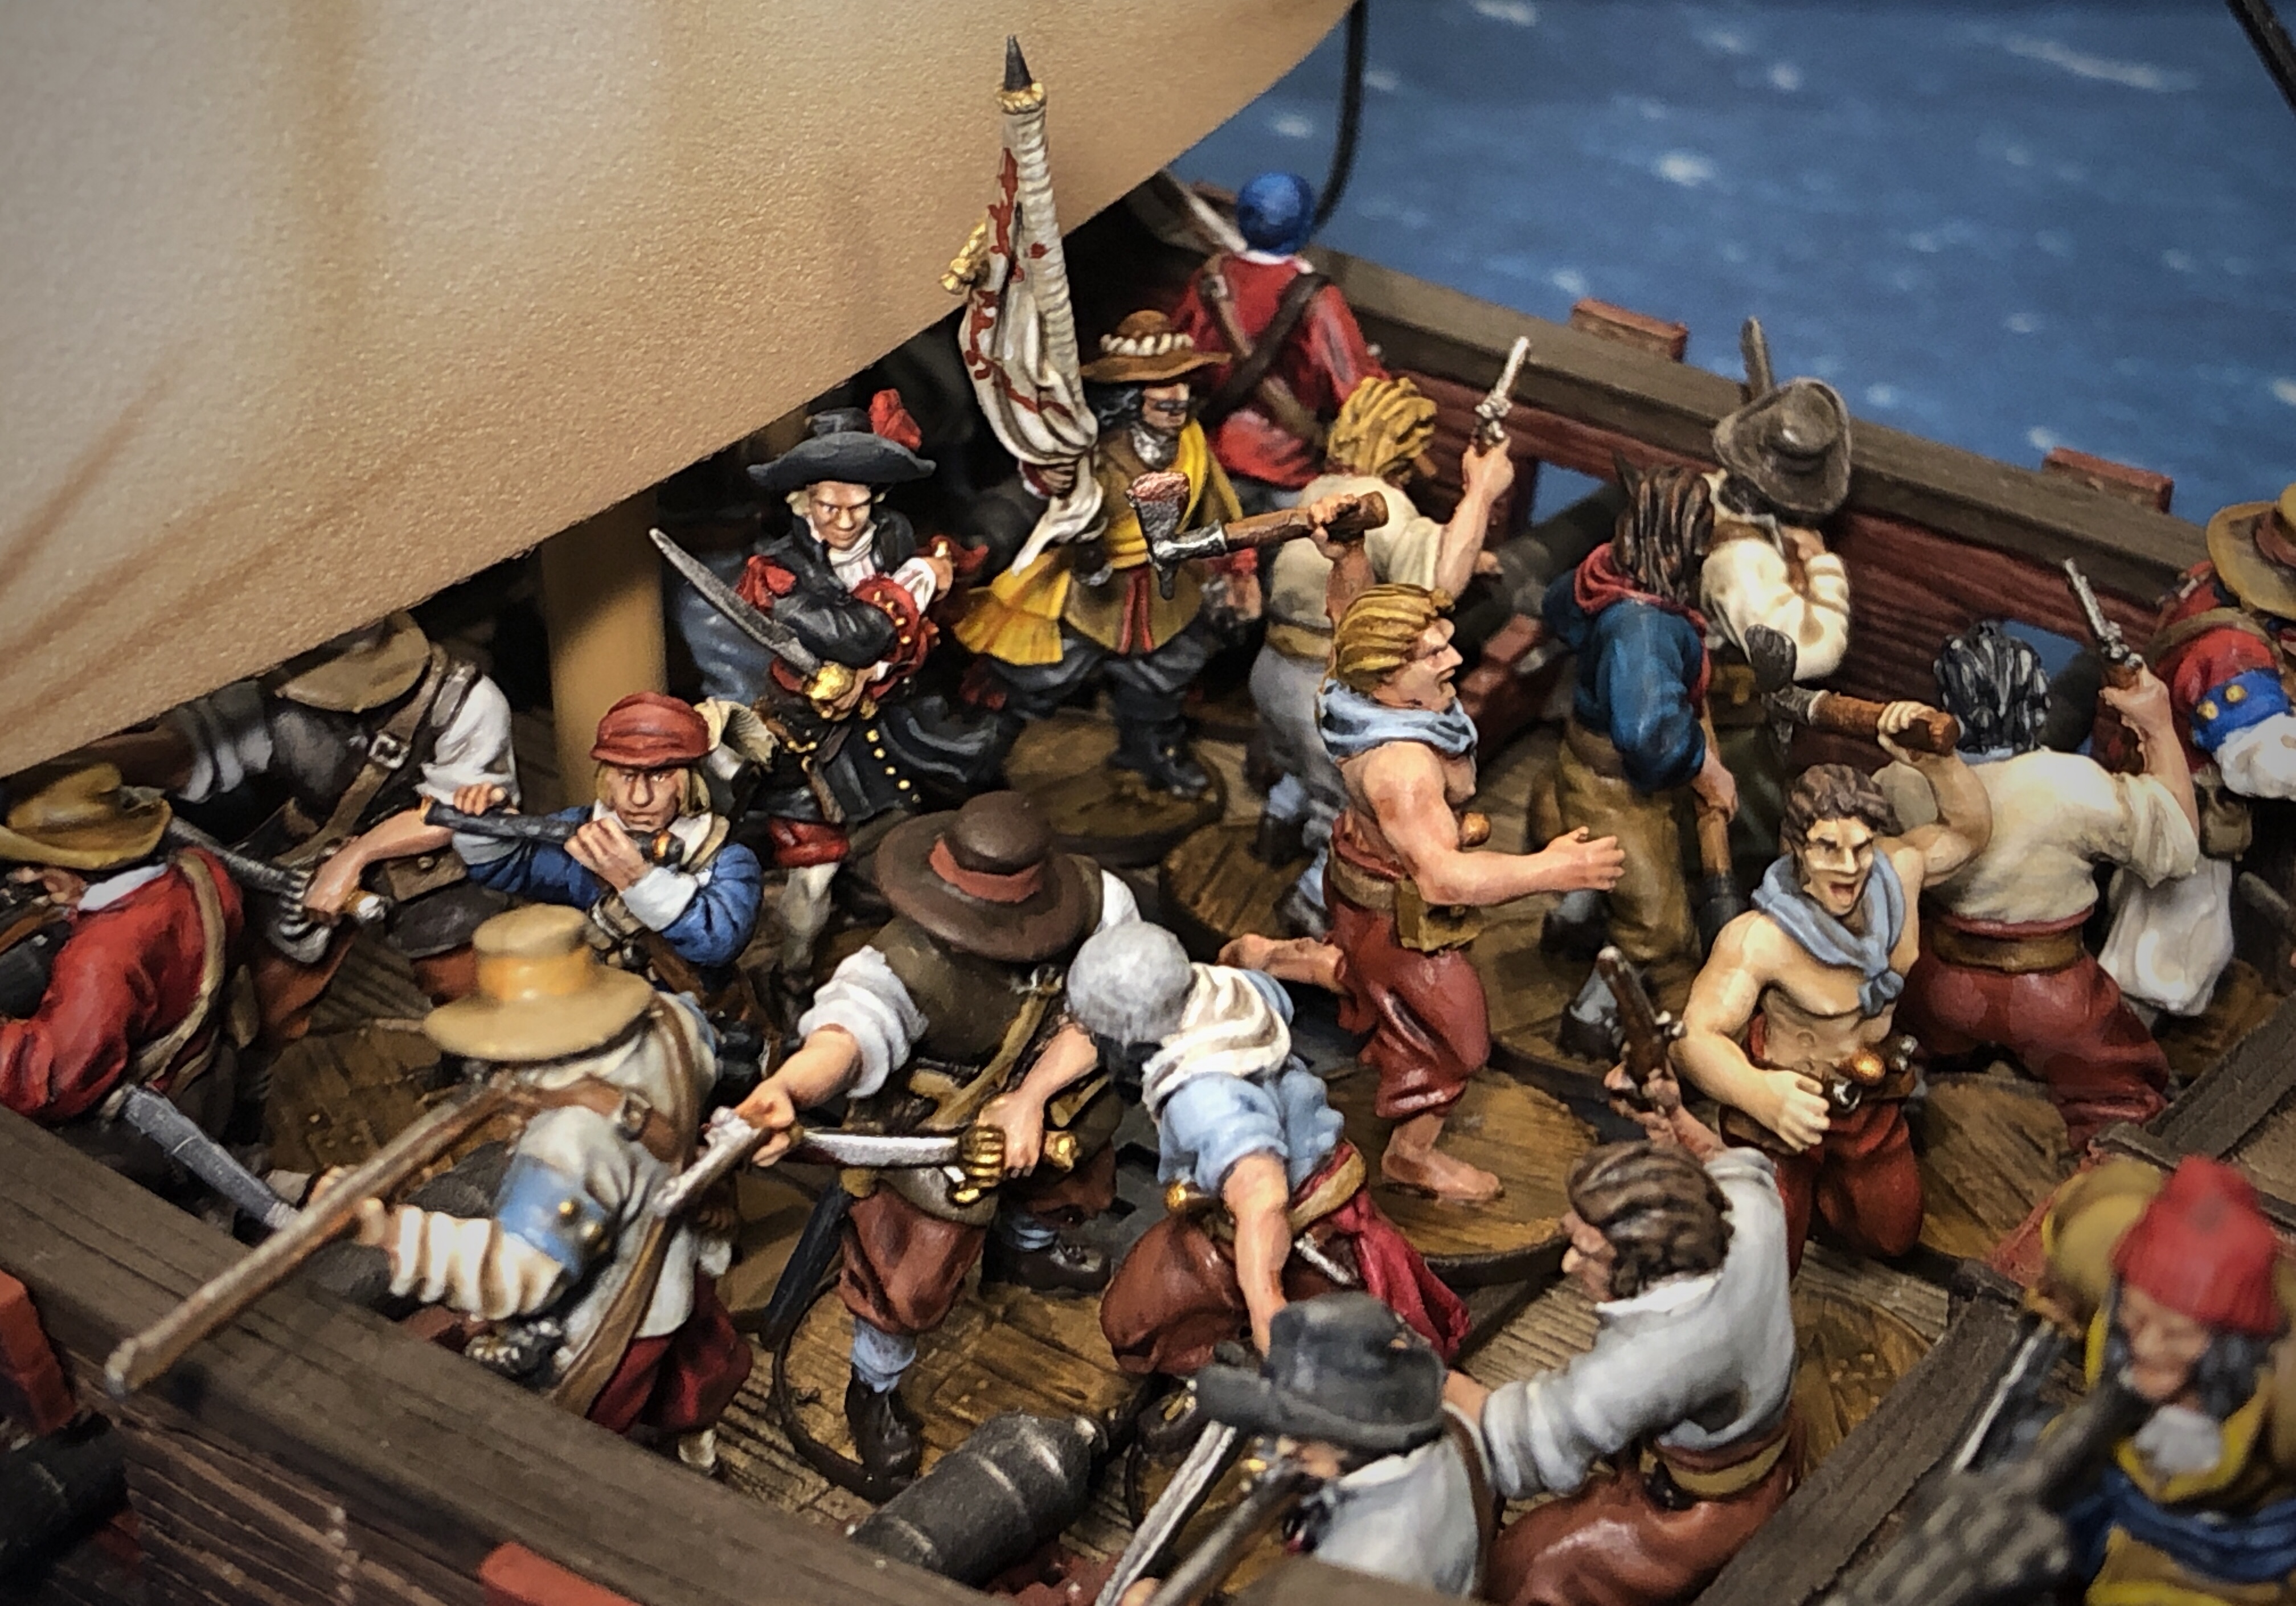
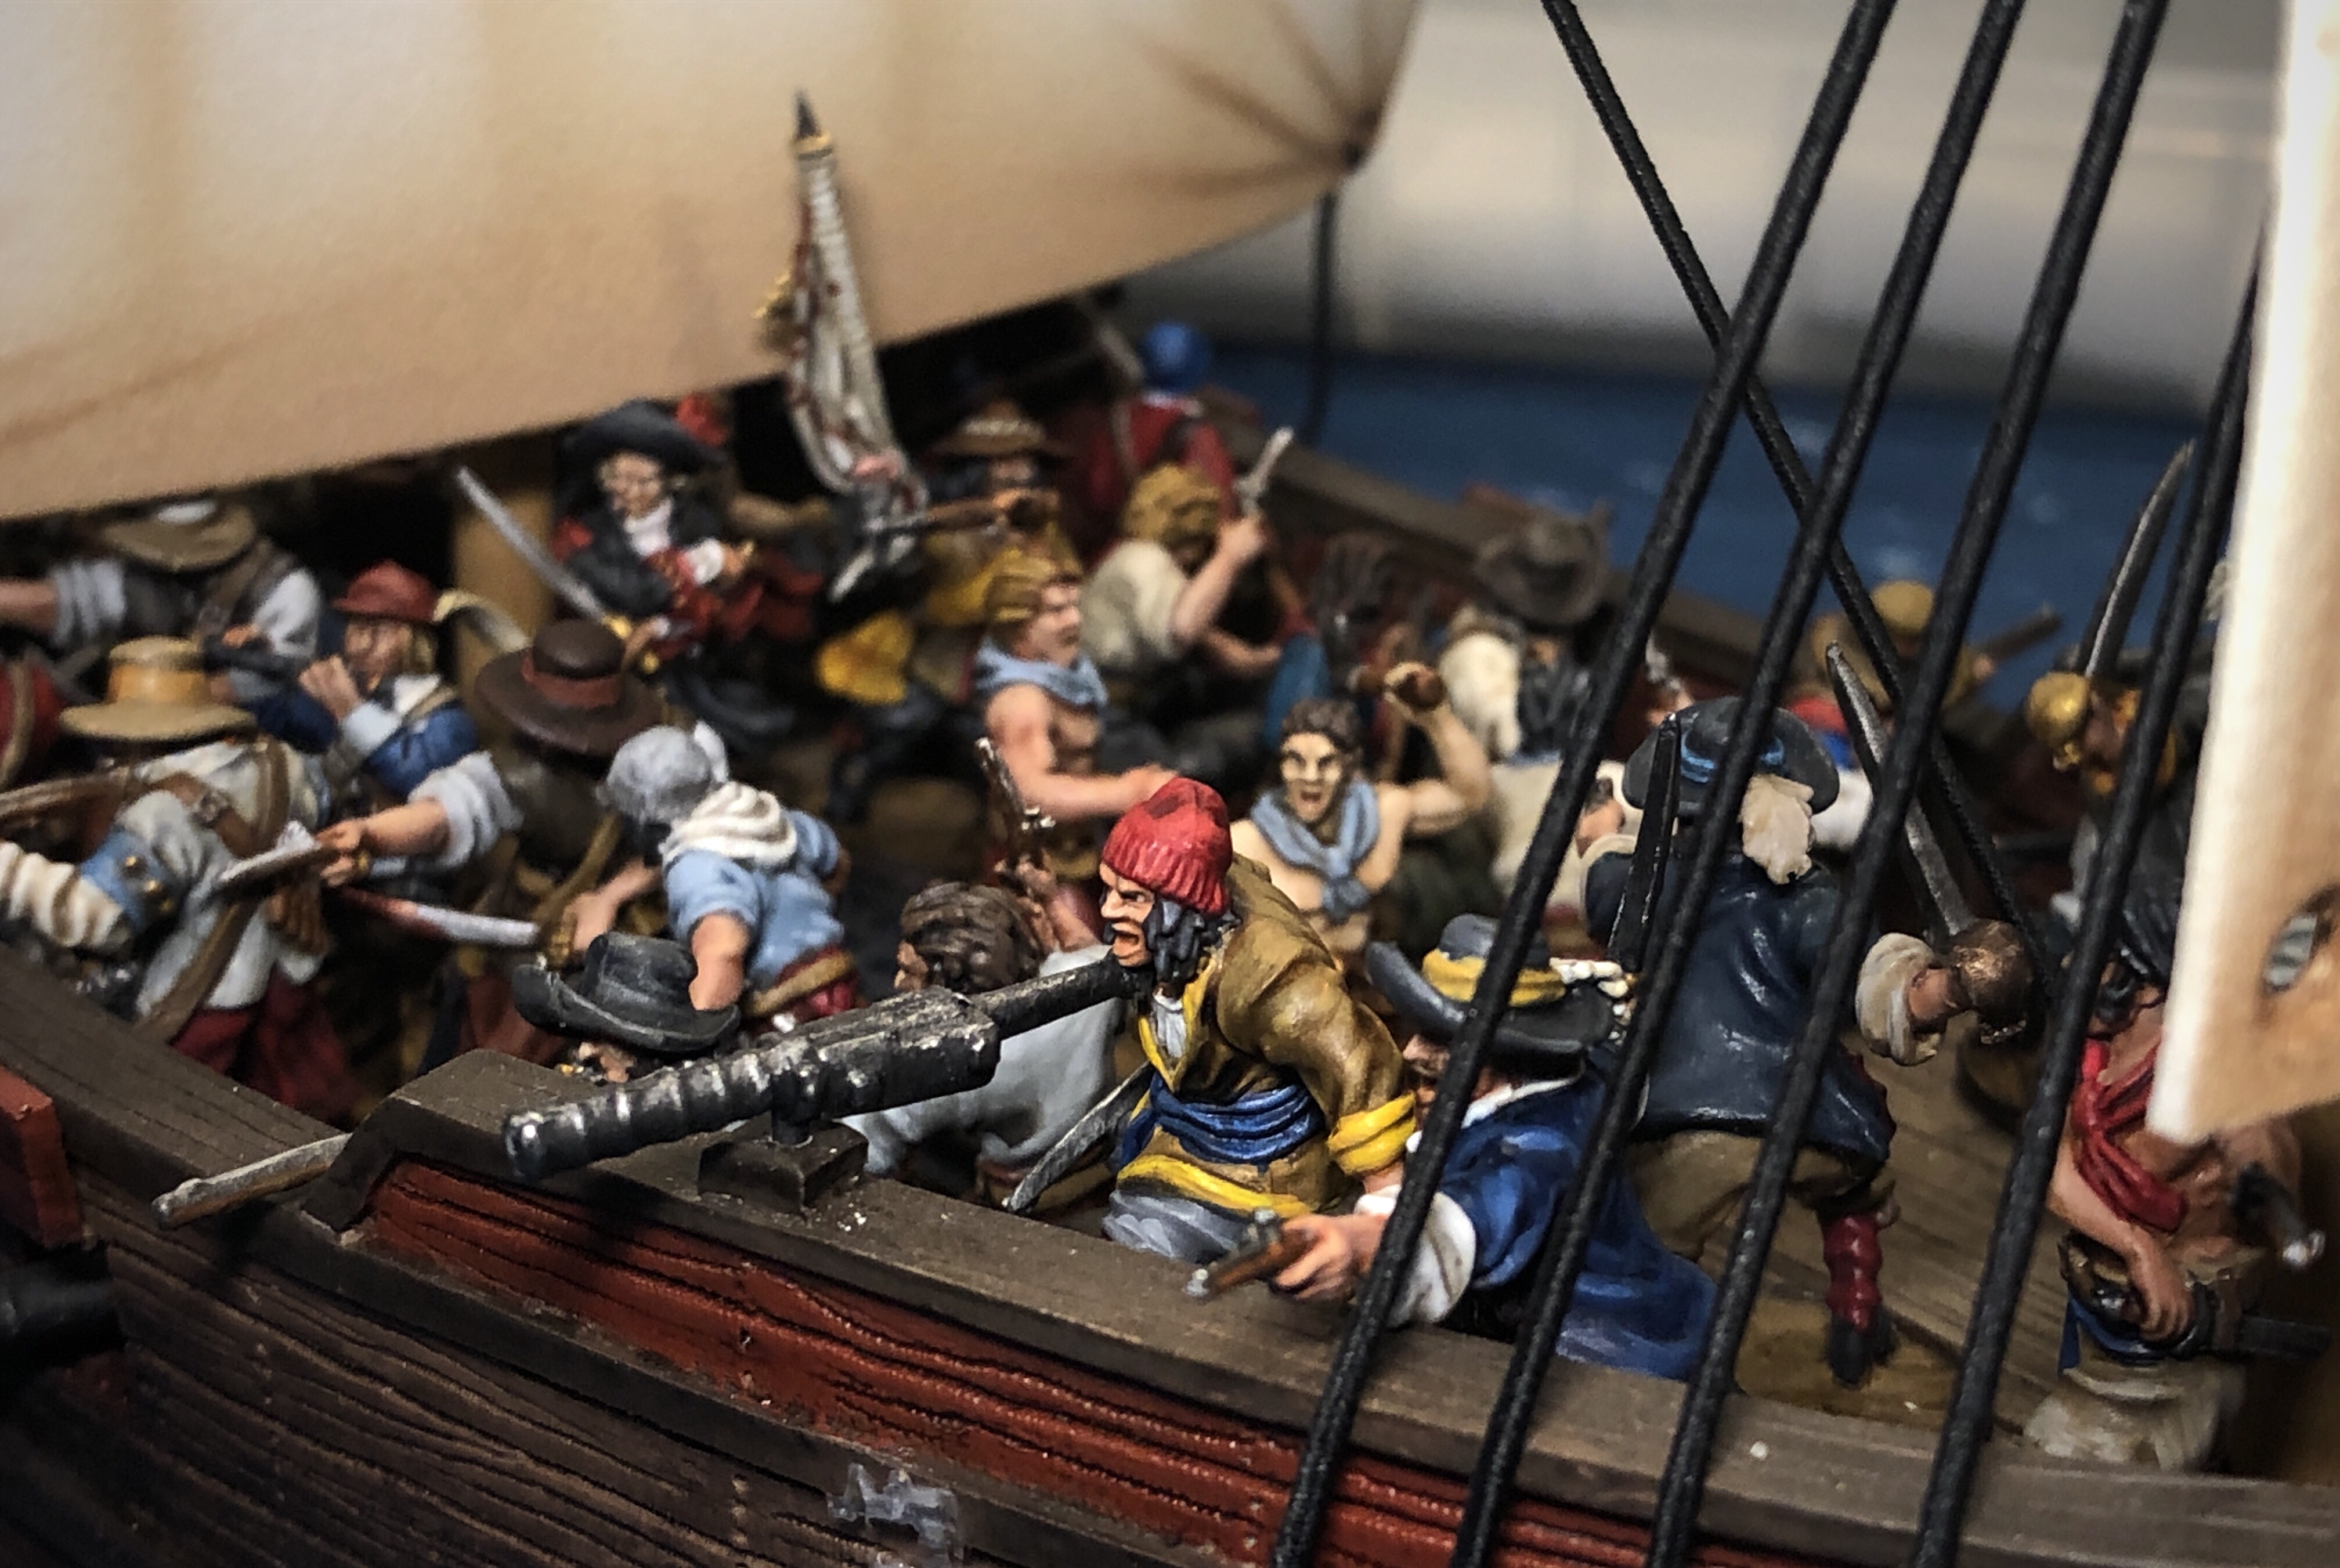
I made the mistake of leaving the rear deck with no options for a defensive fire and Guy took advantage of my mistake and grappled and charged into my ship with his rear unit of Sea Dogs. Both the Freebooters and Sea Dogs have decent Fight Saves and they didn’t break but it wasn’t pretty for me!

The rest of turn 4 was a bloody fist-fight on my back deck. My Sea Dogs proved extremely stout and passed at least 6 Resolve dice without fail. They never broke in spite of getting hit with at least 2 charges and several more Fights over this turn and the next.
Kidd was able to rally his shaken Sea Dogs, command the units in the melee to fight, and rally away all the Fatigue on a shaken group of Freebooters on his activation but he mostly removed Fatigue and didn’t turn the tide of the battle. That addition of Inspiring through the Musician was a great investment! My rerolls didn’t always succeed, but it certainly helped.

The Kapers, who had taken a beating but still numbered 6-7 models, charged into the fray and beat me up pretty bad but those stalwart Sea Dogs didn’t break!

With most of the action happening on the back deck, and no way to join in the fun, my Marins abandoned their guns and attempted to grapple the front decks together so they could charge into the Zeelieden who had 2 Fatigue and all sorts of reloads. I failed with a 1 and had to Fortune to reroll. I pushed to Grapple again and failed again with a 2! These Marins, my hardest hitting melee unit couldn’t even get their grappling hooks onto a ship that was literately side to side with my own ship!
At the end of turn 4 Guy had to roll again for a Strike Test and his Officer had to take the roll with the +1 penalty since Captain John Wright had fallen earlier in the turn. The first mate had just enough sway to keep the crew fighting!
Turn 5 was fairly quick as most of our units were locked in melee combat.

Grappled at two points, the surviving units pushed themselves to the limit to gain the upper hand.

The defenders scored some hits in their Fight action but my stubborn Sea Dogs refused to take even 1 Fatigue and a Dedicated Fight action from one of my units broke the remainder of the Kapers and sent them back to the Quedagh Merchant.
With Captain Kidd’s powerful activation, the last turn tipped further in my favor as I was able to perform more Fight actions over the last turn.
At the end of round 5 I had a unit of Freebooters locked in combat with the Zeelieden on the Quedagh Merchant’s front deck and Guy still have a unit of Sea Dogs in a melee battle on my Frigate’s back deck.

Losses for Kidd’s Privateers
At the end of turn 5 we calculated Strike Points again:
- Kidd’s Privateers had 1 Strike Point for enemies on board the flagship and 1 Strike Point for 22/49 models killed.
- The English Buccaneers had 2 Strike points for 41/56 casualties, 1 Strike Point for enemies on their flagship, and 1 Strike Point for their ship having less than half of it hitpoints remaining.
At 4 to 2 Strikes, Guy’s English Buccaneers rolled a Strike Test using the Officer character and they failed this time, ending the game. Kidd would get his prize ship but it would be a hollow victory as it would later lead to his own hanging!
Losses for the English Buccaneers
Post Game Thoughts
- This was a good game! I thought I had a solid advantage after that devastating Strict Broadside on turn 1, but that led to overconfidence and the Buccaneers rallied and almost took my ship. It was an exciting game!
- Strict went from being useless and a skill I would avoid to being a great game mechanic! I believe its the only special rule that can give you a bonus on your damage dice for cannons. That really gives you an advantage, especially in the early game when that first (and many times, only) broadside can have a large impact on the game. It’s a strong ability to be sure, but it comes at a cost that really has to be considered. That extra Fatigue you gain has be dealt with. If you do some Strict actions on one turn, chances are you’re going to have a lousy following turn.

- Overall I really like William Kidd as a commander now and I’ll be using him again. He’s 32 points, but I feel he brings enough power and fun to a force of at least 200 points to make him a good choice for a commander.
- Commanders with the Strict rule rarely (or never) have other Fatigue management rules like Inspiring, Very Inspiring or Lead by Example. That seems fitting and it makes both the Musician and the Standard Bearer more valuable to those commanders. In turn, that makes those commanders more likely to be assigned to Sailor units rather than units with models that cost 6+ since you have to pay those points for the characters in addition to the character cost.
- Musicians are pretty great. Just the Terror rules makes them worth it in my opinion. It feels bad if your opponent passes all their Resolve checks, but starting the game with Fatigue on any of your units really sucks. It basically stops them from pushing at all on that first turn and if they get shot at all, chances are they’ll start the second turn with 2 Fatigue which means one less action which is a big deal. I hope we get a model for the musician soon! We both had musicians from other miniature lines in this game, but I’d love to get a Firelock mini for this valuable character! Inspiring is an extremely powerful ability as well!
- The Standard Bearer is solid as well but I would count the musician as much stronger. Both of us had strong commanders and a couple other characters with command points of same type or another so that extra Rally action sometimes wasn’t useful and was wasted. Even so, having that rally will come in handy at least a couple times over the course of a game. I wouldn’t mind getting a Firelock mini for this character as well. For this game I used a Pike & Shotte mini carrying a Spanish flag. I have another I need to paint up with an English flag.
- I still don’t know if a character like the Musician and Standard Bearer can help man the cannons. I guess that goes for the commander as well. If you’re gun crew unit contains your commander, a Musician and a Standard Bearer and only 3 regular Sea Dogs for the 2 Medium Guns, can you count the 2 characters and commander as part of the gun crew and reload both cannons or not? The rules seem to say you can, but thematically, it seems odd.
- The Sharpshooter under-performed again! I have yet to see that character contribute 4 points worth of value to a game. For some reason, his die always seems to miss which means you don’t get the “no cover” benefit.
- The Fighting Tops were worthwhile for Guy. That +1 to Saves is meaningful. Once the battle was joined, I forgot I had a Fighting Top since I didn’t physically have it on my ship!

- Blunderbusses seemed strong in this game! We spent much of the game in close quarters and they scored a lot of hits! They are particularly strong on Kapers since they have a base Shoot Skill of 6 instead of 7 like all the standard Sailor/Cannon Crew units who typical have Blunderbusses available. Double dice with exploding 10’s are scary!
- The Kapers performed really well over this entire battle. I’ve never run them myself and I’ve seen some lackluster performance from them on land, but on sea, they seem pretty baller. They have a solid Shoot skill, short range deadliness with Blunderbusses, nasty charges with Brawler and sailing skills when necessary make them a really well rounded unit for 5 points. I need to paint some up for my English Buccaneers. Guy effectively used half shots to make good use of either the muskets at long range or the blunderbusses at short range.
- We both brought grapeshot to this battle and it was fairly effective. In almost every game I use grapeshot in, there comes this moment where I’m close and I can either shoot grapeshot and try to kill as many men on board the enemy ship as possible, or I can shoot solid shot and try to get that extra critical hit. I always choose grapeshot then wish I had done solid shot after the opposing troops save half of the men I just shot. With solid shot, at least you get the damage on the enemy ship and that feels like you accomplished something. In this game, there were two moments where I could have shot solid at point blank range but shot grape instead. I wonder what would have happened if I had done solid shot instead.

- Swivels cost 4 points each now and I think that provides better balance to the game. You really have to think about how many you’re going to take and how many gun crew you’re going to devote to them to make it worth it. In this game, we both still took the maximum number that we could and I think they still provide plenty of value.
- I’m disappointed I didn’t get my bloodthirsty Marins into the melee! I’ve been hit with them so many times and this is the first time I’ve really had enough painted to run a good number of them and then they go and fail two grapple attempts in a row which ruined their chance of making a decisive charge! Next time…

- I like Captain Kidd’s faction. His selection of available units is fairly limited but they’re all good units. Sea Dogs, Marins, Freebooters and Flibustiers are all excellent core units and the option of taking Veteran Freebooters and Forlorn Hope as support units gives them options for elite units in both ranged and melee combat. The Heavily Built trait on one ship is really strong, especially if you use a tough ship like the Light Frigate. I’m eager to see the stats and traits on the recently announced Frigate, or 6th Rate Ship of the Line. It could be an excellent ship for him. I know I’ll have to get one to find out!
- As usual, we made a couple rules mistakes in our game, but we’ve kind of accepted that as normal. I forgot to use my Fighting top the entire game. When Guy attacked with Firepots, we forgot to check to see if my ship caught fire. That could have changed the game, especially with all the Fatigue I had already given myself at that point in the game. At least those weren’t big rules we broke, but they were just advantages we forgot to give ourselves throughout the battle.
- Both the English and Dutch are really tough in a fight. That 6 Fight Save was impressive on both sides in this game. There were times when a solid number of hits were scored in a melee battle but that 50% Save ratio can be impressive. My one units of Sea Dogs in the back of my ship was particularly stout in this game.

- The Sloop of War seems to be a solid ship but we didn’t get to see it show it’s quality very much in this game. One of it’s advantages is it’s top sail setting of 5″ but this game wasn’t much of a race or sailing competition but more of a brawl. Speed, fancy sailing and maneuvers were so little a part of this game that I never even needed to use Kidd’s Sailing Master ability. Guy’s new Sloop of War looks awesome and I want to see it action again soon. I have another Brigantine model ready to build up as a Sloop of War. I’ll get to that right after I finish my Galleon project…

Thanks to Guy for a good game! I always enjoy playing with him and I appreciated his effort into building a historically appropriate force to pay homage to Captain Kidd’s most infamous encounter. Guy also kindly sent me some of his pictures of the game which I included in the report.
Have you used William Kidd or the new Sloop of War? I’d love to hear about your game experiences with them!

Standard Disclaimer
I don’t take notes or record results of battles as I play them so I realize there may be mistakes. I apologize for any inaccuracies. I also realize that these battle reports will often focus on my own force more than my opponent’s. This hard to avoid and I try to grab pictures of my opponent’s models and remember everything they do, but I always remember my own actions more easily and from my vantage point in the game, I invariably end up taking more pictures of my own force.
Awesome battle report… Didnt really know who to root for as the game climaxed, as they’re both English Pirates to me and my Spaniards!!! Lovely pictures too