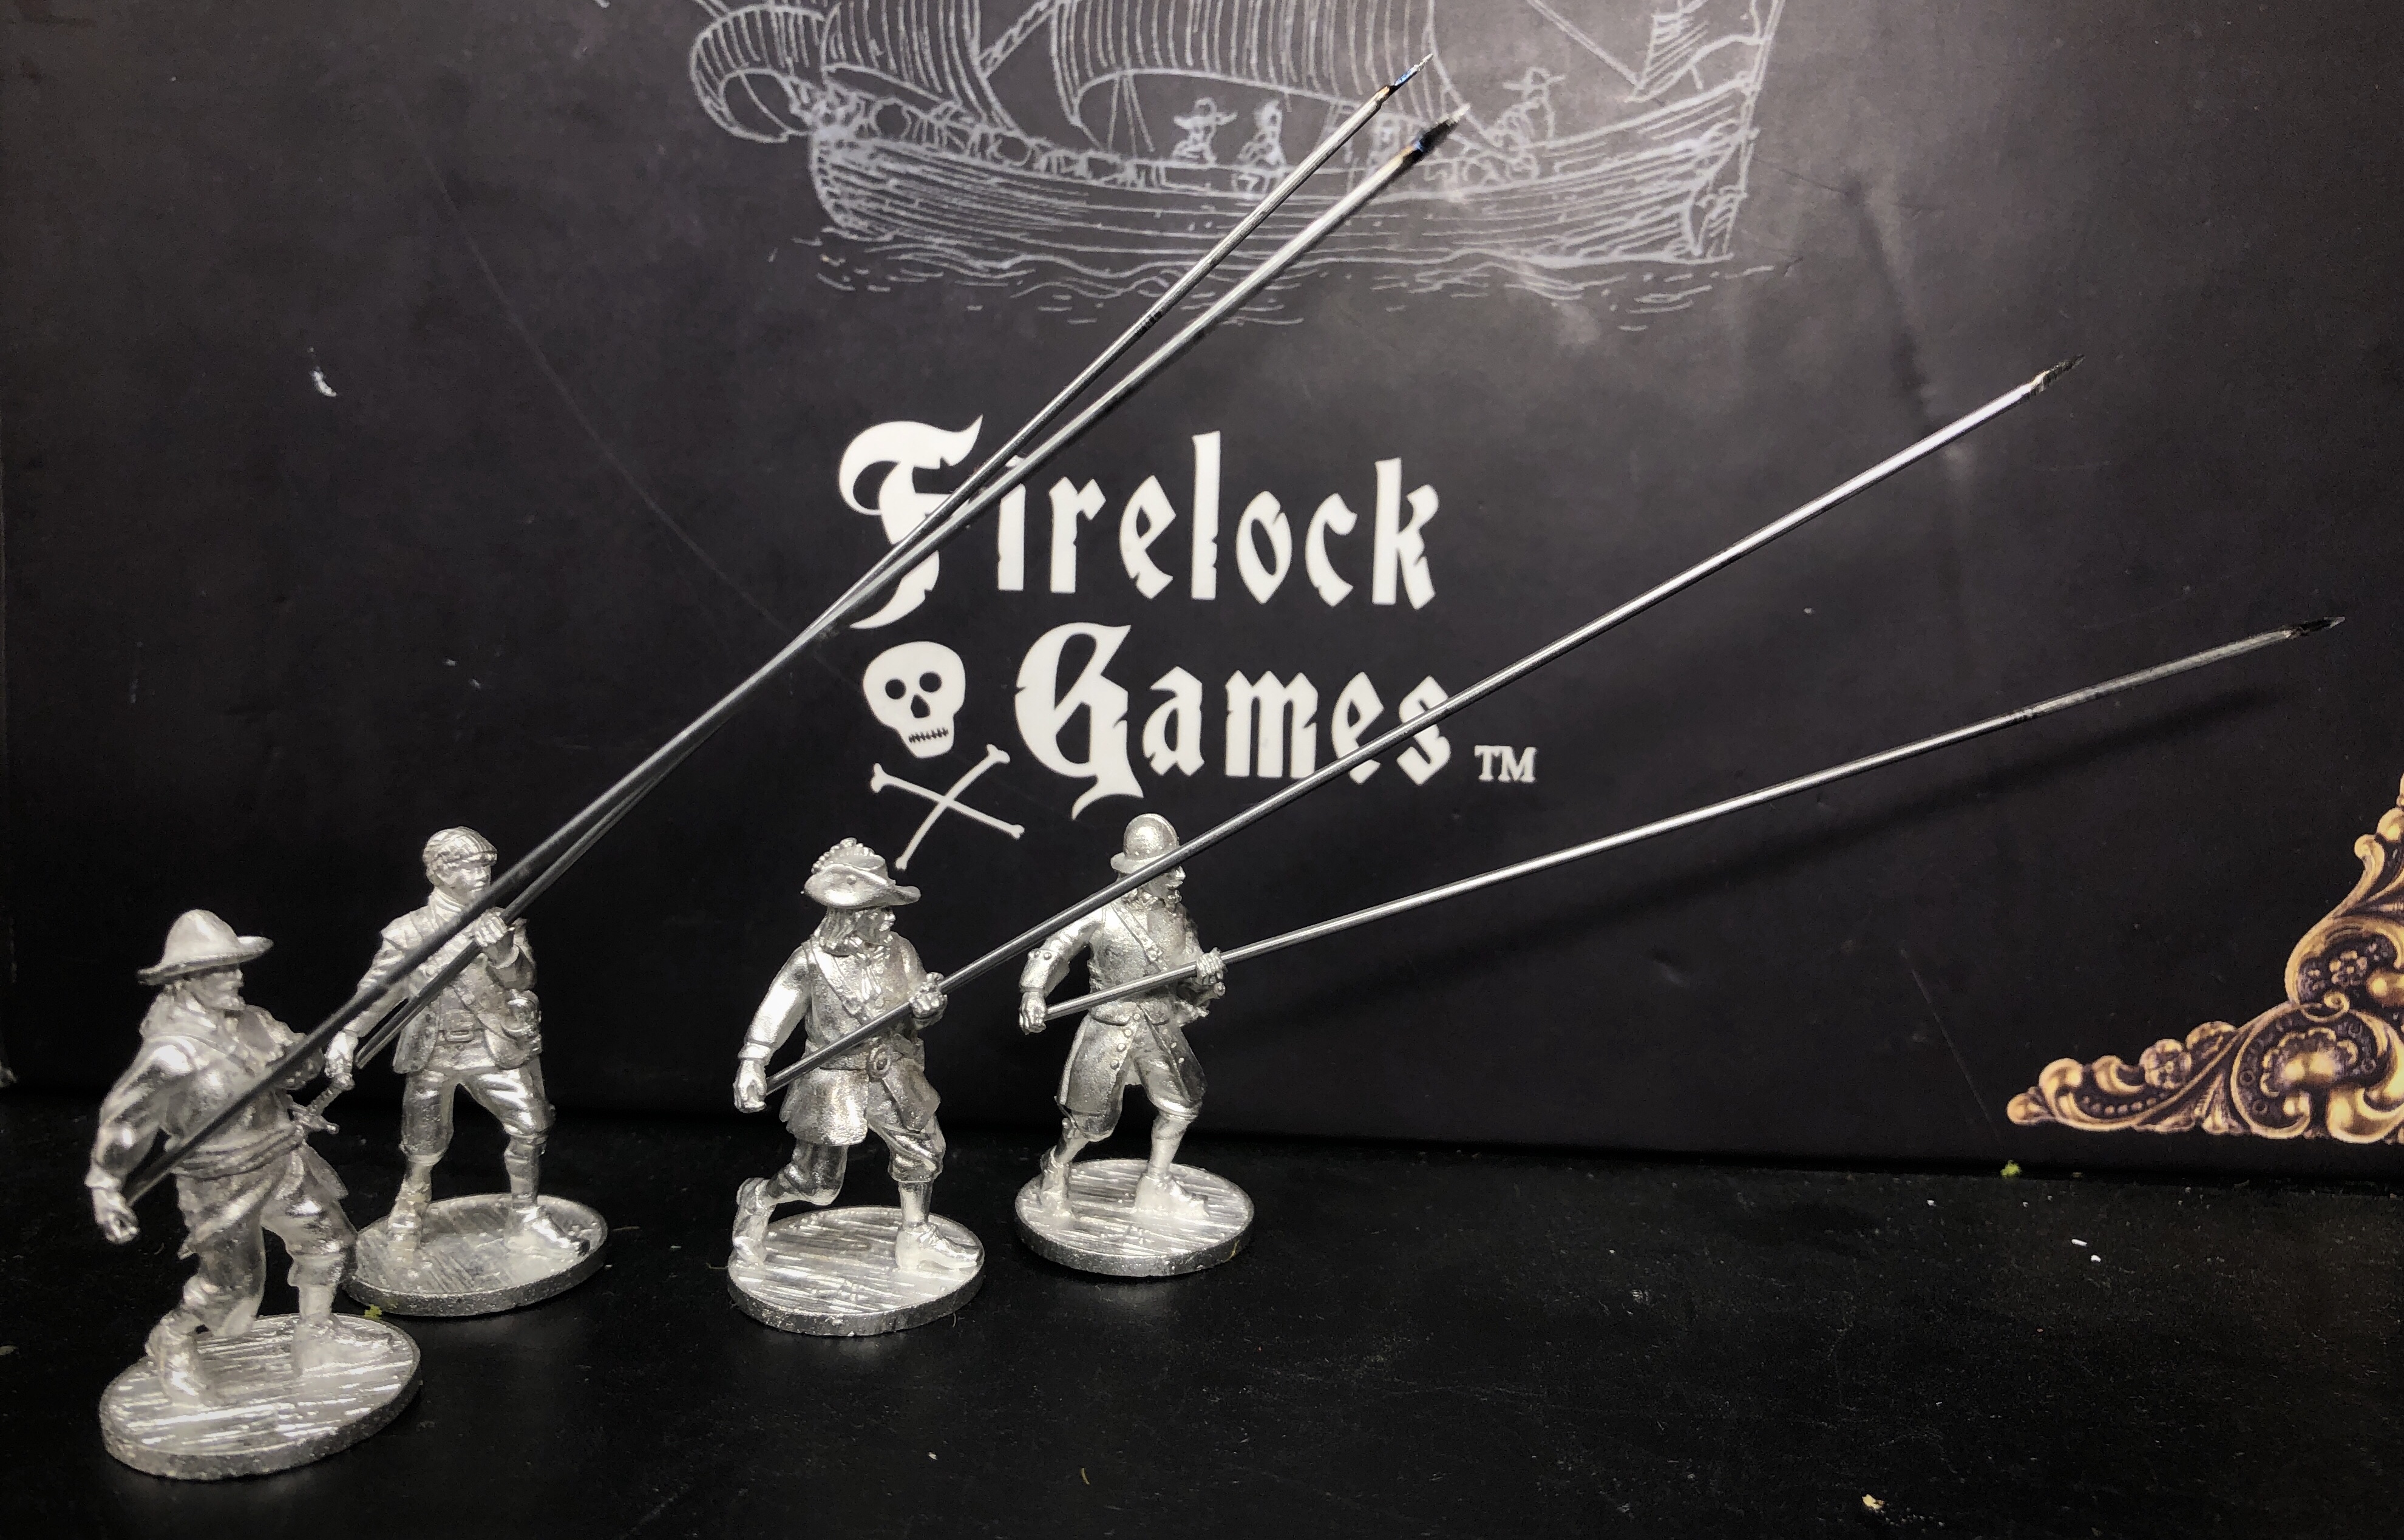
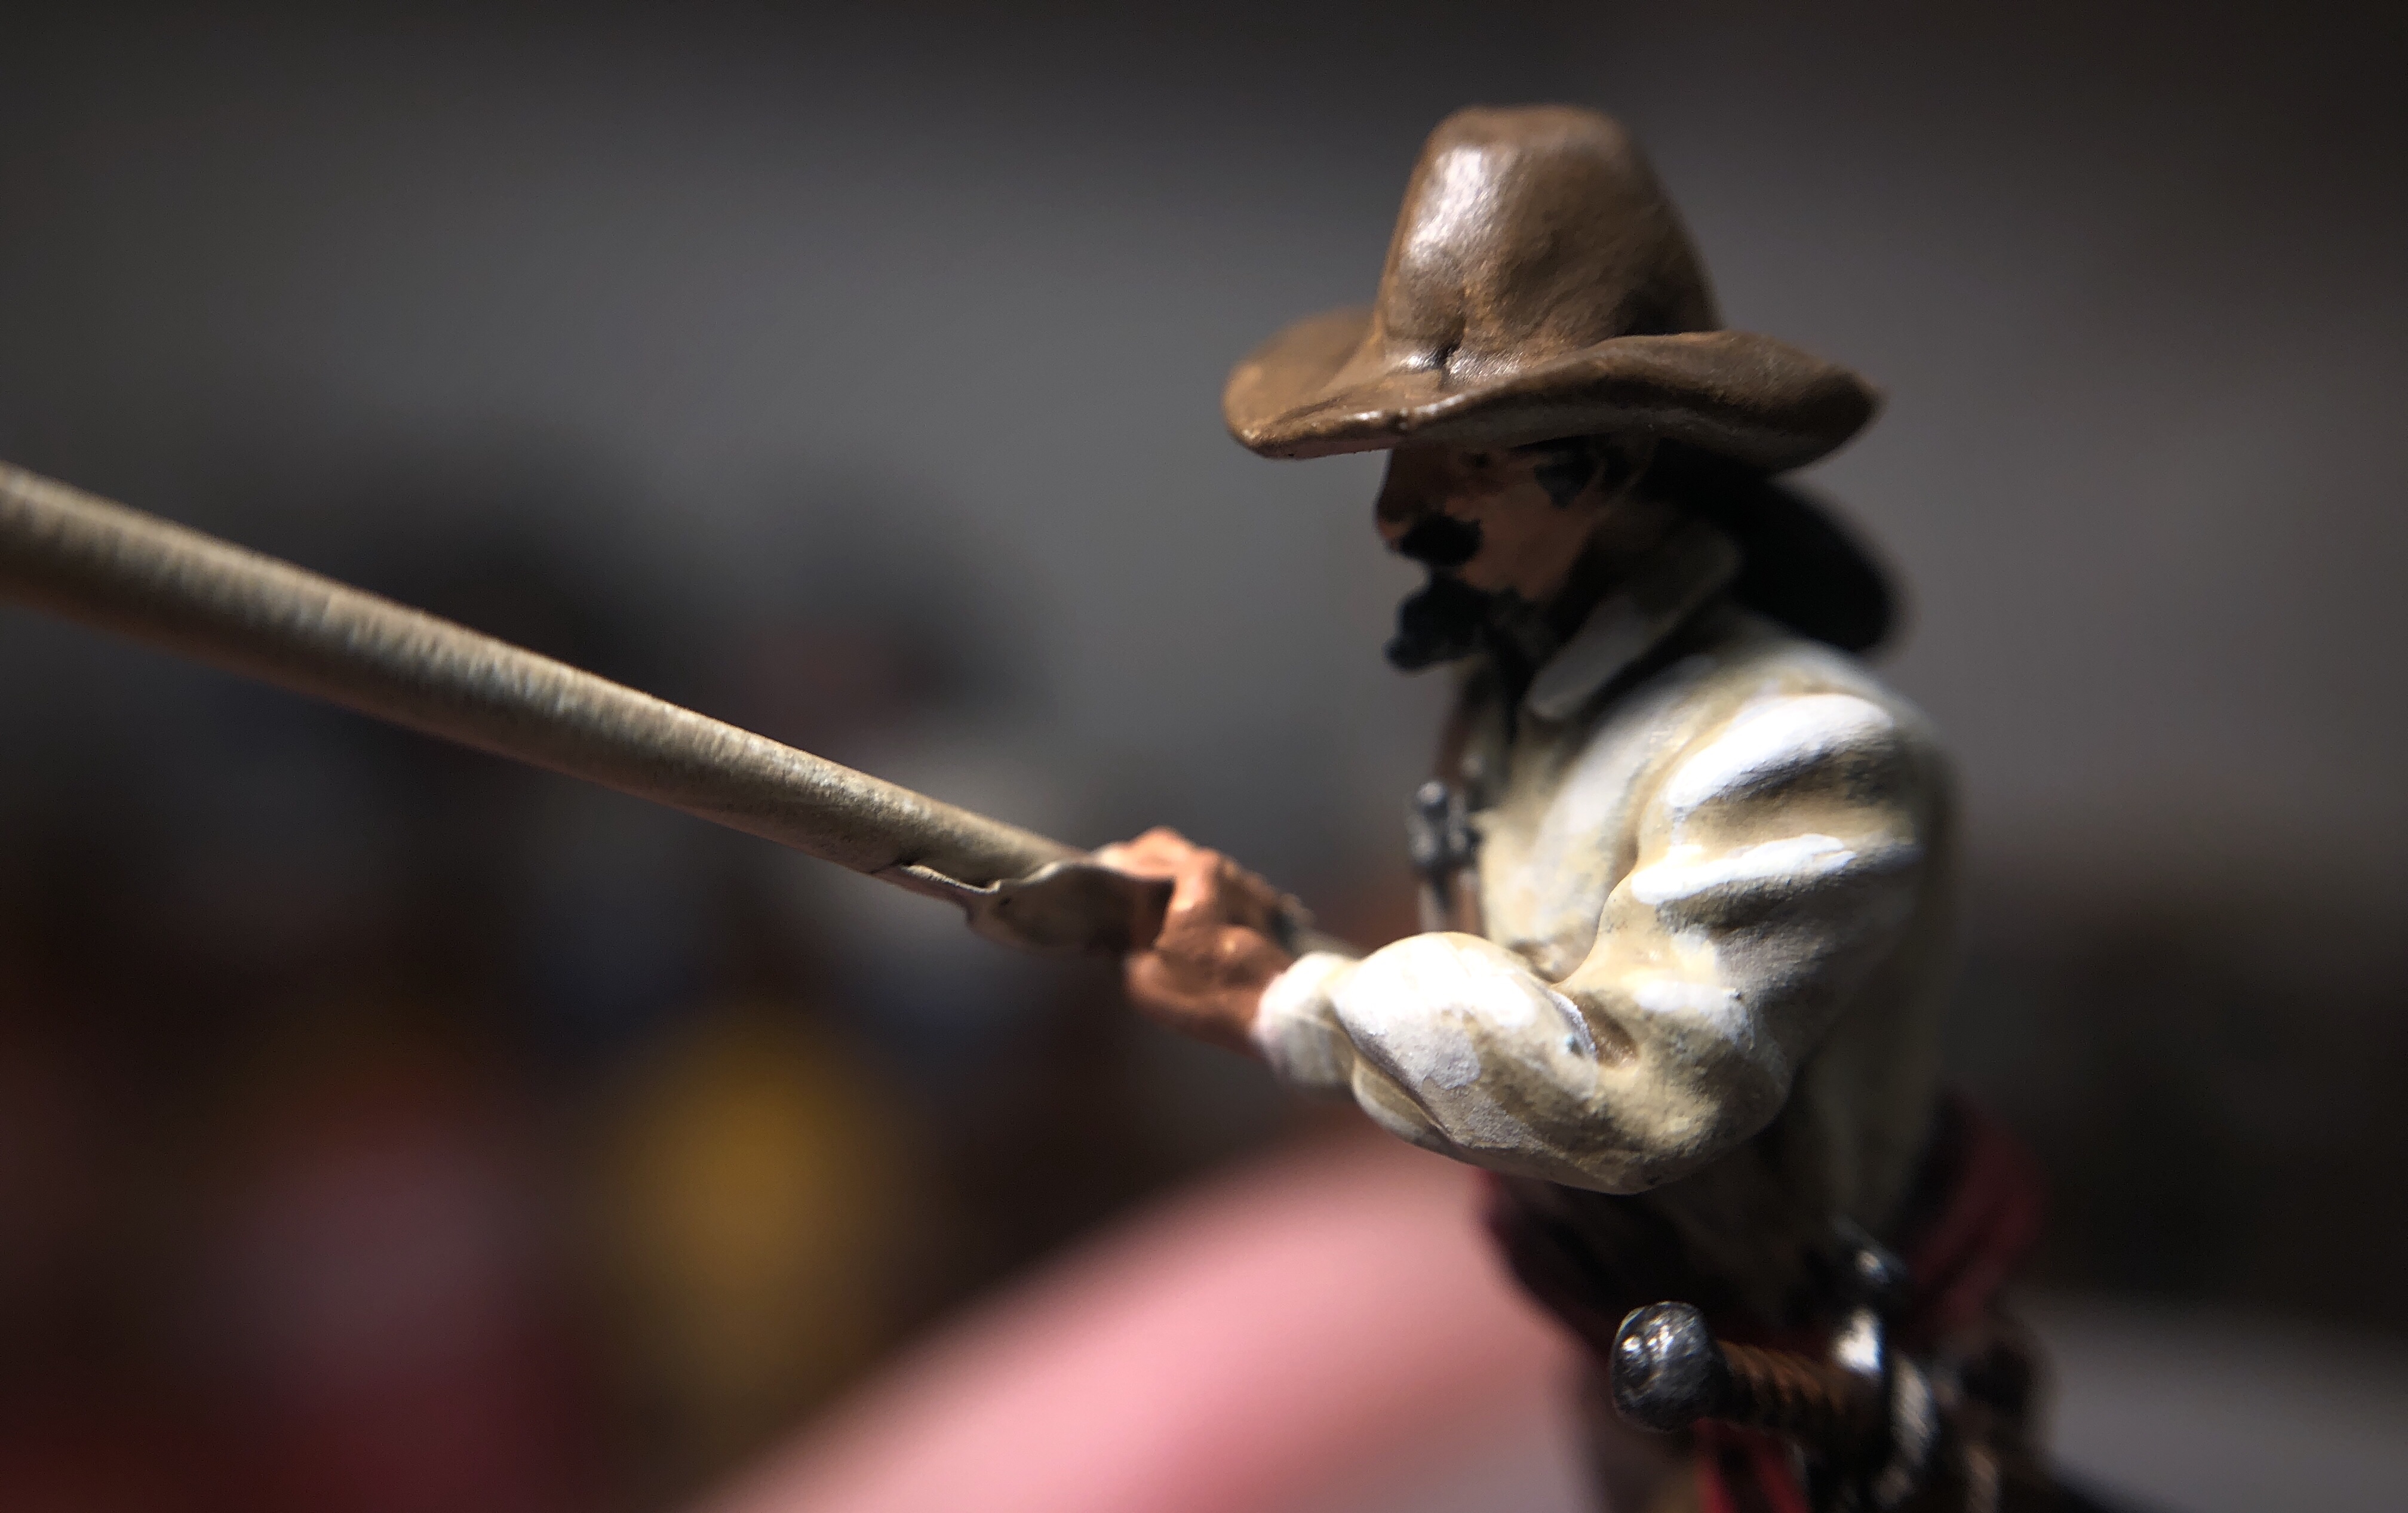
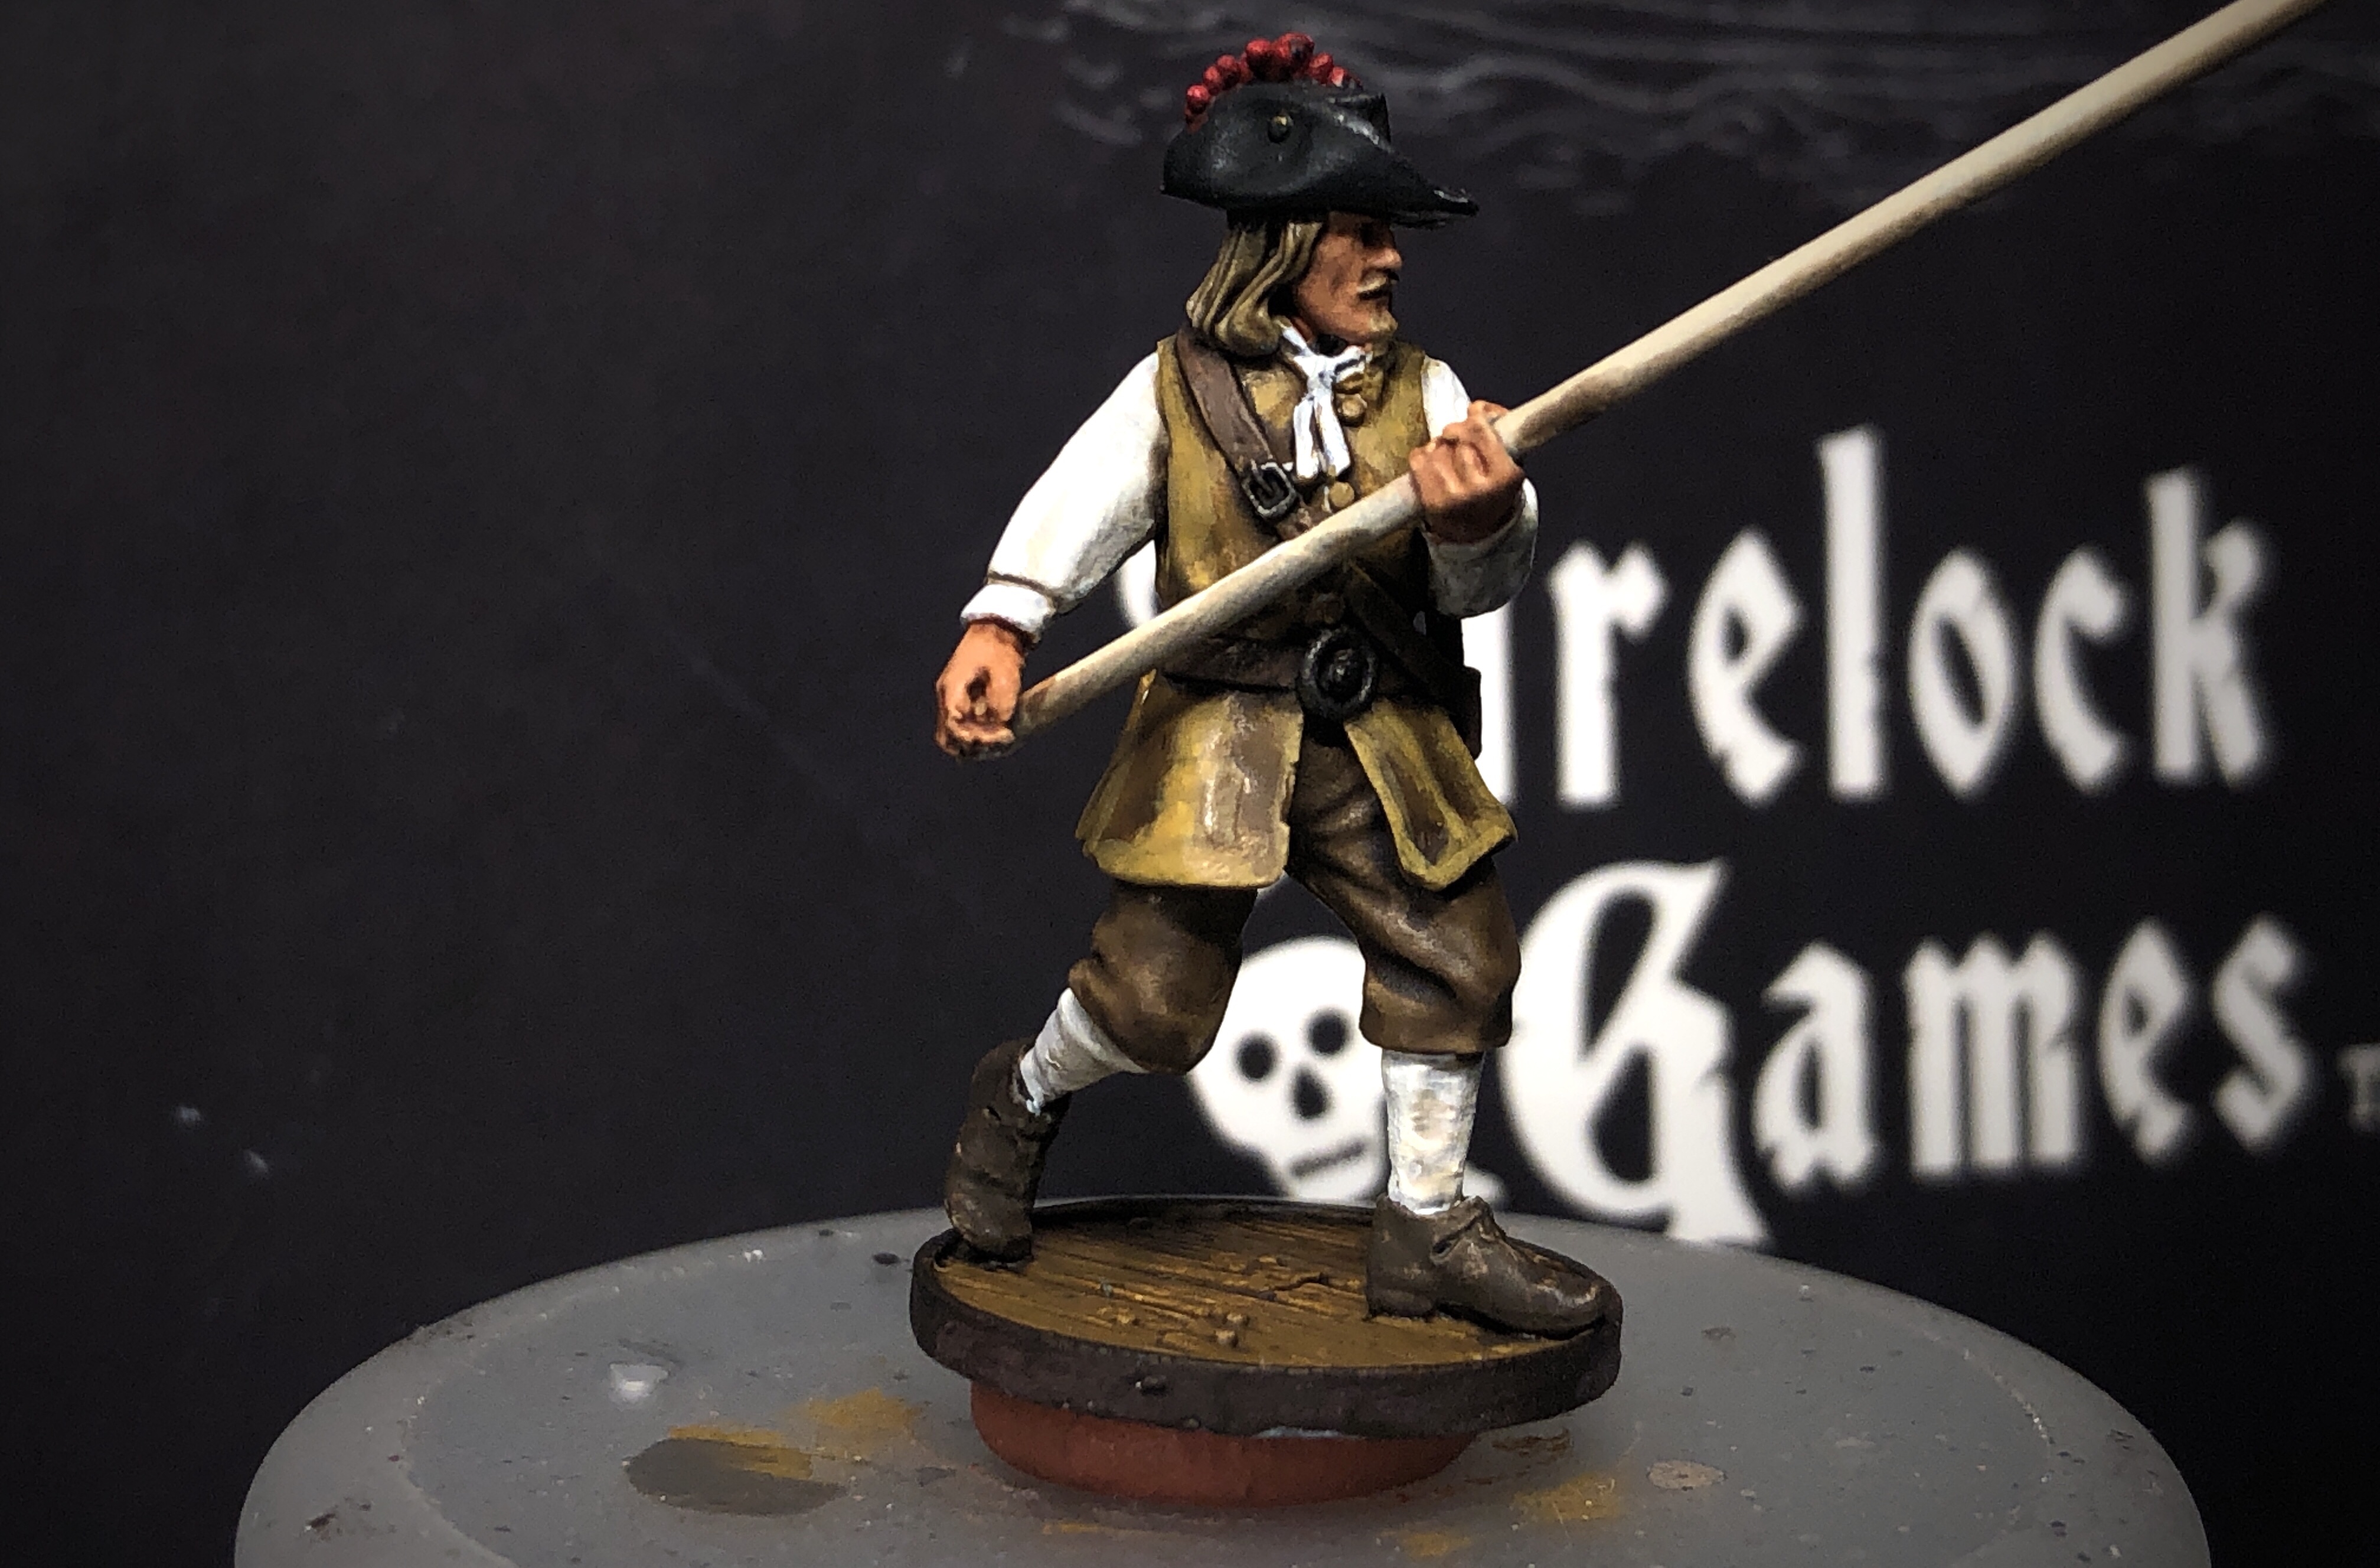
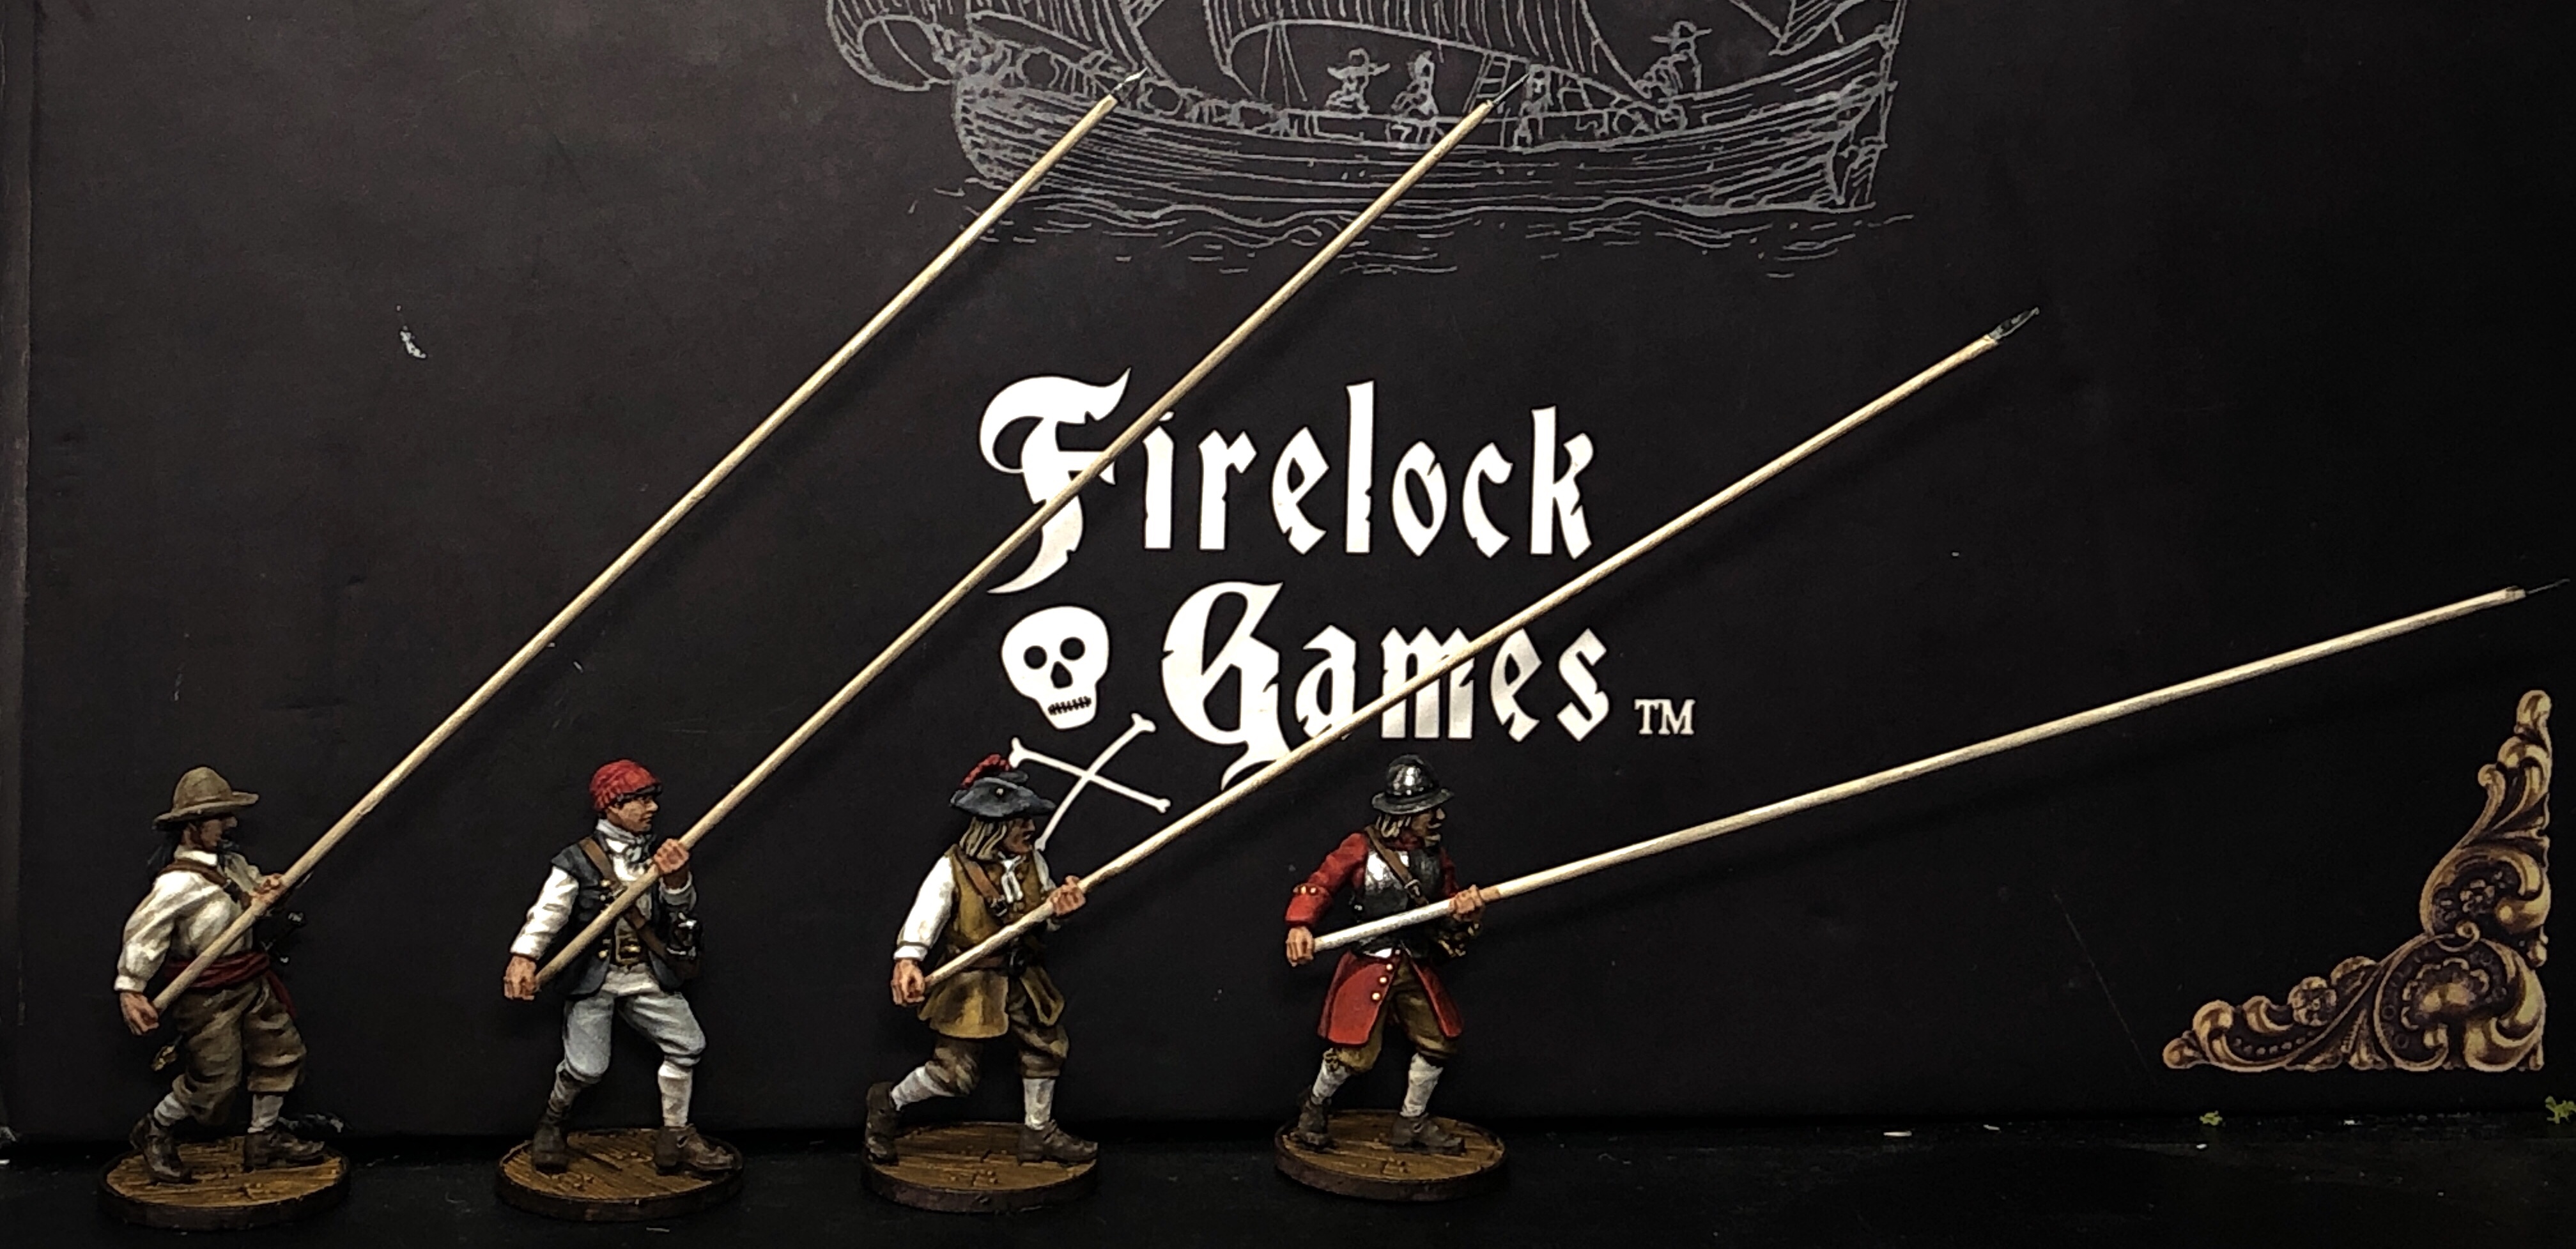
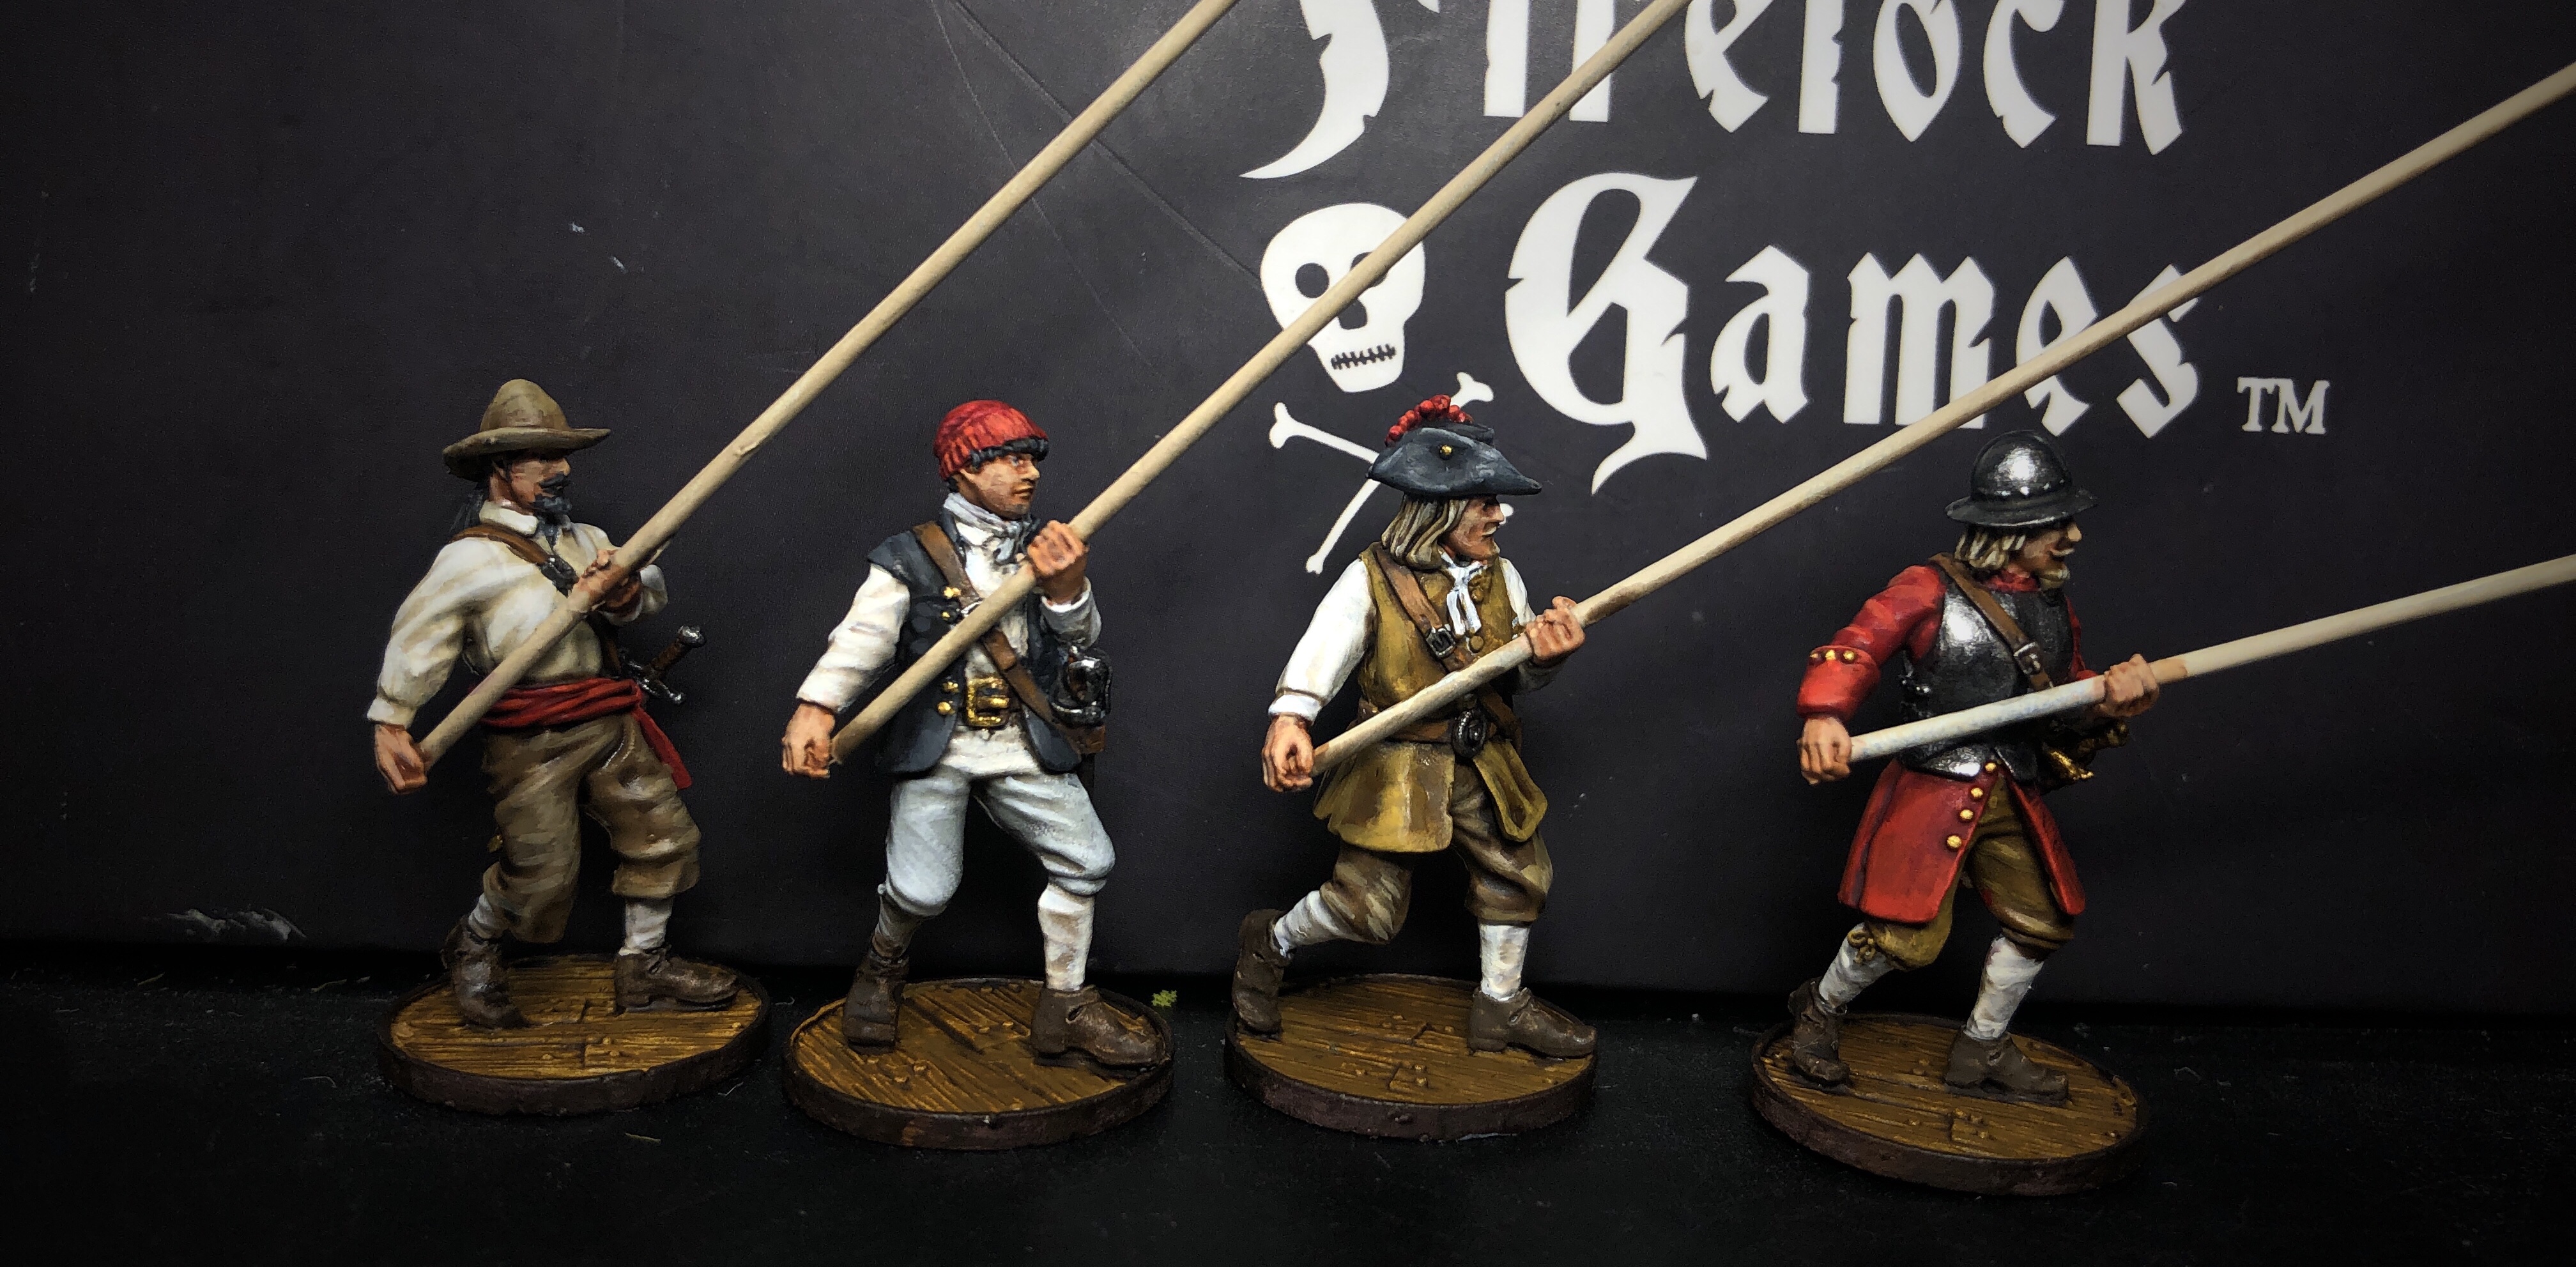
Firelock’s first Firestarter was successfully funded a couple months ago and the Militia Pikemen that were pre ordered have all been delivered! The basic Militia Pikemen are avaliable to most of the European factions as an Inexperienced unit in the No Peace Beyond the Line rule book but Firelock hadn’t actually produced models for that unit until now. I’m not super thrilled about using this unit a lot in my games but I’m happy they produced models for it and I will be experimenting with the unit in my upcoming games as I’m able.
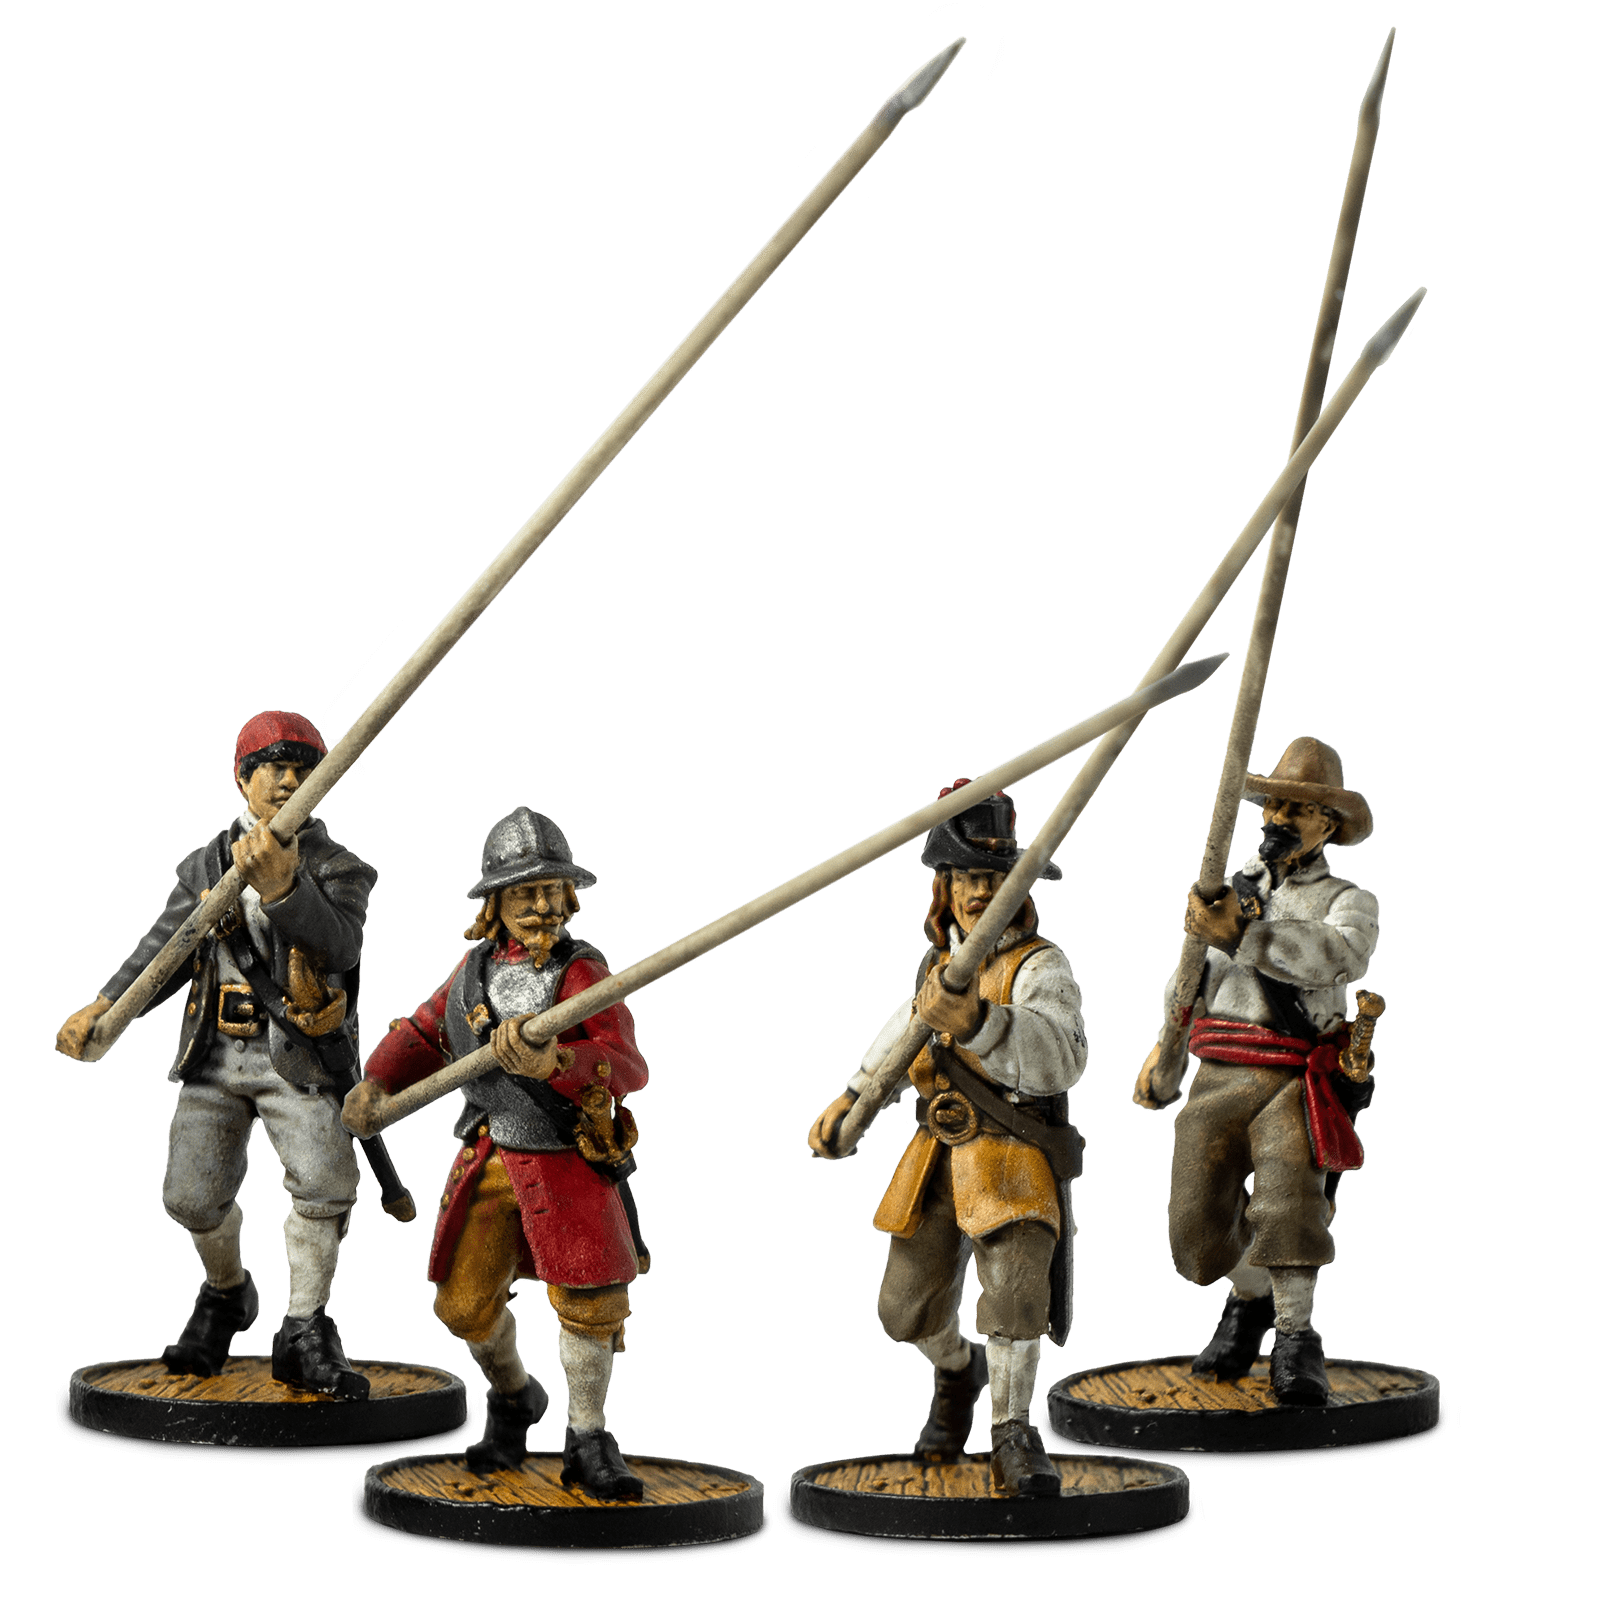
The models are beautifully sculpted with excellent detail, even beyond the standard quality you see on Firelock models. They are nice and clean as well but they are a touch smaller than I’ve come to expect from Firelock. It isn’t a big deal and I’m trying to not let it bother me, but they are more slender in general and a little shorter than the rest of the line of minis.
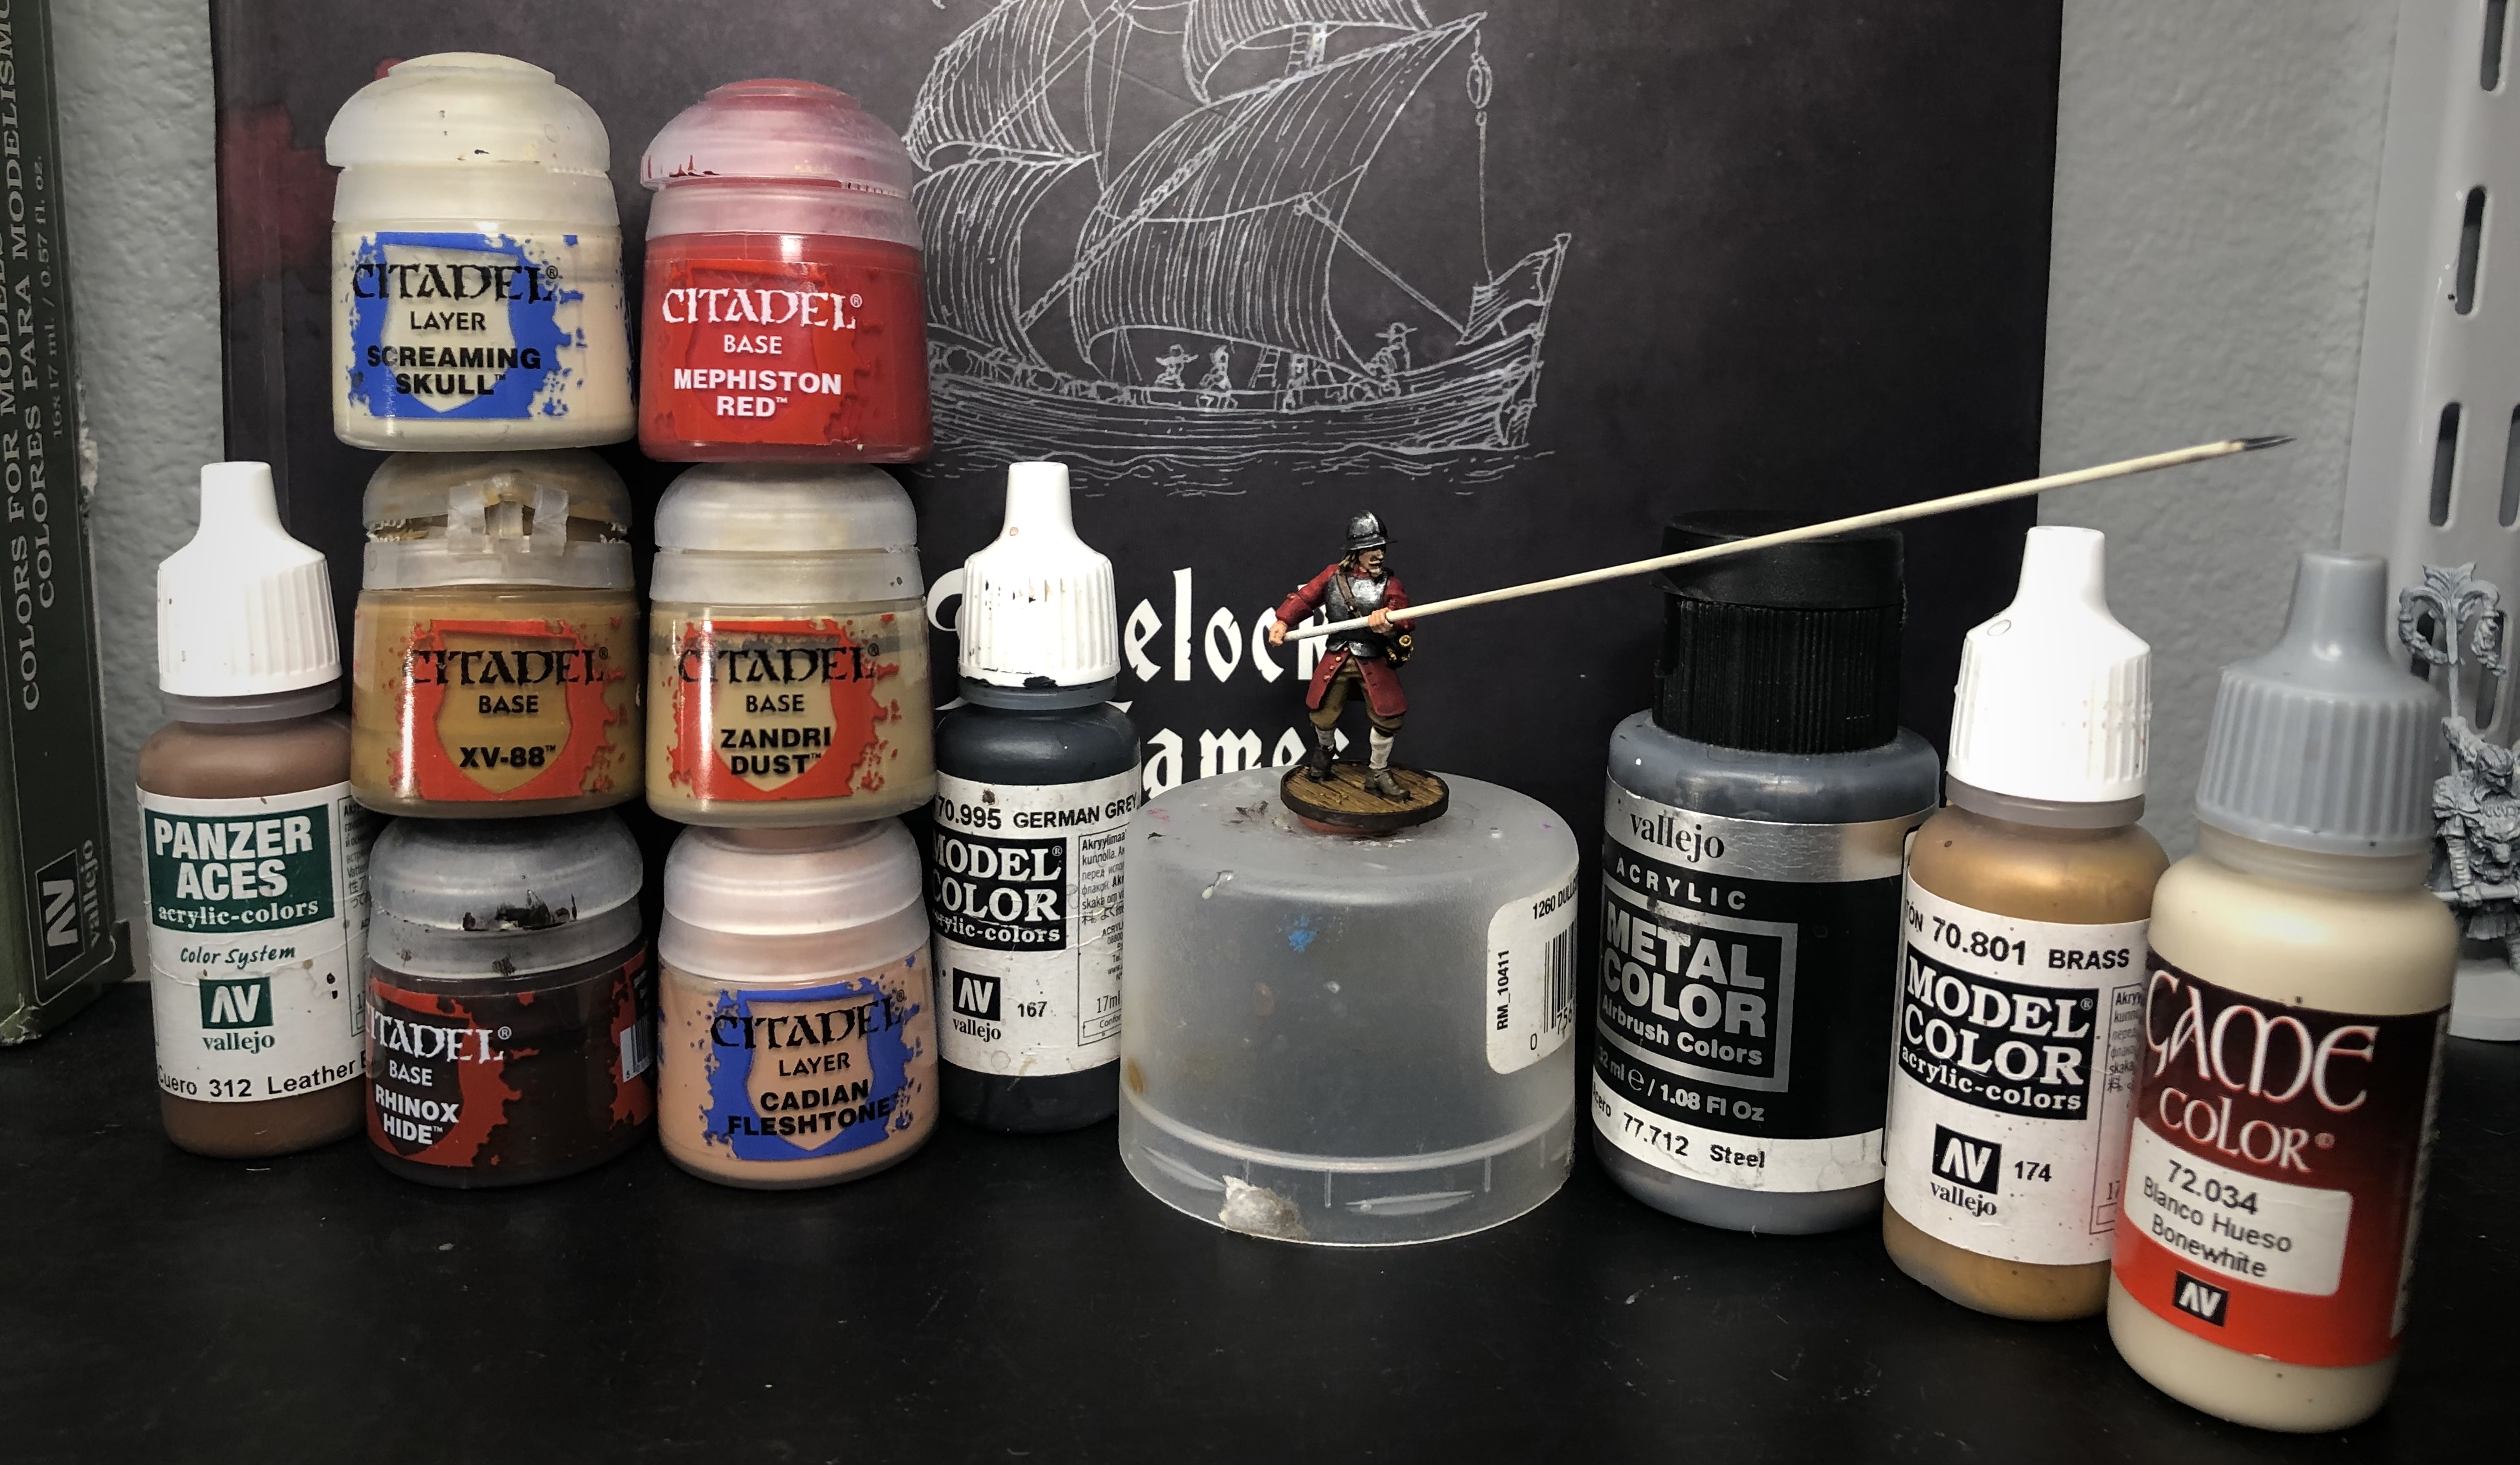
This painting guide will help you select colors close to the examples Firelock is using for their advertising. I will spend very little time on base coats and washes and provide more pictures of the highlighting step this time.
Step 1 – Prep and Assemble
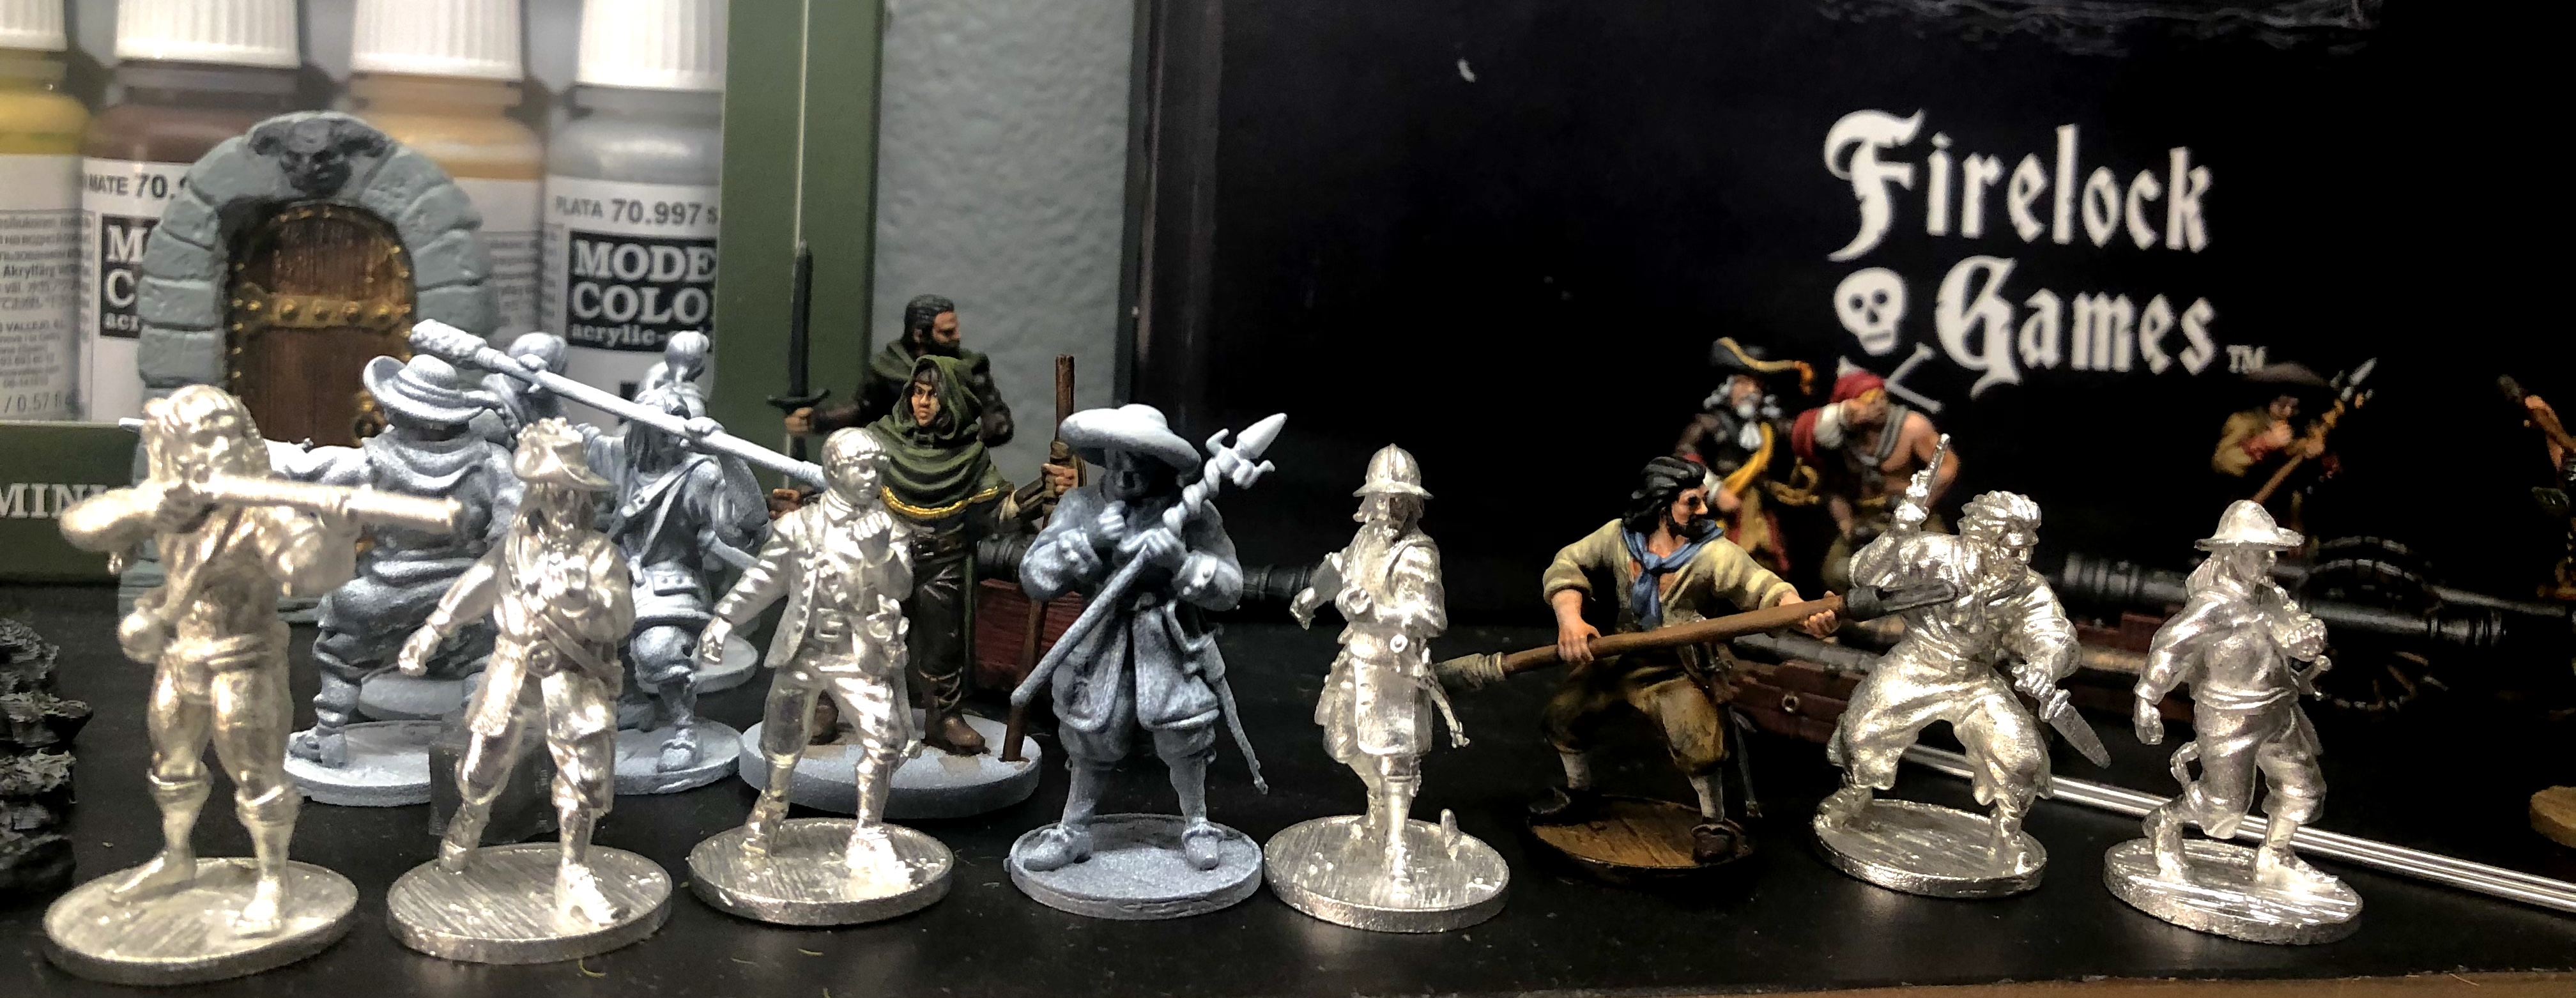
The Pikemen come with a full sized Pike and one hand on each model needs to be drilled out with a small hobby drill before assembly and priming. You will need a pin vise drill.
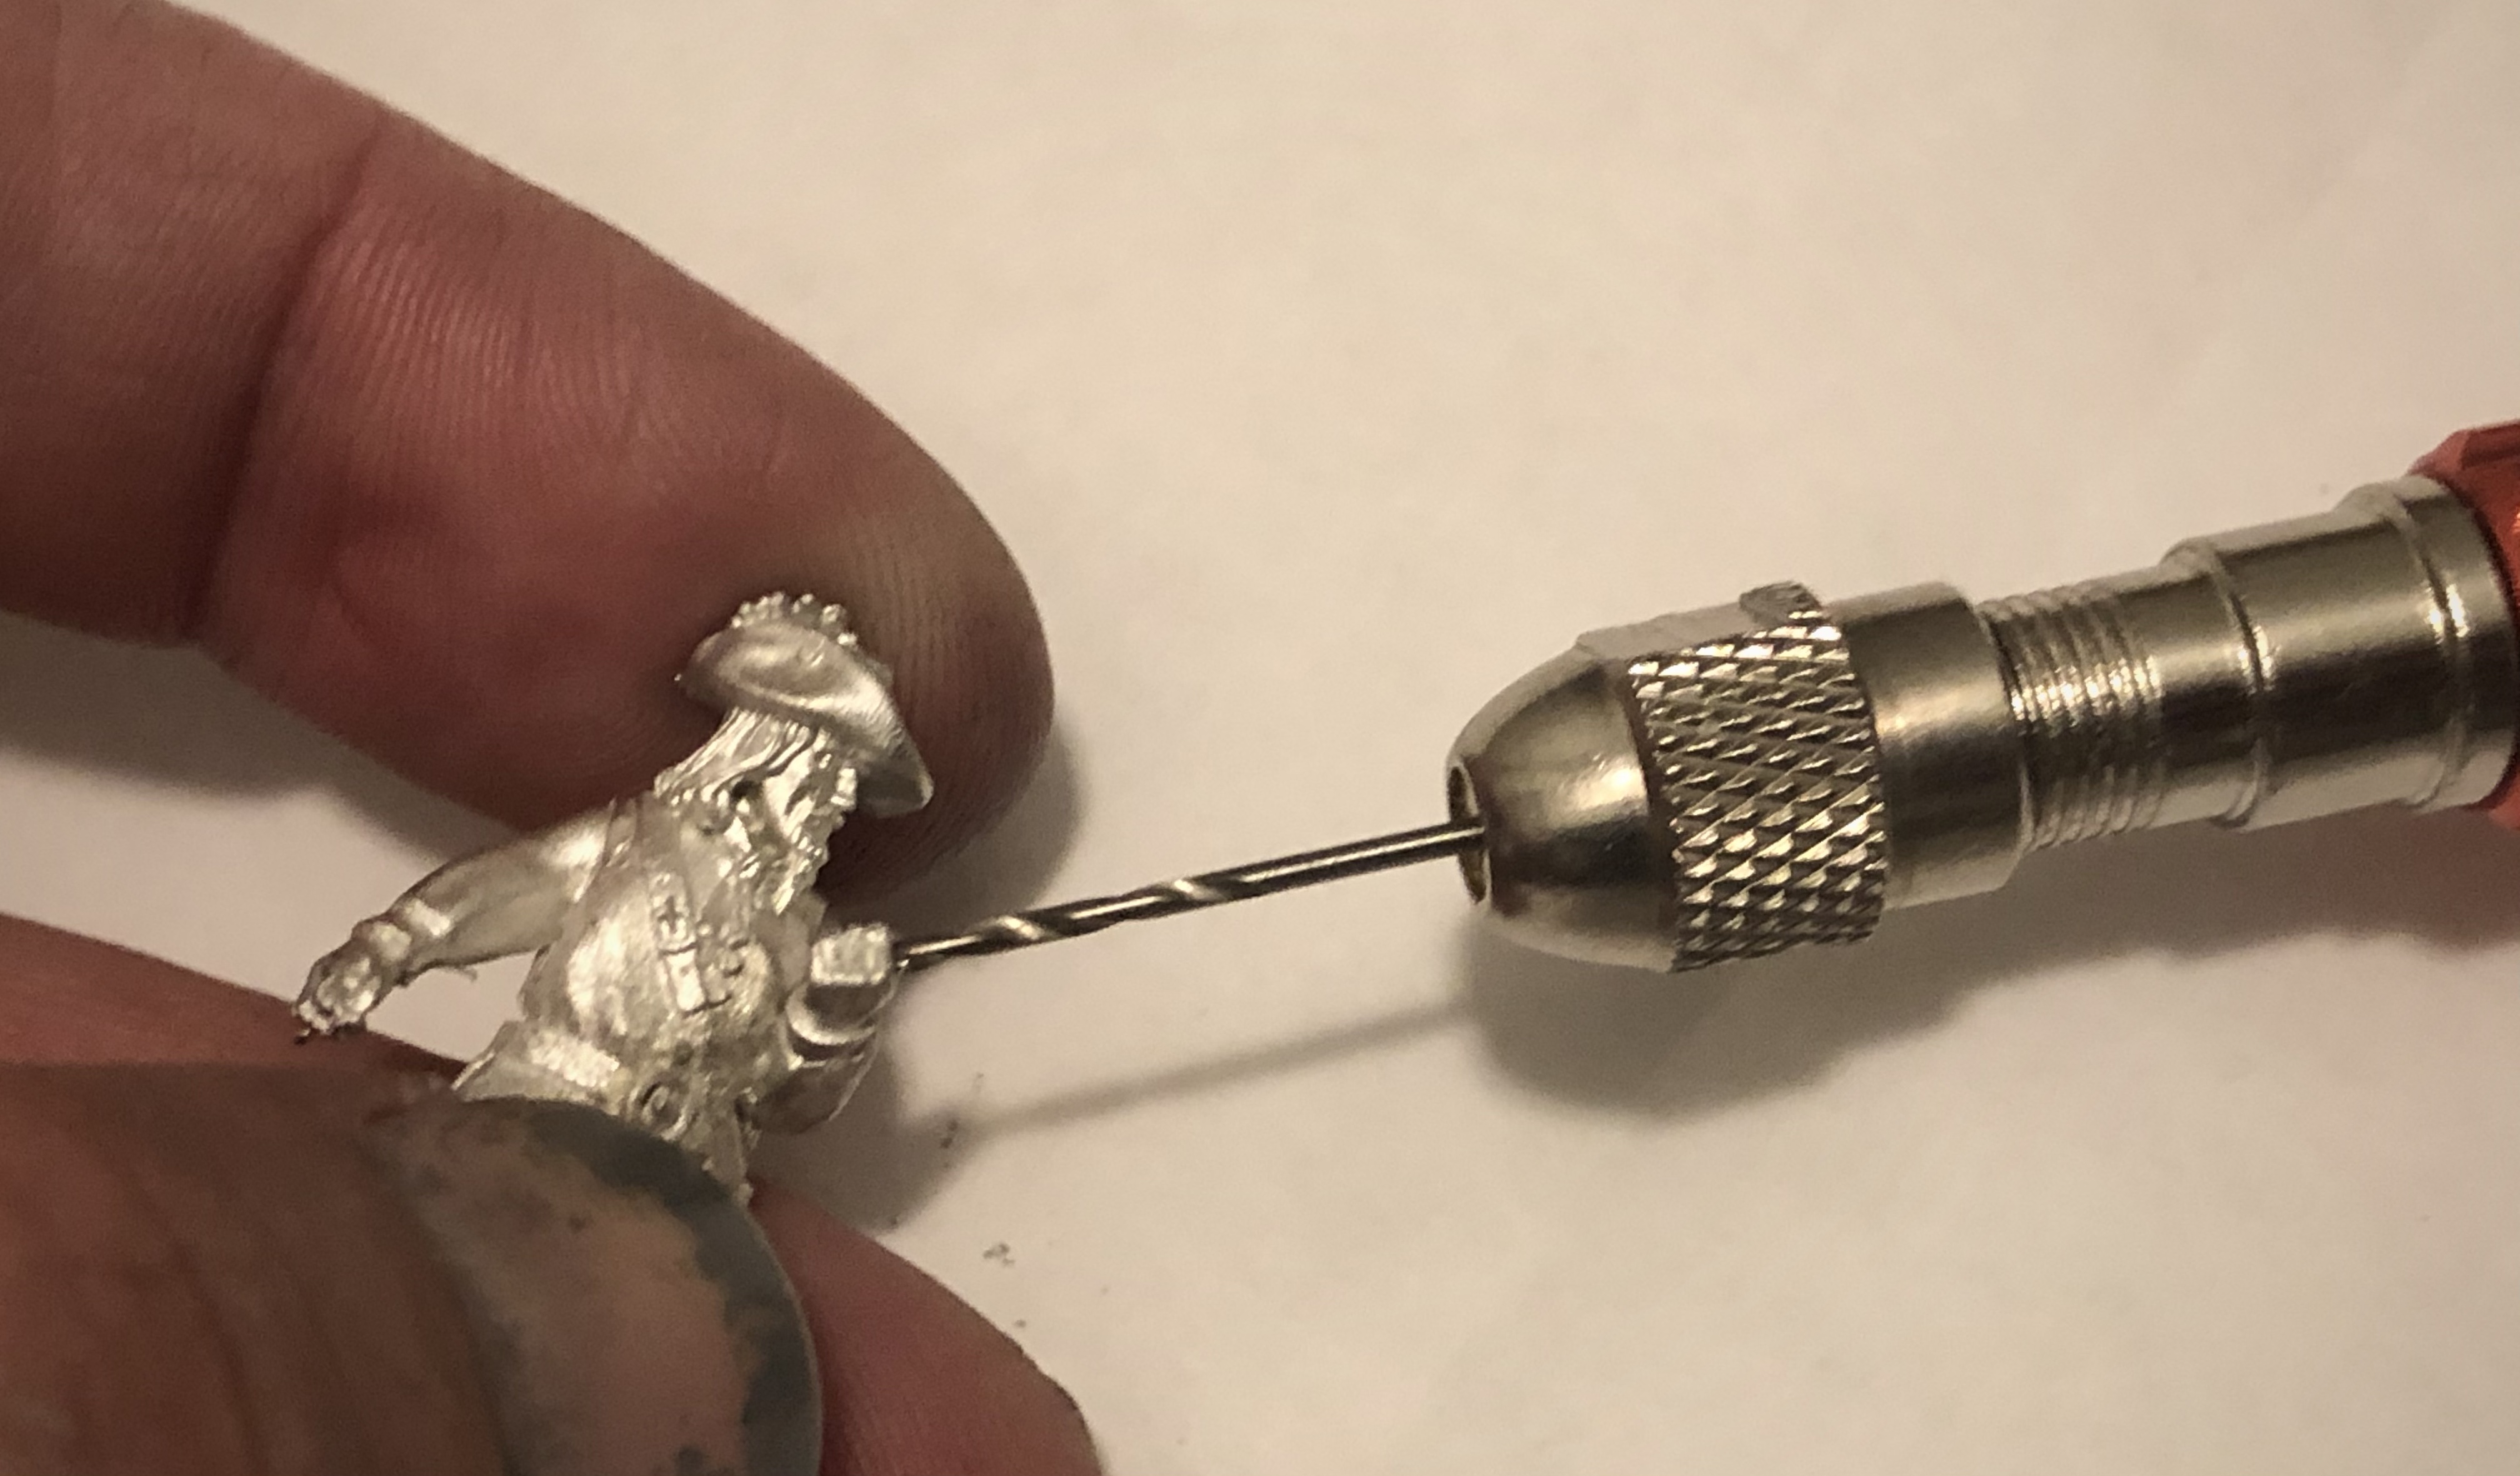
I’m not sure what sized drill bit I used but it was the smallest I had!

This takes a little time and some careful work. I messed one hand up and had to glue the pike in place.
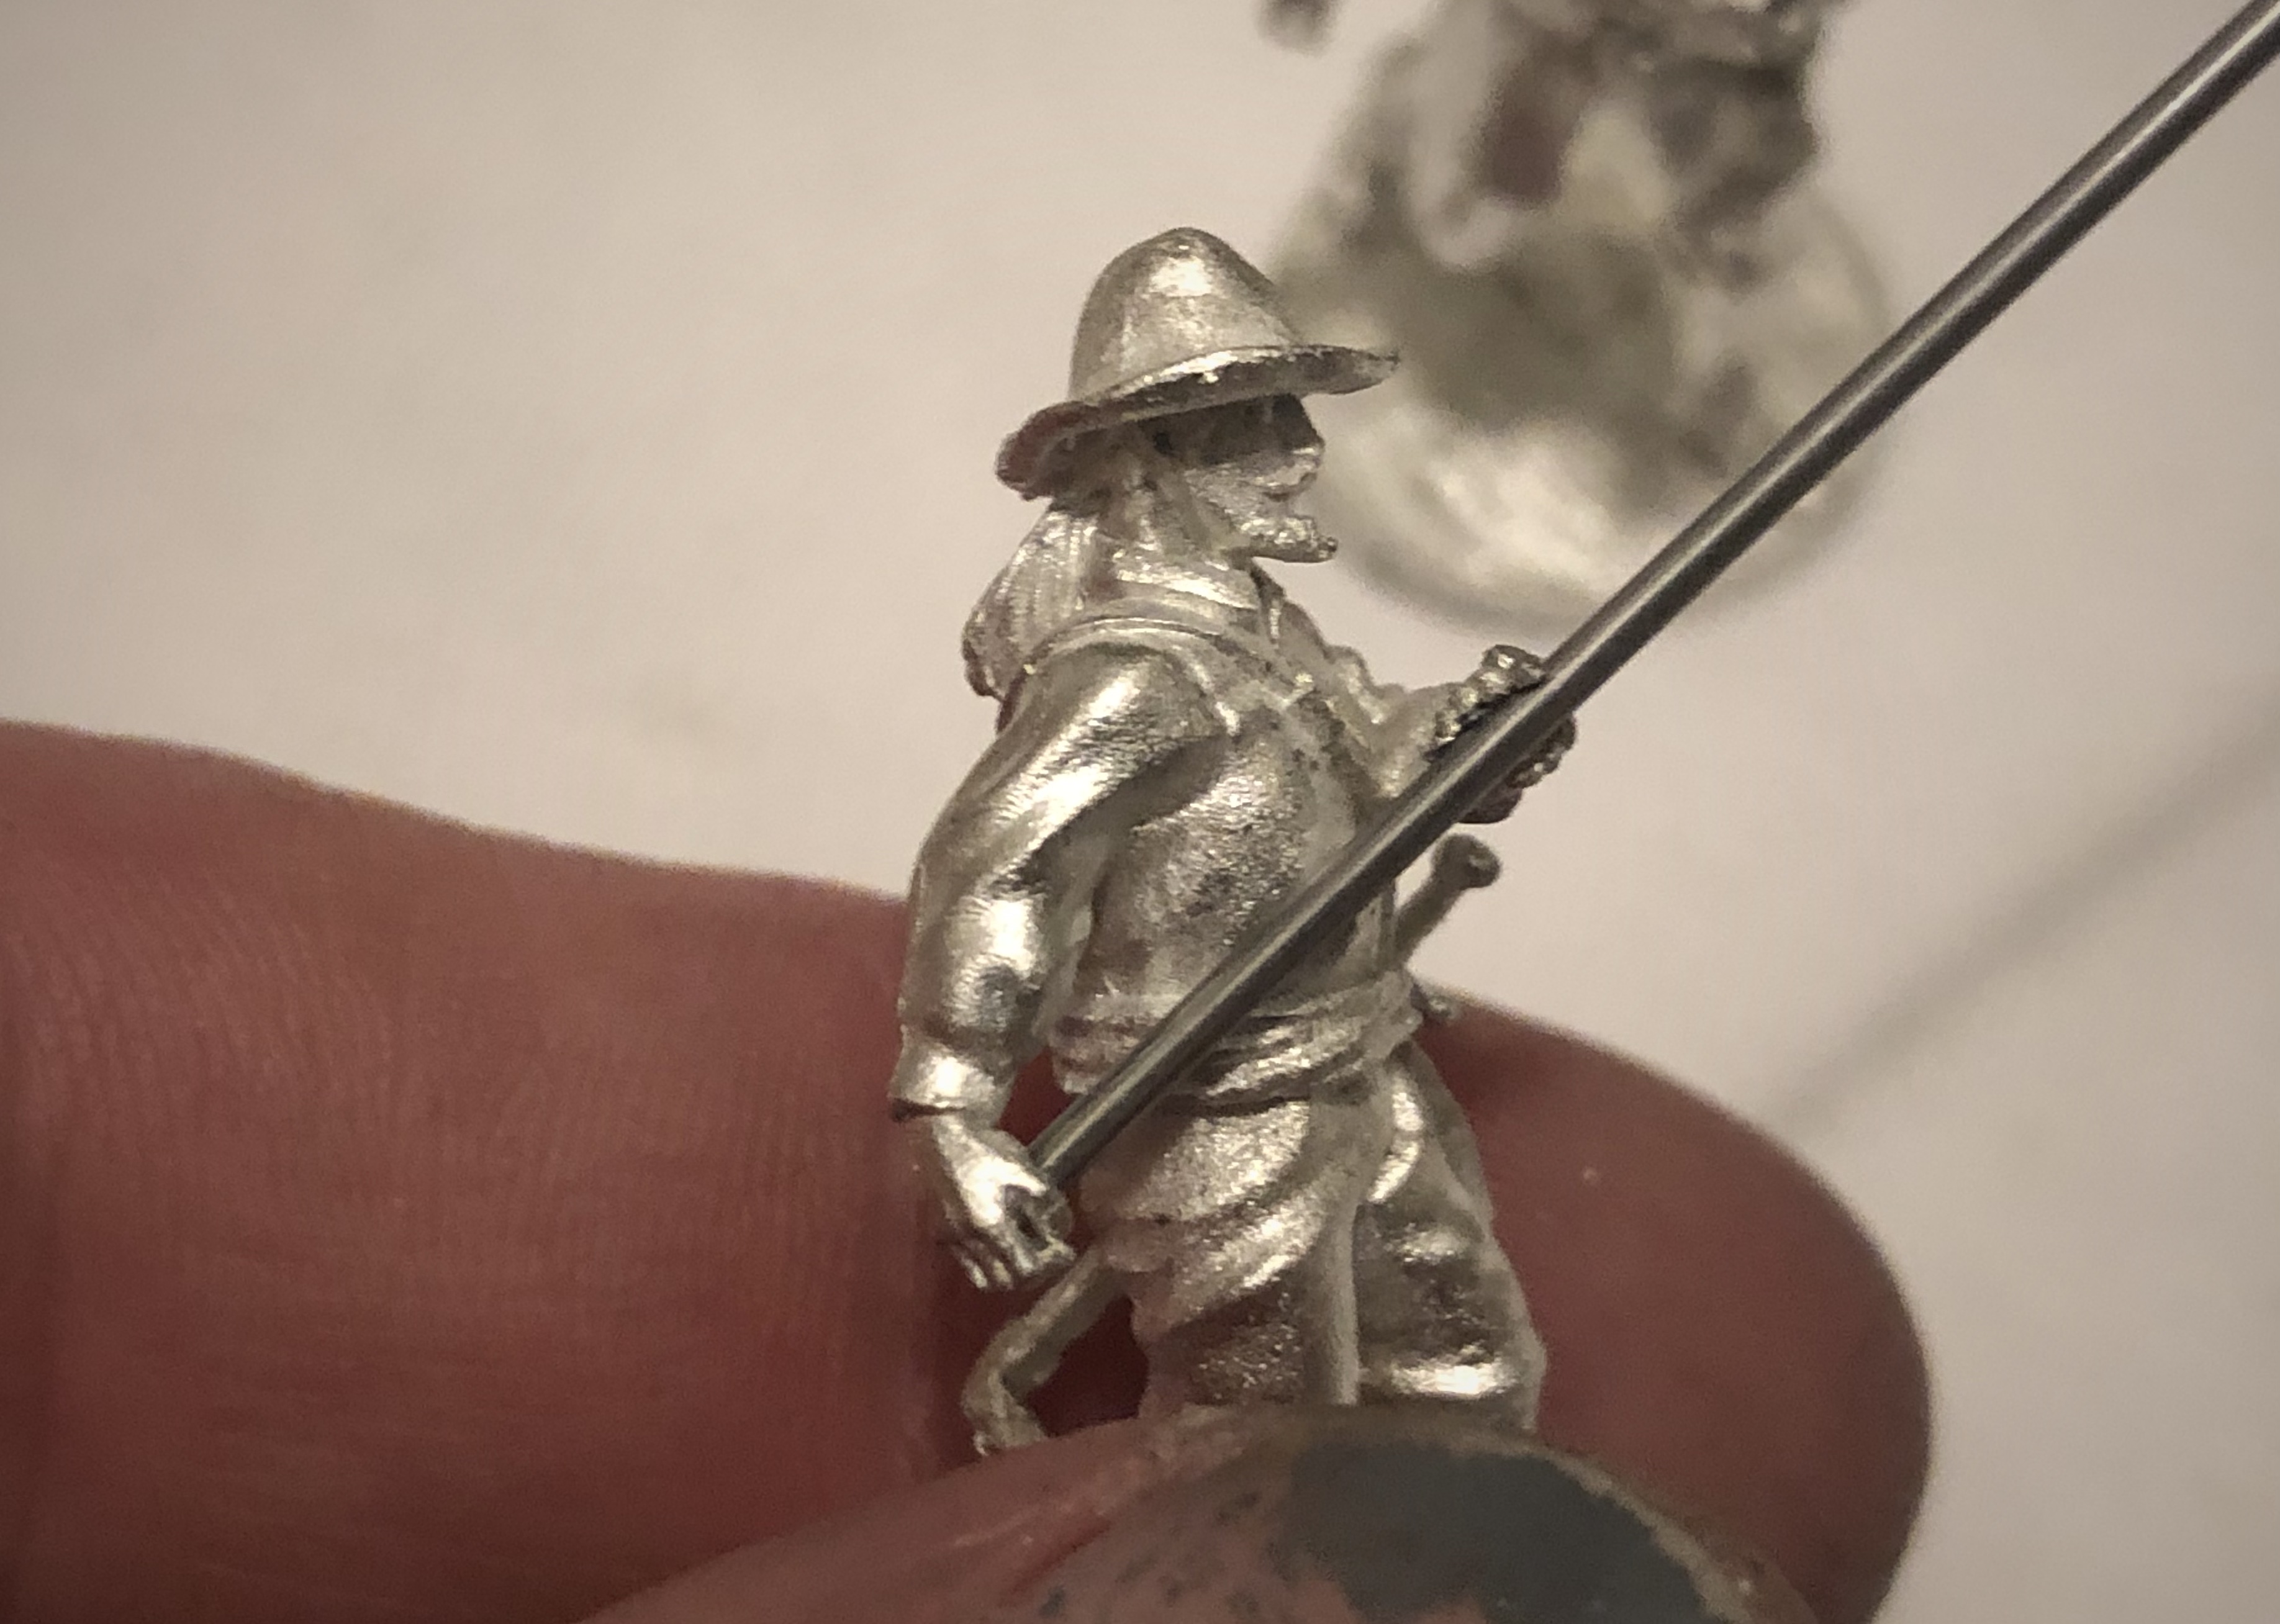
I put a drop of glue in the right hands to help keep the pike in place. I chose to assemble these using the full-length but I plan on cutting trimming the length down a little on my next set. If you want to trim them, make sure to use real wire cutters because this stereo will ruin your standard hobby cutters.
The prep work took about 15 minutes and I’m on to priming!
Step 2 – Prime
I used my standard “zenithal” priming method using a grey base coat then spraying from above with white to bring out the detail and provide a highlighted base which helps with the highlighting later.
Step 3 – Base Coats

I’m going to move through this step quickly because it isn’t difficult. I tried to keep the paint list fairly short by basically using the same set of colors on all four models, but changing where I used them on each model.

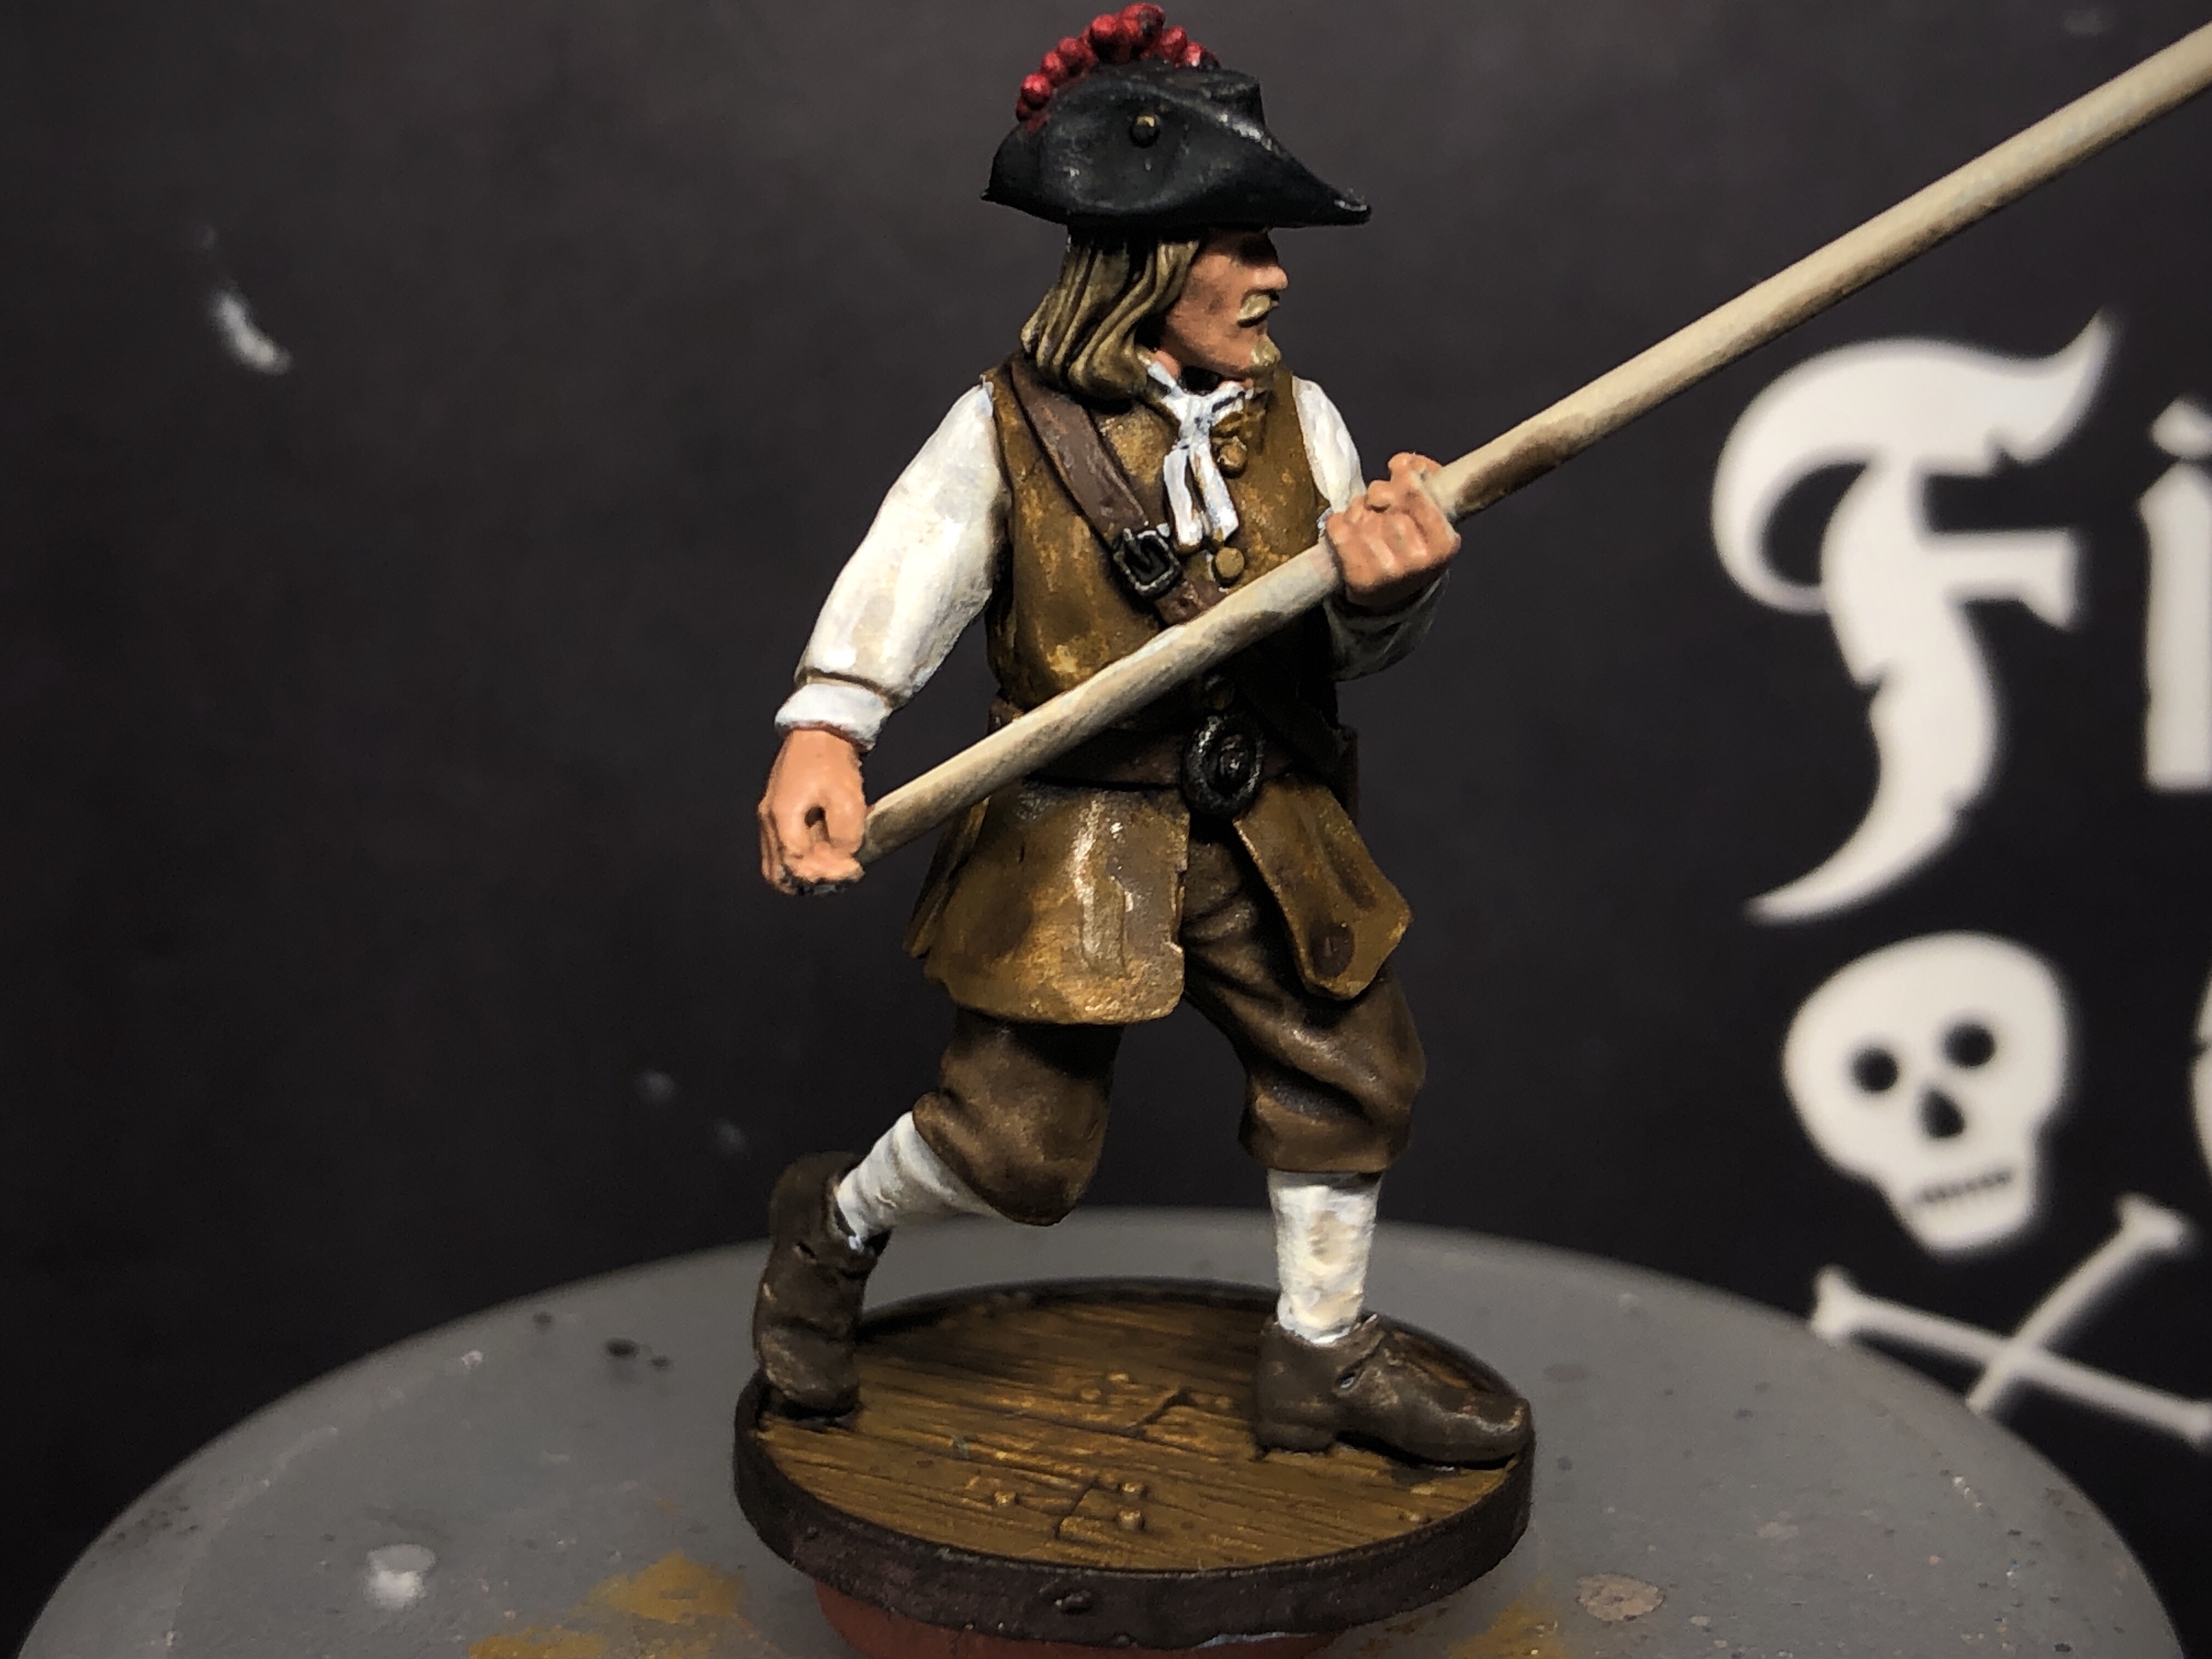
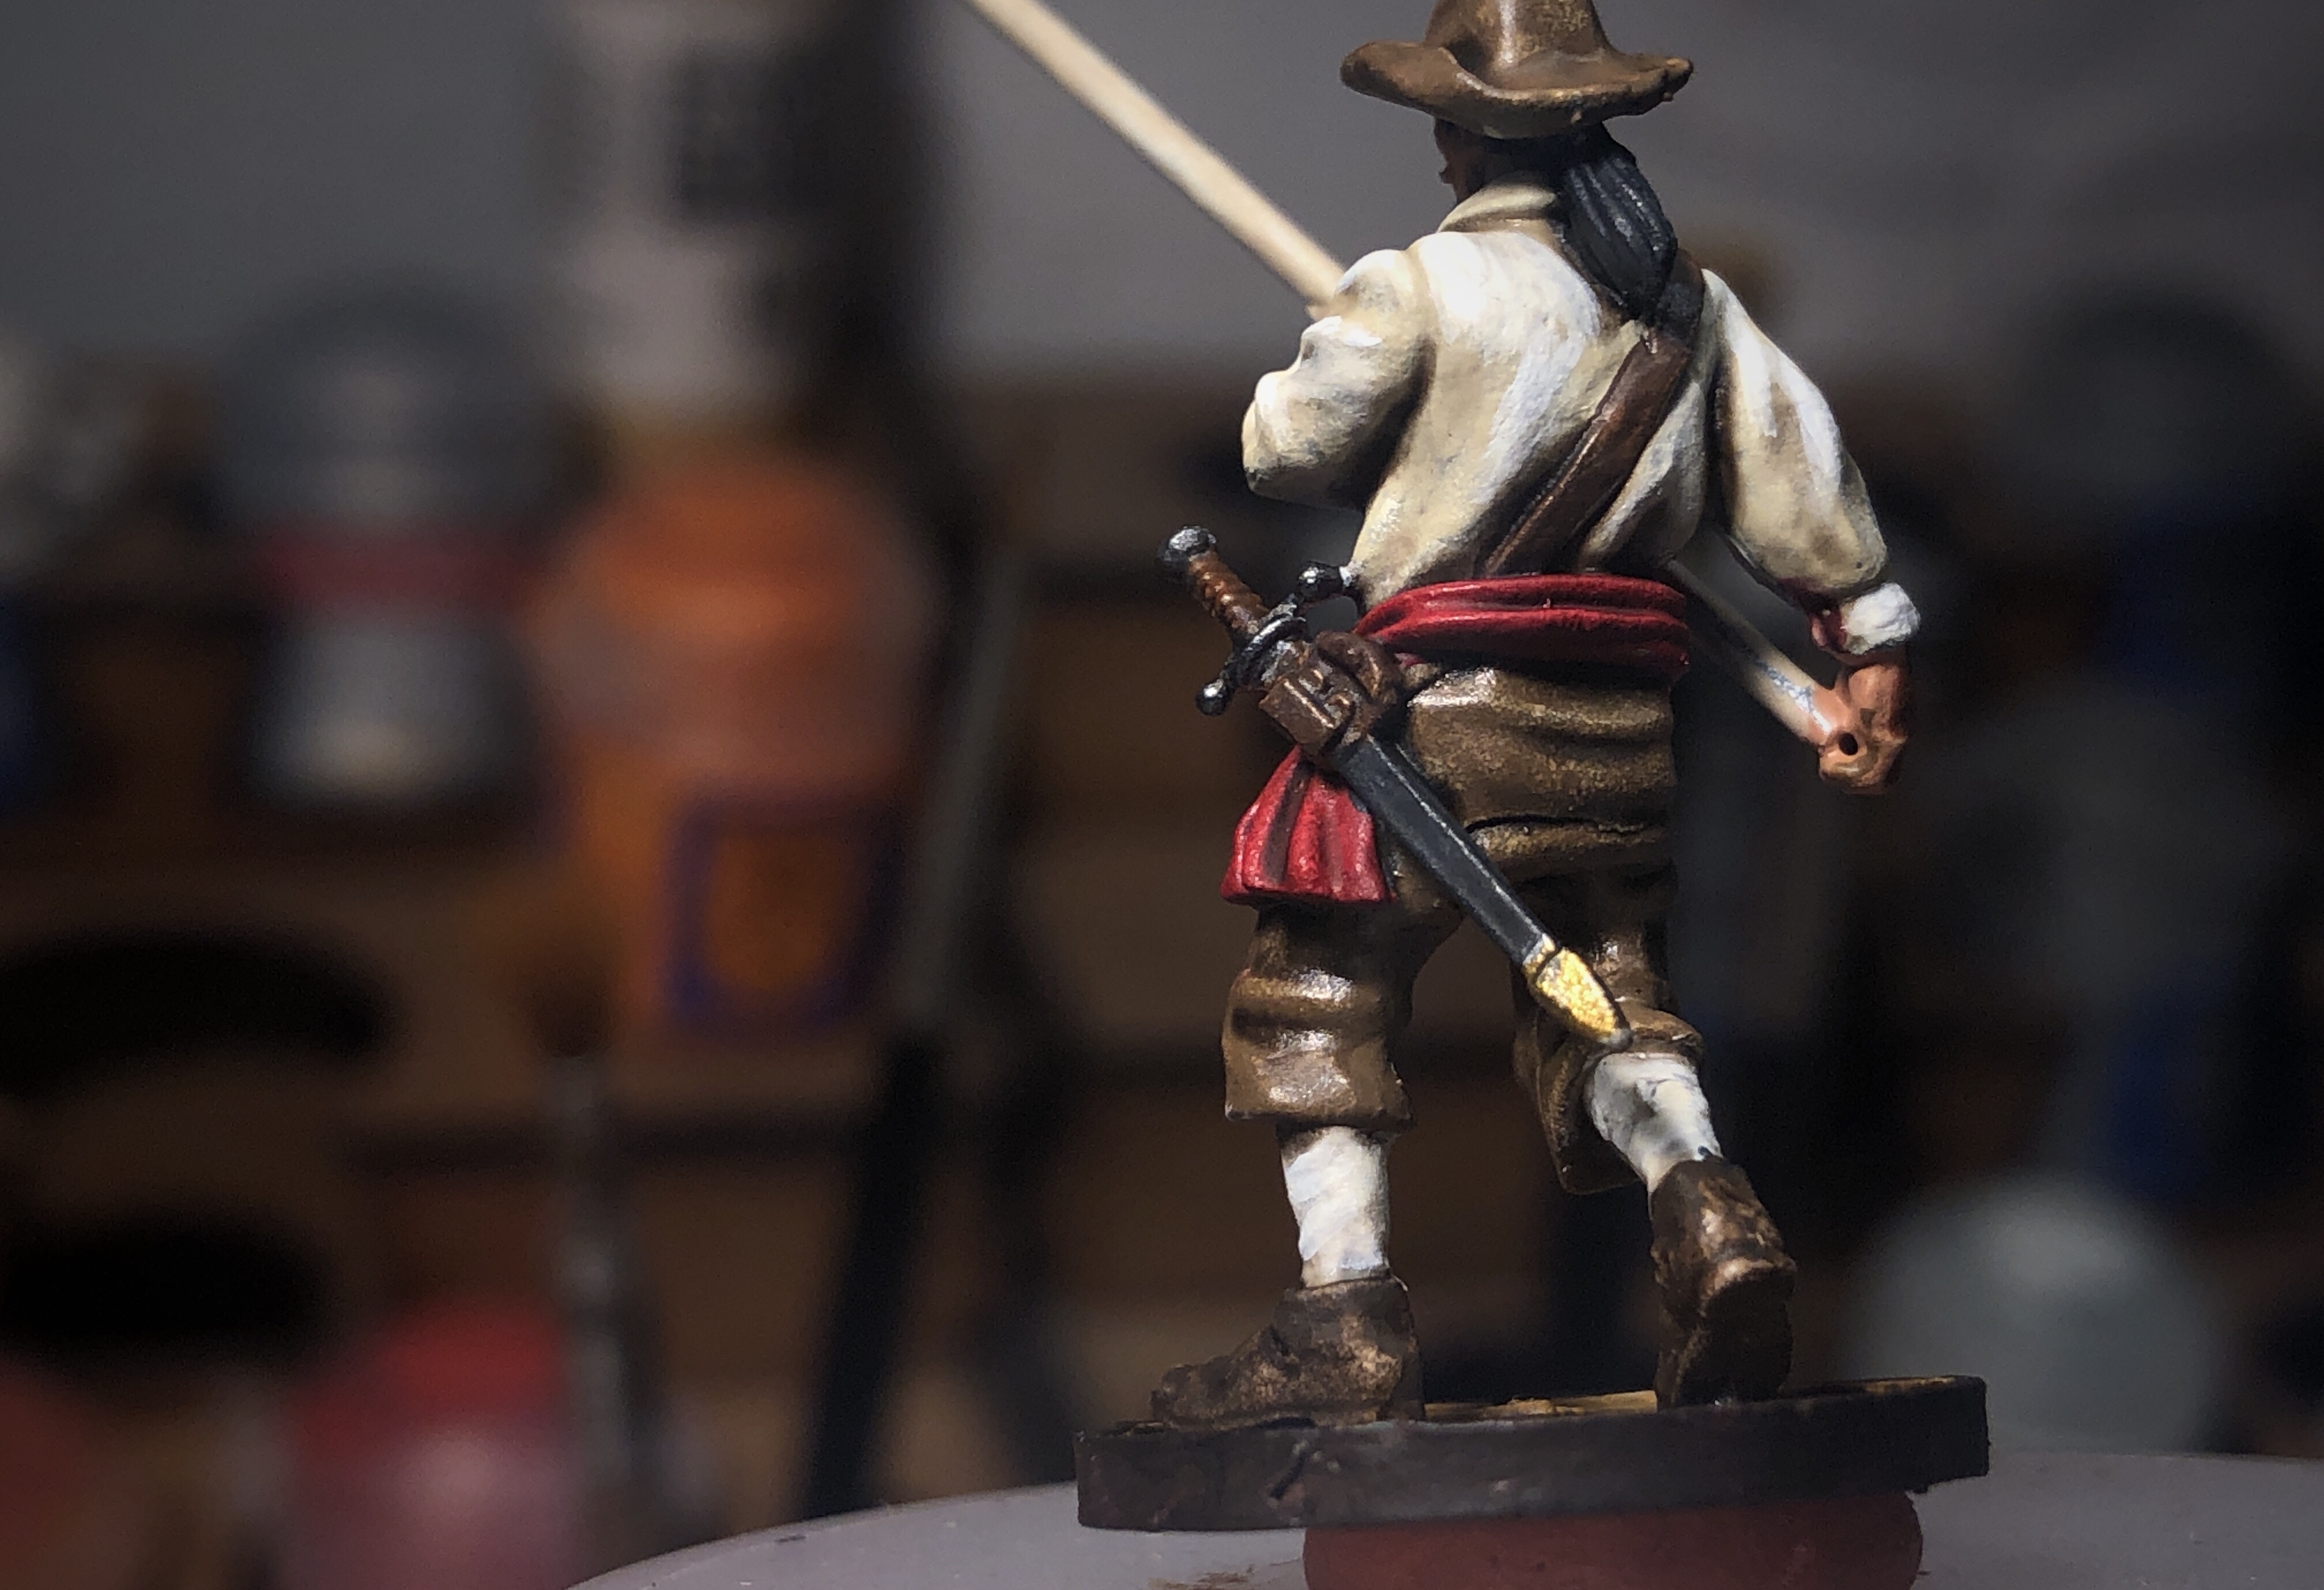
Here is the base paint list for the first model with the floppy hat and sash:
- Base – XV-88 with Rhinox Hide edge
- Shirt and Stockings – Screaming Skull
- Pants and Hat – Steel Legion Drab
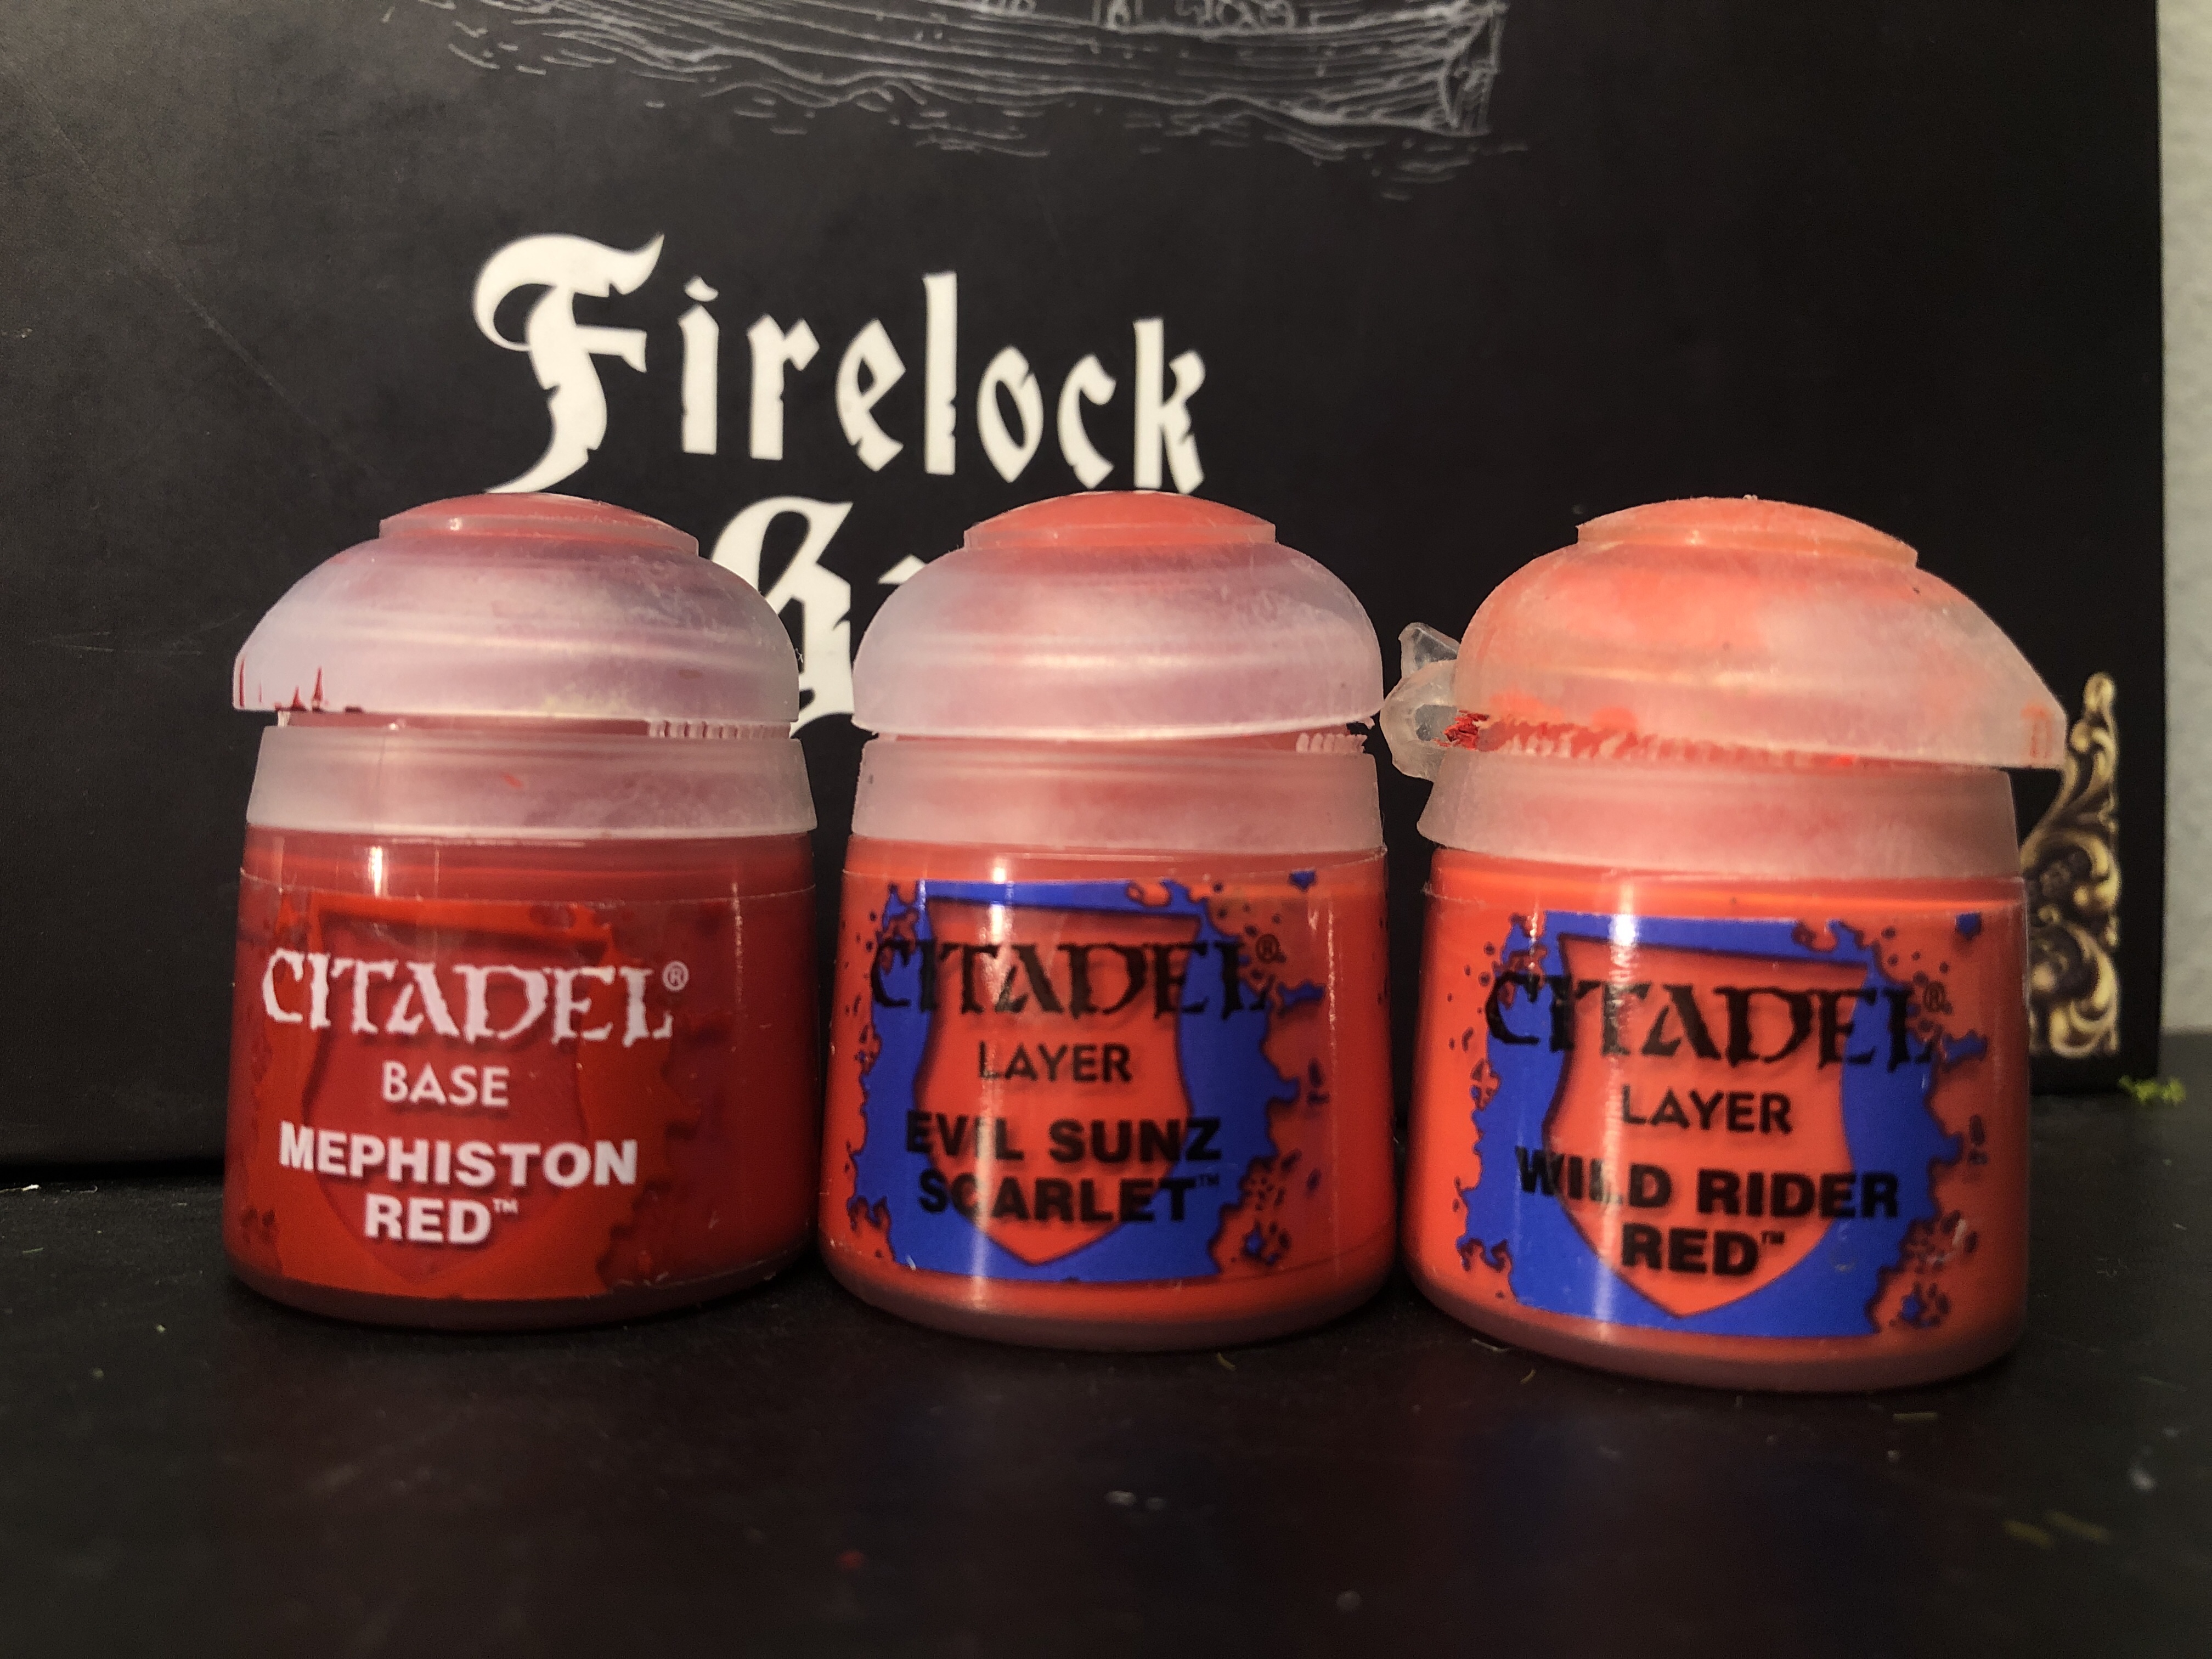
- Sash – Mephiston Red
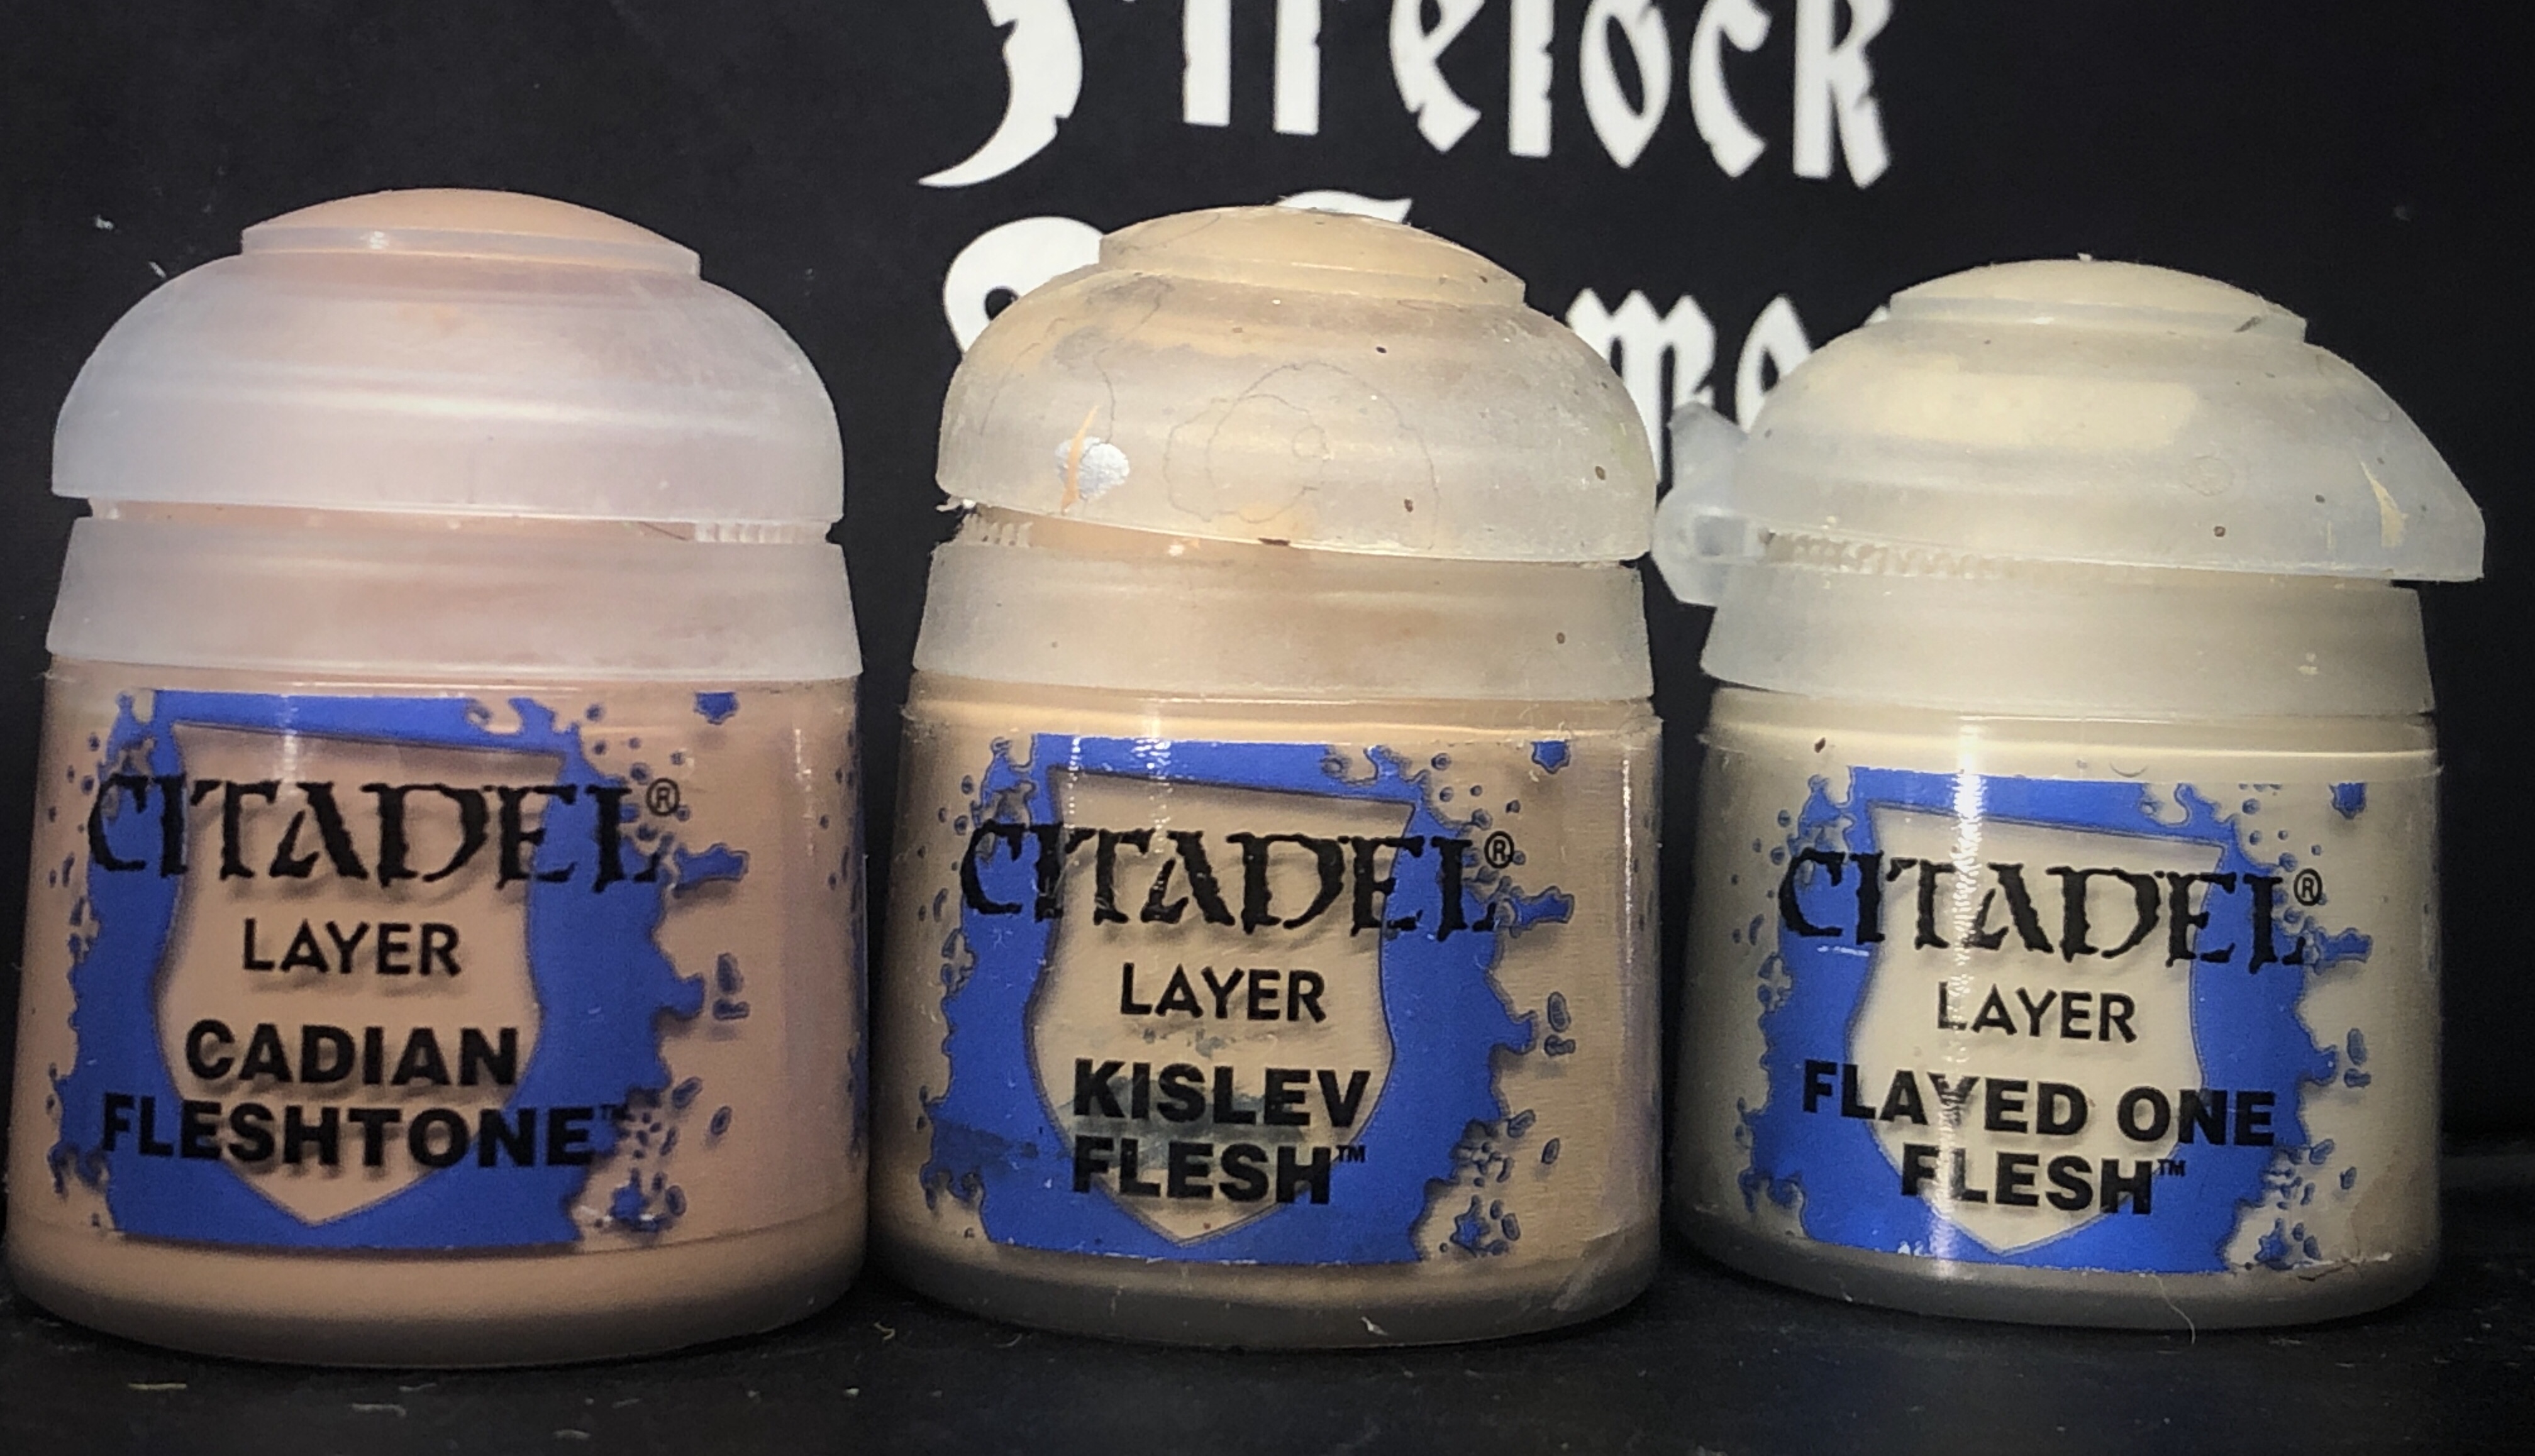
- Flesh – Cadian Fleshtone
- Pike – Bone White
- Sword Belt, Shoes and Sword Grip – Leather Brown
- Scabbard and Hair/Beard – German Grey
- Buckles, Sword Hilt and Pike Tip – Steel

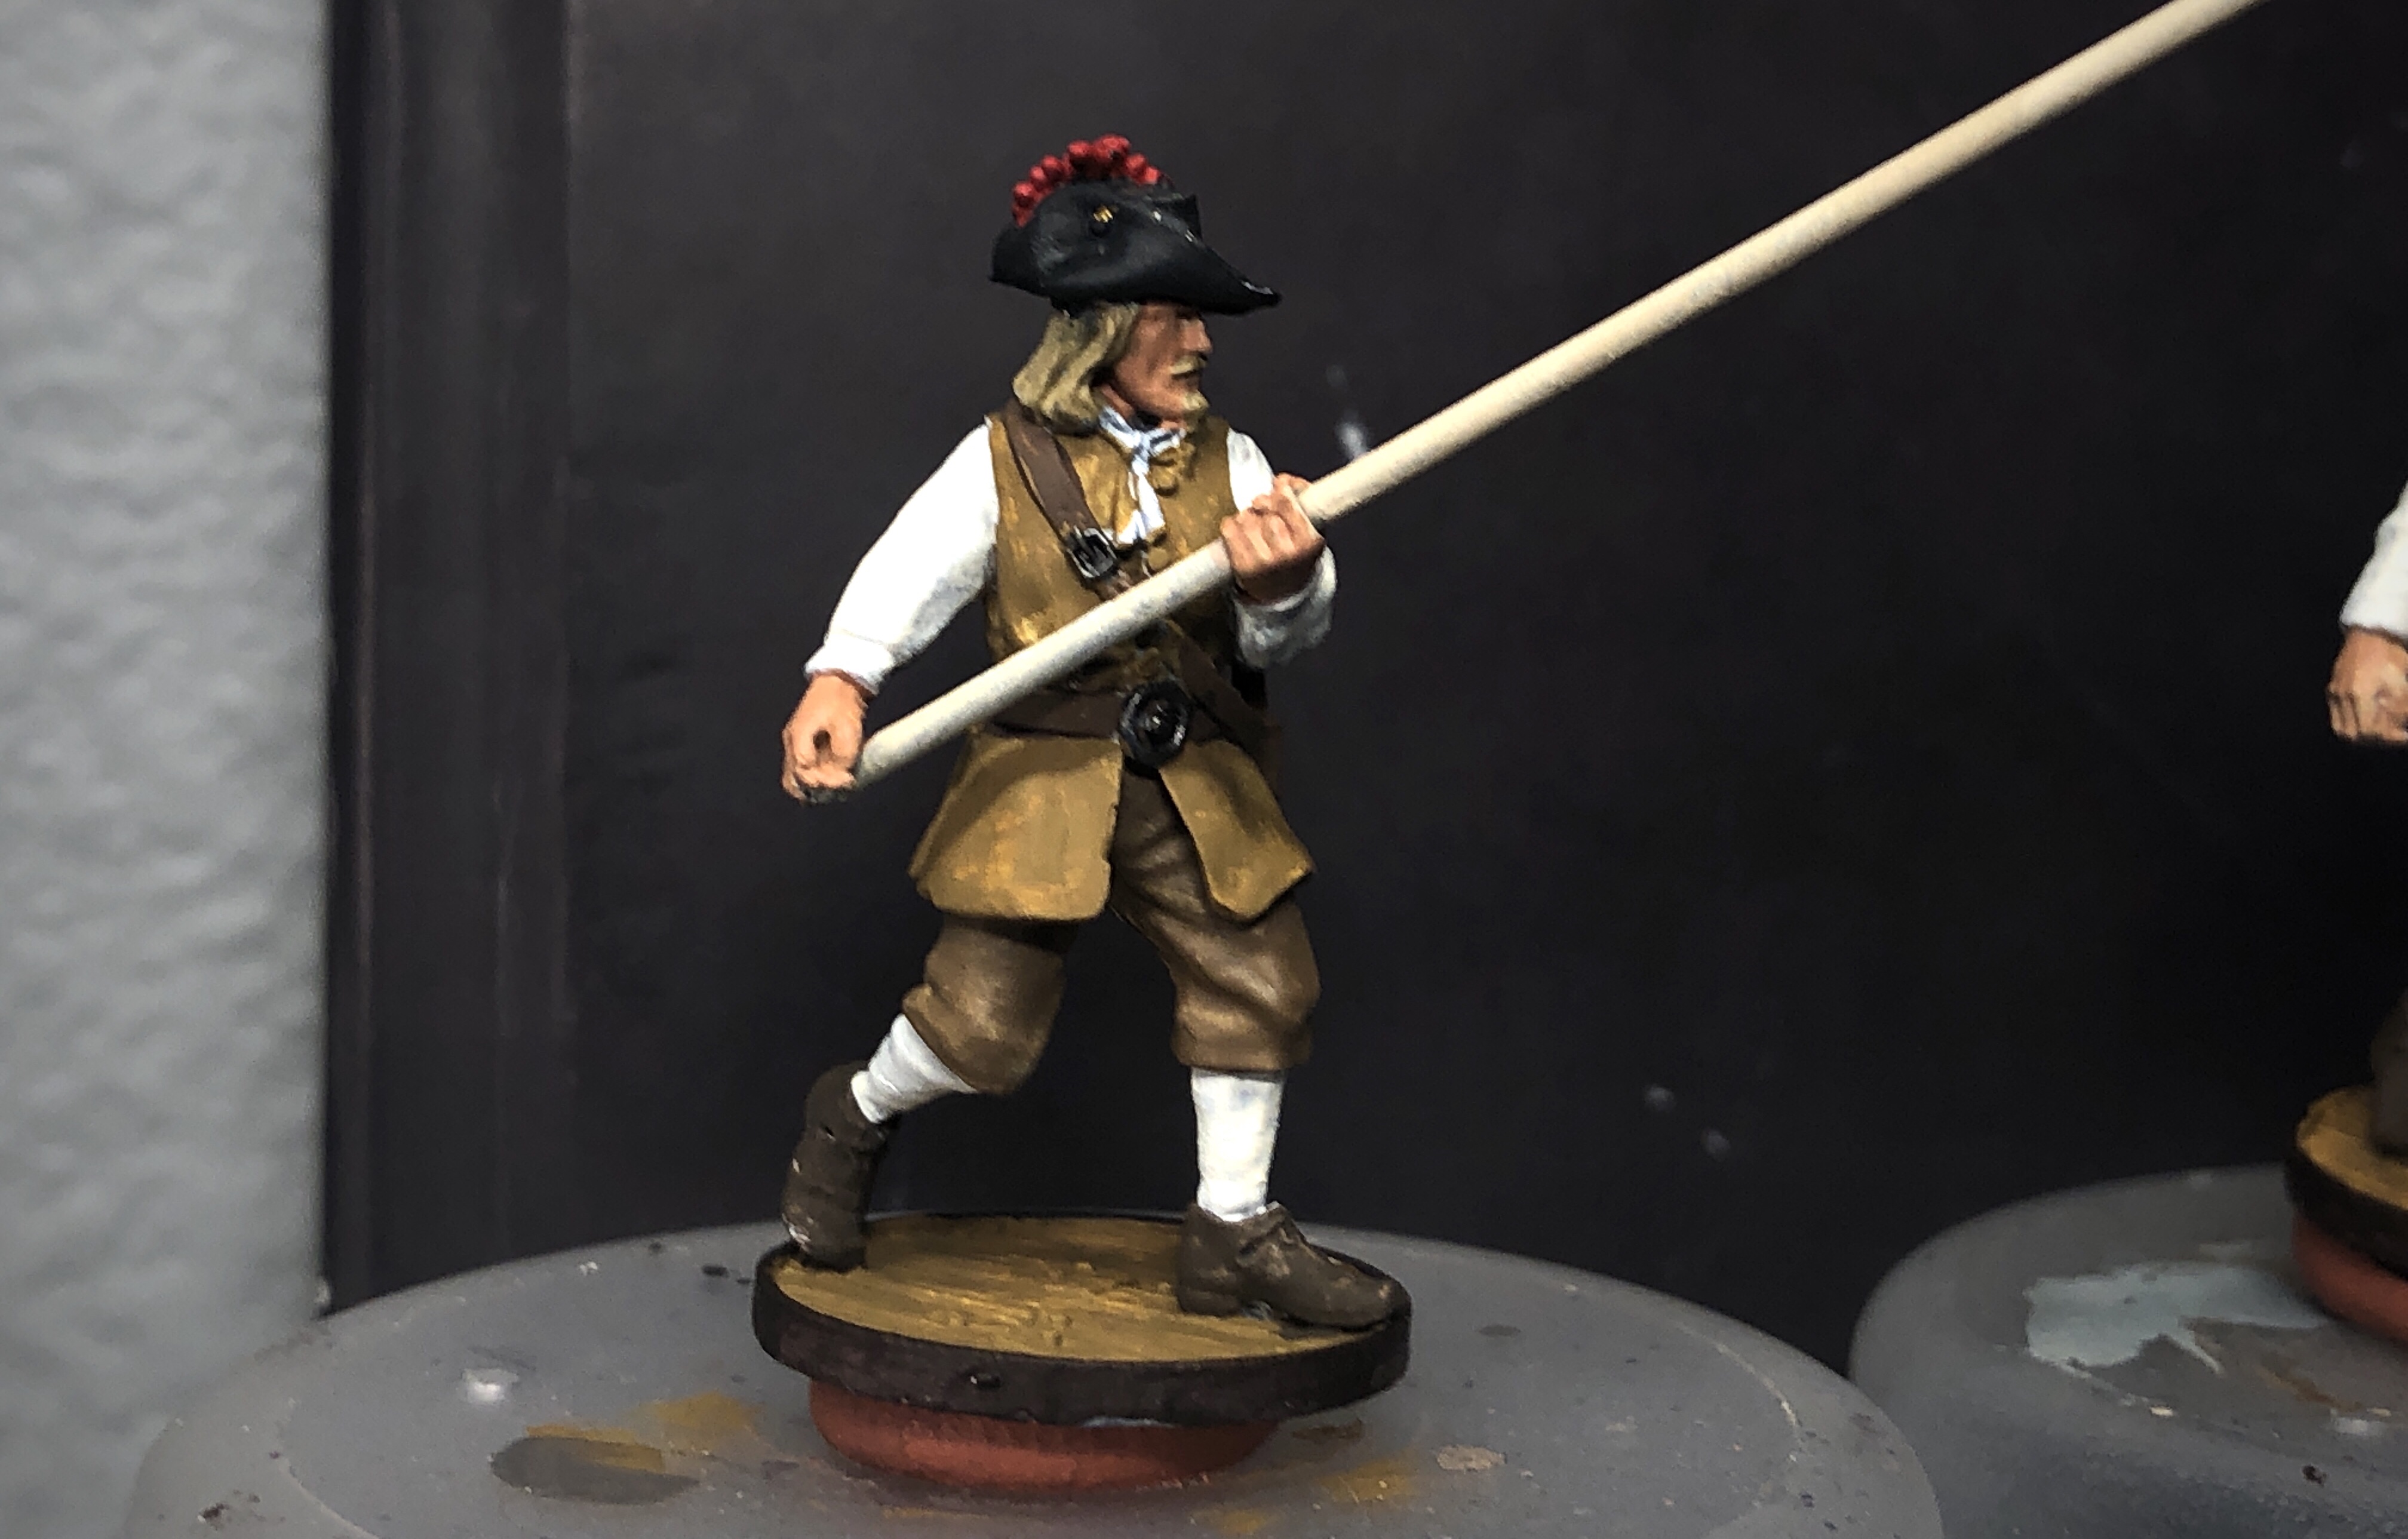
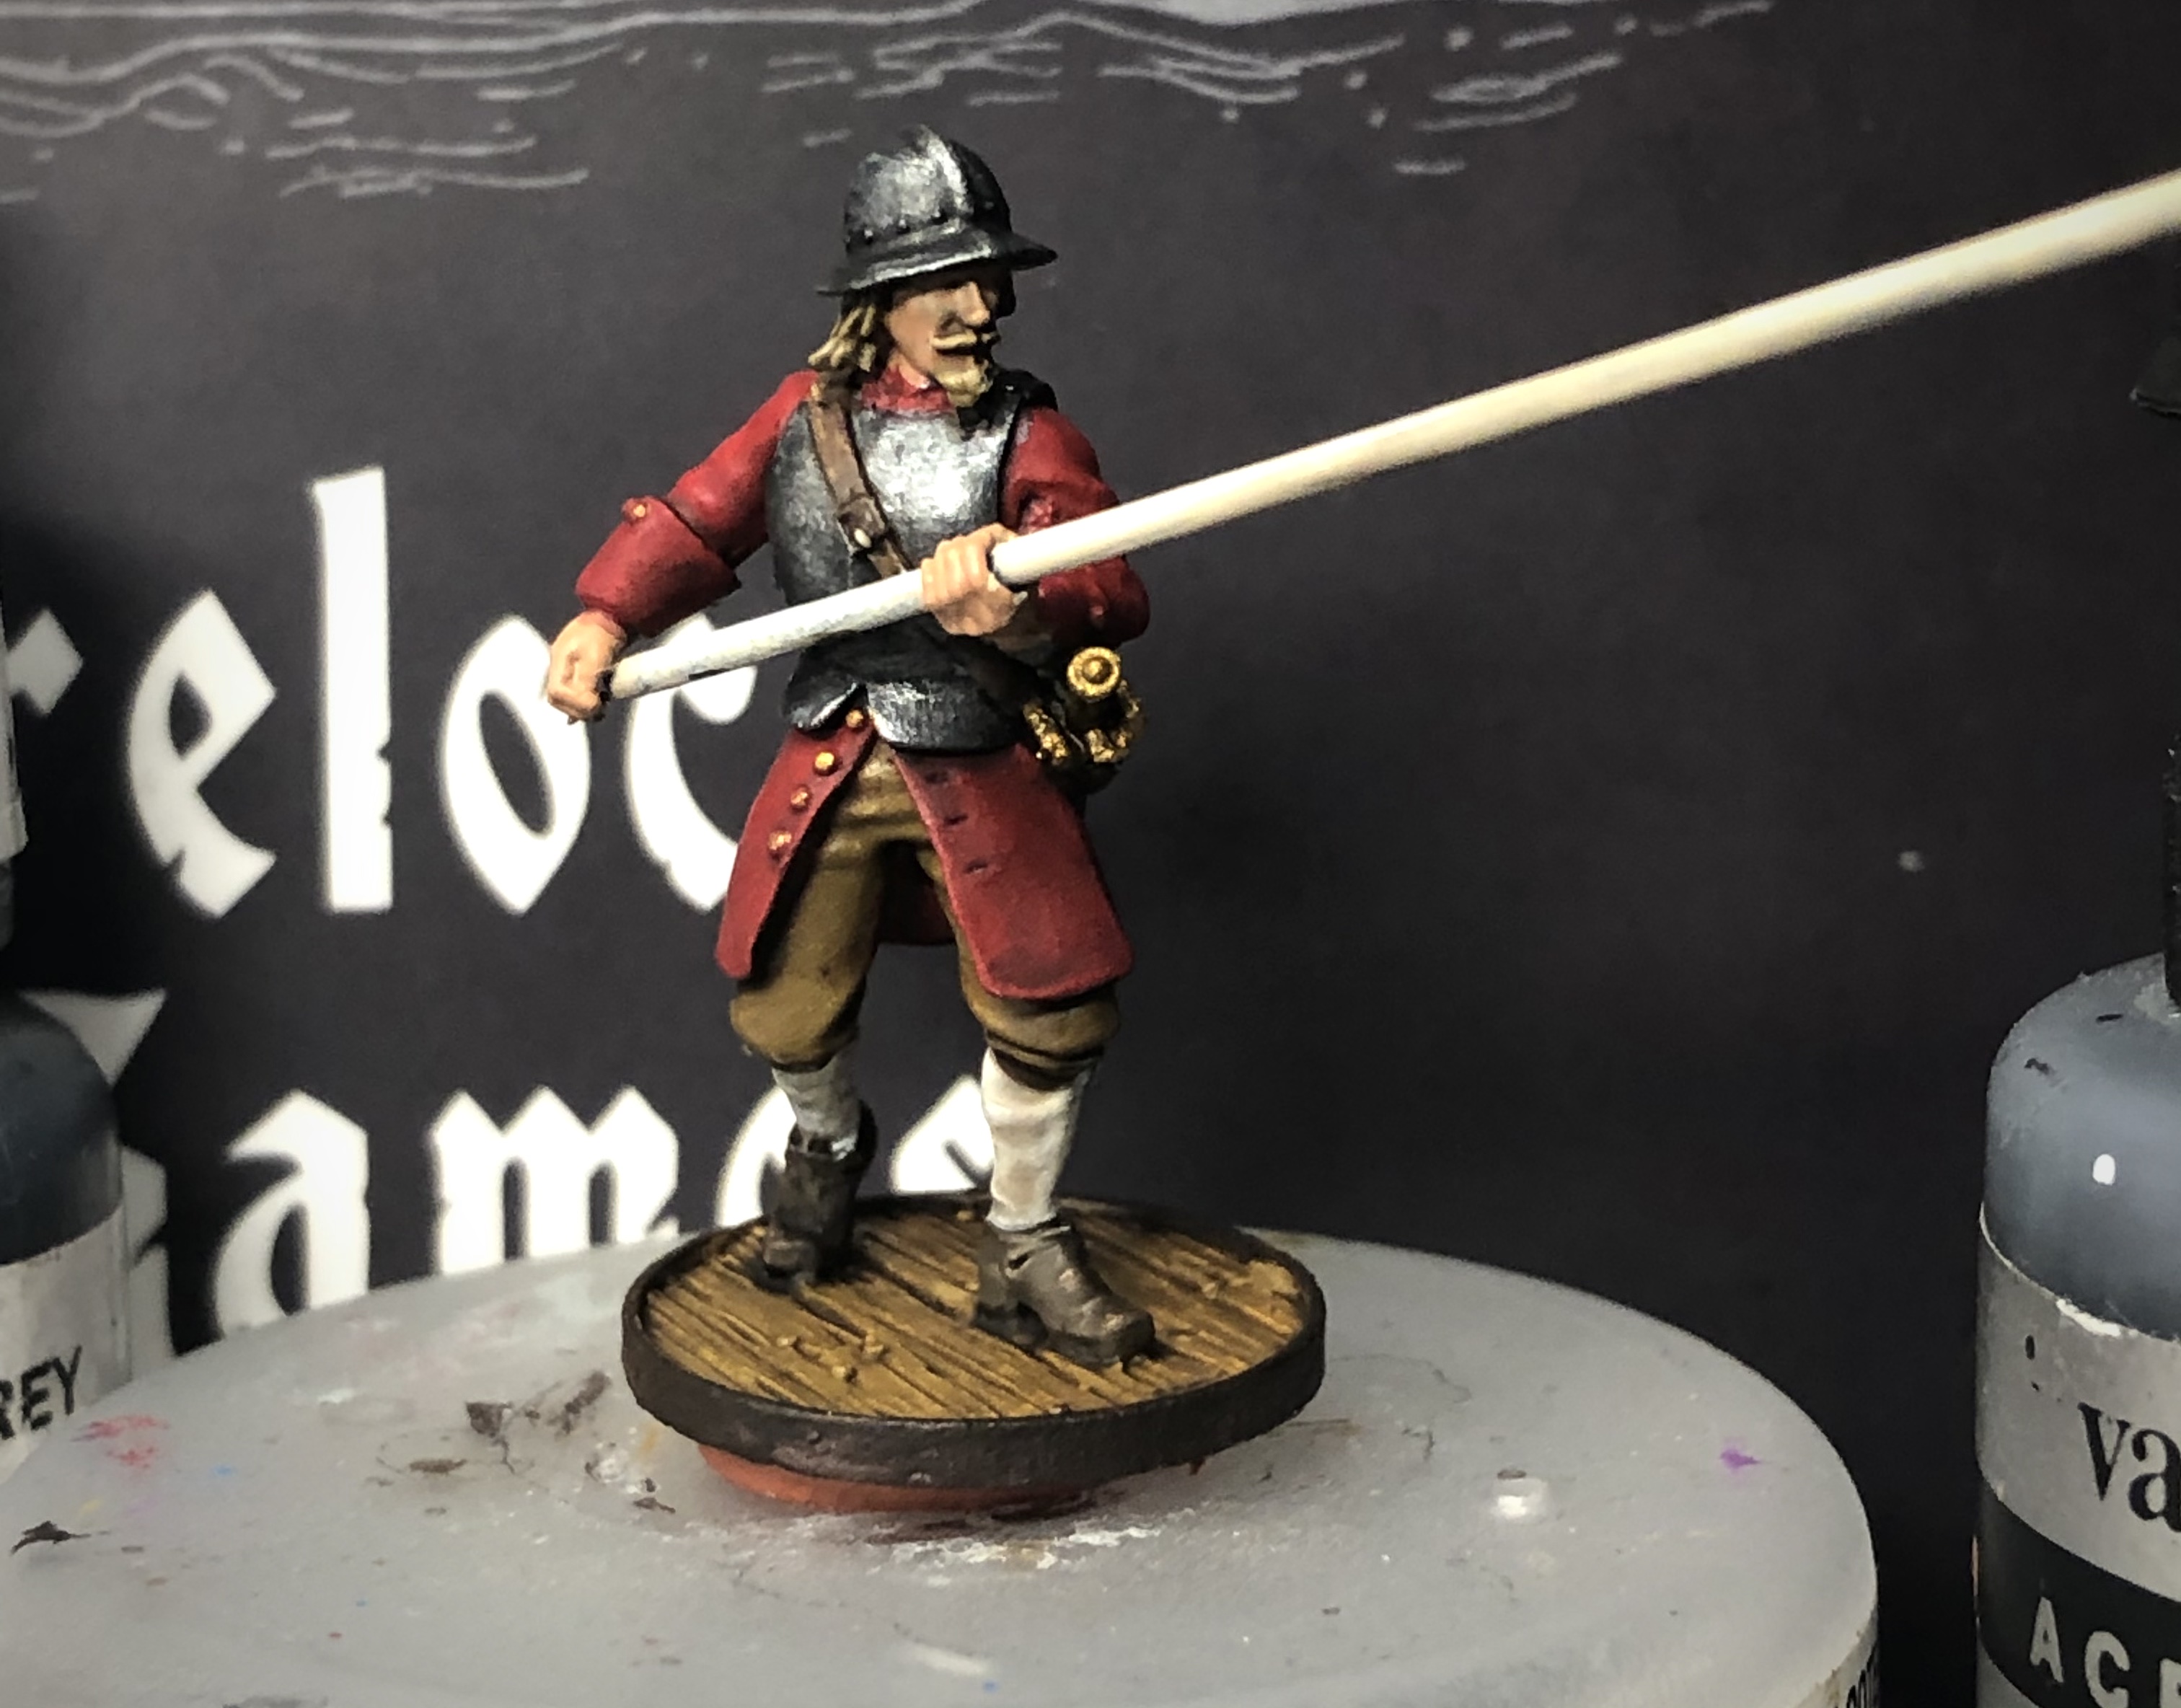
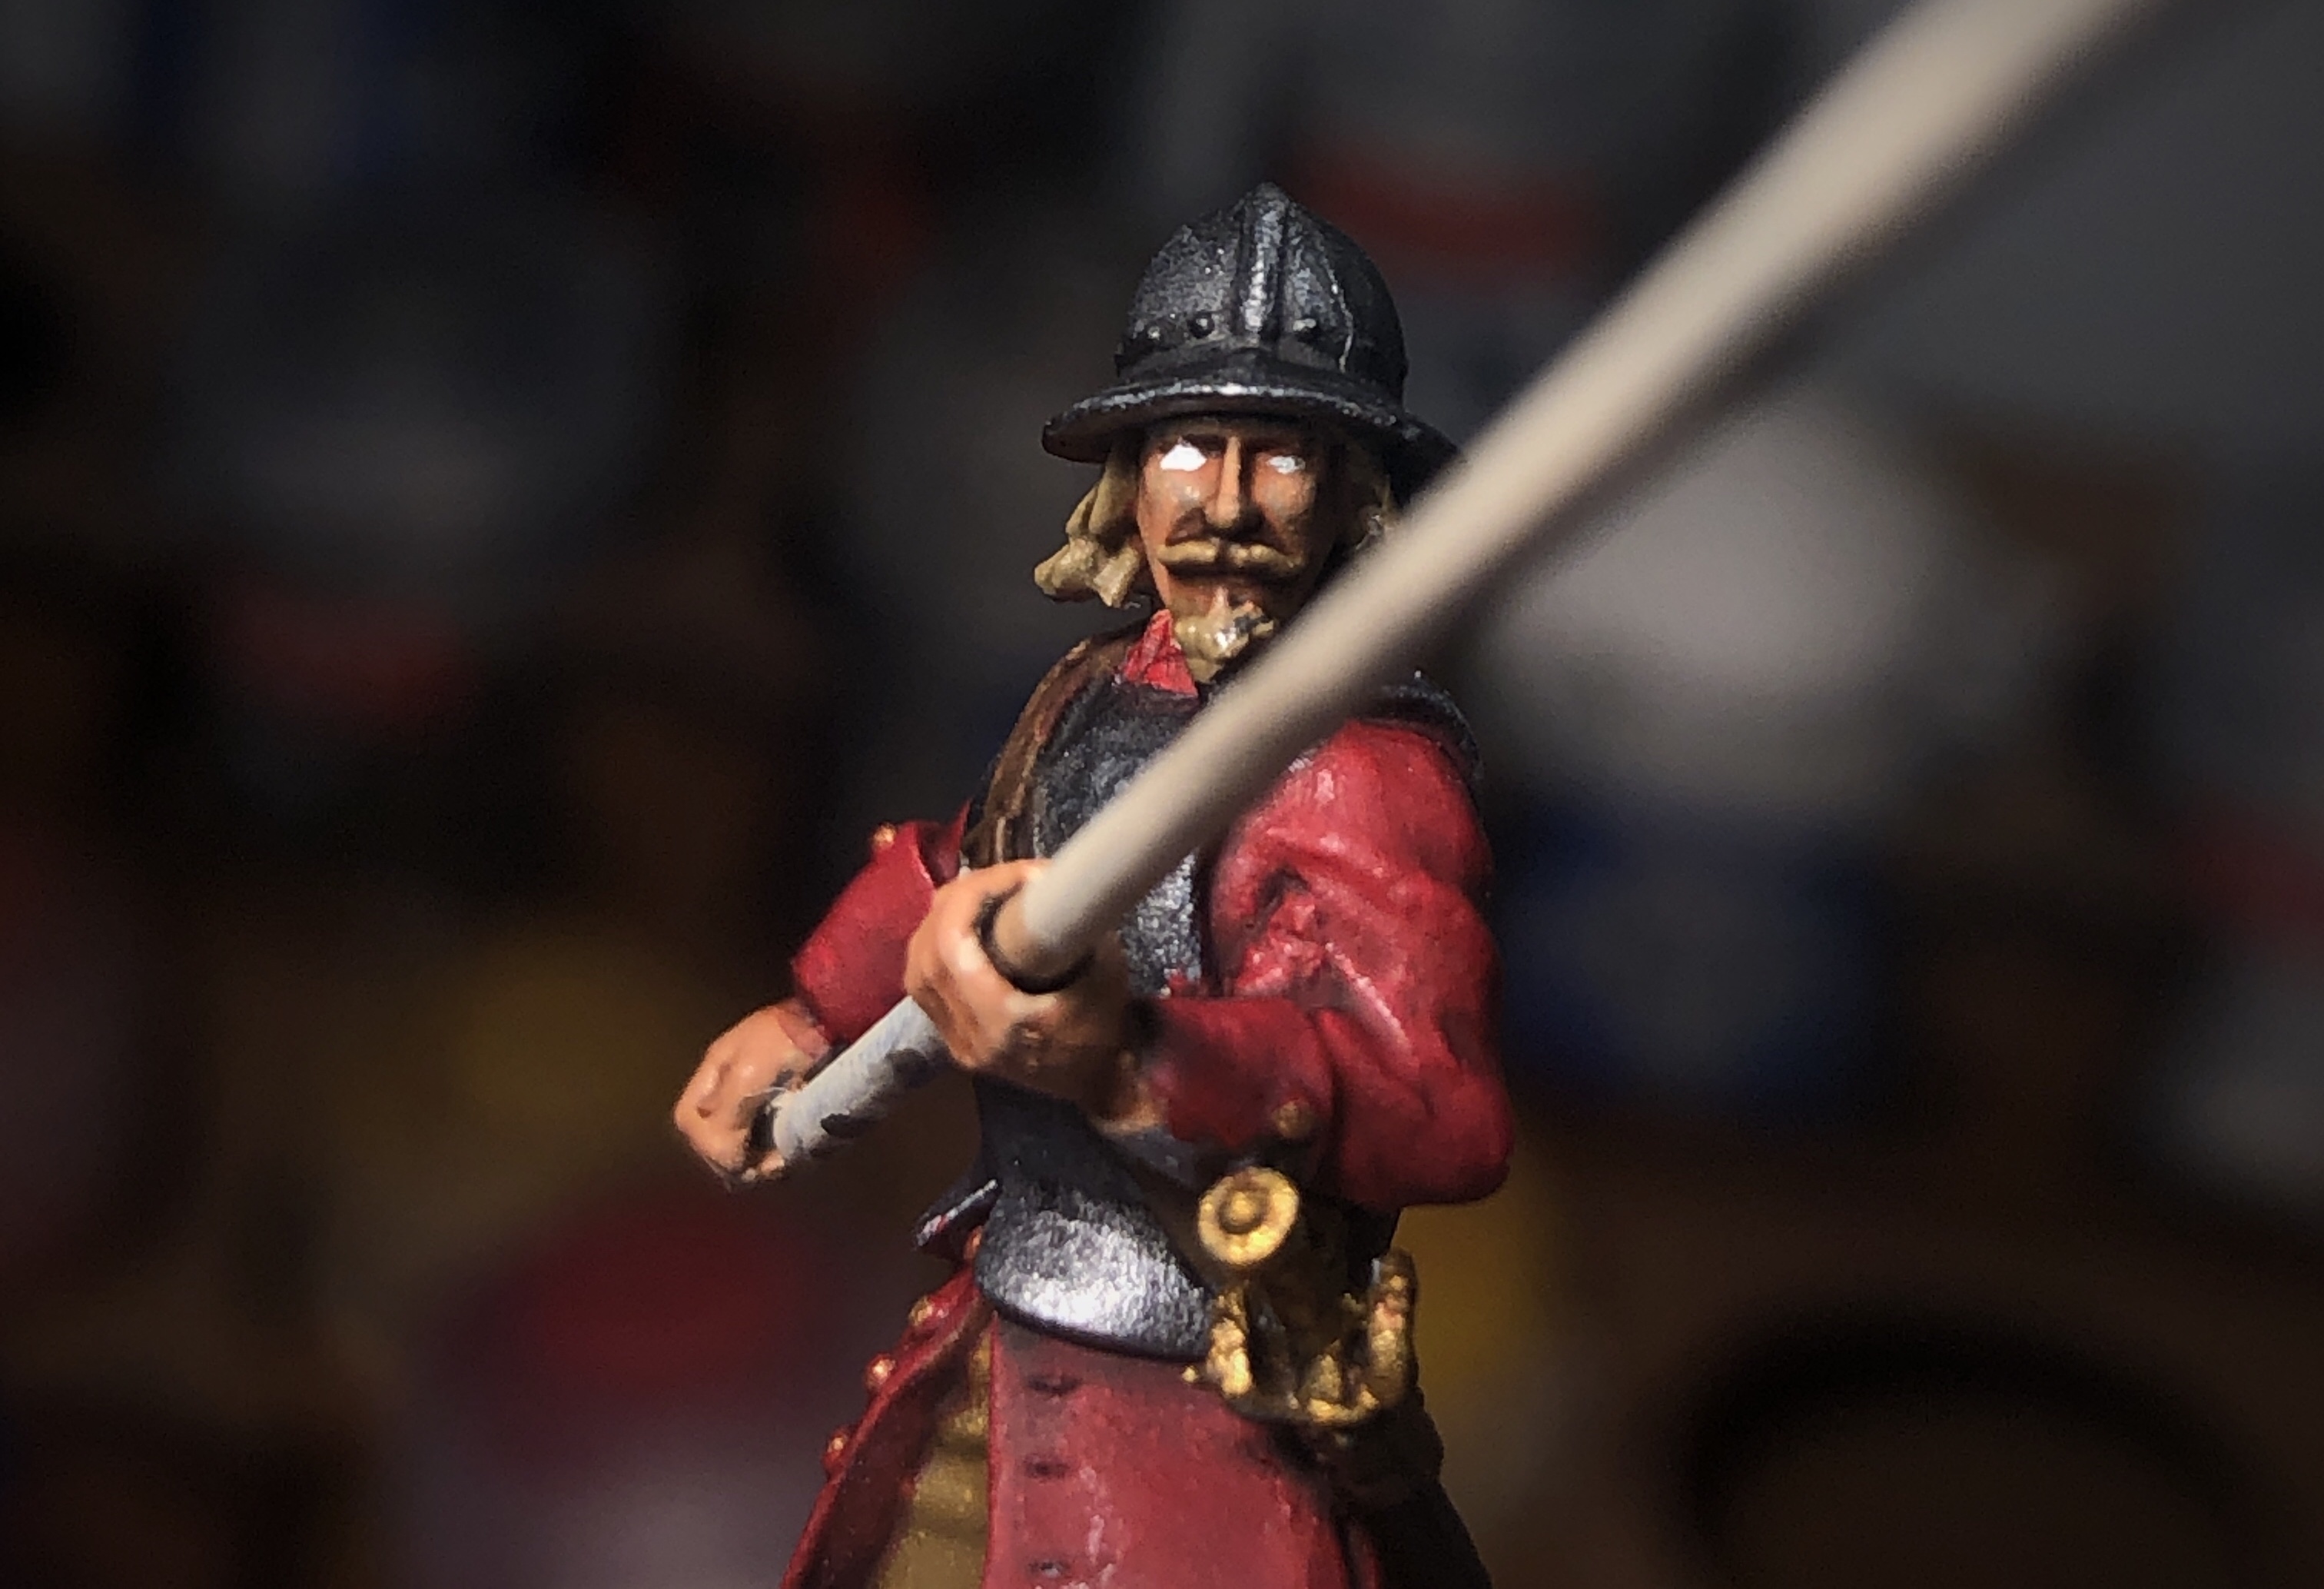
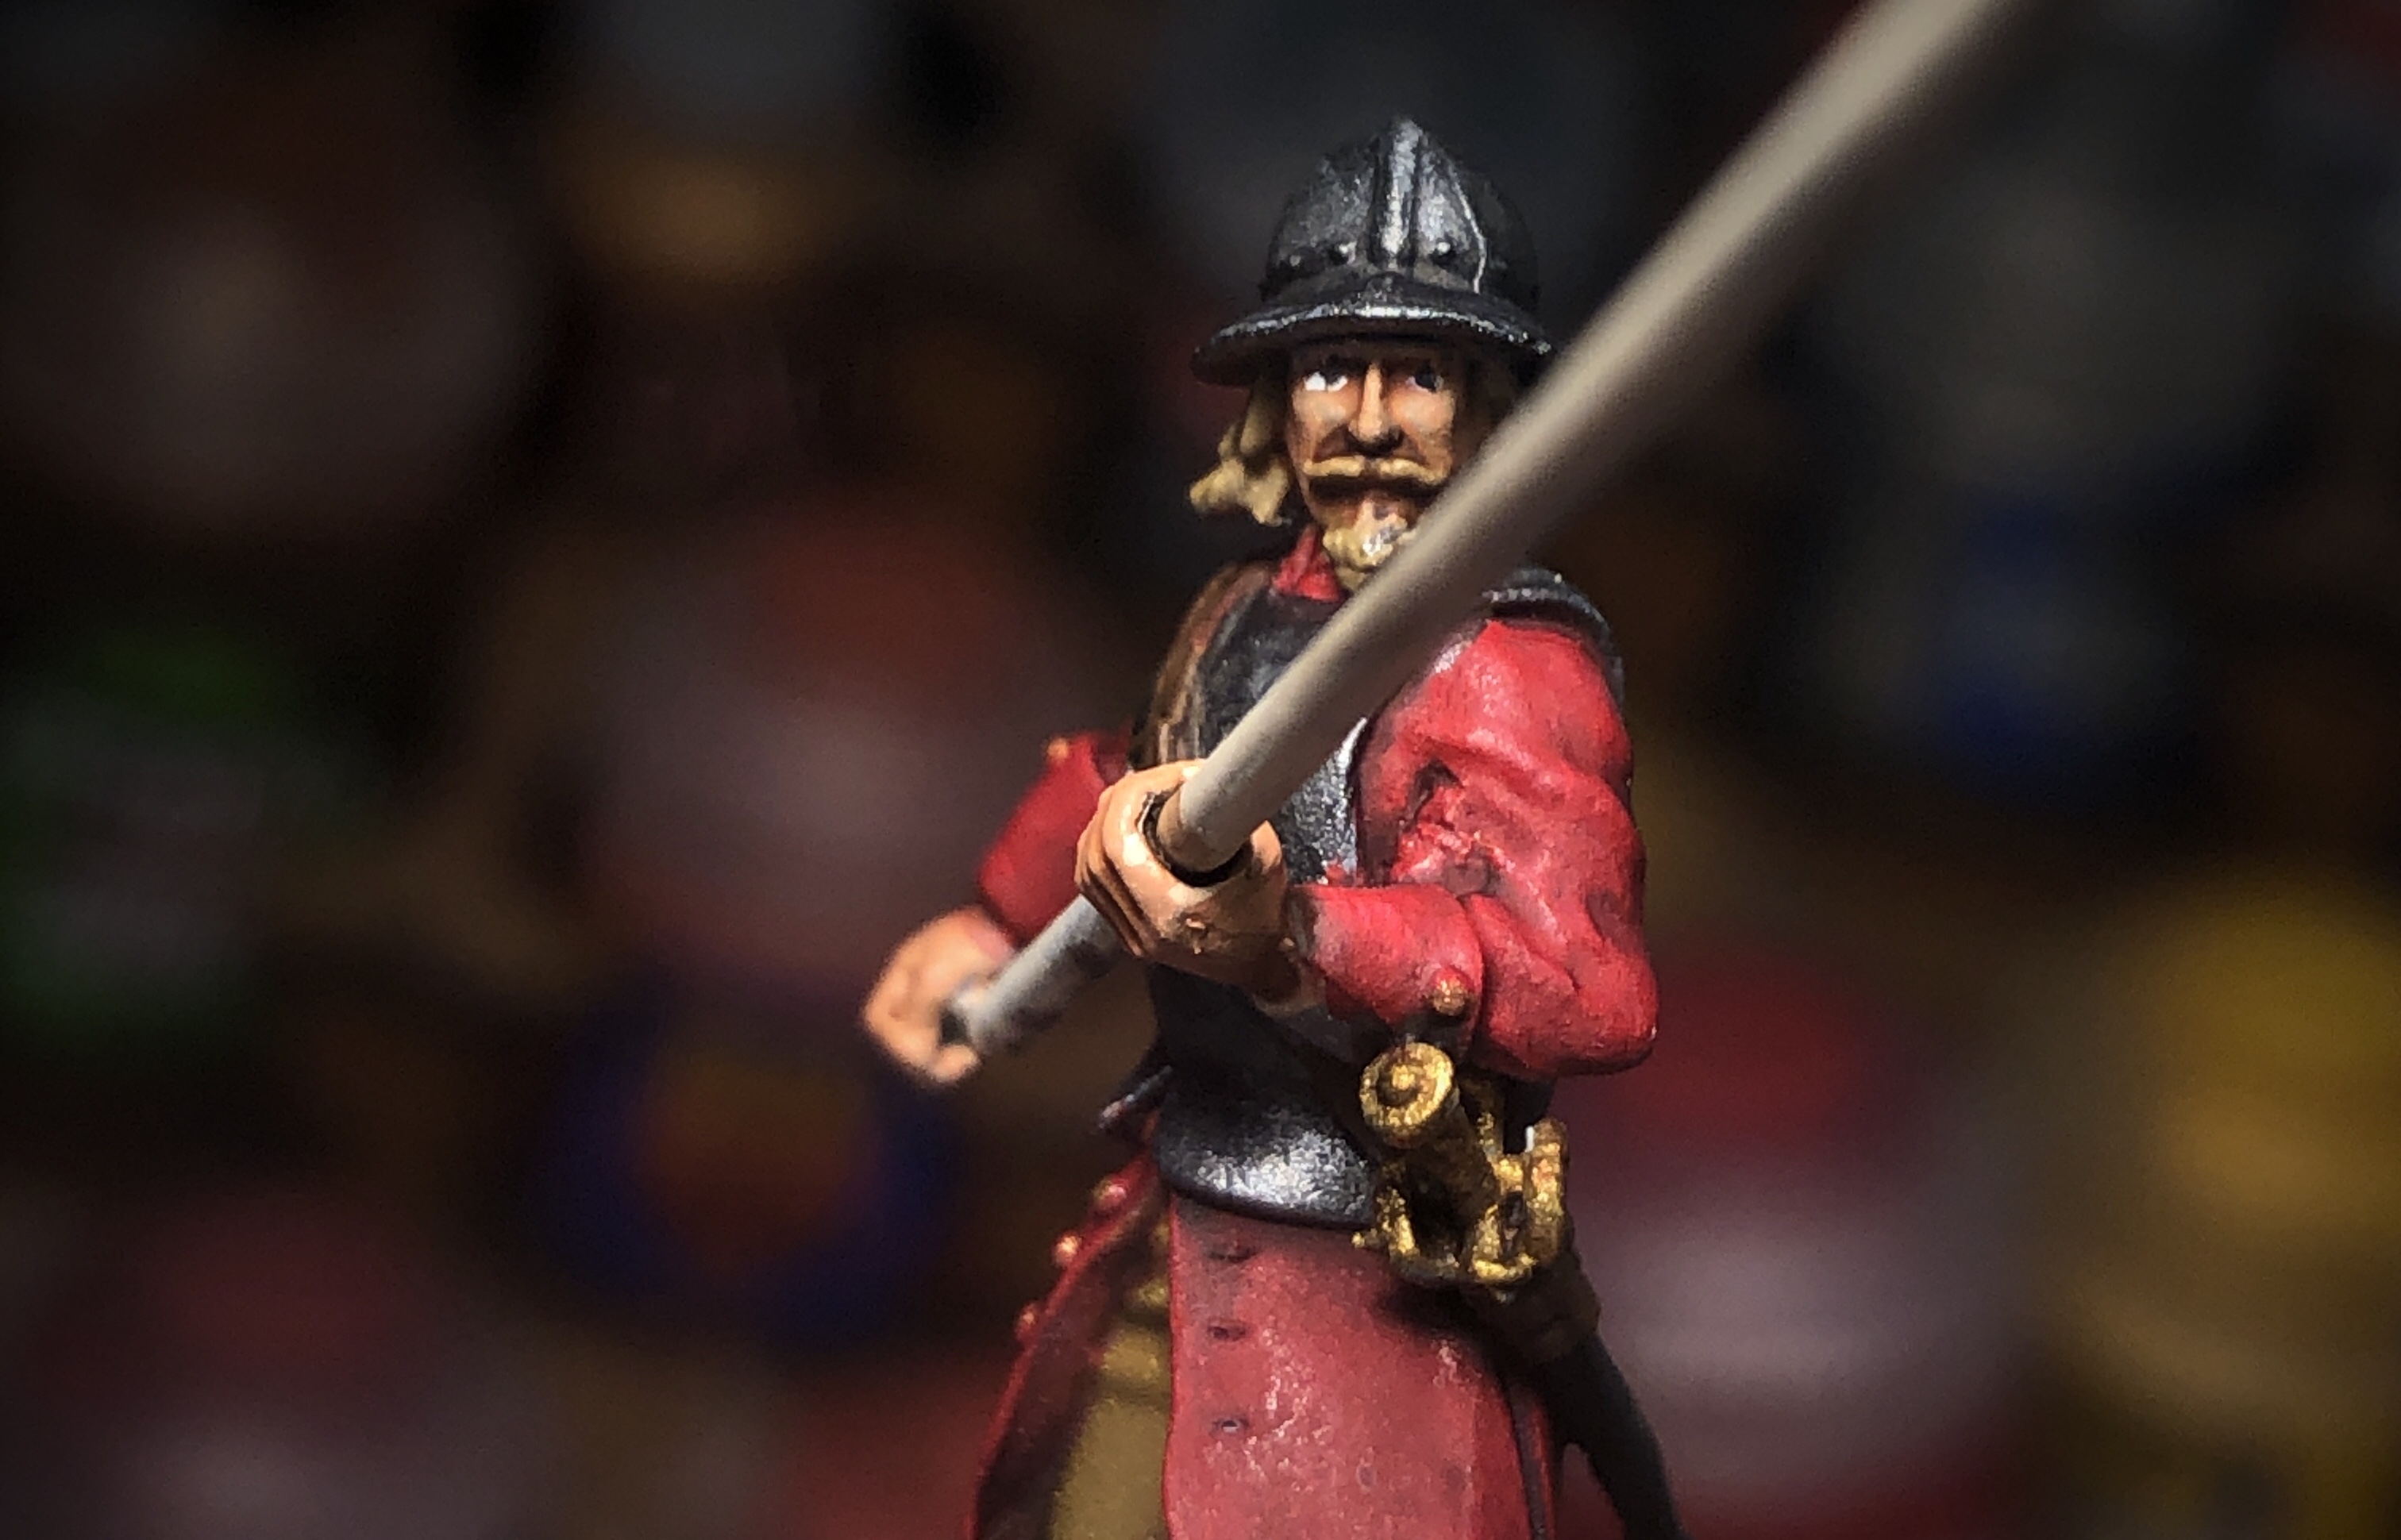
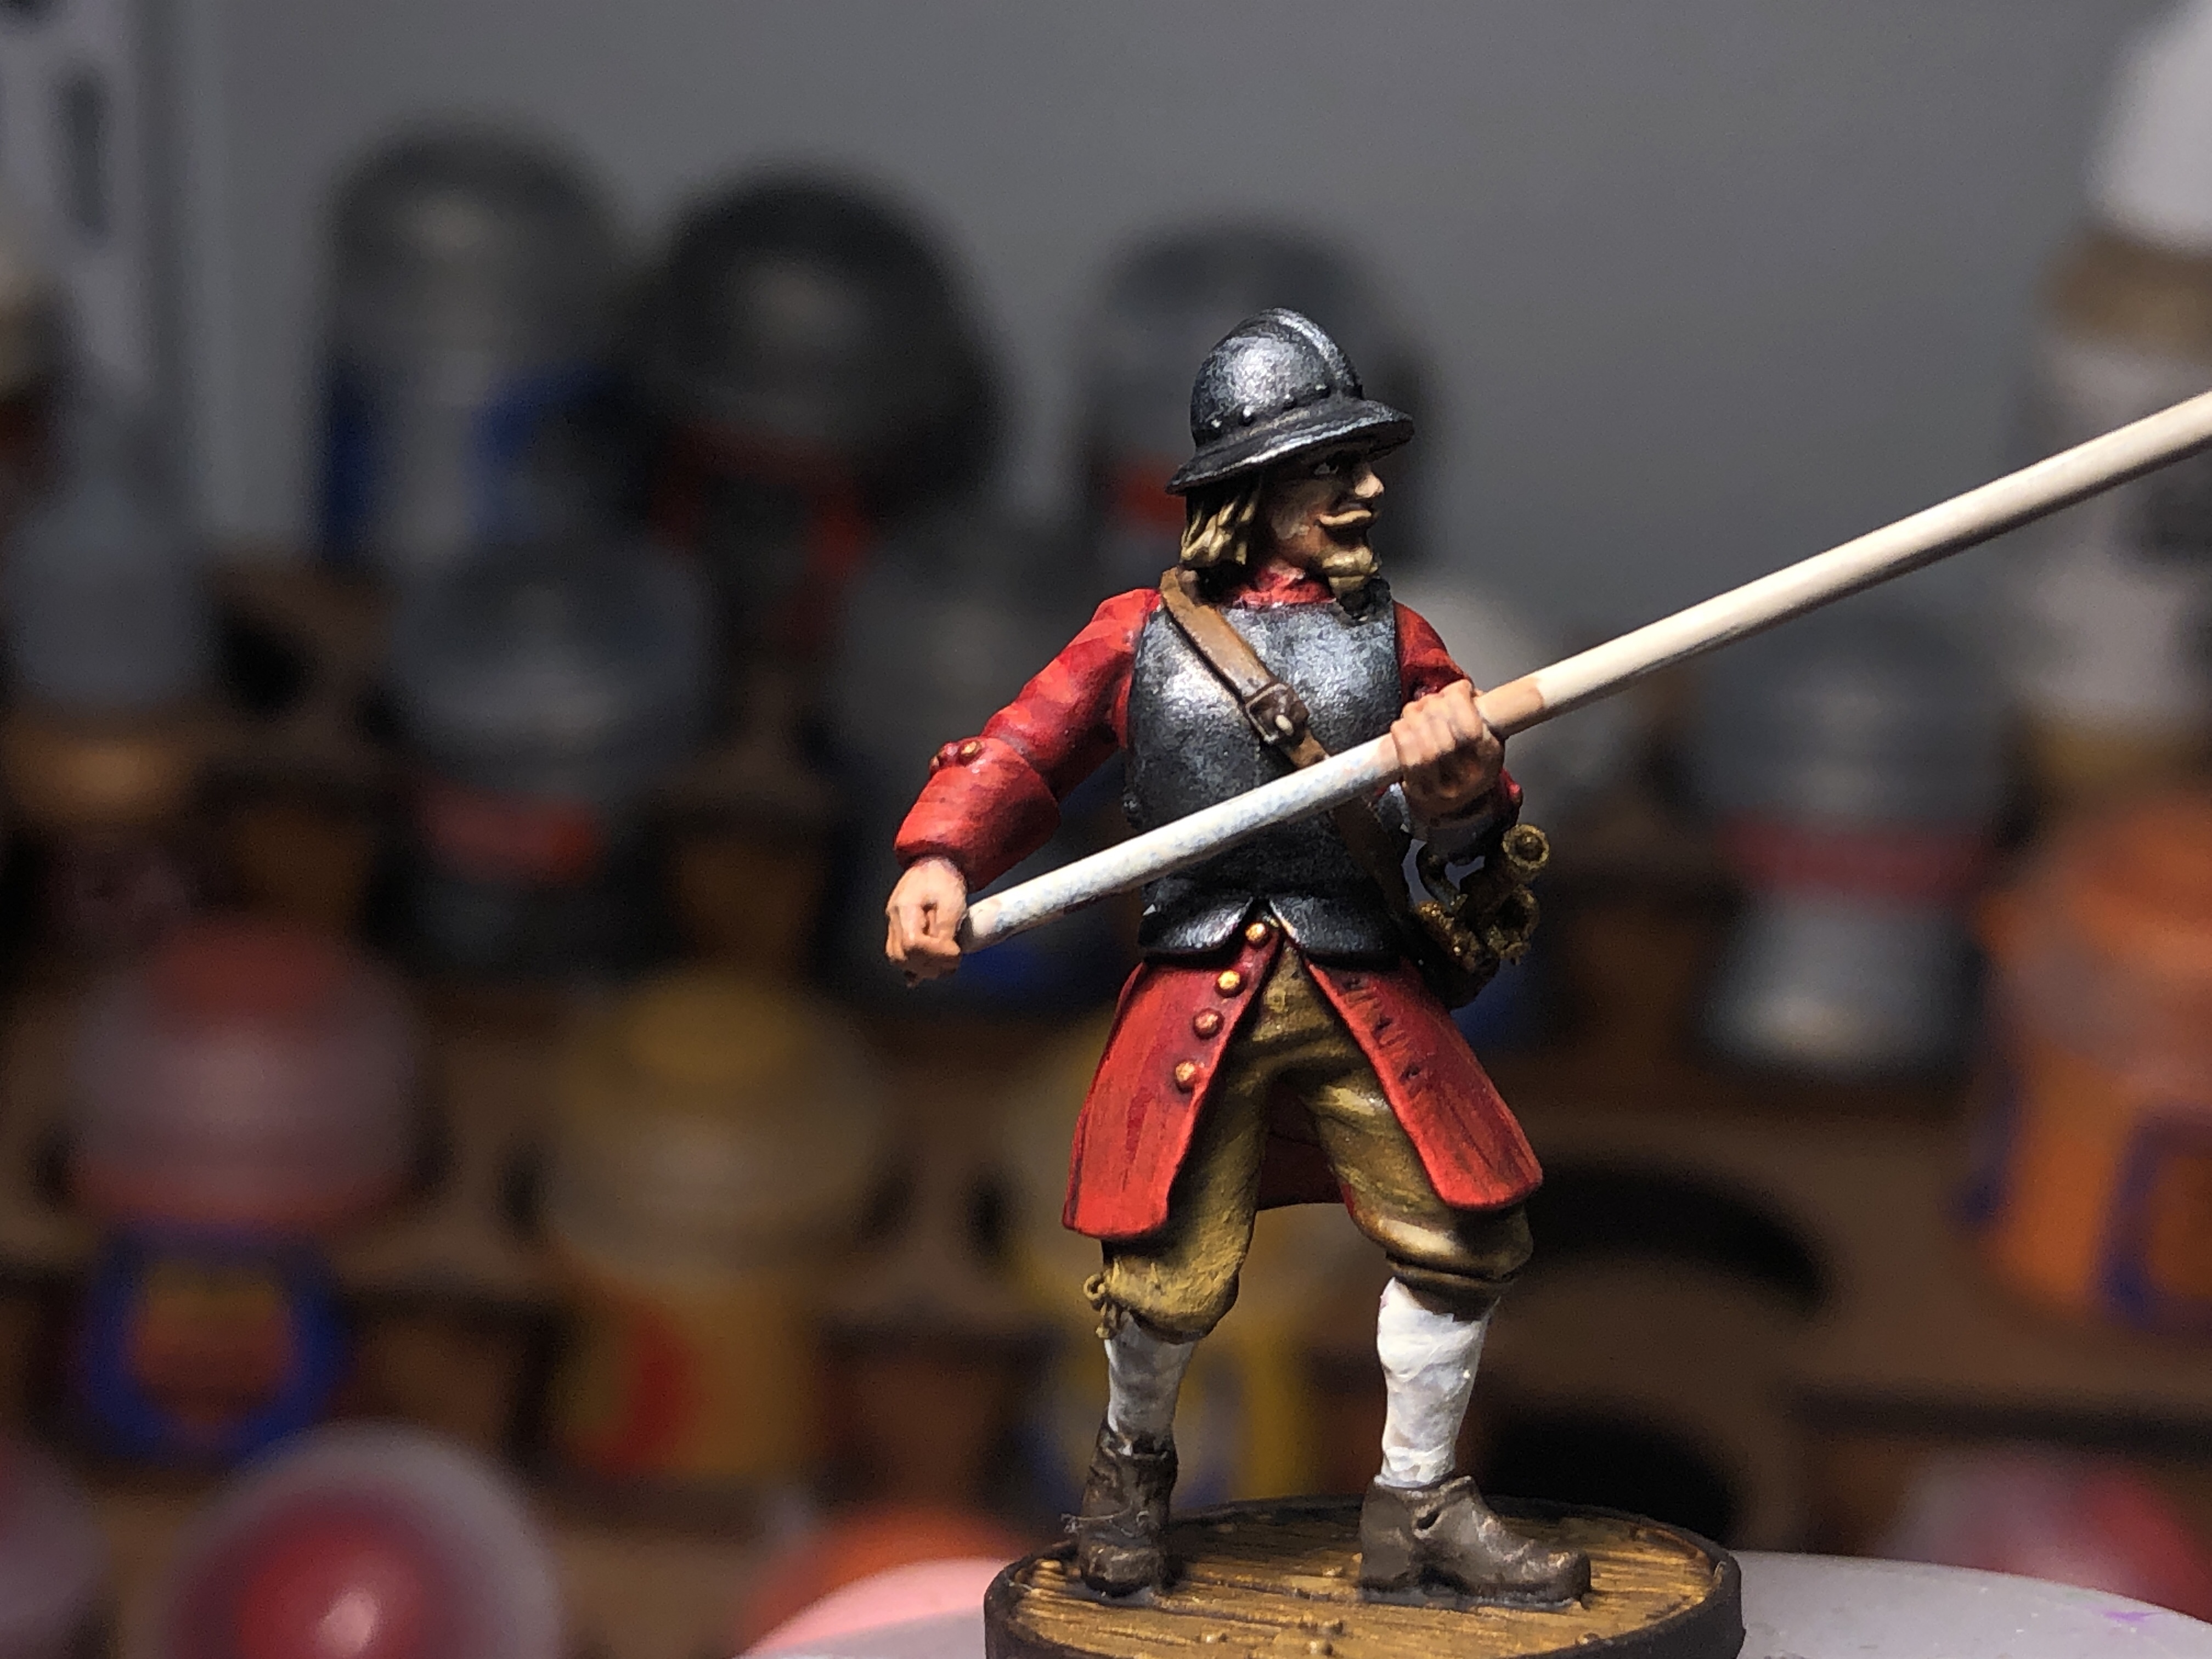
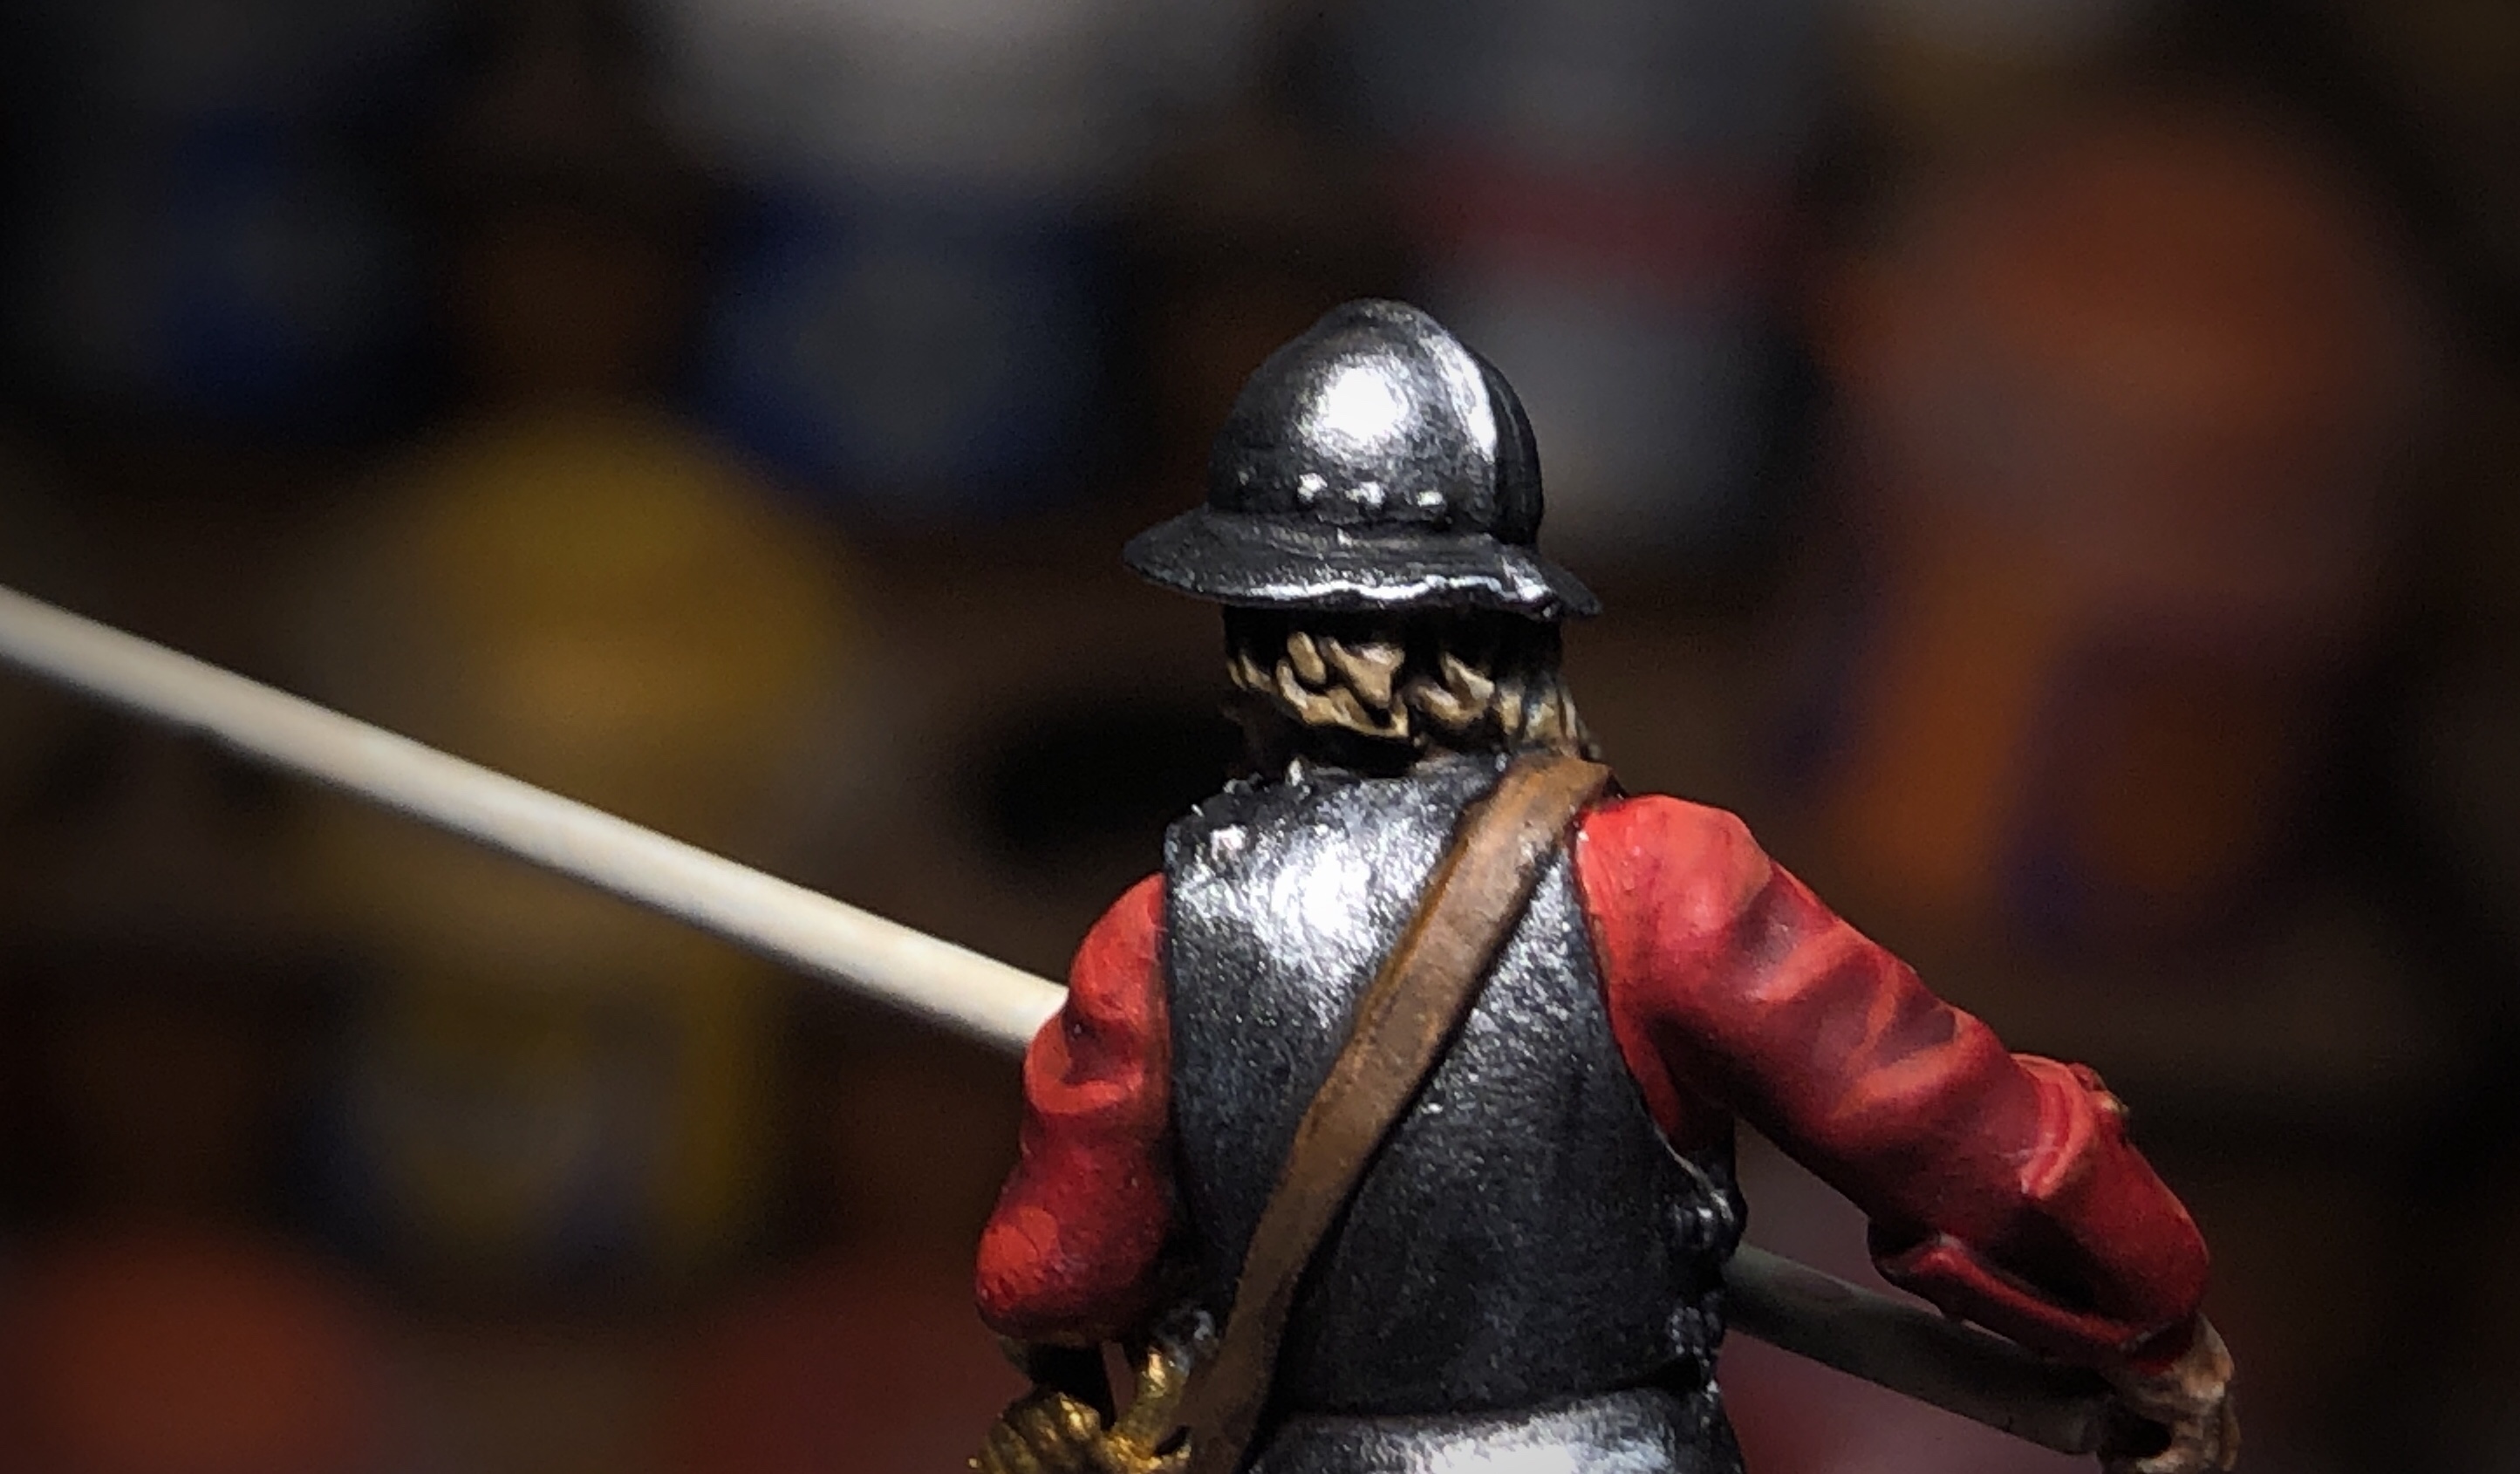
Here is the base paint list for the armored model:
- The base, skin, pike and stocking colors are the same as above.
- Sword Belt and Shoes – Leather Belt
- Helmet and armor – Steel
- Coat – Mephiston Red
- Hair/Beard – Zandri Dust
- Sword Hilt and Buttons – Brass


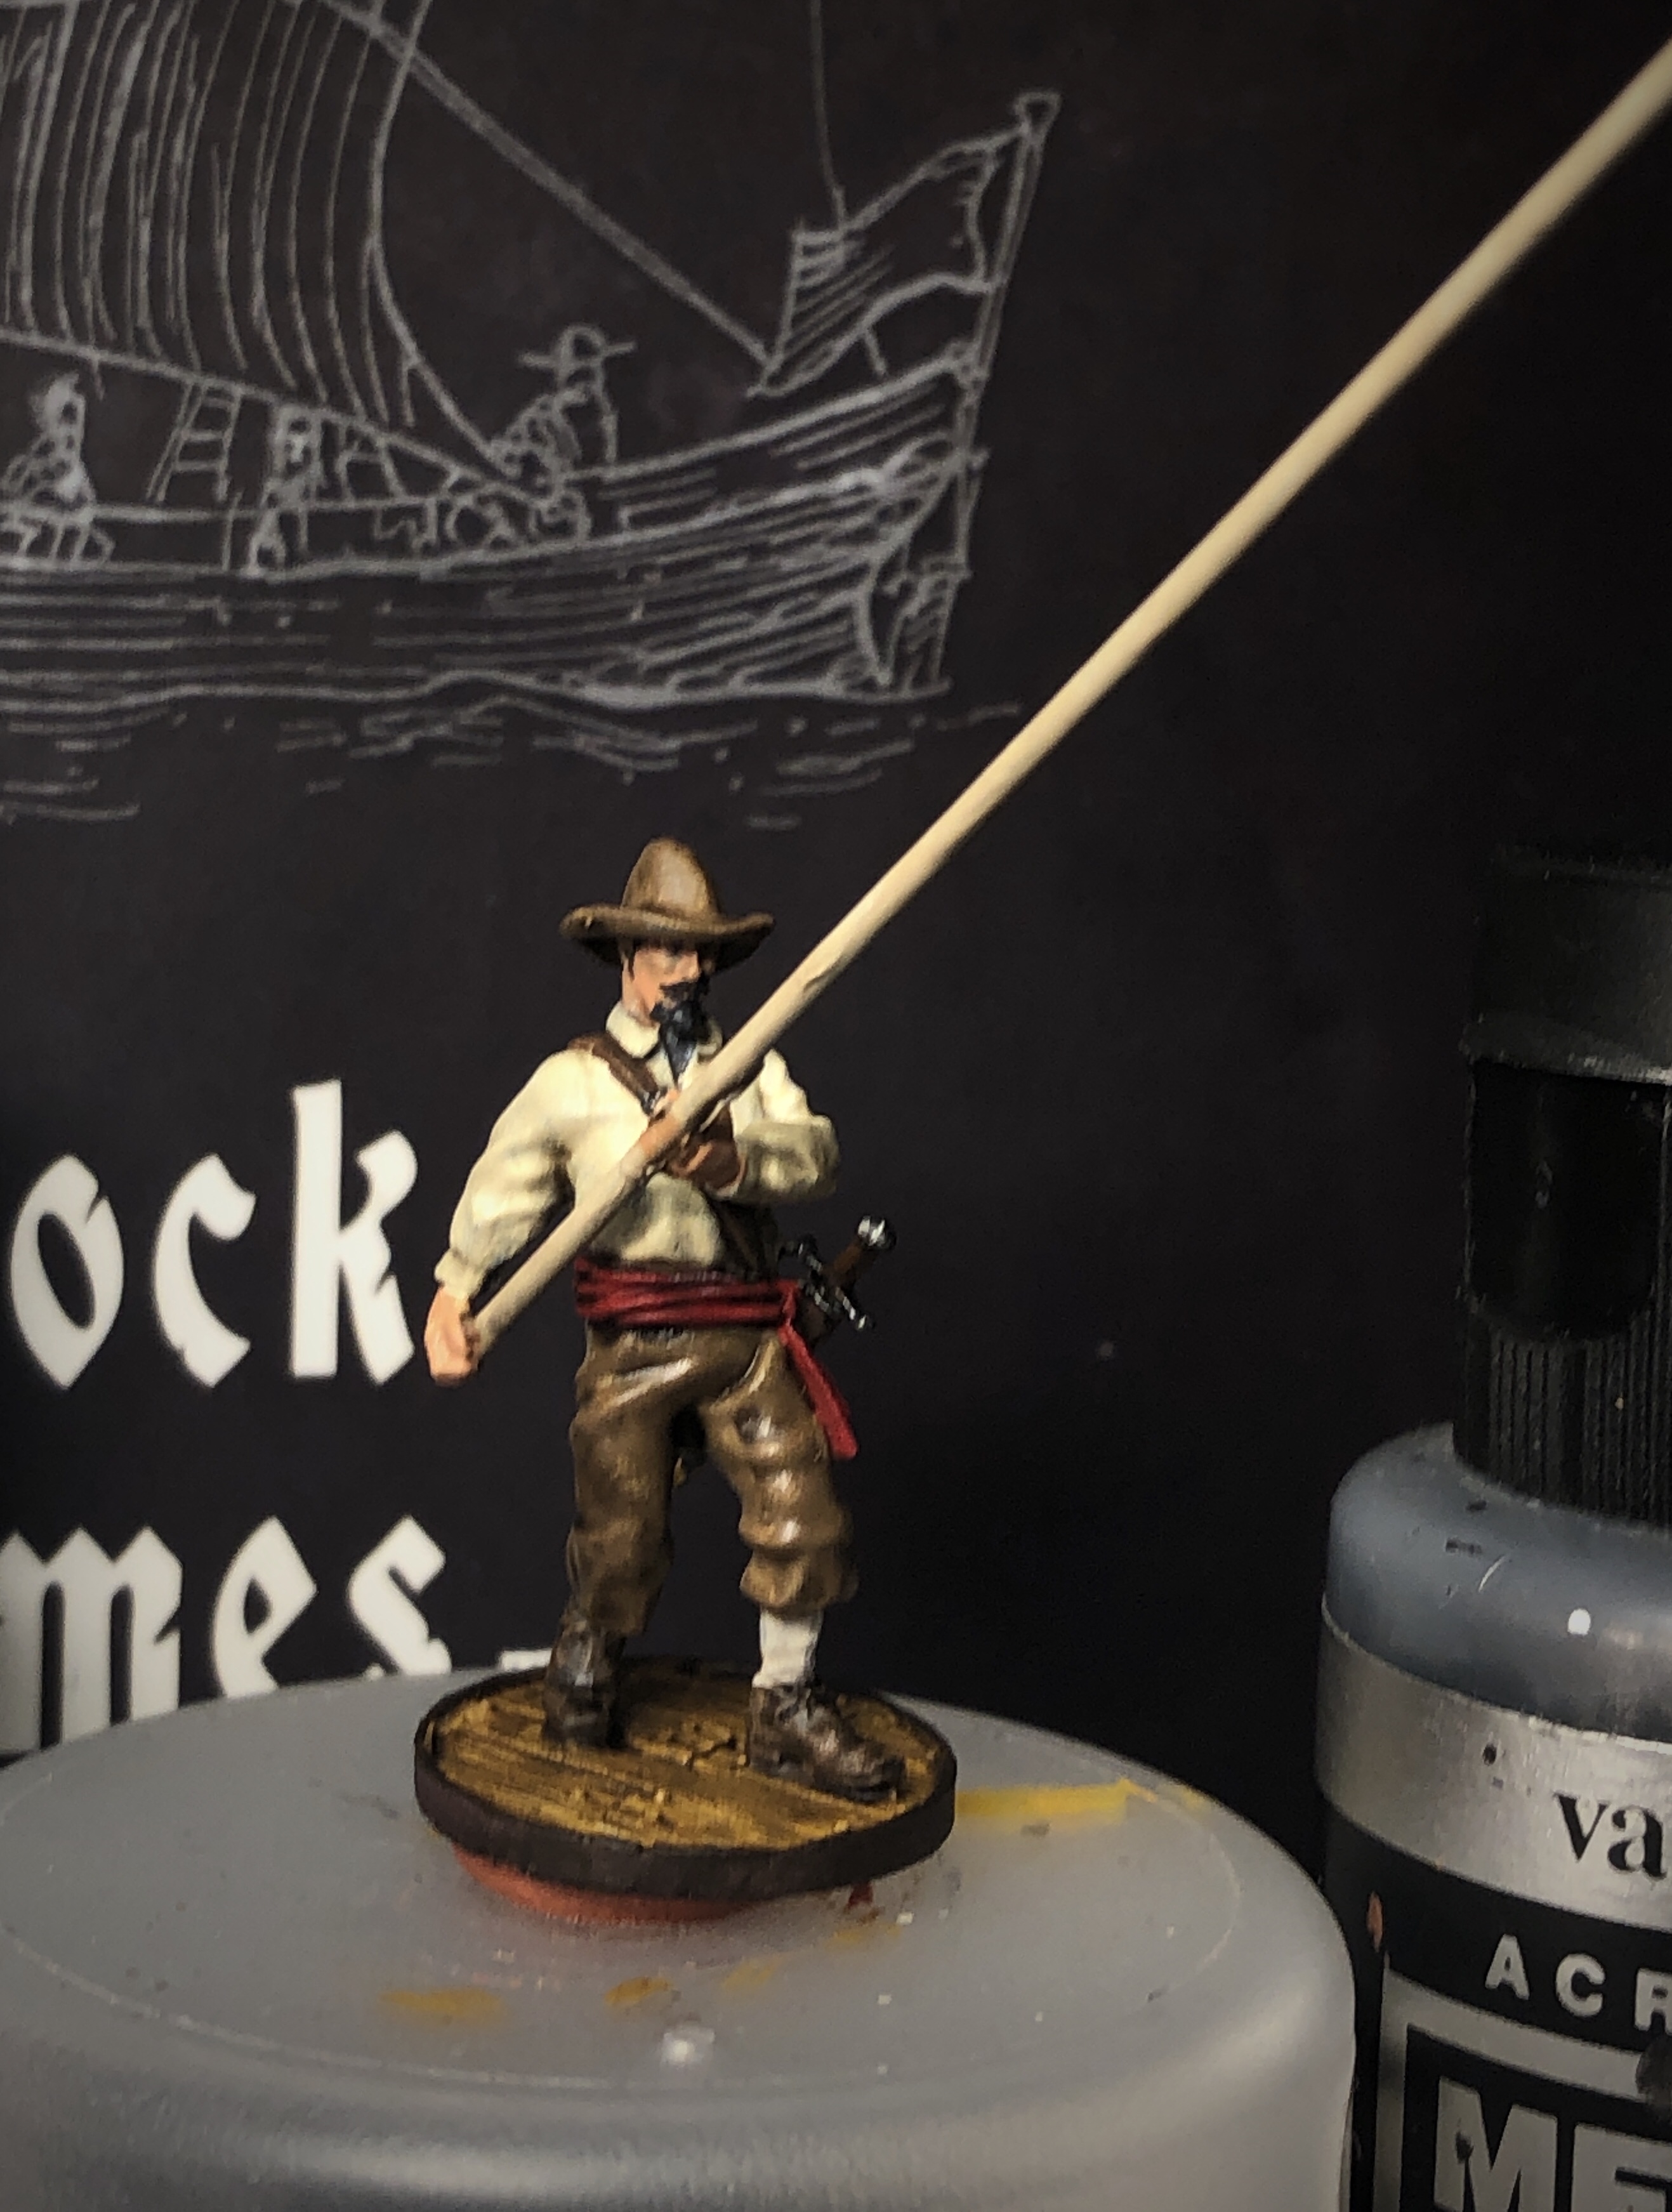
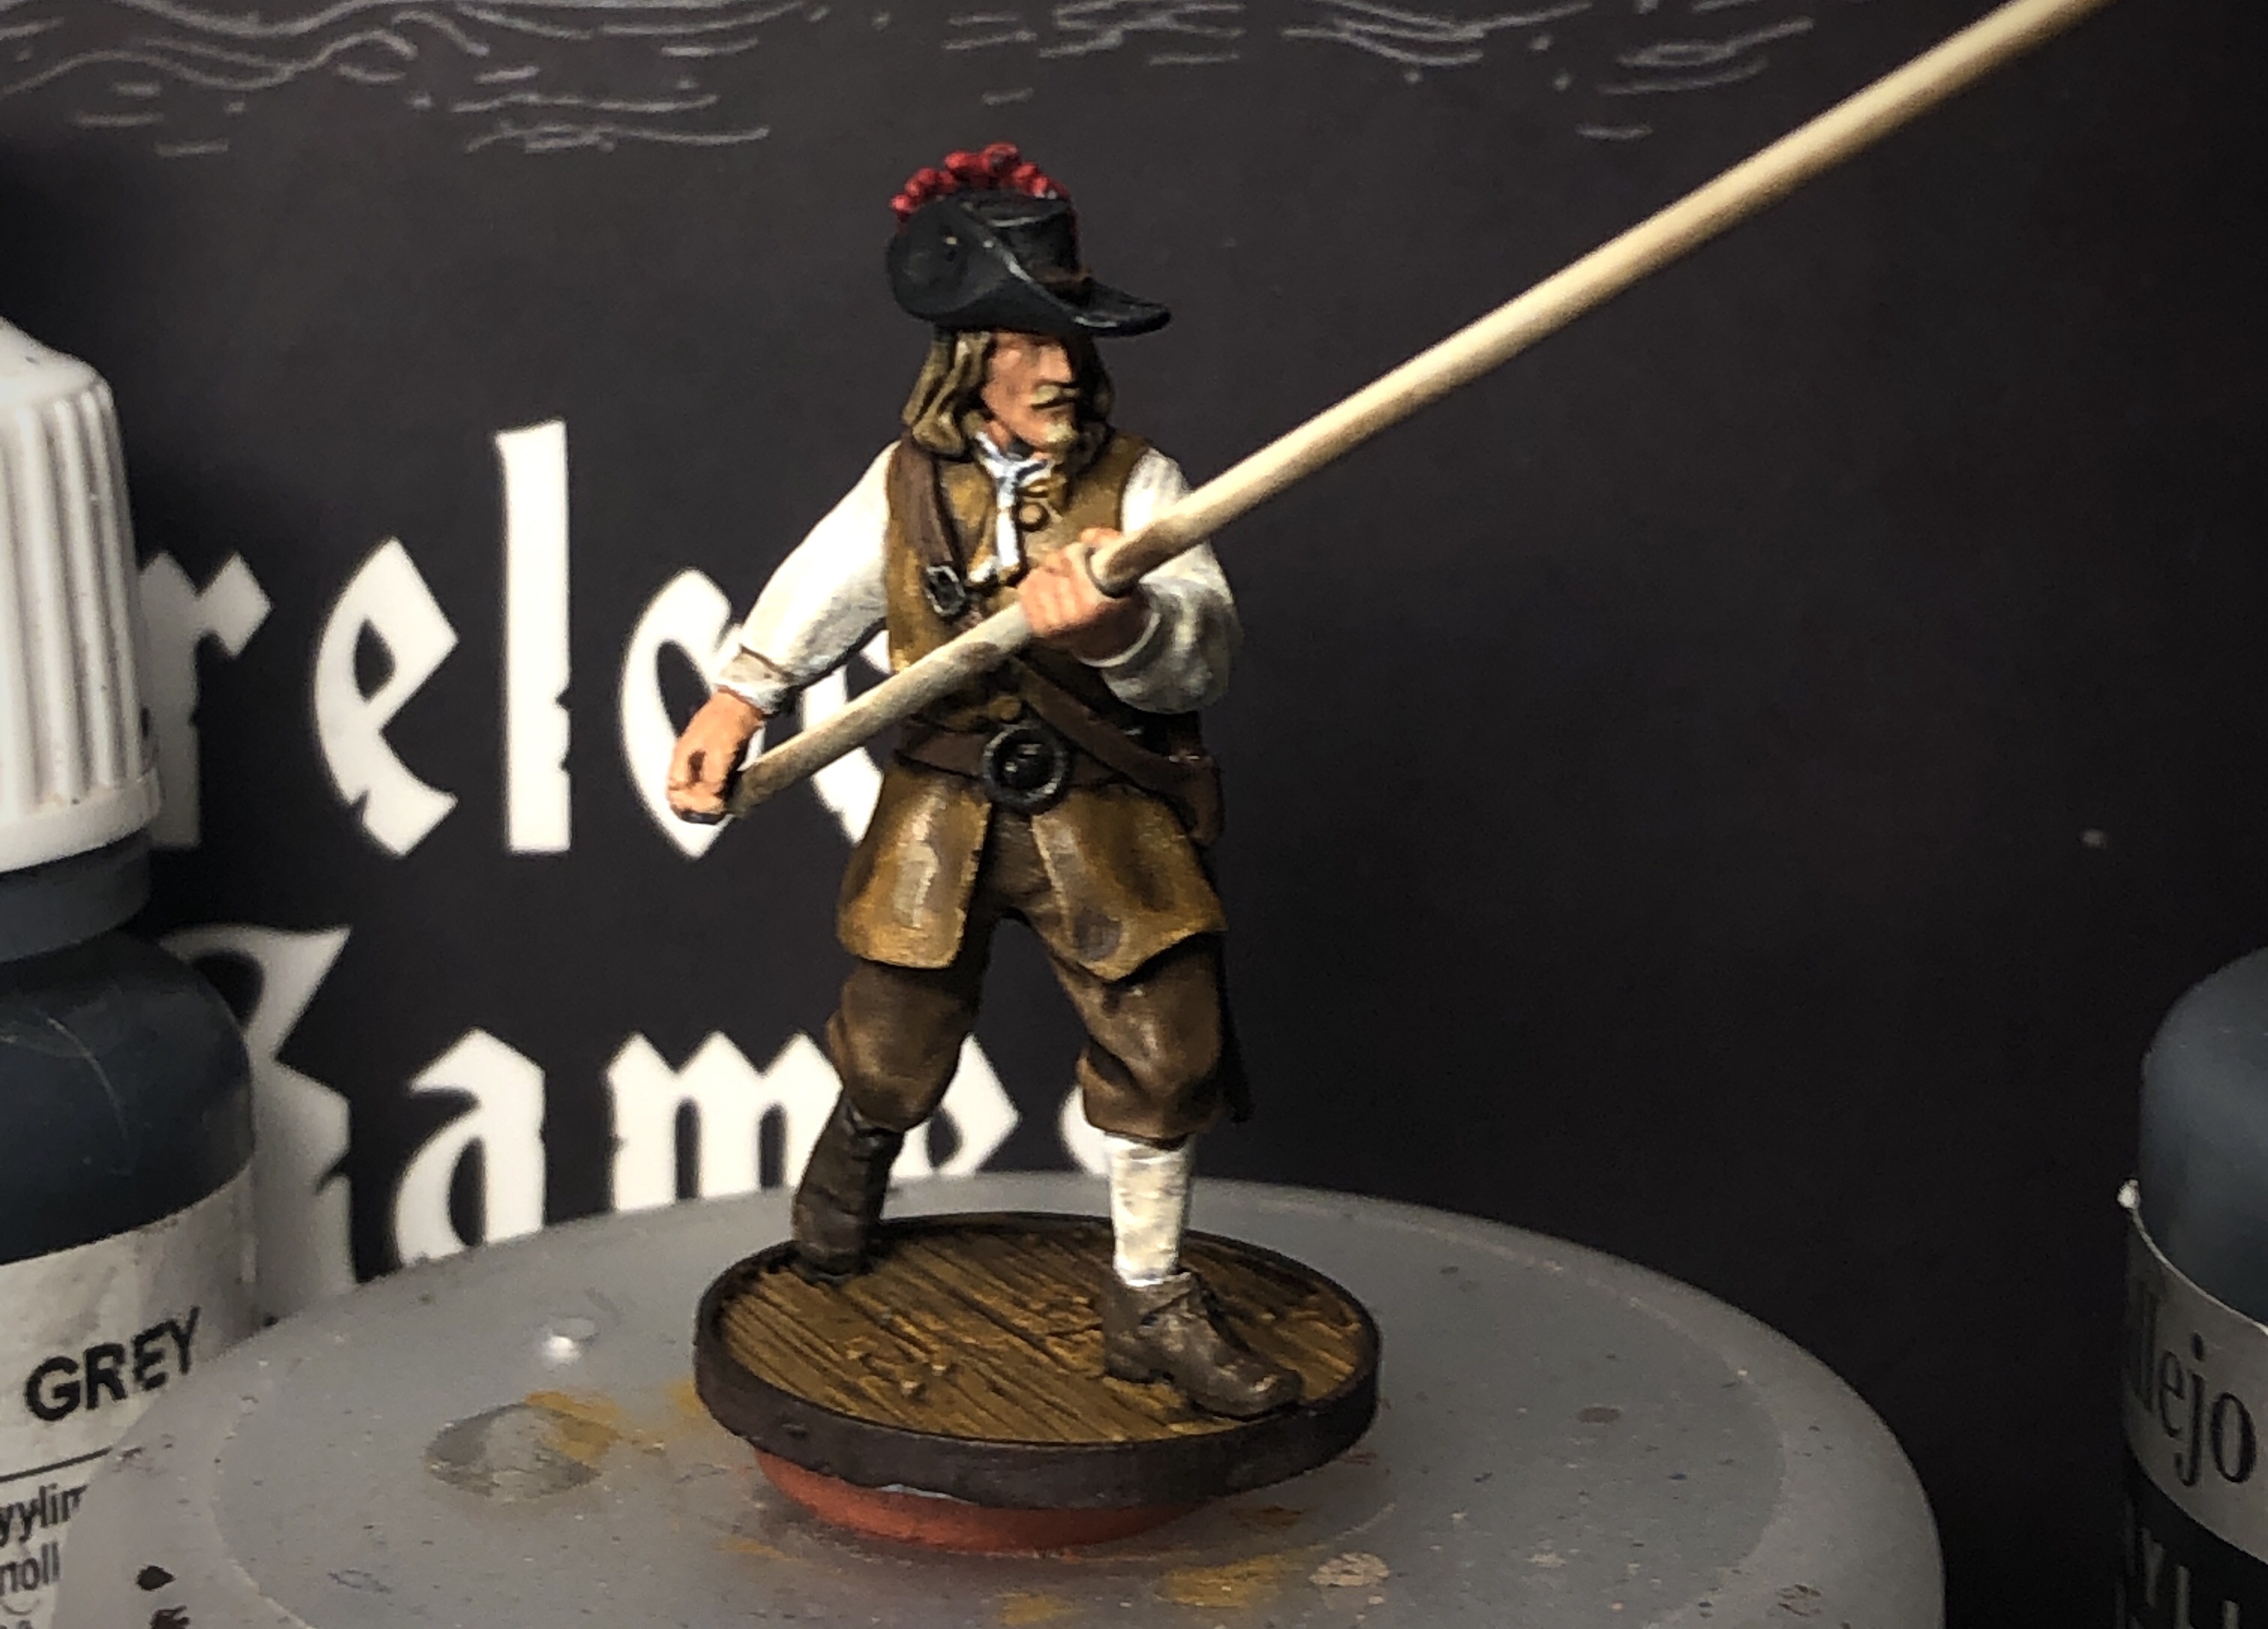
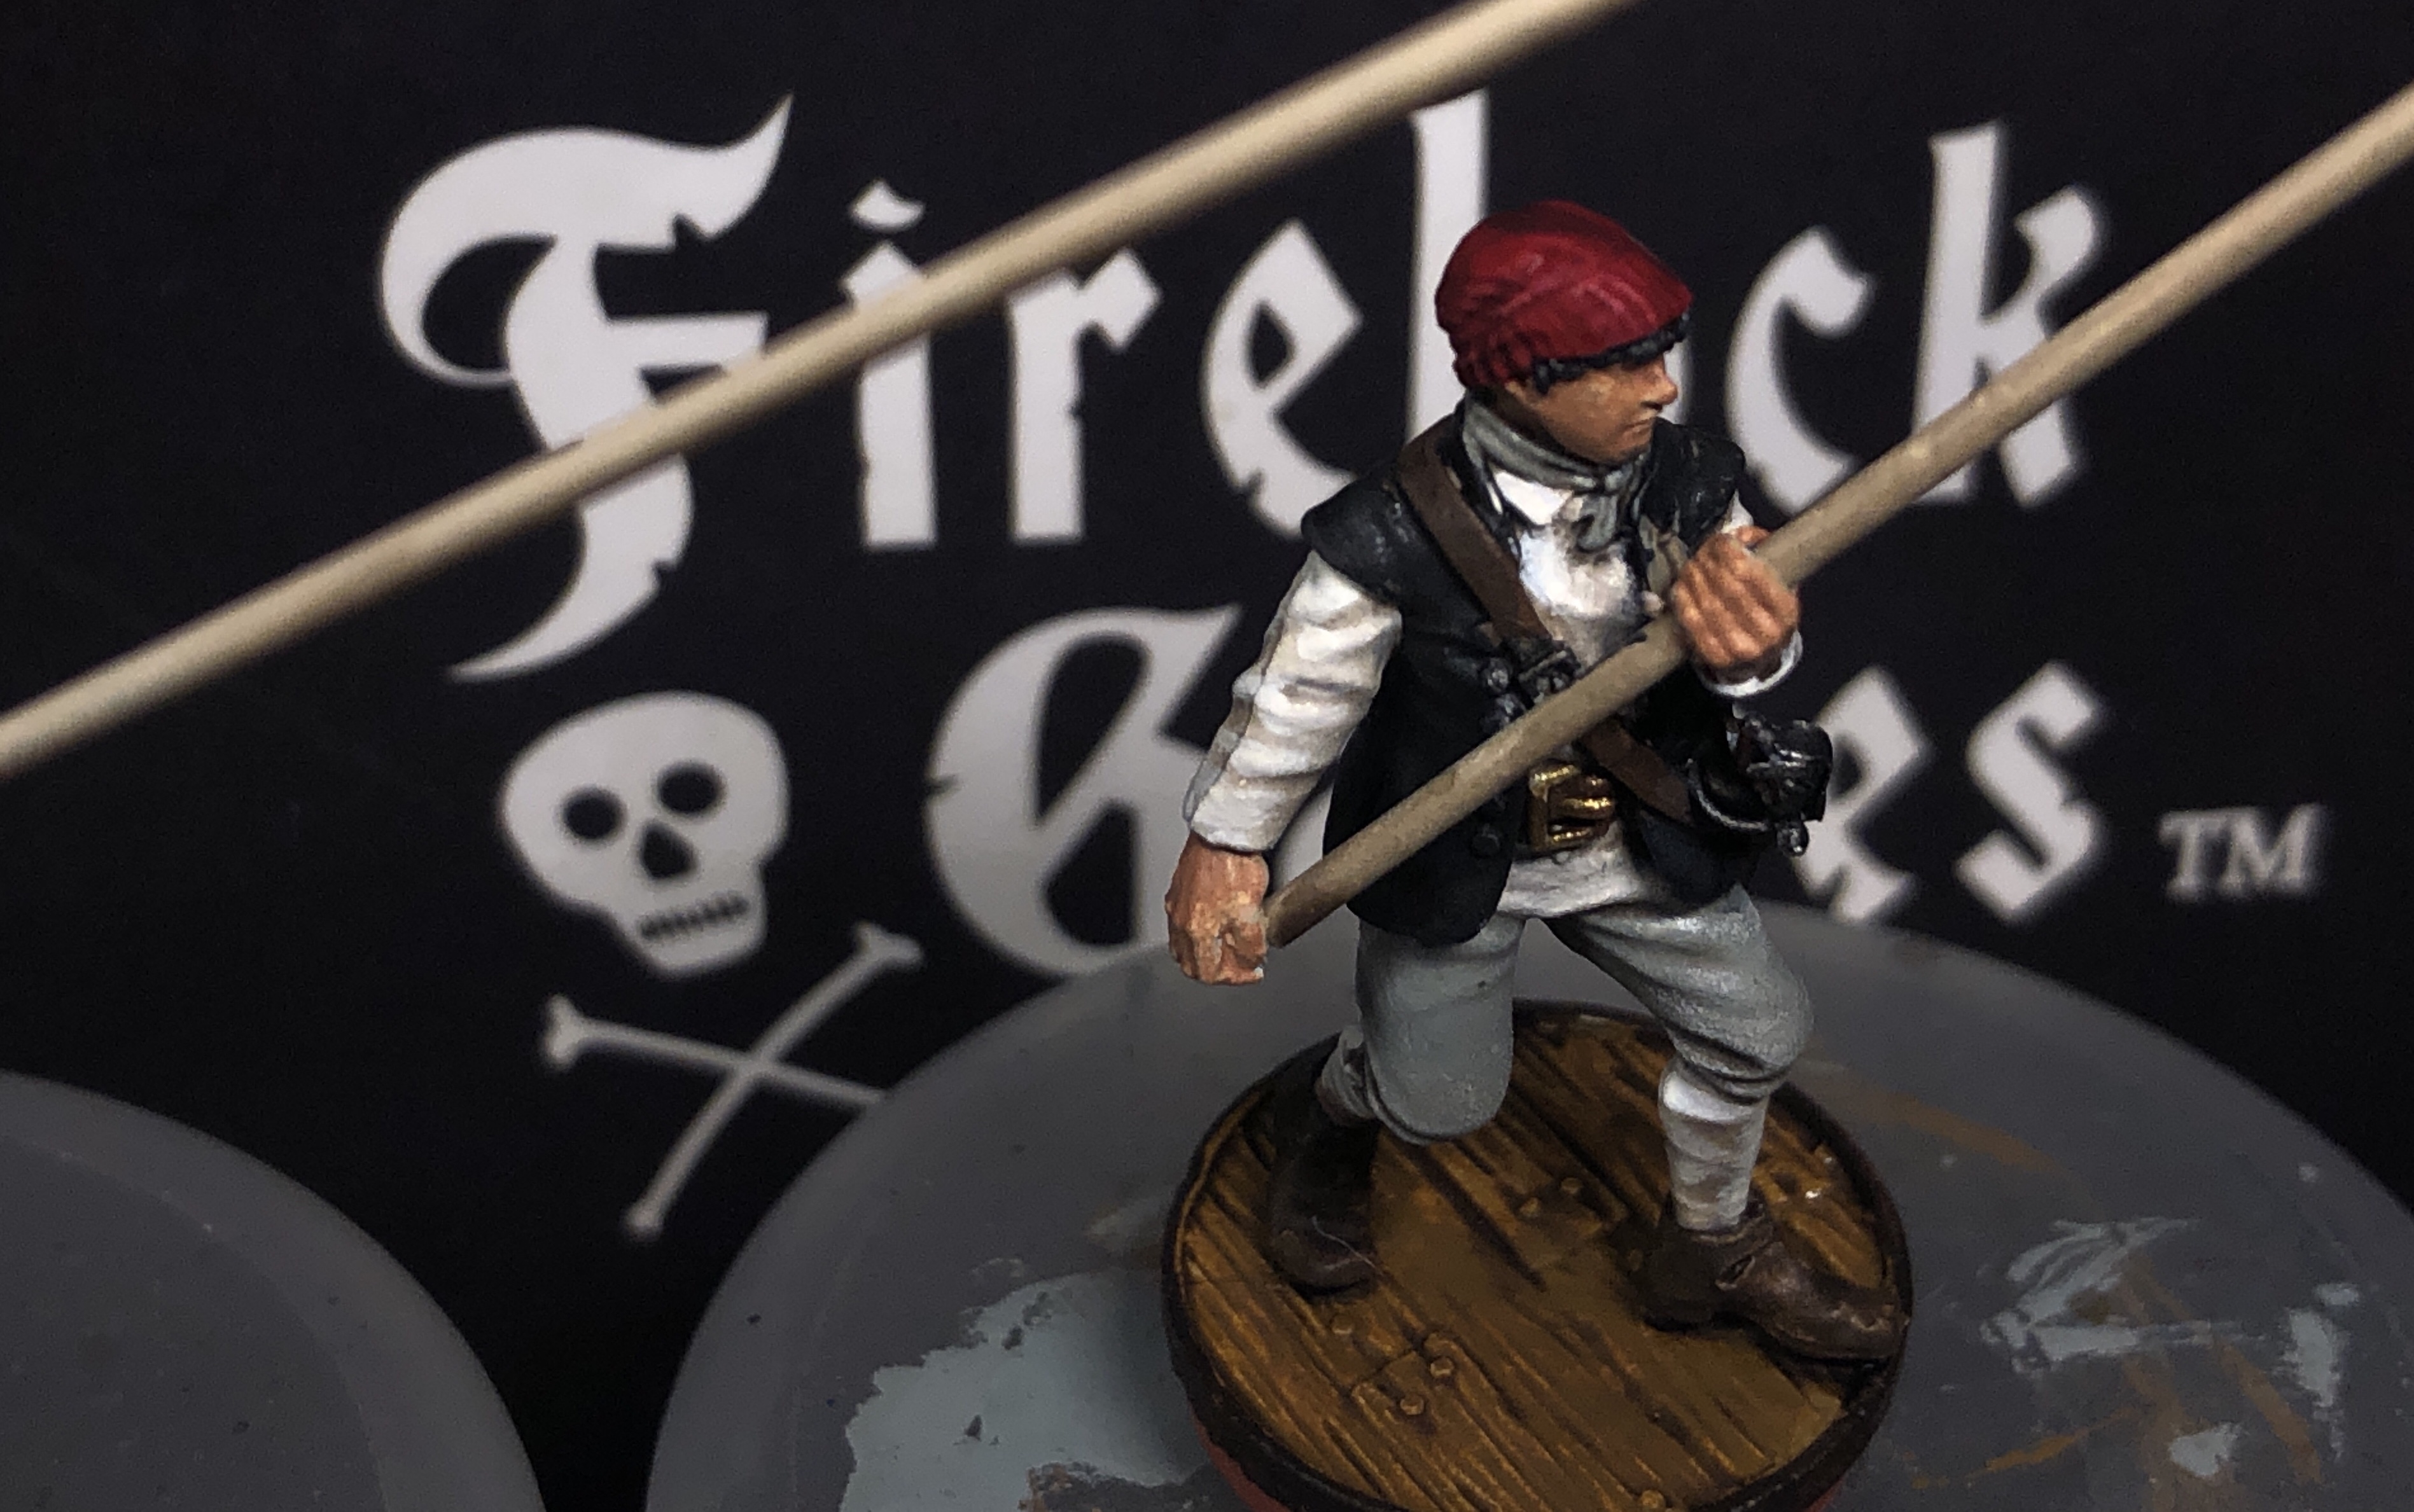
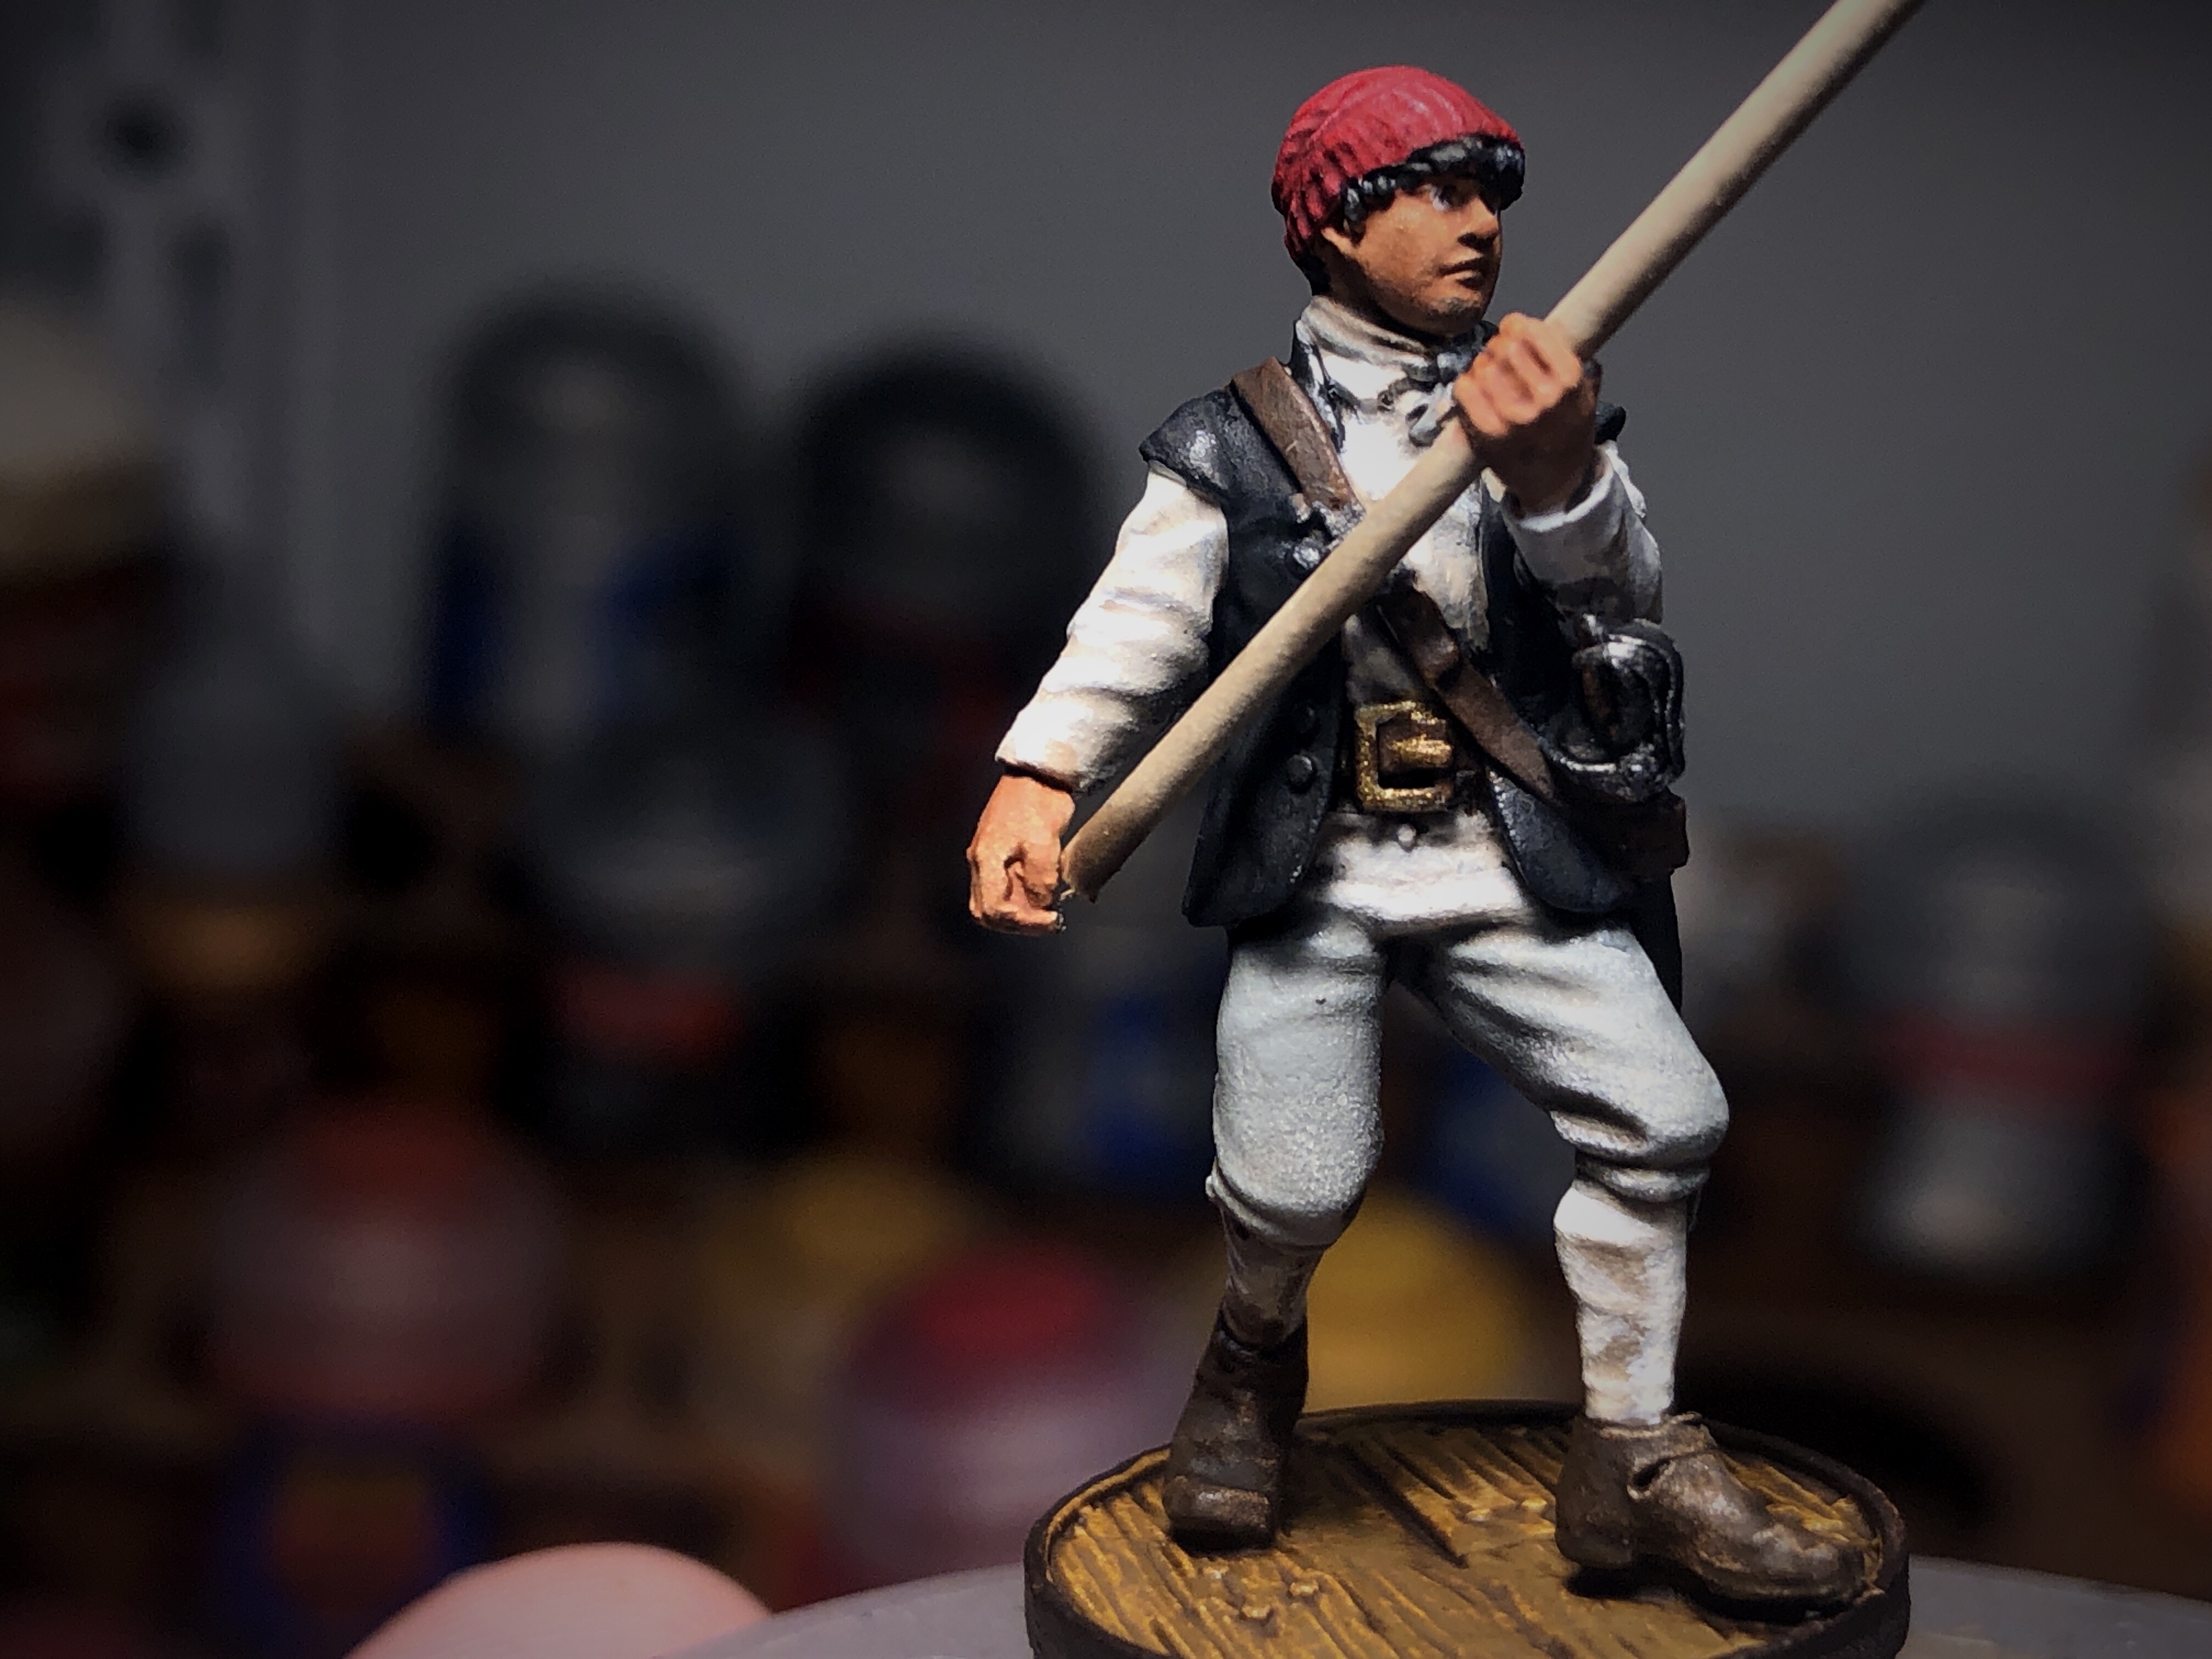
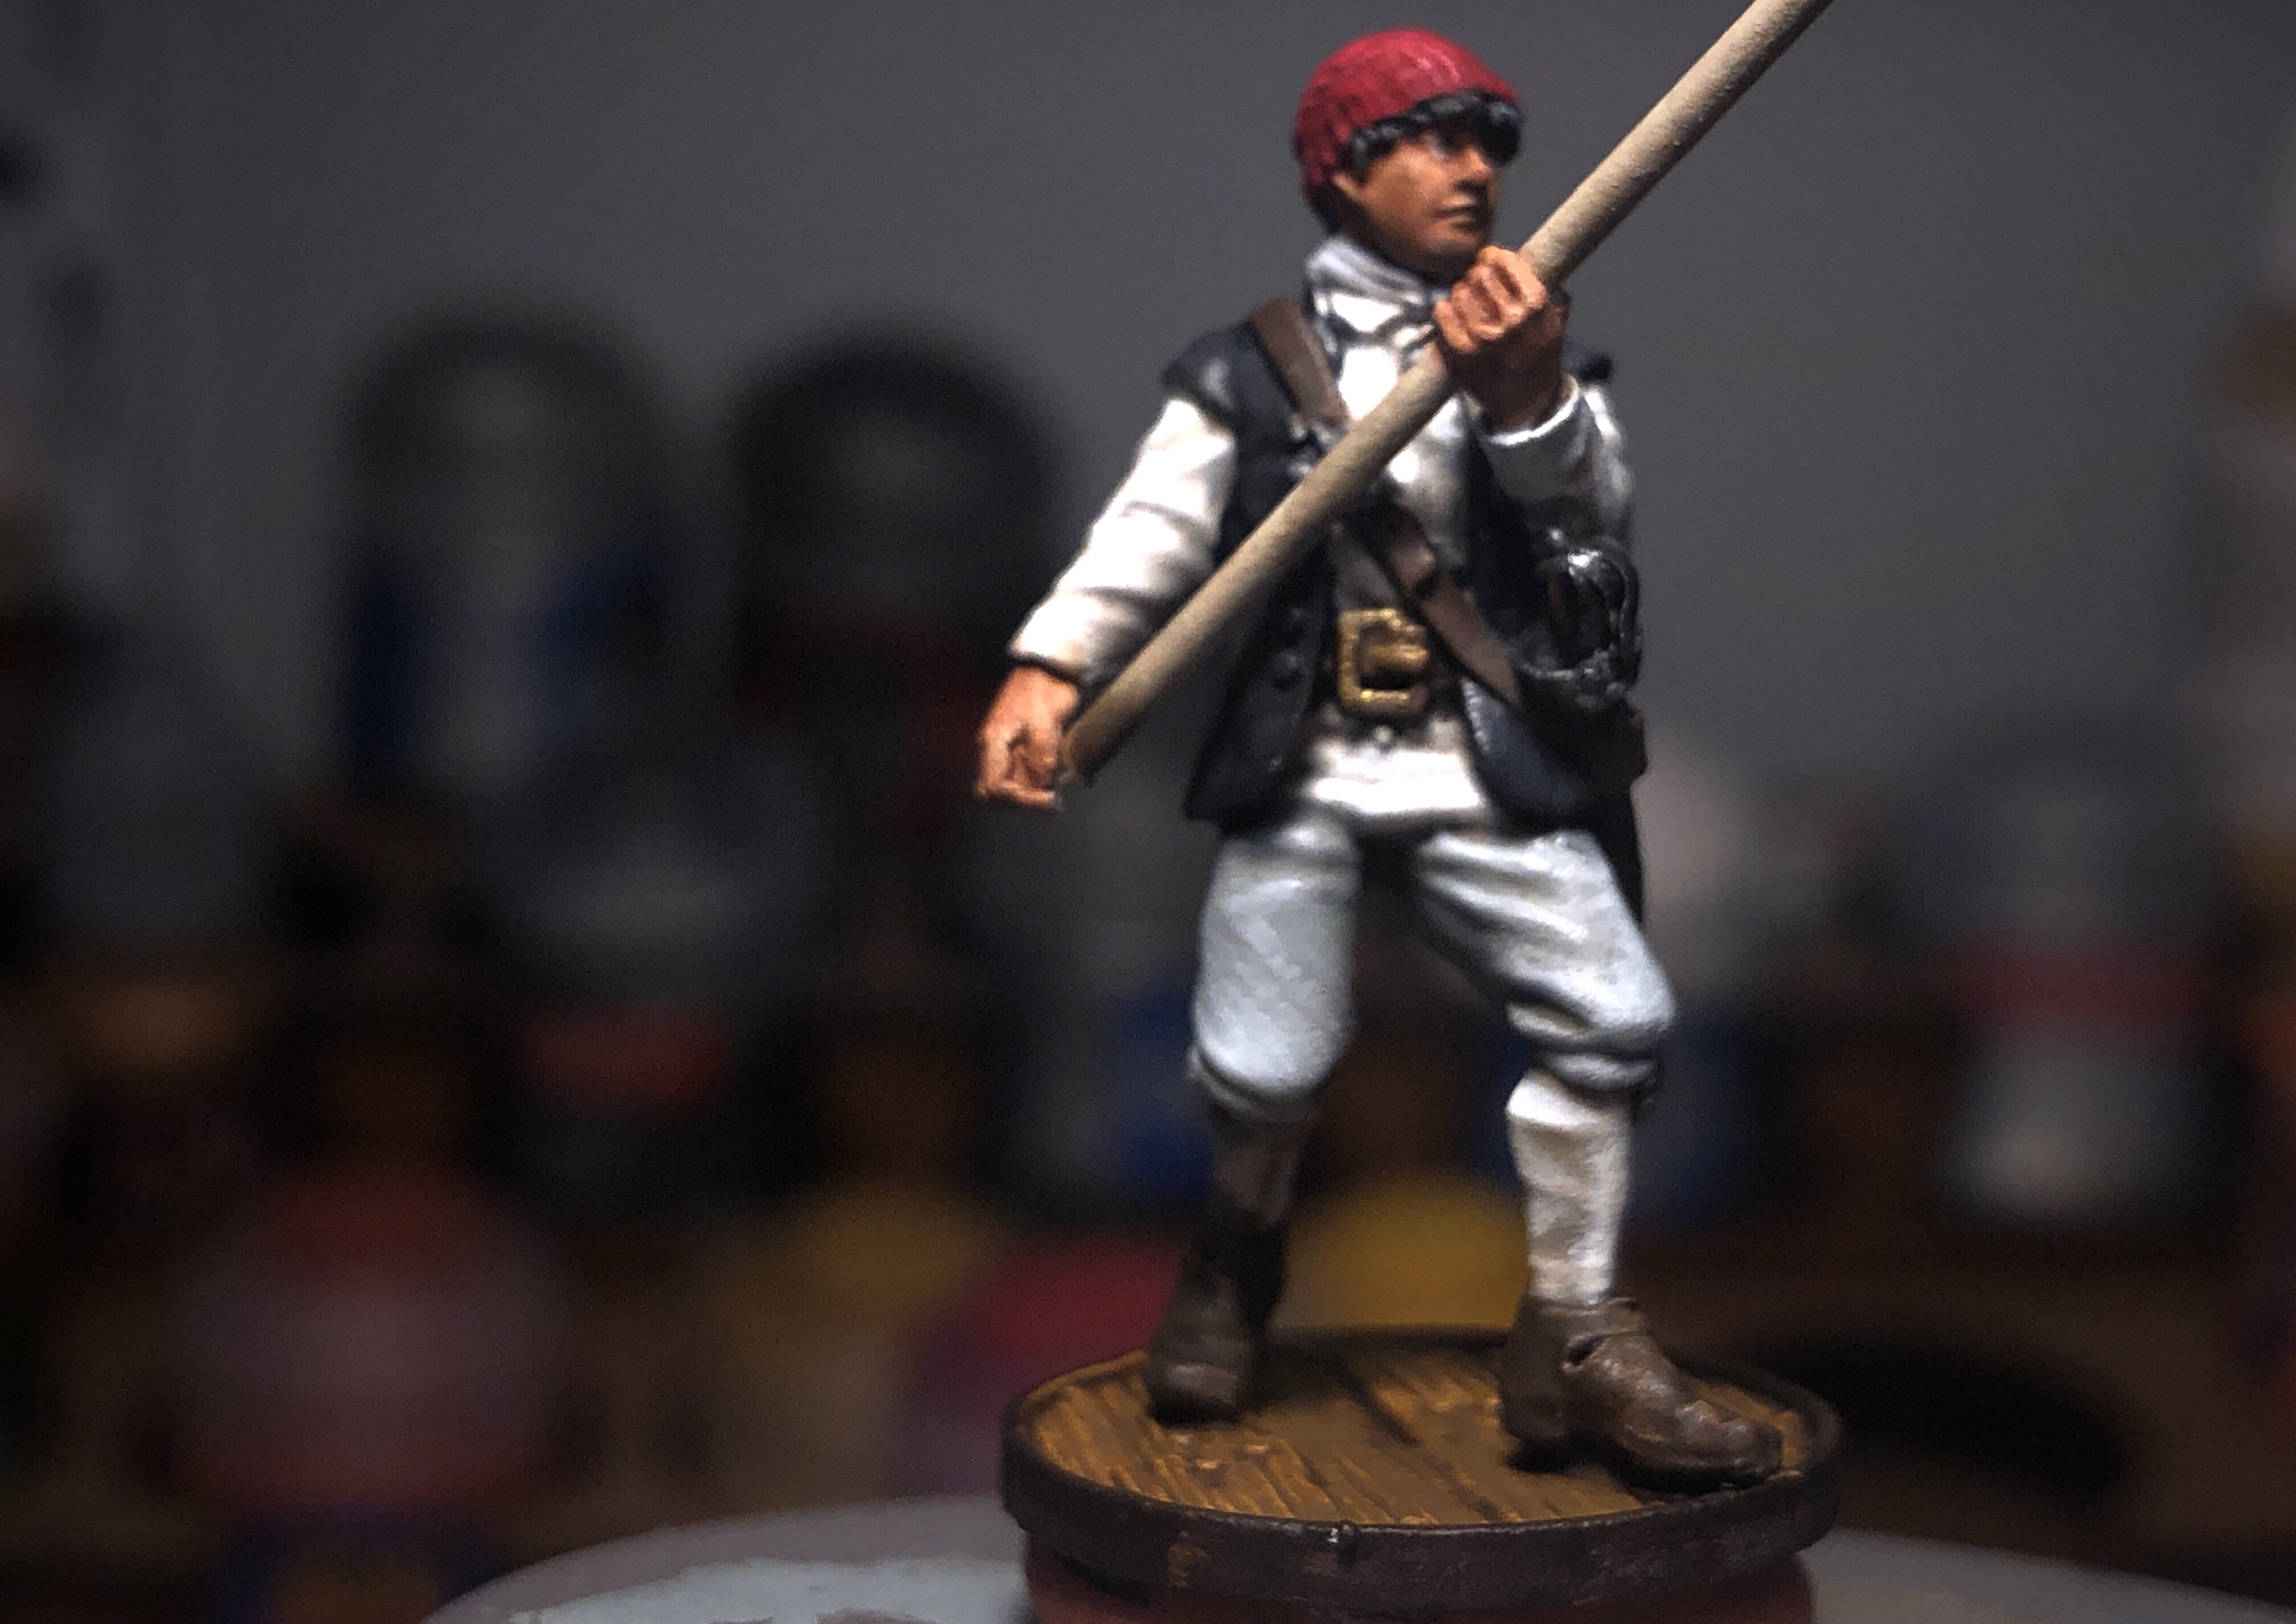
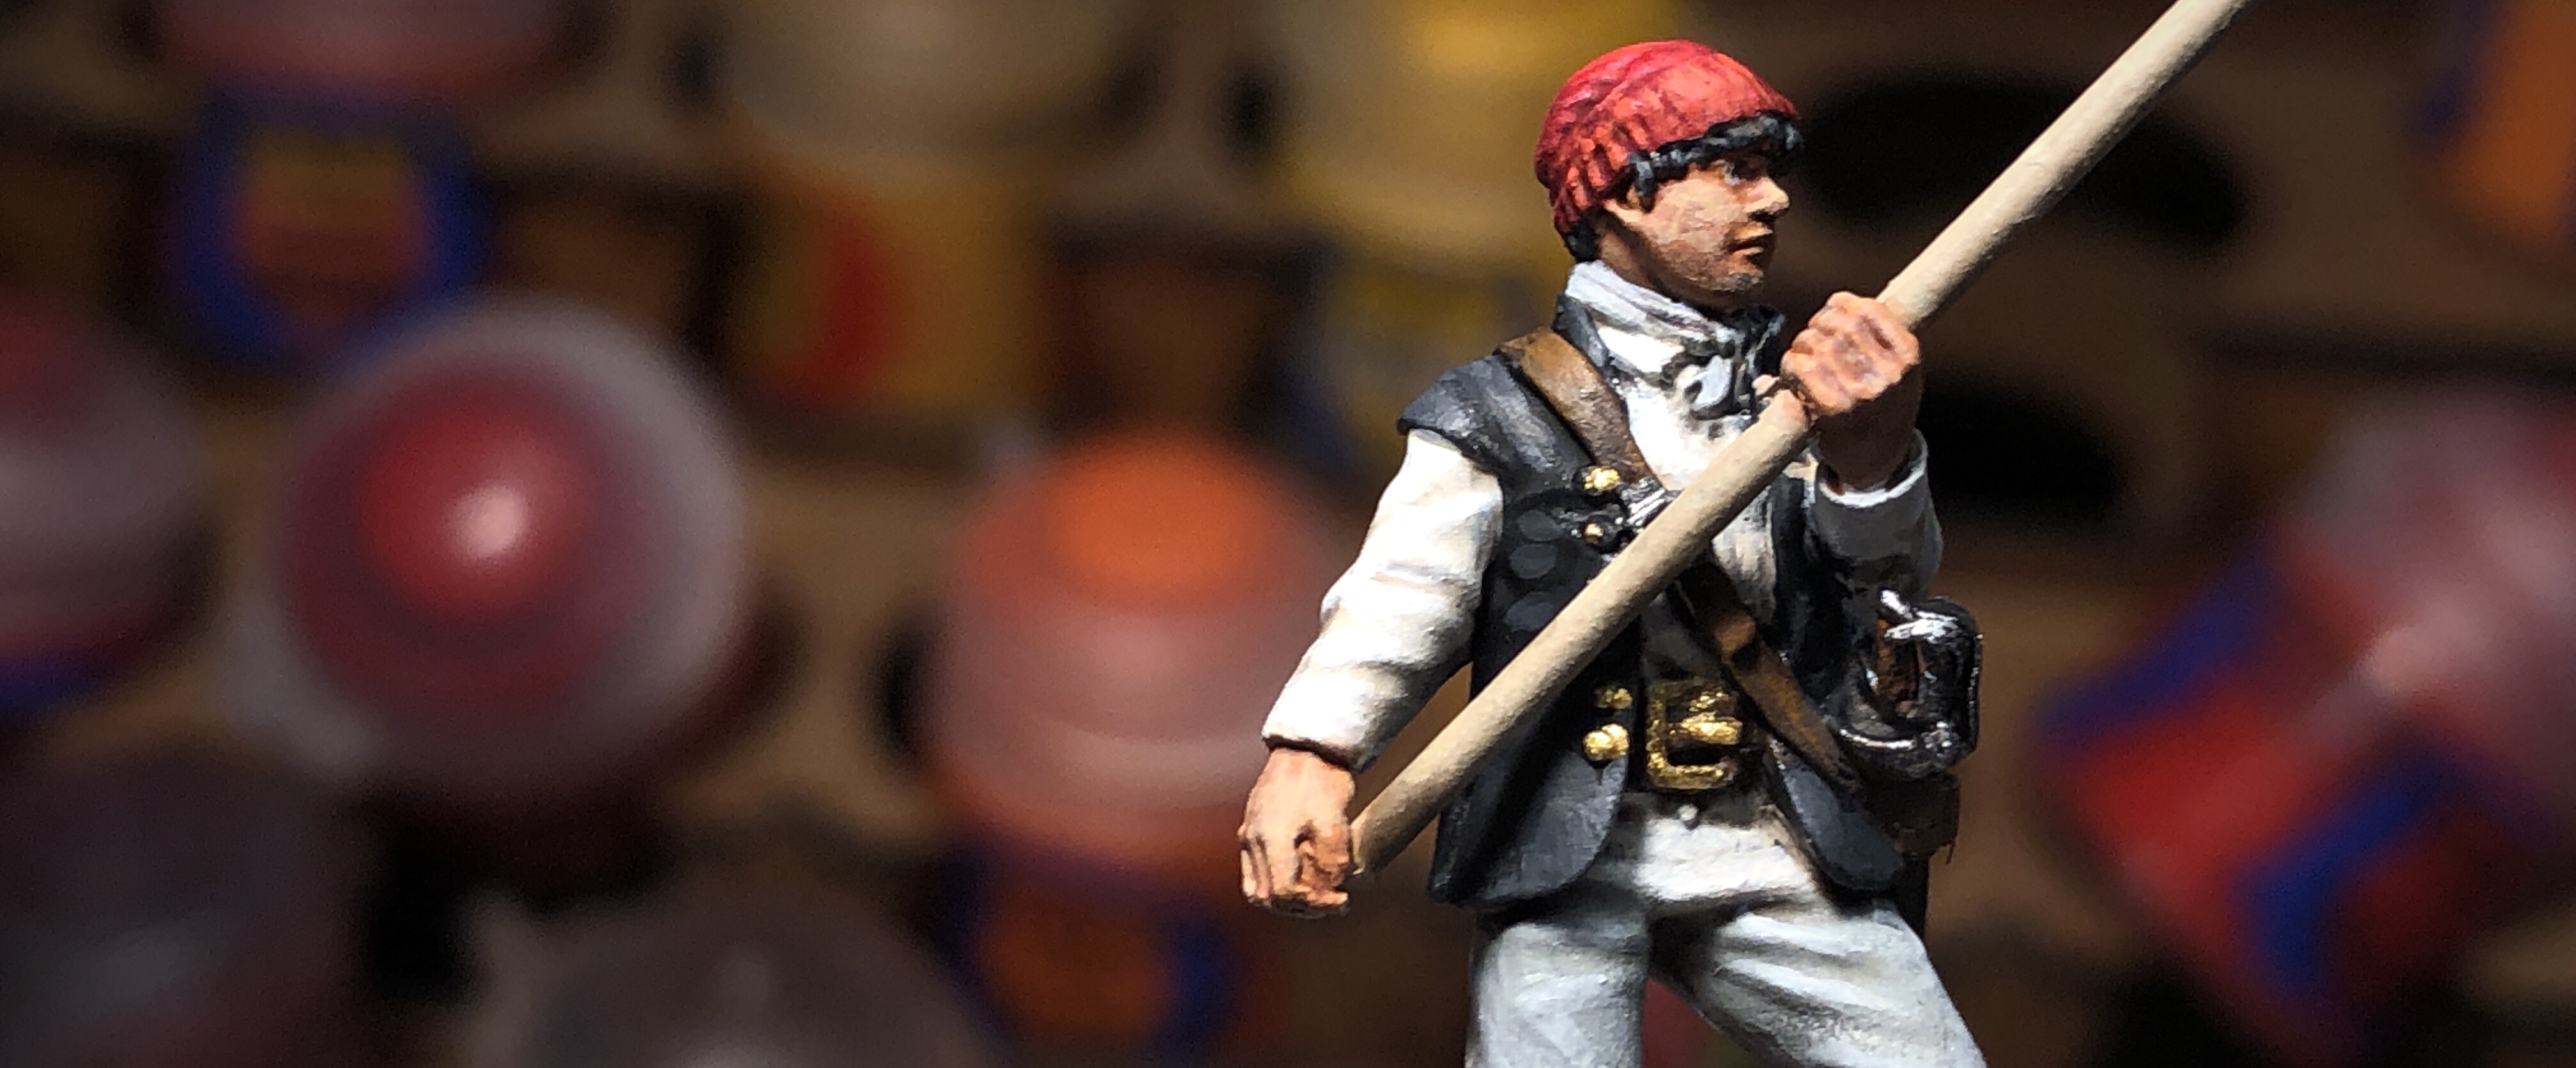
Here is the base paint list for the third model with the “stocking cap”:
- The skin, base, stocking and pike colors are the same as above.
- Shoes and Belts – Leather Brown
- Hat – Mephiston Red
- Jacket and Hair and Scabbard- German Grey
- Shirt – Ivory
- Sword Hilt – Steel
- Pants – Celestra Grey


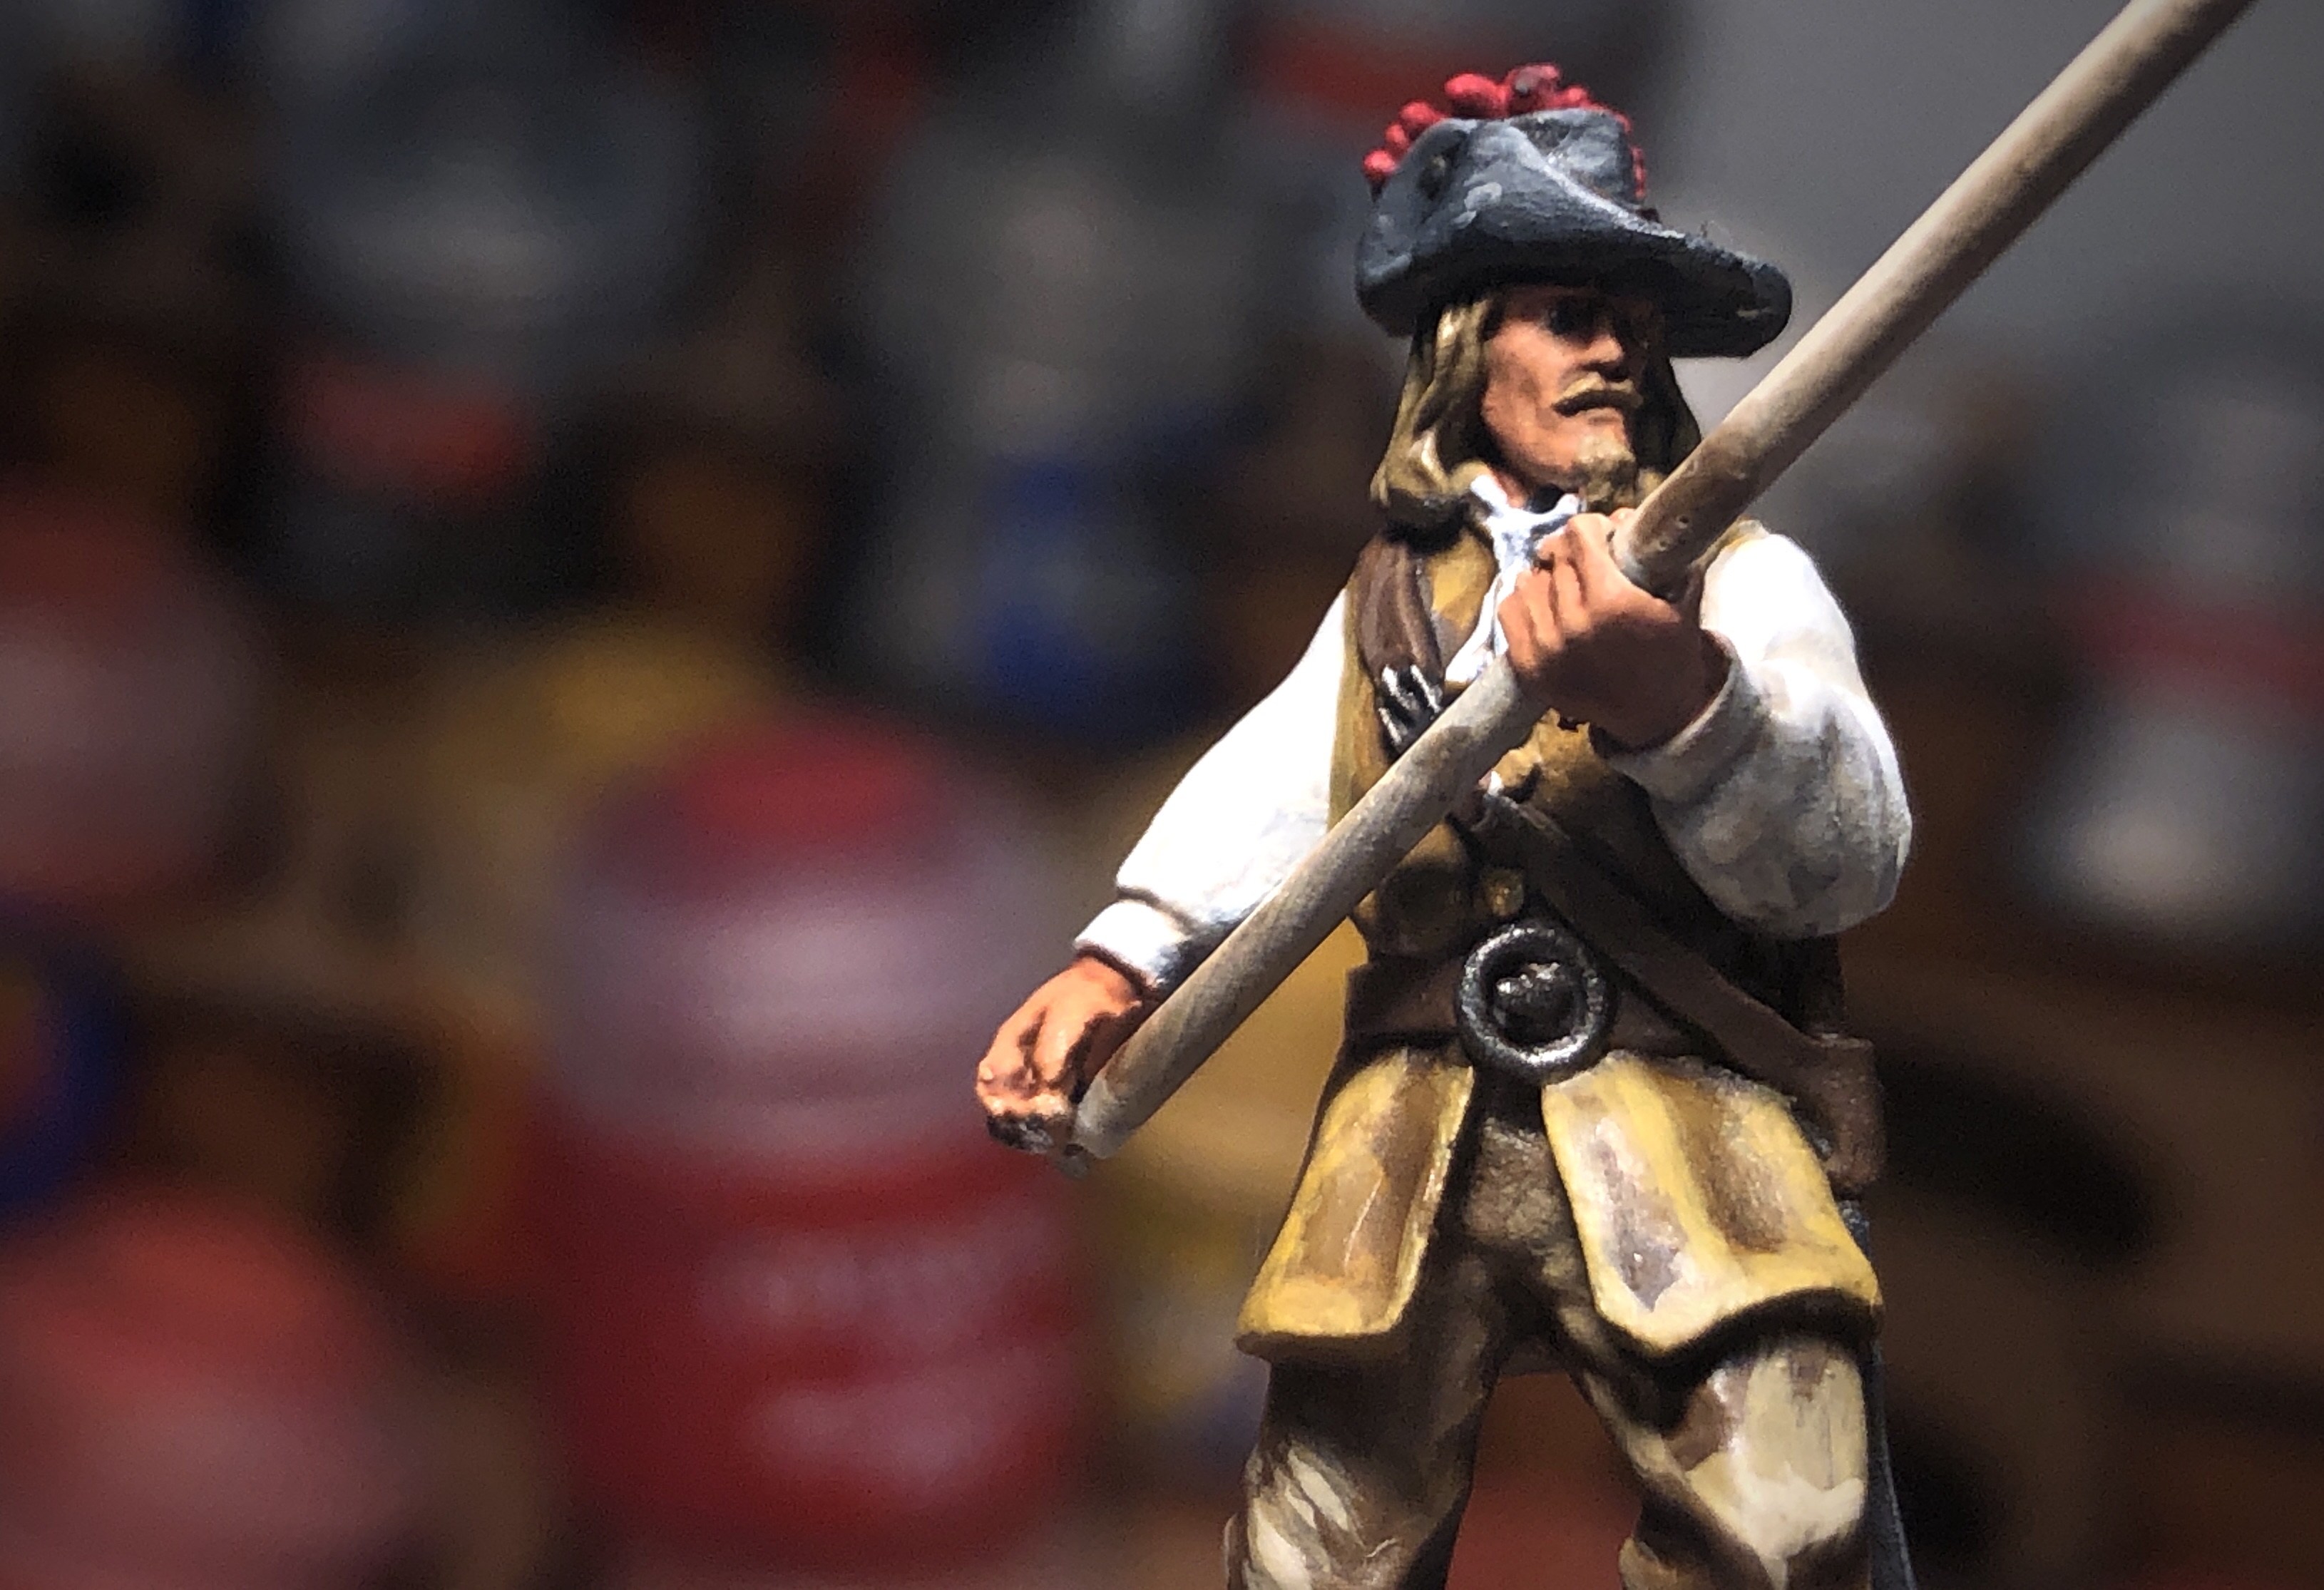
Here is my paint list for the fourth models with the luscious hair:
- The paints for the skin, pike, base, shoes and belts are the same as above.
- Hat – German Grey
- Hair – Zandri Dust
- Jacket – XV-88
- Shirt and Cravat – Ivory
- Feather – Mephiston Red
- Buttons – Brass
- Buckles – Steel
- Pants – Steel Legion Drab
Step 4 – Washes
This step is fairly quick and simple. I used my standard selection of Citadel shades.
I used Agrax Earthshade for all the browns including the base, shoes, belts, brown jackets and pants and light colored hair. I also applied this to the larger brass areas like the belt buckle on the figure with the stocking cap and the sword hilt on the armored model.
I used Carroburg Crimson for all the red areas.

For the black hat, hair, jackets, scabbards and all the armor and steel accessories I used Nuln Oil.
I forgot to paint the button on his hat until later.
For the all the white shirts, stockings, neck ties and grey pants I used a combination of Agrax Earthshade and Nuln Oil thinned with Lahmien Medium or water. I applied this mix to the underside of the pike staff as well to give it a little shadow.
I forgot to apply shade to the flesh areas until after I took these pictures but I used my standard Reikland Fleshshade.
Step 5 – Highlights
If you like the way your minis look at this point, you can skip this next step and go straight to step 6 and be finished. Personally, I find this step to be the most rewarding and enjoyable but if you have a lot of miniatures to paint and don’t have a lot of time to do it, you could truncate or skip this step entirely and have a perfectly good tabletop quality paint job with just base and shades. If you were to to choose one color to highlight I would recommend the flesh because that will accomplish the most towards the goal of making the model look lifelike.
I will proceed through the highlights by color and include at least one “before and after picture” of one or two models. I typically use 2-3 variations of the base color for my highlights. I usually transfer a little of each paint to a wet pallet and blend the paints at the transitions so I have a “stripe” of paint moving from the base color (or a slightly lighter variation of the base) to a much lighter color that I will use for the final highlight.
For each color I will start with either the base tone (which is now slightly lighter than the color on the model since the shades have darkened the base )or that slightly lighter variation of that base tone and apply that fairly widely over the area, then move the the brighter tone and apply it more sparingly. I move through into the brighter variation of the color and usually only apply a few strokes of the brightest color, focusing on the areas that the light would hit most directly.
As you highlight, make sure you thin your paints with water or a medium. You should always thin a bit but it’s even more important during this process.
For the white and cream areas including shirts, stockings and one neck tie, in using Screaming Skull, Ivory and White.
Focus on the highest areas for the brightest color.
I used Ivory for the base color on the model below so I skipped the Screaming Skull and used only Ivory and White for his shirt.
For the light brown color, I skipped using the base XV-88 since it has a lot of pigment and is very opaque and creates rough transitions.
I used Balor Brown and Zamesi Desert. Both of these are part of the Layer paint line that is more transparent and makes better transitions as you apply it on top of a darker paint.
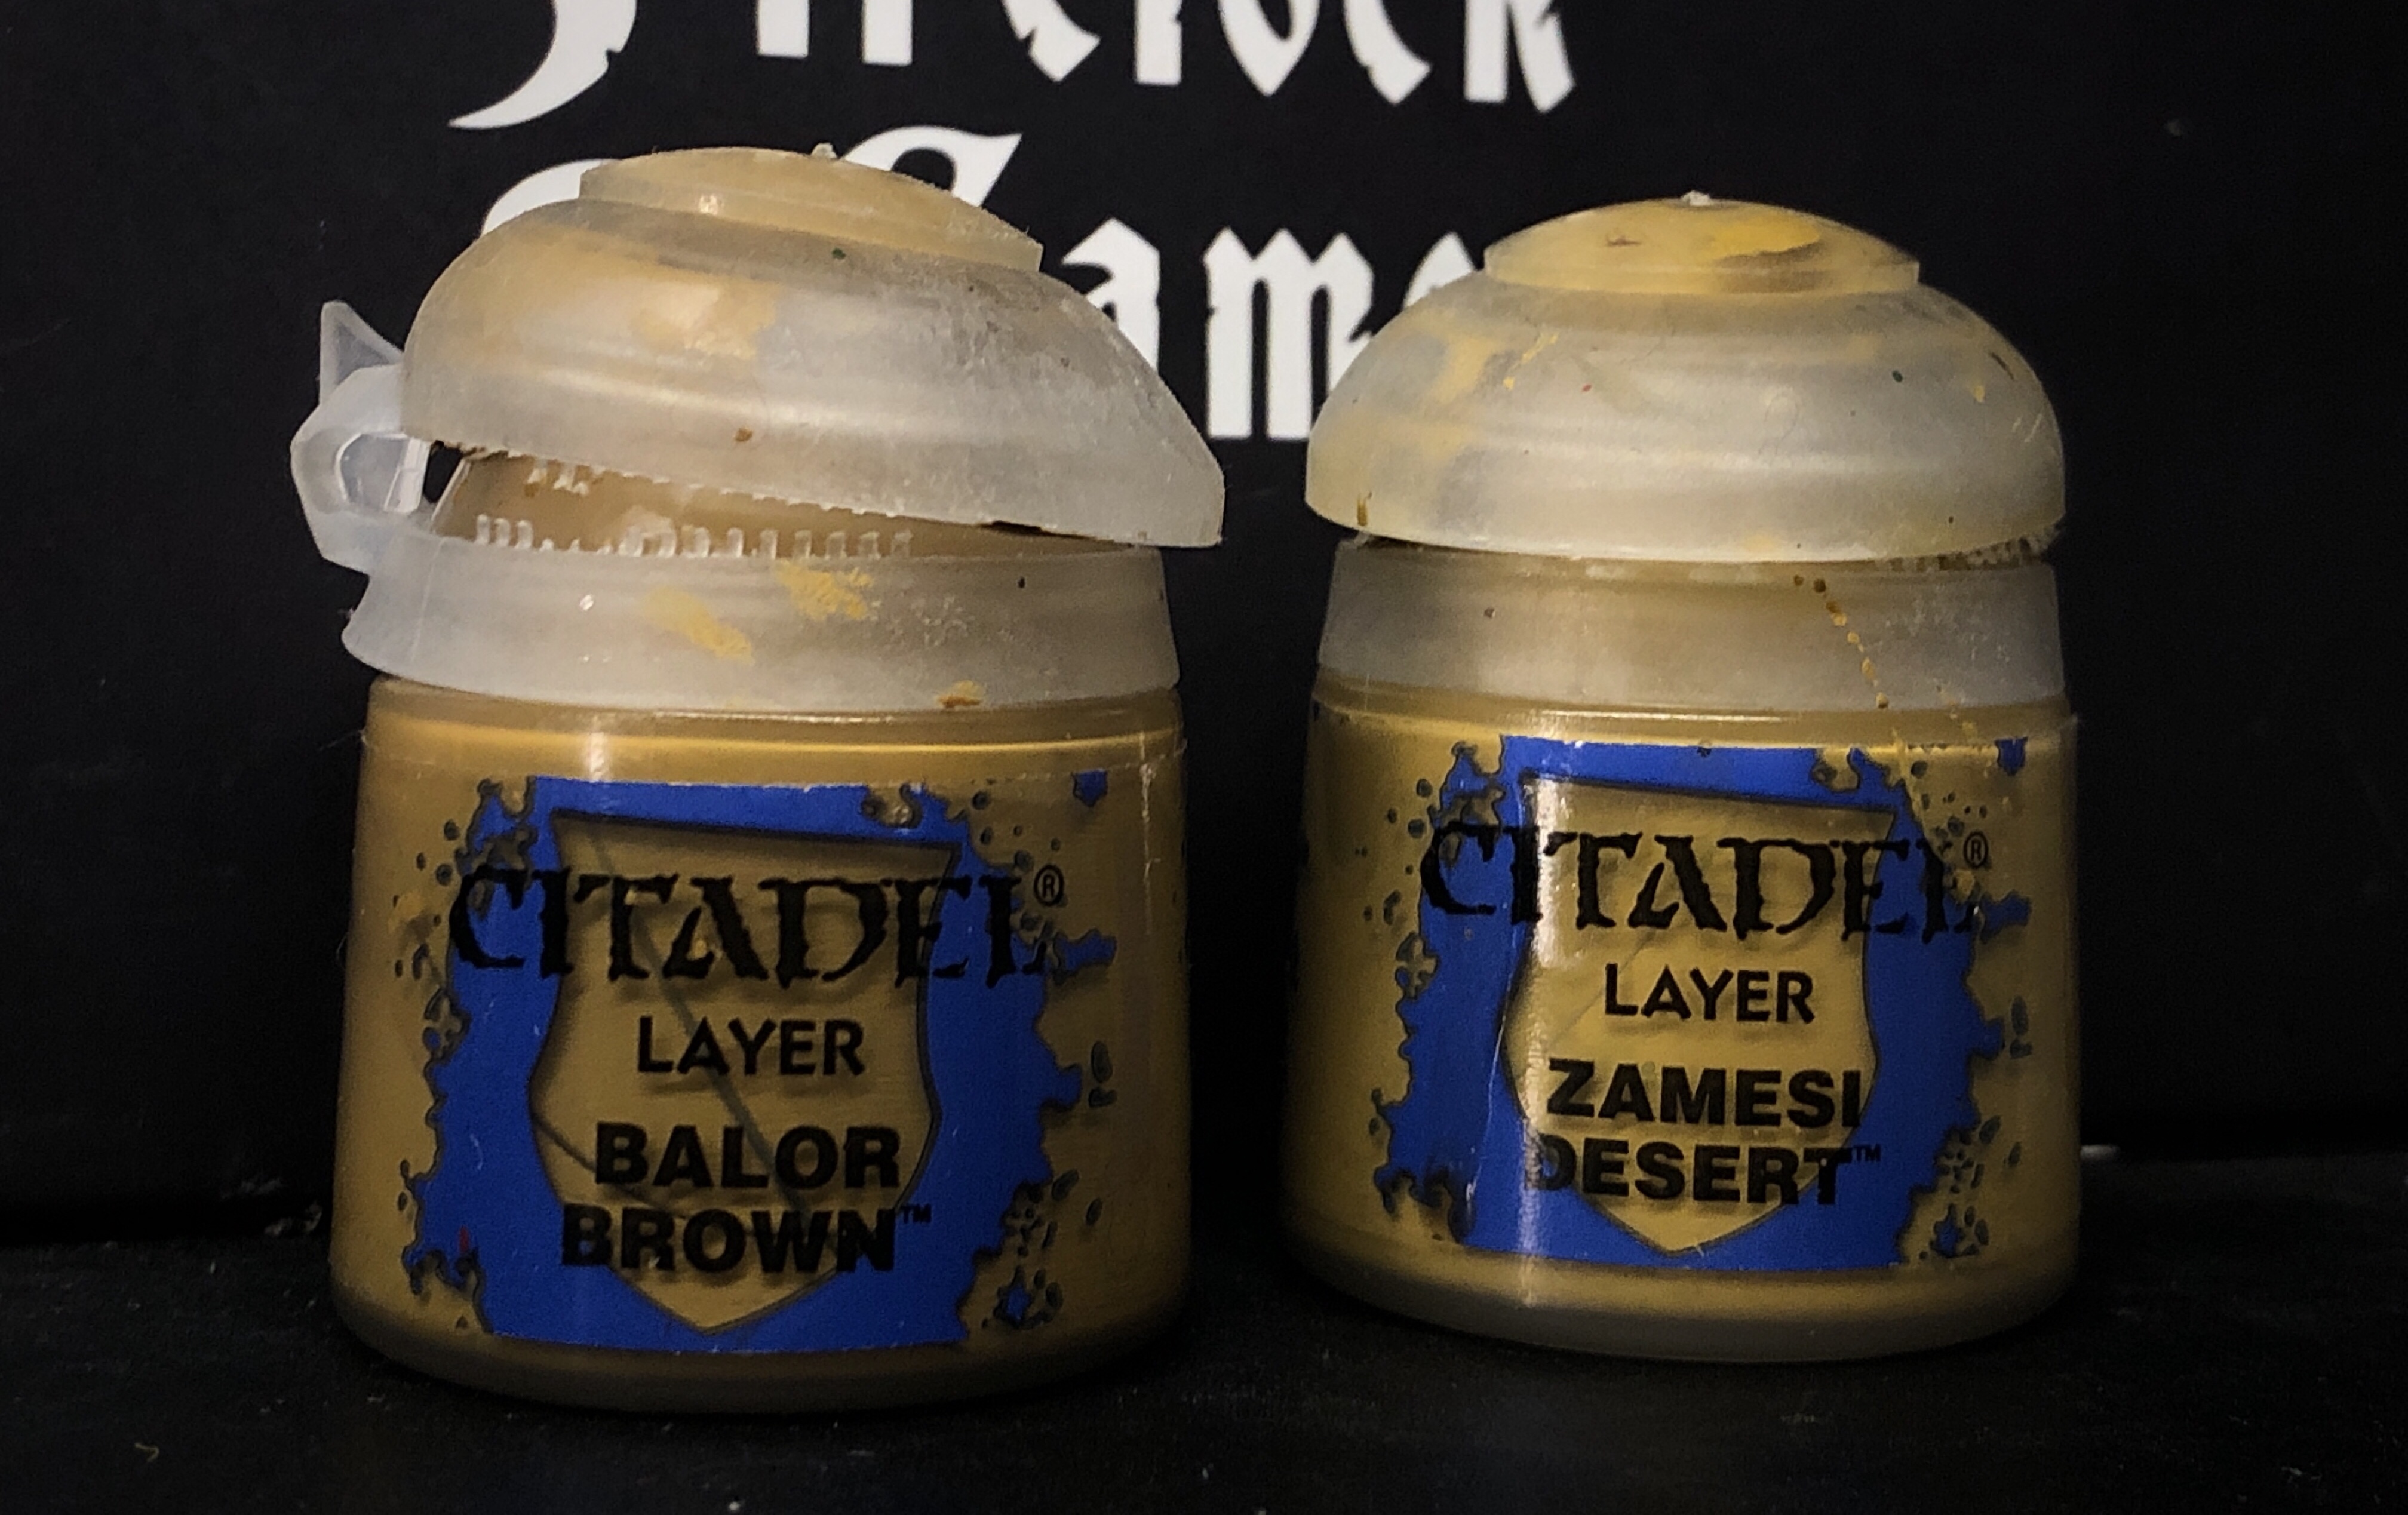
I focused on the edges and most upturned areas.
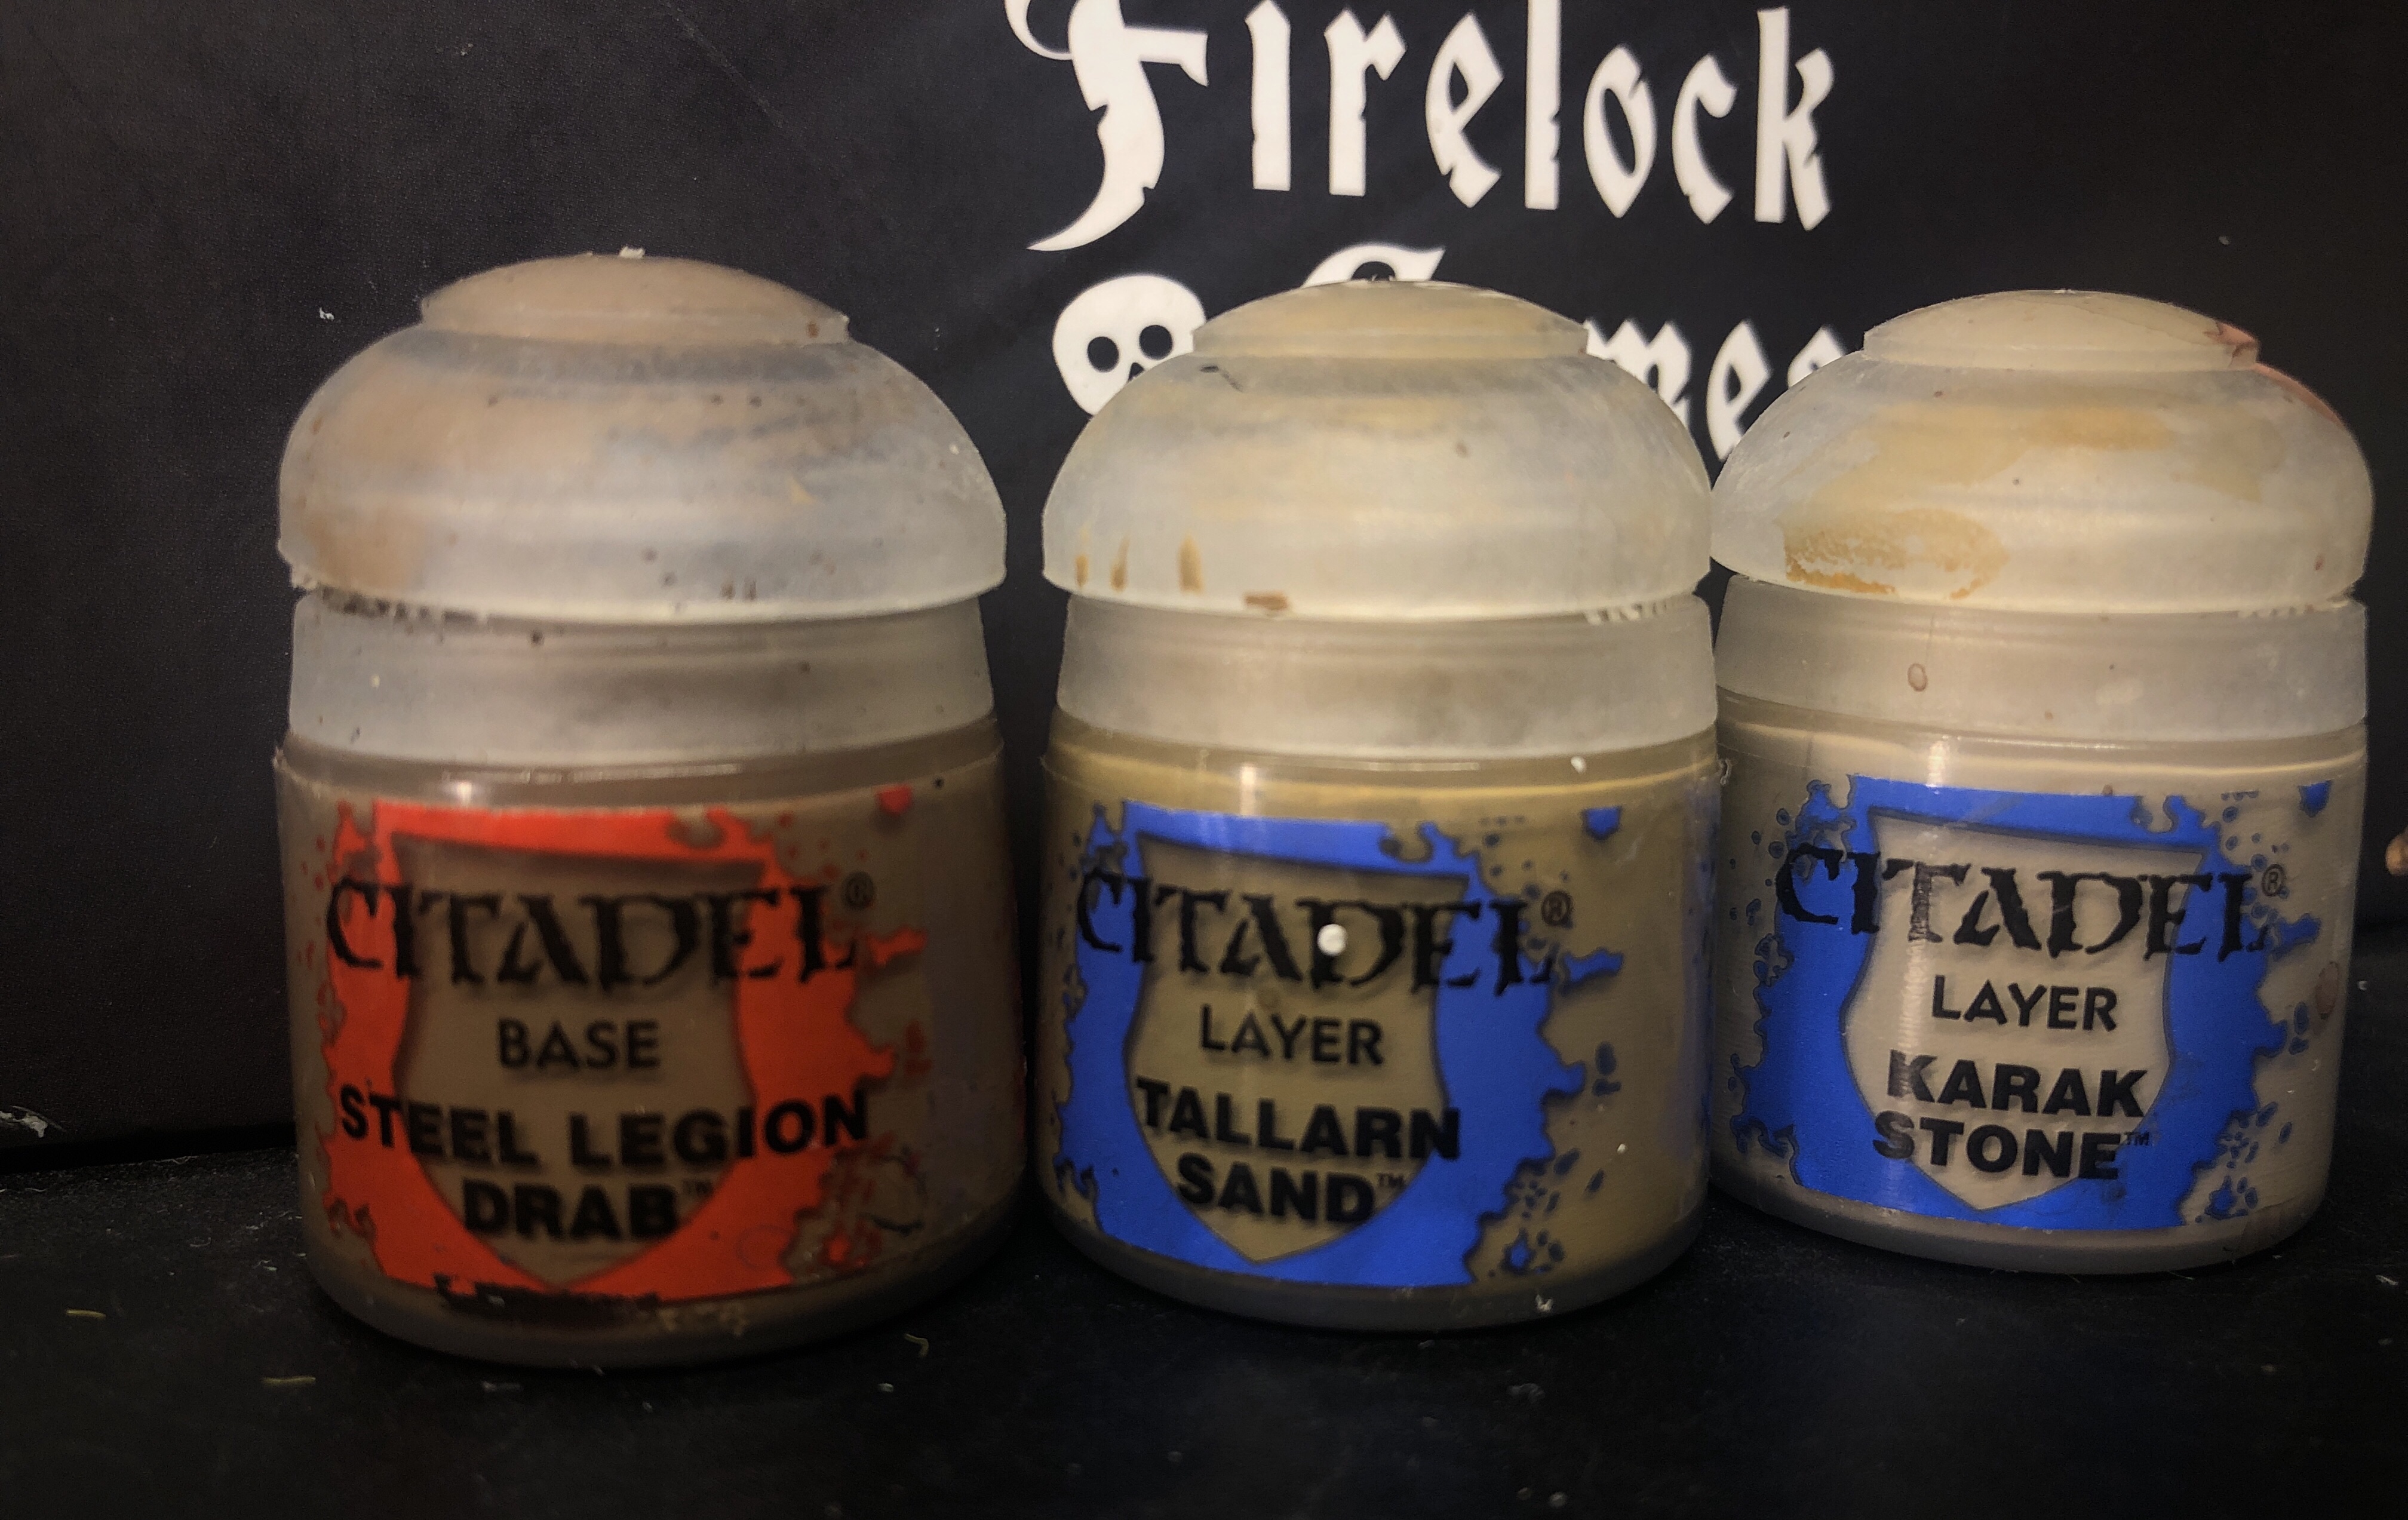
Next I moved to the two pairs of pants and the floppy hat I based with Steel Legion Drab.
I moved from the base tone of Steel Legion Drab to Tallarn Sand and finished with Karak Stone
I find these medium browns difficult to highlight smoothly.

Next I did the eyes. Eyes are optional and can either make or ruin a model. You’ll want to use you smallest brush and don’t be afraid to touch up with the flesh tone after your done. Huge googly eyes are bad news.
I start with a sliver of Ivory in both sockets. If you apply too much (which is likely), don’t bother touching it up until after you paint the pupil because you’ll probably apply too much black as well!

I try to apply the Ivory with a horizontal stroke and the German Grey pupil with a vertical stroke. Apply the fleshtone again to shrink the eye if necessary.
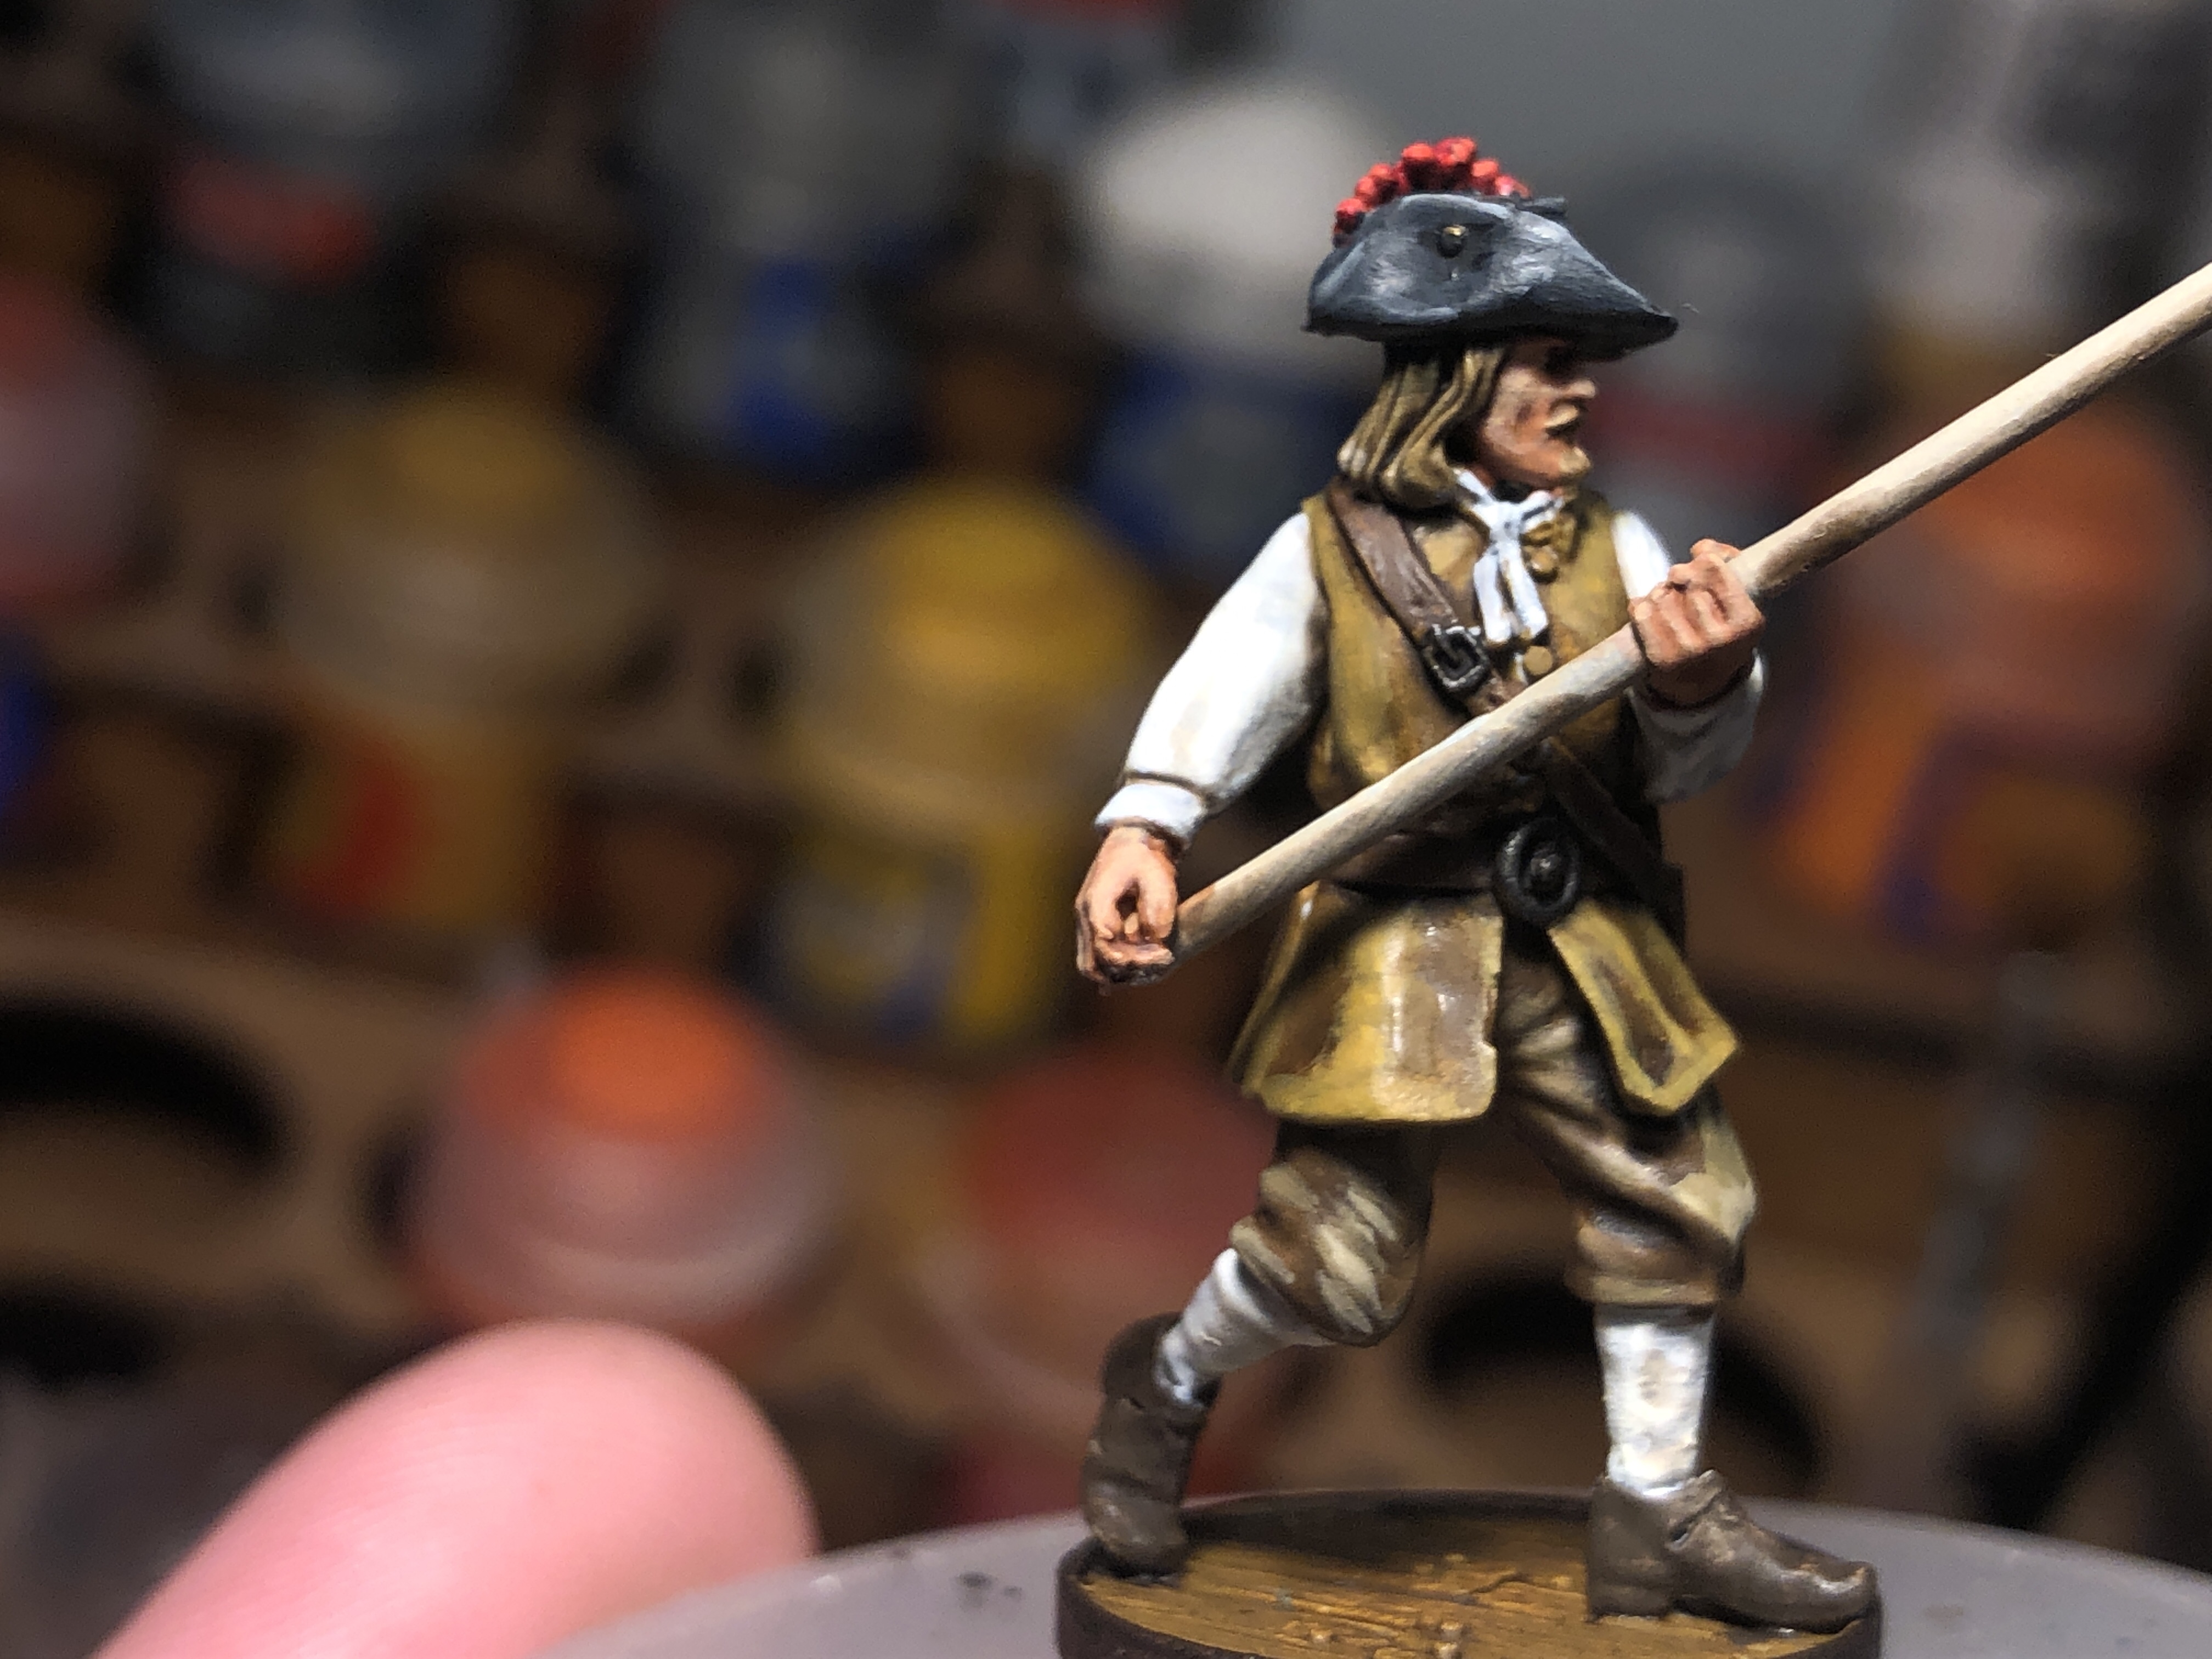
Next I went over the grey pants and and the grey neck tie.
I used Administratum Grey and Ulthuan Grey but you could just lighten the base Celestera Grey with a white.

Emphasize the wrinkles and knees.
Next I highlighted the dark jacket, hat, scabbards and hair with the base of German Grey lightened by an increasing amount of Administratum Grey.

I’m not proud of this jacket…

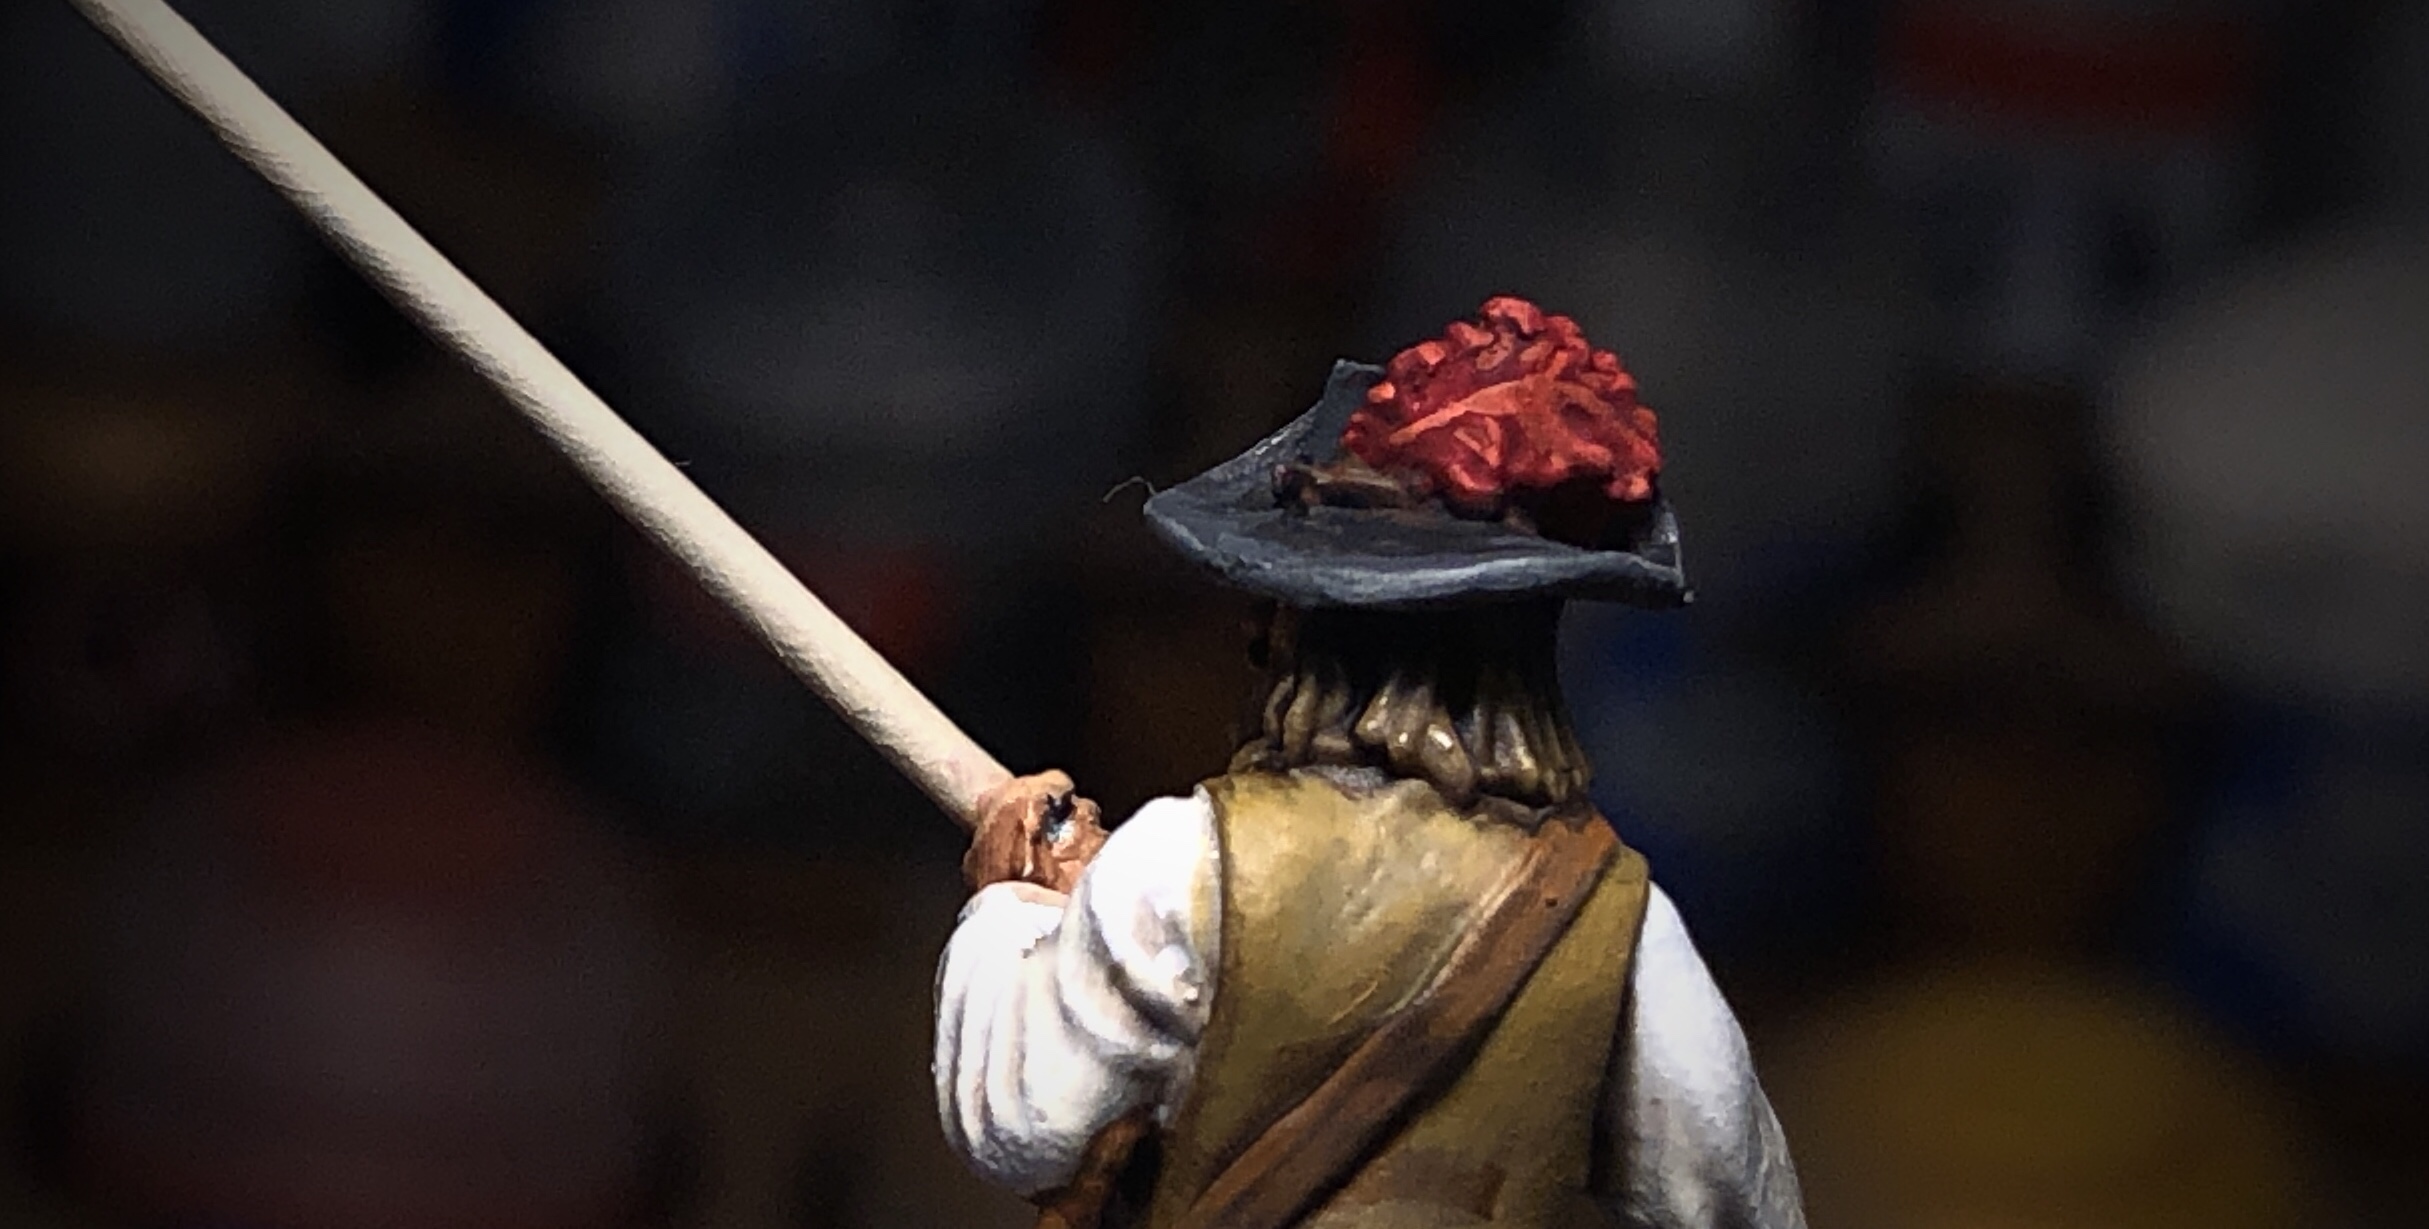
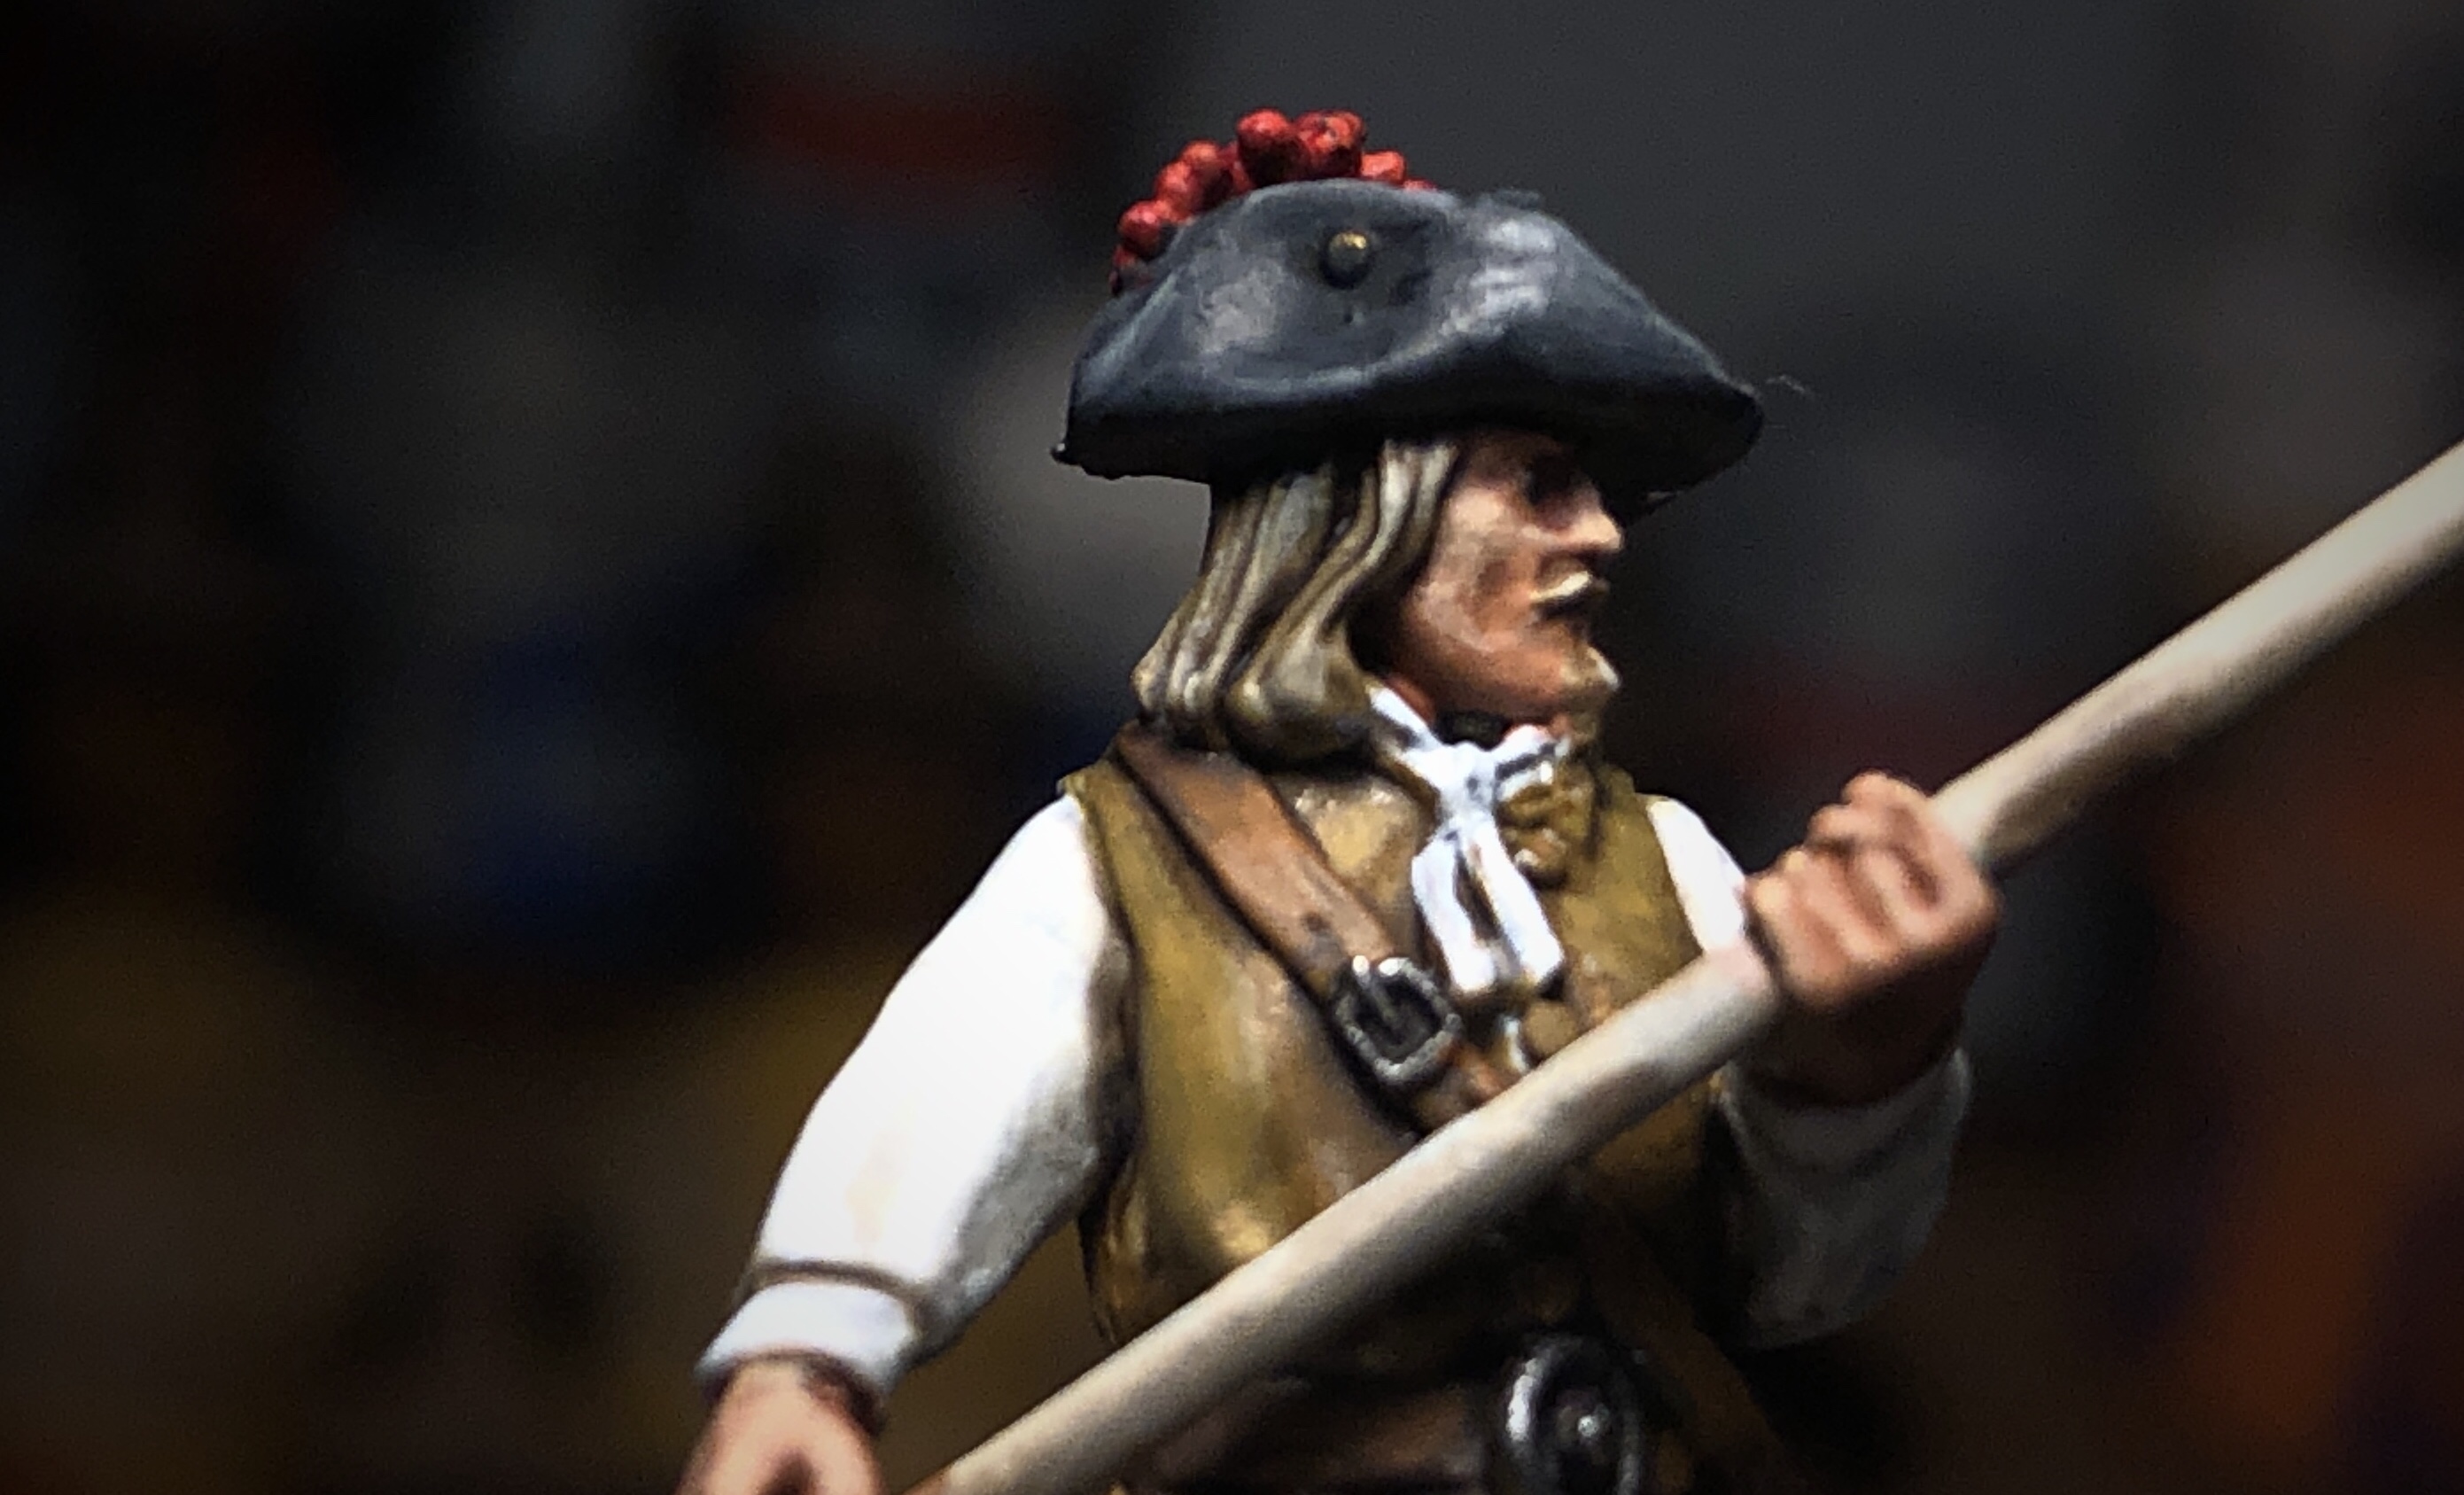
Highlights on the hair and edge of the scabbard.

Highlights on the hat.

Next I highlighted the faces and hands.
These three flesh paints are all nice and translucent which is helpful for this step.
Focus on the nose, cheekbones and fingers.
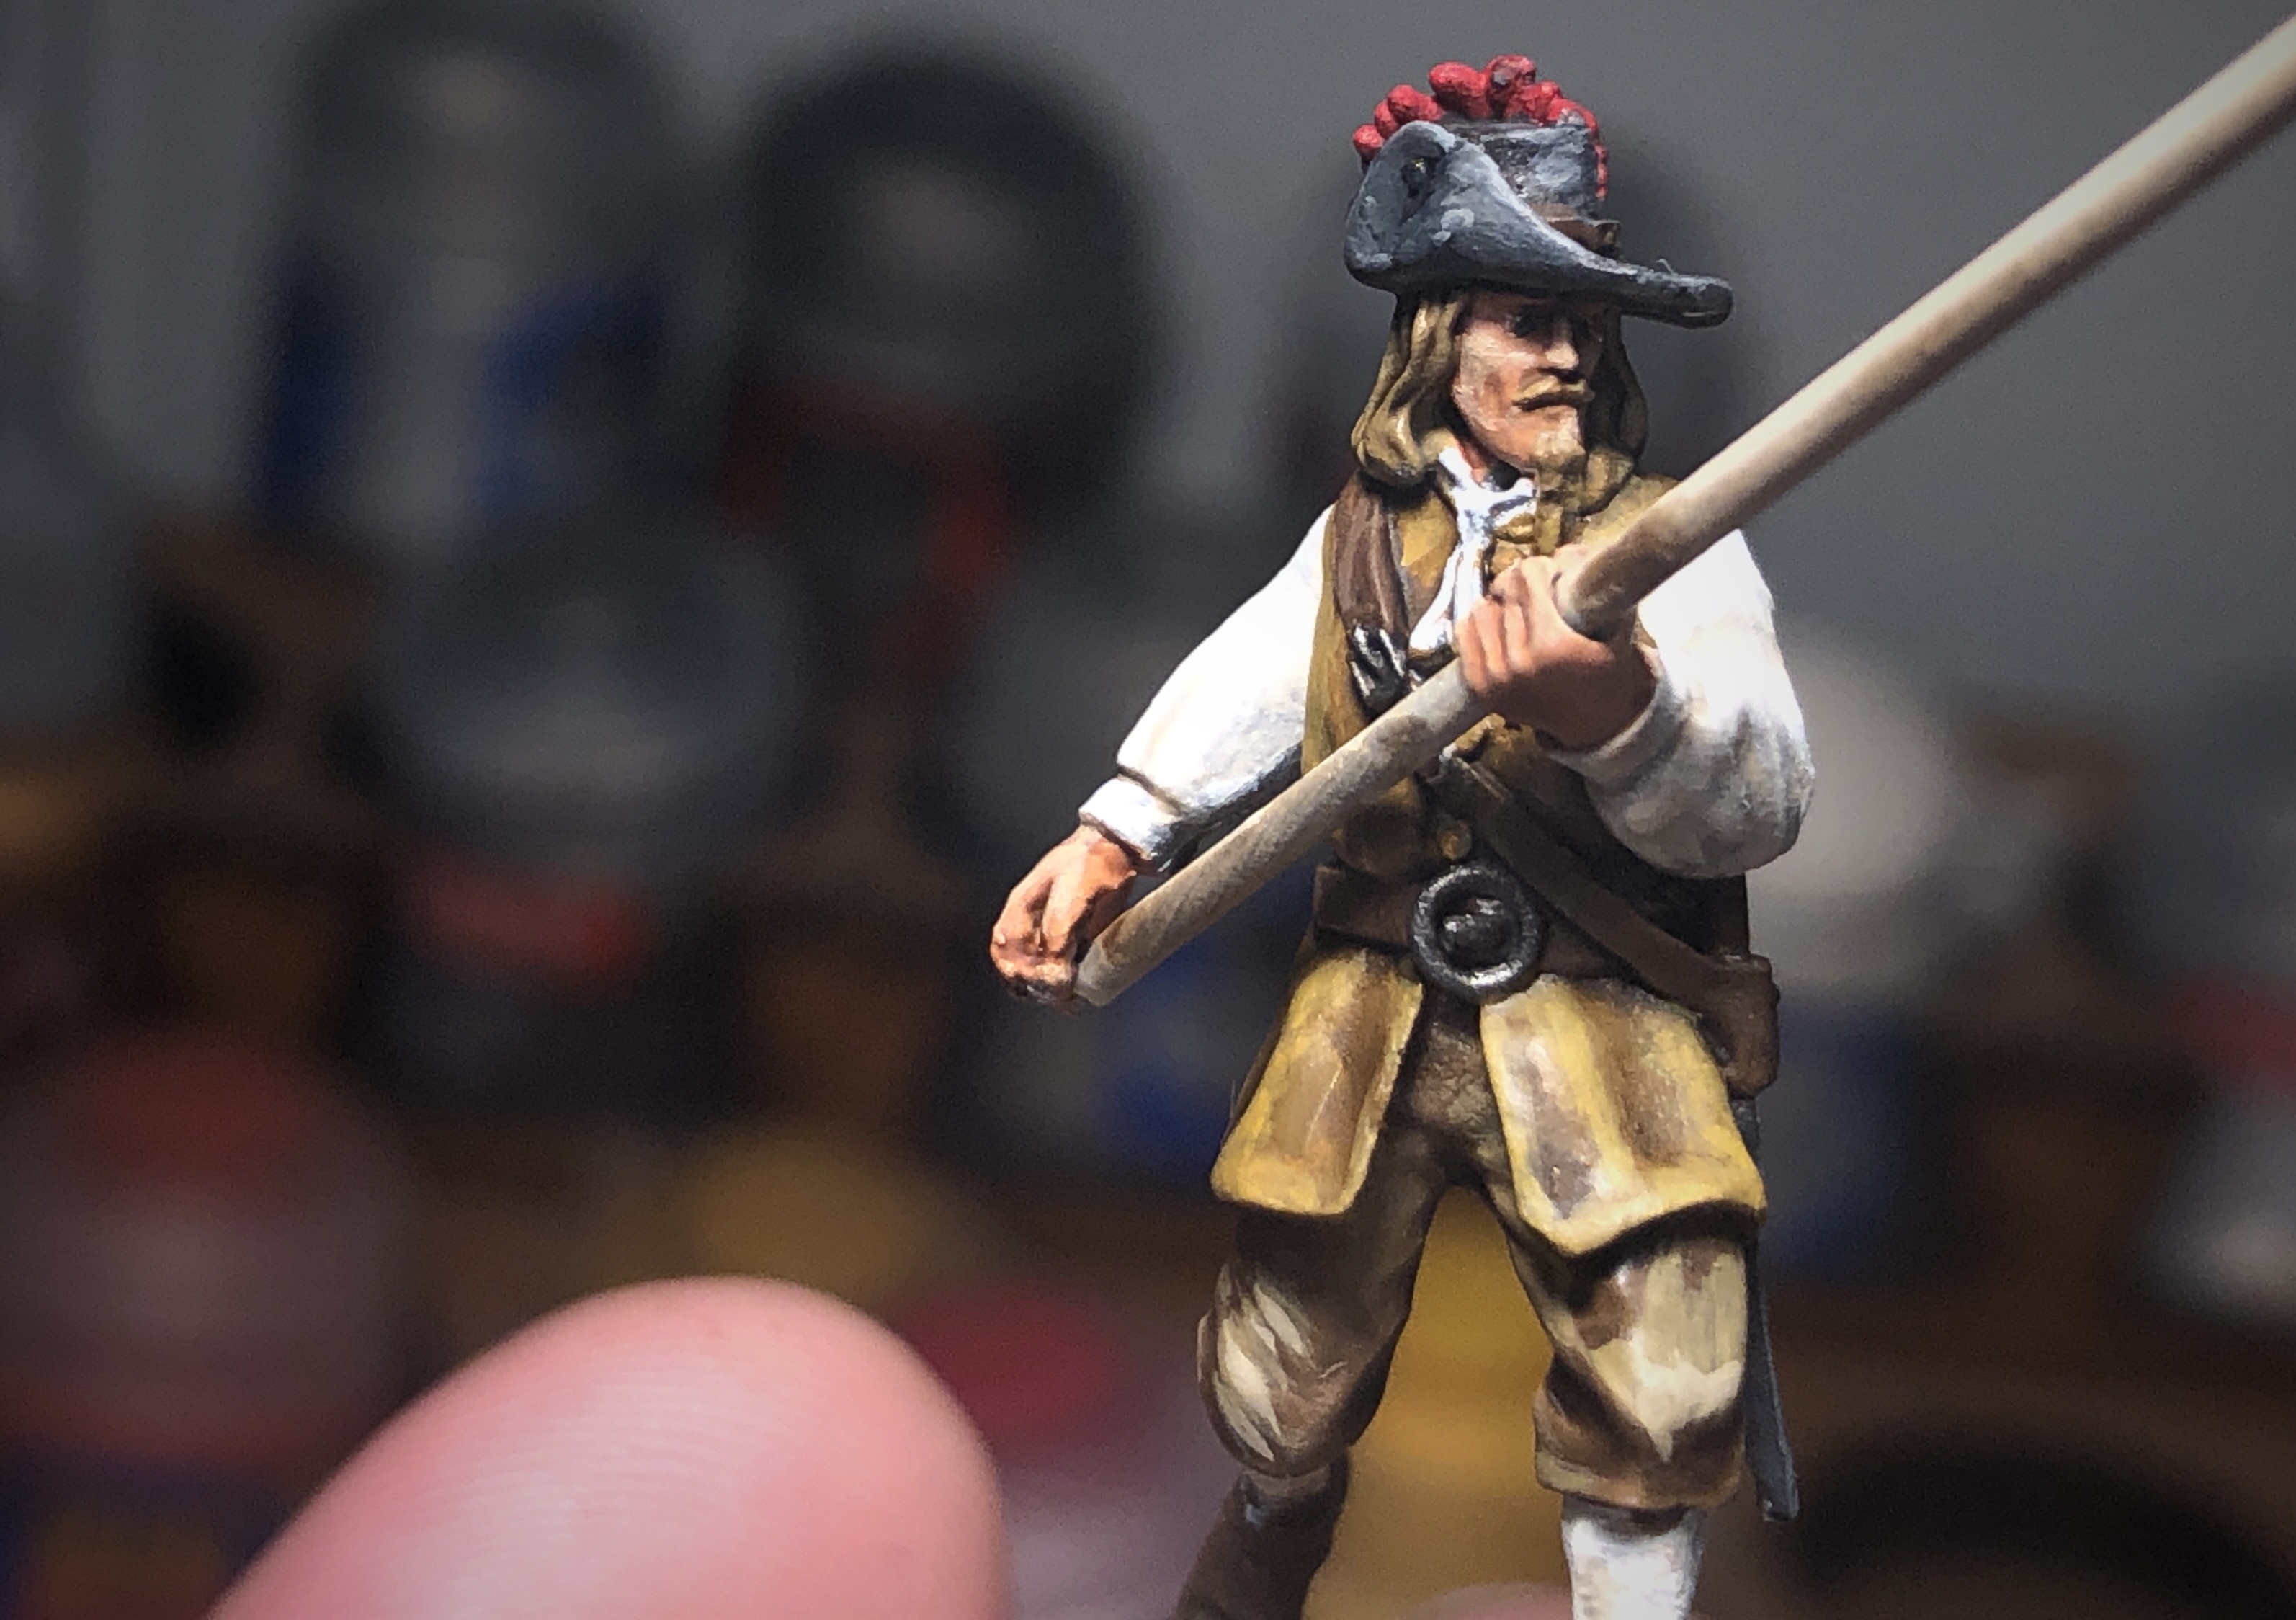
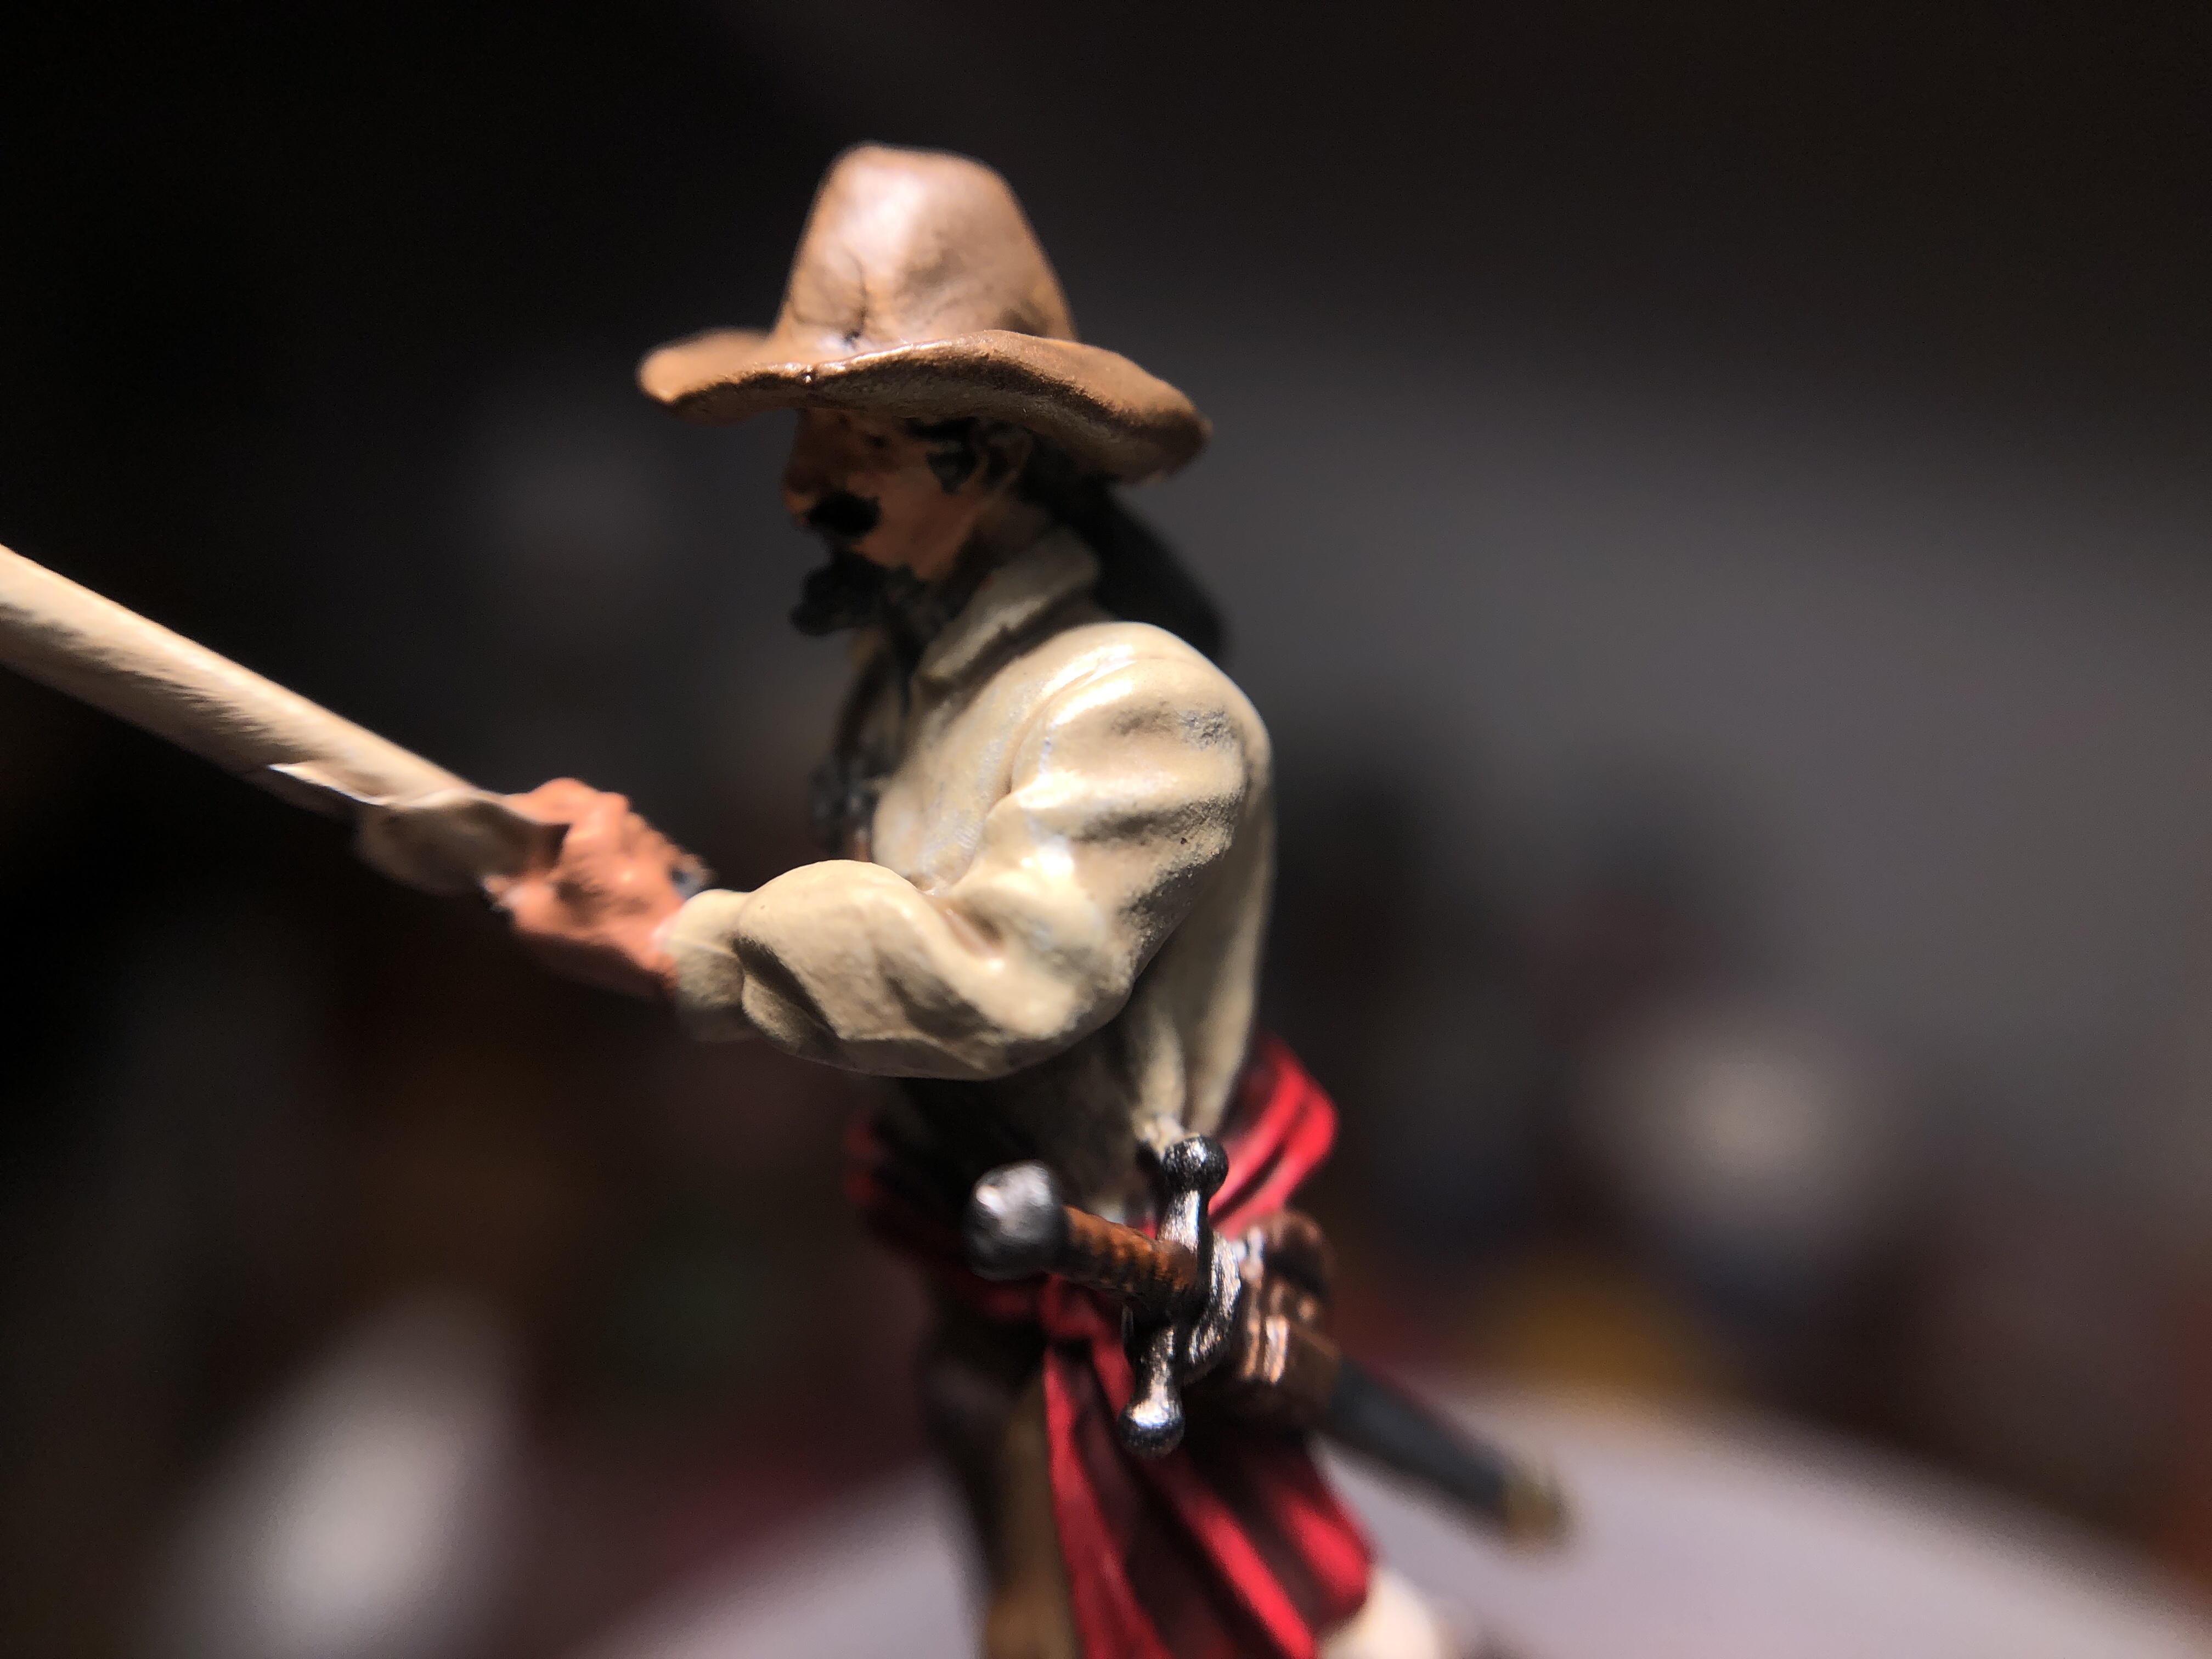
Next I worked over the reds. Each model has at least a little red and this ties the group together.

I started with a blend of Mephiston Red and Evil Sunze Scarlet and worked up to highlights of pure Wild Rider Red.
Just a little contrast makes a big difference.

The feather.

And sash:

The Leather straps and belts are tricky just because they’re so small and have no bumps or wrinkles to guide your highlights.
 §
§
For the belts and straps I used the base Leather Belt lightened with increasing amounts of Skrag Brown.
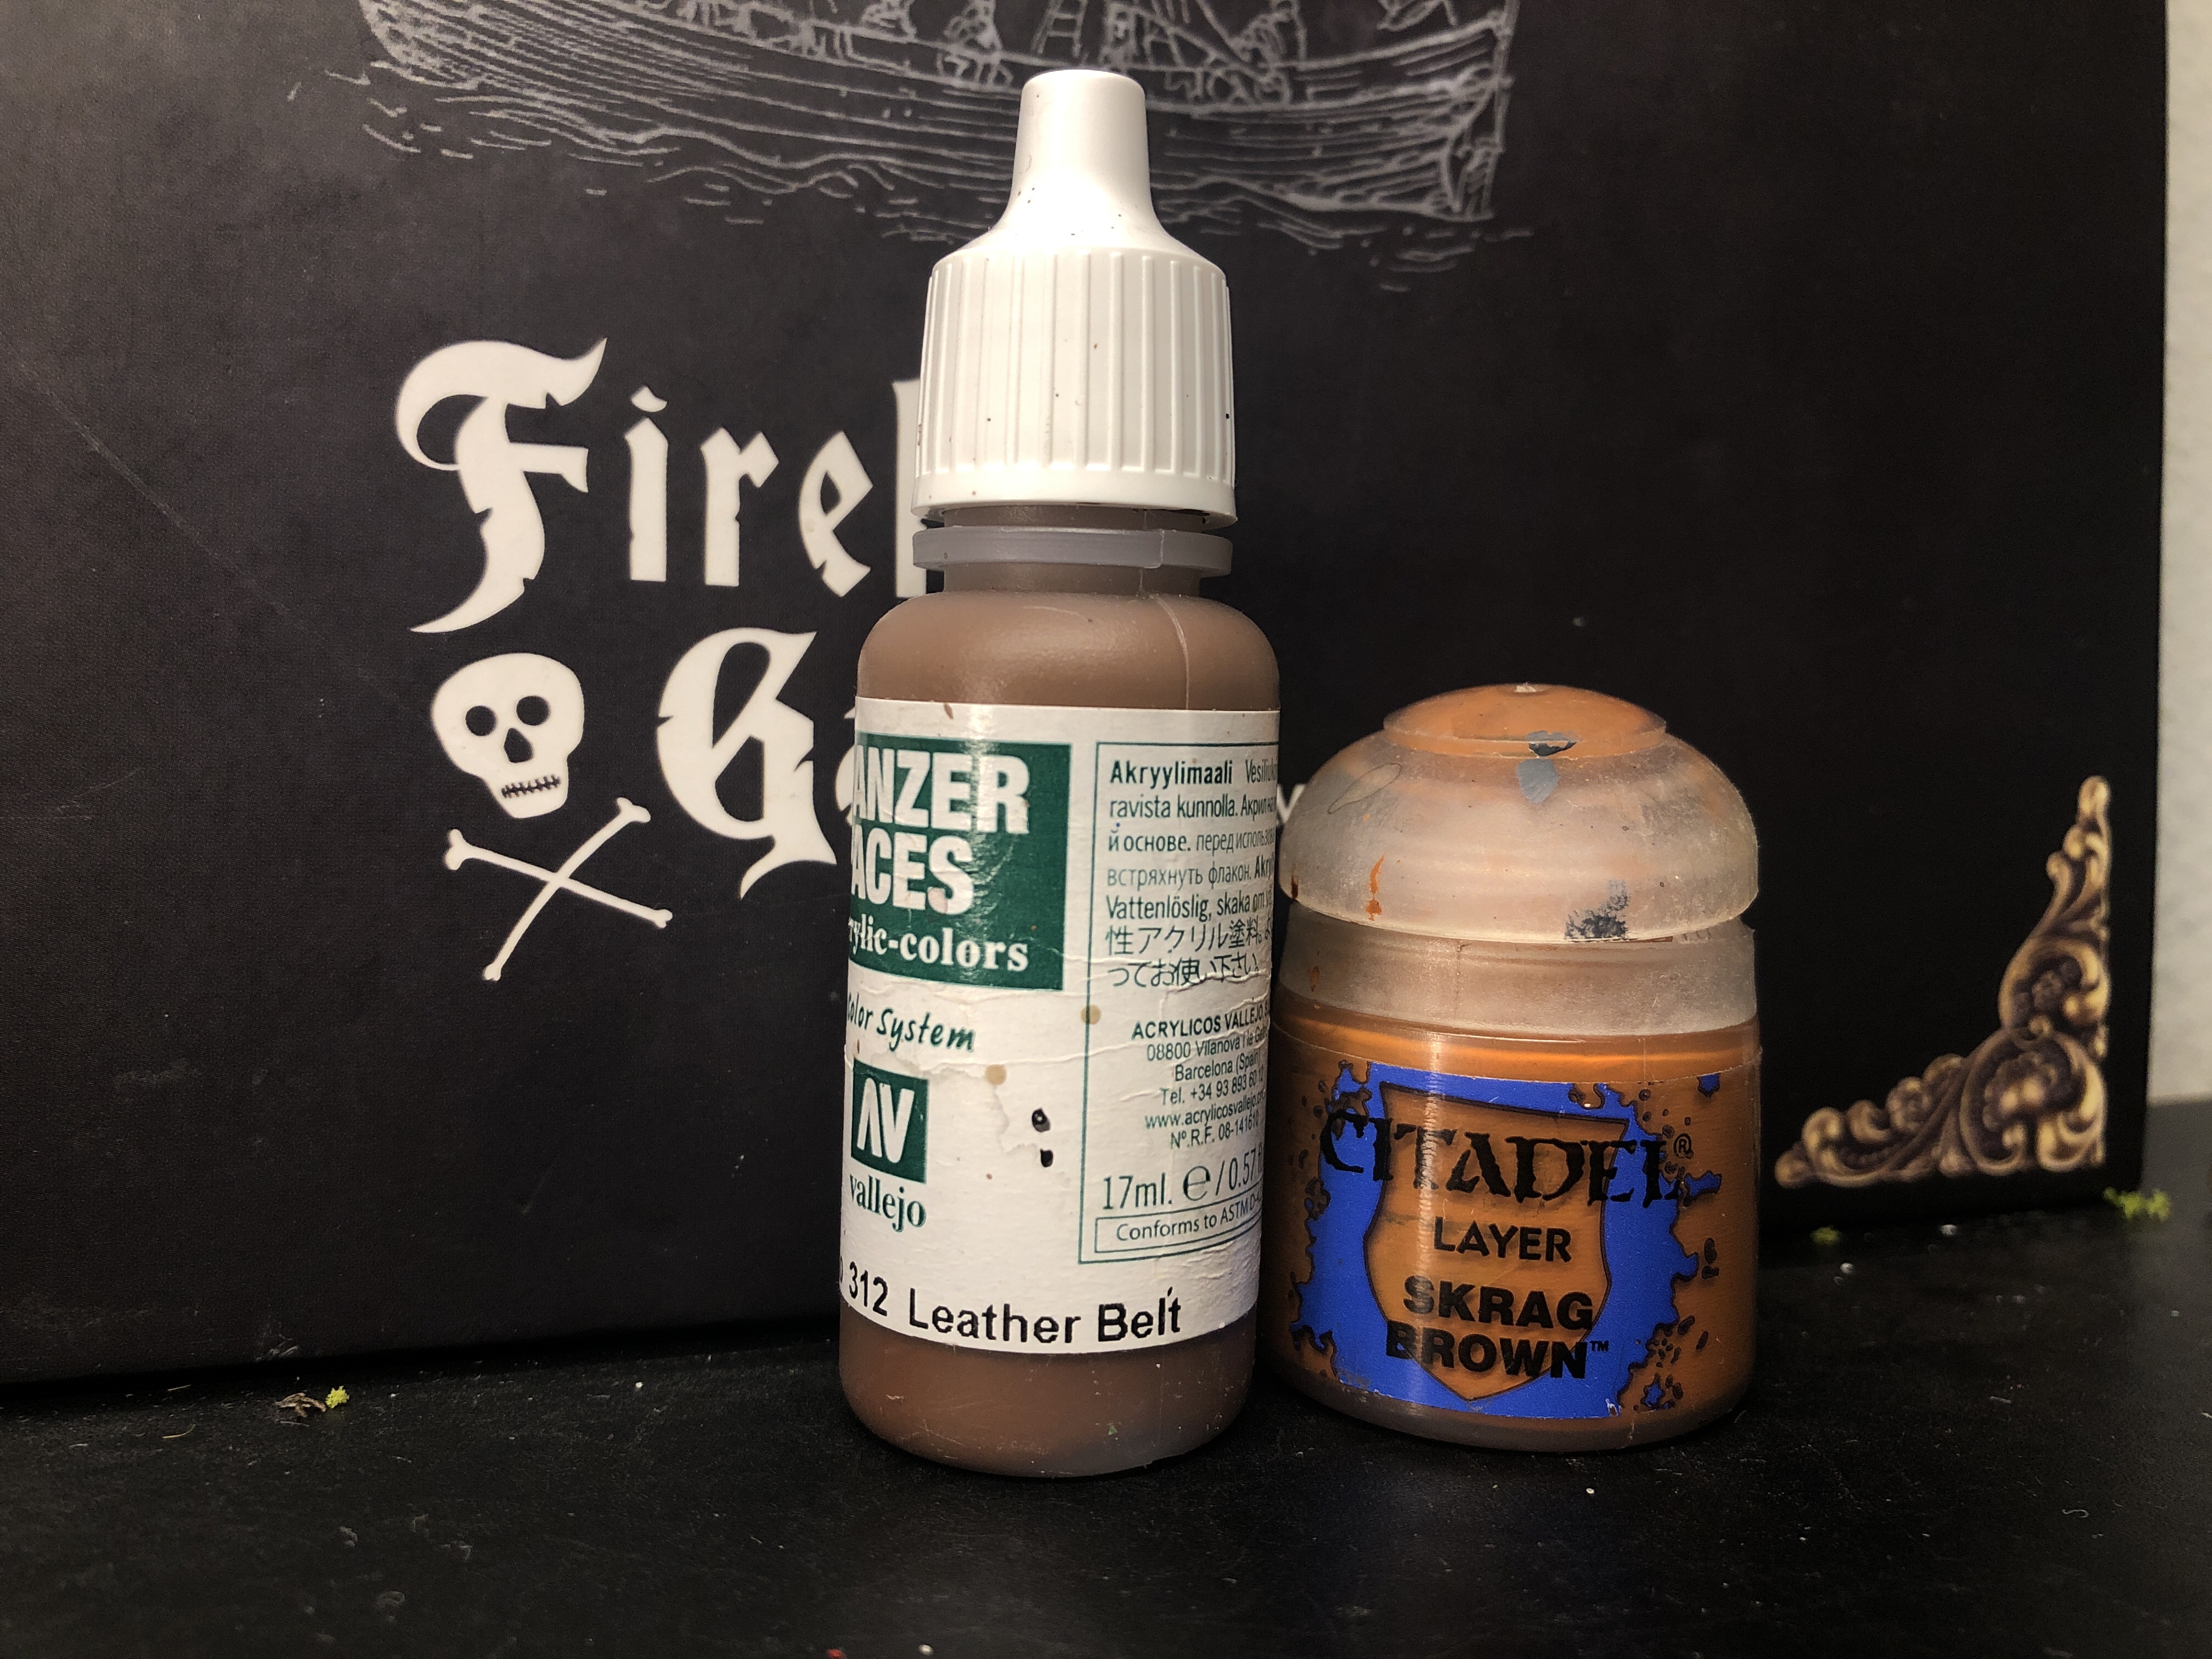
Lighten the highest portions.

And hit the edges with a highlight.
Next I worked over the metallics. The base color with the shade over the top has already given us some nice contrast and variation but I want to brighten it up some more.
Citadel’s Leadbelcher, Ironbreaker, and Stormhost silver would do the job but I’ve become addicted to these Vallejo Metal Color metallics. They aren’t cheap but they’re the best! They have great coverage and are easy to work with compared to Citadels’ gloppy metallic colors.
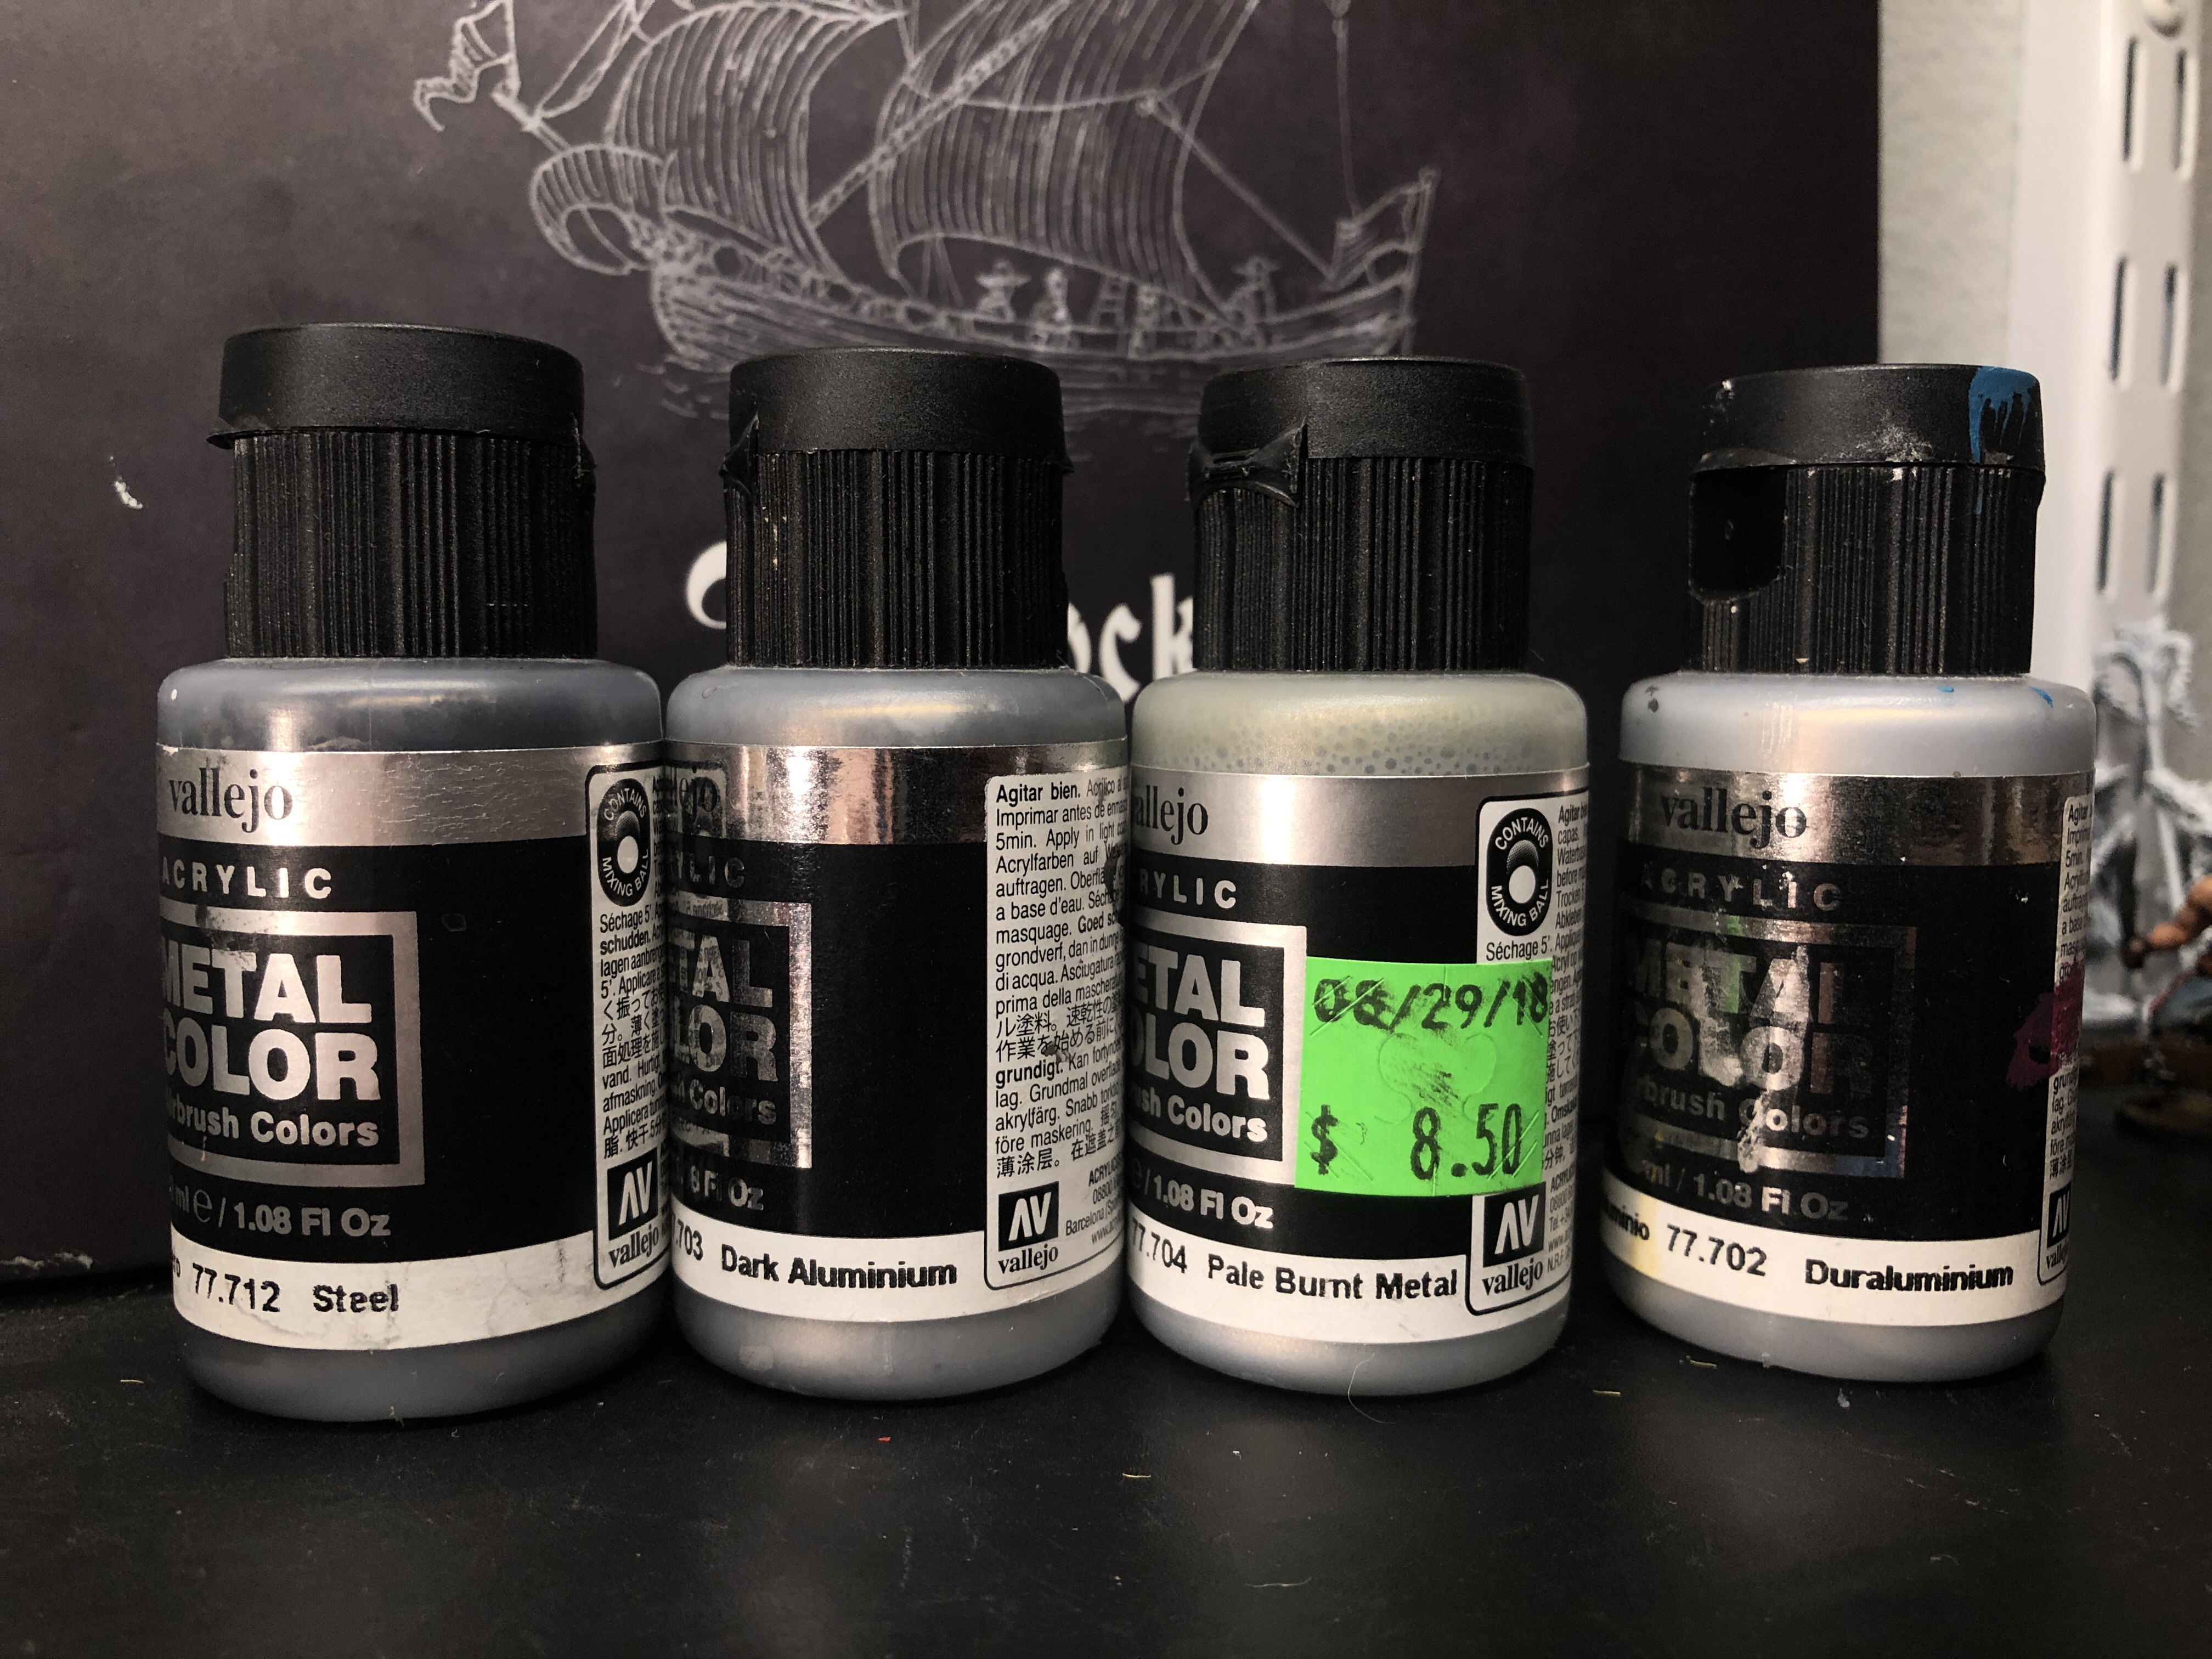
I used all four of these colors to highlight the armor on this figure.
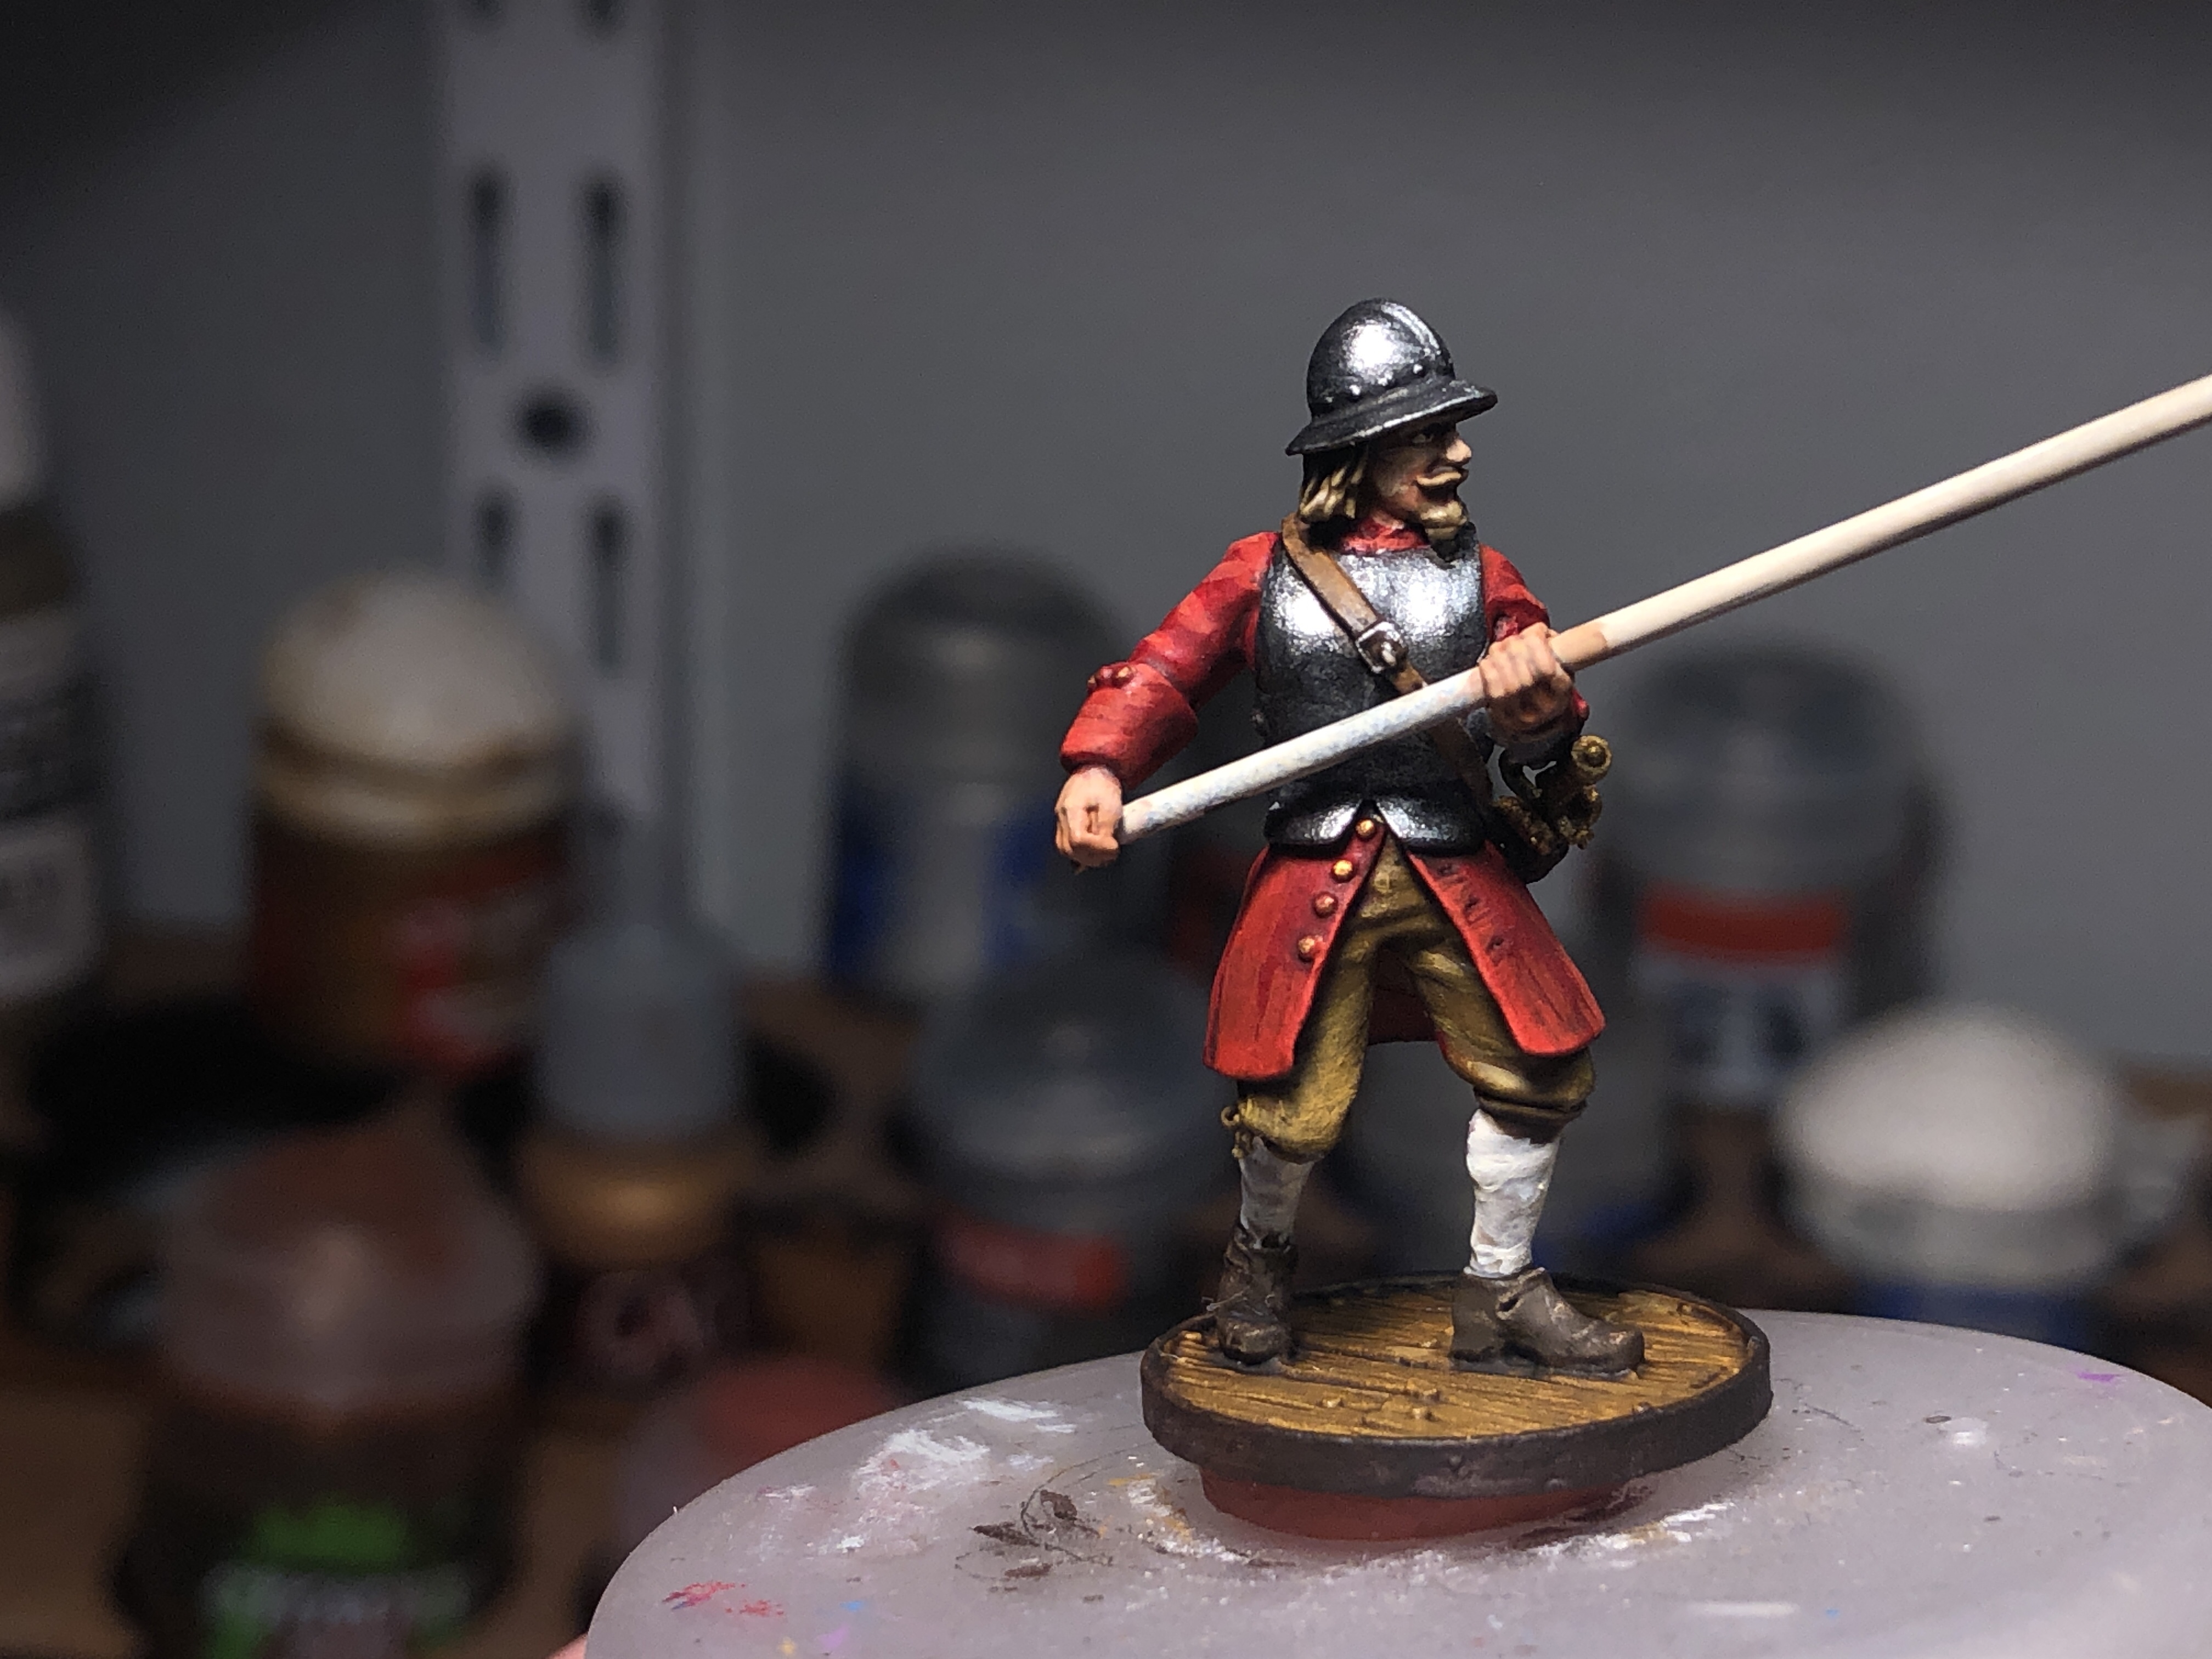
Try to imaging a light source then highlight the areas that that light source would hit first.
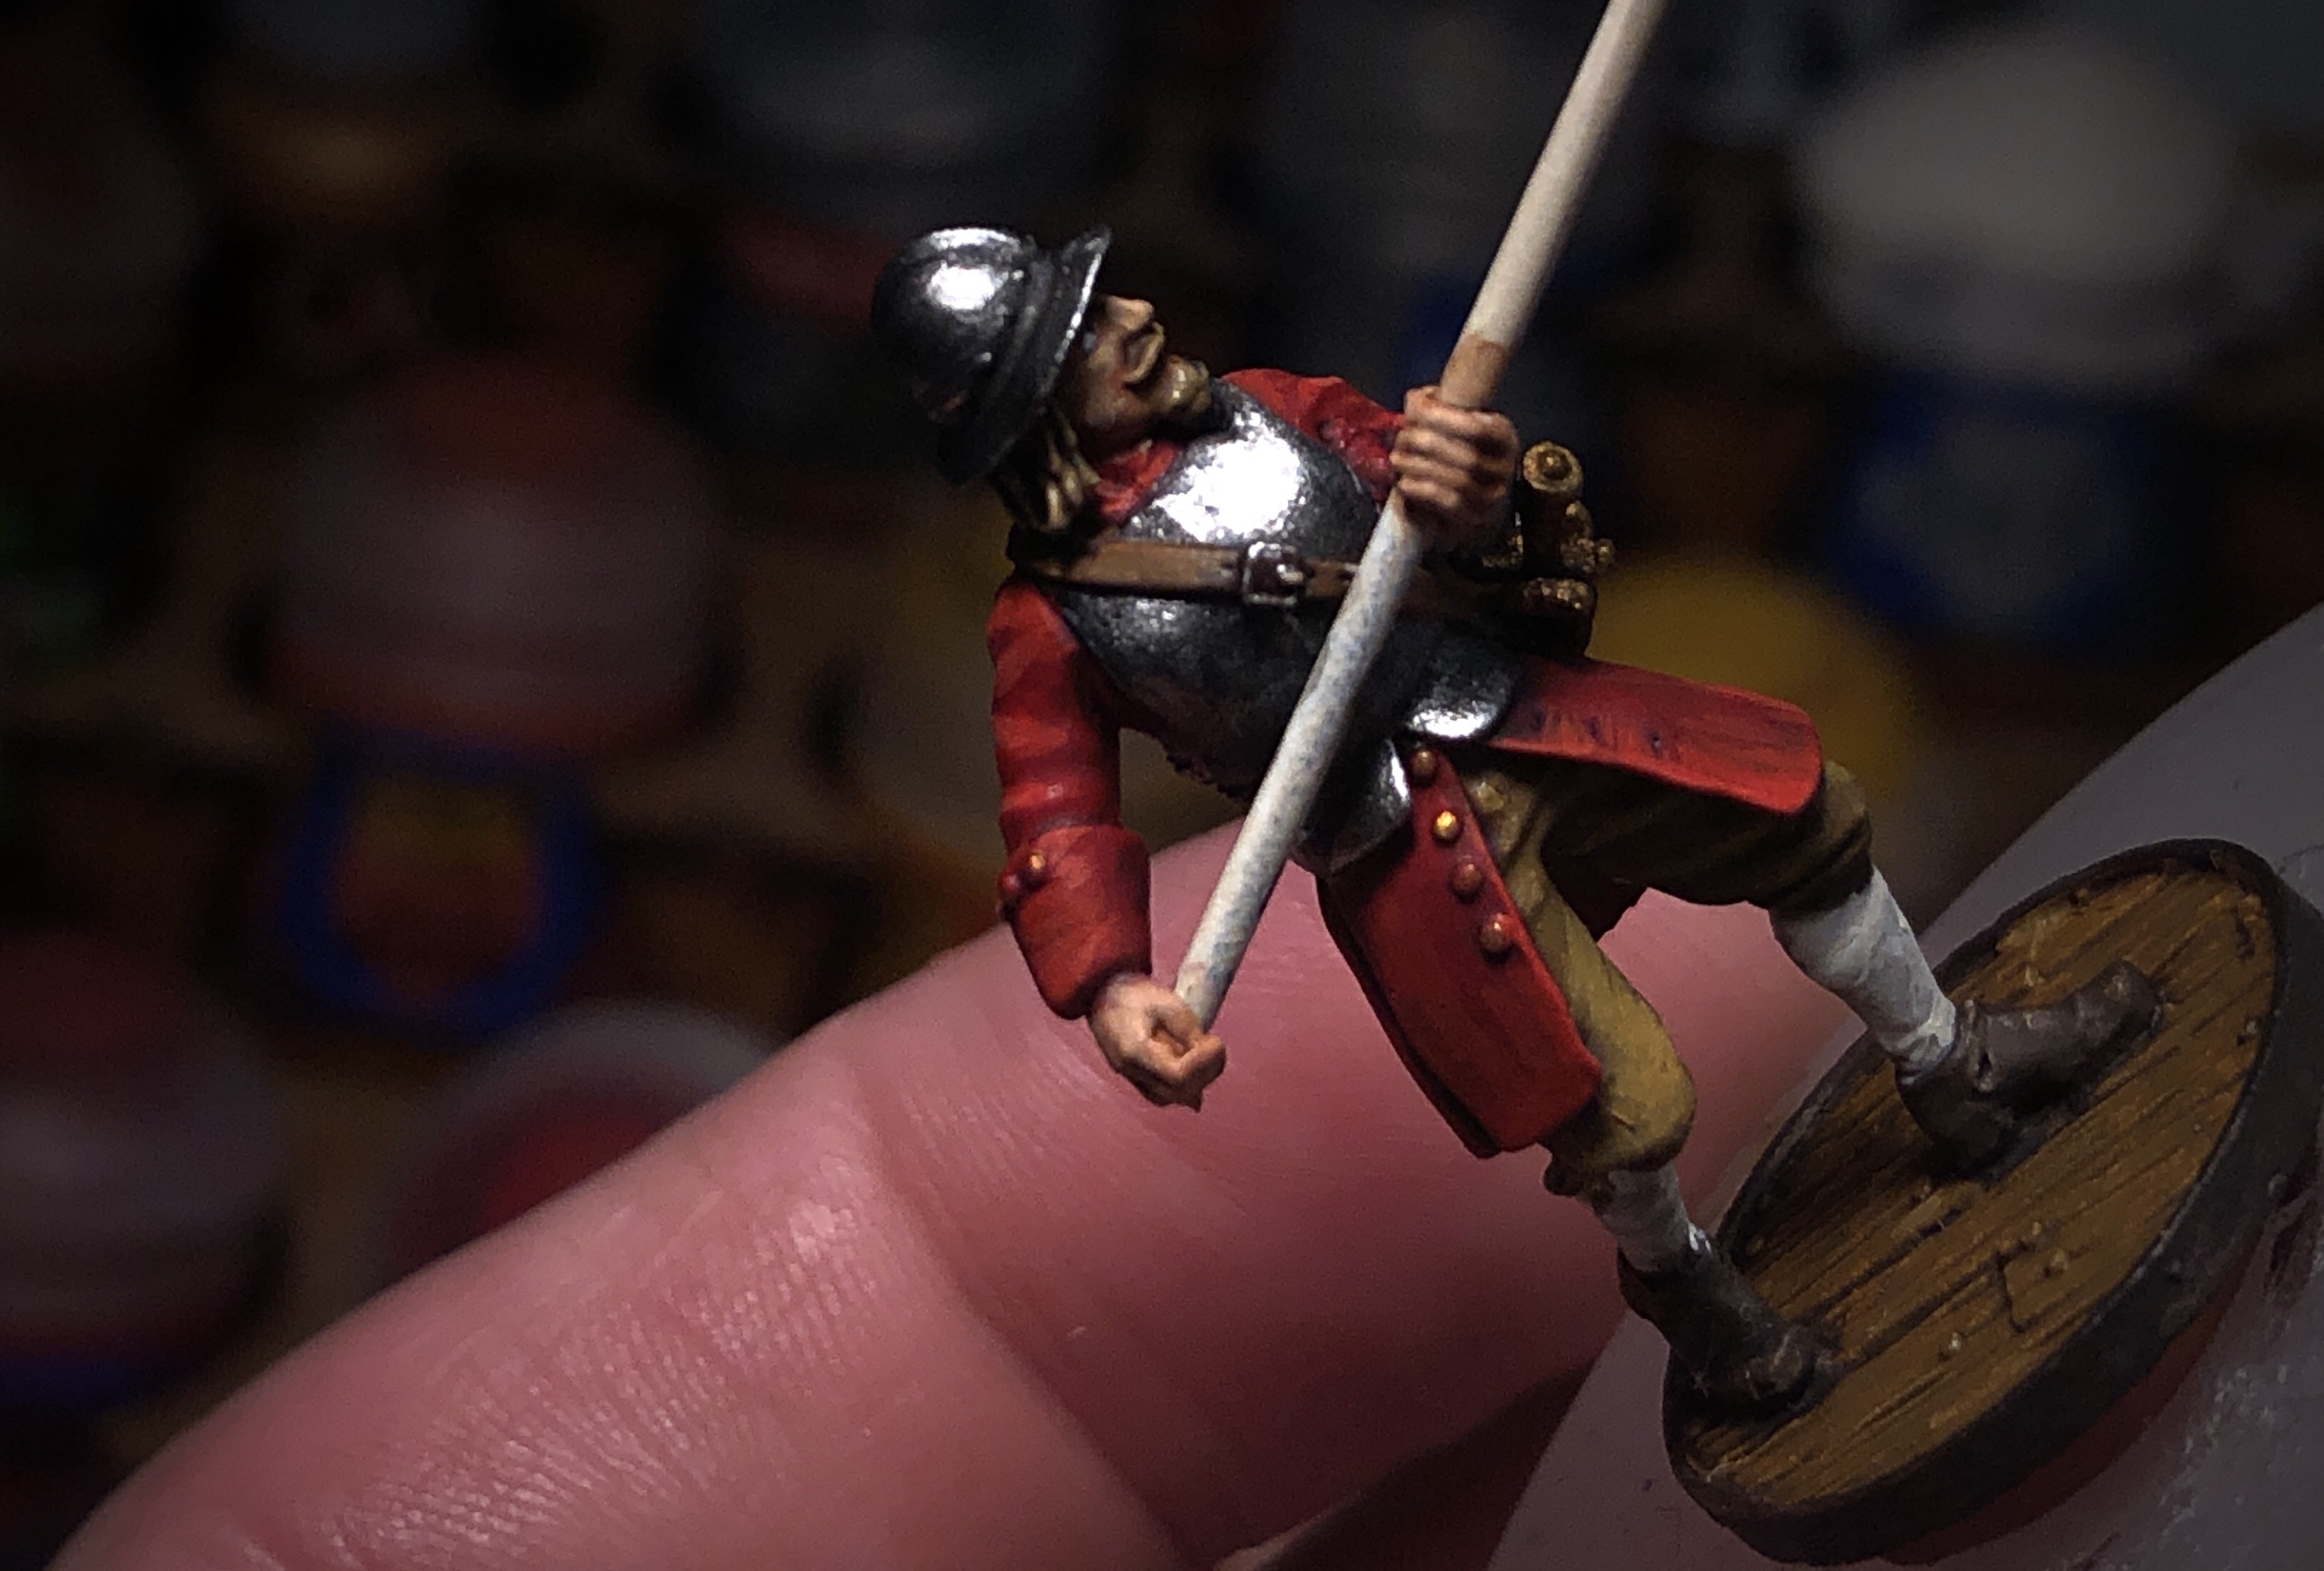
I really like this figure so you get bonus pics.

I hit the edges of the pike heads and the belt buckles and sword hilts with these metallics as well.

For the brass buckles, buttons and sword hilts, I used Game Color Polished Gold but any bright gold would work. I hit the button on the upturned hat with this as well.
I had to go back and touch up the jackets are the buttons after this step.
The light colored hair gets the last highlights!
My shade paint already gave me some good contrast but I’m going to boost that with Karak Stone and Screaming Skull.

Hit that facial hair. Contrast on the face brings the model to life.

Such beautiful locks!
That finishes the highlights!
Step 6 – Protective Spray
I always apply 2 coats of Testor’s Dull Coat to my minis to protect the models from chipping.

I use poster putty to fix them to a piece of cardboard to spray them outside.
They’re finished! Ready to stab some cavalry. Or get shot to pieces by French guns…
I’ll be painting up another set with shorter Lances soon.
Some flesh colored shade got on a like handle that I failed to notice. Have to go back and fix that!
Happy painting!
These are awesome!
Can’t wait getting mine on the table.