My local group has been working on a campaign for a few months and I was scheduled to play my final game this weekend but one of the four players involved was delayed so it was put off to next week. My buddy Bryan had already played his campaign game and was as eager for another game as I was so we got together Sunday afternoon and did a “practice session” using the same scenario as the campaign game I have yet to play.
Our campaign finale is a 2v2 amphibious Raze scenario at 200 points per player. I used the same basic list I built for the campaign game with a couple modifications to make up for the loss of my ally.
Summary
- Joseph F vs Bryan H
- Spanish Caribbean Militia Florida defending vs Dutch Privateers attacking in a Brigantine
- Amphibious Raze Scenario
- 215 points per side (we prepared 200 points lists for campaign which doesn’t count commanders so we just added an experienced commander to each 200 point force).
- Using new cannon rules
- Played in my kitchen on a 4×6 mat
The Scenario
This scenario gives the defender 3 free emplacements with cannons. At 215 points, the defender gets medium cannons but they start unloaded. The defender gets a strike point if the attacker sets fire to or destroys an emplacement or destroys the gun (with a critical hit). The attacker will get a strike point if he fails to set fire to or destroy an emplacement or knock out a gun by the end of turn 4.
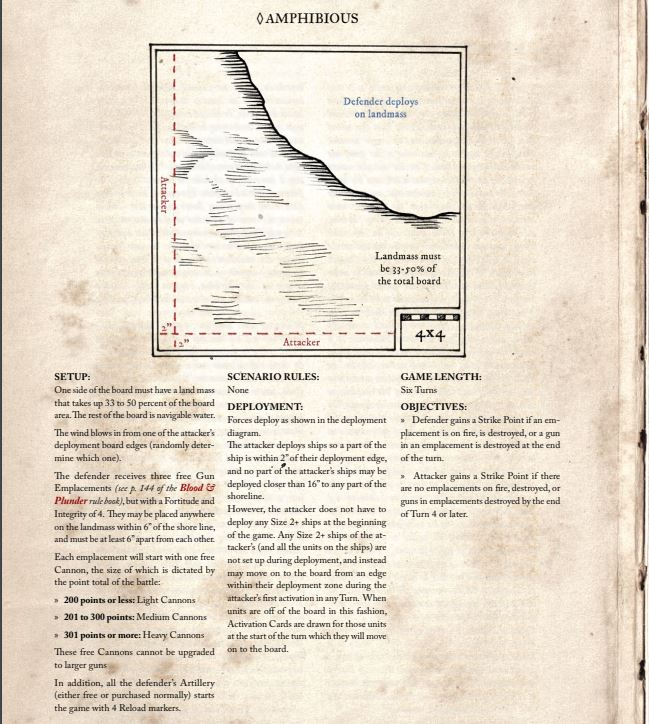
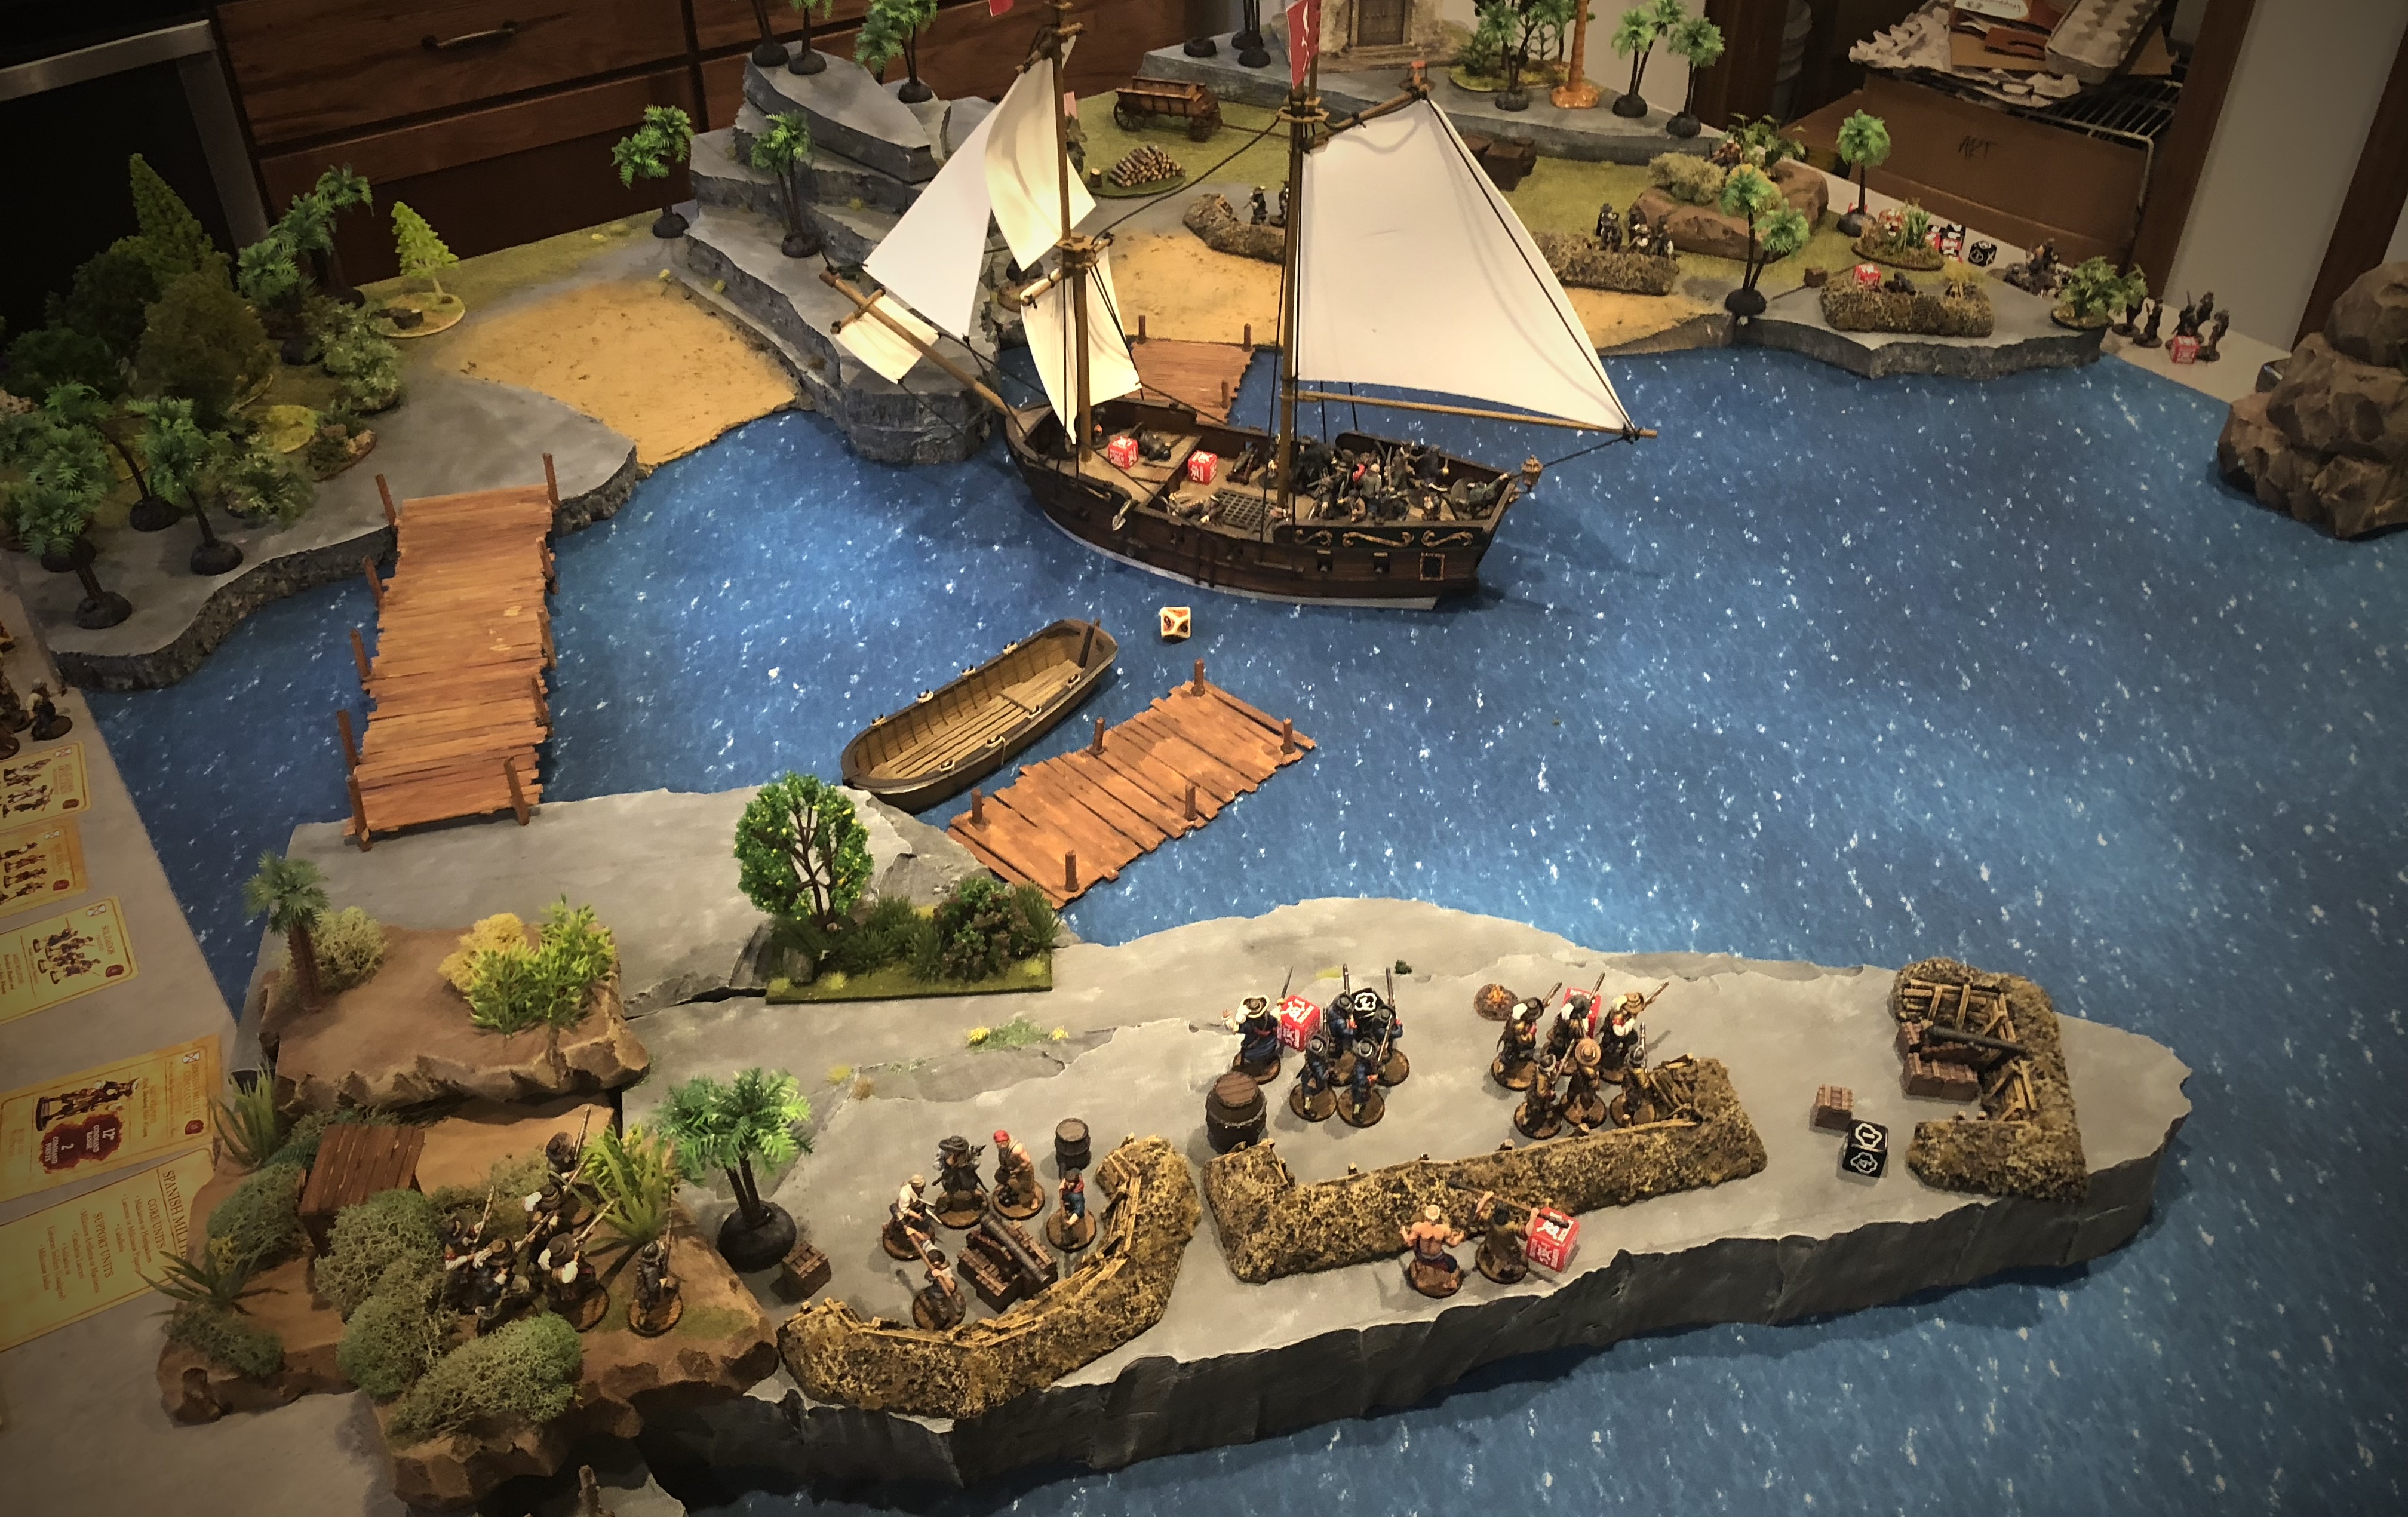
I built this coastal landmass for amphibious scenarios and this was the first time I’ve got to use it! I tried to place my cannons to cover every avenue of attack but with a long and narrow mat, I quickly found out that my cannons wouldn’t do much for me.
The instructions indicated that land should cover 33-50% of the board and I think we covered about 40%.
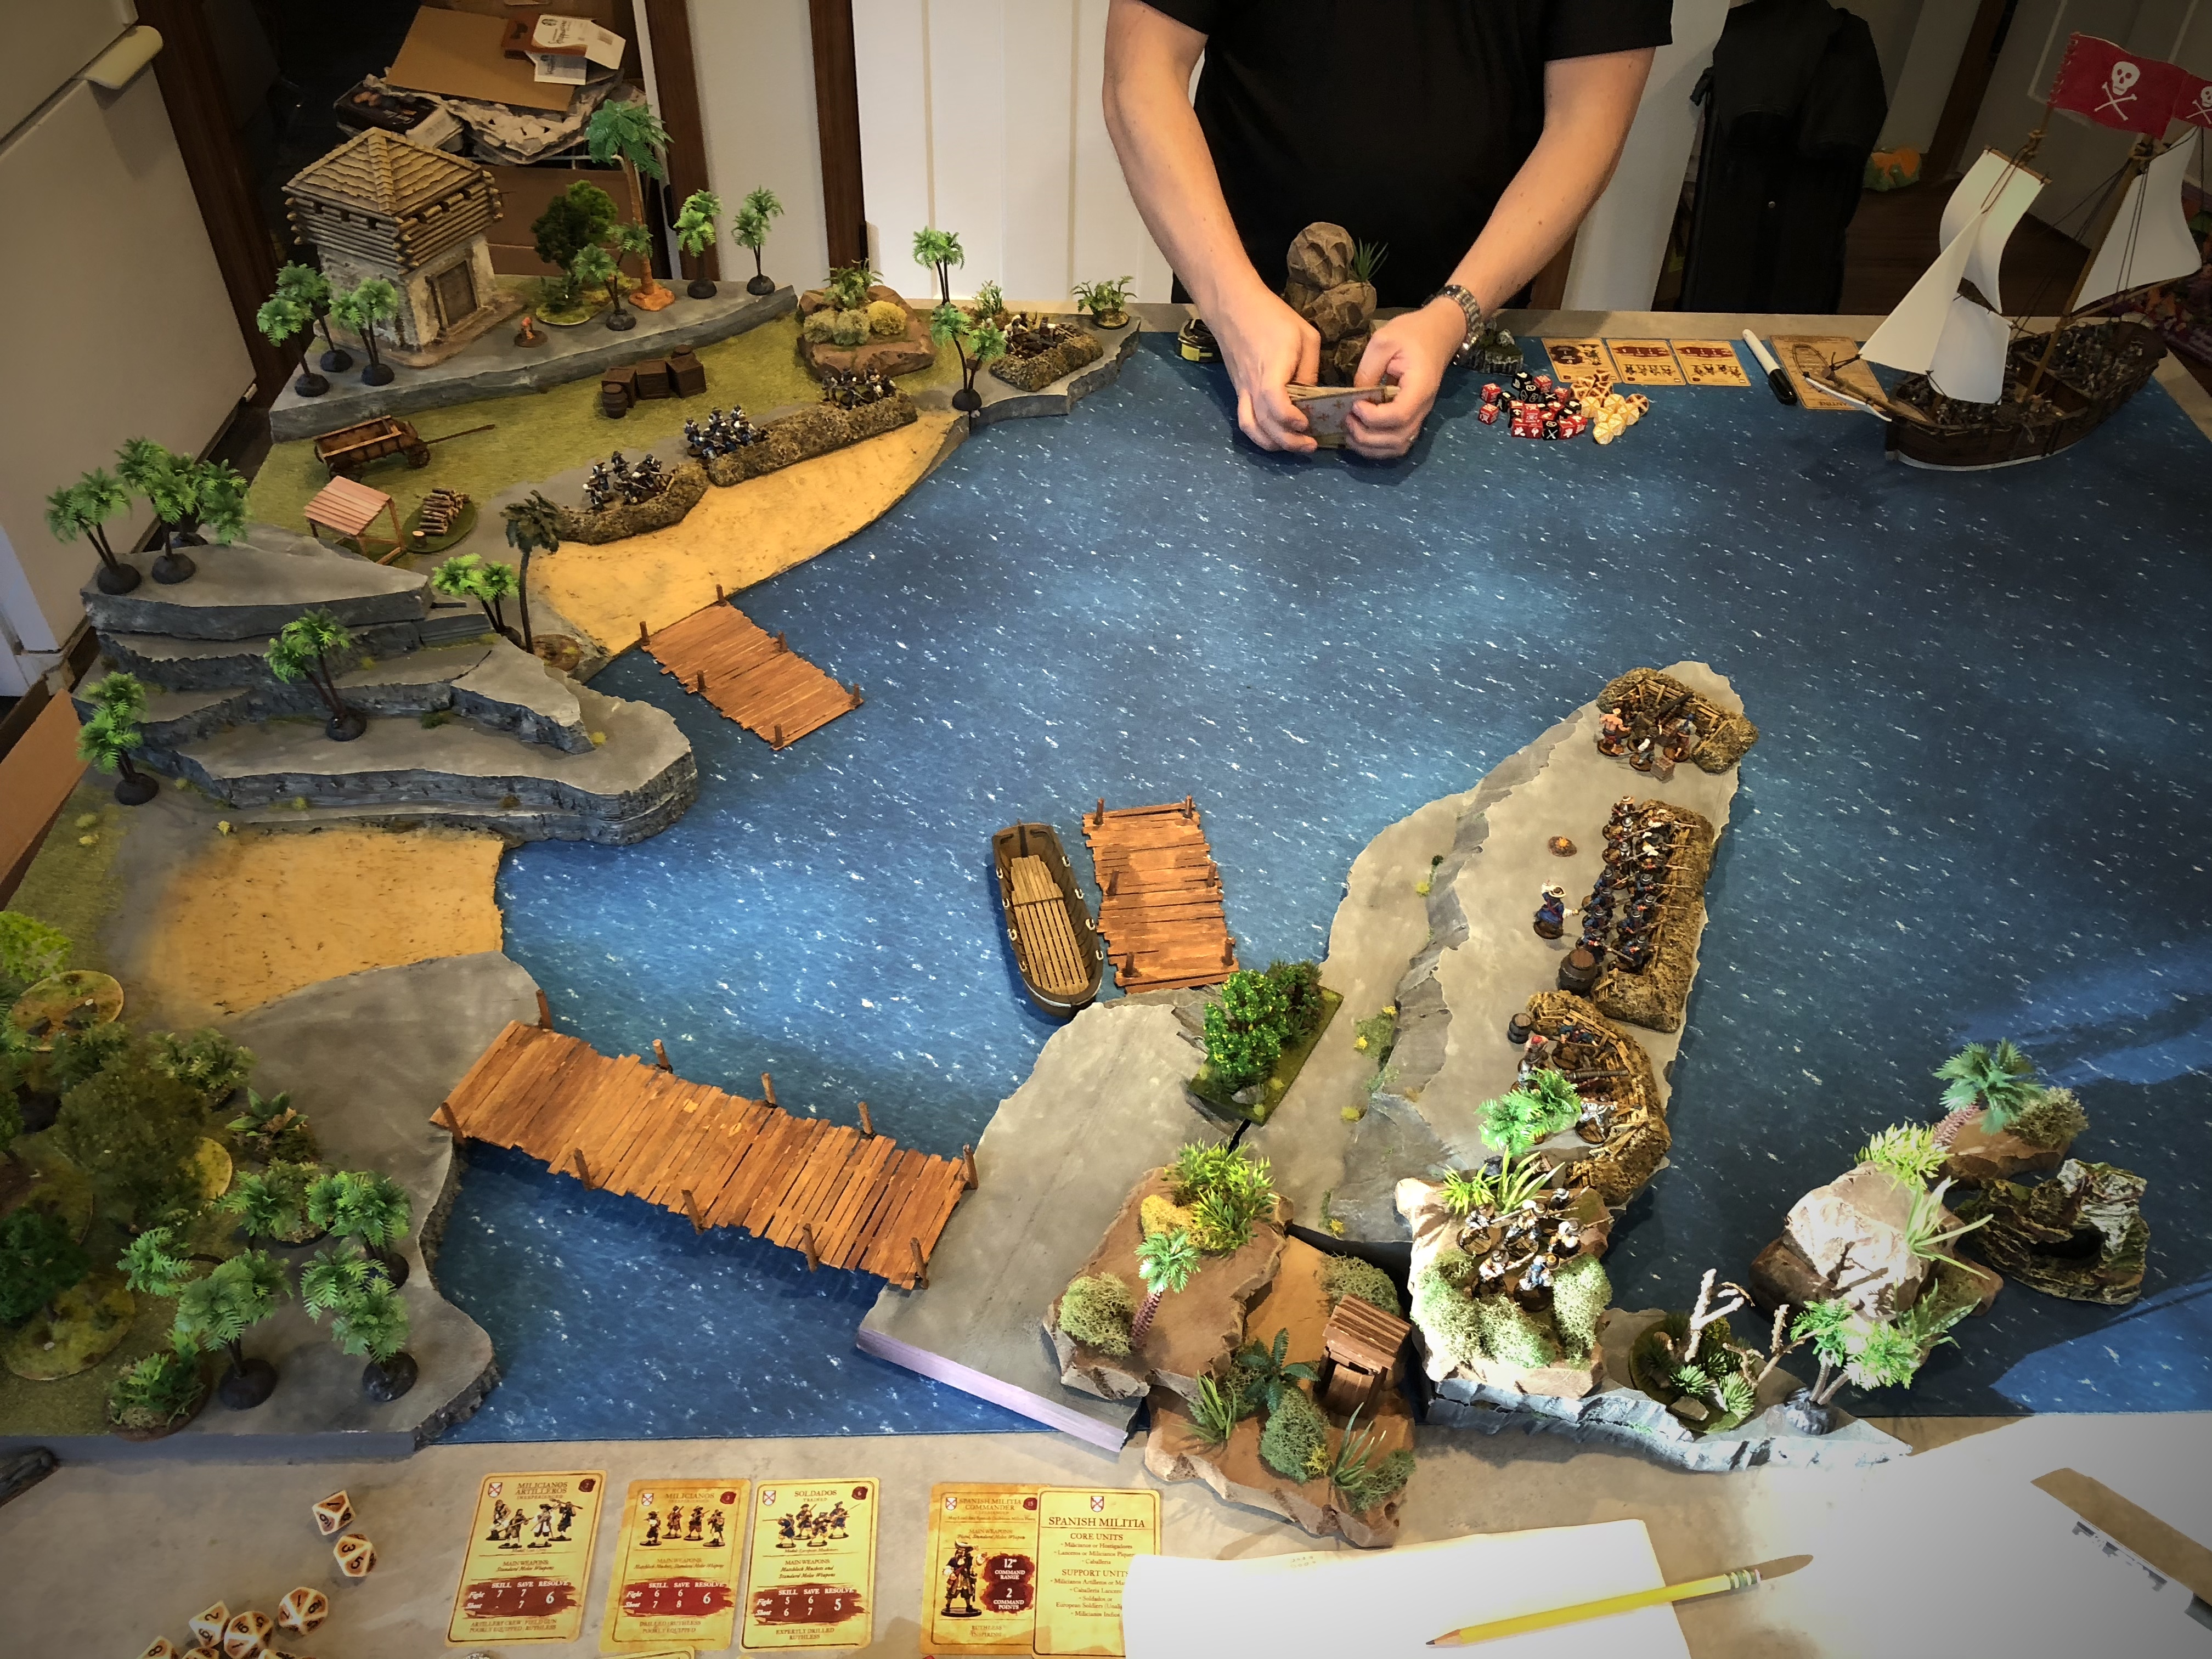
This is before Bryan deployed his ship.
The Forces
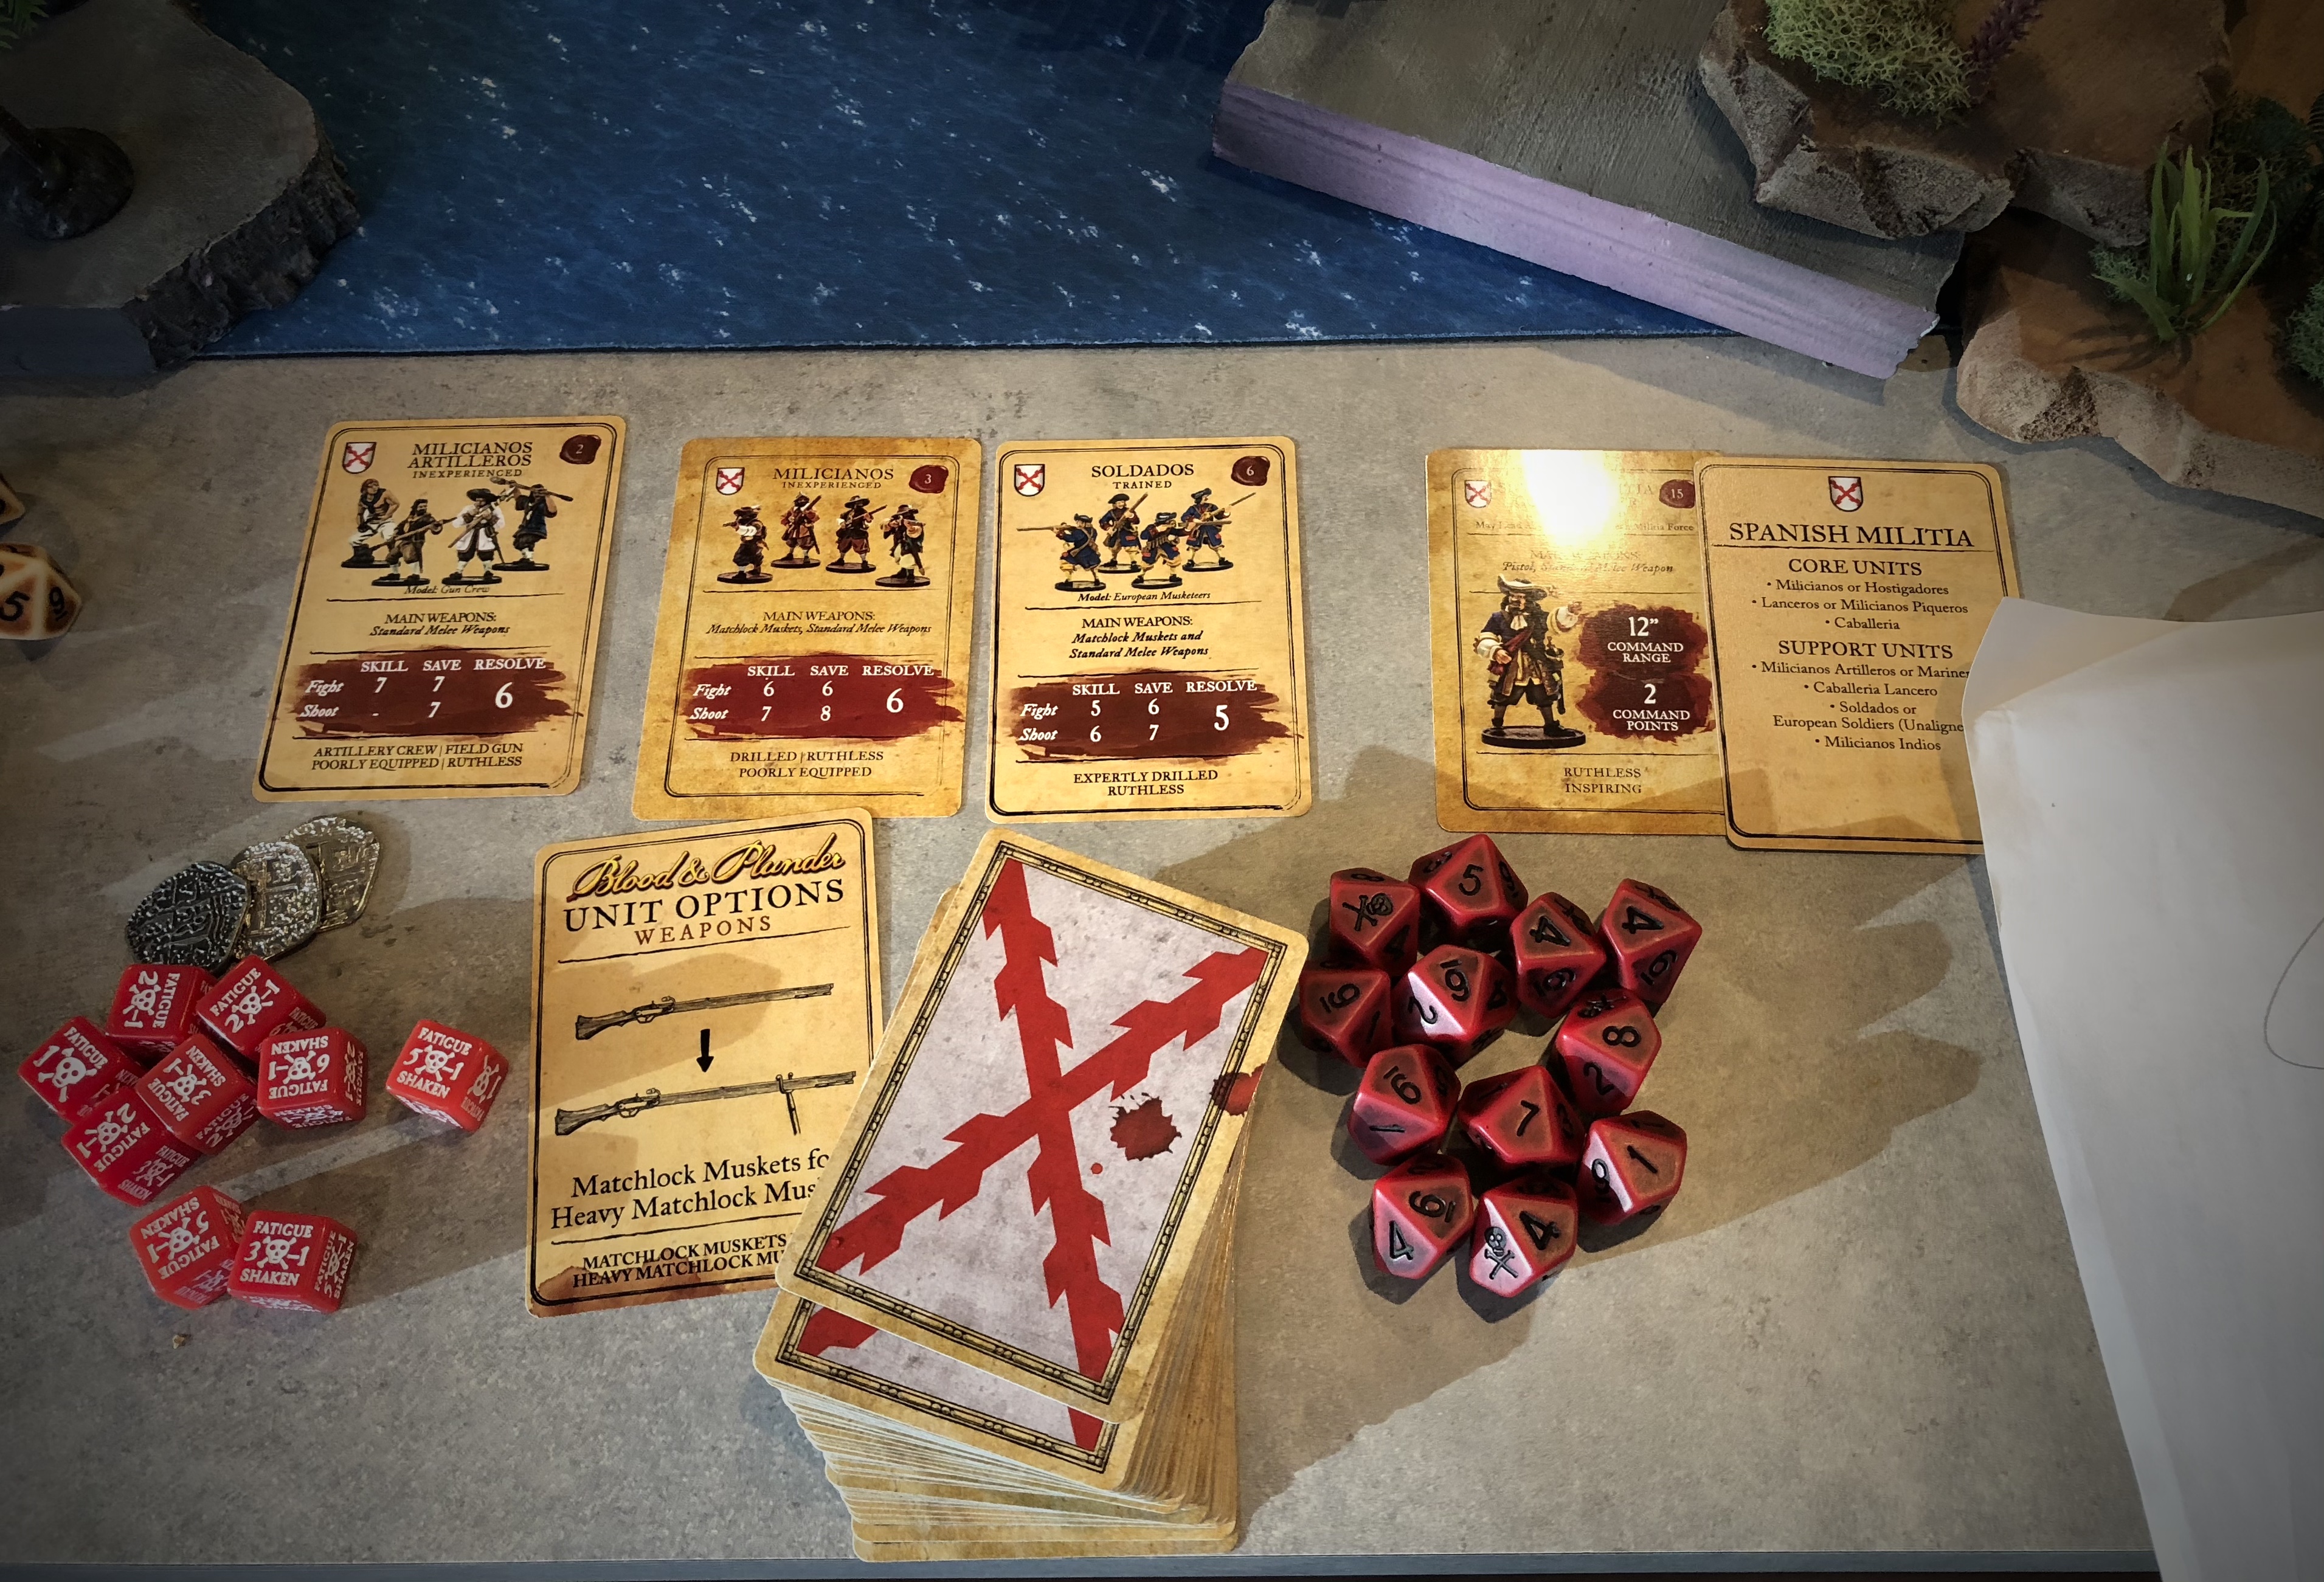
With the 3 medium guns provided by the scenario I had to figure out how to man them efficiently within the constraints of my faction. I brought 3 groups of Milicianos Artilleros to man the cannons and a bunch of Milicianos and Soldados with Heavy Matchlock Muskets for extended range. Knowing that the battle would really take place on the coast I bought breastworks to give my men cover.
I went for quantity over quality so I could have plenty of rifles shooting every turn. I figured the attacker might just anchor off the coast and shoot at the emplacements with cannons so I wanted those Heavy Matchlocks for the 32″ range. I went for smaller units, mostly so I could have 6 core units and get my 3 support units for the artillery crew.
My force contained 54 models with the 2 units of Soldados as the core of the force.
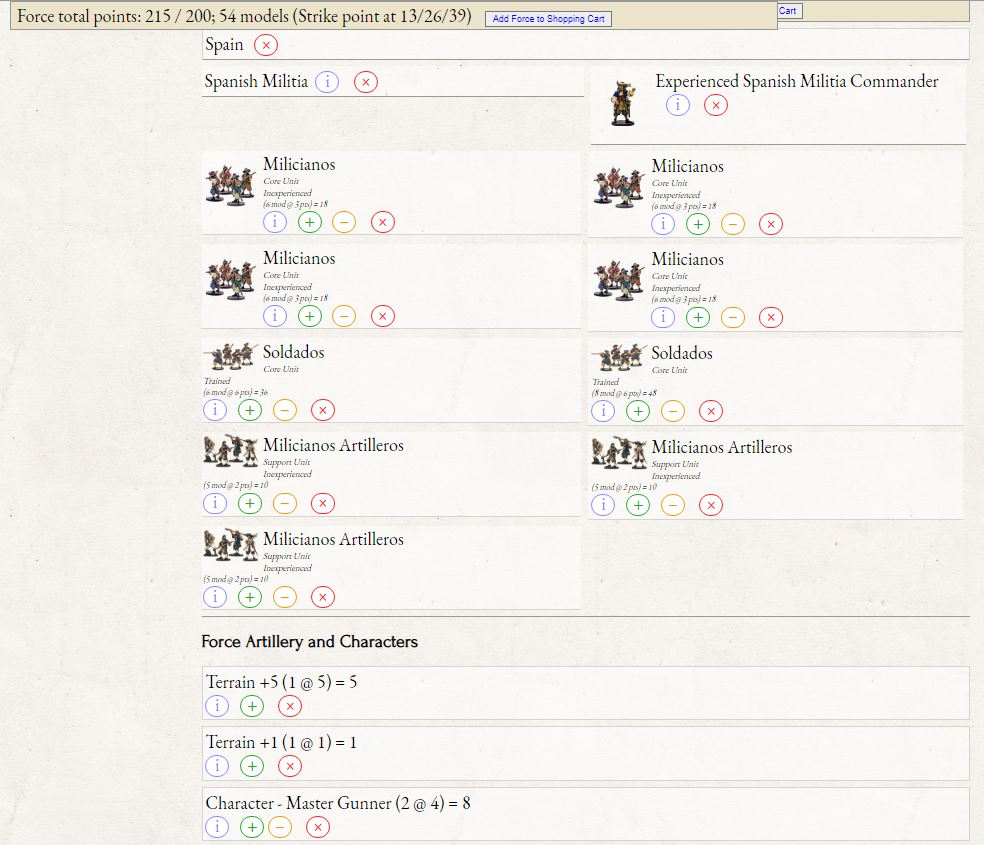
At 6 models per unit, my groups of Milicianos are pretty small, but that not only helps me get my gun crews, but it gives me a ton of cards every turn and I figured my opponent would be focusing fire on either my emplacements or the more dangerous and expensive Soldados.
This was the first time I got to use the new Soldados! It felt good having some good muskets on the board. I didn’t expect much from the Expertly Drilled rule, but I was in for a surprise! It really helped me get fatigue on the enemy units which let me get value out of the Ruthless but notoriously bad Milicianos.
Bryan brought the full 4 medium guns on a Brigantine with plenty of Zeelieden to man them and 3 units of Kapers. The cannons should be great for taking out the gun emplacements, but just the ship and guns use up 72 of 200 points.
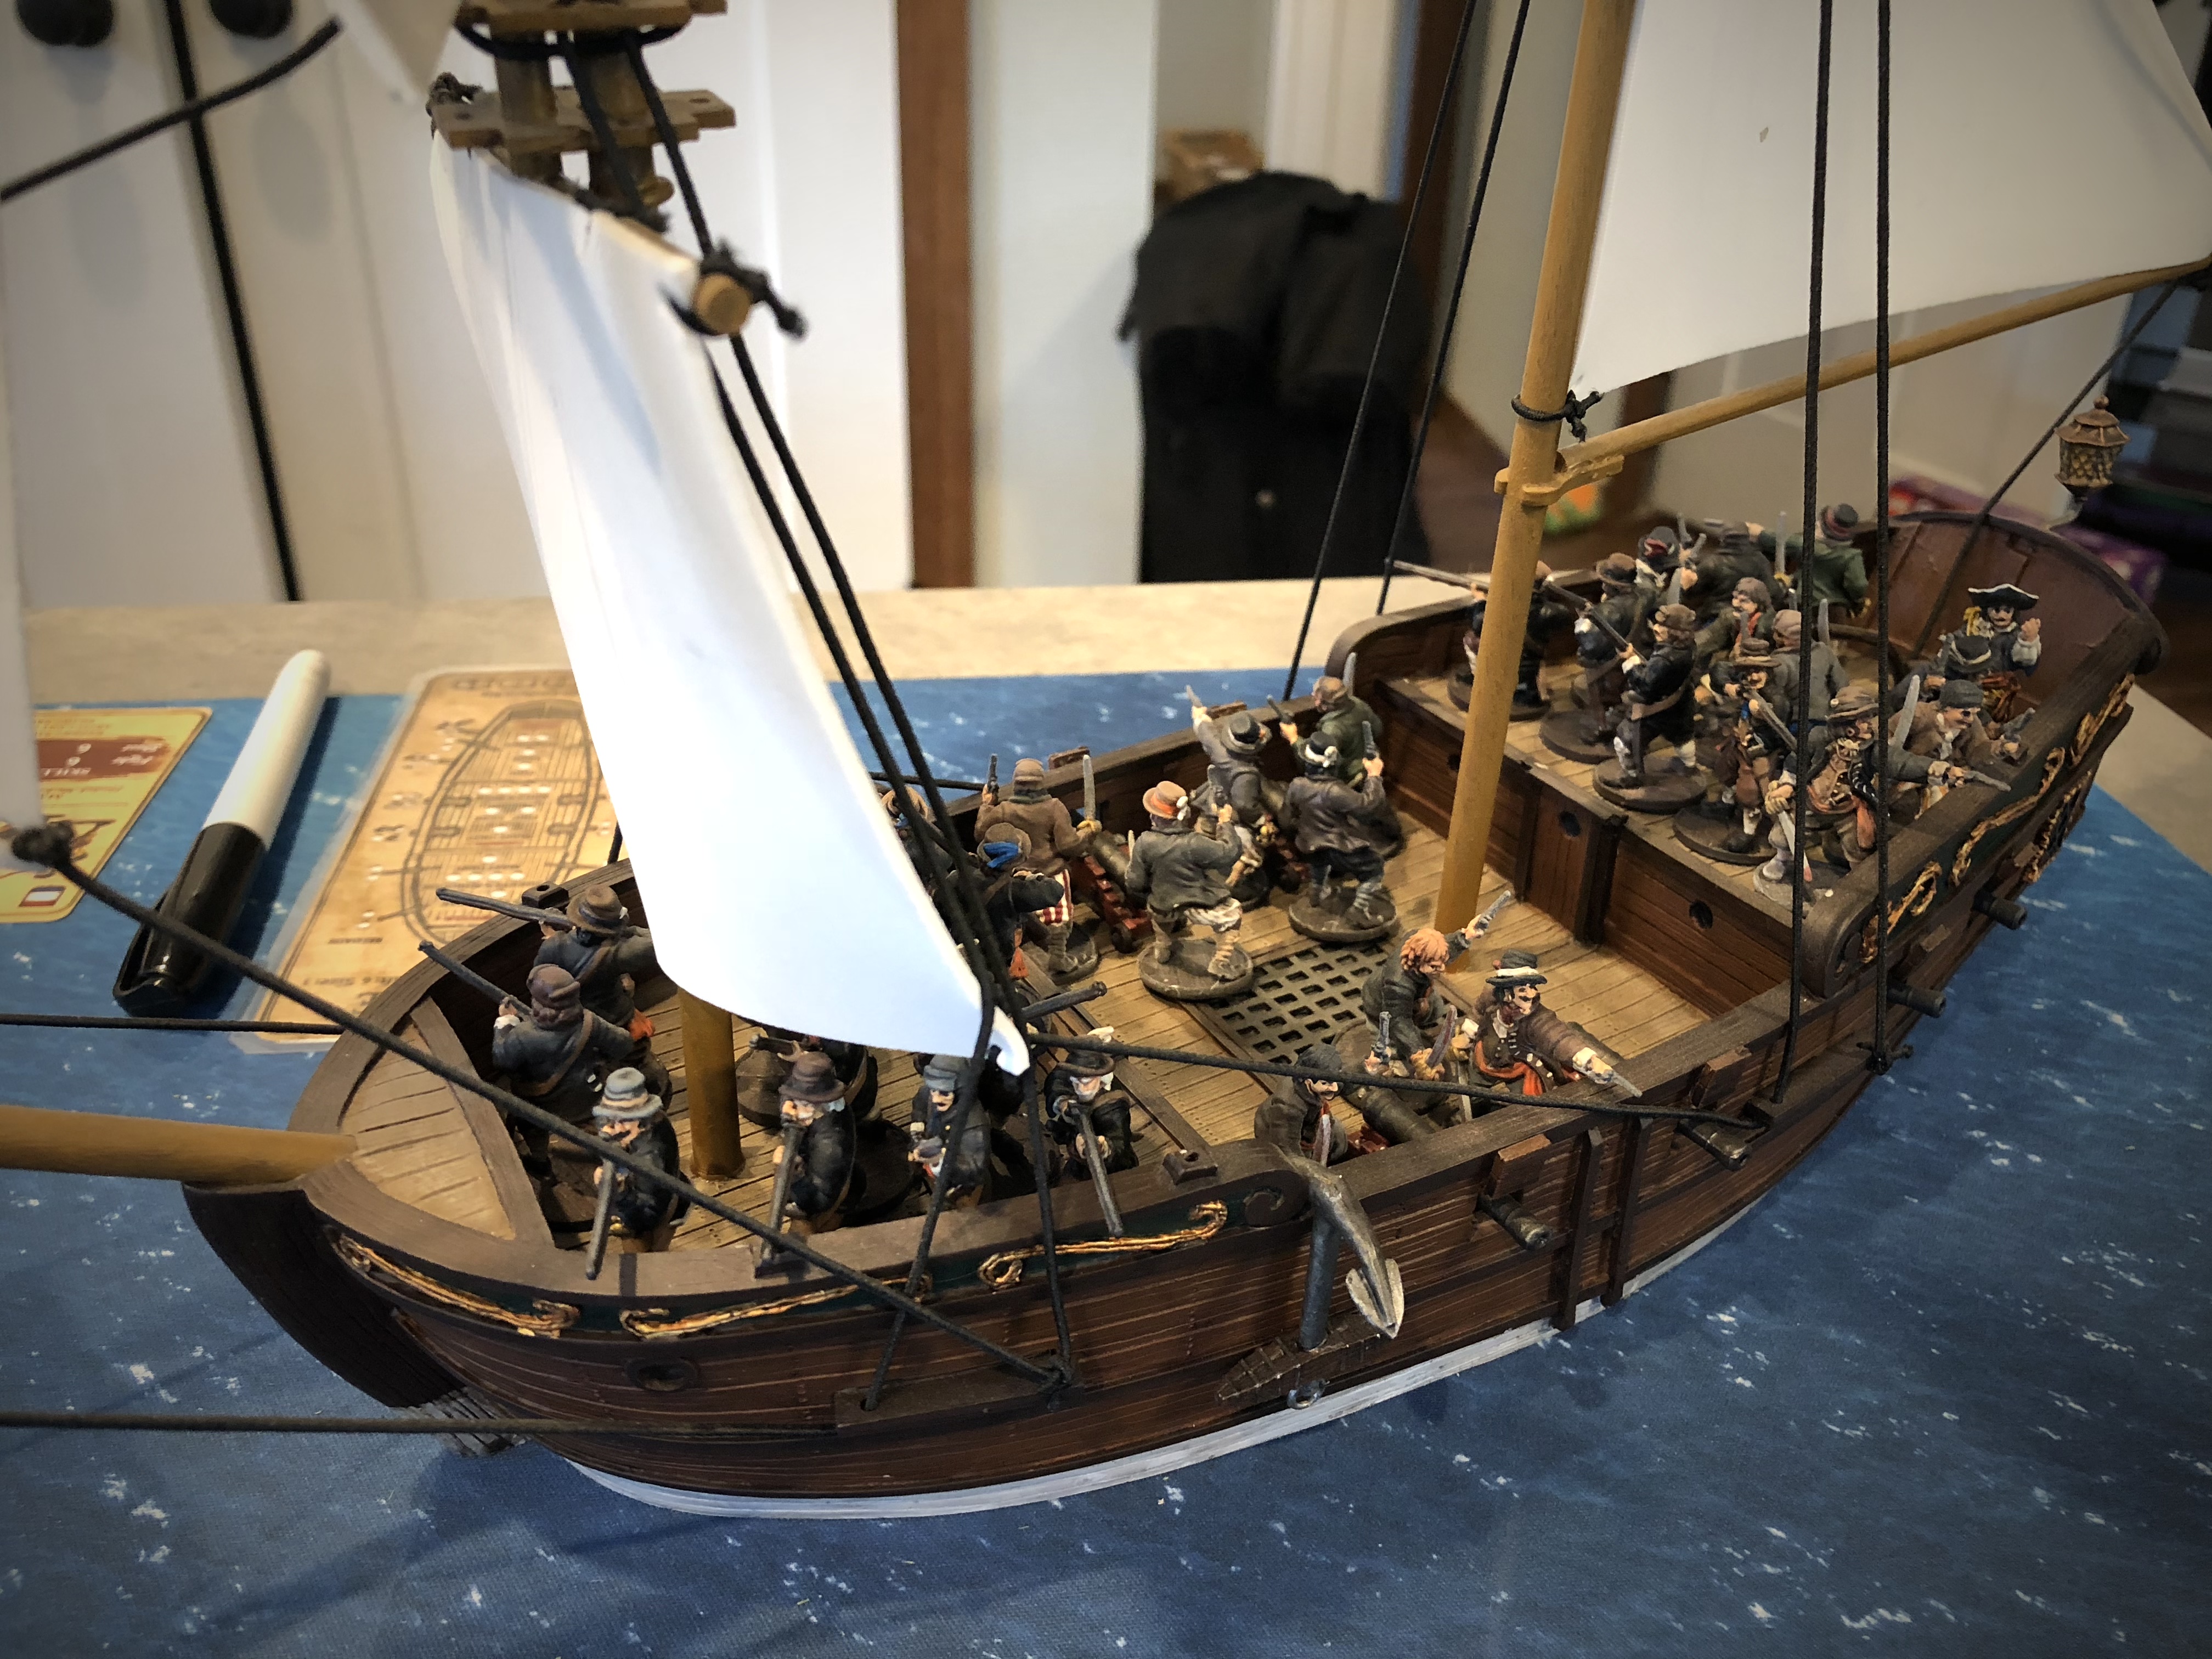
6 and 6 Kapers in the front, 8 Zeelieden in the middle and 8 Zeelieden (with the commander) and 4 Kapers in the back.
From my recollection and pictures, I think his force looked about like this:

Deployment
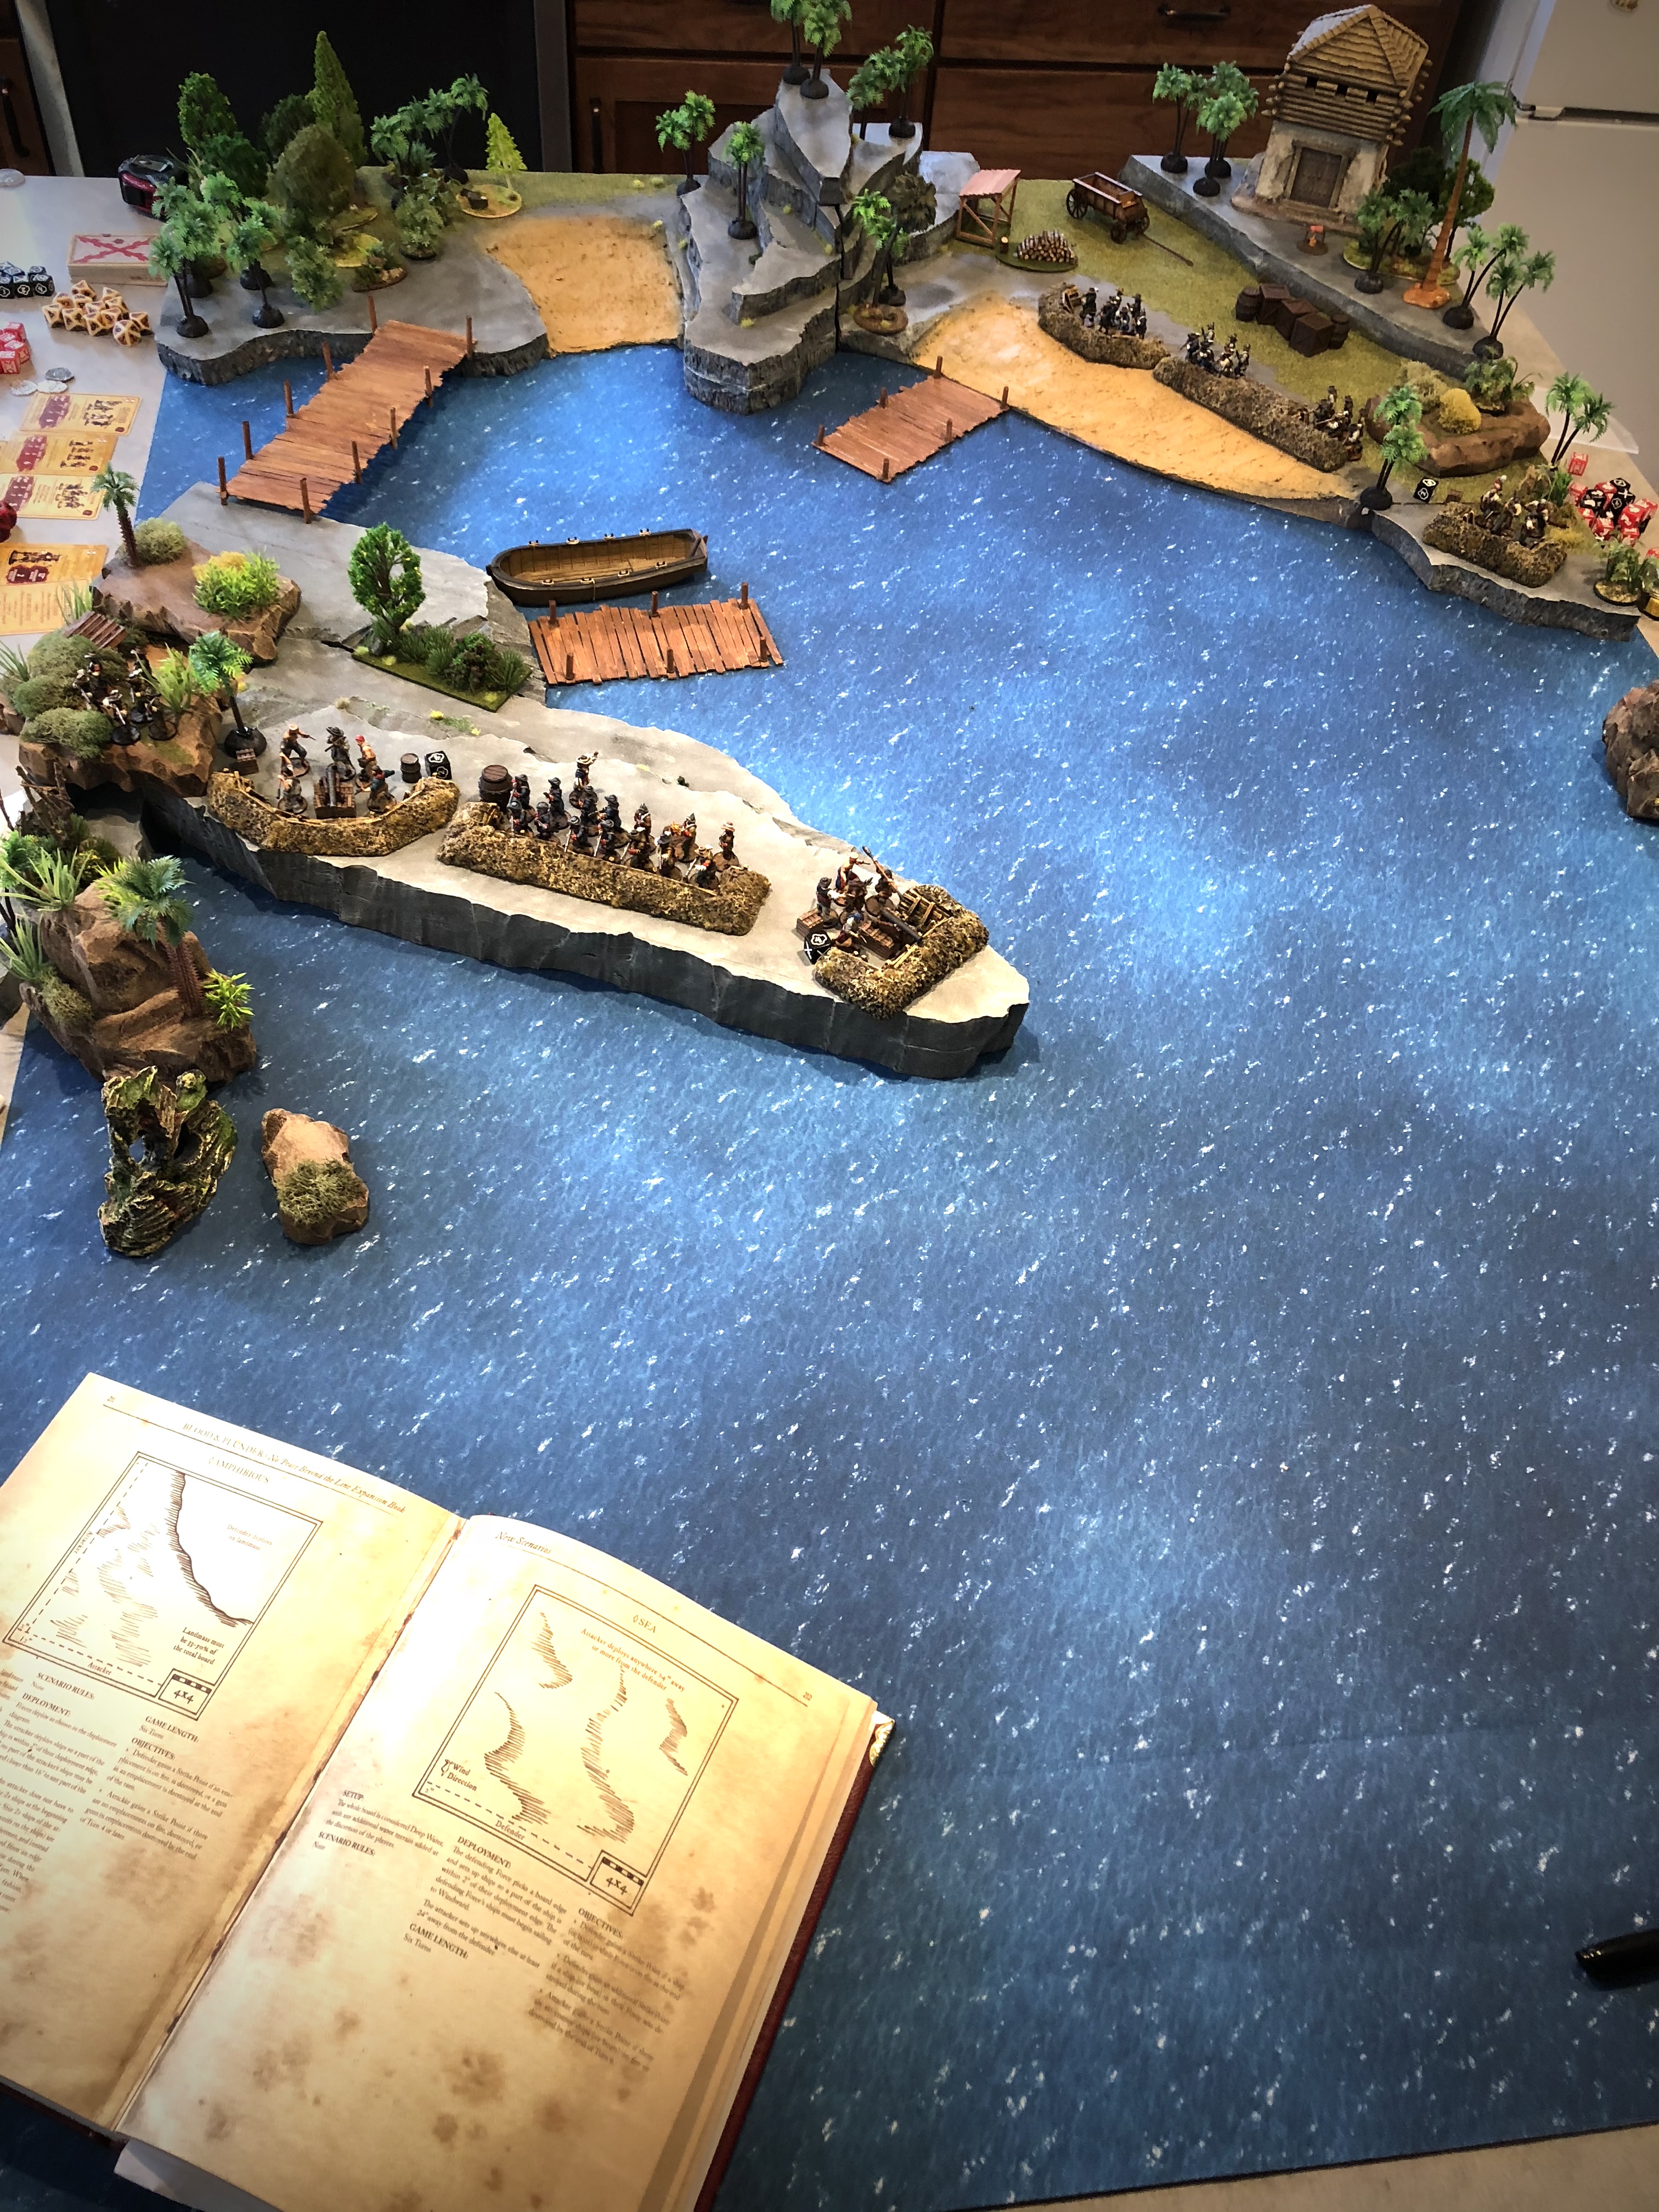
The longboat and the fort/watchtower at the back of the board are just for looks.
I deployed all my units first and Bryan chose to deploy his ship on the first turn as allowed by the scenario rules. With my cannons fully unloaded, this helped him totally dodge 2 of my 3 guns.
I basically split my forces and put 2 units of Milicianos, 2 emplacements and the larger unit of Soldados with the commander on the promontory behind breastworks and the remaining 2 groups of Milicianos, the smaller unit of Soldados and 1 emplacement were along the coast of the mainland.

The emplacements have a fortitude of 5 and integrity of 4. That’s 17 points of damage needed to destroy it!
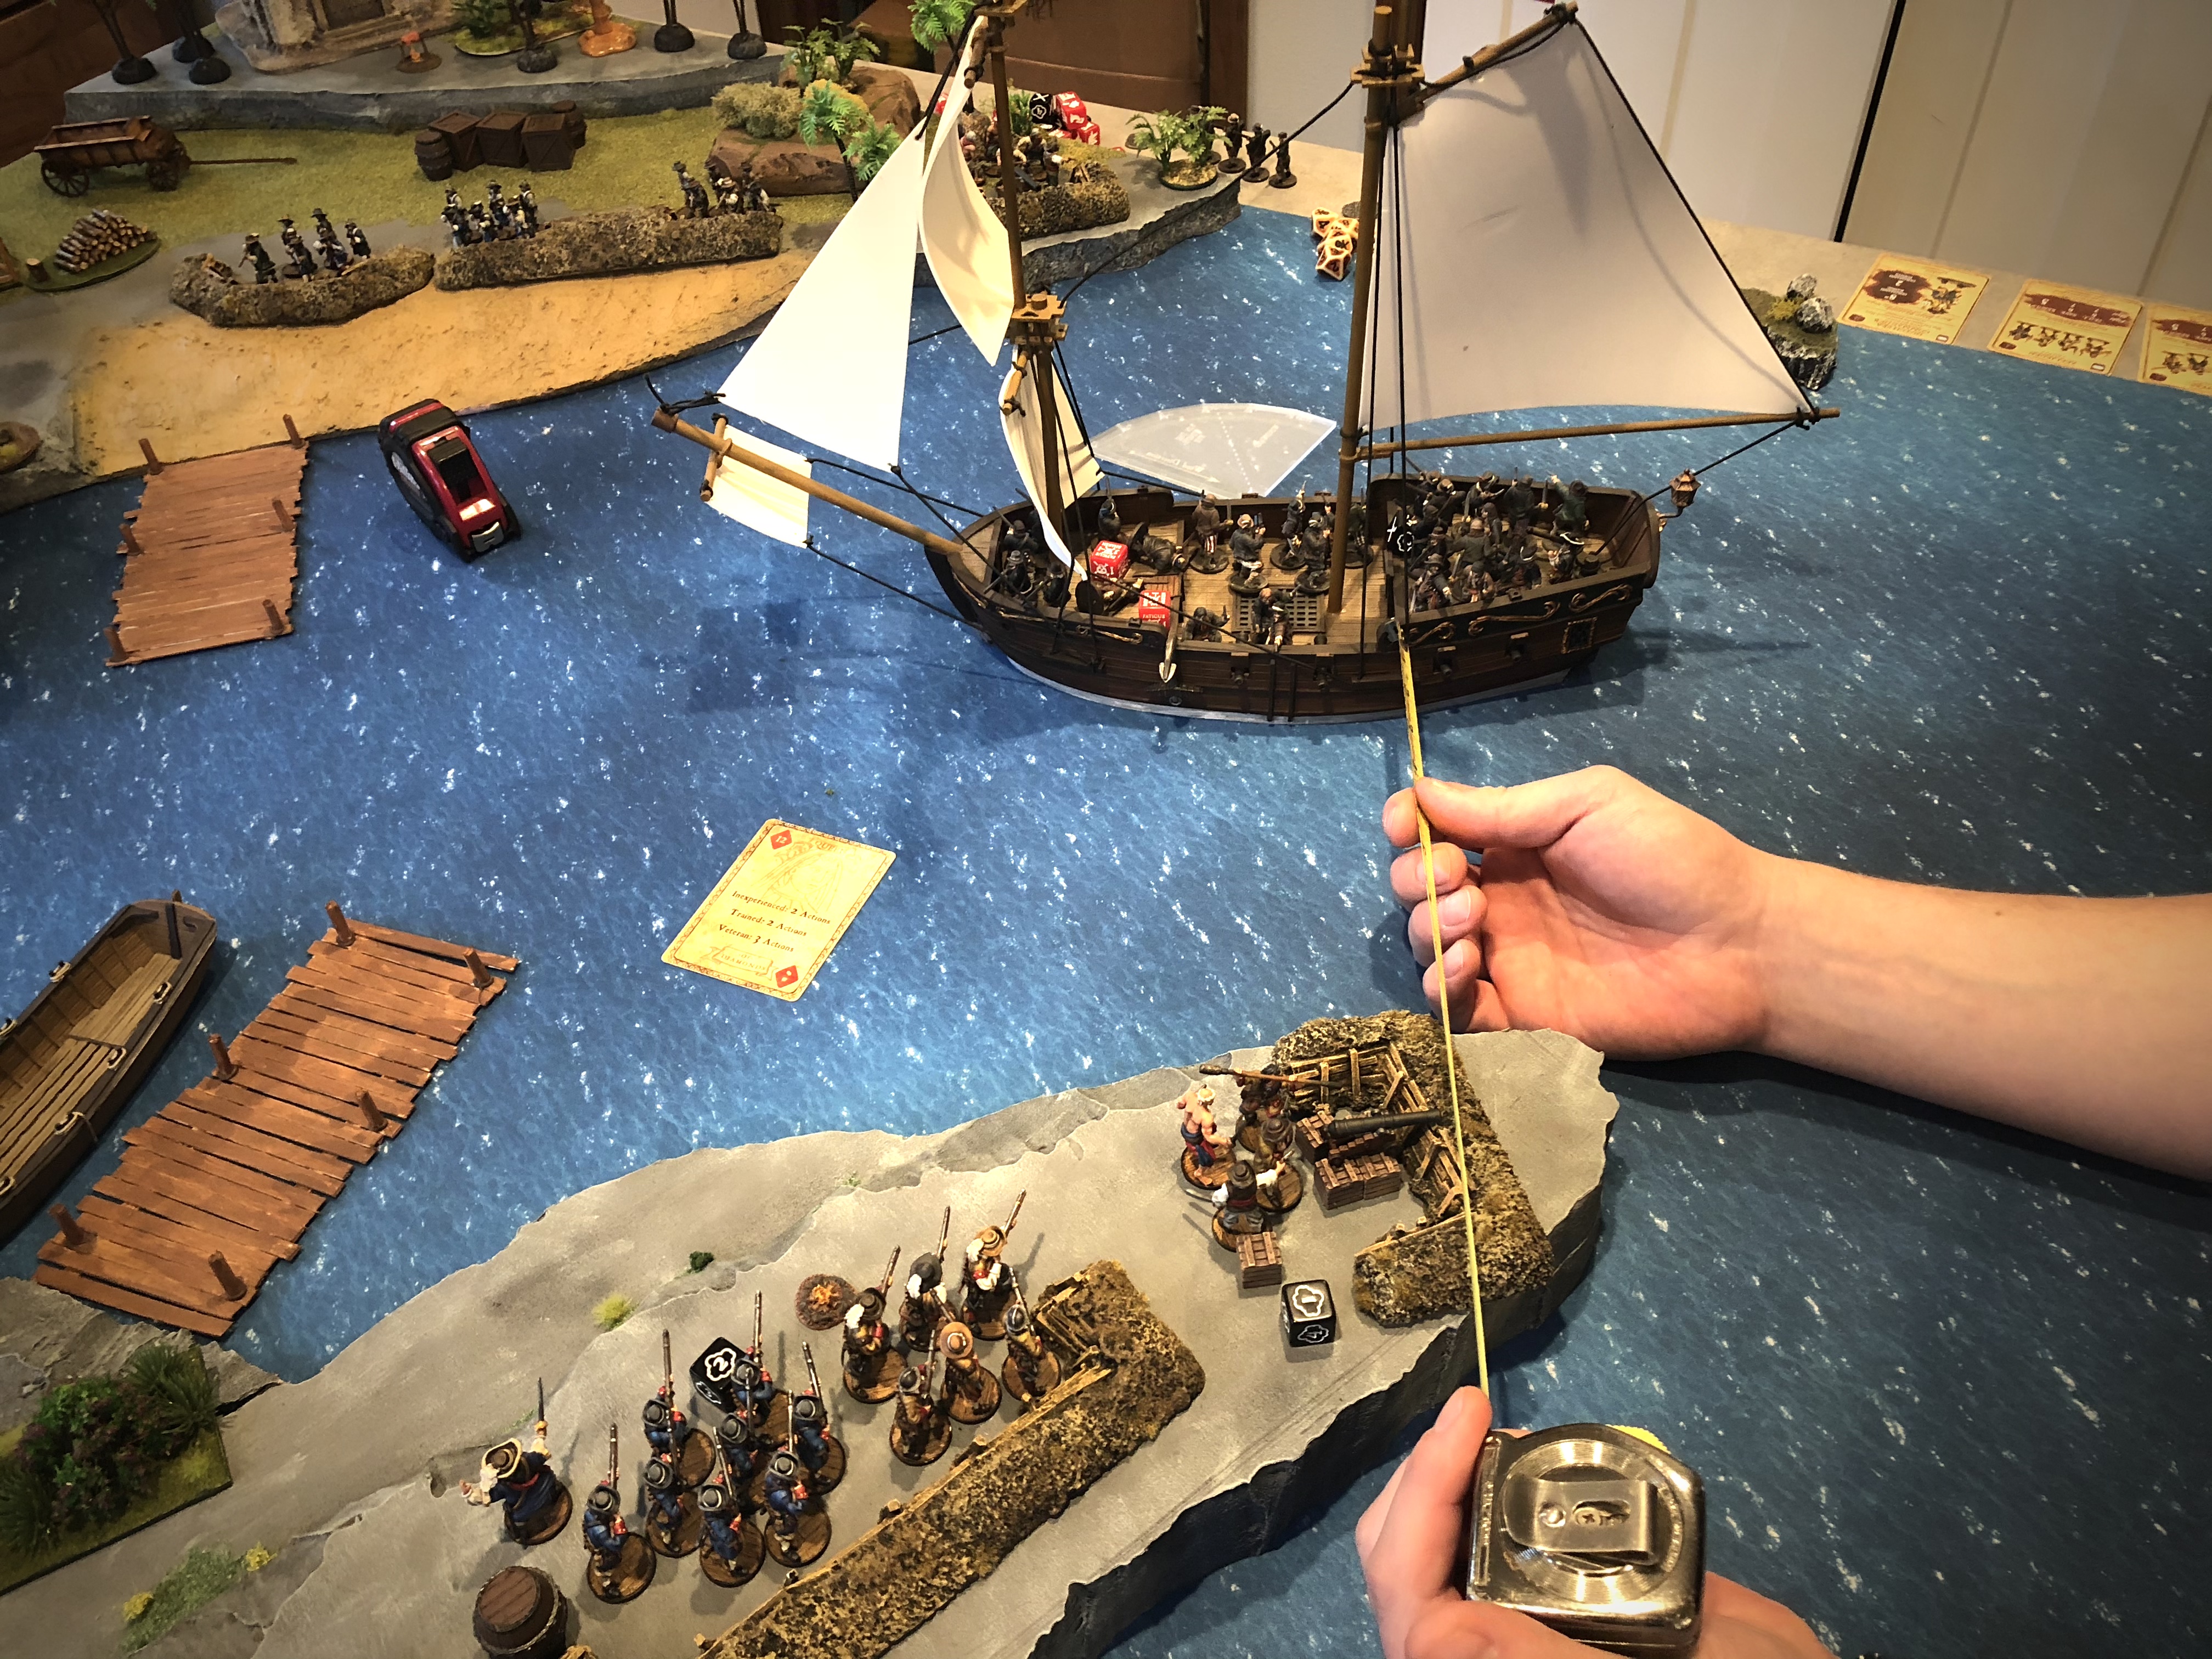
Bryan deployed right at the mouth of the small bay on turn one which basically bypassed the cone of fire for two of my emplacements. Bad planning on my part…

The Dutch sailed right past this emplacement without passing through its arch of fire.
The Game
The game opened with my troops trying to load up their cannons and Bryan’s Kapers firing off volleys at my artillery crews. I lost a model on the first activation.That poor inexperienced gun crew didn’t ever get their gun loaded the entire game.

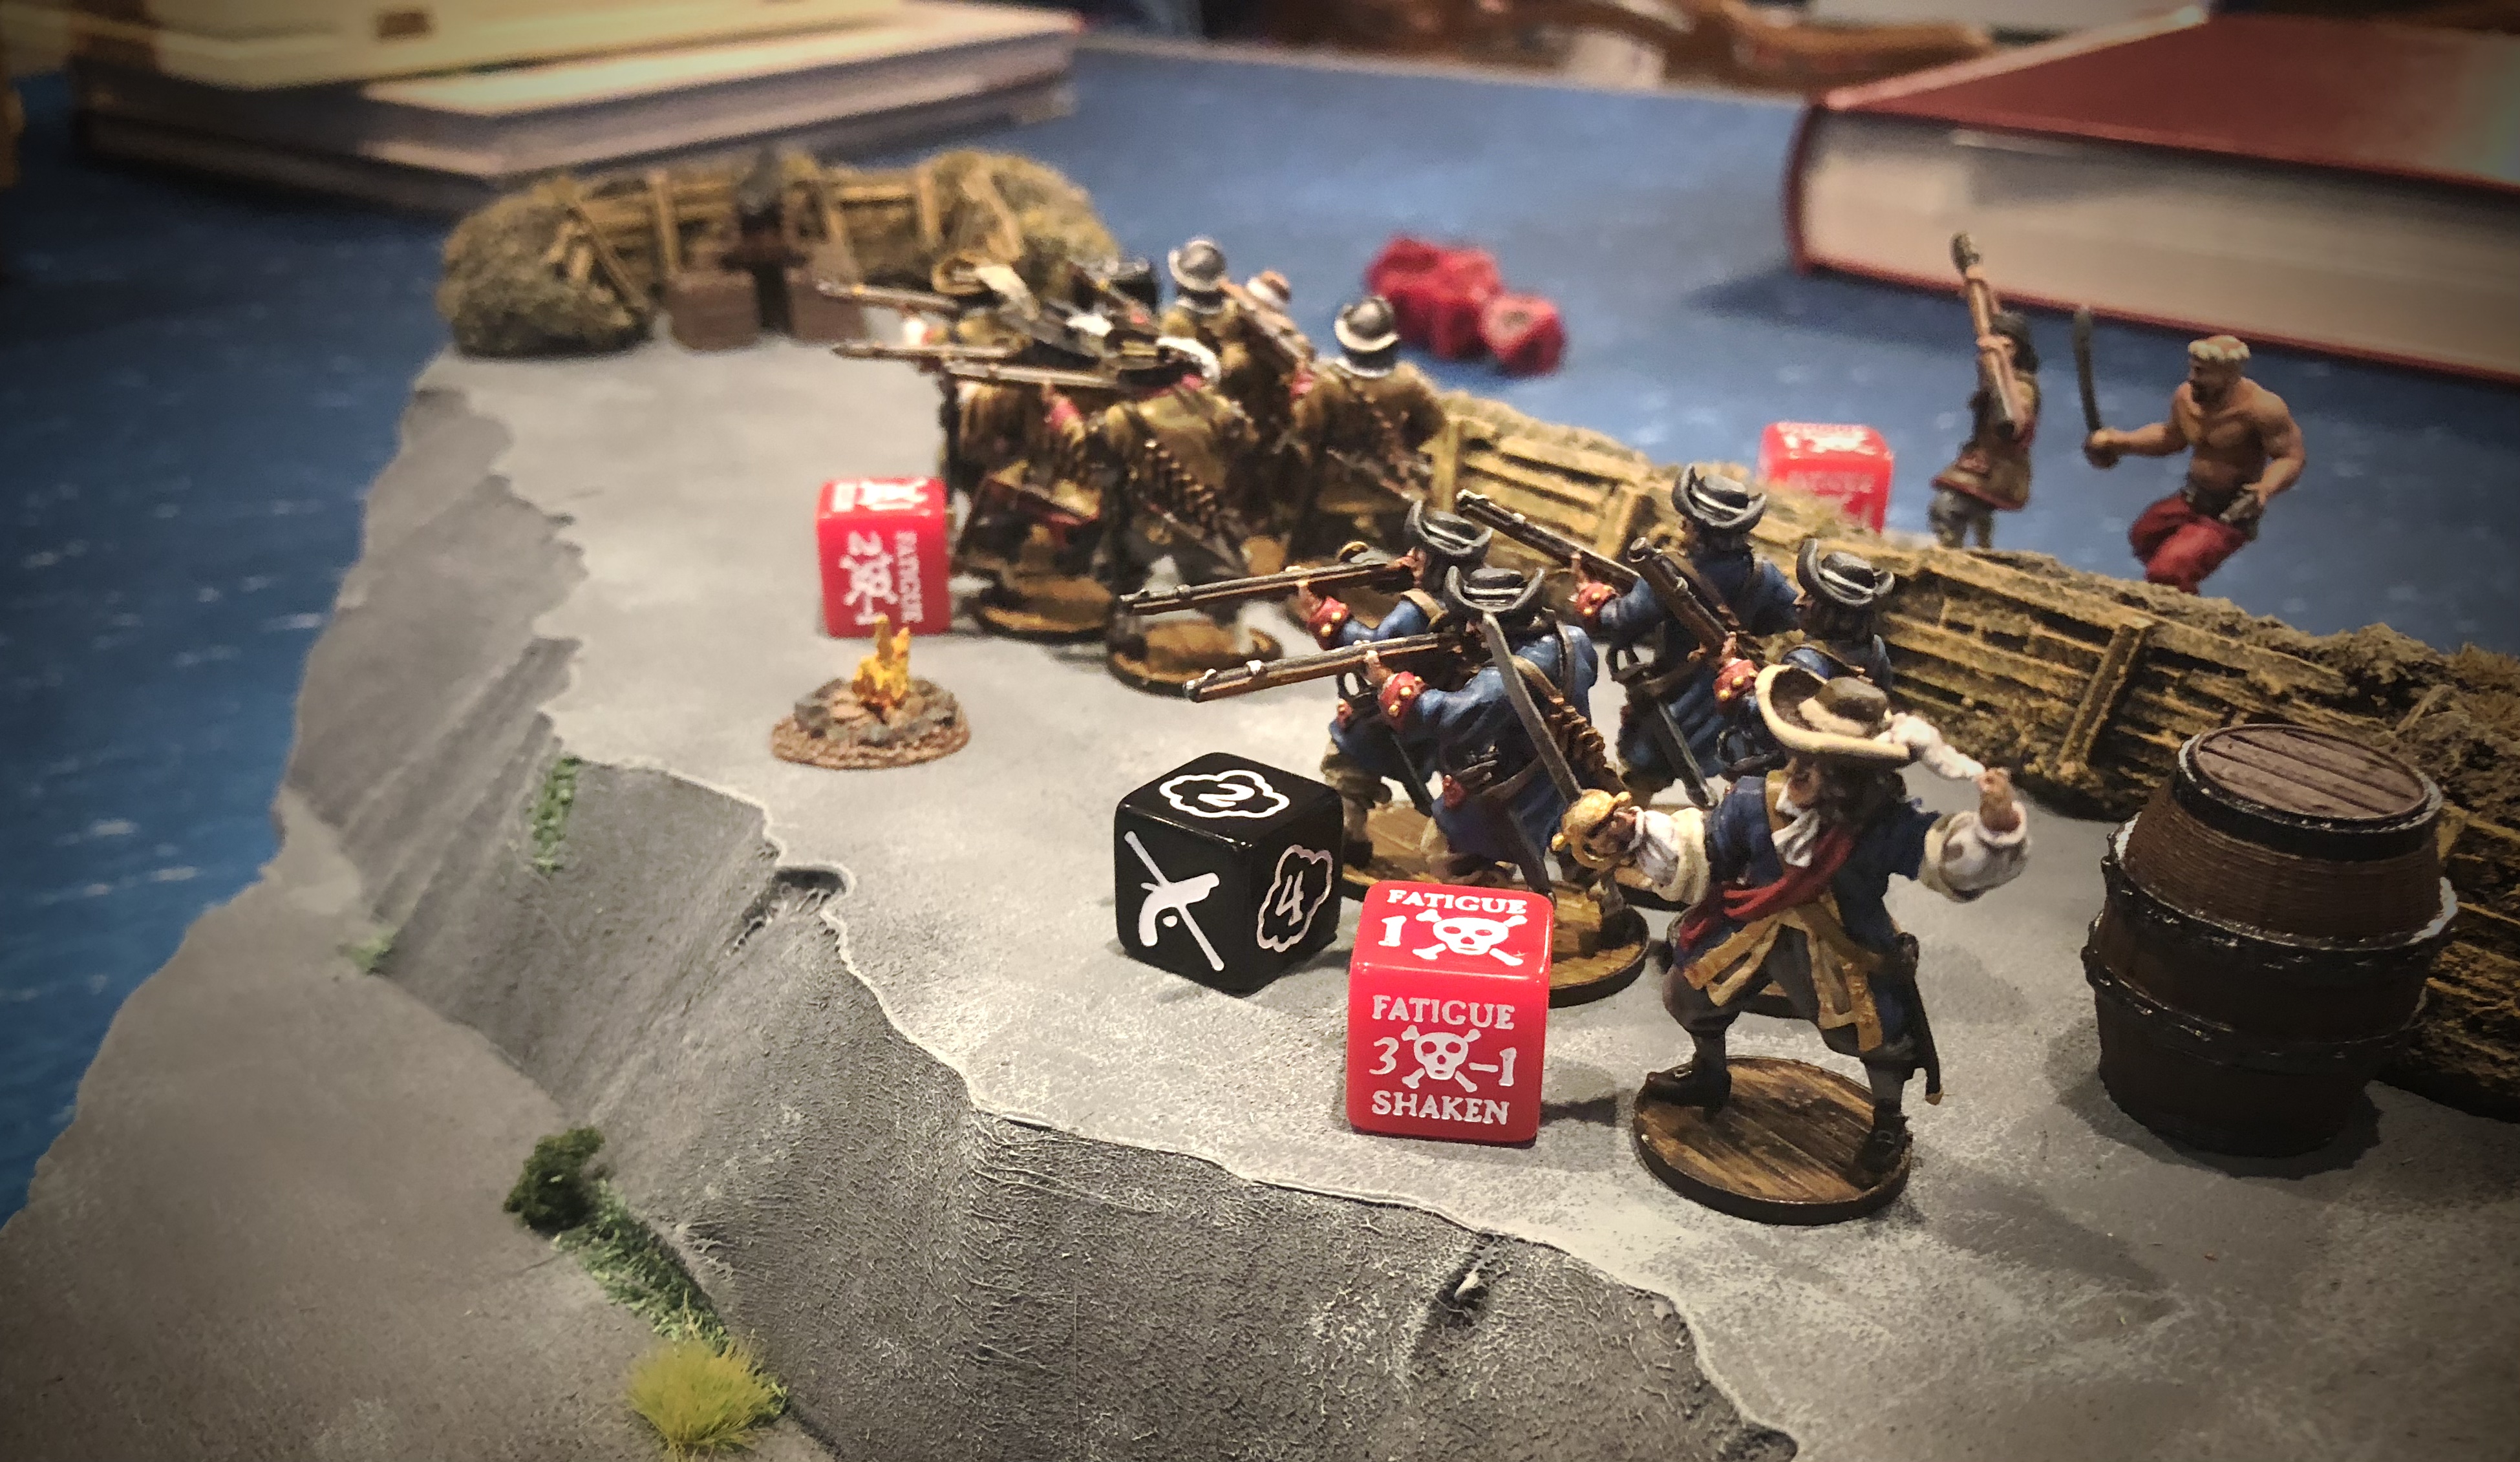
Things got interesting for me when I got to fire off an Expertly Drilled volley with my commander’s Soldados. Hitting on 7’s they got 6 hits on the forward Kapers out of their 8 dice. Both units of Kapers got one save but that forced each to roll 4 dice for their resolves tests and that kind of crippled them for the rest of the game.
I’ve been playing primarily Spanish since the game came out and I rarely use the Drilled rule since the Milicianos are usually inexperienced. It doesn’t benefit them very much unless you upgrade their experience level to Trained and by that time, I’d rather take the Hostigadores with the better save number. This scenario was perfect for Drilled shots and it converted me. I’m a fan of Drilled and a huge fan of Expertly Drilled now!

With 2 units of Soldados on the board, I think this Expertly Drilled rule came into effect at least 5 times and proved really strong. Rolling 3 dice on your Resolve test for losing 1 model is pretty brutal. Expertly Drilled is especially strong firing into a structure with 2 units inside. That way both units have to roll the extra die on the Fatigue Test.
By the last activation of turn 1, Bryan’s port guns were able to fire a full broadside at the emplacement at the end of the jetty and he killed 3/5 models and put 6 damage on the structure.
In spite of my 9 cards to his 5, Bryan had a higher Spade at the opening of turn 2 and he let off the starboard broadside into another emplacement killing 4/5 models and doing 5 damage.

Luckily I had fully reloaded the gun in that emplacement on turn 1 (activating on a Spade or Heart an inexperienced gun crew can get a free reload from the Artillery Crew ability, use their one action to reload again, use the Master Gunner’s command action to reload, then push to remove the final reload marker.) The remaining master gunner was able to fire the only cannon shot I got off all game, and while the initial shot hit, I missed with all 3 dice on the second roll. My cannons literally did nothing for me in the entire game. I’m glad they were free!

This poor Master Gunner fired his gun once and abandoned his post before the ship’s cannons had a chance to fire again. If you wanted to man theses cannons through the whole game, you’d probably need at least 10 models if the enemy is serious about taking those emplacements out.
My Soldados fired another Expertly Drilled shot into the front of the ship and both units of Kapers broke and had to go prone.
I got Battle Forged as an event on turn 3 which let my Soldados fully reload on a Spade and fire a Dedicated volley with their command action and cause more terror and consternation aboard the Brigantine.

I failed to consider the ship entering the harbor when I placed my breastworks. I found myself on the wrong side of some of my breastworks so they did nothing….

The Dutch got revenge on the Soldados at the end of turn 3 with a deadly cannon shot. Luckily for me only 1 of the 2 cannons hit or my entire unit could have been massacred.

By the end of turn 3 nearly every unit in the Brigantine was prone due to Fatigue. The Expertly Drilled shots were extremely effective. Bryan had 1 Strike Point from casualties.
Going into turn 4 I still had all 9 of my units which gave me lots of options.

Bryan drew an event which decreased the wind value by 1. He was about to ram his ship into the rocks but he made a successful grapple test and pulled up to the dock and was able to get a couple more shots off with his Kapers who had successfully rallied.
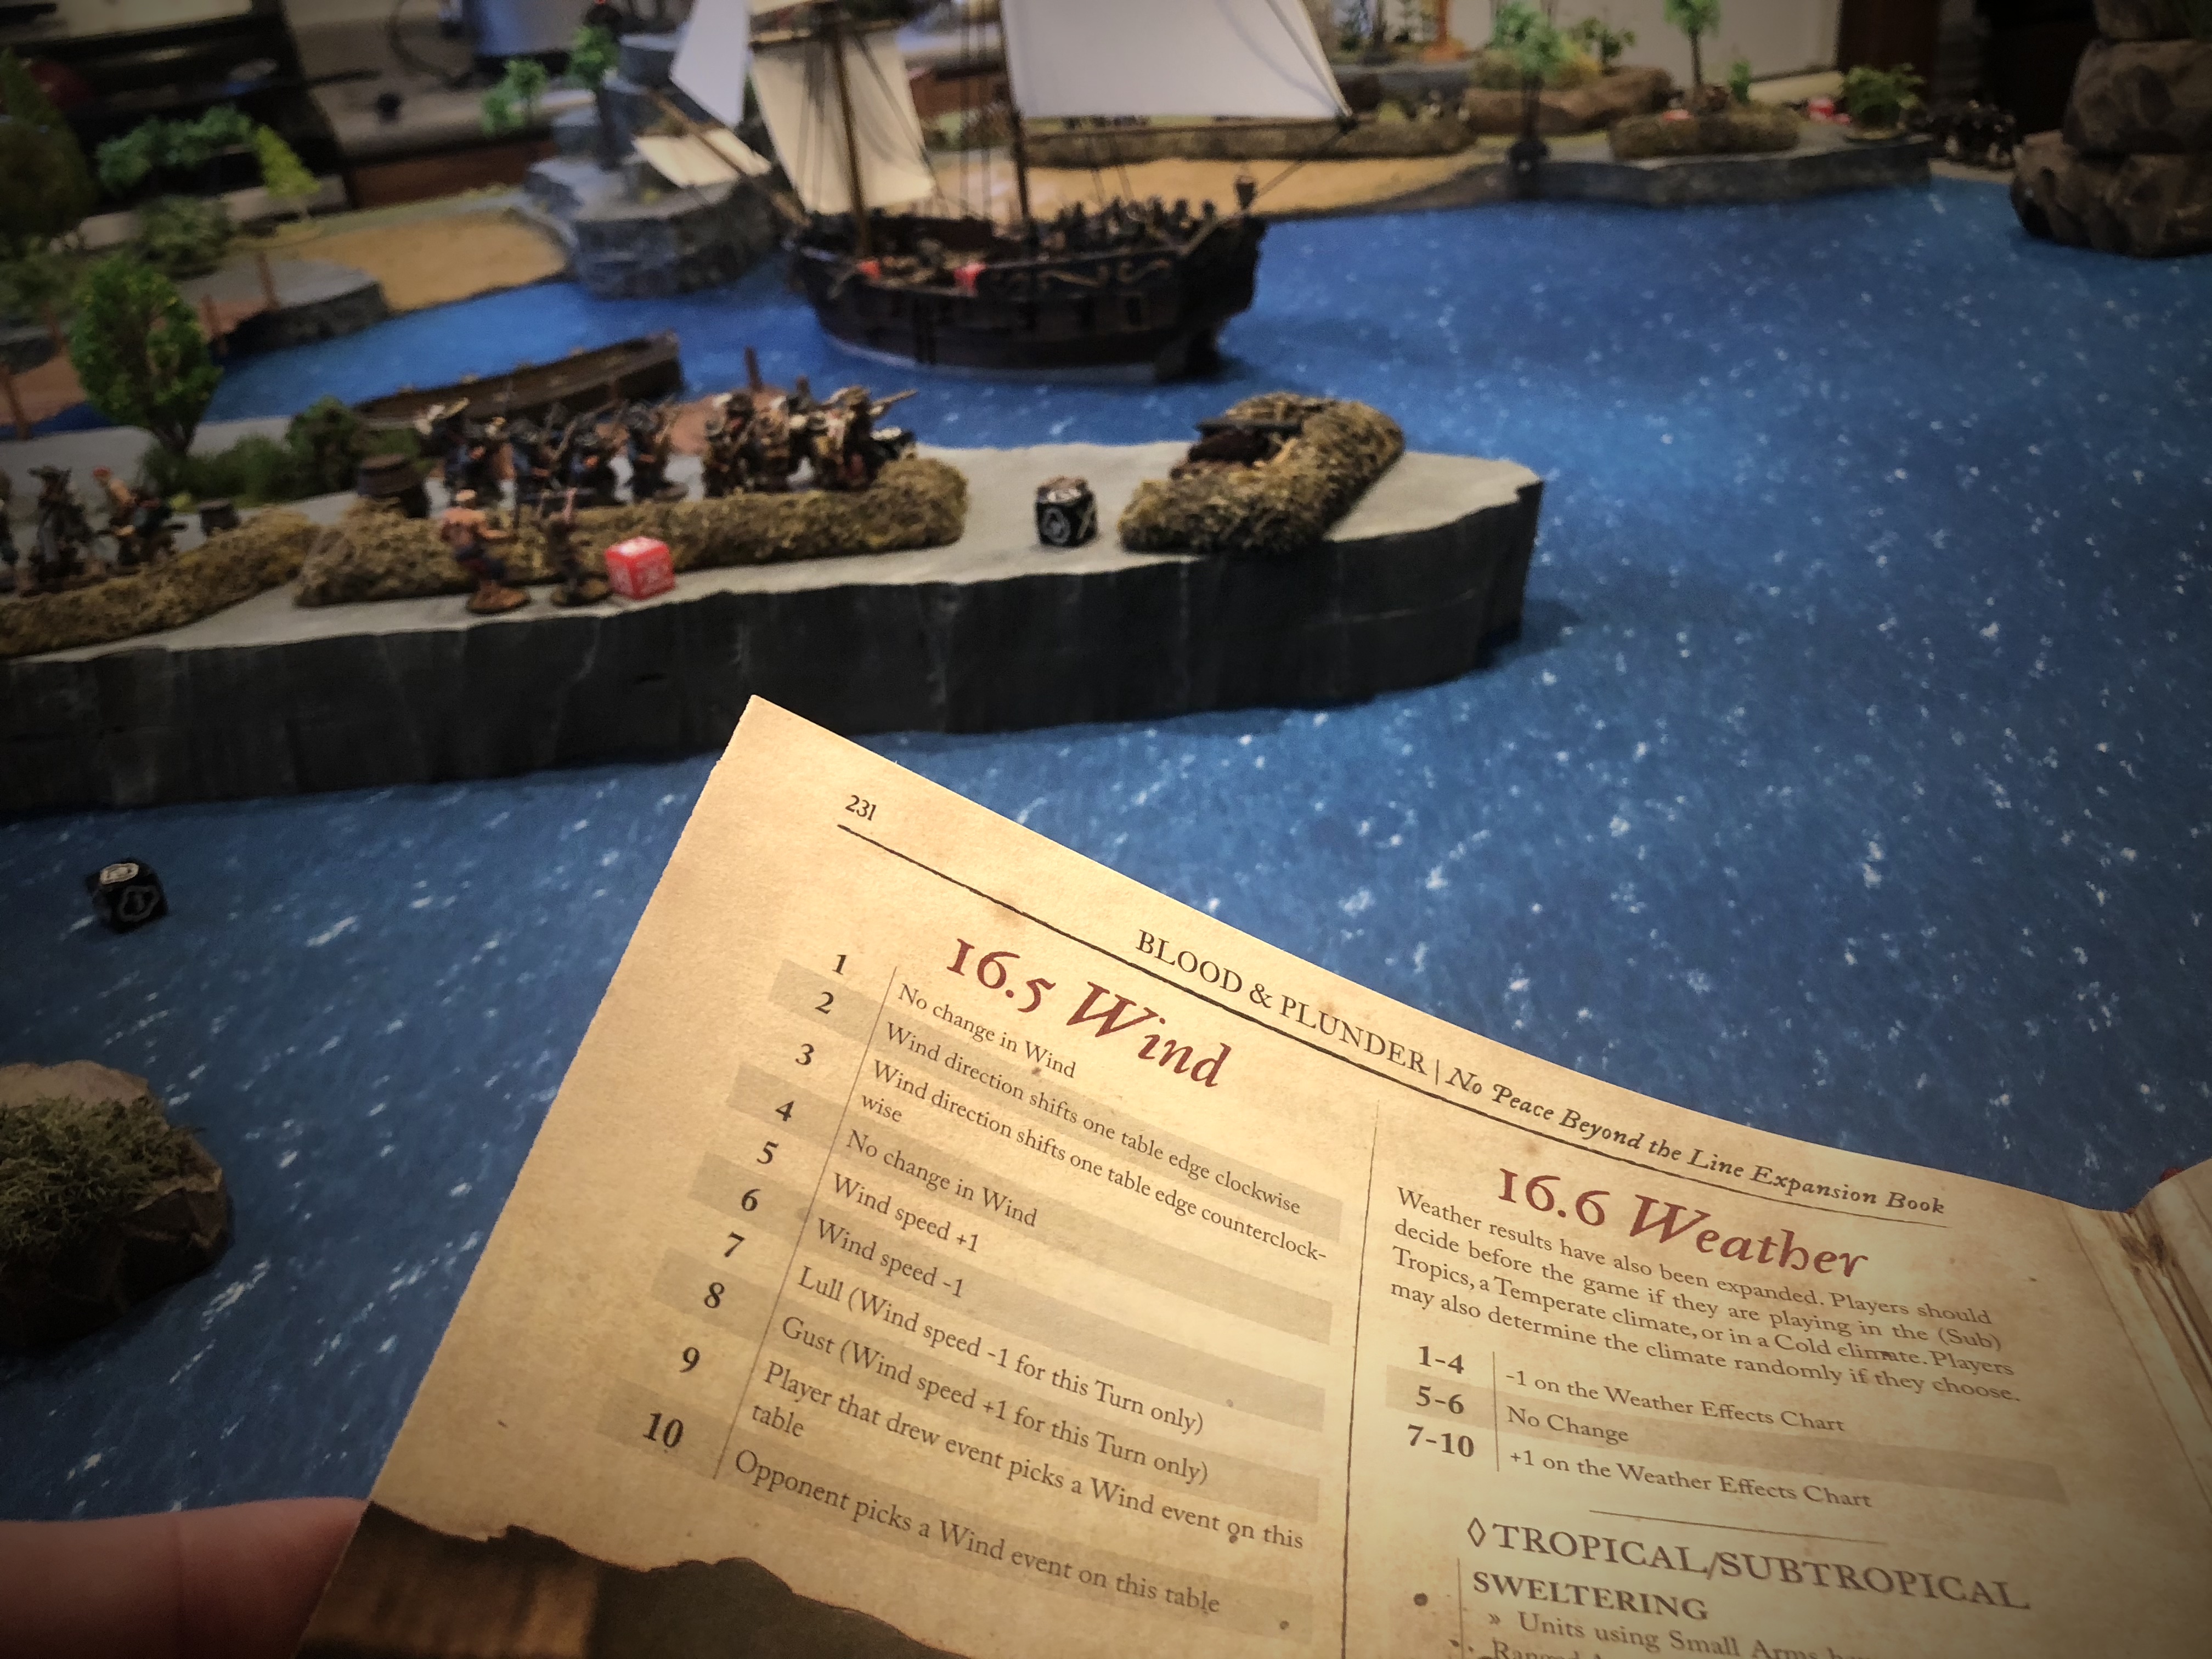
It’s nice having the 2-in-1 Kickstarter rulebook so you can find all the weather/event/critical damage tables in one book.
Near the end of turn 4 I made a Drilled shot with a unit of inexperienced Milicianos near the dock. These Milicianos are typically really hard to hit anything with but at 11″, I was hitting on 7’s! A shoot skill of 7, range penalty of 2, drilled bonus of -1 and Ruthless bonus of -1 brings me back down to a nice 7! I got a couple hits on the forward Kapers again which broke both units and eliminated one of them due to the Strict rule (that rule seems pretty rough for the commander who has it…).

My Milicianos did something!
With 1 Strike Point from casualties and no gun emplacement destroyed or on fire at the end of turn 4, Bryan had to take a strike test which came up as a 1 (he rolled a lot of 1’s during this game!) which ended the game. After we had cleaned up we realized he had forgot to apply the West India Company rule which could have helped him manage his Fatigue. We always miss something!

Conclusion
The game ended here. Two emplacements were heavily damaged and abandoned but the Spanish musket fire proved more deadly than Bryan (and I for that matter!) anticipated.
My casualty count was 11 models totaling 38 points.

I was using Marineros as Milicianos Artilleros since I haven’t painted enough gun crew models yet.
Bryan’s casualties came to 13 totaling 59 points.

Closing Thoughts
- Amphibious battles are tricky and we haven’t really figured them out yet. The balance of holding back and making use of expensive cannons vs getting to land quickly to accomplish scenario goals is hard. If the attacker spends much on their cannons and ship, they really need to get value out of them.
- Raze is a tricky scenario. I’ve played as the defender in a land Raze battle before and it seems hard for the attacker. These emplacements in the amphibious version of the scenario are pretty tough. You really need to focus your cannons on one of them to wear it down to nothing by the end of turn 4. Bryan got two good shots on different emplacements but his ship was moving too fast to hit the same emplacement twice and he never had a chance to get his troops on land to attempt setting them afire (which also sounds hard). After the game we realized it may be a good move for the attacker to anchor at a decent range and fire off a couple broadsides into one emplacement while taking less fire from the defenders.
- As the defender in this scenario, you really can’t rely on your guns to lay down much damage. If your emplacements are attacked at all, you’ll be losing crew and your cannons will become useless pretty quickly unless you start with a massive unit on the gun. One cannon at a time isn’t going to get much damage through a ship’s hull anyway. If the ship’s captain is smart, you’ll be lucky to get one shot off considering the immobile cannon only has a 45* firing arch that ships can dodge fairly easily, especially since the guns start unloaded.
- Cannons vs infantry in the open are deadly! One cannon shot killed half my strongest unit and took out 24 points with of models!
- The Drilled rule can be more effective than I gave it credit for, even with Inexperienced troops. The Expertly Drilled rule is badass. It’s way better than I thought, especially firing into a structure where two units can enjoy the pain of extra fatigue dice.
- I think using less larger units is generally better than many small units, but sometimes it’s practical to use a bunch of small groups. I had 9 cards to choose from every turn while Bryan had 5. With the emplacements taking some of his attention and the most brutal fire, my smaller units didn’t fade away as fast as they might in other scenarios. That Strict rule punished smaller units as well. I need to think about that and figure out how to use it advantageously.
- When practical for a scenario, fortifications are really good. My deployment zone covered the entire landmass in this scenario which let me use my breastworks to full advantage. Getting hard cover for 1 point is so helpful for the defender.

Thanks to Bryan for a good game! We both learned a lot for next time! I’ll be more careful in the placement of my breastworks and guns and I’m suspecting he’ll be a little more conservative in his assault and rely more on his superior range and guns to wear down the defenders before sailing into a bay surrounded by the Men of Old Spain!
The 4-player campaign version of this scenario is scheduled to happen in a week and I’m looking forward to it!
Pingback: Battle Report – 2 vs 2 Campaign Finale | Blood & Pigment
Pingback: Battle Report – English Buccaneers vs Westo Natives | Blood & Pigment
Pingback: What Should I Buy After the Blood & Plunder Starter Box?