(Editor’s Note: This article was been updated for the v1.4 Errata on Jan 21, 2025)
Introduction to Cavalry in Blood & Plunder
Blood & Plunder is a thrilling miniature wargame set during the Age of Sail, and nothing says sailing and pirates more than … horses. Ok maybe not, but the setting of the game includes land combat not purely naval conflicts. In fact, one of the most dynamic and exciting elements of Blood & Plunder is the land combat. One of the most tactically challenging aspects of the Blood & Plunder combat system it the use of cavalry units, which bring speed, power, and a unique tactical dimension to the battlefield.
Cavalry units play a crucial strategic role in the game, often serving as the vanguard of an attack, executing flanking maneuvers, or providing rapid response to enemy threats. Their mobility and versatility make them indispensable for commanders looking to outmaneuver their opponents and control the flow of battle.
This article aims to provide both new and experienced players with valuable tips and tricks for effectively using cavalry in Blood & Plunder. Whether you’re looking to master deployment strategies, improve your cavalry’s survivability, or integrate them seamlessly into your army, this guide will cover what you need to know to harness the full potential of these formidable units. So saddle up and prepare to lead your cavalry to victory!
Table of Contents
- Introduction to Cavalry
- Table of Contents
- Understanding the Rules for Cavalry
- Overview of Cavalry Units Abilities
- Cavalry Units Breakdown
- Deployment Strategies
- Effective Tactics for Cavalry
- Dismounting Strategies
- Initiative Card Management
- Defensive Maneuvers With Cavalry
- Common Mistakes to Avoid
- Force Building Suggestions & Analysis
- Factions that Focus on Cavalry
- Characters That Pair Well With Mounted Units
- Prebuilt Forces Using Cavalry
- Advanced Tips, Tricks, and Oddities
- Conclusion
- Product Recommendations
- Additional Content Suggestions

Understanding the Rules for Cavalry in Blood & Plunder
To effectively use cavalry in Blood & Plunder, it’s essential to have a comprehensive understanding of their capabilities, roles, and strategic value. This section provides an in-depth look at cavalry units and their significance in the game.
General Rules for Cavalry:
- A model with a horse starts the game Mounted.
- A horse and its rider are considered one model and are not targeted separately.
- Mounted Units may not go Prone without first dismounting.
- Mounted Units may not be assigned to Artillery.
- They enter Structures (this includes Ships) unless they dismount.
Bonuses for Mounted Units:
- You may take a free Move action during their activation.
- If Shaken in Melee combat and they choose to move away 4″, non-Mounted enemy units cannot pursue unless the fleeing unit moves through Rough terrain.
- You may use a Move action while engaged in Melee combat to voluntarily leave Ongoing Melee. This Move uses the same rules and limitations as a Shaken unit fleeing Melee combat.

Penalties for Mounted Units:
- All mounted units take an additional -1” to Move actions in Rough terrain. This means they have a max 2″ movement if they begin their activation in or Move through Rough Terrain.
- Mounted models may not Climb obstacles and must Dismount to do so. Climb actions are required for any terrain > 1″ tall.
- Mounted units cannot shoot with muskets of any type. They are restricted to carbines and pistols.
- Mounted units may not deploy using the Lay in Wait scenario Special Rule.
- If the Mounted unit has Lances, they may not be used to make a Defensive Melee attack.
- You may not take Torches or Climbing Gear on Mounted Units.
Dismounting
Dismounting is a bit quirky and the rules are …um… a bit… odd and don’t make 100% sense when compared to real life. It’s important to remember it’s a game and some of the rules are for simplicity of gameplay.
- A unit may dismount by taking a Dismount as a Dedicated Action. When this occurs, replace the mounted miniatures on the table with models on foot
- Once a unit has dismounted, it loses any Special Rules gained from being Mounted and may NOT re-mount the horses and must remain on foot for the duration of the game.
- When you dismount, you replace the mounted model with the appropriate model on foot. If an appropriate model on foot is unavailable, the unit may not dismount.

Overview of Cavalry Units Abilities in Blood & Plunder
Cavalry units in Blood & Plunder come with distinct statistics and abilities that set them apart from other unit types. However, there are some key attributes and special abilities that are common among several of the Cavalry Units.
EVERY Mounted Unit as the Quick Special Ability.
Currently, all mounted Units in the game have the Quick Special Ability. Quick gives the Unit a free 4″ Move when activated on a ♠ Spade. When combined with the free Move for Horses the Unit gets a minimum 8″ Move without spending an action.
QUICK: If this unit is activated with a ♠ card, and it is not Engaged in a Melee Combat, it may at any point during the activation take a free Move action.

Mounted Units often have the Skirmishers Special Ability
Cavalry primarily serve as skirmishers, excelling at swift, hit-and-run tactics, using their speed and mobility to harass and disrupt enemy lines. They are adept at quickly exploiting weaknesses, providing a flexible and dynamic element to the battlefield.
SKIRMISHERS: When this unit is activated with a ♠ SPADE or ❤ HEART:
- If the unit takes a Move action and then attempts one or more Ranged attacks, it may take a free Move action back to its original position after the ranged attacks are resolved.
- If the unit Charges an enemy unit it may take a free Move action back to its original position after the free Fight action is resolved. In this case, the enemy unit cannot pursue the Skirmisher unit.
Brace of Pistols

by Firelock Games
All but one Cavalry Unit type (the Caballeria Lancero) is equipped with Brace of Pistols as their Main Weapon. The new plastic Cavalry models come equipped with bits to outfit all 6 Models with Brace of Pistols, swords or lances. Depending on the color scheme you use in painting your Cavalry models, if you keep it generic neutrals, this allows you to use your Cavalry models for almost any mounted Unit in the game.
- Brace of Pistols is a solid option for Cavalry as the lack of reloads allows you to focus on moving.
- Range is a constant issue for normal units with Brace of Pistols. At 4″ almost all Cavalry units need 8+ to hit, at 8″ they need 10s and anything beyond 8″ is out of range. The Milice à Cheval are better shots with a base Shoot 6 so they need 7s at 4″ and 9s at 8″.
- When you Charge into Melee, Brace of Pistols gives you rerolls on any misses. (Note: this does not stack with Lances, you have to pick the Melee weapon of choice before the attack.)
Carbines
Carbines are shorter, lighter versions of muskets. They follow all the same rules as standard Muskets, but they do not have a chance to hit on 11+ like Muskets.
Carbines are a very common upgrade for mounted Units. Typically, they are 4 points for the Unit (not per model). I tend to use them as single-shot weapons in most forces. You take 1 longer ranged shot as you are closing, and then swap to Brace of Pistols. There are additional strategies for carbines we’ll discuss later.
With a base Shoot Skill of 7 Carbines have a max range of 16″ (20″ for the Milice à Cheval). Some commanders and Faction abilities like Ruthless and Strict can extend the range beyond that maximum.
Cavalry Units Breakdown in Blood & Plunder
There are currently 6 Units in Blood & Plunder that start as mounted with a Horse in their default Equipment.


- Militie Cavalerie has a base 5 Fight. The Dutch also have access to both Strict AND Cold-Blooded Commanders which can get you to a 3 or 4 to hit and with Brace of Pistols you get free Rerolls on misses. This makes them one of the deadliest land units available to the Dutch!
- Militia Cavalry (English) has a unique feature of the Hard Chargers special ability giving them a base 5 Fight Skill if they Charge.
- European Militia Cavalry: Note, that the cost is actually 3 (it got a discount with the revised edition of No Peace Beyond the Line). This makes the unit super cheap and open to swarming tactics.
- Milice à Cheval have a base 6 Shoot Skill which makes them one of the best cavalry options for ranged skirmishers.
- Caballero Lanceros have a Base Fight 5 adding -1 with Ruthless allows you to hit on 4s. If you have a Strict Commander you can get to 3s on one attack. Add in the Lances and the defender has a +1 penalty to their Fight Save defending against Charges.
- The Spanish Cavalry both start as Trained and have the ability to be upgraded to Veteran, more on that later!
British Frontier Militia Unit

The British Frontier Militia Unit has a very unique option that allows it to add Horses as a free upgrade, but increase their Shoot Save to 7 while mounted. So while it is not technically a Cavalry unit it can be upgraded to one.
- Having Scouts makes them unique and extremely mobile, depending on the terrain. It allows you to strike from the woods and fall back to the safety of Cover.
- They may exchange muskets for Carbines for free, which is a must since you can’t use Muskets while mounted.
- The Unit may add Thrown Weapons for 3 points (not per model), giving them free rerolls in Melee like Brace of Pistols.
- As a cheaper option, they can take Sidearm Pistols for 2 pts (not per model).
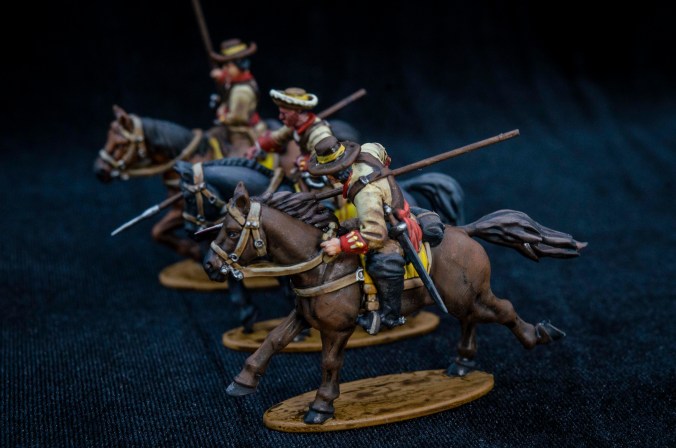
Bonus tip: If you pull some of the Militia hats over to the Cav models they look pretty sweet! Especially with the feathers in their hats.
Deployment Strategies for Cavalry
Cavalry played a pivotal role in 17th and 18th-century warfare, serving as both shock troops and versatile support units. In Blood & Plunder, cavalry units are modeled to reflect their historical counterparts, emphasizing their speed, strength, and strategic importance. Understanding the historical use of cavalry can provide valuable insights into its effective deployment in the game.
Deployment with Cavalry is extremely important. Much more so than standard units. Here are a few things to keep in mind when deploying your cavalry:
- Deploy Cavalry Last. Delaying the deployment of your quick-strike unit lets you get the best view of the battlefield possible and know where the biggest threats lie.
- Pay Attention to Structures & Large Terrain. The ability to stay in cover and out of Line of Sight is the key to your survival. Look beyond the area of your deployment zone to where you will be the most protected and identify areas from which you can quick strike.
- Be Mindful of Rough Terrain. Cavalry drops to a 2″ movement in Rough terrain. Make sure you don’t deploy in a position where you will get bogged down. Unless you have Scouts you also can’t chase units hiding in the woods.
- Look to the Flanks First. Moving to the center of the board may offer you the widest strike zone, but also exposes you to the most incoming fire. You are too fragile to go toe-to-toe in the middle of ththe ring..
- Think Two Moves Ahead. Where are you going to be and where is your enemy likely to be in 1-2 turns? Using cavalry isn’t always about chasing your enemy, sometimes it’s about letting them come to you.

Effective Tactics for Cavalry
Cavalry have an interesting fit in the game because of their strike range and rapid movement. Here are a few effective combat combinations for using them in an actual game.
Long Range Charge
The most simplistic view of Cavalry is just their long-range Charge ability. Cavalry can potentially conduct a Charge from up to 20″ away if they are activated on a ♠ Spade and use some combo of are a Veteran unit, get a Command Point or Push:
- Free Move for Quick = 4″
- Free Move for Horses = 4″
- Veterans get 2 actions, using both as a Move = 8″
- Command Point or Push for a 3rd Action to Charge up to 4″.
- Total distance Moved: 20″
If you are playing a land game on a 36″ x 36″ board, with deployment zones of 6″ each, units are starting 24″ apart. If your opponent goes first and moves forward even 4″ they are potentially in strike range for a Charge on your first activation card.
Soften Up the Target, Then Charge
This typically requires you to be within 8″ of your target. Take a free Quick or horse Move to get within 4″ of the target, then Shoot. If the enemy is at 2 Fatigue, Charge. If not, take a Fatigue to Shoot again with Brace of Pistols. Then Charge. If the enemy is dead, take your second free Move either towards Cover, safety, or on to the next target.

Skirmisher Chargey, Charge
With the release of Errata 1.4, this tactic is no longer valid:

This one is flat-out BRUTAL. It can be done when within 4-12″ of an enemy OR if you are already engaged in ongoing Melee (remember horses can break from Melee for free!).
1-2 Free Moves with the horse ability and Quick = 4-8″ closing on an enemy.Action 1: Charge + skirmish backAction 2: Charge + Skirmish = +1 Fatigue for a second FightAction 3 (pick one):Run away to make the enemy burn at least 1 action to move towards you.Rally to recover.Skirmish and Shoot to finish off the stragglers.
Any charge from Cavalry with Brace of Pistols gets rerolls, there are very few units (who have already been softened up) that can survive a well-timed double charge from cavalry.
Peek-a-Boo I Shoot You!
This strategy is usable with Brace of Pistols but is well suited for the Carbines upgrade. The tactic requires you to position your cavalry behind a building (or other Line of Sight blocking terrain piece) initially. You step out, Shoot and immediately move back out of line of sight, Reload, then rinse and repeat. It doesn’t require Skirmishers, but you will get a faster rate of fire with it.
- Free Move out from behind the building to a position where you can see an enemy.
- Action 1: Shoot.
- Action 2: Shoot BoP if in range and gains a Fatigue. (optionally Skirmish back to the original position)
- Action 3: Shoot BoP for a 2nd Fatigue or Rally or Reload.
- Skirmish back out of Line of Sight.
This is the go-to tactic to soften your target by inflicting Fatigue and Casualties to prep for a Charge.
This tactic is also good and frustrating to your opponent when done as a fighting retreat. As your opponent closes to get you, you either loop around the building or run away and find another location and start the process over. Given the right terrain, this tactic is maddening to fight against because it is difficult to catch the cavalry as they just slowing wear down the opponent who has to spend multiple actions to Move and gain line of sight.


“Knight Takes Queen” – Headhunting with Cavalry
In Blood & Plunder, your force’s commander is comparable to a Queen in chess. They are typically the most valuable and powerful mini in a force. This strategy involves using your cavalry as a headhunting unit to target an enemy’s command unit. This has multiple benefits if it succeeds:
- Potentially removes a large % of the enemy’s force in terms of points.
- Eliminates an enemy’s Command Points and therefore reduces their effectiveness.
- Forces without a Commander (and no backup Officer Character) automatically fail their Strike Tests.
Charge from Around a Blind Corner
When you initiate a Charge, the enemy can take a Fatigue to make a Defensive Attack if they have less than 2 Fatigue. However, there is a rule that can be used strategically. Defensive Shoot actions are resolved from the starting position of the Charge. This means a charging Unit cannot be the target of a Defensive Attack if the defending Unit did not have Line of Sight at the start of the Charge.
This allows you to hit any target regardless of their Fatigue Level or Reloads. Even if they have Brace of Pistols they can’t Shoot. Be mindful that it does not cancel Bayonets or Lances for Defensive Melee.


Meteor Swarm Charge
This tactic involves using multiple cavalry units to overwhelm your opponent with several rapid-fire attacks. With the price decrease in Cavalry, you now have access to 4pt models and the super cheap 3pt European Militia Cavalry. Build at least 3 squads of 4-5 Cavalry and models have them travel in a pack or within equal distance of an enemy and then charge them against the same unit in rapid succession. Once the first unit engages the target they are denied Defensive Shoot attacks. Every subsequent charge (unless they have pikes, bayonets, etc) is safe from retaliation.
Tips:
- Charge an enemy unit that has already activated so they cannot Fight on their turn.
- This is stronger with more initiative cards so you can stack the attacks near the end of the round when your opponent has few cards.
- Keep your secondary units behind the the first to deny LOS to the other units.
- Putting a Commander/Fighting man that can give bonus Charge actions allows you to potentially dogpile the target.
Charge Then Fight or Fight Then Charge
A Fight Action is a Dedicated Action. By the core rules “All Dedicated actions must be taken as the first action of a unit’s activation, and prevent the unit from taking any further actions.” However, a Command Point can be used as Dedicated action. This means you can Charge a target to engage in Melee and then use a command Point to do a second Fight. This can be extremely powerful, particularly with the Caballero Lanceros or Militie Cavalerie who have a 60-70% chance of hitting with their Melee attack (5 or 4 with Ruthless/Strict).
Dismounting Strategies
Dismounting is one of those Actions that is very specialized in purpose. It is something that isn’t typically recommended unless you have specific reasons.
- You can use it as an alternate version of the Vanguard special ability. Vanguard lets you take a free single move at the start of a game. Cavalry can be used similarly by spending your first card activation to move your models 8-16″ Moves into the battlefield.
- Dismounting is a Dedicated Action that would normally take your entire Activation. Use a Command Point instead.
- You can use high-speed Cavalry moves to secure key structures on the battlefield. Dismounting is required before entering Structures.
- Many scenarios require you to capture certain objectives. Again, you can charge forward early on and then dismount to capture them before your opponent. Timed properly at the end of a Turn you can force Strike Points on an enemy and potentially end a game early.
- Frontier Militia maintain their same Core stats after dismounting. Caballero Lanceros are nearly identical to standard Lanceros.
Initiative Card Management
Initiative cards matter more to forces with a heavy cavalry focus than others. The timing of when the Cavalry activates and moves is critical to their success.
- Spades vs Clubs. Cavalry favors ♠ Spades as it activates their Quick and Skirmishers abilities. It’s typically best to allocate them to your mounted units. However, if you have sufficient distance from your enemies and your units are safely out of LOS, Clubs are a solid choice too. going later in the activation lets you see where your opponent is going to go and sets you up to react. If you took carbines you could Reload more effectively.
- Go Last, then Go First. I like to time my cavalry activations for the last card of the round. It gives you the best view of the battlefield and avoids surprises. It also gives you time to inflict fatigue on targets with your other units. You can then rush in and hammer the best target. Then next round, on the fresh activation hand, you can hopefully use a ♠ Spade to go first. Finish off the target with your first or second action and then retreat to safety and hopefully out of Line of Sight.
- Be Patient. Because cavalry favors ♠ Spades, people like to play them first. Just because ♠ Spades wins initiative, does NOT mean you should use them as the first 1-2 cards. Let your opponent burn their ♠ Spades early. Waiting increases your odds of winning when you are ready to activate the cavalry on a ♠ Spade later in the round.

Photo by Joseph Forster
Defensive Maneuvers With Cavalry in Blood & Plunder
Cavalry by nature are “glass cannons”. A glass cannon is a term commonly used in gaming to describe a unit, or entity that has extremely high offensive capabilities, but typically has low defensive capabilities or is very fragile and can be easily defeated if not properly protected.
As a whole, most Cavalry models have a Shoot Save of 8 (though a few have a 7). I assume it is to reflect their larger mass and target area for incoming fire. This means you have only a 30% chance of surviving a Hit. So obviously the best way to survive is to avoid getting hit in the first place.
Strategies To Keep Your Cavalry Alive
- Deny LOS. Stay close to Structures and terrain that can block line of sight. If the enemy can’t see you they can’t shoot you.
- Timing is Everything. Make sure the enemy has 2 Reload tokens or 2 Fatigue BEFORE charging to avoid getting hit by Defensive Shoot actions.
- Watch Out for Pointy Objects. Unless you are Cabellero Lanceros, think twice before you charge units with Pikes, Lances, or Bayonets (see Braveheart). Make sure they have 2 Fatigue and can’t do a Defensive Melee.
- Disengage from Melee. Do not feel like you have to stay locked in Melee with an enemy. Too many new players want to fight to the death. Mounted units may break from Melee freely.
- Run like the wind. If the enemy moves towards you and you aren’t ready to attack. Don’t engage. Runaway or move across the board. It will frustrate your opponent and hopefully set up a new attack. The more actions they waste chasing you the fewer they are taking shooting. So you can shoot with the other units.
- Be Patient. If you don’t have a good attack, don’t force it. Discretion is the better part of valor -> stay out of line of sight and wait for another turn. It’s not worth the risk.
- Watch for Backup Weapons. Pay attention to units with Pistols, Sidearm weapons, Brace of Pistols, or secondary weapons like Blunderbusses! Ask what your enemy has for weapons at the start of the game and BEFORE you charge. There is nothing worse than thinking a unit with 2 Reloads is fair game only to get blasted with backup weapons!
- Don’t Get Tunnel Vision. The top killer of cavalry is rarely the target unit, it’s the secondary units nearby. If you focus too much on killing one unit, you won’t see the surrounding units that will pounce after your charge.

Pair Cavalry with Another Unit
Pair your Cavalry with another unit that has better Shoot Saves. Keep your cavalry behind the friendly unit to deny your enemy LOS. You don’t have to be right behind your unit; you just have to keep them between you and the enemy.
- It is better to sacrifice models worth 3-4 pts to protect Cavalry which is 4-7 pts each.
- Units with Elusive or Hidden make good options as their -1 to their Shoot Save can help keep them alive. Those abilities require maintaining a 12″ range, but that is well within the 16″-20″ strike Range of a Mounted Unit.
- Skirmishers can move forward through your shielding unit, make a Shoot, and then fall back to safety.


Common Mistakes to Avoid
There are a few common mistakes that seem to be common with Cavalry. These mistakes can lead to your cavalry living a short life and struggling to make it to the end of the game.
- Overextending Your Reach. Because Cavalry units are so fast, it is easy to get excited and charge them ahead and away from your other units. This can lead to situations where you are unsupported without backup units to run interference or back you up. You can easily get outside of your Commander’s maximum Command Range denying you Command Points.
- Overconfidence in Your Speed. Cavalry units are fast, but only when used properly and your Initiative Cards cooperate. Some new players are so overconfident in their speed, they underestimate the speed of the enemy. They end up charging in, expecting to charge back out only to find themselves getting overrun by multiple enemy units in Melee. Once your own Fatigue hits 2, you lose an action that slows you down and you lose the ability to Push to move faster.
- Underestimating Enemy Capabilities. Cavalry is a glass cannon. In a prolonged fight, you will lose. If overwhelmed by incoming firepower, you will lose. Most Cavalry has a Shoot Save of 8. That is extremely fragile. Once you take hits, casualties, and subsequently, Fatigue can stack up quickly.
- Neglecting the Need to Rally. It is easy to stack Fatigue on cavalry by taking multiple Charge (e.g. Fight) or Shoot Actions in a round or by Pushing. Once you’re at two Fatigue you are in the danger zone of being Shaken and paralyzed. Do your best to stay at 0 or 1 Fatigue at the end of your Activation. This may mean you run away and hide to recover.
- Too Big to Fail. I think there is a psychological disconnect that bigger minis are inherently “tougher”. Because cavalry appear bigger, they feel like they should be stronger and able to resist damage; the opposite is true. The minis and bases are also larger so you stick out more, making finding space for your minis to stay in cover more difficult. You have to be EXTRA careful with the bigger minis and treat them as fragile.
Force Building Suggestions & Analysis
Keep the Core vs Support Requirements in Mind!
The vast majority of Cavalry Units are Support rather than Core Units. This means that in most cases you cannot assign a Commander to the Unit. However, you can add a Character like an Officer, Hidalgo, or even a Reformado to a unit to still give them a Command Point in their Activation.
Adding a Horse as Equipment
The free Force Builder for Blood & Plunder is awesome, but occasionally a bit quirky. Just because you can see a Horse in the Equipment section, does NOT mean you can freely add it to any unit. That section is reserved for Commanders who have the option to take a horse as an upgrade.

Standard Commanders in Raise the Black
All Standard Commanders added as part of the Raise the Black expansion pack are compatible with mounted Core Units. While it may not be clear in the force builder, each has a clause in the rulebook that allows them to be “armed and equipped as the units they join, regardless of which weapons are actually on the model.”
These commanders can be retrofitted into, “any Force of this Nationality, including those not present in this book.” This fixes some gaps and holes in No Peace Beyond the Line and Fire on the Frontier where you couldn’t add a Commander to some Core Units due to an inability to take a horse.


Inexperienced Cavalry Doesn’t Need to be Upgraded to Trained
To use the Quick ability on Cavalry you want to Activated on a ♠ Spade. If you are going to Activate on a ♠ Spade, Inexperienced and Trained get the same number of actions. And since many of the models also have Brace of Pistols so they don’t need to Reload meaning there is no need to be Trained.
There are benefits of upgrading to Trained by they only come when you play a ❤ Heart or ◆ Diamond. Just keep in mind that Cavalry with Quick are different than other Inexperienced units.
Upgrade the Unit to Veteran When PLaying as Spanish or Frontier Militia
- Activate on a ♠ Spade.
- Free Move for Quick = 4″
- Free Move for Horses = 4″
- Veteran gives you 2 actions both as a Move = 8″
- Command Point or Push for a 3rd Action to Charge.
- Total distance Moved = 20″ with a Fight at the end
Is Armor Worth the Upgrade?
In my opinion, the Armor upgrade is inefficient and a poor strategy mathematically for the following reasons:
- Low Probability of Success: With a Shoot Save of 8, a unit needs to roll an 8 or higher on a d10 to succeed. This gives a base success probability of 30%. Armor only comes into play when the unit rolls a 1 on their Save, which has a 10% chance of occurring. When this happens, the unit gets a second chance to roll for a Save. The probability of rolling an 8 or higher on this second attempt remains 30%. Therefore, the overall probability of benefiting from Armor on any given roll is 0.10 (chance of rolling a 1) * 0.30 (chance of successful re-roll) = 0.03, or 3%.
- Marginal Gain vs. Cost: Given the low probability of Armor providing any benefit (3%), the 2-point cost per unit is unjustified. Investing these points in other upgrades or additional models would likely yield a higher return and improve your force’s overall effectiveness and survivability.
If you are planning to fight Natives who like to use Arrows, the Armor “might” be worth it. Because Bows give you a -3 bonus to your Shoot Save
With a Shoot Save of 5, you have a 60% success probability. Thus, the overall probability of benefiting from Armor on any roll is 0.10 (chance of rolling 1) * 0.60 (chance of successful re-roll) = 0.06, or 6%.

General Force Building Tips
- When you are picking other units to pair with cavalry, don’t take multiple units that are also “spade hungry”, e.g. require ♠ Spades to activate their special abilities. Units that have Fast Reload, Quick, Skirmishers, etc will compete with the ♠ Spades you want to use on your Cavalry.
- Units with Bayonets, Pikes, and Lances are great to pair with Cavalry.
- When you overlap your control zones, an enemy has to charge both units and gives you an opportunity to do a Defensive Fight.
- When you Charge with your cav and lock an opponent in ongoing melee, a follow-up charge to take out survivors from another melee unit is more effective.
- Cheaper units with Bows can be effective when paired with Cavalry. The optimal time to charge an enemy is when they have 2 or more Fatigue. Rapid firing with inexpensive bows that don’t require reloads is one of the best strategies for inflicting fatigue.
- Your success with cavalry is often dependent on Initiative Cards. Taking multiple smaller units throughout your force lets you draw more cards. The more cards you draw the better your options are for initiative.
- Larger cavalry Units of 7+ models are harder to conceal. Cavalry Units of 3 or 4 are susceptible to retreat by Fatigue or being reduced in number below effectiveness. To me, the Goldilocks number is typically 5-6 Models.
- Carbines are good when taking mixed forces with only 1 or 2 Cavalry Units. When taking a Cavalry heavy or even all Cavalry force, you will likely want more than 1 or 2 Units with Carbines. Carbines are a great option to use with the Peek-a-Boo strategy mentioned previously.

using the new plastic Cavalry models and Militia bits
Factions that Focus on Cavalry
The following is a list of the factions that allow you to field a Cavalry Unit as a Core Unit in some capacity allowing to you to go all in on Cavalry or at least take more than 1-2 Support units of Cavalry. I’m not going to make this article even longer by doing an indepth analysis of each, but have instead simply compiled them for quick reference and research by those with more interest.
 Spanish
- SPANISH MILITIA (1621-1713) NPBtL
- Caballeria Core units
- Cinquentaine (sub-faction): Caballeria Lancero units become Core units in this Force, and at least two of the units in this force must be Caballeria Lancero units. This Force’s commander must also be mounted.
- Spanish Militia Commanders can add a Horse for +1pt.
- Gaspar de Oviedo (commander) can add a Horse for +1pt.
- Francisco de Fuentes de Galarza (commander) can add a Horse for +1pt.
- REFORMED SPANISH MILITIA
- This faction has Caballeria as a Core Unit
- Cinquentaine: Caballeria Lancero units become Core units in this Force, and at least half of the units in this Force must be Caballeria Lancero units. The Commander in this Force must also be mounted.
- SPANISH ARMY
- Caballeros de Caballería: Caballeria and Caballeria Lancero become Core units and all other Core units become Support units.
- Additionally, the basic faction may include one more Support unit than is usually allowed.
- TERCIOS 1621-1713
- Caballeria as Core units and Caballeria Lancero as Support units

English / British
- ENGLISH CARIBBEAN MILITIA
- Militia Cavalry as Core
- NORTH AMERICAN ENGLISH MILITIA (1620-1713) NPBtL
- Ranging Party: This Force may include Indian Fighters and Militia Cavalry as Core units if it does not include any Militia Pikemen, Sea Dogs, or Militia Artillery Crew.
- Troop of Horse: This Force may take Militia Cavalry as a Core unit if it includes at least two units of Militia Cavalry and its Commander is mounted.
- English Militia Commanders can add a Horse for +1pt.
- BRITISH MILITIA (1700-1730)
- Cavalry Troop: This Force may take Militia Cavalry as a Core unit if it includes at least two units of Militia Cavalry and its Commander is mounted.
- Frontier Militia are available as a Support Unit or Core if using the North American Militia subfaction.
- BRITISH RAIDERS (1700-1730)
- Frontier Militia is available as a Core Unit
Dutch
DUTCH CARIBBEAN MILITIA (1634-1697) NPBtL
Mounted Patrol: Militie Cavalerie units become Core units in this Force if it includes at least two units of Militie Cavaleri and its Commander is mounted.
French
- FRENCH BUCCANEERS (1635-1713) NPBtL
- Le Sieur de Grammont (Commander – 32pts) = Unorthodox Force: Flibustier units in this Force may add Horses for 4 points (not per model). While mounted, these units apply a +1 penalty to all Fight and Shoot saves. This is a unique option that works well with the Dismount strategies. Once dismounted you have regular Flibustiers.
- FRENCH CARIBBEAN MILITIA (1635-1713) NPBtL
- Troupe de Cheval: This Force may take Milice à Cheval as a Core unit if it includes at least two units of Milice à Cheval and its Commander is mounted.
- FRENCH CARIBBEAN MILITIA (1700-1730) RtB
- Troupe de Cheval: This Force may take Milice à Cheval as a Core unit if it includes at least two units of Milice à Cheval and its Commander is mounted.
Unaligned & Minor Powers
- PORTUGUESE-BRAZILIAN TERCIOS & MILITIA – 1630-1720 NPBtL
- The faction can access both Caballeria Lancero and European Militia Cavalry as Core Units.

Characters That Pair Well With Mounted Units
Multiple Characters work well with Cavalry Units. These are the top 3 recommendations:
Officer

Officers are a bit expensive,but they allow you to assign an open-ended Command Point to the unit. Since Cavalry Units have Quick you will typically want to assign a ♠ Spade-based initiative card to them. While it does give you a free Move for Quick it reduces your number of actions. Giving the unit an Officer helps you consistently get 2-3 actions.

Hidalgo

The Hidalgo is a Spanish or Portuguese only Fighting Man, but he is extremely powerful and very well suited for Cavalry Units. At 4pts, he is an excellent value. Cavalry specializes in Melee combat, especially the Lanceros. The Hidalgo can give the unit a free Charge with his Command Point.
By giving the Unit Swordsman he also helps keep the Models alive if they suffer a Fight attack.
The Hidalgo does not come without risks however. He adds Implusive to the Unit. Impulsive forces the Hidalgo’s Unit to Shoot or Charge any enemy unit within 8″ at the start of its activation. This can result in a loss of control over your unit. But the benefit is worth the risk, but you may need a game or to get used to the way the unit acts during a game.

Reformado

A Reformado?!? Yeah, a Reformado. Because of his Unit Restrictions, he can only join any unit with Drilled, Expertly Drilled, Sailors, or Expert Sailors as special rules. That eliminates all of the cavalry units as none of them have those abilities by default.
However, there is a fringe case with the Portuguese-Brazilian Tercios & Militia faction. Their faction bonus gives all Core units in this Force the Drilled Special rule at no cost. So while you probably won’t actually use Drilled as an ability, it does make it legal to add him to the Unit.
For only 3 pts you can get an extra Charge action as a command point. As an added bonus, because you are Portuguese, you can also take a Hidalgo and Reformado!
Prebuilt Forces Using Cavalry
- 100 points or less
- 100pt Brazilian Portuguese Garrison “Blitzkrieg Bushwhackers” by Jason Klotz
- 100pt Spanish Militia – 1 unit of Caballeria by Joseph Forster
- 150 pts
- 150pt Brazilian Portuguese Garrison – 100% Cavalry swarm by Garrett Swader
- 150pt Dutch Caribbean Militia -1634-1697 (NPBtL) by Dan Carlson
- 150pt French Caribbean Militia – Troupe à Cheval by Jason Klotz
- 150 pt Scottish Militia “Porcupine Militia with Cav Support” by Jason Klotz
- 150pt Spanish Militia “2x Hostigadores+ 2x Cav” by Jason Klotz
- 200 pts
- 200pt Dutch Caribbean Militia -1634-1697 (NPBtL) by Dan Carlson
- N. American English Militia – Ranging Party by Jason Klotz
- 2x Drilled/2x Elusive Provincials + 2xFrontier Militia horsies by Jason Klotz
- 200pt French Expeditionary Force “Peek-a-boo I shoot you!” by Jason Klotz
- 200pt Grammont et les chevaux by Jason Klotz
- 200pt Spanish Militia “Cavalry Everywhere” by Joseph Forster
- 200pt Portuguese-Brazilian Tercios & Militia – Cavalry, Indios & Jewish Militia mix by Jason Klotz
- 200pt Portuguese-Brazilian Tercios & Militia – 1630-1720 “45 Horsemen of the Apocolypse” by Jason Klotz
- 300pts
- “Gondor calls for aid! And Rohan will answer.” by Jason Klotz
Advanced Tips, Tricks, and Oddities
The following section covers some advanced tips and info that may be edge cases or things that don’t necessarily play out in all games.
- Use Fortune Tokens to redraw Initiative Cards. Initiative Cards are much more important to Cavalry Units. I highly recommend you keep a Fortune Token available to swap your Initiative Cards when your survival or ability to strike first is critically important.
- Spare Your Enemy… Temporarily. In some situations, if you charge and completely kill an enemy unit it may be better to let them live rather than finishing them off. If you wipe them down to 1-2 models and are at risk of incoming fire from 1 or more enemy units, don’t Skirmish or Move away. Enemy units cannot Shoot into Melee, so the best protection from an enemy can be their own units. Risking a Fight from 1-2 models is much safer than getting shot by a larger squadron of models.
- Maximize your Control Zone. Units must be Cohesive, meaning that all models must be within 4” of each other (5″ if more than 12 Models). It DOES NOT mean they have to be fully within the 4″ bubble. Because of their larger base size, Cavalry can push that to an extreme. By spreading out, you can exert larger control zones and set yourself up for movement in multiple directions. It’s kind of a “stay frosty” position where you are ready for anything. The risk is that you are also exposing yourself to incoming fire and Charges from a wider field. It can get models sniped if you aren’t careful.
- Present a Juicy Target. This falls into what I call psychological warfare. Cavalry is unpredictable and scary, especially to less experienced players. They will almost always shoot Cavalry before another Unit if given the option, even if there is a +1 difference in difficulty. You can use this to your advantage in two ways:
- Find the 10+ to Hit barrier. Premeasuring in this game is legal, so figure out where you can move that gives the enemy a 10+ to hit you. Make them waste their Reloads and leave themselves vulnerable to being charged.
- Move into a position where only 1 or 2 of your models are in Line of Sight. Your opponent may be tempted to spend their entire Shoot action to hit 1 or 2 Models. At this point, they are unloaded and can be charged.
- NOTE: These are suggestions against units without Pistols or secondary weapons!
- This one isn’t a tip, just an oddity and fun observation. Commander Jean Bernard Desjeans may add a Horse for 1pt … he also has an Unorthodox Force rule preventing him from taking Milice à Cheval. He also has High Standing preventing him from using Quick in an activation. So he can pompously ride on a horse to elevate himself above his men, but they get none of the benefits.

Mounted Commanders in Unmounted Units
Horses were first added as equipment and upgraded options in the No Peace Beyond the Line Expansion book. If you delve into some of the command options some oddities allow you to add a Horse to your Commander, but the forces don’t have mounted units as Core Units preventing the commander from truly taking advantage of the benefits. Because the unit is a mix of models on foot and with horse you don’t get the horse benefits. You just get to pay +1 pt to have your commander on a Horse. So paying for a Mounted commander in a non-mounted unit is not worth bothering.
HOWEVER, there are a few super rare ways to get your commander into a Mounted unit.
- Cheat Death. If your force’s commander is alone or would be removed as a Casualty, and there is a friendly unit within 8”, you can spend a Fortune Token to have the commander join the new unit.
You could have your commander in a cheap tiny 3-4 model unit that you use as a meat shield in front of your cavalry and intentionally sacrifice them to move the commander to your larger Support cavalry unit. It’s gamey, but when you move to a new unit you regain the command points and could use them twice this way. This is NOT a good way to win friends and influence people so be prepared to find a new gaming group. :p - Events Table. There is a random event in the 16.3 Land Events Table of the No Peace Beyond the Line Expansion book called “Commander’s View”:
The Commander of the player who drew the Event card may perform the Cheat Death ability without being a possible casualty or spending a Fortune Point. If this option is chosen, it must be done immediately after this Event is determined, not later in the Turn.
There is no way to force this to happen, but it would be a lot cooler if it did.
Conclusion
Cavalry units in Blood & Plunder offer a thrilling combination of speed, power, and tactical flexibility. While they may be glass cannons requiring a bit of finesse to maximize their potential. As we’ve explored they can be an extremely useful tool in your toolbox. Learning to effectively use these units requires a keen understanding of both their strengths and vulnerabilities. Emphasizing defensive tactics is crucial and positioning your cavalry to exploit their mobility while protecting them from sustained enemy fire can make the difference between victory and defeat!
For seasoned players and newcomers alike, I would encourage you to take a new look at adding cavalry to your next force list. Hopefully, this article has offered you some help in honing your strategic approach, so you can keep your Cavalry alive and wreak havoc on the battlefield. Learning to embrace the risk-reward nature of cavalry, can be challenging, but is super satisfying once you master the skill.
Let us know if I missed anything or if you have additional tips, tricks, and suggestions to add. And as always, if you have a force list you’d like to see added to one of our articles, pass it along and we’ll do our best to get it added to our options.
Happy gaming!
Article by Jason Klotz
Product Recommendations
Firelock Games has moved from metal minis to plastics and resin. The once super-expensive metal cavalry minis are now available at a fraction of the price. this new plastic Cavalry boxed set is an excellent value with 6 cav minis for $30 making them about $5 a mini.
The CAVALRY Boxed set contains 2 Sprues and can make 6 models with multiple weapon options.
Each With a total of 50 parts, the Cavalry sprue includes:
by Firelock Games
- 6 horse halves
- 3 torsos
- 3 heads
- 6 legs
- 2 arms holding pistols
- 1 arm holding a sword
- 3 arms holding lances
- 3 arms holding reigns
- 6 hats (3 tricorns and 3 floppy hats)
- 3 carbines
- 3 swords in scabbards
- 6 holstered pistols
- 3 blanket rolls


Additional Content Suggestions
- Get some inspiration for painting your Cavalry minis in our miniatures gallery.
- St. Augustine Cattle Stampede Scenario – Battle Report
- Our other articles tagged with Cavalry