The time has come for the Week 3 Campaign Map update of the 2024 Summer of Plunder. As always in this phase of the weekly update we’ll delve into the impact of player votes and commander actions on the world map. The battles were intense this week! And one nation suffered a painful loss of their capital. There were raids aplenty and numerous skirmishes. The voting this week made a major difference and the coordination of commanders had a big impact.
As we look ahead, we’ll also provide the objectives for Week 4 of the campaign.
The participation this week continued to be strong with 237 games played, marking a substantial increase from the 176 games in Week 3 of the 2023 campaign and 132 of 2022. This represents continued upward growth trend in the Summer of Plunder!

Week 3 Announcements
We’ve reevaluated the RAID mechanics for the campaign rules system and made some minor changes to make it a little more balanced. It adds a little more risk the process to prevent it from being an auto select as an option, and levels the results so they aren’t as big of a swing in points.
Old Raid Results Chart
| Roll | Outcome |
|---|---|
| 1 | -1 from the Attacker +1 Defender |
| 2-3 | No Change |
| 4-7 | +1 Attacker, -1 Defender |
| 8-9 | +2 Attacker, -2 Defender |
| 10 | +3 Attacker, -3 Defender |
New Raid Results Chart
| Roll | Outcome |
|---|---|
| 1 | -2 from the Attacker +2 Defender |
| 2 | -1 from the Attacker +1 Defender |
| 3-4 | No Change |
| 5-9 | +1 Attacker, -1 Defender |
| 10 | +2 Attacker, -2 Defender |
Week 3 Campaign Level Combat Results
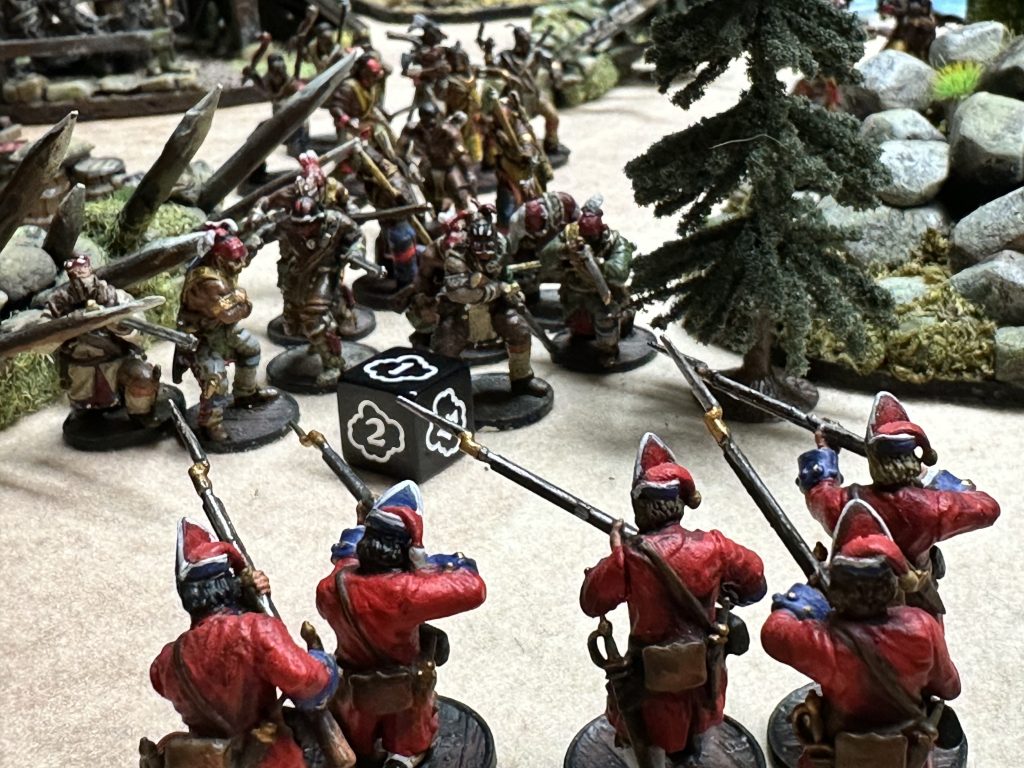
Betrayal in the Apalachee!
A warm summer’s breeze swept through the Apalachee capital of Anhaica as a half dozen wagons rolled into the region. Expecting what appeared to be a caravan of friendly merchants, the tribesmen were caught completely unawares as the canvases lifted and French Fusiliers took up arms, slaying targets indiscriminately. Bugles sounded from the forest signaling more Frenchmen to engage their charge.
Chevalier Tanwyn and his vanguard unit broke through the pines at the city’s outskirts and launched a sudden and devastating attack. Musket fire echoed repeated as the Apalachee defenders, caught off guard, scrambled to protect their homes.
Chief Wrymouth rallied his warriors quickly, but despite their valiant efforts, the Apalachee were overwhelmed by the French’s superior numbers and firepower. The battle raged on for what seemed like hours. Despite their fierce resistance, the Anhaica defenses collapsed. In a final stand at the Great Hall, Chief Wrymouth and his remaining warriors fought bravely but were ultimately captured.
With Chief Wrymouth capture, General Tanwyn declared the region under French control, marking the fall of the Apalachee capital. The French victory, though strategically significant, is tainted by the betrayal of their former allies and the shattering of their non-aggression pact. The smoldering ruins of the Great Hall, leaving a deep and lasting scar on the Apalachee people, no doubt will light a fire elsewhere among the natives.
French 6 – Natives 5

Campeche Sees Continued Violence
British forces commanded by Master Adam Bortner launched a calculated assault on Campeche, a stronghold of the Native Confederation. At dawn, the British field guns thundered from a hill overlooking its largest settlement, breaking the city’s peaceful morning and catching the Native defenders by surprise. Struggling to counter the superior firepower of the British artillery and disciplined infantry.
The battle was over before it began, with the British holding the high ground they rained down death from above. By the local chief cave word of their surrender. Master Bortner valiant push helped to bring Campeche firmly under British control.
English 2 – Natives 1
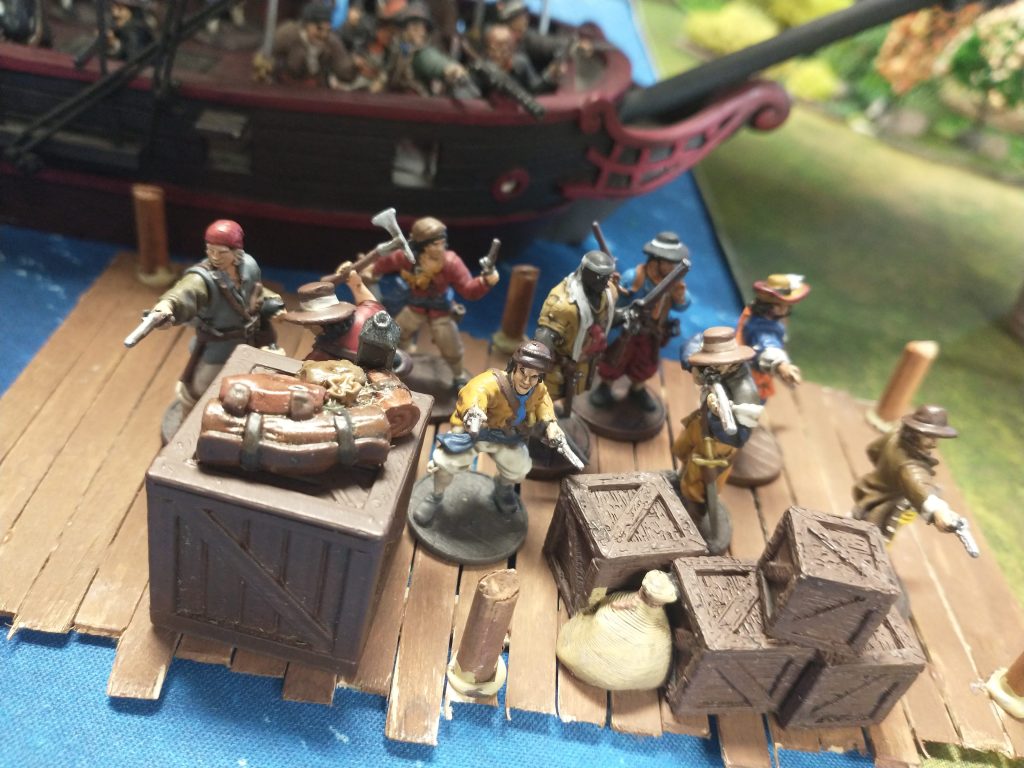
Cartagena Liberated from the Pirates
The Pirates who had recently captured Cartagena were reveling in their hard-won victory. The streets echoed with their raucous celebrations, as barrels of rum flowed freely and caution was thrown to the wind. Unbeknownst to them, a formidable Spanish reinforcement fleet was fast approaching, determined to reclaim the strategic port.
Just after midnight, the sounds of Spanish cannons shattered the revelry. The pirates, groggy and unfit to defend after a night of heavy drinking, scrambled to mount a defense against the well-coordinated and heavily armed Spanish troops. Chaos ensued as the unprepared pirates were quickly overpowered by the disciplined Spanish forces.
By dawn, the Spanish had regained control of Cartagena, driving the bandits back into the sea. The once jubilant victors were now in disarray, their short-lived dominance crushed by the arrival of Spanish reinforcements. The recapture of Cartagena by the Spanish once again reasserted their power over the critical port.
Pirates 1 – Spanish 2
Charleston, SC in Flames!
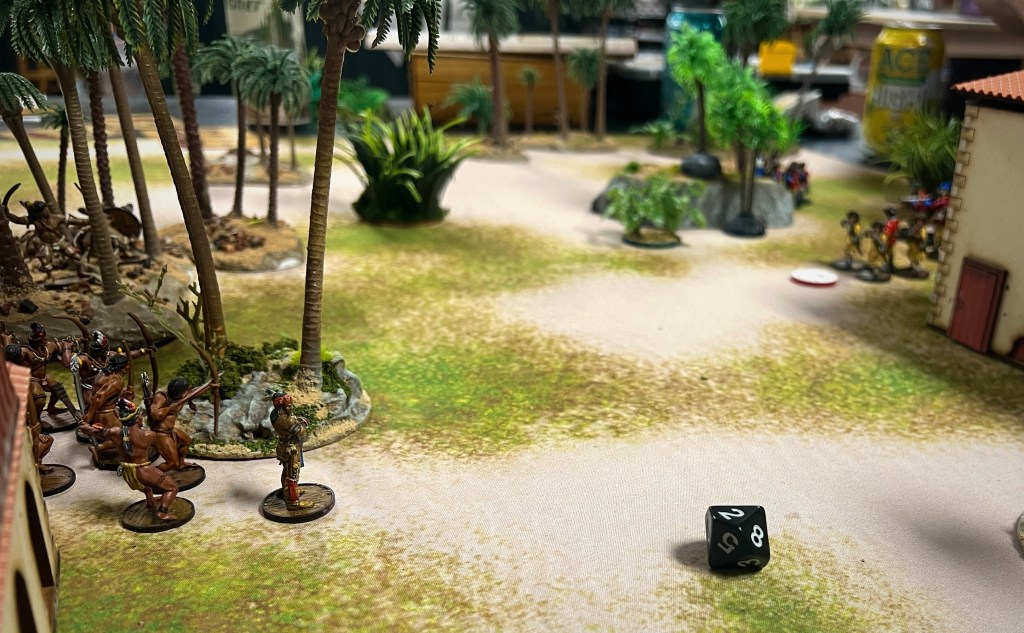
Under the cover of night, native warriors descended upon the city of Charleston, SC. In an orchestrated surprise attack, dozens of torches flared to life. Rooftops were set alight and crops were engulfed in flame. their blaze lighting up the night sky for miles around.
The English settlers asleep in their beds, were caught completely off guard and no defenses mounted. Refugees fled the face of the overwhelming assault. Thick columns of smoke marked their hasty retreat, visible for miles as they abandoned their homes and livelihoods to the mercy of the advancing native forces. By dawn, Charleston lay devastated, its streets deserted and its once prosperous buildings reduced to smoldering ruins.
English 1 – Natives 3
Fire on the Frontier in Missisquoi
Native scouting parties probe the regions of the Missisquoi looking for easy plunder. The fierce settlers appeared to have a well enough organized militia to discourage an attack.
Natives 1 – Unaligned 2
New York Ravaged by ye Savages
A formidable coalition of Native American tribes launched a decisive raid on New York, outnumbering the English defenders three to one. Led by the Wabanaki, the native warriors executed a well-planned assault on settlements across the region.
With sheer force of numbers, the native forces systematically overwhelmed the scattered English defenses. Village after village fell to their relentless advance as they pressed deeper into English territory. The outnumbered English, despite their valiant efforts, were unable to withstand the coordinated onslaught.
The bustling colonial settlement of New York now lies subdued and under native control. News of the capture of a city so great reverberated throughout the colonies, sending terror far and wide.
English 1 – Natives 3
French Traders Ousted from Norridgewock
French traders seeking to establish an outpost in Norridgewock were summarily rebuffed upon news of the Apalachee’s capture reaching the borderlands. The locals, wary of foreign influence and emboldened by the recent betrayals, swiftly closed their territories to any French presence. Tensions simmered as both sides prepared for potential conflict amidst the backdrop of shifting alliances and territorial disputes in the region.
French 1 – Unaligned 1
Panama Reclaimed by Spain
In a pivotal engagement off the coast of Panama, Spanish forces mobilized to reclaim territory from the notorious band of pirates who had captured the region weeks earlier. When news reached Havana, the governor was furious and immediately dispatched a formidable contingent of Soldados and Milicianos to bolster the local defenses and expel the pirate occupation. The ensuing battle was fierce and abrupt. The Spanish ruthlessly routed the enemy and regained control of their vital shipping lanes hub.
Pirates 1 – Spanish 2
Netherlands Denied Access to Rhode Island
In a bold move to end piracy in their northern settlements, the Dutch launched a calculated attack on the pirate haven in Rhode Island. Expecting minimal resistance, they were caught off guard by the fierce determination and organized defense of the pirates. Despite their numerical advantage and supplies, the Dutch forces faced unexpected setbacks and were ultimately rebuffed. The failed assault left the Dutch forces reevaluating their approach and the pirates emboldened and ready for revenge.
Dutch 2 – Pirates 2
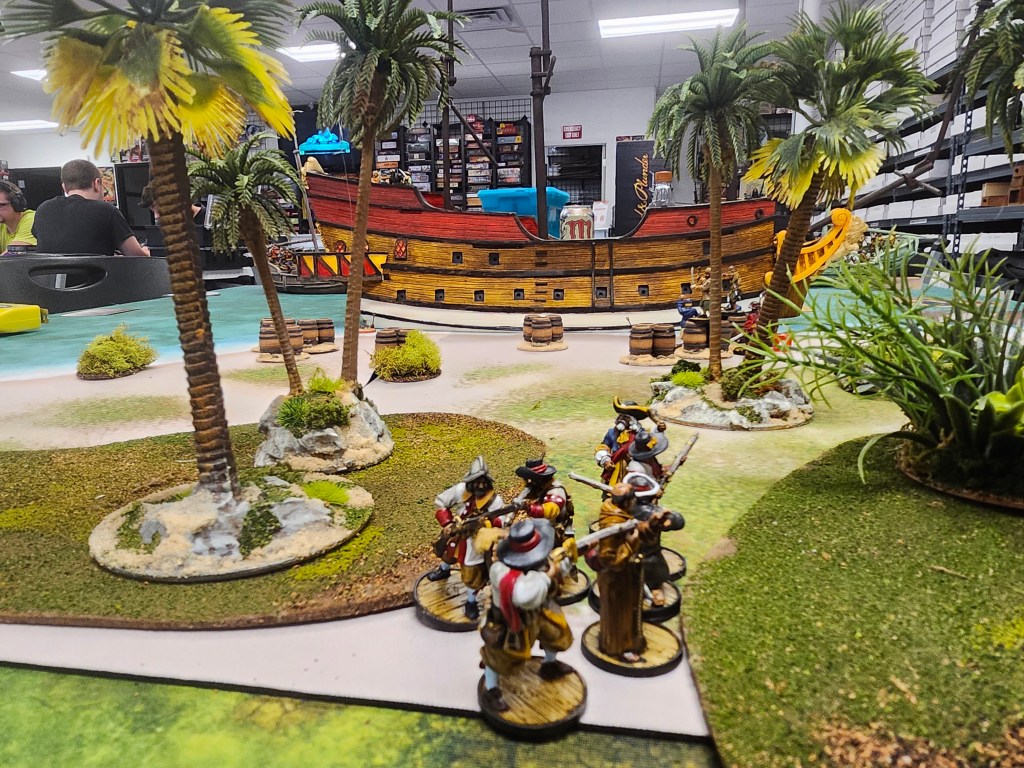
Attempts to Reclaim St Augustine, FL Rebuffed
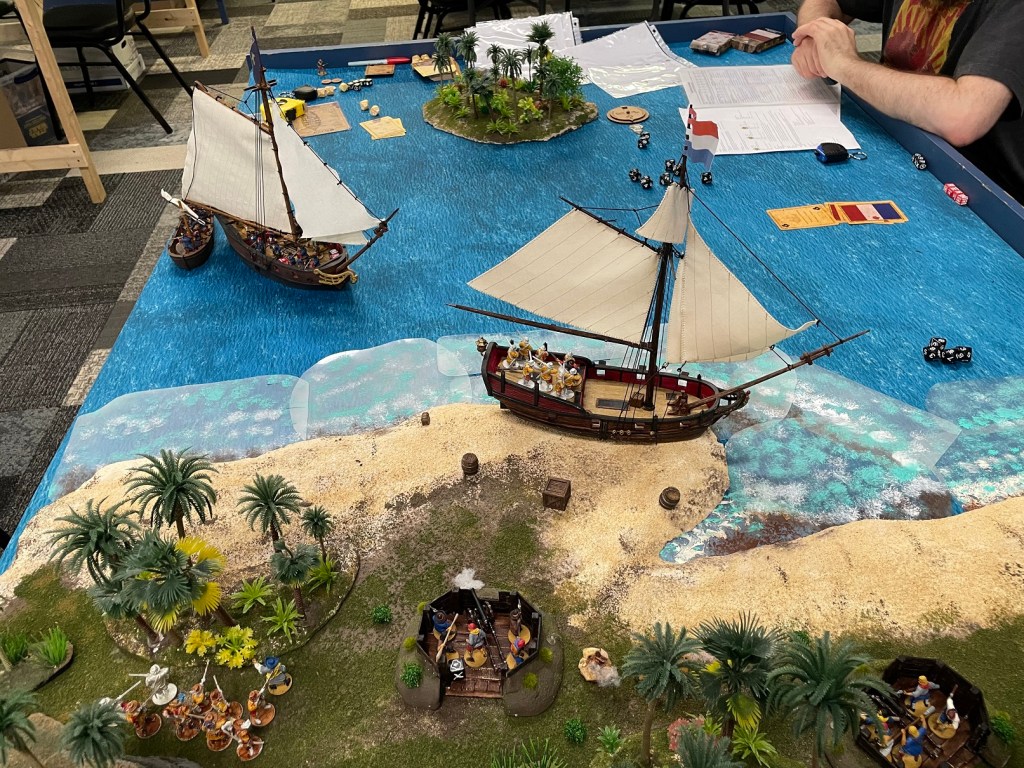
In a bid to reclaim their province of St. Augustine from the control of the Flying Gang, Spain launched dispatched a contingent of naval vessels laden with troops. As the Spanish warships approached the southern Florida coast, they were met with fierce resistance from the well-prepared pirate fleet. Despite being woefully outgunned, the pirates held a numerical superiority with smaller sloops. Skillfully outmaneuvered the more sluggish Spanish ships that traded long-range volleys for hours. Unwilling to engage in boarding actions, due to the presence of trained military forces, The harassing fire and a lucky rake of the Spanish flagship wounded the commanding officer and ended the conflict. The thwarted assault left Spain regrouping and reassessing their next move against the resilient pirate defenders holding St. Augustine.
Pirates 2 – Spanish 2
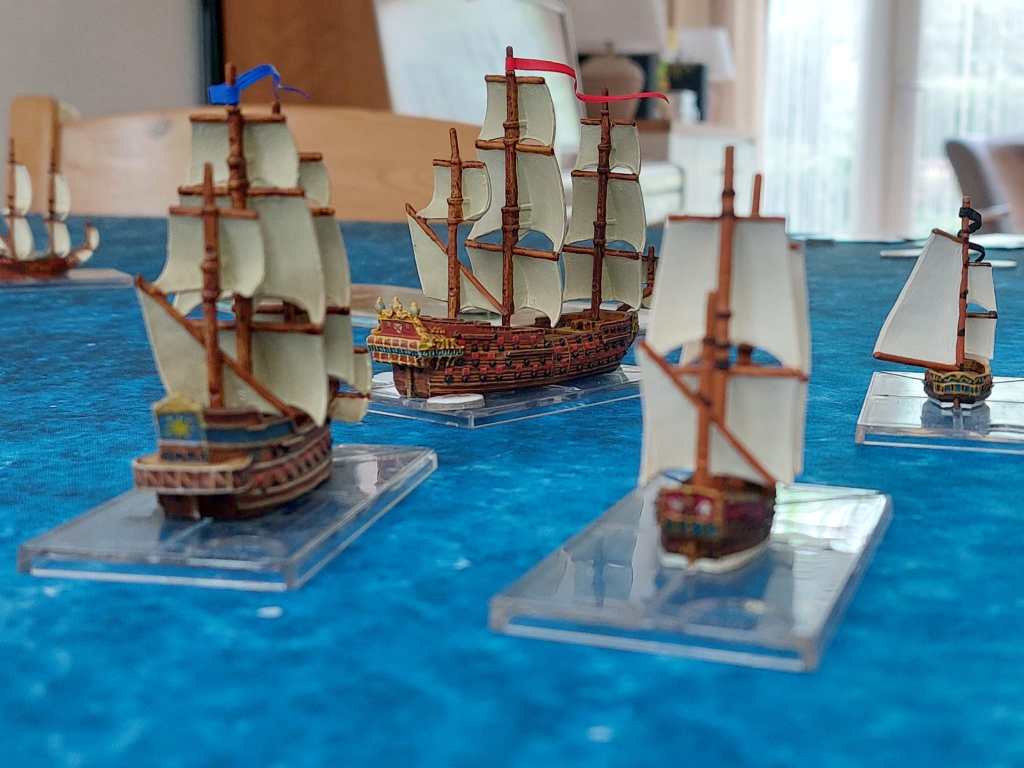
Seas of Tortuga Set Ablaze
In an ambitious effort to eradicate piracy from the Caribbean, the Dutch had set their sights on maintaining their claim on the island of Tortuga. The Dutch patrol fleets continued to patrol the waters of the notorious pirate haven. Seeking revenge for their fallen comrades, the pirates launched a counterattack. Engaging the Dutch patrols at close range, boarding parties equipped with deadly firepots began igniting chaos among the Zeelander ships.
The decks of the multiple vessels erupted into savage hand-to-hand combat as pirates clamored aboard, cutlasses flashing. Amidst the melee, firepots continued to hurled by the pirates creating towering infernos of ash and smoke. The intense and unexpected ferocity of the pirate assault quickly turned the tide, sinking multiple Dutch ships and forcing the remainder of the small fleet to retreat in disarray. The Pirates liberated the region and regained control
Dutch 1 – Pirates 3
Storms Continue in Vera Cruz
In the wilds of Vera Cruz, small bands of French Raiders
and Pirates engaged in a series of brief skirmishes. The challenging terrain forced both sides to rely on guerrilla tactics. The weather soon became a factor, limiting visibility and making movement treacherous. Neither side was able to gain the upper hand, leading to a stalemate. Exhausted and weary from slogging through the wet jungle, both forces withdrew to fight another day leaving Vera Cruz uncontested.
French 1 – Pirates 1 – Unaligned 1
Campaign Map Update At the End of Week 3
Raid Actions During Week 3
We had a total of 6 Raids this week. The gloves came of and there was a scramble to rob the Dutch of their lead as 3 nations attempted to Raid the Dutch. Something also must have happened diplomatically because the Pirates were also raided 3 times, twice by the Dutch!
- Dutch raid Pirates = Roll 4 –> +1 from the Attacker -1 Defender
- Dutch raid Pirates = Roll 7 –> +1 from the Attacker -1 Defender
- English raid Pirates = Roll 1 –> -1 from the Attacker +1 Defender
- English raid Dutch = Roll 5 –> +1 from the Attacker -1 Defender
- Natives raid Dutch = Roll 7 –> +1 from the Attacker -1 Defender
- Pirates raid Dutch = Roll 2 –> No change
Trade Actions During Week 3
Only two nations’ Commanders ordered Trade actions this week. The English and Spanish maintain their steady and deliberate claim for points.
- England = 1 Action
- Spain = 1 Action
Current Standings at the End of Week 3
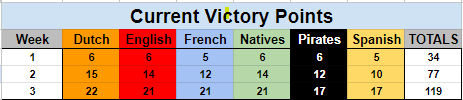
At the end of Week 3, the Dutch managed to hold on to 1st place and survive multiple Raids. After capturing the Natives capital France made up a lot of ground. The Spanish also regained some ground… literally, by capturing two provinces.

France and Spain were the only two to increase their performance over last week. Everyone else faltered slightly. The intrigue and back stabbing have begun! The Raids have started and a non-aggression pact between France and the Natives has been violated. Blood will be spilled in Week 4!
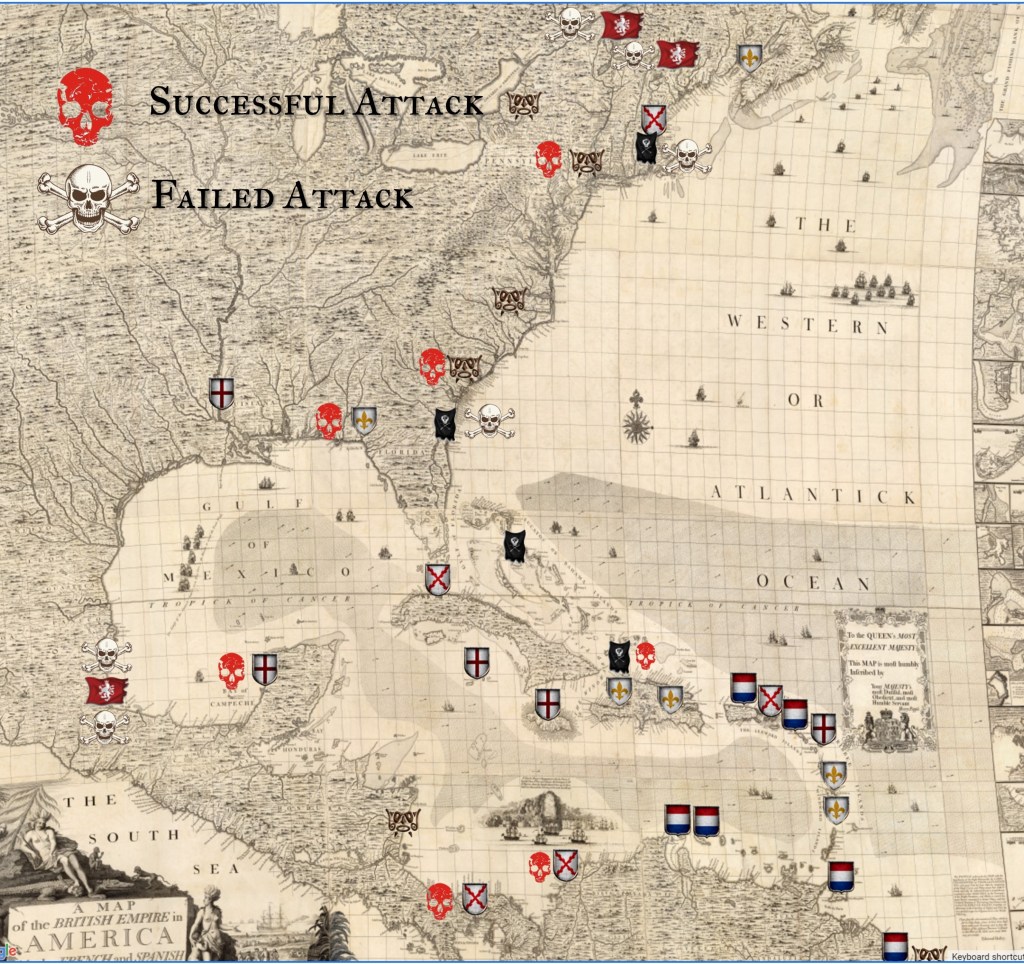
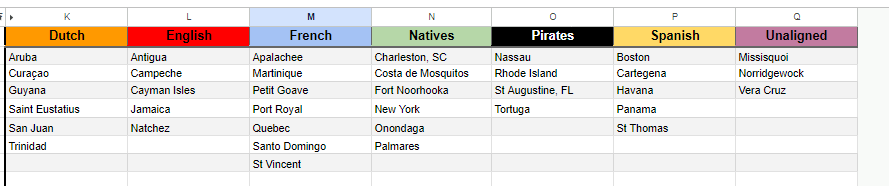
Current Location Ownership by Nation
Here is a breakdown of which nations control each location on the Campaign Map.
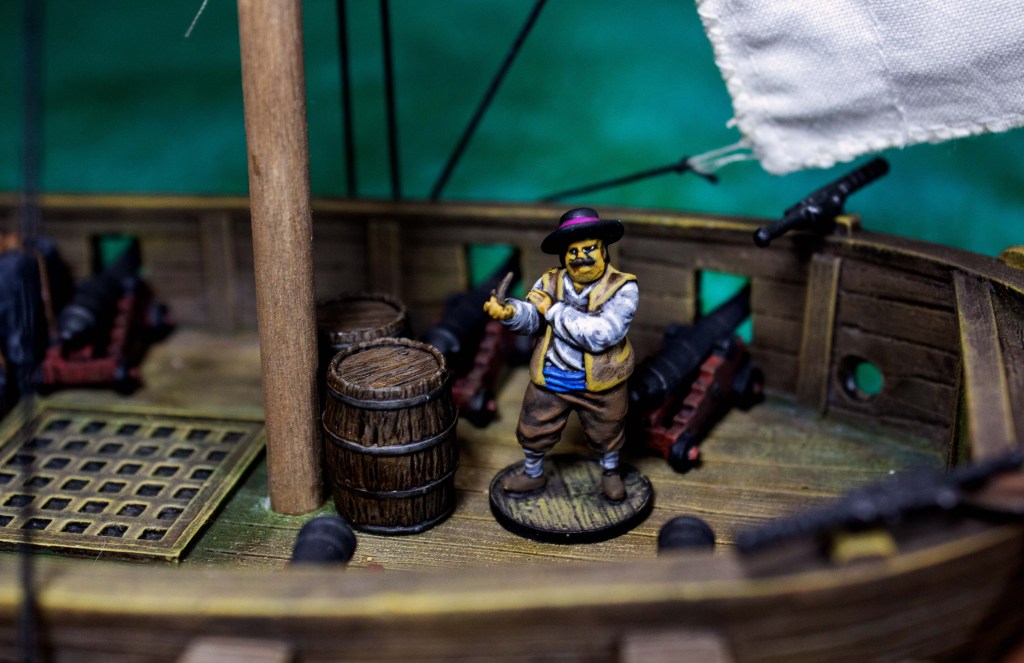
Week 4 Objective – “DANGEROUS WATERS”
Week 4 of the Summer of Plunder runs from June 23rd (Sun) -29th (Sat). Your objective this week is:
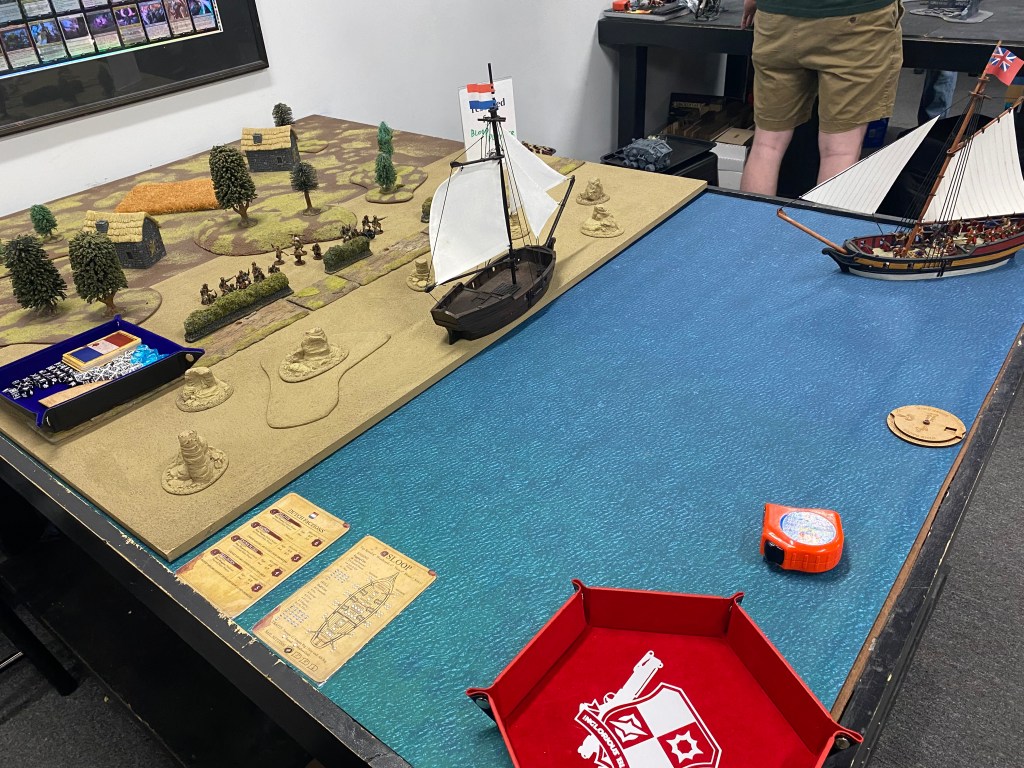
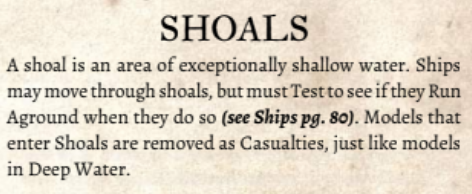
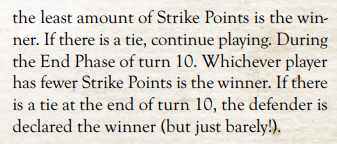
Week 4 Objective: Play a Sea game with 2 or more shoals on the board.
This week brings another element of the game to the forefront – Shoals and Running Aground.
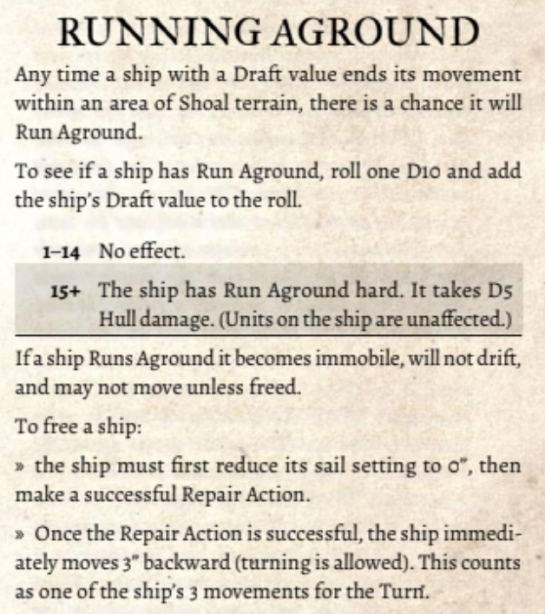
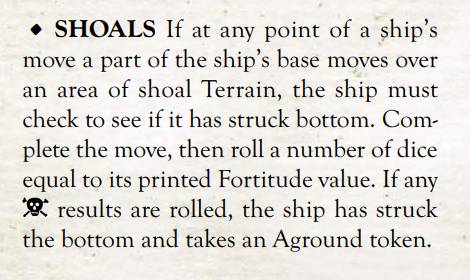
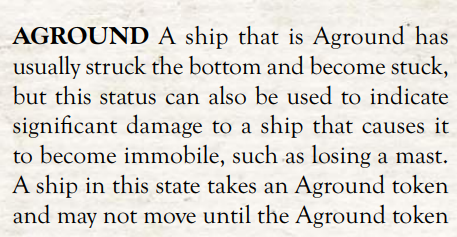
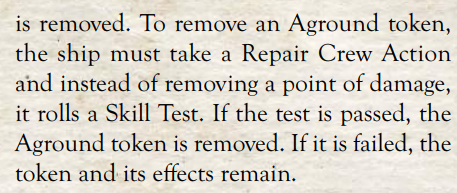
Blood & Plunder Rules for Shoals & Running Aground
Here are some snippets from the Blood & Plunder rules to help you navigate those dangerous waters:
Tips & Tricks for Dangerous Waters in Blood & Plunder
Characters to Deal with Shoals
There are a few Characters in Blood & Plunder that can help you deal with Shoals in Blood & Plunder
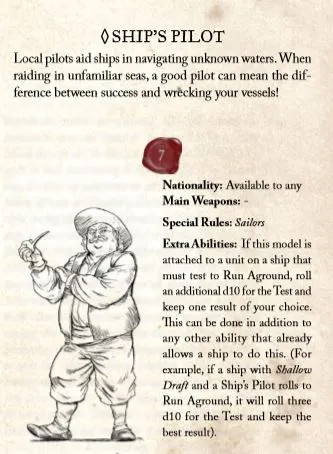
- The Ship’s Pilot: When you test to run Aground if your force includes a Ship’s Pilot, it gives you an Additional d10 to roll. This gives you twice the chances to escape, and if you use a Fortune Point, you have 4 tries!
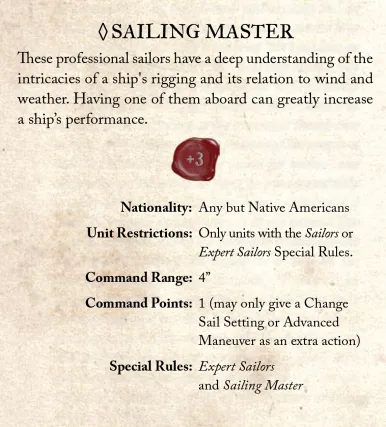
- A Sailing Master: If you run aground, before you get free you have to lower your Sail Setting to zero and then once free you have to raise it again. Sailing Master gives your Sailor Unit Expert Sailors making them more adept at sailing test. It also gives an extra Change Sail Setting command point.
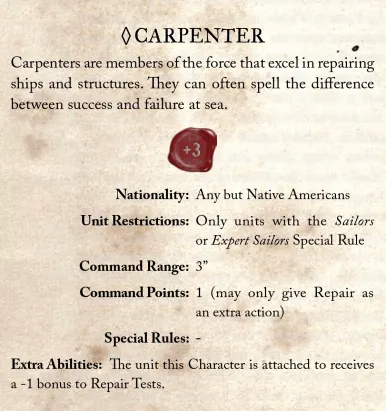
- A Carpenter: To get free from a Shoal you need to make a Repair test. The Carpenter gives you a -1 to the difficulty and a bonus Command Point for Repair action.
Choosing the Right Ship
Your Draft is extremely important in shallow water. Draft refers to the vertical distance between the waterline and the bottom of the hull (keel). It indicates how deep the ship sits in the water. The draft is a crucial measurement as it determines the minimum depth of water a ship or boat can safely navigate. A ship with a deeper draft requires deeper water to avoid running aground, whereas a vessel with a shallow draft can operate in shallower waters.
Some ships have a Shallow Draft special ability that lets you roll 2 dice and select one result when checking for Running Aground. These include:
- Balandra
- Bark
- Bermuda Sloop
- Privateer Sloop for +3pts
- Privateer Brigantine for +3pts
- Sloop of War for +3pts
- Privateer Fluyt for +3pts
Easy To Handle is an ability that lets you change you Sail Setting as a Standard Action instead of a Dedicated Action. The following ships have that ability:
- Tartana
- Piragua
- Fluyt
- Privateer Fluyt
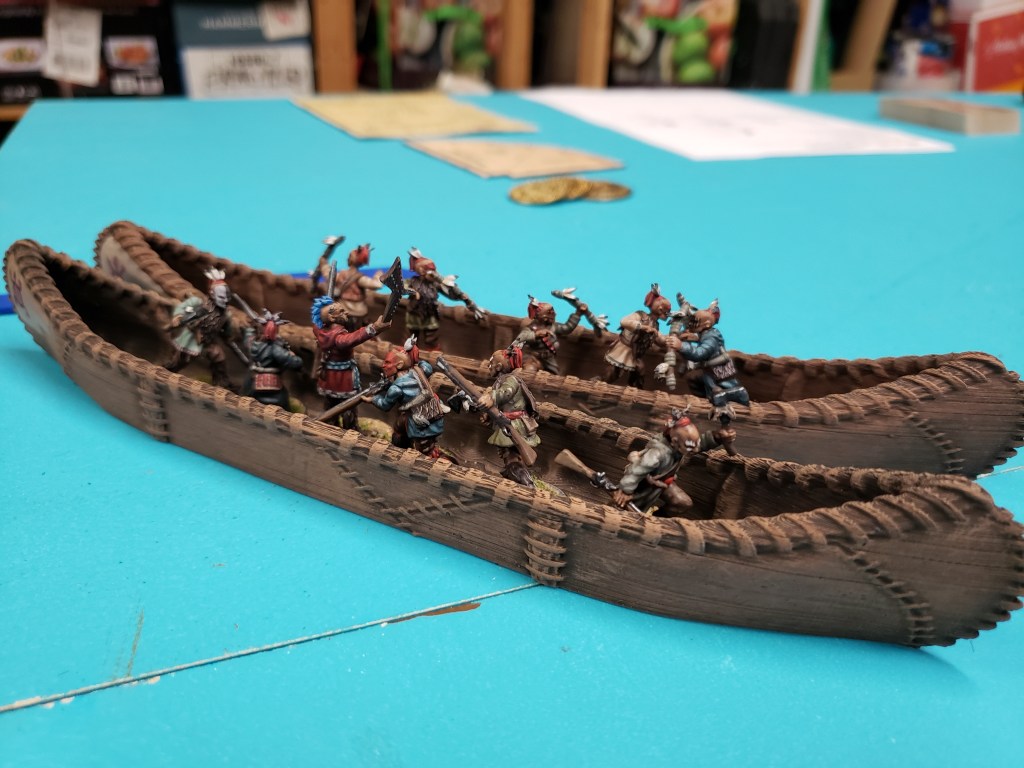
ZERO DRAFT! Boats have no Draft score, this means they can navigate over Shoals without fear of running aground. Boats include:
- Canoas
- Birchbark Canoes
- Longboats
- Piraguas
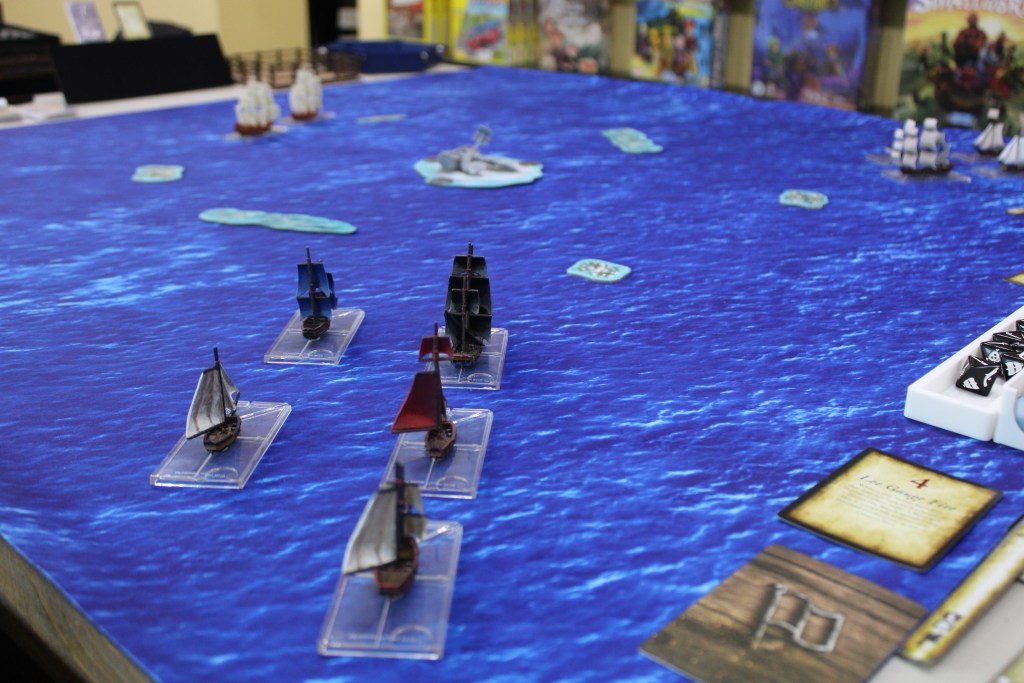
Oak & Iron Rules for Shoals & Running Aground
In Oak & Iron Shoals are added to the game as part of the initial game setup. When selecting Terrain cards to randomly generate the game you have the option to select shoals. For this weeks agenda, feel free to select and extra two if you want and add a bit of challenge to the game.
During a game if you ship moves over a shoal at any time during it’s deployment it has to make a check to run aground. You roll a number of dice equal to the ships’s Fortitude score. If any results are a skull you’re stuck!
That means smaller light ships stand a better chance of sailing safely. The largest Ships of the Line and Galleon with a Fortitude 4 have to roll 4 dice. The probability of rolling at least one 8 on a d8 with four dice is approximately 0.635, or 63.5%. And unless you clip the edge, most ships can’t cross a Shoal in a single move which means you have to make the check twice!
Consequences of Running Aground in Oak & Iron
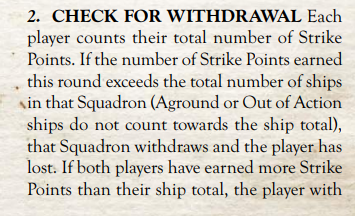
If you run aground in Oak & Iron you ship takes an Aground Token and immediately becomes immobile. You have to make a successful Repair Crew Action the next round.
There are other consequences to being Aground. In the End Phase of any round. In the End Phase when you make a strike test to check for withdrawals ships that are Aground or Out of Action do not count as part of your total number of active ships. This can force a withdrawal form the game and a loss earlier than expected.
Additional Considerations in Force Building with Shoals in Oak & Iron
When building your Squadron, here are some things to keep in mind:
- SHALLOW DRAFT: This trait is free for all Dutch ships. It allows you to roll 1 fewer dice (to a minimum of 1) when testing to Run Aground.
- SKILLED SAILORS: The Dutch and English have a Skilled Sailors faction bonus. This lets them roll 1 more dice during all Skill Tests allowing you a better chance to get free from a Shoal if you run aground.
- CONDITION CARDS: There is a Condition Card for a Local Pilot that can come up during the initial game setup allowing essentially the same as Shallow Draft. It allows you you to reduce the number of dice rolled by 1 (to a minimum of 1) when making an Aground test.
Ship Upgrades to Consider
- Bold Captain: Recover from Aground faste by may re-roll up to 3 dice. If any of the re-rolled dice fail to score a hit during the Attack or if the Skill test is failed, this ship takes 1 Point of Fatigue
- Brilliant Captain: Adds 1 Dice to a Skill Test.
- Skill 1 or Skill 2: These give you more dice and more chances to get free.
- Veteran Crew: If this ship is not Shaken or Crippled, it treats its Fatigue level as one less when making Attacks or Skill tests.
Ships Recommendations
The Fluyt ship has Shallow Draft as an attribute built into the ship for free. Ships with a Fortitude of 1 or 2 are optimate for this objective as they naturally have few chances of running aground. Ships that have Fast, Swift or a base speed of 4 help you cross shoals quickly and avoid getting stuck.
Initiative Cards to Consider
The Dutch are the best sailors in the game and have a couple of cards that can make the game even more deadly for an opponent.
- Shoals Ahead: All ships in this Squadron ignore Shoal Terrain. This is a great way to surprise your opponent by sailing straight over danger waters without rick. It’s a recyclable card you you can use multiple times.
- Lured into the Shoals (Dutch): “Place a shoal terrain piece within Musket Shot of a ship in this Squadron. May not be placed within Yard Arm distance of any ship. Discard this Initiative Card instead of returning it to your hand during the end phase.” This card is one of my favorites, but on a board already laden with shoals it becomes even more dangerous.
More Tips on Terrain in Oak & Iron
There is an extensive article regarding terrain on Timber & Sail. You can get some good info on deployment and dealing with terrain in their Terrain Strategy Guide.
Organized Play Kits by Firelock Games
We saw several of the new Objective Markers from the Firelock Games Organized Play kits make their way to the gaming tables. These are a fun way to represent an object on the table that players have to pick up and bring back to their deployment zone or maintain control of during the game.
If you’ve not yet got your kit reach out to jonathan@firelockgames.com to get yours ordered today!
Check out this article to learn more about the Organized Play Kits


Conclusion for the Week 3 Campaign Update
If you haven’t yet joined out Summer of Plunder Discord, you’re missing out! Yes there is a learning curve, but there is a LOT of great info being shared in the community. LOTS of rules questions answered, a ridiculous number of pictures and battle reports being shared. And of course, lots of scheming and plotting in the National chats!
We’ve had our first capital city fall and it will be interesting to see how that plays out. Will the Natives seek revenge? With it garner them support from new allies or turn into a feeding frenzy on the weakened nation.
Somehow we managed to make it another week with 3 Unaligned territories on the map. Any bets on how many we’ll have at the end of week 4?
That’s it from me on the Campaign Map update. Stay tuned for the Player Update and see this week’s prize winners and find out who won the SHIPWRECKED! prize from DeadMansChest.org.
Pingback: Week 3 Player Update & Prize Winners - 2024 Summer of Plunder - Blood & Pigment